Resident Evil 4 | 100% Collectibles Guide
 June
June(107 ratings)
Nov 19, 2024 @ 10:41pm9,423311
AchievementsCraftingGame ModesLootMaps or LevelsModding or ConfigurationSecretsStory or LoreWalkthroughsWeaponsEnglish
What This Guide Is For:
This guide will help you collect all the achievements and collectibles in the Resident Evil 4 Remake.
Notes:
- This guide is based on the current version of the game.
- Some collectibles may require multiple playthroughs.
- Achievements may be unlocked at different points depending on your difficulty setting.
- Make sure to save progress regularly, especially before important sections.
I hope this guide helps you with everything you need. Be sure to check out my other guides for more tips and info.
Other Guides:
(Chapter 1: The Village)
In Chapter 1, you'll explore the village and its surroundings, uncovering treasures, files, and key items. Be sure to search thoroughly for everything before progressing.
Collectibles Breakdown:
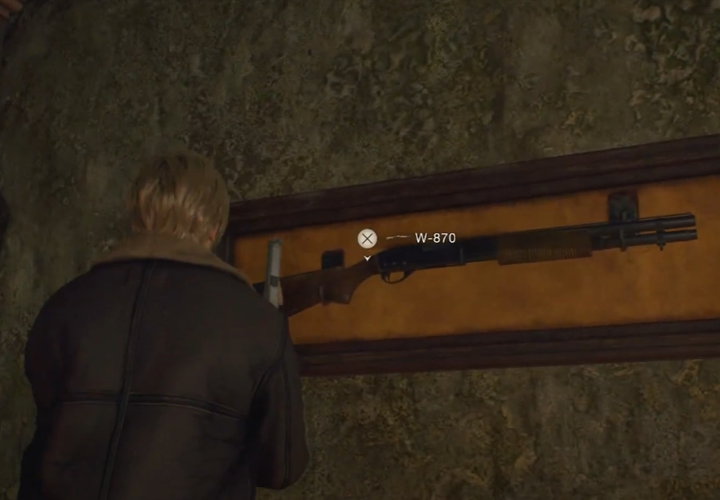
There is a treasure near the W-870 Shotgun, head to the right and use your knife to slash the window until it shatters. Climb through the window to reach the rooftop, then turn right to locate the treasure on the roof.
When you first encounter a chainsaw-wielding enemy in the village, head towards the last shed on the left before the gate where the chainsaw enemy appeared. You’ll find the item you’re looking for inside that shed.

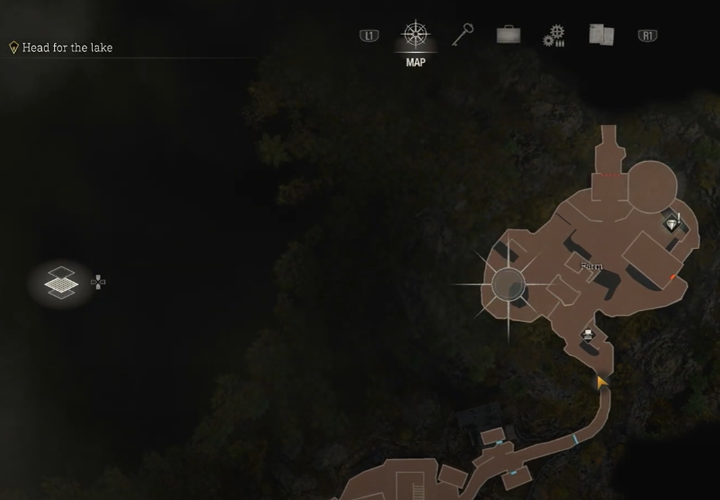
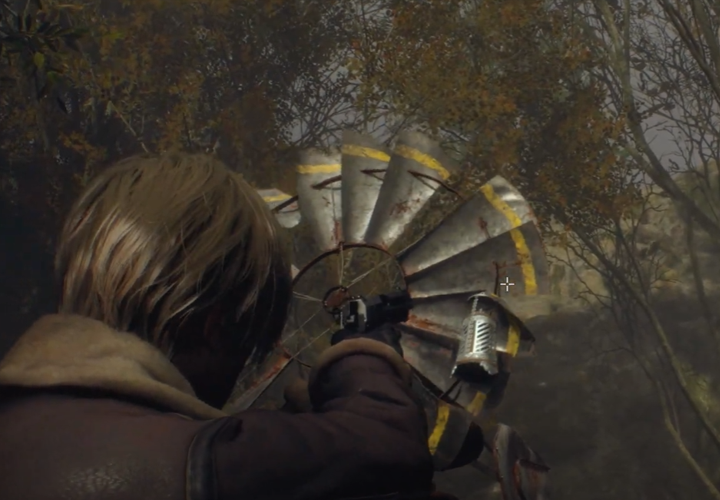
When you reach the Farm, head to the left side and locate the silver container hanging off the windmill. Try to shoot it when it’s not above the well to avoid getting the treasure dirty. This will enable you to sell it for more money later, but it will count as a Collectible either way.
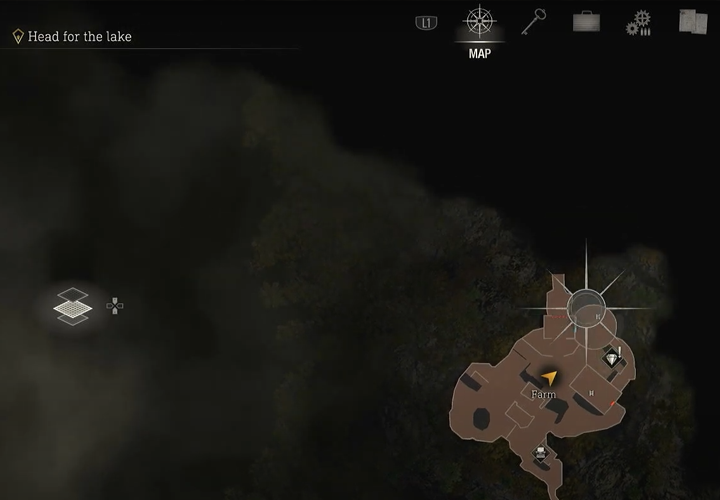
To find the treasure chest located behind the wooden fence, climb up the windmill and then jump down onto the balcony on the side of the windmill. From there, you can get behind the wooden fence below and make your way to the end where the treasure chest is located.
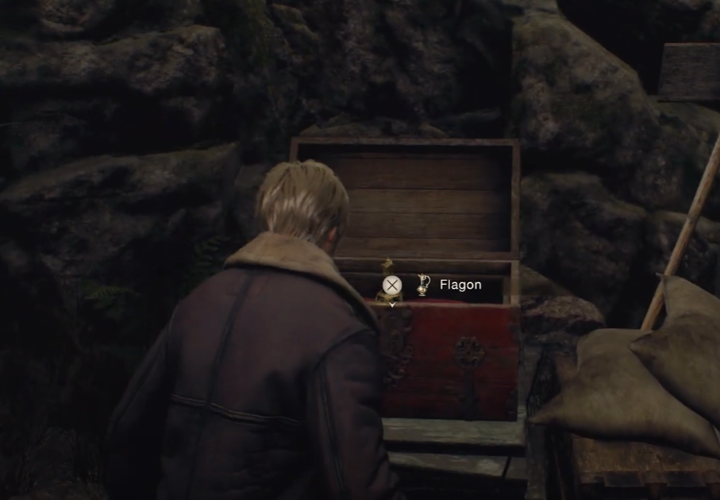
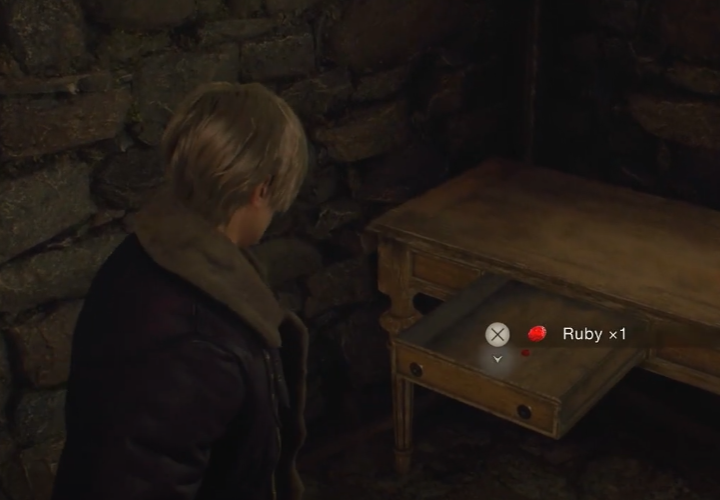
Once you’ve picked up the Flagon, shoot the lock on the door to enter the big barn. You’ll find the Ruby collectible in the corner of the room, along with the Kitchen Knife and Wooden Cog which are also located in the same room.
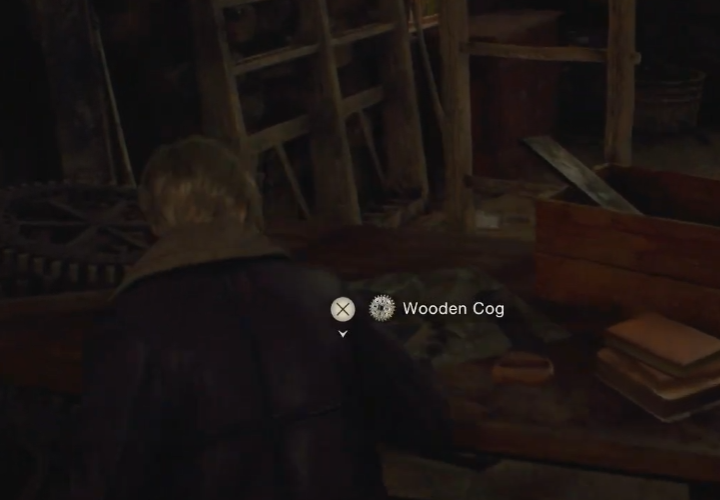
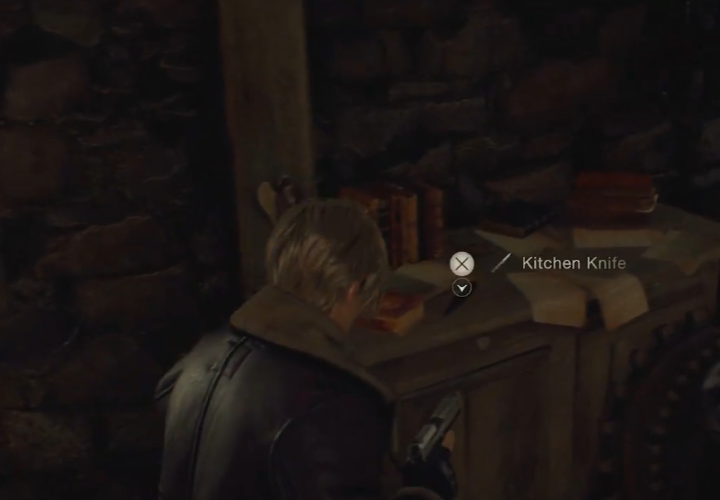
You can find both the Kitchen Knife and Wooden Cog in the same room where the previous Ruby collectible was located. These items are needed to climb back up the windmill and use the Cog on the wall there to open the gate.
Once you encounter a chainsaw-wielding enemy in the Village Square, head over to the big house on the left. Inside, you’ll find a shotgun hanging on the wall upstairs.
Collectibles Breakdown:
- Treasure: Valuable items like necklaces and gems.
- Files: Story-related documents to enhance the lore.
- Key Items: Key items like the Small Key to unlock special containers.
Clockwork Castellan
Blue Medallions
Chapter 1: Treaures
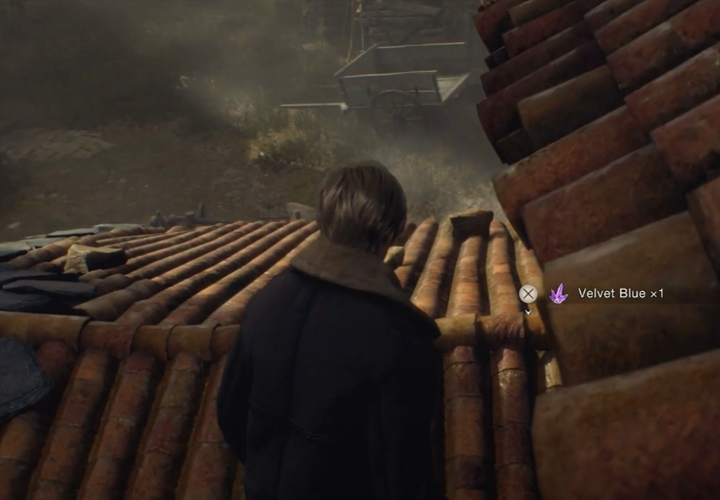
Velvet Blue (Treasure)There is a treasure near the W-870 Shotgun, head to the right and use your knife to slash the window until it shatters. Climb through the window to reach the rooftop, then turn right to locate the treasure on the roof.
Treasure #2
Ruby (Treasure)When you first encounter a chainsaw-wielding enemy in the village, head towards the last shed on the left before the gate where the chainsaw enemy appeared. You’ll find the item you’re looking for inside that shed.
Treasure #3
Pearl Pendant (Treasure)When you reach the Farm, head to the left side and locate the silver container hanging off the windmill. Try to shoot it when it’s not above the well to avoid getting the treasure dirty. This will enable you to sell it for more money later, but it will count as a Collectible either way.
Treasure #4
Flagon (Treasure)To find the treasure chest located behind the wooden fence, climb up the windmill and then jump down onto the balcony on the side of the windmill. From there, you can get behind the wooden fence below and make your way to the end where the treasure chest is located.
Treasure #5
Ruby (Treasure)Once you’ve picked up the Flagon, shoot the lock on the door to enter the big barn. You’ll find the Ruby collectible in the corner of the room, along with the Kitchen Knife and Wooden Cog which are also located in the same room.
Treasure/Weapon #6
Wooden Cog (Key Item) & #14 Kitchen Knife (Weapon)You can find both the Kitchen Knife and Wooden Cog in the same room where the previous Ruby collectible was located. These items are needed to climb back up the windmill and use the Cog on the wall there to open the gate.
Weapon #2
W-870 Shotgun (Weapon)Once you encounter a chainsaw-wielding enemy in the Village Square, head over to the big house on the left. Inside, you’ll find a shotgun hanging on the wall upstairs.
(Chapter 2: The Valley)
In this chapter, you'll find treasures, files, and key items like the Small Key to unlock hidden chests and drawers. Explore thoroughly to collect everything before moving on.
Collectibles Breakdown:
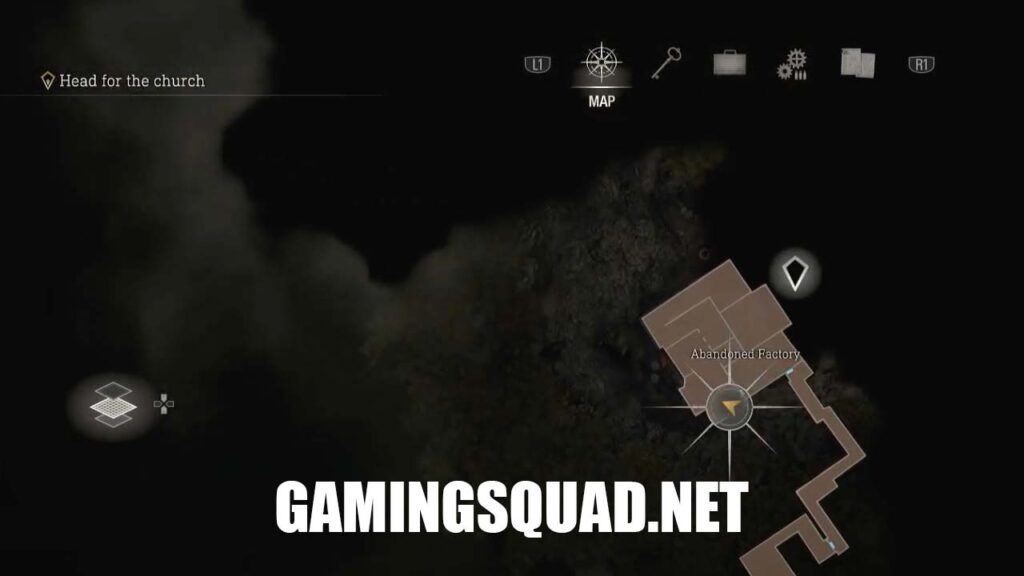
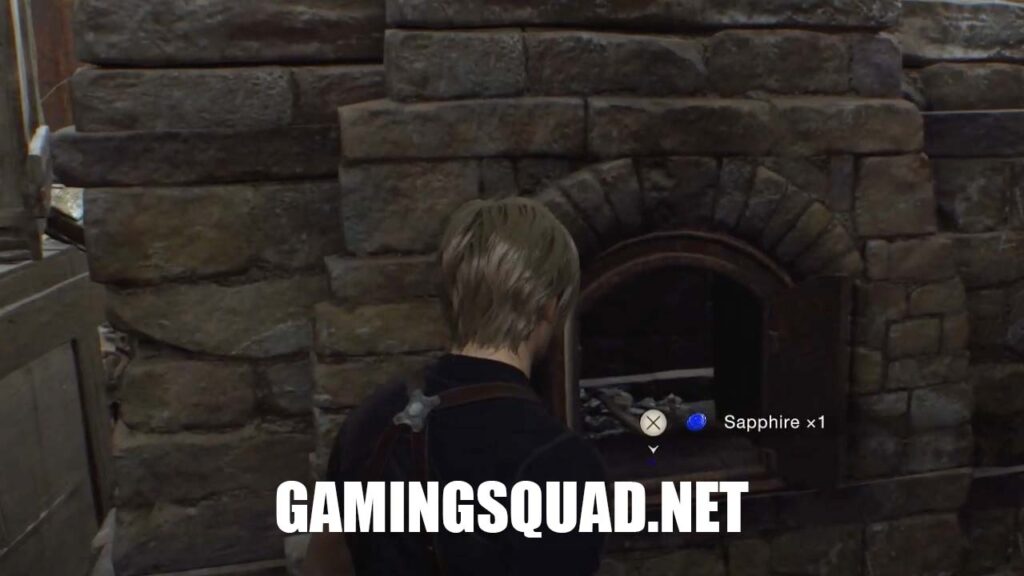
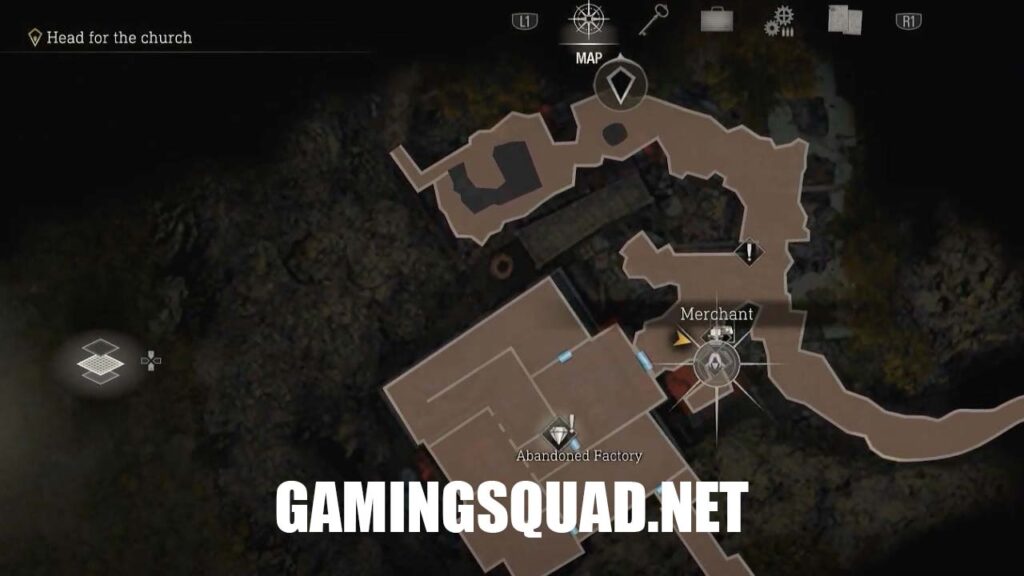
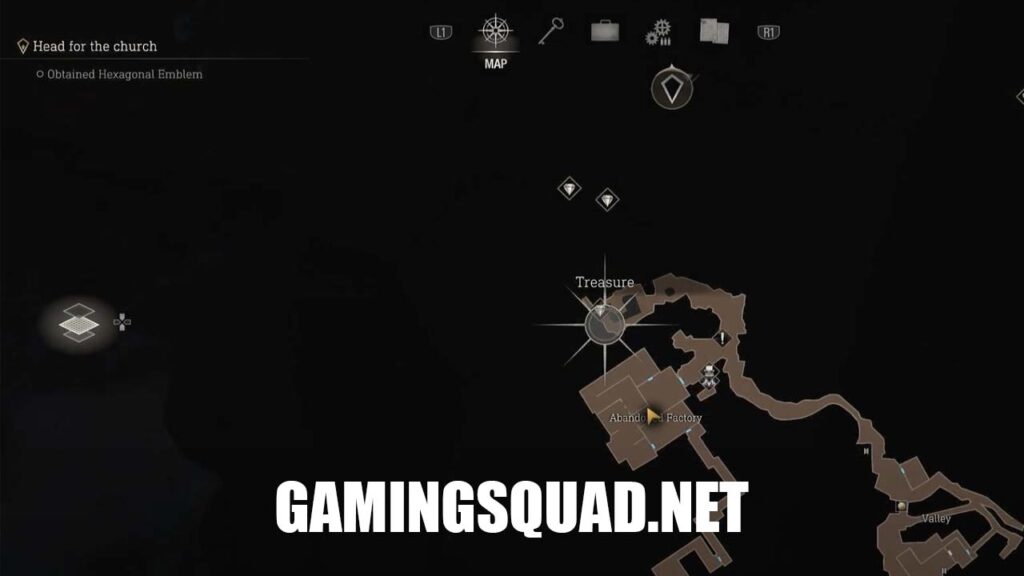
Once you receive a Parry tutorial in the Abandoned Factory, the collectible can be found in the second oven on the left.
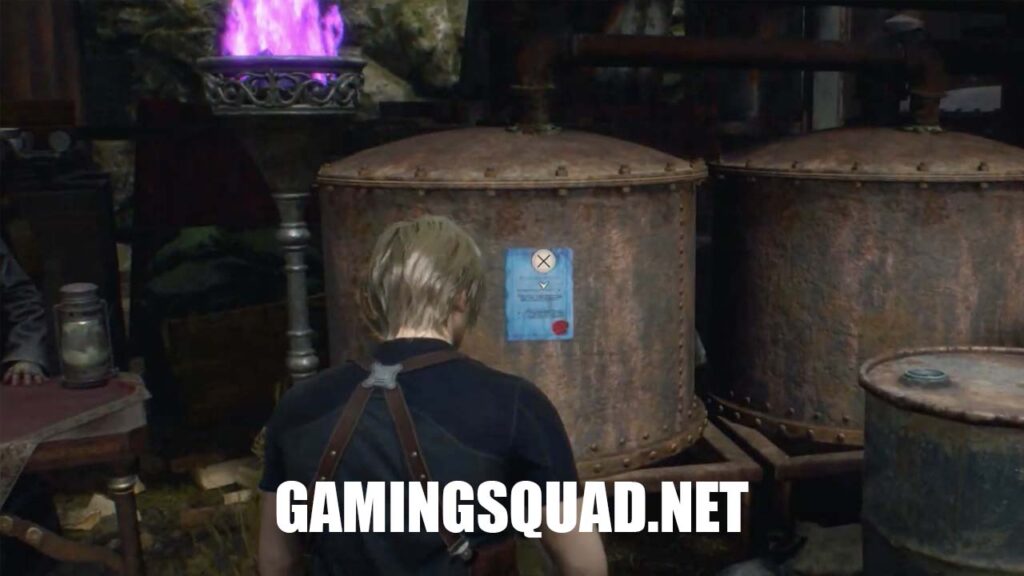
The first Merchant is located nearby. Simply return to the factory you just exited and eliminate the 3 rats in the area – one can be found in the destroyed hallway on the right, while the other two are in the central room where the Parry tutorial was held. After dealing with the rats, head back to the Merchant.

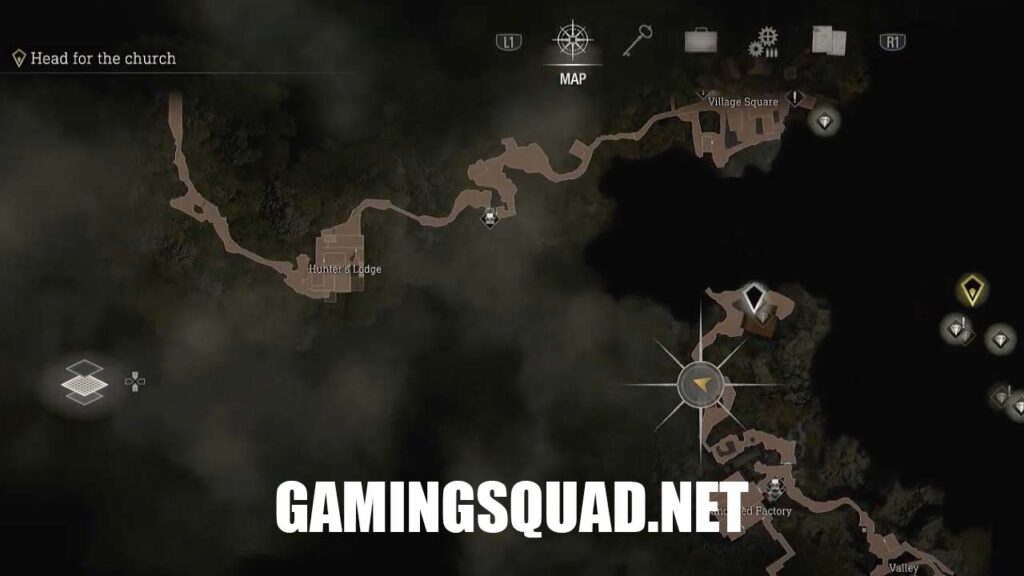
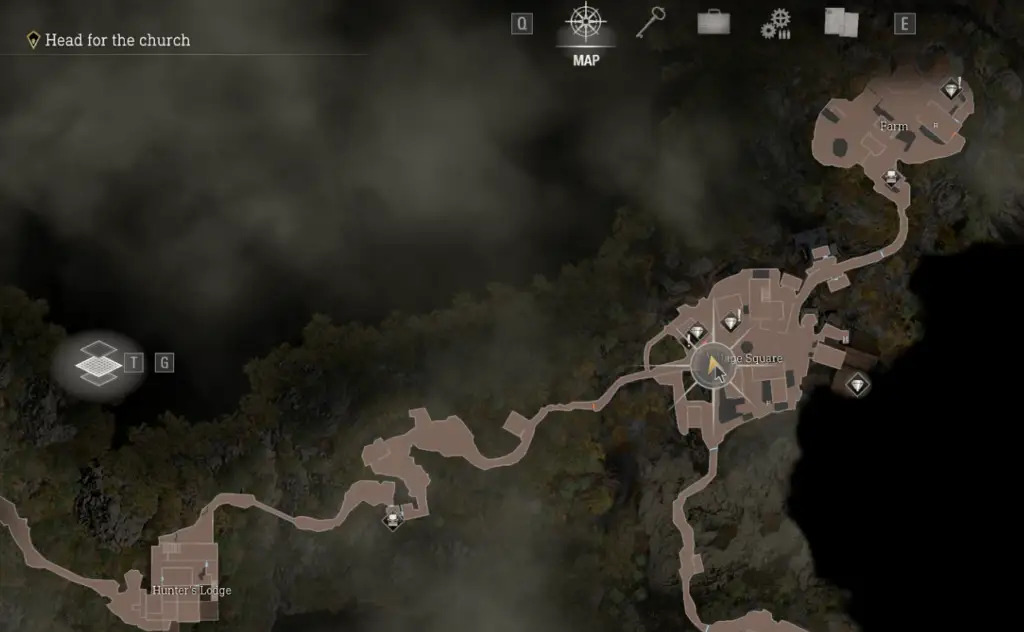
You can purchase the Treasure Map from the Merchant under the “Trade” section for 1 Spinel. This handy item will display the locations of all the remaining Village Treasures on your map, making them much easier to find.
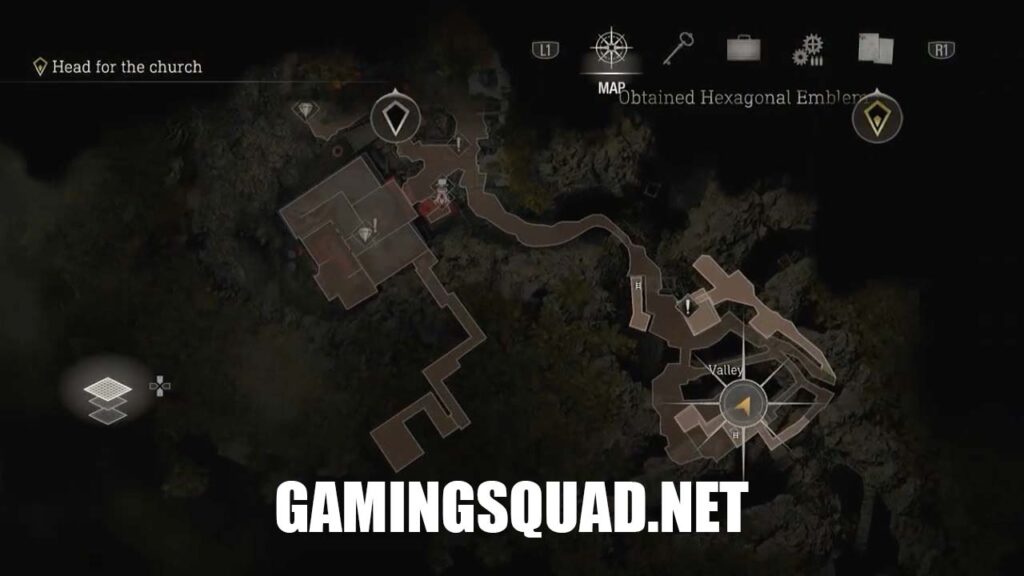
Following your encounter with the first Merchant, you will enter an enemy-infested region known as the “Valley.” To find the treasure, head to the northernmost part of this area, uphill, and open the chest.
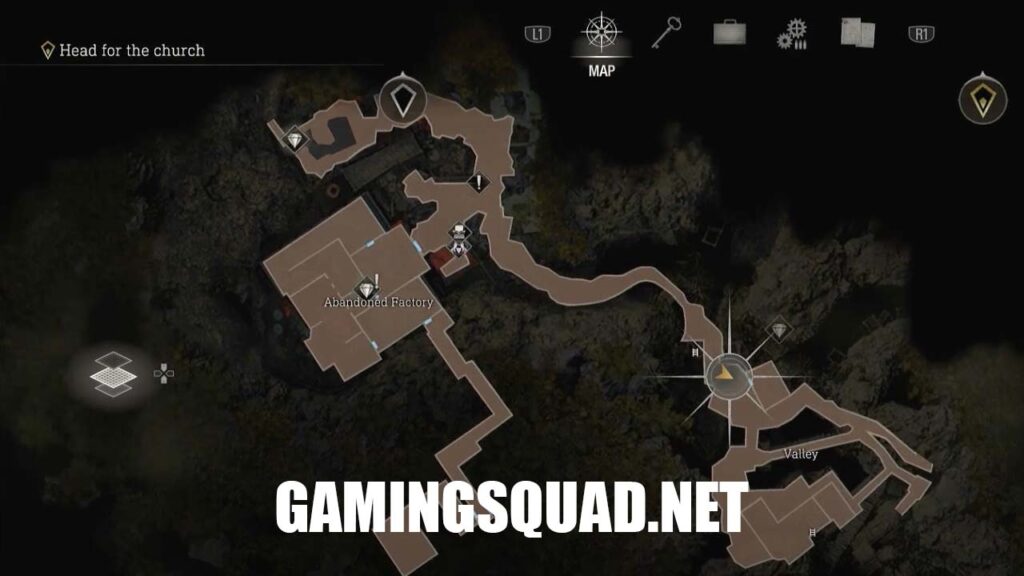
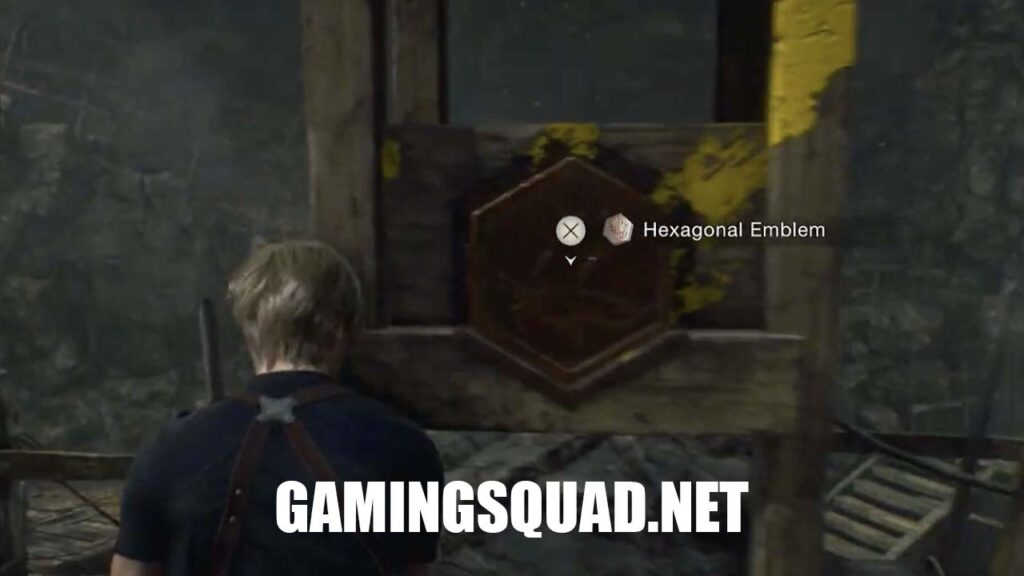
In the southern portion of the “Valley” area, proceed upstairs after clearing out the enemies to locate the collectible on the side of the weather vane. Once obtained, you can insert it into the gate located next to the Merchant, but remember to rotate the emblem so that the phoenix is facing the wall.
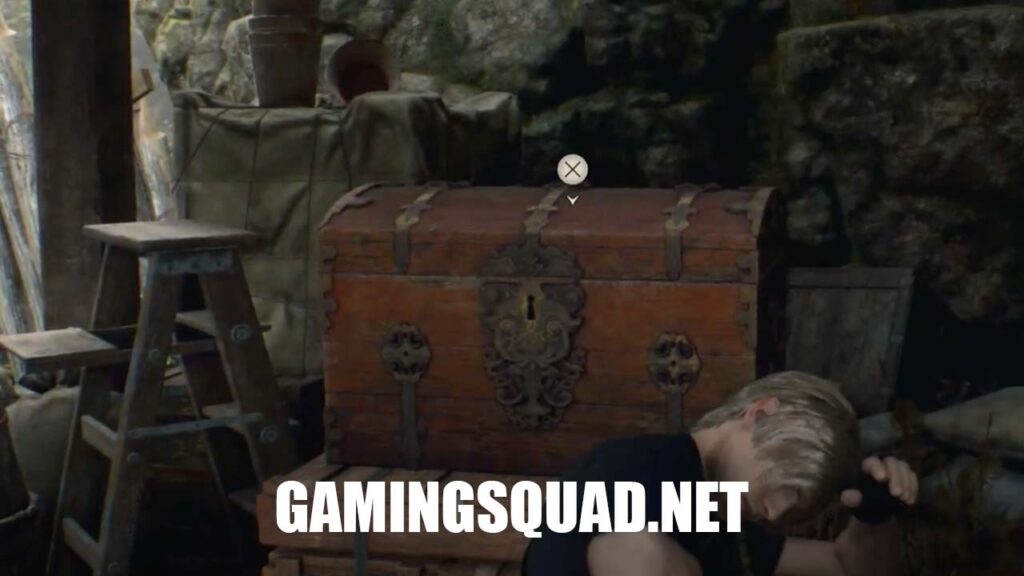
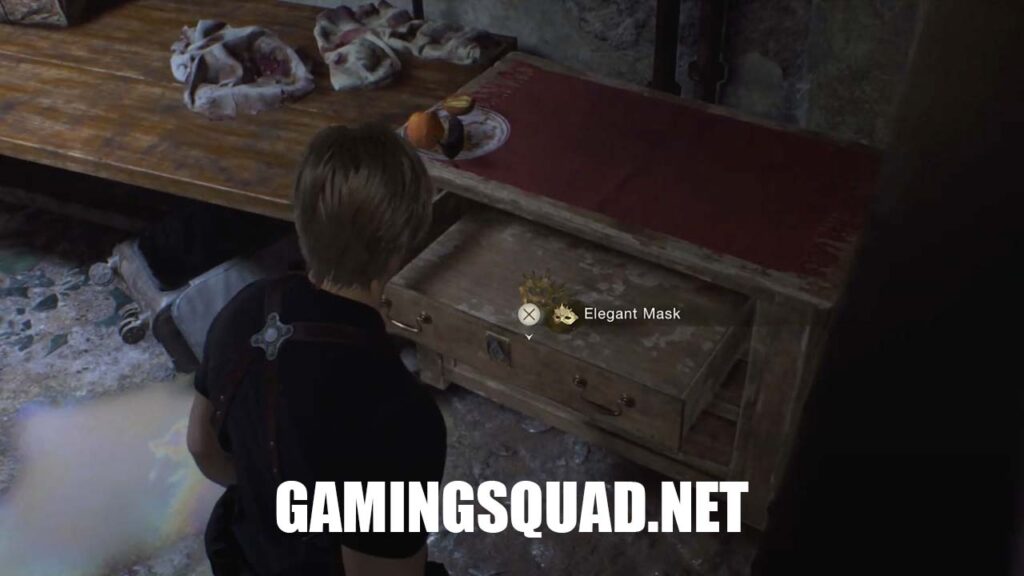
To find the next set of collectibles, return to the Merchant and enter the factory where you previously retrieved your equipment. Once inside, use the Small Key on the locked drawer located behind the gate.
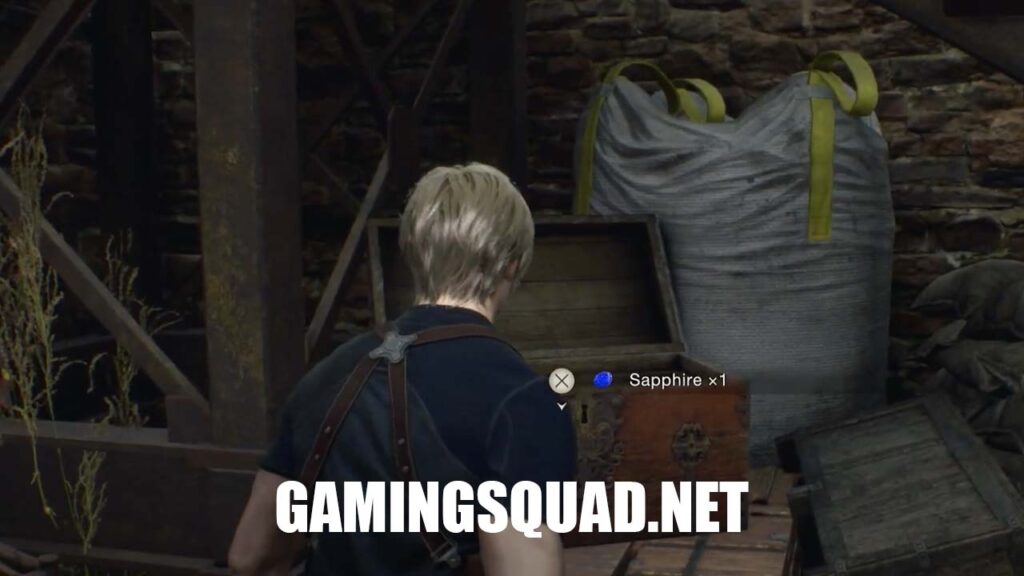
After using the Hexagonal Emblem on the gate, proceed through it and crouch under the boxes to the left. At the end of the path, you’ll find a treasure chest containing the Sapphire.
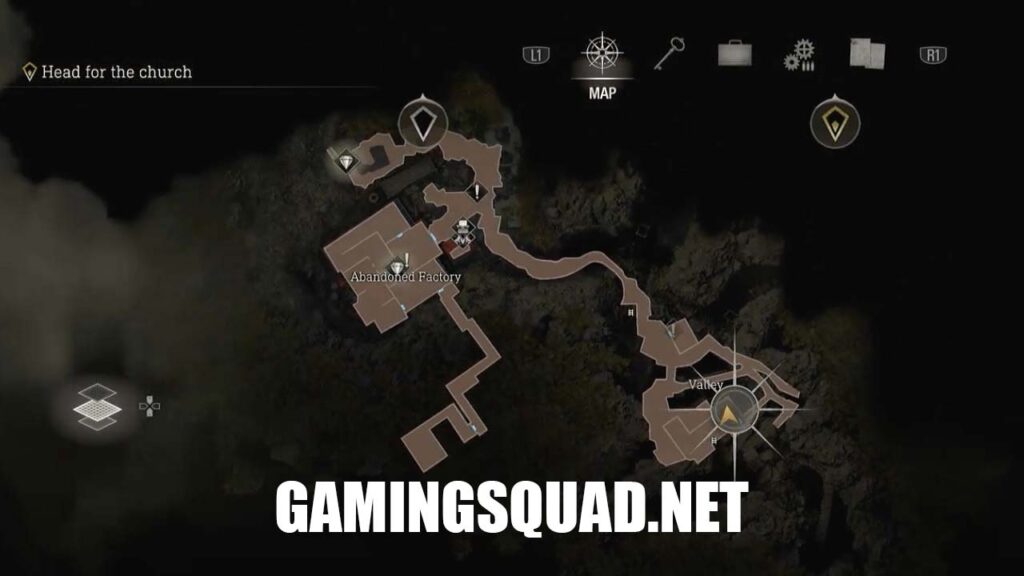
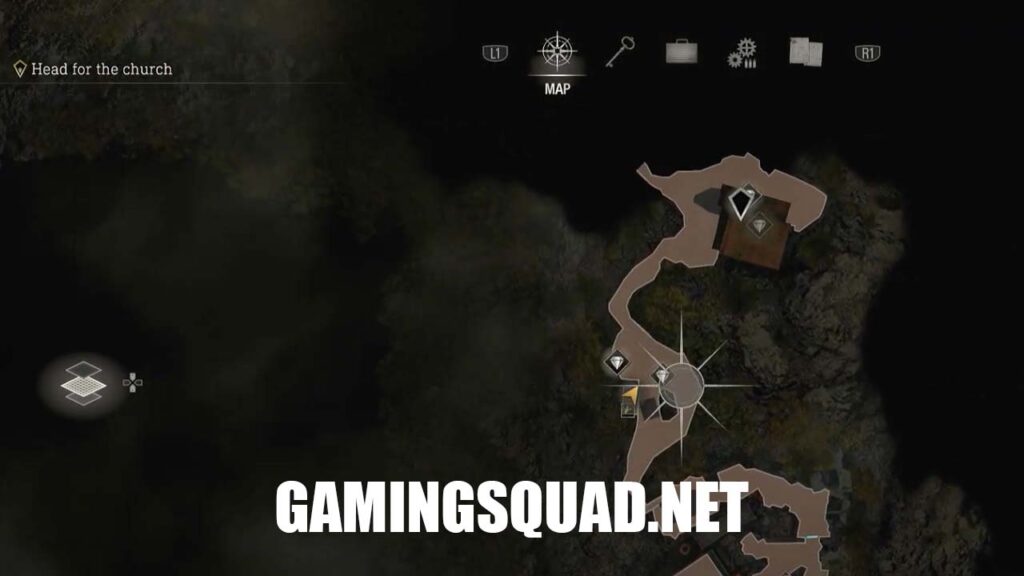
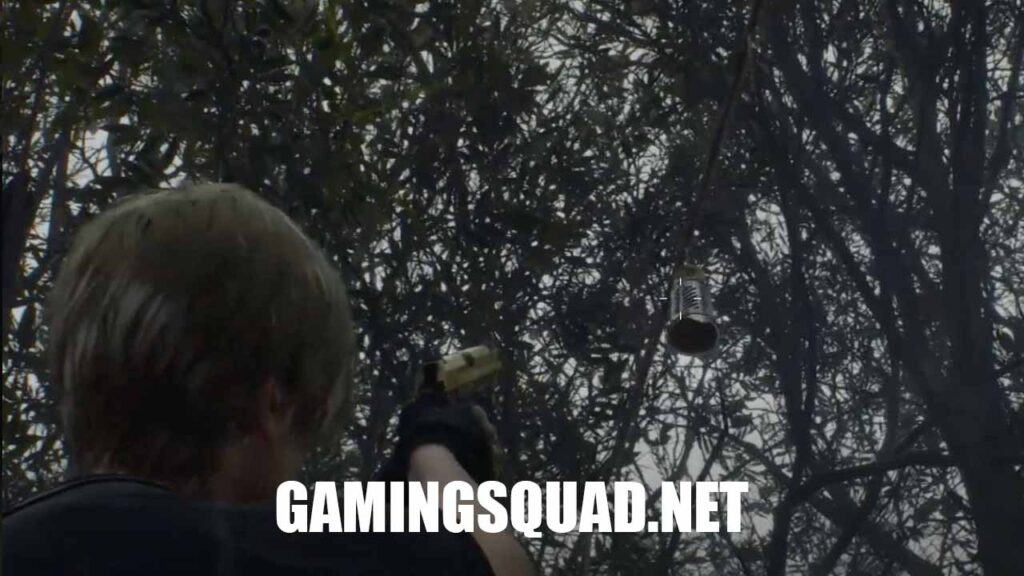
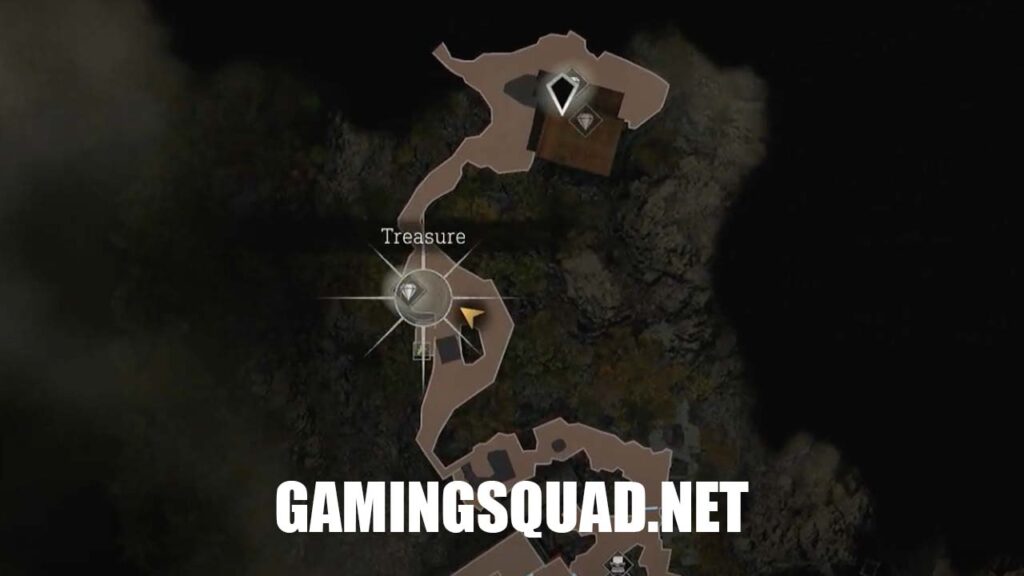
Return to the same area as before and look for a silver bell hanging from a tree in the middle. Shoot it down and pick up the treasure from the ground.
Also in the same area, look for a well on the left side. Shoot the stick behind the well first so that the treasure doesn’t get dirty when it falls down. Then shoot the silver bell hanging from the well to make the treasure safely land on the lid.
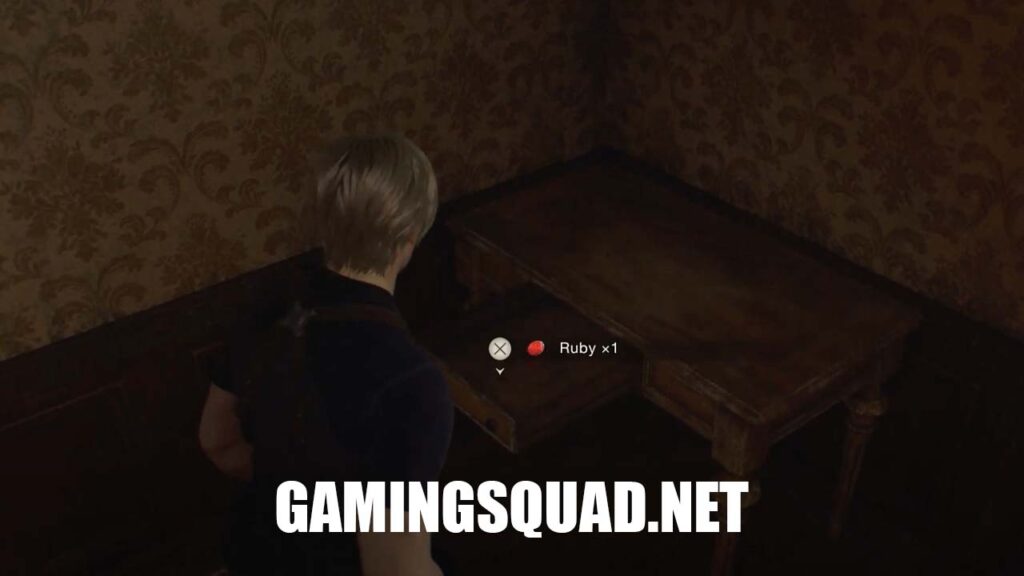
In the next house you enter, check the drawer in the entry hallway downstairs to find the Ruby.
Collectibles Breakdown:
- Treasure: Valuable gems and necklaces.
- Files: Important documents for lore.
- Key Items: The Small Key for locked containers.
Clockwork Castellan
Small Key
Chapter 2 Treasures
Sapphire (Treasure)Once you receive a Parry tutorial in the Abandoned Factory, the collectible can be found in the second oven on the left.
Merchant Request
Pest Control (Merchant Request)The first Merchant is located nearby. Simply return to the factory you just exited and eliminate the 3 rats in the area – one can be found in the destroyed hallway on the right, while the other two are in the central room where the Parry tutorial was held. After dealing with the rats, head back to the Merchant.
Village (Treasure Map)
You can purchase the Treasure Map from the Merchant under the “Trade” section for 1 Spinel. This handy item will display the locations of all the remaining Village Treasures on your map, making them much easier to find.
Treasure #2
Ruby (Treasure)Following your encounter with the first Merchant, you will enter an enemy-infested region known as the “Valley.” To find the treasure, head to the northernmost part of this area, uphill, and open the chest.
Key Item
Hexagonal Emblem (Key Item)In the southern portion of the “Valley” area, proceed upstairs after clearing out the enemies to locate the collectible on the side of the weather vane. Once obtained, you can insert it into the gate located next to the Merchant, but remember to rotate the emblem so that the phoenix is facing the wall.
Treasure #3
Elegant Mask (Treasure)To find the next set of collectibles, return to the Merchant and enter the factory where you previously retrieved your equipment. Once inside, use the Small Key on the locked drawer located behind the gate.
Treasure #4
Sapphire (Treasure)After using the Hexagonal Emblem on the gate, proceed through it and crouch under the boxes to the left. At the end of the path, you’ll find a treasure chest containing the Sapphire.
Treasure #5
Sapphire (Treasure)Return to the same area as before and look for a silver bell hanging from a tree in the middle. Shoot it down and pick up the treasure from the ground.
Treasure #6
Pearl Pendant (Treasure)Also in the same area, look for a well on the left side. Shoot the stick behind the well first so that the treasure doesn’t get dirty when it falls down. Then shoot the silver bell hanging from the well to make the treasure safely land on the lid.
Treasure #7
Ruby (Treasure)In the next house you enter, check the drawer in the entry hallway downstairs to find the Ruby.
(Chapter 3: The Lake)
In Chapter 3, you’ll explore the lake area, where you’ll encounter new challenges and find treasures, files, and key items. Thorough exploration is key to collecting everything in this chapter.
Collectibles Breakdown:
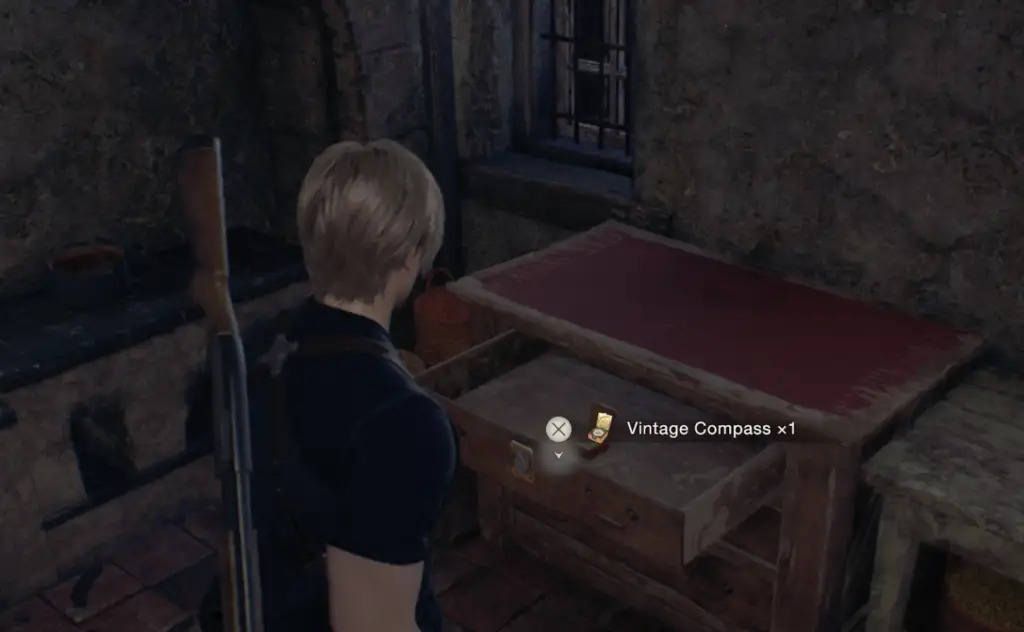
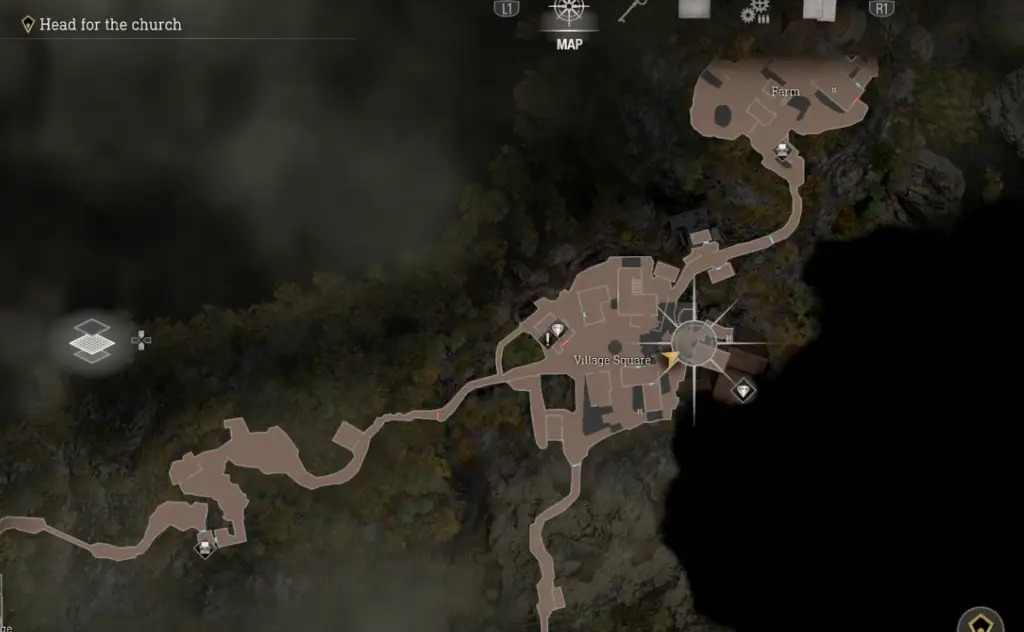
In the Main Village Square, there’s a small house where you can find this treasure inside a drawer. You’ll need the Small Key obtained from the house at the end of Chapter 2.
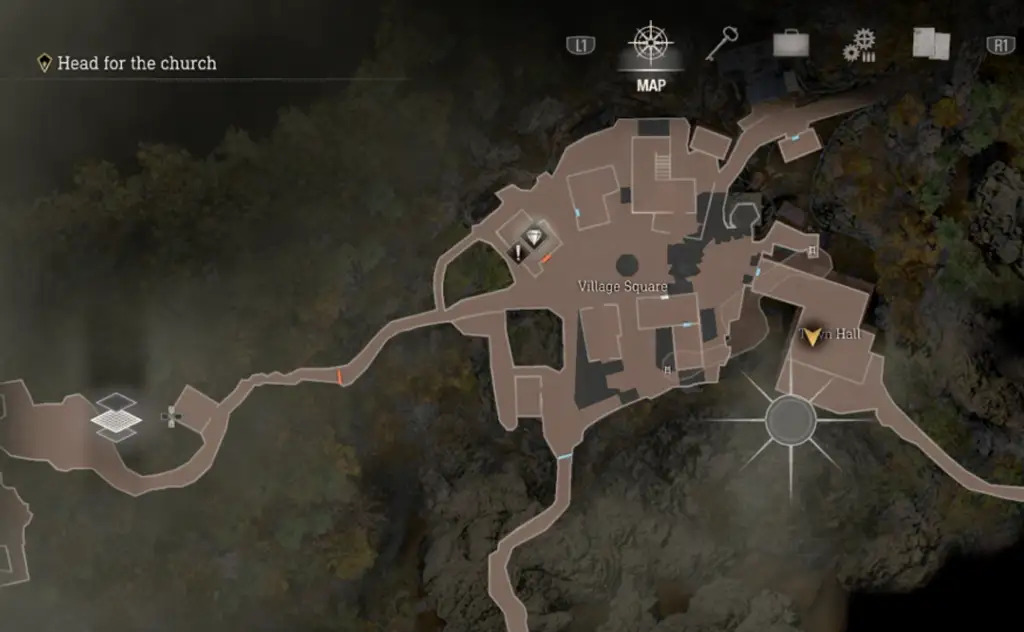
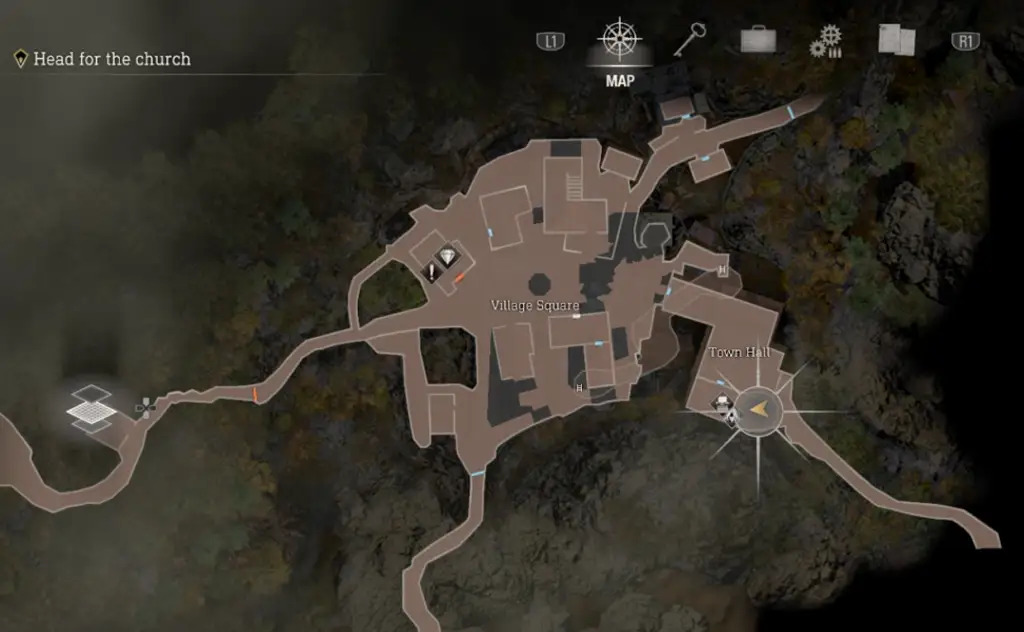
Once you’ve collected the Vintage Compass, use the Insignia Key to unlock the Town Hall door at the Village Square. Inside the Town Hall, you’ll find a silver container hanging from the ceiling which you need to shoot down.
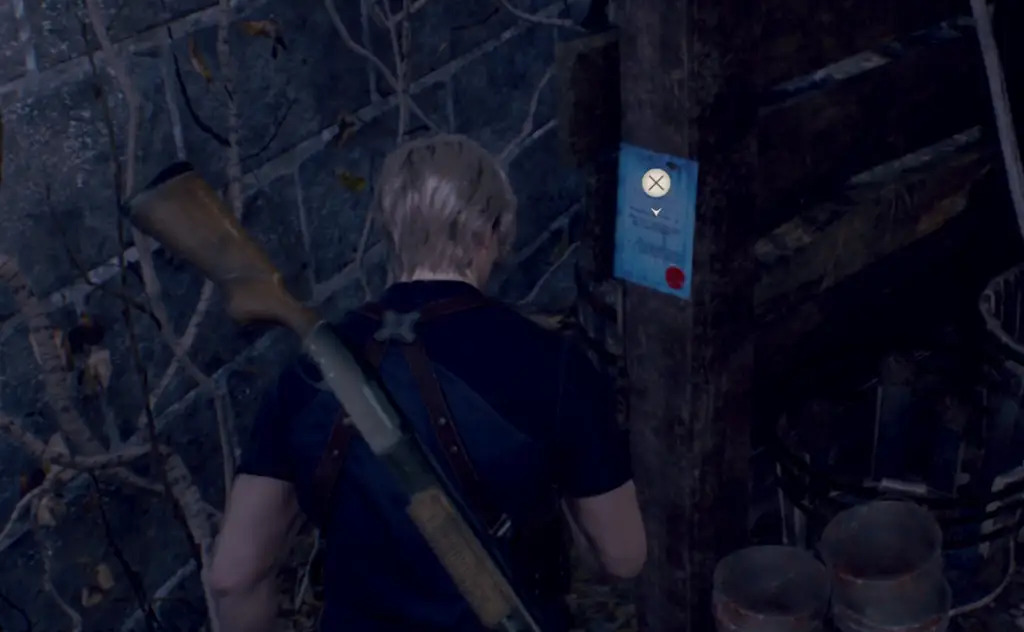
After leaving the Town Hall, you’ll come across the next merchant. The blue request letter for the Viper Hunter quest can be found on the wall next to him. To complete the quest, you must find and sell 3 Vipers to the merchant. You’ll find them over time, and they can also be found in loot crates.
Go back to the previous room, to find the first viper, inside a box.
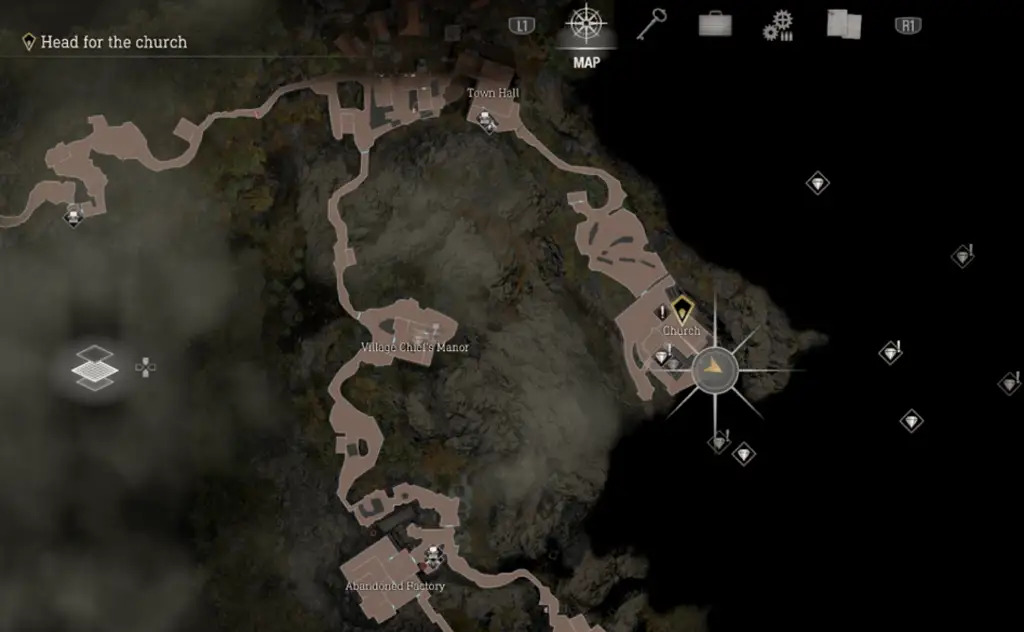
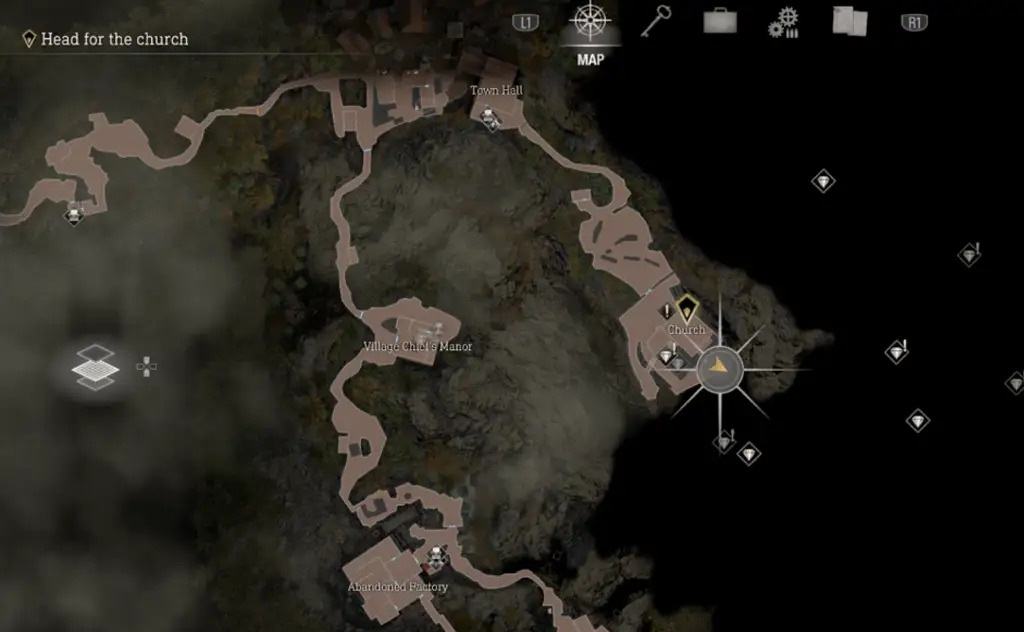
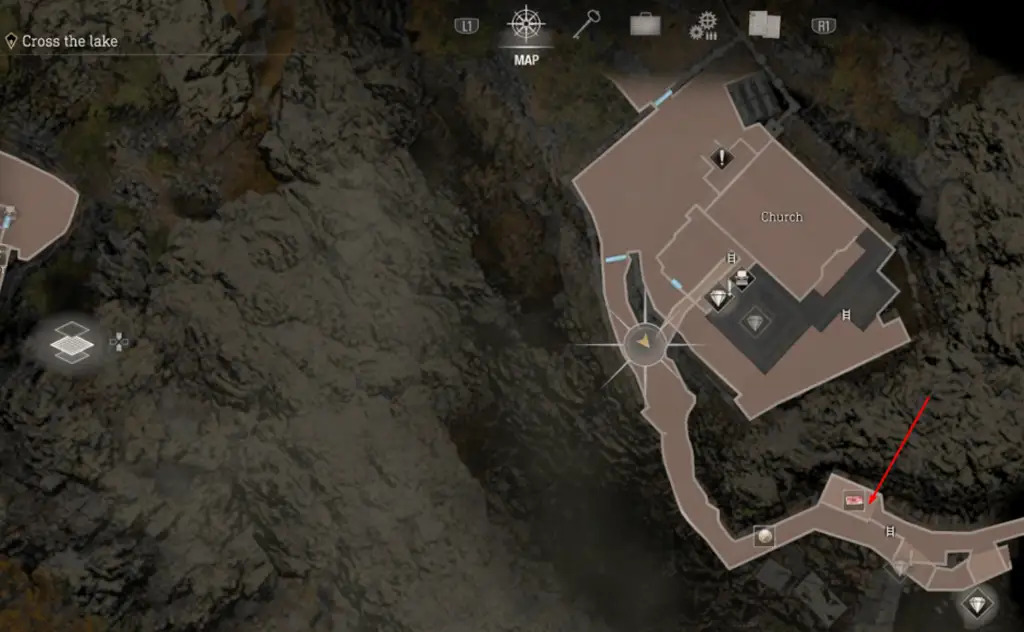
After going through a graveyard, you’ll reach the church. Outside the church, follow the path on the right all the way to the end to find a treasure chest and a request letter. This is located outside the typewriter save room.
To complete this quest, head left of the Elegant Headdress treasure and pick up the request letter. Then, go back to the graveyard in front of the church and shoot the V-emblems on the double graves near the center of the graveyard.
When you follow the corridor to the right of the church, you will soon find a house, where there is a viper inside the box.
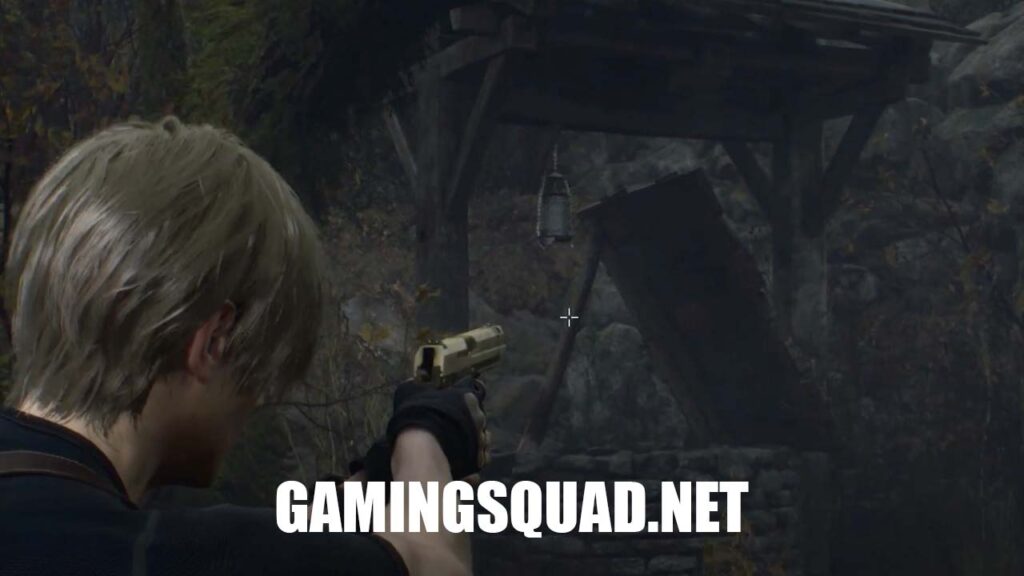
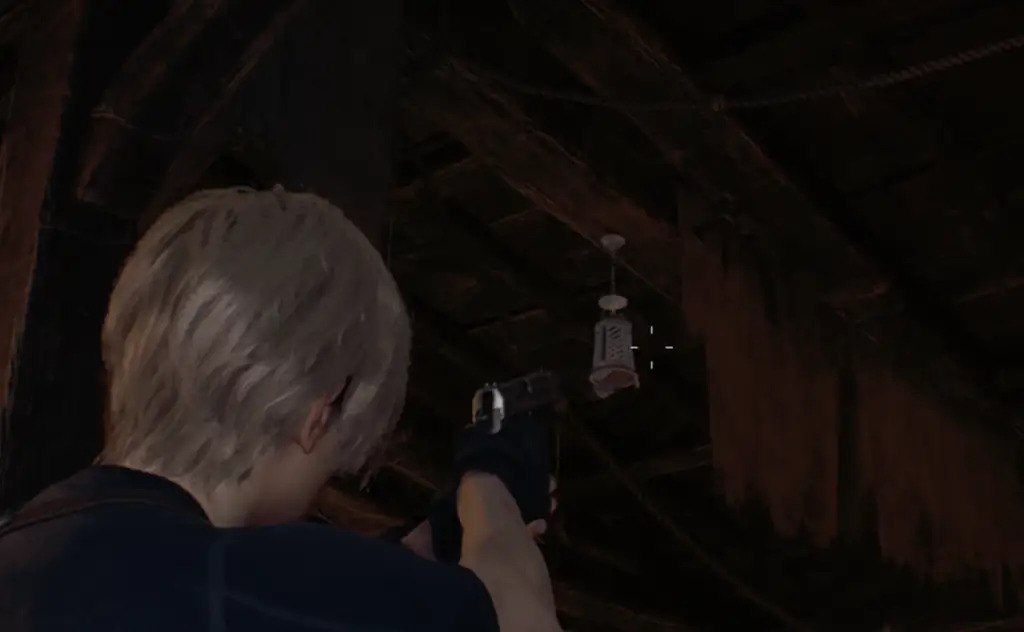
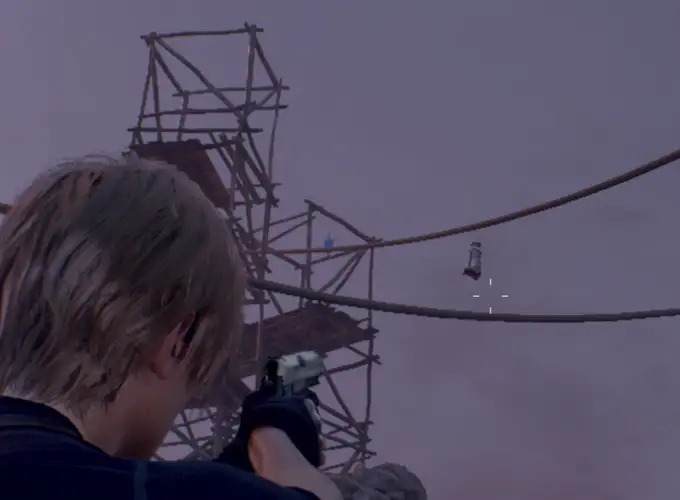
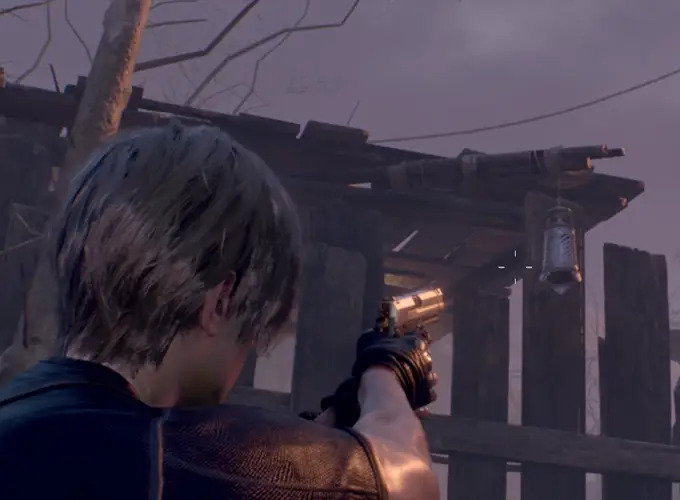
Shoot down the lamp from the wires above in the same area.
You can find three vipers in the same place as the previous medallion, usually on the path before the hut. Shoot and collect them, then sell them to the merchant later to complete the request.
Shoot down the silver container in the flooded area on the right side of the Fish Farm.
Sell the vipers to the merchant to complete the “Viper Hunter” request
Drop down the ladder next to the merchant and open the locked drawer with the small key to find this treasure.
Collectibles Breakdown:
- Treasure: Valuable items like gems and necklaces.
- Files: Documents that reveal more of the story.
- Key Items: Items like the Small Key for unlocking chests and drawers.
Blue Medallions
Clockwork Castellan
Small Key
Treasure #1
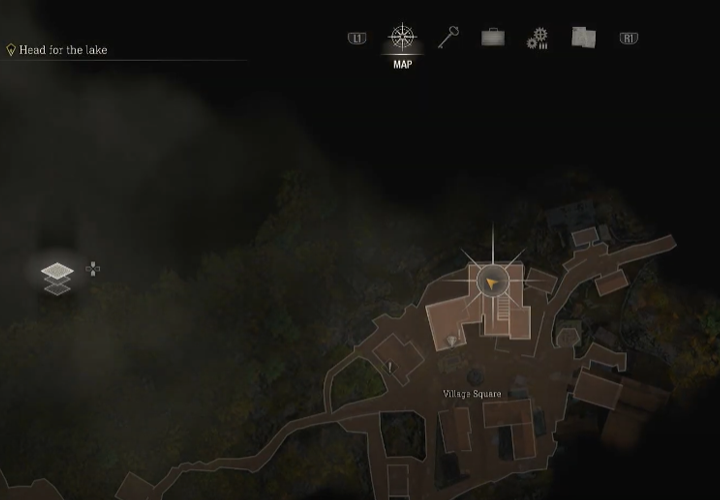
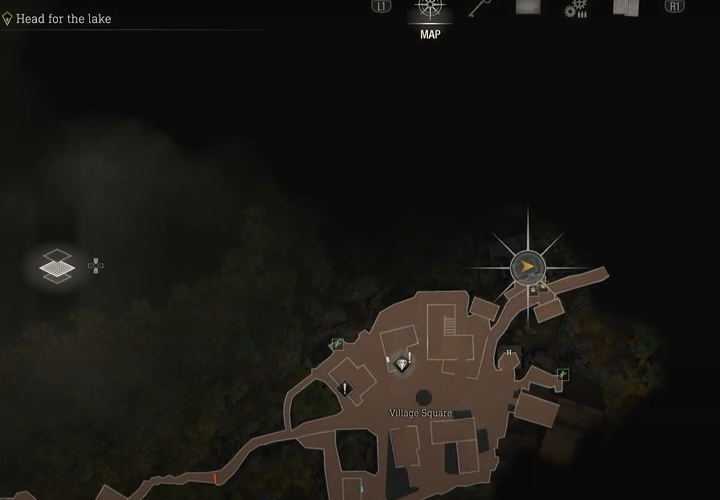
Vintage Compass (Treasure)In the Main Village Square, there’s a small house where you can find this treasure inside a drawer. You’ll need the Small Key obtained from the house at the end of Chapter 2.
Treasure #2
Velvet Blue (Treasure)Once you’ve collected the Vintage Compass, use the Insignia Key to unlock the Town Hall door at the Village Square. Inside the Town Hall, you’ll find a silver container hanging from the ceiling which you need to shoot down.
Viper Hunter (Merchant Request
After leaving the Town Hall, you’ll come across the next merchant. The blue request letter for the Viper Hunter quest can be found on the wall next to him. To complete the quest, you must find and sell 3 Vipers to the merchant. You’ll find them over time, and they can also be found in loot crates.
Viper 1(Merchant Request)
Go back to the previous room, to find the first viper, inside a box.
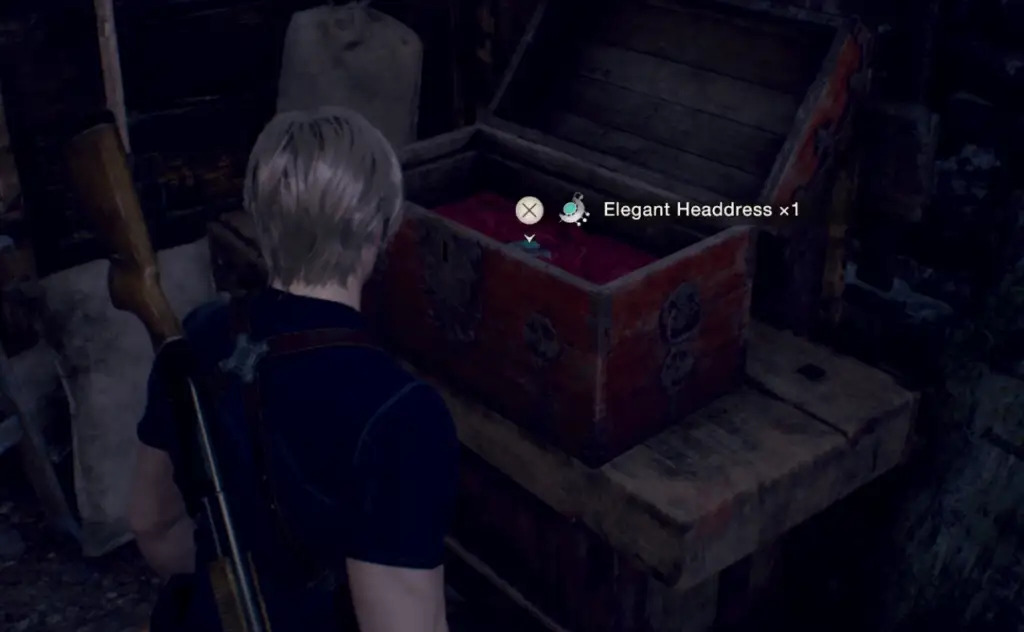
Treasure #3
Elegant Headdress (Treasure)After going through a graveyard, you’ll reach the church. Outside the church, follow the path on the right all the way to the end to find a treasure chest and a request letter. This is located outside the typewriter save room.
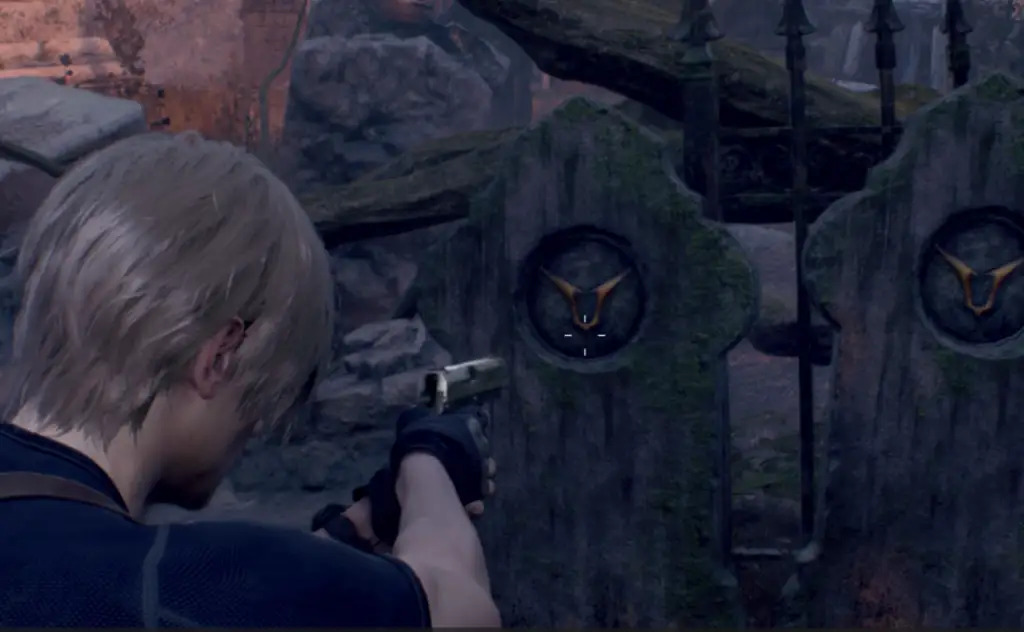
Grave Robber (Merchant Request)
To complete this quest, head left of the Elegant Headdress treasure and pick up the request letter. Then, go back to the graveyard in front of the church and shoot the V-emblems on the double graves near the center of the graveyard.
Viper 2 (Merchant Request)
When you follow the corridor to the right of the church, you will soon find a house, where there is a viper inside the box.
Treasure #4
Ruby (Treasure)Shoot down the lamp from the wires above in the same area.
Viper 3 (Merchant Request)
You can find three vipers in the same place as the previous medallion, usually on the path before the hut. Shoot and collect them, then sell them to the merchant later to complete the request.
Treasure #5
Antique Pipe (Treasure)Shoot down the silver container in the flooded area on the right side of the Fish Farm.
Finish Viper Hunt (Merchant Request)
Sell the vipers to the merchant to complete the “Viper Hunter” request
Treasure #6
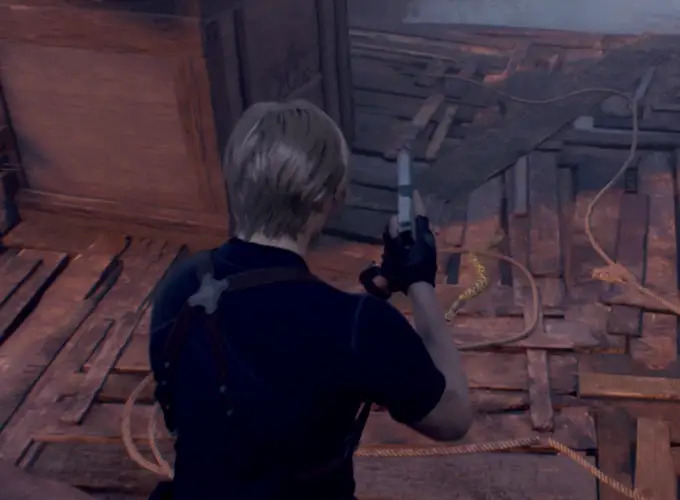
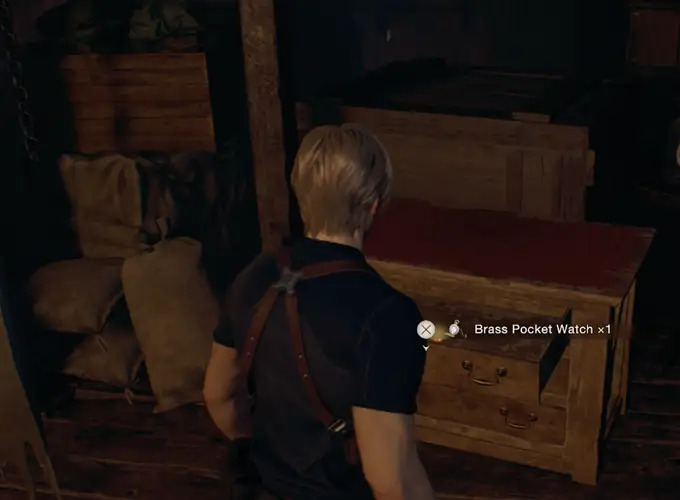
Brass Pocket Watch (Treasure)Drop down the ladder next to the merchant and open the locked drawer with the small key to find this treasure.
(Chapter 4: The Church)
In Chapter 4, Leon explores the church and its surrounding areas, finding various treasures, files, and key items. Be sure to check every corner as some collectibles are hidden in hard-to-reach spots.
Collectibles Breakdown:
You can find it in a chest on the shipwreck at the center of the lake.
Find it on a barrel on the little island located in the east of the lake, where the chicken farm is.
Use the Old Wayshrine Key on the altar in Lakeside Settlement, which is located in the northwest area of the lake.
Enter the house in Lakeside Settlement and open the drawer in the first room on the left with the small key.
Drop down into the dark basement of the same house and go to the end of the basement where Chapter 1 ended.
In the same room as the last key item, upstairs. Shoot down the silver container to get the treasure.
Solve the puzzle on the altar where you can insert the 3 Hexagon Pieces, located on the west side of the lake. Follow the instructions shown in the image to obtain the treasure.
Drive the boat through the tunnel on the west side of the lake. After the cave, use the Old Wayshrine Key to open a shrine and get the treasure.
Shoot down the silver bell to the right of the previous treasure shrine.
To find the Velvet Blue treasure, take the boat to the far south-west of the lake and enter the dripstone cave. Once inside, disembark from the boat and head towards the Large Cave Shrine. Look up and shoot down the hanging silver container from the ceiling to claim your prize.
To get the Butterfly Lamp, return to the merchant in the southwest of the lake. Then, go through the doors next to him to backtrack towards the church using the same path from Chapter 3. Finally, use the Wayshrine Key on the Wayshrine to reach the church.
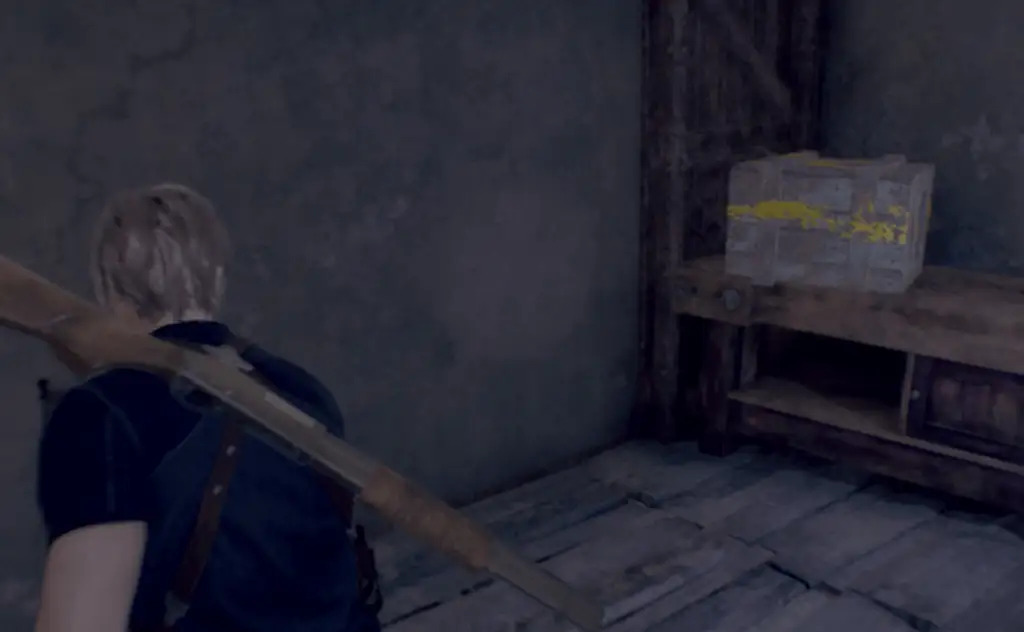
The Yellow Diamond can be found in the typewriter save room of the church. To access it, use the Small Key to open the drawer.
Collectibles Breakdown:
- Treasure: Valuable gems, necklaces, and other items.
- Files: Story-related documents to enhance the lore.
- Key Items: Key items required for progression, including Small Keys for locked container
Clockwork Castellan
Small Key
Old Wayshrine Key (Key Item)
Find it in the Mural Cave by turning right before entering the underground lake and look for it on a small altar.Egg Hunt (Merchant Request)
The golden egg you need for this is on the east island of the lake, where the chicken farm is located. After getting it, sell it to the merchant who is located southwest of the lake.Treasure 1#
Alexandrite (Treasure)You can find it in a chest on the shipwreck at the center of the lake.
Red 9 Pistol (Treasure + Weapon)
This treasure is on the same boat as Alexandrite.Treasure #2
Velvet Blue (Treasure )Find it on a barrel on the little island located in the east of the lake, where the chicken farm is.
Gold Chicken Egg (Merchant Request)
On the same island as the previous treasure, sell it to the Merchant to complete the Egg Hunt request.Treasure #3
Pearl Bangle (Treasure)Use the Old Wayshrine Key on the altar in Lakeside Settlement, which is located in the northwest area of the lake.
Catch Me A Big Fish (Merchant Request)
To complete this request, open the locked door in Lakeside Settlement using the Insignia Key. The door is located in the tunnel, and the blue letter is behind it. You must then catch a Lunker Bass fish in the lake in front of the Boat House.Treasure #4
Gold Bar (Treasure)Enter the house in Lakeside Settlement and open the drawer in the first room on the left with the small key.
Treasure #5
Red Gemstone Ring (Treasure)Drop down into the dark basement of the same house and go to the end of the basement where Chapter 1 ended.
Lunker Bass (Merchant Request)
Harpoon the big fish near the Boat House in the southeast corner of the lake. Sell it to the merchant in the southwest of the lake to complete the request.Finish Egg Hunt & #15 Catch me a Big Fish (Merchant Request)
Sell the Golden Egg and Lunker Bass to the merchant in the southwest of the lake to free up inventory space and complete the two requests for him.Blasphemer’s Head (Key Item)
Drive the boat to the north-east corner of the lake and dock it in the cave. Interact with the console by the locked door and press the 3 correct icons to obtain the key item. The next treasure is also located here.Hexagon Piece C (Key Item)
In the same room as the last key item, on the right before climbing up. This is needed for one of the shrines on the west of the lake to obtain a treasure later.Treasure #6
Ruby (Treasure)In the same room as the last key item, upstairs. Shoot down the silver container to get the treasure.
Treasure #7
Depraved Idol (Treasure)Solve the puzzle on the altar where you can insert the 3 Hexagon Pieces, located on the west side of the lake. Follow the instructions shown in the image to obtain the treasure.
Treasure #8
Splendid Bangle (Treasure)Drive the boat through the tunnel on the west side of the lake. After the cave, use the Old Wayshrine Key to open a shrine and get the treasure.
Treasure #8
Alexandrite (Treasure)Shoot down the silver bell to the right of the previous treasure shrine.
Treasure #8
Velvet Blue (Treasure)To find the Velvet Blue treasure, take the boat to the far south-west of the lake and enter the dripstone cave. Once inside, disembark from the boat and head towards the Large Cave Shrine. Look up and shoot down the hanging silver container from the ceiling to claim your prize.
Apostate’s Head (Key Item)
To obtain the Apostate’s Head key item, go to the same area as the Velvet Blue treasure and climb up the ladder to the end of the path. Interact with the console by the door and select the 3 correct icons (refer to the guide below). Once you have successfully entered the combination, the door will unlock and you can retrieve the item inside.Church Insignia (Key Item)
To obtain the Church Insignia, head back to the Mural Cave where the chapter started. Once there, place both the Blasphemer’s Head on the left pedestal and the Apostate’s Head on the right pedestal. Afterward, backtrack to the church from Chapter 3 and insert the Insignia on the church gate.Treasure #9
Butterfly Lamp (Treasure)To get the Butterfly Lamp, return to the merchant in the southwest of the lake. Then, go through the doors next to him to backtrack towards the church using the same path from Chapter 3. Finally, use the Wayshrine Key on the Wayshrine to reach the church.
Small Key (Key Item)
After entering the church with the Insignia and proceeding inside, the Small Key can be found on the right side of the altar. Use the Small Key on the drawer in the save room of the church (see next treasure).Treasure #10
Yellow Diamond (Treasure)The Yellow Diamond can be found in the typewriter save room of the church. To access it, use the Small Key to open the drawer.
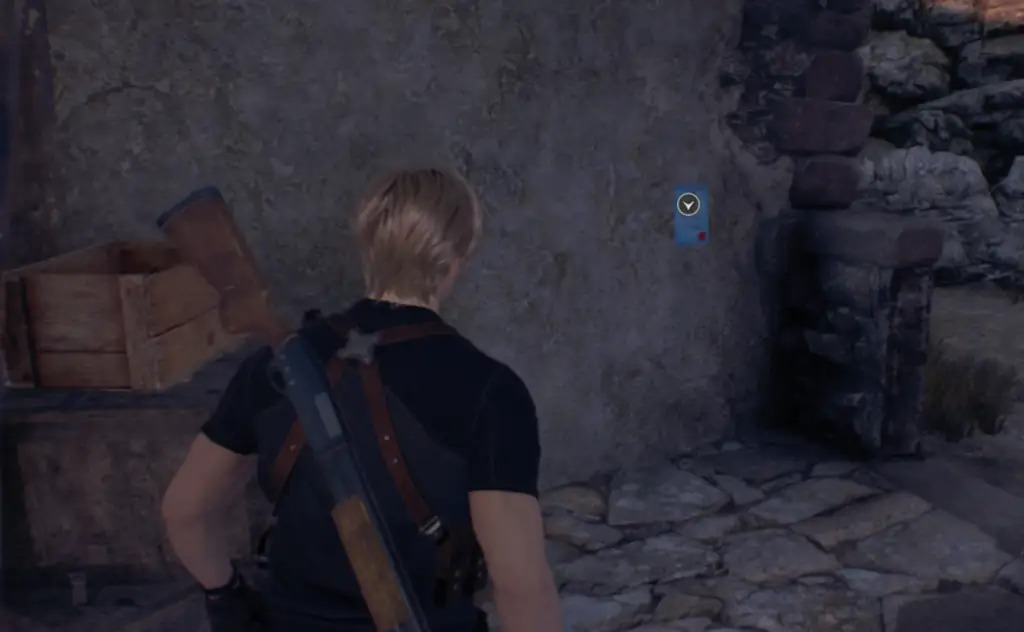
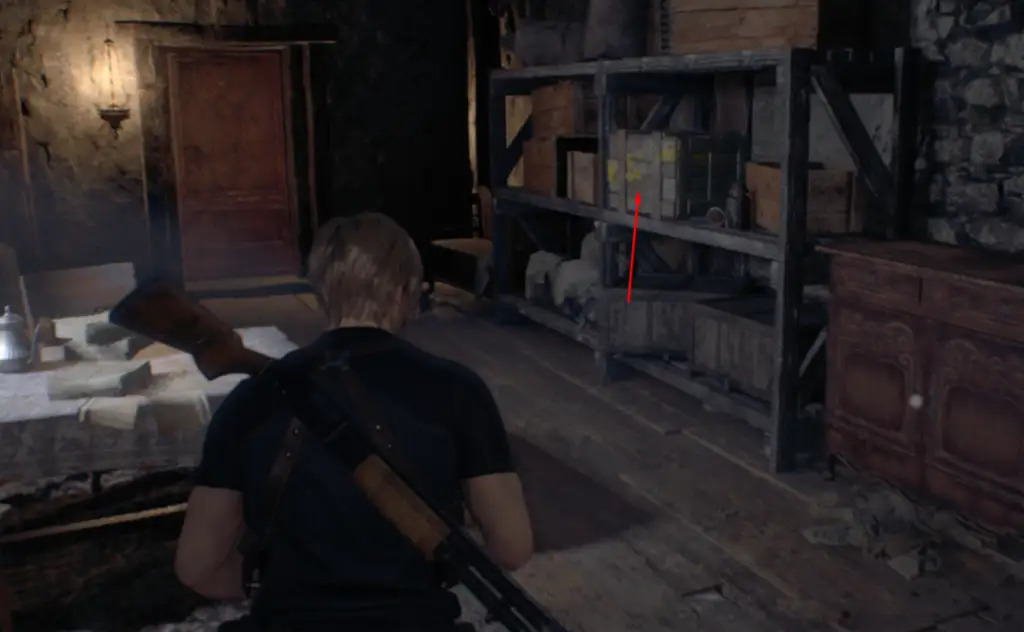
Blue Dial (Key Item)
To obtain the Blue Dial, search for it on a shelf located on the right side of the church. Once obtained, pull the lever to the left of the altar and insert the Blue Dial into the altar. Finally, spin the blue, green, and red glass around the wings of the creature so that all the colored glass fills the full area but doesn’t overlap each other.
(Chapter 5: The Villa)
In Chapter 5, Leon explores the villa, encountering enemies and discovering hidden treasures, files, and key items. Make sure to thoroughly explore the villa and its surroundings to collect everything before moving forward.
Collectibles Breakdown:
At the beginning of Chapter 5, turn around and enter the room where Chapter 4 ended. Once inside, shoot down the silver container hanging from the ceiling to get the Yellow Diamond. This is still inside the church, upstairs.
In Village Square, after defeating the enemies, go to the last house and interact with the yellow ledge on the side to boost Ashley up. She will open the door, and inside, you can find a blue chest with the Elegant Bangle.
Also found in the attic of Village Chief’s Manor. At the end of the attic, you must crouch under a wooden plank and then find it on a shelf.
At the farm, use the Wayshrine Key to interact with the Wayshrine and obtain the Antique Pipe.
Collectibles Breakdown:
- Treasure: Gems and valuable items to sell or combine.
- Files: Documents that provide additional story details.
- Key Items: Important items like the Small Key used to unlock locked chests and drawers.
Treasure #1
Yellow Diamond (Treasure)At the beginning of Chapter 5, turn around and enter the room where Chapter 4 ended. Once inside, shoot down the silver container hanging from the ceiling to get the Yellow Diamond. This is still inside the church, upstairs.
A Savage Mutt (Merchant Request)
To complete this request, go to the wall next to the merchant outside Town Hall. You must kill a big wolf in Village Square, but it only spawns after going south to Village Chief’s Manor and exploring the attic by boosting up Ashley. Once you return to Village Square, the enemy will spawn. This will be pointed out in the collectibles below when it happens, so don’t worry about it for now and continue with the next collectibles.Treasure #2
Elegant Bangle (Treasure)In Village Square, after defeating the enemies, go to the last house and interact with the yellow ledge on the side to boost Ashley up. She will open the door, and inside, you can find a blue chest with the Elegant Bangle.
Castellan 5
From Village Square, take the path south to Village Chief’s Manor. This can be found in the attic of Village Chief’s Manor, accessed from the bedroom by pulling the lever and boosting Ashley up the ladder. It’s on the left side of the attic, behind a yellow destructible crate. You cannot pick it up earlier because you need Ashley to reach the attic.Treasure #3
Antique Camera (Treasure)Also found in the attic of Village Chief’s Manor. At the end of the attic, you must crouch under a wooden plank and then find it on a shelf.
A Savage Mutt (Merchant Request)
After clearing out the attic, return to the Village Square, and a big wolf enemy will spawn. Defeat it to finish this Merchant Request.Treasure #4
Antique Pipe (Treasure)At the farm, use the Wayshrine Key to interact with the Wayshrine and obtain the Antique Pipe.
(Chapter 6: The Checkpoint)
Treasure #1
Yellow Diamond (Treasure)Find this in a chest upstairs on the left side, after defeating enemies through the door past the first typewriter save room and going up the stairs.
Treasure #2
Chalice of Atonement (Treasure)Inside a chest in the first house on the left after going through the next gate.
Castellan 6
Located under the bonfire to the right after exiting the previous treasure’s house, just before reaching the “Checkpoint” area.Treasure #3
Elegant Headdress (Treasure)Upstairs in the “Checkpoint” area, accessible with a Wayshrine Key.
Checkpoint Crank (Key Item)
Located in the middle house of the “Checkpoint” area, use it to open the gate with a black map marker to the south. Beware, using it will spawn powerful enemies, and they will drop the crank afterward.Mendez’s False Eye (Key Item)
Dropped by Bitores Mendez Boss.Treasure #4
Emerald (Treasure)Shoot down the silver container hanging from a tree next to an old car after leaving the Mendez Boss area
(Chapter 7: The Castle)
Castle (Treasure Map)
Purchase the Castle Treasure Map from the merchant located in the first door on the right as you enter the Castle. The map will mark all treasures and add a progress counter to the bottom right of the map.Treasure #1
Vintage Compass (Treasure)Find the Vintage Compass outside behind the merchant in a chest. Circle around the building to locate it.
Boot Knife (Weapon)
Loot the Boot Knife from the first enemy encountered in the Chapel during Chapter 7.Treasure #2
Elegant Bangle (Treasure)After destroying the counterweight on the cannon, climb the ladder to find the Elegant Bangle before the next door.
Destroy the Blue Medallions 3 (Merchant Request)
Find the blue request letter behind the gate opened with the cannon. Shoot six blue medallions.Blue Medallion 1
In the pavilion behind the cannon.Blue Medallion 2
In the window of ruins across from the cannon when facing north.Blue Medallion 3
Hanging above the 2nd medallion or shoot it from the cannon.Blue Medallion 4
In the room where the cannon’s counterweight was destroyed, hanging on the ceiling.Blue Medallion 5
Climbing up the next ladder from the previous location and looking left and down.Blue Medallion 6
Before entering the next door on the left, left of the previously opened treasure chest.Treasure #3
Elegant Perfume Bottle (Treasure)Defeat enemies in the Audience Chamber and boost Ashley up the left wall to open the gate. The Elegant Perfume Bottle can be found by turning right and reaching the end of the path.
Treasure #4
Ruby (Treasure)After squeezing through the gap, turn left and shoot down the silver container from the ceiling to acquire the Ruby.
Dungeon Key (Key Item)
At the end of the left path inside the dungeon. Use it on the door in the middle of the dungeon.Treasure #5
Spinel (Treasure)This gem is located in the storage room right after you climb up the ladder and enter. It will be in plain sight.
Castellan 7
Inside the same storage room, on top of a shelf to your immediate right.Golden Sword, Rusted Sword, and Iron Sword (Key Items)
All three swords can be found inside the Treasury, mounted on the wall. Pick them up from there.Bloodied Sword (Key Item)
In the same room as the other swords, you’ll find a gate and a string you can pull. Pull the string and shoot the three hanging icons on the gate – Viper on the right through the gate, Stag on the left where you pulled the string, and Eagle on the right through the gate. The gate will then open, and you can pick up the Bloodied Sword behind it. To solve the puzzle, insert the swords on the frames in the following order from left to right: Iron Sword, Golden Sword, Bloodied Sword, Rusted Sword. This will open the next door.Treasure #6
Gold Bangle (Treasure)In the next corridor, inside a treasure chest.
Golden Hourglass (Treasure)
After going through the next door, kick down the ladder on the right side of the path before anything else. This will allow you to climb back up later. Next, jump across the chandelier on the right, turn right, and drop down the hole to land in front of the treasure chest containing the Golden Hourglass.
Halo Wheel (Key Item)
After dropping down in the Water Hall, you’ll find the Halo Wheel on a statue. Insert it on the right side to lower the stairs, then use it on the pedestal in the middle upstairs. After that, simply continue on the linear path to finish the chapter.
(Chapter 8: The Castle Battlements)
Crimson Lantern (Key Item)
Acquired by defeating the summoner, the first enemy of the chapter in the Wine Cellar. Use it on the door at the start of the area, where you entered the room with the enemy encounter.Treasure 1
Mirror with Pearls & Rubies (Treasure)Found in the Wine Cellar, open the chest behind the Summoner enemy.
Treasure 2
Extravagant Clock (Treasure)After a cutscene, inside the “Bindery,” open the treasure chest.
Lithographic Stone B, C, D
Located in the “Bindery,” pick up the 3 stones and insert them on the door in the same room. Place the stones as shown in the image below, matching each icon to the correct color and square or hexagon around it: Left = Orange Helmet in Hexagon / Top = Orange Shield in Square / Right = Blue Sword in Square / Bottom = Blue Armor in Hexagon. Note that you must place the correct stone in the correct slot.Treasure 3
Small Key (Key Item)Found in the corridor after solving the Lithographic Stones Puzzle. Backtrack to the Bindery and use it to open the locked drawer for a treasure.
Treasure 4
Brass Pocket Watch (Treasure)Located in the Bindery, use the Small Key on the locked drawer to acquire this treasure.
Treasure 5
Ornate Necklace (Treasure)While going through the Castle Battlements, flip a switch to Night (yellow switches that let you pick between Day/Night to open gates). Follow the path until you must climb up yellow rubble, climb up, then drop down through a hole to land near this treasure chest.
Castellan 8
When you go back outside and reach the top of the castle walls, a Giant will throw rocks at you (big Ogre). Here, drop down the RIGHT side of the tower towards the west of the map. Enter the 2nd tower in the west. On the rooftop, circle around the tower to find the Castellan at the end.Treasure 6
Emerald (Treasure)Located on the same tower as the Castellan.
Treasure 7
Ruby (Treasure)After passing the third tower on the map in the Castle Battlements area, flip the switch to Day, then drop down to the bottom floor and enter the room under the third tower. Here, you can shoot down the silver container to acquire the Ruby.
(Chapter 9: The Grand Hall)
#5 Shooting Range(2A, 2B, 2C)
Located in the typewriter save room after the maze. Enter the elevator next to the merchant and get S rank on all 3 new shooting range challenges here. They count towards the Real Deadeye trophy. However, you will still need another Shooting Range found later in the game, so you can’t earn the trophy yet.
(Merchant Request)
#6 Destroy the Blue Medallions 4
Destroy the Blue Medallions 4: Located in the same typewriter save room with the merchant on the table with the typewriter. Destroy 6 medallions, which are individually listed below.
#7 Blue Medallion 1
Found on the wall on the side of the gate to the maze.#8 Blue Medallion 2
Located in Grand Hall, behind the Headless Statue, which is a story objective.(Merchant Request)
#9 More Pest Control
On the wall left of the Headless Statue. Defeat 3 rats. They will be listed below when we get to them.
#10 Rat 1
Found in the Dining Hall, runs around the dining hall.
#11 Serpent Head (Key Item)
Located in the Dining Hall, sit at the tables displayed on the portraits of the king and queen and ring the bell. Order Ashley to sit down at the queen’s dining place. See locations below. Ashley must sit at the 2nd chair on the right, Leon at the last chair on the left.
#12 Blue Medallion 3
Found in the Dining Hall, hanging from the last window behind the curtain.
#13 Blue Medallion 4
Shoot the medallion on the chandelier in Grand Hall and go upstairs.
#14 Small Key (Key Item)
Located in the room upstairs in the north. Open the cabinet on the left for a Small Key, which is needed for a treasure.#15 Blue Medallion 5
In Armory, upstairs, hanging above the throne.#16 Lion Head (Key Item)
Located inside Armory on Lion Statue.#17 Cubic Device (needed for treasures)
Located in the corridor after exiting Armory, in a chest. This doesn’t count as a treasure itself but is needed to open the treasure shrines throughout Castle.#18 Rat 2
Located in the same corridor after exiting Armory.#19 Blue Medallion 6
Enter the last room upstairs to reach “Gallery”. It is hanging at the end of the path behind a pillar.#20 Yellow Diamond (Treasure)
Located in the Gallery, climb up the ladder and pull the lever where the summoner enemy was. This reveals the treasure chest in the middle of the room.#21 Goat Head (Key Item)
Located in Gallery go up the stairs on the side, then across the platform over treasure chest. Don’t place the 3 heads on the headless statue yet, doing so would skip to a new section.#22 Butterfly Lamp (Treasure)
Before placing the 3 heads on headless statue, go back to the merchant in Grand Hall. Use the Cubic Device on the Square Lock Box there.#23 Justitia Statue (Treasure)
Go through the door next to the merchant in the same room and use the golden Gondola to arrive near Water Hall. From there, backtrack to the Audience Chamber. With the Cubic Device and Small Key, obtain the 2 Treasures that were previously unavailable in Chapter 7. Open the Square Lock Box to obtain one of the treasures.#24 Gold Bar (Treasure)
In the Audience Hall, open the Locked Drawer with the Small Key found earlier.During objective: Rescue Leon
#25 Bunch of Keys (Key Item)
Head back to the Grand Hall and place the 3 heads on the headless statue. A cutscene will trigger and you will play as Ashley in the library. In the south of the library, place the lantern on the pedestal to reveal a hidden staircase. Ascend the stairs to find the key.#26 Elegant Perfume Bottle (Treasure)
As Ashley in the library, crouch under the hole in the bookshelves to obtain the treasure. Use the 2nd key from the left to open it.#27 Sapphire (Treasure)
From the previous treasure, go to the north of the library and use the 3rd key on the door to activate the elevator. This takes you upstairs to a typewriter save room. On the right of the room is a chest. Use the 4th key to open it.#28 Emerald (Treasure)
Next to the typewriter, solve the clock puzzle by entering the correct time: 11:04 on Assisted/Normal or 7:00 on Hardcore/Professional. Head back to the room before the library, where you find a clock puzzle on a door. Enter the time again there (11:04/7.00). Behind this door, go down the path and use the elevator to reach the Mausoleum. Pull the 4 strings under the 4 symbols to open the door. The treasure is behind the door on the right. Use the 1st key to open it.#29 Salazar Family Insignia (Key Item)
In the same area, continue following the path in the Mausoleum until you reach a lamp puzzle. Place the lamps on the correct pedestal. Each lamp projects a certain shape onto the wall. You can switch out the lamp in your hand with the one from a pedestal and move them around. The solution is as follows: Left = Half-Moon / Right = Star / Top = Full Moon. Insert it in the typewriter save room above the library.
RE4 Achievements
Knife Basics
 Knife Basics
Successfully parry an attack using your knife.
My Preferred Piece
 My Preferred Piece
 Upgrade a weapons.
Nice One, Stranger!
 Nice One, Stranger!
Complete a request for the Merchant.
Harpoon Hunter
 Harpoon Hurler
Defeat Del Lago. f