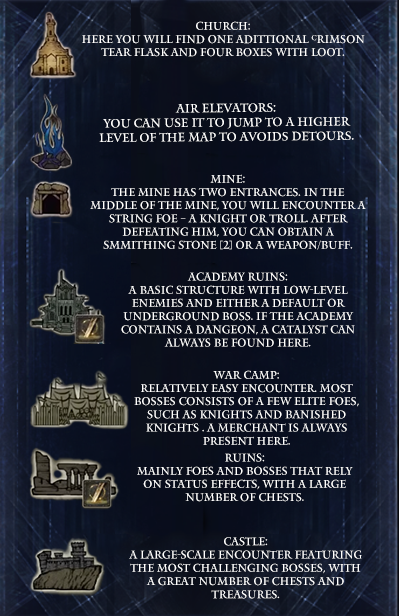
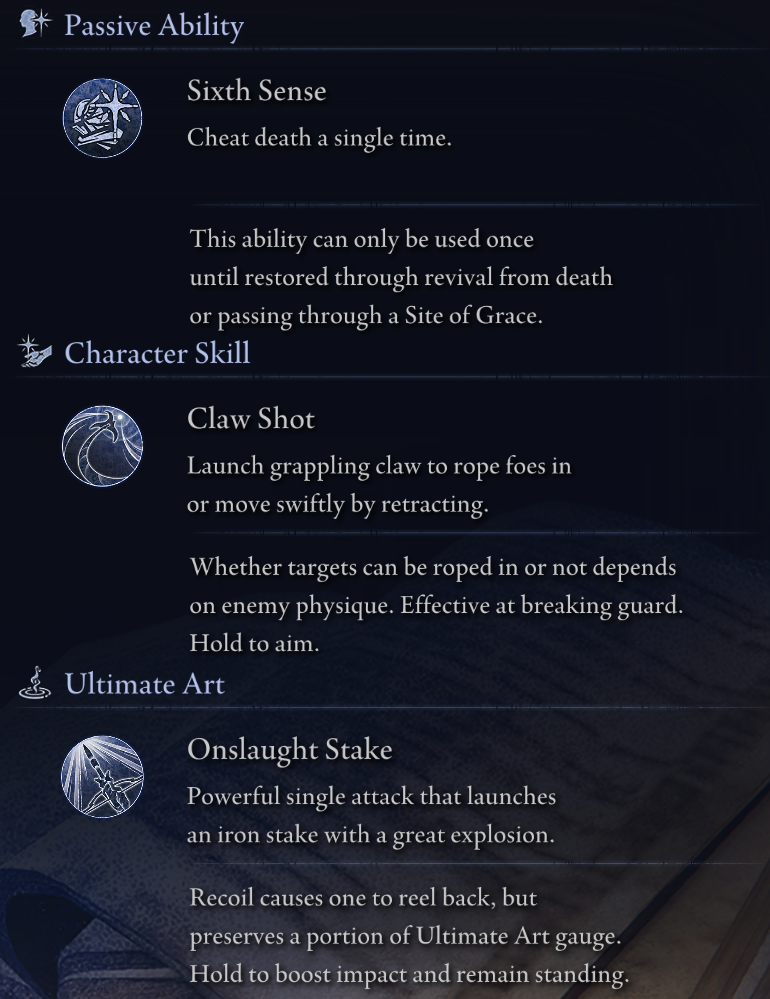
Elden Ring Nightreign Basics
 Danigose
(71 ratings)
May 31, 2025 @ 9:10am5,41987
CharactersClassesCo-opGame ModesGameplay BasicsLootMaps or LevelsMultiplayerSecretsWalkthroughsWeaponsEnglish
Gameplay
 \
\Upon arriving in Limveil, you should immediately check the map to locate churches, castles, mines, and other landmarks. Near the landing site, there is always a grace point and a small group of enemies with loot chests. Defeating them will grant you your first level. Based on the elemental themes of camps and castles, choose where you need to go most and where you prefer to avoid entirely. Churches are an essential part of the game—their locations are random, but aside from four item chests, each contains a single charge for your flask. Picking it up restores your flasks to their maximum amount and increases their total count by +1. Mines are another crucial aspect of the game. They are not randomly placed, but they always contain a troll boss and chests with valuable equipment. Only in mines can you find stones to upgrade weapons from blue to purple level, which is quite important. To succeed in the game, you need to quickly defeat bosses, collect flasks, and avoid dying too often to preserve your level.
Each expedition is divided into three days. The first day begins with landing, followed by marking the first circle. Then, the zone expands to this first circle, after which a tree-shaped marker appears on the map, indicating the location of the boss battle. After some time, the flames narrow toward this zone. Once you enter the final zone, regular enemies will appear first, followed by the boss. It is important to note that enemies and bosses are linked—by remembering which enemies preceded the boss, you can better prepare for the encounter. After defeating the boss, the cycle repeats. If you fail to defeat the boss on the first day, you can do so on the second, as they do not regenerate their health. After the second night, you enter a room containing smithing tools for weapon upgrades and a merchant with grace, allowing you to level up or purchase items.
During the first two days, you will encounter both prisons and the stone sword-like keys that unlock them. The unique aspect of prison bosses is that they provide only two rewards—10,000 runes or a passive effect that enhances your abilities. Defeating them is not mandatory, but given their relatively low difficulty and the quality of their rewards, I consider their elimination highly beneficial.
The most crucial elements for a successful expedition are communication and planning. You have limited time, so while flying toward the landing site, it is wise to check the map and mark the locations you will explore first. Unfortunately, coordinating with random allies can be challenging, but if you are playing with a friend, try to formulate a clear plan for your movements. This will provide a solid foundation for optimal progression. The game does not forgive hesitation or delays—everything you do must be calculated. Therefore, I recommend starting each expedition by carefully planning your route.

Map
Weapons
Weapons come in four qualities: Common, Uncommon, Rare, and Legendary. This classification primarily affects damage and weapon type. Most standard swords, axes, and staves have common rarity but can be upgraded with stones to reach the rare stage. At that point, they can remain viable even in battles against the Night Lord, provided the weapon suits your playstyle or preference. Legendary weapons, on the other hand, are mostly unique items from the main game (such as Radahn’s Swords or Marika’s Hammer) and exist only in legendary rarity.
Initially, you cannot effectively wield weapons of any rarity. To use an Uncommon weapon, you need level 3; for Rare, level 7; and for Legendary, level 10. Because of this, you must be particularly mindful of your deaths, as losing levels may prevent you from using powerful weapons you have acquired.
Smithing Stone 1
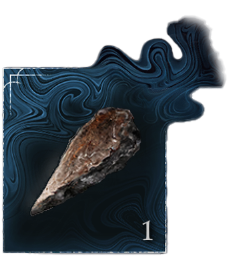
- For upgrading weapons from common to uncommon rarity.
Smithing Stone 2
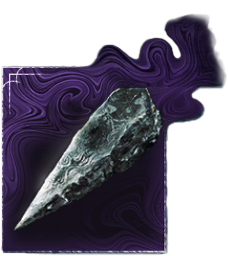
- For upgrading weapons from uncommon to rare rarity
But rarity is just the beginning—Nightreign’s weapons have far more unique mechanics than you might expect! Let’s start with damage types and status effects. Unlike in Elden Ring, weapons in Nightreign have only one elemental damage type. In the base game, for example, the Sword of St. Trina deals both physical and magic damage, meaning the final damage calculation considers both types separately based on the enemy’s defenses. In Nightreign, weapons have only one damage type, which increases their overall effectiveness against most enemies.
Status effects are even more intriguing, as they can now be enhanced further. This is because greases can be applied to weapons that are already imbued with a specific damage type or status effect. For example, if you have an axe with poison and blood rot, you can add frost and bleed to it—something impossible in the base game. As a result, using magical weapons with magic oil or other oils becomes much more strategic and beneficial.
Weapon preferences:
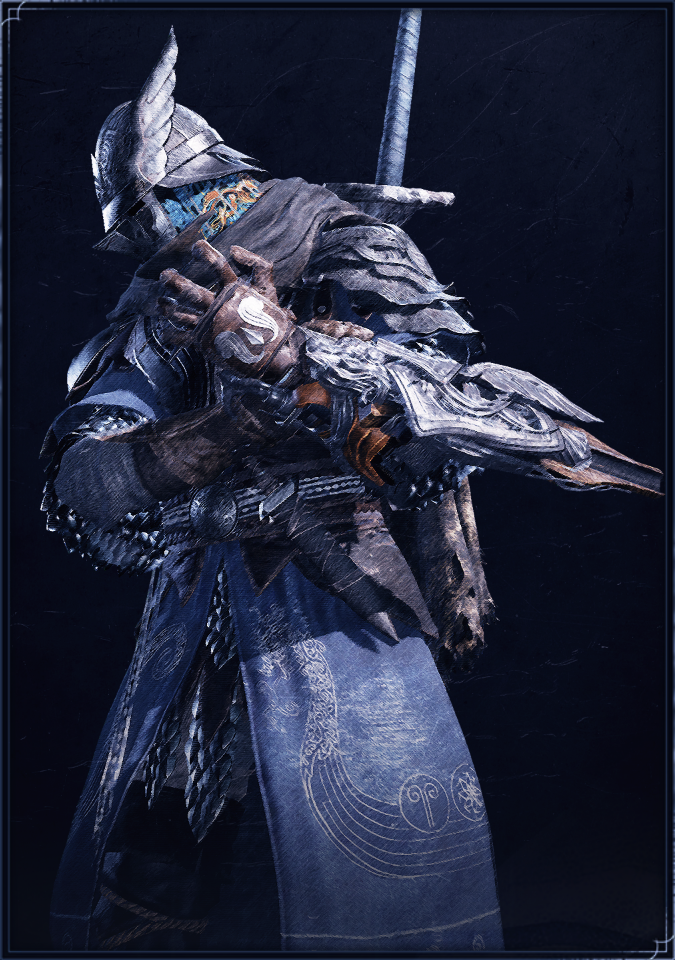
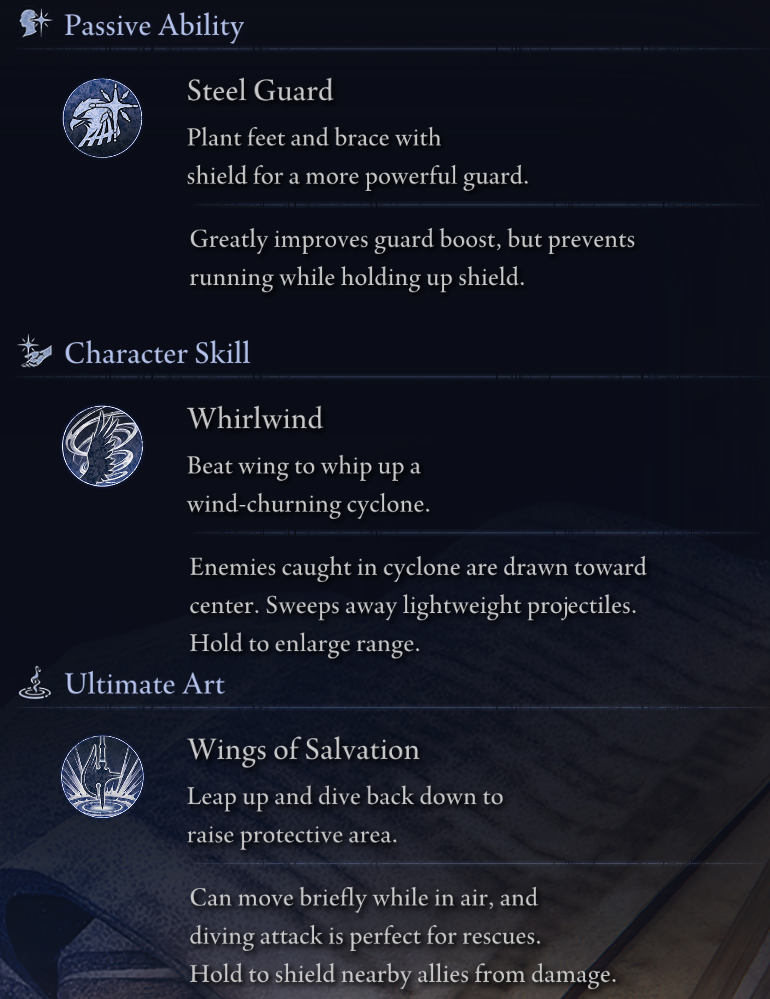
- Wylder – Greatswords
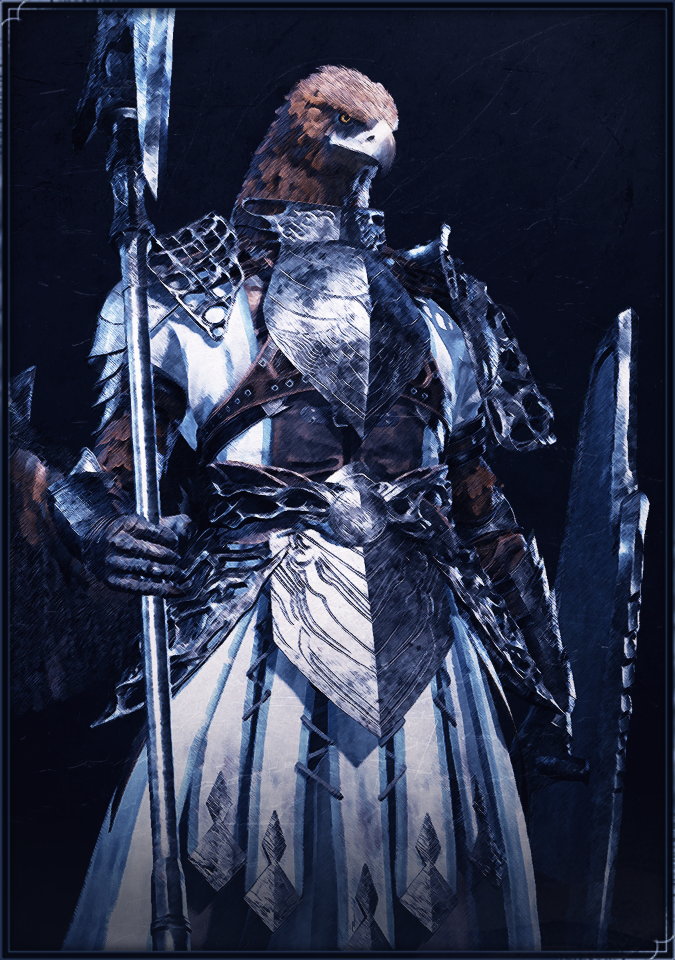
- Guardian – Halberds
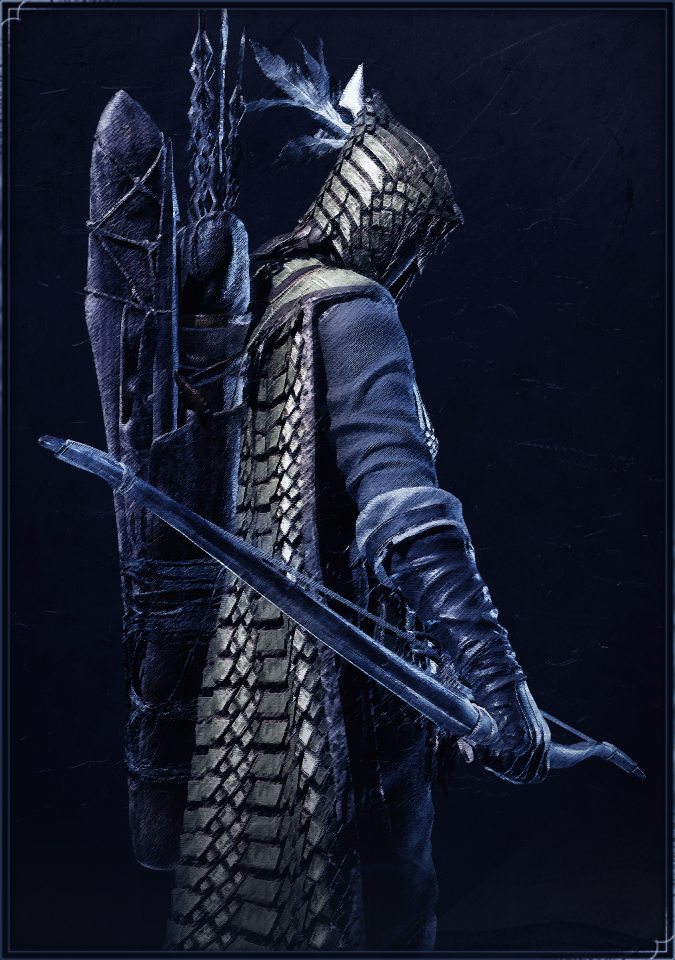
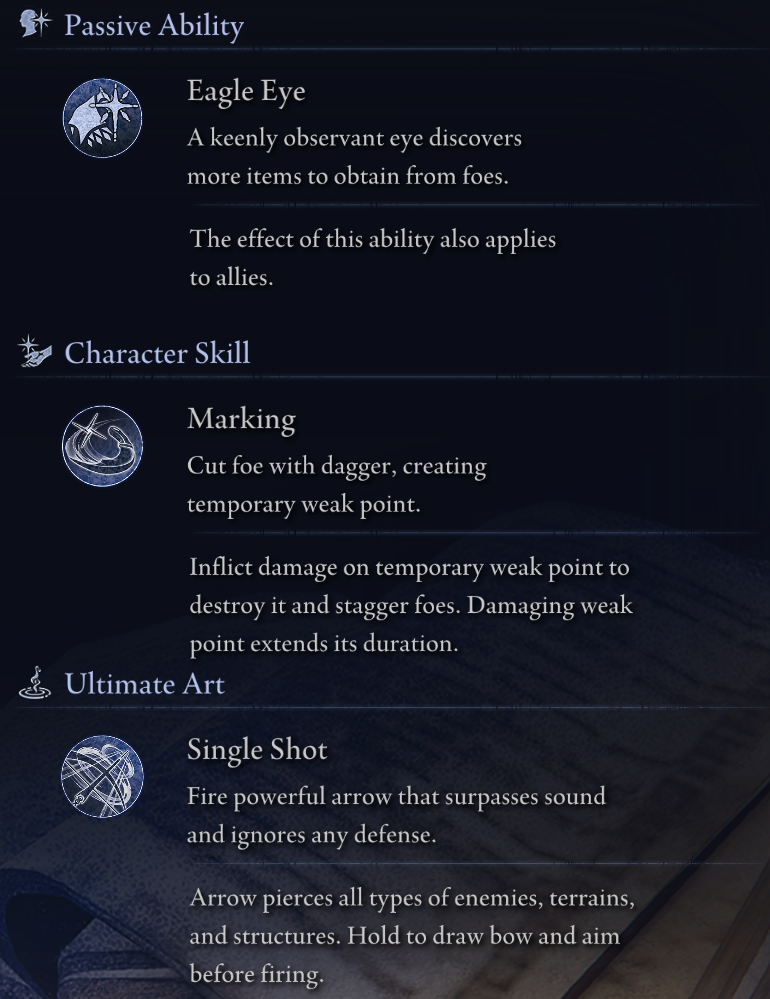
- Ironeye – Bows
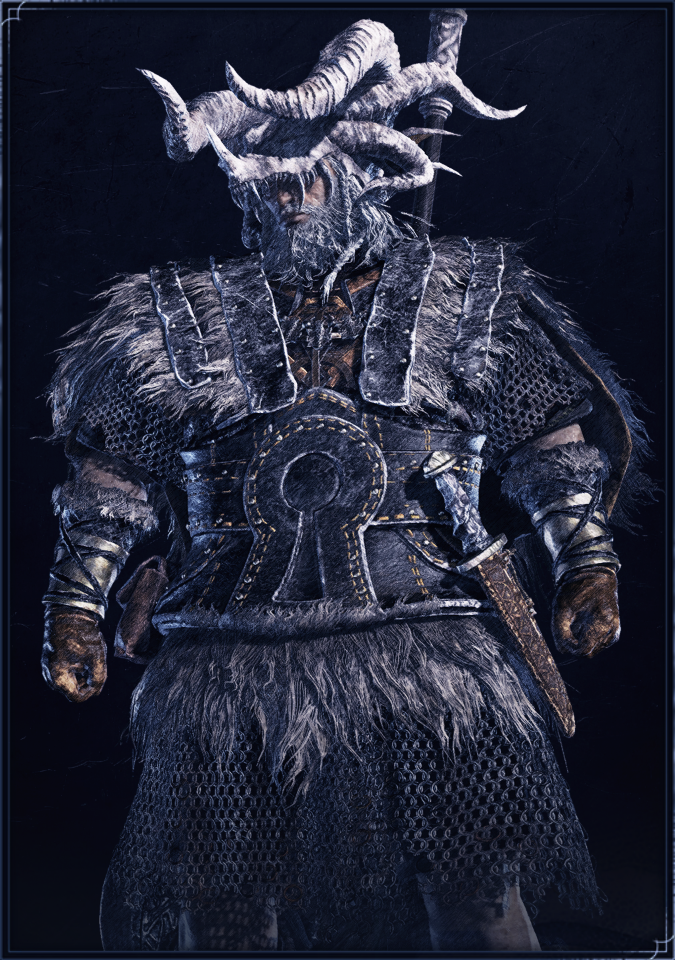
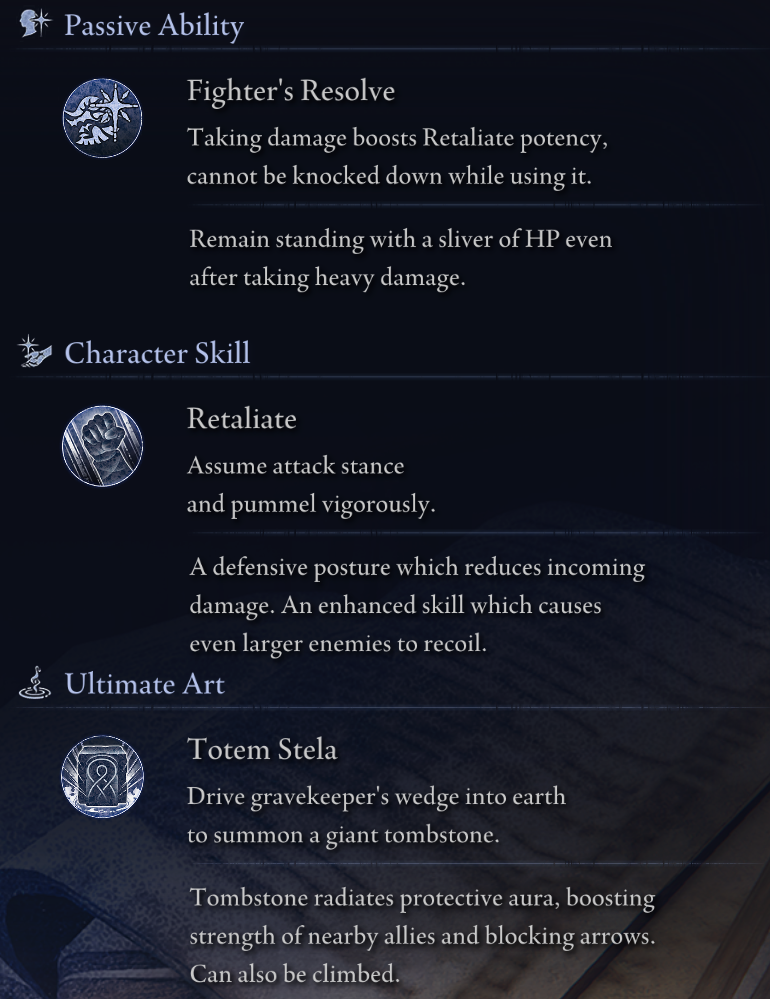
- Rider – Greataxes, Great Hammers, and Colossal weapons
- Resclure – none
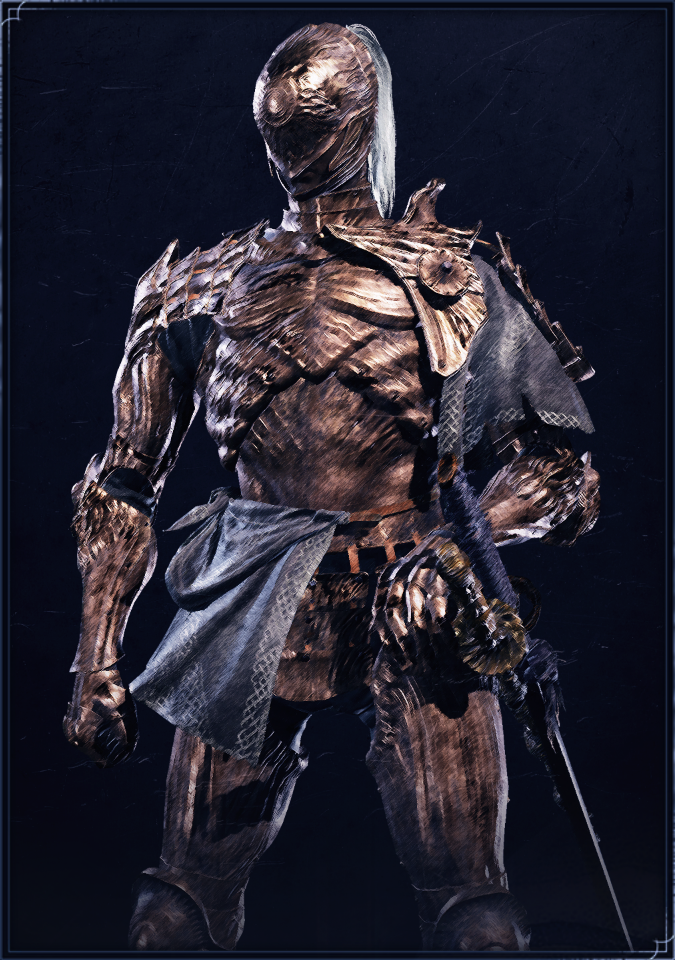
- Executor – Katanas
- Duchess – Daggers
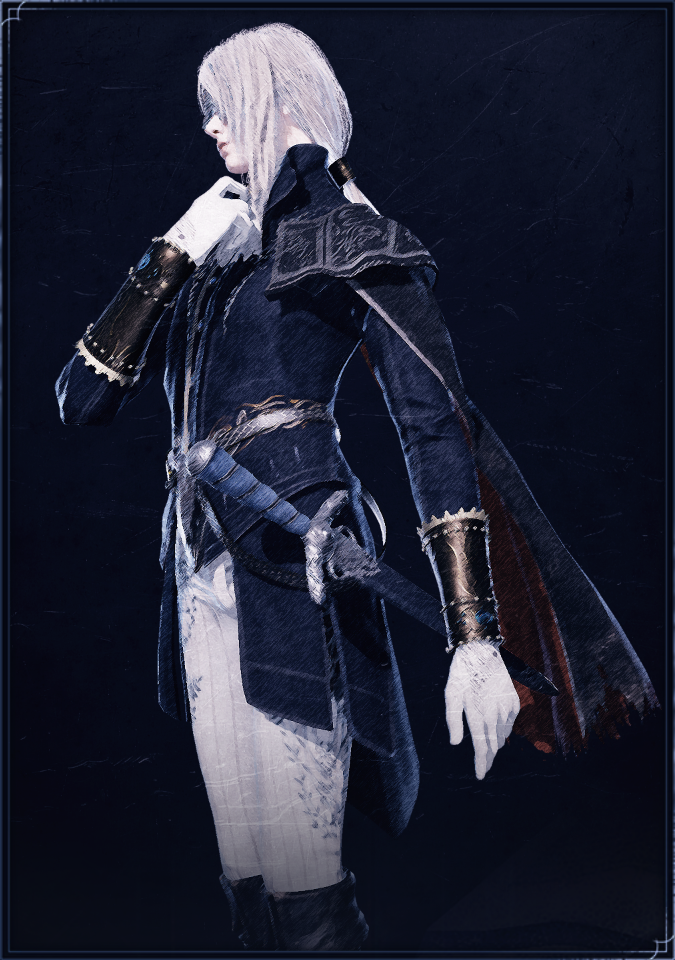
- Revenant – none
Characters
Attribute
Vigor
Mind
Endurance
Strength
Dexterity
Intelligence
Faith
Arcane
Scale
A
C
B
A
B
C
C
C
Attribute
Vigor
Mind
Endurance
Strength
Dexterity
Intelligence
Faith
Arcane
Scale
S
C
A
B
C
D
C
C
Attribute
Vigor
Mind
Endurance
Strength
Dexterity
Intelligence
Faith
Arcane
Scale
C
C
B
C
A
D
D
B
Attribute
Vigor
Mind
Endurance
Strength
Dexterity
Intelligence
Faith
Arcane
Scale
A
D
A
S
C
D
D
C

Attribute
Vigor
Mind
Endurance
Strength
Dexterity
Intelligence
Faith
Arcane
Scale
D
A
C
D
C
S
S
C
Attribute
Vigor
Mind
Endurance
Strength
Dexterity
Intelligence
Faith
Arcane
Scale
B
D
B
C
S
D
D
S

Characters(Hidden)

Attribute
Vigor
Mind
Endurance
Strength
Dexterity
Intelligence
Faith
Arcane
Scale
C
B
D
D
B
A
B
C
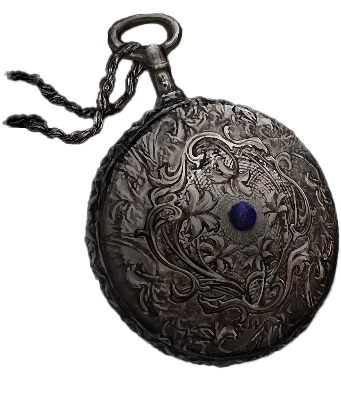
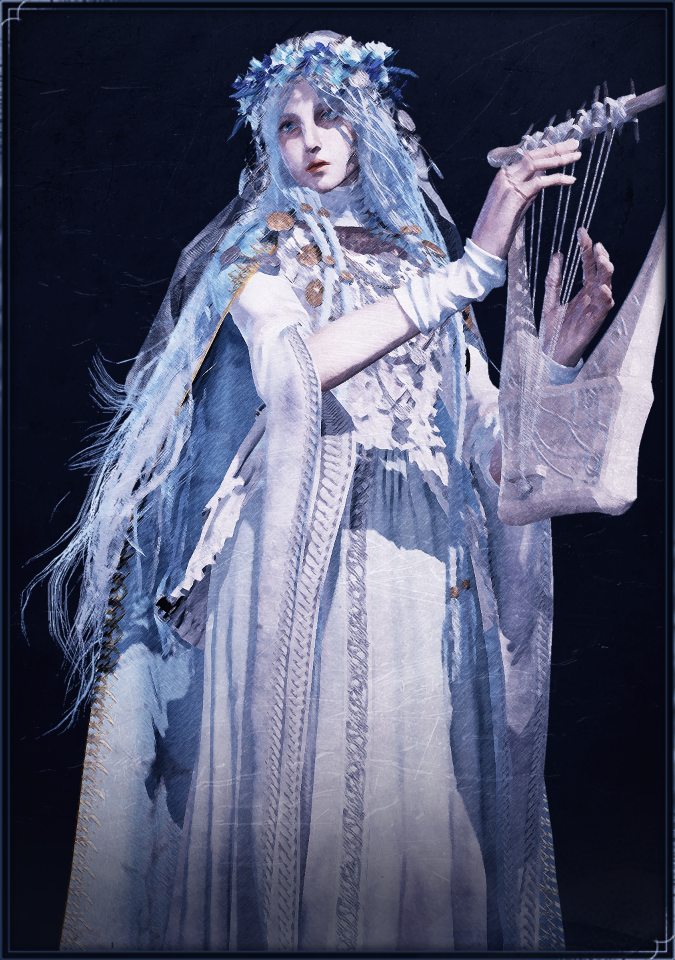
Old Pocketwatch:
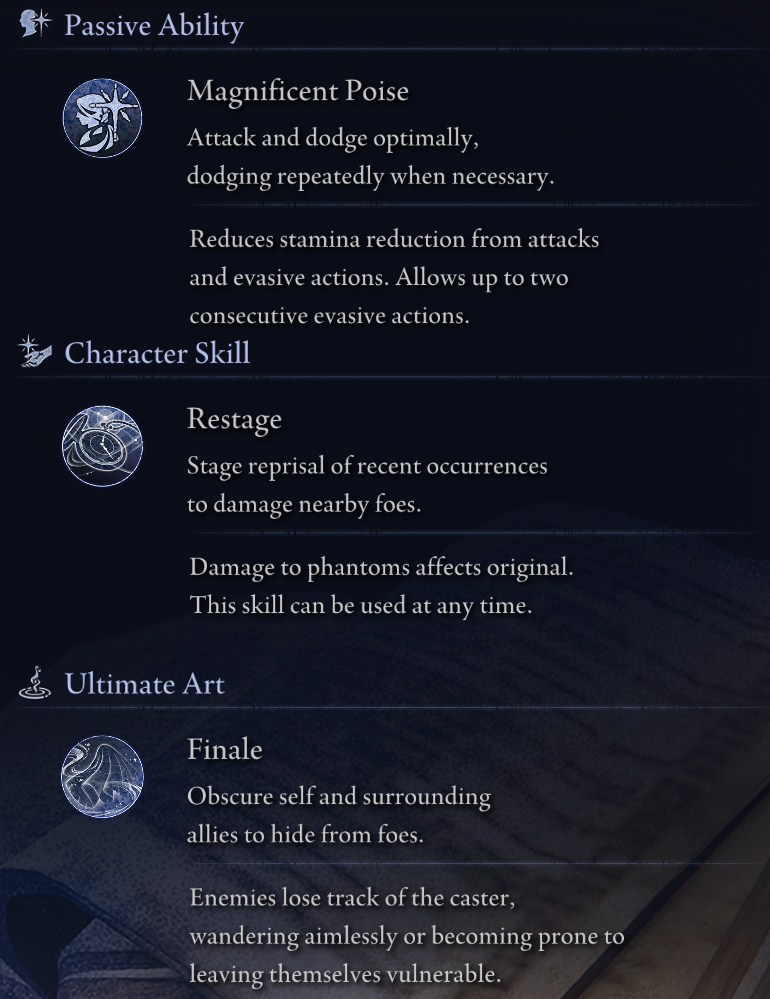
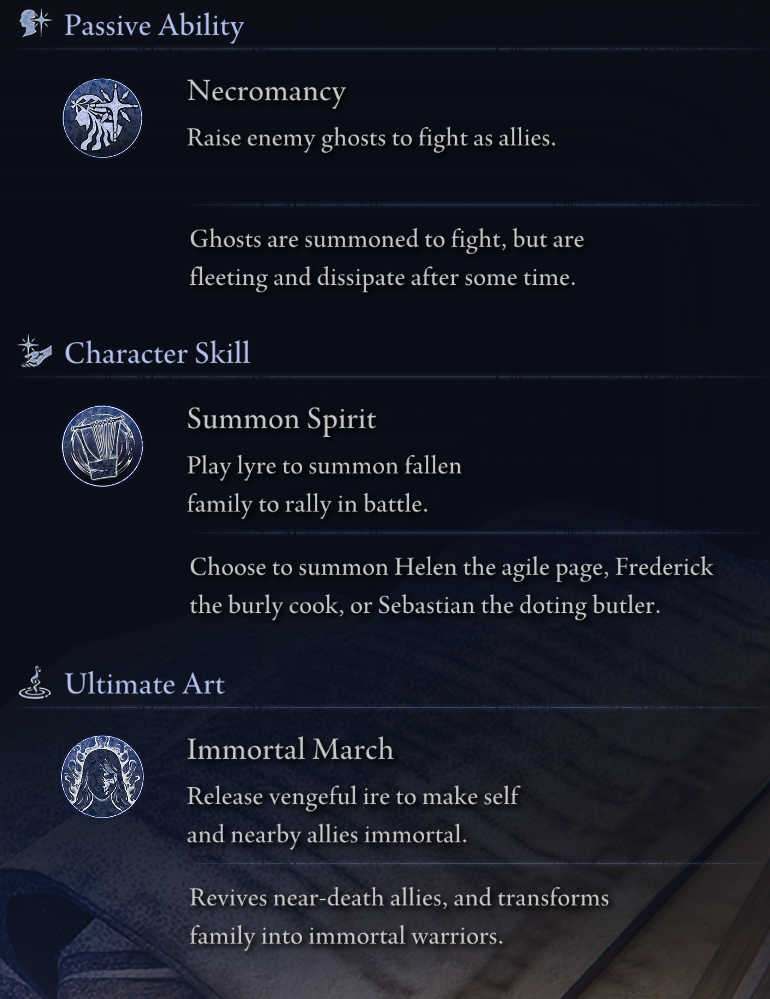
The Duchess is swift and mobile, truly shining in coordinated team play and situational awareness. Her most notable features are her efficient dodges and rolls, requiring practice for optimal use. Her ultimate ability is useful against enemies with highly focused attacks or when safely reviving a fallen ally. However, against enemies with wide-sweeping attacks (such as dragons or mounted foes), her invisibility is less effective.
Attribute
Vigor
Mind
Endurance
Strength
Dexterity
Intelligence
Faith
Arcane
Scale
D
A
C
C
B
B
S
B
Besmirched Frame:
Her location will also be visible on the Roundtable Hold map. Approach and select the "Touch the Ghost" option to enter an arena battle against her—defeating her unlocks her as a playable character. Playing as her is unusual but enjoyable. You can choose from three phantoms, though only one can be used at a time. After a battle, the injured phantom begins regenerating health. The key to mastering this character lies in skillfully combining her abilities and phantoms, as different phantoms may be necessary depending on the speed or aggression of the boss.
Bosses
There are currently many bosses in the game, which makes the variety of tactics and strategies quite vast. But what are they like? In terms of difficulty, they progressively increase—from camp bosses and ruins to fortresses, large castles, and finally, roaming the world. Following the chain I described, you can progress through and defeat bosses, starting with the easiest ones and gradually moving up a level each time. Of course, there are exceptions to this formula, such as the large flowers found in the world, but aside from them, the general hierarchy remains.
The greatest danger comes from the bosses found in transitions between days and the Night Lords themselves. If general preparation helps with the former, facing the Night Lords requires more meticulous planning. When starting an expedition, you will see the type of damage or status effect to which a boss is weak. This doesn't mean you can't defeat them without using a weapon of that specific damage type, but rather that it provides an additional advantage in fighting the Night Lords. For example, Gladius, who is weak to holy damage—once you deal a certain amount of holy damage to him, he will receive a debuff, causing him to take increased damage from your attacks. This effect lasts for 80 seconds.
Another crucial aspect of battle is understanding who the Night Lord prioritizes in their attacks. It's no secret that the game is designed for cooperative play, so quickly identifying who is the target of the boss’s wrath is essential. Fortunately, the game marks the unfortunate character with a red-and-black sign, indicating that they are the primary target of relentless fury. This doesn’t mean the boss will only attack them, but rather that they are the priority target.
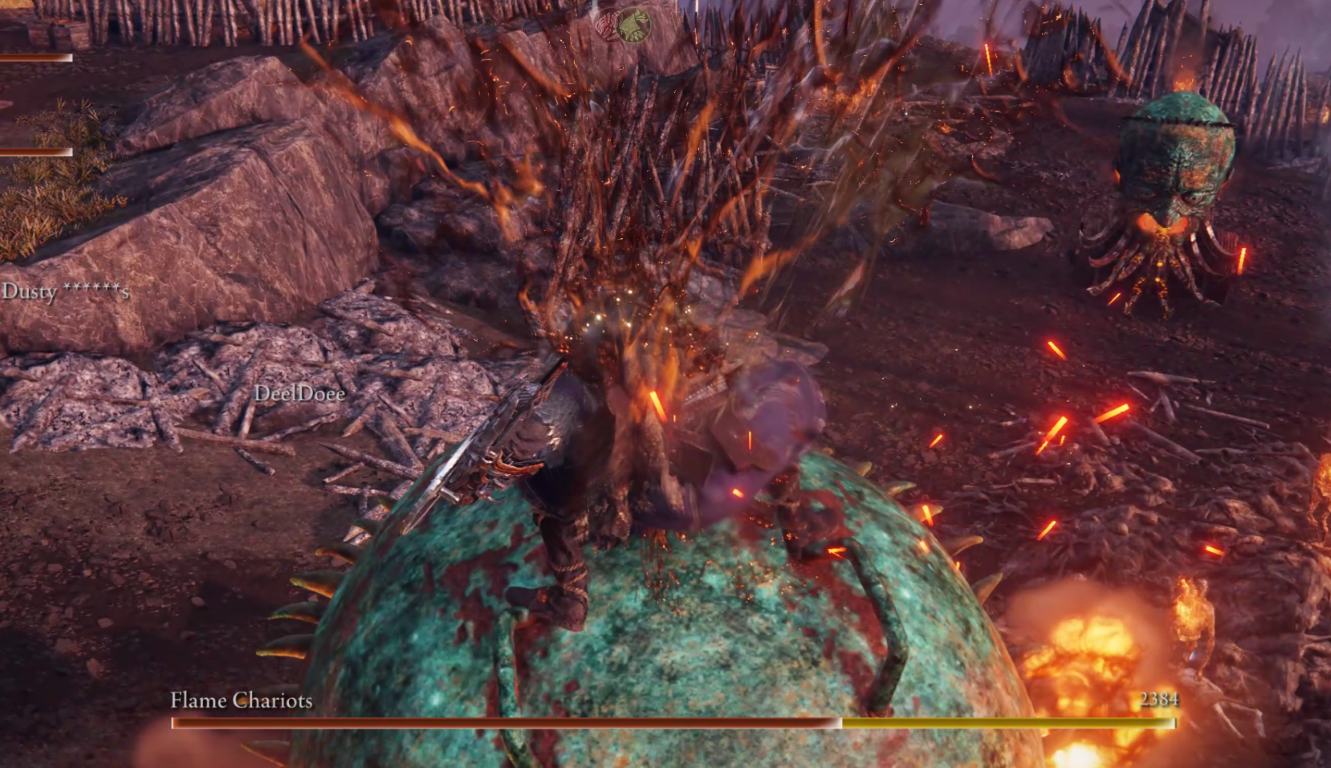
One particularly troublesome boss for many players is the Fire Chariots. To defeat them quickly, you need to activate fast running (Alt key on the keyboard), jump onto their back, and strike with an aerial attack. If you jump high enough, you can kill the chariot in one hit, sparing yourself unnecessary suffering.
Example:


I hope this guide has been useful or at least interesting to you. Thank you for your attention!
To support the guide, you can leave a like, add it to your favorites, and share it with friends and acquaintances. If you wish to show extra appreciation, you can do so through Steam awards or by subscribing on Patreon and Buy Me a Coffee. This is optional, but it helps me a lot.
Enjoy the game, Night Warriors!
Patreon: https://www.patreon.com/PankCrock?utm_campaign=creatorshare_creator
Buy me a Coffee: https://buymeacoffee.com/PankCrockD