How-To Bow
 Ya_Mama--
(119 ratings)
Mar 4, 2025 @ 5:19am7,105227
ClassesCraftingGameplay BasicsLootMultiplayerWeaponsEnglish
1. Basic Mechanics
In this section, I will be going over the basics of bow gameplay and combine those mechanics into a loop from which you can expand.
The most straightforward way to increase your charge level is to simply aim and land consecutive shots. Your basic attack will shoot 1 arrow at charge level 1, 2 arrows at level 2, and 3 arrows at level 3. Your 4th basic attack will be fired at charge level 1 again. If you wait too long without shooting, your charge level will also reset. Keep in mind that your basic attacks fire quicker if you aren't moving.
If the monster is repositioning, you can hold the left mouse button to start charging your bow while you adjust your aim.
Shoot (lv1) > Shoot (lv2) > Shoot (lv3) > Charging Sidestep > Shoot (lv3) > Charging Sidestep > etc.
Unfortunately, you don't have infinite stamina. But with some practice it can be close enough.
Since Discerning Dodge costs stamina before it can replenish it, you ideally want to perform one of these before you run out of the stamina necessary to do so. That means you have to position yourself both close enough to the monster to dodge its attacks and far enough to remain in your critical range.
Another reason for staying close to the monster is that you will be making frequent use of multiple close-range shots (spread bow vibes).
There is a cap when it comes to stamina reduction. Meaning that stacking certain sources of stamina reduction only works up to a certain point. You can max out your stamina reduction with the following combinations:
Shoot (lv1) > Shoot (lv2) > Power Shot (lv3) > Power Volley (lv3) > Charging Sidestep > Shoot (lv3) > Power Shot (lv3) > Power Volley (lv3) > Charging Sidestep > etc.
There is a reason why we use a basic attack at charge level 3 instead of going straight into Power Shot, and that's because you can cancel some of the animation time if you press the keys/buttons immediately after each other.
If you need to reposition, you can also charge up in the following way:
Hold Shoot (lv1) > Charging Sidestep > Release Shoot (lv2) > Power Shot (lv3) > Power Volley (lv3) > Charging Sidestep > Shoot (lv3) > Power Shot (lv3) > Power Volley (lv3) > Charging Sidestep > etc.
Whenever you see an opportunity to land a Discerning Dodge, it's almost always worth taking to avoid damage and refill your stamina:
Discerning Dodge > Shoot (lv3) > Power Shot (lv3) > Power Volley (lv3) > Charging Sidestep > etc.
When you've got those 3 things down, it's time to take a look at the trick shot gauge.
Charge Levels
The bow makes use of charge levels. Through various actions, you can increase your charge level to deal more damage. The dots next to your reticle represent your current charge level. Your bow will also start to glow yellow at charge level 2 and red at charge level 3.The most straightforward way to increase your charge level is to simply aim and land consecutive shots. Your basic attack will shoot 1 arrow at charge level 1, 2 arrows at level 2, and 3 arrows at level 3. Your 4th basic attack will be fired at charge level 1 again. If you wait too long without shooting, your charge level will also reset. Keep in mind that your basic attacks fire quicker if you aren't moving.
If the monster is repositioning, you can hold the left mouse button to start charging your bow while you adjust your aim.
Critical Range
If your reticle is orange, you are in critical range. Your arrows deal 10% more raw damage when you are in critical range, so you want to avoid shooting from either too close or too far away. Increasing your charge level extends your critical range. Although for reasons we get into later, you want to stay relatively close to the monster.Charging Sidestep
Remember what I said about your 4th basic attack resetting your charge level? That's where Charging Sidestep comes in. To maintain your maximum charge level after your 3rd basic attack, you have to perform a Charging Sidestep (aka your dodge). After which, you can shoot another basic attack at charge level 3. Thereafter, the same rules apply as before, meaning that your charge level will be reset if you shoot another basic attack. So you have to keep using the Charging Sidestep in between your shots if you want to maintain your charge level.Basic loop
Putting the above into practice will look like this:Shoot (lv1) > Shoot (lv2) > Shoot (lv3) > Charging Sidestep > Shoot (lv3) > Charging Sidestep > etc.
Unfortunately, you don't have infinite stamina. But with some practice it can be close enough.
Discerning Dodge
To replenish your stamina, you have to perfectly dodge a monster's attack with your Charging Sidestep. Time it correctly and you will perform a Discerning Dodge instead, giving you iframes (immunity to damage), an immediate refill of your stamina bar, and a partial refill of your trick shot gauge (put a pin in that). The amount that gets refilled depends on how well you timed your dodge, with at most 100 stamina and a full segment (30 points) of your trick shot gauge. A successful dodge also sets your bow's charge level to 3 if it wasn't there already. Last but not least, the last part of your dodge gives you hyperarmor. Meaning you can still take damage after a successful dodge.Since Discerning Dodge costs stamina before it can replenish it, you ideally want to perform one of these before you run out of the stamina necessary to do so. That means you have to position yourself both close enough to the monster to dodge its attacks and far enough to remain in your critical range.
Another reason for staying close to the monster is that you will be making frequent use of multiple close-range shots (spread bow vibes).
Stamina Management
Without stamina, you can't maintain your charge level. Therefore, it's a good idea to always have enough stamina for a Discerning Dodge, even if that means shortly losing your charge level. That's because you can easily pick up the pace again with a fully charged-up bow and refilled stamina bar, provided you timed that dodge right.There is a cap when it comes to stamina reduction. Meaning that stacking certain sources of stamina reduction only works up to a certain point. You can max out your stamina reduction with the following combinations:
- Constitution Level 5
- Constitution Level 4 & Dash Juice
- Constitution Level 3 & Black Belt Meal (Lo)
- Constitution Level 2 & Dash Juice & Black Belt Meal (Lo)
- Constitution Level 2 & Black Belt Meal (Hi)
- Constitution Level 1 & Dash Juice & Black Belt Meal (Hi)
Quick Shot, Power Shot & Power Volley
These 3 close-range shots are bound to the same key and follow each other in sequence.- Quick shot shoots 3 arrows, which costs no stamina, making it useful to do some damage while waiting for an opportunity to get your stamina back. You can't use this move as a follow-up shot.
- Power Shot is used after either a quick shot, basic attack, or Charging Sidestep. Depending on your charge level, it will either shoot 3, 4, or 5 arrows.
- Power Volley follows after a Power Shot and deals quite a lot more damage in exchange for a longer animation time. So, time it wisely. Depending on your charge level, it will either shoot 4, 5, or 6 arrows.
Improving the loop
After reaching charge level 3, you want to start weaving Power Shots and Volleys into your loop whenever it's safe to do so:Shoot (lv1) > Shoot (lv2) > Power Shot (lv3) > Power Volley (lv3) > Charging Sidestep > Shoot (lv3) > Power Shot (lv3) > Power Volley (lv3) > Charging Sidestep > etc.
There is a reason why we use a basic attack at charge level 3 instead of going straight into Power Shot, and that's because you can cancel some of the animation time if you press the keys/buttons immediately after each other.
If you need to reposition, you can also charge up in the following way:
Hold Shoot (lv1) > Charging Sidestep > Release Shoot (lv2) > Power Shot (lv3) > Power Volley (lv3) > Charging Sidestep > Shoot (lv3) > Power Shot (lv3) > Power Volley (lv3) > Charging Sidestep > etc.
Whenever you see an opportunity to land a Discerning Dodge, it's almost always worth taking to avoid damage and refill your stamina:
Discerning Dodge > Shoot (lv3) > Power Shot (lv3) > Power Volley (lv3) > Charging Sidestep > etc.
TLDR
To use the bow effectively, you have to:- know how to maintain your charge level;
- know when to weave in your Power Shot & Volley;
- know when to perform your Discerning Dodge.
When you've got those 3 things down, it's time to take a look at the trick shot gauge.
2. Trick Shot Gauge
The second part of playing with a bow is managing and utilizing your trick shot gauge. In this section, I will explain how to do that.
Hitting weak spots and pulling off a Discerning Dodge will refill your trick shot gauge. Ideally, you want to refill your gauge quickly enough to always have a tracer arrow ready and a coating applied.
Remember when I said that holding the left mouse button would start charging your bow? This also starts refilling your trick shot gauge. So you might want to hold it for a quick second if it means you can shoot a new tracer arrow, for example.
Tracer arrows are effectively a homing beacon on whatever part of the monster you hit. All subsequent arrows will home in on this tracer arrow, even if you are not aiming at the monster directly. Furthermore, all subsequent arrows will be treated as if fired at max charge level. That goes for every move that is affected by charge levels. After a certain number of hits, your tracer arrow will explode. Shooting a tracer arrow at a higher charge level will increase the damage of that explosion. Tracer arrows also extend your critical range.
In low rank, you want to make frequent use of tracer arrows, because stamina management is a lot more iffy without the proper stamina skills. Once you start playing with maxed-out Constitution and Stamina Surge, reapplying tracer arrows becomes too disruptive to your loop. They do come in handy occasionally to focus on elusive wounds or weak points.
Furthermore, you keep the trick shot gauge you have spent on applying the coating until you use a charge:
Each bow has access to 1 or more specific coatings. You only want to use the ones that boost your damage.
Useful
Low Stamina Loop:
Because you have very little stamina in low rank, you can utilize a combination of tracer arrows and Quick/Power Shot/Volley:
Coating > Tracer Arrow (lv1) > Power Shot (lv3) > Power Volley (lv3) > Quick Shot (lv3) > Power Shot (lv3) > Power Volley (lv3) > Quick Shot (lv3) > etc.
High Stamina Loop:
Coating > Shoot (lv1) > Shoot (lv2) > Power Shot (lv3) > Power Volley (lv3) > Charging Sidestep > Shoot (lv3) > Power Shot (lv3) > Power Volley (lv3) > Charging Sidestep > etc.
You can weave in a tracer arrow after a Charging Sidestep:
You can weave in a tracer arrow after a Charging Sidestep:
Charging Sidestep > Tracer Arrow (lv3) > Power Shot (lv3) > Power Volley (lv3) > Charging Sidestep > Shoot (lv3) > etc.
Whenever you need to reapply a coating, you have 2 options:
1: Coating > Discerning Dodge > Shoot (lv3) > Power Shot (lv3) > Power Volley (lv3) > Charging Sidestep > Shoot (lv3) > etc.
2: Charging Sidestep > Hold Shoot (lv3) > Coating > Release Shoot (lv3) > Power Shot (lv3) > Power Volley (lv3) > Charging Sidestep > Shoot (lv3) > etc.
If you apply the coating too quickly after charging sidestep you will perform a special move instead. You can avoid this by releasing the aim button, but holding the shoot button to keep charging your shot. Loading your coating while holding charge will sometimes cause a bug, which gives you a phantom reload.
Get to the Point
Your trick shot gauge is a blue bar with 3 segments in it, 3 arrows above it, and a number next to it. You deplete this gauge by applying coatings and shooting tracer arrows. For each segment, you can either apply 10 charges of a coating or shoot 1 tracer arrow.Hitting weak spots and pulling off a Discerning Dodge will refill your trick shot gauge. Ideally, you want to refill your gauge quickly enough to always have a tracer arrow ready and a coating applied.
Remember when I said that holding the left mouse button would start charging your bow? This also starts refilling your trick shot gauge. So you might want to hold it for a quick second if it means you can shoot a new tracer arrow, for example.
Tracer Arrows
Above the trick shot gauge, you will see 3 arrows. These are the number of tracer arrows you can fire. You need at least 1 full segment of the gauge before you can shoot a tracer arrow, since it will deplete that segment.Tracer arrows are effectively a homing beacon on whatever part of the monster you hit. All subsequent arrows will home in on this tracer arrow, even if you are not aiming at the monster directly. Furthermore, all subsequent arrows will be treated as if fired at max charge level. That goes for every move that is affected by charge levels. After a certain number of hits, your tracer arrow will explode. Shooting a tracer arrow at a higher charge level will increase the damage of that explosion. Tracer arrows also extend your critical range.
In low rank, you want to make frequent use of tracer arrows, because stamina management is a lot more iffy without the proper stamina skills. Once you start playing with maxed-out Constitution and Stamina Surge, reapplying tracer arrows becomes too disruptive to your loop. They do come in handy occasionally to focus on elusive wounds or weak points.
Coatings
You can also deplete the trick shot gauge by applying coatings. A full segment grants 10 charges of a coating, but you don't need a full segment to apply said coating. Next to the gauge, you will see exactly how many charges of a coating you can apply at any given time.Furthermore, you keep the trick shot gauge you have spent on applying the coating until you use a charge:
- If you have applied 10 uses of Power Coating, you can swap those for 10 Poison Coatings without depleting the gauge.
- If you have 6 charges of your Power Coatings left, you can swap those for 10 Poison Coatings. In that case, it will replace 6 charges for free, and deplete the trick shot gauge for the 4 extra coating charges.
- If you unequip a coating, your trick shot gauge will refill depending on the amount of charges left. If you want to know exactly how much the gauge will refill, keep an eye on the segment in the gauge that gradually depletes as you spend your charges.
Each bow has access to 1 or more specific coatings. You only want to use the ones that boost your damage.
Useful
- Power Coating: Increases raw damage by 35%, and extends your critical range.
- Close-Range Coating: Increases raw damage by 40%, but reduces your critical range.
- Pierce Coating: Shots can pierce and hit multiple times, but deal reduced damage (it halves your motion values). They are viable if you can consistently get 3-4 pierce ticks on weak spots. You also deal slightly more mounting damage with these coatings.
- Poison Coating: Poison buildup
- Paralysis Coating: Paralysis buildup
- Sleep Coating: Sleep buildup
- Blast Coating: Blastblight buildup
- Exhaust Coating: Stun damage and exhaust buildup
Improving the loop
Building on the previous loop, you now want to mix in coatings and tracer arrows. Keep the following in mind:- Applying a coating can interrupt your loop and reset your charge level. So, try to either reapply them before performing a Discerning Dodge or while holding your shot.
- Tracer arrows are affected by charge level and count as a basic attack regarding maintaining your charge level.
Low Stamina Loop:
Because you have very little stamina in low rank, you can utilize a combination of tracer arrows and Quick/Power Shot/Volley:
Coating > Tracer Arrow (lv1) > Power Shot (lv3) > Power Volley (lv3) > Quick Shot (lv3) > Power Shot (lv3) > Power Volley (lv3) > Quick Shot (lv3) > etc.
High Stamina Loop:
Coating > Shoot (lv1) > Shoot (lv2) > Power Shot (lv3) > Power Volley (lv3) > Charging Sidestep > Shoot (lv3) > Power Shot (lv3) > Power Volley (lv3) > Charging Sidestep > etc.
You can weave in a tracer arrow after a Charging Sidestep:
You can weave in a tracer arrow after a Charging Sidestep:
Charging Sidestep > Tracer Arrow (lv3) > Power Shot (lv3) > Power Volley (lv3) > Charging Sidestep > Shoot (lv3) > etc.
Whenever you need to reapply a coating, you have 2 options:
1: Coating > Discerning Dodge > Shoot (lv3) > Power Shot (lv3) > Power Volley (lv3) > Charging Sidestep > Shoot (lv3) > etc.
2: Charging Sidestep > Hold Shoot (lv3) > Coating > Release Shoot (lv3) > Power Shot (lv3) > Power Volley (lv3) > Charging Sidestep > Shoot (lv3) > etc.
If you apply the coating too quickly after charging sidestep you will perform a special move instead. You can avoid this by releasing the aim button, but holding the shoot button to keep charging your shot. Loading your coating while holding charge will sometimes cause a bug, which gives you a phantom reload.
3. Special Moves
With a bow, you can perform a variety of special moves. In this section, I will explain what each move does.
Effectiveness:
Although it's quite fun to hop around, it's not very effective damage-wise. It's best used as a reposition tool.
This move doesn't benefit from coatings and instead uses the modifiers equal to green sharpness.
Effectiveness:
This is a nice setup move when you need to recharge stamina. However, this will rarely happen if you are consistent with your dodges.
If you dodge right after firing, you can cancel the last part of the animation. When you are low on stamina, you can use your Focus Strike instead (even if you don't target anything). Taking the animation cancel into account, you can take advantage of some openings that you can't punish with the Power Shot/Volley combo.
Effectiveness:
Its real benefit is that all arrows hit at once. If a tracer or wound is 1 shot away from popping, it's better to hit it with Thousand Dragons compared to your Power Shot/Volley. You do have to track your hits to pull this off consistently.
If you use Dragon Piercer after a combo, it will reduce both the damage and the animation time by 30%. Making it a great finisher of your loop.
Keep in mind that Dragon Piercer deals sever damage, so try to pierce your shot through the hit zones that take high sever damage. It can also cut off tails if you need those.
Effectiveness:
It's genuinely amazing that Dragon Piercer wasn't a meme for 4 weeks. Unless you run a specific Dragon Piercer build, this will mainly come into play when you use your Focus Strike.
If you hit at least 1 wound, you will automatically follow up with a Dragon Piercer. Although this combination deals a lot of damage, it also locks you into place for an eternity. Luckily, you get Hyper Armor when you transition into the Dragon Piercer.
Effectiveness:
The only part that matters is that you can very quickly destroy wounds. Get 1 triangle on a wound, and release it for the stagger. Shoot the follow-up Dragon Piercer through it and wait for the wound to pop. This will often knock monsters down (from the sky) and stop them from fleeing to a new zone. Pop the wounds separately to maximize staggers and downs.
Be polite, though, and keep the easy-to-reach wounds open. Lots of weapons and skills rely on hitting those, your own included.
Aim + side buttons:
Because you have very little stamina in low rank, you can utilize a combination of tracer arrows and Quick/Power Shot/Volley:
Coating > Tracer Arrow (lv1) > Power Shot (lv3) > Power Volley (lv3) > Quick Shot (lv3) > Power Shot (lv3) > Power Volley (lv3) > end loop > Focus Strike: Hailstorm (+ Dragon Piercer)
High Stamina Loop
In High Rank, you have plenty of stamina to keep up the rotation between your basic attack and Power Shot/Volley. There can be multiple reasons why you would want to end your loop. For example: repositioning, using items, or swapping weapons.
If you have an opening:
Coating > Shoot (lv1) > Shoot (lv2) > Power Shot (lv3) > Power Volley (lv3) > Charging Sidestep > end loop > Dragon Piercer.
If you need a knockdown:
Coating > Shoot (lv1) > Shoot (lv2) > Power Shot (lv3) > Power Volley (lv3) > Charging Sidestep > Focus Strike: Hailstorm (+ Dragon Piercer).
If you are in danger:
Coating > Shoot (lv1) > Shoot (lv2) > Power Shot (lv3) > Power Volley (lv3) > Charging Sidestep > Flying Swallow Shot.
Flying Swallow Shot
Flying Swallow shot can be performed after a Charging Sidestep, and effectively functions as another dodge that deals damage. You jump into the air, and depending on your charge level, you shoot 3, 4, or 5 arrows. However, it also resets your charge level. Which means you only want to use it in specific situations. Mainly when you need extra mobility.Effectiveness:
Although it's quite fun to hop around, it's not very effective damage-wise. It's best used as a reposition tool.
Arc Shot
This shot showers the targeted area with arrows. Charging up your Arc Shot increases the size of the area affected as well as the number of arrows. This move will drop fuse arrows that stick into the monster. These fuse arrows can explode in multiple ways, which we will go over next.This move doesn't benefit from coatings and instead uses the modifiers equal to green sharpness.
Effectiveness:
This is a nice setup move when you need to recharge stamina. However, this will rarely happen if you are consistent with your dodges.
Thousand Dragons
Thousand Dragons is a souped-up version of Power Volley, which can blow up your tracer arrow and fuse arrows. It's a bit harder to pull off if the targets aren't bunched up, especially if the arrows track towards your tracer arrow. You can deal some nice burst damage on a tracer or wound, though.If you dodge right after firing, you can cancel the last part of the animation. When you are low on stamina, you can use your Focus Strike instead (even if you don't target anything). Taking the animation cancel into account, you can take advantage of some openings that you can't punish with the Power Shot/Volley combo.
Effectiveness:
Its real benefit is that all arrows hit at once. If a tracer or wound is 1 shot away from popping, it's better to hit it with Thousand Dragons compared to your Power Shot/Volley. You do have to track your hits to pull this off consistently.
Dragon Piercer
Dragon Piercer has a long animation time and deals more damage the longer it pierces through the monster. Using this move will also blow up your tracer arrow and fuse arrows should it come into contact with them.If you use Dragon Piercer after a combo, it will reduce both the damage and the animation time by 30%. Making it a great finisher of your loop.
Keep in mind that Dragon Piercer deals sever damage, so try to pierce your shot through the hit zones that take high sever damage. It can also cut off tails if you need those.
Effectiveness:
It's genuinely amazing that Dragon Piercer wasn't a meme for 4 weeks. Unless you run a specific Dragon Piercer build, this will mainly come into play when you use your Focus Strike.
Focus Strike: Hailstorm
Focus Strike: Hailstorm is a finisher that locks onto your own tracer arrow and fuse arrows, as well as any wounds and weak spots on the monster. You can lock on to 4 targets in total, but the targeting works differently for arrows and wounds.- It will target as many tracer and fuse arrows as possible, up to a maximum of 4.
- It will only target 1 wound until the 2nd triangle appears on said wound. Only then will it lock onto another wound, provided you don't have 4 targets already.
If you hit at least 1 wound, you will automatically follow up with a Dragon Piercer. Although this combination deals a lot of damage, it also locks you into place for an eternity. Luckily, you get Hyper Armor when you transition into the Dragon Piercer.
Effectiveness:
The only part that matters is that you can very quickly destroy wounds. Get 1 triangle on a wound, and release it for the stagger. Shoot the follow-up Dragon Piercer through it and wait for the wound to pop. This will often knock monsters down (from the sky) and stop them from fleeing to a new zone. Pop the wounds separately to maximize staggers and downs.
Be polite, though, and keep the easy-to-reach wounds open. Lots of weapons and skills rely on hitting those, your own included.
Controls
If you have rebounded your F-key and R-key to your side mouse buttons, you can use all your moves with some easy-to-reach combinations.Aim + side buttons:
- Coating
- Power Shot
- Power Volley
- Dragon Piercer
- Coating (will apply coating and continue to hold shoot)
- Arc Shot
- Thousand Dragons
- Tracer Arrow
- Focus Strike: Hailstorm
- Charging Sidestep + side button = Flying Swallow Shot
Finishing the Loop
Low Stamina LoopBecause you have very little stamina in low rank, you can utilize a combination of tracer arrows and Quick/Power Shot/Volley:
Coating > Tracer Arrow (lv1) > Power Shot (lv3) > Power Volley (lv3) > Quick Shot (lv3) > Power Shot (lv3) > Power Volley (lv3) > end loop > Focus Strike: Hailstorm (+ Dragon Piercer)
High Stamina Loop
In High Rank, you have plenty of stamina to keep up the rotation between your basic attack and Power Shot/Volley. There can be multiple reasons why you would want to end your loop. For example: repositioning, using items, or swapping weapons.
If you have an opening:
Coating > Shoot (lv1) > Shoot (lv2) > Power Shot (lv3) > Power Volley (lv3) > Charging Sidestep > end loop > Dragon Piercer.
If you need a knockdown:
Coating > Shoot (lv1) > Shoot (lv2) > Power Shot (lv3) > Power Volley (lv3) > Charging Sidestep > Focus Strike: Hailstorm (+ Dragon Piercer).
If you are in danger:
Coating > Shoot (lv1) > Shoot (lv2) > Power Shot (lv3) > Power Volley (lv3) > Charging Sidestep > Flying Swallow Shot.
4. Elemental vs. Raw Damage
In this section, I will be going over the basics of how damage is calculated. In particular, how the bow benefits from raw and elemental damage.
In the Weapon Attack Power Display setting, you can check Display Without Coefficient. This will make it so weapons always show their true attack value, making it easier to see what impact each skill will have, at least for your raw damage.
Element attack will always be displayed with its bloated value. For bow, you have to divide that number by 10 to get the true elemental attack. I.e., if a bow shows 100 fire attack, it actually has 10 fire attack. A skill that increases elemental attack by 10% will therefore give that bow 1 extra elemental attack, not 10.
Let's compare the basic attack to Power Shot/Volley:
Power Volley's motion value and elemental modifier are significantly higher than the rest, which is why it deals so much more damage in comparison. However, it also comes with a longer animation time, so you need an opening before you can use it risk-free.
For bow, you want to pay attention to sever hitzone values for Dragon Piercer, and ranged hitzone values for all other abilities. Elemental hit zones show which element is optimal to use, but can be ignored if you don't deal elemental damage.
True Weapon Attack
With the default settings, your weapons won't show their true raw attack stat. This makes it difficult to calculate damage. A skill that gives +10 extra raw attack won't add that 10 to the number shown, but to the true (hidden) raw attack. Which then gets multiplied by a coefficient into the number shown on screen. Unless you know your weapon's coefficient, you won't know what that +10 attack will turn into before applying it.In the Weapon Attack Power Display setting, you can check Display Without Coefficient. This will make it so weapons always show their true attack value, making it easier to see what impact each skill will have, at least for your raw damage.
Element attack will always be displayed with its bloated value. For bow, you have to divide that number by 10 to get the true elemental attack. I.e., if a bow shows 100 fire attack, it actually has 10 fire attack. A skill that increases elemental attack by 10% will therefore give that bow 1 extra elemental attack, not 10.
Motion Values
All your abilities have different multipliers associated with them. Those multipliers are called motion values. All you have to know for bow is that your charge level increases those multipliers. As an example, these are the multipliers for your basic attack:- Basic Attack Charge level 1 has a motion value of 10 and an elemental modifier of 0.4.
- Basic Attack Charge level 2 has a motion value of 11 and an elemental modifier of 0.7.
- Basic Attack Charge level 3 has a motion value of 12 and an elemental modifier of 1.
Let's compare the basic attack to Power Shot/Volley:
- Basic Attack Charge level 3 has a motion value of 12 and an elemental modifier of 1.
- Power Shot Charge level 3 had a motion value of 12 and an elemental modifier of 0.8.
- Power Volley Charge level 3 had a motion value of 15 and an elemental modifier of 1.
Power Volley's motion value and elemental modifier are significantly higher than the rest, which is why it deals so much more damage in comparison. However, it also comes with a longer animation time, so you need an opening before you can use it risk-free.
Hitzones Values
Each monster has several hit zones. Each hitzone has (hidden) numbers tied to it, 3 for raw damage and 1 for each type of elemental damage. For raw damage, it picks 1 of the 3 numbers, depending on the type of damage dealt (ranged, sever, or blunt). For elemental damage, it only picks one if you also deal elemental damage. The higher those numbers, the more raw and elemental damage that the hitzone takes. In the monster field guide, this system is displayed through the (very simplified) stars. A hitzone of 45 or higher is considered a weak point.For bow, you want to pay attention to sever hitzone values for Dragon Piercer, and ranged hitzone values for all other abilities. Elemental hit zones show which element is optimal to use, but can be ignored if you don't deal elemental damage.
Raw Damage vs. Elemental Damage
Bow is a lot more element-focused after the TU4 buffs. On average, around 30% of your damage comes from element attack. That being said, a lot of inherent damage increases only boost raw attack:- Critical Range only boosts your raw damage (10%).
- Power and Close-Range Coatings only boost your raw damage (35/40%).
- Critical Hits only boost your raw damage (25%).
Exact Values
- Motion Values[docs.google.com] (outdated right now)
- Hitzone Values[mhwilds.kiranico.com]
5. Progression Builds
The next couple of sections go over the builds for progressing through the story, from Low Rank to early High Rank (roughly HR 40). There is also an armor set for the grind to HR100, after which the end-game sets become available.
5.1 - Low Rank
I wouldn't worry too much about a build when you start, since everything in low rank will become obsolete quite quickly. There are a few sets to keep an eye out for, though.
A bit later, you get access to the Hirabami set, which will make your dodges more consistent through Evade Window (more iframes).
You can mix and match the Rey Dau set with the Balahara and Hirabami set, depending on how many levels of Evade Extender and Evade Window you want to play with.
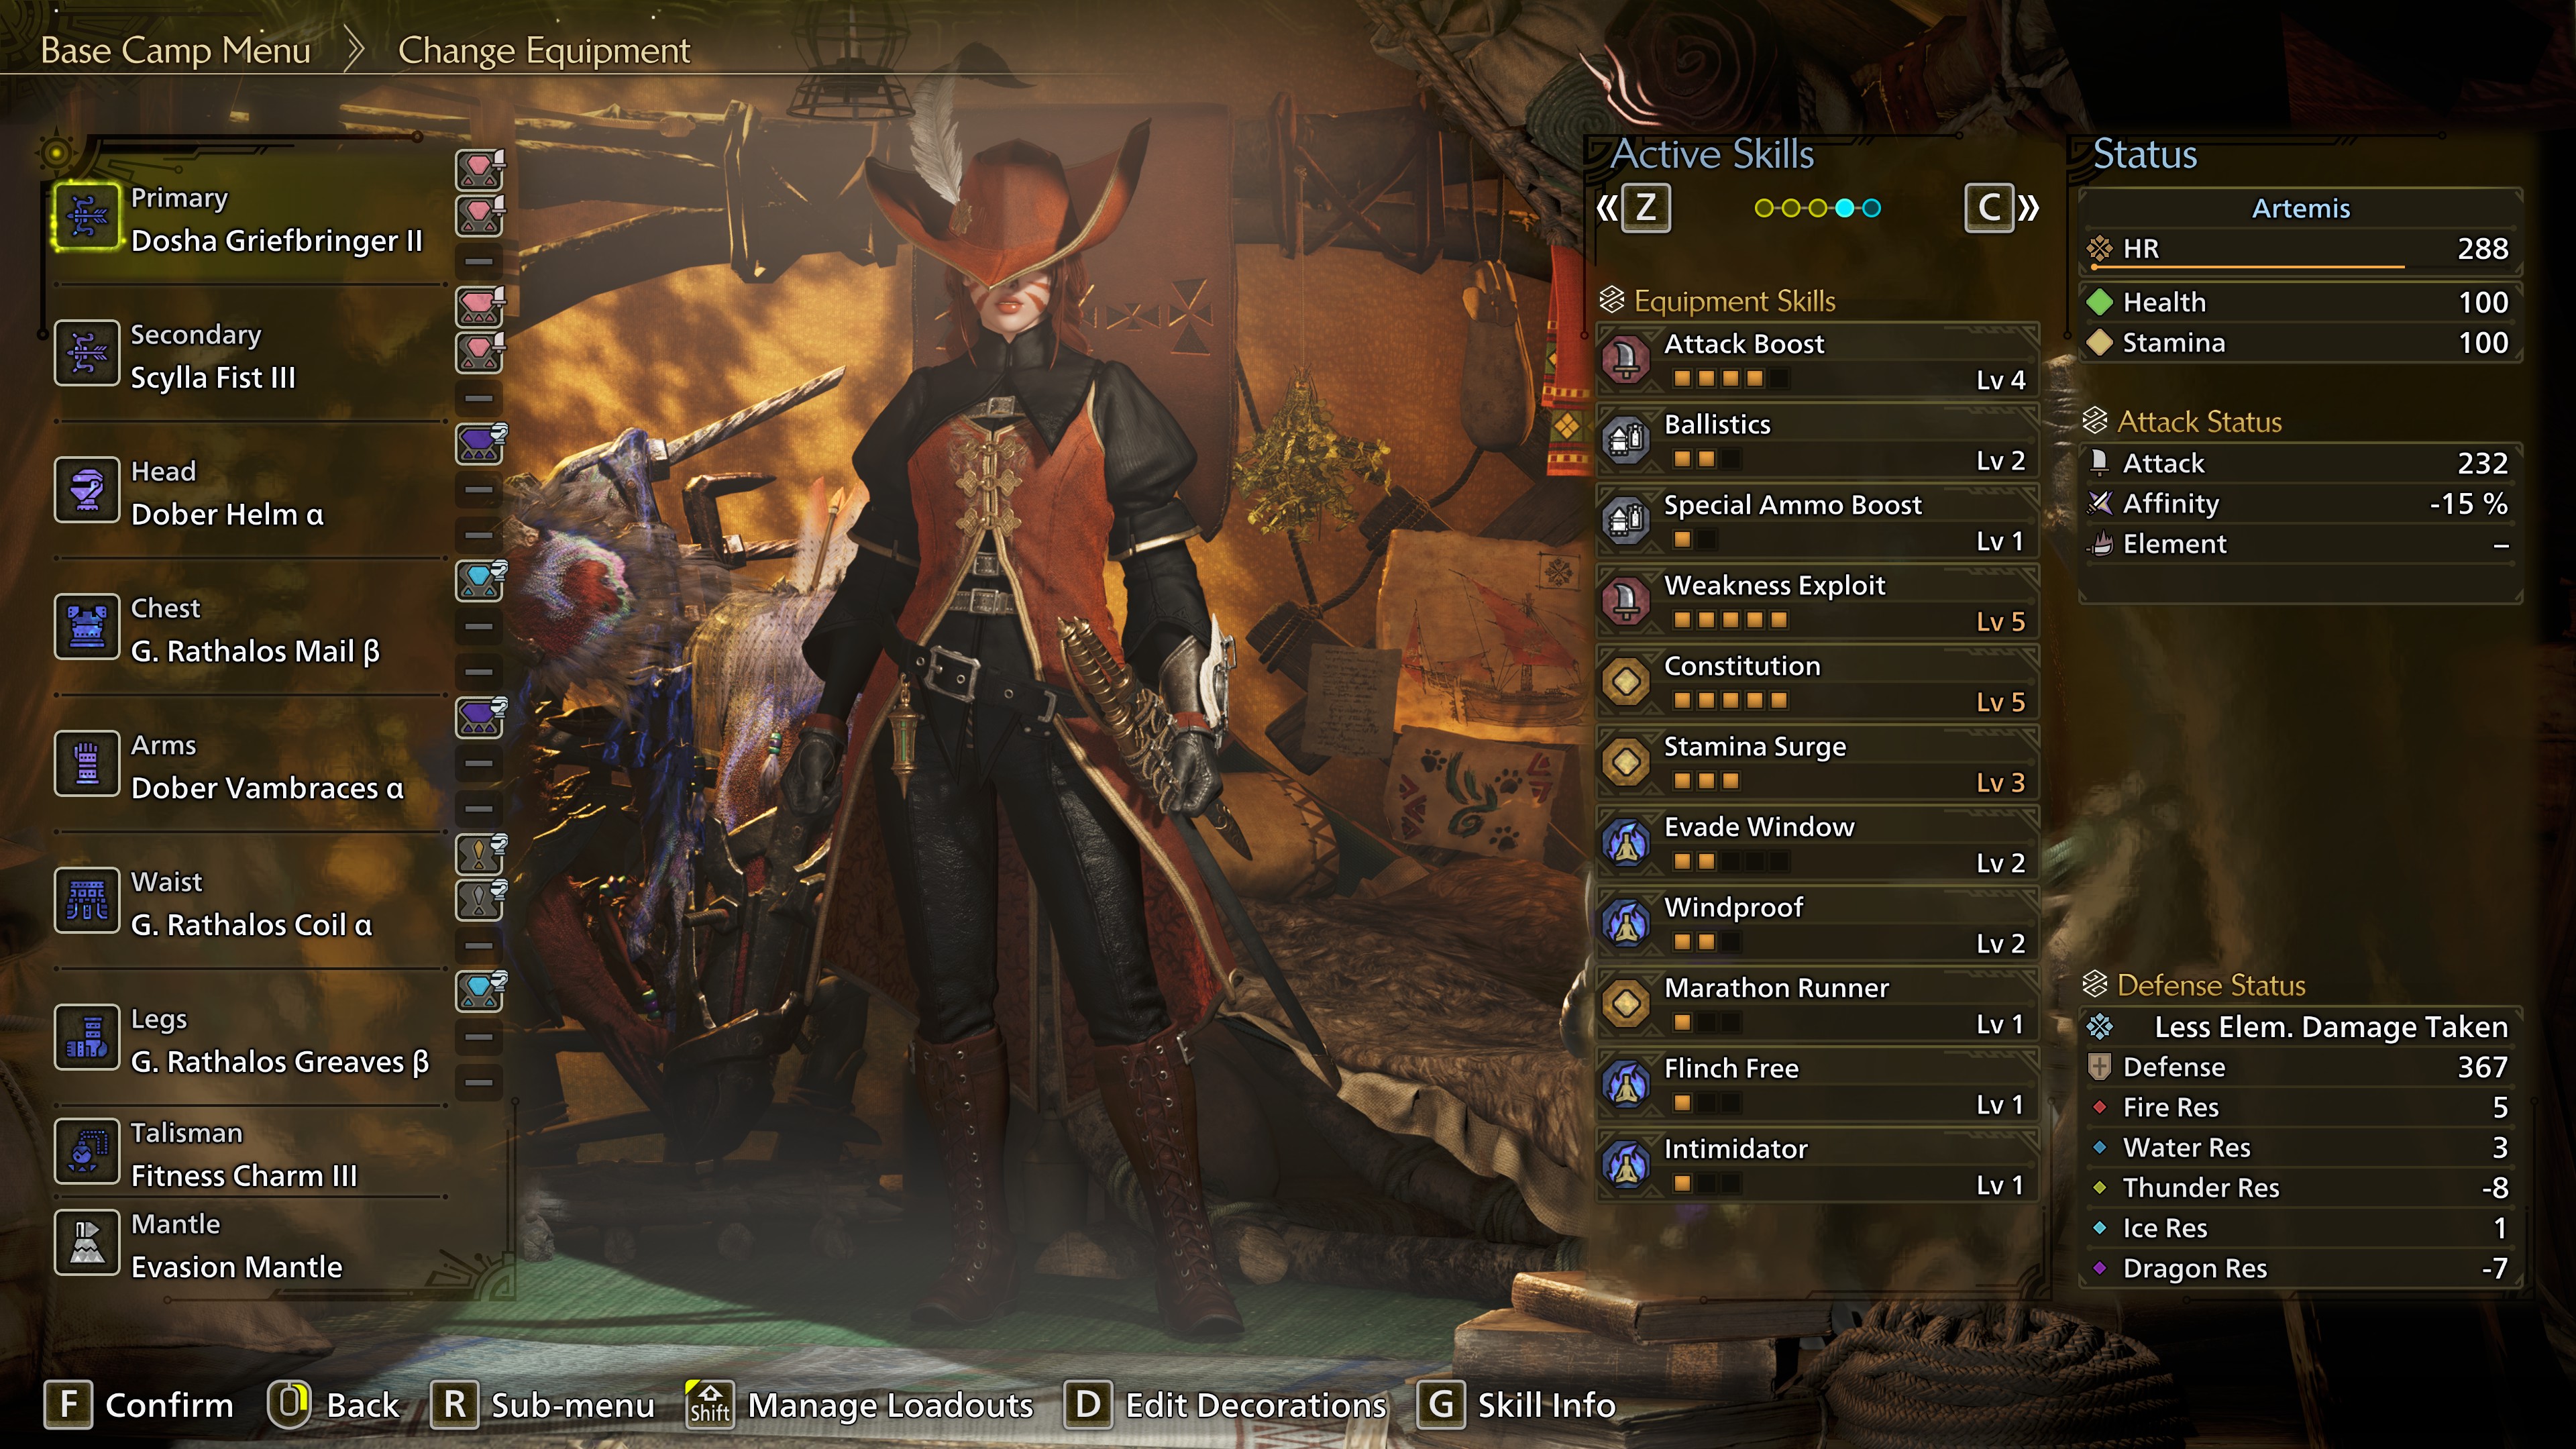
In high rank, you will upgrade to the Dosha Griefbringer, so you can craft the low rank version in preparation. However, it does come with negative affinity, so it's only worth using once you can upgrade it to the high rank version.
Optional: Secondary Bow
The Scylla Fist is a good option if you also want access to Pierce Coatings.
After hunting Xu Wu, you want to spend some of its materials on a Surge Charm (Stamina Surge) in preparation for the early high rank build.
If you have difficulty timing your dodges, you want to use the Rocksteady Mantle. This mantle gives you a 60% damage reduction for 90 seconds and has a cooldown of 10 minutes. It also negates roar, tremor, wind, and knockback effects.
Mending Mantle
The Mending Mantle is more useful if dodging goes smoothly for you. This mantle will rapidly heal you for 80 seconds and has a cooldown of 10 minutes.
For your weapon decorations, you should prioritize raw attack, affinity, and elemental attack, in that order.
All decorations are optional in low rank. Use them if you can, move on if you can't.
Raw attack is displayed without a coefficient.
You can spend the lowest level armor spheres on defense upgrades, but keep in mind that this build will become redundant fairly soon. Invest enough to get by comfortably, and save the rest.
Starting Armor
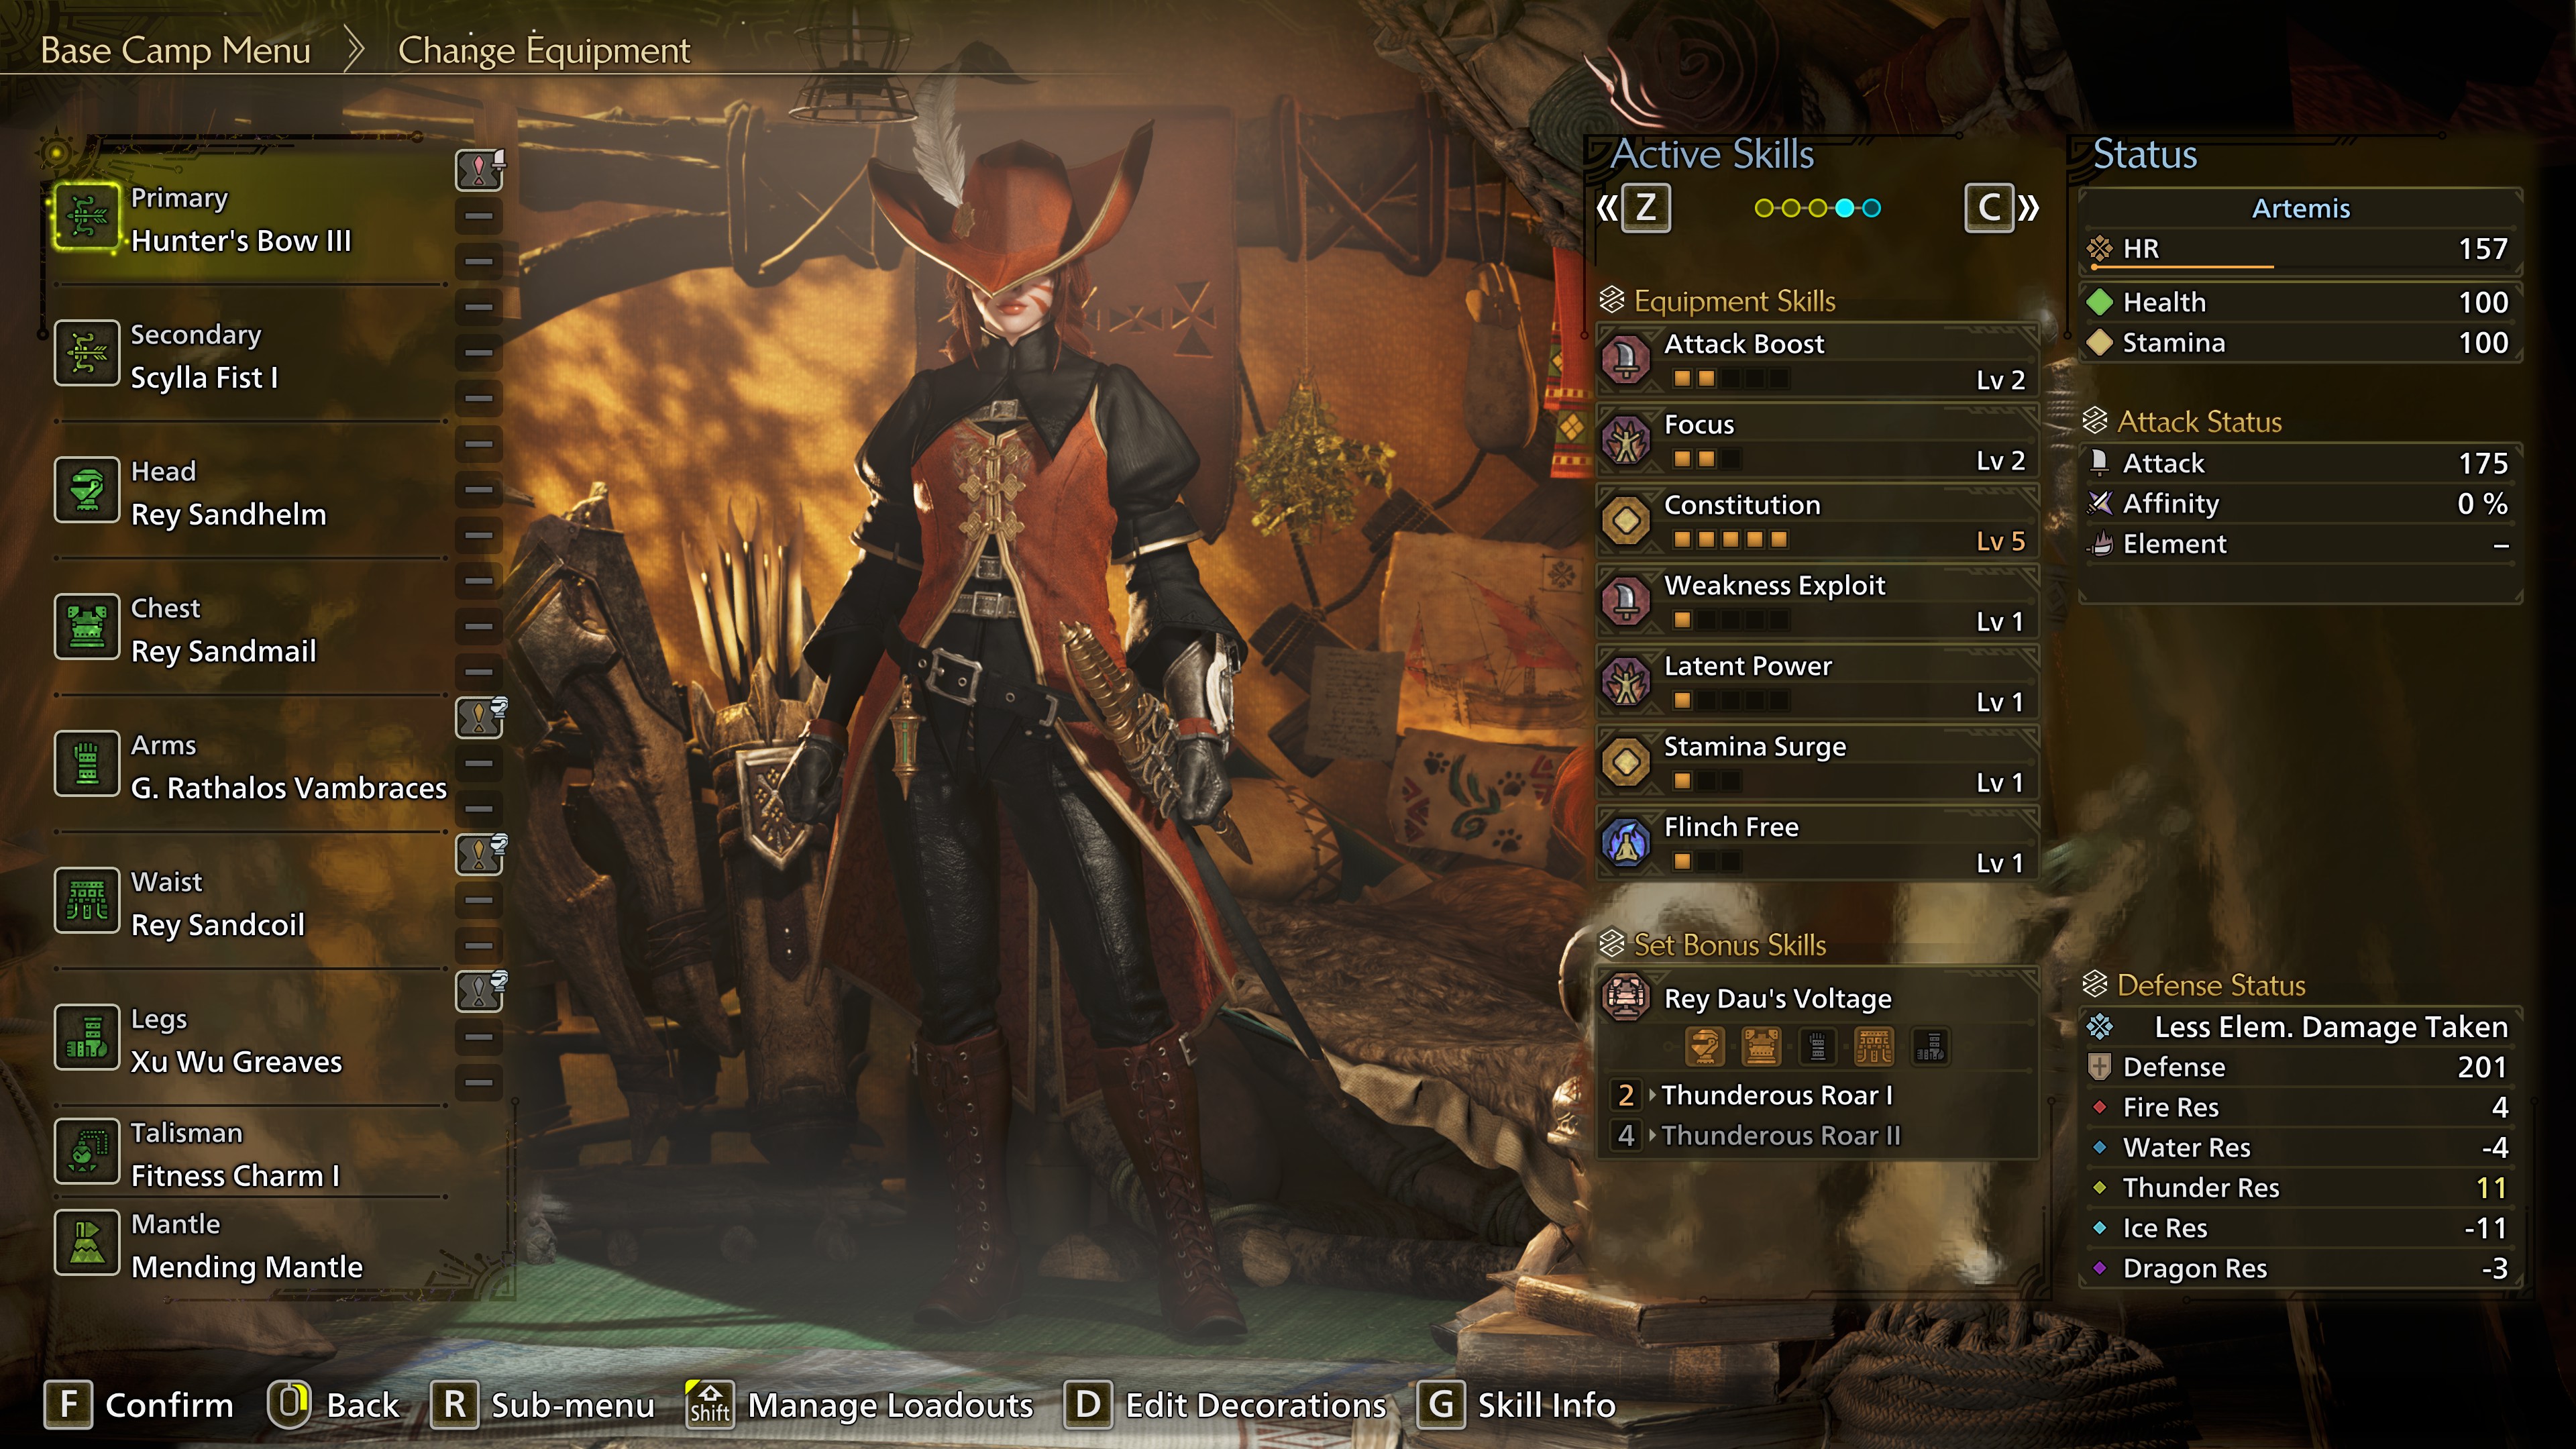
The Hope set will serve you just fine with Divine Blessing and Stun Resistance until you get consistent with your Discerning Dodges.Evade Extender
It won't be too long until you unlock the Balahara set. This is the first set I recommend getting your hands on. The complete set gives you 50 extra defense and 3 levels of Evade Extender (extends dodge range). Especially in low rank, it's nice to get a feel for the skill and see if you want to play with 1, 2, or 3 levels.Constitution, Evade Window & Evade Extender
The next couple of upgrades come from the Rey Dau set. This set will provide you with Constitution (actions cost less stamina), which is arguably the most important skill for the bow. Using at least 2 pieces of this set also improves your Latent Power skill, so make sure to grab at least 1 level of that skill.A bit later, you get access to the Hirabami set, which will make your dodges more consistent through Evade Window (more iframes).
You can mix and match the Rey Dau set with the Balahara and Hirabami set, depending on how many levels of Evade Extender and Evade Window you want to play with.
Constitution & Weakness Exploit
After repelling the Guardian Arkveld, you will unlock the Guardian Rathalos set. This set gives you access to Weakness Exploit (more critical hit chance if you hit weak spots and wounds). Swap out as many Evade Extender and Evade Window levels as you are comfortable with. This effectively trades quality of life for damage.Constitution, Stamina Surge & Weakness Exploit
Near the end of low rank, you get access to the Xu Wu set. Picking up a piece with Stamina Surge (speeds up stamina recovery) will smooth your transition into high rank.Bows
The Hunter's Bow will serve you well throughout low rank. It has good raw attack and, most importantly, Close-Range Coatings. You won't need to worry about elemental bows until you can craft Artian weapons in high rank.In high rank, you will upgrade to the Dosha Griefbringer, so you can craft the low rank version in preparation. However, it does come with negative affinity, so it's only worth using once you can upgrade it to the high rank version.
Optional: Secondary Bow
The Scylla Fist is a good option if you also want access to Pierce Coatings.
Talismans
Pick up the Fitness Charm I (Constitution) when it becomes available in chapter 2. Until that time, any other skill available will do just fine.After hunting Xu Wu, you want to spend some of its materials on a Surge Charm (Stamina Surge) in preparation for the early high rank build.
Mantels
Rocksteady MantleIf you have difficulty timing your dodges, you want to use the Rocksteady Mantle. This mantle gives you a 60% damage reduction for 90 seconds and has a cooldown of 10 minutes. It also negates roar, tremor, wind, and knockback effects.
Mending Mantle
The Mending Mantle is more useful if dodging goes smoothly for you. This mantle will rapidly heal you for 80 seconds and has a cooldown of 10 minutes.
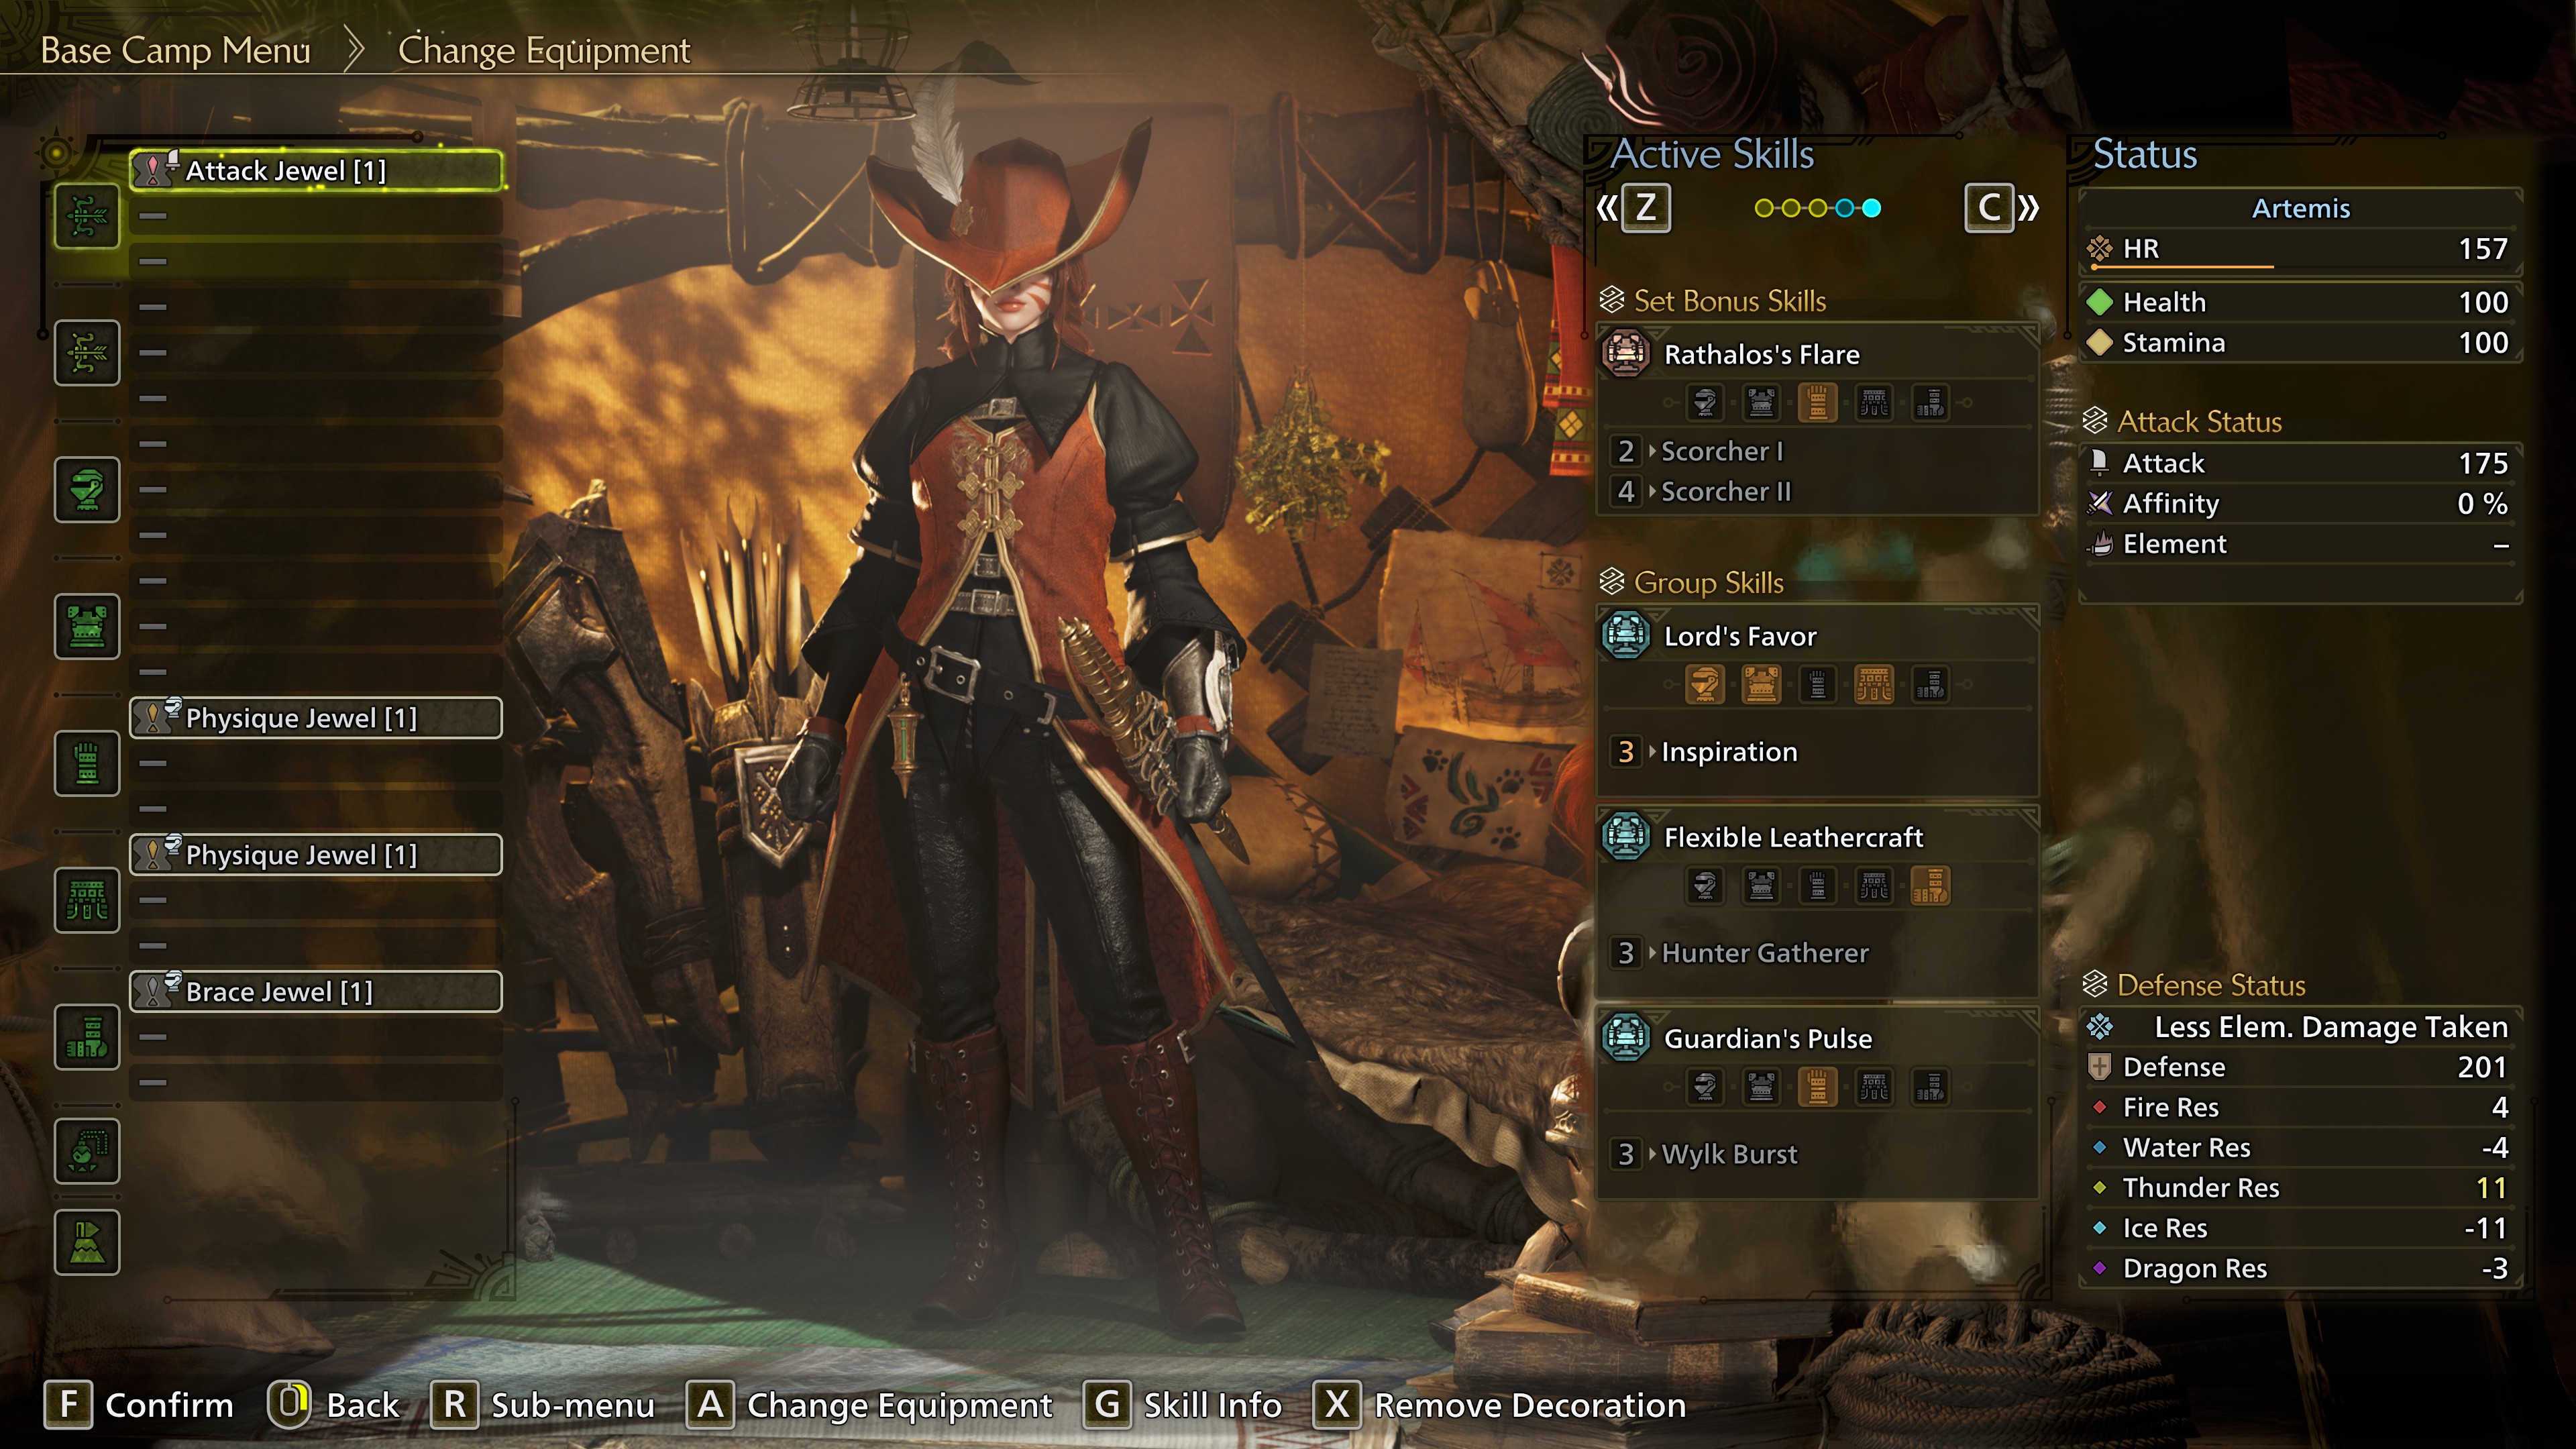
Decorations
You are only going to have access to level 1 decorations. Physique jewels (Constitution) are very useful armor decorations, even for end-game builds. The sooner you can get your hands on multiple of these, the better.For your weapon decorations, you should prioritize raw attack, affinity, and elemental attack, in that order.
All decorations are optional in low rank. Use them if you can, move on if you can't.
Late Low Rank Build
If you want to do minimal farming and crafting, I suggest you aim for the following build:Raw attack is displayed without a coefficient.
You can spend the lowest level armor spheres on defense upgrades, but keep in mind that this build will become redundant fairly soon. Invest enough to get by comfortably, and save the rest.
5.2 - HR 1-20
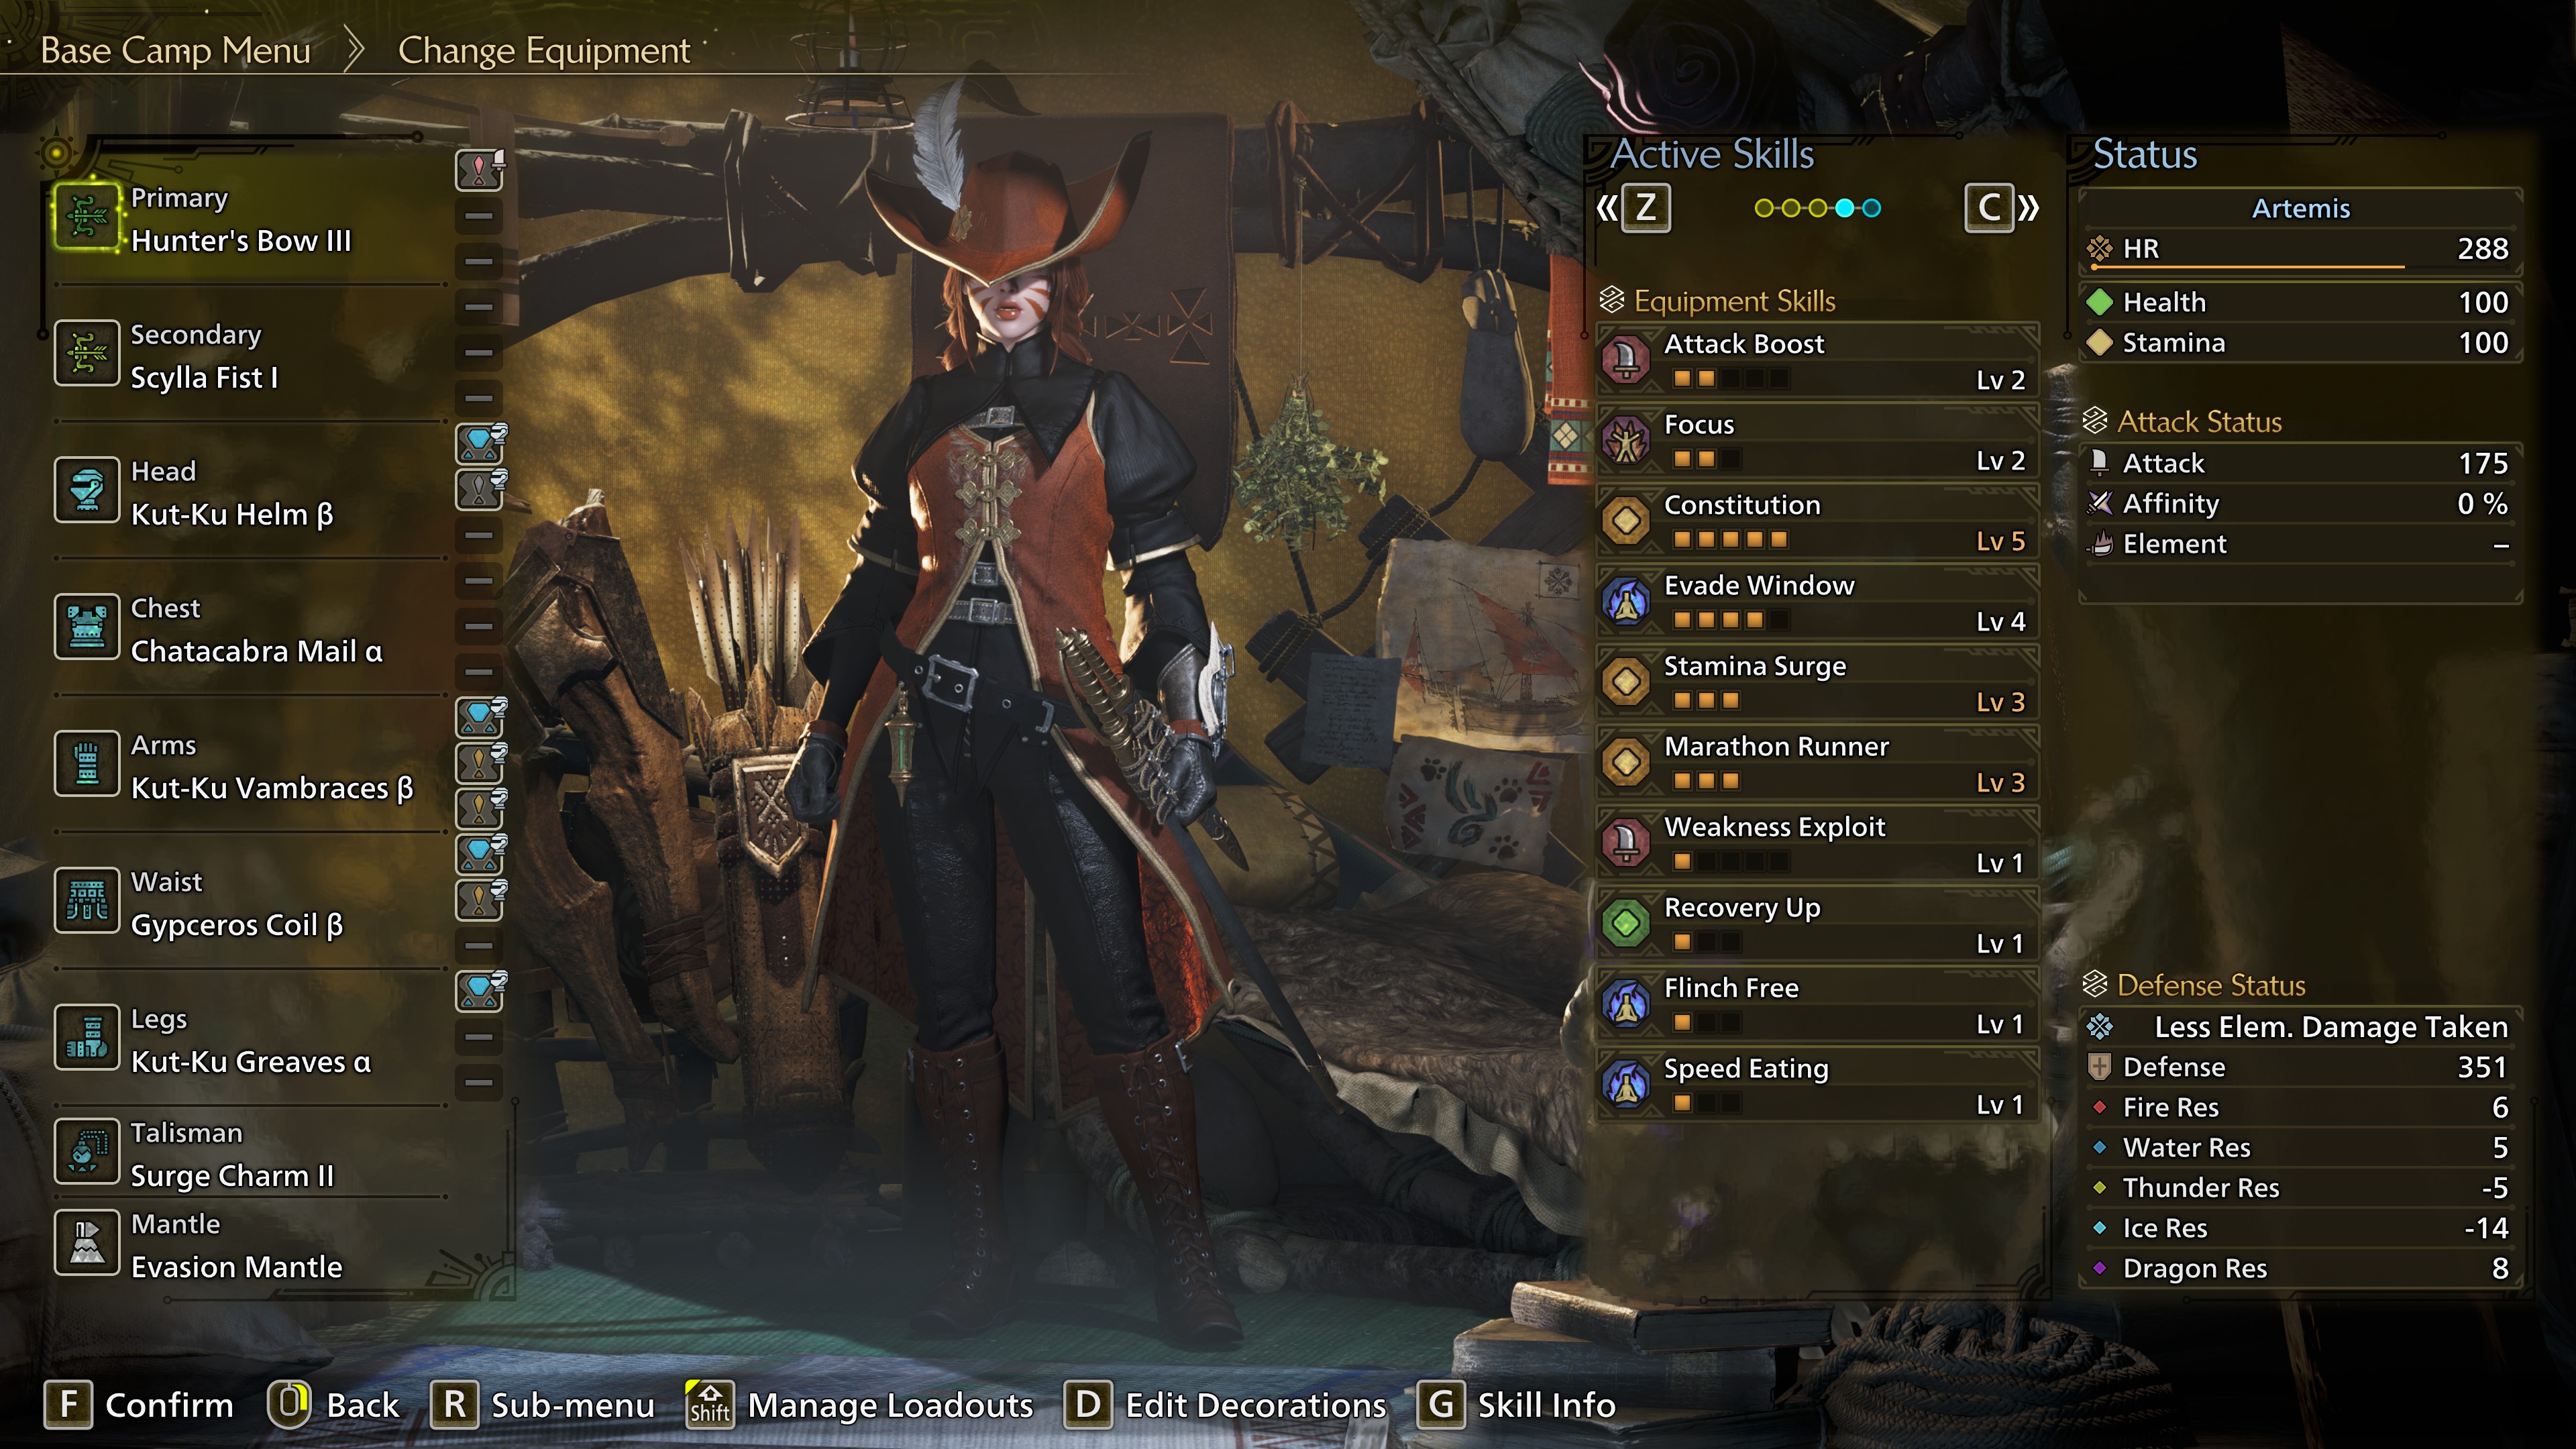
To get you started in high rank, you only have to hunt Yian Kut-Ku and Gypceros. This build will remain useful till hunter rank 20.
Raw attack is displayed without a coefficient.
With this combination, all decorations are optional. The lowest-level armor spheres become more and more obsolete the further you progress into high rank, so feel free to use those to grab some extra defense. I recommend saving your higher-level armor spheres for your end-game build.
Stamina Surge is not essential, provided you have enough aggro and skill for consistent dodges. If you play with other people and/or support hunters, I recommend prioritizing Stamina Surge.
Alternatively, you can get your hands on the Balahara set to max out Stamina Surge and get a level of both Evade Window and Evade Extender. You will have to give up some decoration slots and a level of Weakness Exploit.
For your weapon decorations, you should prioritize raw attack, affinity, and elemental attack, in that order.
Again, don't worry too much about the decorations and work with what you have. You won't be min-maxing until the end game.
Optional: Secondary Bow
The Scylla Fist is a good option if you also want access to Pierce Coatings.
Raw attack is displayed without a coefficient.
With this combination, all decorations are optional. The lowest-level armor spheres become more and more obsolete the further you progress into high rank, so feel free to use those to grab some extra defense. I recommend saving your higher-level armor spheres for your end-game build.
Constitution Level 5
The Kut-Ku set is the first one that provides Constitution. You can opt for set A with okay-ish skills and/or set B, so you can more easily tweak it to your liking with jewels. With a combination of the helm, arms, and legs, you can max out your Constitution.Stamina Surge Level 3
It's also a good idea to invest in an upgraded Surge Charm (faster stamina recovery) by hunting a couple of Gypseros. You can max out the skill via either the mail or coil from the Gypseros set.Stamina Surge is not essential, provided you have enough aggro and skill for consistent dodges. If you play with other people and/or support hunters, I recommend prioritizing Stamina Surge.
Filler Skills
That leaves you with one other piece to fill out your early high rank build. You can choose between damage and quality of life:- The Hirabami set provides Evade Window.
- The Chatacabra set provides Weakness Exploit (and speed eating as a nice bonus).
Alternatively, you can get your hands on the Balahara set to max out Stamina Surge and get a level of both Evade Window and Evade Extender. You will have to give up some decoration slots and a level of Weakness Exploit.
Mantle
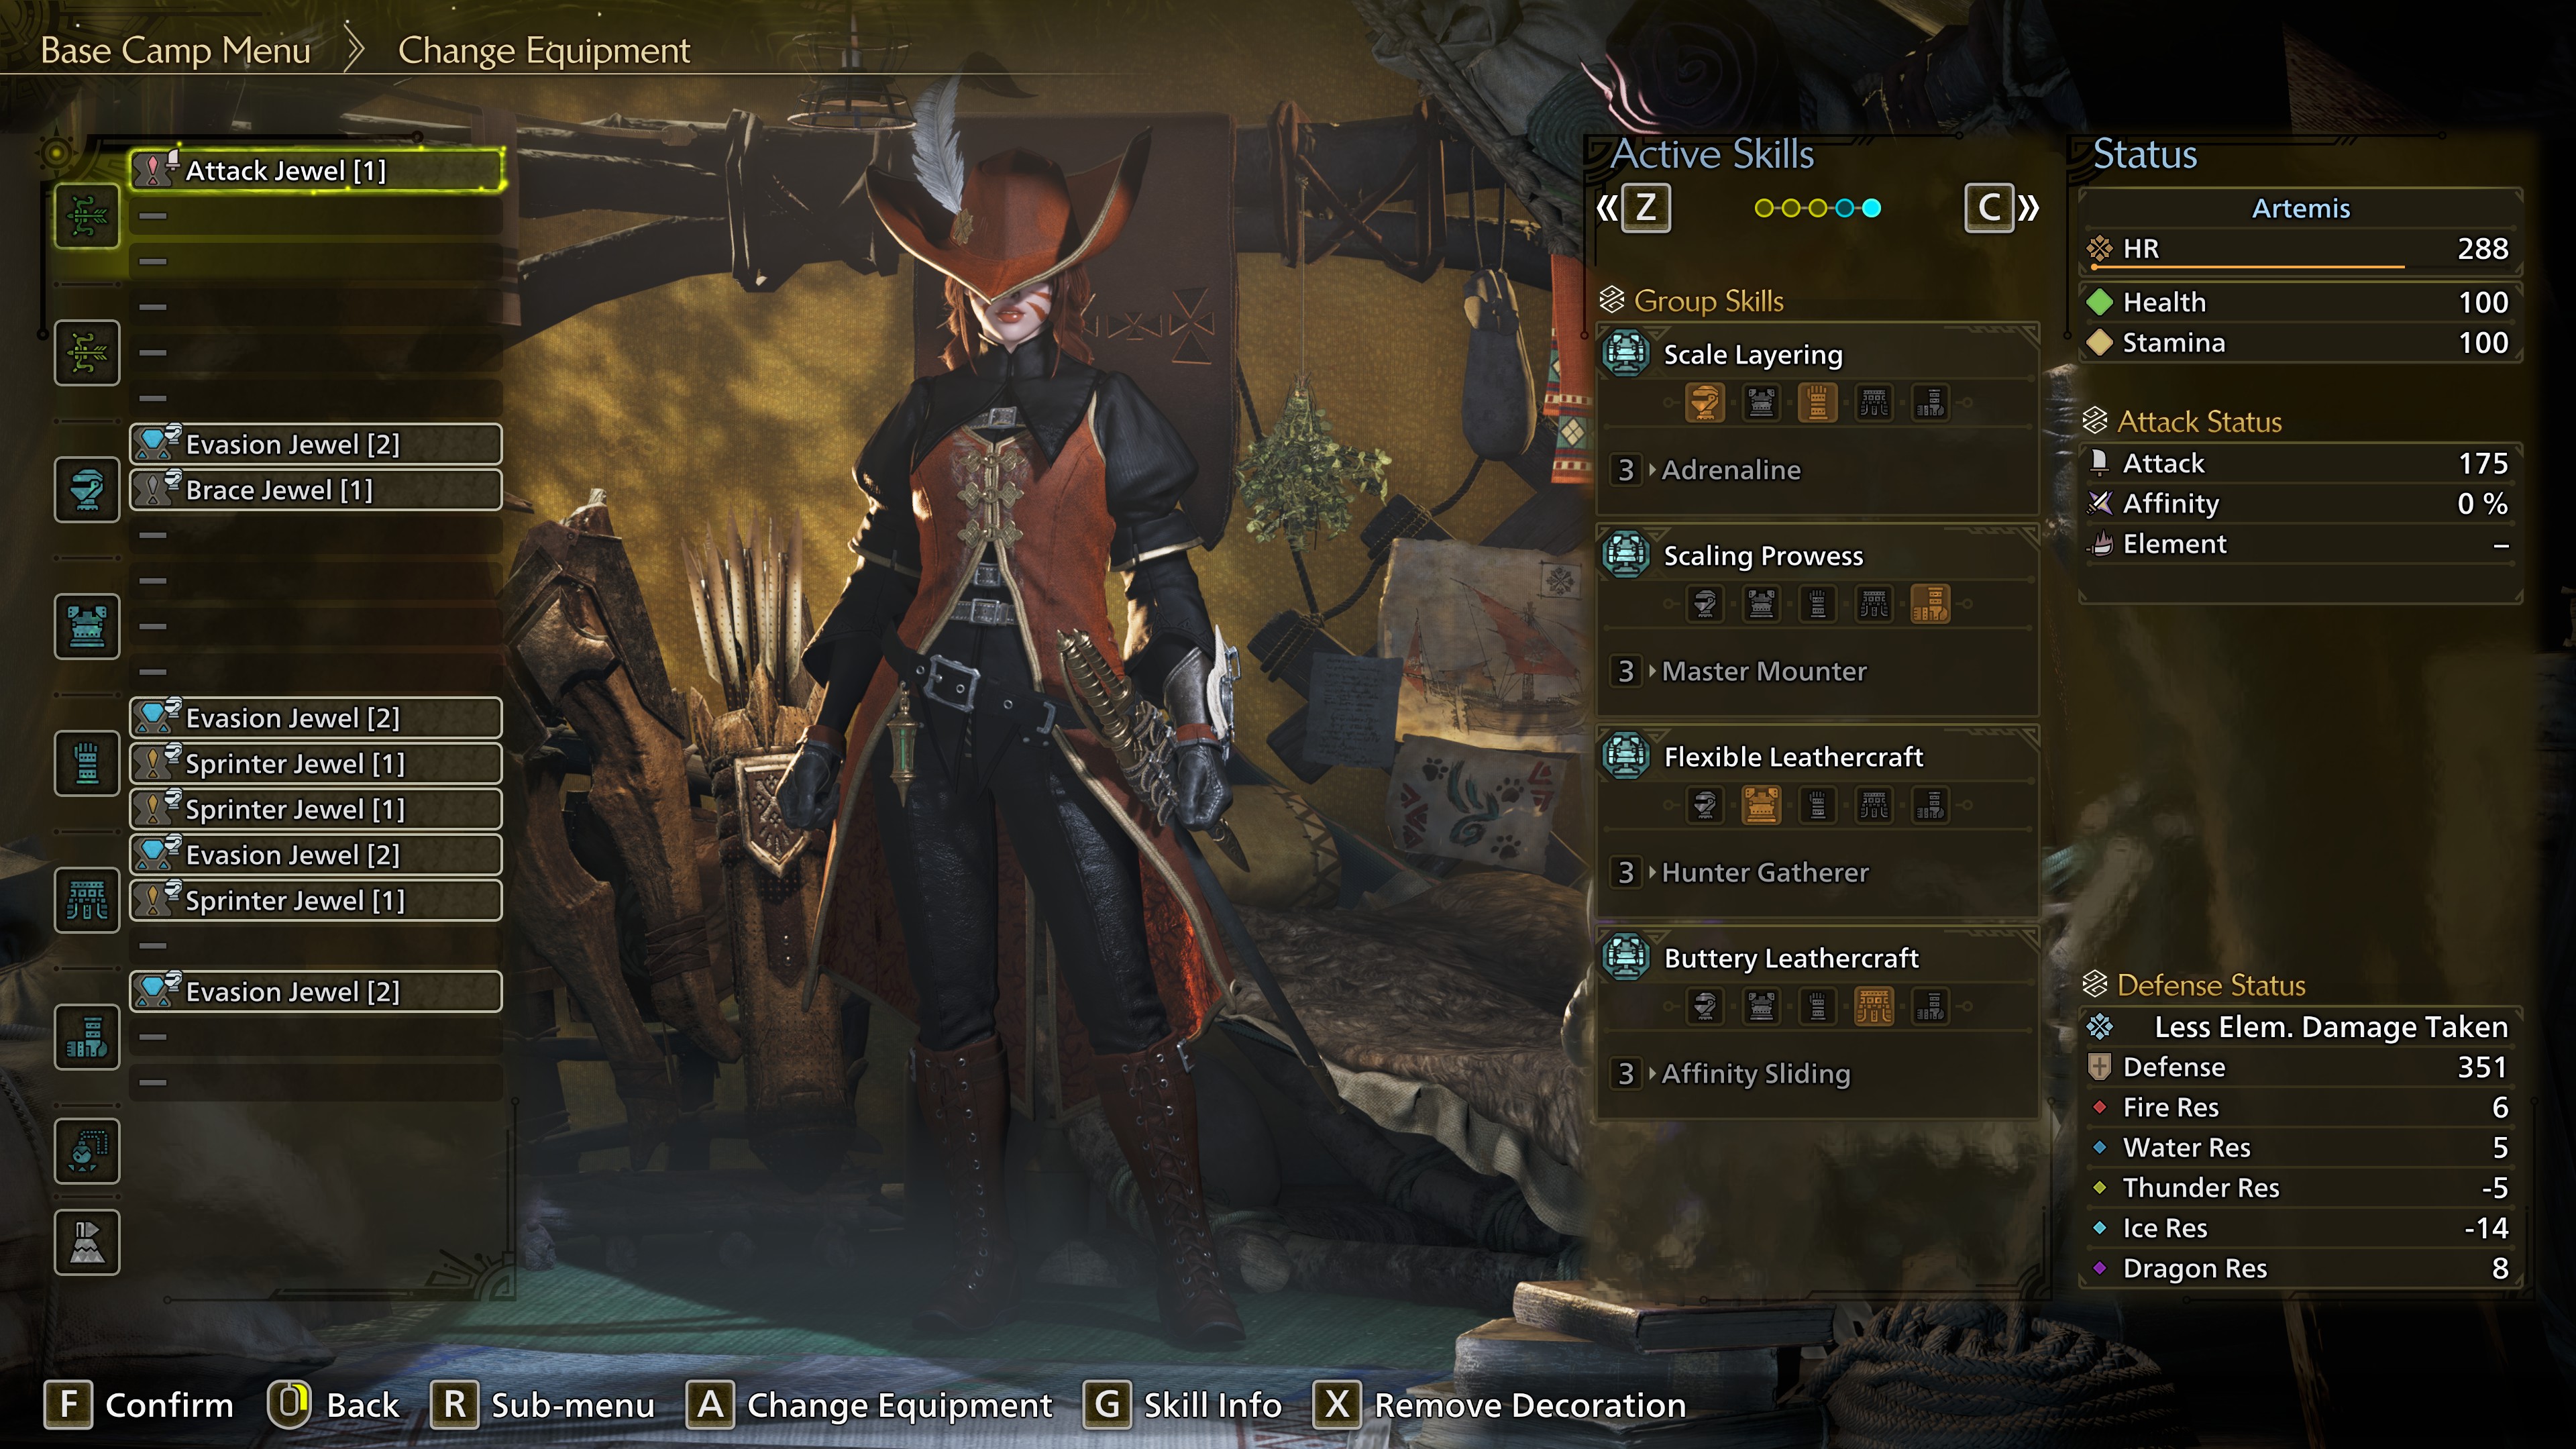
Along the way, you can also add the Evasion Mantle to your loadout. It boosts your raw attack by 20% for 10 seconds after a successful dodge. The mantle stays active for 105 seconds.Decorations
This will largely depend on which jewels you managed to pick up during your hunts. Physique jewels (Constitution) and Refresh Jewels (Stamina Surge) should be prioritized because they allow you to use more armor pieces with offensive skills.For your weapon decorations, you should prioritize raw attack, affinity, and elemental attack, in that order.
Again, don't worry too much about the decorations and work with what you have. You won't be min-maxing until the end game.
Bows
Stick with the Hunter's Bow III for now. You want to upgrade your bow when you get access to the Dosha Griefbringer II.Optional: Secondary Bow
The Scylla Fist is a good option if you also want access to Pierce Coatings.
5.3 - HR 21-40
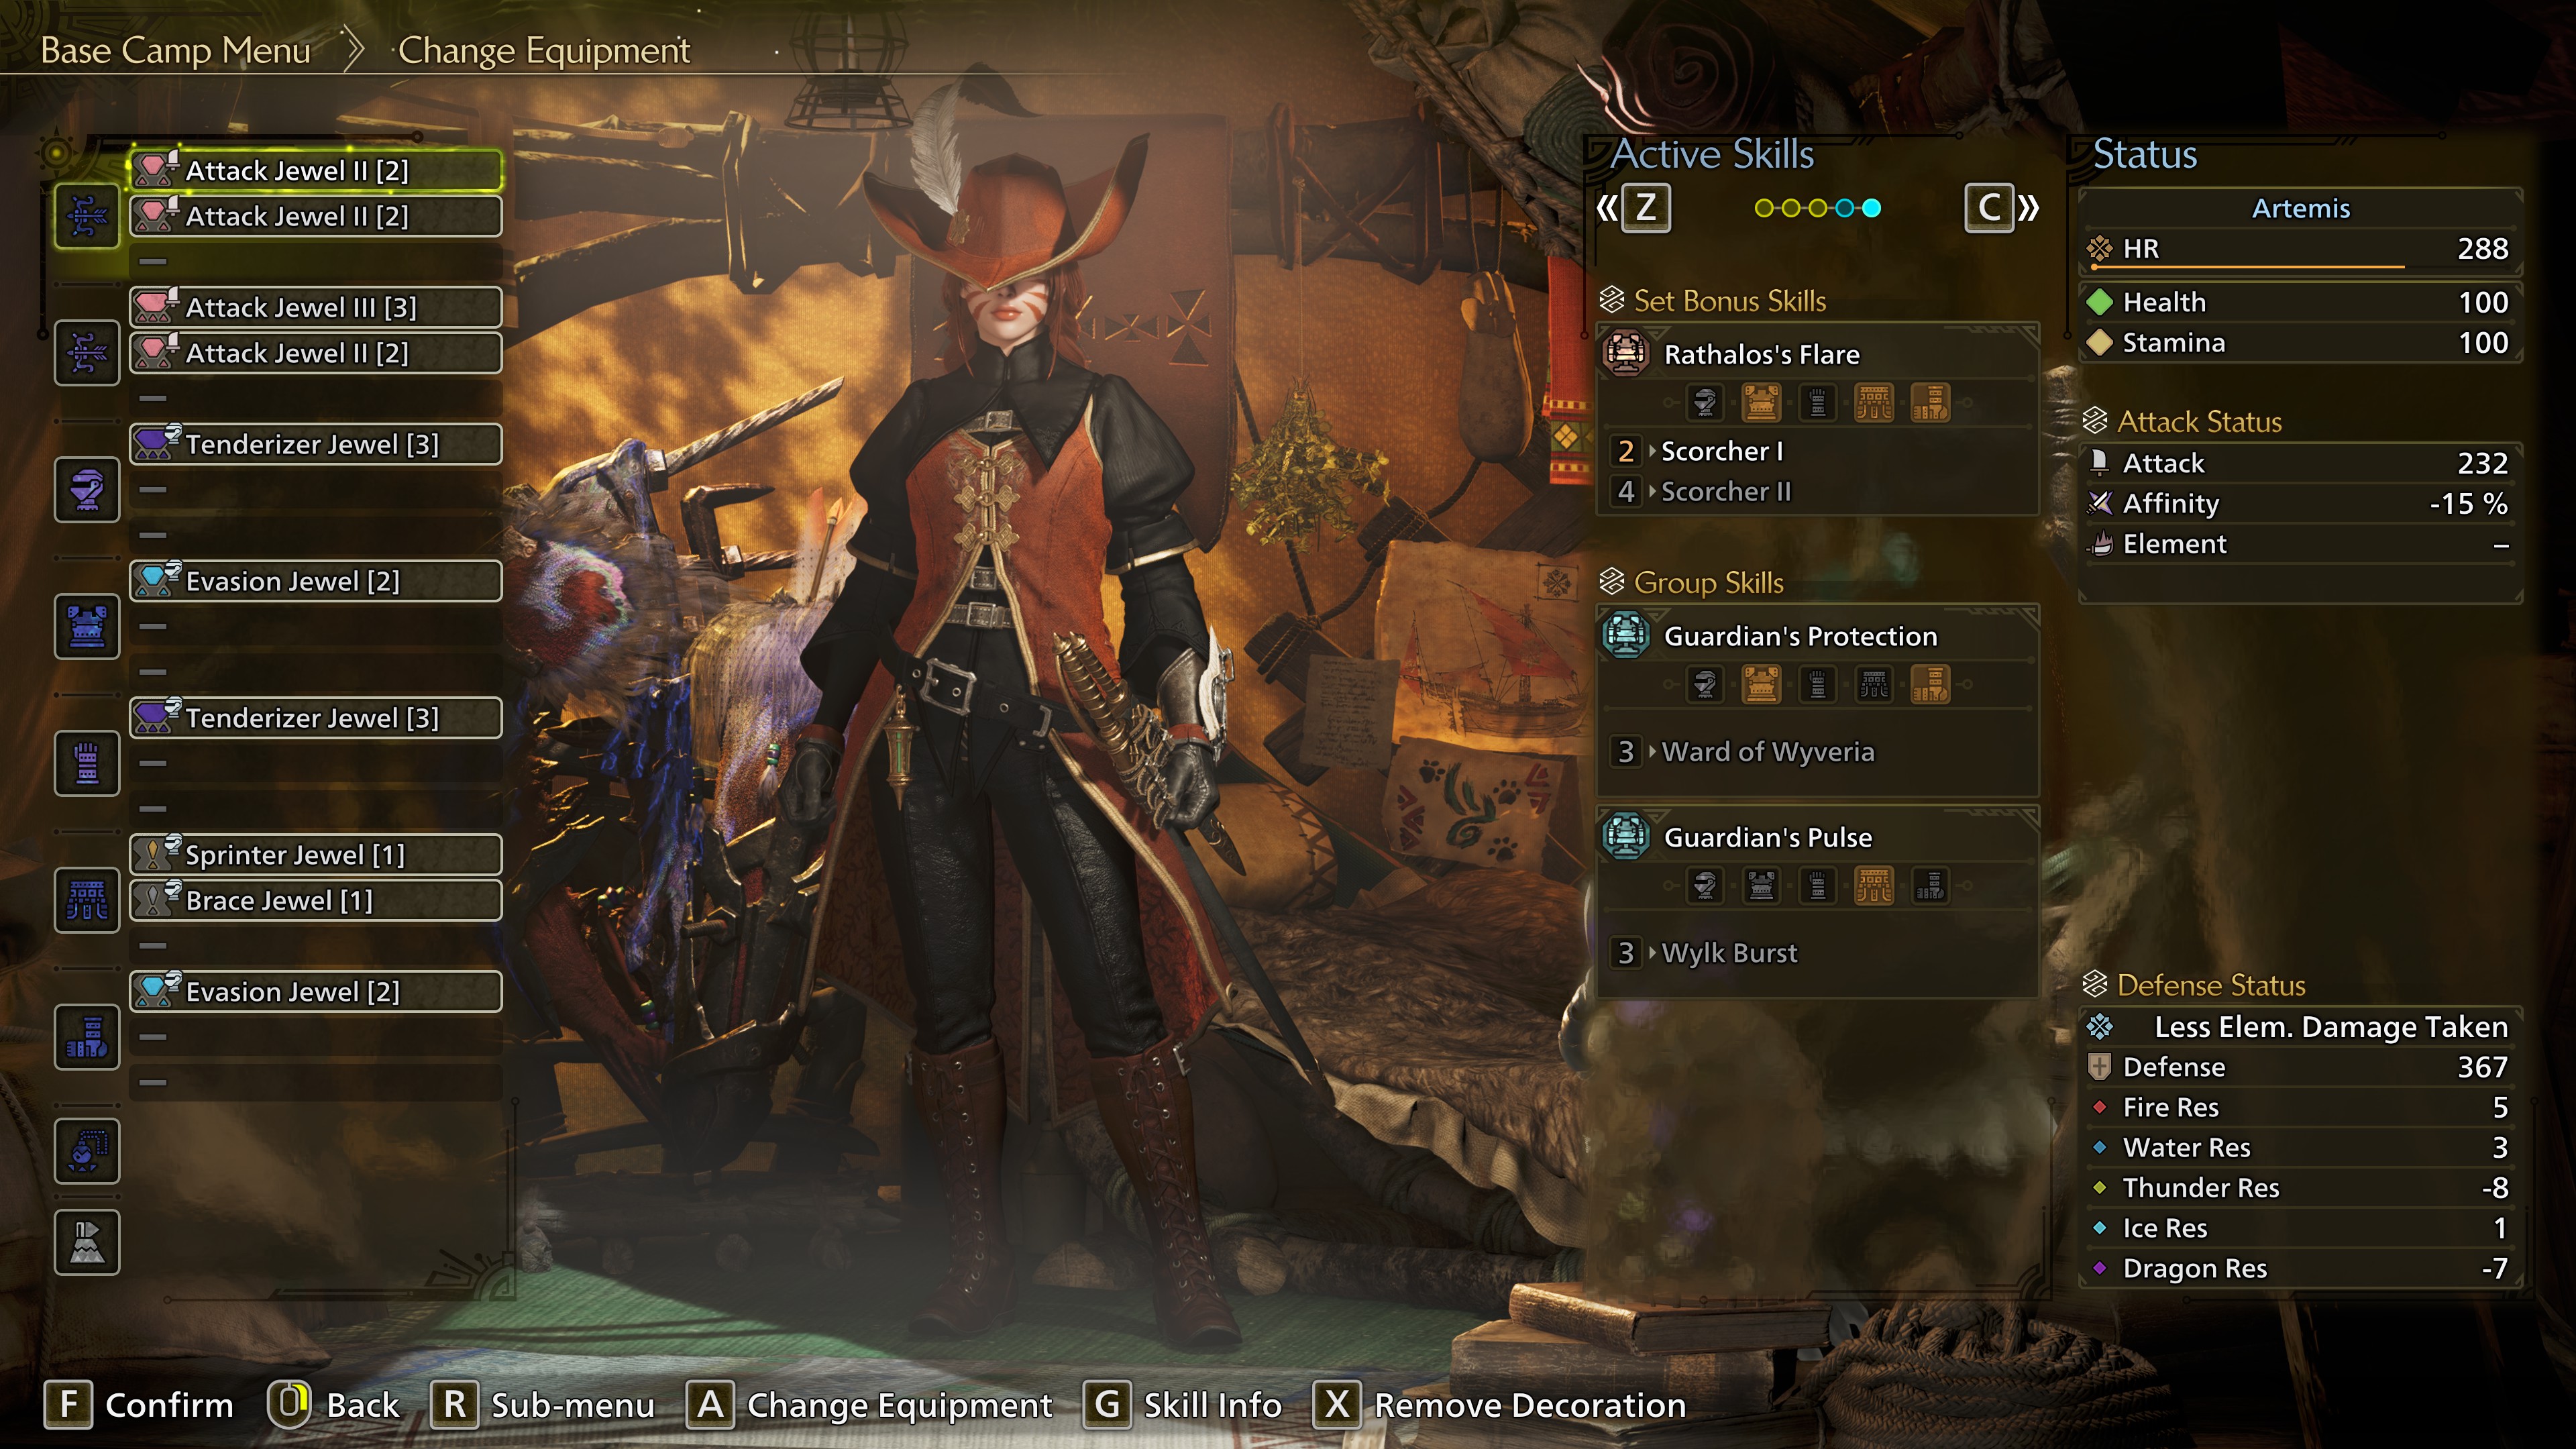
After you've gained access to the Dober set (rarity 7), you can create a solid build for fighting the tougher monsters. This build effectively covers Hunter Rank 20 through 40.
Raw attack is displayed without a coefficient.
All decorations are optional. The lowest-level armor spheres can be used to grab some extra defense, but save your higher-level armor spheres for your end-game build.
This will also grant you another level of the Scorcher Set Bonus skill.
For your weapon decorations, you should prioritize raw attack, affinity, and elemental attack, in that order.
Optional: Secondary Bow
The Scylla Fist is a good option if you also want access to Pierce Coatings.
Raw attack is displayed without a coefficient.
All decorations are optional. The lowest-level armor spheres can be used to grab some extra defense, but save your higher-level armor spheres for your end-game build.
Constitution Level 5 & Stamina Surge Level 3
You can combine the helm and vambraces from the Dober set with a Fitness Charm III to max out Constitution and Stamina Surge.Weakness Exploit Level 3
After maxing out your stamina skills, you want to grab 3 other pieces that have Weakness Exploit on them. A certain Guardian Rathalos set is the obvious choice here.Evade Window Level 3
Alternatively, you can grab Constitution and Evade Window from the Rathalos set (helm and vambraces) and Weakness Exploit from the Guardian Rathalos set. In that case, you need a Surge Charm III for Stamina Surge and 2 Physique Jewels to max out your Constitution.This will also grant you another level of the Scorcher Set Bonus skill.
Solo: Adrenaline Rush
You can also grab Adrenaline Rush (extra damage after dodging) from the Rathalos set, but then you need a Fitness Charm to max out Constitution. That means you will be missing levels in Stamina Surge. If you hunt solo, then this won't matter too much, since you have loads of opportunities to dodge and refill your stamina.Scorcher I or II
The Rathalos Set Bonus skill deals extra fire damage, regardless of whether you use bows with a different element. It's not a game-changer, but more damage is always nice.Mantle
Keep the Evasion Mantle in your loadout. It boosts your raw attack by 20% for 10 seconds after a successful dodge. The mantle stays active for 105 seconds.Decorations
By this point, you should have collected a fair amount of jewels, but whether they are useful is up to chance. Physique jewels (Constitution) and Refresh Jewels (Stamina Surge) will be mandatory for your end-game build, so now is a good time to start collecting those.For your weapon decorations, you should prioritize raw attack, affinity, and elemental attack, in that order.
Bows
You can upgrade to the Dosha Griefbringer II as soon as it becomes available.Optional: Secondary Bow
The Scylla Fist is a good option if you also want access to Pierce Coatings.
5.4 - HR 50-100
With this build, you can bridge the gap until you can get your hands on the gear that's locked behind HR 100.
Raw attack is displayed without a coefficient.
Thunder Variant
The High Voltsender converts Thunder Resistance to Thunder Attack. To make use of this, swap the Lagiacrus Mail B for the A variant, and slot in a Thunder Res Jewel and Physique Jewel.
For a bit more damage, you can replace the Physique Jewel with a Counter Jewel. You can max out your stamina reduction with Dash Juice instead.
Thanks to Antivirus, you need fewer hits to recover from the Frenzy Virus, and it grants an additional 10% affinity (25% in total) upon recovery.
Constitution levels are pretty flexible if you are willing to use Dash Juice or forgo feasts for Black Belt meals. For example, if you need room to slot in Shockproof, Adaptability, or specific resistances.
Depending on your preferences, you can eat for a different meal skill, and/or swap these jewels for Counterstrike levels.
Alternatively, you can opt for a level of Adaptability to remove the need for Hot and Cold Potions.
The Evasion Mantle boosts your raw attack by 20% for 10 seconds after a successful dodge. The mantle stays active for 105 seconds. This means it can outperform the Corrupted Mantle, but only during solo hunts. The uptime in multiplayer is much lower.
Corrupted Mantle
The Corrupted Mantle temporarily drains your health and provides 5% affinity for 1,5 minutes. Continuous attacks stop the health drain and give you an additional 5% affinity (10% total) as well as +4.5 % extra raw attack.
Sheathing your weapon pauses the duration of your Corrupted Mantle, but not the health drain. When it runs out, it takes 10 minutes to recharge.
Raw attack is displayed without a coefficient.
Thunder Variant
The High Voltsender converts Thunder Resistance to Thunder Attack. To make use of this, swap the Lagiacrus Mail B for the A variant, and slot in a Thunder Res Jewel and Physique Jewel.
For a bit more damage, you can replace the Physique Jewel with a Counter Jewel. You can max out your stamina reduction with Dash Juice instead.
Talisman
The Counterattack Charm III offers the most value until you can farm Golden Age Charms.Black Eclipse I & Antivirus Level 3
The Set Bonus skill infects you with the Frenzy Virus when you enter combat. Upon being infected, you also gain +10 raw attack. After hitting the monster enough times, you will recover from the virus and gain +5 raw attack and +15% affinity.Thanks to Antivirus, you need fewer hits to recover from the Frenzy Virus, and it grants an additional 10% affinity (25% in total) upon recovery.
Leviathan's Fury I
With this Set Bonus Skill, you deal a flat amount of thunder damage after enough hits. After you deal that damage, you will gain +20% affinity for 20 seconds. After those 20 seconds, there is a 30-second cooldown.Constitution Level 5 & Stamina Surge Level 3
These skills max out your stamina reduction and stamina recovery.Constitution levels are pretty flexible if you are willing to use Dash Juice or forgo feasts for Black Belt meals. For example, if you need room to slot in Shockproof, Adaptability, or specific resistances.
Weakness Exploit Level 5
Weakness Exploit level 5 provides 30% affinity when you hit a weak point, and 50% affinity for hitting a wound.Adrenaline Rush Level 3
You gain +20 raw attack for 30 seconds after a perfect dodge.Agitator Level 1
You get +4 raw attack and +3% affinity if the monster is enraged. Simple yet effective, but not consistent. It's active around 60-80% of the hunt.Burst Level 1
After hitting the monster 5 times in quick succession, you get +6 raw attack and +40 elemental attack for 3 seconds.Counterstrike Level 1
This skill provides +10 raw attack for 30 seconds if an attack knocks you back...or not. You want to activate this skill when you have hyperarmor. You get Hyper Armor:- during the last few frames of your dodge;
- when you transition into a Dragon Piercer after targeting a wound with your Focus Strike.
Optional: Evade Window Level 2
You can max out your iframes if you combine 2 levels of Evade Window with the Thumbler Hi skill from a meal or feast. This will make your dodges very consistent, but also makes it harder for Counterstrike to activate.Depending on your preferences, you can eat for a different meal skill, and/or swap these jewels for Counterstrike levels.
Recovery Speed Level 1
This skill doubles the speed at which red health recovers.Flinch Free Level 1 & Shock Absorber
With these, you don't have to worry about most flinches.Alternatively, you can opt for a level of Adaptability to remove the need for Hot and Cold Potions.
Mantles
Evasion MantleThe Evasion Mantle boosts your raw attack by 20% for 10 seconds after a successful dodge. The mantle stays active for 105 seconds. This means it can outperform the Corrupted Mantle, but only during solo hunts. The uptime in multiplayer is much lower.
Corrupted Mantle
The Corrupted Mantle temporarily drains your health and provides 5% affinity for 1,5 minutes. Continuous attacks stop the health drain and give you an additional 5% affinity (10% total) as well as +4.5 % extra raw attack.
Sheathing your weapon pauses the duration of your Corrupted Mantle, but not the health drain. When it runs out, it takes 10 minutes to recharge.
Bows & Decorations
See: 6. End Game - Optimal Bows & Matchups.
6. Optimal Bows & Matchups (<HR 100)
In this section, I will dive into crafting Artian bows and list the optimal bows up to HR 100. These will become obsolete once you can upgrade the Artian Bows.
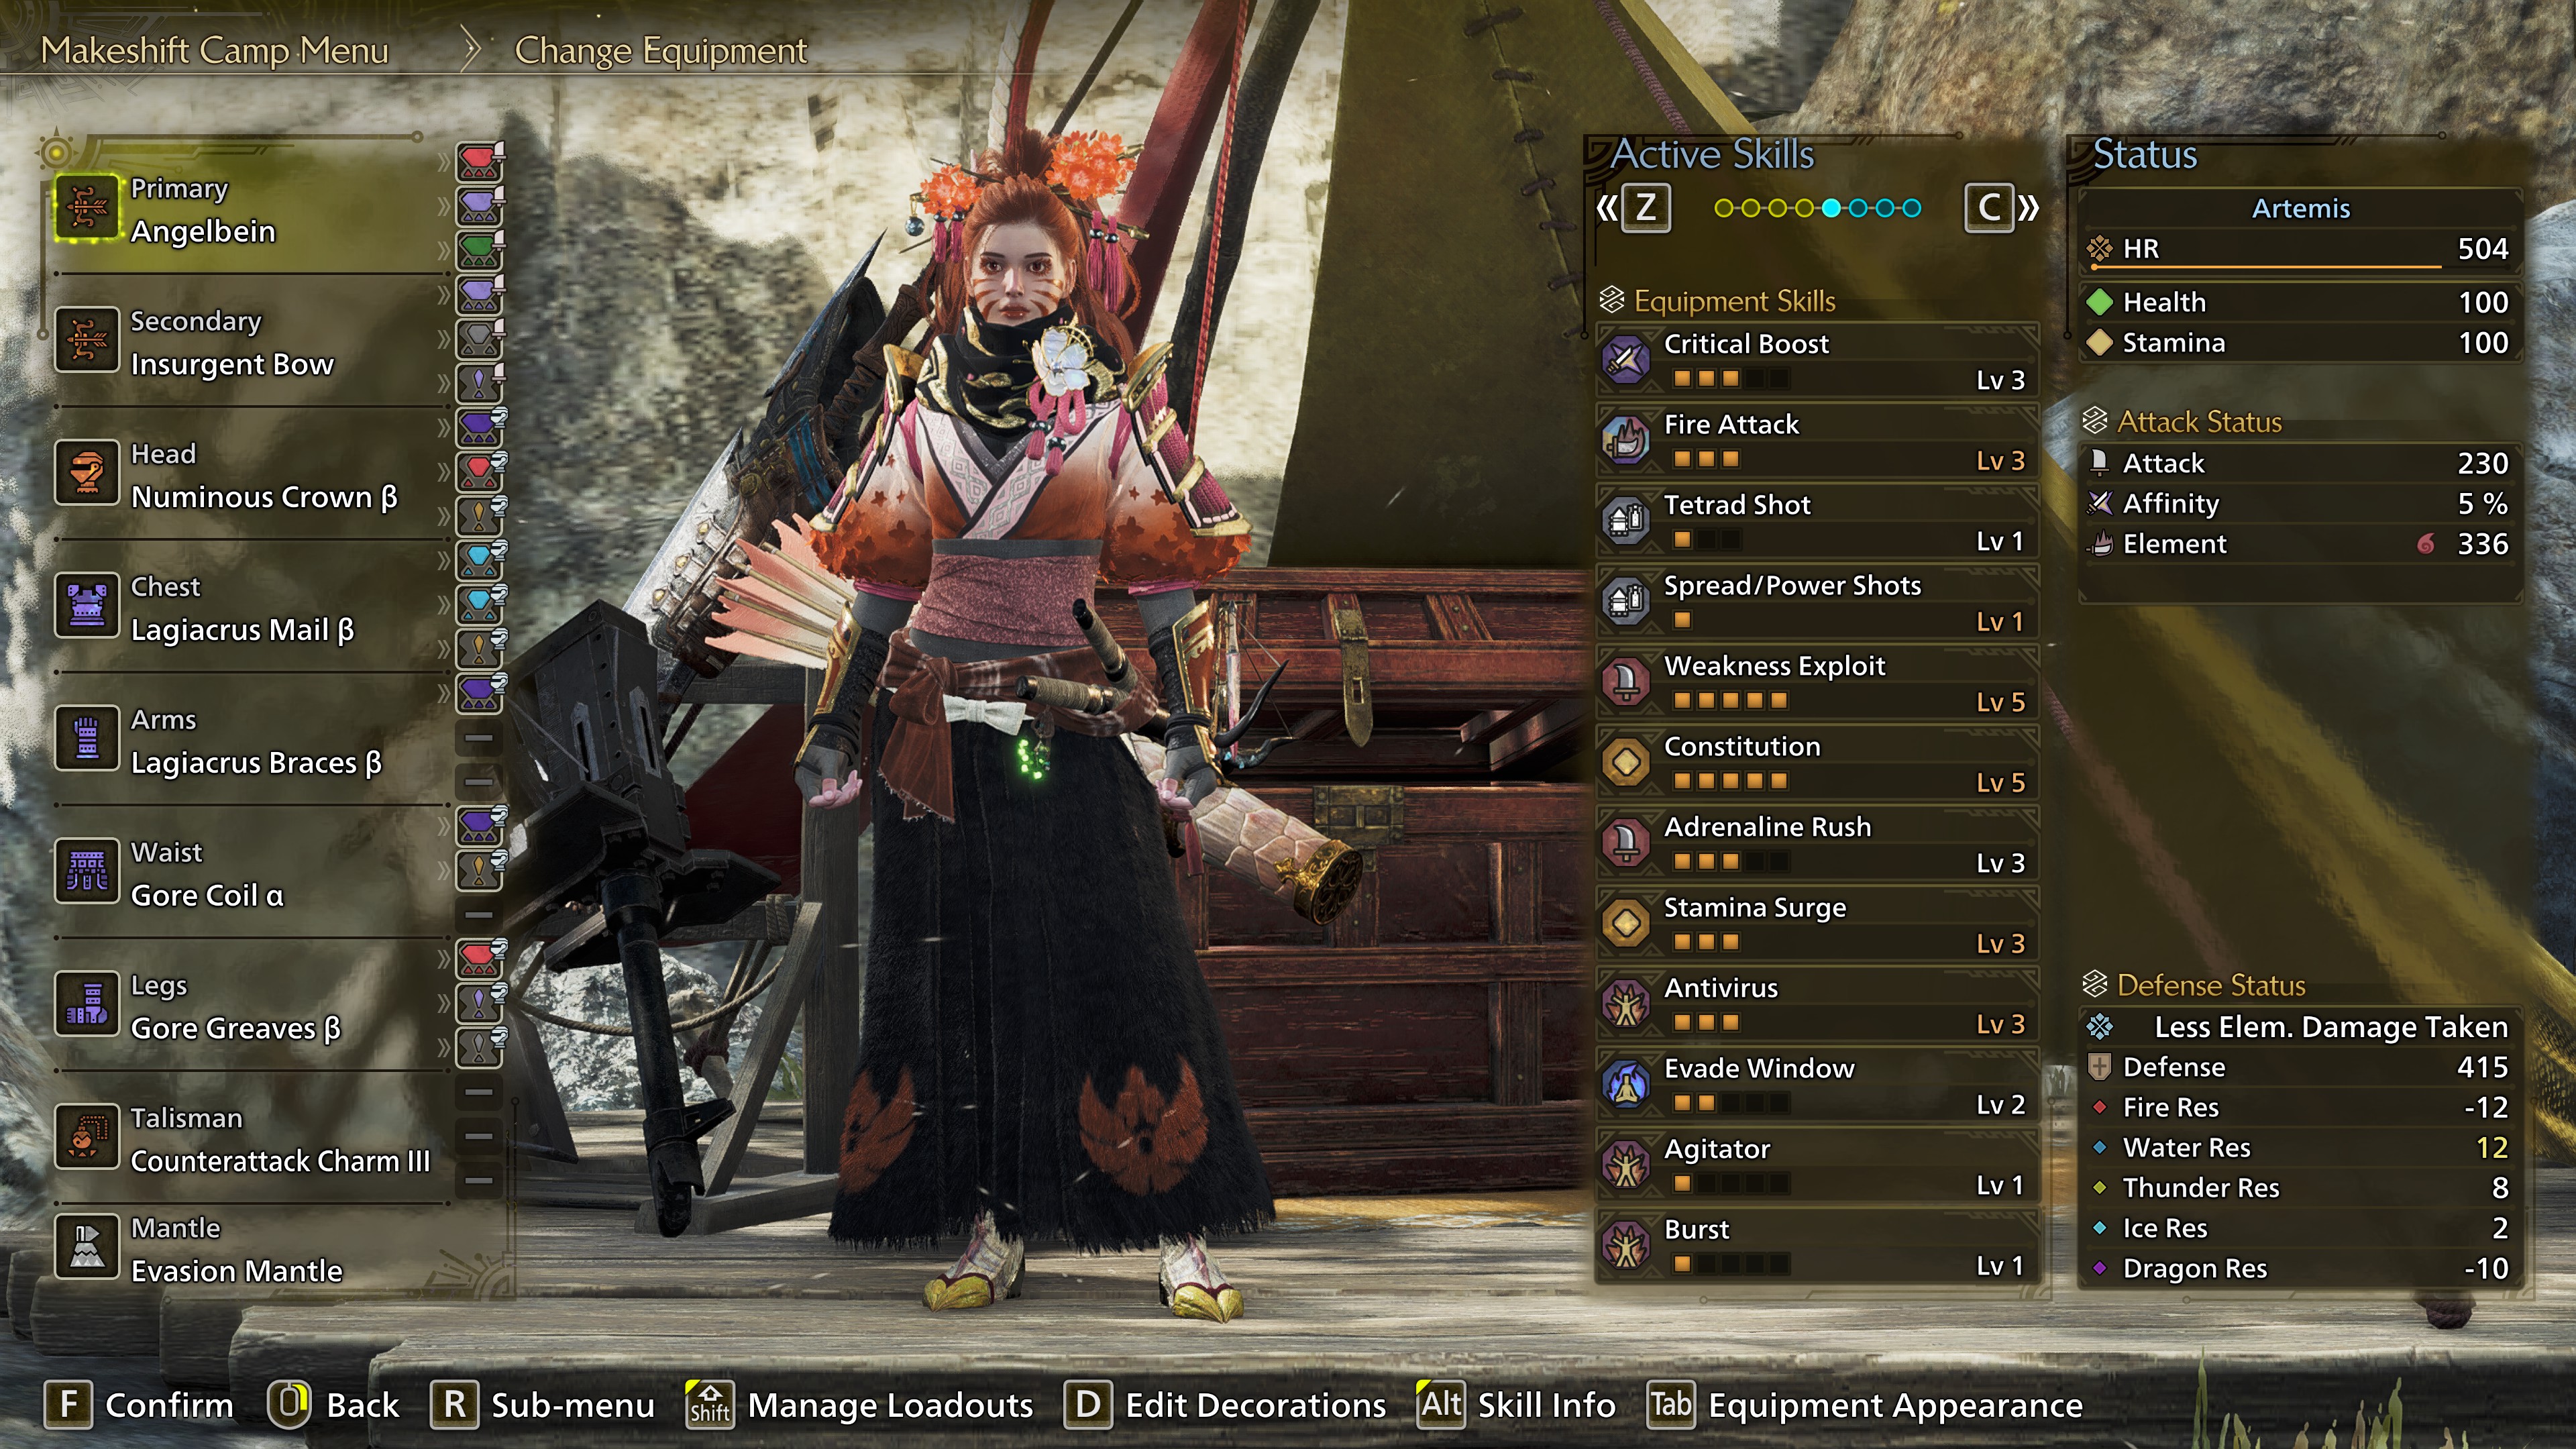
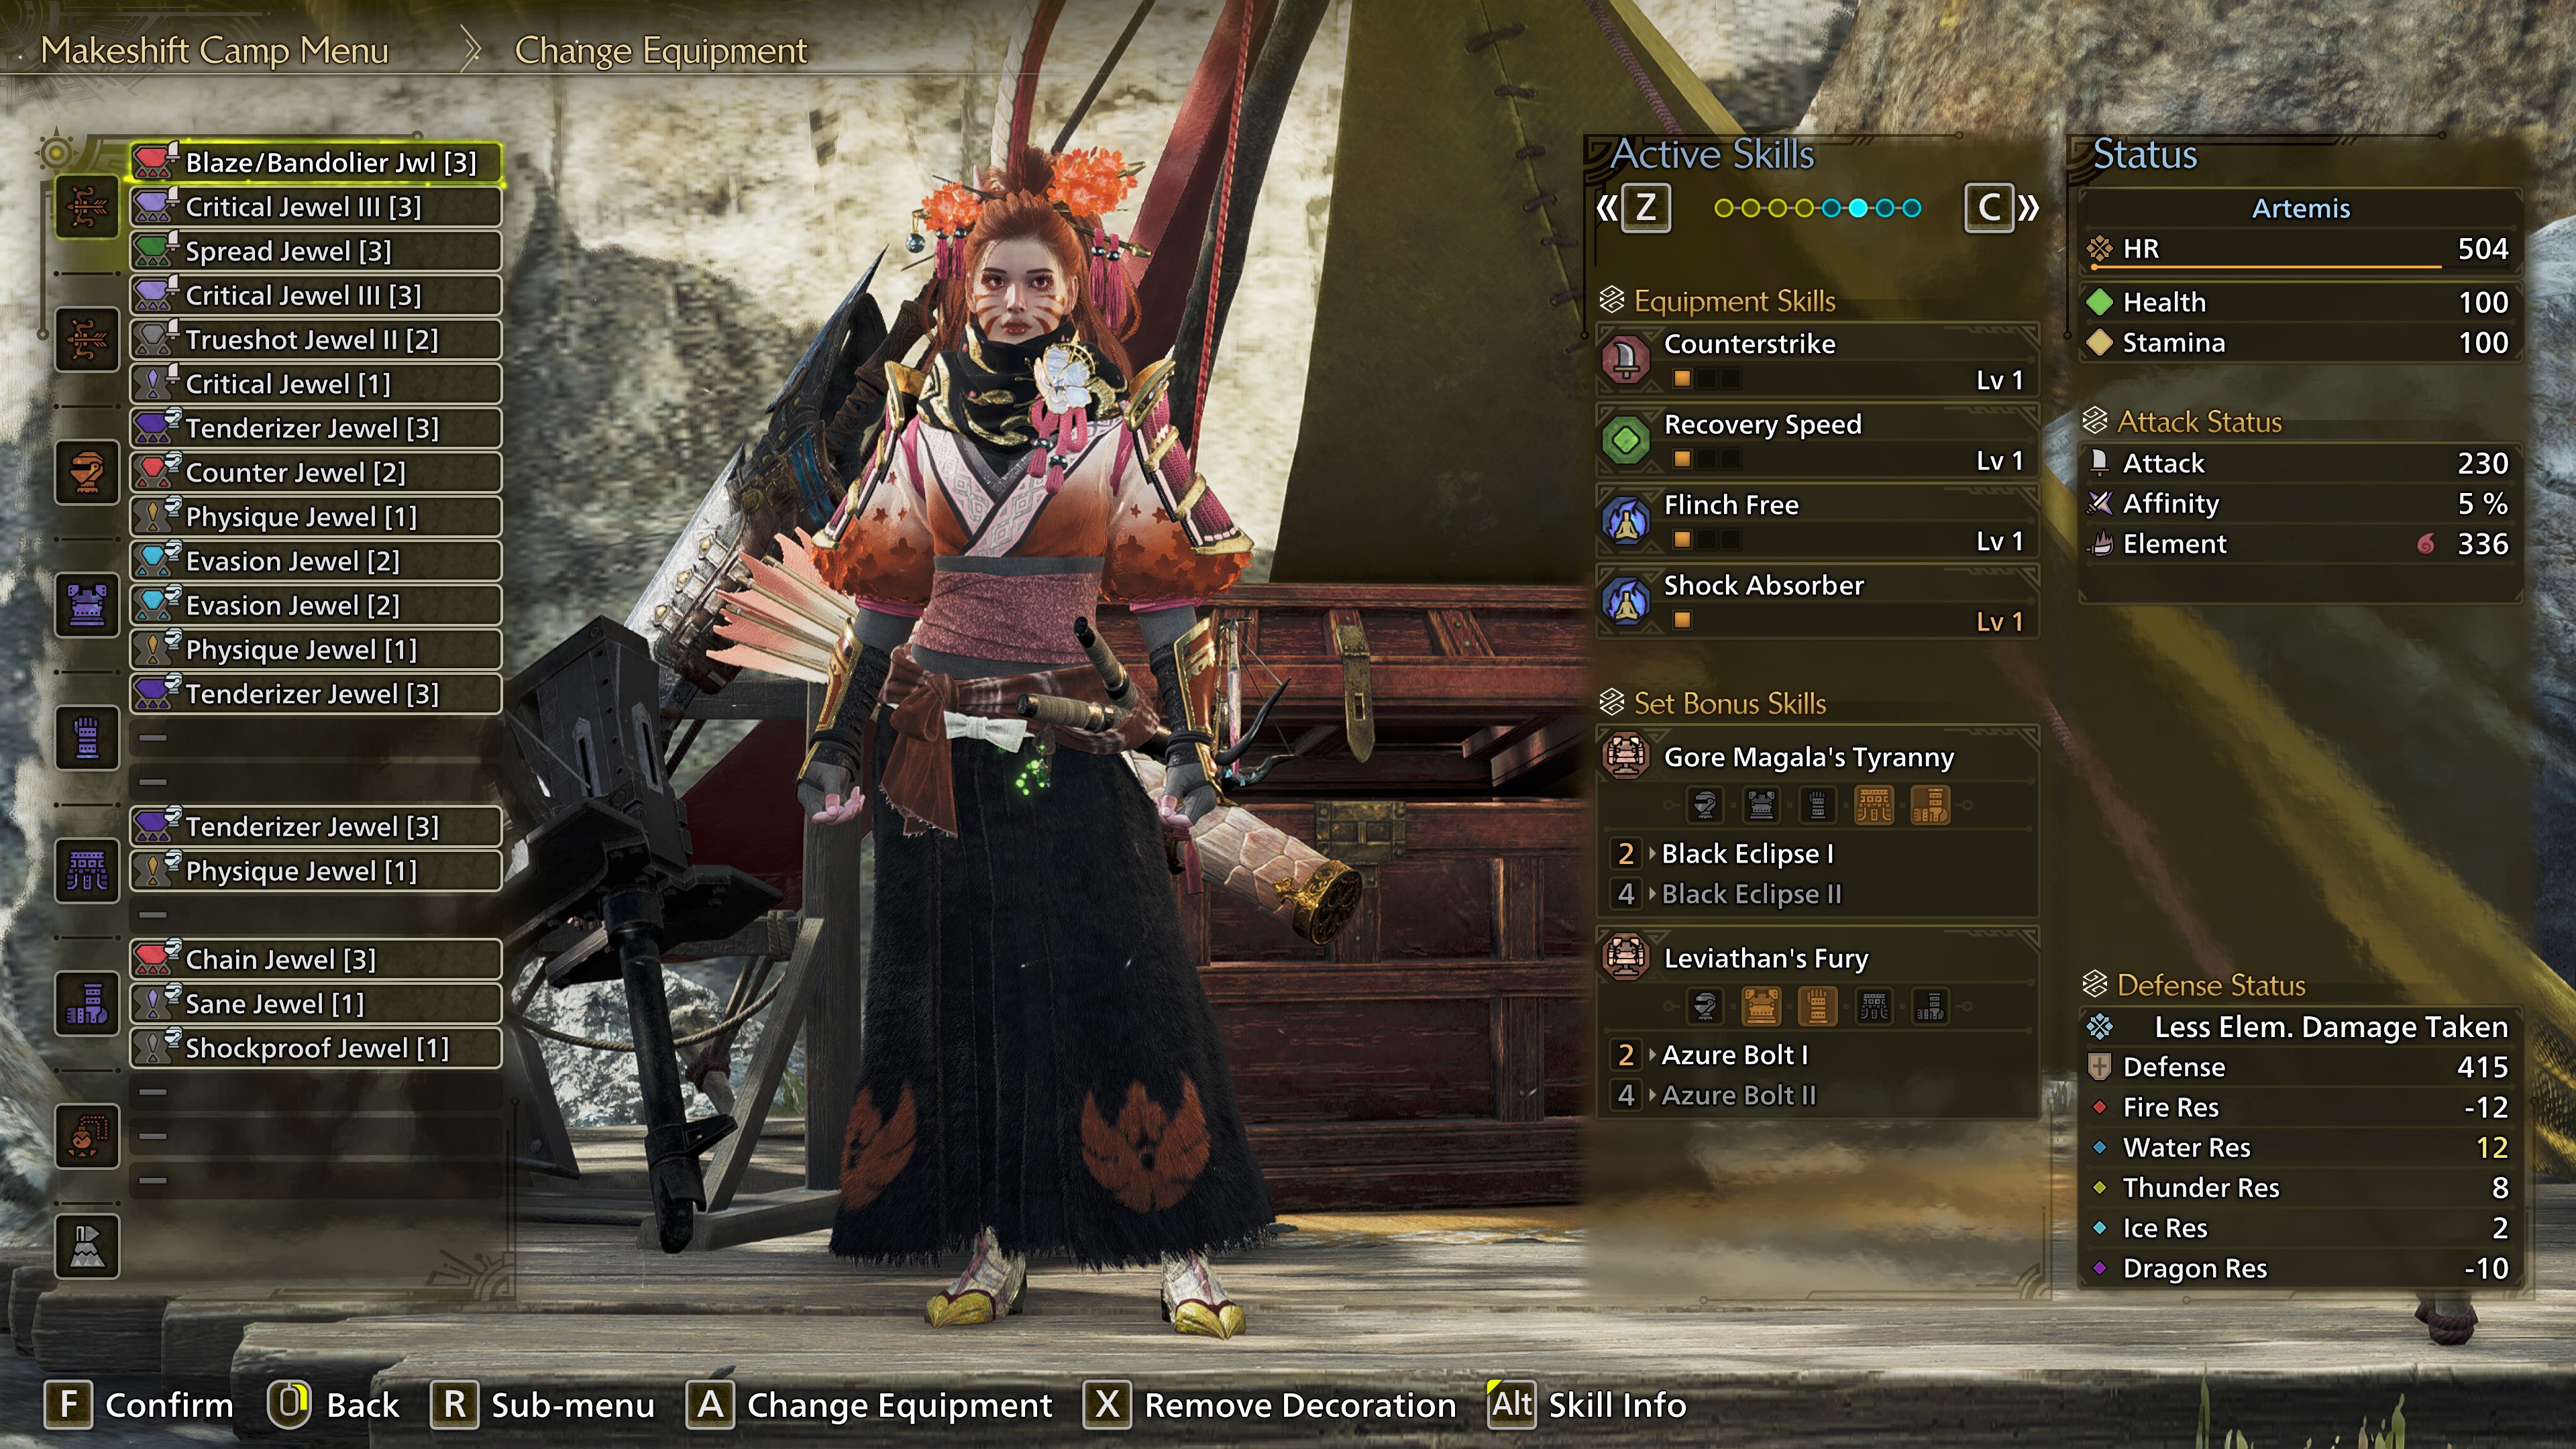
Angelbein (3-3-3)
Monsters
No exceptions.
Angelbein (3-3-3)
Monsters
You can also use this bow for all monsters that are weak to Ice, except Xu Wu.
Singha Sharanga (3-2-1)
Monsters
Only use this bow for Xu Wu. For all other monsters that are weak to Ice, you can use the Water bow.
High Voltsender (3-2-1)
Monsters
Yian Kut-Ku's secondary weakness is Thunder, but the Water Angelbein deals more damage due to the better decoration slots.
G. Renowned Tristram (3-3-1)
Monsters
You can also use this one as a generic raw bow.
*Starting from the 4th coating charge, you get 8% affinity, which lasts until your coating charges run out. Additionally, the 4th and 6th coating charge deal +3 raw attack, as well as +5% element damage. In other words, pay attention to when you should reload your coating.
Insurgent Bow (3-2-1)
Monsters
All monsters. However, this bow falls off very quickly if you don't make frequent use of the Bladescale Coatings. Only use it if you play without other players and/or support hunters.
Dragon Piercer
Spamming Dragon Piercer is somewhat viable against the following monsters:
However, if you can get your hands on these Talismans, you are also ready to move on to the Gogma Artian Bows.
Artian Bows
The coating that an Artian bow can use depends on its element. Because Close-Range Coatings provide the largest damage boost, you want to craft Artian bows with 3 rarity 8 attack relics with either fire or water as the elemental attack type. The ideal reinforcement slots are 5x +5 raw attack. The +5% affinity is a good alternative.Fire Bow
Bow & DecorationsAngelbein (3-3-3)
- Blaze/Bandolier Jewel: provides +60 fire attack and +20% elemental damage, as well as Tetrad Shot Level 1*.
- Critical Jewel 3: increases your critical damage to 134% (from 125%).
- Spread Jewel: increases the damage of your Power Shot/Volley by 5%.
Monsters
No exceptions.
Water Bow
Bow & DecorationsAngelbein (3-3-3)
- Stream/Bandolier Jewel: provides +60 water attack and +20% elemental damage, as well as Tetrad Shot Level 1*.
- Critical Jewel 3: increases your critical damage to 134% (from 125%).
- Spread Jewel: increases the damage of your Power Shot/Volley by 5%.
Monsters
You can also use this bow for all monsters that are weak to Ice, except Xu Wu.
Ice Bow
Bow & DecorationsSingha Sharanga (3-2-1)
- Frost/Bandolier Jewel: provides +60 ice attack and +20% elemental damage, as well as Tetrad Shot Level 1*.
- Spread Jewel: increases the damage of your Power Shot/Volley by 5%.
- Critical Jewel 2: increases your critical damage to 131% (from 125%).
- Critical Jewel 1: increases your critical damage to 134% (from 131%).
Monsters
Only use this bow for Xu Wu. For all other monsters that are weak to Ice, you can use the Water bow.
Thunder Bow
Bow & DecorationsHigh Voltsender (3-2-1)
- Bolt/Bandolier Jewel: provides +60 thunder attack and +20% elemental damage, as well as Tetrad Shot Level 1*.
- Spread Jewel: increases the damage of your Power Shot/Volley by 5%.
- Critical Jewel 2: increases your critical damage to 131% (from 125%).
- Critical Jewel 1: increases your critical damage to 134% (from 131%).
Monsters
Yian Kut-Ku's secondary weakness is Thunder, but the Water Angelbein deals more damage due to the better decoration slots.
Dragon Bow
Bow & DecorationsG. Renowned Tristram (3-3-1)
- Dragon/Bandolier Jewel: provides +60 dragon attack and +20% elemental damage, as well as Tetrad Shot Level 1*.
- Spread Jewel: increases the damage of your Power Shot/Volley by 5%.
- Critical Jewel 3: increases your critical damage to 134% (from 125%).
- Critical Jewel 1: increases your critical damage to 137% (from 134%).
- Bandolier Jewel: provides Tetrad Shot Level 1*.
Monsters
You can also use this one as a generic raw bow.
*Starting from the 4th coating charge, you get 8% affinity, which lasts until your coating charges run out. Additionally, the 4th and 6th coating charge deal +3 raw attack, as well as +5% element damage. In other words, pay attention to when you should reload your coating.
Raw Bow
Bow & DecorationsInsurgent Bow (3-2-1)
- Critical Jewel 3: increases your critical damage to 134% (from 125%).
- Trueshot Jewel 2: Special arrows deal 20% more damage.
- Critical Jewel 1: increases your critical damage to 137% (from 134%).
Monsters
All monsters. However, this bow falls off very quickly if you don't make frequent use of the Bladescale Coatings. Only use it if you play without other players and/or support hunters.
Dragon Piercer
Spamming Dragon Piercer is somewhat viable against the following monsters:
- Uth Duna: Line up between its foreleg and hind leg, or between its head and tail.
- Nu Udra: Line up between two tentacles vertically.
- Jin Dahaad: Line up between its foreleg and hind leg, or between its head and tail.
- Arkveld: Line up between its head and arm chains.
Talisman
If you are using a talisman with Spread/Power Shots, you can replace the Spread Jewel with an Expert Jewel 3. For specifically the Ice and Dragon bow, you might want to consider an Element Attack/Bandolier Jewel instead of an Expert Jewel.However, if you can get your hands on these Talismans, you are also ready to move on to the Gogma Artian Bows.
7. End Game Builds (HR 100+)
The next couple of sections cover the late-game builds. As of right now, you need at least Hunter Rank 100 before you can start collecting this gear.
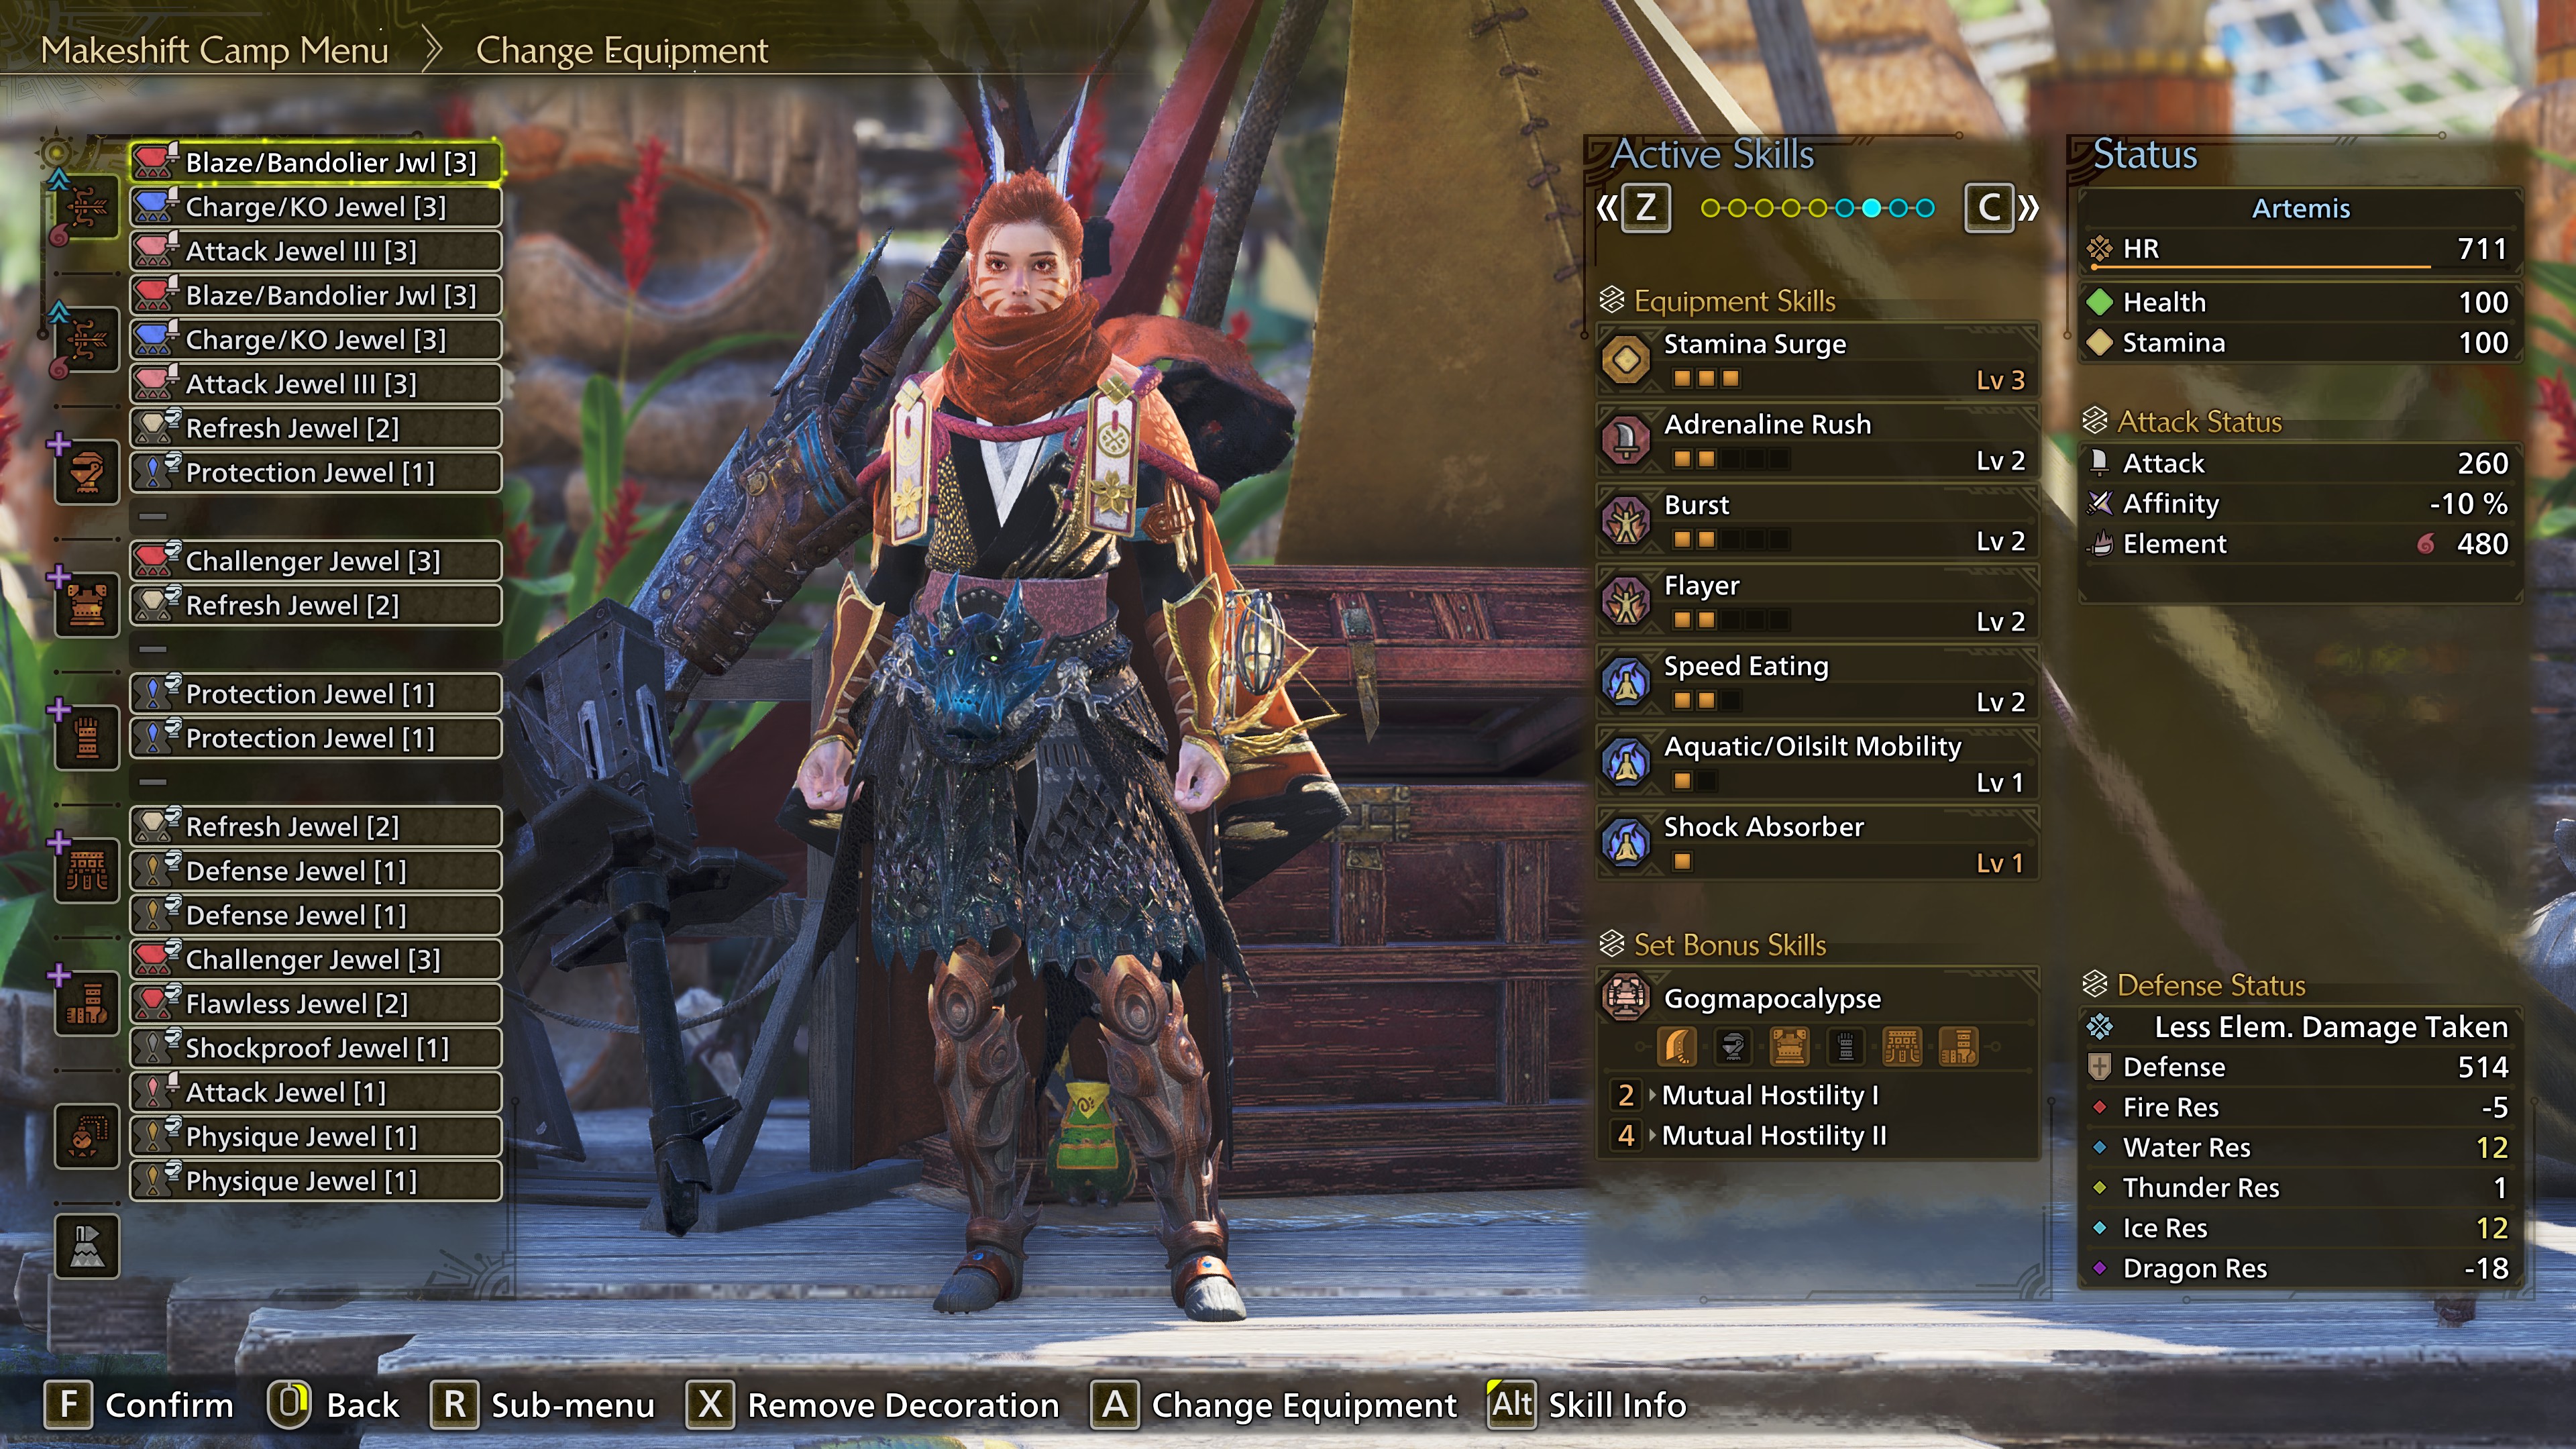
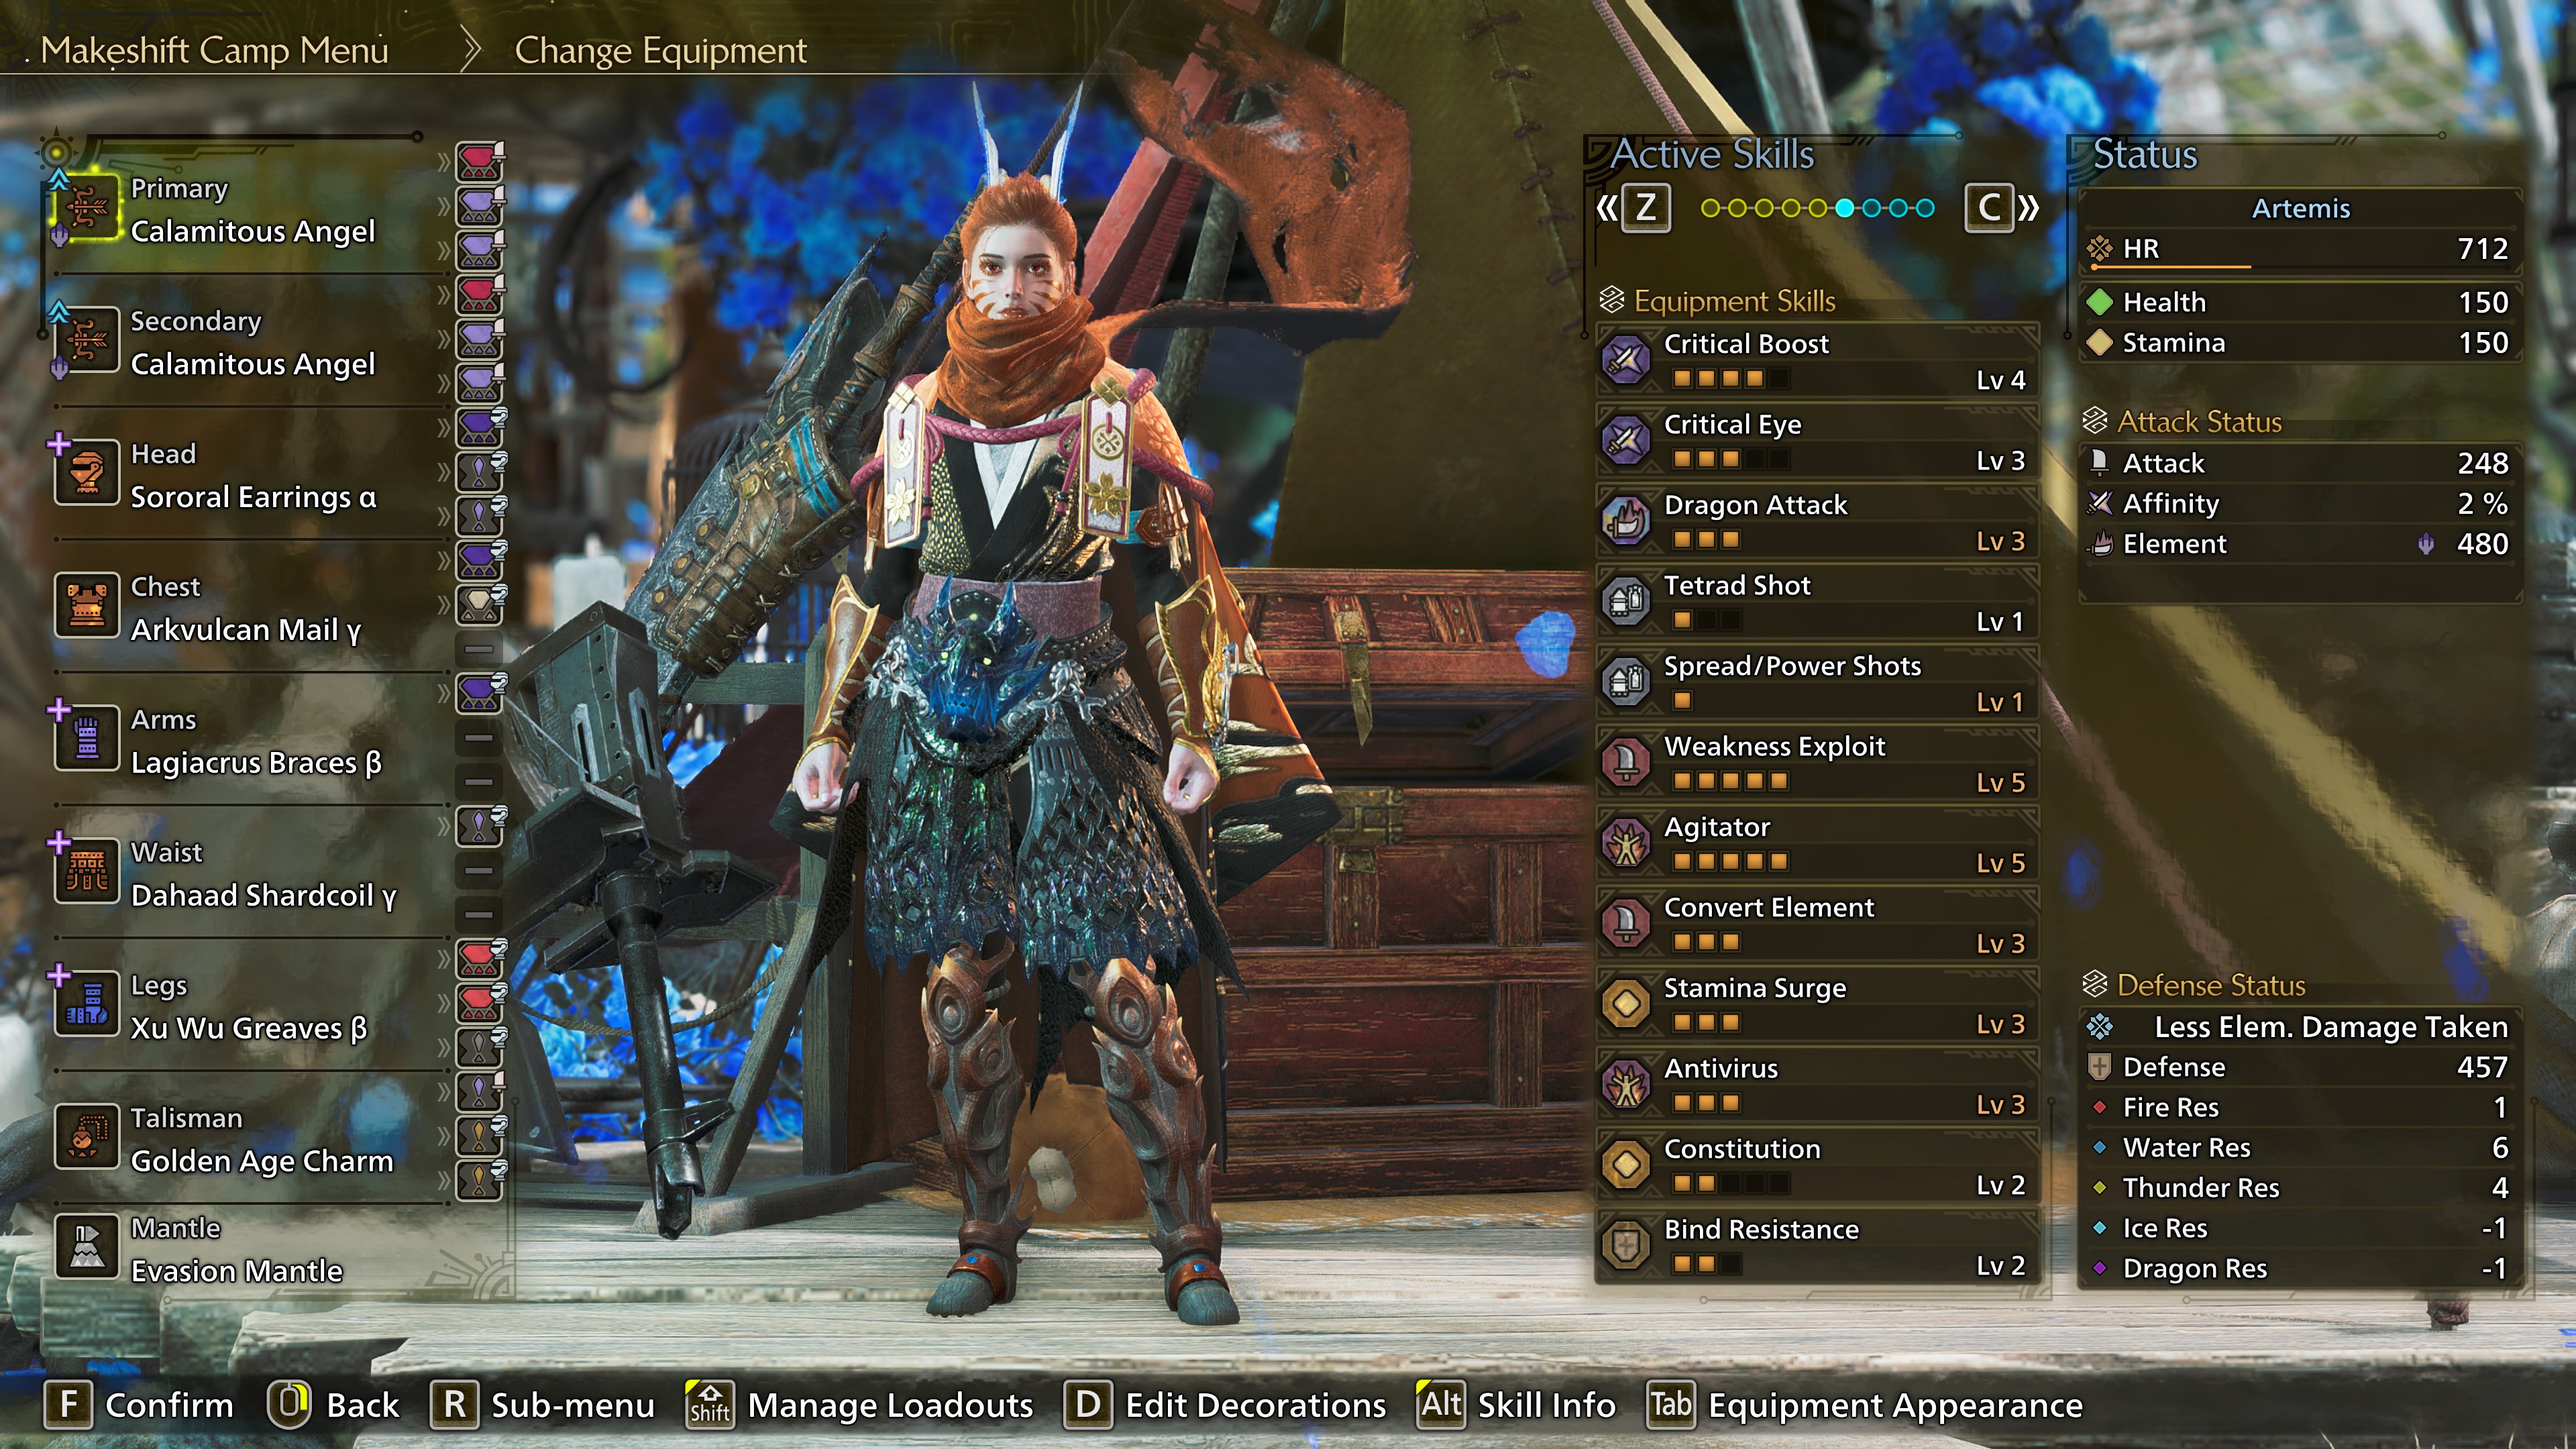
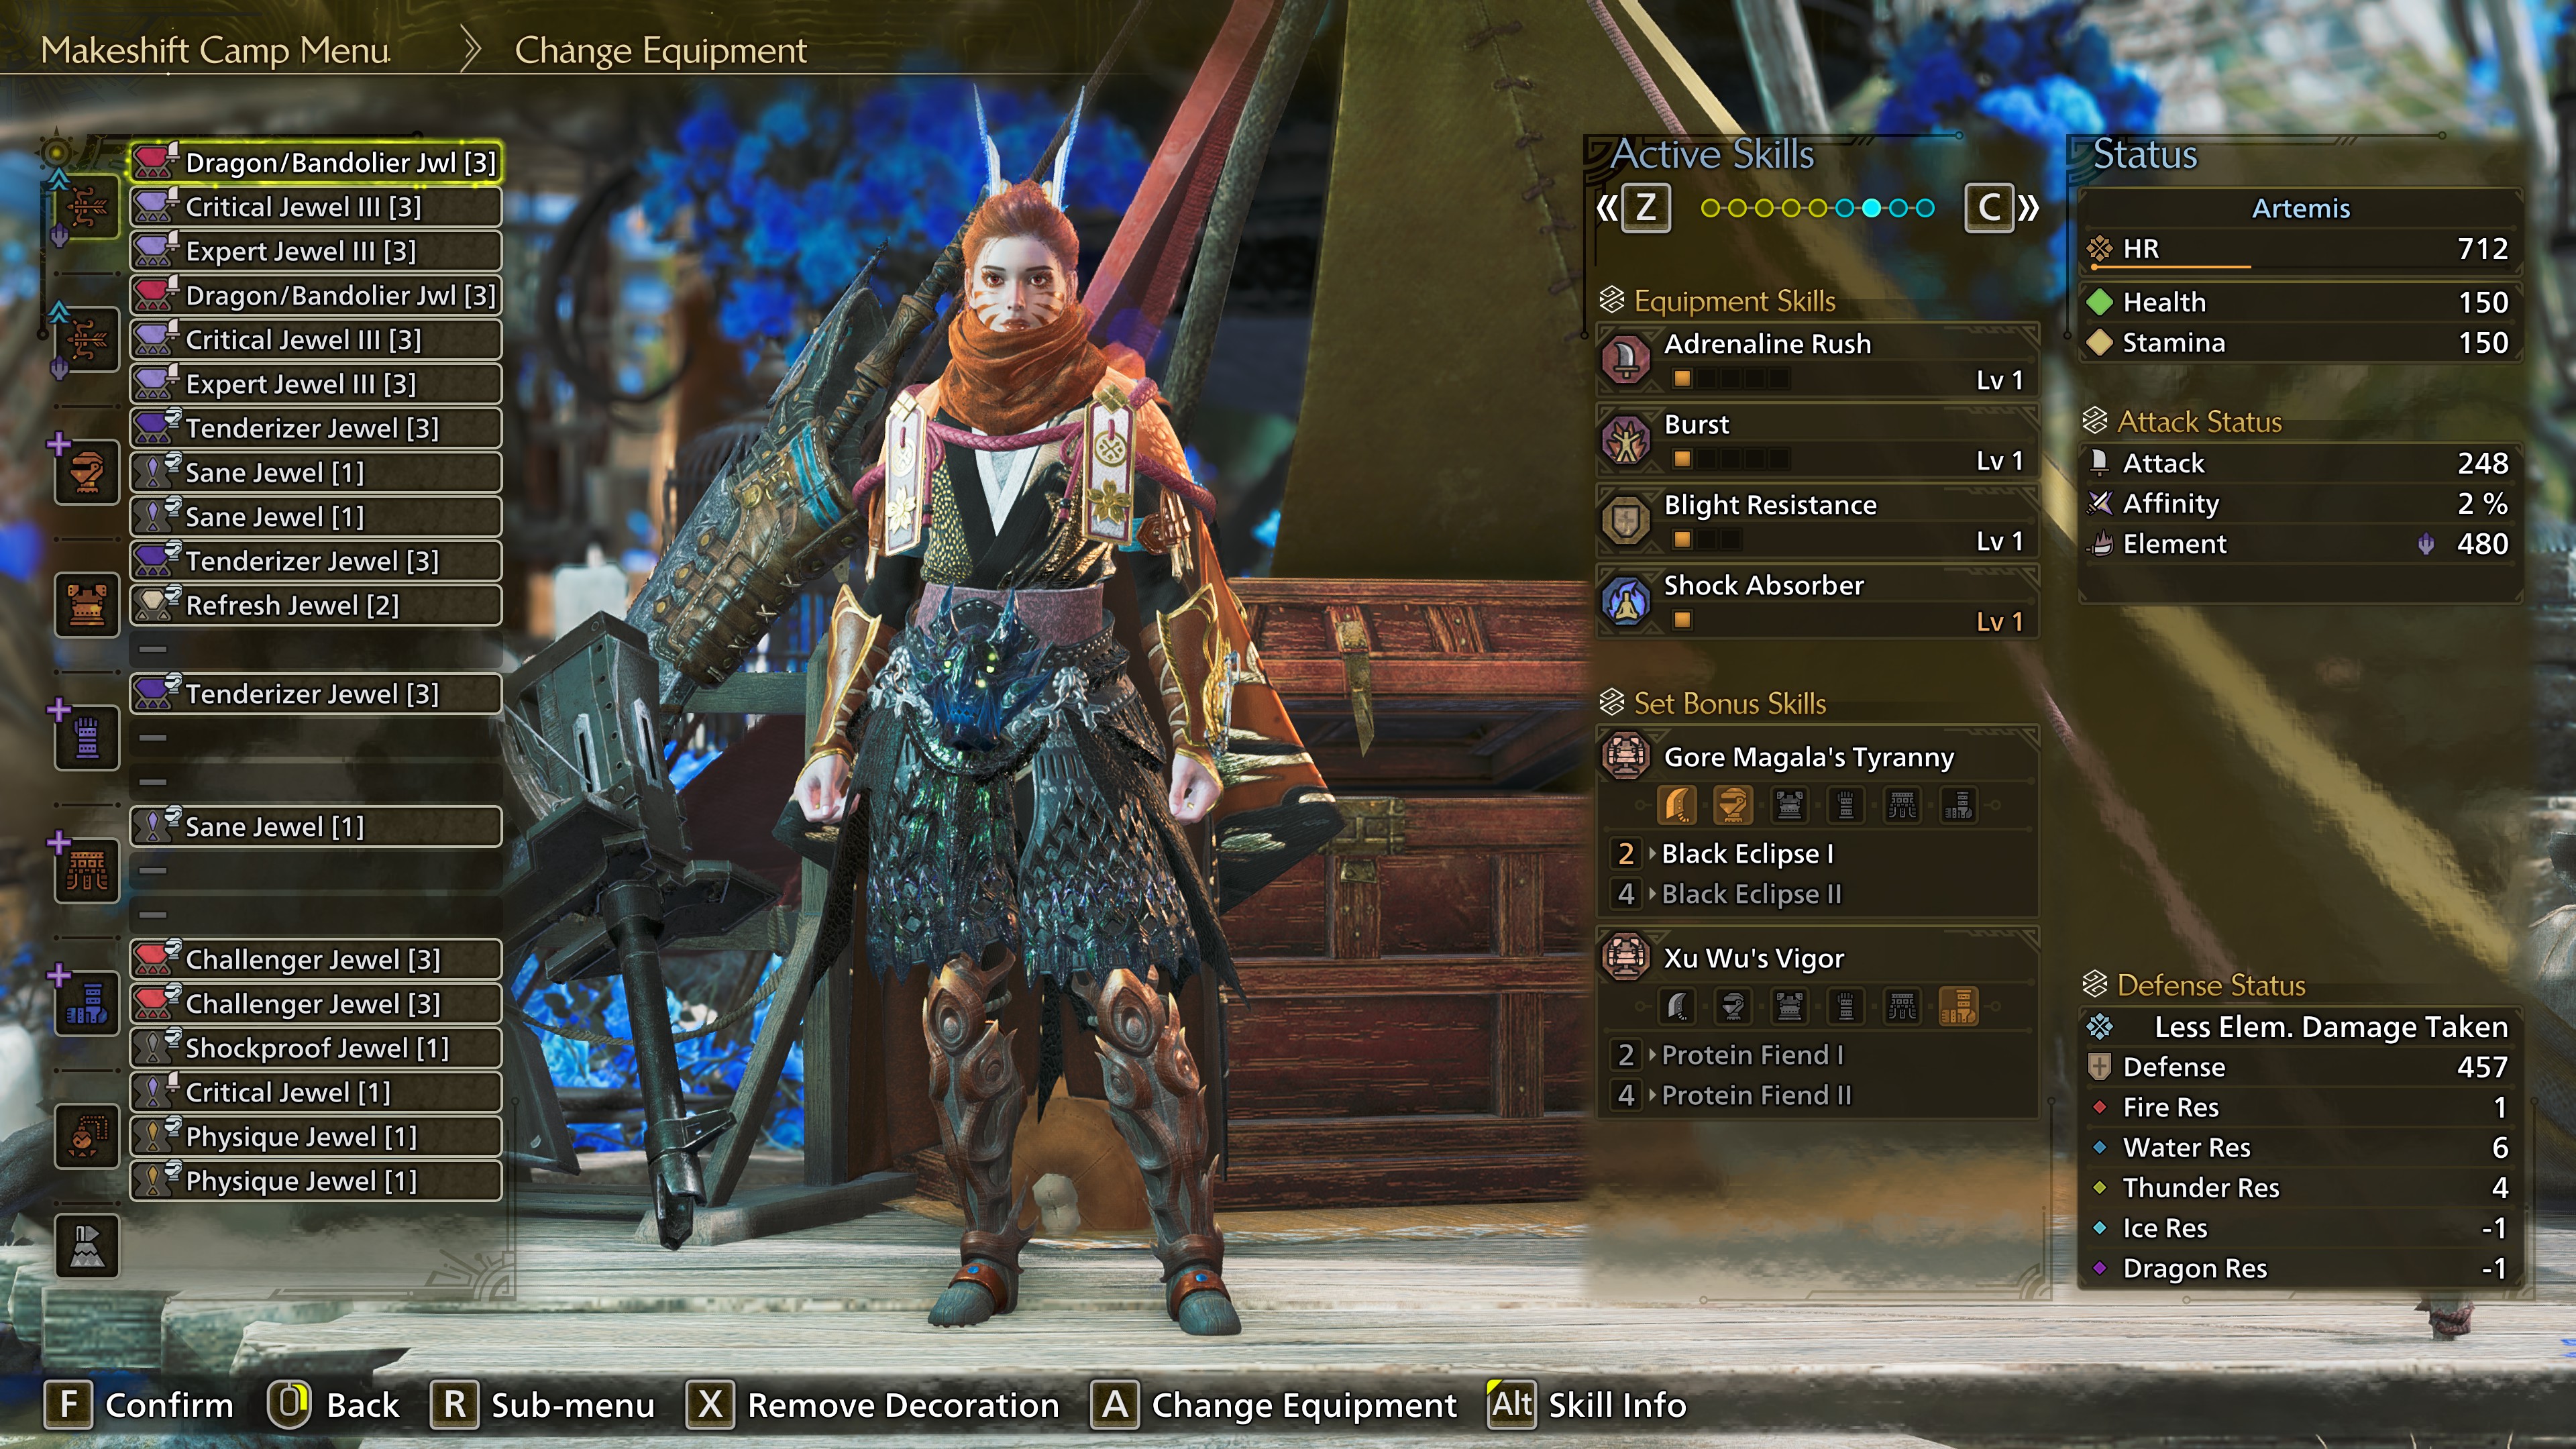
7.1 DPS Build
This build prioritizes damage output above everything else, but offers 0 protection if you're not on point with your dodges and animation locks. It also requires the Black Belt Meal skill or Dash Juice, depending on your preferences.
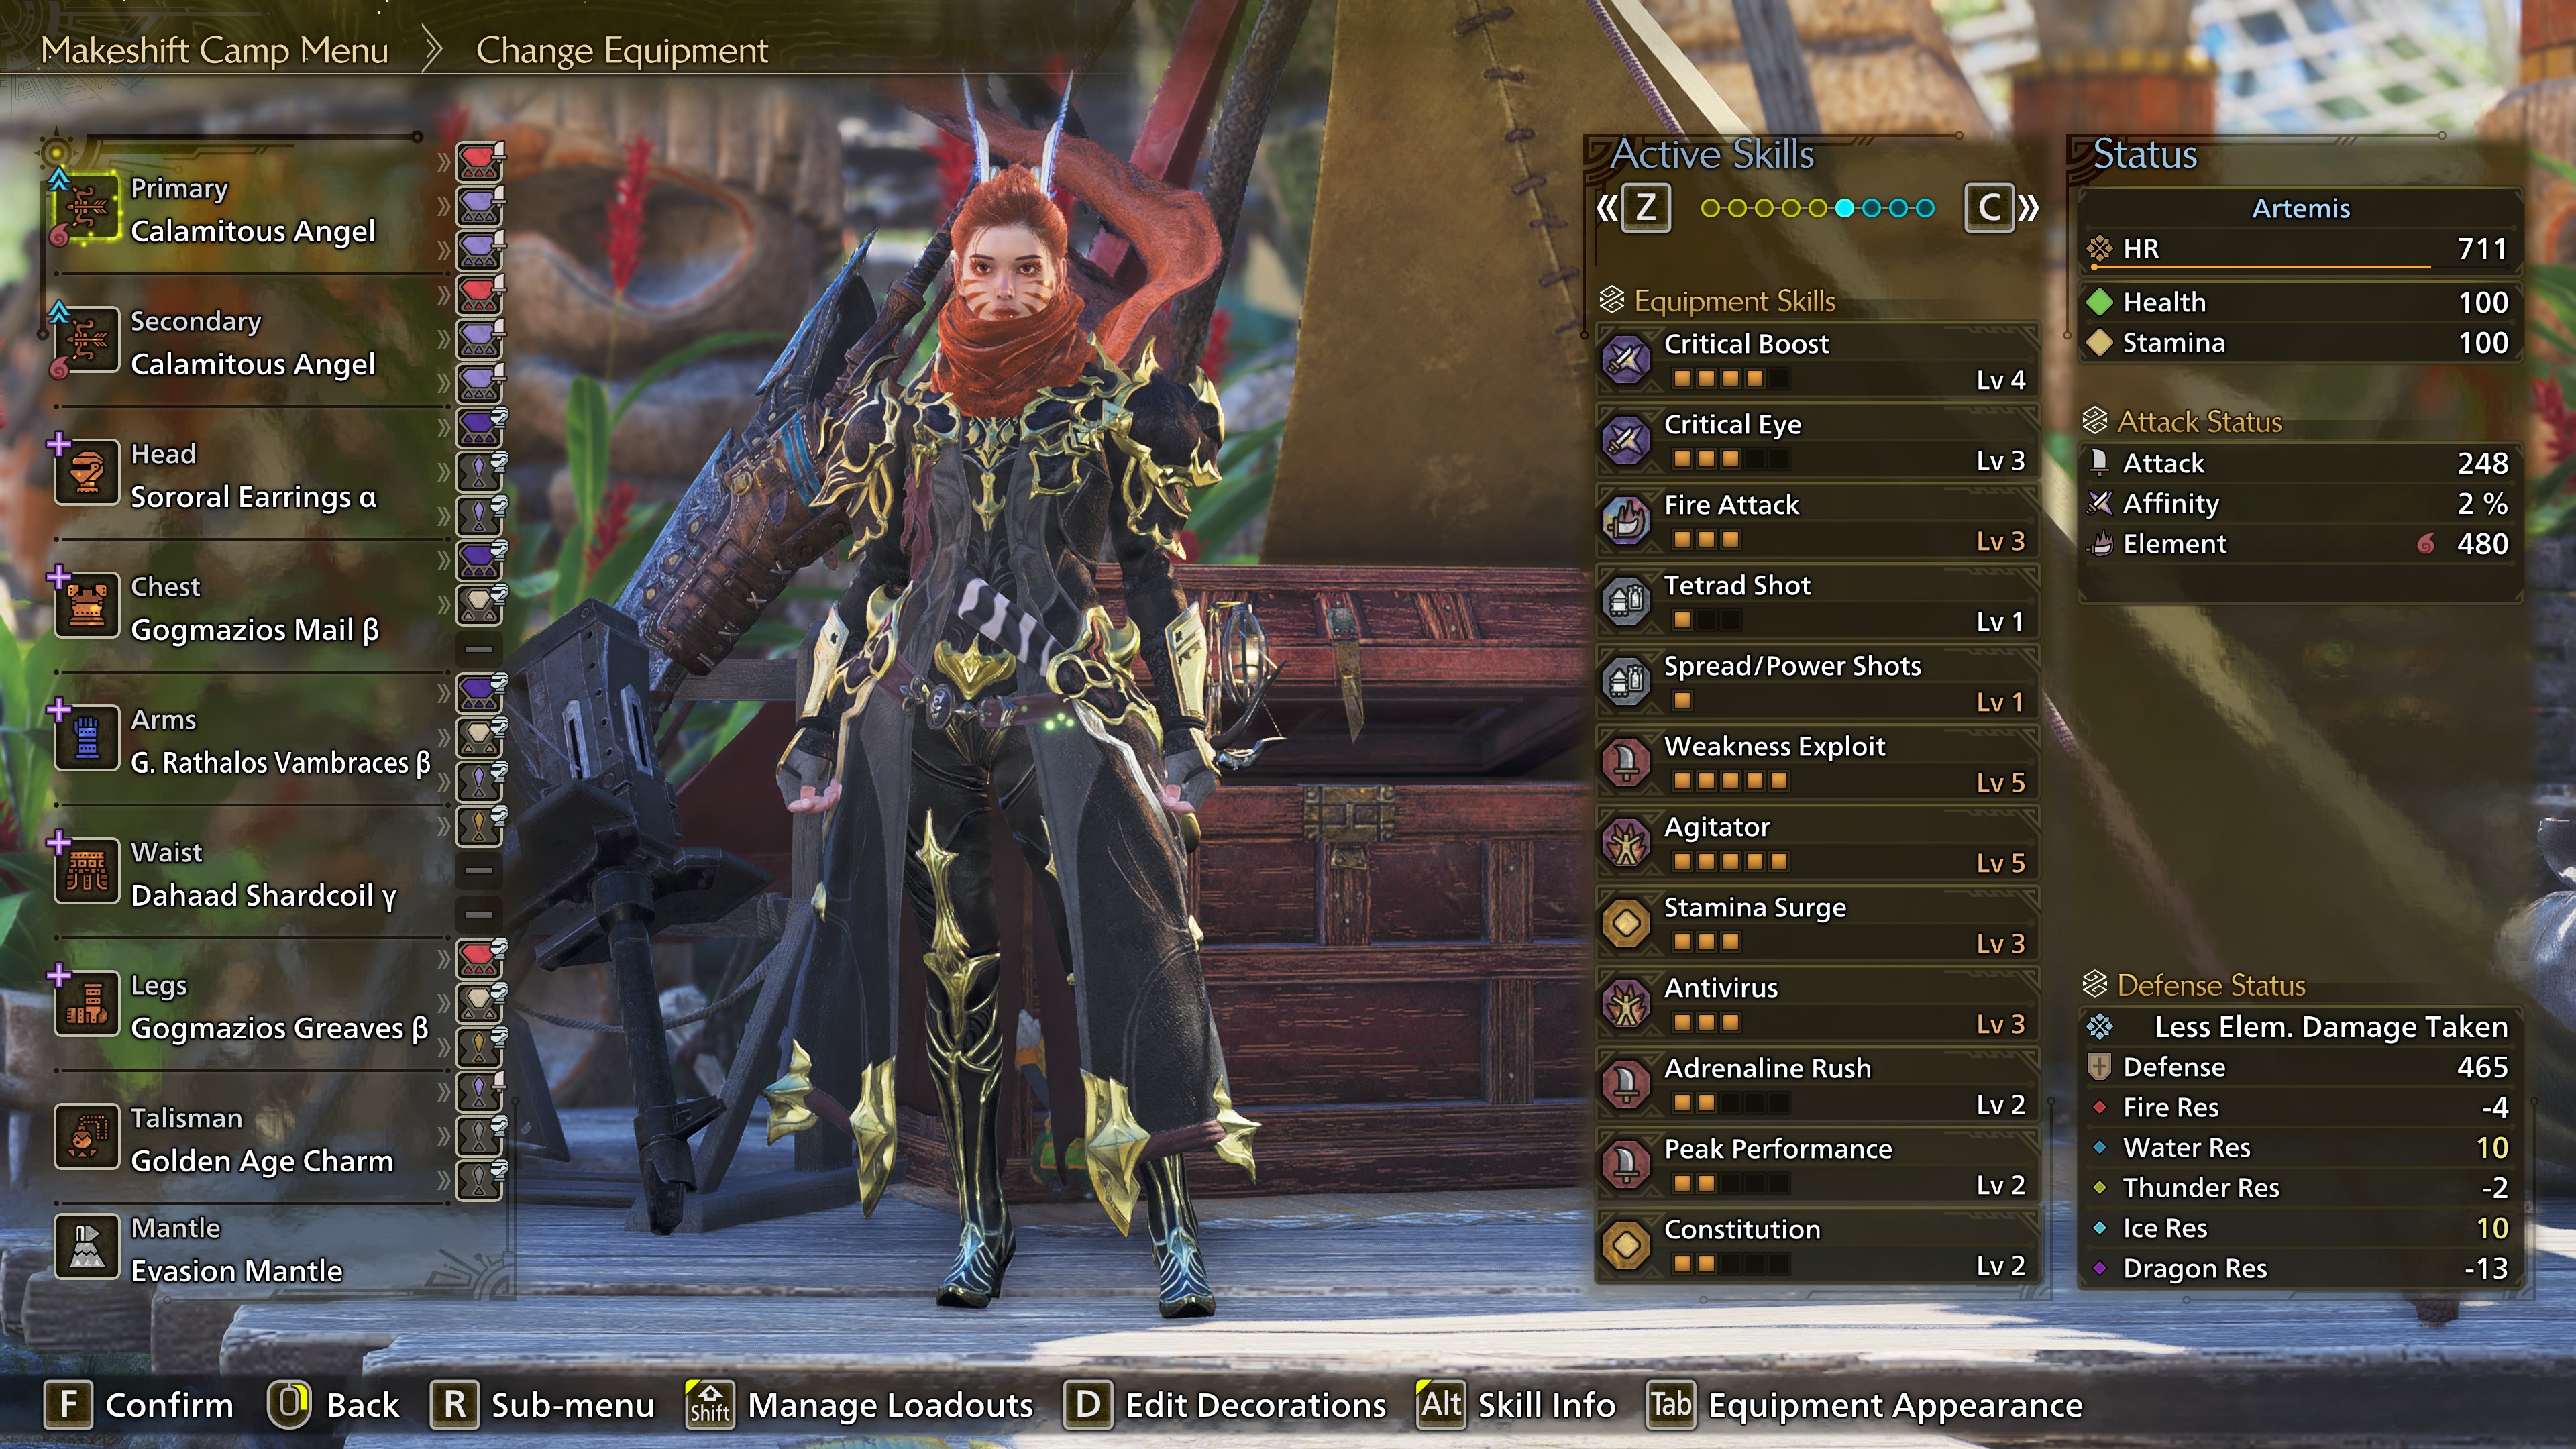
Raw attack is displayed without a coefficient.
*If you can get Lord's Soul, you'd only have to swap 1 more piece to activate Guts for the more difficult fights.
For a more detailed overview of the bows, see: 8. Gogma Artian Bows.
*Adrenaline Rush or Burst is an acceptable alternative, since you still get the extra weapon skill. However, Agitator Level 5 provides the biggest boost out of all levels, while Adrenaline Rush and Burst have diminishing returns.
Alternatively, you can use the Exploiter Charm III or Counterattack Charm III, which means you will miss out on Critical Eye Level 3 and gain an additional 3 levels of Adrenaline Rush. Critical Eye really shines in this build, so it's worth farming for a good random charm.
If you think you won't get enough hits in, you can consume a nullberry to slow down the frenzy build-up. If you become fully infected, you take double damage and can't heal naturally. You can consume a nullberry to get rid of this debuff.
Antivirus reduces the amount of hits needed to cure the Frenzy Virus and adds 10% affintiy upon curing it (25% total).
Stamina Surge can be replaced with Counterstrike jewels if you hunt solo. For multiplayer, I would recommend sticking with Stamina Surge.
The Evasion Mantle boosts your raw attack by 20% for 10 seconds after a successful dodge. The mantle stays active for 105 seconds. This means it can outperform the Corrupted Mantle, but only during solo hunts. The uptime in multiplayer is much lower.
Corrupted Mantle
The Corrupted Mantle temporarily drains your health and provides 5% affinity for 1,5 minutes. Continuous attacks stop the health drain and give you an additional 5% affinity (10% total) as well as +4.5 % extra raw attack.
Sheathing your weapon pauses the duration of your Corrupted Mantle, but not the health drain. When it runs out, it takes 10 minutes to recharge.
Raw attack is displayed without a coefficient.
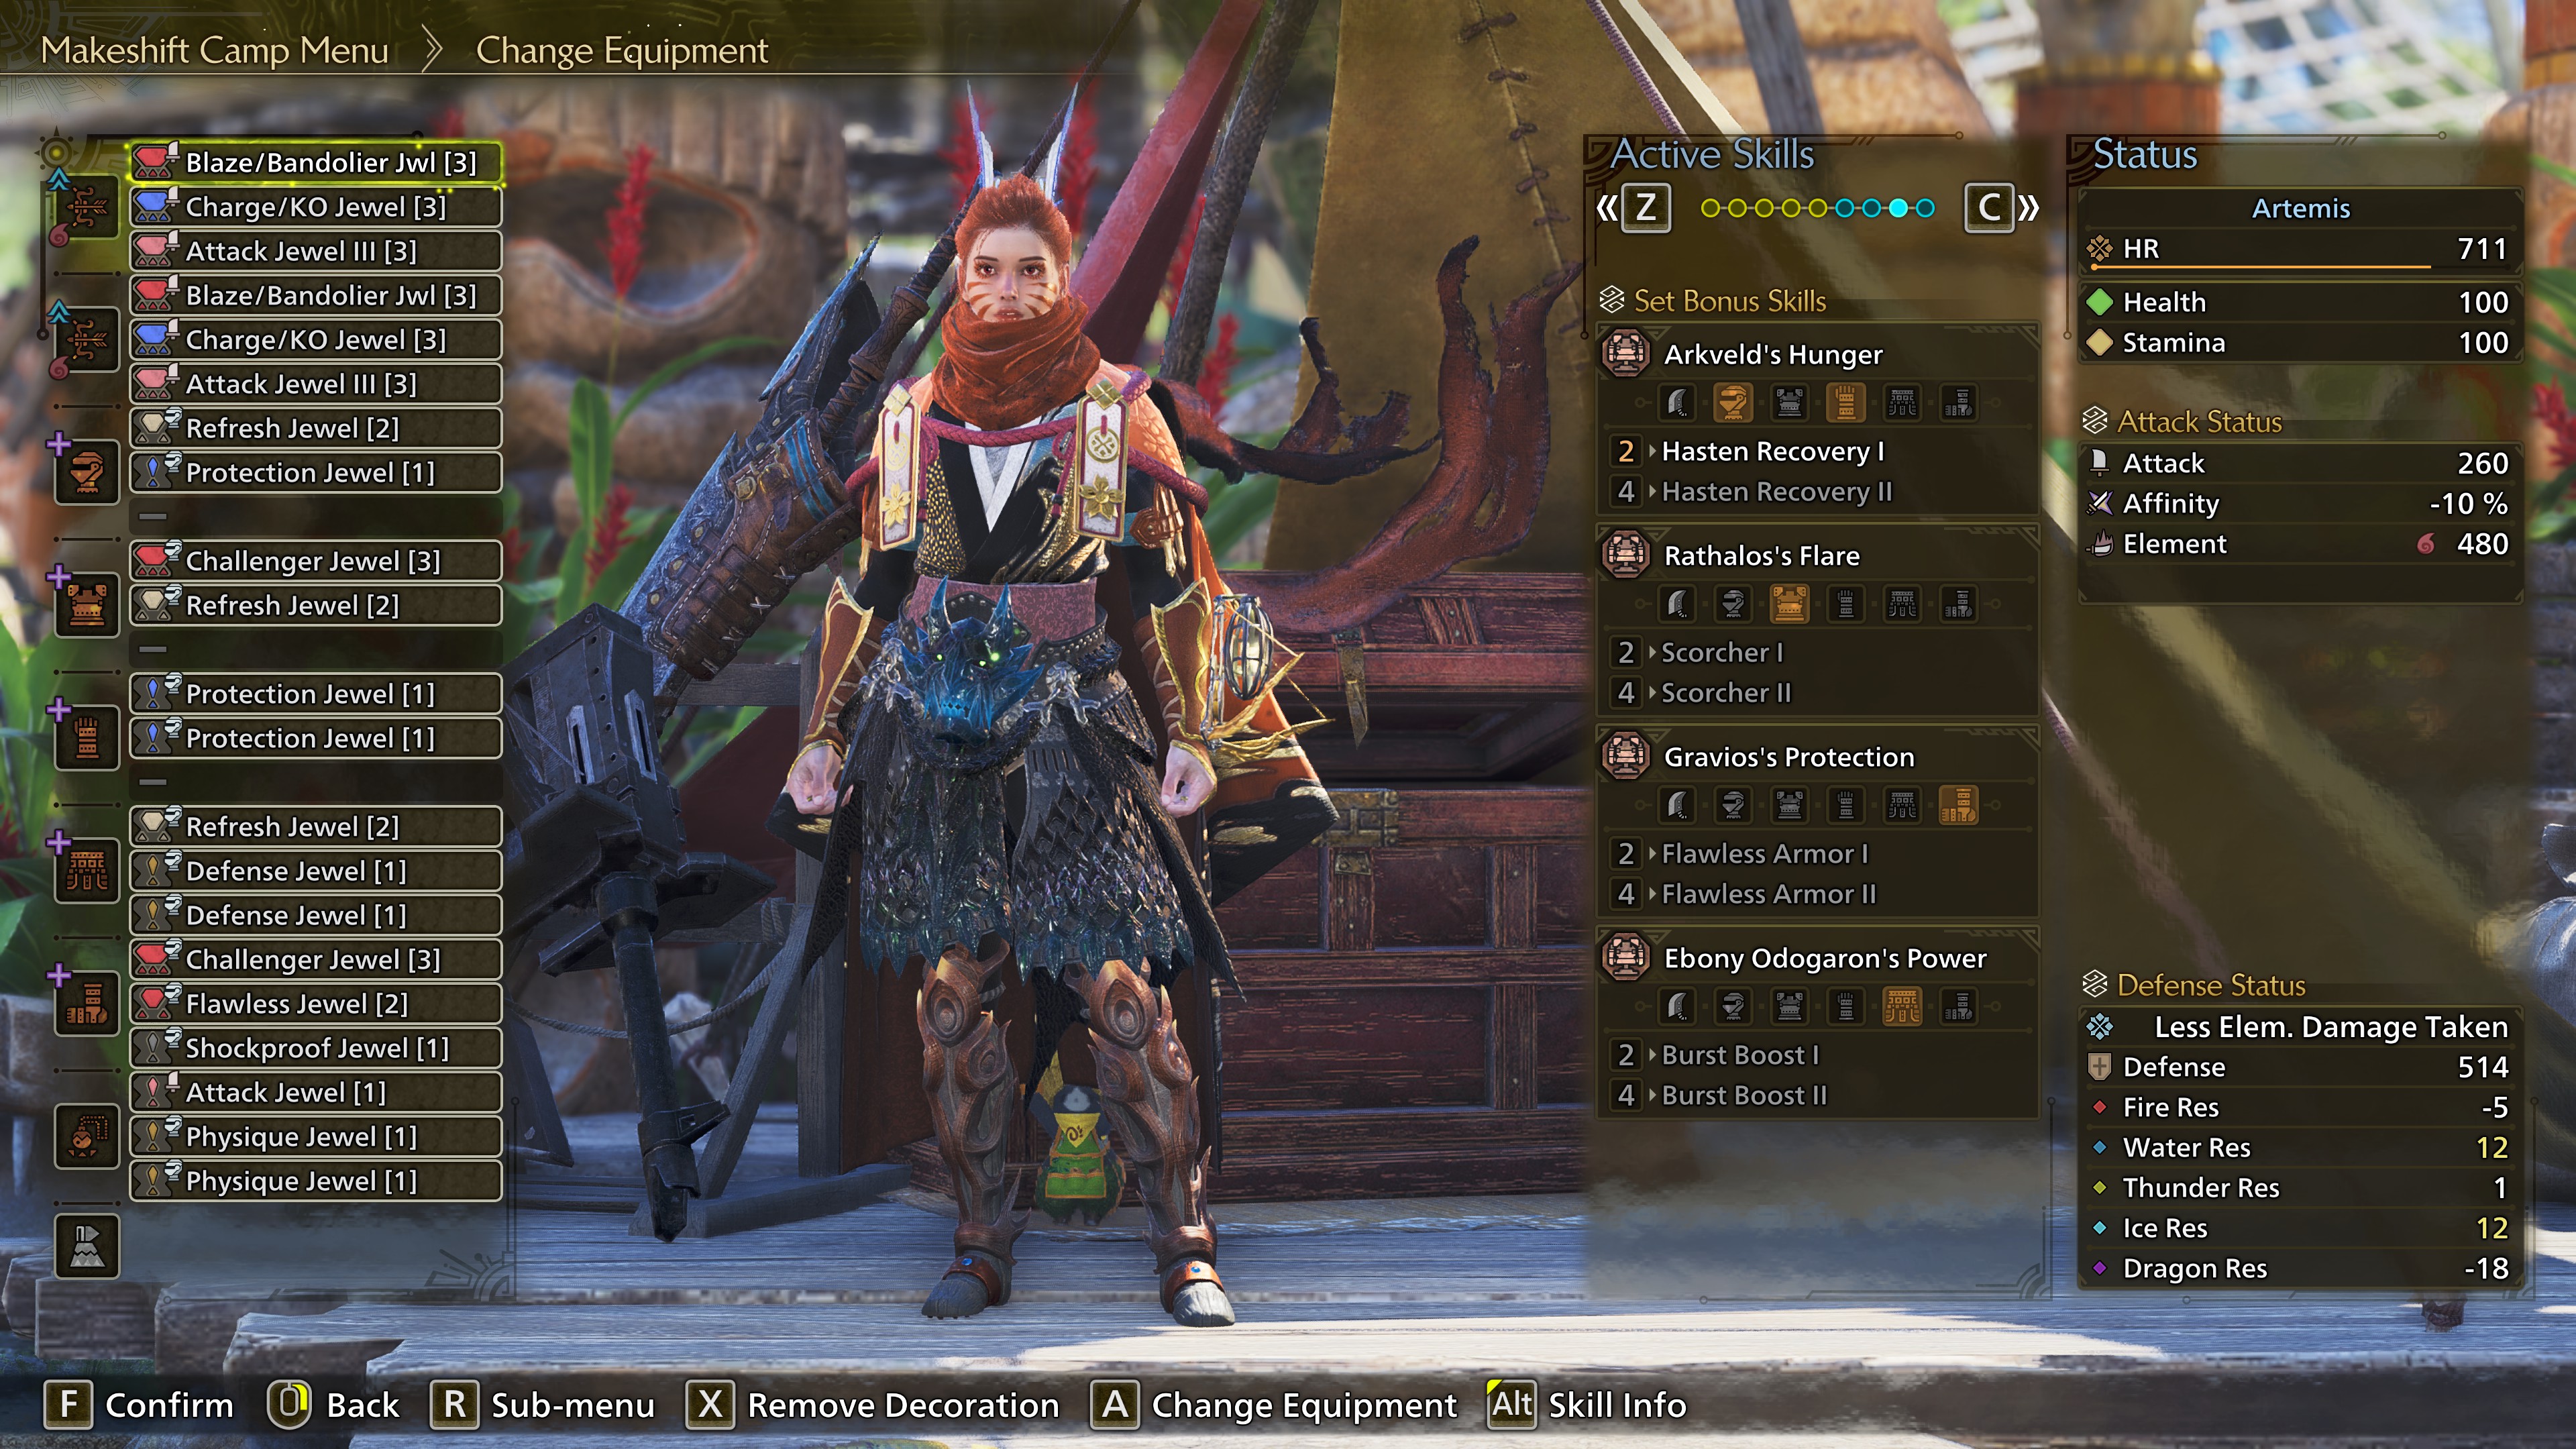
Gogma Artian Bow
Active skills- Black Eclipse
- Redundant*
*If you can get Lord's Soul, you'd only have to swap 1 more piece to activate Guts for the more difficult fights.
For a more detailed overview of the bows, see: 8. Gogma Artian Bows.
Golden Age Charm
Skills- Spread/Power Shots / Critical Eye Level 3
- Weakness Exploit or Agitator Level 1*
*Adrenaline Rush or Burst is an acceptable alternative, since you still get the extra weapon skill. However, Agitator Level 5 provides the biggest boost out of all levels, while Adrenaline Rush and Burst have diminishing returns.
Alternatively, you can use the Exploiter Charm III or Counterattack Charm III, which means you will miss out on Critical Eye Level 3 and gain an additional 3 levels of Adrenaline Rush. Critical Eye really shines in this build, so it's worth farming for a good random charm.
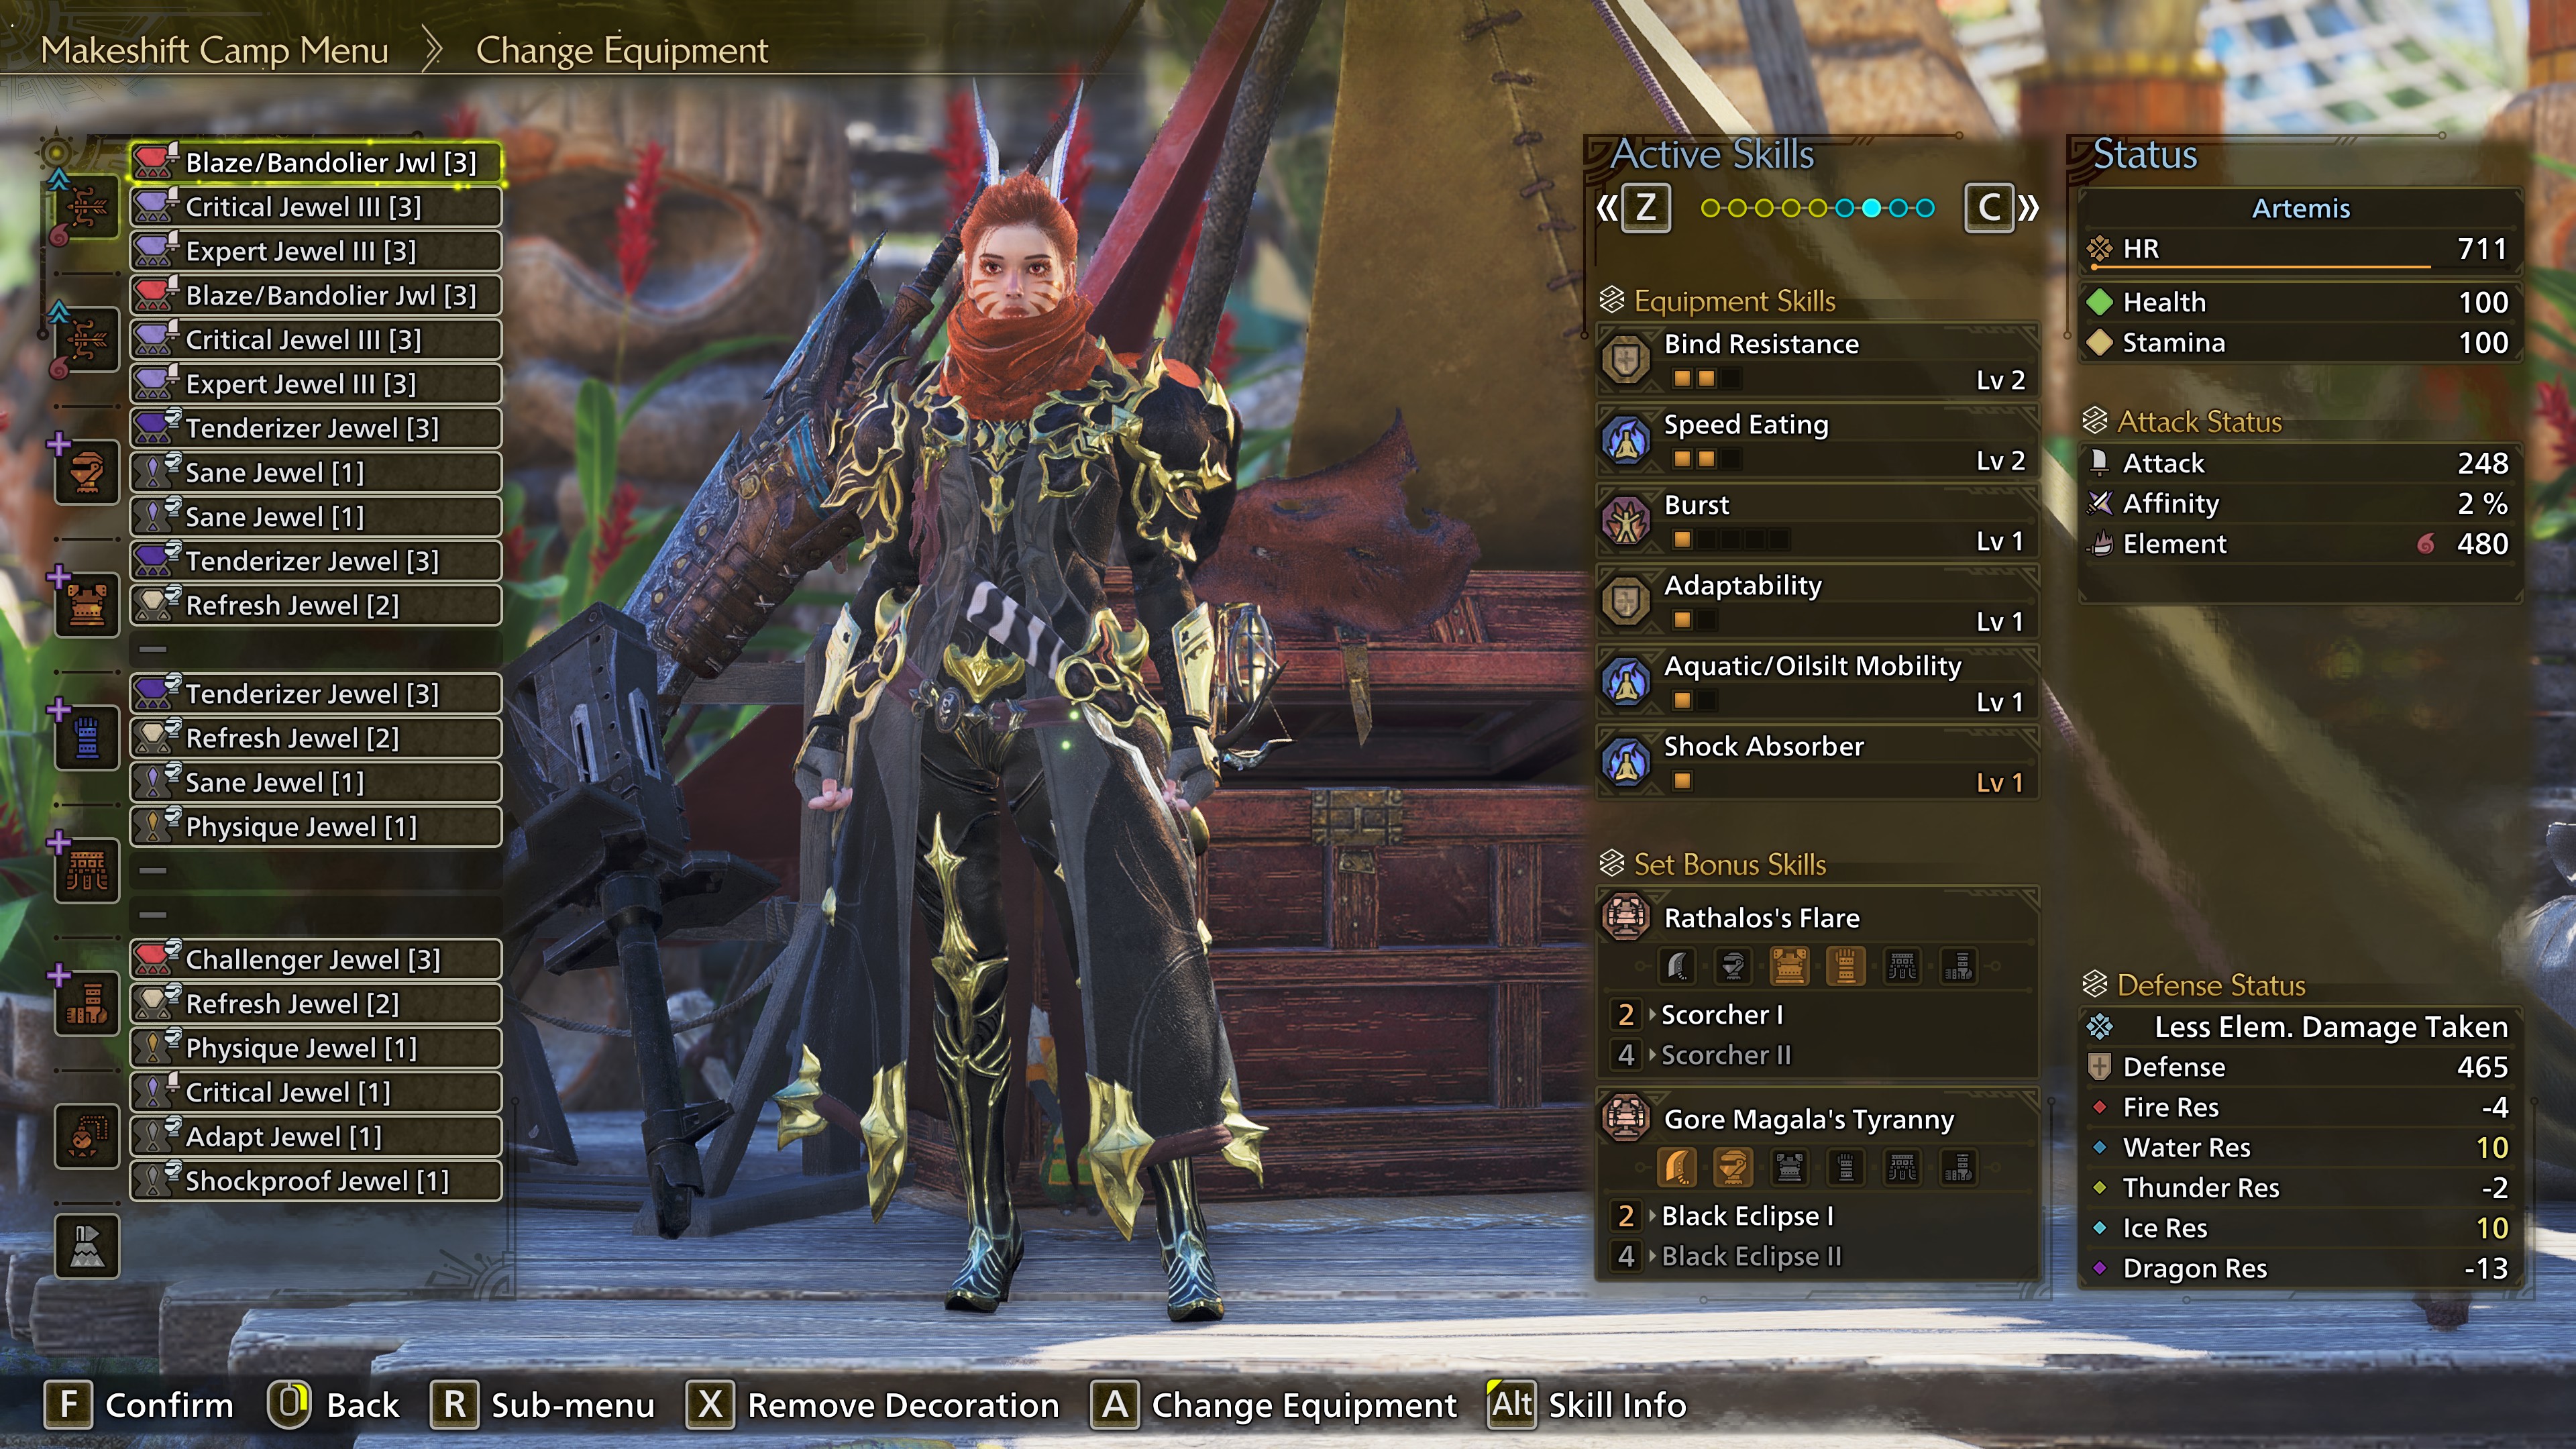
Black Eclipse I & Antivirus Level 3
This Set Bonus Skill infects you with the Frenzy Virus when you start combat. After a certain amount hits, you cure the Frenzy Virus and gain +15% affinity for 1 minute.If you think you won't get enough hits in, you can consume a nullberry to slow down the frenzy build-up. If you become fully infected, you take double damage and can't heal naturally. You can consume a nullberry to get rid of this debuff.
Antivirus reduces the amount of hits needed to cure the Frenzy Virus and adds 10% affintiy upon curing it (25% total).
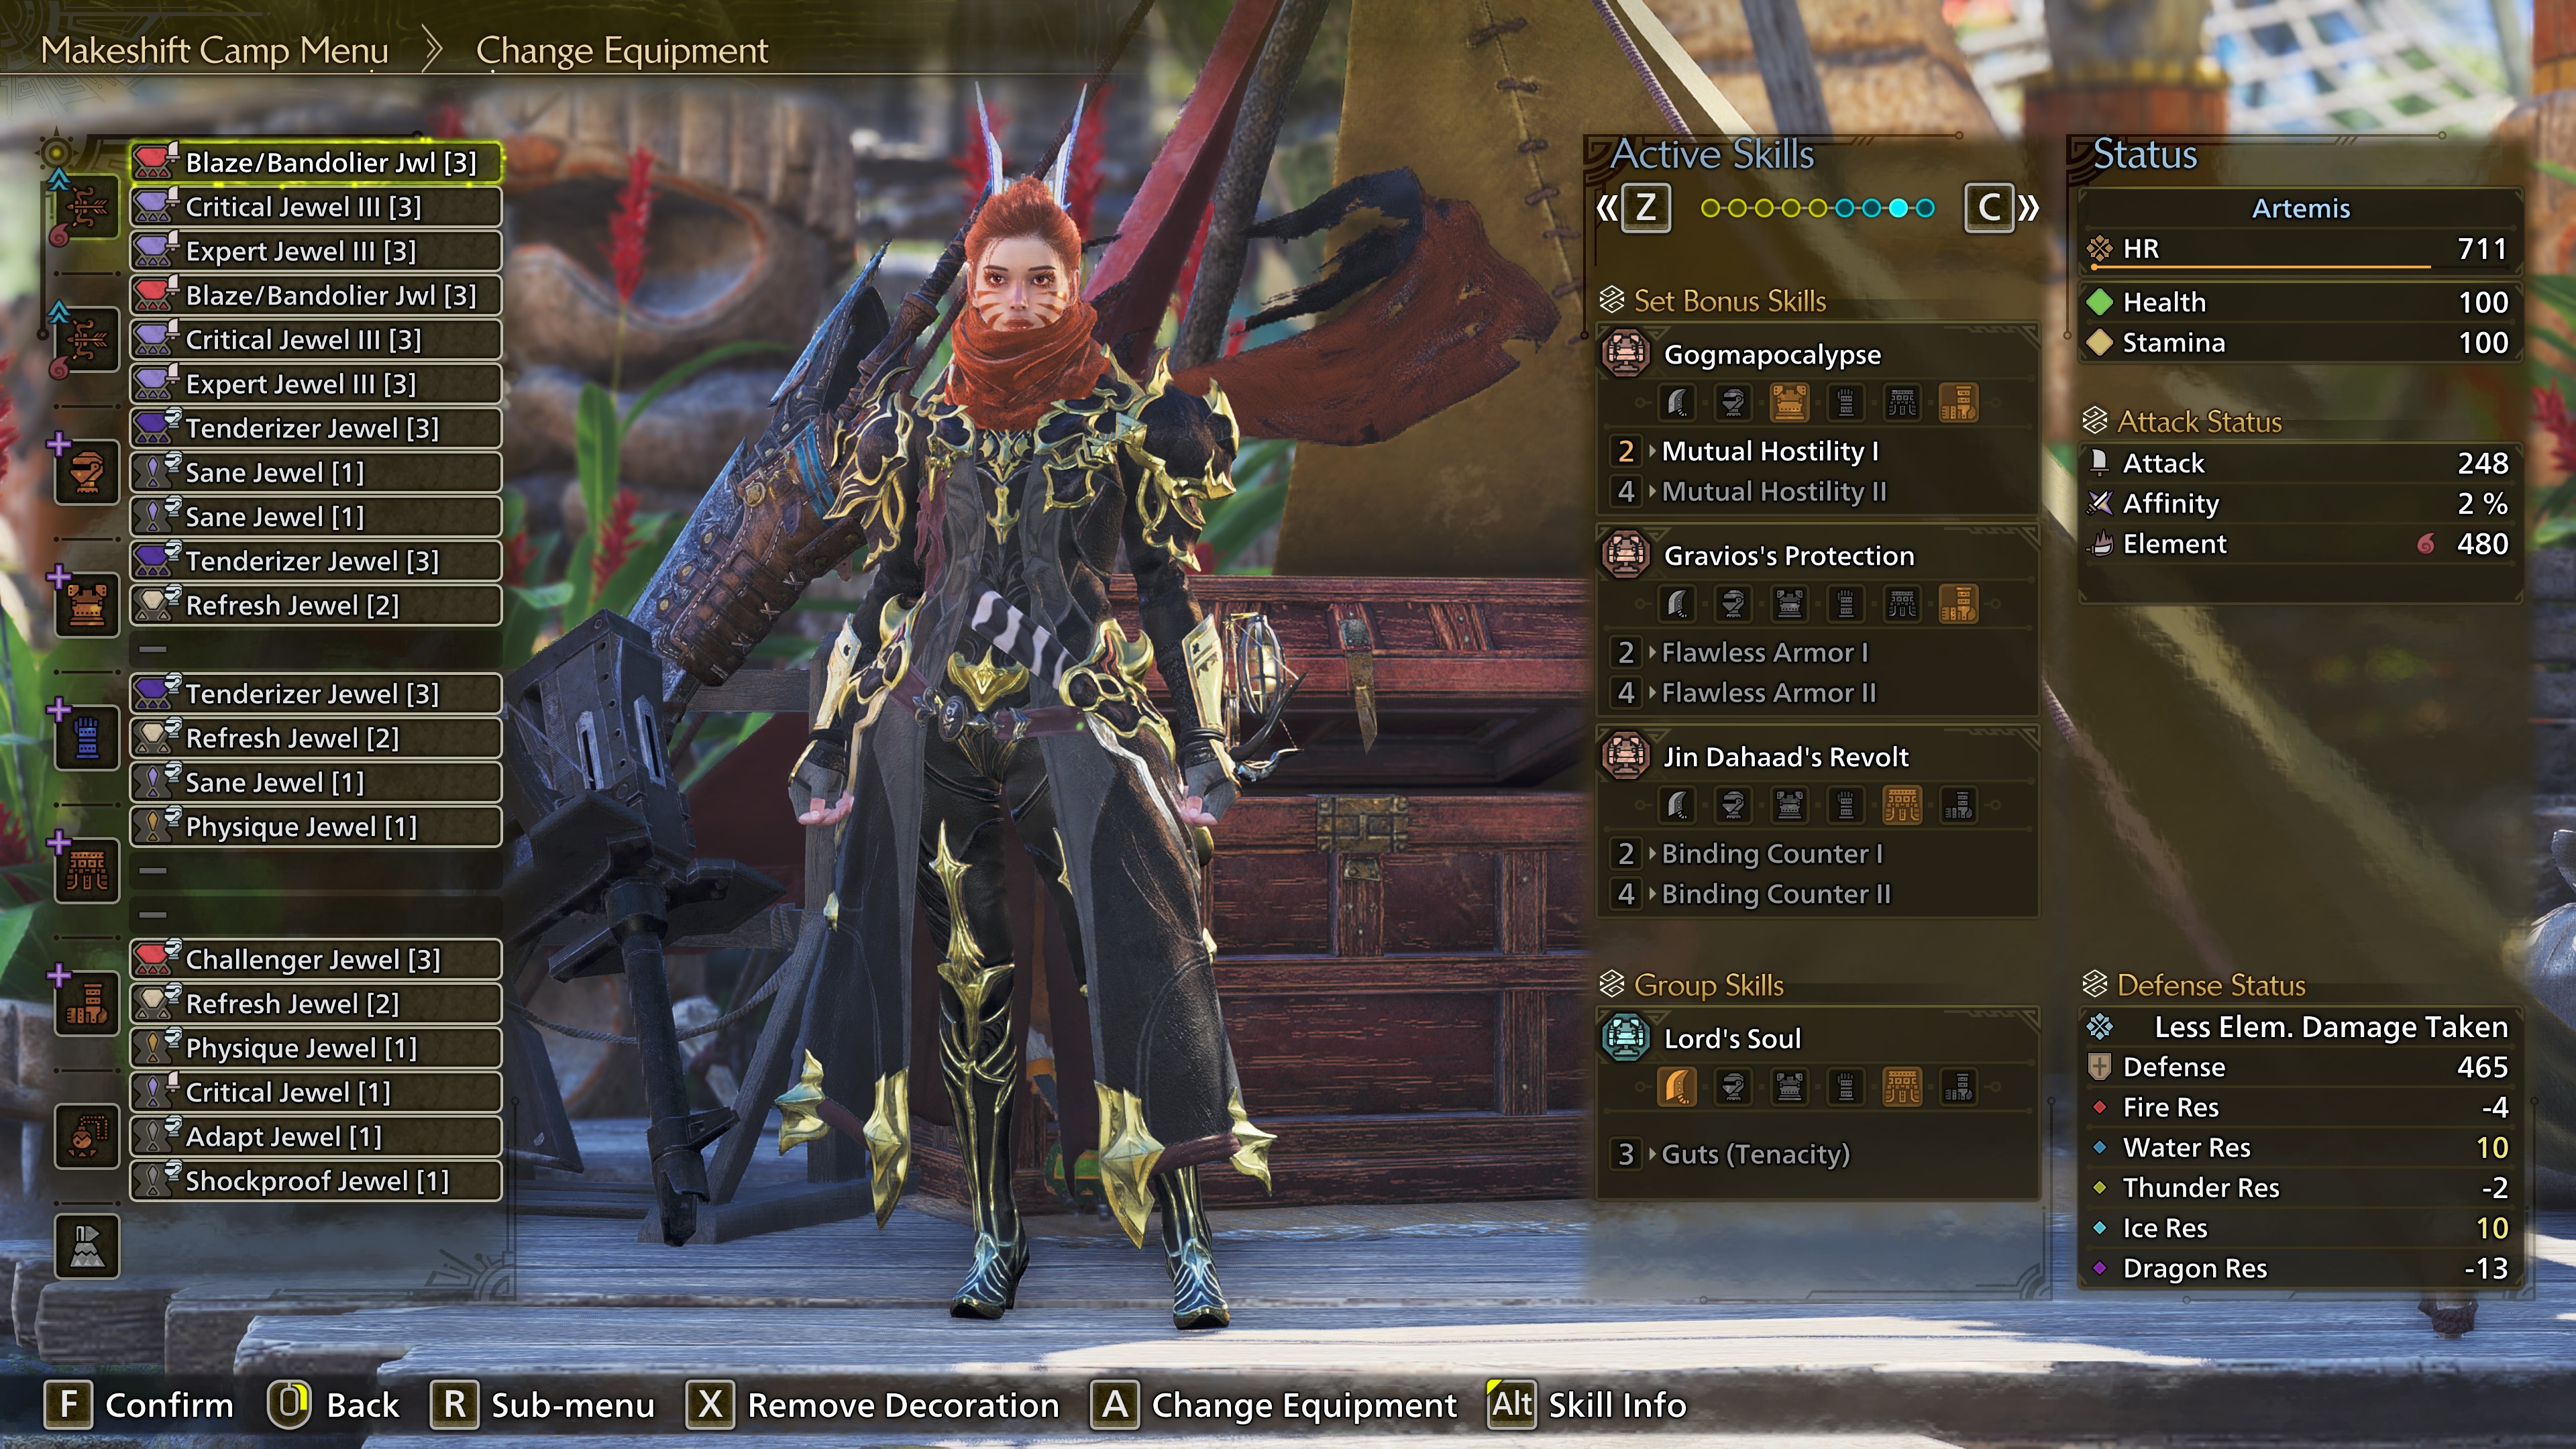
Mutual Hostility I
The Gosmapocalypse Set Bonus Skill activates when the monster becomes enraged, and provides +20% element & +20 element (flat).Scorcher I
The Rathalos's Flare Set Bonus Skill can activate when you deal damage. It deals 20 fire damage (flat) and 60 fire damage that is affected by hitzone values and skills like Fire Attack, but not by the elemental attack of your weapon.Constitution Level 2 & Stamina Surge Level 3
You need to eat for the Black Belt Hi meal skill for the additional stamina reduction. Shockproof and Adaptability are filler decorations. You can replace 1 of them with another level of Constitution and eat for the Black Belt Lo meal skill, or both of them and drink Dash during combat (freeing up a feast if you prefer). Last and least, you can also combine level 2 with Black Belt Lo and Dash Juice.Stamina Surge can be replaced with Counterstrike jewels if you hunt solo. For multiplayer, I would recommend sticking with Stamina Surge.
Weakness Exploit Level 5
Weakness Exploit level 5 provides 30% affinity when you hit a weak point, and 50% affinity for hitting a wound.Agitator Level 5
You get +20 raw attack and +15% affinity if the monster is enraged. Simple yet effective, but not consistent. It's active around 60-80% of the hunt.Adrenaline Rush Level 2
You gain +15 raw attack for 30 seconds after a perfect dodge.Burst Level 1
After hitting the monster 5 times in quick succession, you get +6 raw attack and +40 elemental attack for 3 seconds.Peak Performance Level 2
When you are at full health, you gain +6 raw attack.Aquatic/Oilsilt Mobility Level 1
Negates the effects of muddy streams, nullifies slowing from water and oilsilt, and reduces slowing from heavy oil.Speed Eating Level 2
Consuming items faster is a nice bonus.Optional: Adaptability Level 1 & Shock Absorber
These are my go to QoL-skills for spare slots. As I mentioned before, you can replace these with more Constitution levels if you are running low on Delishrooms.Mantles
Evasion MantleThe Evasion Mantle boosts your raw attack by 20% for 10 seconds after a successful dodge. The mantle stays active for 105 seconds. This means it can outperform the Corrupted Mantle, but only during solo hunts. The uptime in multiplayer is much lower.
Corrupted Mantle
The Corrupted Mantle temporarily drains your health and provides 5% affinity for 1,5 minutes. Continuous attacks stop the health drain and give you an additional 5% affinity (10% total) as well as +4.5 % extra raw attack.
Sheathing your weapon pauses the duration of your Corrupted Mantle, but not the health drain. When it runs out, it takes 10 minutes to recharge.
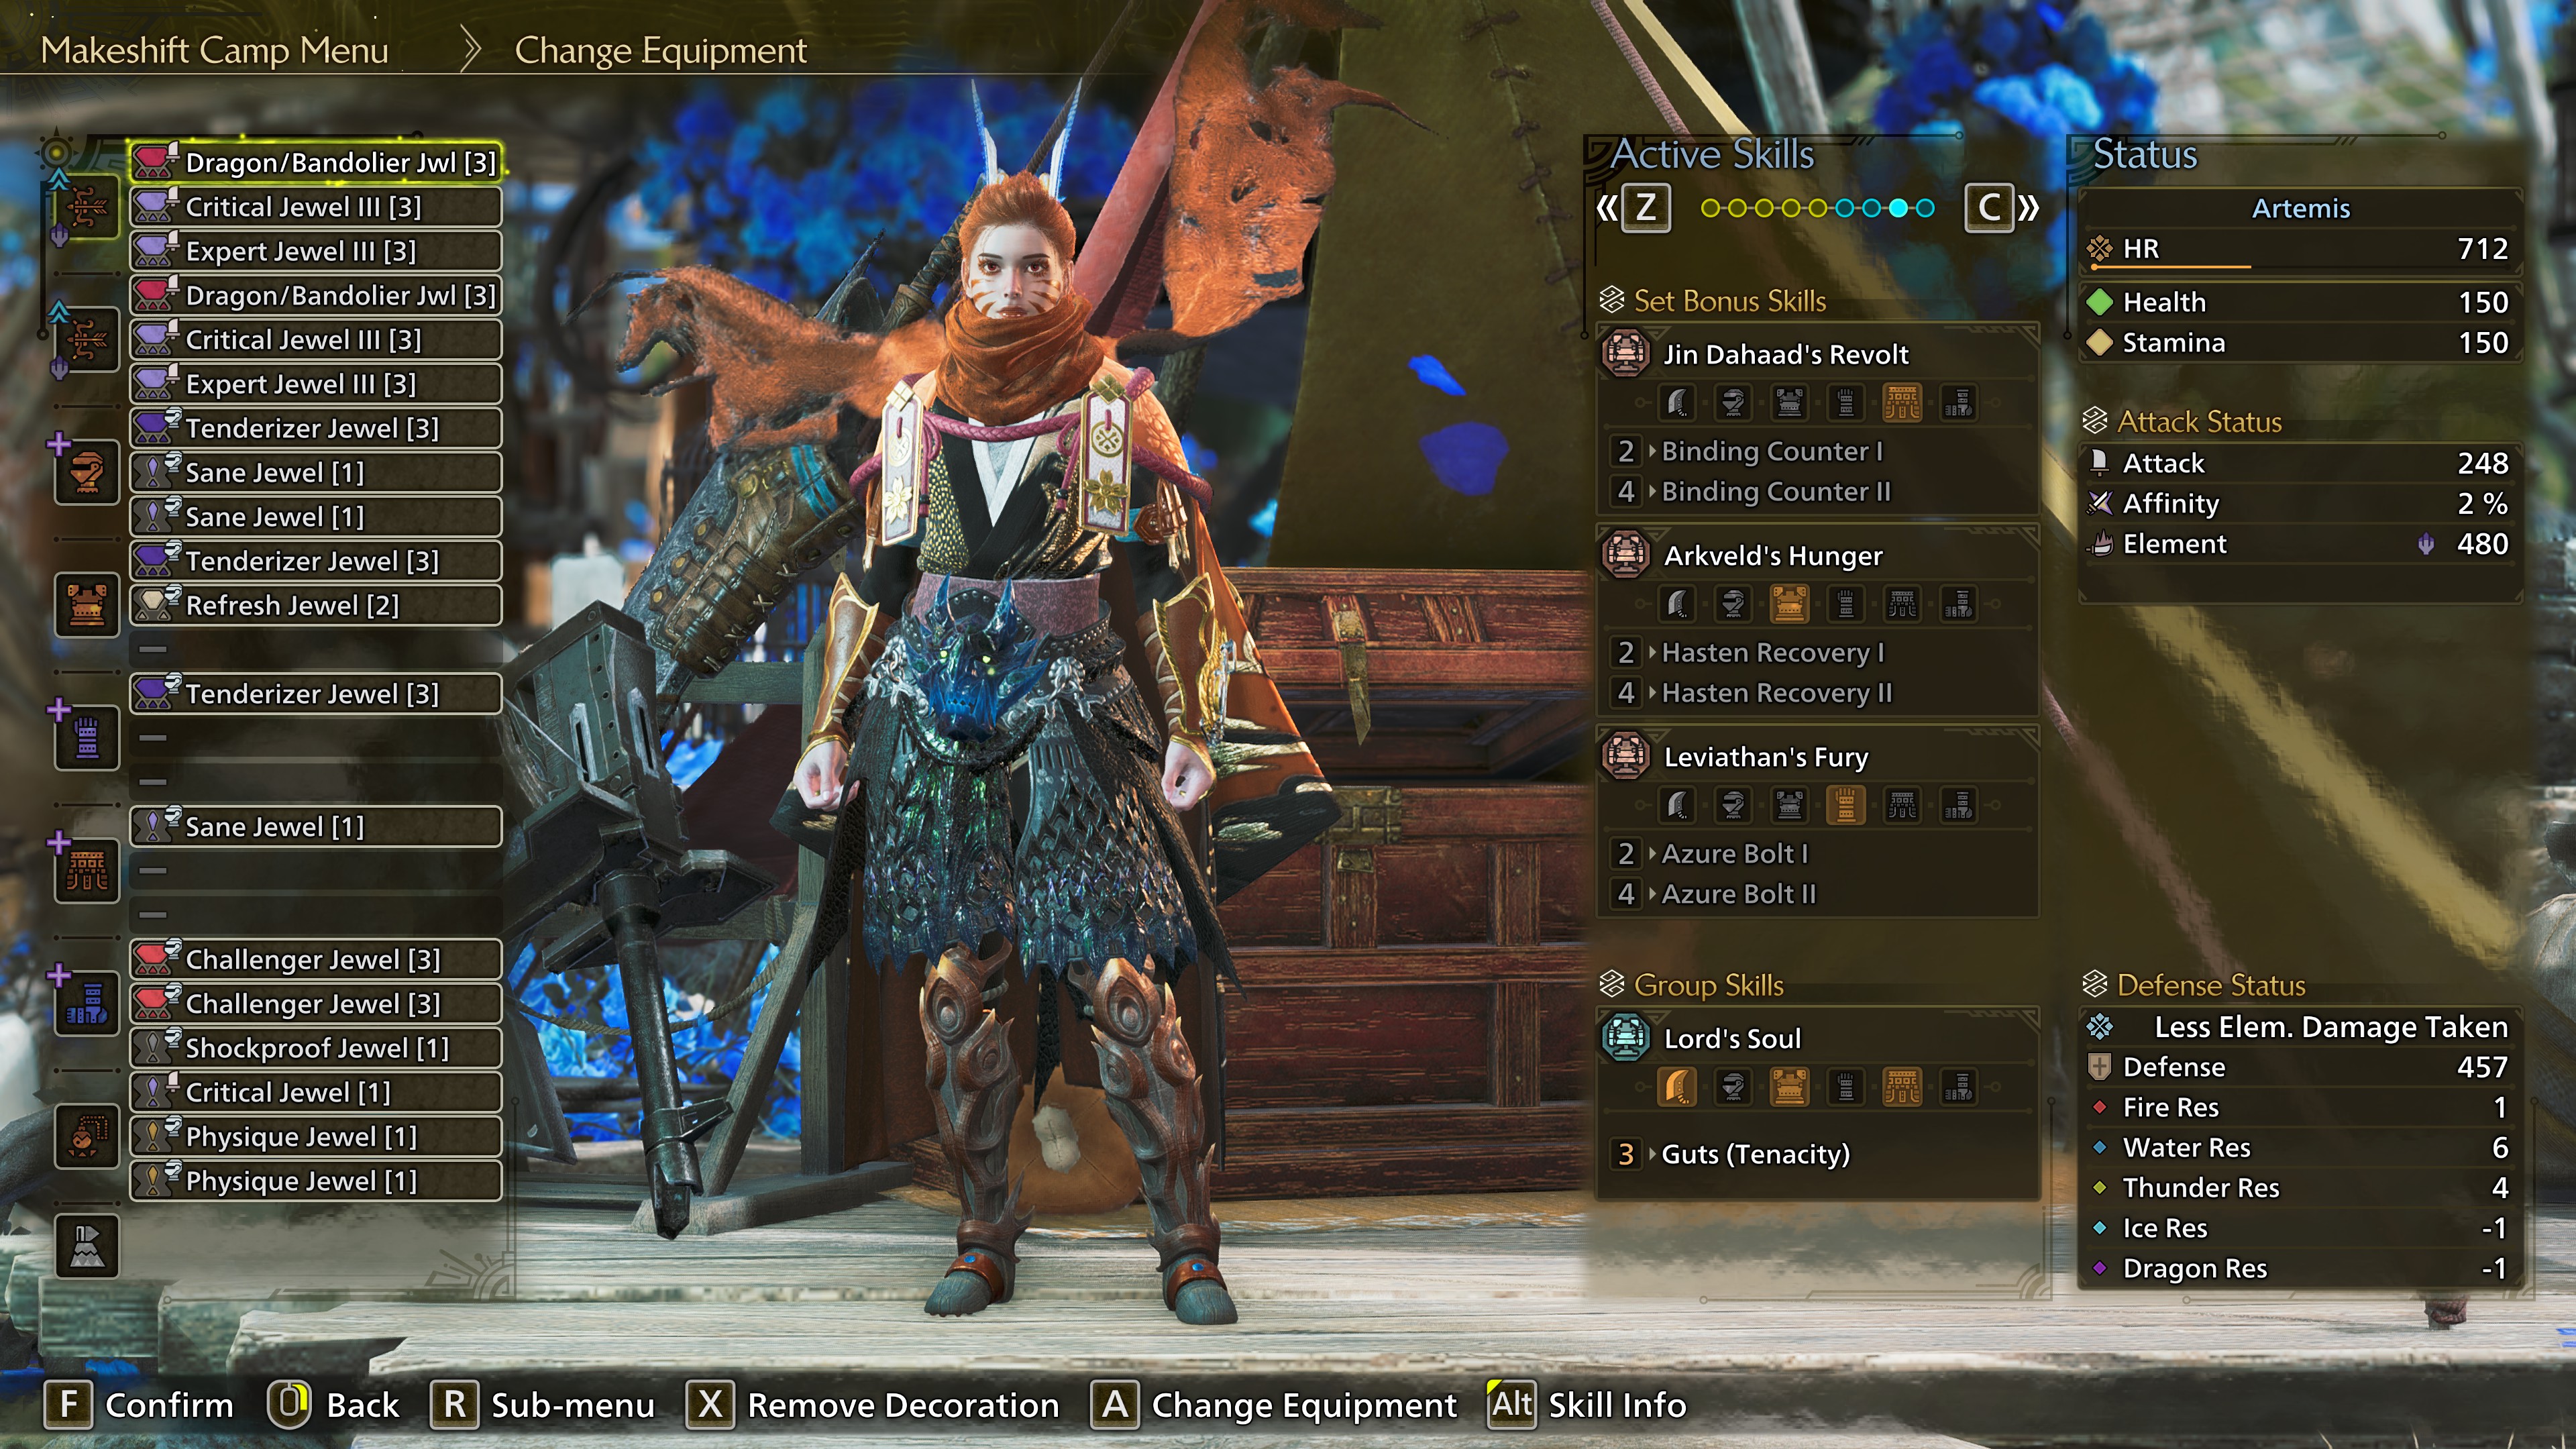
7.2 Guts Build
This build offers layered protection against one-shots. You lack the affinity and Agitator levels from the DPS build, but you get a barrier and Guts in return. It is primarily meant for 9 and 10-star quests, as anything below that doesn't really one-shot you anymore.
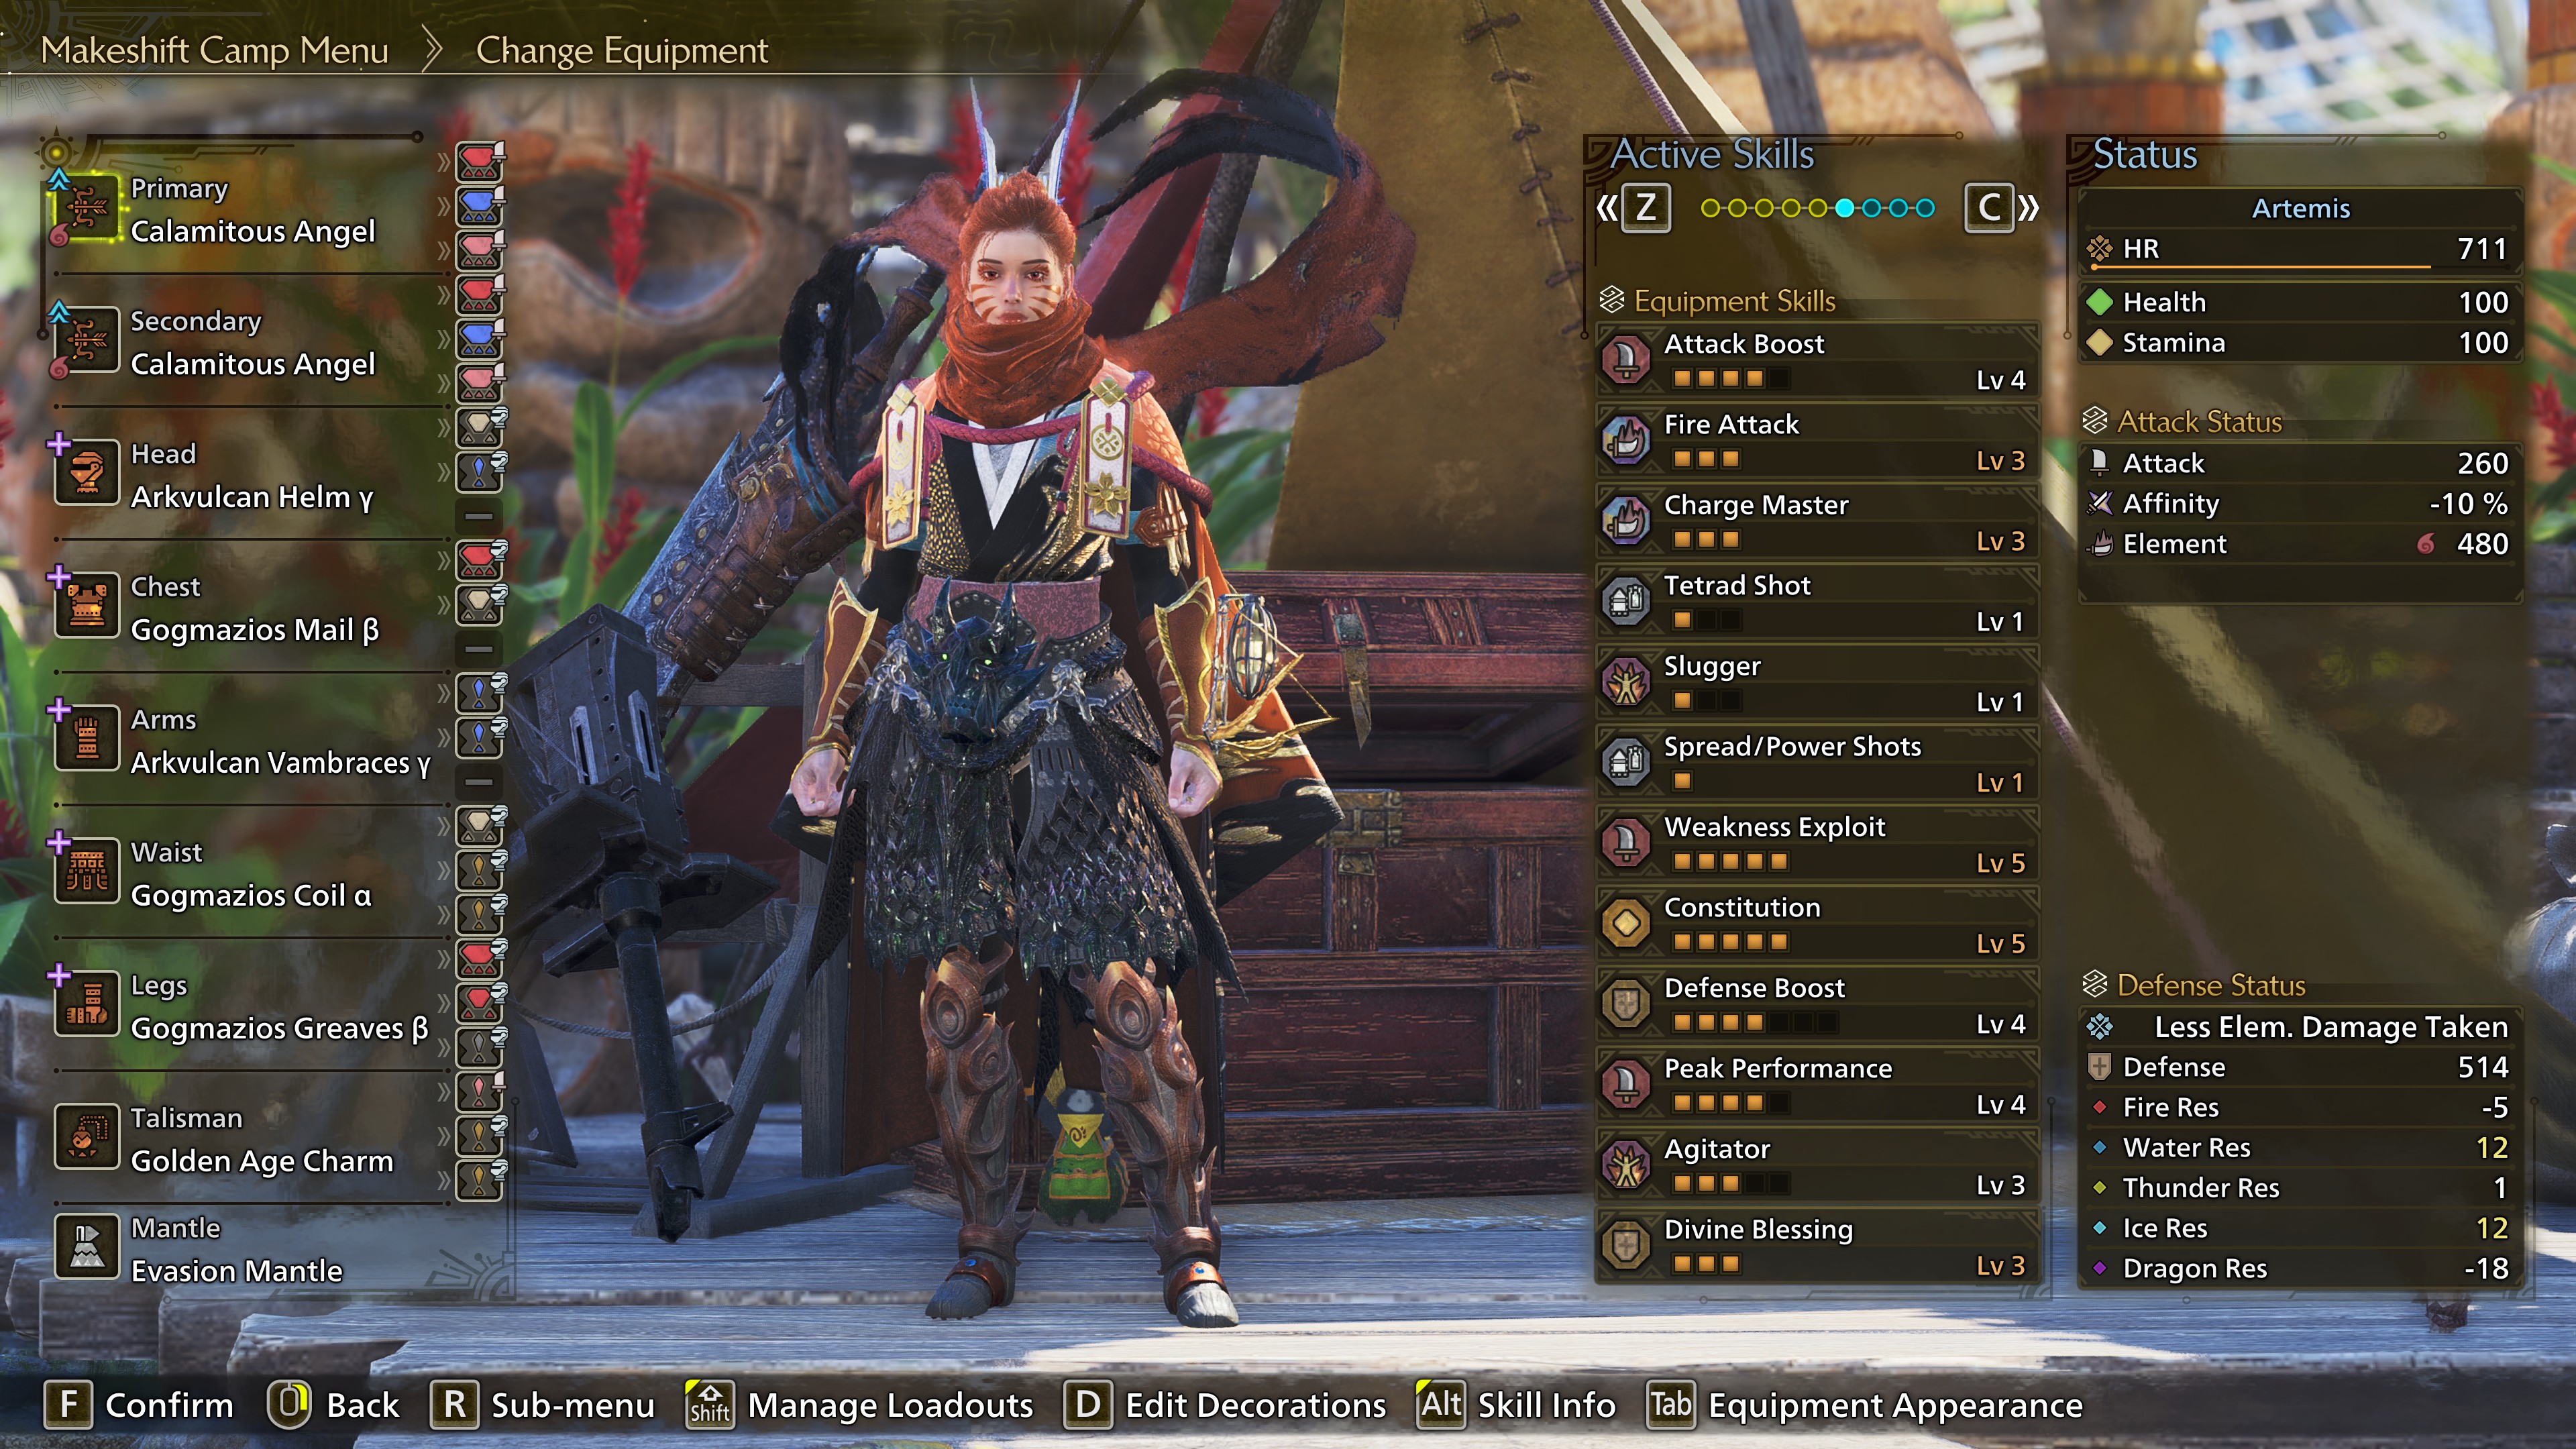
Raw attack is displayed without a coefficient.
For a more detailed overview of the bows, see: 8. Gogma Artian Bows.
A craftable charm can work too, but you will miss some level 1 slots (ideally Divine Blessing). You also want to opt for Critical Eye as the weapon skill, since you can't get the 4th level that makes Attack Boost worth it.
It also gives you a barrier of 75 health (50% of your total health). The barrier lasts 2:20 minutes, and upon creation, a 2:50-minute cooldown starts. Damage does not carry over to your health bar (a barrier with 1 health will still protect you from 1 hit). The barrier will also prevent any status effects (like burn).
Constitution levels are pretty flexible if you are willing to use Dash Juice or forgo feasts for Black Belt meals.
If you hunt solo, you can replace 1 or 2 levels of Stamina Surge with more offensive skills.
The better you are at not losing the barrier from Mutual Hostility, the higher the uptime on this skill.
On top of that, after dealing a certain amount of damage, you will deal 160 raw damage (flat). This damage is dealt in the form of a burst, which can create additional wounds.
In specific cases, you are better off replacing these jewels with the relevant resistances.
The Evasion Mantle boosts your raw attack by 20% for 10 seconds after a successful dodge. The mantle stays active for 105 seconds. This means it can outperform the Corrupted Mantle, but only during solo hunts. The uptime in multiplayer is much lower.
Corrupted Mantle
The Corrupted Mantle temporarily drains your health and provides 5% affinity for 1,5 minutes. Continuous attacks stop the health drain and give you an additional 5% affinity (10% total) as well as +4.5 % extra raw attack.
Sheathing your weapon pauses the duration of your Corrupted Mantle, but not the health drain. When it runs out, it takes 10 minutes to recharge.
Raw attack is displayed without a coefficient.
Gogma Artian Bow
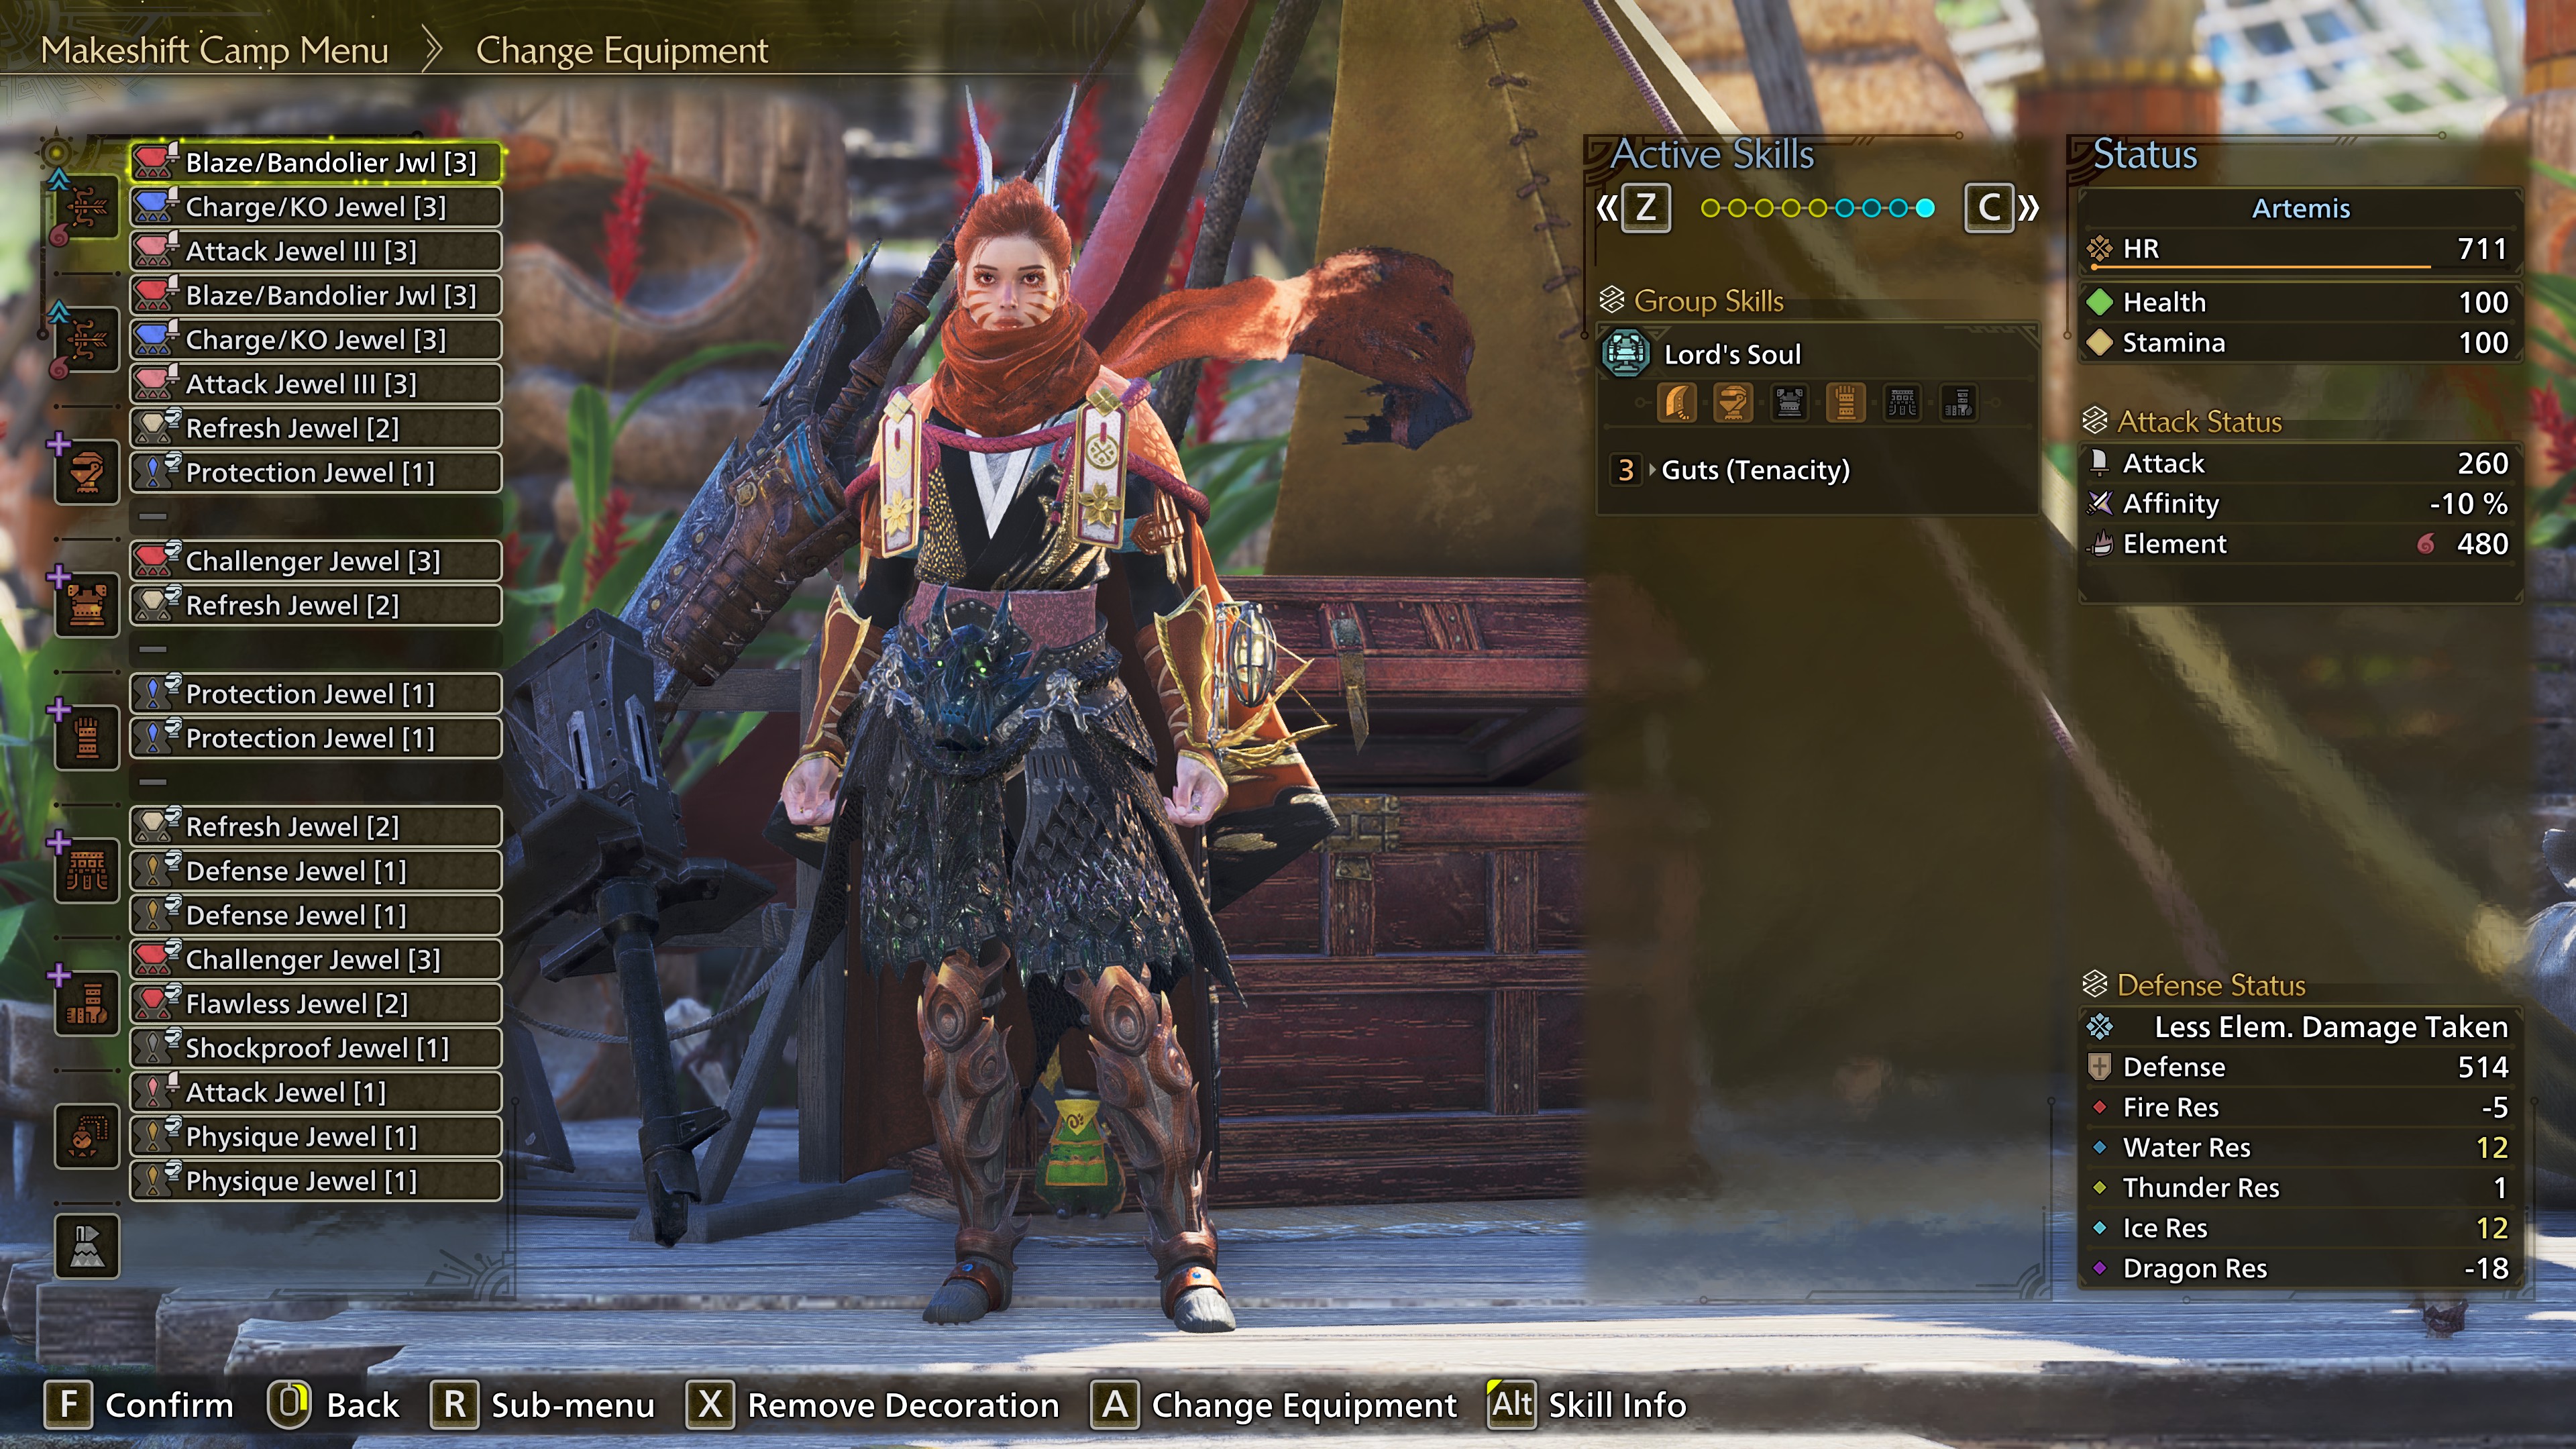
Active skills- Gogmapocalypse
- Lord's Soul
For a more detailed overview of the bows, see: 8. Gogma Artian Bows.
Golden Age Charm
Skills- Spread/Power Shots / Charge Master or Critical Eye Level 3
- Defense Boost Level 3 / Constitution Level 3
- Constitution Level 2 / Defense Boost Level 2
A craftable charm can work too, but you will miss some level 1 slots (ideally Divine Blessing). You also want to opt for Critical Eye as the weapon skill, since you can't get the 4th level that makes Attack Boost worth it.
Mutual Hostility II
The Gosmapocalypse Set Bonus Skill activates when the monster becomes enraged, and provides +30% element & +40 element (flat).It also gives you a barrier of 75 health (50% of your total health). The barrier lasts 2:20 minutes, and upon creation, a 2:50-minute cooldown starts. Damage does not carry over to your health bar (a barrier with 1 health will still protect you from 1 hit). The barrier will also prevent any status effects (like burn).
Guts (Tenacity)
The Lord's Soul Group Skill provides +5% raw attack, but also -5% defense. If you are struck by a lethal hit while above the health threshold, you'll survive with 1 health left. After that, you get -5% raw attack and +5% defense & +3 resistances. If you cart, Guts will reset.Hasten Recovery I
The Arkveld's Hunger Group Skill heals 3 health after every couple of attacks. This won't be your main source of healing by any means, but it will help with activating Peak Performance after taking chip damage.Constitution Level 5 & Stamina Surge Level 3
These skills max out your stamina reduction and stamina recovery.Constitution levels are pretty flexible if you are willing to use Dash Juice or forgo feasts for Black Belt meals.
If you hunt solo, you can replace 1 or 2 levels of Stamina Surge with more offensive skills.
Weakness Exploit Level 5
Weakness Exploit level 5 provides 30% affinity when you hit a weak point, and 50% affinity for hitting a wound.Peak Performance Level 4
When you are at full health, you gain +15 raw attack.The better you are at not losing the barrier from Mutual Hostility, the higher the uptime on this skill.
Agitator Level 3
You get +12 raw attack and +7% affinity if the monster is enraged. Simple yet effective, but not consistent. It's active around 60-80% of the hunt.Burst Level 2
After hitting the monster 5 times in quick succession, you get +7 raw attack and +60 elemental attack for 3 seconds.Adrenaline Rush Level 2
You gain +15 raw attack for 30 seconds after a perfect dodge.Flayer Level 2
Every time you attack a large monster, Flayer will provide a 50% chance to reduce the number of attacks needed to create a wound.On top of that, after dealing a certain amount of damage, you will deal 160 raw damage (flat). This damage is dealt in the form of a burst, which can create additional wounds.
Defense Boost Level 4
At level 6, this skill offers +5% defense as well as +20 defense and +3 to all resistances.Divine Blessing Level 3
You have a ~33% chance to reduce incoming damage by 50%. This can also reduce the damage your barrier takes.In specific cases, you are better off replacing these jewels with the relevant resistances.
Aquatic/Oilsilt Mobility Level 1
Negates the effects of muddy streams, nullifies slowing from water and oilsilt, and reduces slowing from heavy oil.Speed Eating Level 2
Consuming items faster is a nice bonus.Optional: Shock Absorber
A nice quality of life skill if you play at close range. Feel free to slot in something else if you prefer.Mantles
Evasion MantleThe Evasion Mantle boosts your raw attack by 20% for 10 seconds after a successful dodge. The mantle stays active for 105 seconds. This means it can outperform the Corrupted Mantle, but only during solo hunts. The uptime in multiplayer is much lower.
Corrupted Mantle
The Corrupted Mantle temporarily drains your health and provides 5% affinity for 1,5 minutes. Continuous attacks stop the health drain and give you an additional 5% affinity (10% total) as well as +4.5 % extra raw attack.
Sheathing your weapon pauses the duration of your Corrupted Mantle, but not the health drain. When it runs out, it takes 10 minutes to recharge.
7.3 Convert Element Build
This build makes use of Convert Element and is only suited for Dragon matchups. You also have Guts, since the build relies on risky dodges to make it work. It also requires the Black Belt meal skill or Dash Juice, depending on your preferences.
Raw attack is displayed without a coefficient.
For a more detailed overview of the bows, see: 8. Gogma Artian Bows.
*Adrenaline Rush or Burst is an acceptable alternative, since you still get the extra weapon skill. However, Agitator Level 5 provides the biggest boost out of all levels, while Adrenaline Rush and Burst have diminishing returns.
Alternatively, you can use the Exploiter Charm III or Counterattack Charm III, which means you will miss out on Critical Eye Level 3 and gain an additional 3 levels of Adrenaline Rush. Critical Eye really shines in this build, so it's worth farming for a good random charm.
If you think you won't get enough hits in, you can consume a nullberry to slow down the frenzy build-up. If you become fully infected, you take double damage and can't heal naturally. You can consume a nullberry to get rid of this debuff.
Antivirus reduces the amount of hits needed to cure the Frenzy Virus and adds 10% affintiy upon curing it (25% total).
Stamina Surge can be replaced with Counterstrike jewels if you hunt solo. For multiplayer, I would recommend sticking with Stamina Surge.
After every couple of hits, you will deal 280 flat damage and 100 dragon damage. The latter is affected by the monster's dragon hitzone values, but not by your weapon's dragon attack.
The Evasion Mantle boosts your raw attack by 20% for 10 seconds after a successful dodge. The mantle stays active for 105 seconds. This means it can outperform the Corrupted Mantle, but only during solo hunts. The uptime in multiplayer is much lower.
Corrupted Mantle
The Corrupted Mantle temporarily drains your health and provides 5% affinity for 1,5 minutes. Continuous attacks stop the health drain and give you an additional 5% affinity (10% total) as well as +4.5 % extra raw attack.
Sheathing your weapon pauses the duration of your Corrupted Mantle, but not the health drain. When it runs out, it takes 10 minutes to recharge.
Raw attack is displayed without a coefficient.
Gogma Artian Bow
Active skills- Black Eclipse
- Lord's Soul
For a more detailed overview of the bows, see: 8. Gogma Artian Bows.
Golden Age Charm
Skills- Spread/Power Shots / Critical Eye Level 3
- Weakness Exploit or Agitator Level 1*
*Adrenaline Rush or Burst is an acceptable alternative, since you still get the extra weapon skill. However, Agitator Level 5 provides the biggest boost out of all levels, while Adrenaline Rush and Burst have diminishing returns.
Alternatively, you can use the Exploiter Charm III or Counterattack Charm III, which means you will miss out on Critical Eye Level 3 and gain an additional 3 levels of Adrenaline Rush. Critical Eye really shines in this build, so it's worth farming for a good random charm.
Black Eclipse I & Antivirus Level 3
This Set Bonus Skill infects you with the Frenzy Virus when you start combat. After a certain amount hits, you cure the Frenzy Virus and gain +15% affinity for 1 minute.If you think you won't get enough hits in, you can consume a nullberry to slow down the frenzy build-up. If you become fully infected, you take double damage and can't heal naturally. You can consume a nullberry to get rid of this debuff.
Antivirus reduces the amount of hits needed to cure the Frenzy Virus and adds 10% affintiy upon curing it (25% total).
Constitution Level 2 & Stamina Surge Level 3
You need to eat for the Black Belt Hi meal skill for the additional stamina reduction. You can replace the Shockproof jewel with another level of Constitution and eat for the Black Belt Lo meal skill, too. Last and least, you can also combine level 2 with Black Belt Lo and Dash Juice.Stamina Surge can be replaced with Counterstrike jewels if you hunt solo. For multiplayer, I would recommend sticking with Stamina Surge.
Convert Element Level 3
If you take elemental damage (ideally when you have hyperarmor), you gain +180 dragon attack for 2 minutes. After which, there is a 90-second cooldown.After every couple of hits, you will deal 280 flat damage and 100 dragon damage. The latter is affected by the monster's dragon hitzone values, but not by your weapon's dragon attack.
Weakness Exploit Level 5
Weakness Exploit level 5 provides 30% affinity when you hit a weak point, and 50% affinity for hitting a wound.Agitator Level 5
You get +20 raw attack and +15% affinity if the monster is enraged. Simple yet effective, but not consistent. It's active around 60-80% of the hunt.Adrenaline Rush Level 1
You gain +10 raw attack for 30 seconds after a perfect dodge.Burst Level 1
After hitting the monster 5 times in quick succession, you get +6 raw attack and +40 elemental attack for 3 seconds.Shock Absorber
A nice quality of life skill if you play at close range. As I mentioned before, you can replace this with another Constitution level if you are running low on Delishrooms.Mantles
Evasion MantleThe Evasion Mantle boosts your raw attack by 20% for 10 seconds after a successful dodge. The mantle stays active for 105 seconds. This means it can outperform the Corrupted Mantle, but only during solo hunts. The uptime in multiplayer is much lower.
Corrupted Mantle
The Corrupted Mantle temporarily drains your health and provides 5% affinity for 1,5 minutes. Continuous attacks stop the health drain and give you an additional 5% affinity (10% total) as well as +4.5 % extra raw attack.
Sheathing your weapon pauses the duration of your Corrupted Mantle, but not the health drain. When it runs out, it takes 10 minutes to recharge.
8. Gogma Artian Bows (HR 100+)
In this section, I'll go over the optimal way to upgrade your Artian Bows to the Gogma Artian Bows. These bows outperform all other craftable bows.
Attack Focus
Grants:
The -15% affinity is definitely noticeable, but the fact that you get Close-Range Coatings makes this the default choice. It's good against every matchup, and with the new armor additions, you can create very good low-affinity builds.
Affinity Focus
Grants:
A significant hit to both attack and element for some affinity is a terrible trade-off. Damage-wise, it can't compete with the other options. However, you do get Power Coatings if you prefer to play at a distance. Aside from the damage loss, these coatings are just as viable as Close-Range Coatings in terms of matchups.
Element Focus
Grants:
The extra element for a small affinity hit is a good trade-off, and Pierce Coatings benefited a lot from the buffs. However, they are only viable against specific matchups*. I recommend crafting these if you are willing to craft additional bows.
*Any monster where you can consistently get 3-4 pierce ticks on a weak spot is a good rule of thumb.
In Summary
You want at least 5 Gogma Artian Bows, one for each element. Damage-wise, the optimal pick is the Attack focus, but if you prefer Power Coatings, you can go for the Affinity focus.
Additionally, you can upgrade more bows with an Element focus for the pierce-matchups.
Which skills are optimal depends heavily on the build you are using, so I will go over them in each build section.
For those reasons, you want to aim for:
*If you want a raw bow, you should replace these with Affinity EX.
Every Gogma Artian Bow should have the corresponding Element/Bandolier Jewel.
Spread/Power Shots
Another mandatory jewel to boost the damage of the Power Shot combo.
Charge Master/Critical Boost
Charge Master is the better option for low-affinity builds, primarily those that run the Mutual Hostility II Set Bonus skill. Charge Master jewels can also come with a bonus level of Slugger, but we don't use Exhaust Coatings.
Critical Boost is the go-to skill if you use the Black Eclipse Set Bonus skill.
Talisman
There is a good chance you already got one of these skills on your Talisman. In that case, you can fit in both Charge Master/Critical Boost Level 3 and either Attack Boost Level 4 or Critical Eye Level 4. Attack Boost is the more consistent option for low-affinity builds, while Critical Eye is more beneficial if you use a crit build.
Production Bonusses
To start, you need a rarity 8 Artian Bow that was crafted with 3 Attack Infusions of the same element. This will give you the best Production Bonuses. The reinforcements don't matter yet, since you can reroll these later. The coatings don't matter either, since you can choose the one you want when you upgrade the bow.Focus
When you upgrade an Artian Bow, you can choose a focus. The available coating is directly tied to the focus you choose.Attack Focus
Grants:
- Close-Range Coatings
- +10 raw attack
- -15% affinity
The -15% affinity is definitely noticeable, but the fact that you get Close-Range Coatings makes this the default choice. It's good against every matchup, and with the new armor additions, you can create very good low-affinity builds.
Affinity Focus
Grants:
- Power Coatings
- +10% affnity
- -10 raw attack
- -20 element attack
A significant hit to both attack and element for some affinity is a terrible trade-off. Damage-wise, it can't compete with the other options. However, you do get Power Coatings if you prefer to play at a distance. Aside from the damage loss, these coatings are just as viable as Close-Range Coatings in terms of matchups.
Element Focus
Grants:
- Pierce Coatings
- +30 element attack
- -5% affinity
The extra element for a small affinity hit is a good trade-off, and Pierce Coatings benefited a lot from the buffs. However, they are only viable against specific matchups*. I recommend crafting these if you are willing to craft additional bows.
*Any monster where you can consistently get 3-4 pierce ticks on a weak spot is a good rule of thumb.
In Summary
You want at least 5 Gogma Artian Bows, one for each element. Damage-wise, the optimal pick is the Attack focus, but if you prefer Power Coatings, you can go for the Affinity focus.
Additionally, you can upgrade more bows with an Element focus for the pierce-matchups.
Armor Skills
Each Gogma Artian Bow gets 1 level of both a Set Bonus Skill and a Group Skill, which you can reroll separately from the reinforcements. Resetting these skills also allows you to change the weapon's focus.Which skills are optimal depends heavily on the build you are using, so I will go over them in each build section.
Reinforcements
You can upgrade (and reroll) the 5 reinforcement slots of your Gogma Artian Bows. By default, they start at level 1, and both attack and affinity reinforcements can be upgraded to either level 2, 3, or EX. Element reinforcements can be upgraded to either level 2 or EX (no level 3). You can't get more than 2 EX upgrades of the same reinforcement.For those reasons, you want to aim for:
- 2x Attack Boost EX
- 1x Attack Boost III
- 2x Element Boost EX*
*If you want a raw bow, you should replace these with Affinity EX.
Decorations
Element Attack Level 3 + Tetrad Shot Level 1Every Gogma Artian Bow should have the corresponding Element/Bandolier Jewel.
Spread/Power Shots
Another mandatory jewel to boost the damage of the Power Shot combo.
Charge Master/Critical Boost
Charge Master is the better option for low-affinity builds, primarily those that run the Mutual Hostility II Set Bonus skill. Charge Master jewels can also come with a bonus level of Slugger, but we don't use Exhaust Coatings.
Critical Boost is the go-to skill if you use the Black Eclipse Set Bonus skill.
Talisman
There is a good chance you already got one of these skills on your Talisman. In that case, you can fit in both Charge Master/Critical Boost Level 3 and either Attack Boost Level 4 or Critical Eye Level 4. Attack Boost is the more consistent option for low-affinity builds, while Critical Eye is more beneficial if you use a crit build.
9. Meals & Item Loadout
In this section, I will be going over everything else to complete your bow build. Mainly your item loadout and meals.
Black Belt Meal (Hi/Lo)
This meal will replace Constitution levels.
Caprice Meal (Hi)
This meal offers the most damage but offers little quality of life.
Tumbler Meal (Hi)
This meal provides more invulnerability (iframes) when dodging.
Moxie Meal (Hi)
This meal turns your first cart into a heal. Meaning you have to eat again if you want to reapply the Moxie skill.
Defender Meal (Hi)
This meal is only useful if you are in one-shot range and can't consistently dodge (i.e., Dragon Piercer).
Defender Hi and Divine Blessing stack in a weird way. When you get hit, both skills have an individual chance to activate. Meaning you don't necessarily have a bigger chance, as you have 2 separate chances at reducing incoming damage. Since only one of them can proc at a time, they don't stack when it comes to reducing incoming damage.
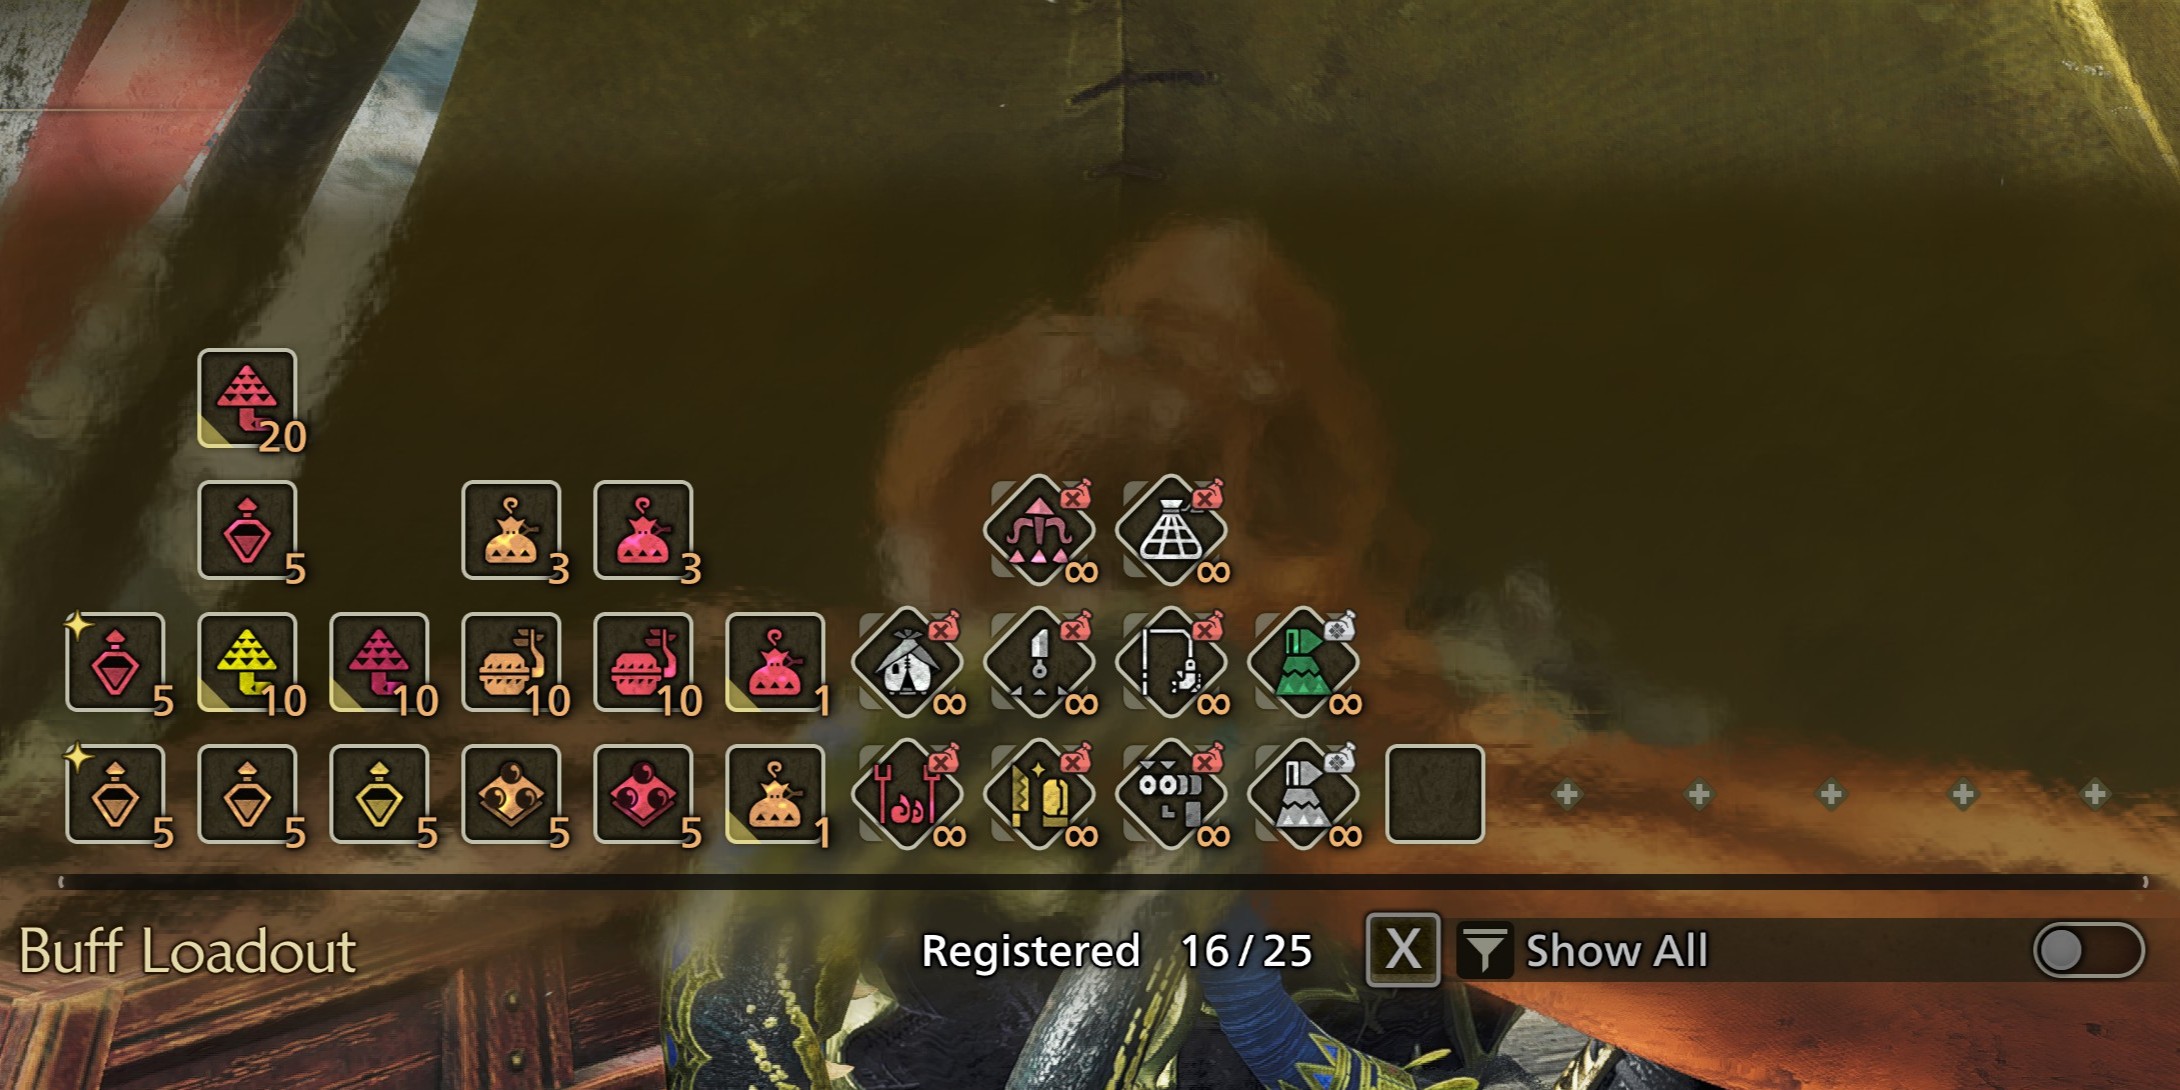
The next loadout is the one I bring with me on the hunt. Most key items are disabled from showing up in the menu because I can access them via my radial menu.
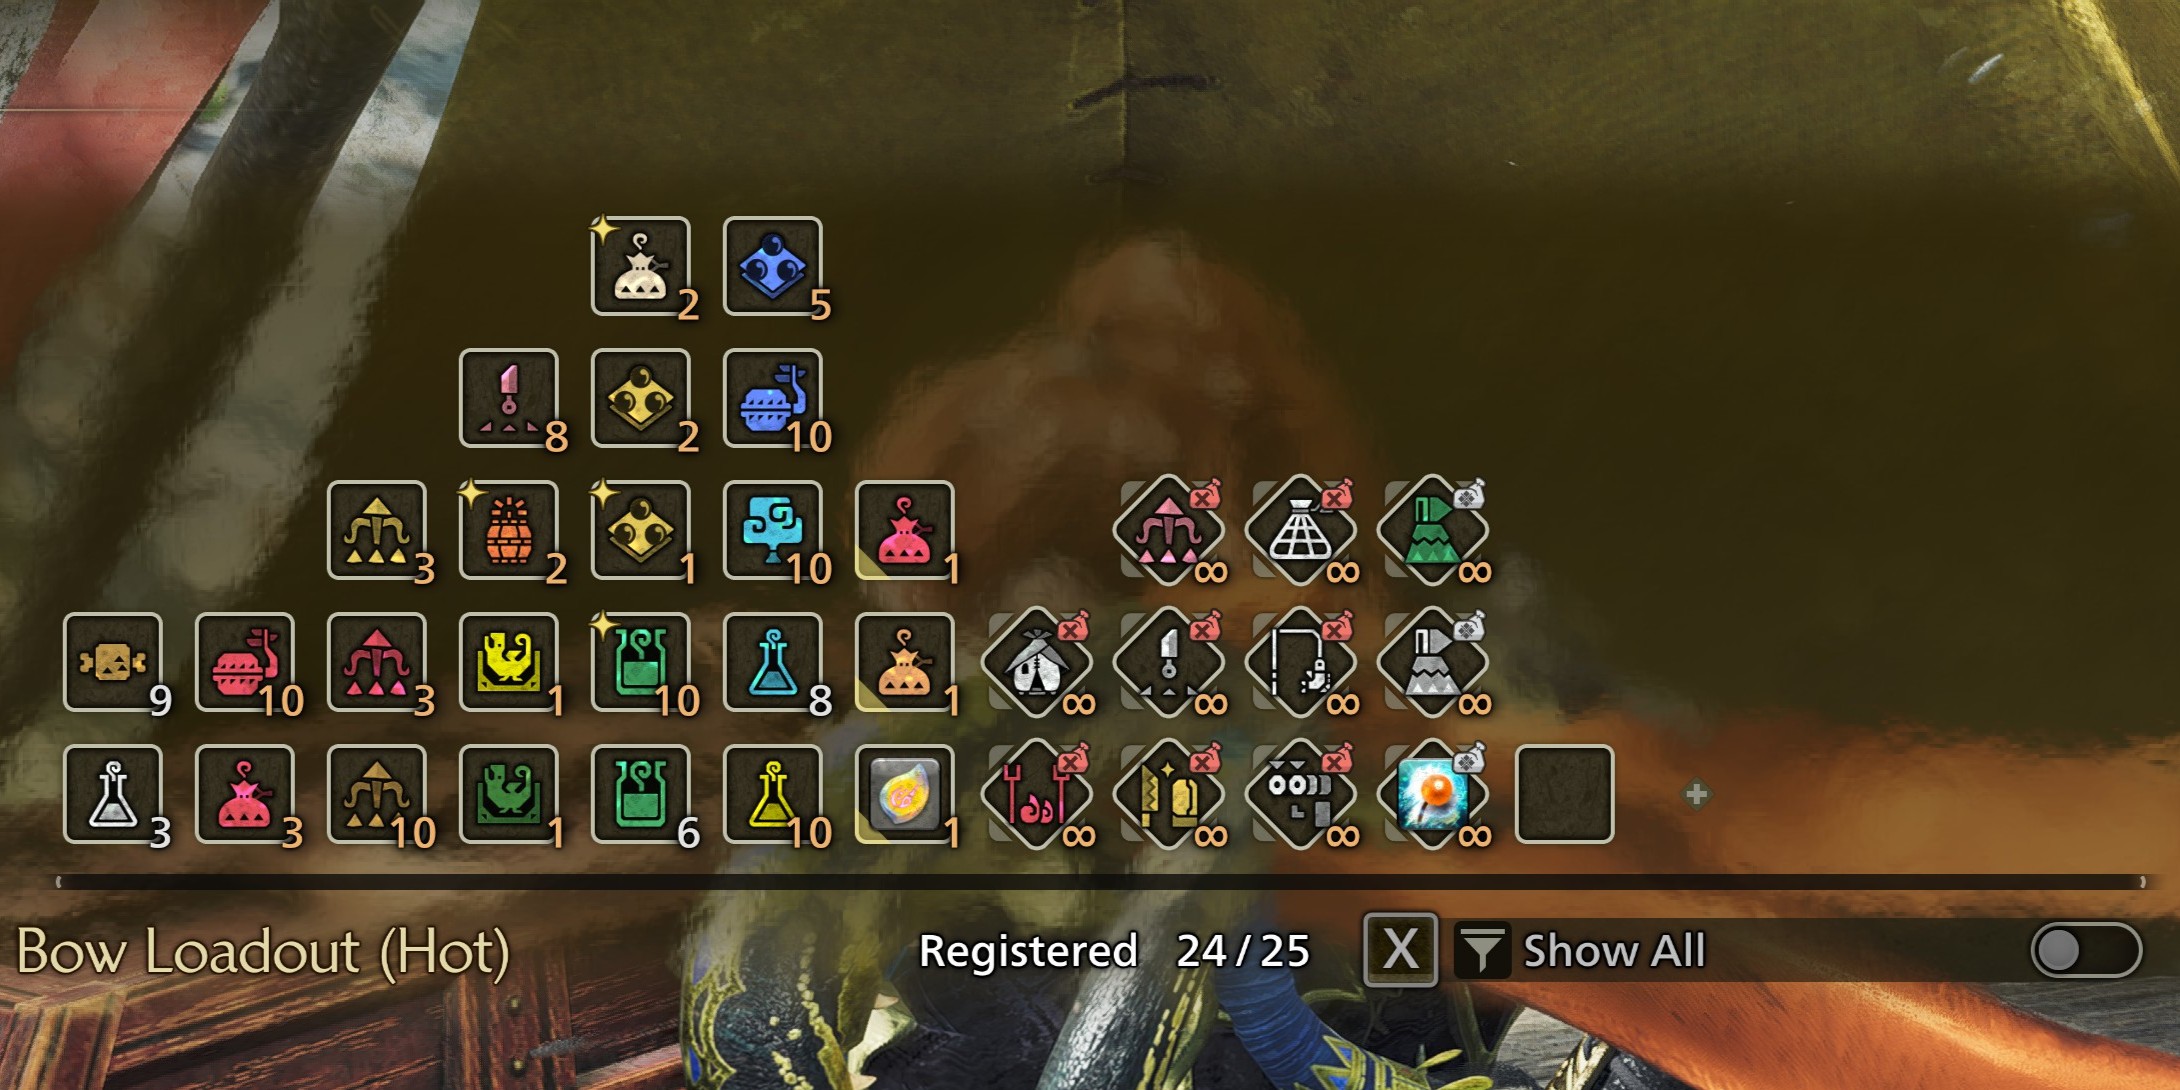
I saved a 2nd one where I replaced the Cold Potions for Hot Potions.
The reduced stacks and empty slot are for the free stuff in your Seikrets pouch. If you keep the empty slot, you can pick up honey when traveling to refill Mega Health Potions via auto-crafting. You can also use it for Dash Juice, should your build require it.
Last but not least, you can use it to take one more buff with you. Keep the following in mind when deciding which buff:
F5-F8:
Meals
Adding ingredients to meals provides the following effects:- Additional ingredients extend the meal duration by 20 minutes.
- Finishing touches provide +5 to every elemental resistance.
Black Belt Meal (Hi/Lo)
This meal will replace Constitution levels.
- Ration: Meat
- Addition Ingredient: Delishrooms/Droolshroom
- Finishing Touches: Monster Chili
Caprice Meal (Hi)
This meal offers the most damage but offers little quality of life.
- Ration: Meat
- Addition Ingredient: Airy Eggs
- Finishing Touches: Monster Chili
Tumbler Meal (Hi)
This meal provides more invulnerability (iframes) when dodging.
- Ration: Meat
- Addition Ingredient: Turbid Shrimp
- Finishing Touches: Monster Chili
Moxie Meal (Hi)
This meal turns your first cart into a heal. Meaning you have to eat again if you want to reapply the Moxie skill.
- Ration: Meat
- Addition Ingredient: Specialty Sild Garlic
- Finishing Touches: Monster Chili
Defender Meal (Hi)
This meal is only useful if you are in one-shot range and can't consistently dodge (i.e., Dragon Piercer).
- Ration: Fish/Veggies
- Addition Ingredient: Sharp Kunafa Cheese
- Finishing Touches: Eastern Honey
Defender Hi and Divine Blessing stack in a weird way. When you get hit, both skills have an individual chance to activate. Meaning you don't necessarily have a bigger chance, as you have 2 separate chances at reducing incoming damage. Since only one of them can proc at a time, they don't stack when it comes to reducing incoming damage.
Feasts
All feasts in the Gathering Hub last 70 minutes and provide +5 attack, +10 defense, and +10 to all elemental resistances. All meals also come with the insurance skill, which prevents penalization from the first cart by you or a teammate. I would prioritize a feast over meals in the following order:- Colorful Suja Cuisine (Caprice Hi): gives you extra attack and more rewards from wounds.
- Hot Azuz Cuisine (Tumbler Hi): gives you more iframes during dodges and more carves.
- Fresh Sild Cuisine (Moxie Hi): negates your first cart once and gives you more rewards from captures.
- Springy Kunafa Cuisine (Defender Hi): provides a chance to reduce incoming damage and increases the rewards at the end of the quest.
Item Loadouts
I use the following loadout to pre-buff before a hunt.The next loadout is the one I bring with me on the hunt. Most key items are disabled from showing up in the menu because I can access them via my radial menu.
I saved a 2nd one where I replaced the Cold Potions for Hot Potions.
The reduced stacks and empty slot are for the free stuff in your Seikrets pouch. If you keep the empty slot, you can pick up honey when traveling to refill Mega Health Potions via auto-crafting. You can also use it for Dash Juice, should your build require it.
Last but not least, you can use it to take one more buff with you. Keep the following in mind when deciding which buff:
- Mega Demondrug (30 min.) doesn't stack with Demondrug (30 min.).
- Both versions of Demondrug (30 min.) do stack with Demon Powder (3 min.).
- Both (Mega) Demondrug (30 min.) and Demon Powder (3 min.) stack with Might Seeds (3 min.).
- Might Pills (20 sec.) will temporarily overwrite your other buffs, so it doesn't stack. However, when it runs out, you get your other buffs with their remaining duration back.
Radial Menus
F1-F4:F5-F8:
9.1 Gathering Build
This build is designed solely for gathering runs, making use of both Hunter Gatherer and Forager's Luck.
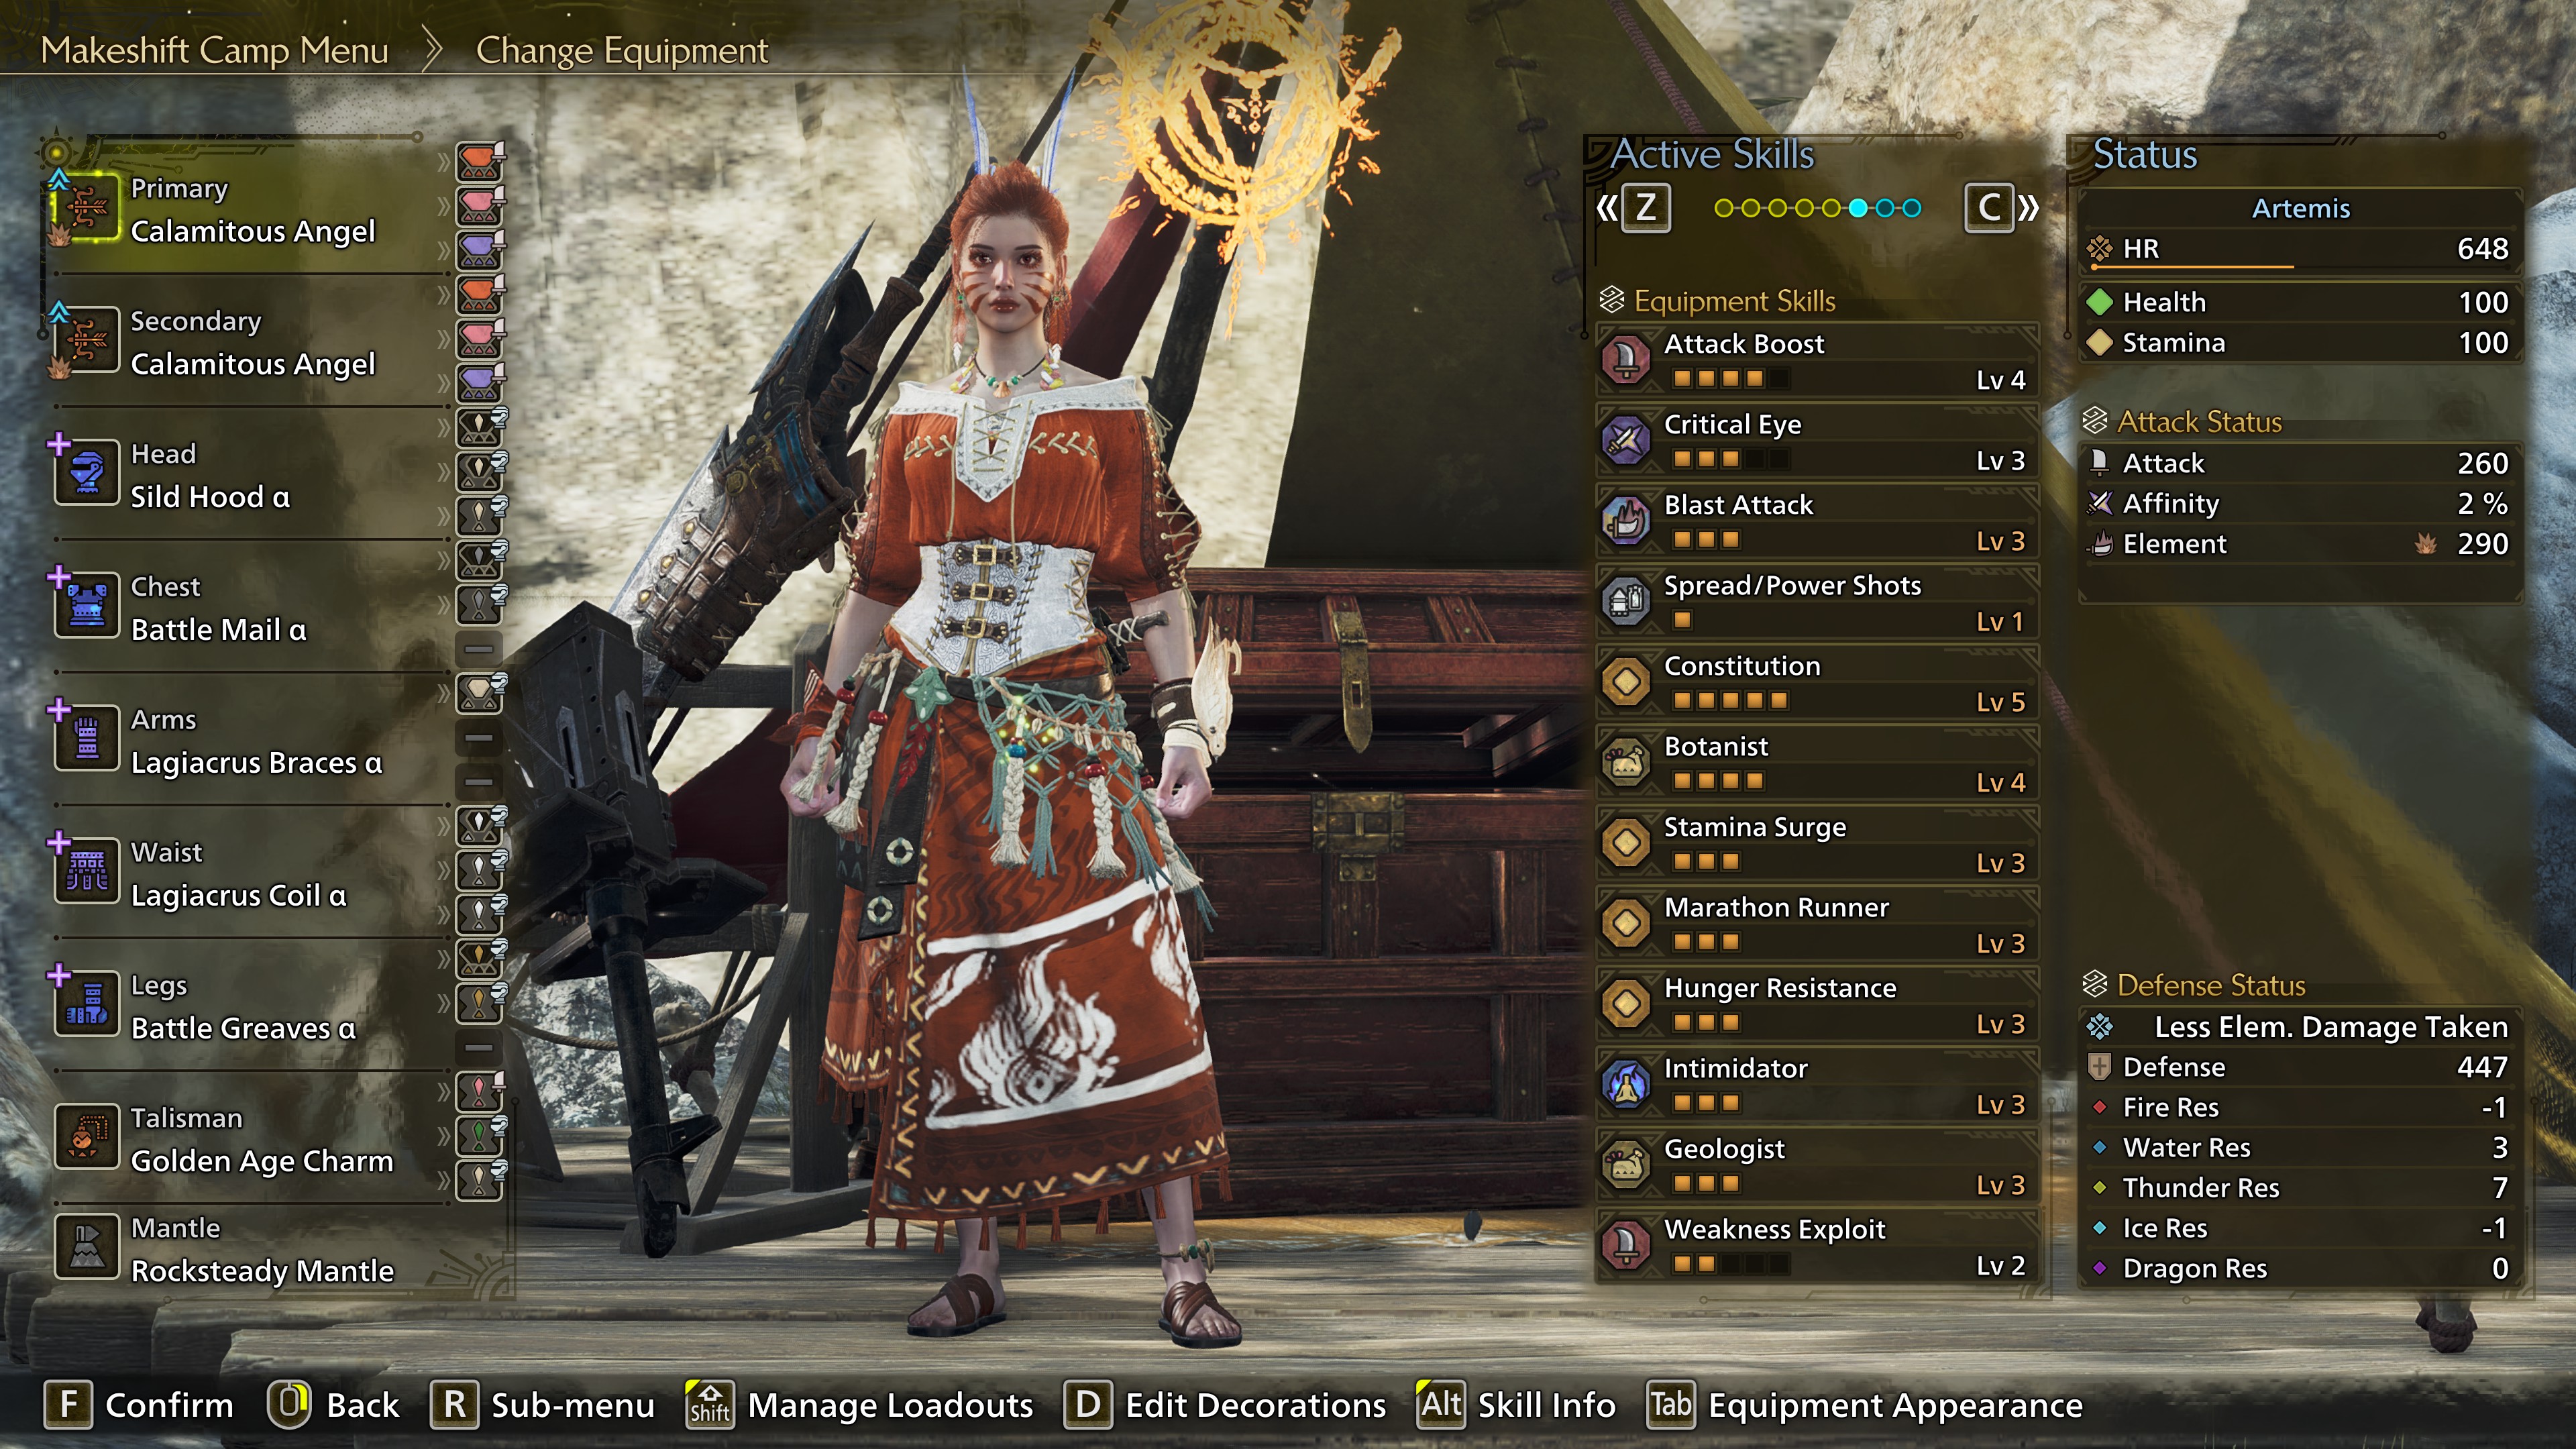
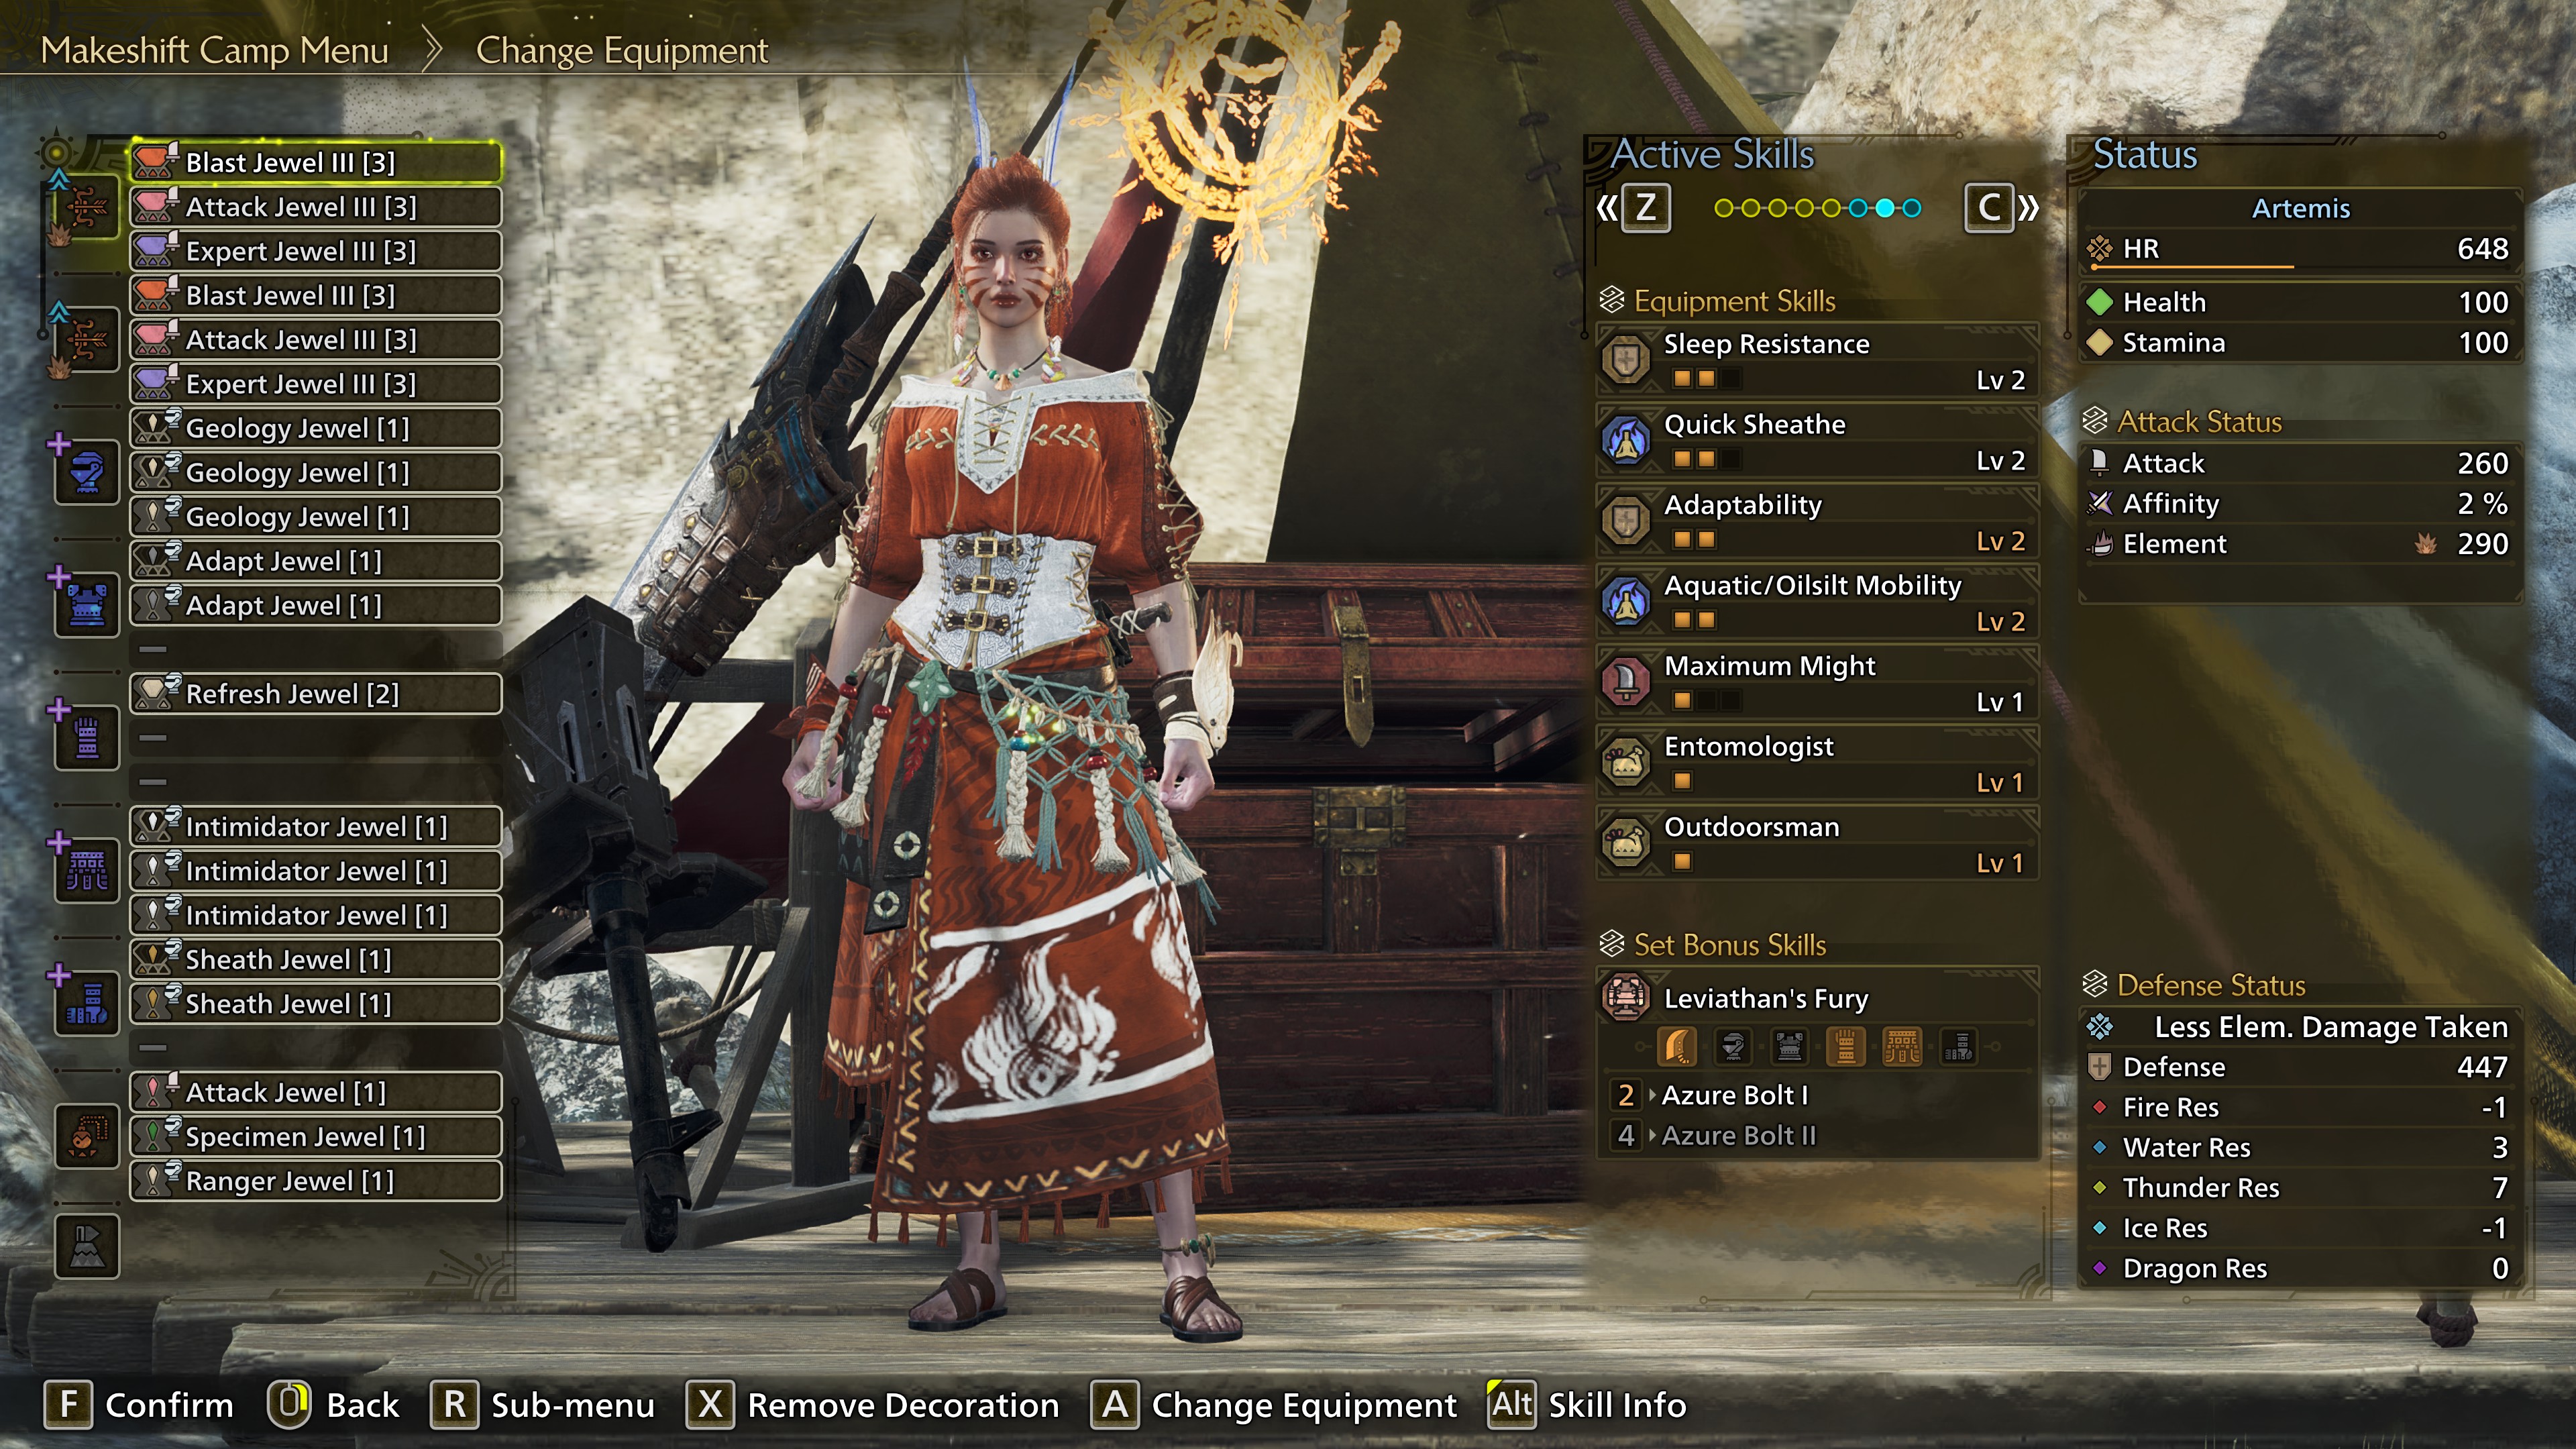
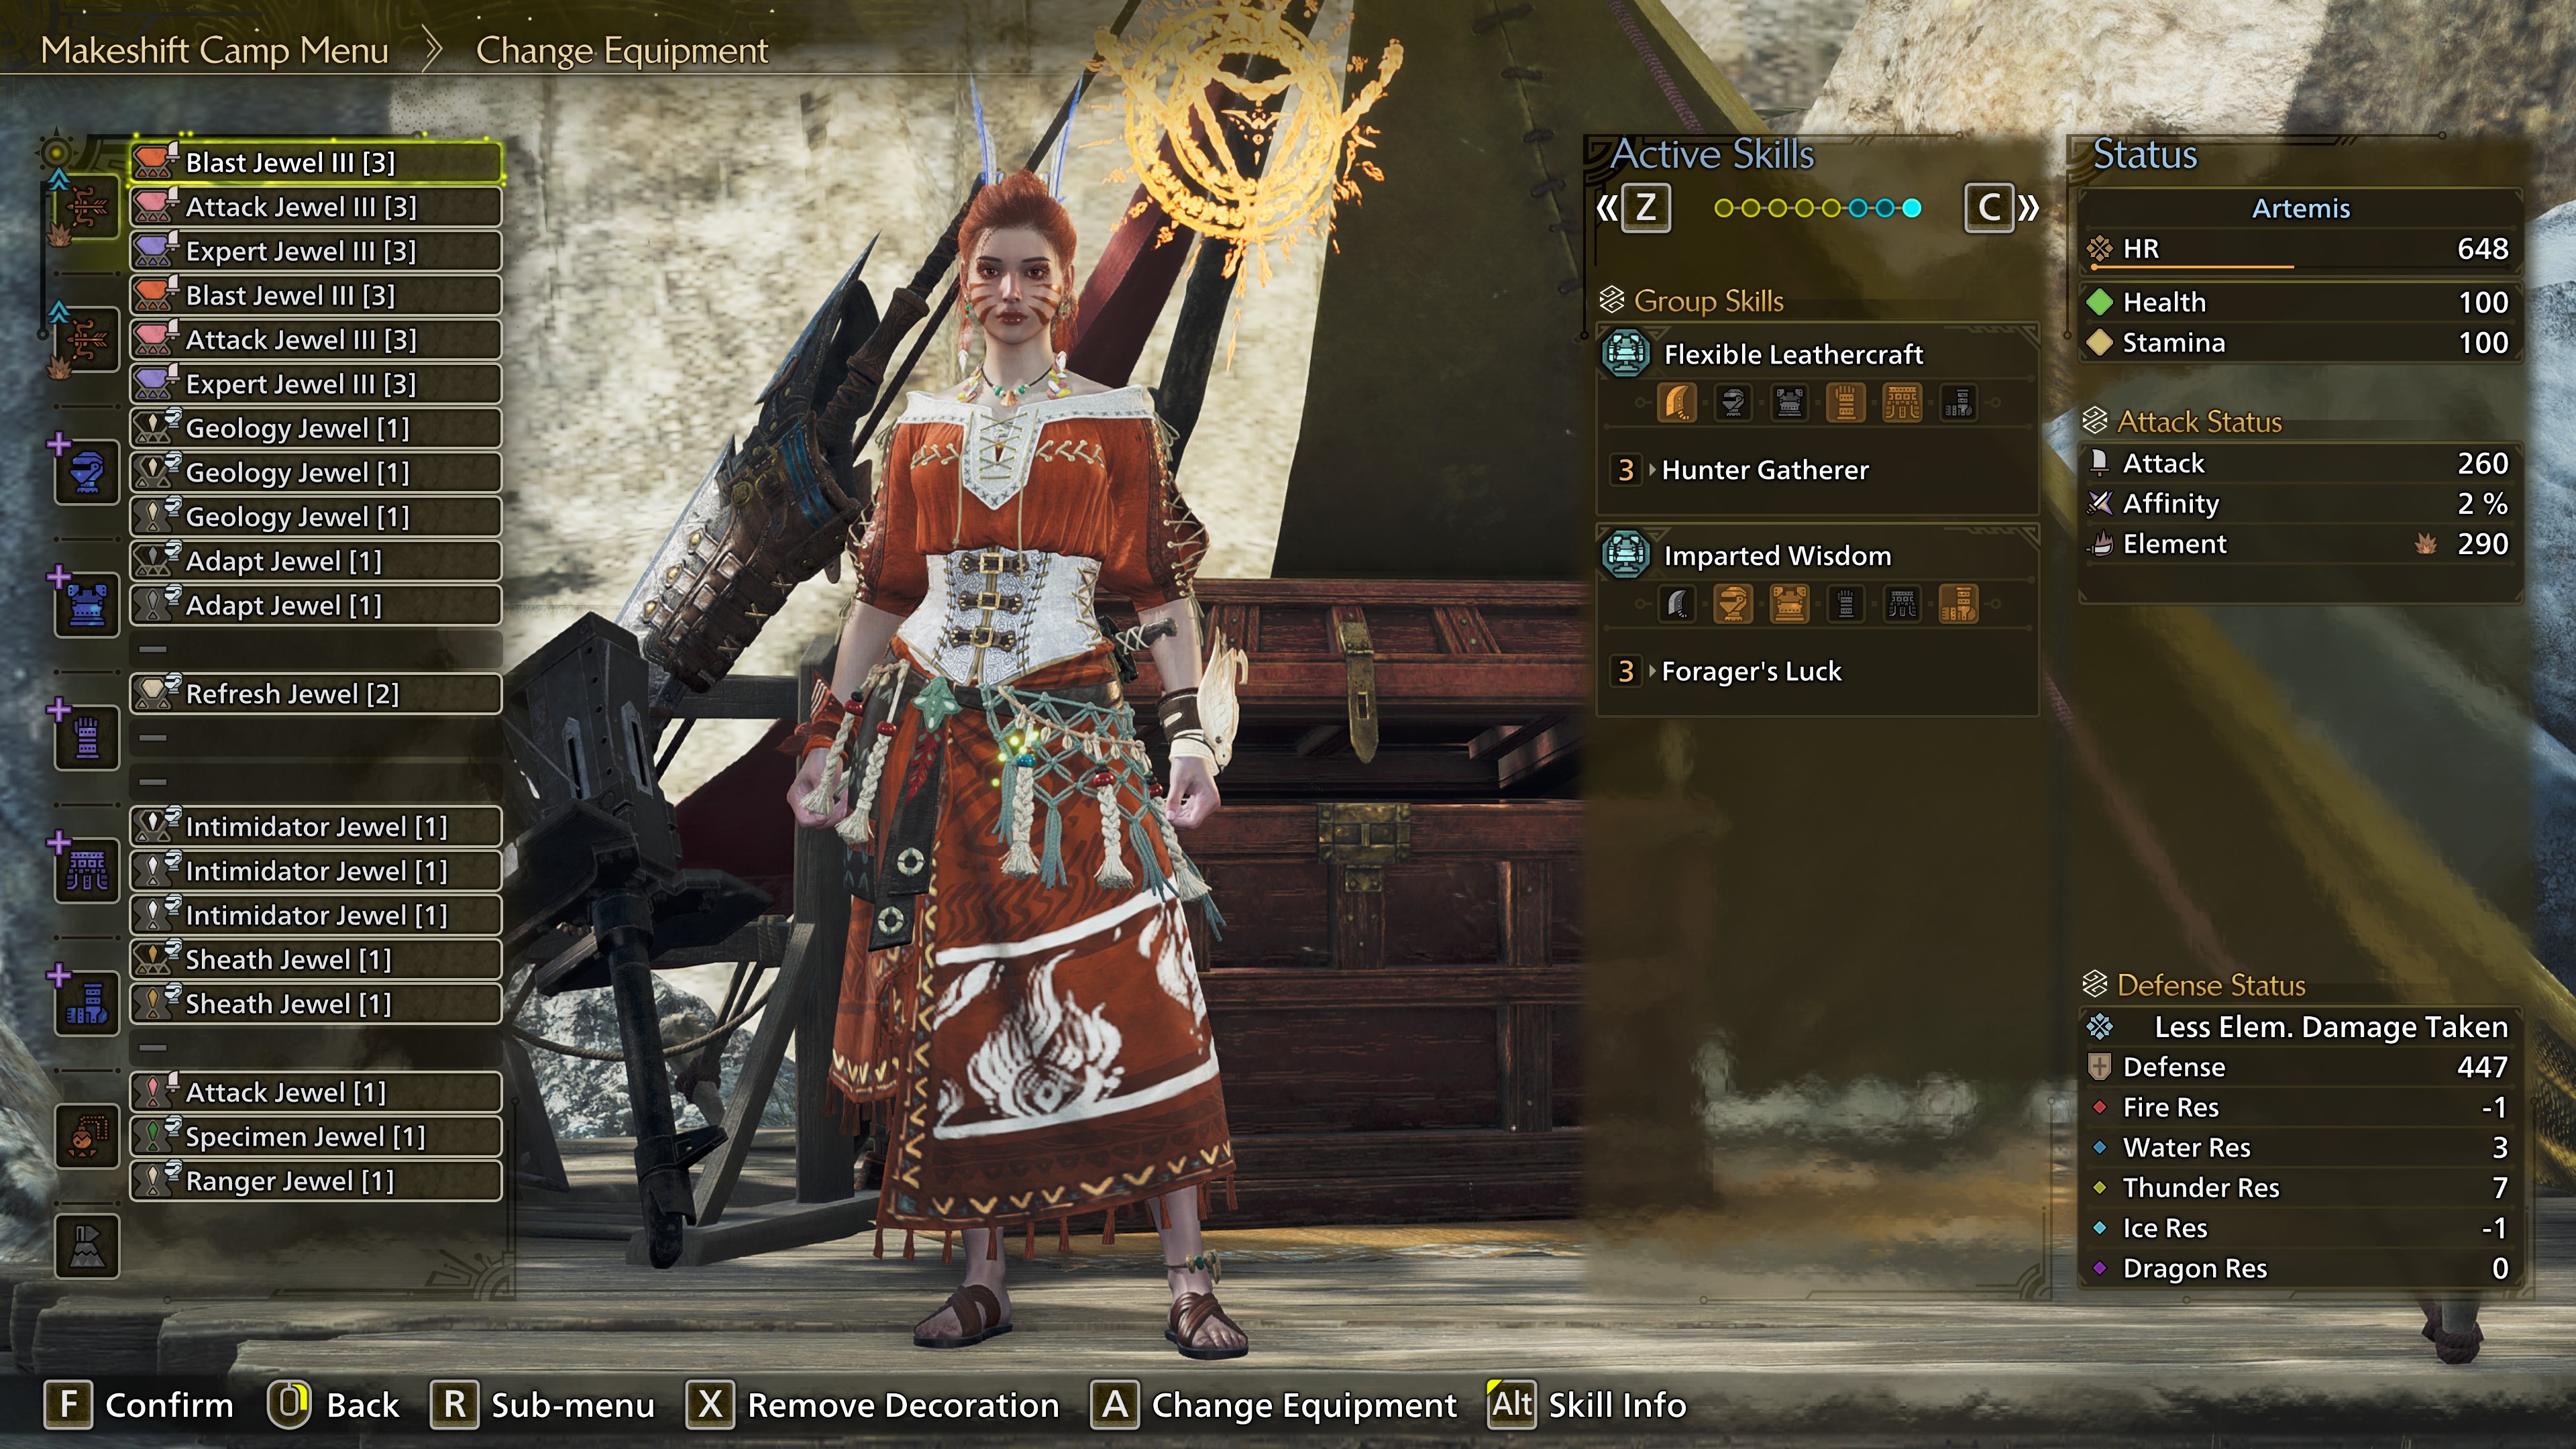
Raw attack is displayed without a coefficient.
The only thing that matters is the Group Skill, since you won't be fighting any large monsters. Ranged weapons are more useful for the flying monsters, but not essential by any means.
Yes, Blast is suboptimal. Sue me.
Aside from Constitution in the 2nd slot, it doesn't matter which of the skills you get, as you can replace decorations to get the remaining skills.
But if it does, you will get 15% affinity for 20 seconds. After which, the skill goes on cooldown for 30 seconds. You will also deal 51 thunder damage (affected by the Thunder Attack skill, but not by your weapons stats).
The Imparted Wisdom Group Skill increases the chance of finding rare nodes (indicated by sparkles around the node).
Large monsters will still ruin your day if you pick a fight with them.
Ghillie Mantle
You only need this if you somehow enter combat with a large monster.
Raw attack is displayed without a coefficient.
Gogma Weapon
Active skills- ...
- Flexible Leathercraft
The only thing that matters is the Group Skill, since you won't be fighting any large monsters. Ranged weapons are more useful for the flying monsters, but not essential by any means.
Yes, Blast is suboptimal. Sue me.
Golden Age Charm
Skills- Spread/Power Shots / Attack Boost or Critical Eye Level 3
- Constitution Level 3
- Botanist Level 2 / Intimidator, Geologist, Adaptability, or Quick Sheathe Level 1
Aside from Constitution in the 2nd slot, it doesn't matter which of the skills you get, as you can replace decorations to get the remaining skills.
Azure Bolt I
Small monsters will be dead before this Set Bonus Skill has a chance to activate.But if it does, you will get 15% affinity for 20 seconds. After which, the skill goes on cooldown for 30 seconds. You will also deal 51 thunder damage (affected by the Thunder Attack skill, but not by your weapons stats).
Hunter Gatherer & Forager's Luck
The Flexible Leathercraft Group Skill increases your gathering speed and prevents knock-backs while gathering or carving.The Imparted Wisdom Group Skill increases the chance of finding rare nodes (indicated by sparkles around the node).
Botanist Level 4 & Geologist Level 3
With both of these skills maxed, you get 1 additional item per gather, on every source.Entomologist & Outdoorsman
Two more staples for a gathering build. Thanks to Entomologist, you can carve small insects, and Outdoorsman is mostly there for fishing.Intimidator Level 3
Thanks to this skill, you won't be bothered by large monsters, even if they spot you. This completely removes the need for the Ghillie Mantle, and subsequently the Tool Specialist skill.Large monsters will still ruin your day if you pick a fight with them.
Aquatic/Oilsilt Movement Level 2 & Adaptability Level 2
With these skills, your movement, health, and stamina are never impeded by the environment.Quick Sheathe Level 2
Because we might as well grab a few levels if we have slots to fill.Stamina Skills
Which stamina skills do you mean? Yes.- Constitution level 5
- Stamina Surge level 3
- Marathon Runner level 3
- Hunger Resistance level 3
Mantles
Each mantle has its own benefits. The evasion and corrupted mantles help you deal with small monsters, the mending mantle heals chip damage, and the rocksteady mantle can serve as a panic button if you bully the large monsters.Ghillie Mantle
You only need this if you somehow enter combat with a large monster.
9.2 Pre-Buff & Support Build
I use this build to pre-buff before hunts. If you want, you can also use it as a support build. But keep in mind that a hunting horn or sword & shield are better options compared to the bow. For the pre-buff build, you only need: Free Meal, Speed Eater & Item Prolonger.
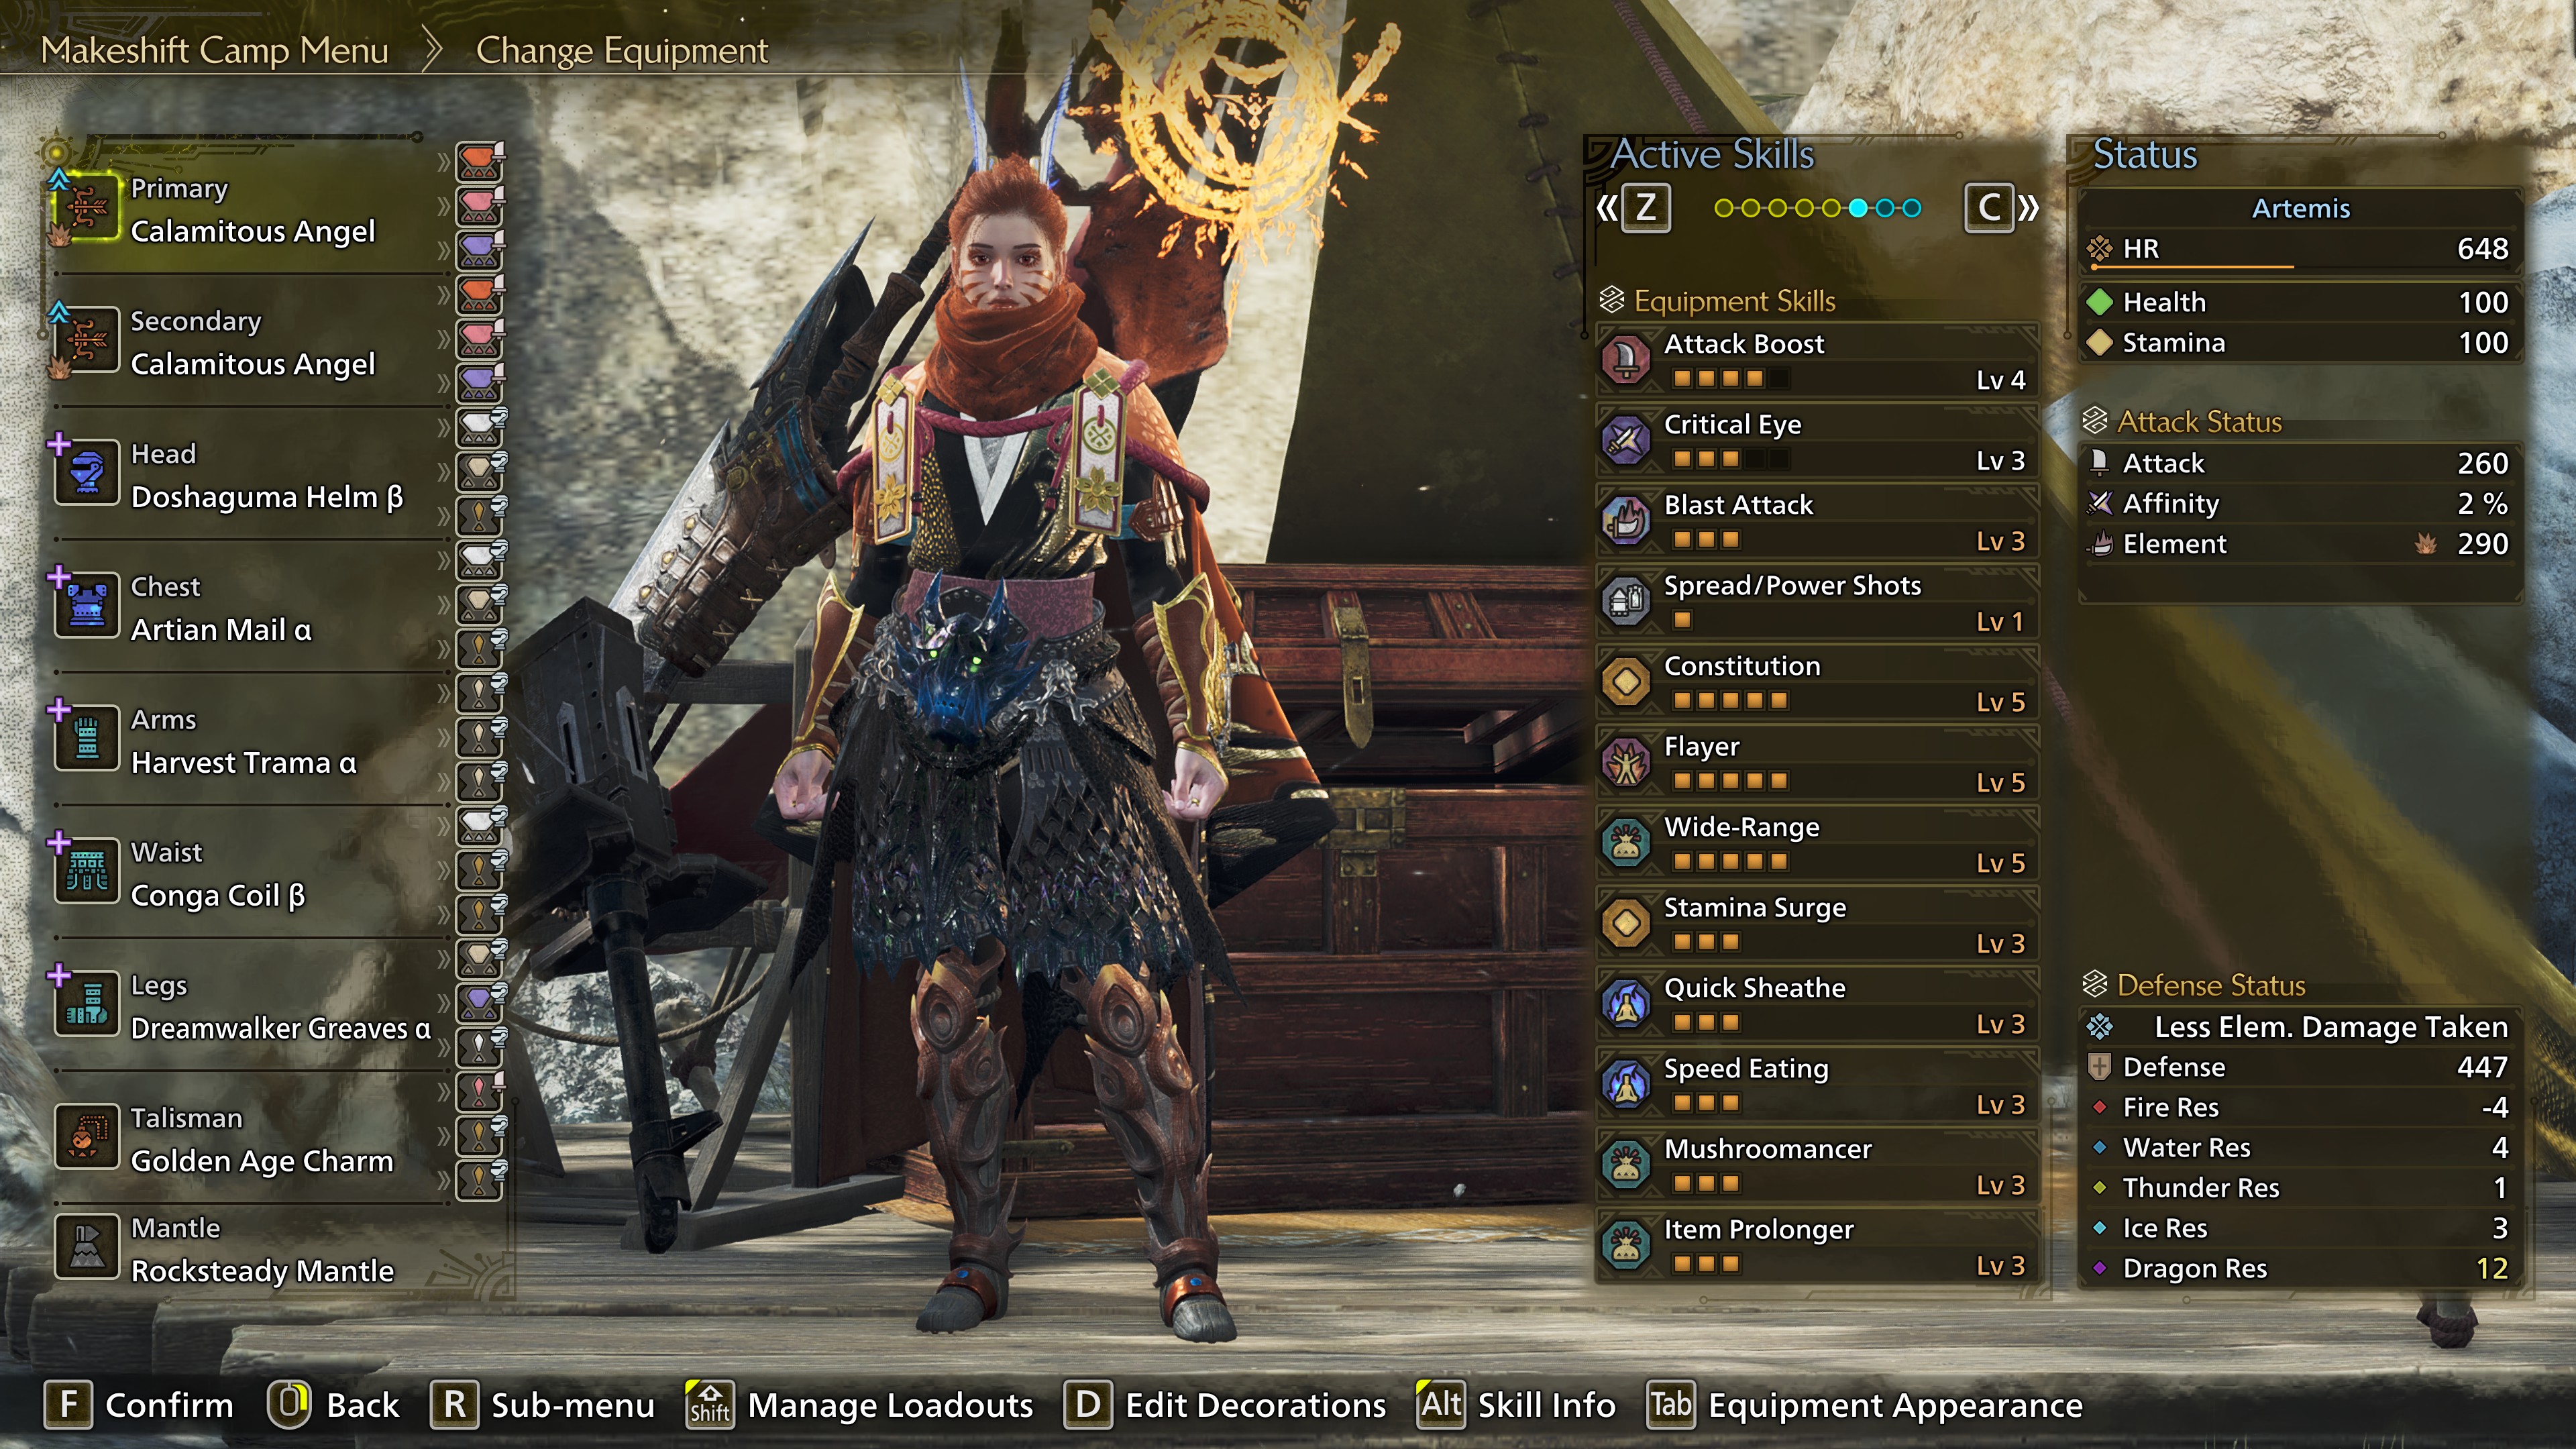
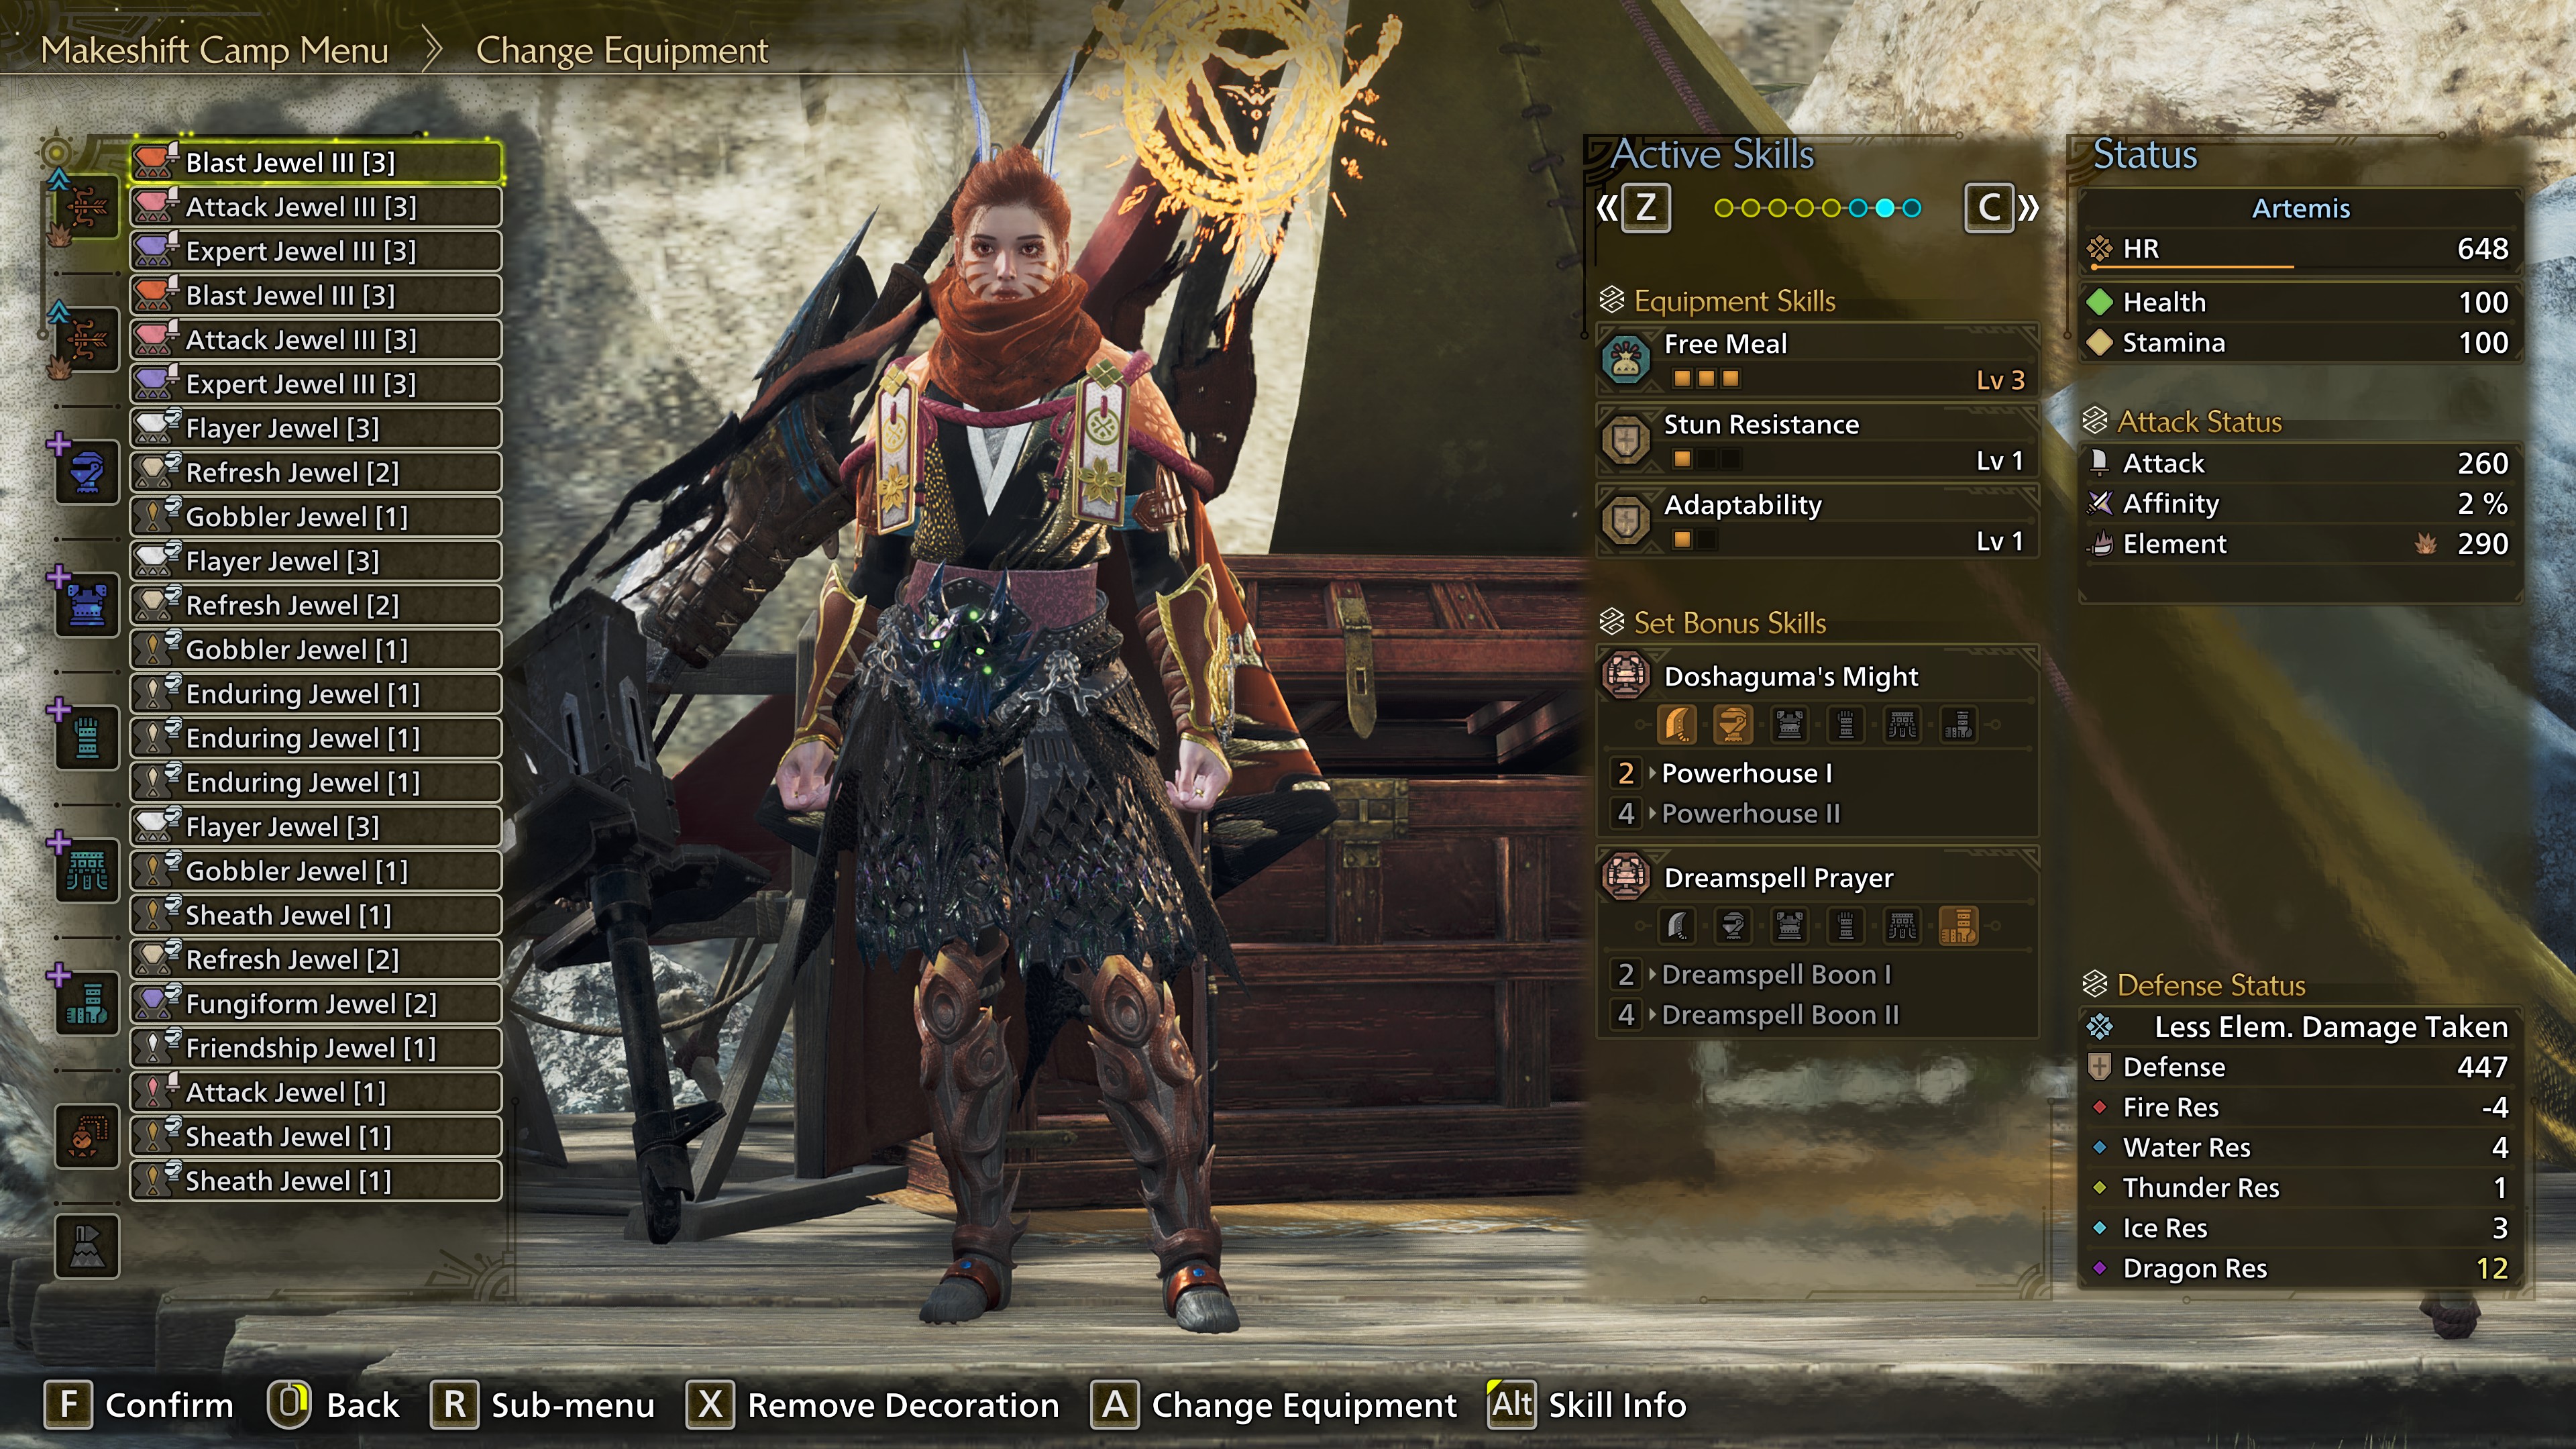

Raw attack is displayed without a coefficient.
*Powerhouse I only activates after a Power Clash or Offset, meaning it's useless for bow specifically.
**Diversion draws aggro, so opt for a different skill if you don't want that.
Yes, Blast is suboptimal. Sue me.
It's quite a specific talisman for a very niche build. Unfortunately, bow needs some min-maxing to get it going as a support role.
Keep in mind that Item Prolonger won't extend the duration of the shared buffs for your allies. They need to have the skill themselves if they want to extend the duration. The same applies to Recovery Up.
Since you get more aggro thanks to Diversion, you can replace Stamina Surge decorations with Partbreaker.
On top of that, after dealing a certain amount of damage, you will deal 400 raw damage (flat). This damage is dealt in the form of a burst, which can create additional wounds.
This mantle lasts 90 seconds and has a cooldown of 10 minutes. When it's active, damage is reduced by approximately 30%. It also makes you immune to knockbacks, roars, tremors, and stun damage.
Raw attack is displayed without a coefficient.
Gogma Weapon
Active skills- Doshaguma's Might*
- Alluring Pelt**
*Powerhouse I only activates after a Power Clash or Offset, meaning it's useless for bow specifically.
**Diversion draws aggro, so opt for a different skill if you don't want that.
Yes, Blast is suboptimal. Sue me.
Golden Age Charm
Skills- Spread/Power Shots / Charge Master or Critical Eye Level 3
- Constitution Level 3
- Wide-Range Level 2
It's quite a specific talisman for a very niche build. Unfortunately, bow needs some min-maxing to get it going as a support role.
Mandatory: Free Meal, Speed Eater & Item Prolonger Level 3
These are the only skills you need if you just want to use them as a pre-buff build. Free Meal reduces the costs, Speed Eater saves time, and Item Prolonger extends the duration of your buffs.Diversion
The Alluring Pelt Group Skill makes the monsters more likely to attack you. The idea being that you first heal/buff your allies, and then take aggro to help them to combo off uninterrupted. Do make sure you are not the one who ends up having to be supported.Wide-Range Level 5
With this skill, you can share your heals and buffs with allies. Keep in mind that Item Prolonger won't extend the duration of the shared buffs for your allies. They need to have the skill themselves if they want to extend the duration. The same applies to Recovery Up.
Mushroommancer Level 3
Mushroommancer allows you (and your allies) to gain the effect of certain items by eating mushrooms. Making efficient use of this will save you a lot of materials in the long run, since mushrooms are very easy to farm.Quick Sheathe Level 3
This skill is primarily here to get your heals out faster.Constitution Level 5 & Stamina Surge Level 3
These skills max out your stamina reduction and stamina recovery.Since you get more aggro thanks to Diversion, you can replace Stamina Surge decorations with Partbreaker.
Adaptability Level 1
This skill removes the need for hot and cold potions.Stun Resistance Level 1
You will recover 30% faster from stuns. Not that useful, but it comes with the armor.Flayer Level 5
Every time you attack a large monster, Flayer will provide a 50% chance to reduce the number of attacks needed to create a wound.On top of that, after dealing a certain amount of damage, you will deal 400 raw damage (flat). This damage is dealt in the form of a burst, which can create additional wounds.
Optional: Weakness Exploit, Burst, Adrenaline Rush & Agitator
If you want more damage, you can replace up to 3 Flayer Jewels with the go-to bow skills. Keep in mind that this also lowers the amount of flat damage you deal with Flayer.Mantles
Rocksteady MantleThis mantle lasts 90 seconds and has a cooldown of 10 minutes. When it's active, damage is reduced by approximately 30%. It also makes you immune to knockbacks, roars, tremors, and stun damage.
Skill Issues
Some skills seem like obvious choices, but don't quite work as expected. This explains why you might have missed them on certain builds.
Blacklist
The following skills don't work properly, at least for the bow:- Piercing Shots doesn't work on Pierce Coatings. Those coatings require the Spread jewel.
Other Sources
I get my information from many different places. Below, I will list the most important ones.
Content Creators
- Tidus69: He is a very competent speedrunner and can craft some very solid builds. Given his background, his builds tend to be focused on the meta and less on quality of life.
- SDShepard: This guy bullies the training dummy every time he sees a skill description without exact values. It's largely thanks to him that we know how effective (or useless) skills are.
Motion and Hitzone Values
- Motion Values[docs.google.com] (outdated)
- Hitzone Values[mhwilds.kiranico.com]
Different Bow Guide
I found this guide[docs.google.com] very useful when I needed to compare my findings to the consensus. It speaks for itself that there is a lot of overlap, but don't just take my words for it.
Change Log (1/2)
Below, I will list all the noteworthy changes I've made.
10-03
18-03
25-03
31-03
07-04
09-04
11-04
15-04
04-07
19-08
09-10
28-10
22-12
24-12
Ongoing Changes
None.Launch - March 2025
09-03- While tracer arrows are quite useful in low rank, they become disruptive once you get your stamina skills up and running in high rank. I rewrote that part to reflect this.
- I added my 2 cents about how effective each special move is. I separated the loop into a low rank loop (with very few stamina skills) and a high rank loop (with maxed stamina skills).
10-03
- Focus Strike: Hailstorm can now lock on to 4 targets in total. Edited the description for that move.
18-03
- I summarized all the possible ways to cap out your stamina reduction.
- I elaborated on the most useful coatings.
- I added a new section that delves deeper into raw and elemental attack for bows.
- Since more precise values are known regarding damage increases, I specified them wherever possible.
- I slightly optimized the progression builds for low rank through high rank. I put less focus on elemental attack and shifted the builds more towards raw damage.
- I replaced the end-game builds with optimized versions that focus more on raw damage.
- I put the information about optimal bows, as well as skills that don't work properly, into separate sections.
25-03
- Added a Convert Element and Buffing Build since I find them moderately useful.
- I slightly optimized my item loadout, given that I now use a Buffing Build.
31-03
- I updated the recommended meal choices.
Title Update 1 - April 2025
Title Update 1 came with 3 changes to be aware of:- Dragon Piercer has been nerfed (lower tick rate), and Thousand Dragons has been buffed (increased motion value to 23). This changes nothing. Dragon Piercer is still good, and Thousand Dragons is still useless.
- Power Volley's elemental modifier was increased by 0.1, but you should still prioritize raw damage regardless.
- The Corrupted Mantle was nerfed (now provides +10% affinity & +4.5 % raw attack). The Evasion Mantle can outperform the Corrupted Mantle, but only during solo hunts.
07-04
- High Rank armor got extra defense levels, so I uploaded new screenshots of the same builds with a slightly higher defense stat.
- The Corrupted Mantle has been nerfed, so I added the new values to the relevant builds. Also mentioned the Evasion Mantle as a solo alternative.
- Charge Master now works on Power Shot/Volley, so I corrected this in the section Skill Issues.
- The gathering hub added a canteen, so I added the related feasts.
- The upgraded Convert Charm allows for an optimized version of the Convert Element build. I added that one below the original one, since both have their uses. I also optimized the bow decorations for this build.
09-04
- The original build didn't change, but I renamed it to 4x Gore Build. The new Zoa Shia set allows for slightly more damage for slightly less stamina recovery, aka the 2x Gore Build. Both are viable; you can pick whichever one you prefer.
- I removed the Dragon Piercer build since the 2x Gore build can serve as a Dragon Piercer build with very few adjustments. I went over those in that section.
- Since every build uses the same bow decorations, I moved that information to 'Optimal Bows & Matchups'. To avoid repetition, I simply refer to the correct section whenever relevant.
- I made small changes across all sections to remove any inconsistencies and outdated information.
11-04
- Added an off-meta build that focuses more on defensive skills while still retaining respectable damage output.
15-04
- The new glasses and upgraded Fitness Charm are useful upgrades for the Gathering build, making it more suitable to kill small critters with a bow. I updated the build with Forager's Luck and added one with Hunter Gatherer.
- With the new armor sets, it's possible to create a Buffing build that can be taken into combat as well. Albeit with horrendous damage output. I updated that build accordingly.
Title Update 2 - June 2025
Title Update 2 came with zero noteworthy buffs or debuffs for the bow, but the new armor and weapons spice things up.04-07
- I replaced the comfy build with a more defensive Guts build, primarily to survive the toughest
quests. - I removed the 2x & 4x Gore builds and replaced them with the current meta DPS build.
- I updated the optimal bows and matchups, since thunder damage is relevant now.
Talisman Update - August 2025
The optimal RNG talismans allow us to cram in a bit more offense into the builds, but don't change the foundation of most bow builds. Furthermore, all weapons, except the bow, got some attention.19-08
- Updated all the late-game builds with optimized talismans and made a small optimization to the Convert Element build.
Title Update 3 - September 2025
The new Omega set skill provides a slightly higher damage output compared to the old builds, but only works in multiplayer. Aside from that, the bow is still consistently being ignored when it comes to weapon changes.09-10
- I updated the item loadouts and radial menus.
- I deleted outdated builds and structured the remaining ones in subsections.
- Updated the late-game builds and updated the optimal bow matchups and decorations.
28-10
- All the end-game builds, as well as the gathering and support builds, got improvements. I updated all of them.
Title Update 4 - December 2025
After nerfing the Dragon Piercer playstyle, Capcom finally remembered that the bow exists. It got the following buffs:- Almost every attack got 1 additional motion value and a higher elemental modifier. On average, the bow deals 12% more damage with these buffs (not taking the new gear into account).
- Power Coatings deal 5% more damage (35% total), but they are also tied to the Affinity focus for the Gogma Artian Bows. Since that is the worst one out of the 3, Power Coatings are now even less optimal than before the update.
- Pierce Coatings are tied to the Elemental focus, and they get more mileage out of the buffs (comparatively speaking). On paper, this makes Pierce Coatings viable. In practice, it only works if you can get 3-4 extra piercing ticks, and if they all hit a weak spot.
- Close-Range Coatings received no changes, and are tied to the Attack focus. They remain the most consistent option.
- Coatings reload slightly faster.
- Your input for equipping a tracer arrow is no longer ignored while in the middle of a Discerning Dodge. The animation time itself didn't change.
- A lot more bow attacks benefit from extra damage skills, whereas previously only the basic charge shots did.
22-12
- Updated the section about elemental vs. raw damage, since bows are a lot more element-focused thanks to the buffs.
- Added a section about upgrading the Artian Bows to the new Gogma Artian Bows.
24-12
- I updated the DPS, Guts, Gathering, and Support Builds. All got significant upgrades thanks to the new TU4 gear.
Change Log (2/2)
2026
03-03
- Updated the optimal decorations for the Gogma Artian Bows.
- Updated the DPS build.
- Updated the Guts build.
- Updated the Convert Element build.