Screenshot Guide - It Takes Two
 Rachel
Nov 2, 2025 @ 6:50am1546
Game ModesModding or ConfigurationSecretsEnglish
 An important stage
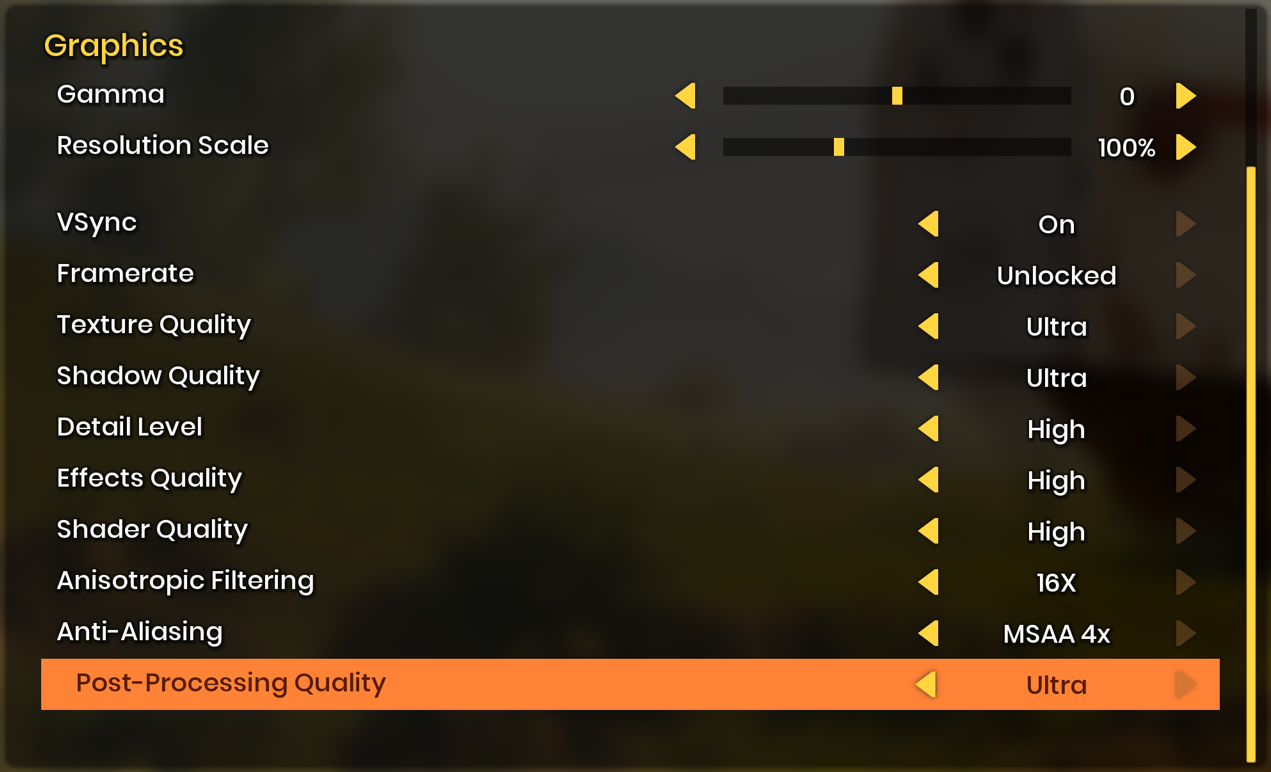
To begin with, it is recommended to set up the game, change the graphics settings to make the picture better.


| Dynamic Super Resolution

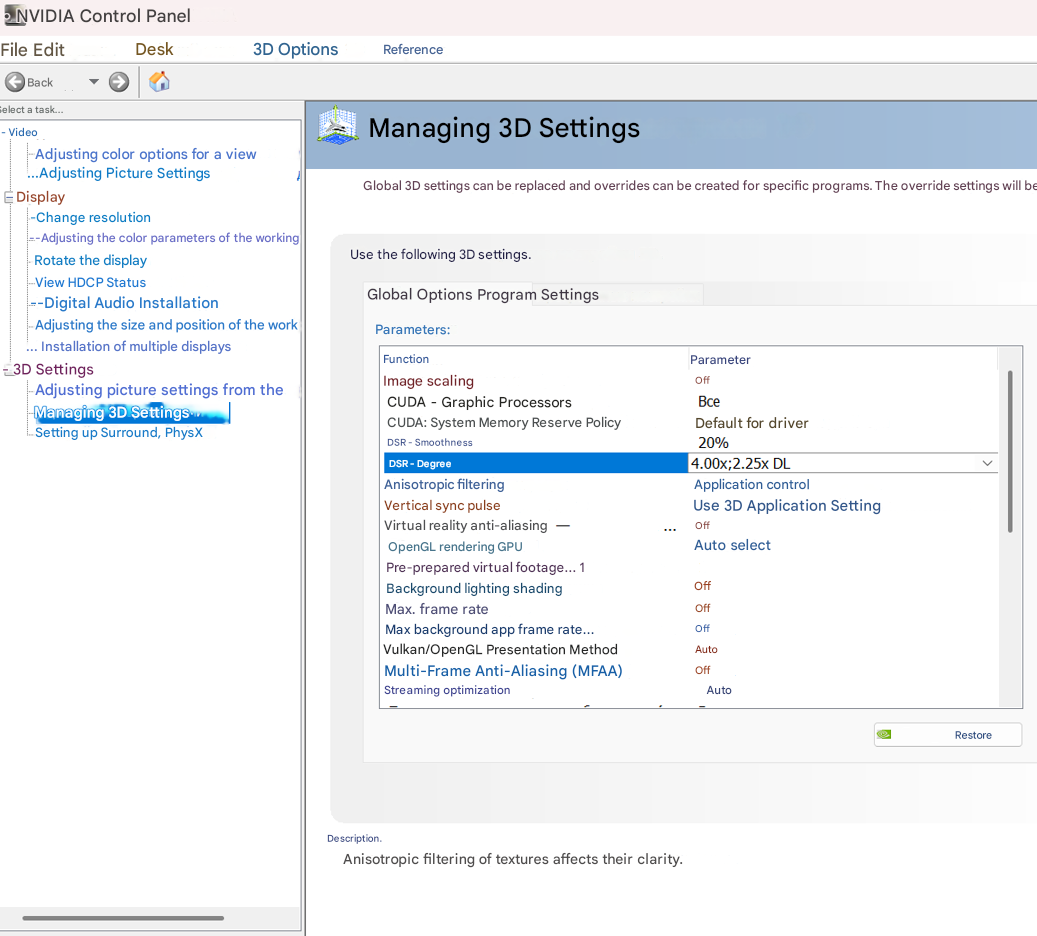 It is important to change the screen resolution to achieve maximum detail. Often it is enough to increase the resolution to 4K, but not everyone has access to such a configuration and to fix this, we use the NVIDIA panel - the DSR function. DSR-degree is the level of increase in the DSR (Dynamic Super Resolution) resolution relative to the original. That is, you can choose how many times to increase the resolution (for example, 2.00x, 2.25x, 3.00x, and so on). This allows you to get 4K quality on a monitor with a resolution of 1920 by 1080.
 Camera tools
The most important thing is the freedom to make your screenshot unique. And that's where the Noclip tool comes in.


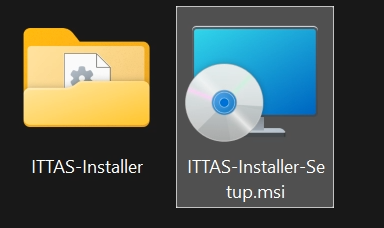

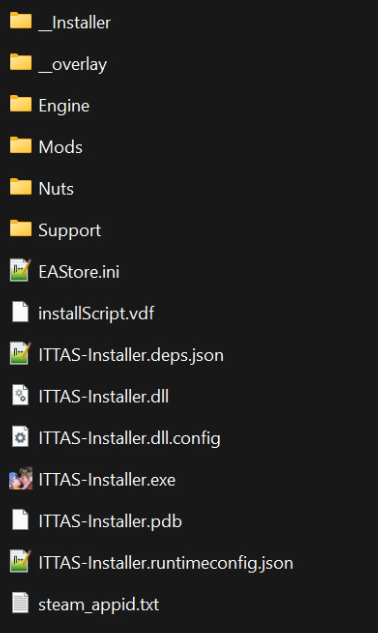
The second step is to copy all the files from the “ITTAS-Installer” folder and paste them, replacing the existing files, into the folder where the “Installer-Setup” program was installed, i.e. C:\Program Files (x86)\Steam\steamapps\common\ItTakesTwo.
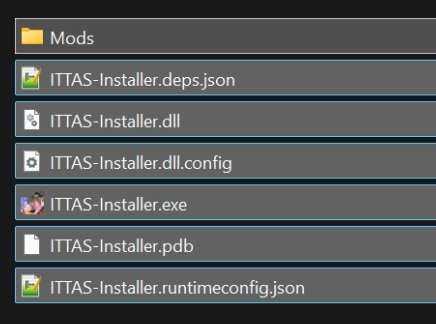
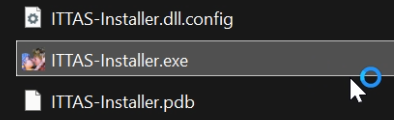
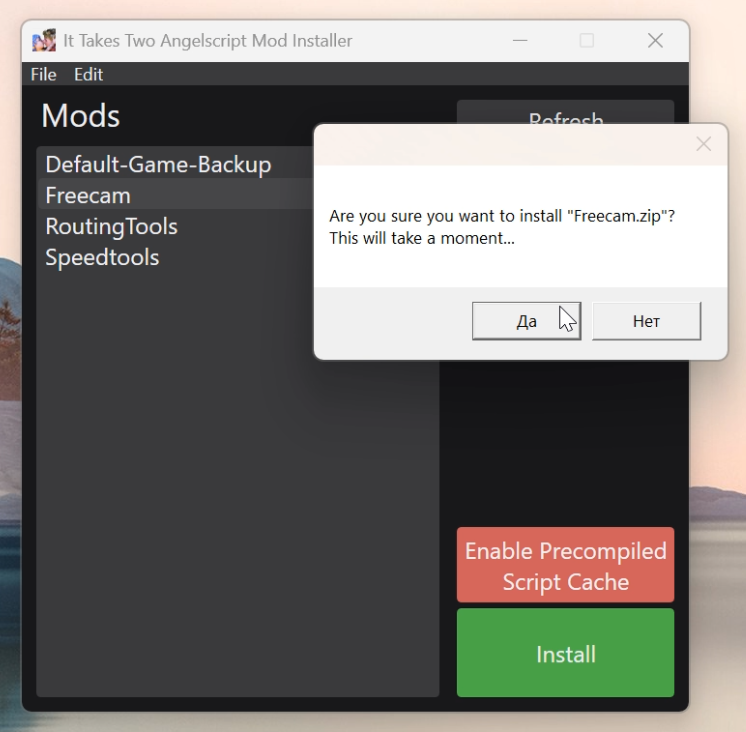
Now you can run the “ITTAS-Installer.exe” program from the It Takes Two root folder. In the menu that appears, select the “Freecamera” mod and click install, then confirm everything.
Before starting the game, in the final stage, you need to change the game launch parameters: Go to Steam, select the game It Takes Two, right-click - properties, general - launch options and write: -devmenu


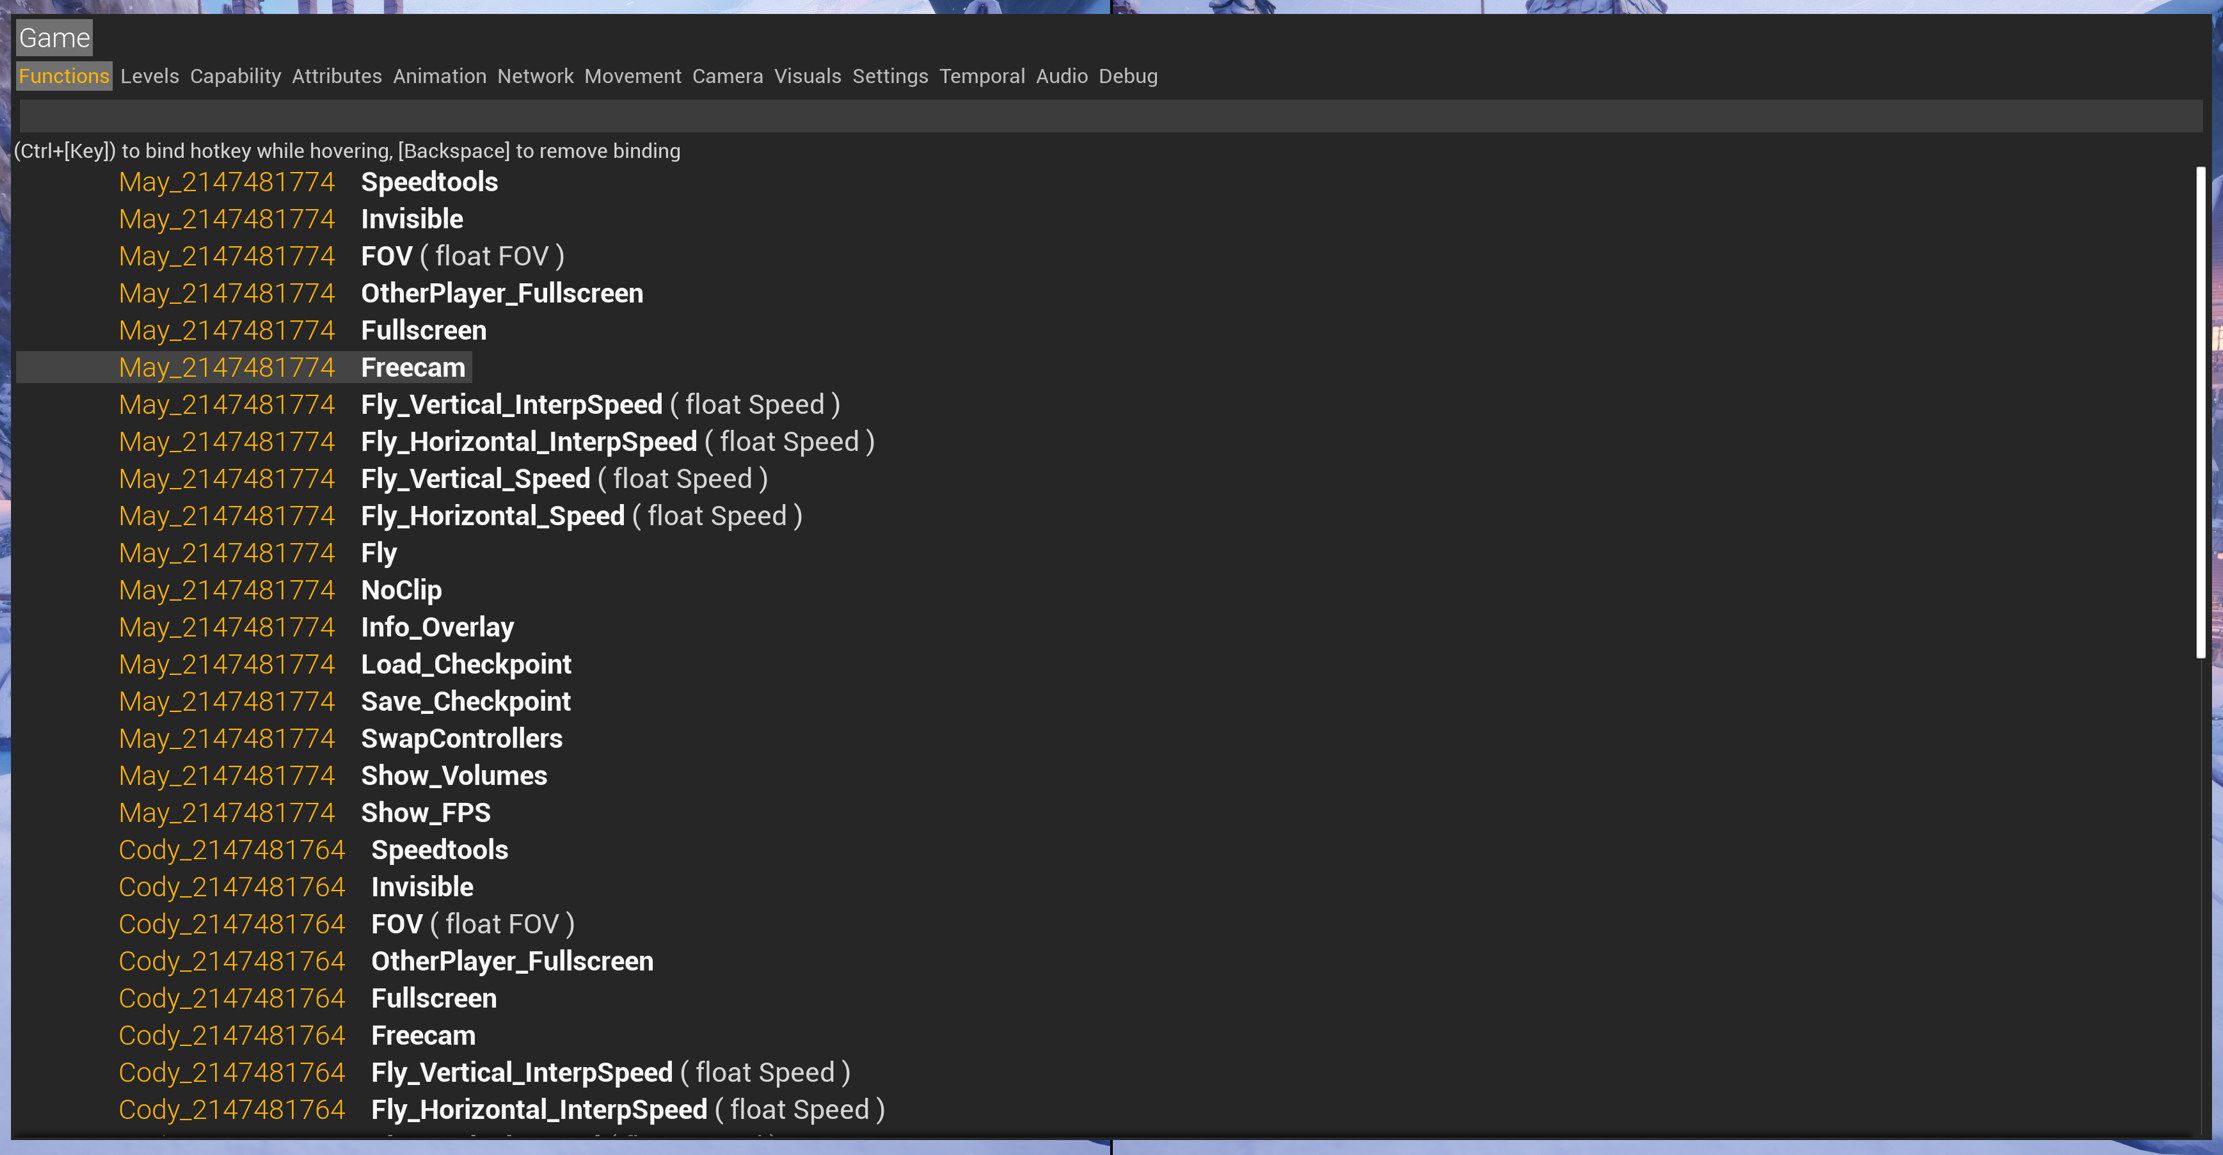 To take full advantage of the menu, load any save file and start the game, for example, on a local network (you will need two gamepads). Now that two characters have appeared on separate screens, you can activate the menu by pressing Esc. In general, the game camera is tied to the characters, which means there are two cameras - one for Cody and one for Mai. The Freecamera parameter enables no-clip mode and hides the character from view. Although these parameters can be enabled separately from the menu, it is easier to use just one - freecamera, which will be sufficient.
Basic controls.


Universal Unreal Engine 4 Unlocker does not function; it can be used, but only to pause and hide the HUD.
- Download the mod from the following sources:✅Google Drive[drive.google.com]
The author of the original mod:github[github.com] - Installation:
The second step is to copy all the files from the “ITTAS-Installer” folder and paste them, replacing the existing files, into the folder where the “Installer-Setup” program was installed, i.e. C:\Program Files (x86)\Steam\steamapps\common\ItTakesTwo.
Now you can run the “ITTAS-Installer.exe” program from the It Takes Two root folder. In the menu that appears, select the “Freecamera” mod and click install, then confirm everything.
Before starting the game, in the final stage, you need to change the game launch parameters: Go to Steam, select the game It Takes Two, right-click - properties, general - launch options and write: -devmenu
- Launch and control:
To take full advantage of the menu, load any save file and start the game, for example, on a local network (you will need two gamepads). Now that two characters have appeared on separate screens, you can activate the menu by pressing Esc. In general, the game camera is tied to the characters, which means there are two cameras - one for Cody and one for Mai. The Freecamera parameter enables no-clip mode and hides the character from view. Although these parameters can be enabled separately from the menu, it is easier to use just one - freecamera, which will be sufficient.Basic controls.Feature
Key
Freecam
May/Cody
Move the camera forward/left/backward/right
W/A/S/D - UpArrow/LeftArrow/DownArrow/RightArrow
Move the camera upwards
Space
Move the camera downwards
LeftControl
Change freecam orientation
Mouse
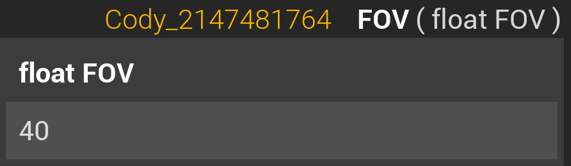
Reset FOV
Parameter in the menu, values from 0 to 100, depending on the character
Pause
Numpad . - UUU4 unlocker will help; the camera does not work when paused
Freeze NPC animations
Numpad 0 - UUU4 unlocker will help; the camera does not work when paused
Frameskip
PageDown
HUD Toggle
Delete - Need the UUU4 or Reshade mod
Universal Unreal Engine 4 Unlocker does not function; it can be used, but only to pause and hide the HUD.
HUD - Reshade mod
To get started, you'll need to download an archive with the pre-made files—specifically, the ShaderToggler HUD add-on and its underlying platform, Reshade. This is the best option, as you can further customize the settings if needed. Everything is in one archive.

The author of the original mod:Reshade[reshade.me] and ShaderToggler[github.com]
C:\Program Files (x86)\Steam\steamapps\common\ItTakesTwo\Nuts\Binaries\Win64
Where is the exe file.
✅UUU4[drive.google.com]
The author of the original mod:Official source[www.patreon.com]
(First launch the game, then launch IGCSClient.exe, select the game's exe file - ItTakesTwo.exe - from the menu, inject, then refer to the table above for control instructions).
- Download the mod from the following sources:
The author of the original mod:Reshade[reshade.me] and ShaderToggler[github.com]
- Installation:
C:\Program Files (x86)\Steam\steamapps\common\ItTakesTwo\Nuts\Binaries\Win64
Where is the exe file.
- Injector start and control:
- Universal Unreal Engine 4 Unlocker
✅UUU4[drive.google.com]
The author of the original mod:Official source[www.patreon.com]
(First launch the game, then launch IGCSClient.exe, select the game's exe file - ItTakesTwo.exe - from the menu, inject, then refer to the table above for control instructions).
| Additional features of Reshade
ReShade is a versatile tool for changing post-processing effects in games. It allows you to adjust color saturation, contrast, depth of field, film grain, and other aspects of game graphics. However, you can experiment with this for a long time.

 Reshade has a variety of effects, which you can learn more about here:Reshade[reshade.me]
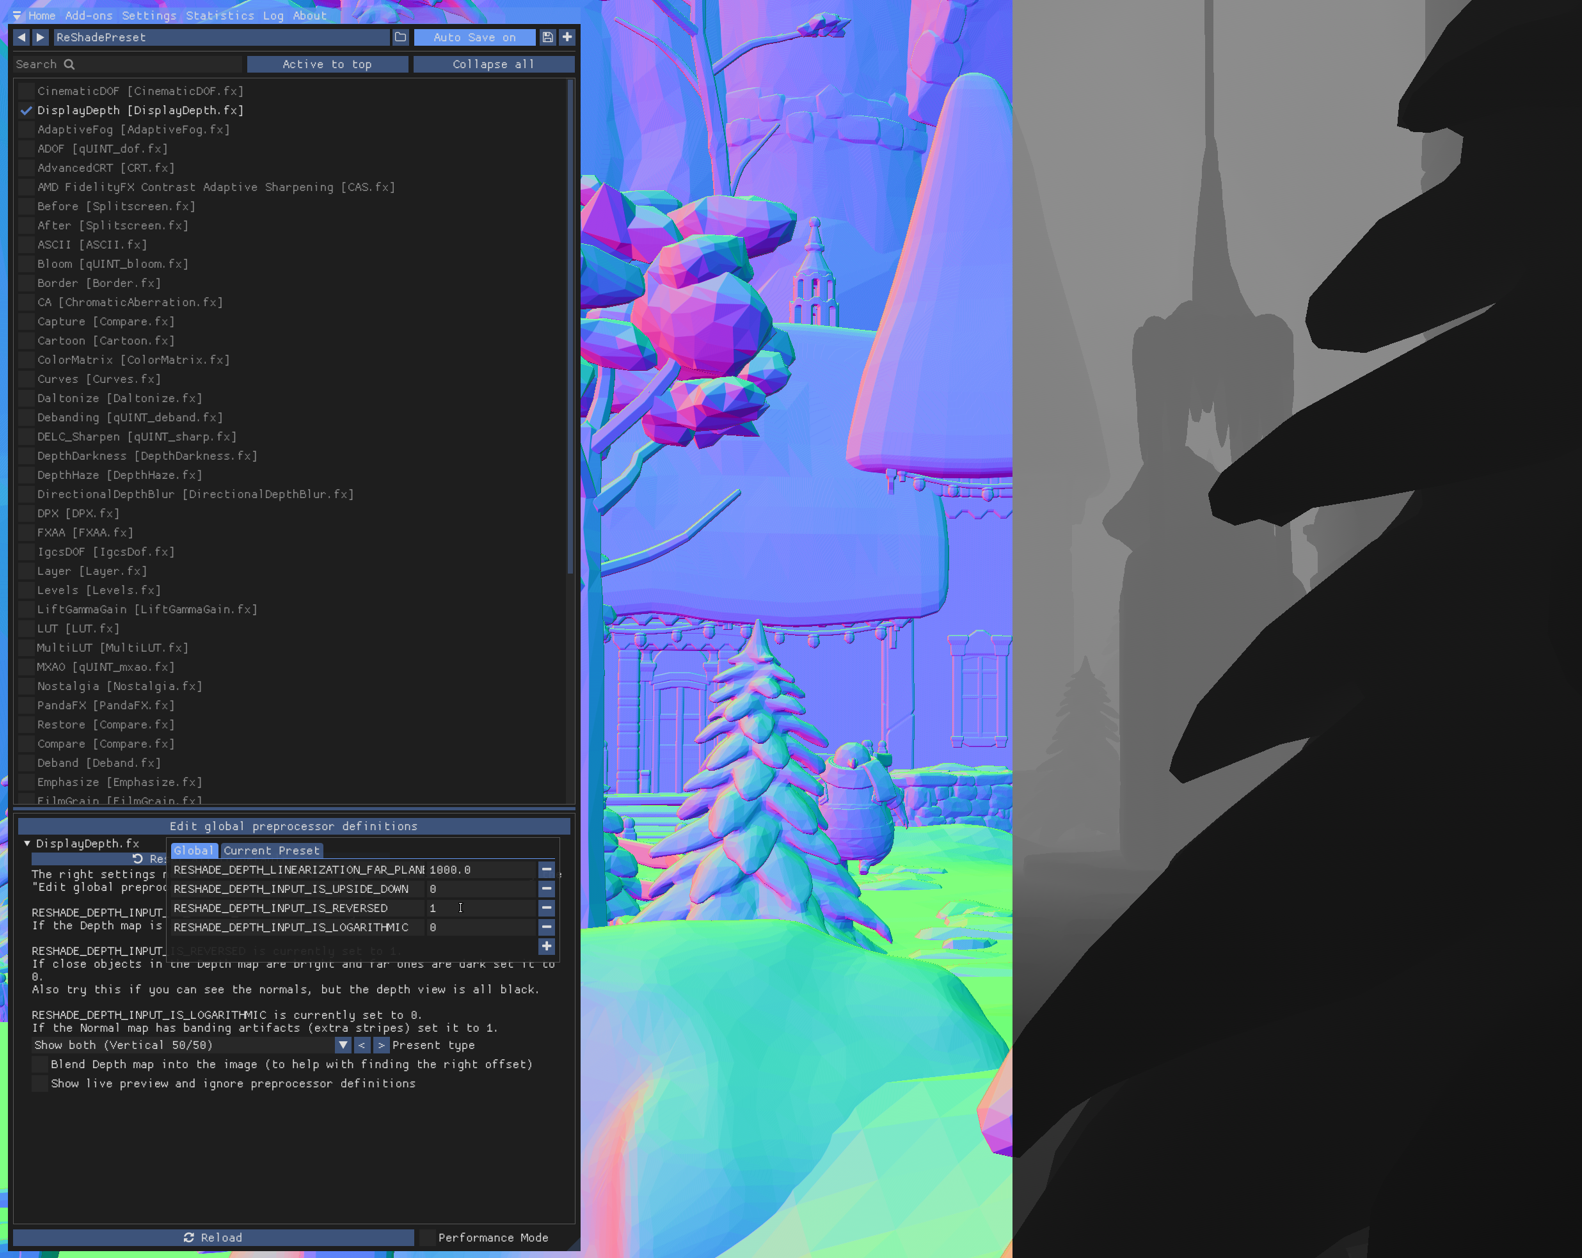
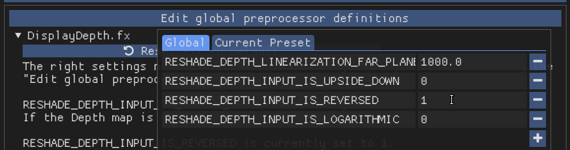
- DisplayDepth
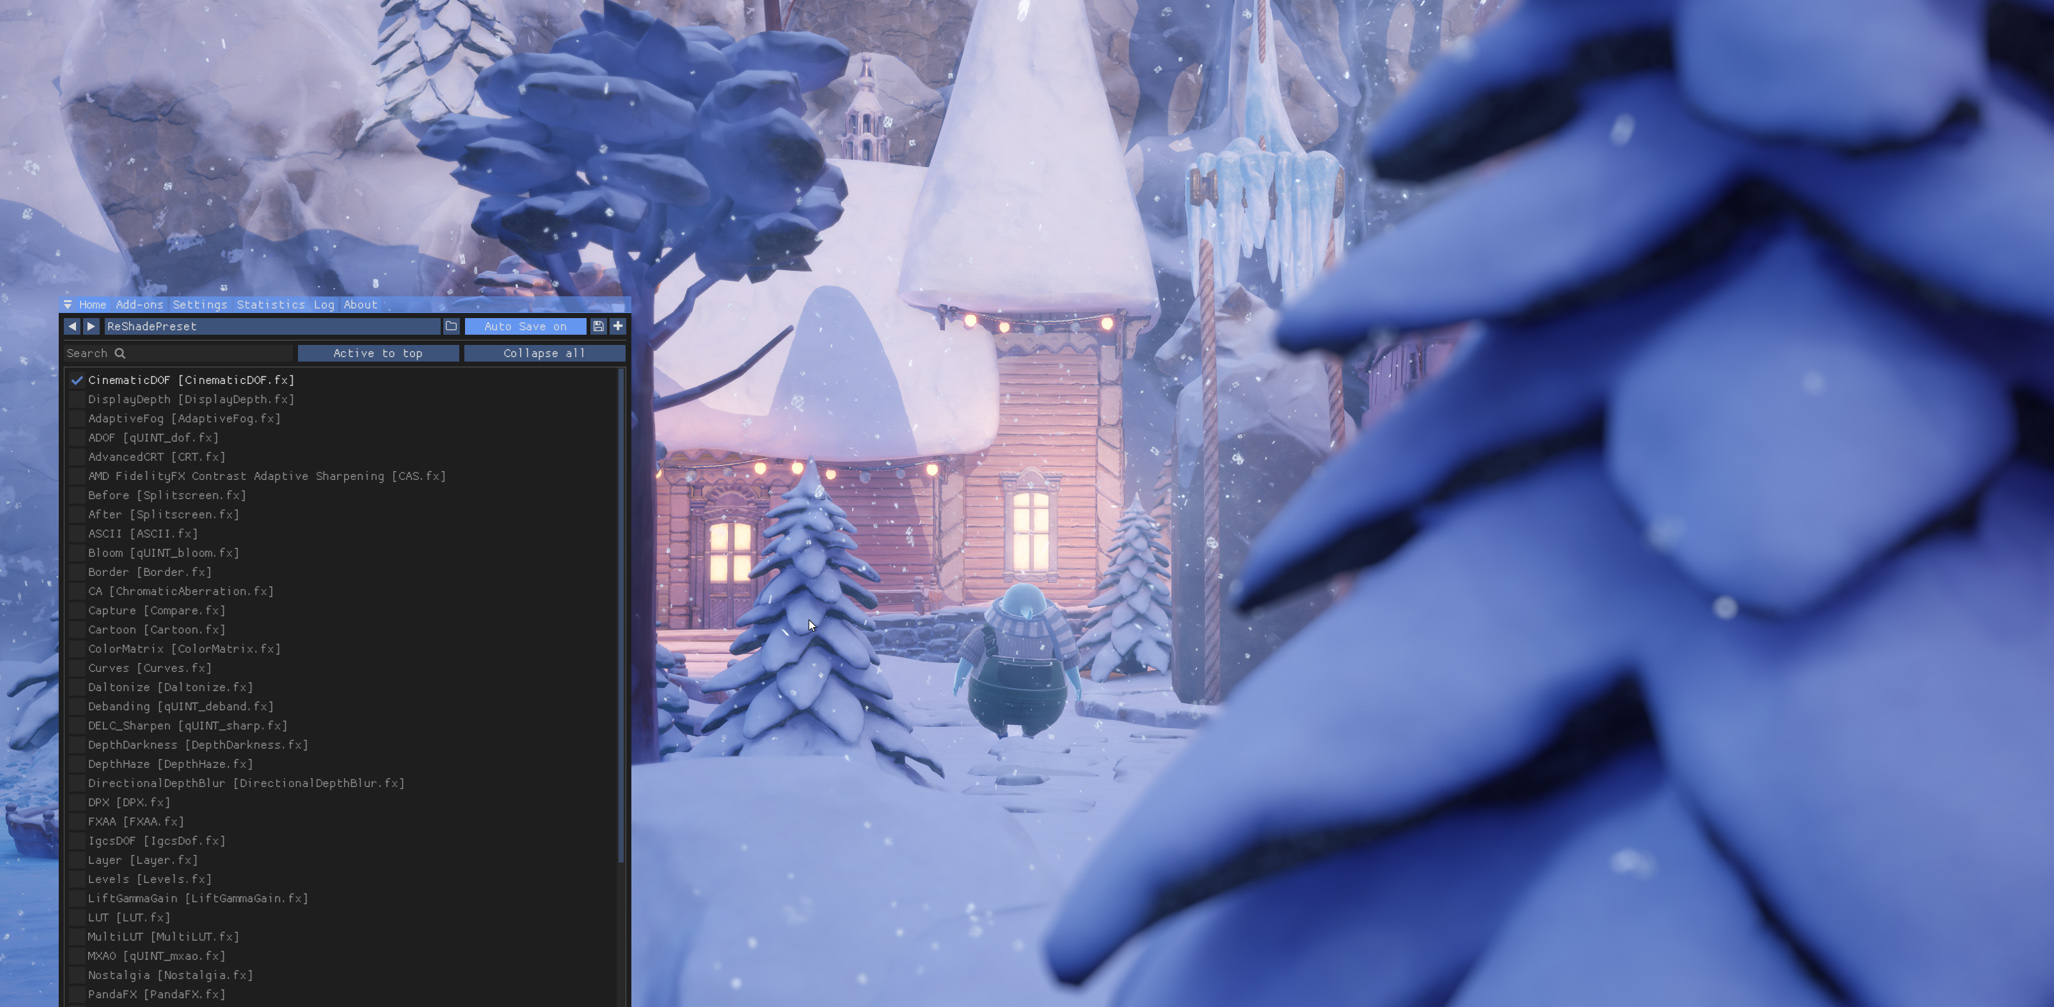
- CinematicDOF - Depth of Field
Reshade has a variety of effects, which you can learn more about here:Reshade[reshade.me]
| Other editors
- Image Composite Editor
- Topaz Gigapixel AI
- Adobe Photoshop
Samples of works
All the tools in this tutorial were used for these screenshots.
https://steamcommunity.com/sharedfiles/filedetails/?id=3599132658
https://steamcommunity.com/sharedfiles/filedetails/?id=3597712159
https://steamcommunity.com/sharedfiles/filedetails/?id=3598345165
See more guides

https://steamcommunity.com/sharedfiles/filedetails/?id=3599132658
https://steamcommunity.com/sharedfiles/filedetails/?id=3597712159
https://steamcommunity.com/sharedfiles/filedetails/?id=3598345165
See more guides