Resident Evil Requiem All Achievements Guide
 Flame
Flame(223 ratings)
Mar 6 @ 6:13am11,990548
AchievementsCharactersLootSecretsEnglish
Intro
Welcome to my Resident Evil Requiem all achievement guide.
Difficulty level of achievements: Medium
Total achievements: 49
Estimated time to complete all achievements: 30 ~ 40 hours
Missable Achievements: Yes, aside from the story-related achievements, technically most of them are missable.
Required DLCs for 100% achievements: no DLC at moment.
This guide is not a walkthrough. Each achievement is explained individually.

Déjà vu
 Story-related, you will get it as you progress through the Main Story.
Descent Into Darkness
 Story-related, you will get it as you progress through the Main Story.
It's Been a Long Night
 Story-related, you will get it as you progress through the Main Story.
A Harsh Reality
 Story-related, you will get it as you progress through the Main Story.
Going Down?
 Story-related, you will get it as you progress through the Main Story.
The Hero Returns
 Story-related, you will get it as you progress through the Main Story.
I Remember That, Too
 Story-related, you will get it as you progress through the Main Story.
Umbrella's Legacy
 Story-related, you will get it as you progress through the Main Story.
The Final Mission
 Story-related, you will get it as you progress through the Main Story.
Hope and Requiem
 At the end of the game, there will be a moment where you need to make a choice. Choose "Release Elpis" to get this achievement.

Out of Sight, Out of Mind
 Store any item in an Item Box inside a Safe Room to obtain it.
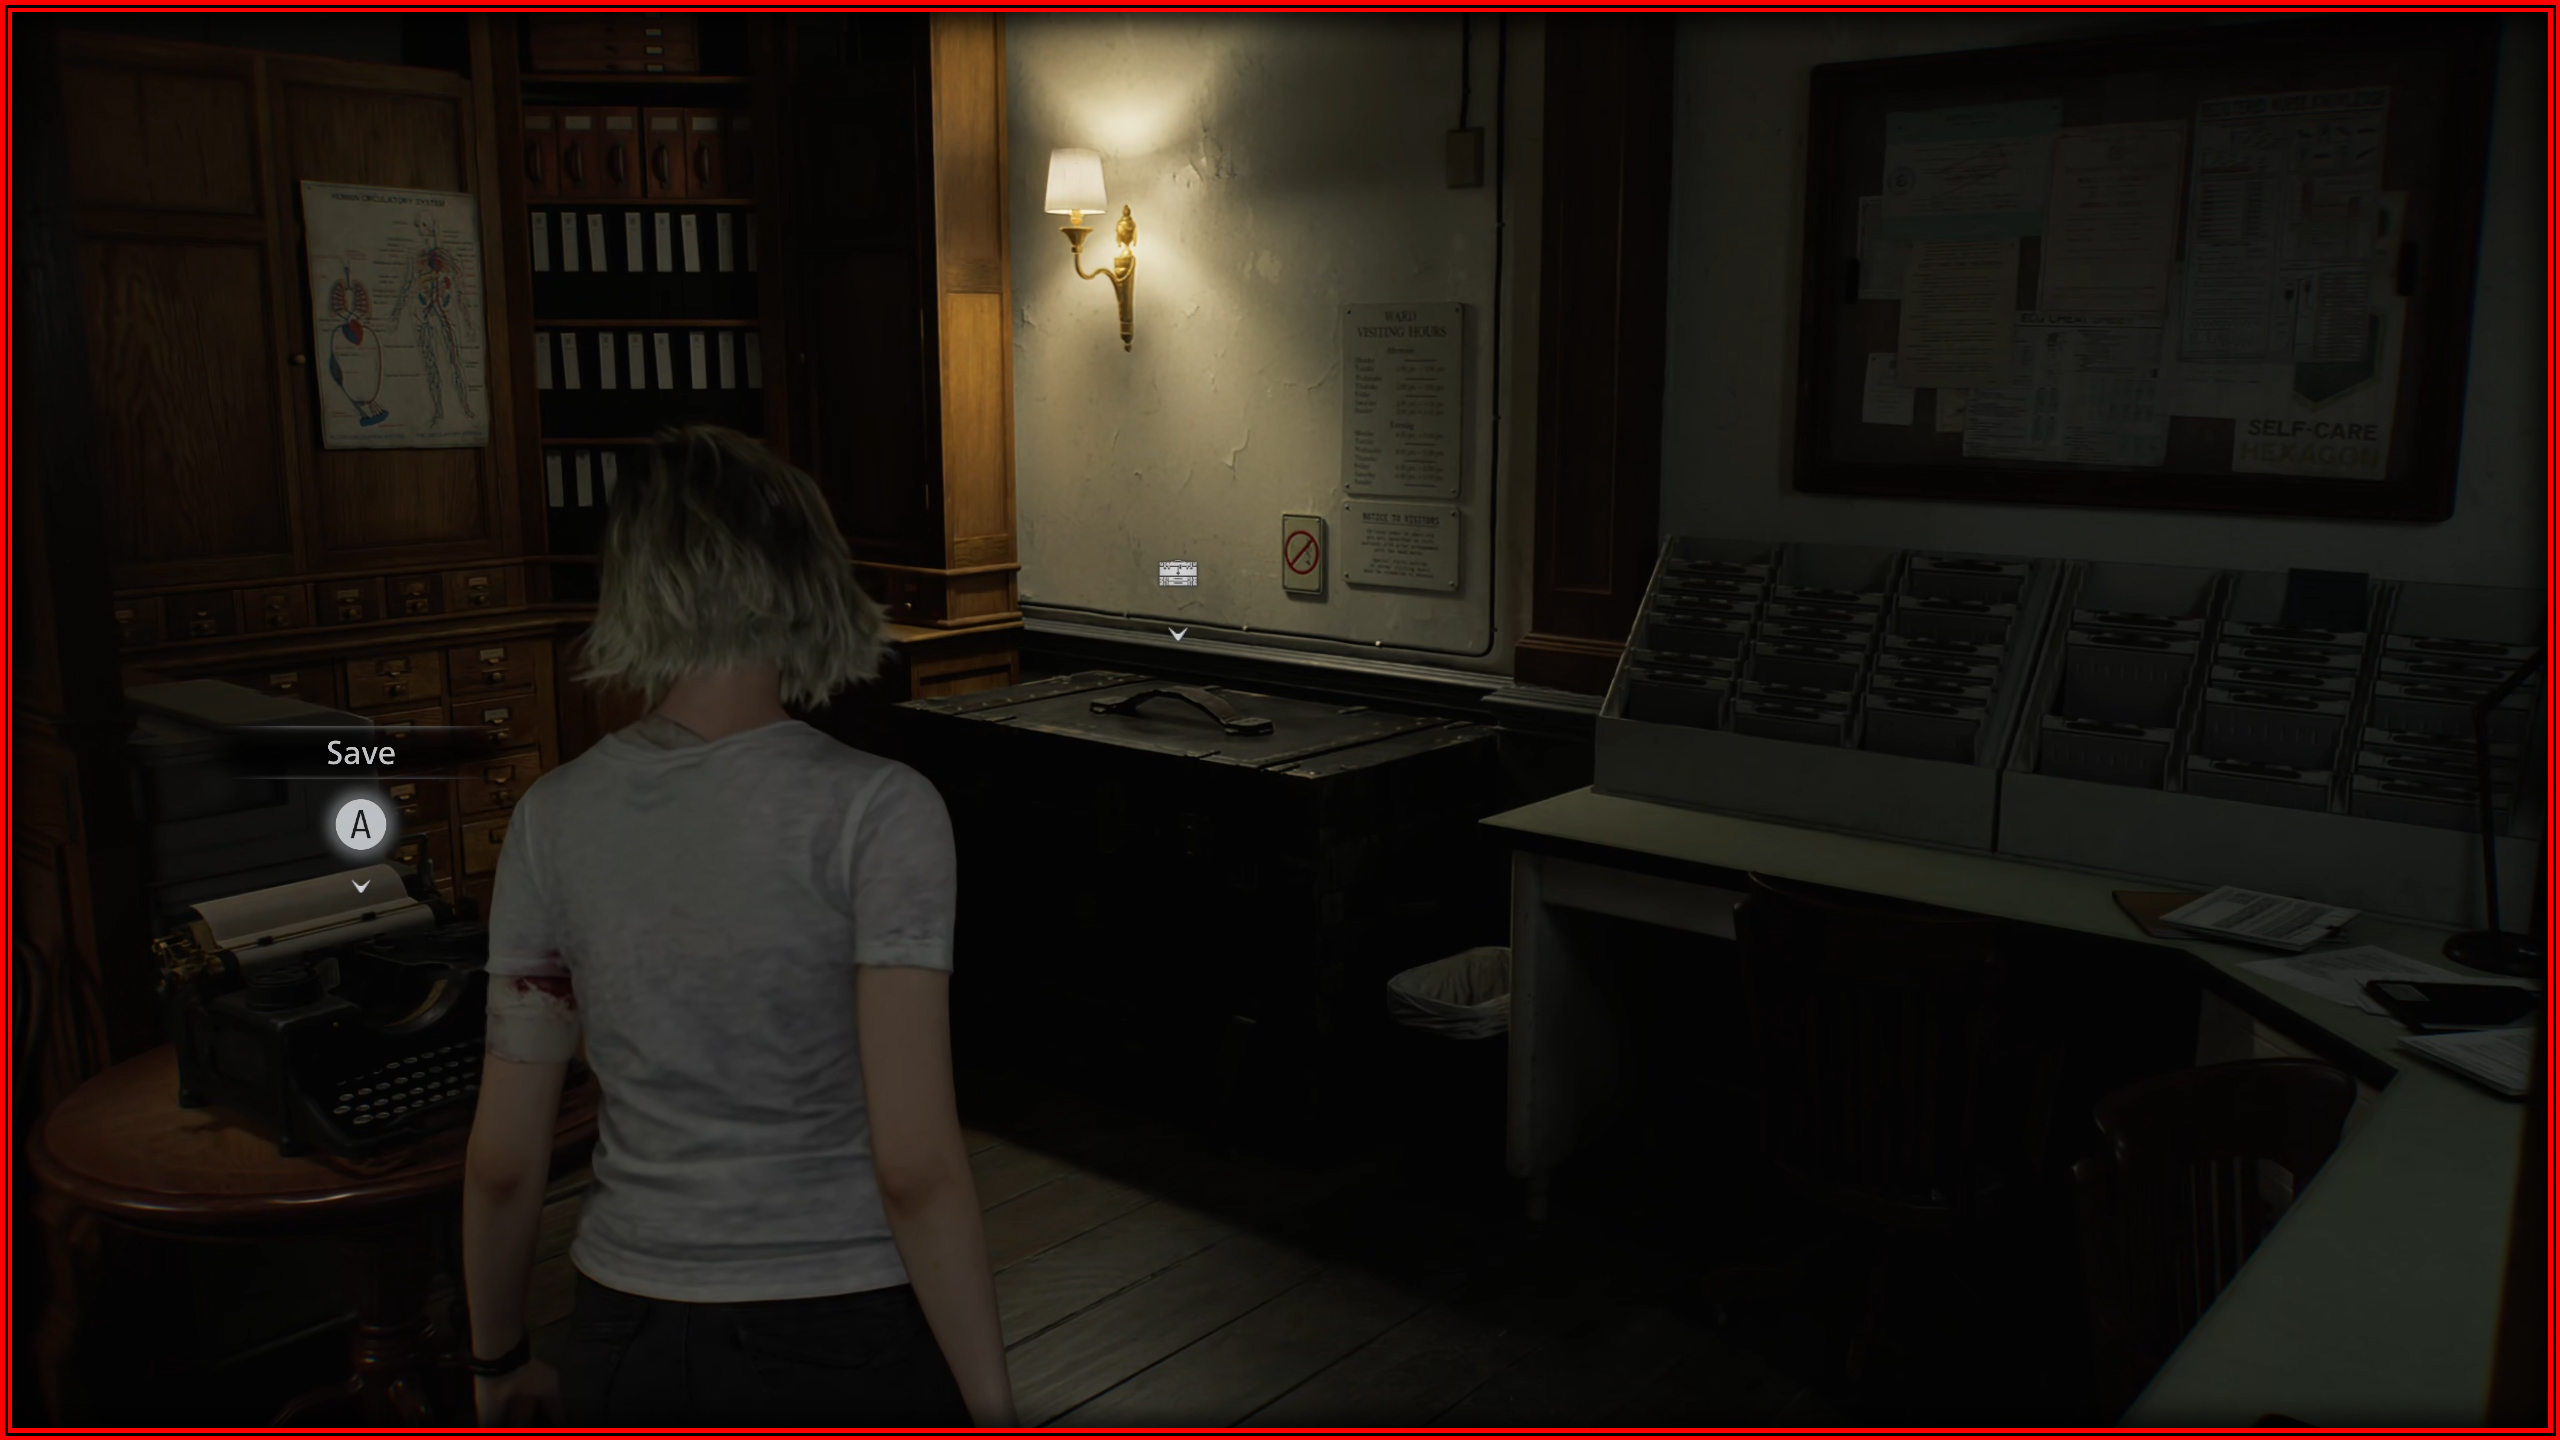
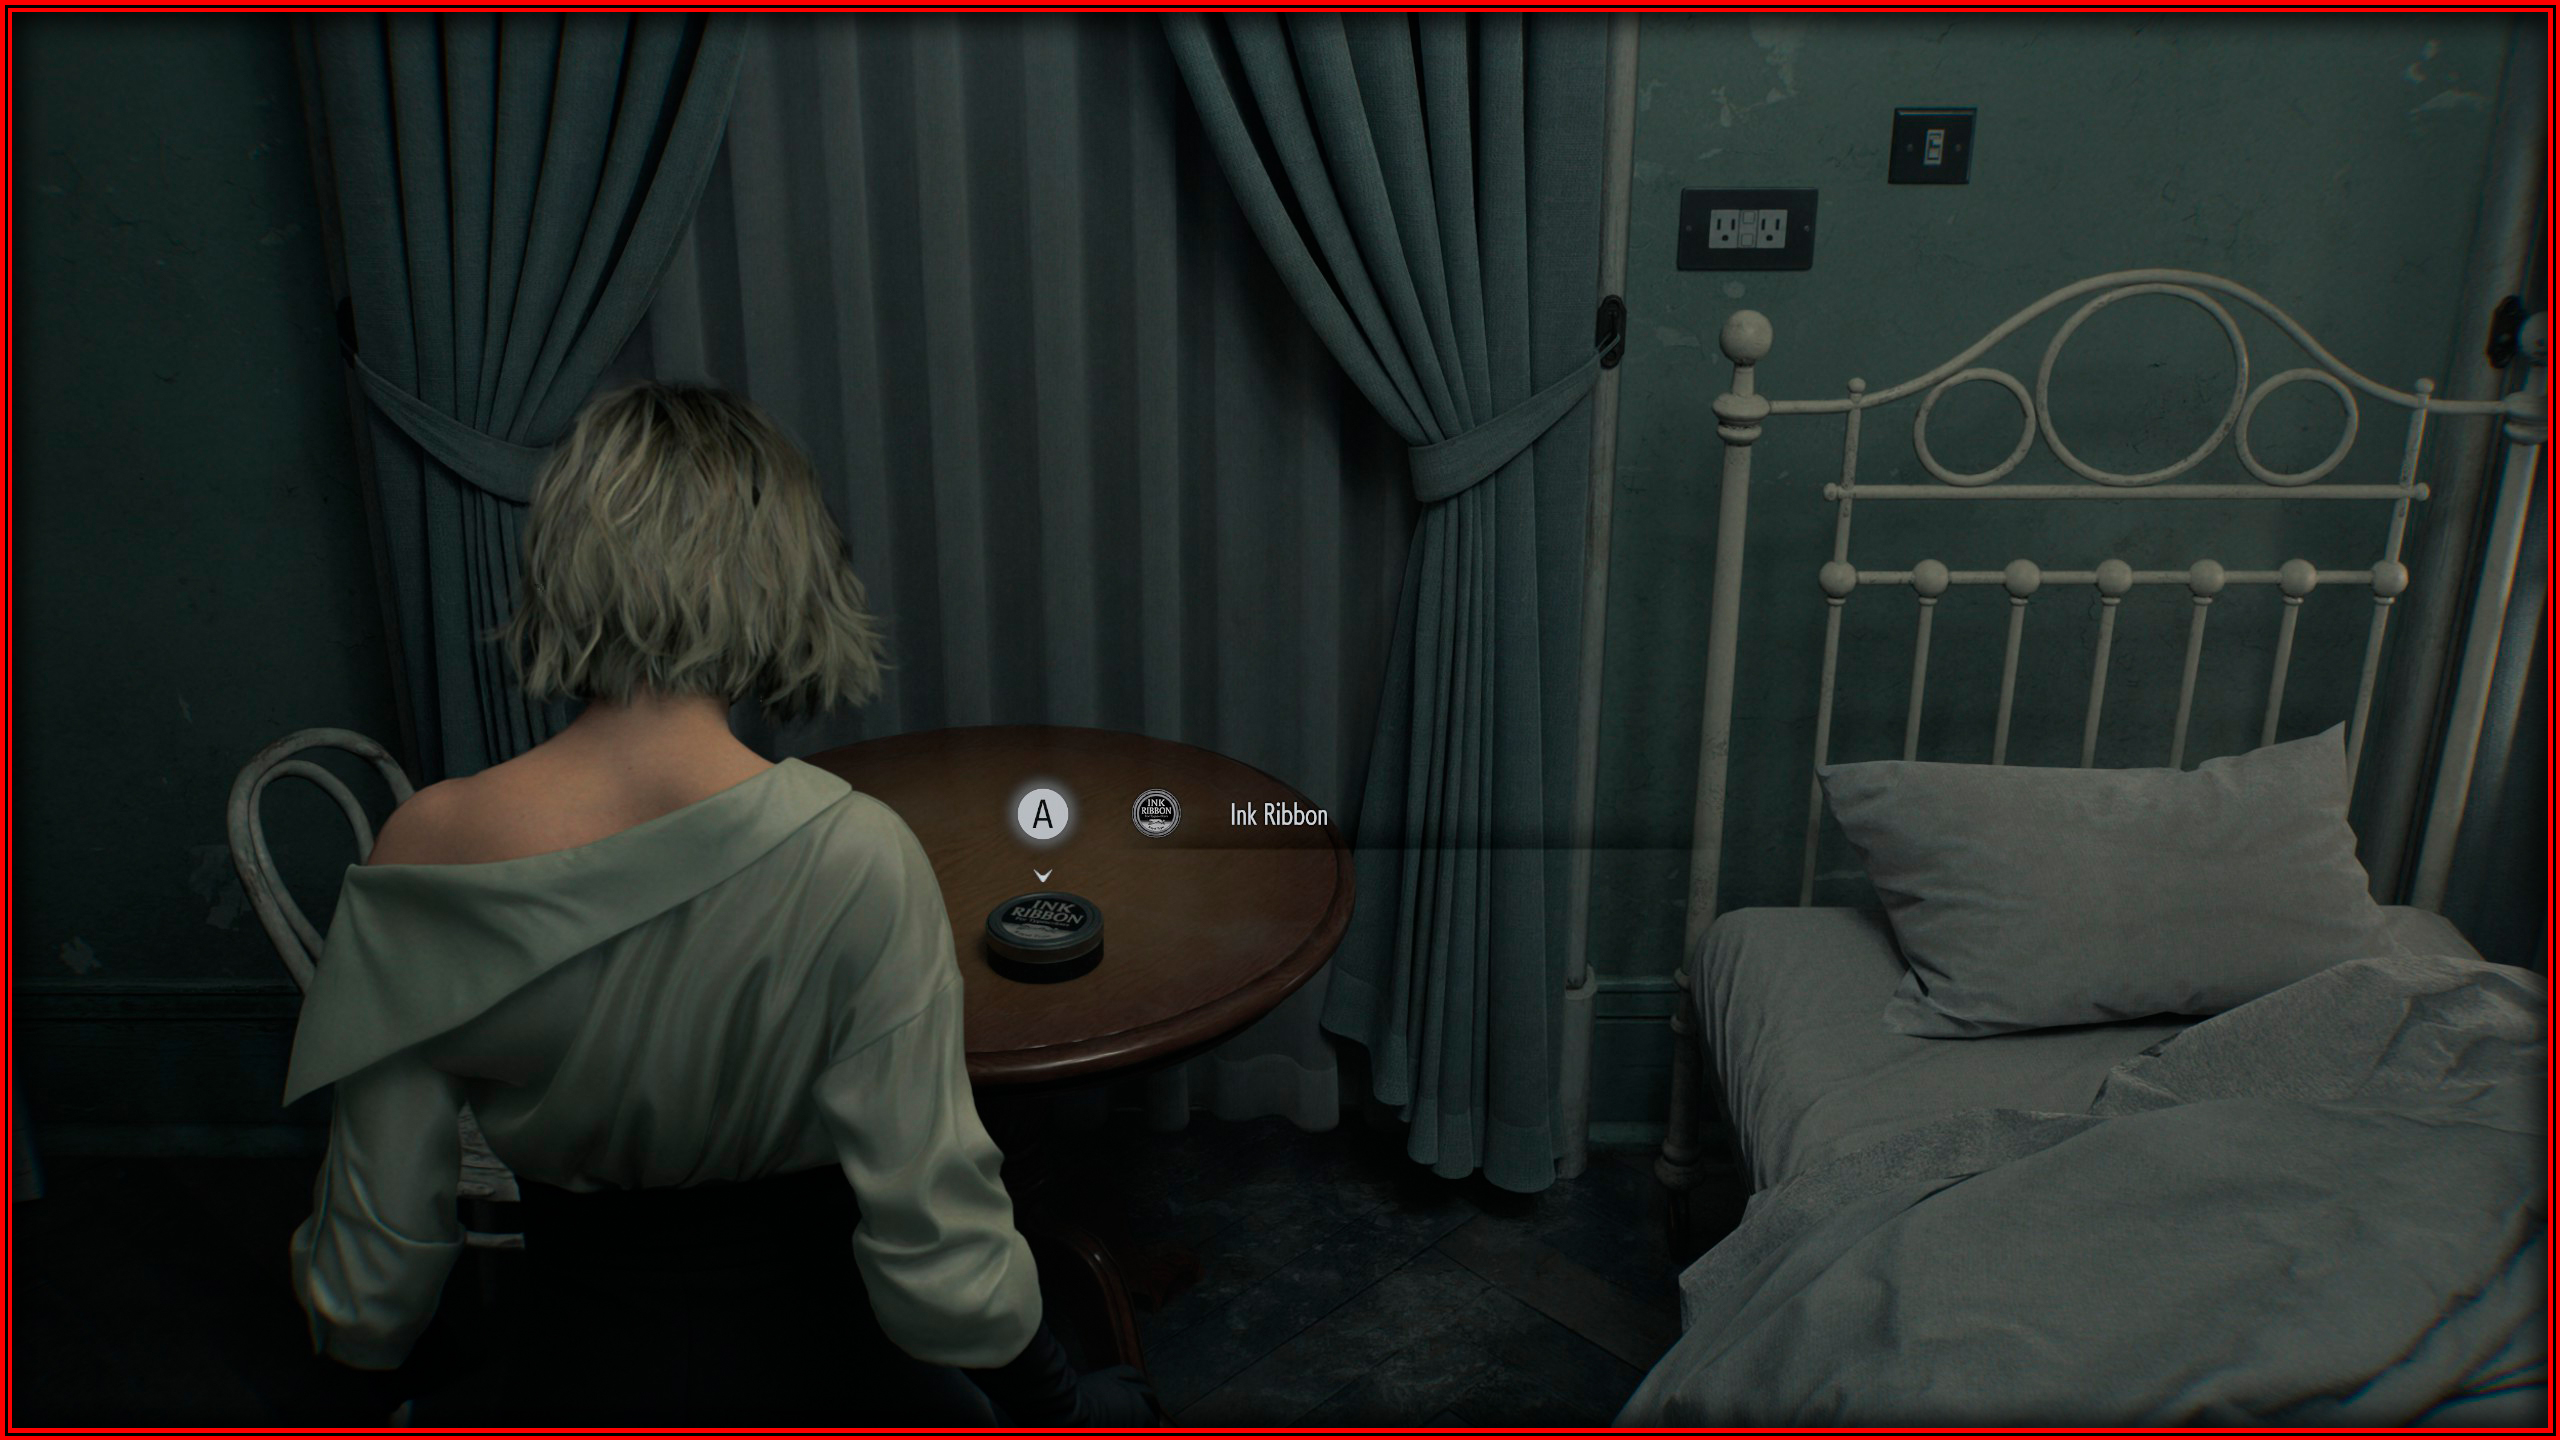
The Ol' Fashioned Way
 Ink Ribbons can only be found on Standard (Classic) or Insanity difficulties. Pick one up and make a manual save to obtain this achievement.
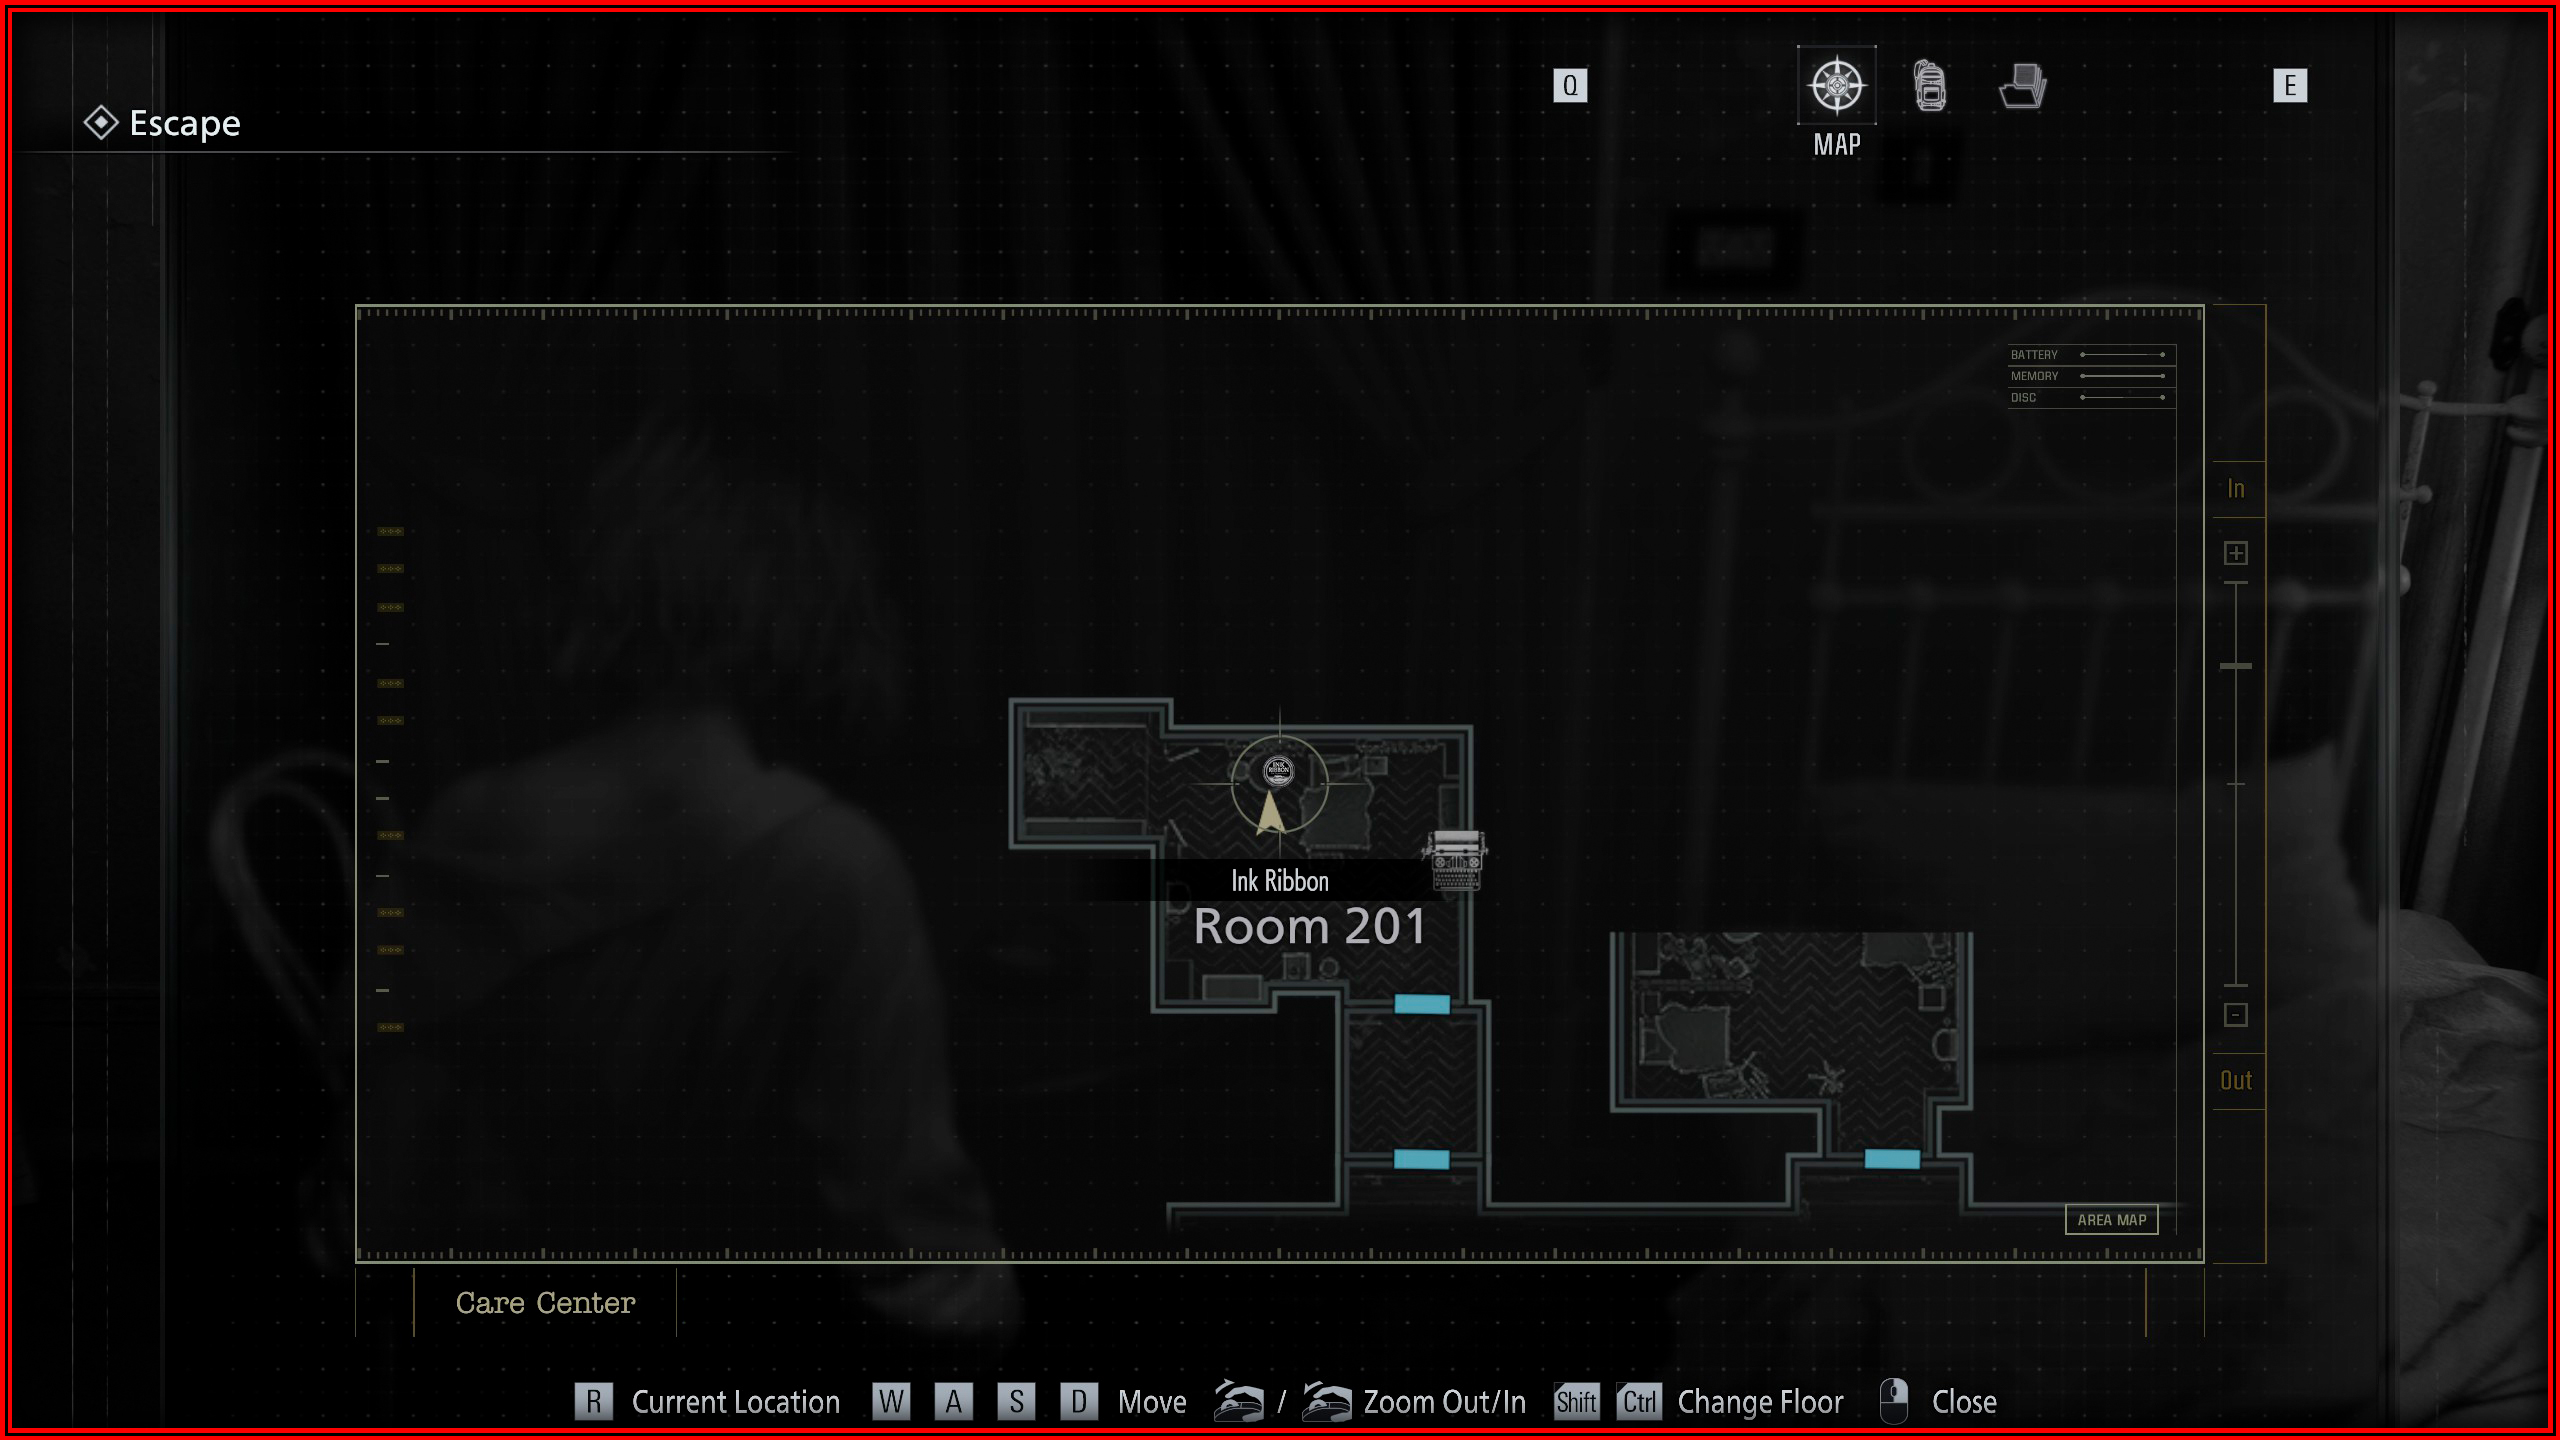
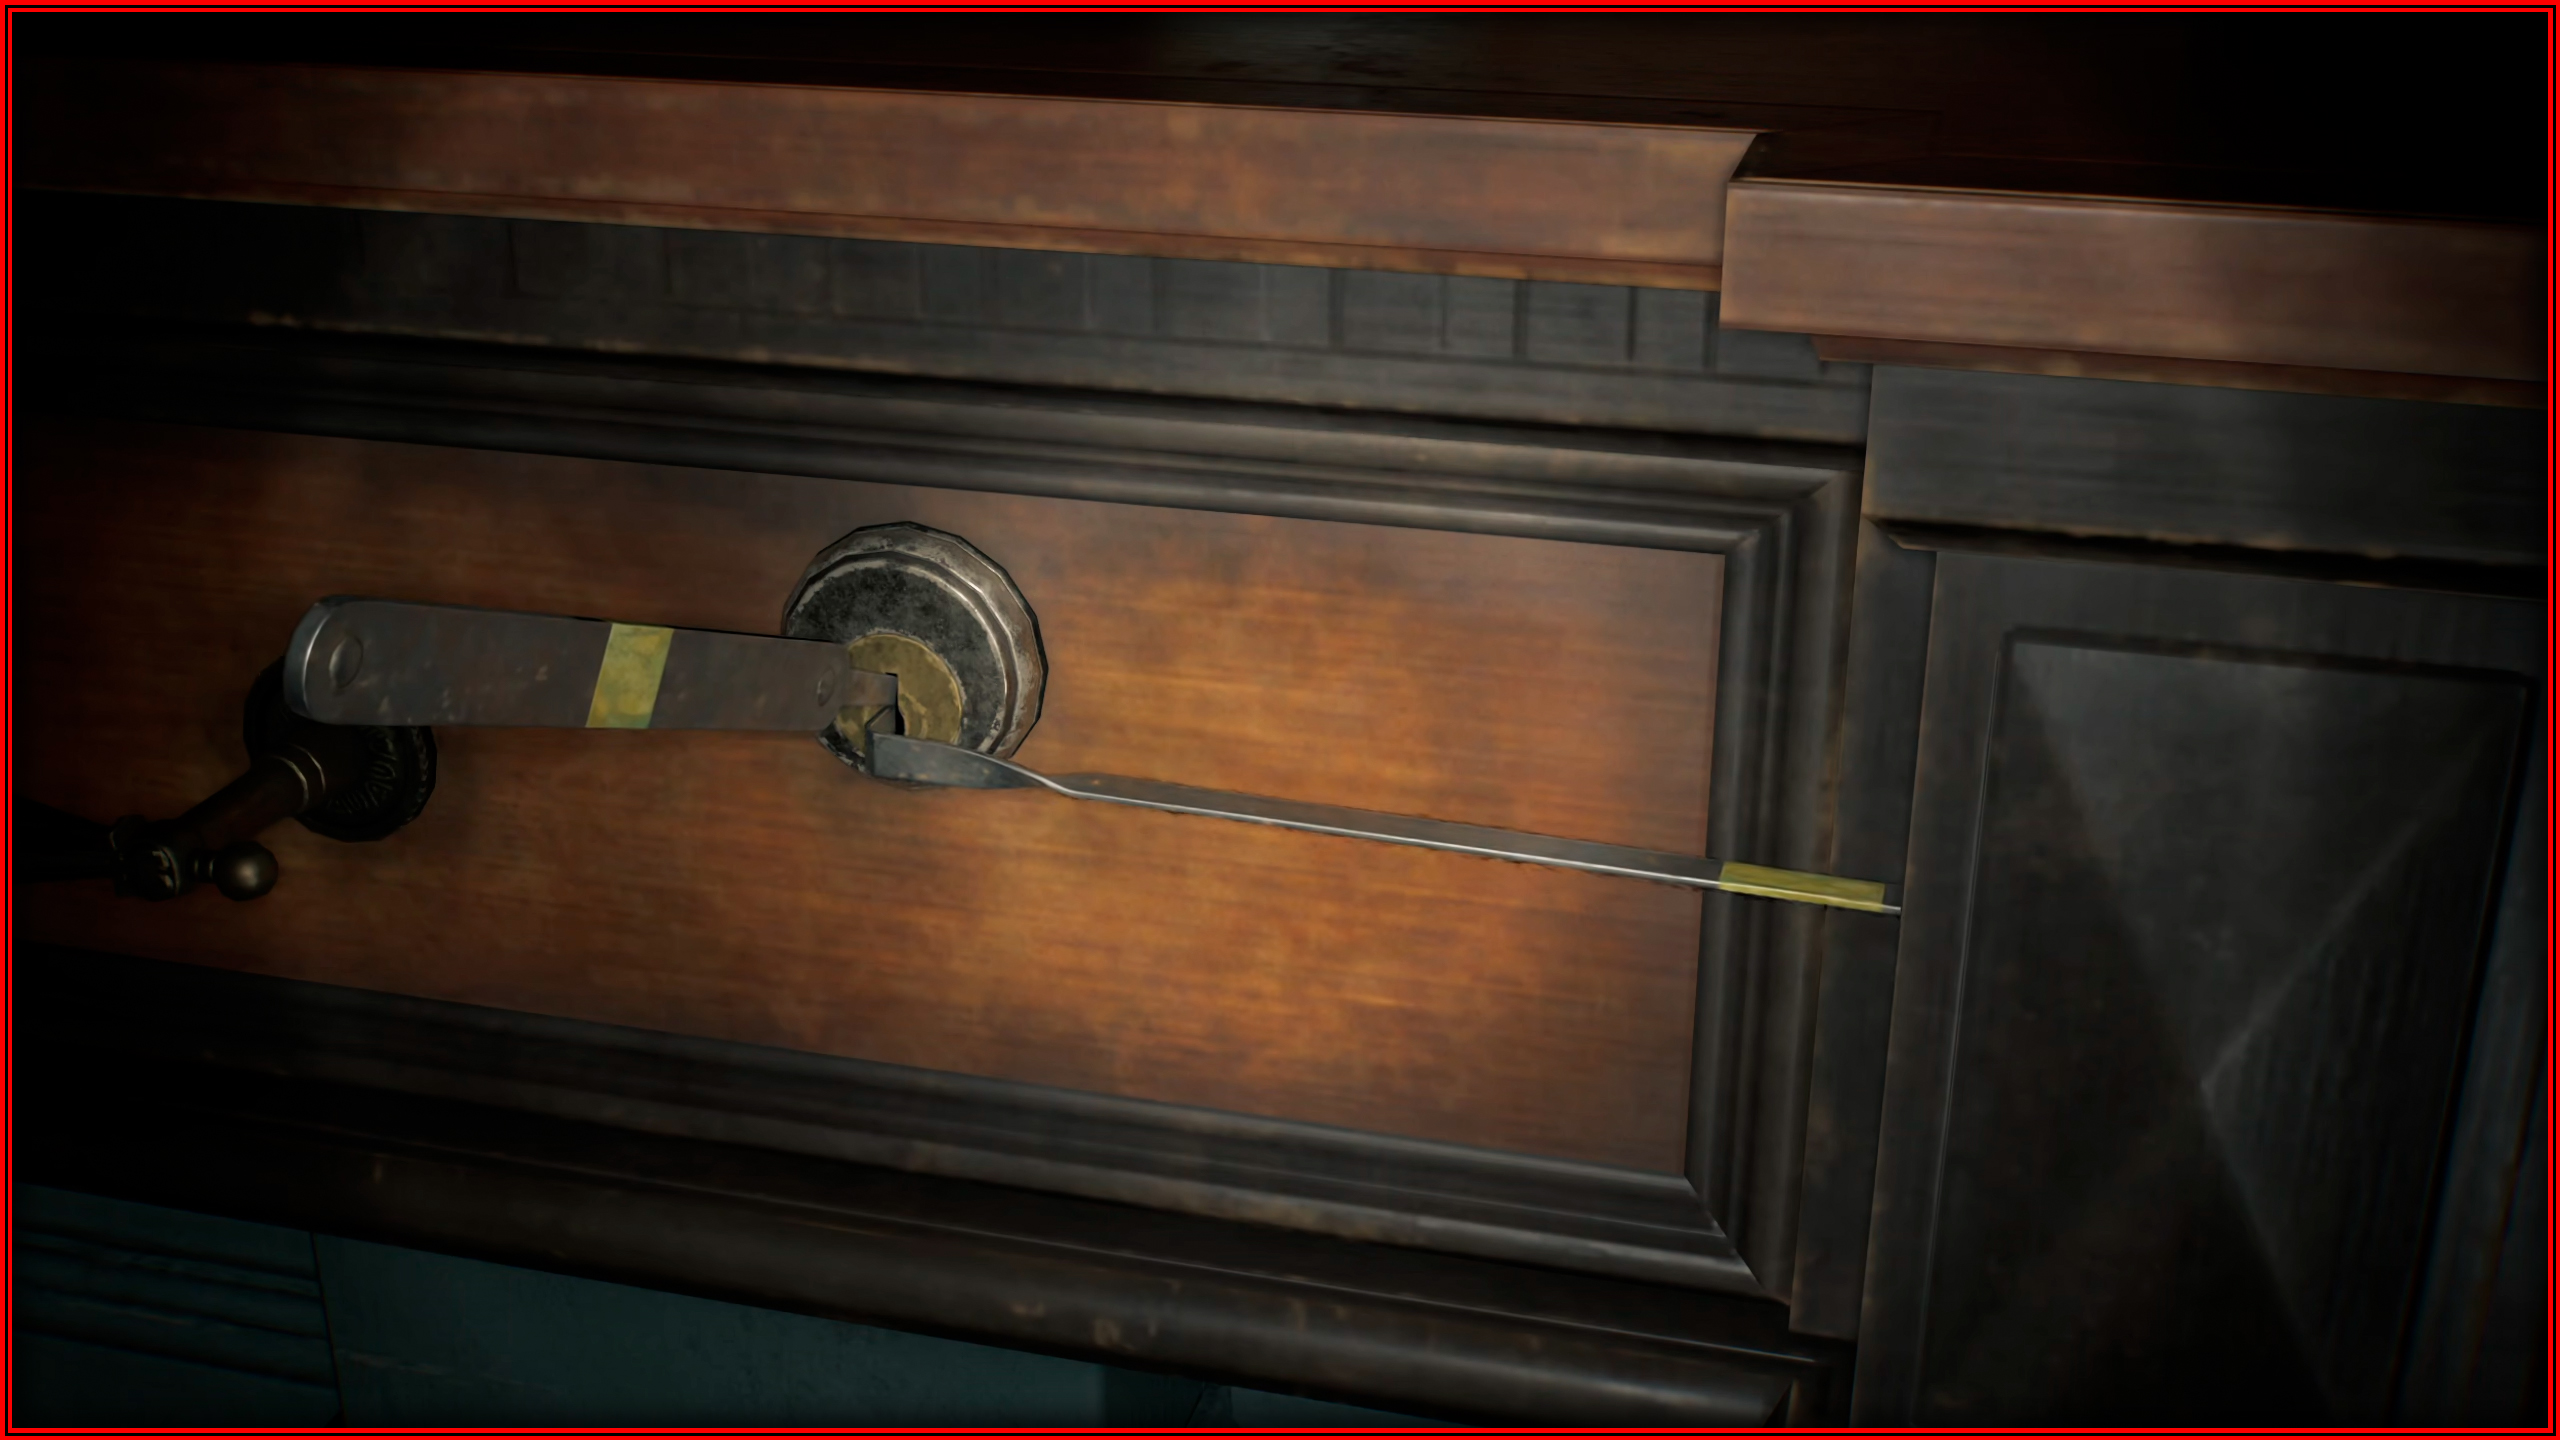
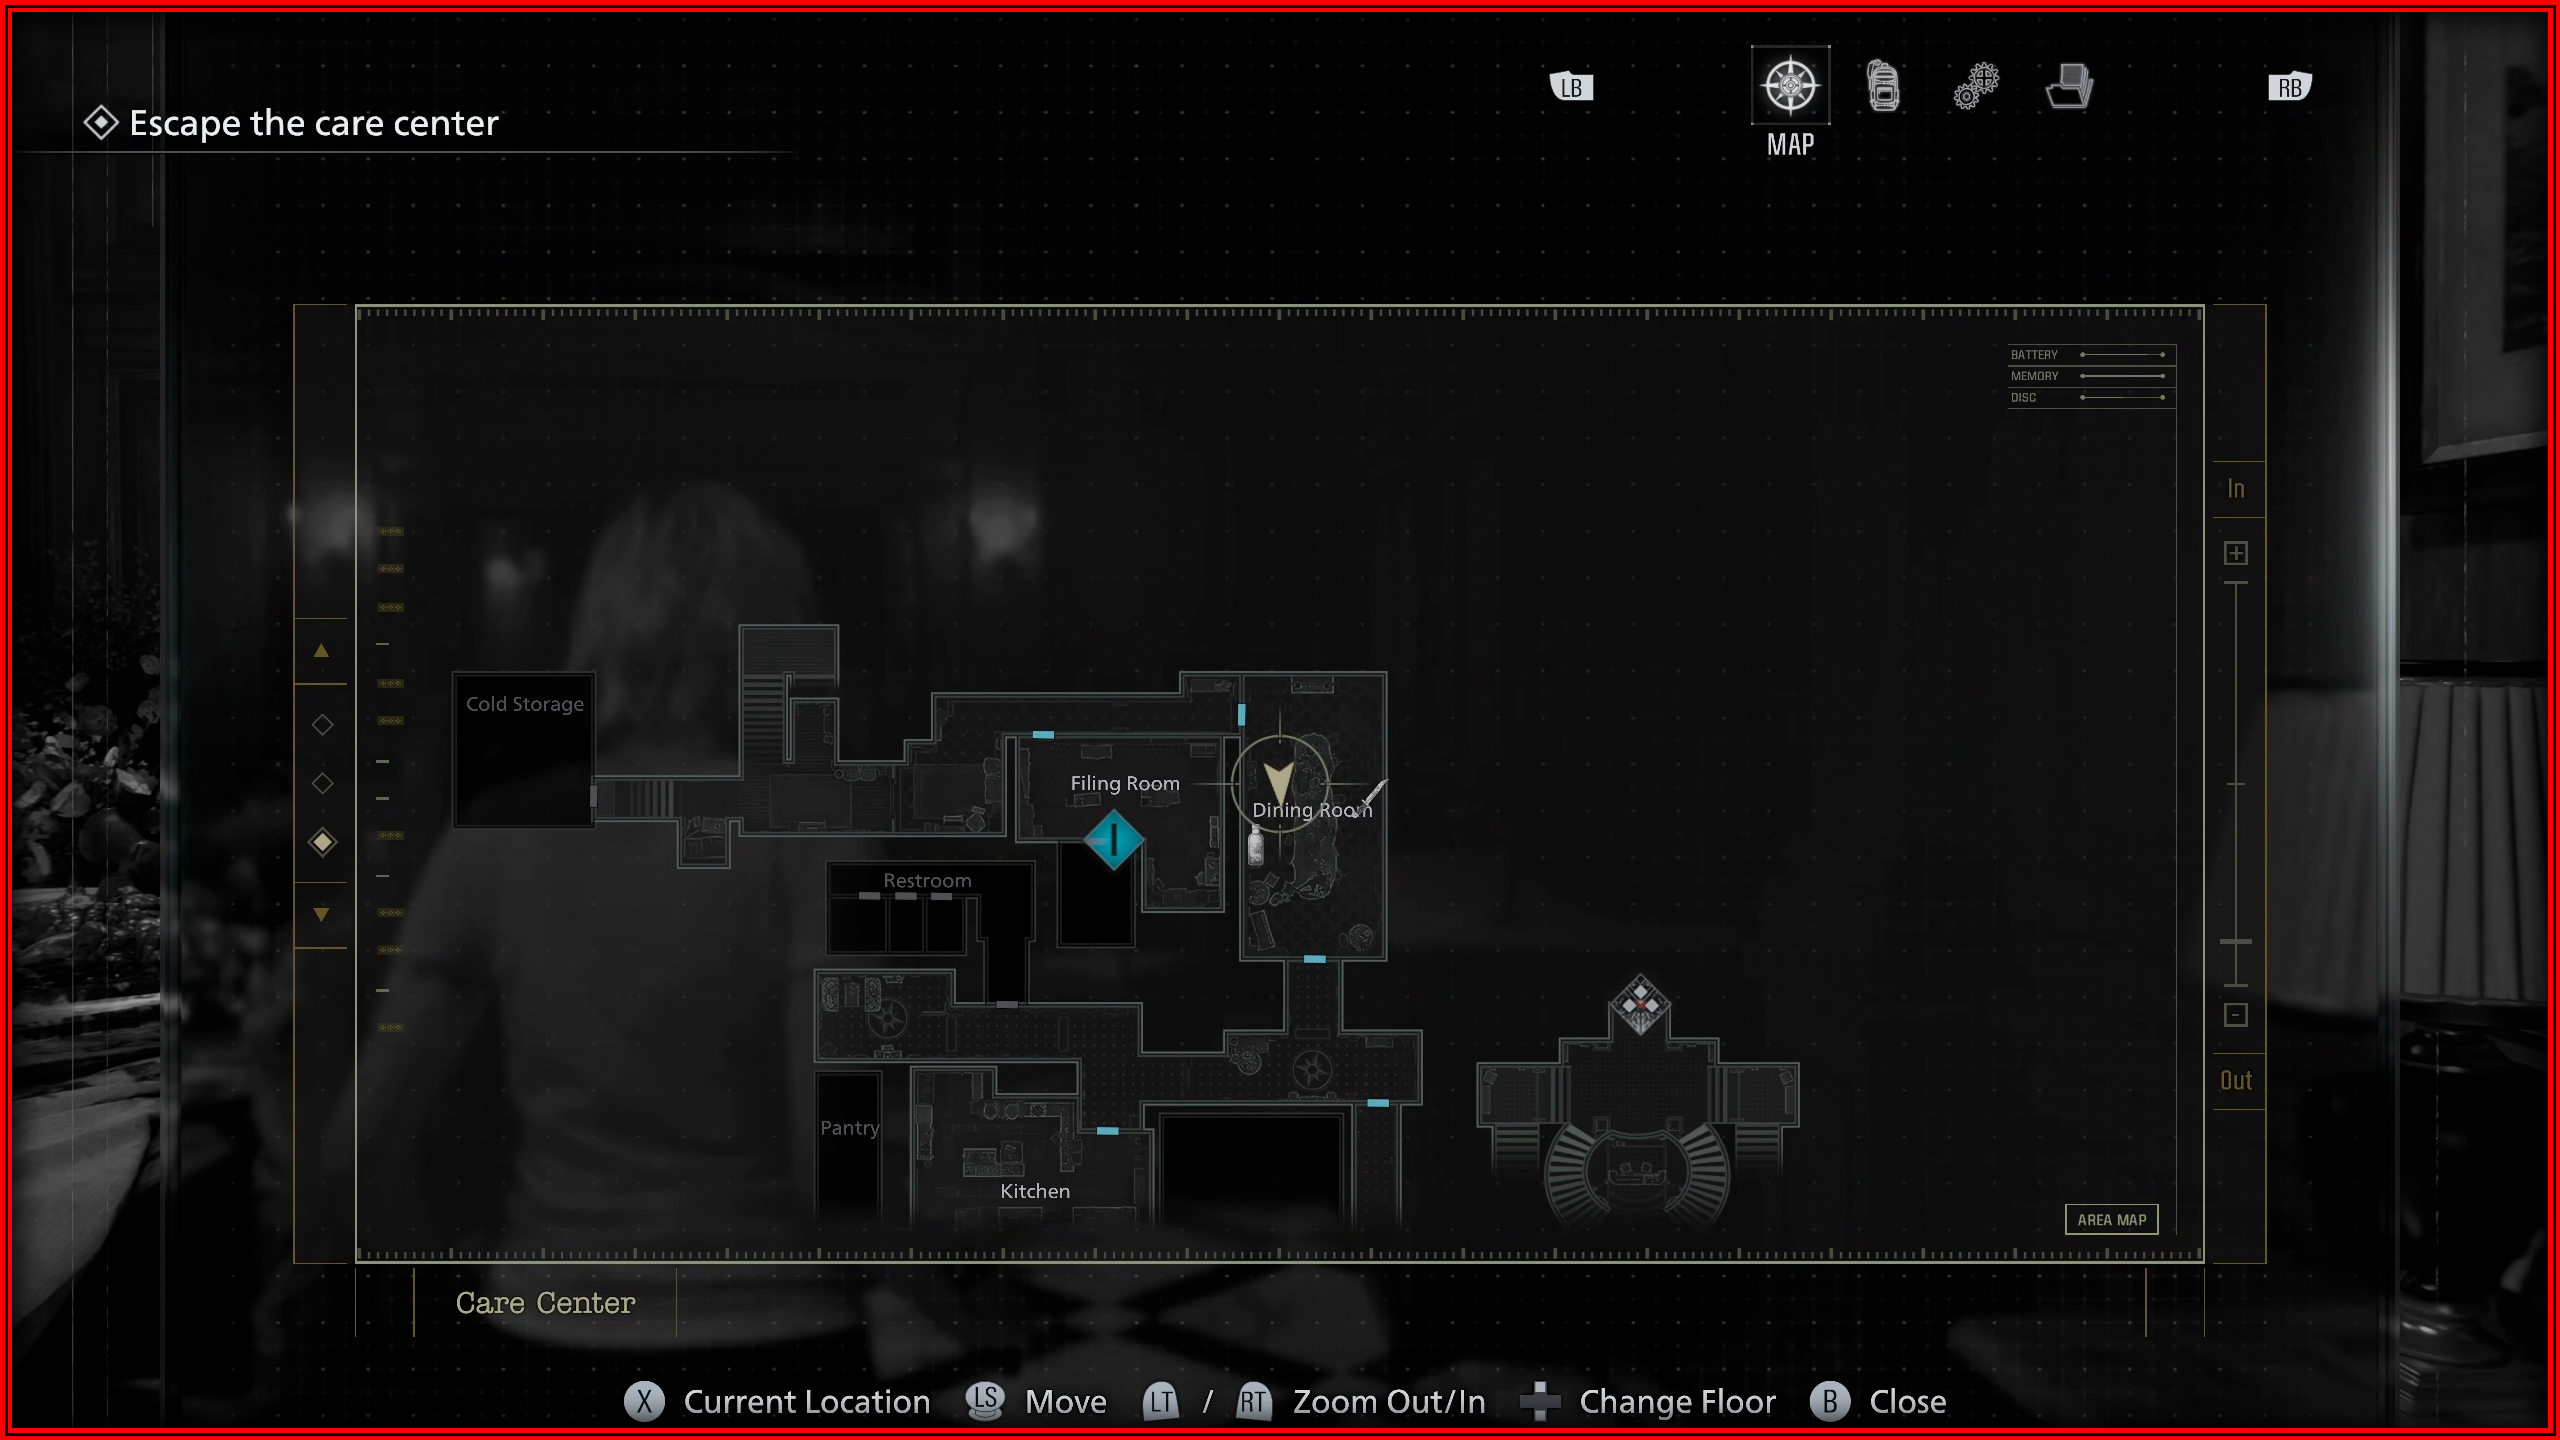
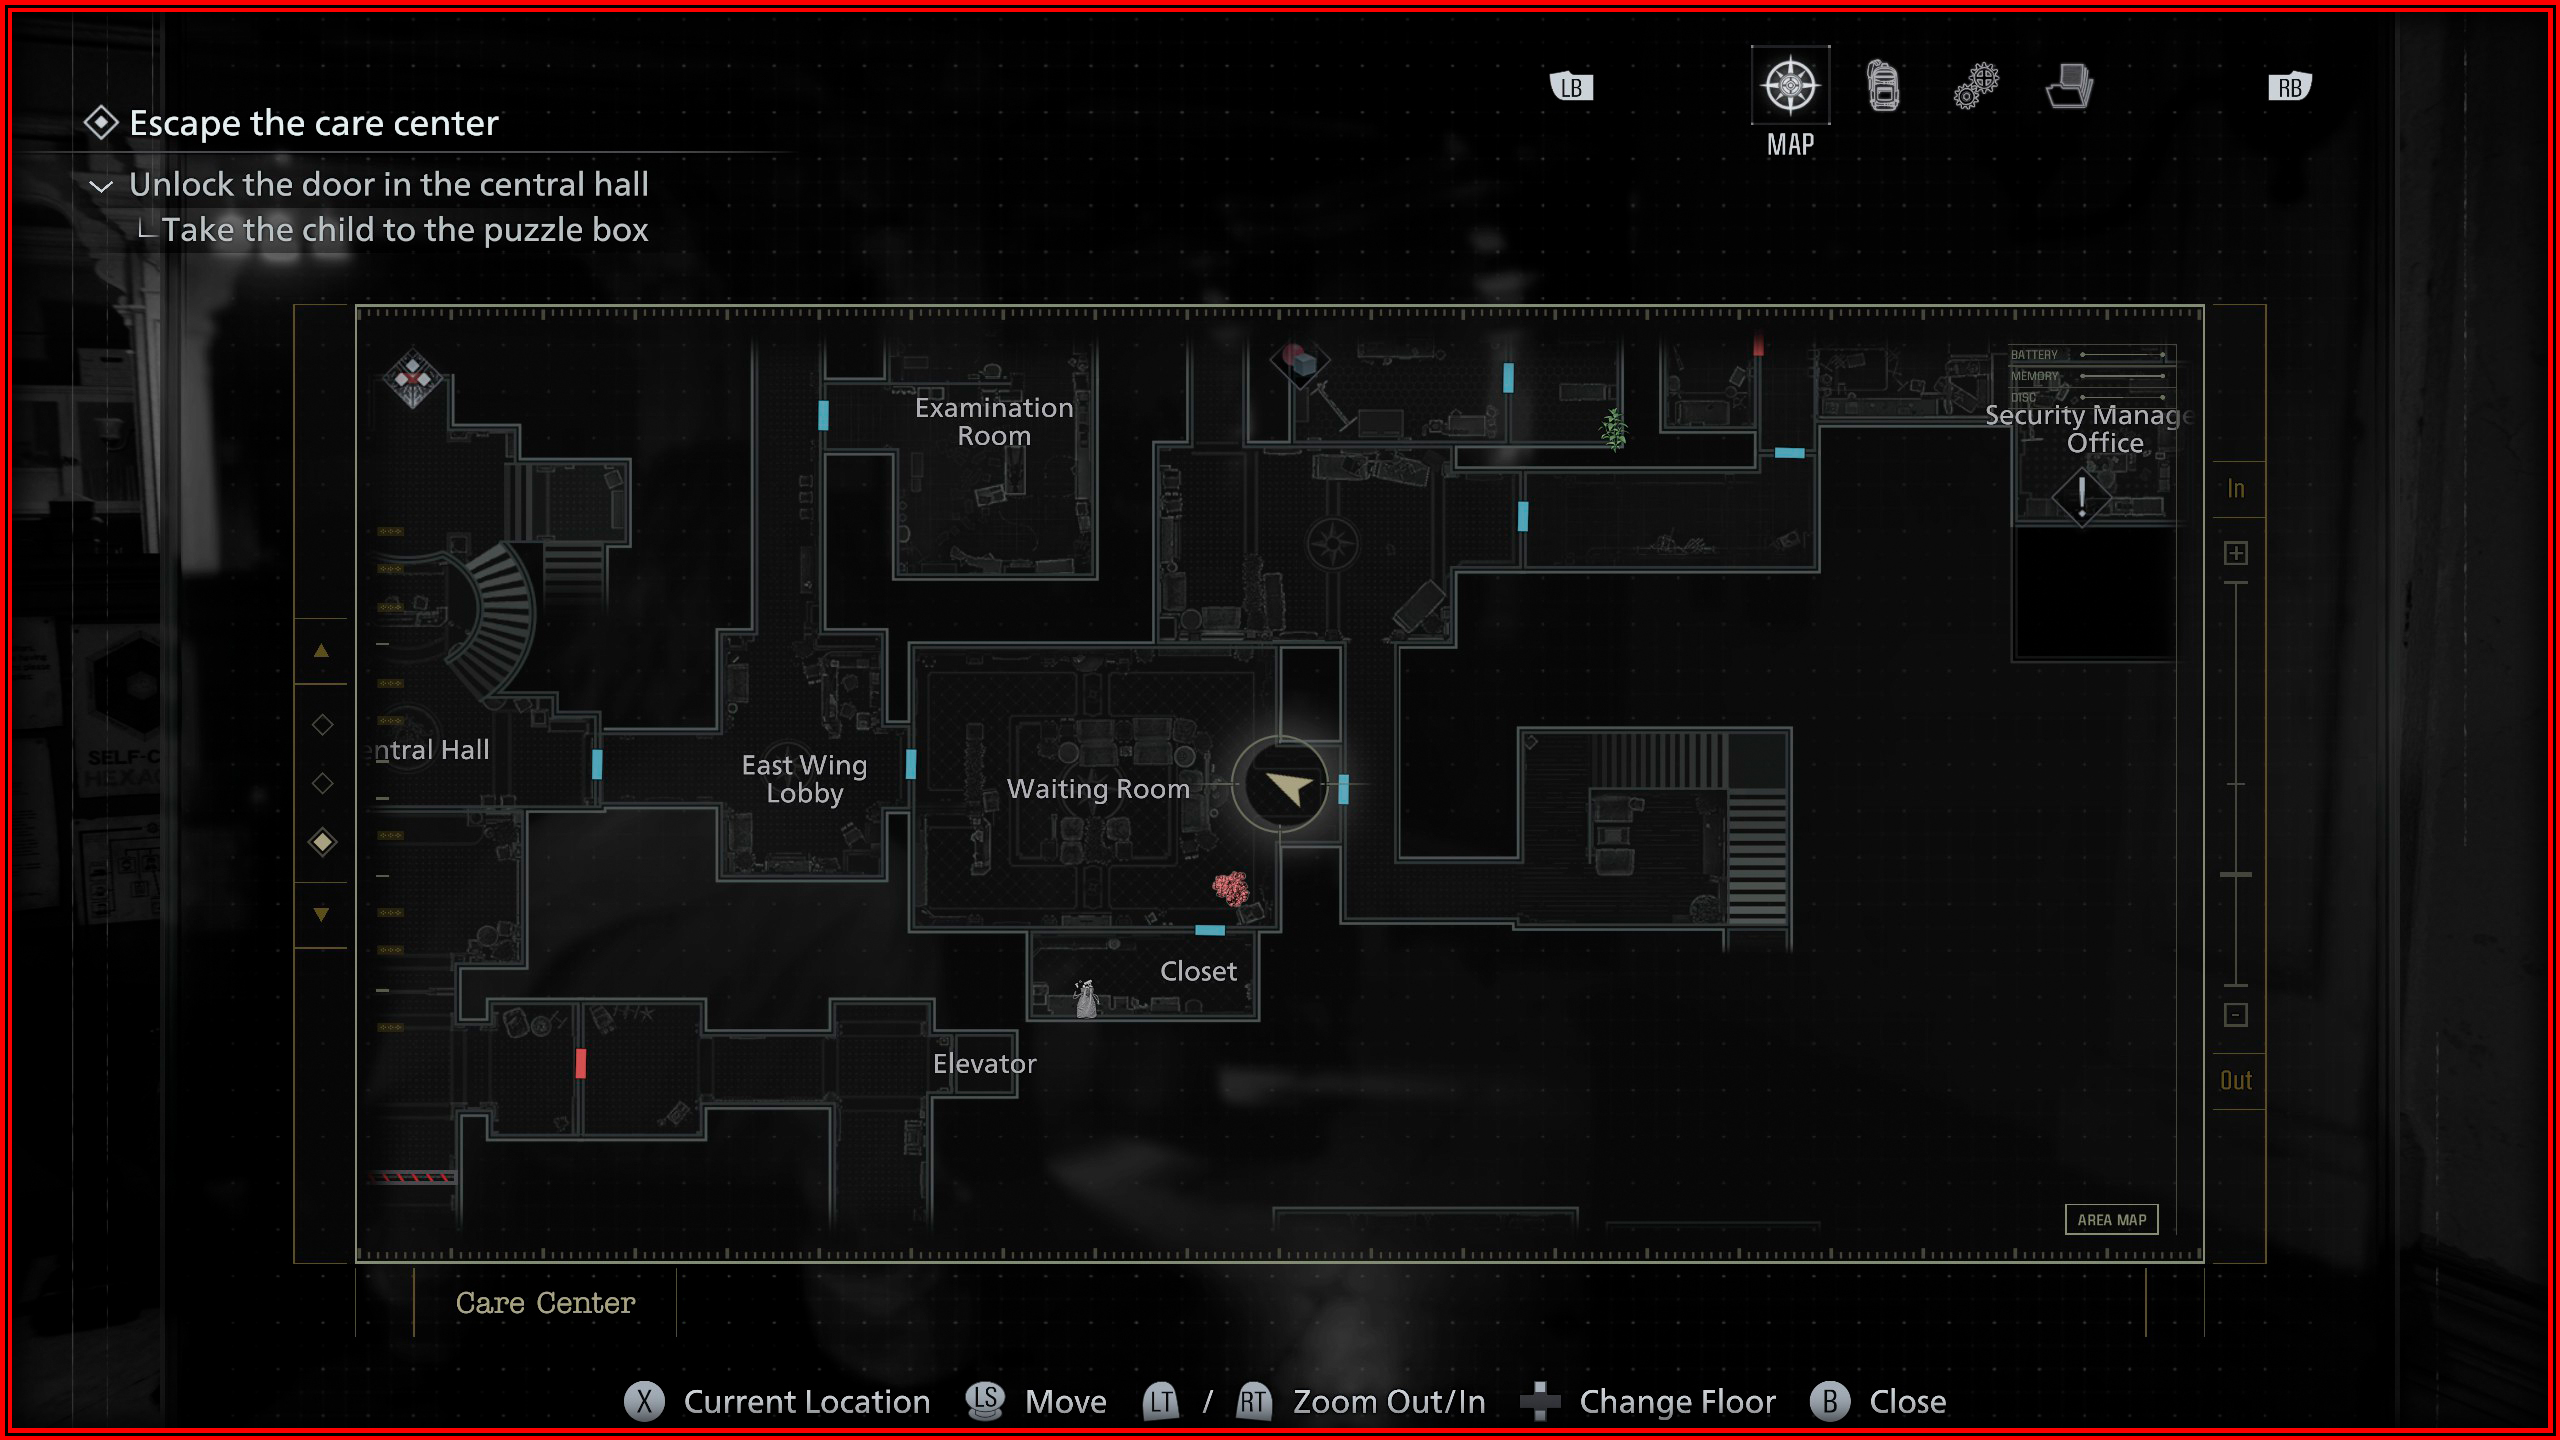
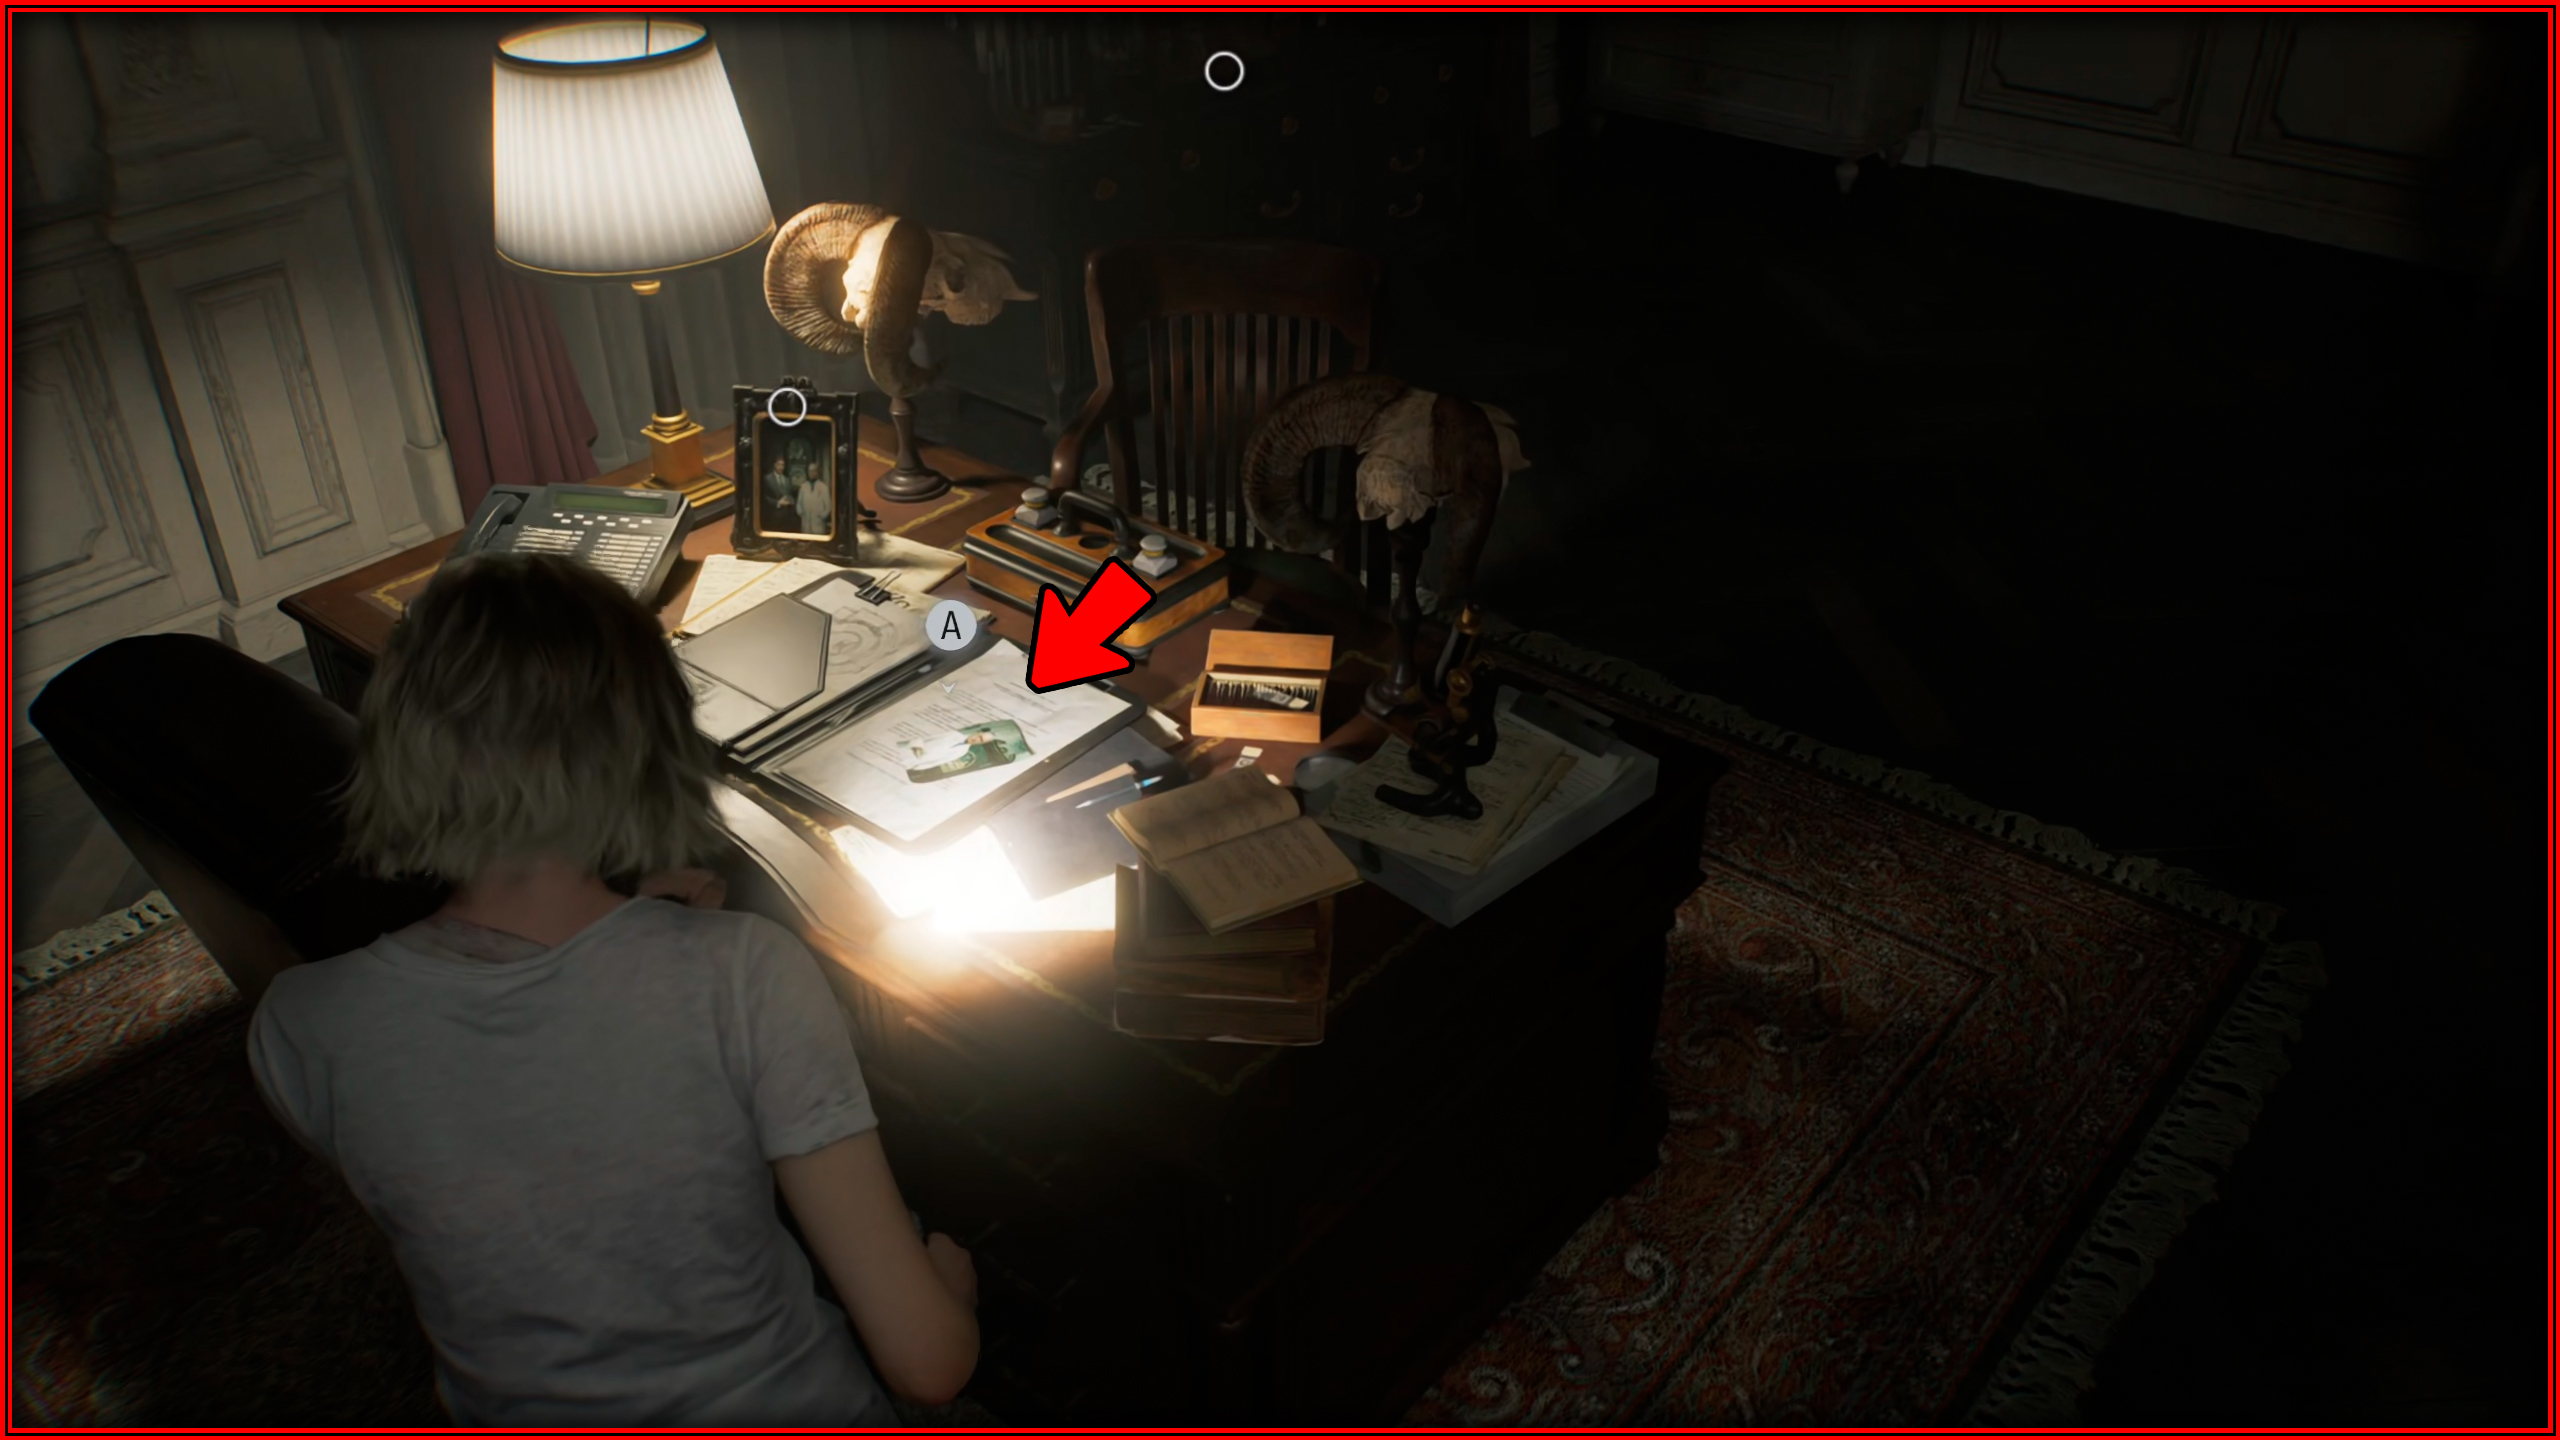
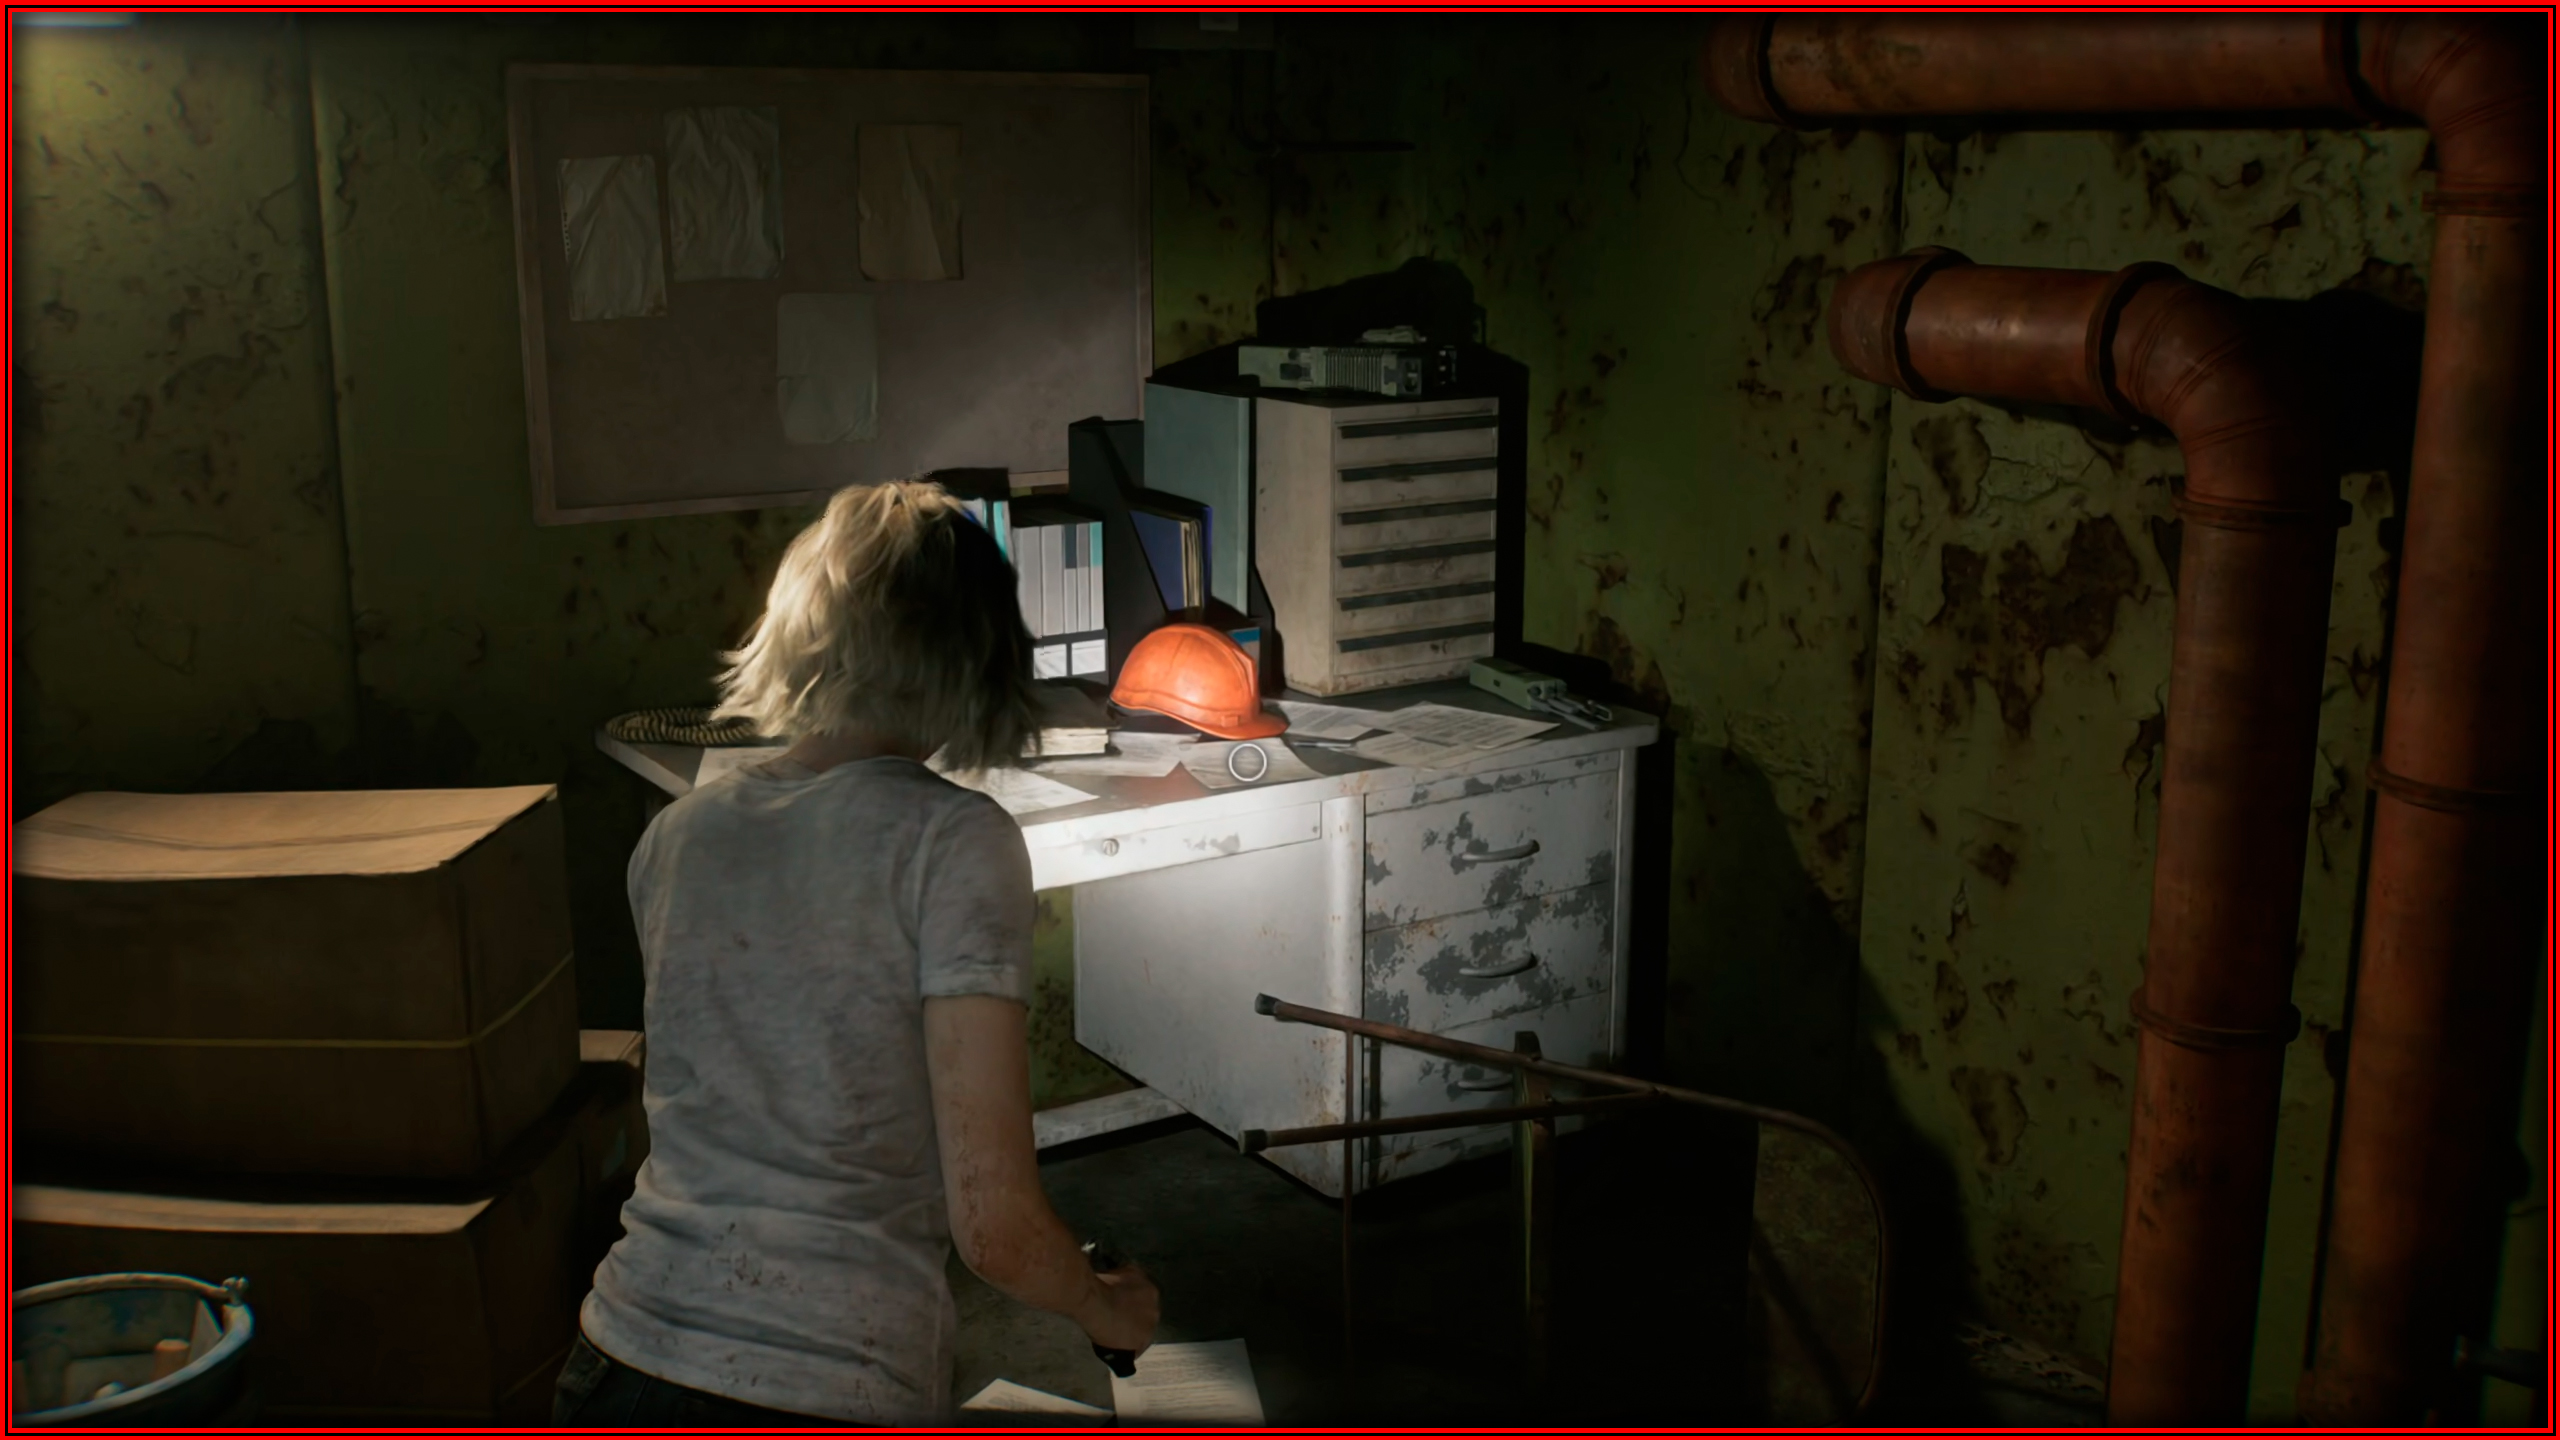
Like Mother, Like Daughter

Obtained by Grace for opening some Simple Locks using Lockpicks. You will have a few opportunities to do this, I will leave the location of a Lockpick and a Simple Lock below.
Lockpick Location
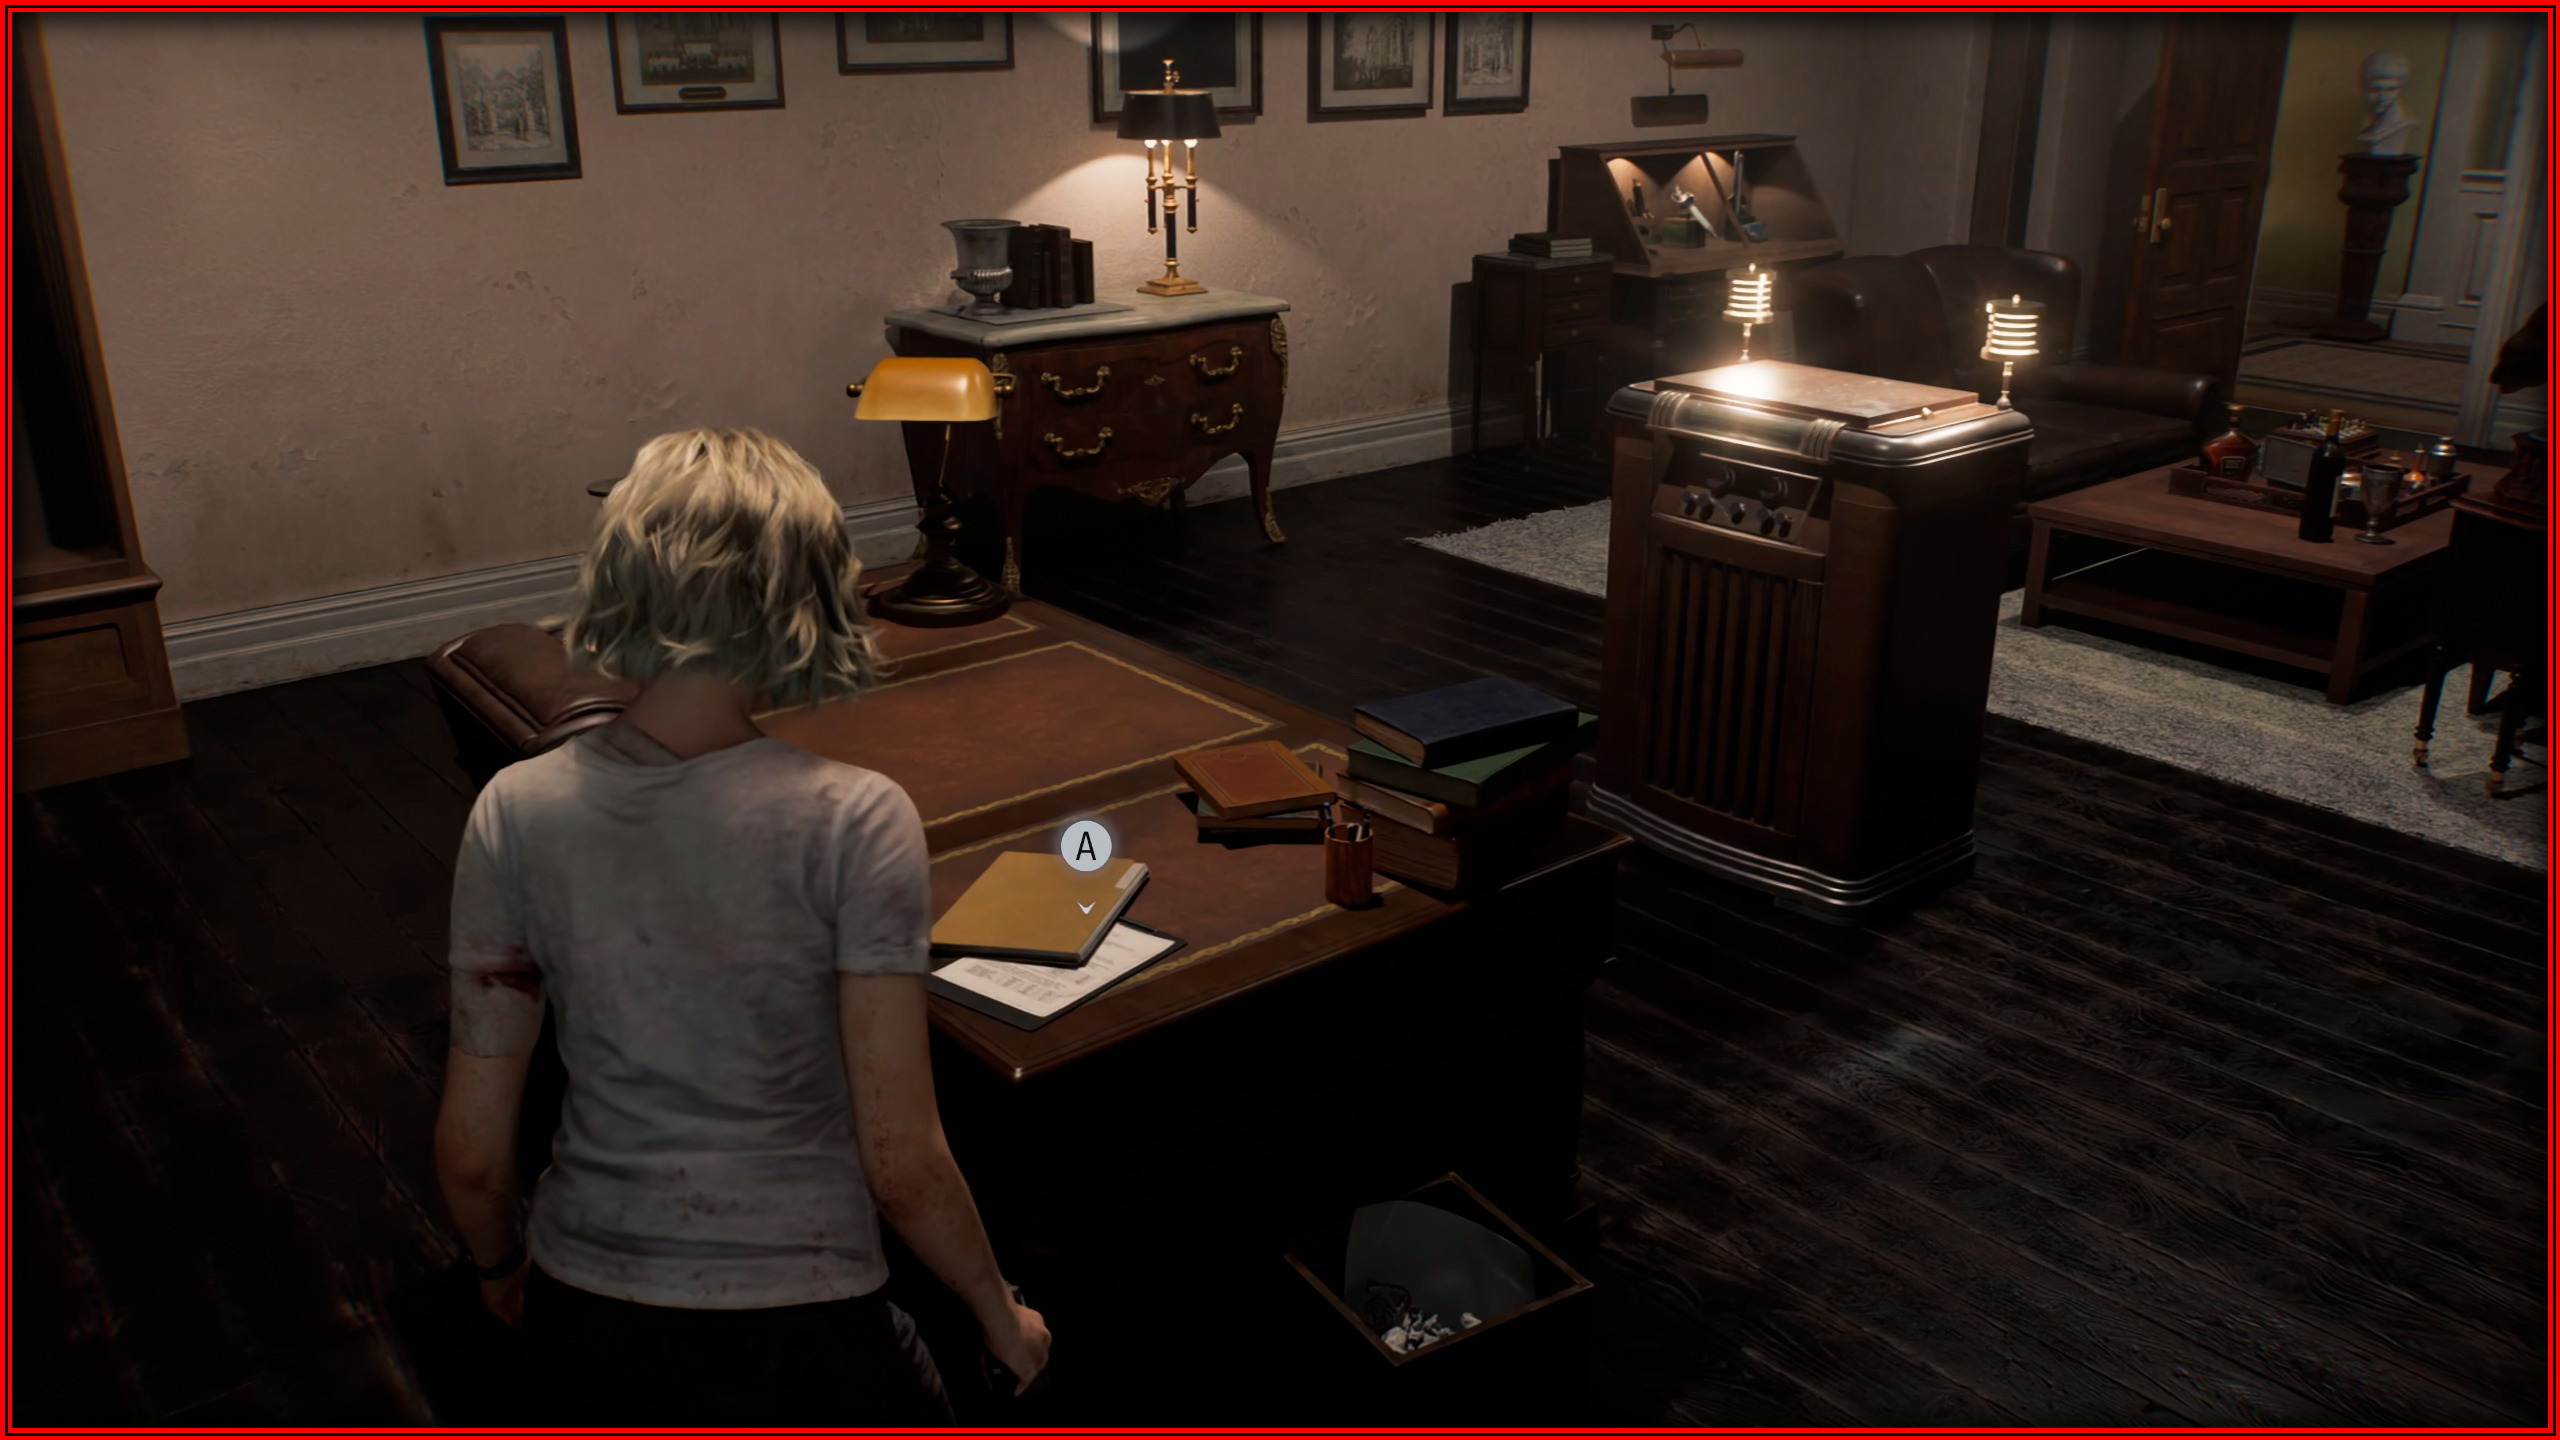
Care Center - Lead Researcher's Office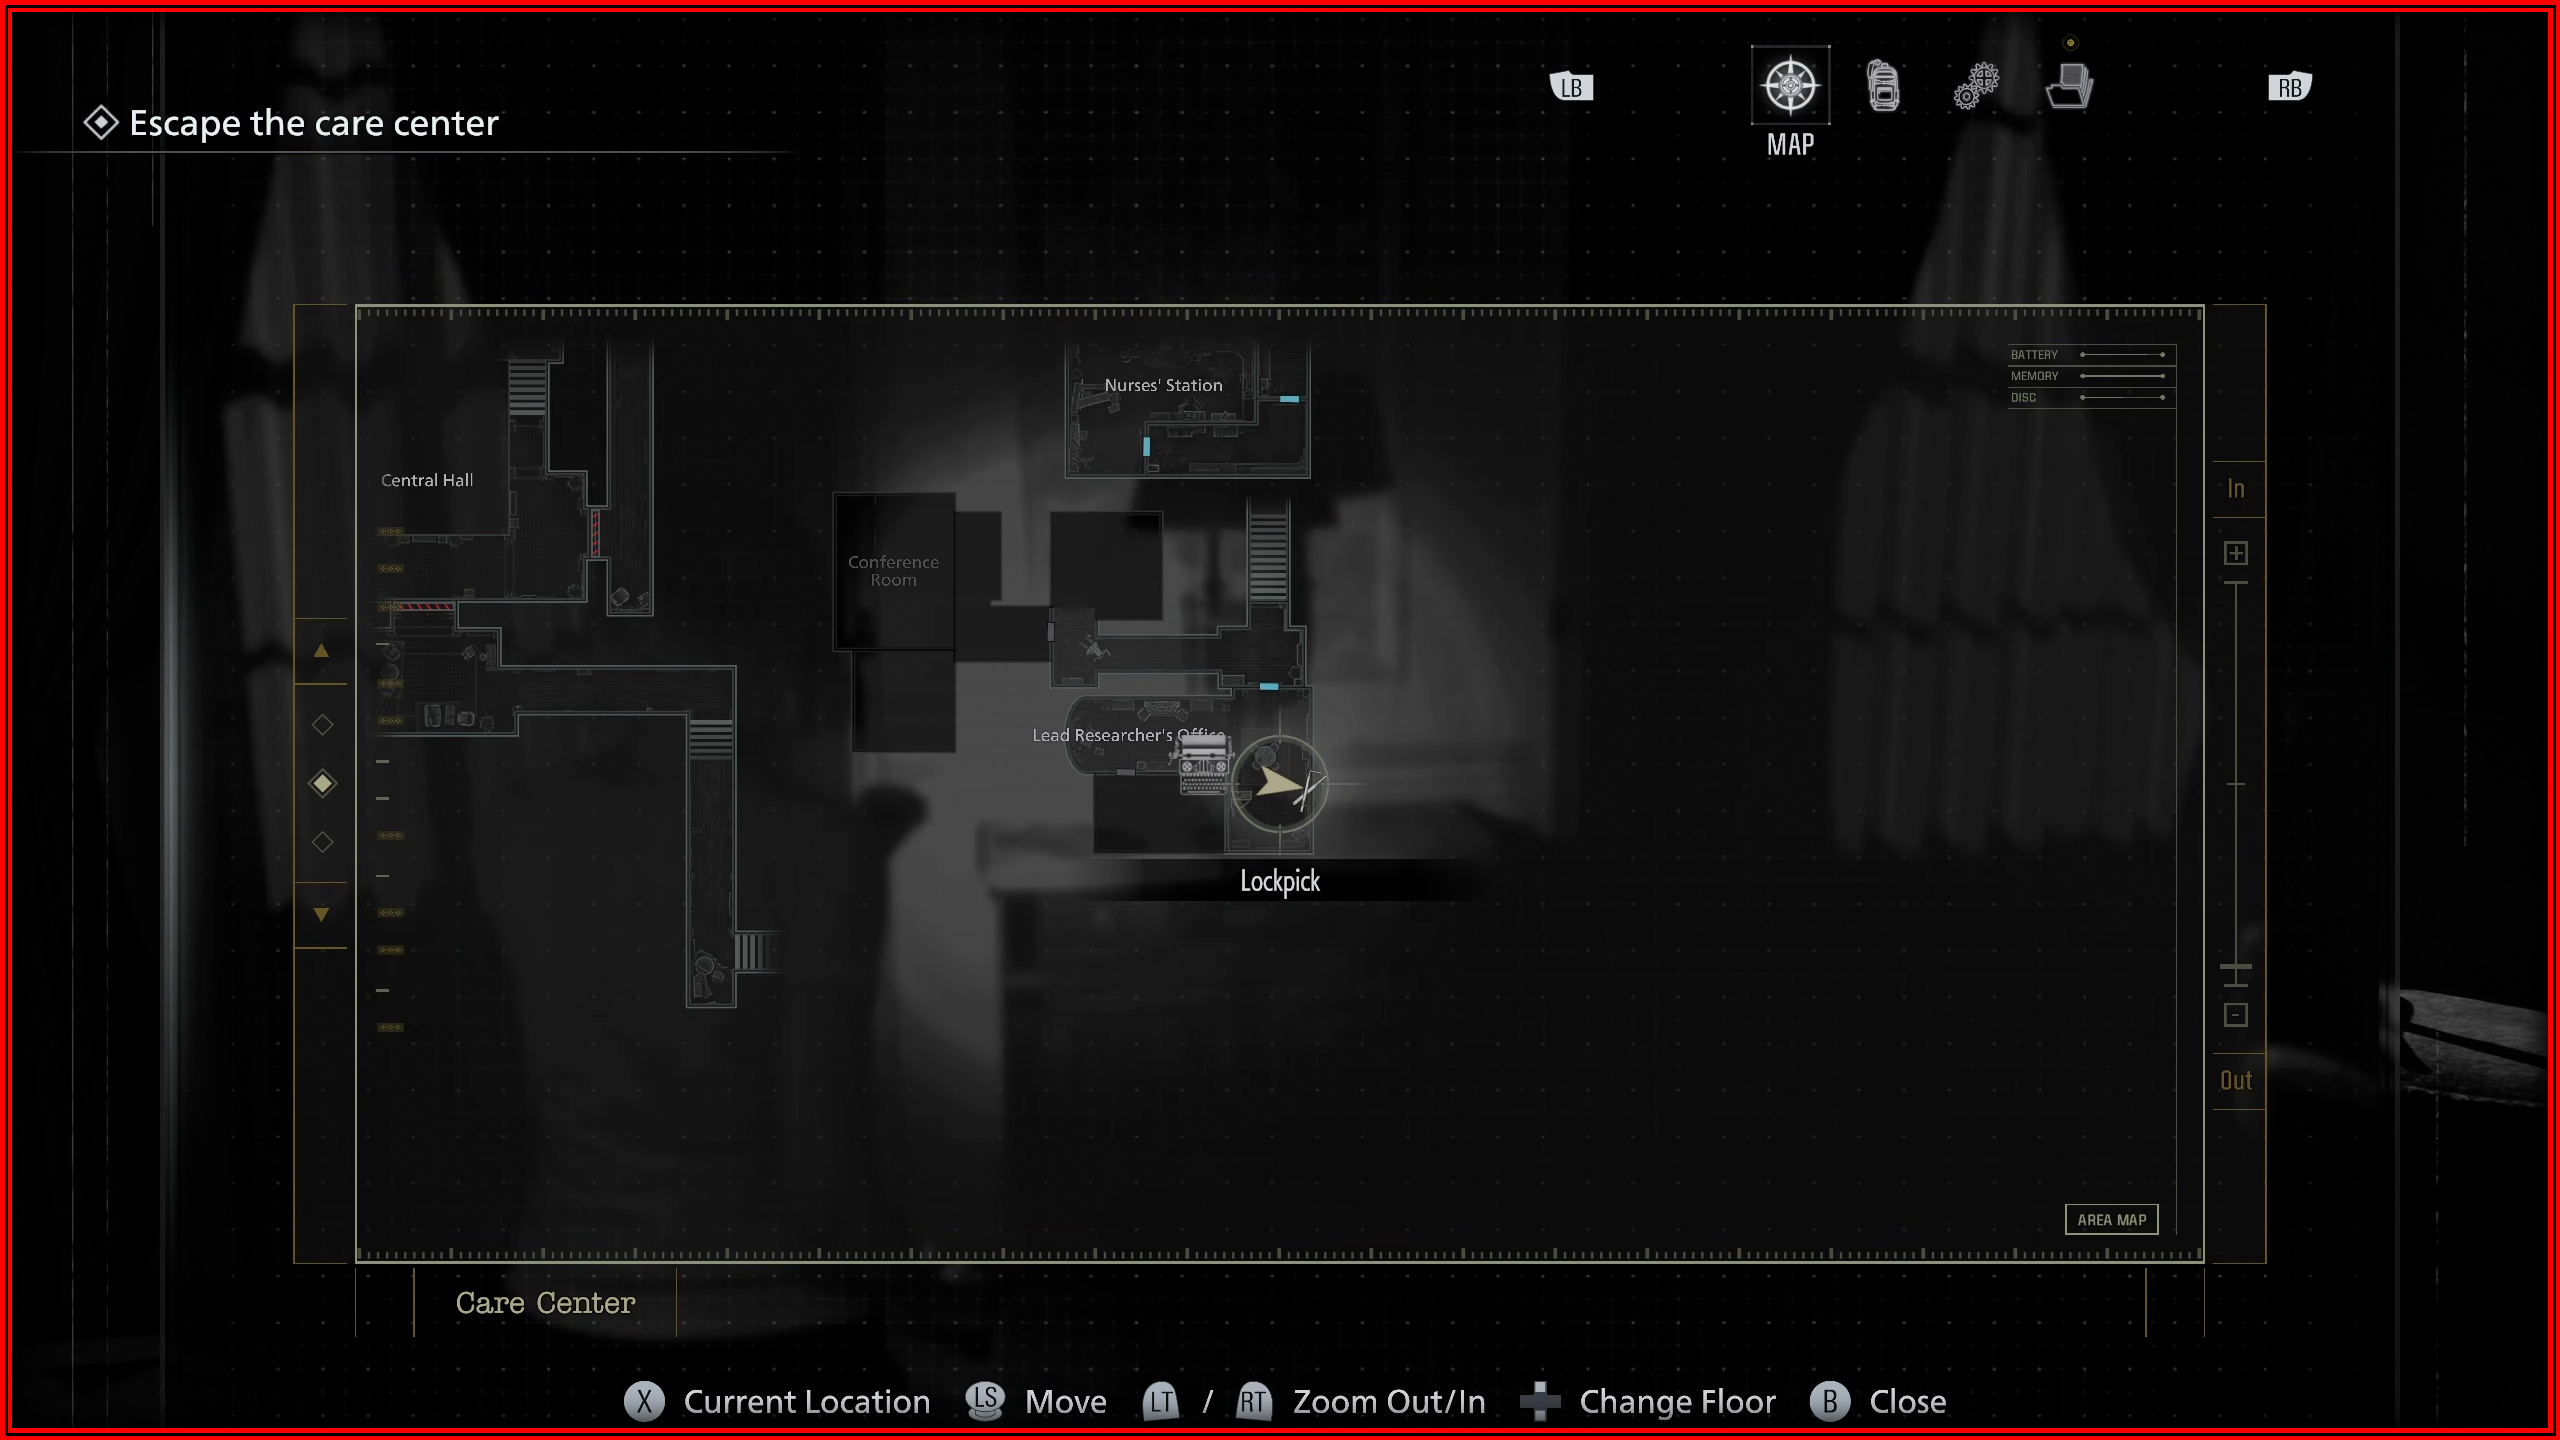
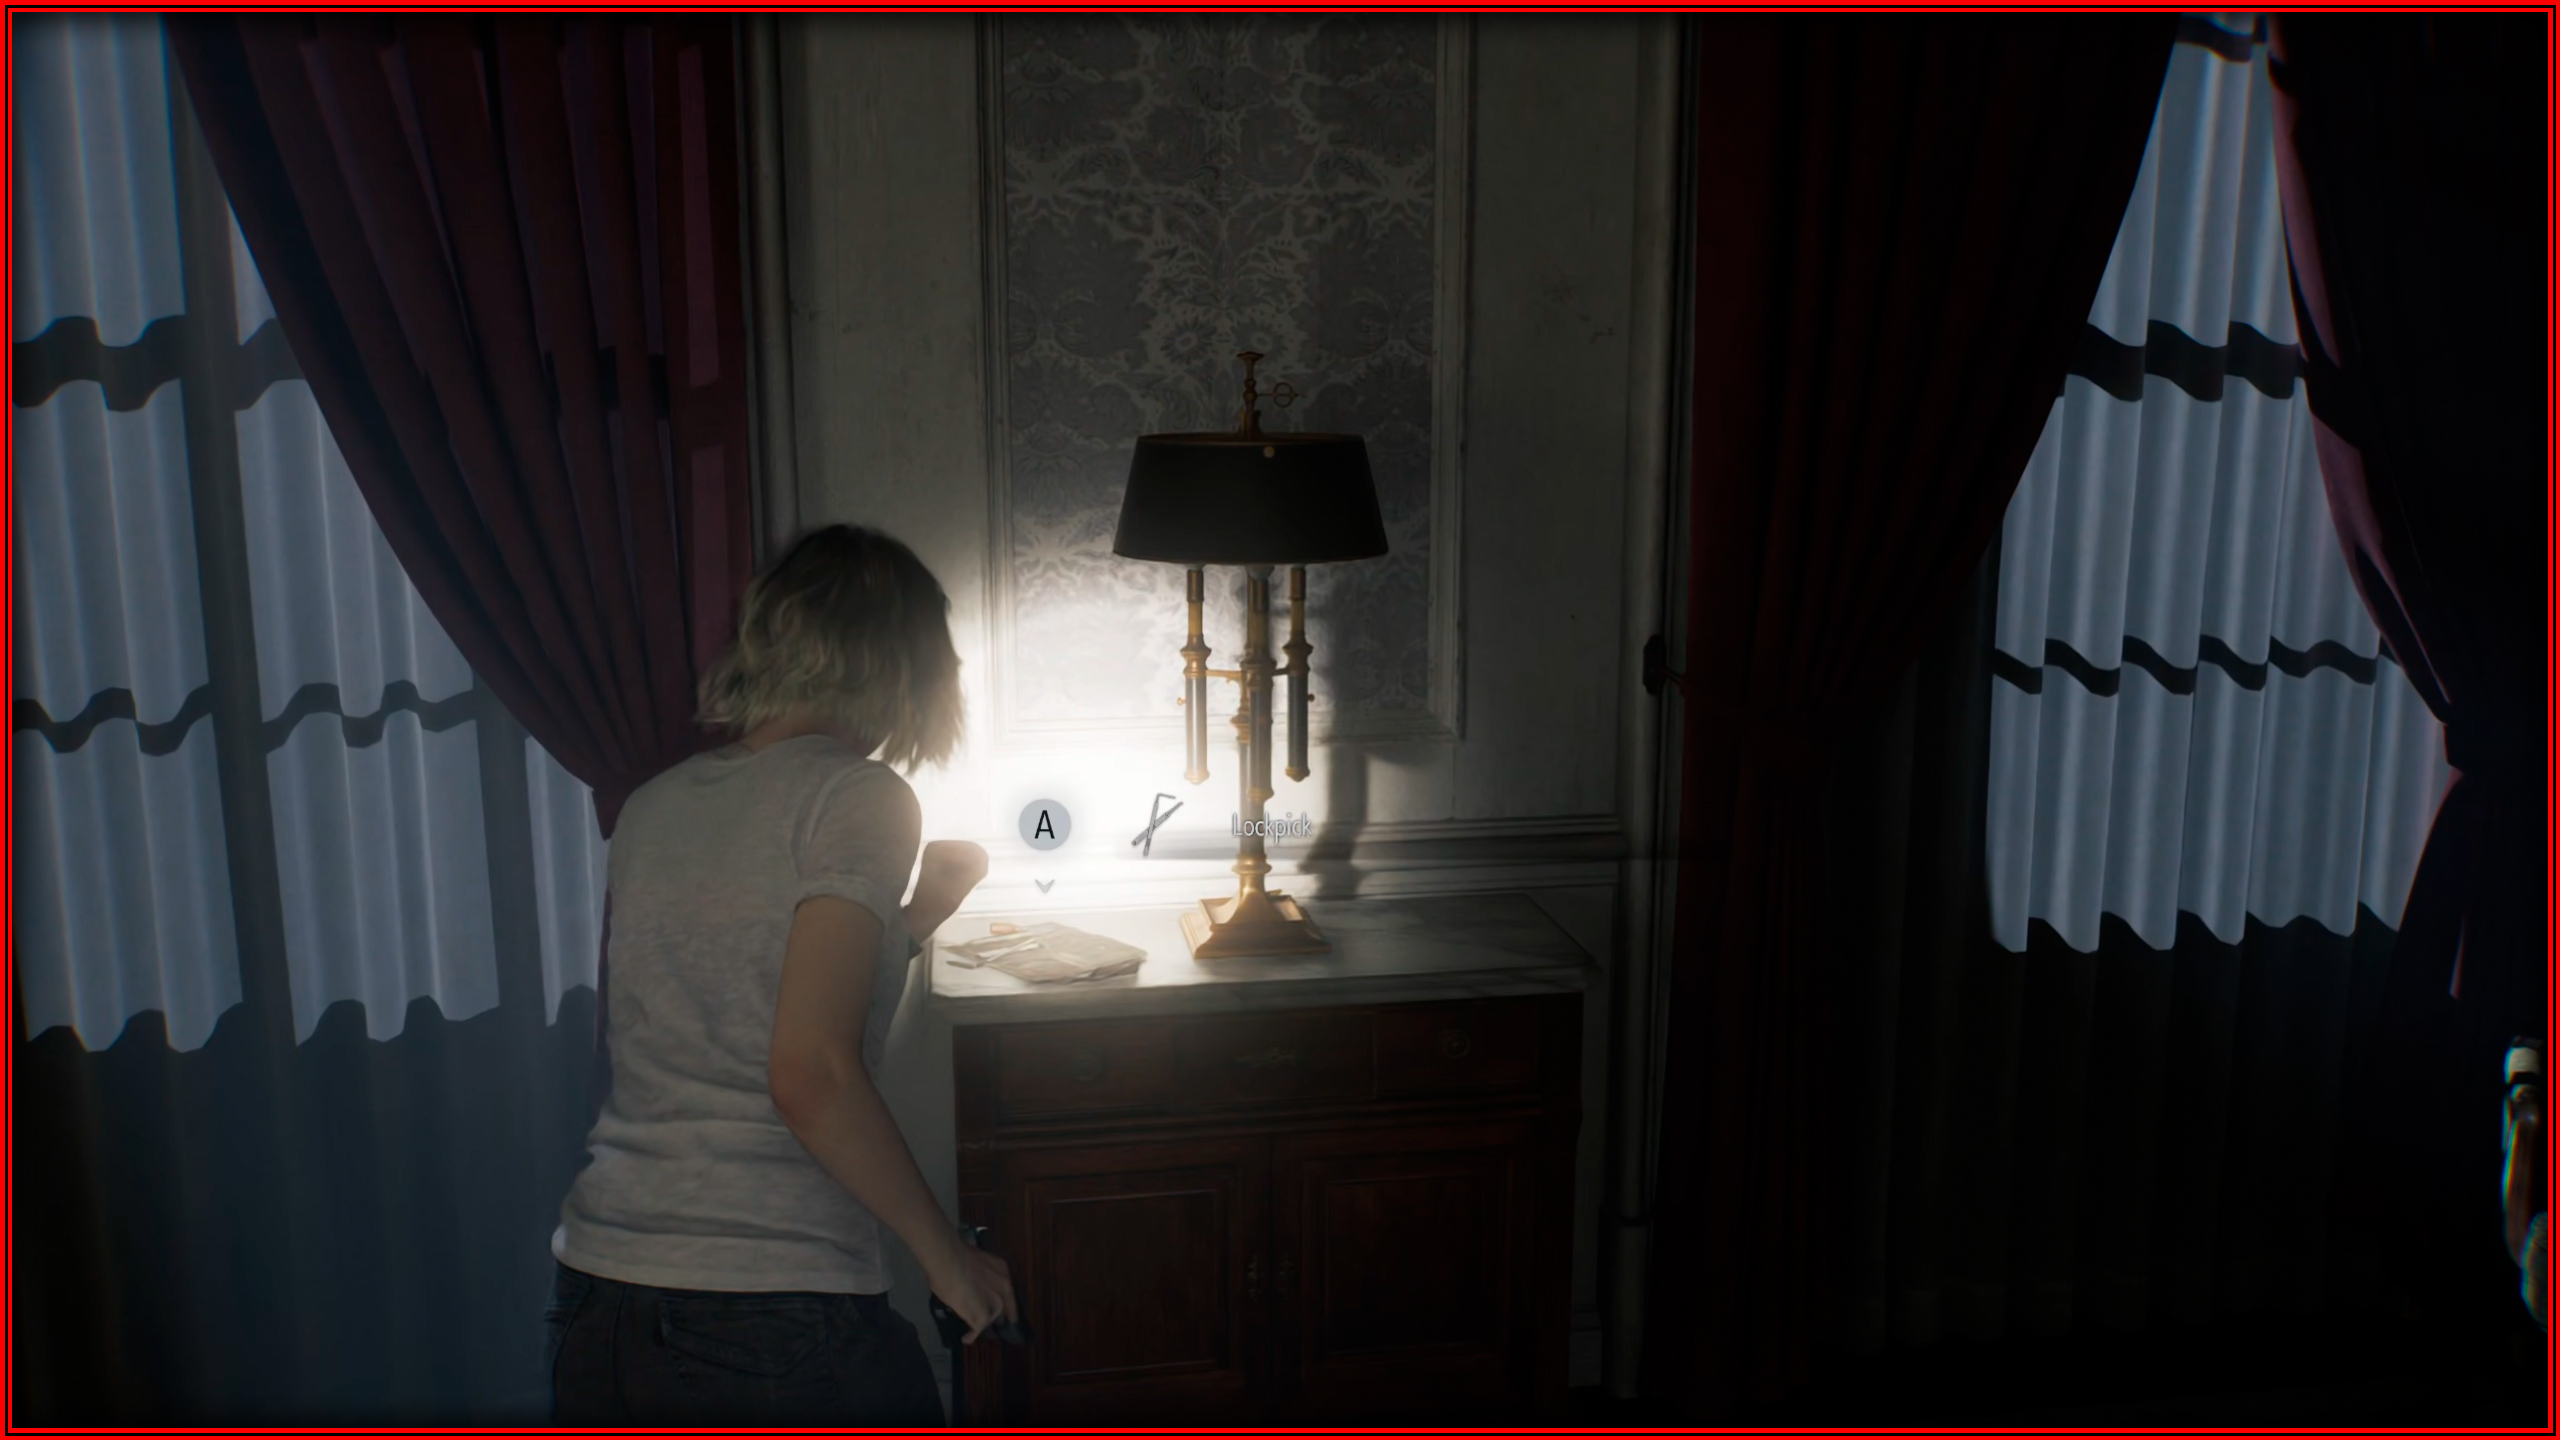
Simple lock
Care Center - East Wing Lobby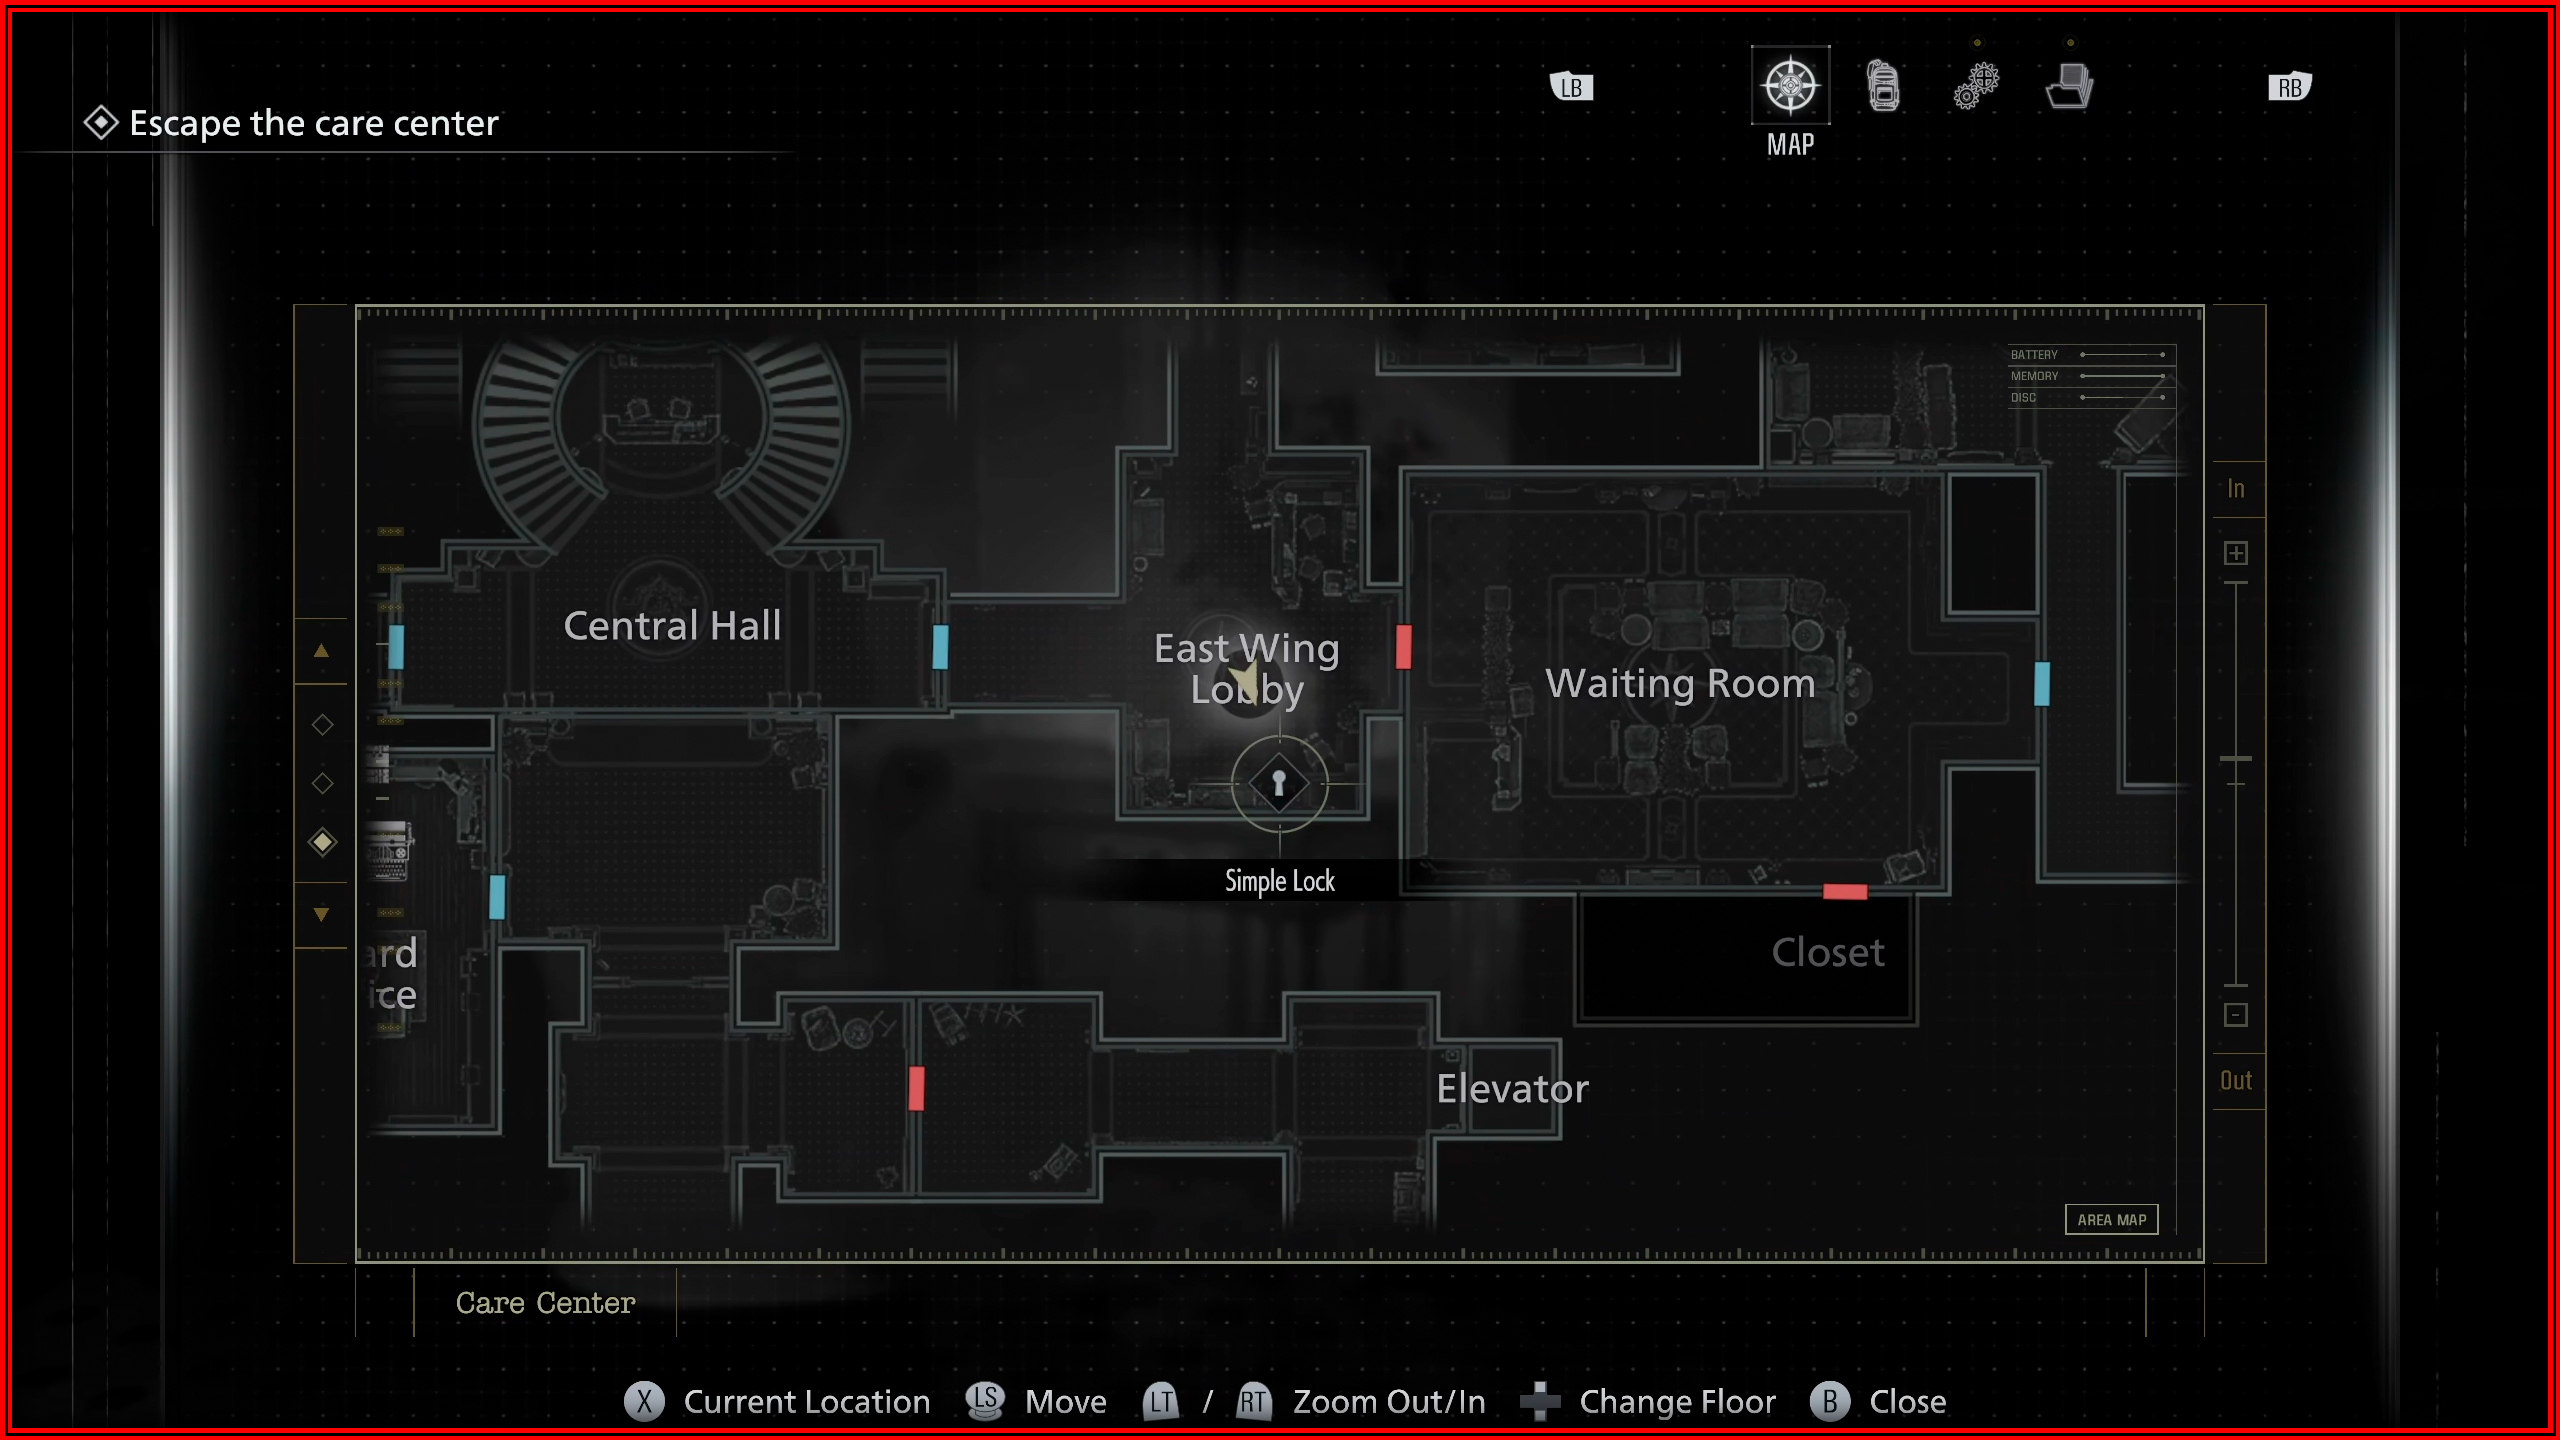
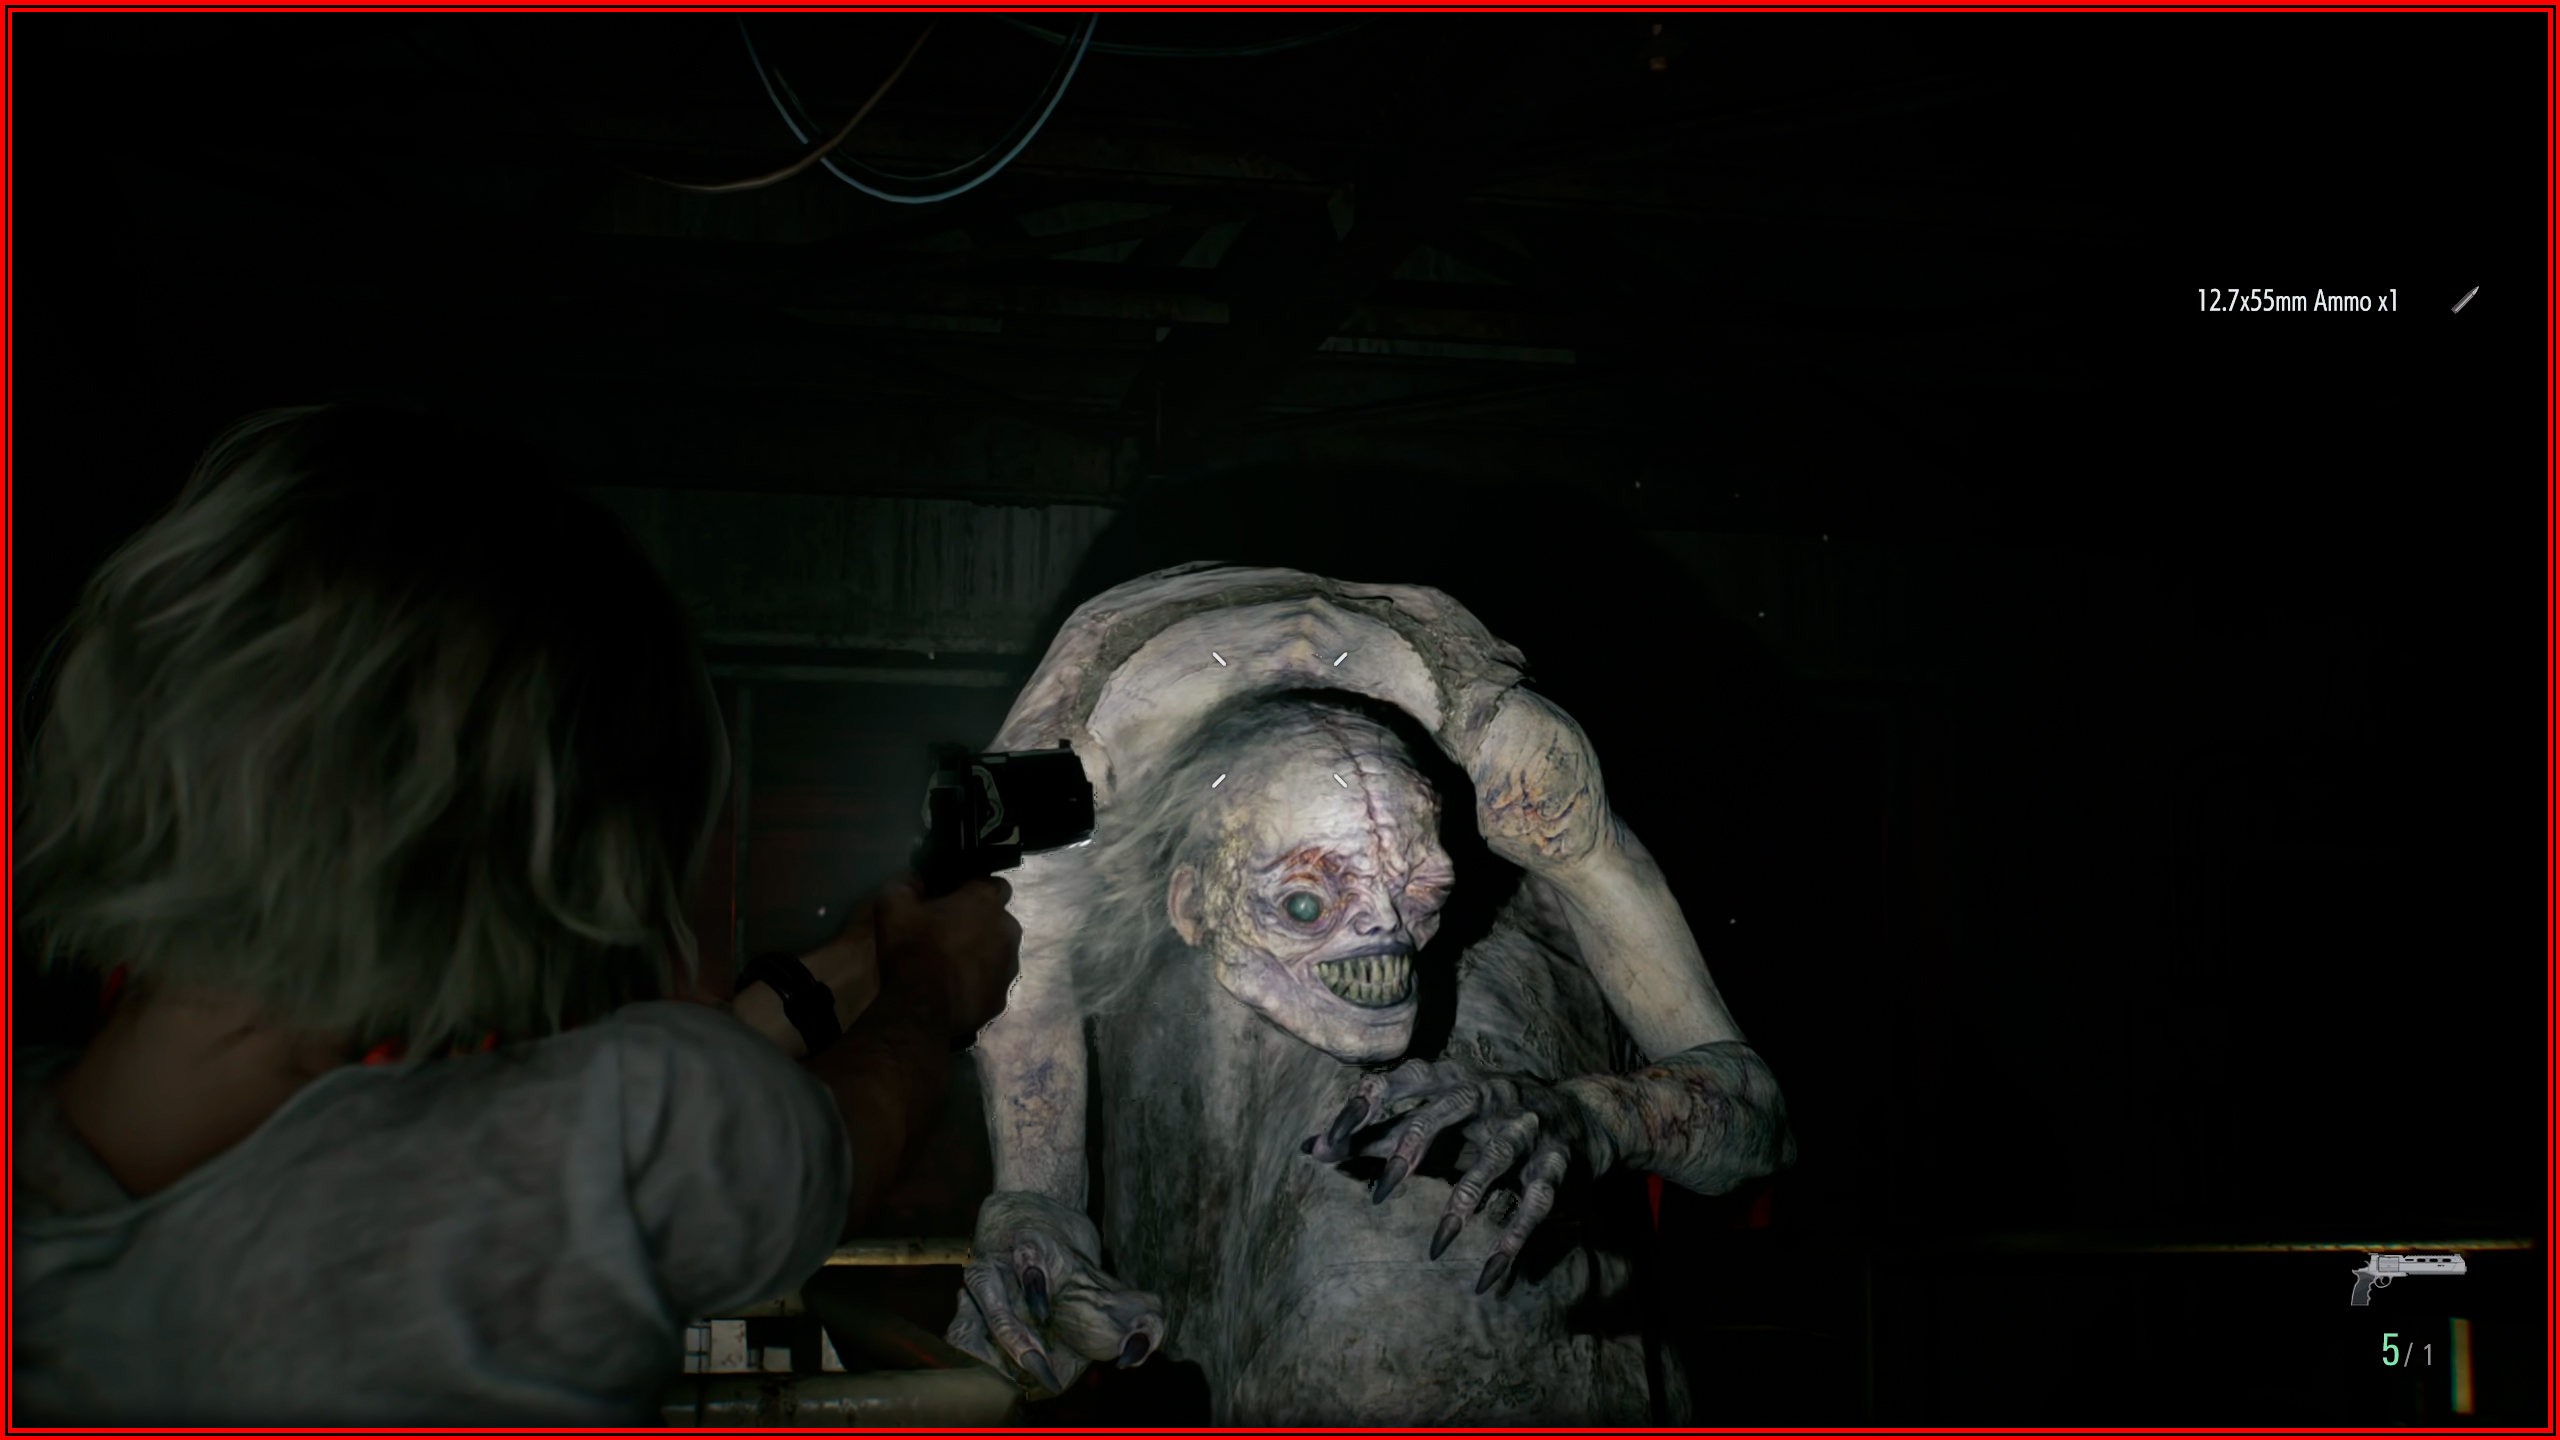
Fatal Dose
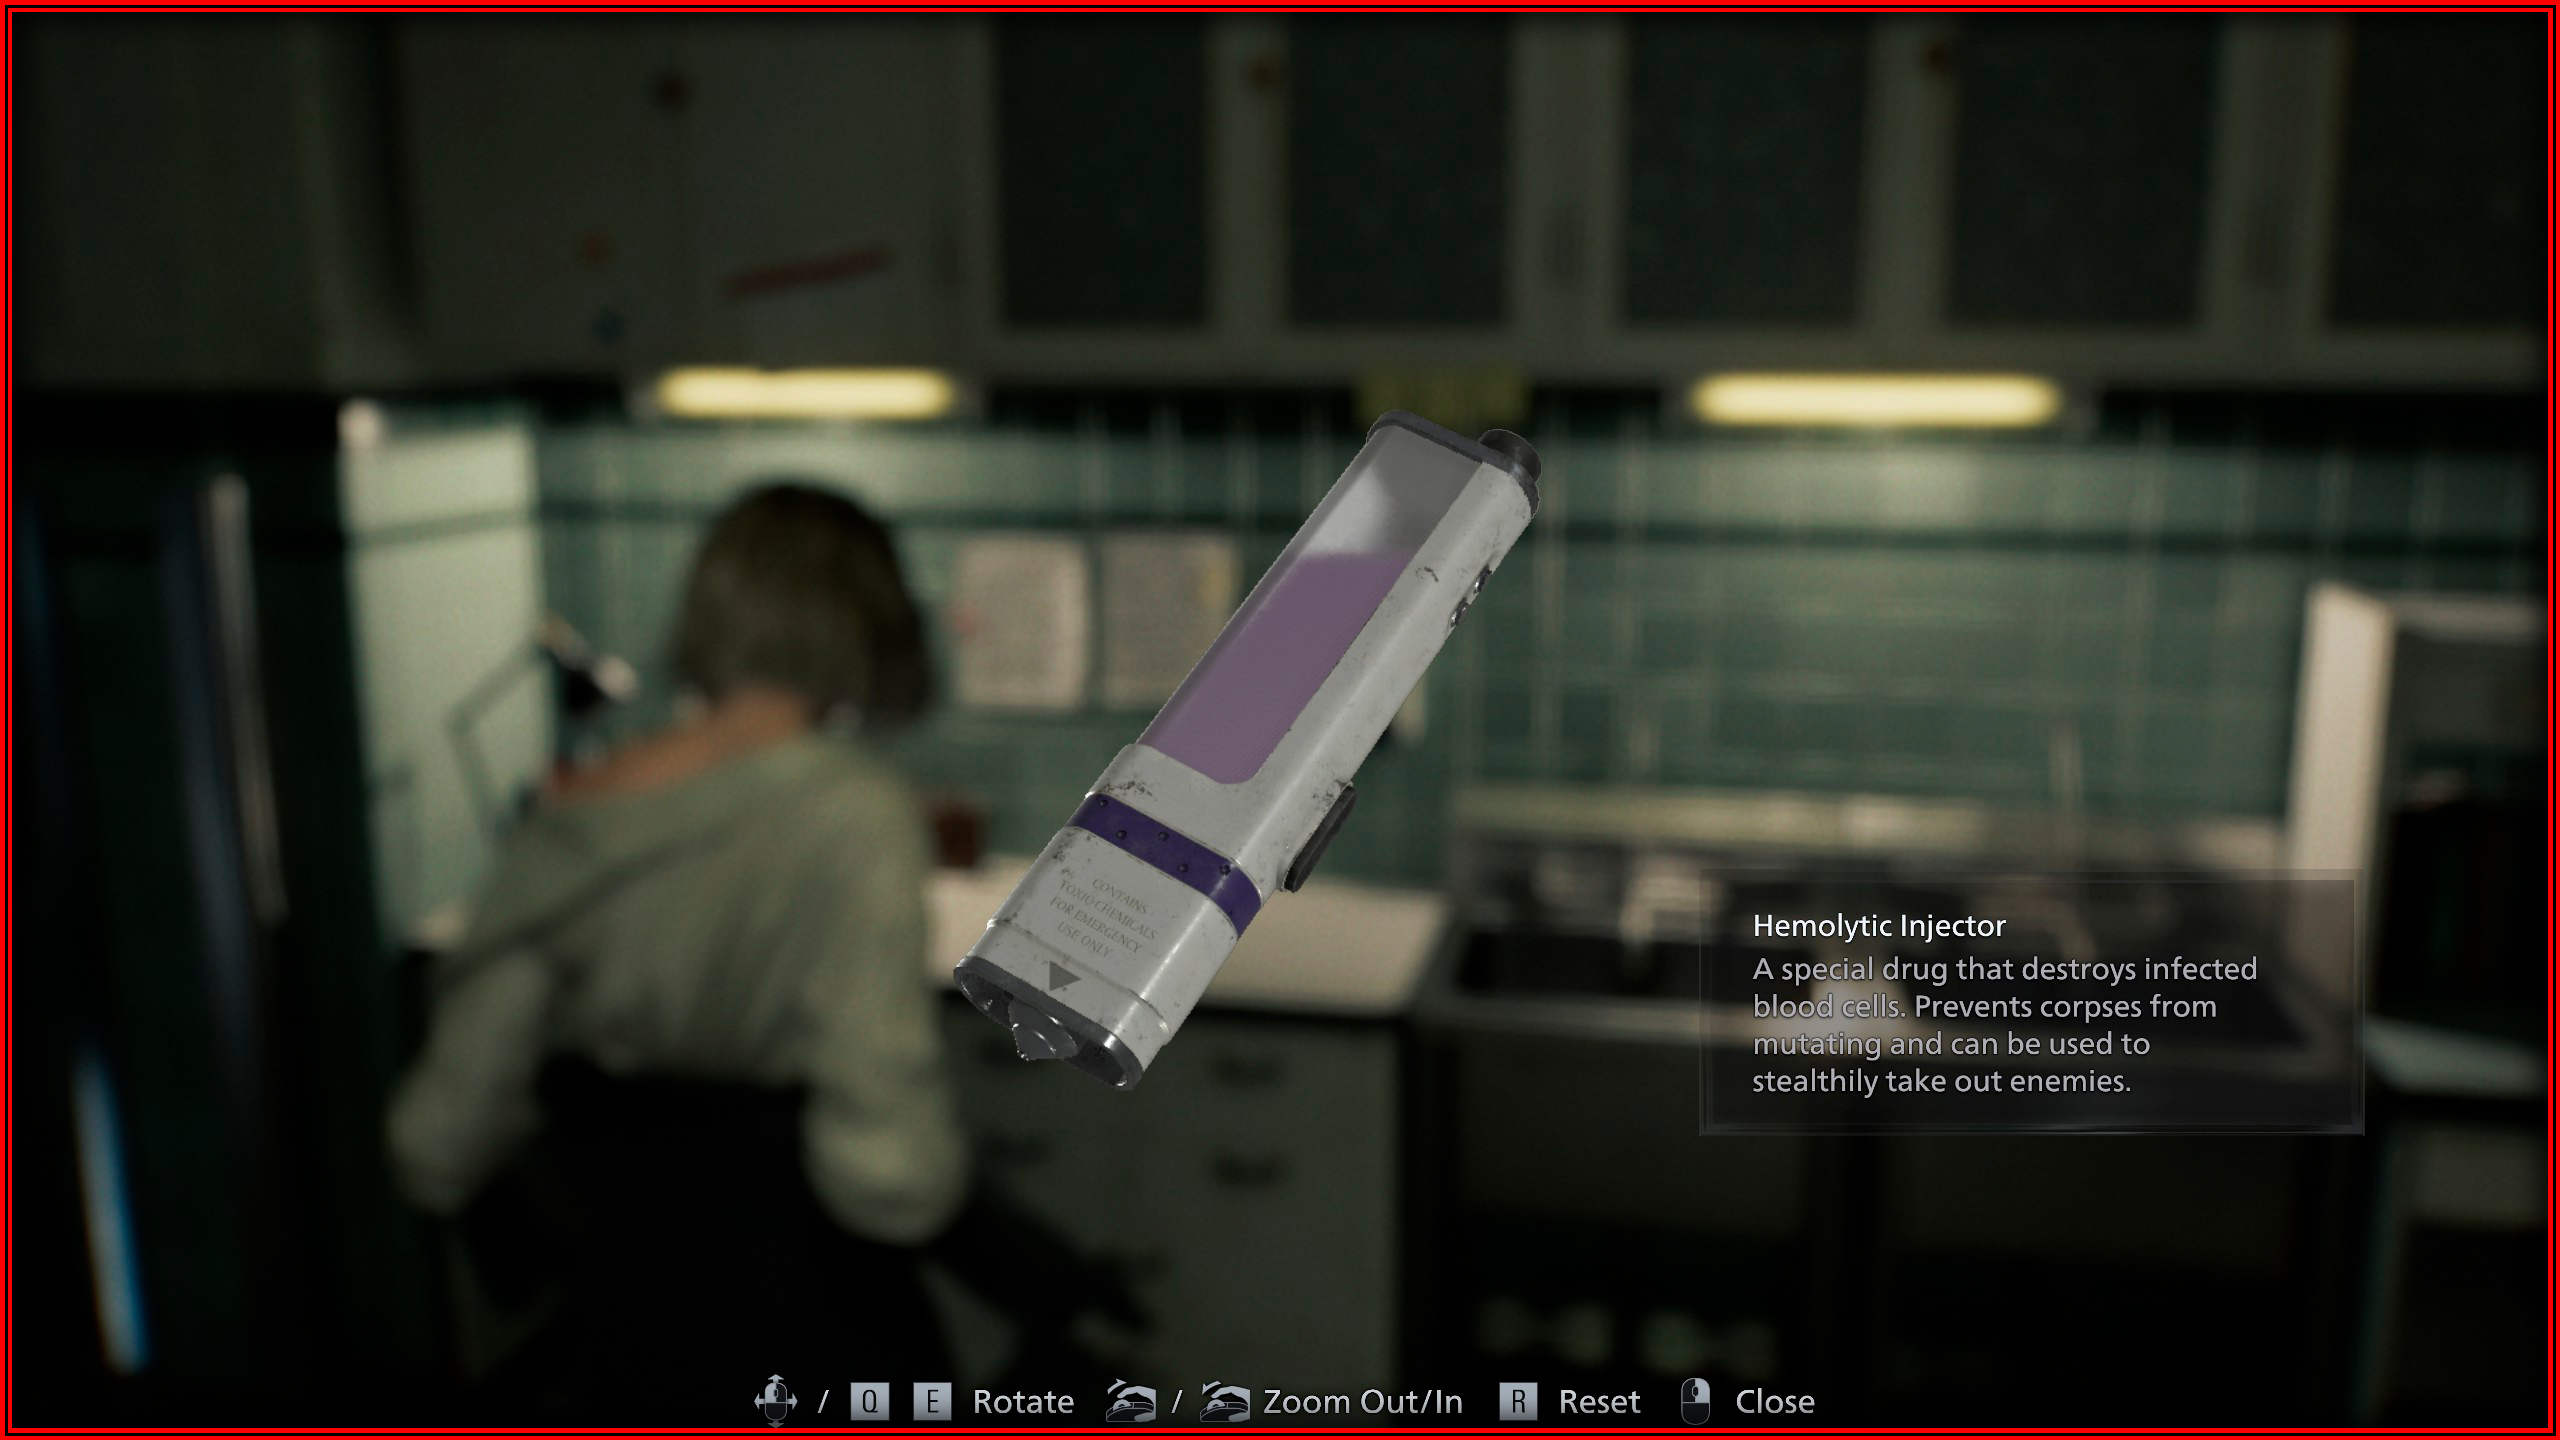
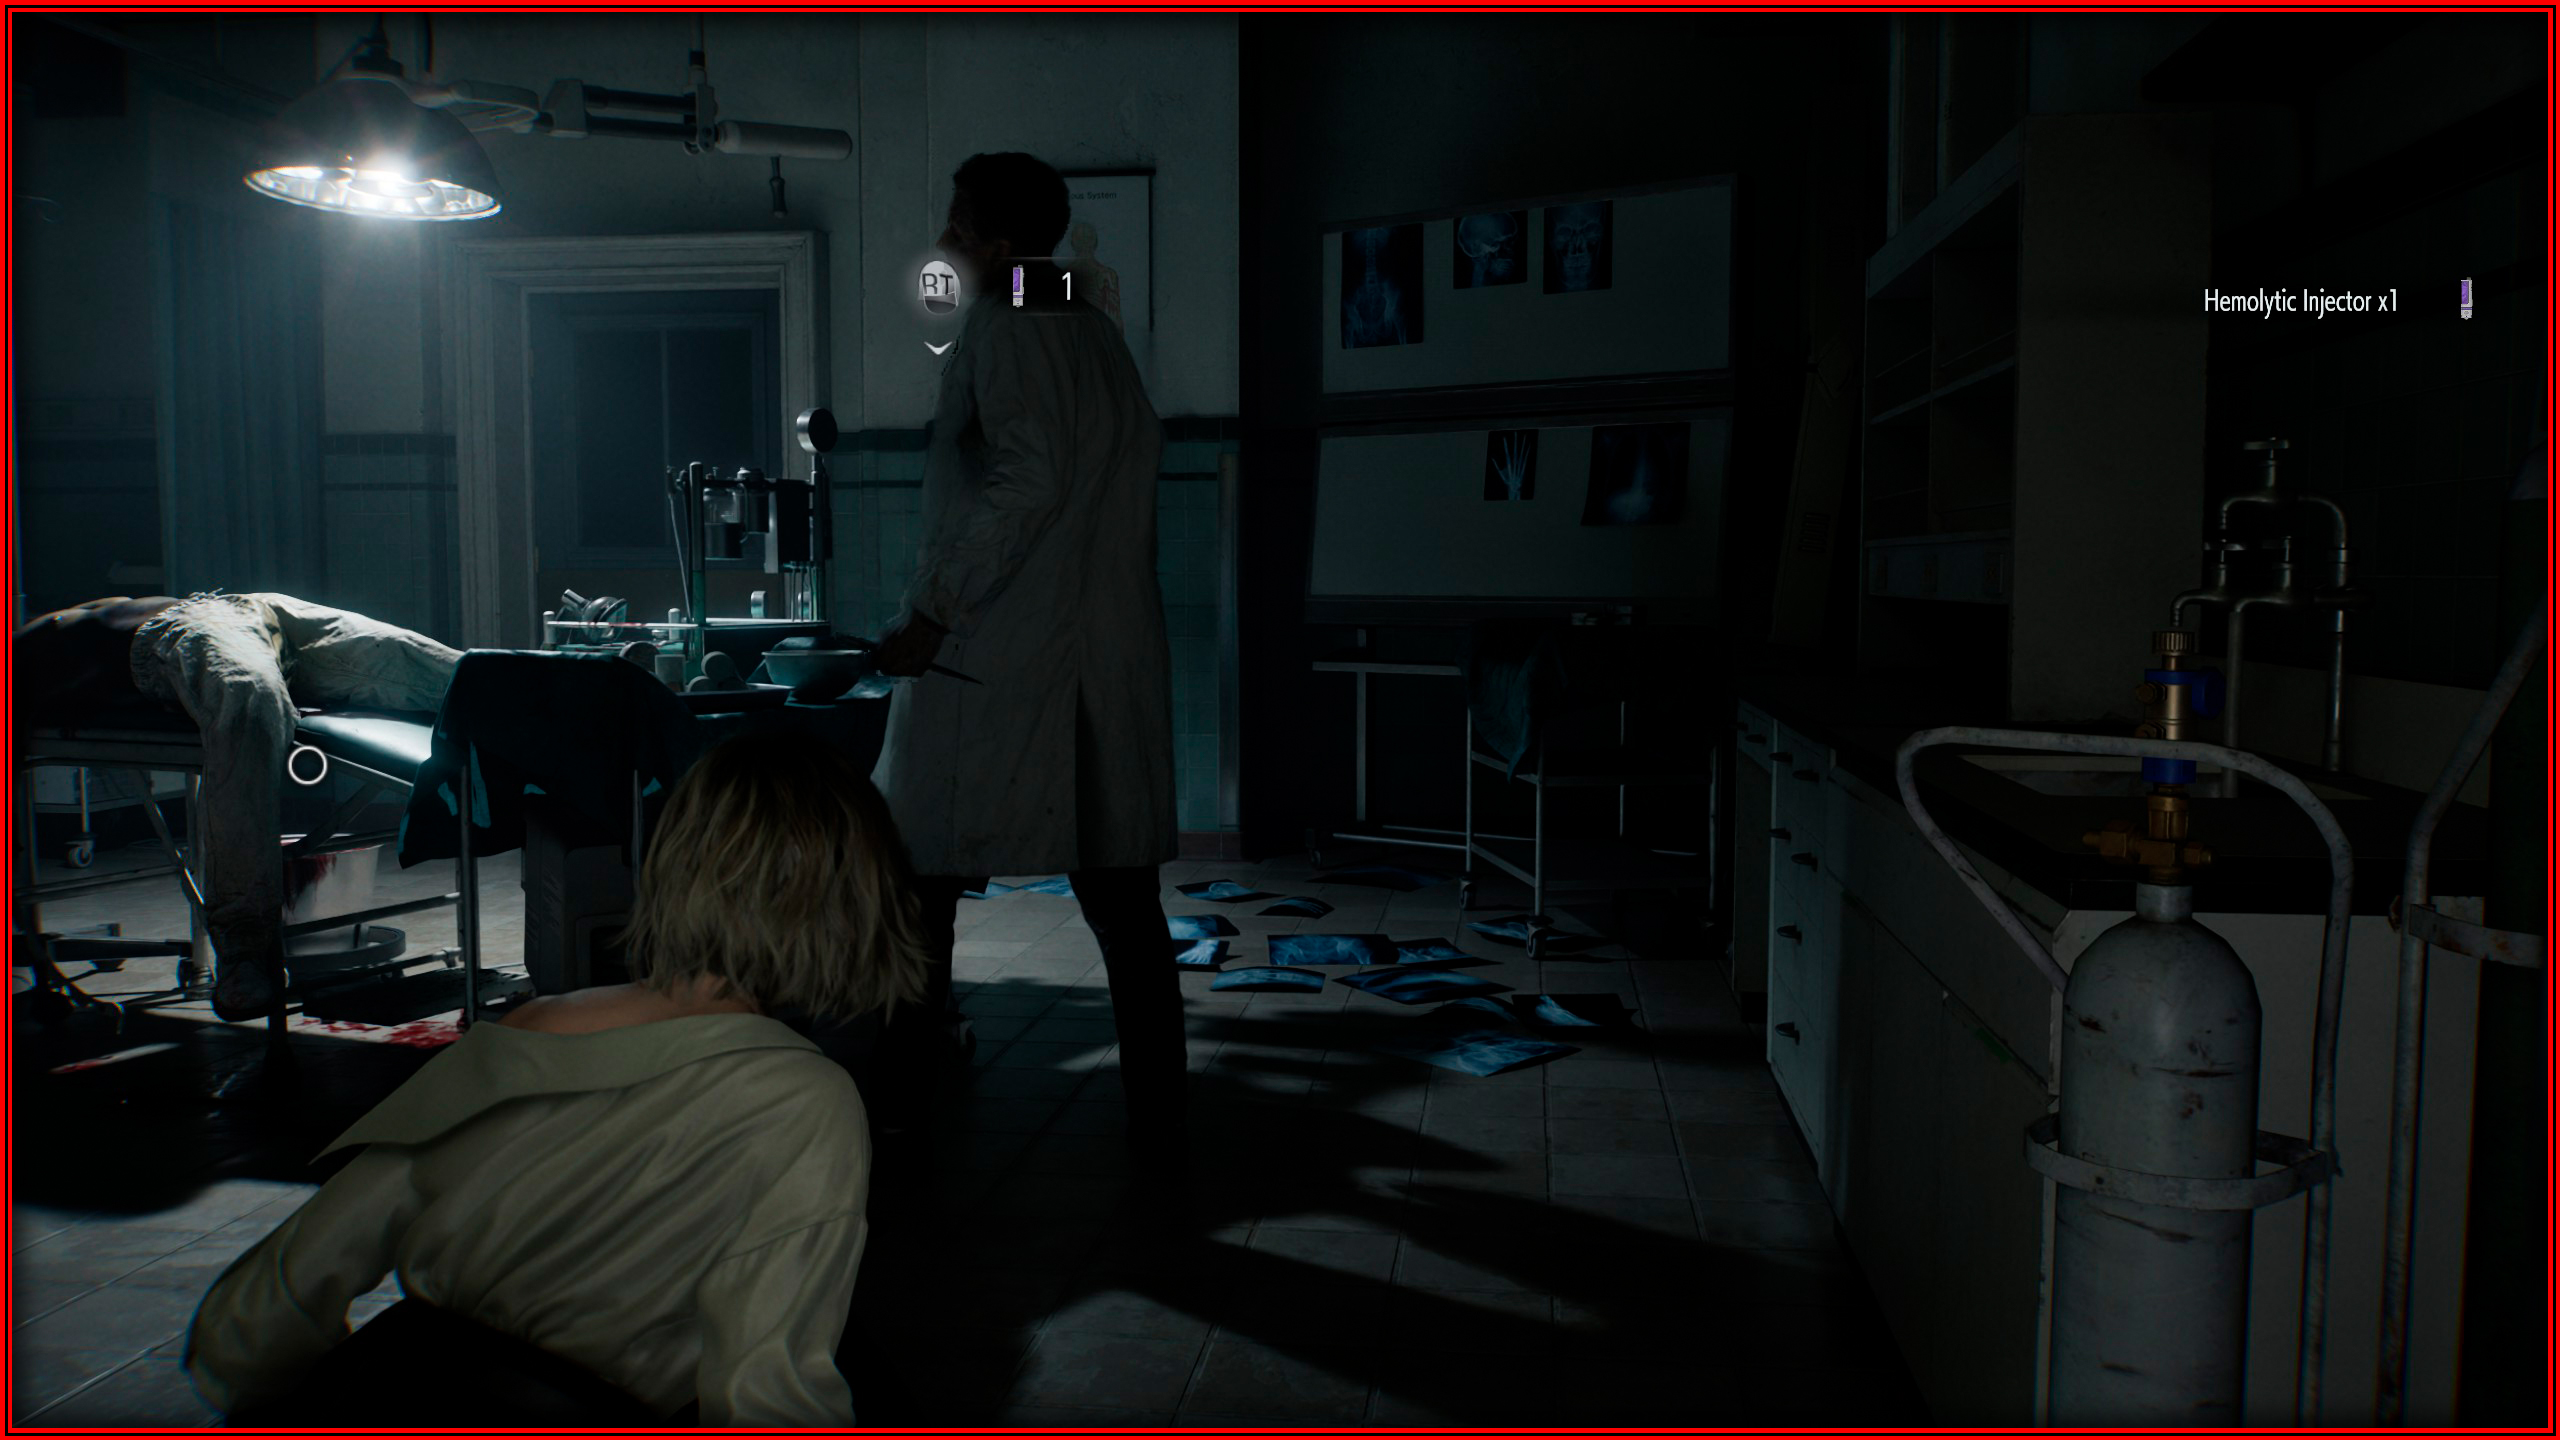
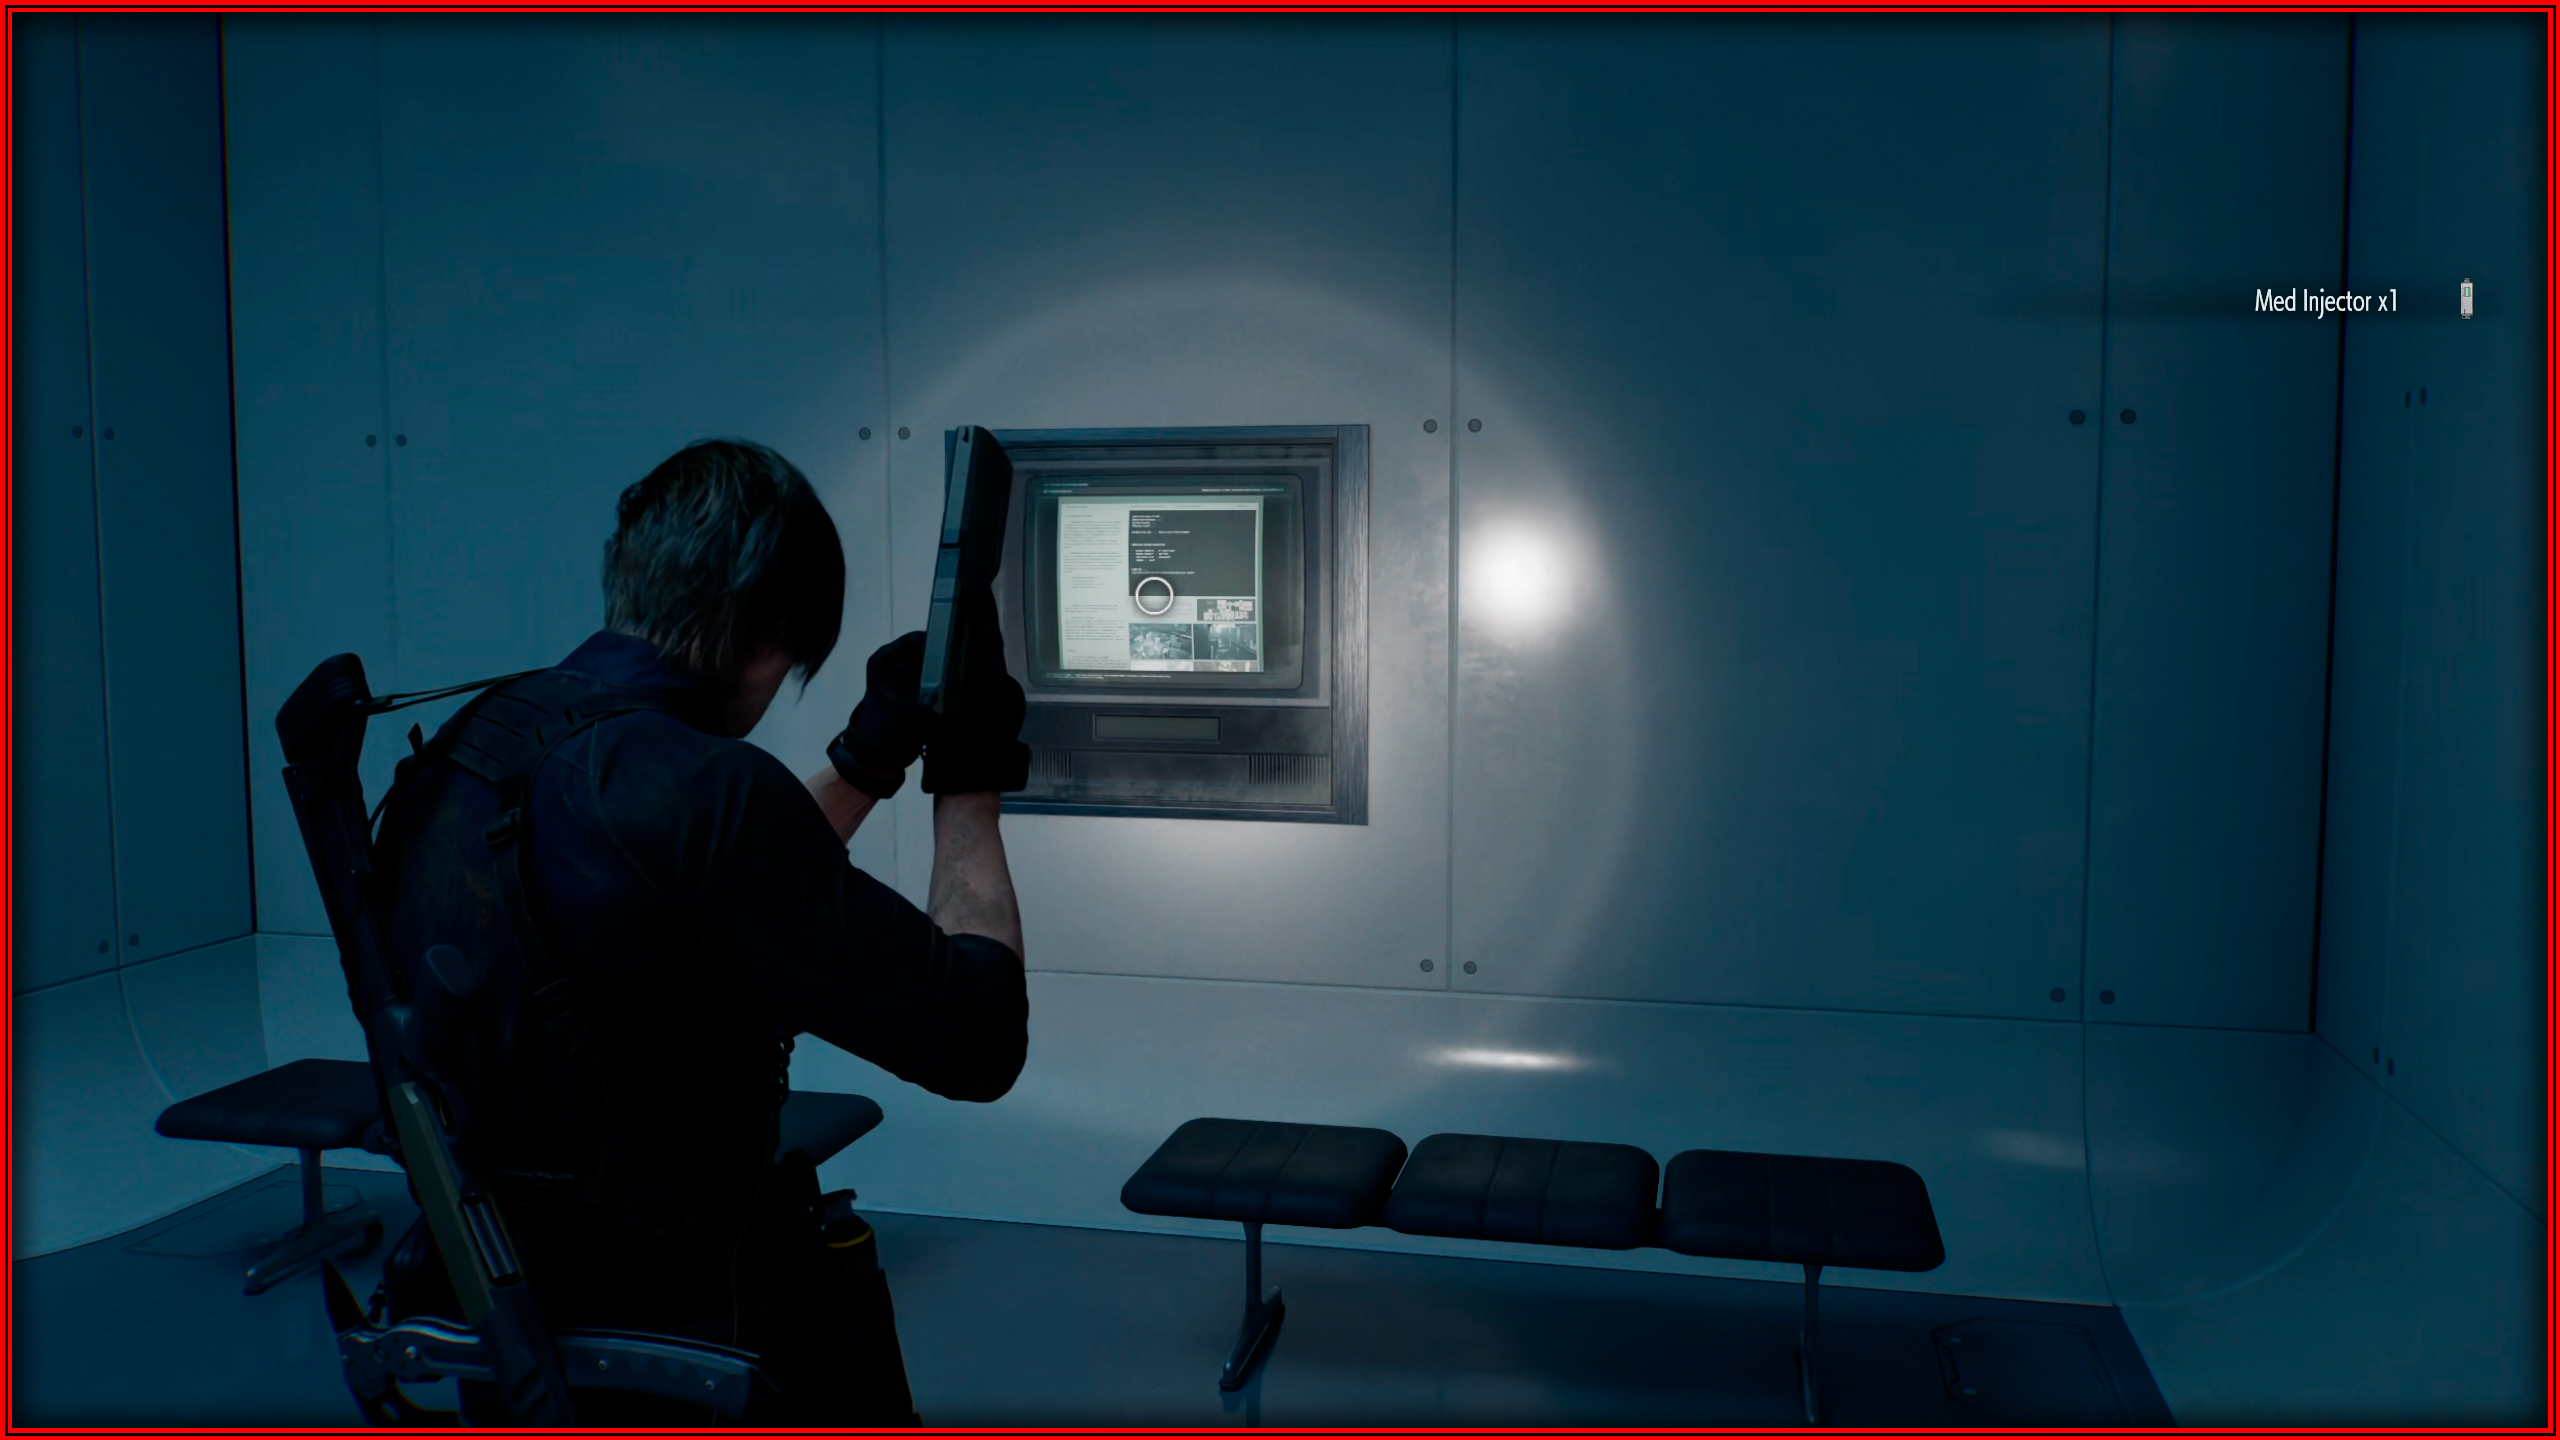
 You get a Hemolytic Injector for the first time in the Examination Room. Next to it, there will be a Zombie, sneak behind it and press R2/RT to get the achievement.
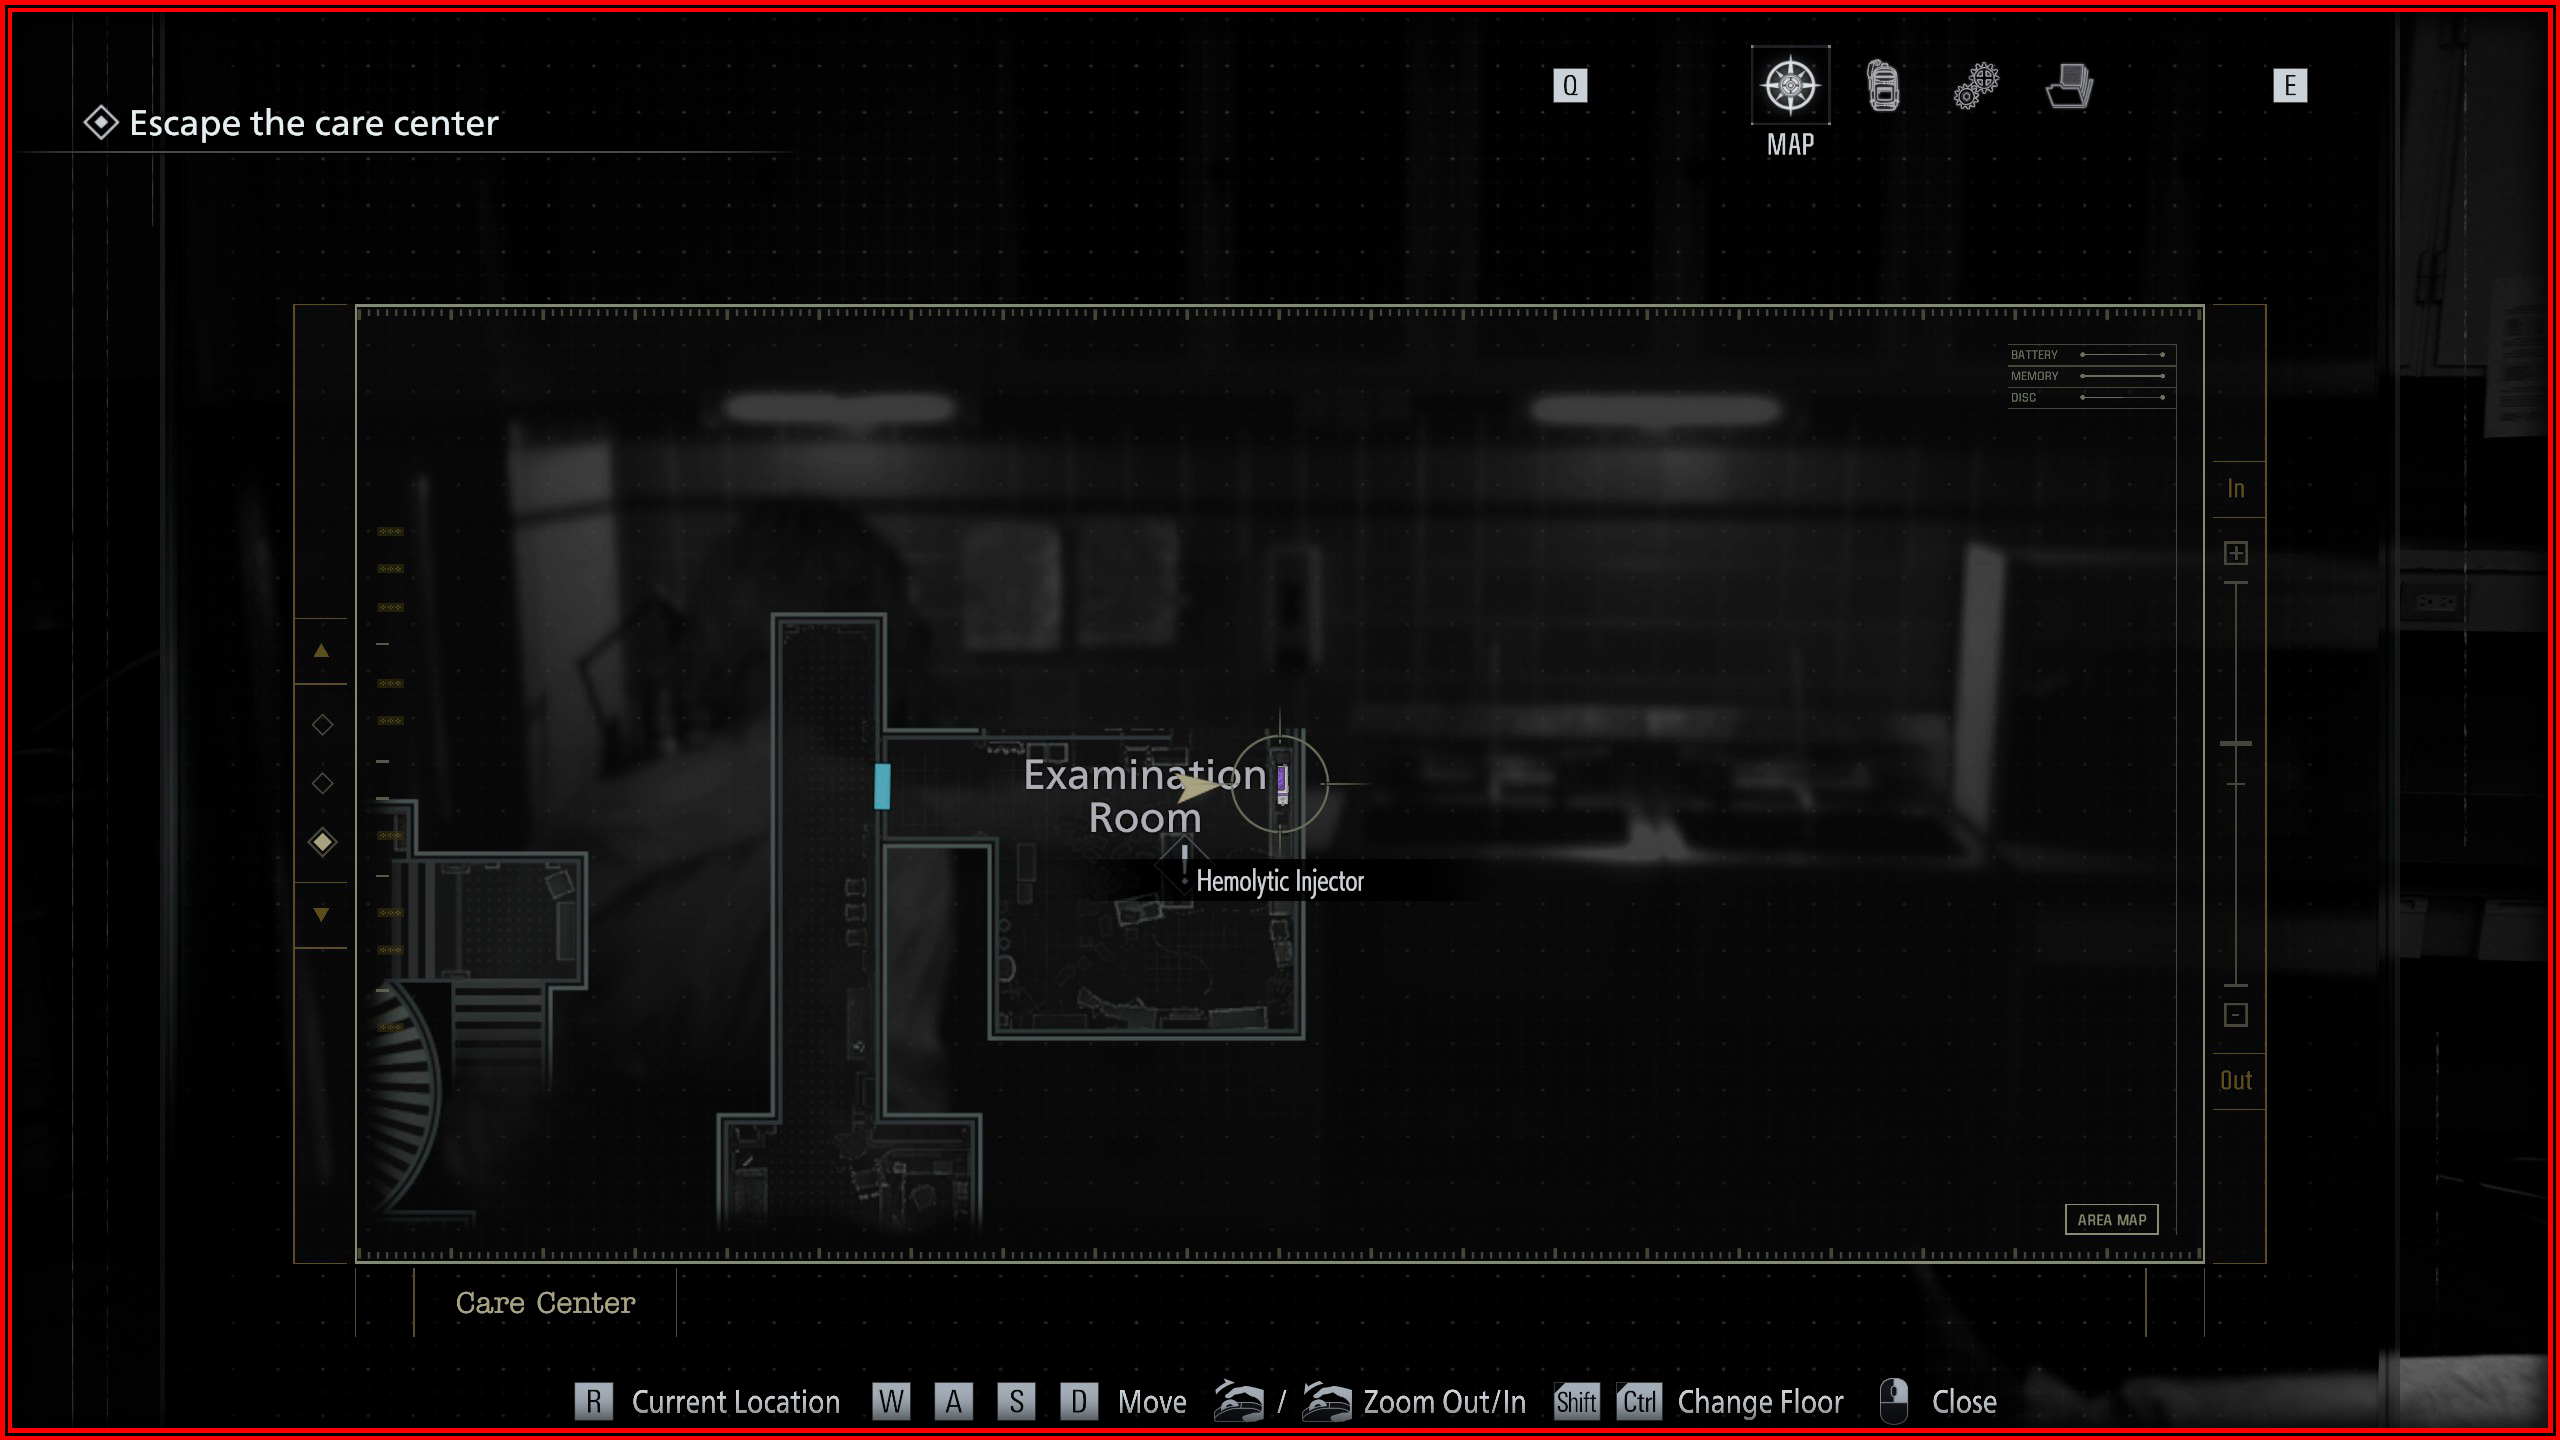
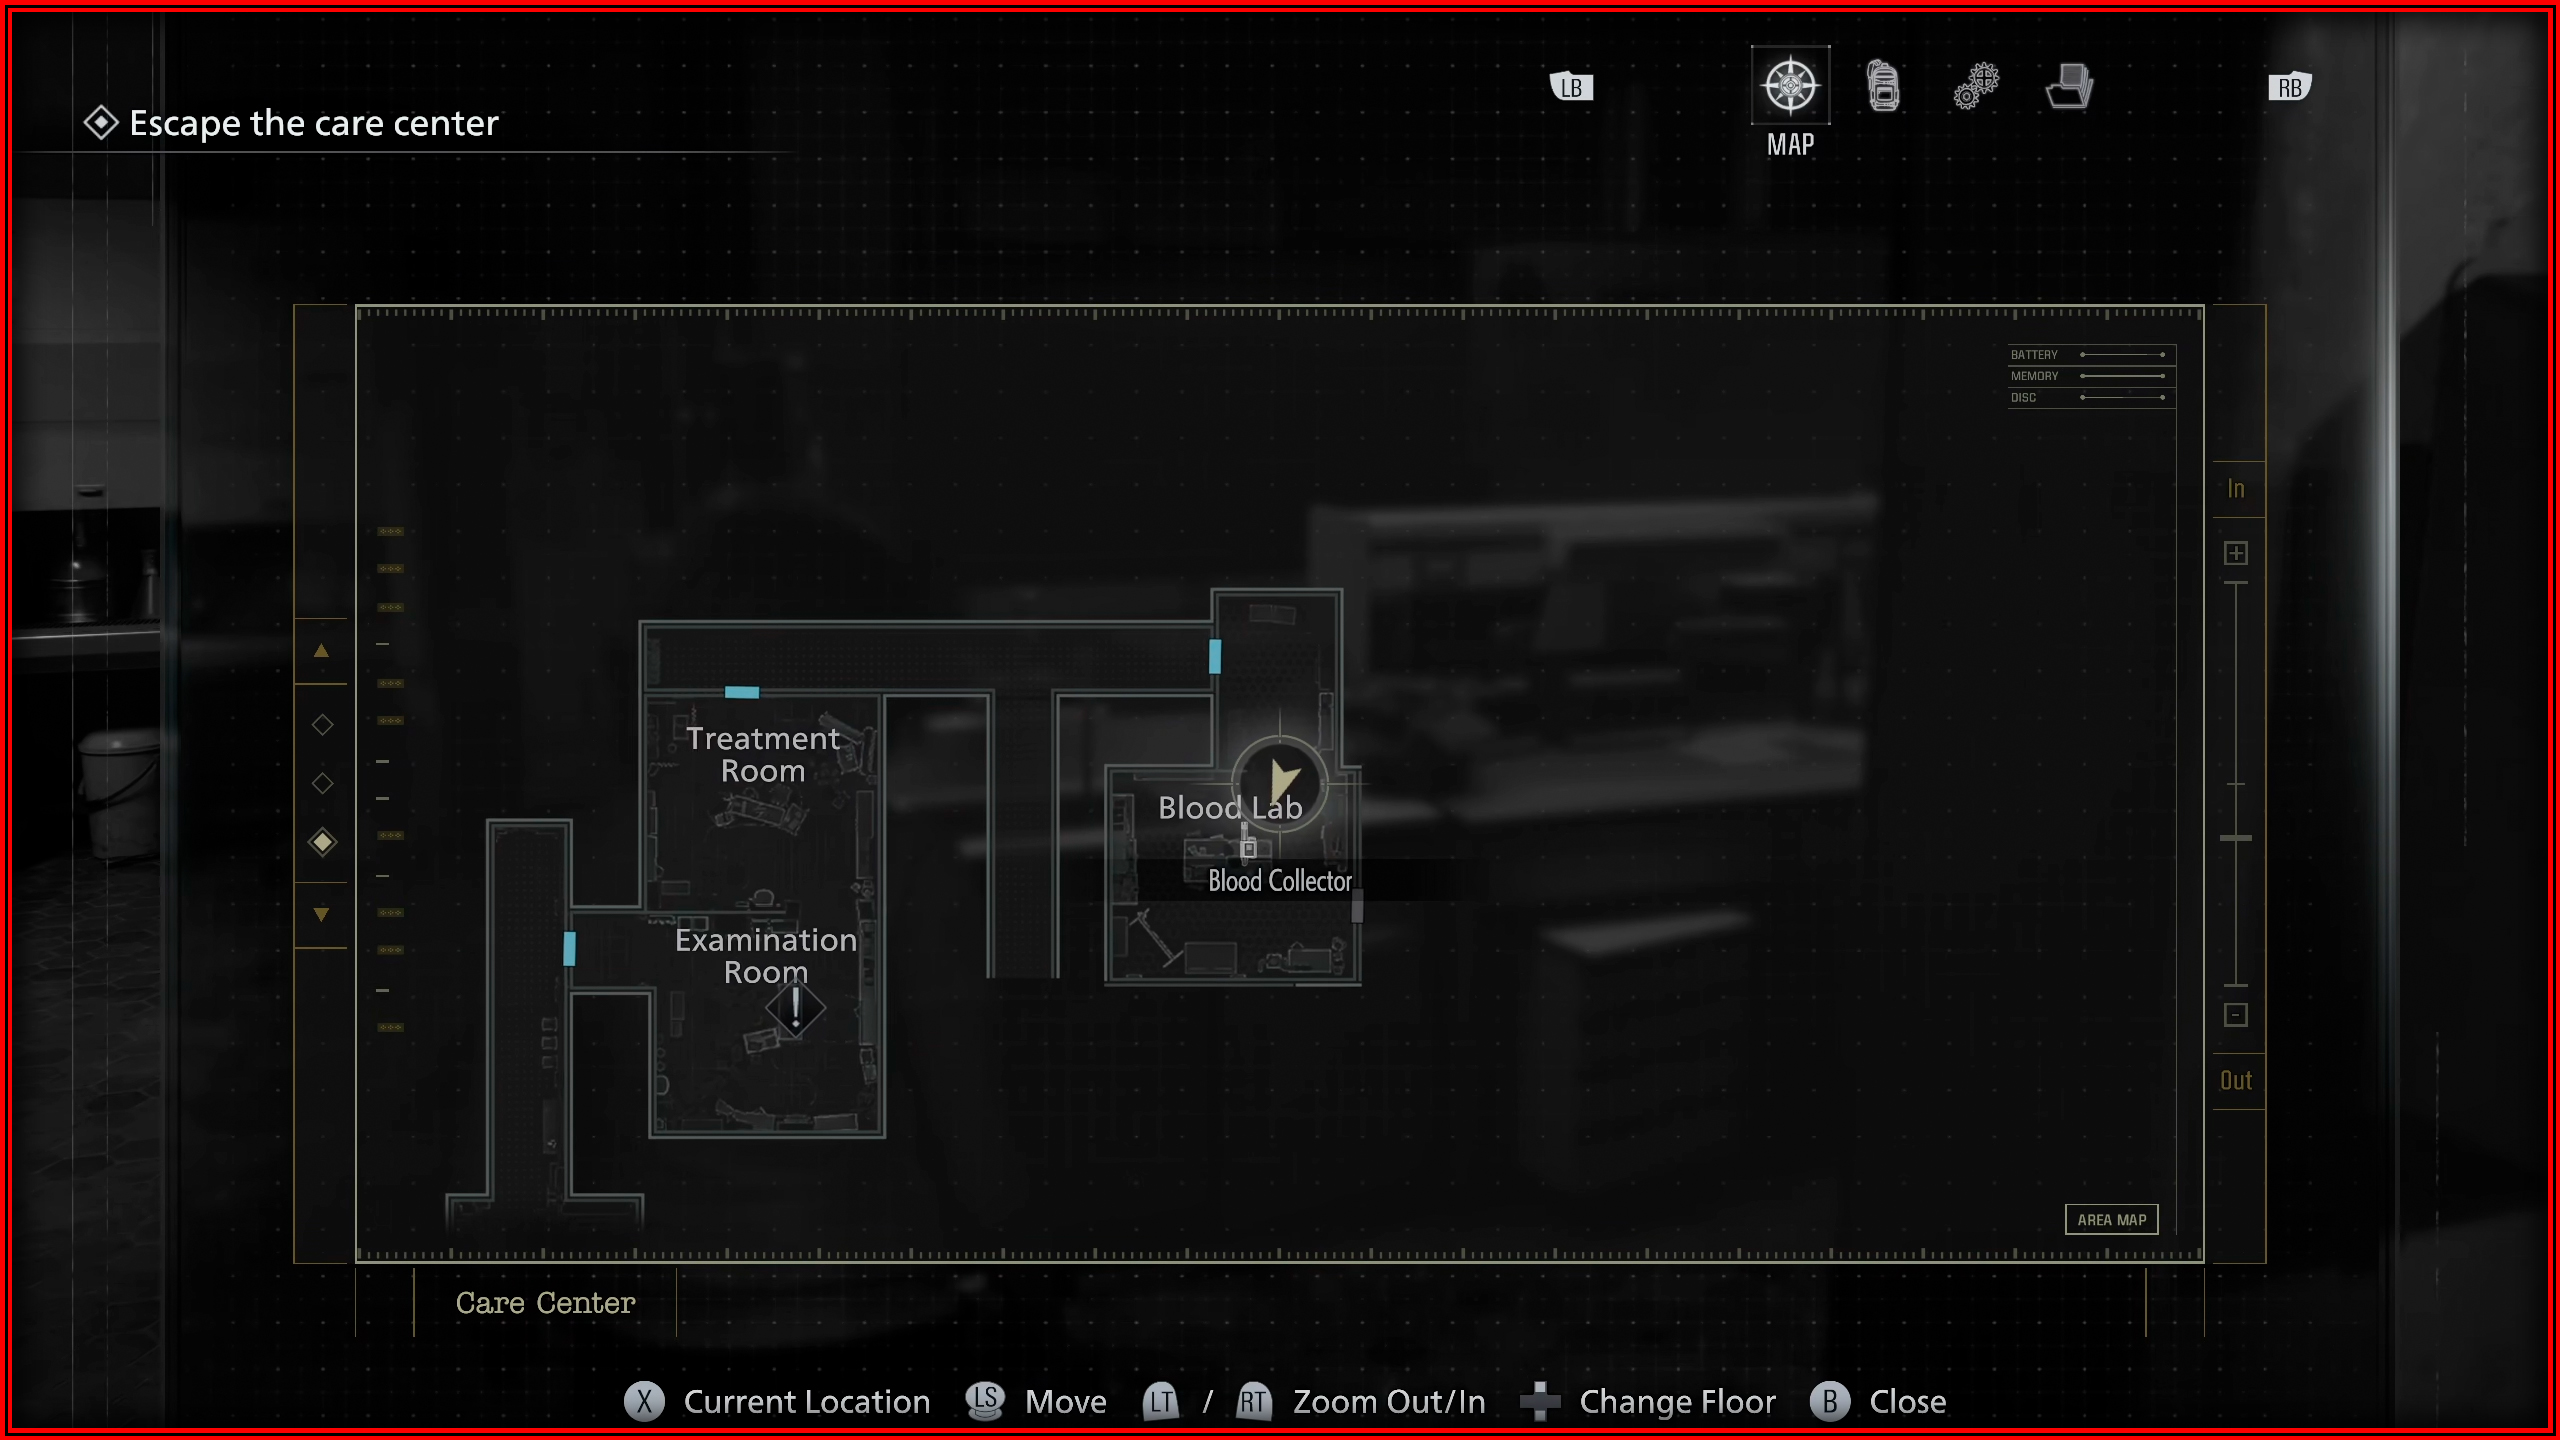
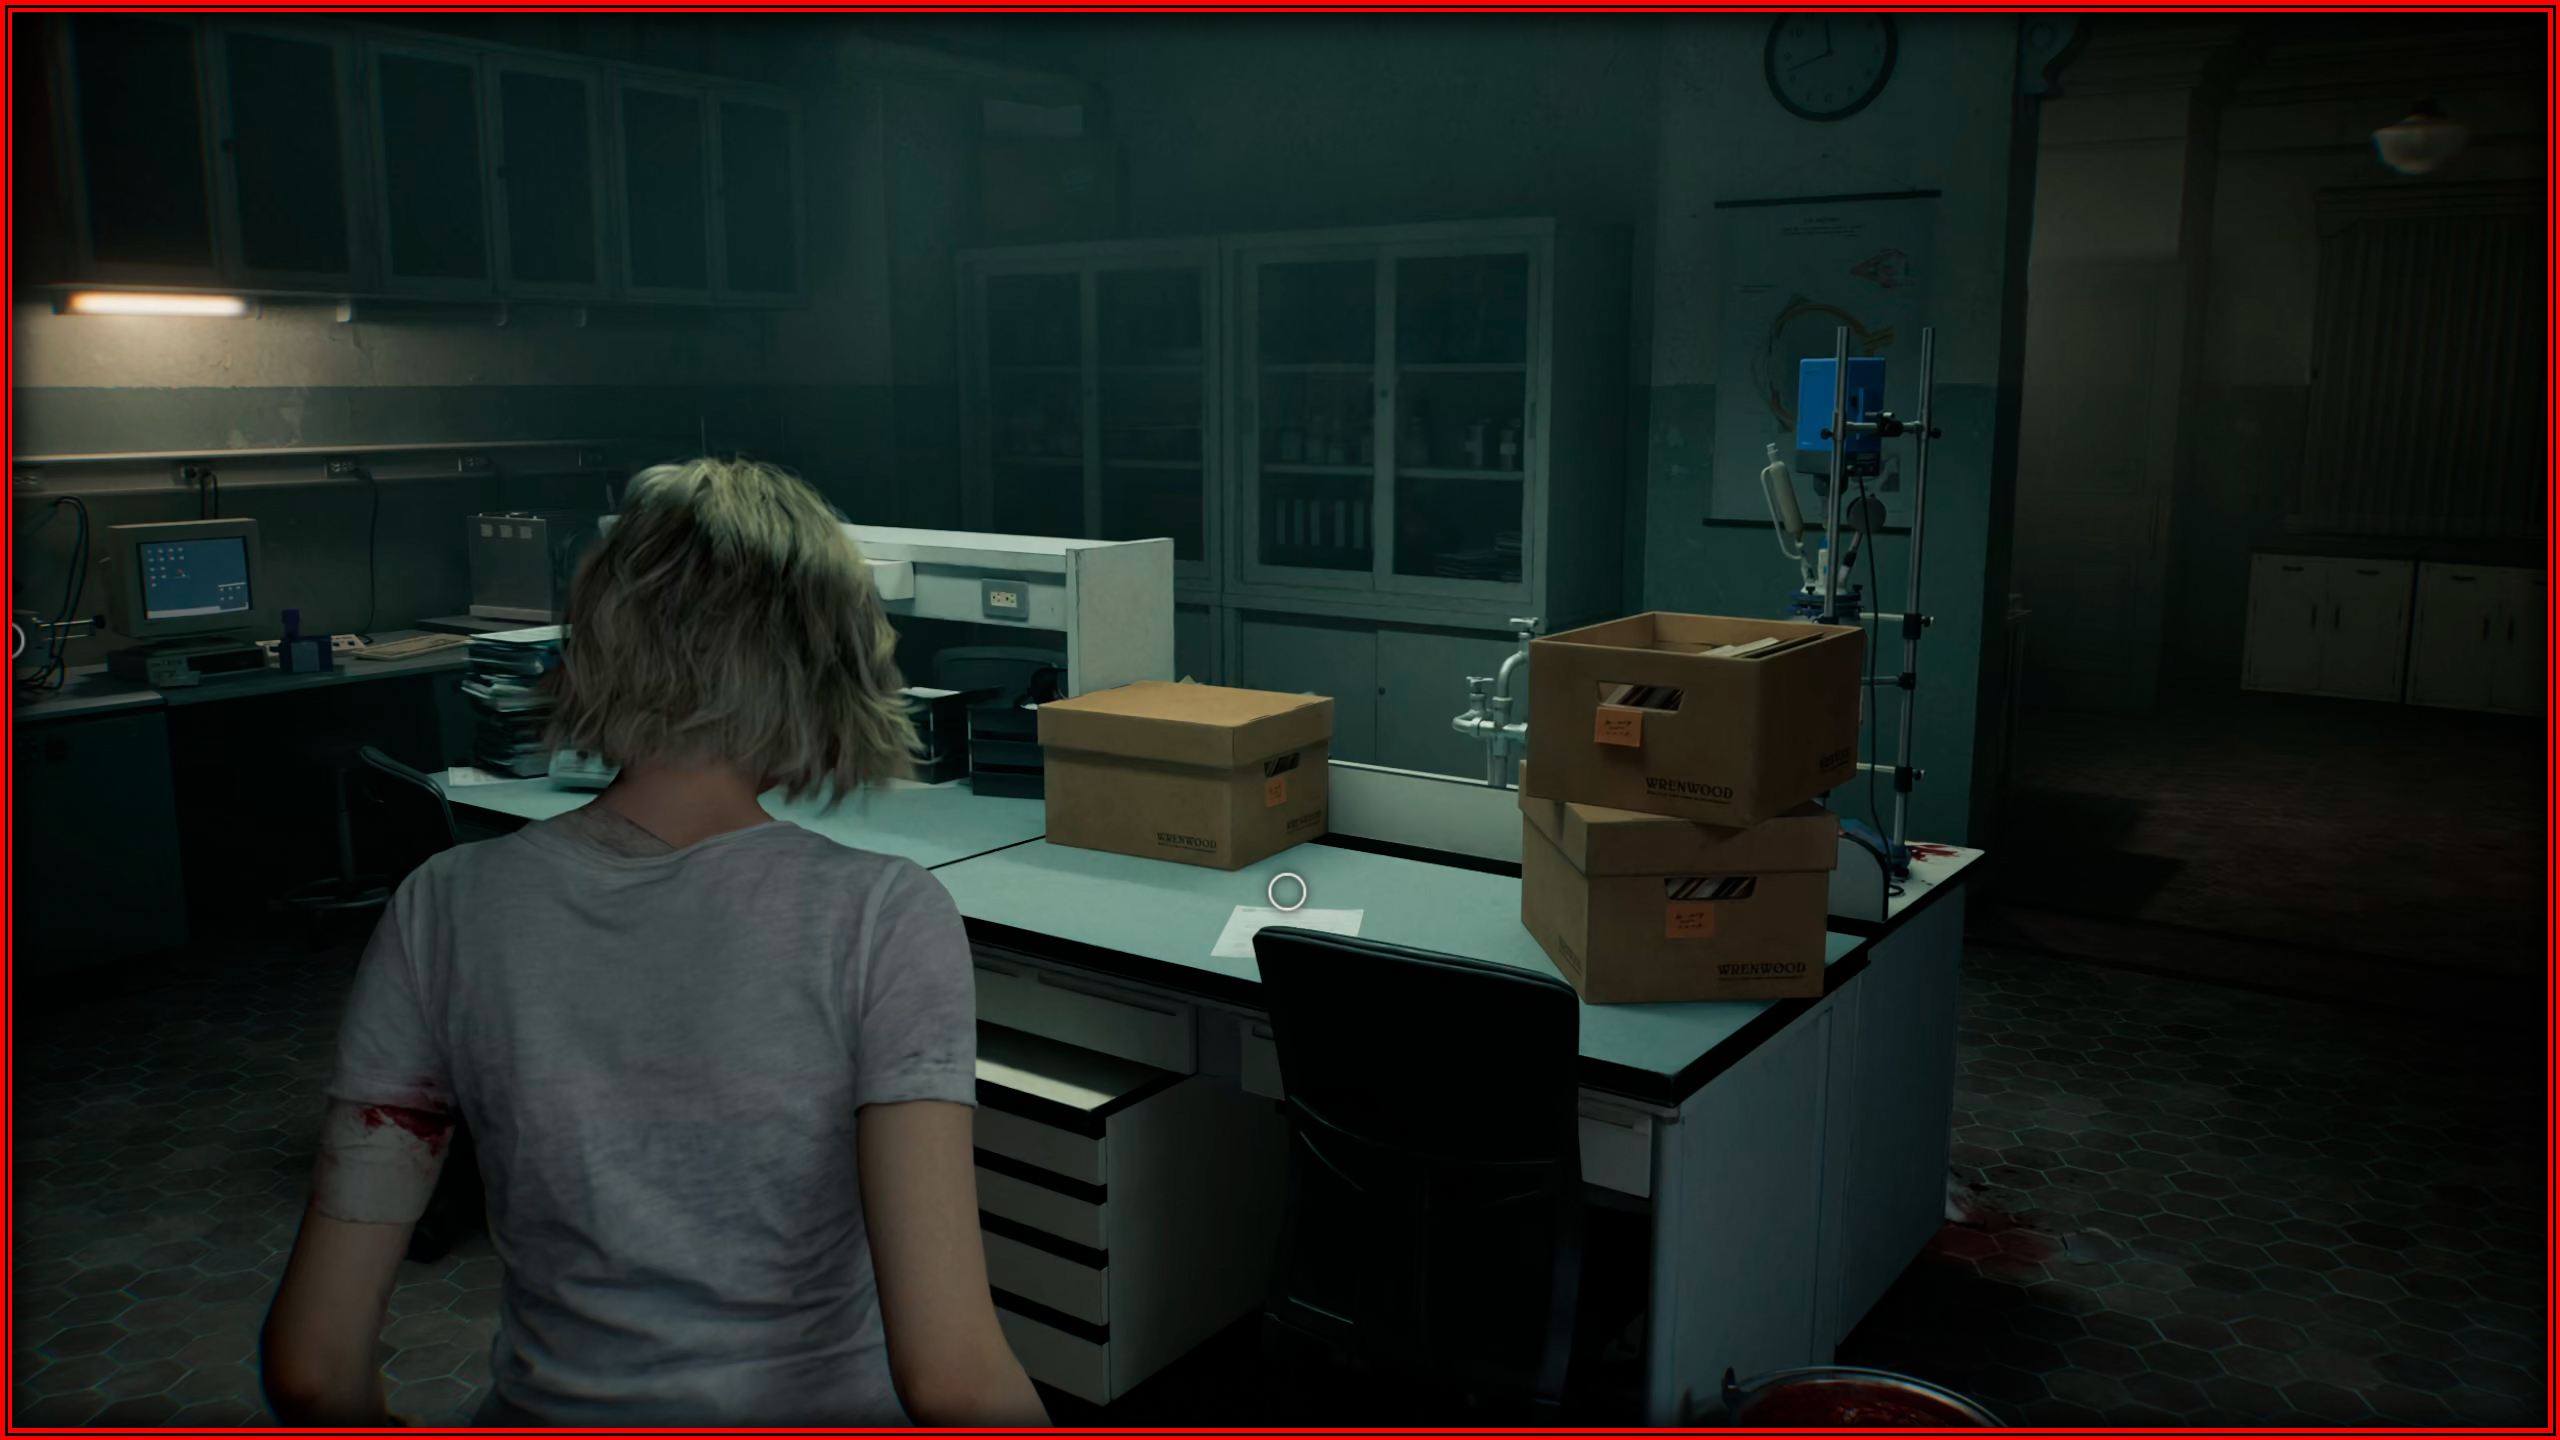
Science!
 In the Blood Lab at the Care Center, after getting the Blood Collector, take the Blood Specimen (Denatured) and interact with the Analyzer. Solve the puzzle by making all the atoms red to unlock a new recipe.
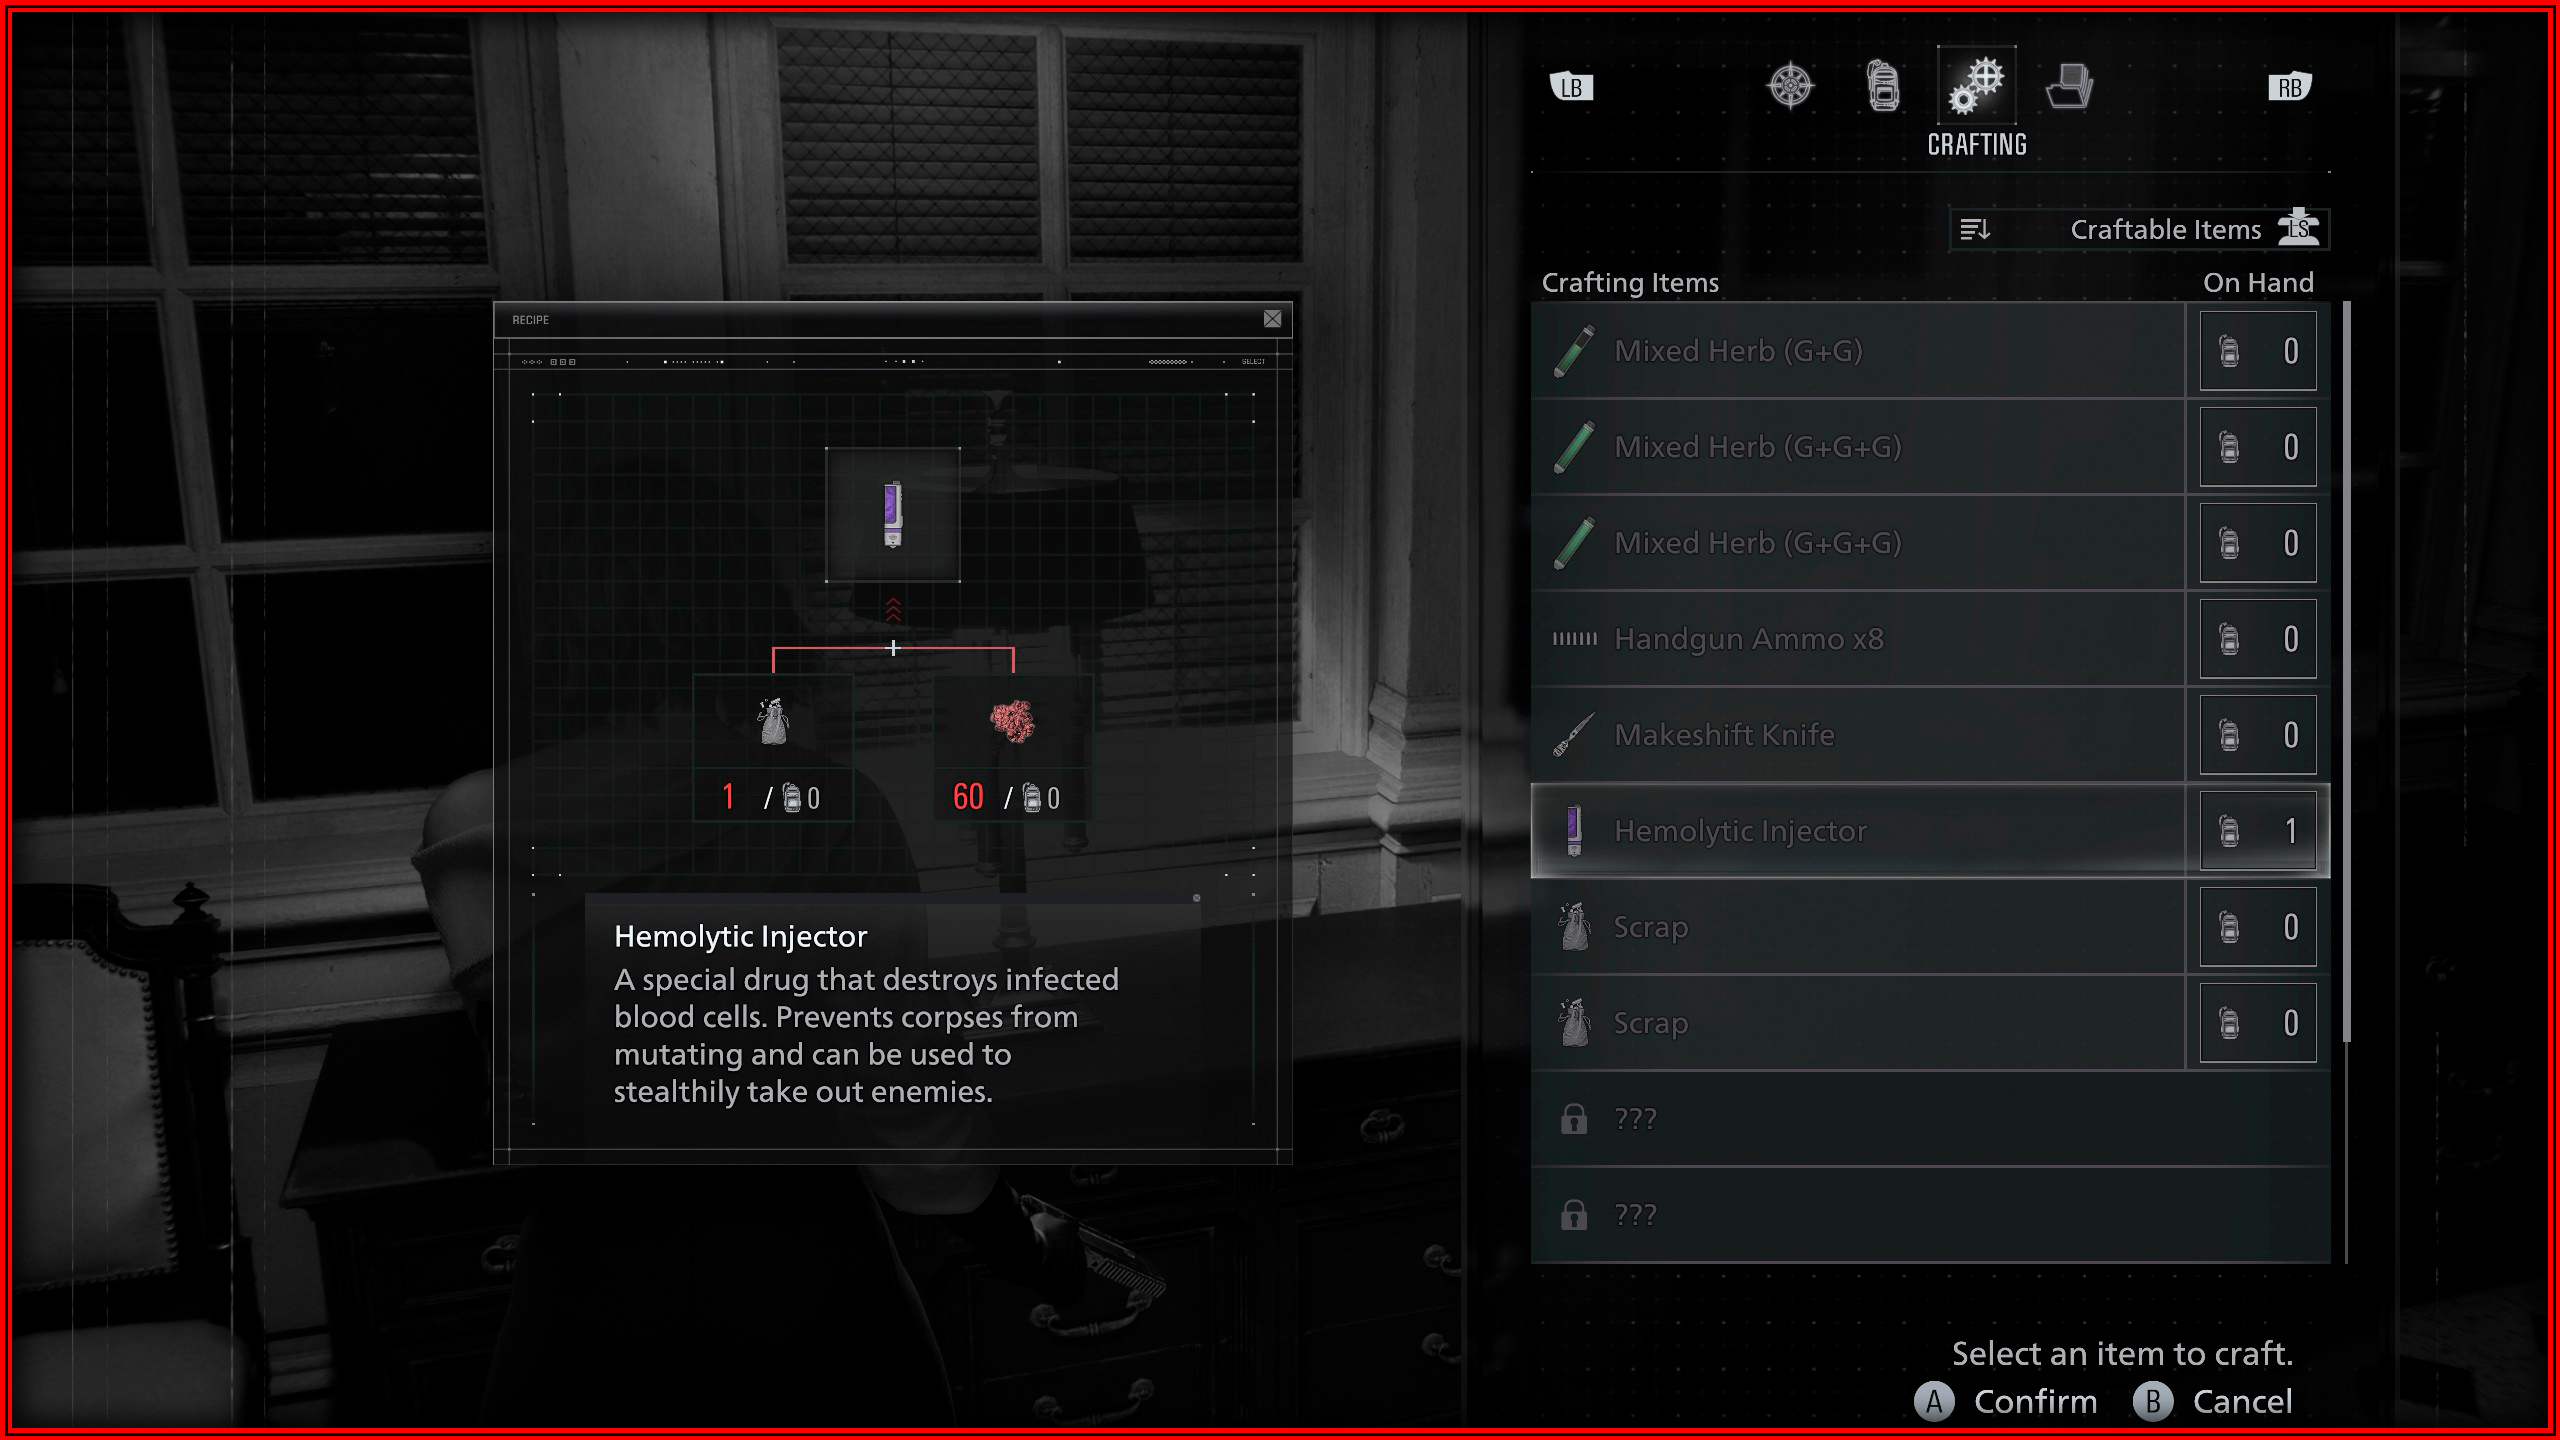
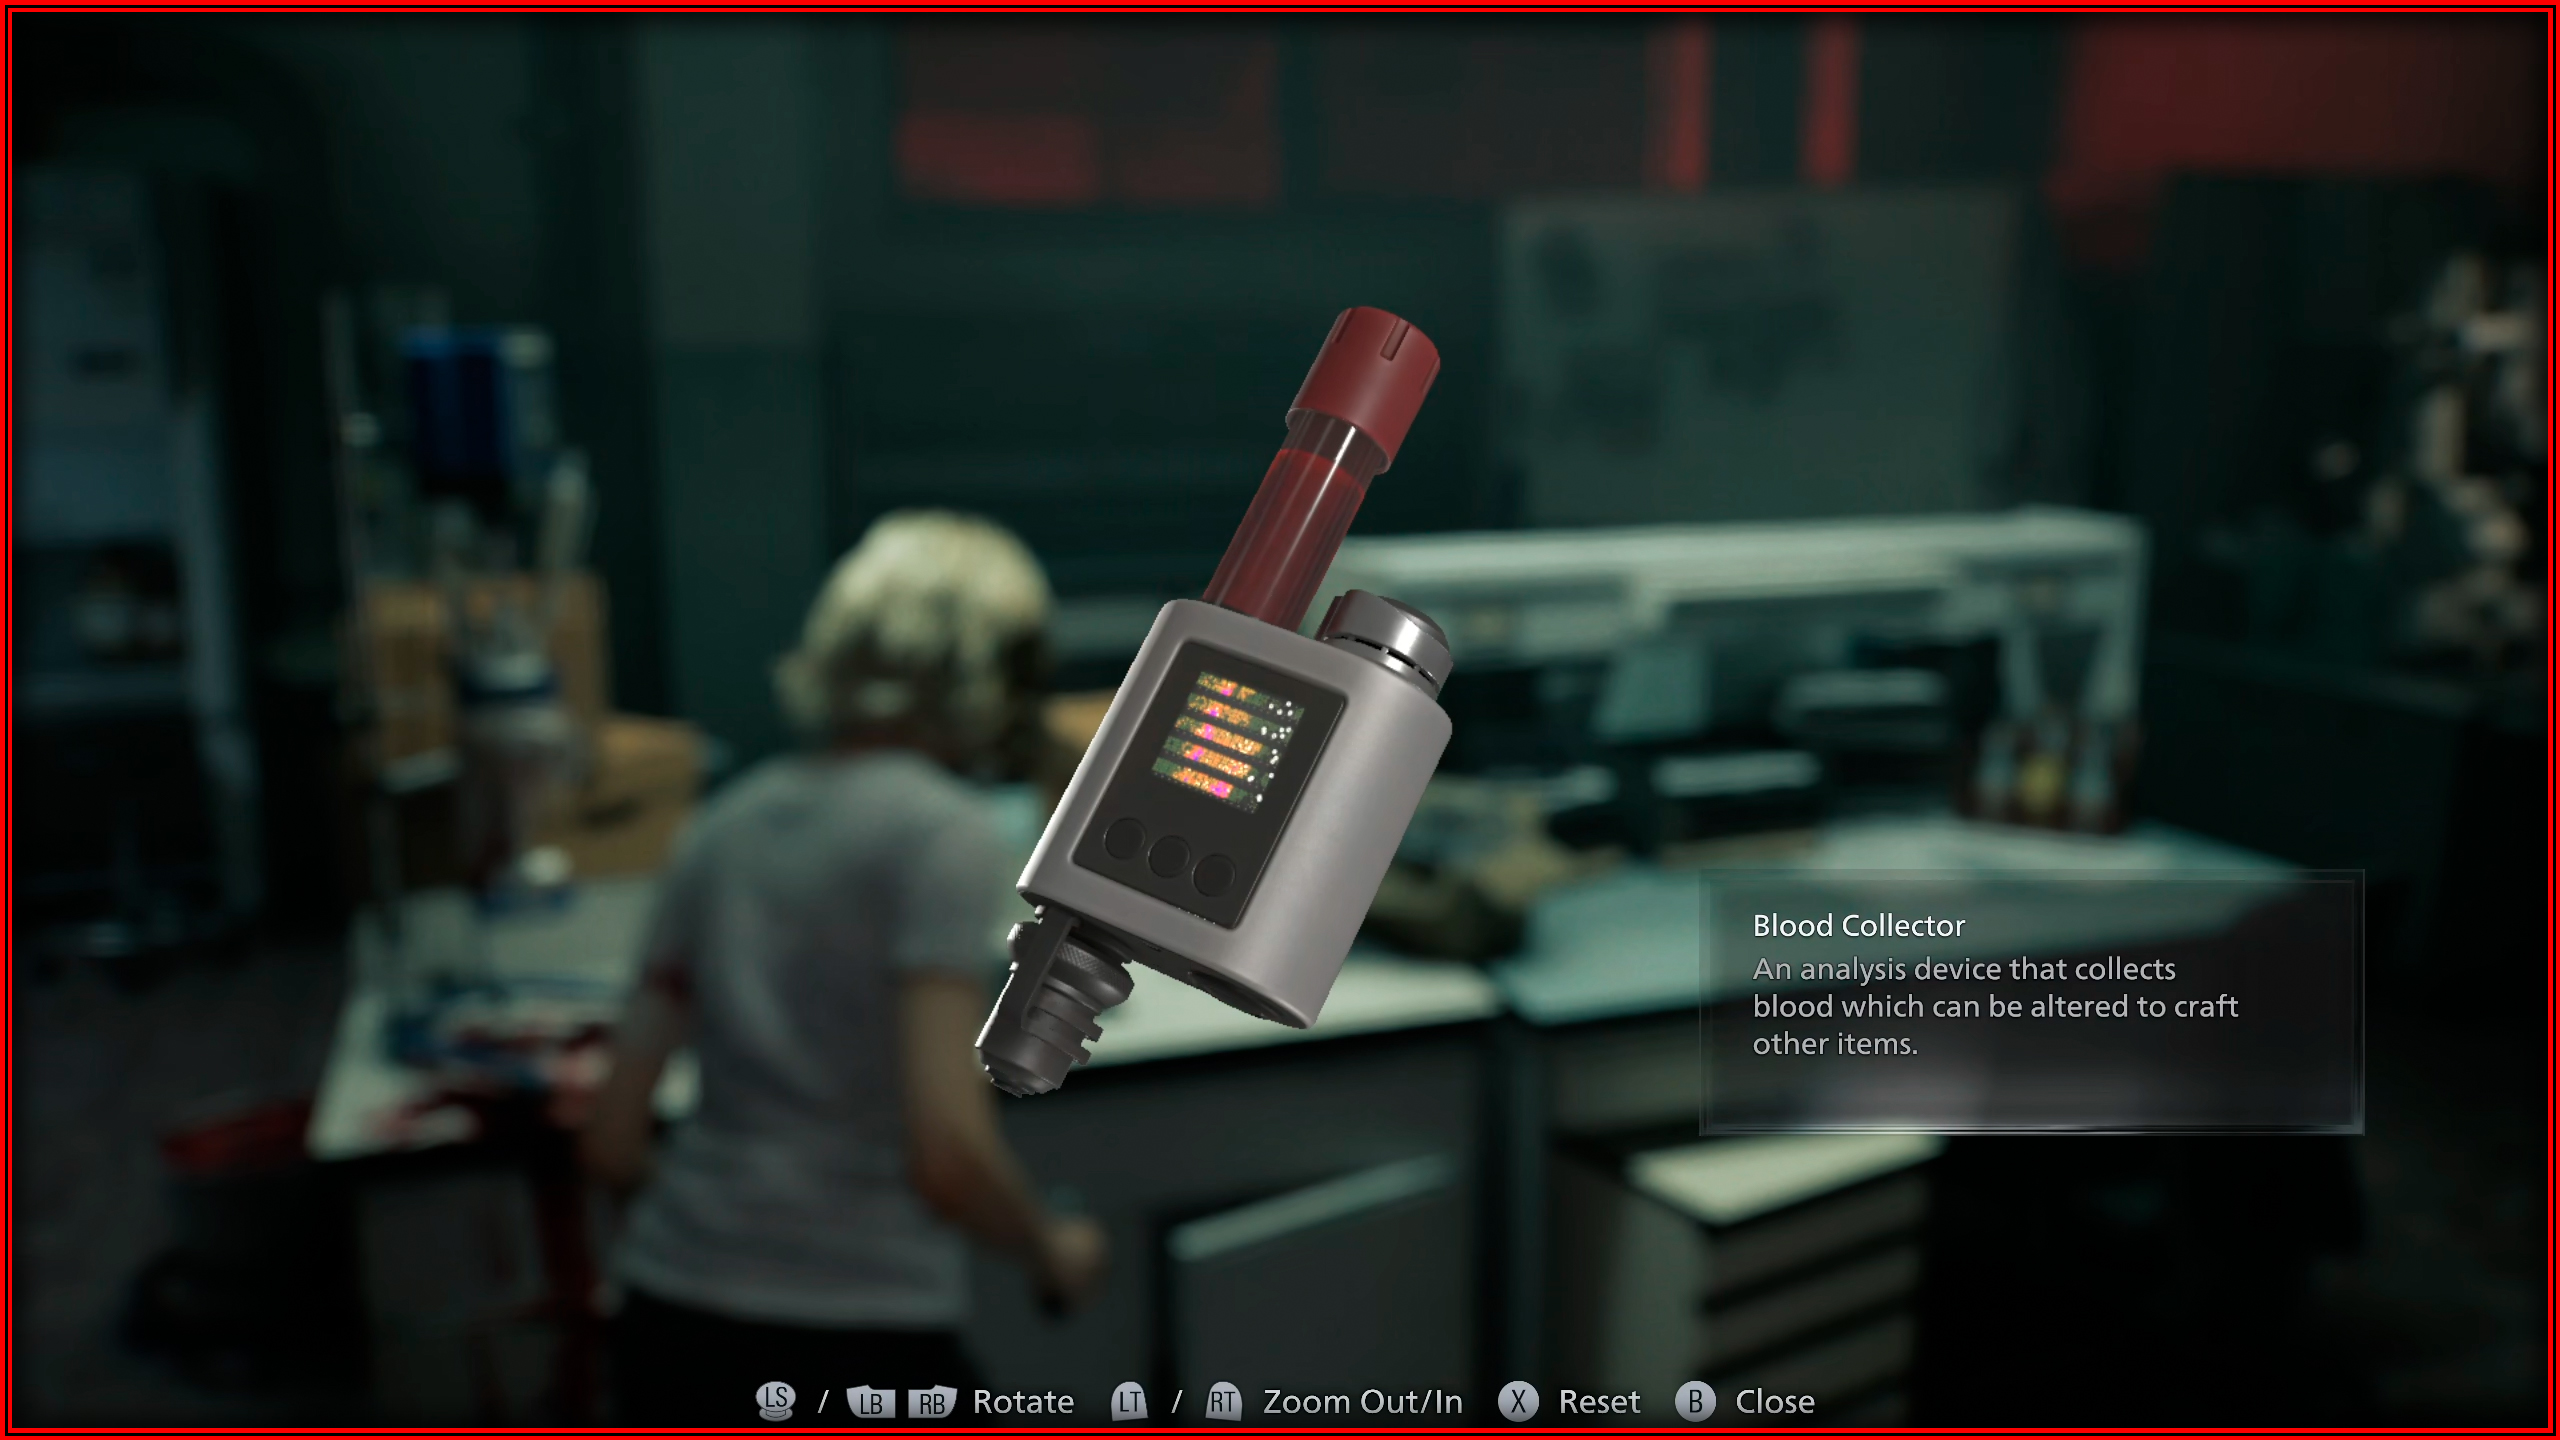
The Power of Blood

You get the Blood Collector in the Blood Lab at the Care Center, and you can unlock a new recipe by interacting with the Blood Specimen and the Analyzer in the same room. A new option will appear in the menu for crafting items. You obtain the necessary materials in various places throughout the game, simply craft any item to obtain it.
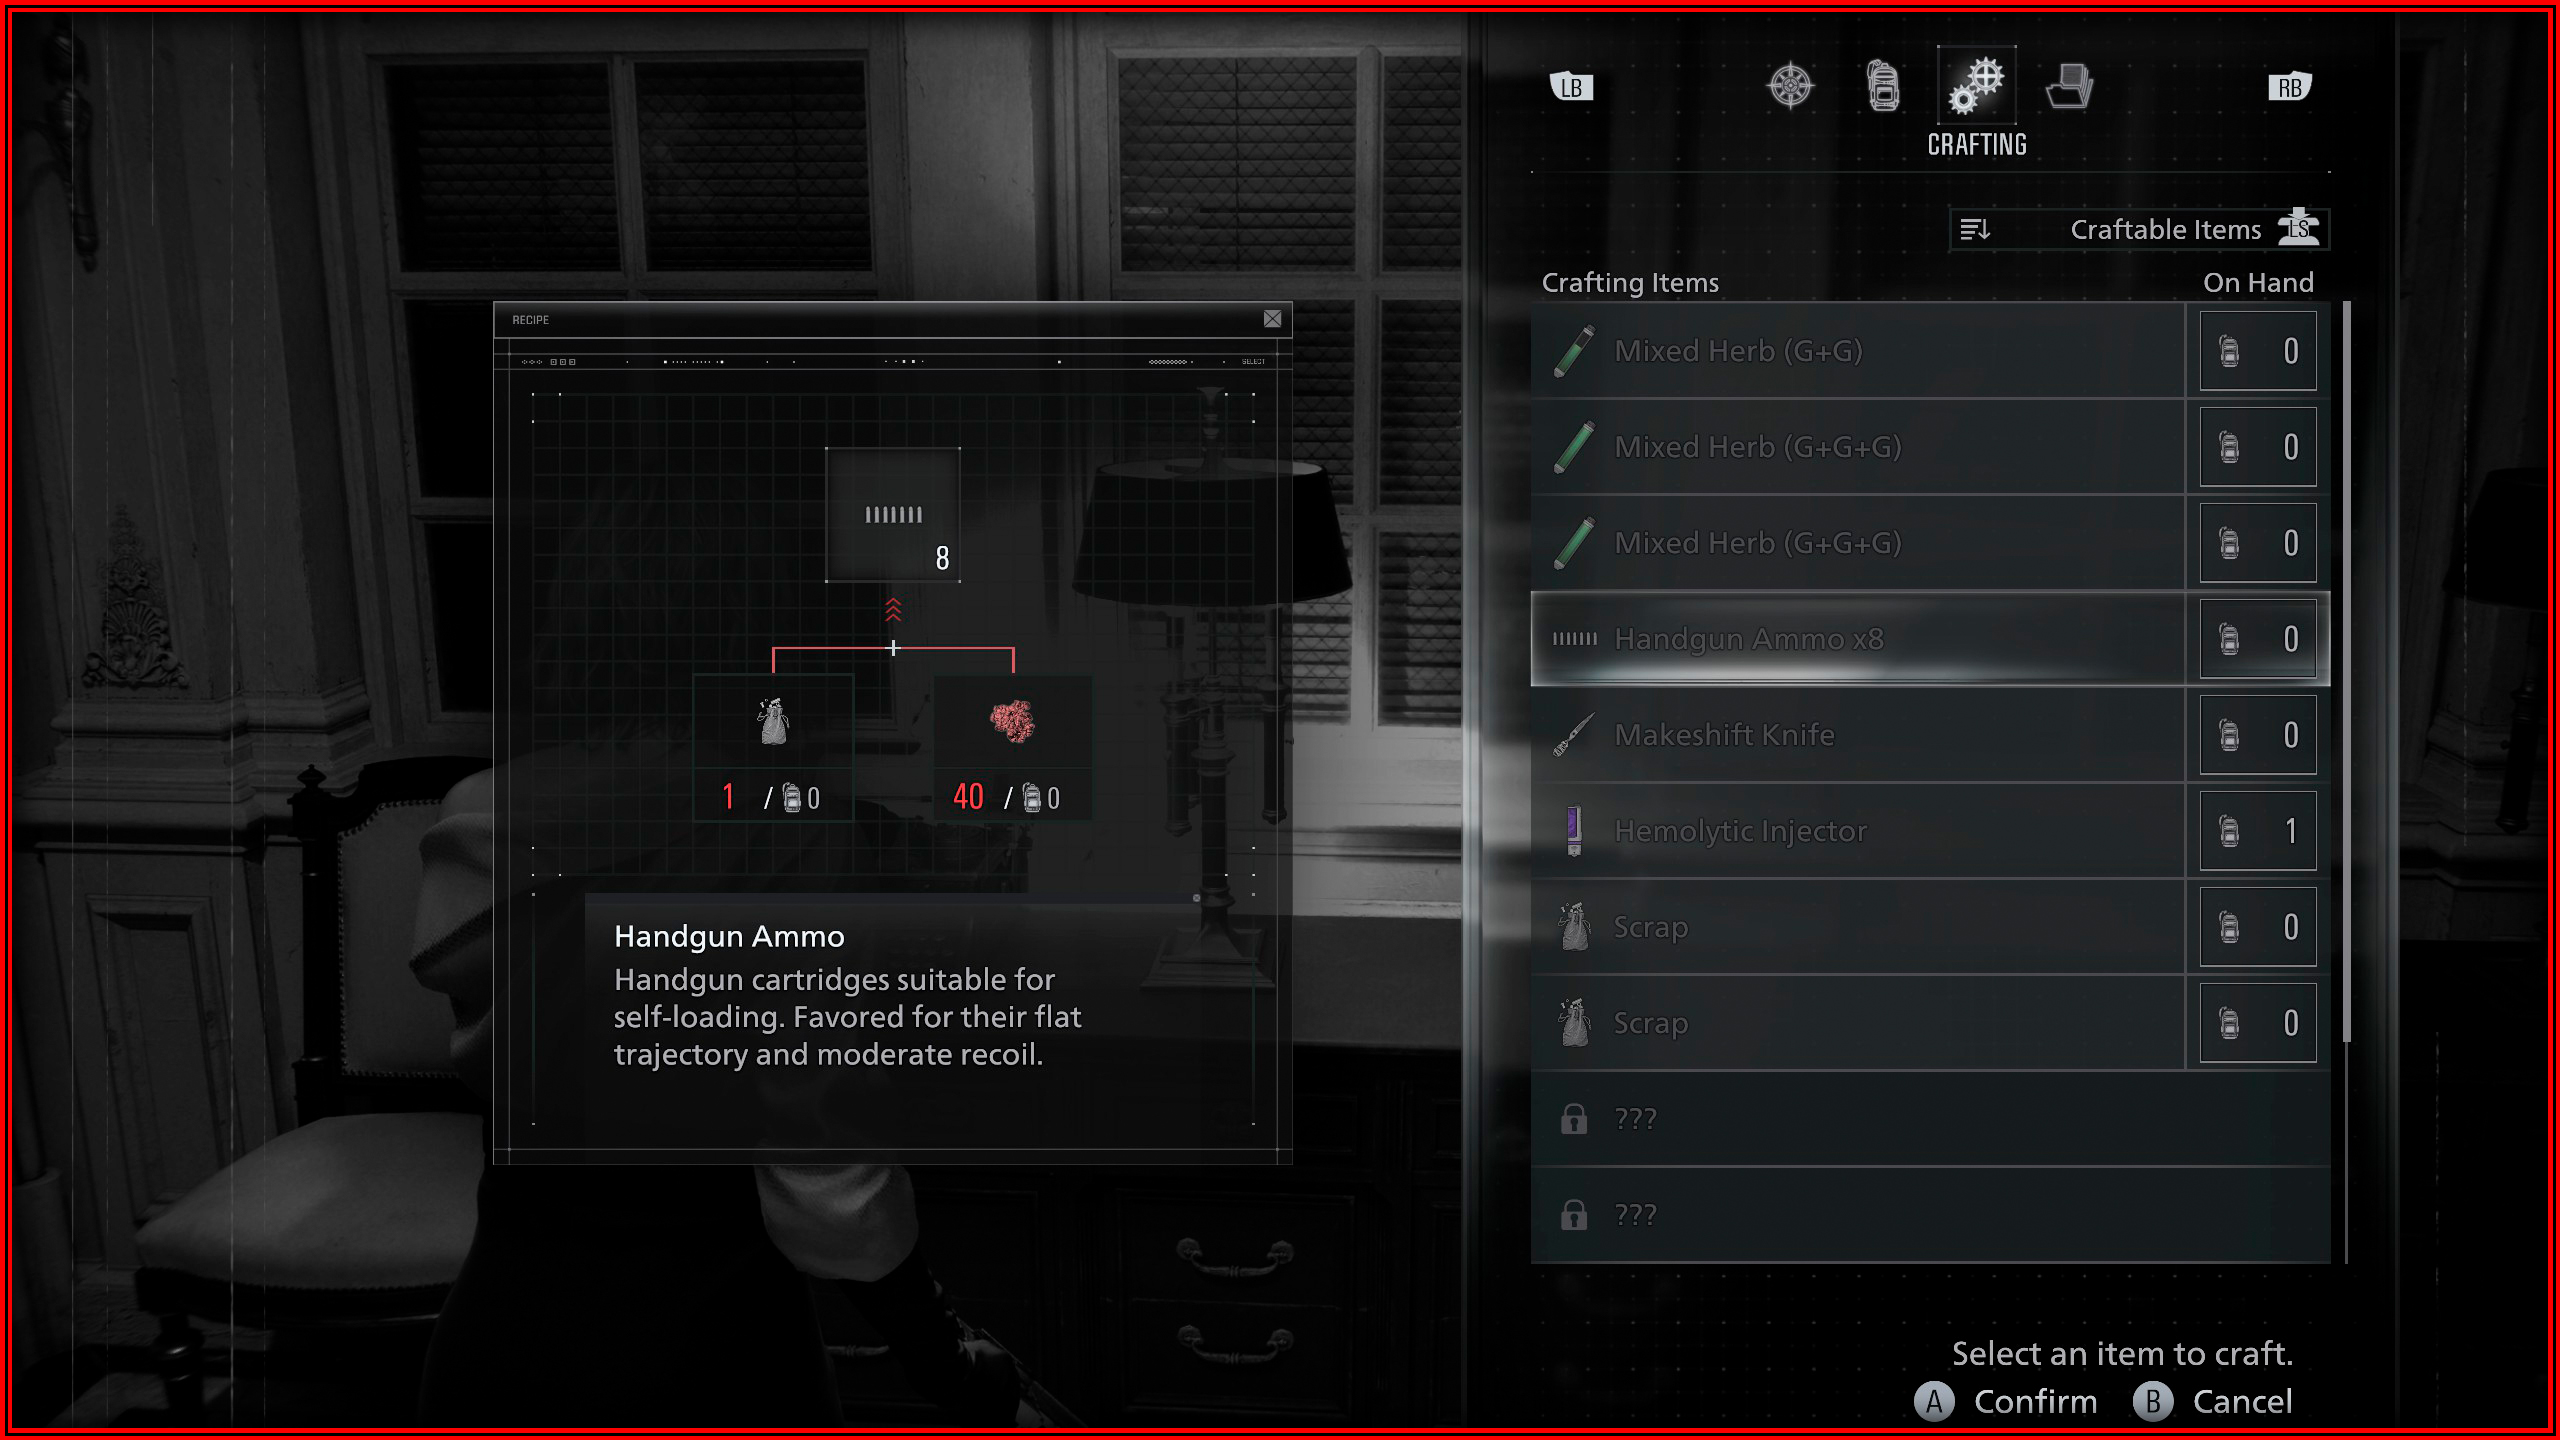
Blood! More Blood!

You need to craft items using the Blood Collector by spending a total of 300 Infected Blood. You will practically obtain this while playing normally, but you can also farm it by saving and reloading (Save, craft an item, and reload the save).
Untouchable
 Playing as Leon, press L1 when an enemy is about to hit you.
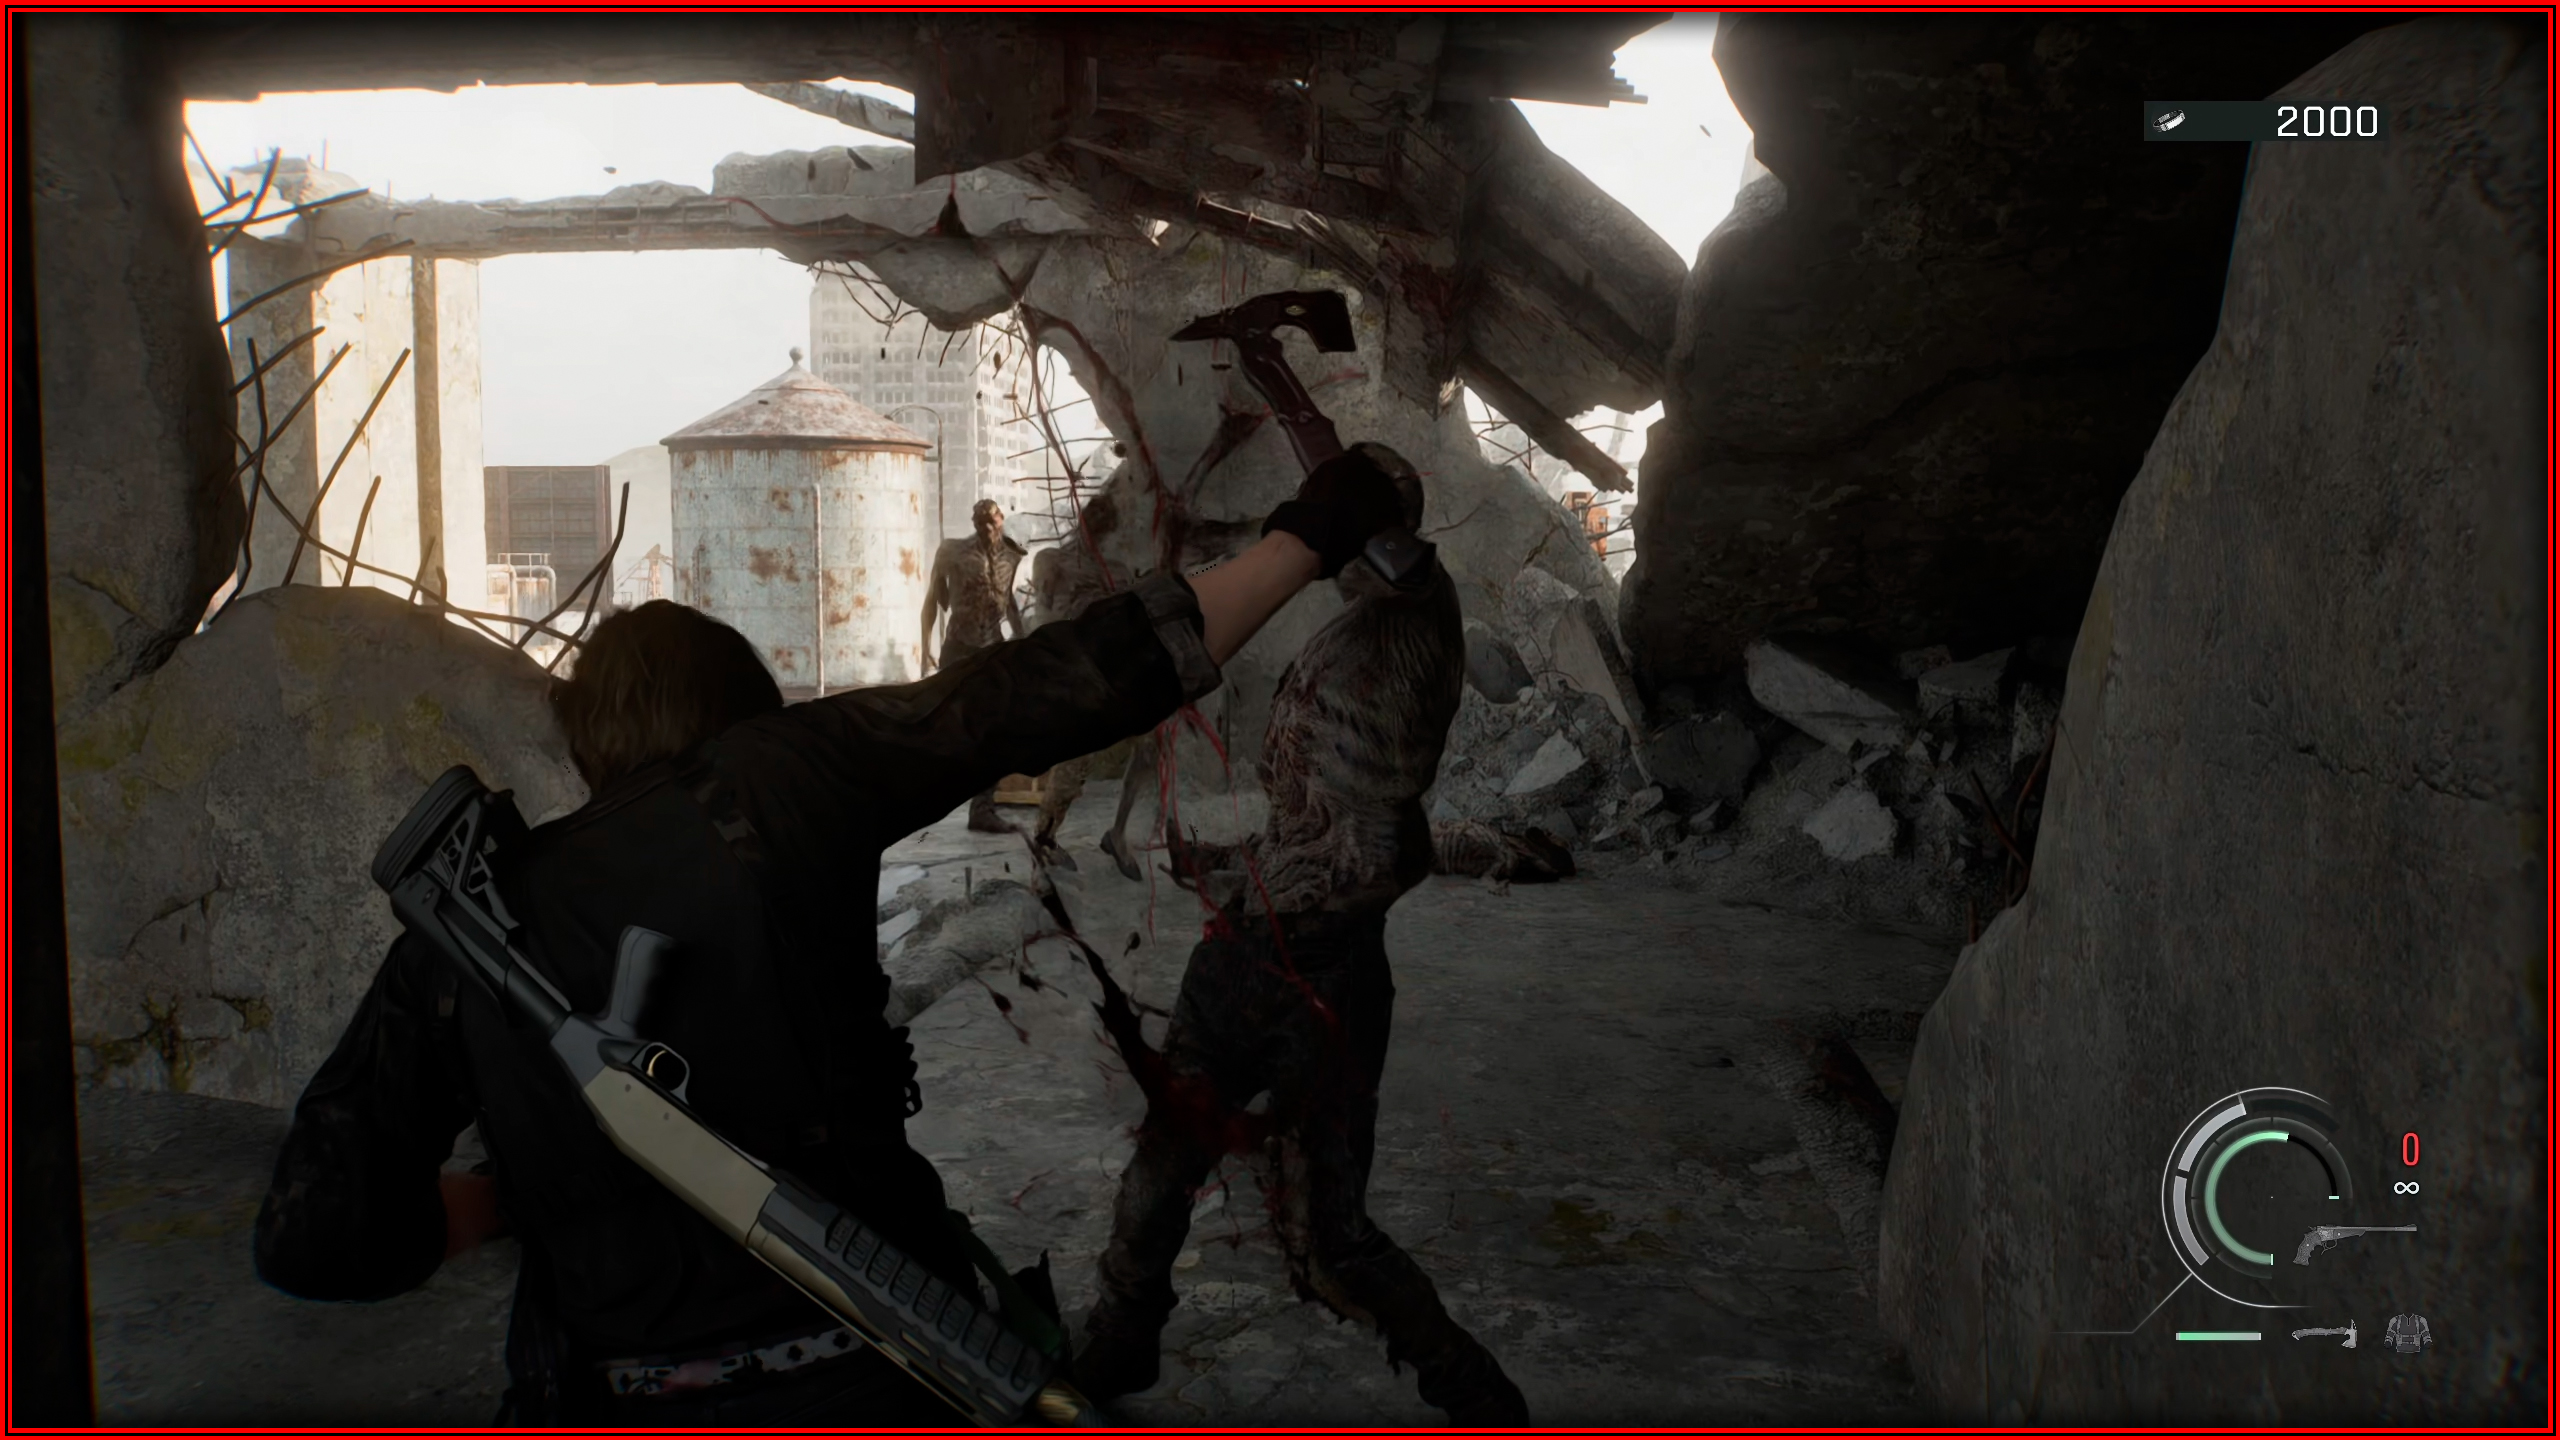
Can I Borrow This?
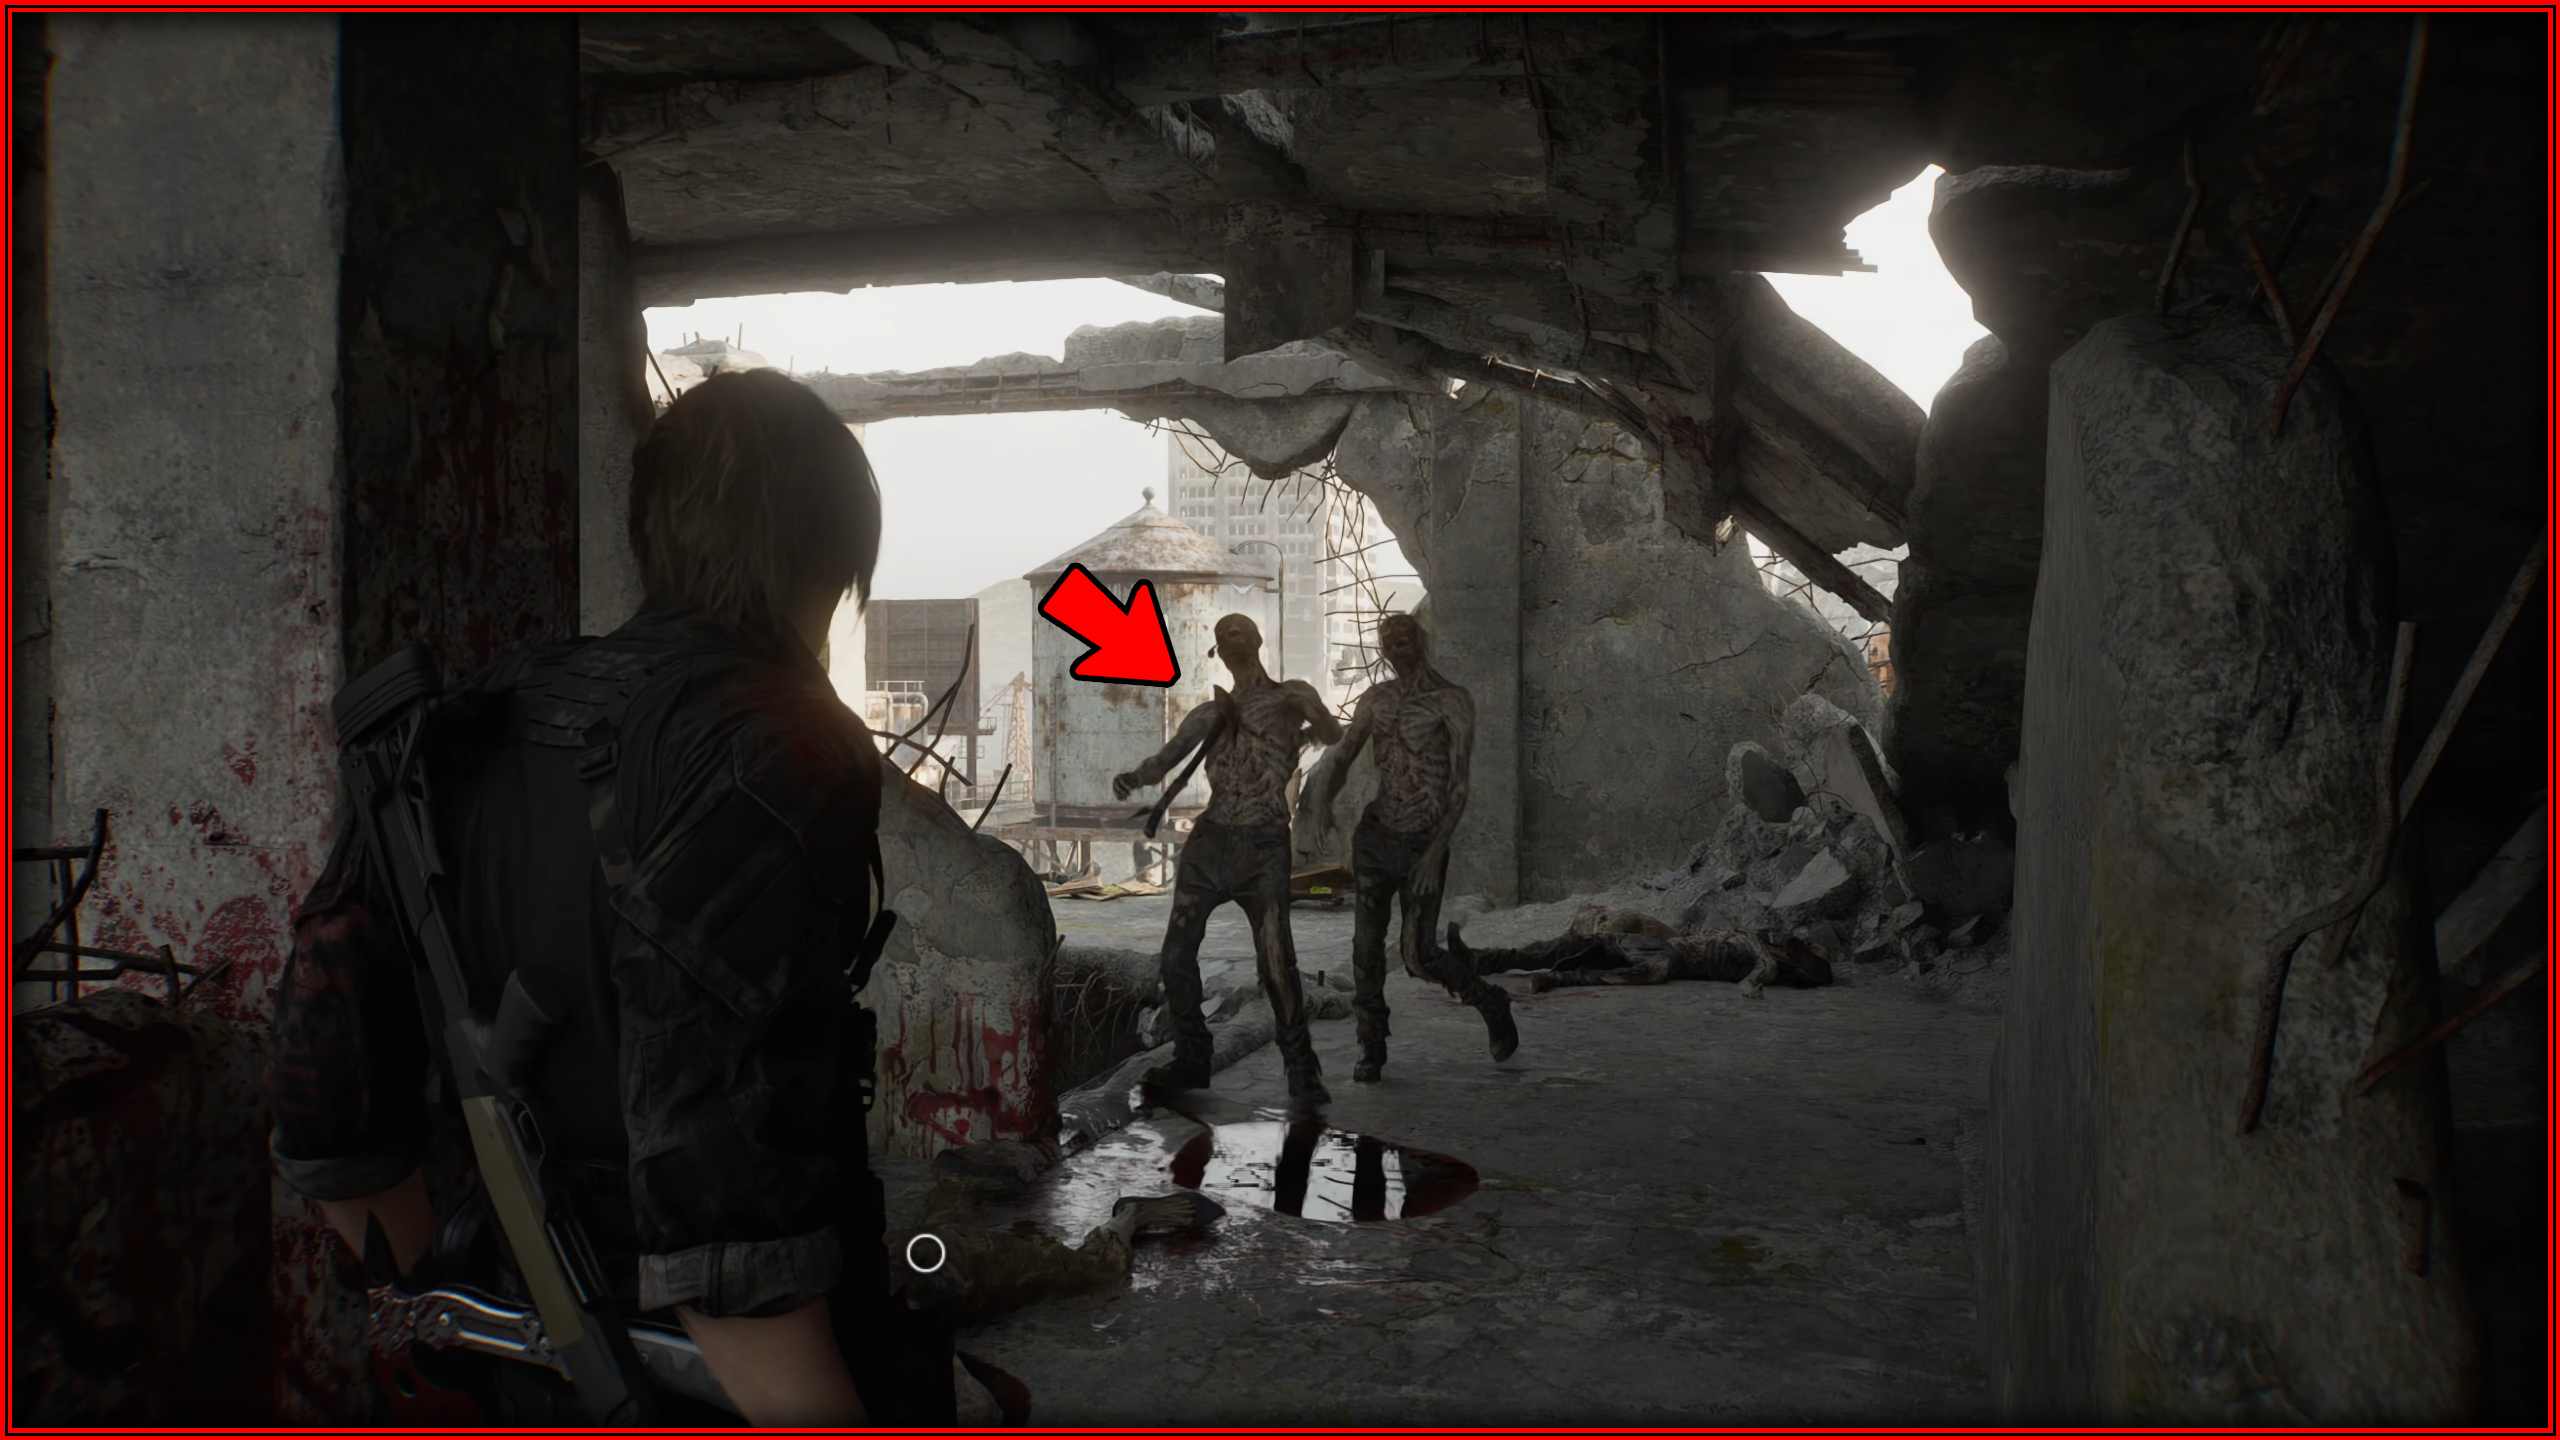
 Some enemies will have an axe stuck in them. Knock these enemies down and wait for another Zombie to enter your line of sight, then press X to throw the axe at another Zombie.
Chop Chop
 Shoot the enemies until a symbol appears above their heads, then finish off 3 different Zombies using a Hatchet to obtain it.
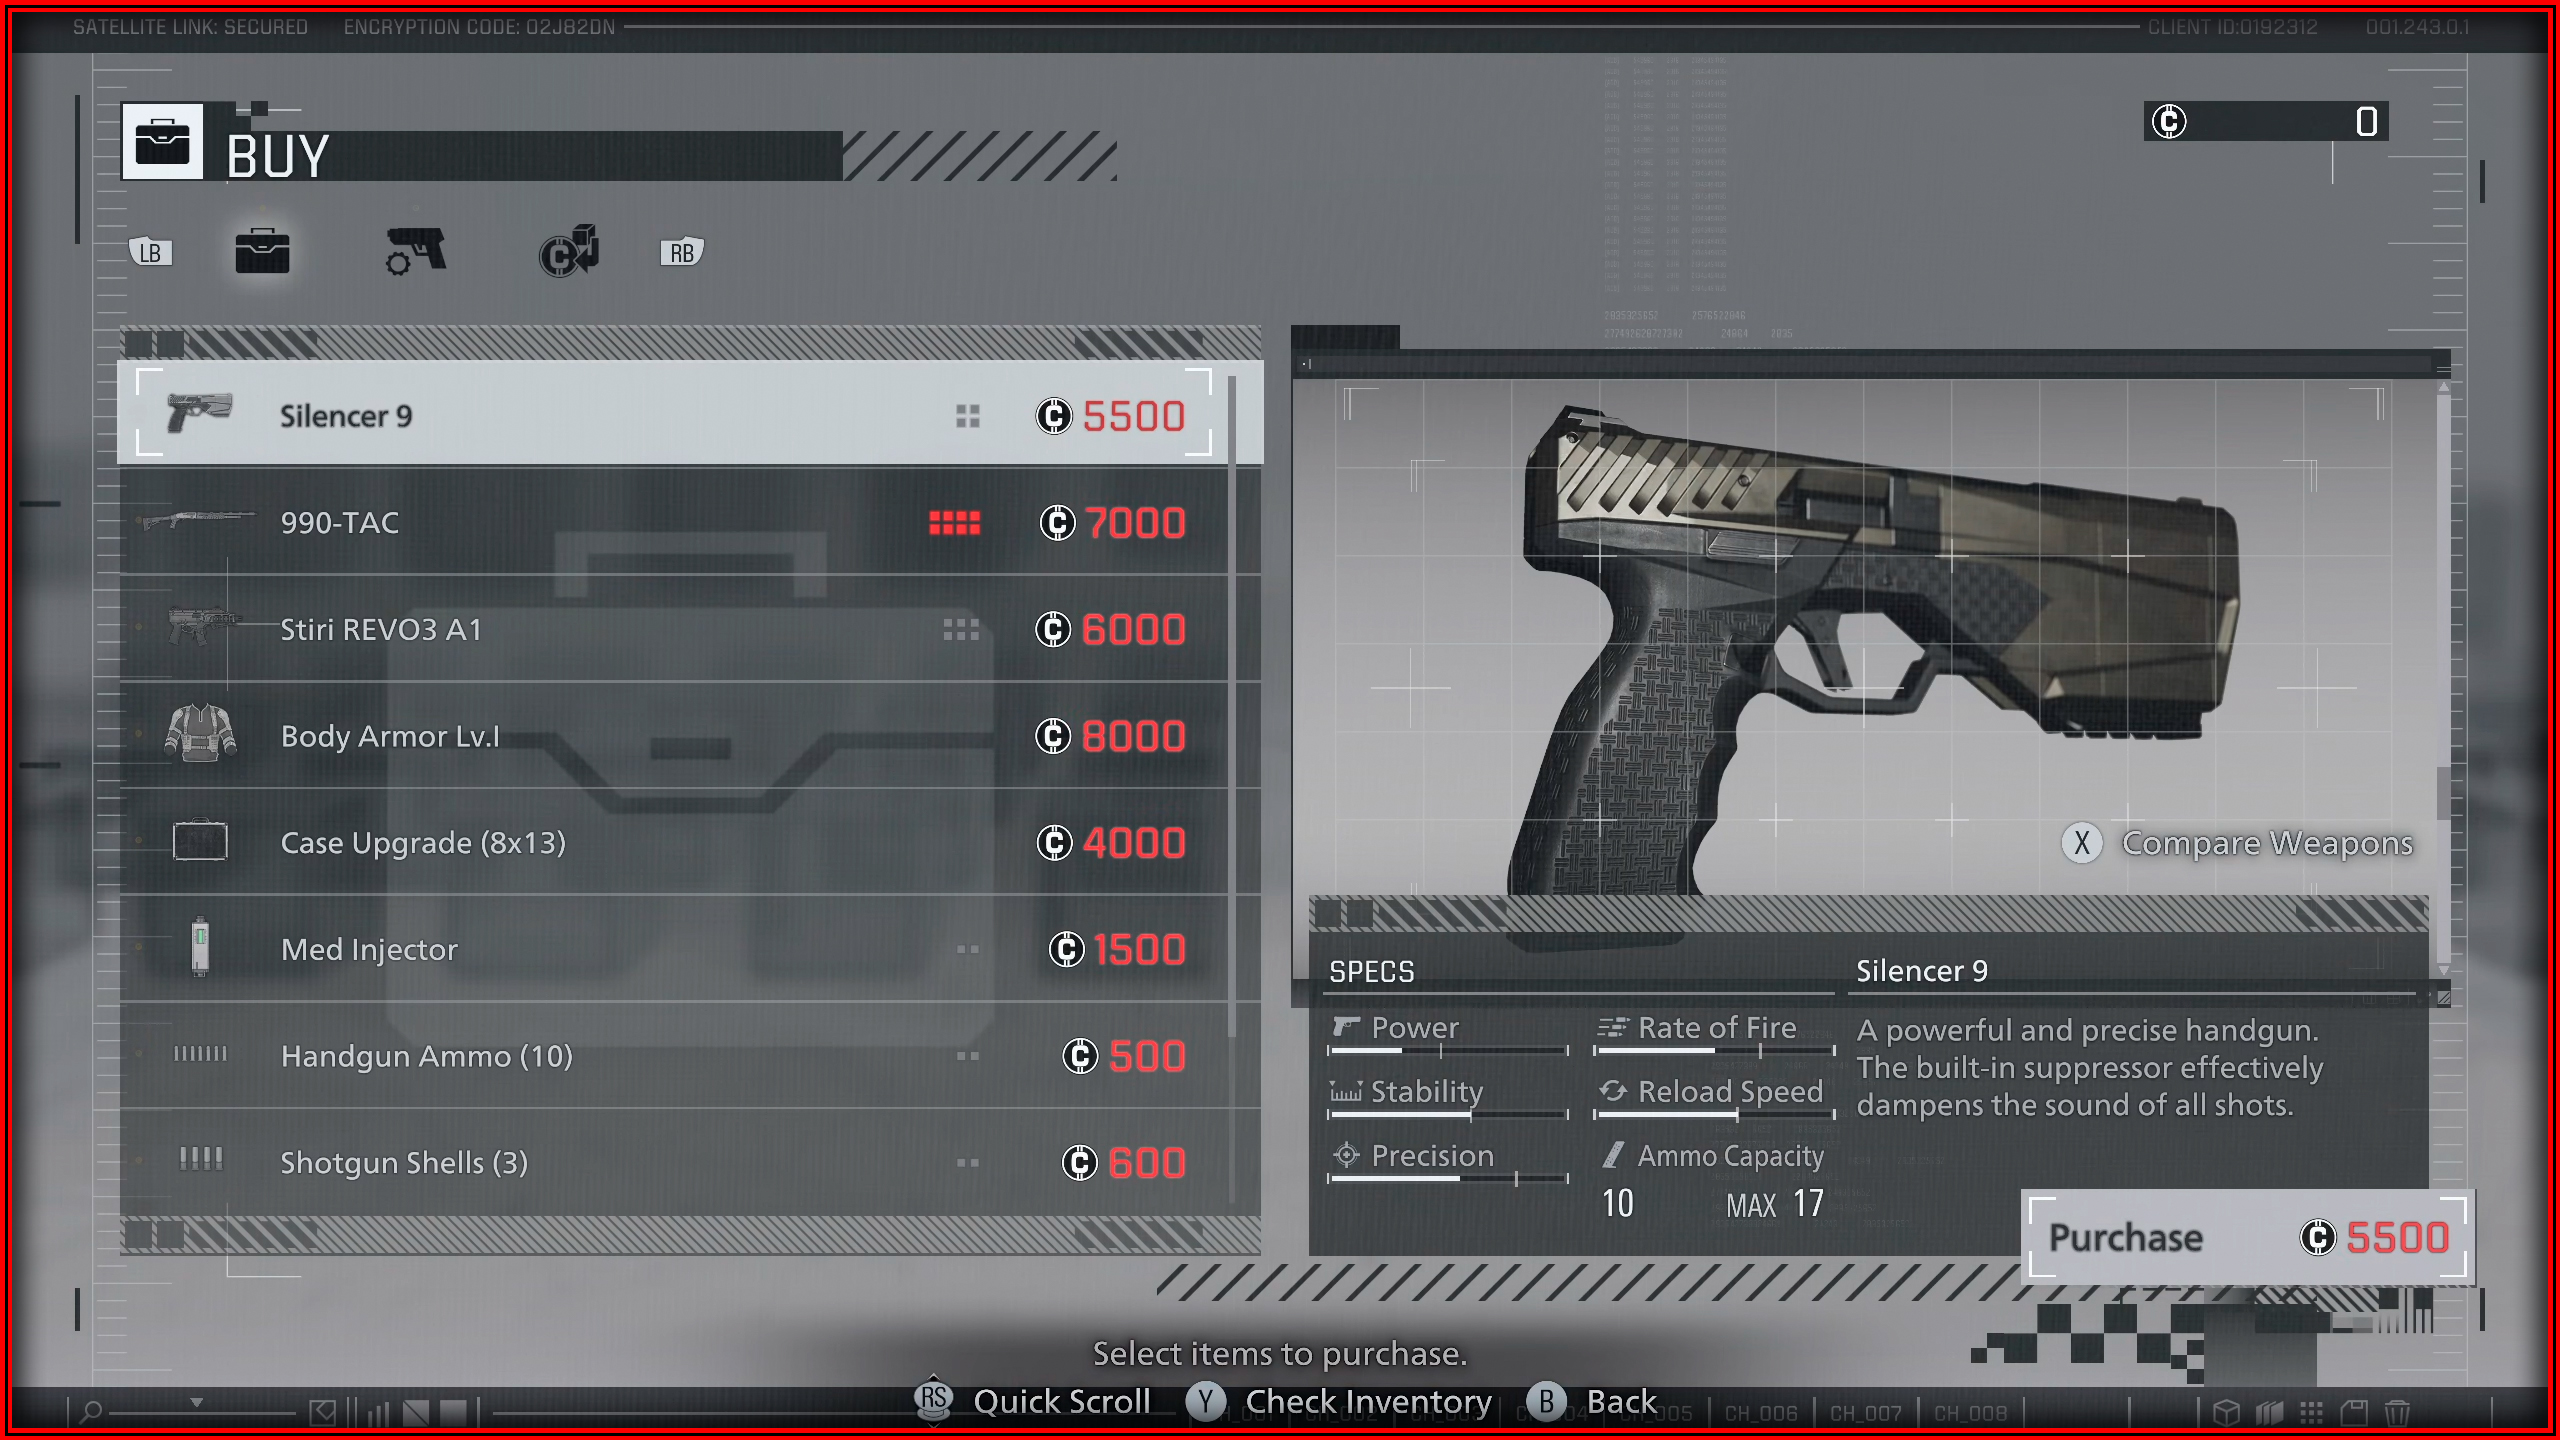
Retail Therapy
 The Supply Box is available in East Raccoon City. After obtaining the Tactical Tracker in the Central Camp, you will earn Credits for each enemy you defeat, buy any item in the shop to obtain it.
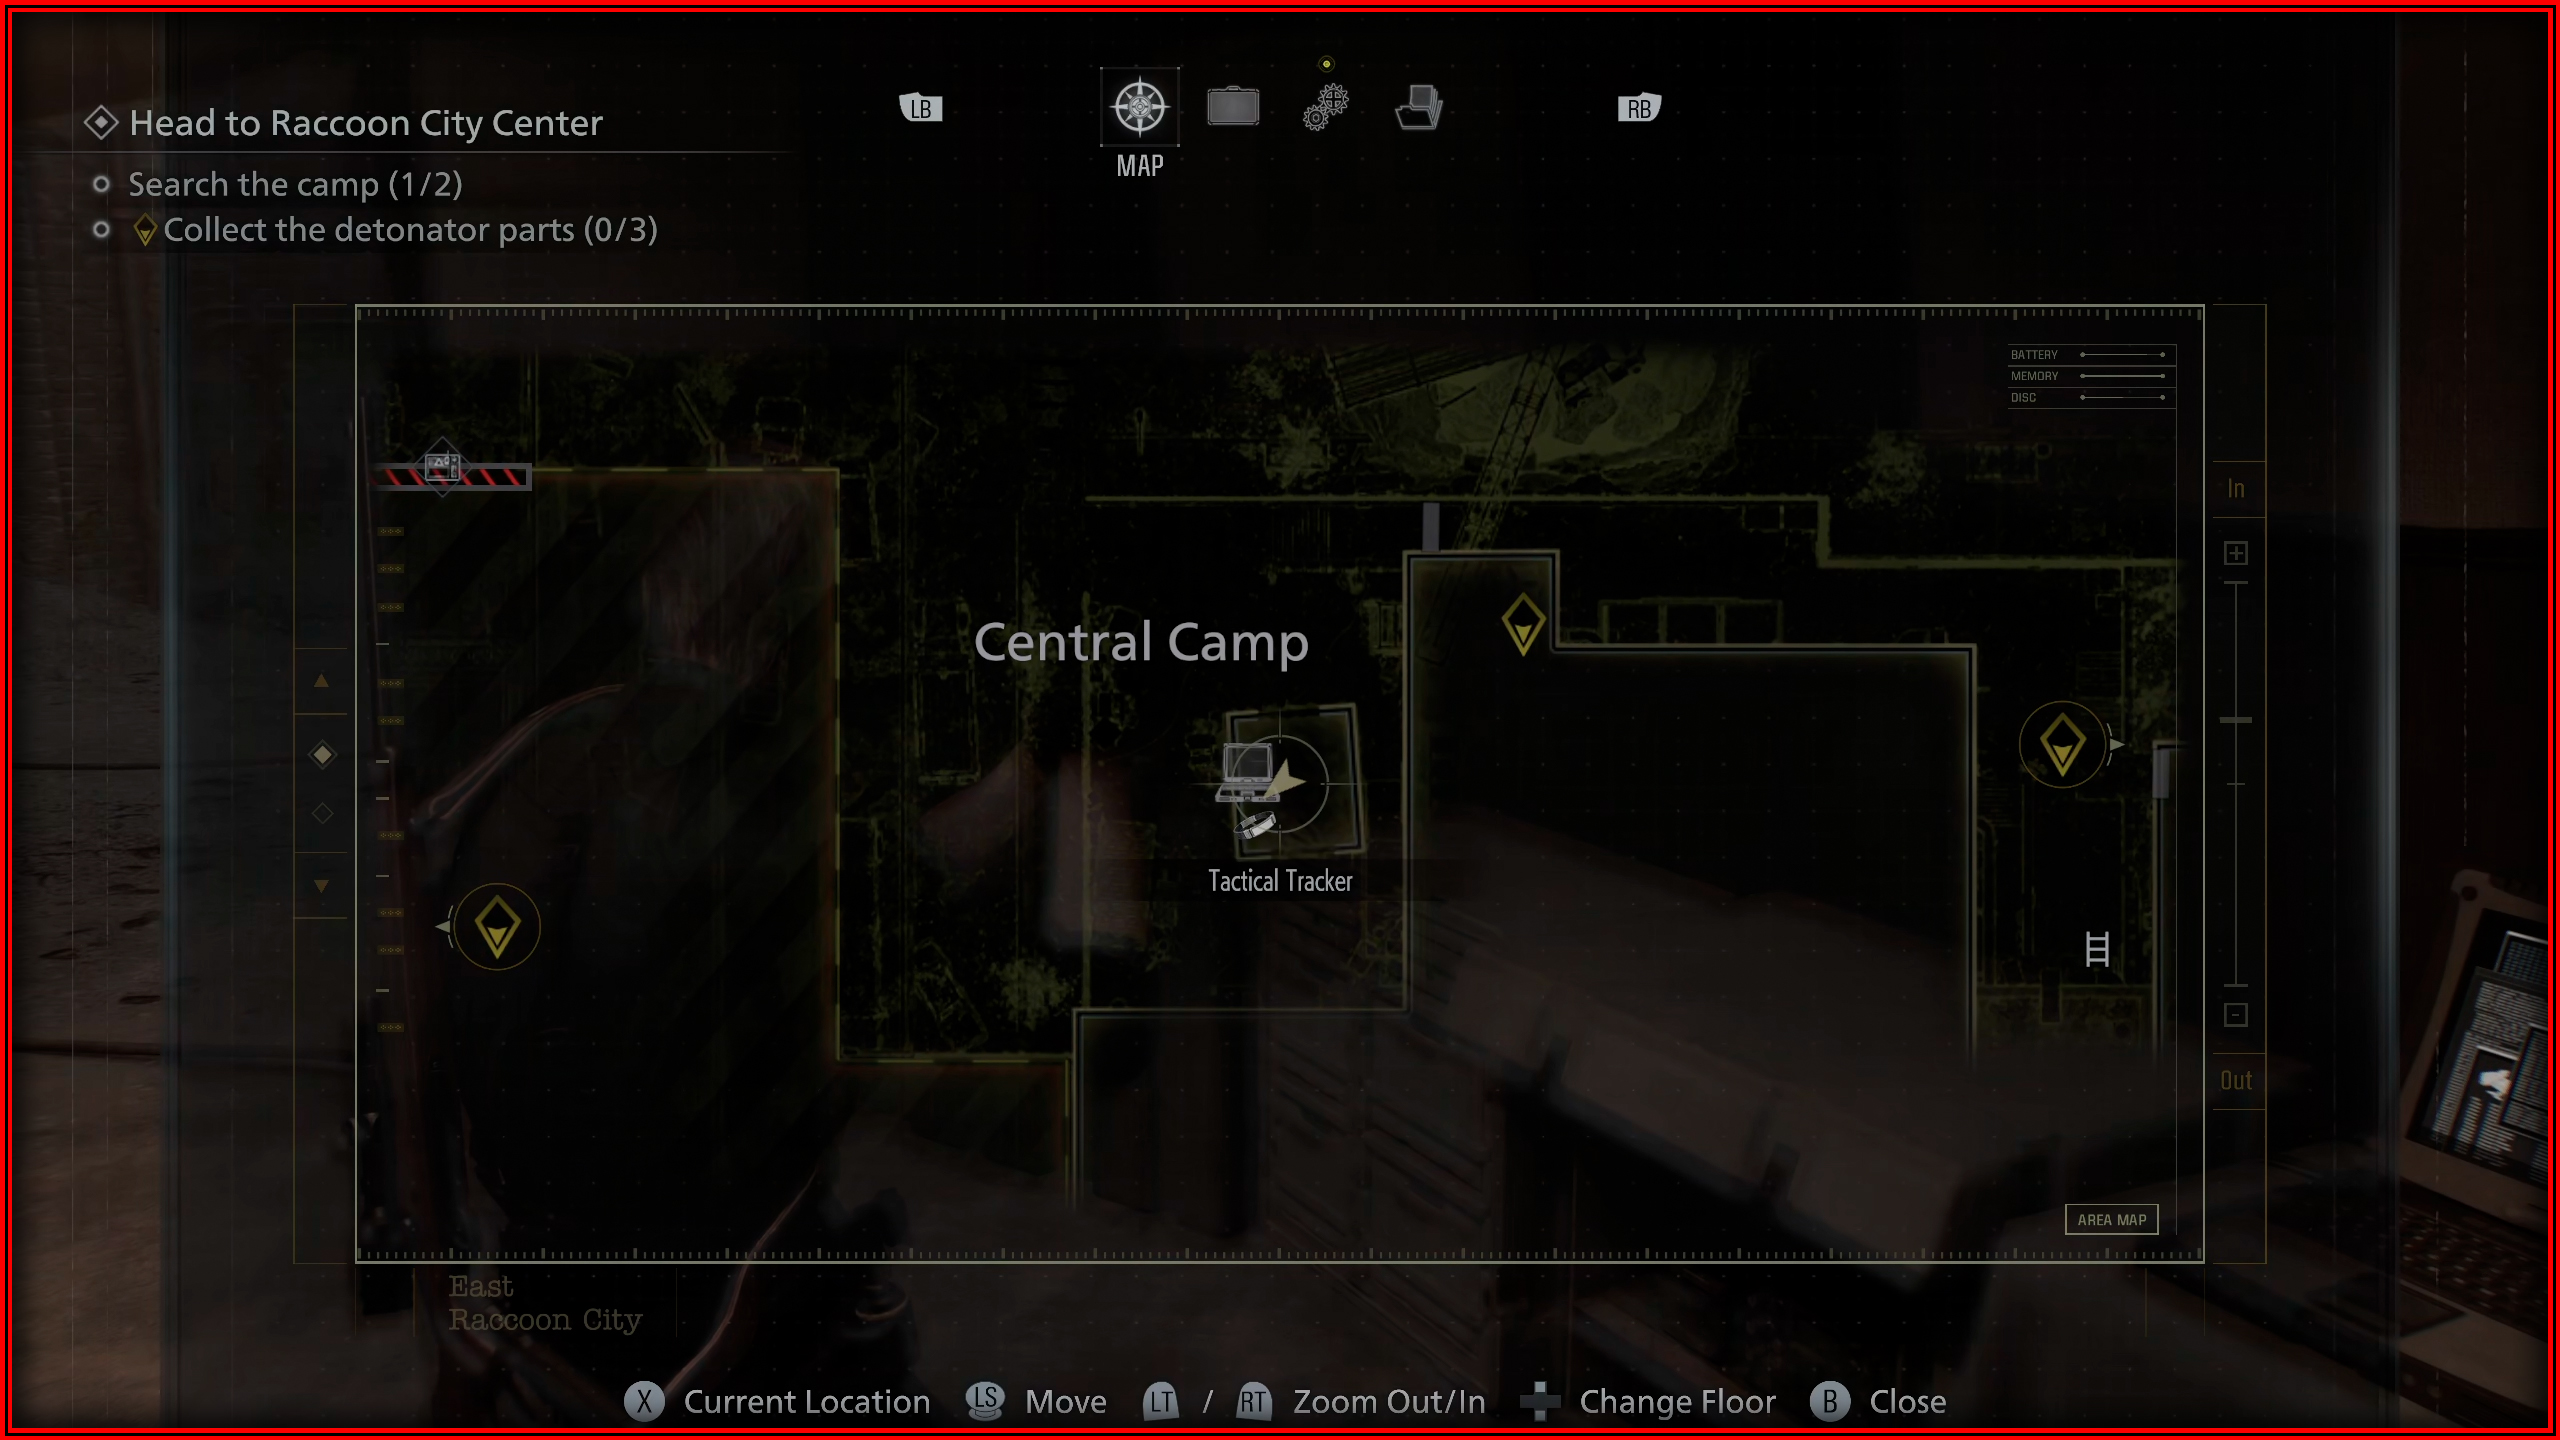
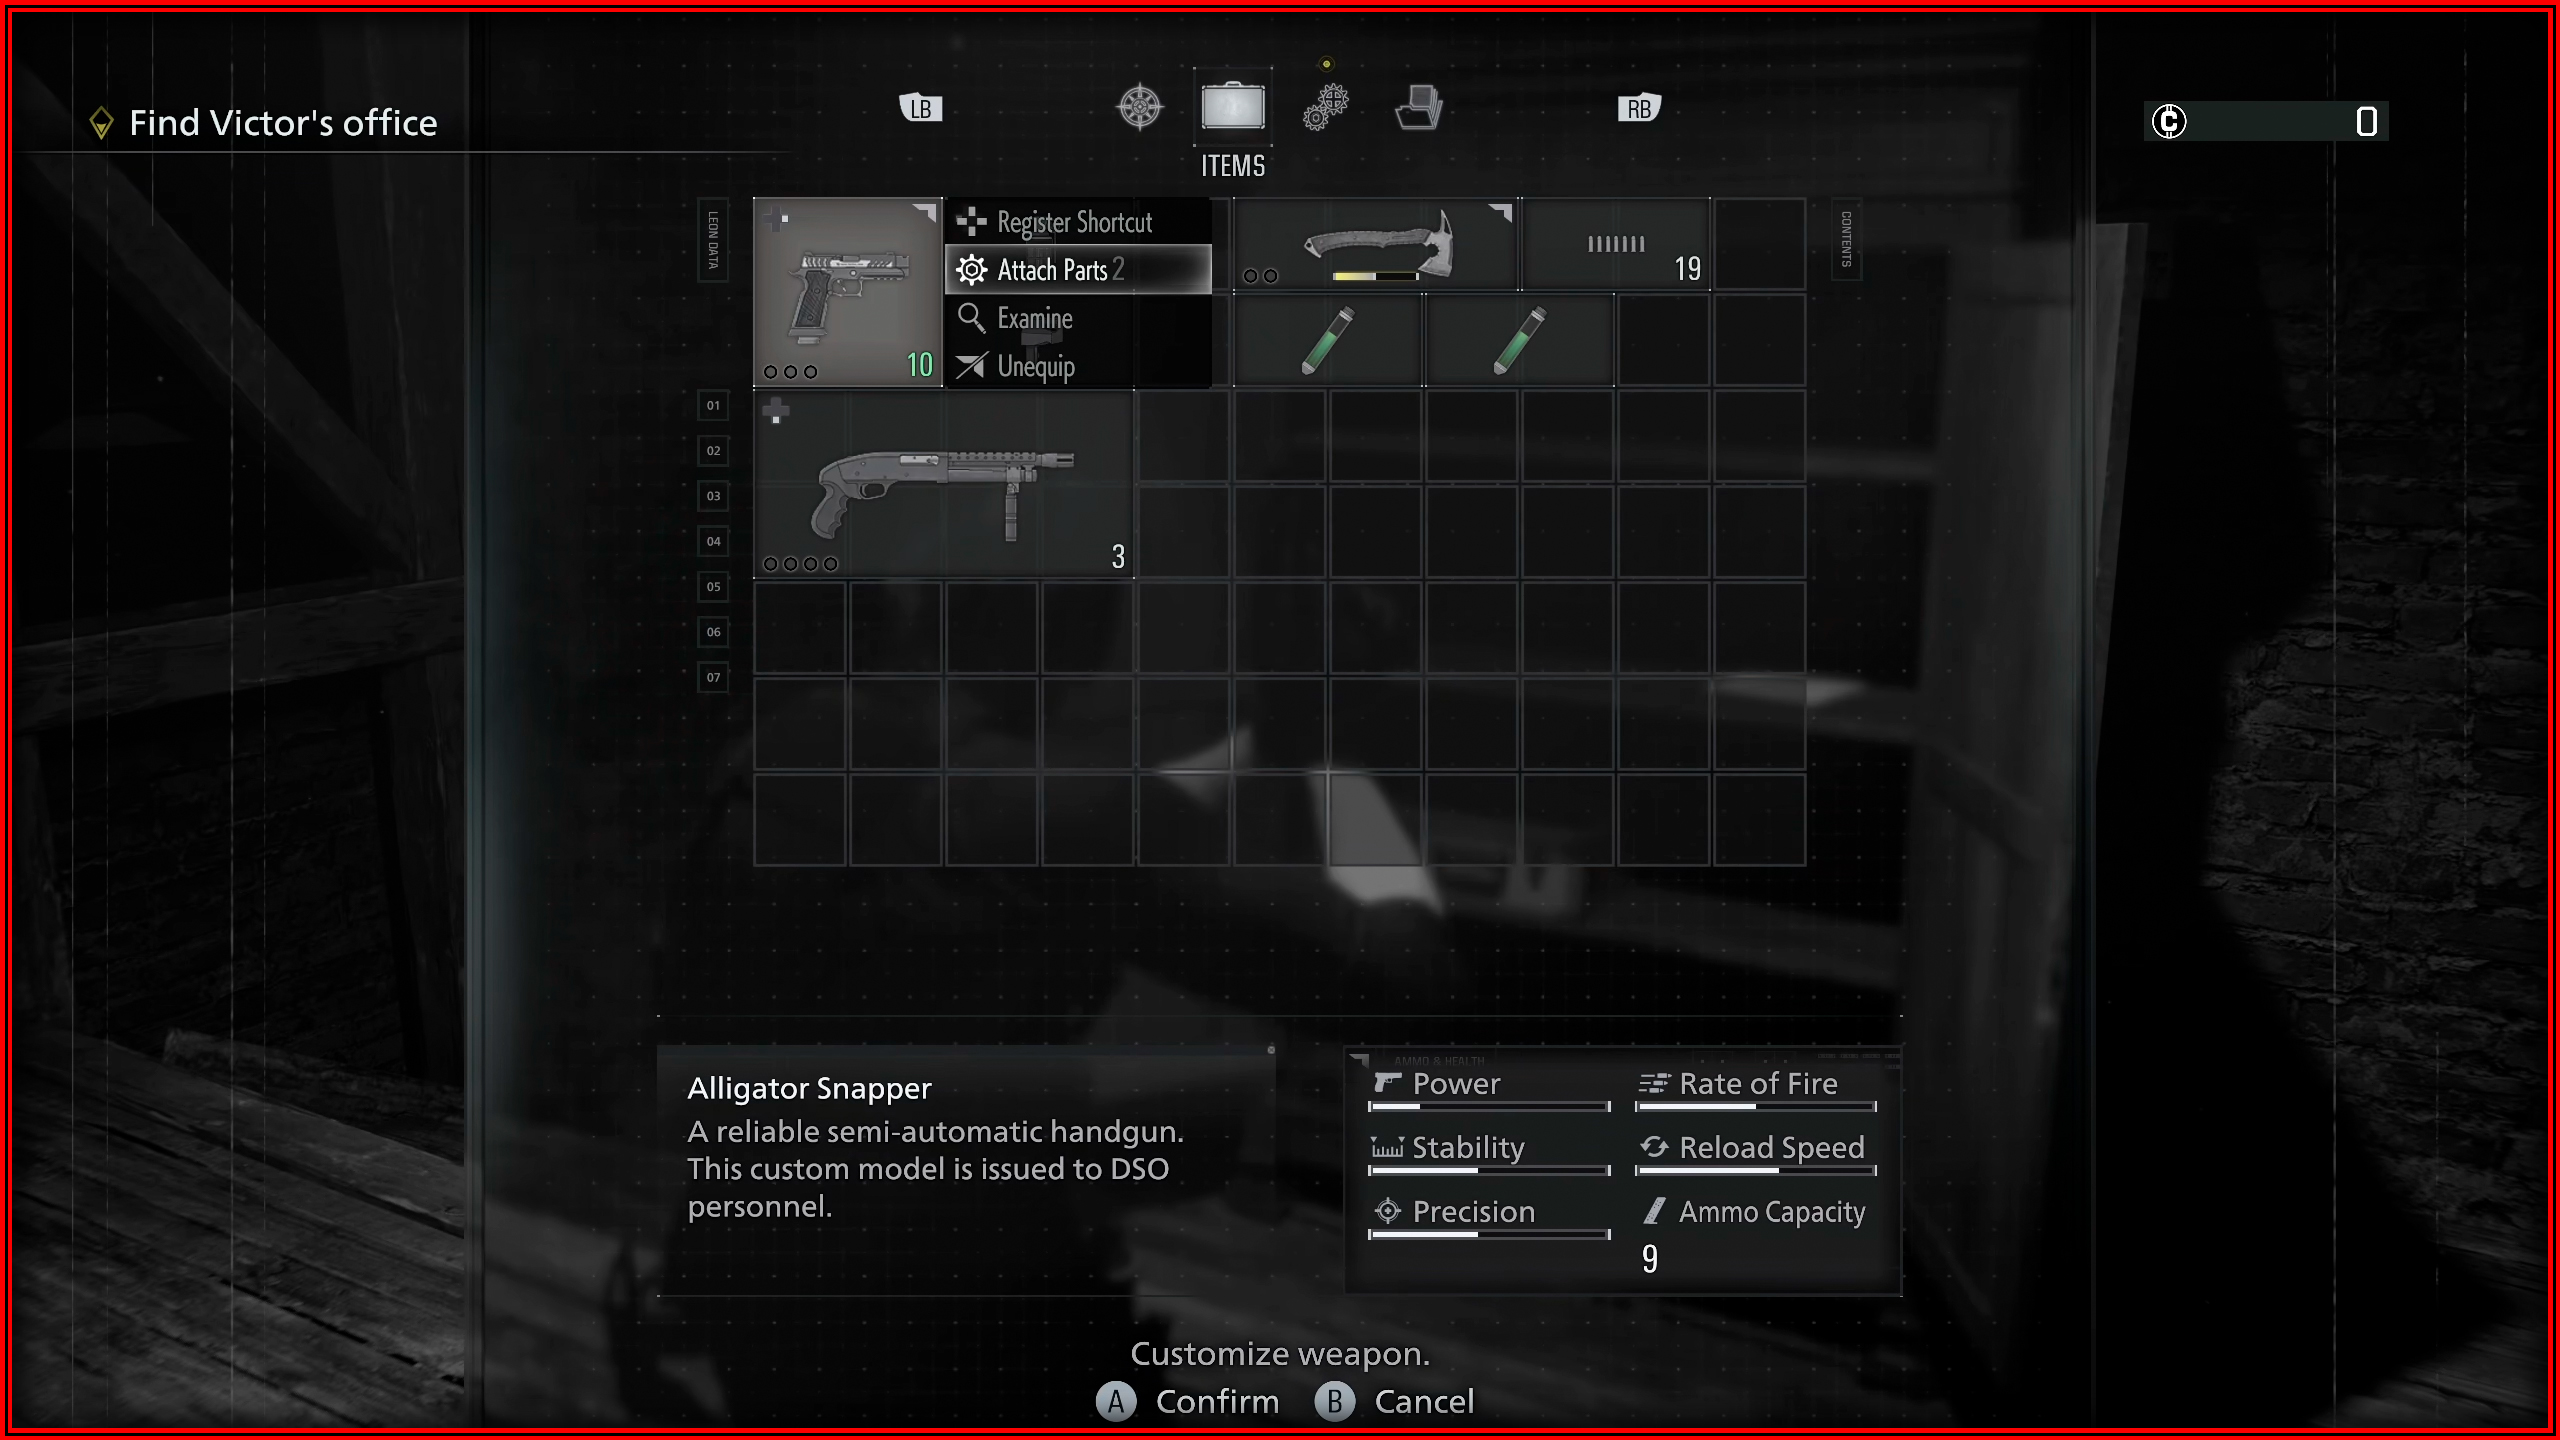
Tailor Made
 You can upgrade a weapon for the first time in the corridor after the Attic Room. Break the cabinet to obtain the Compensator, attach it to your handgun.
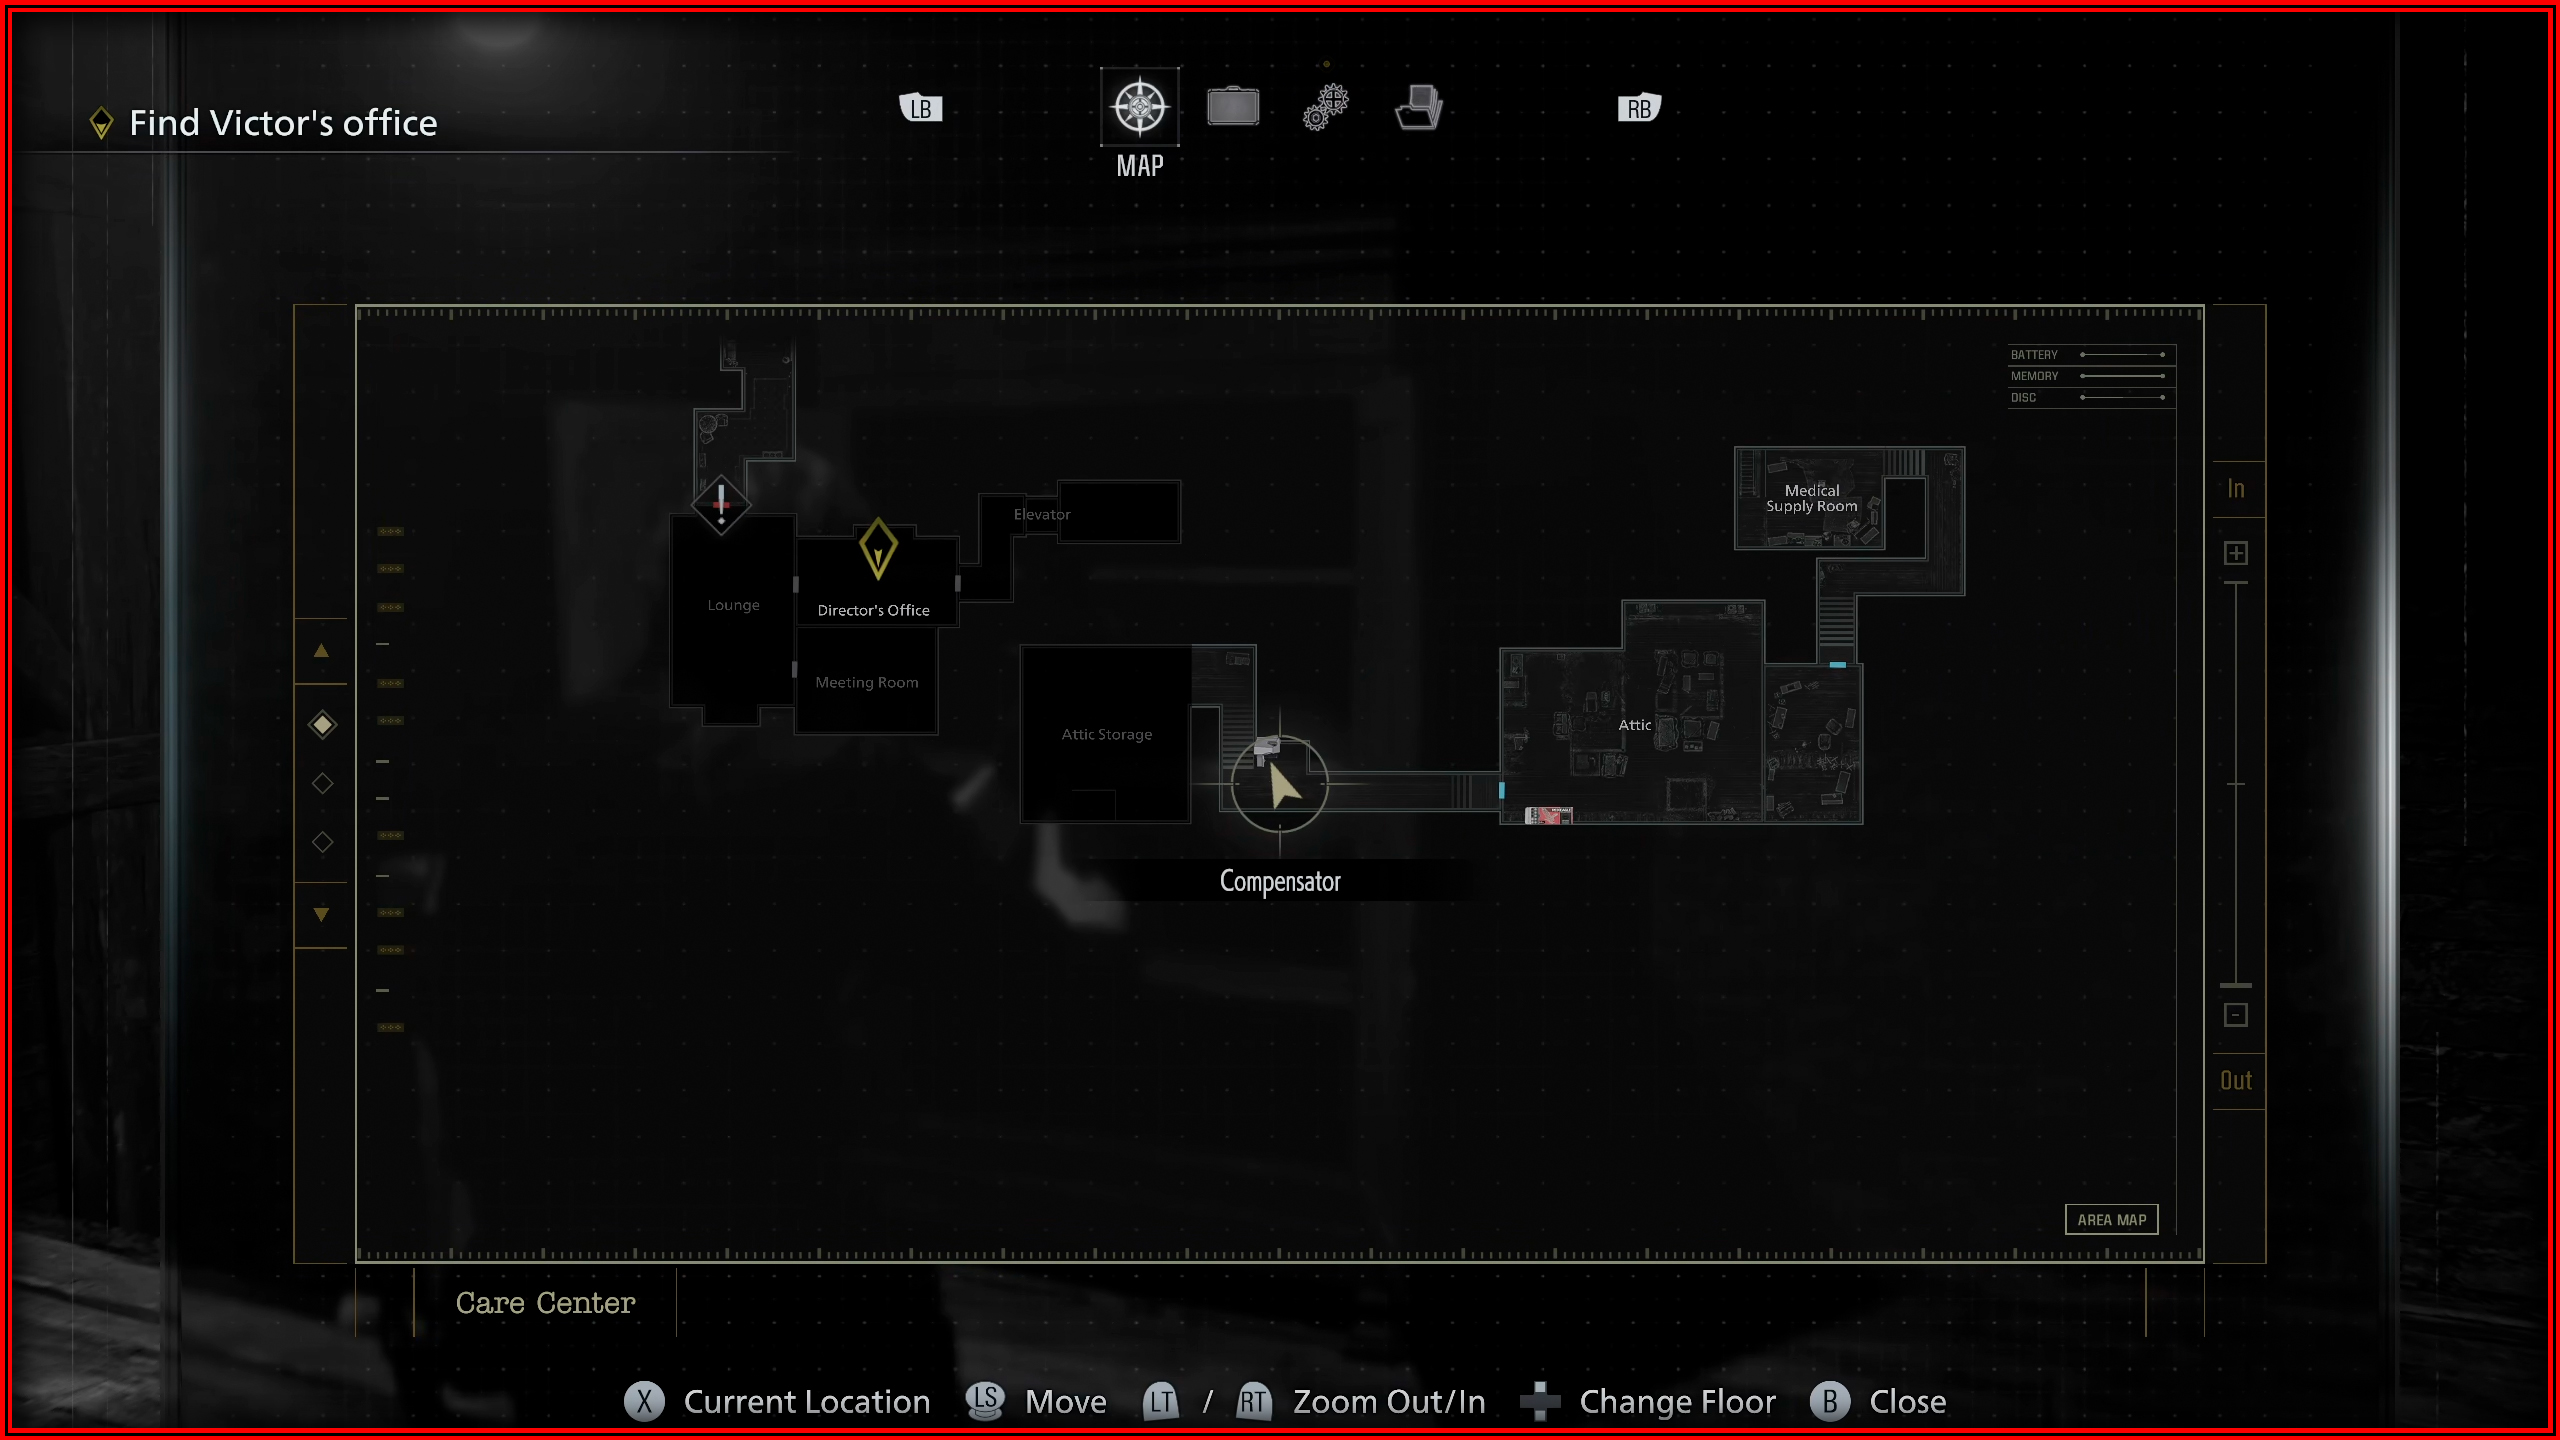
 You can upgrade weapons later at the Supply Box.
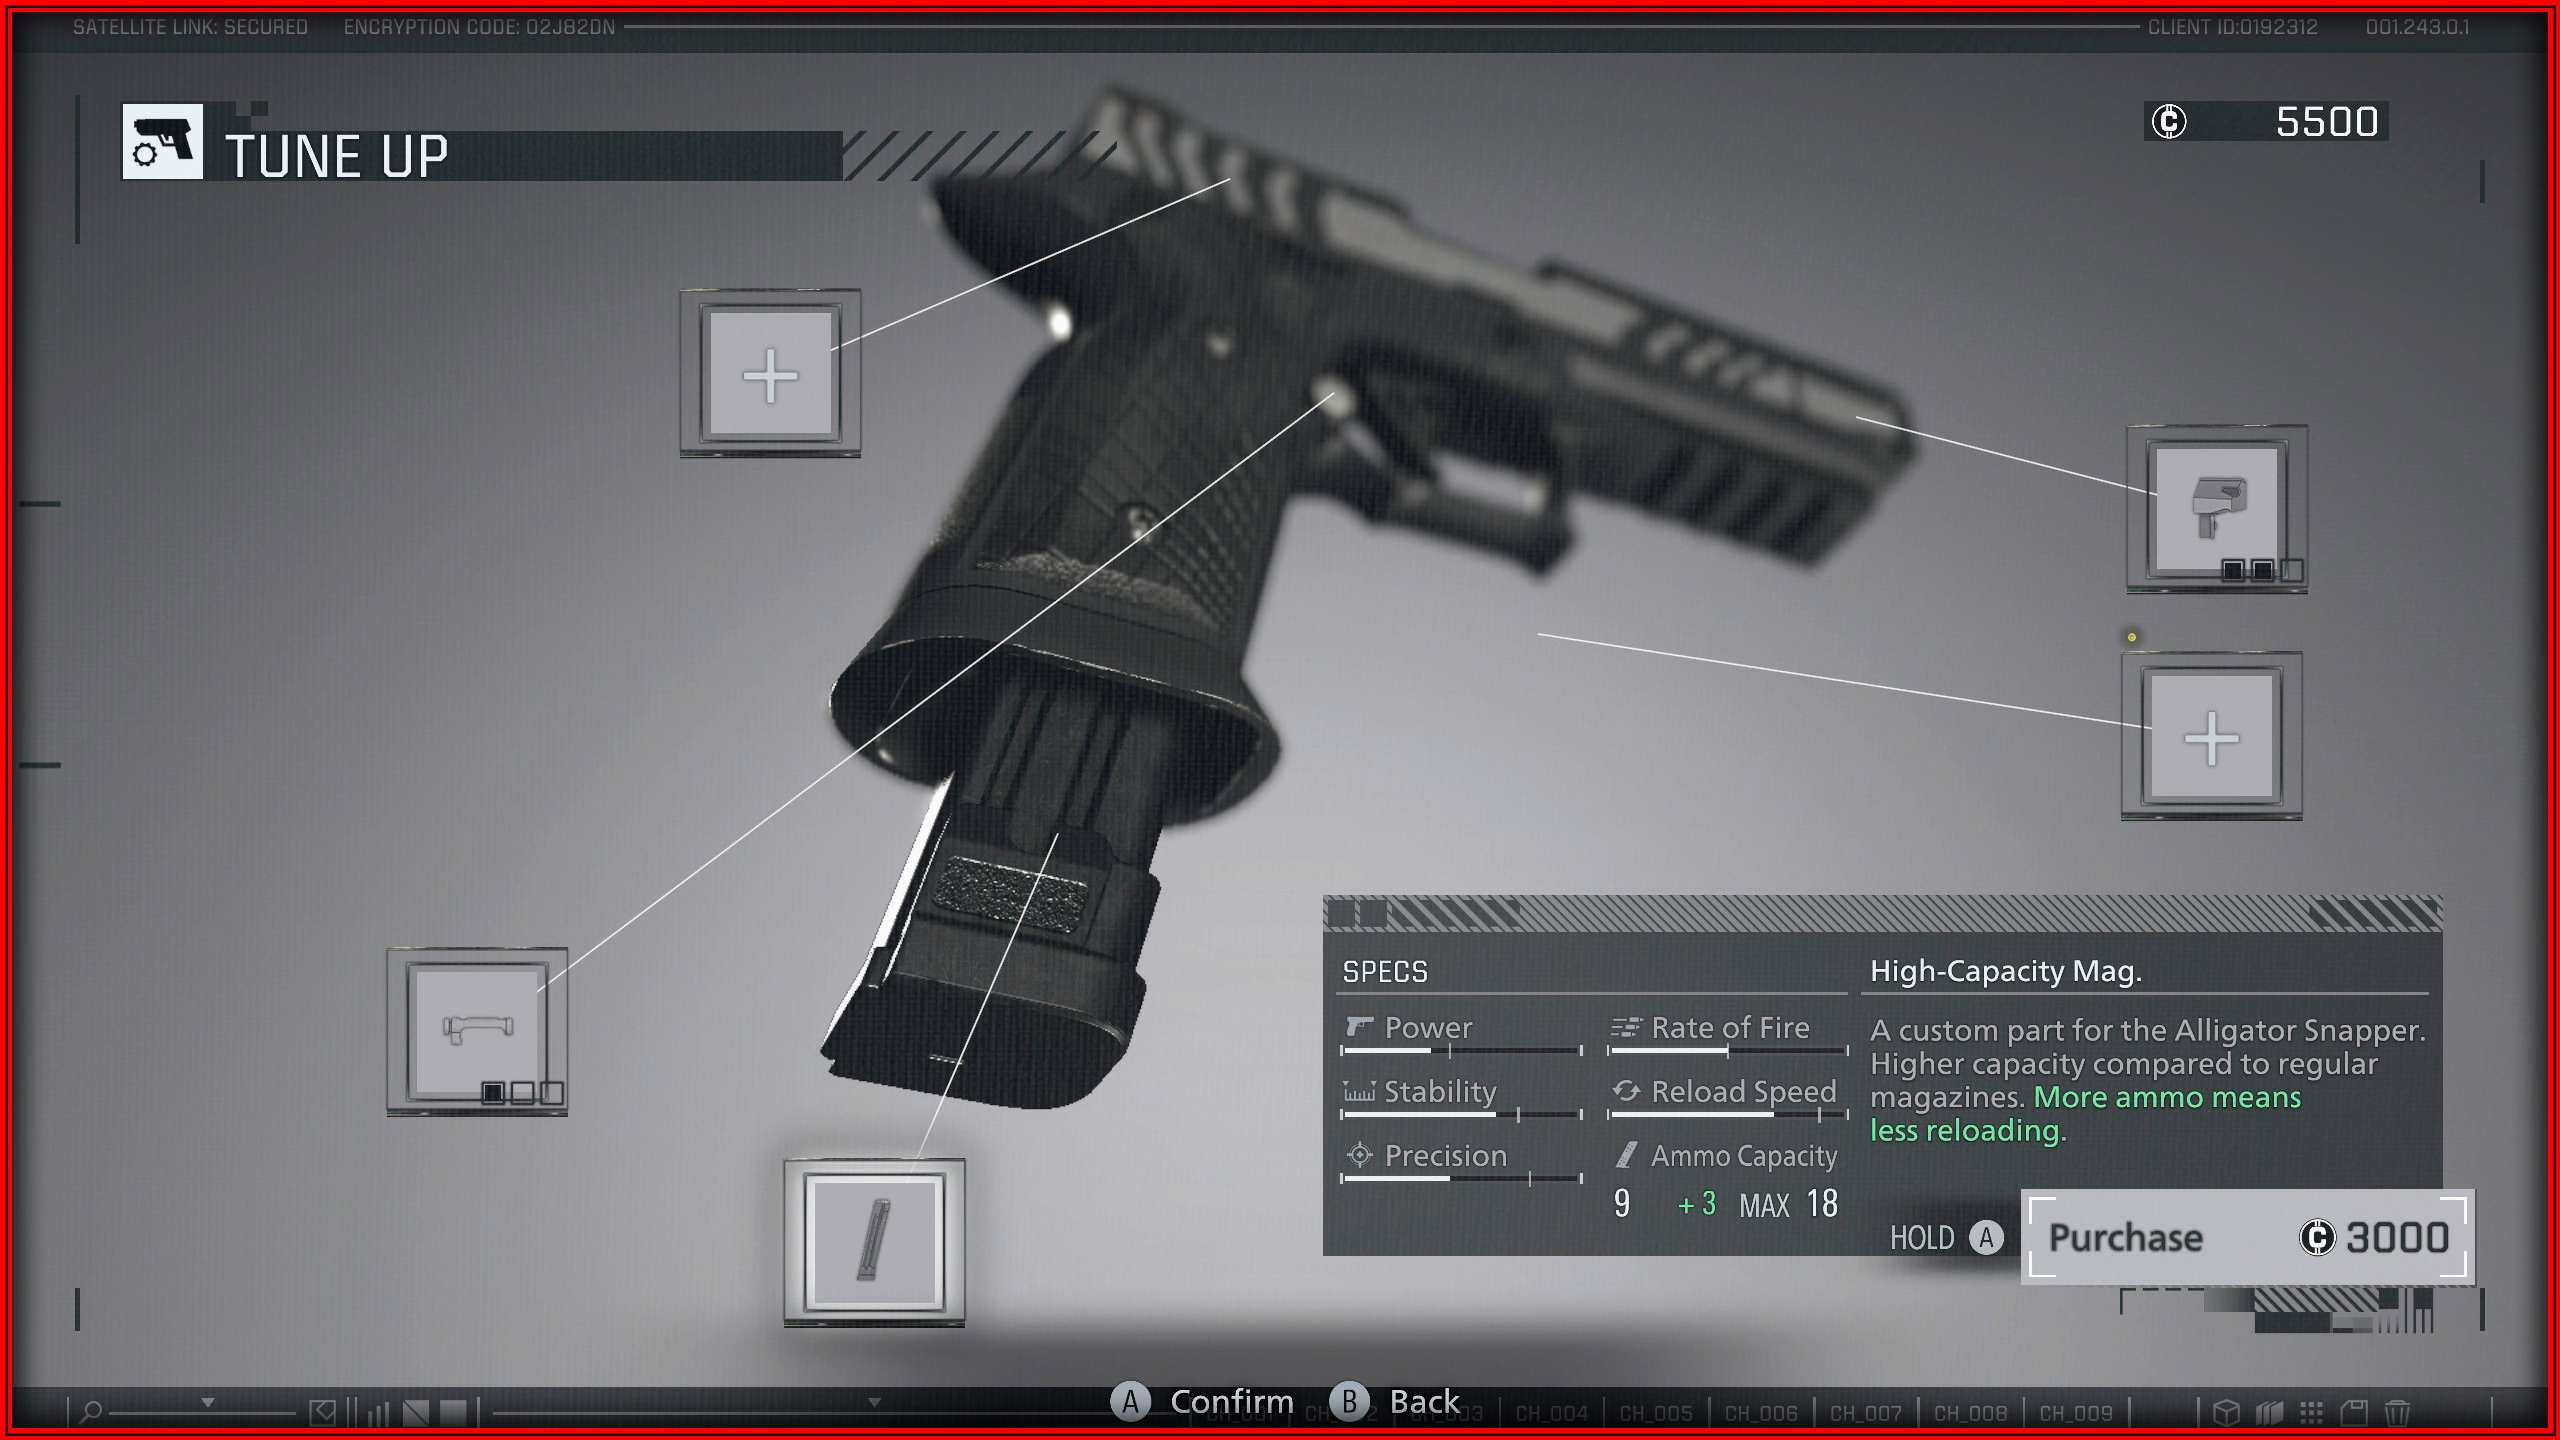
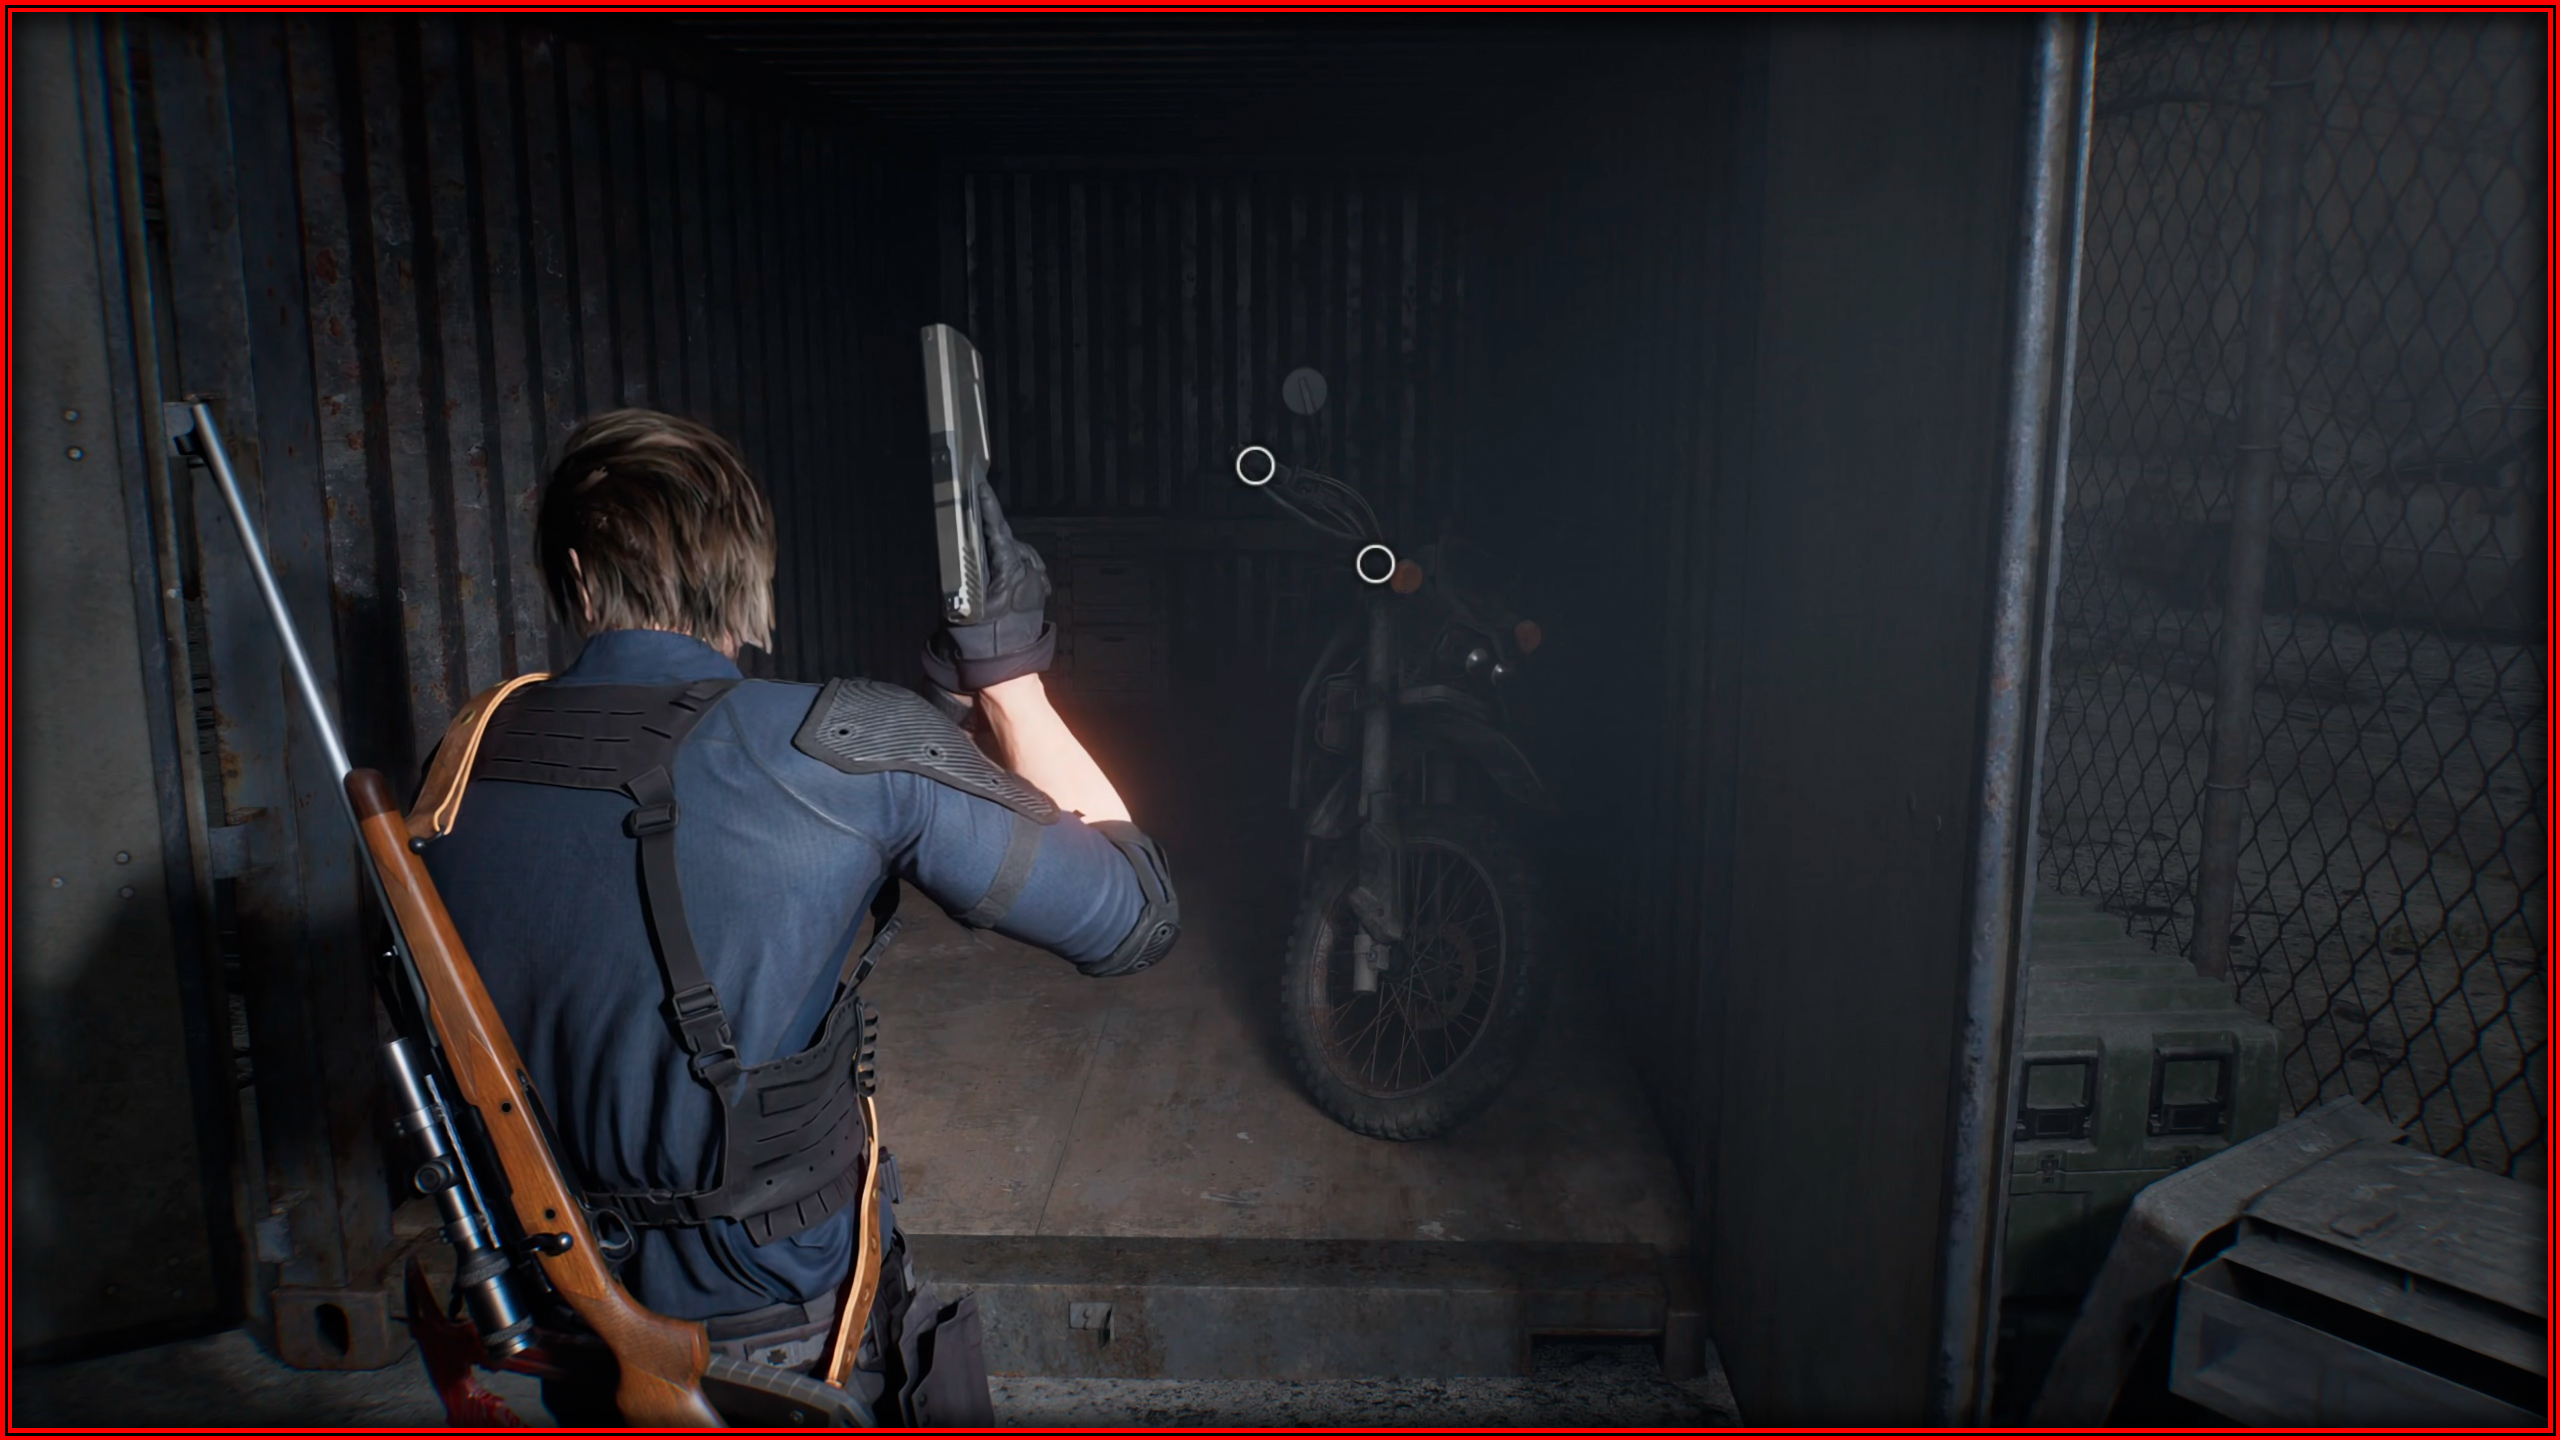
Road Rage
 During the part where you ride a Motorcycle, shoot Victor when he is about to fire a missile at you. A red mark will appear above him when he is about to hit you.
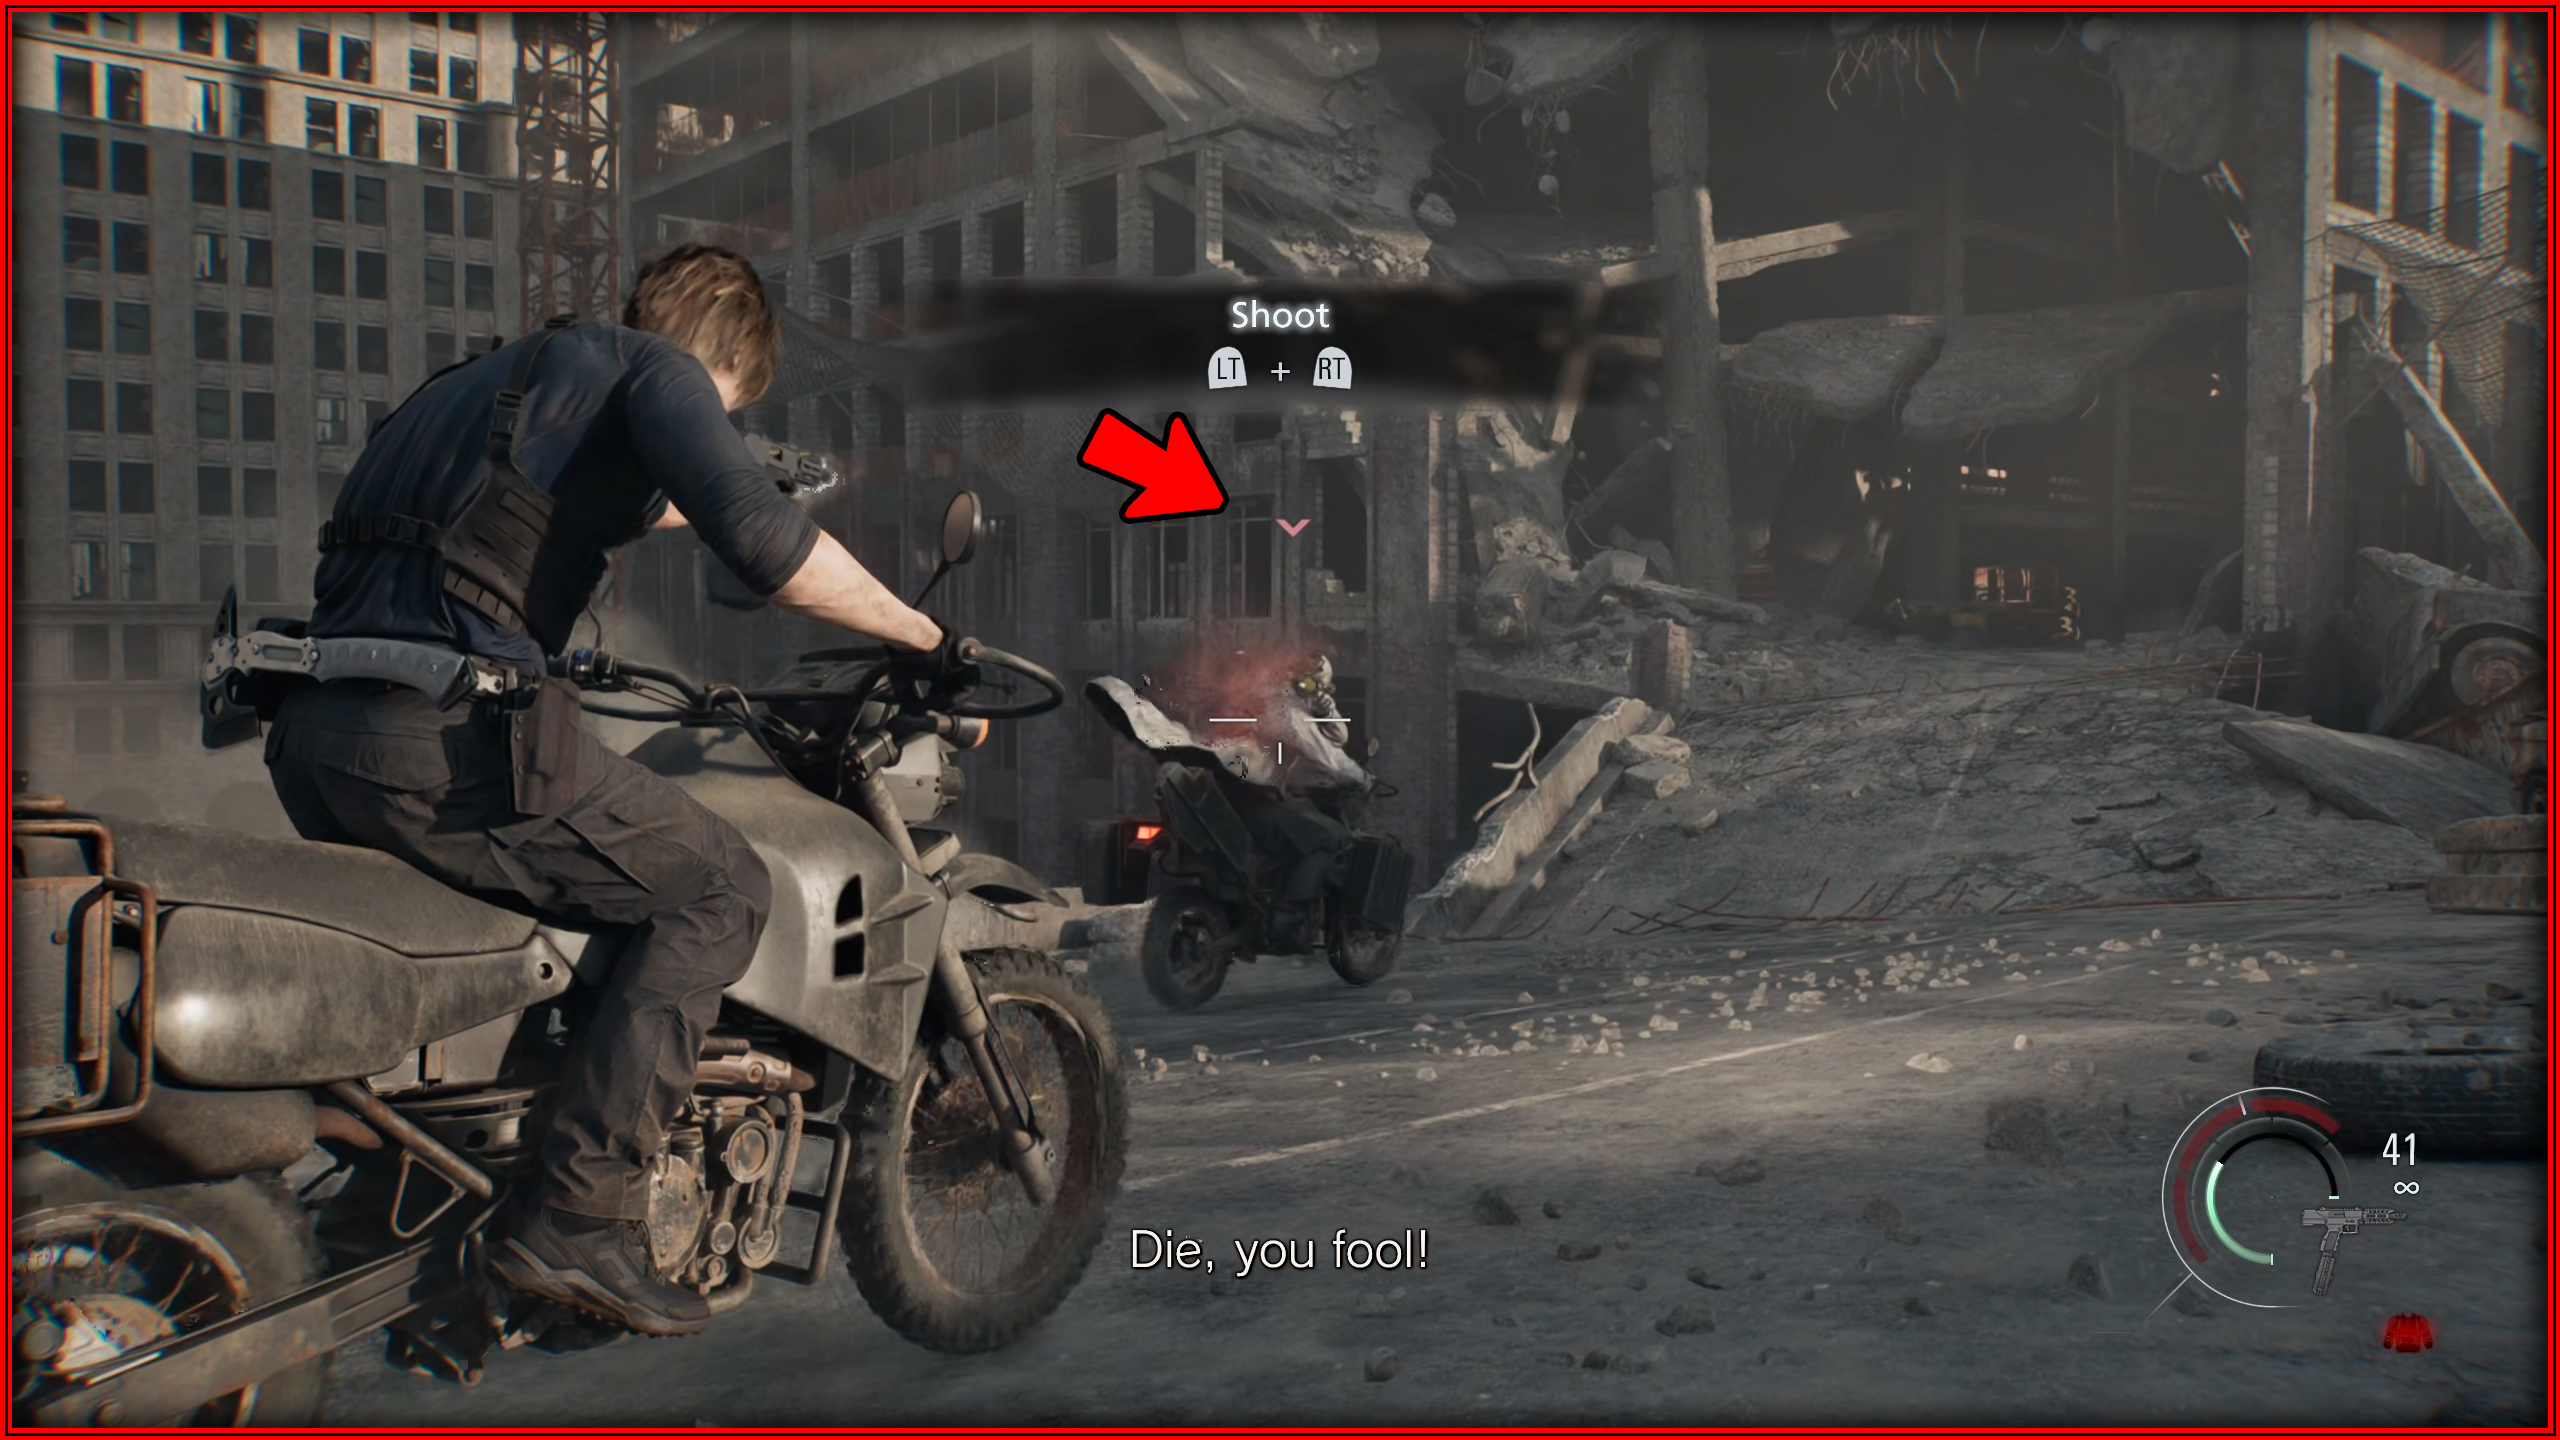
Master Craftsman
 You need to craft at least 1 of each item with Leon. The recipes will be unlocked automatically upon picking up the necessary materials. You will only be able to do this in Raccoon City and onwards.
List of all craftable items:
Mixed Herb (G+G)
2 Green Herbs
Mixed Herb (G+G+G)
3 Green Herbs
Mixed Herb (G+G+G)
G+G Mixed Herb + 1 Green Herb
Handgun Ammo
Scrap + Gunpowder Small
Shotgun Ammo
Scrap + Gunpowder Larger
Rifle Ammo
Scrap + Gunpowder Large
Machine Gun Ammo
Scrap – Gunpowder Small
Hand Grenade
Scrap + Gunpowder Large
Stacked Hand Grenade
2x Hand Grenade
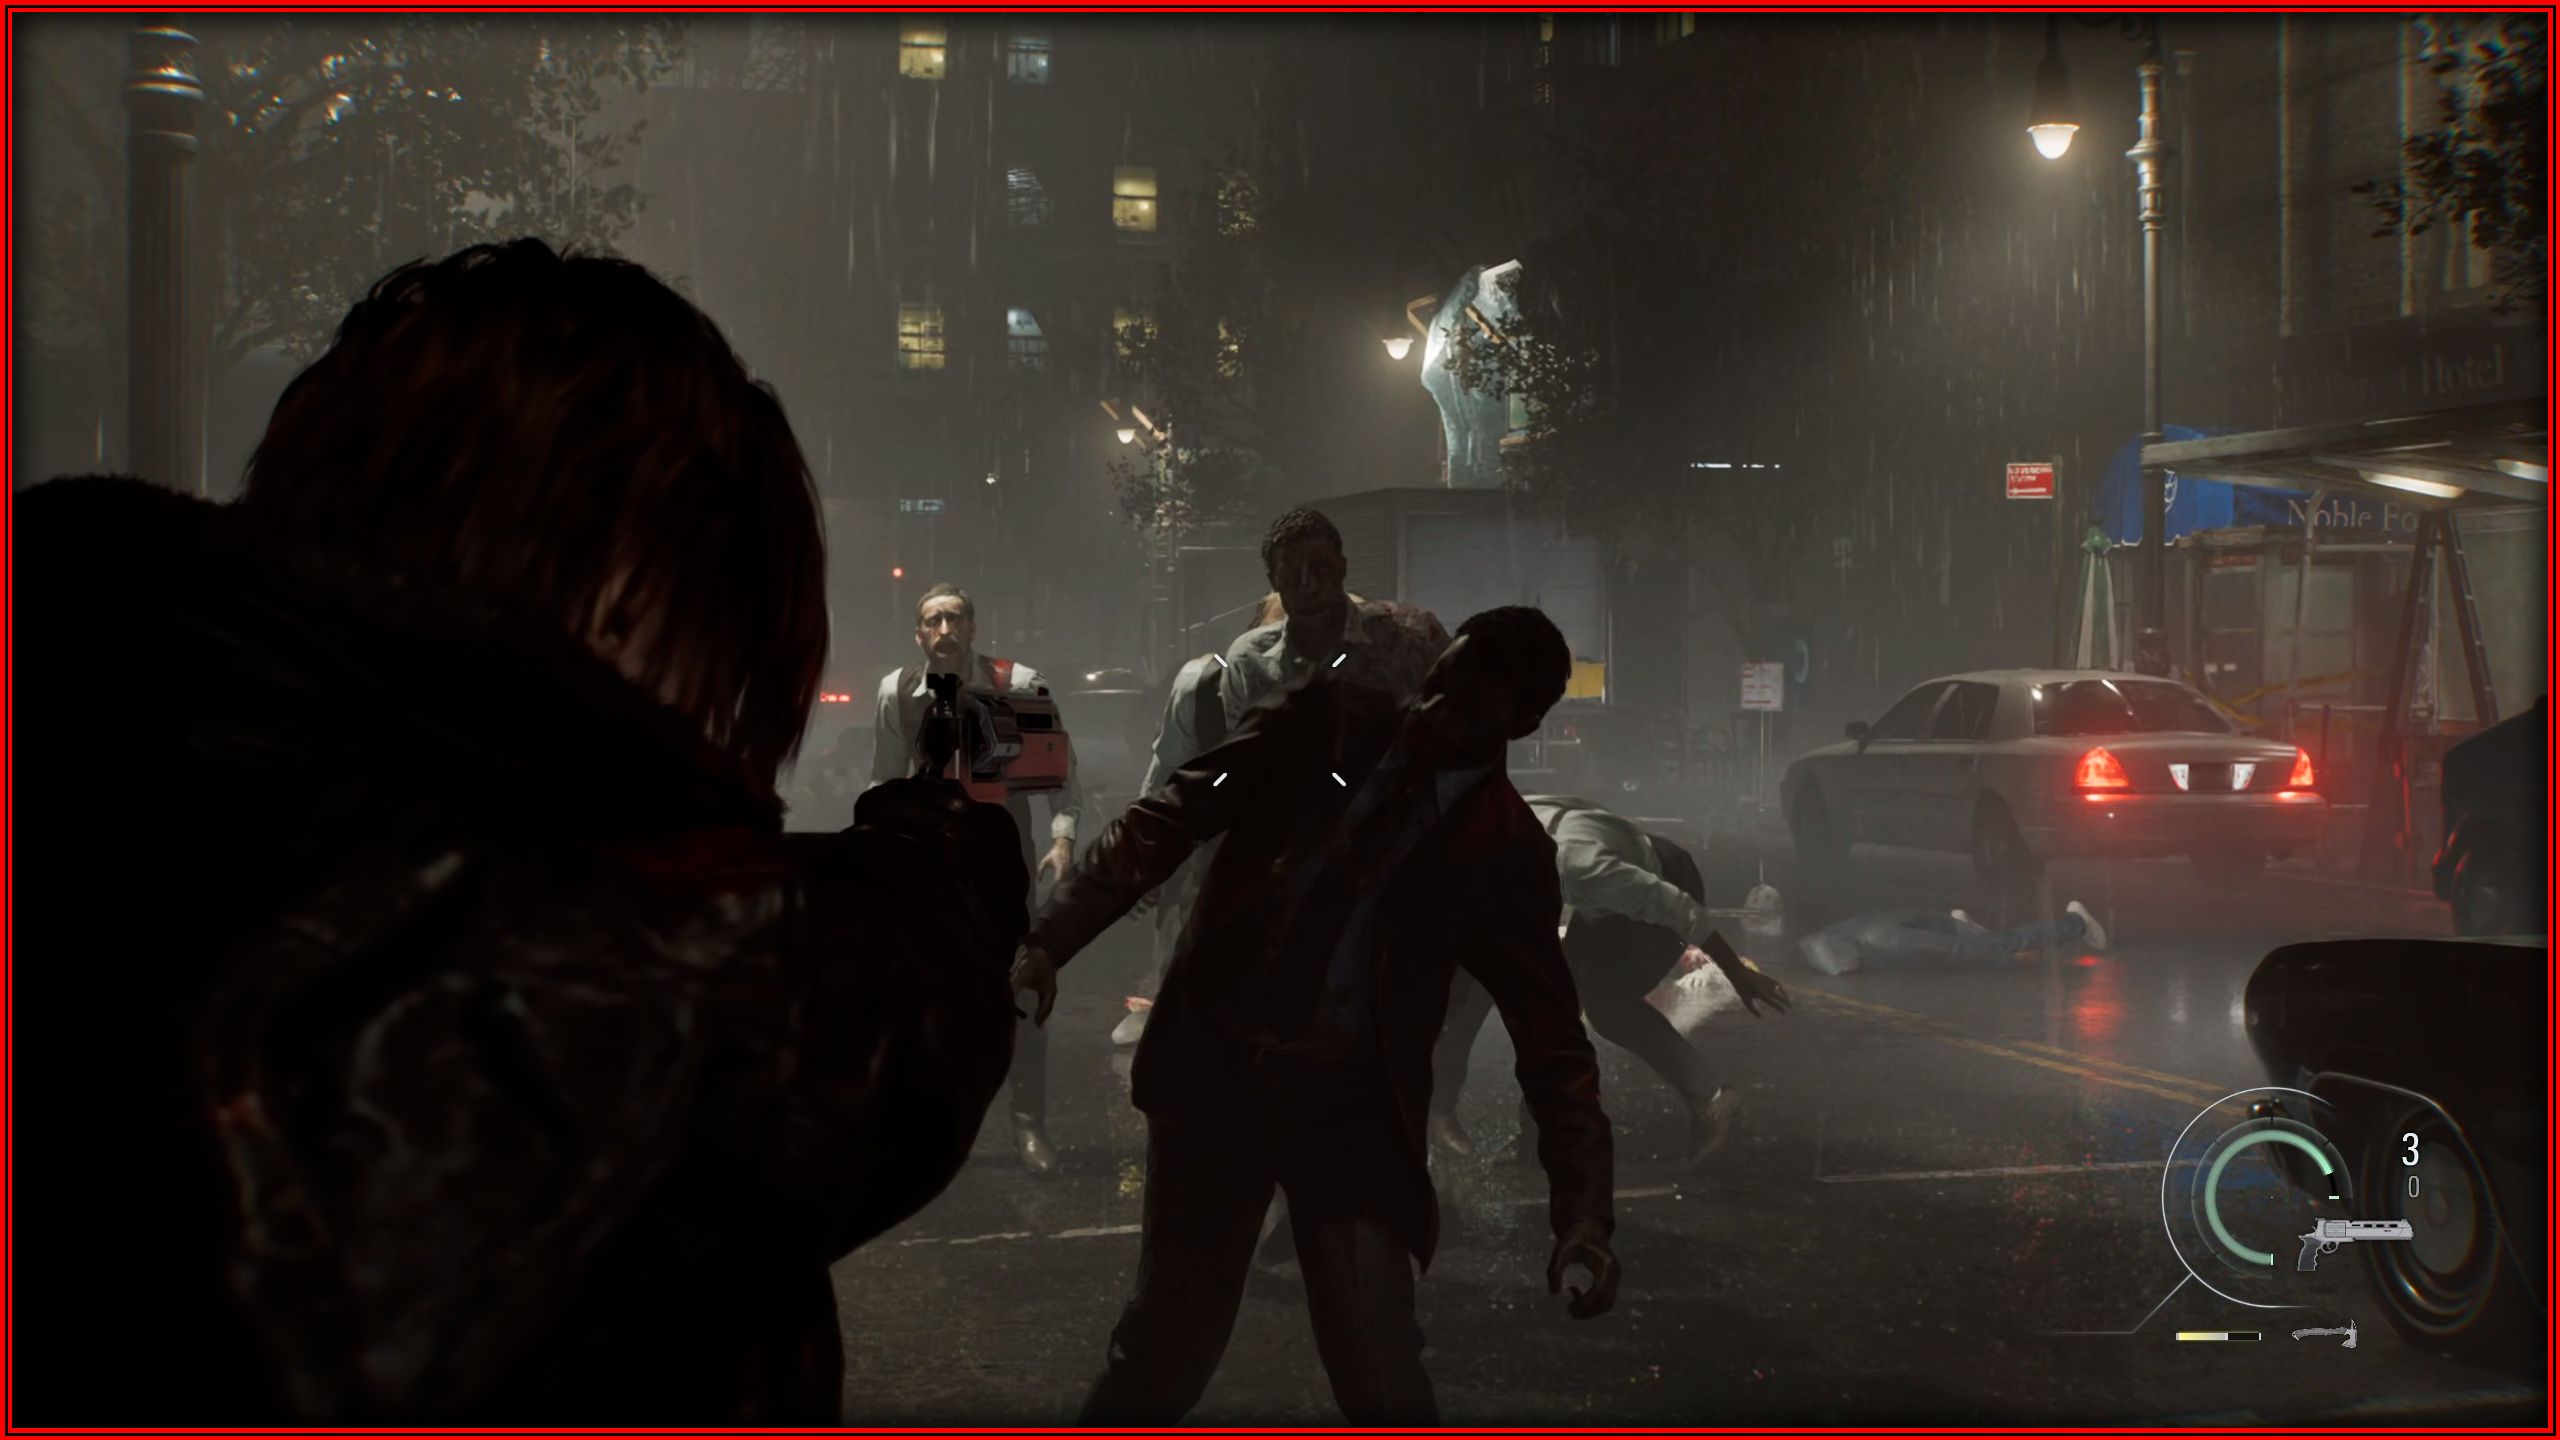
Bang For Your Buck
 You can obtain this as either Leon or Grace. The first time you play as Leon, there will be several Zombies on the street. Wait for 3 of them to align and fire a Requiem shot.
 Playing as Grace, the first time you go to the corridor that gives access to the Waiting Room, three Zombies will appear. Align the 3 in the corridor and shoot with the Requiem.
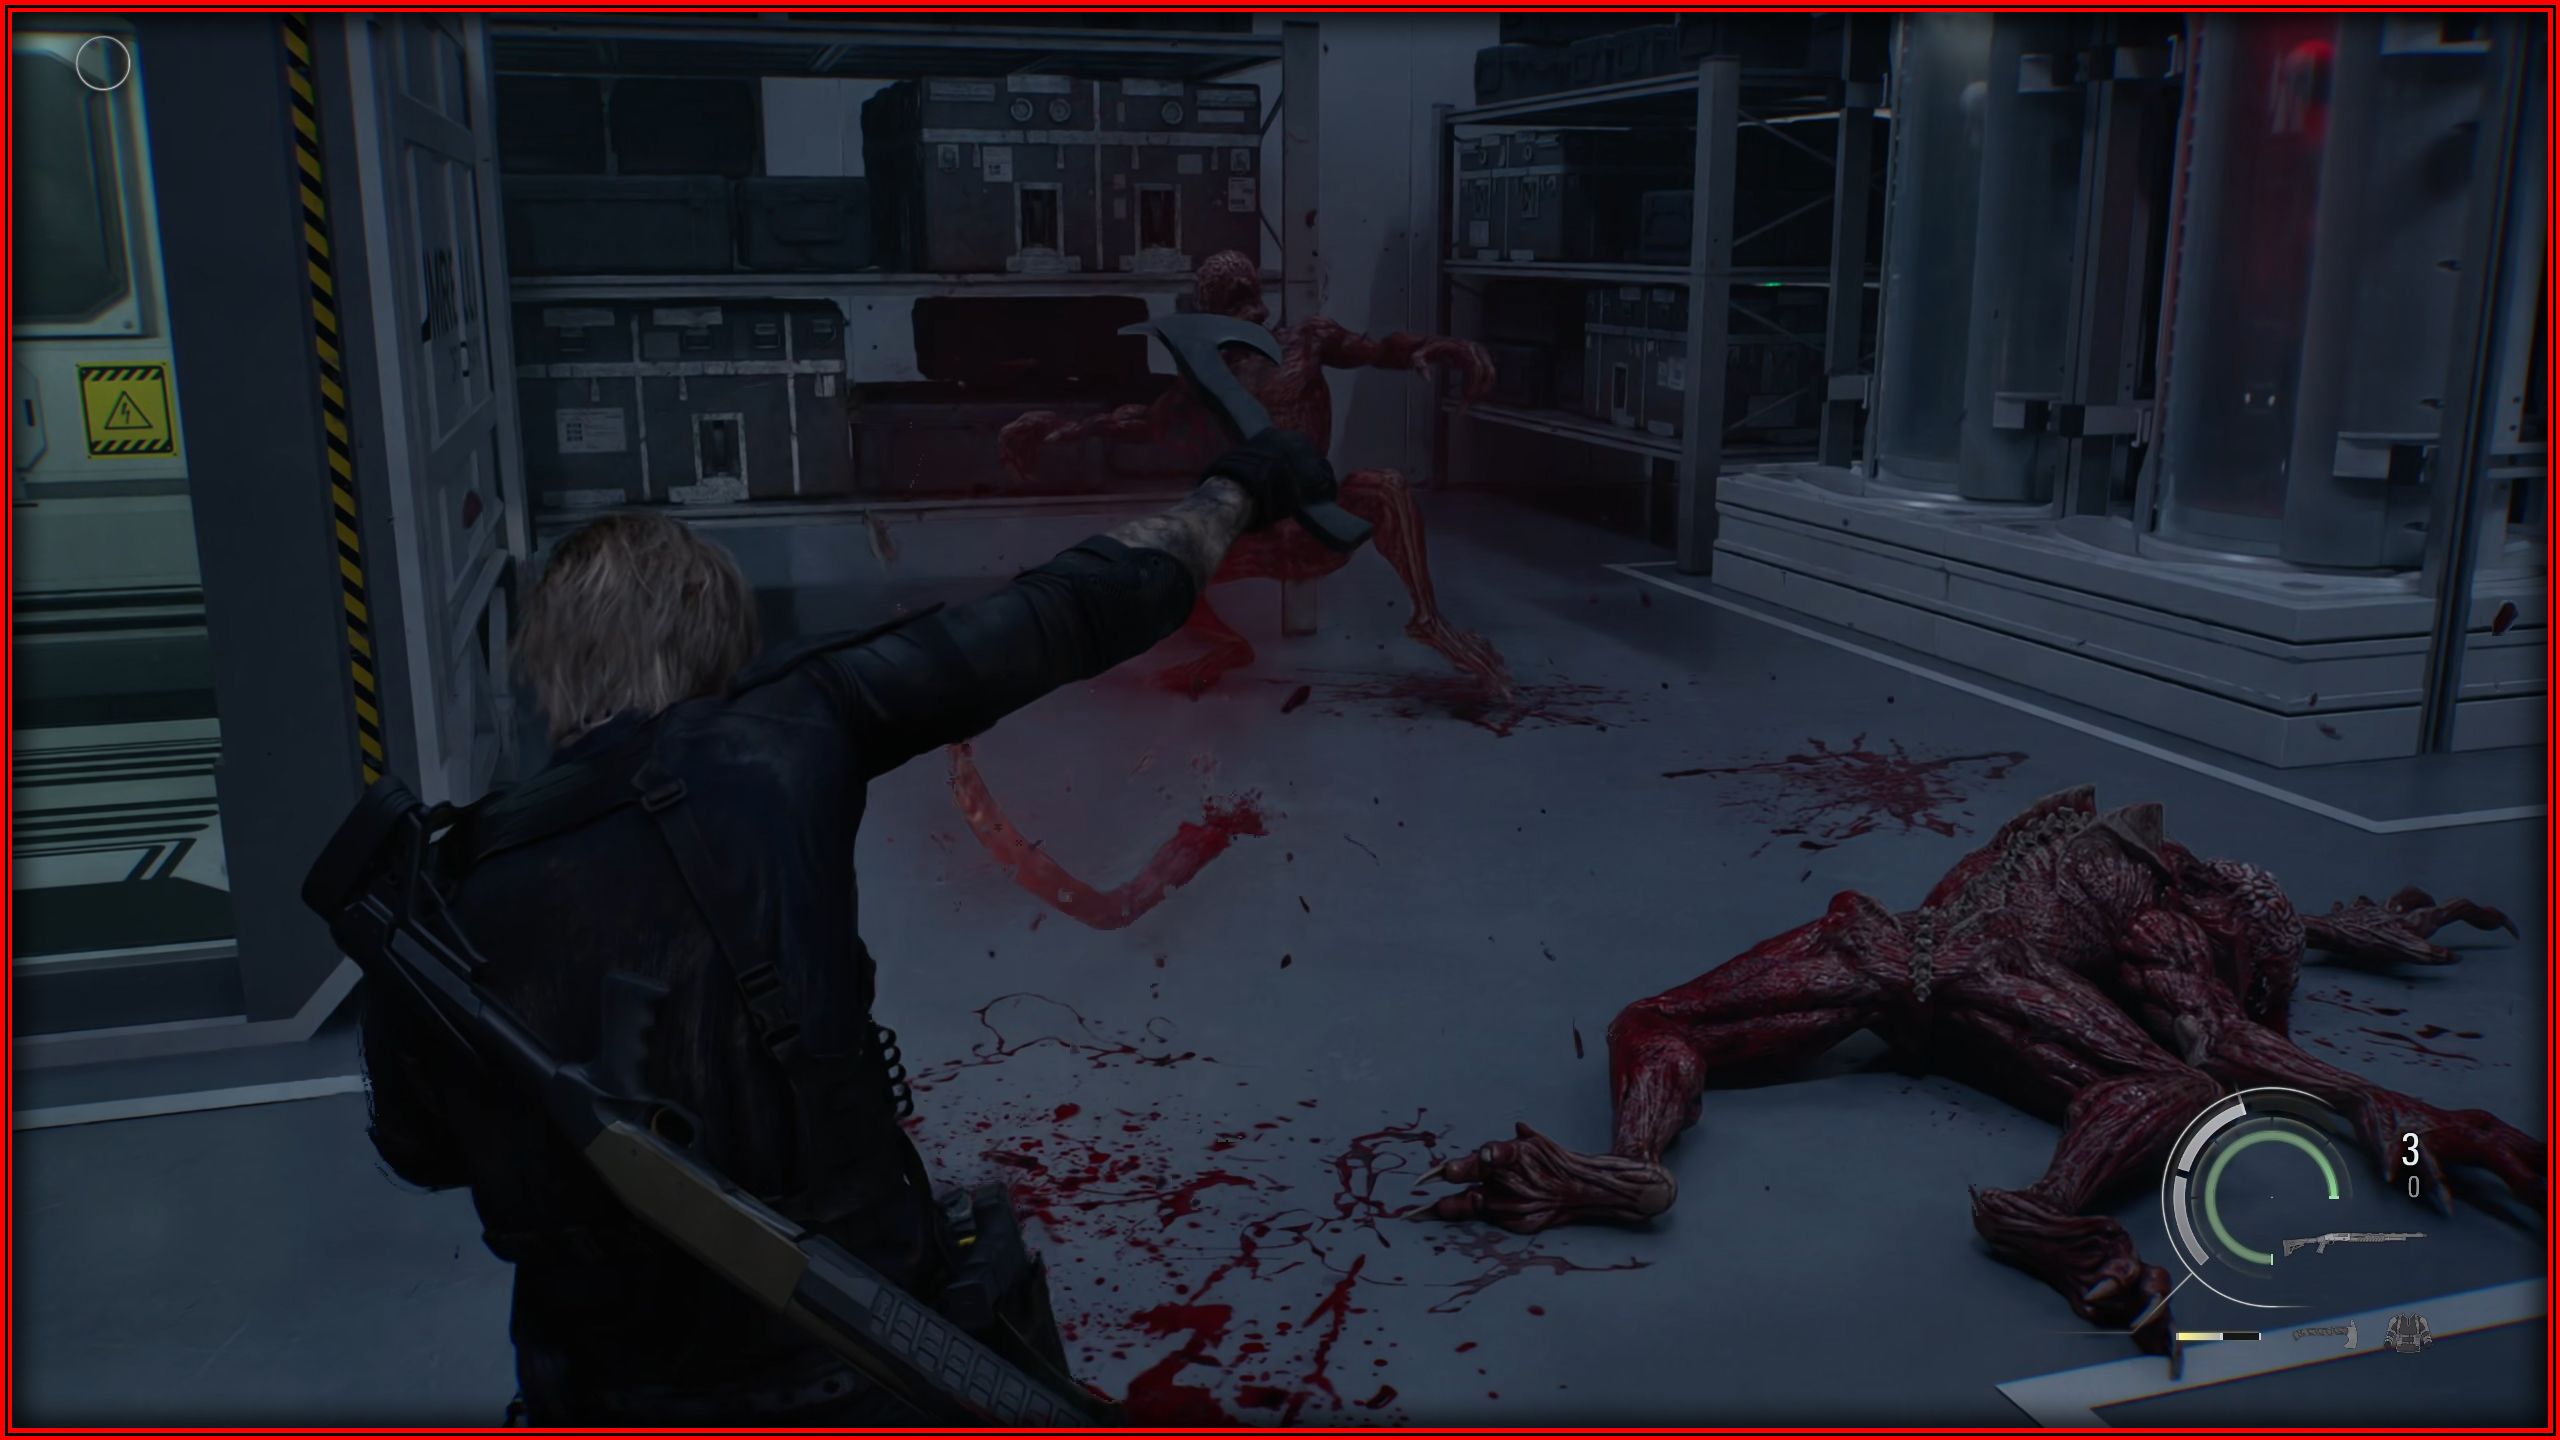
Cat Got Your Tongue?
 You need to parry when a Licker attacks you using its tongue. I recommend doing this in Bioweapon Repository 12, where there will be several Lickers. Leave only one alive and keep parrying its attacks until you get the achievement.
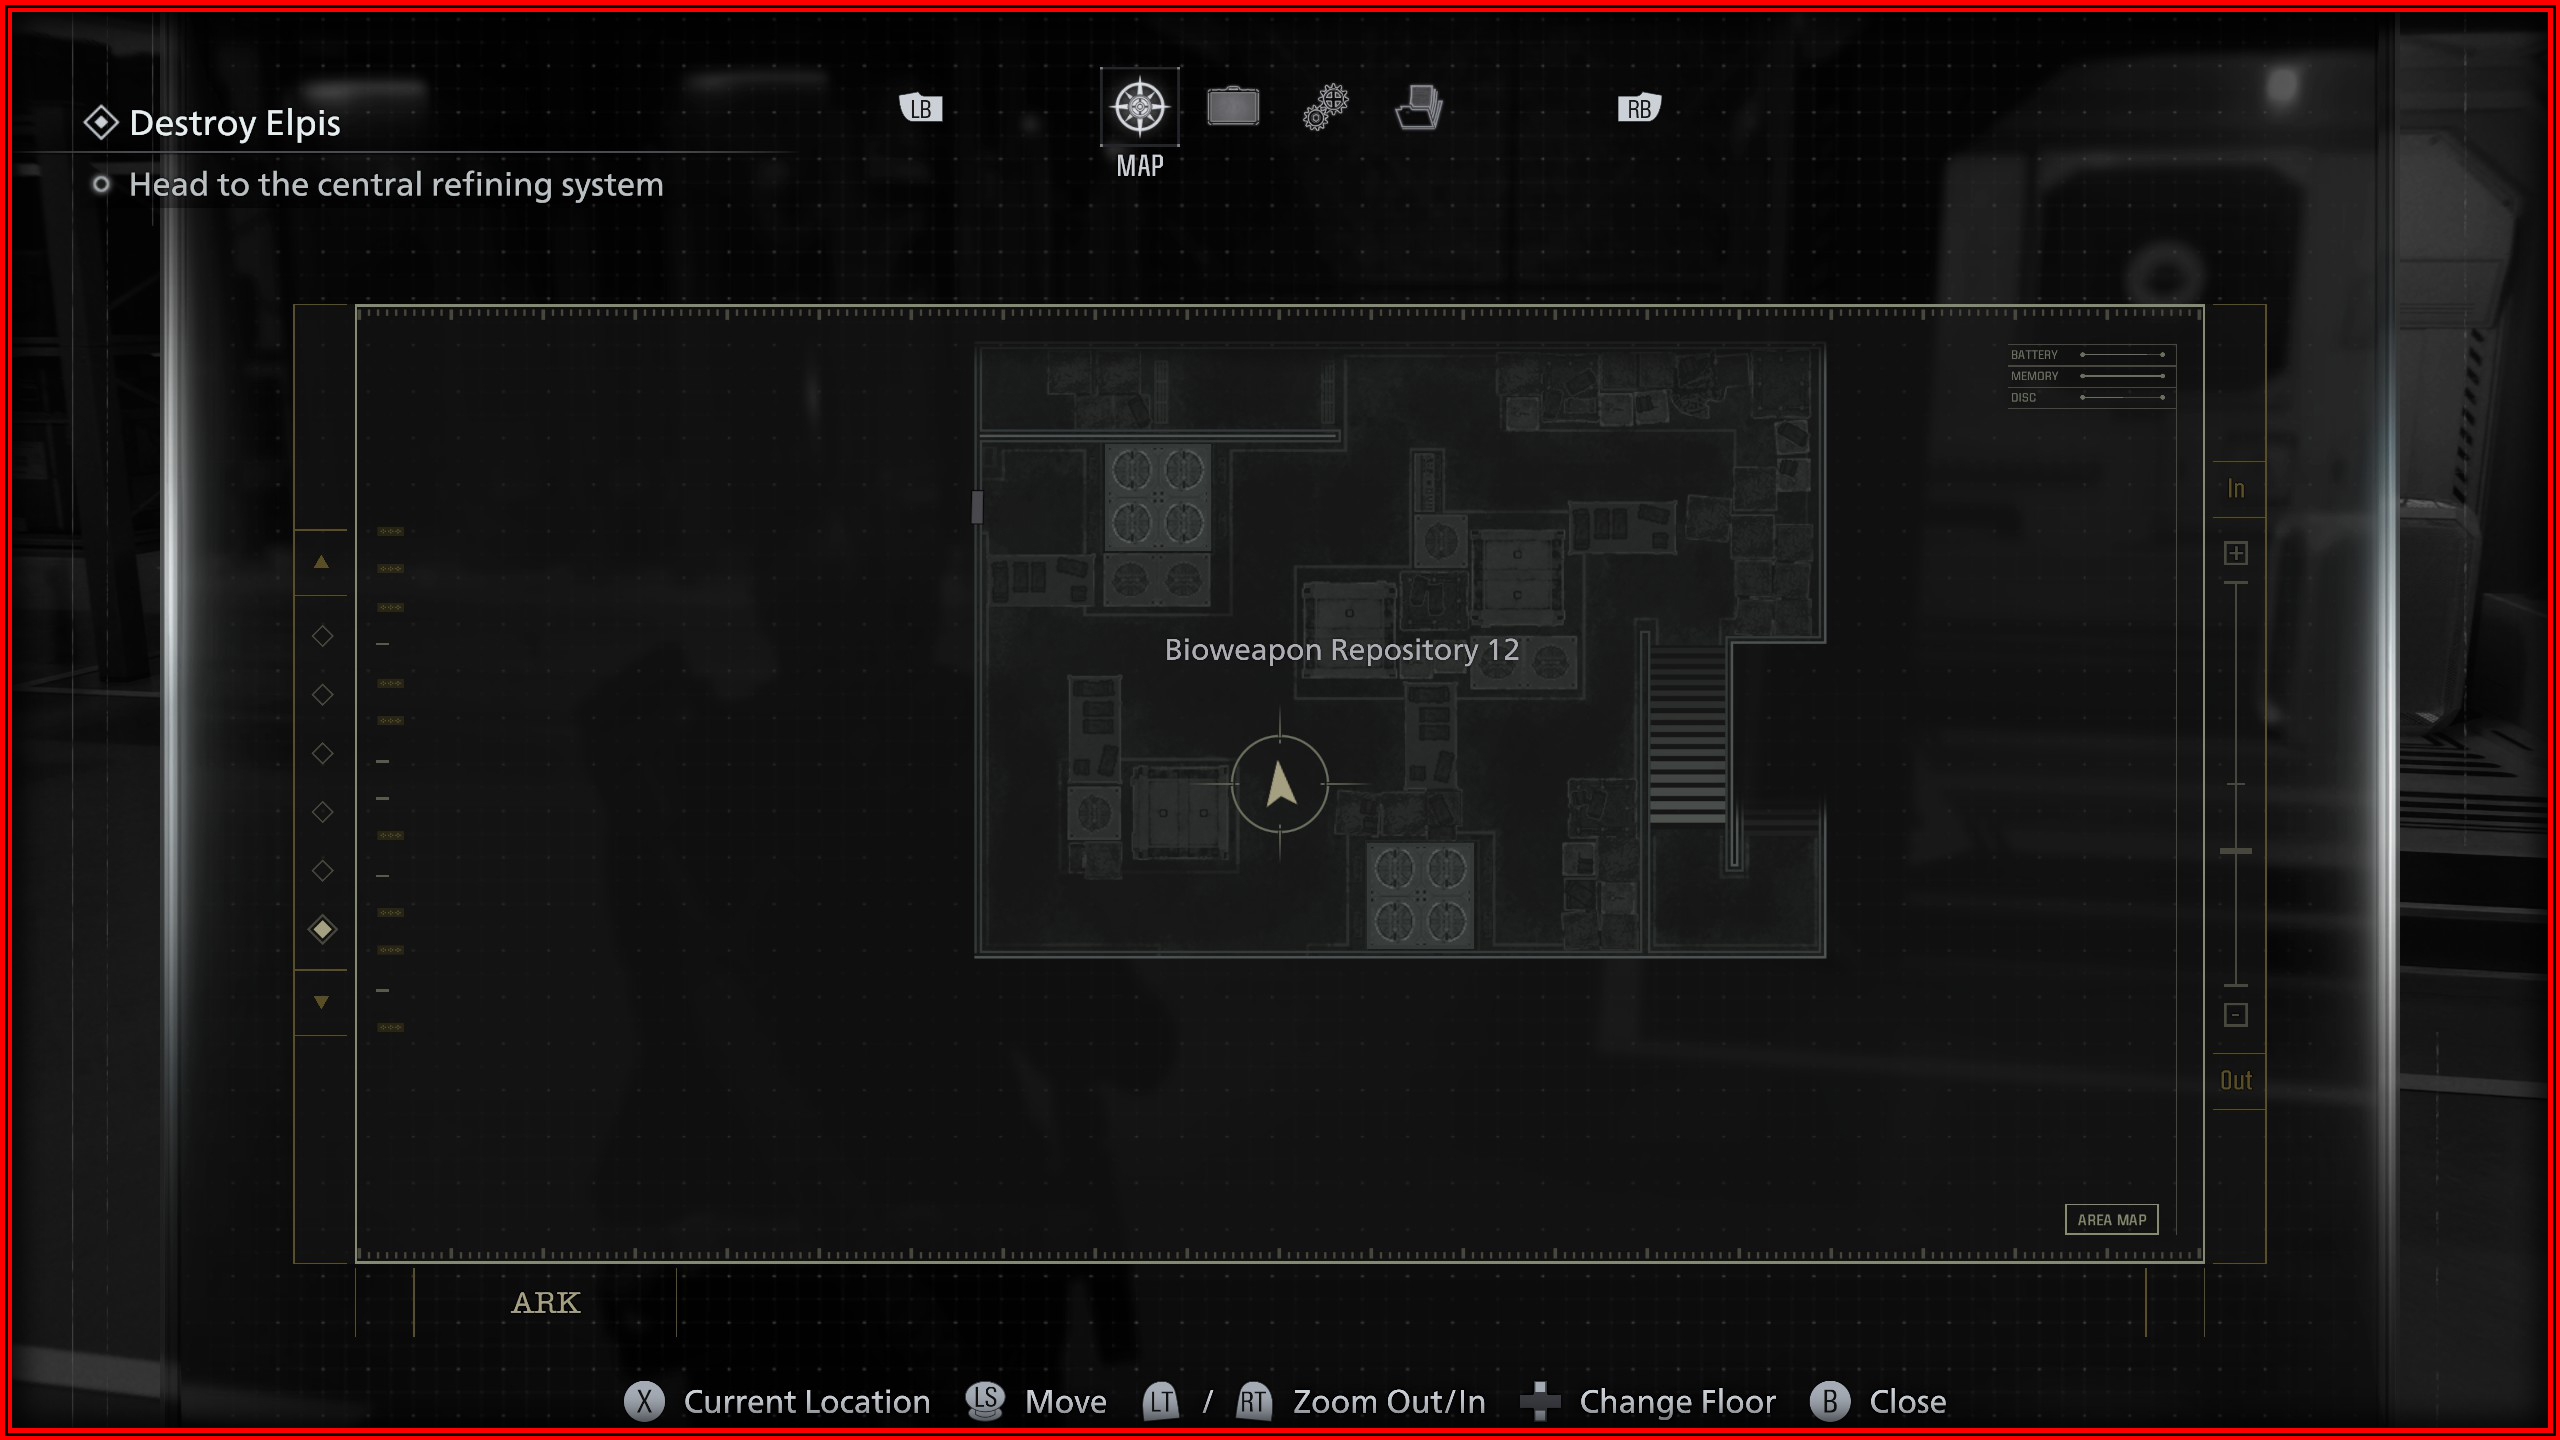
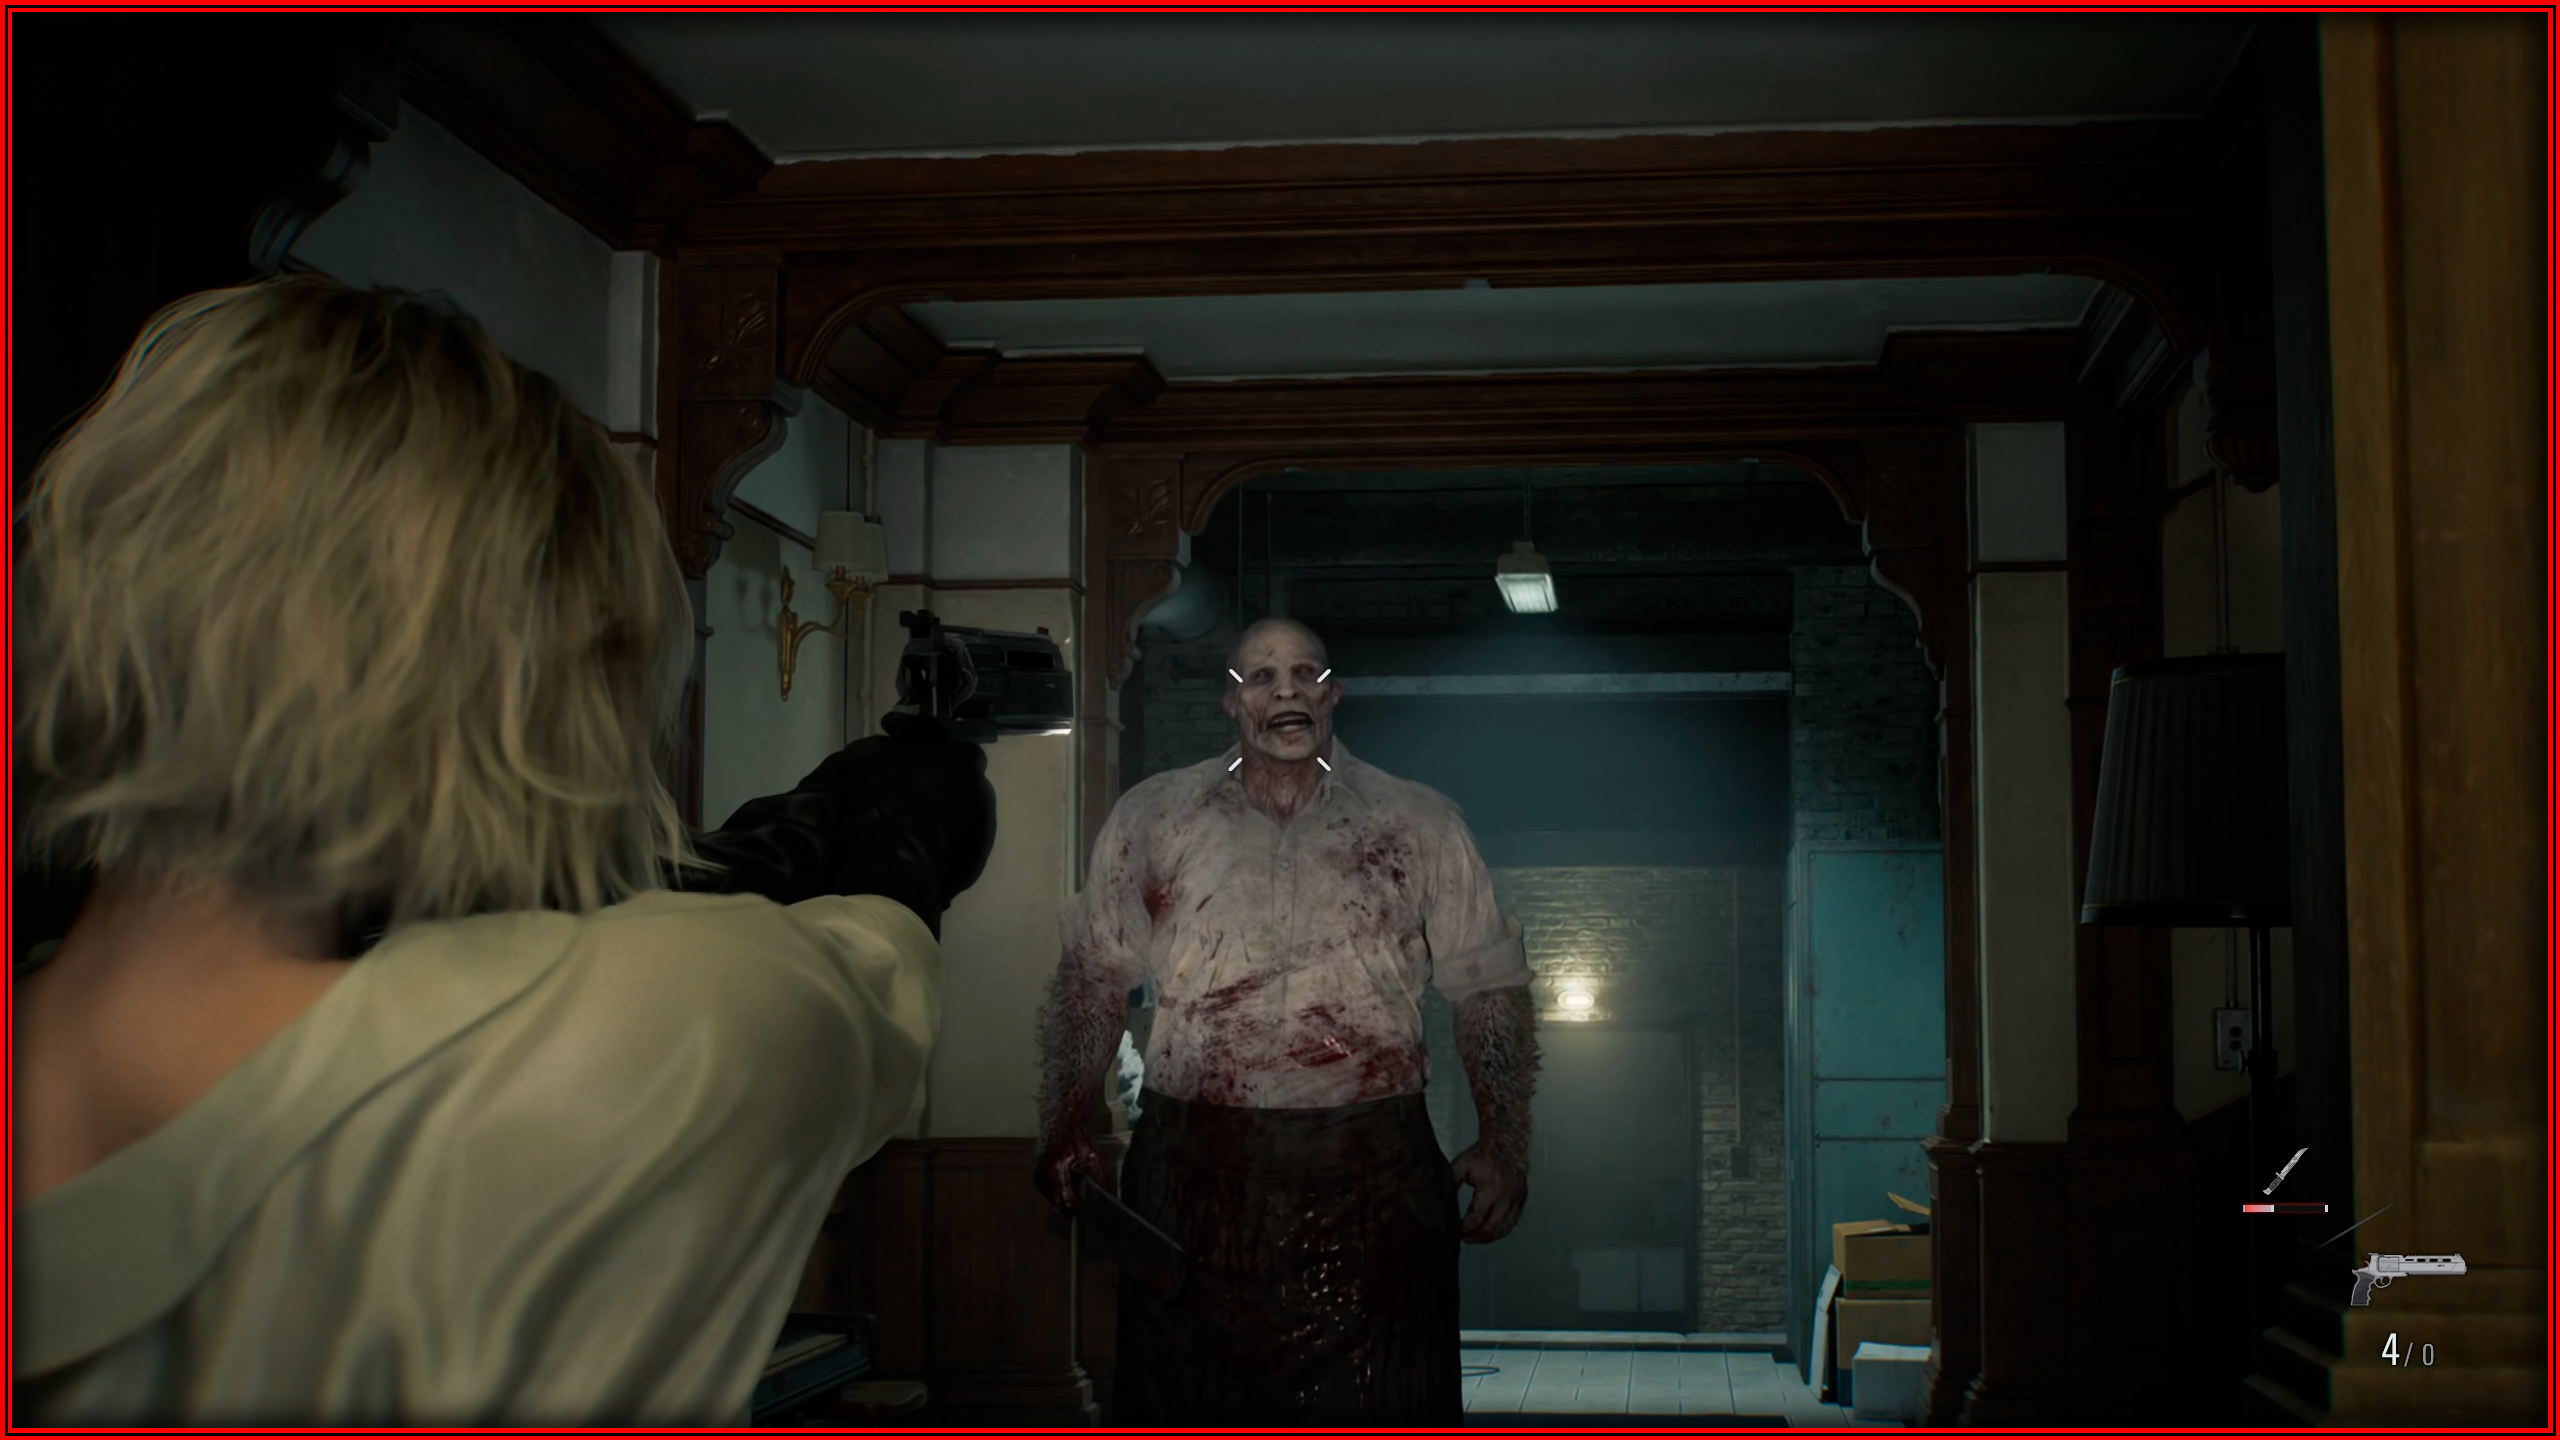
Order Up!
 You encounter the chef for the first time in the Kitchen, after which he will be roaming around the West Wing. You can defeat him as either Grace or Leon. I recommend defeating him playing as Grace. Make a save, spend your Requiem ammo on him, and then just reload the save.
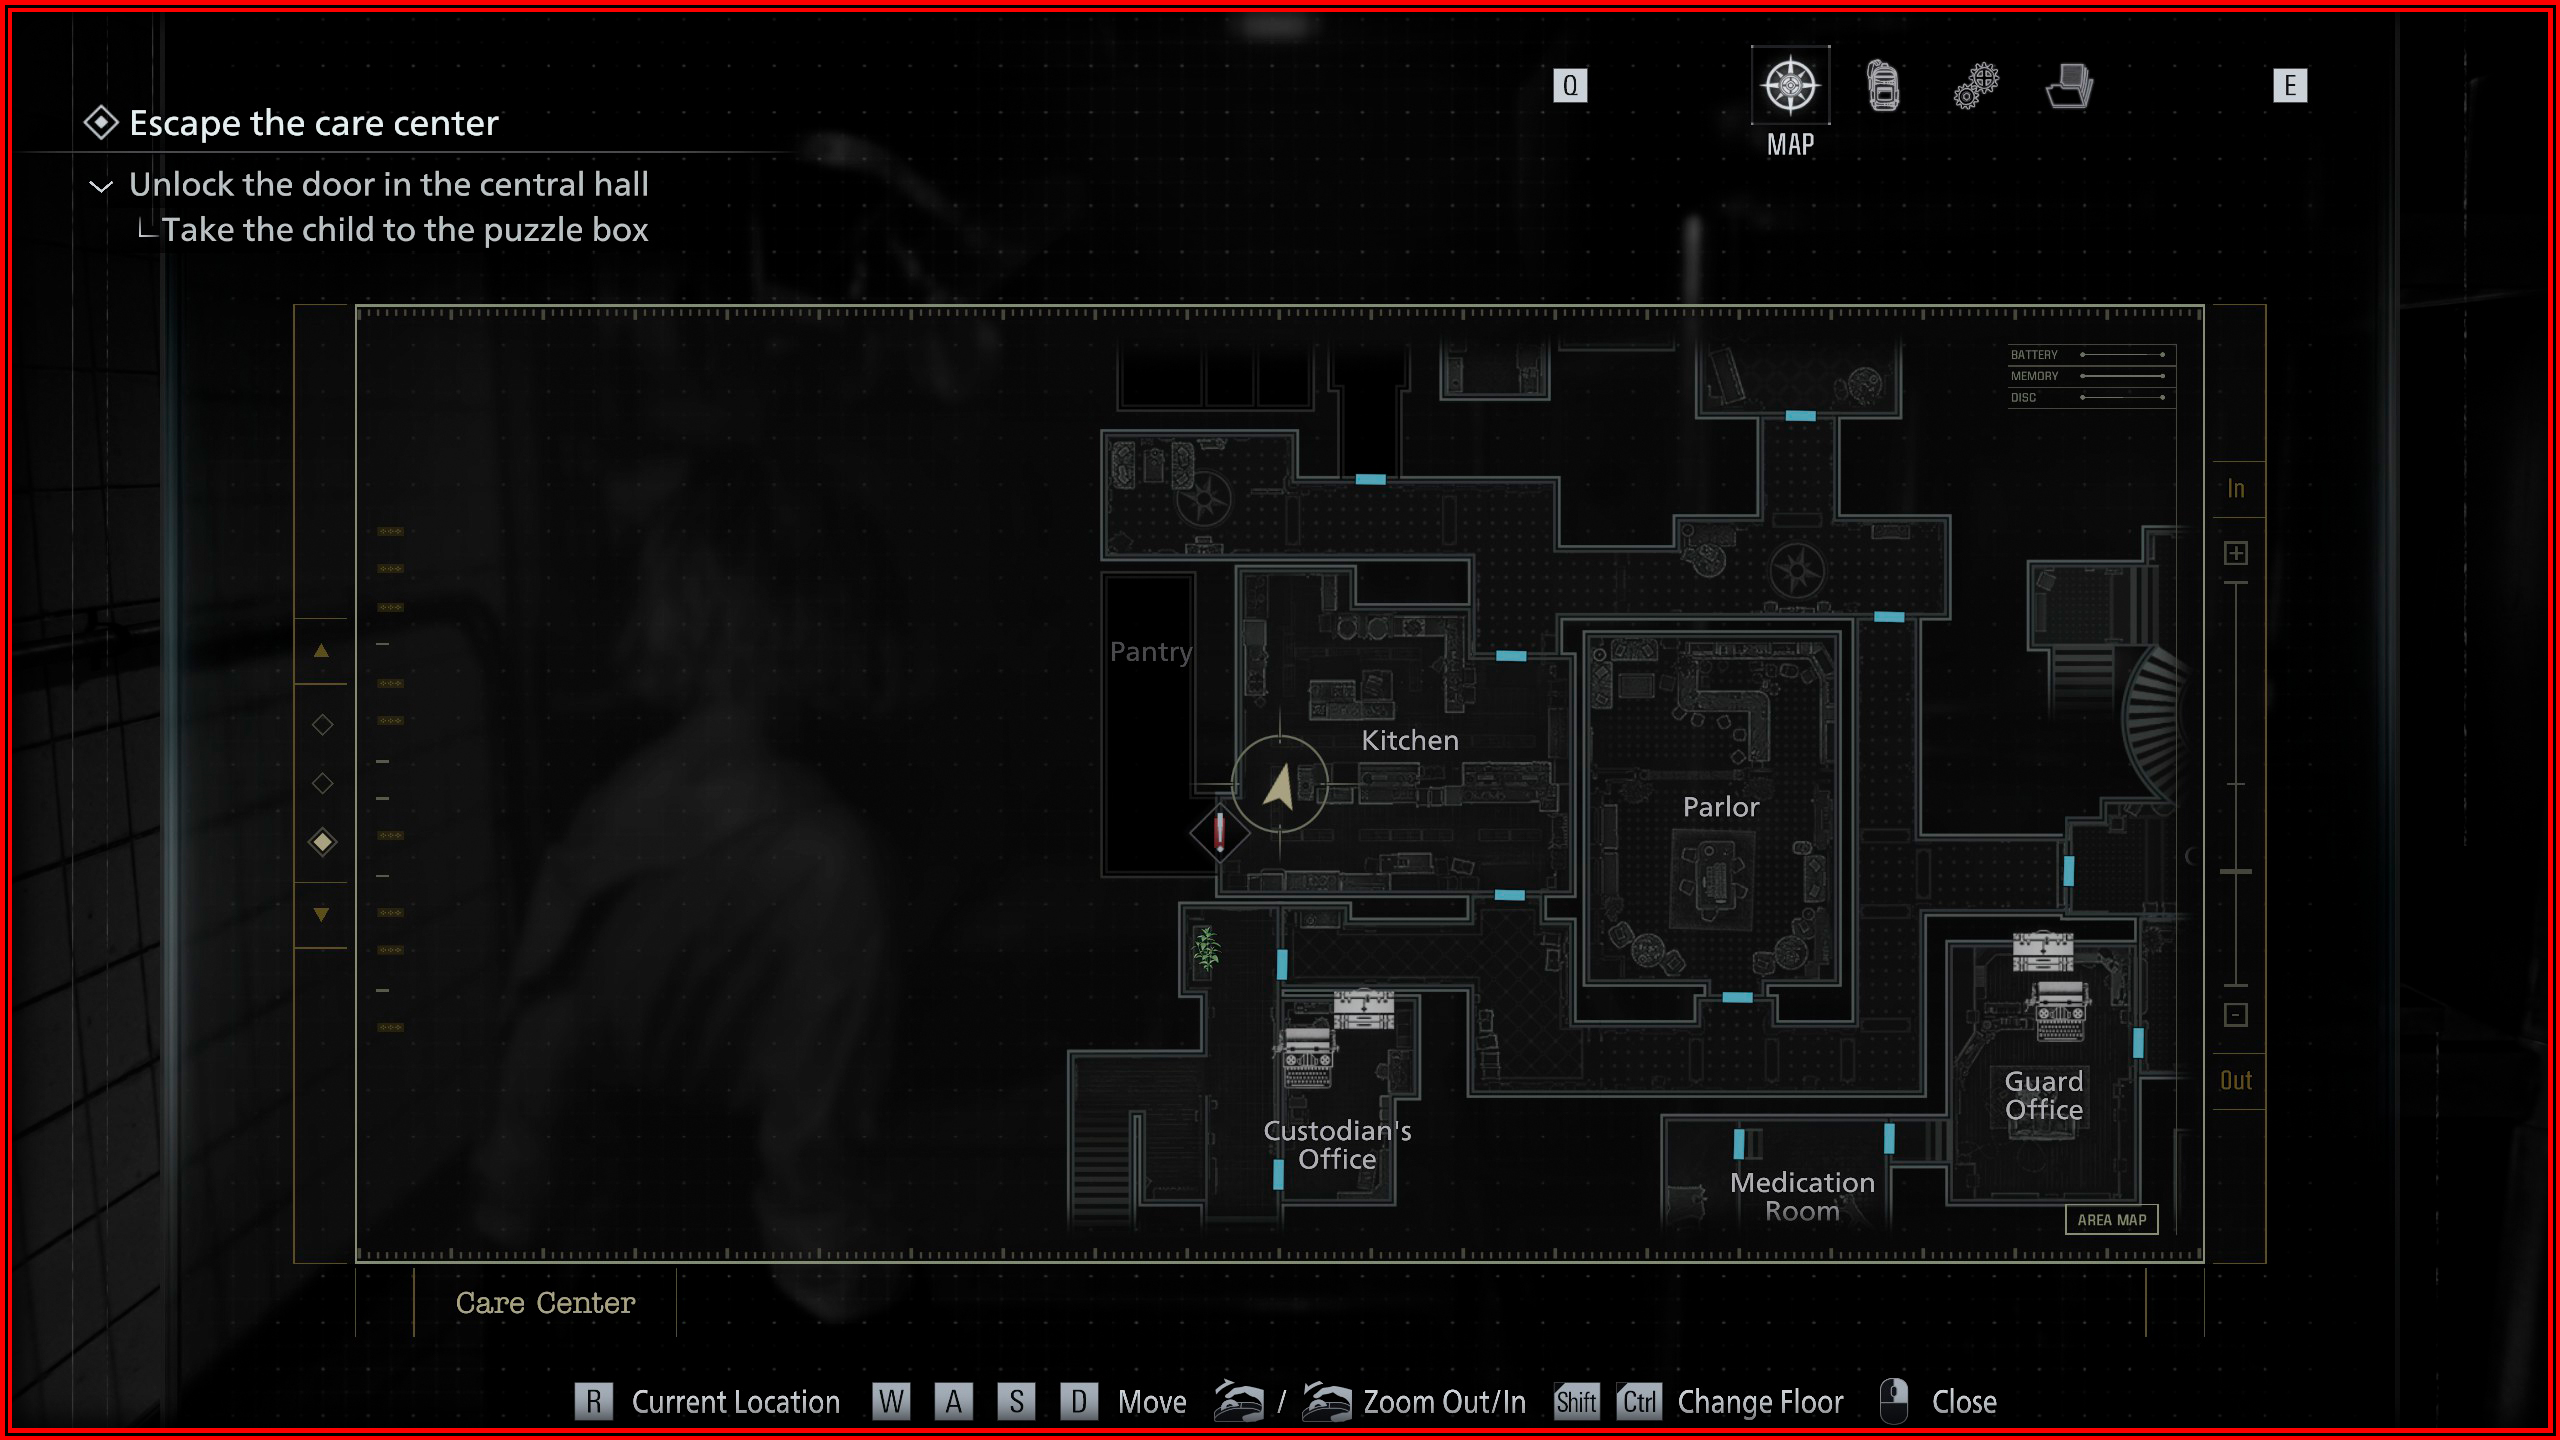
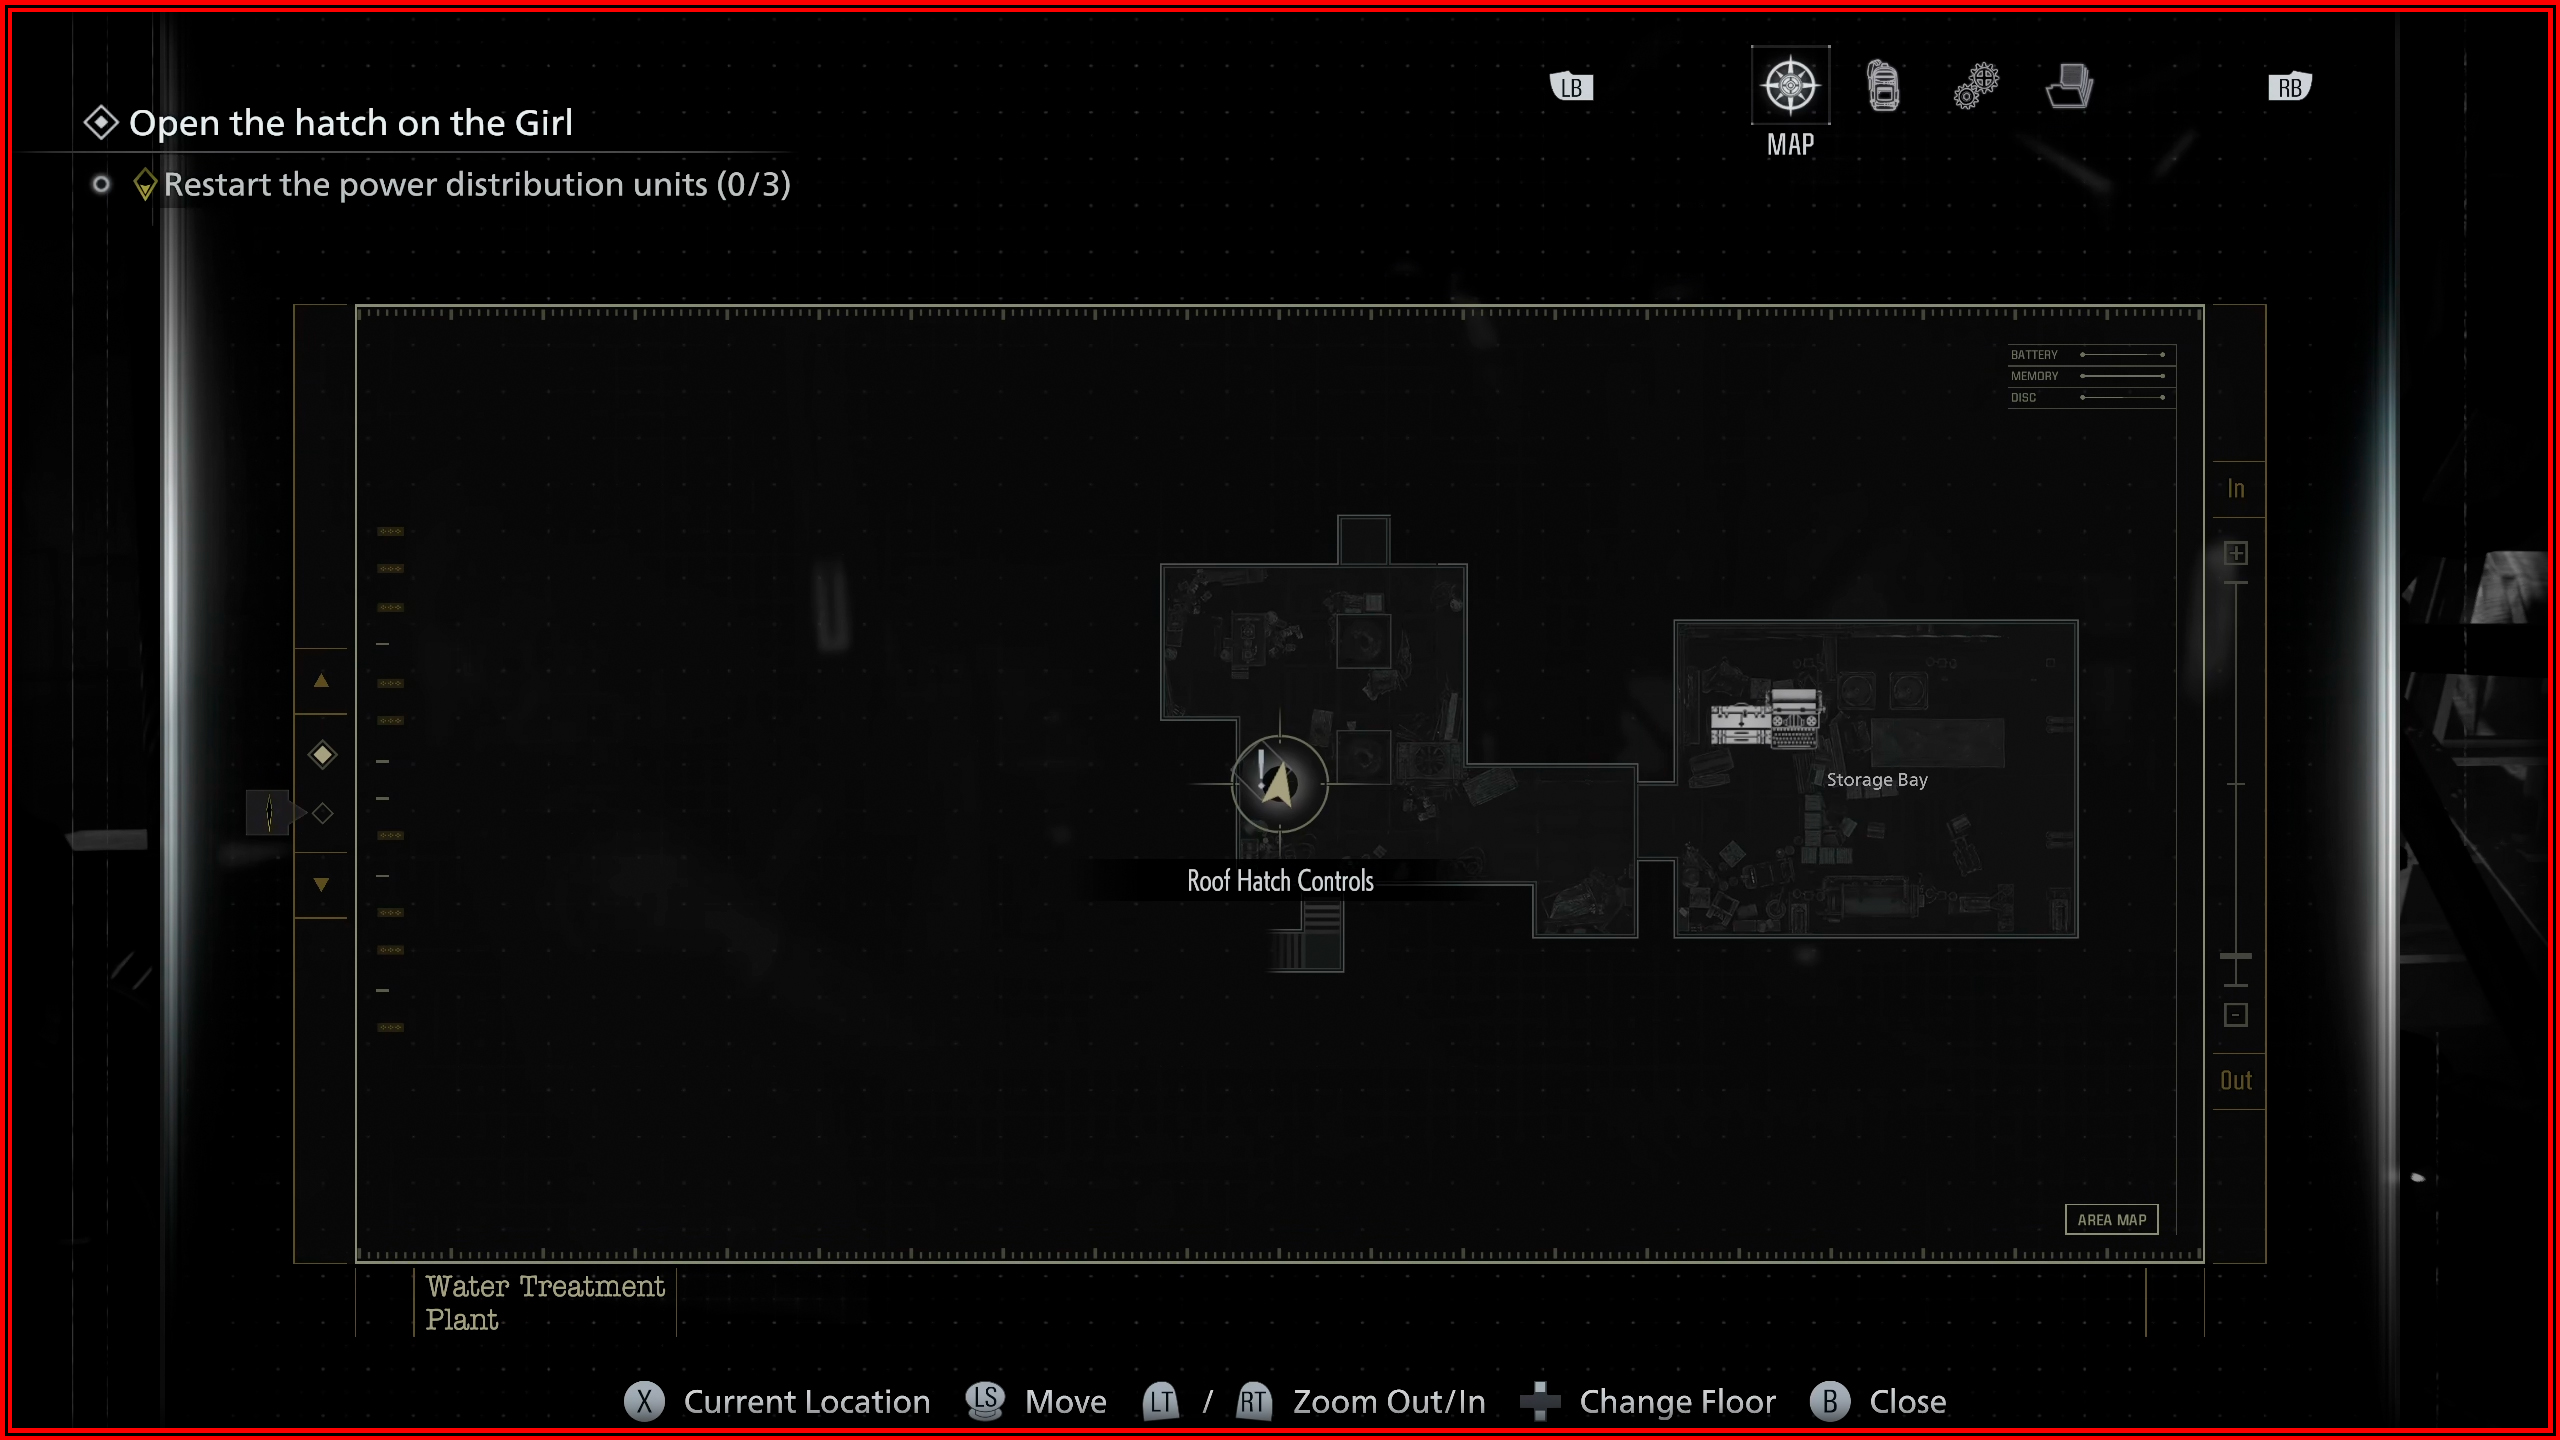
Bring Out the Big Guns

Just fire one Requiem shot at The Girl. She will chase you in the Basement or the Water Treatment Plant. The best time to do this is in the Water Treatment Plant when you have to activate the 3 power switches.
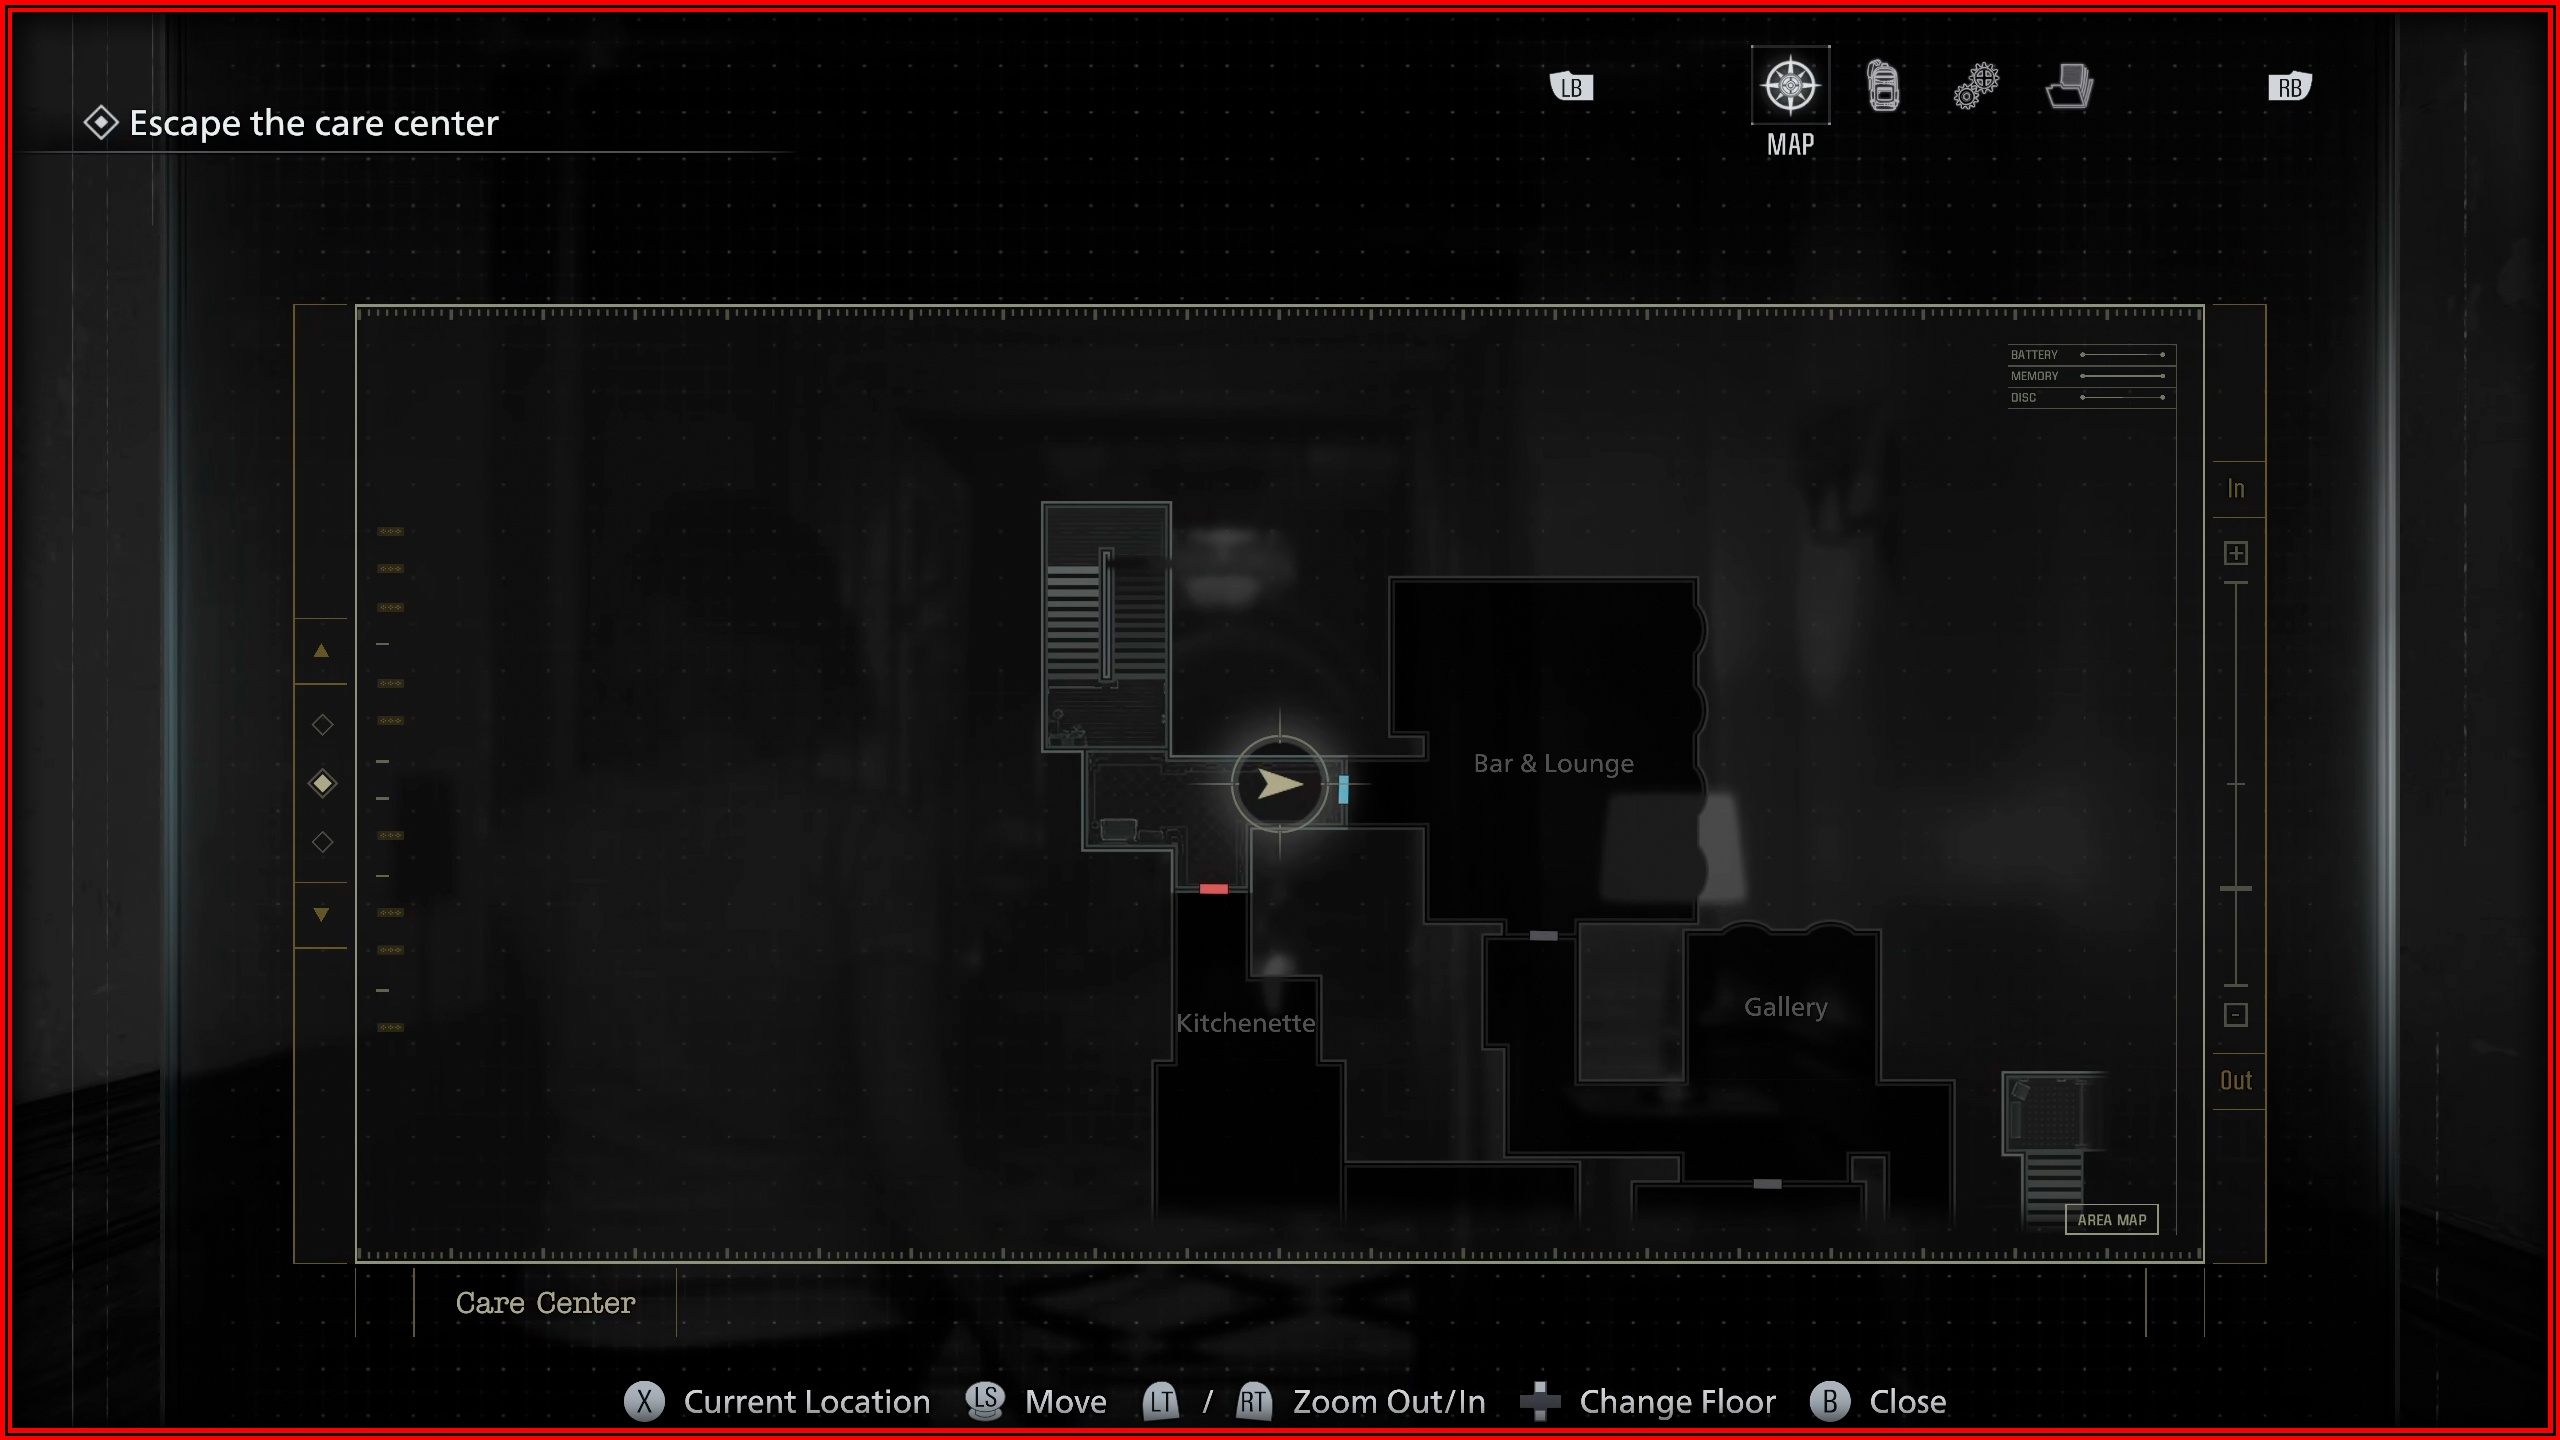
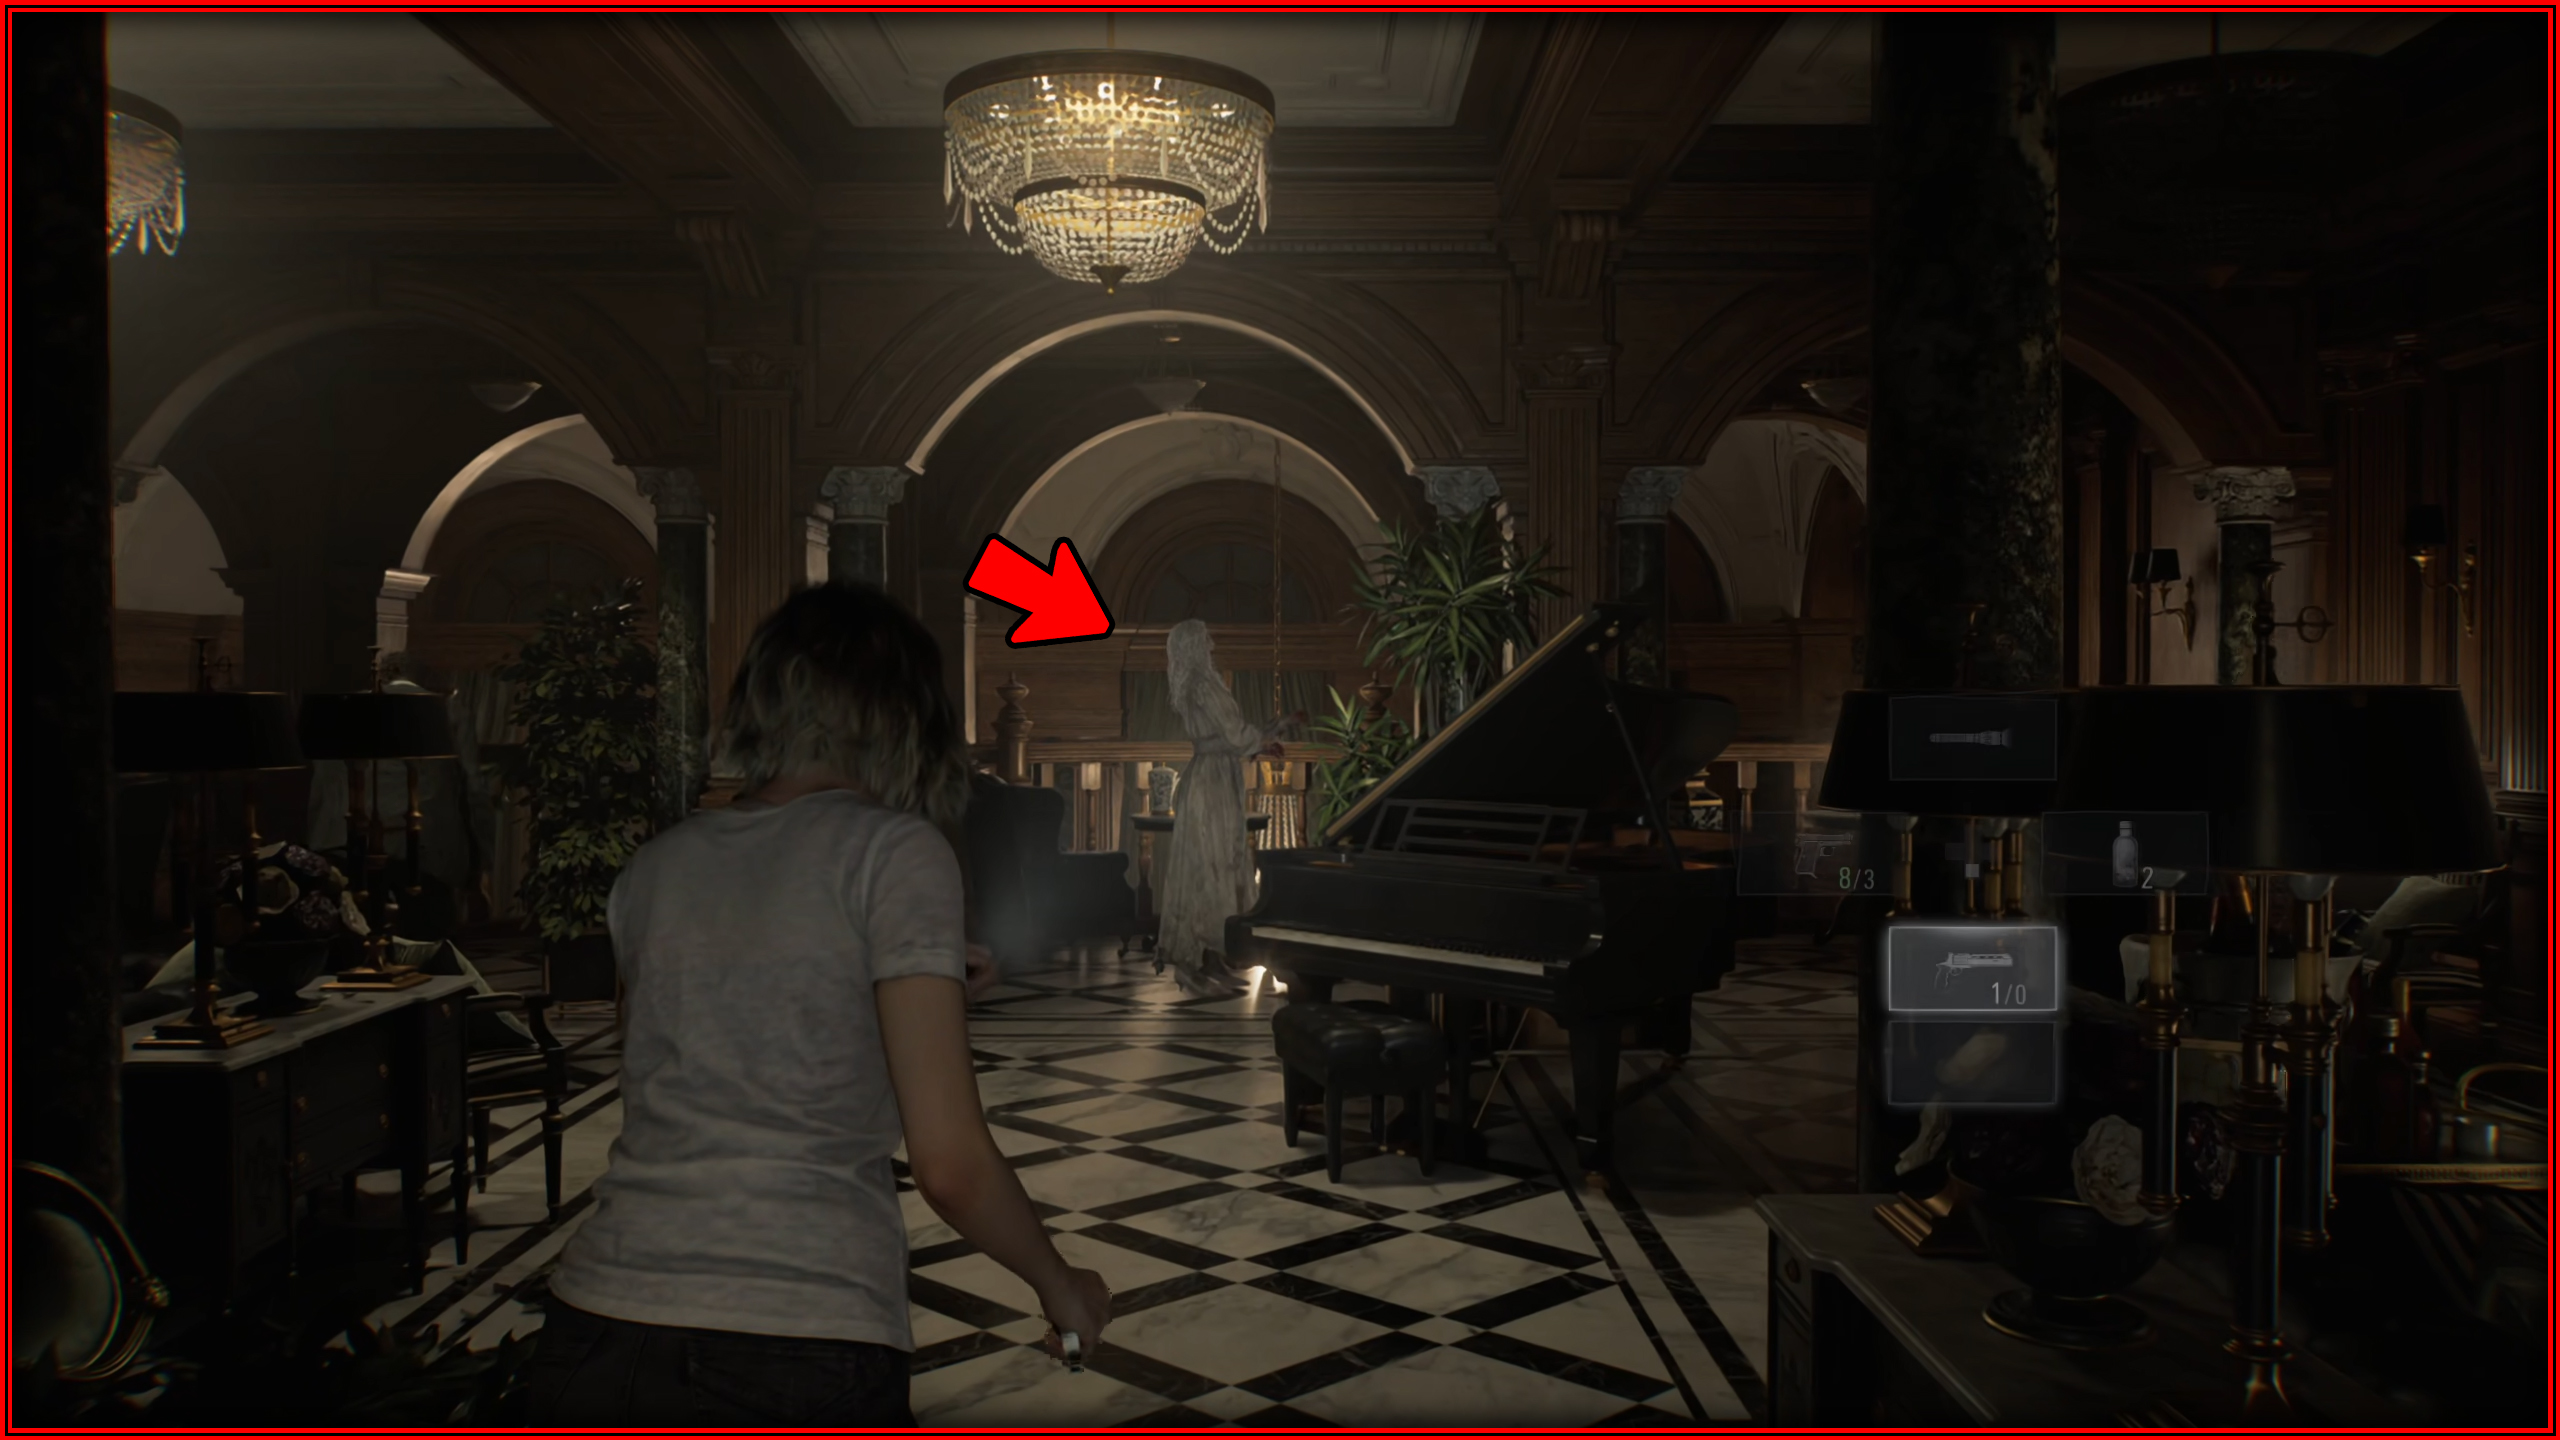
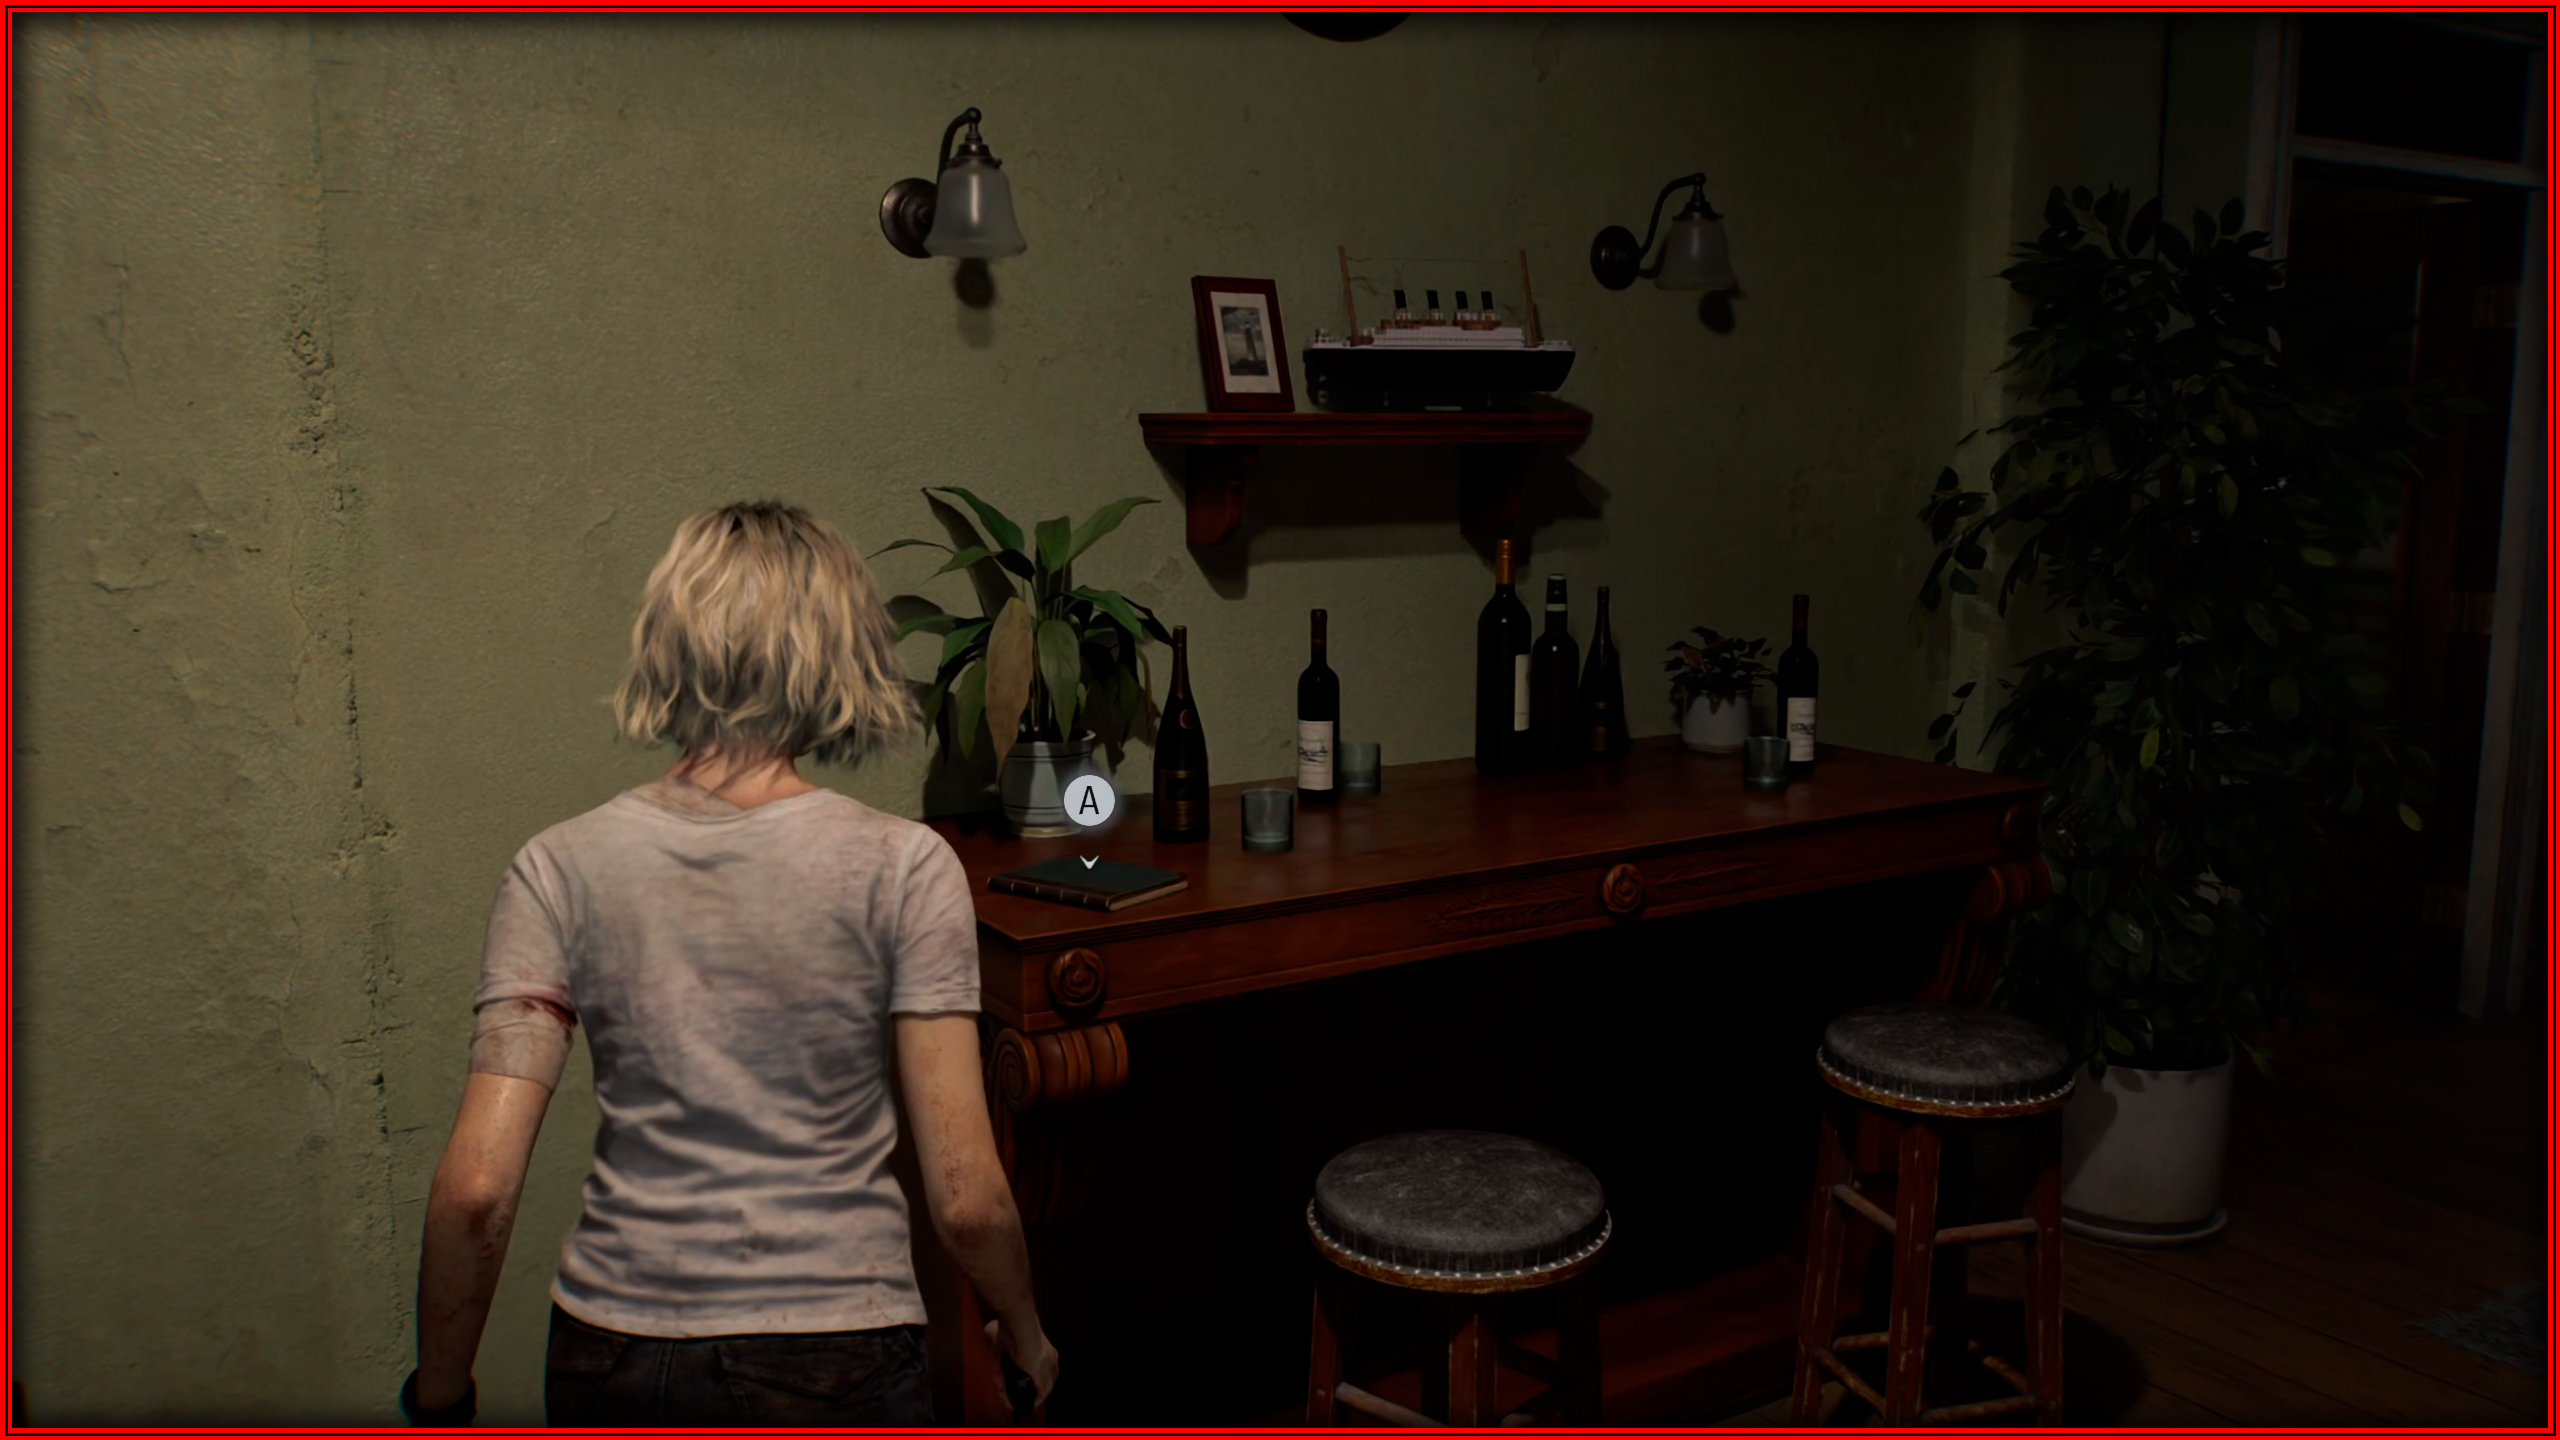
Deadly Duet
 While playing as Grace, you need to defeat 2 female singing Zombies in the Care Center.
 The first one is located in the Bar & Lounge on the second floor of the West Wing.
 The second one is in the Conference Room on the second floor of the East Wing.
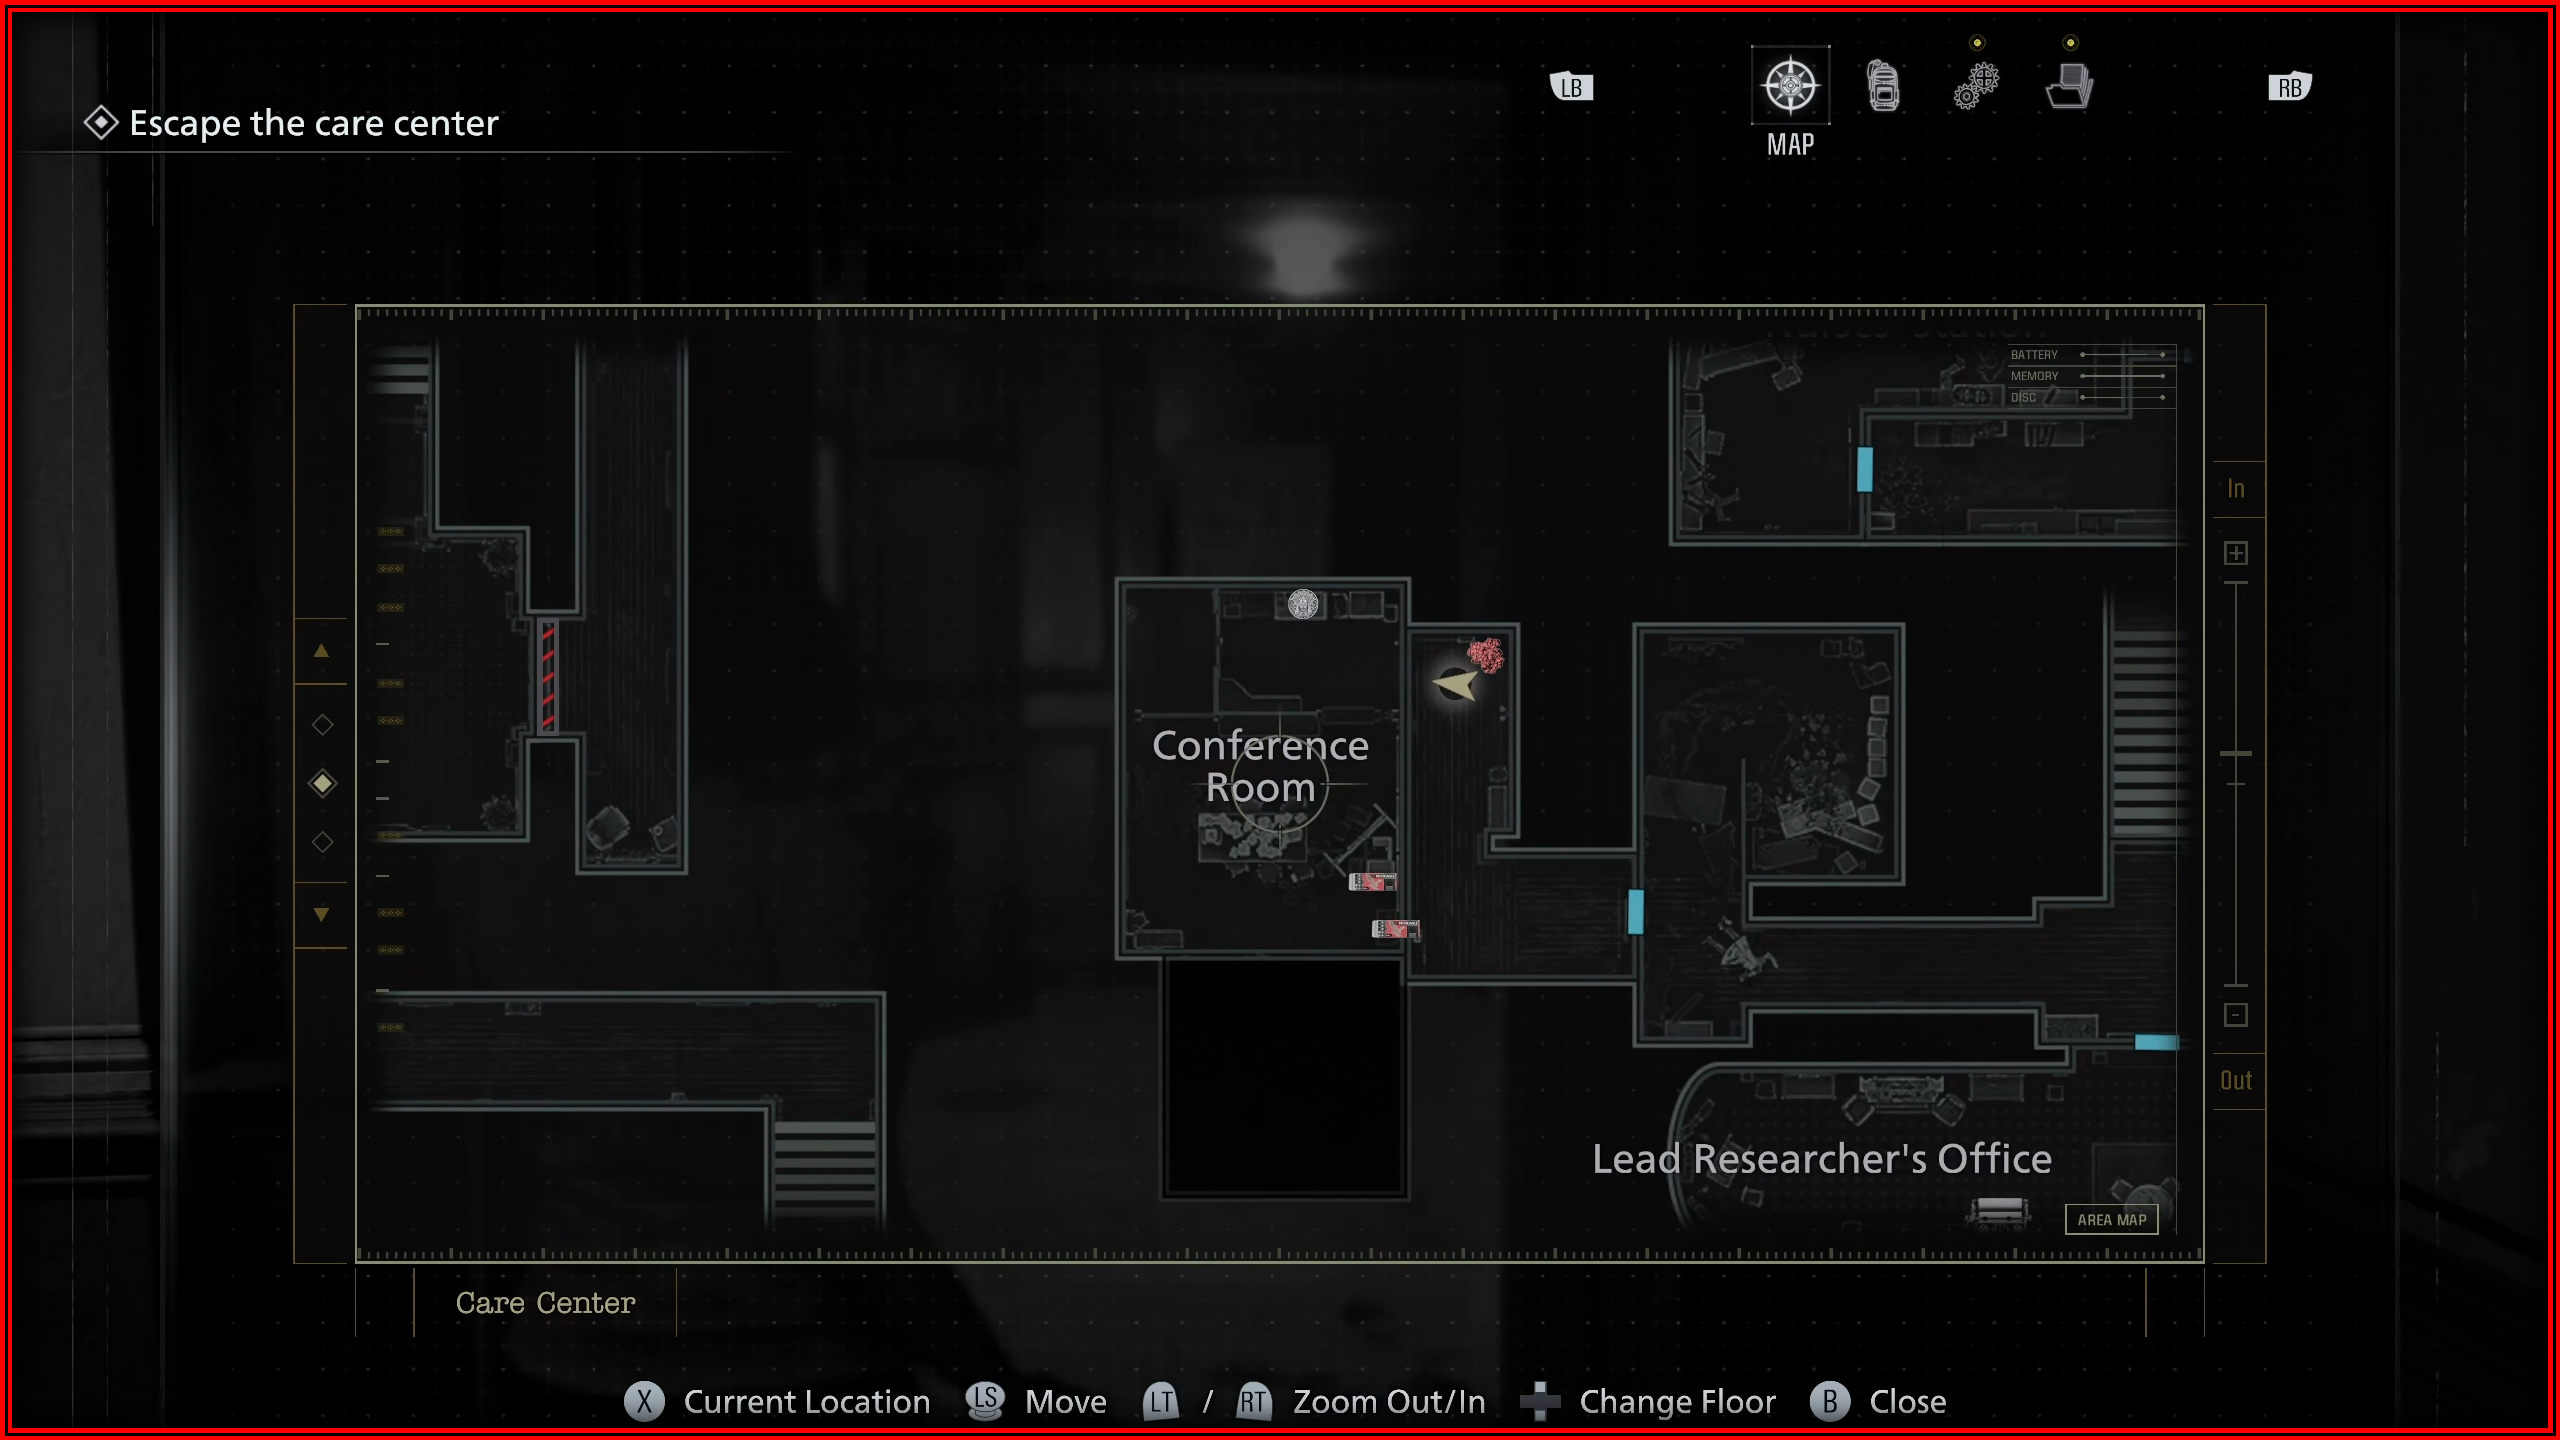
Grace and Goliath
 You encounter Chunk for the first time on the second floor of the East Wing when getting the ID Wristband. After this he will roam around the East Wing. You will need a lot of ammunition to defeat him so I recommend making a save before trying. You can also use Hemolytic Injectors to reduce his health.
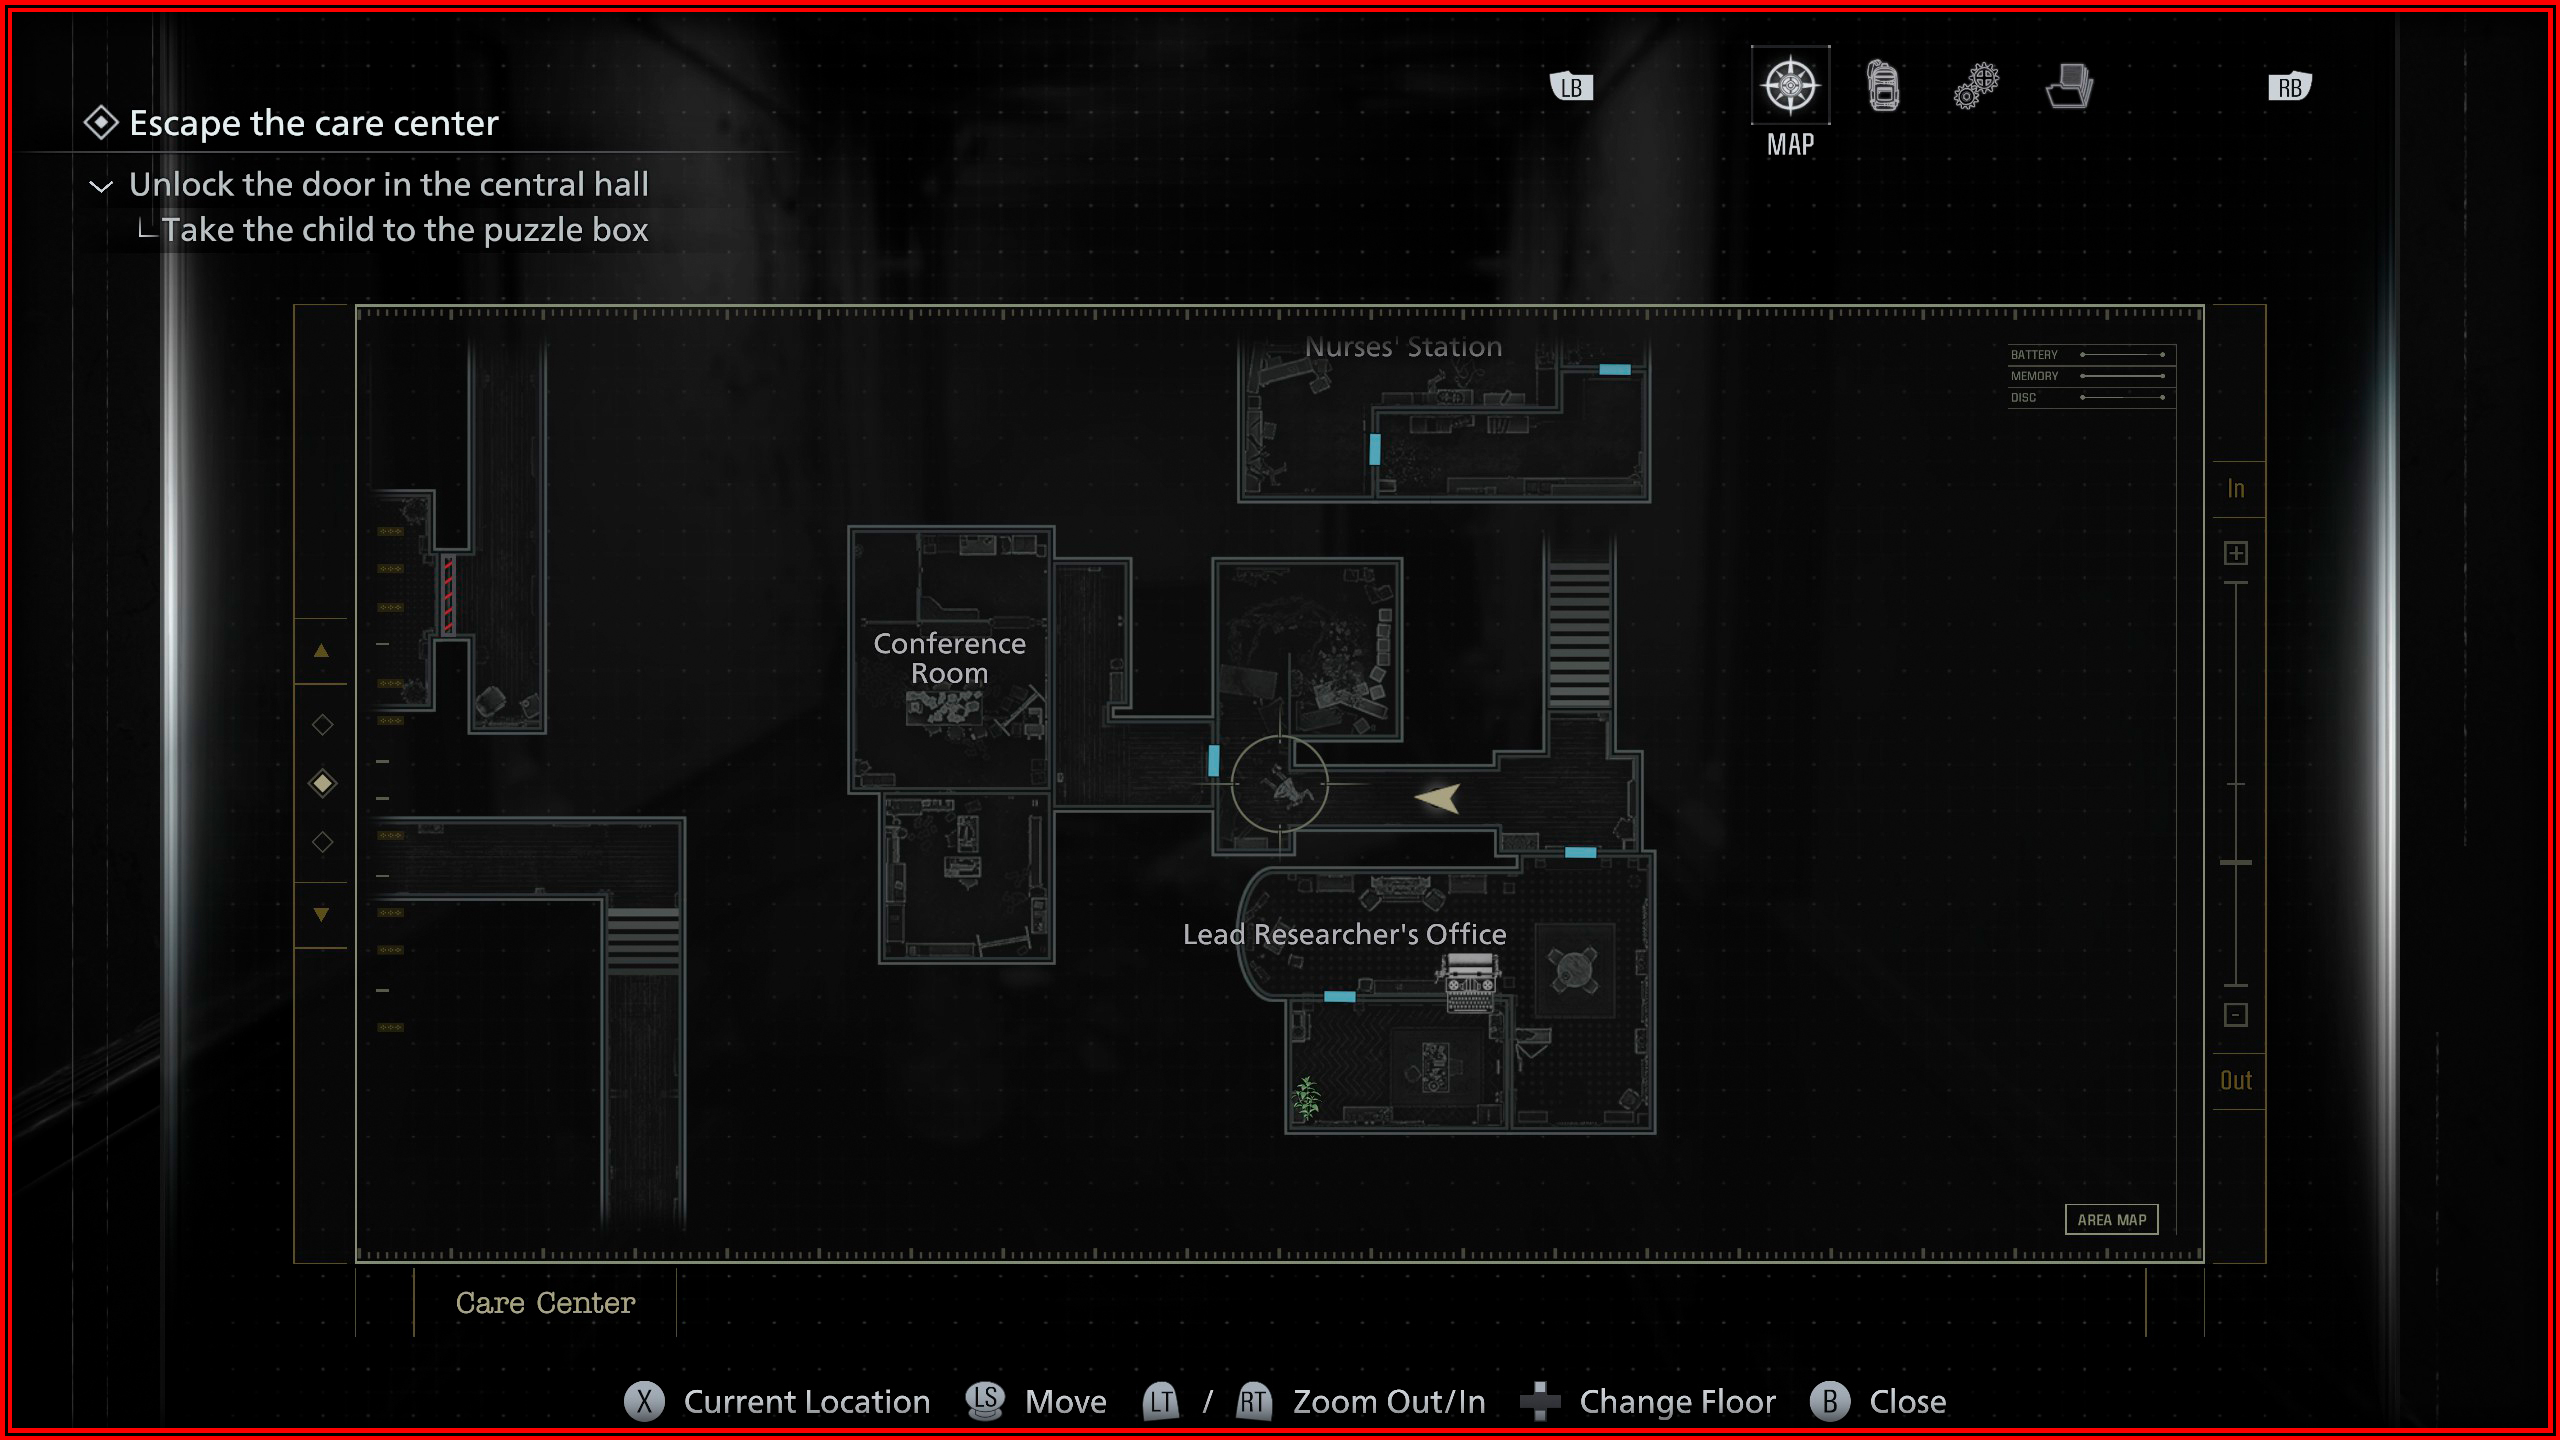
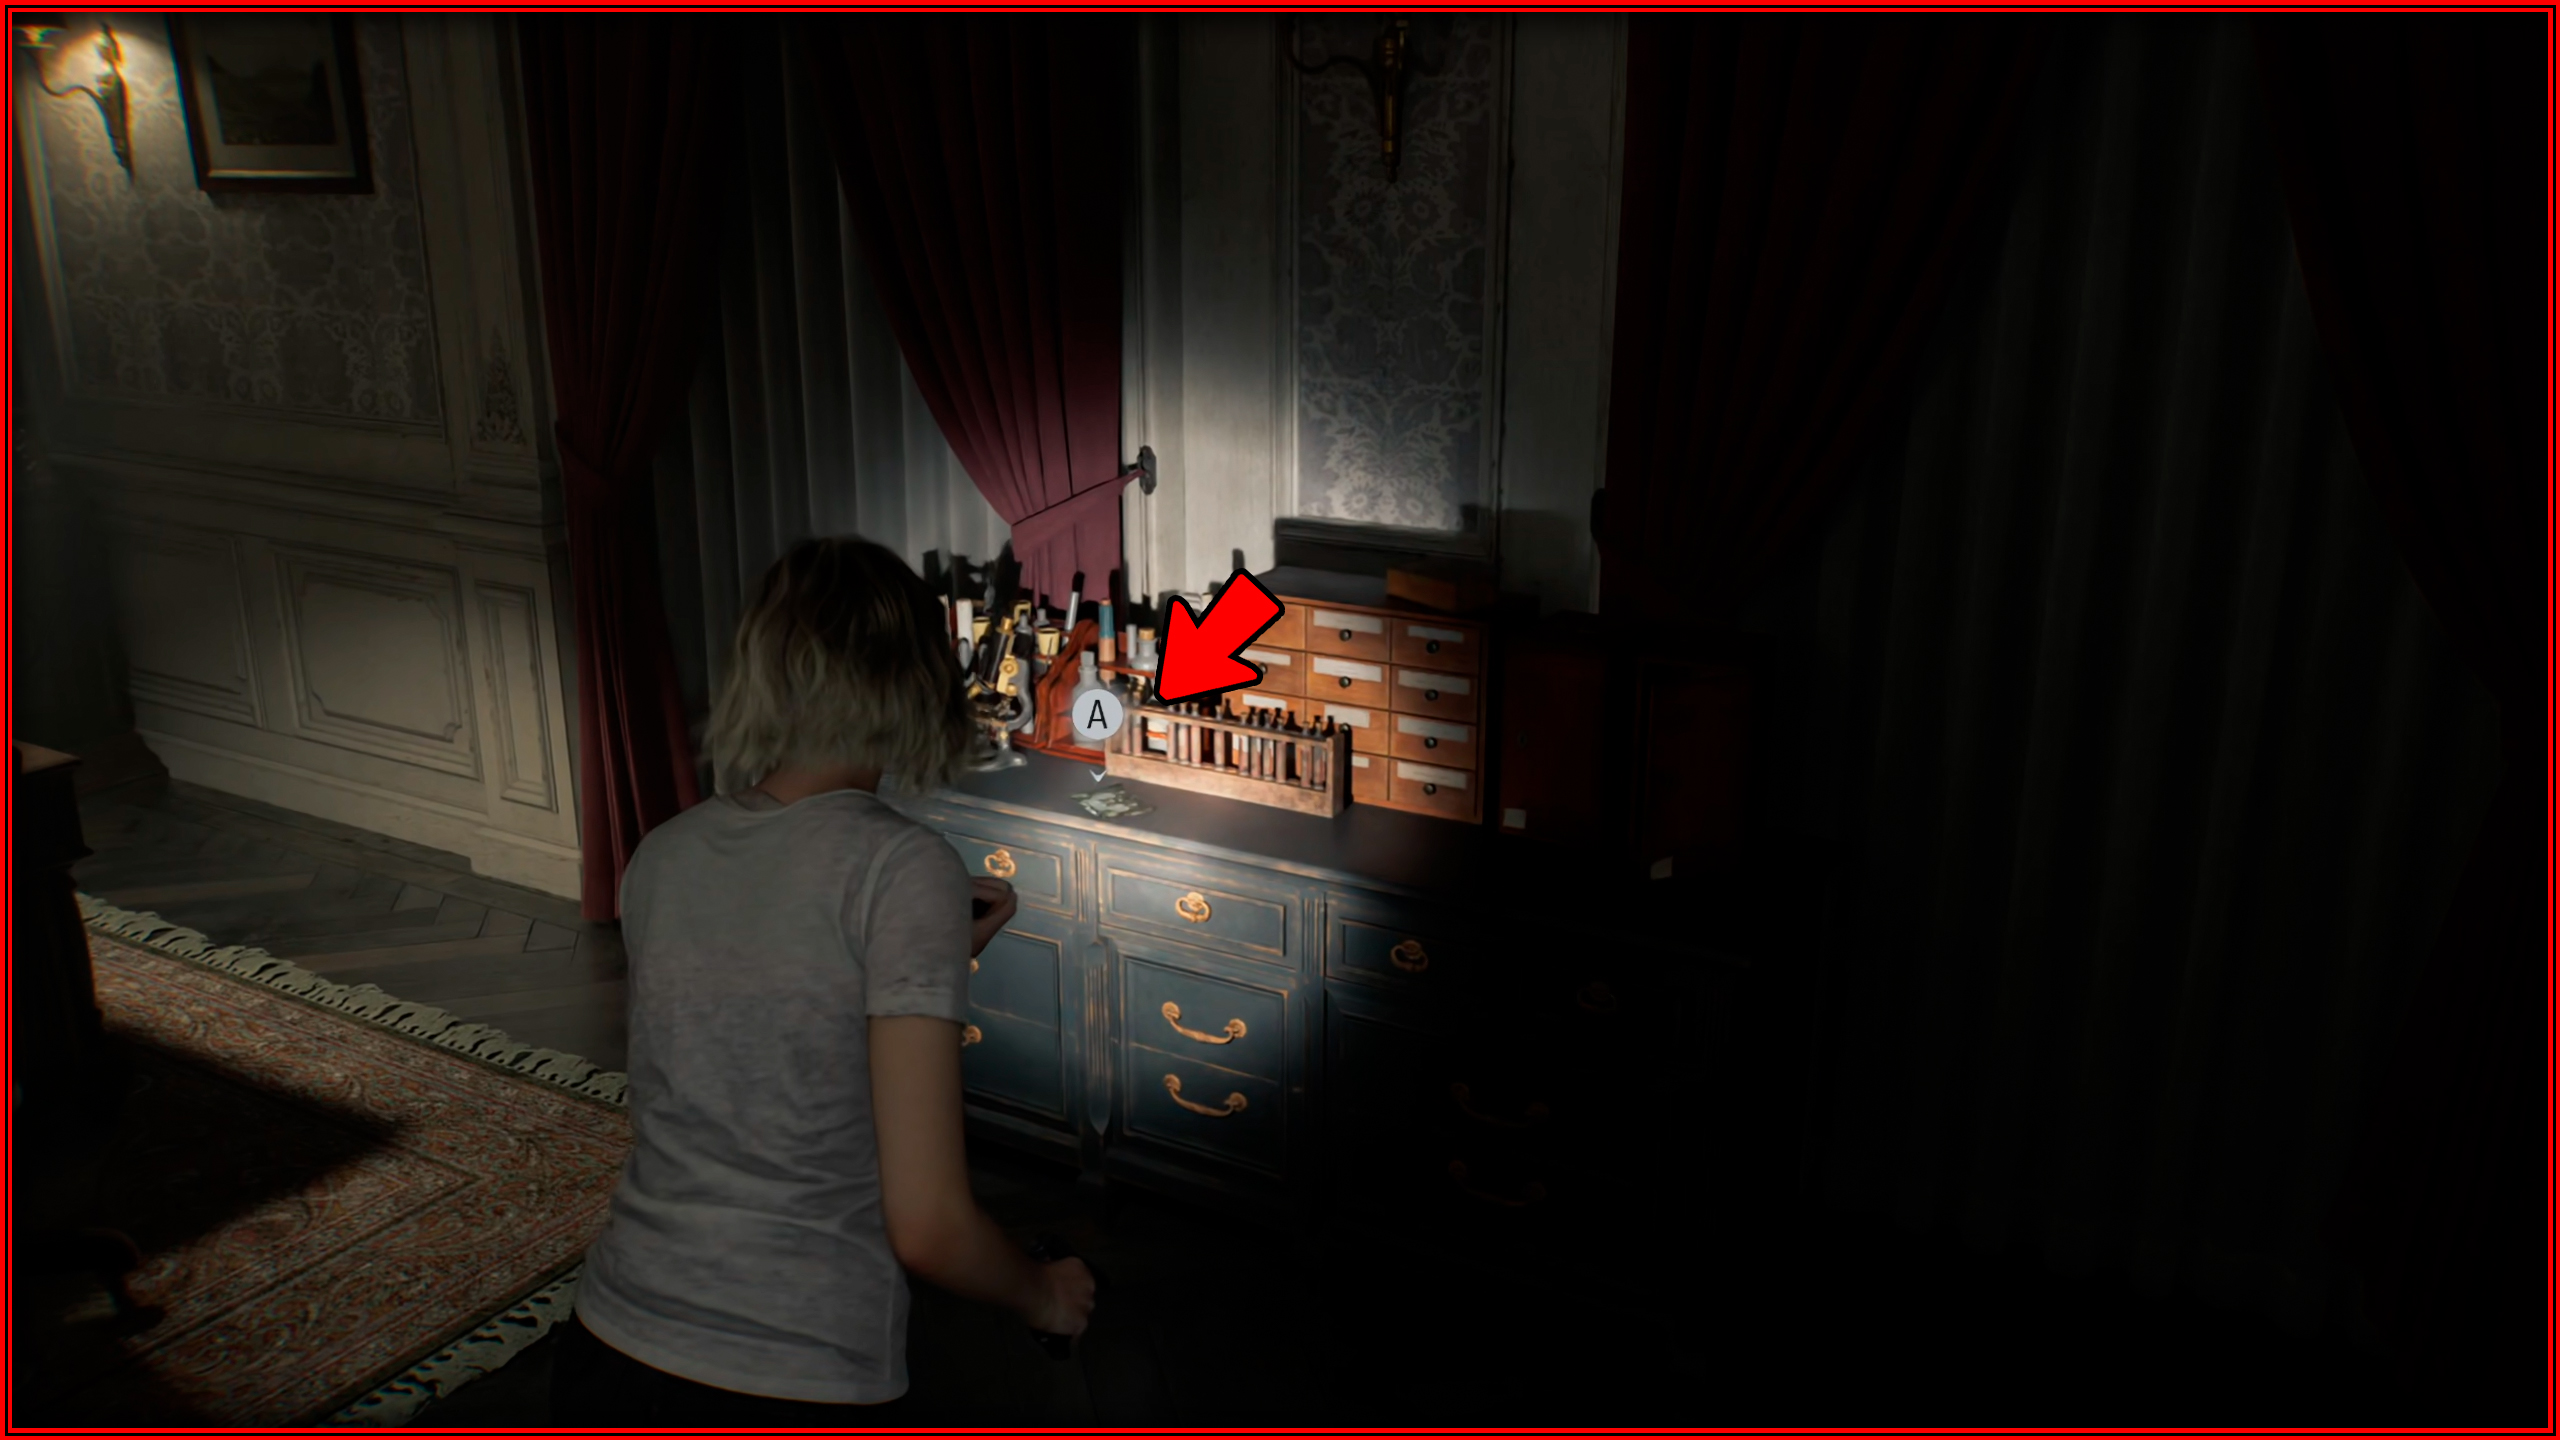
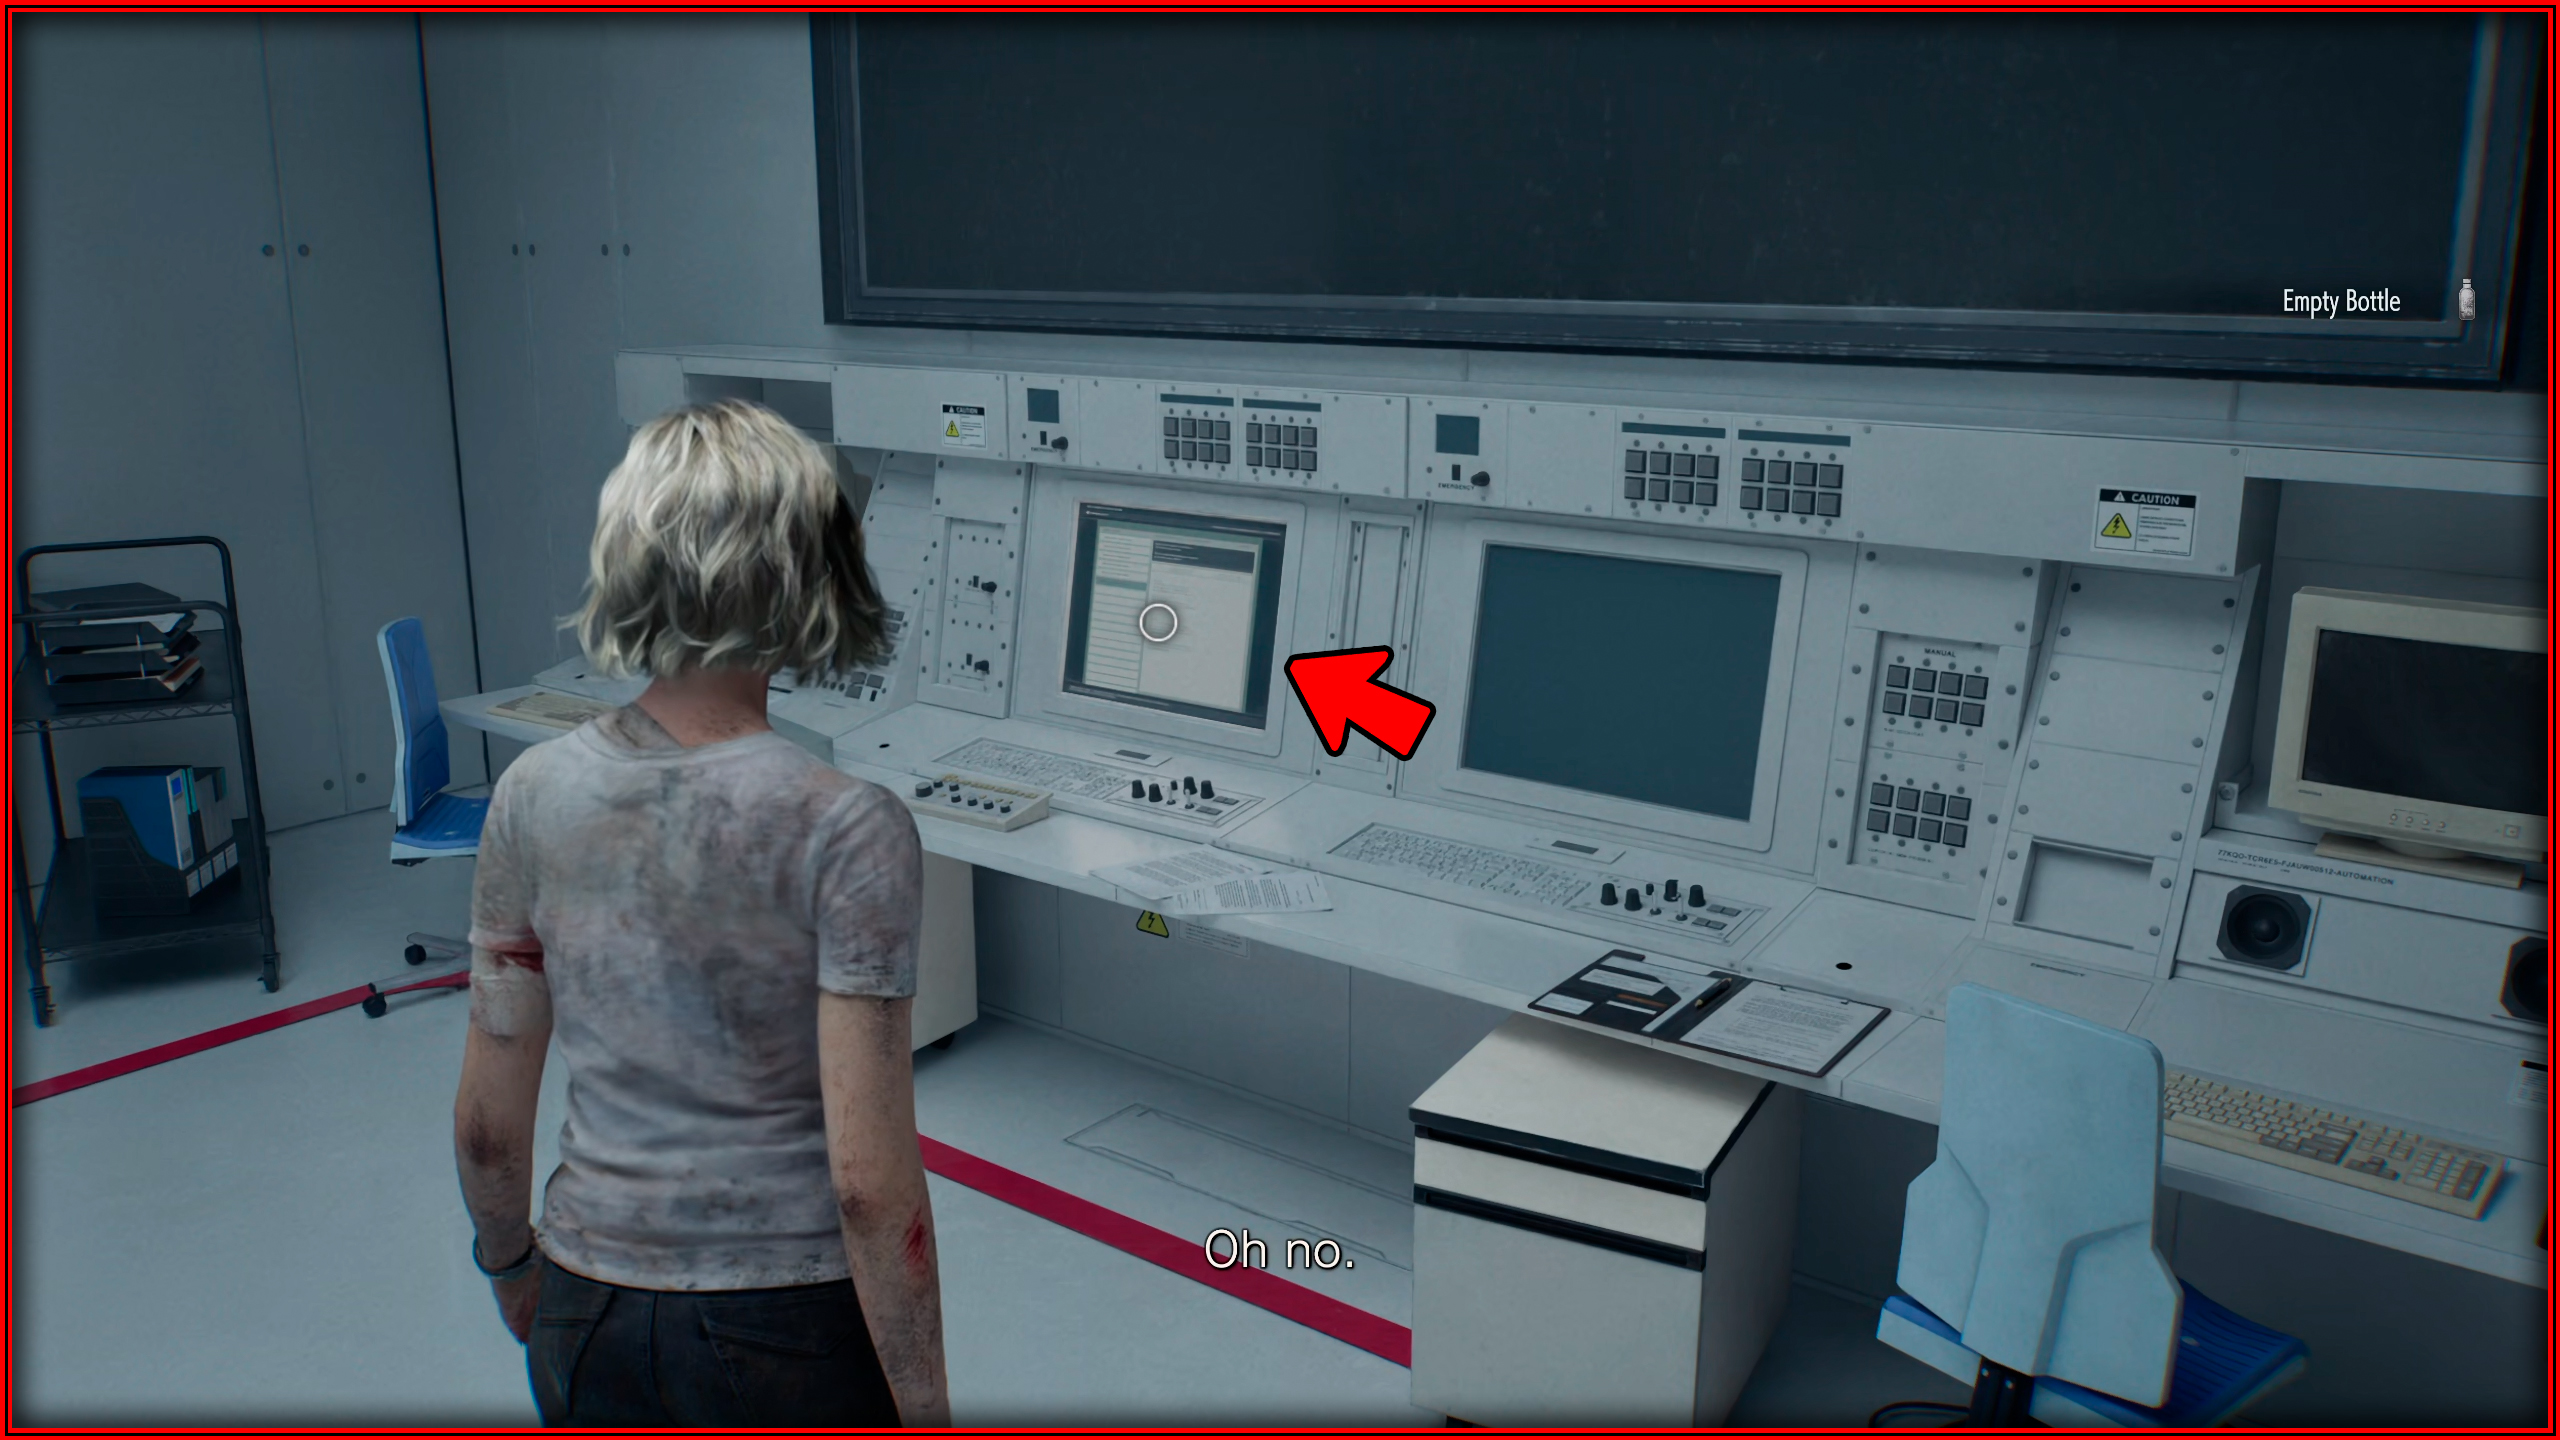
Internal Dispute

First You need to get an empty bottle in Care center - Dining Room.
 After this, go to the Examination Room and break the vase to lure the 2 Zombies. Throw the empty bottle at the female Zombie so the other blind Zombie will hit her.
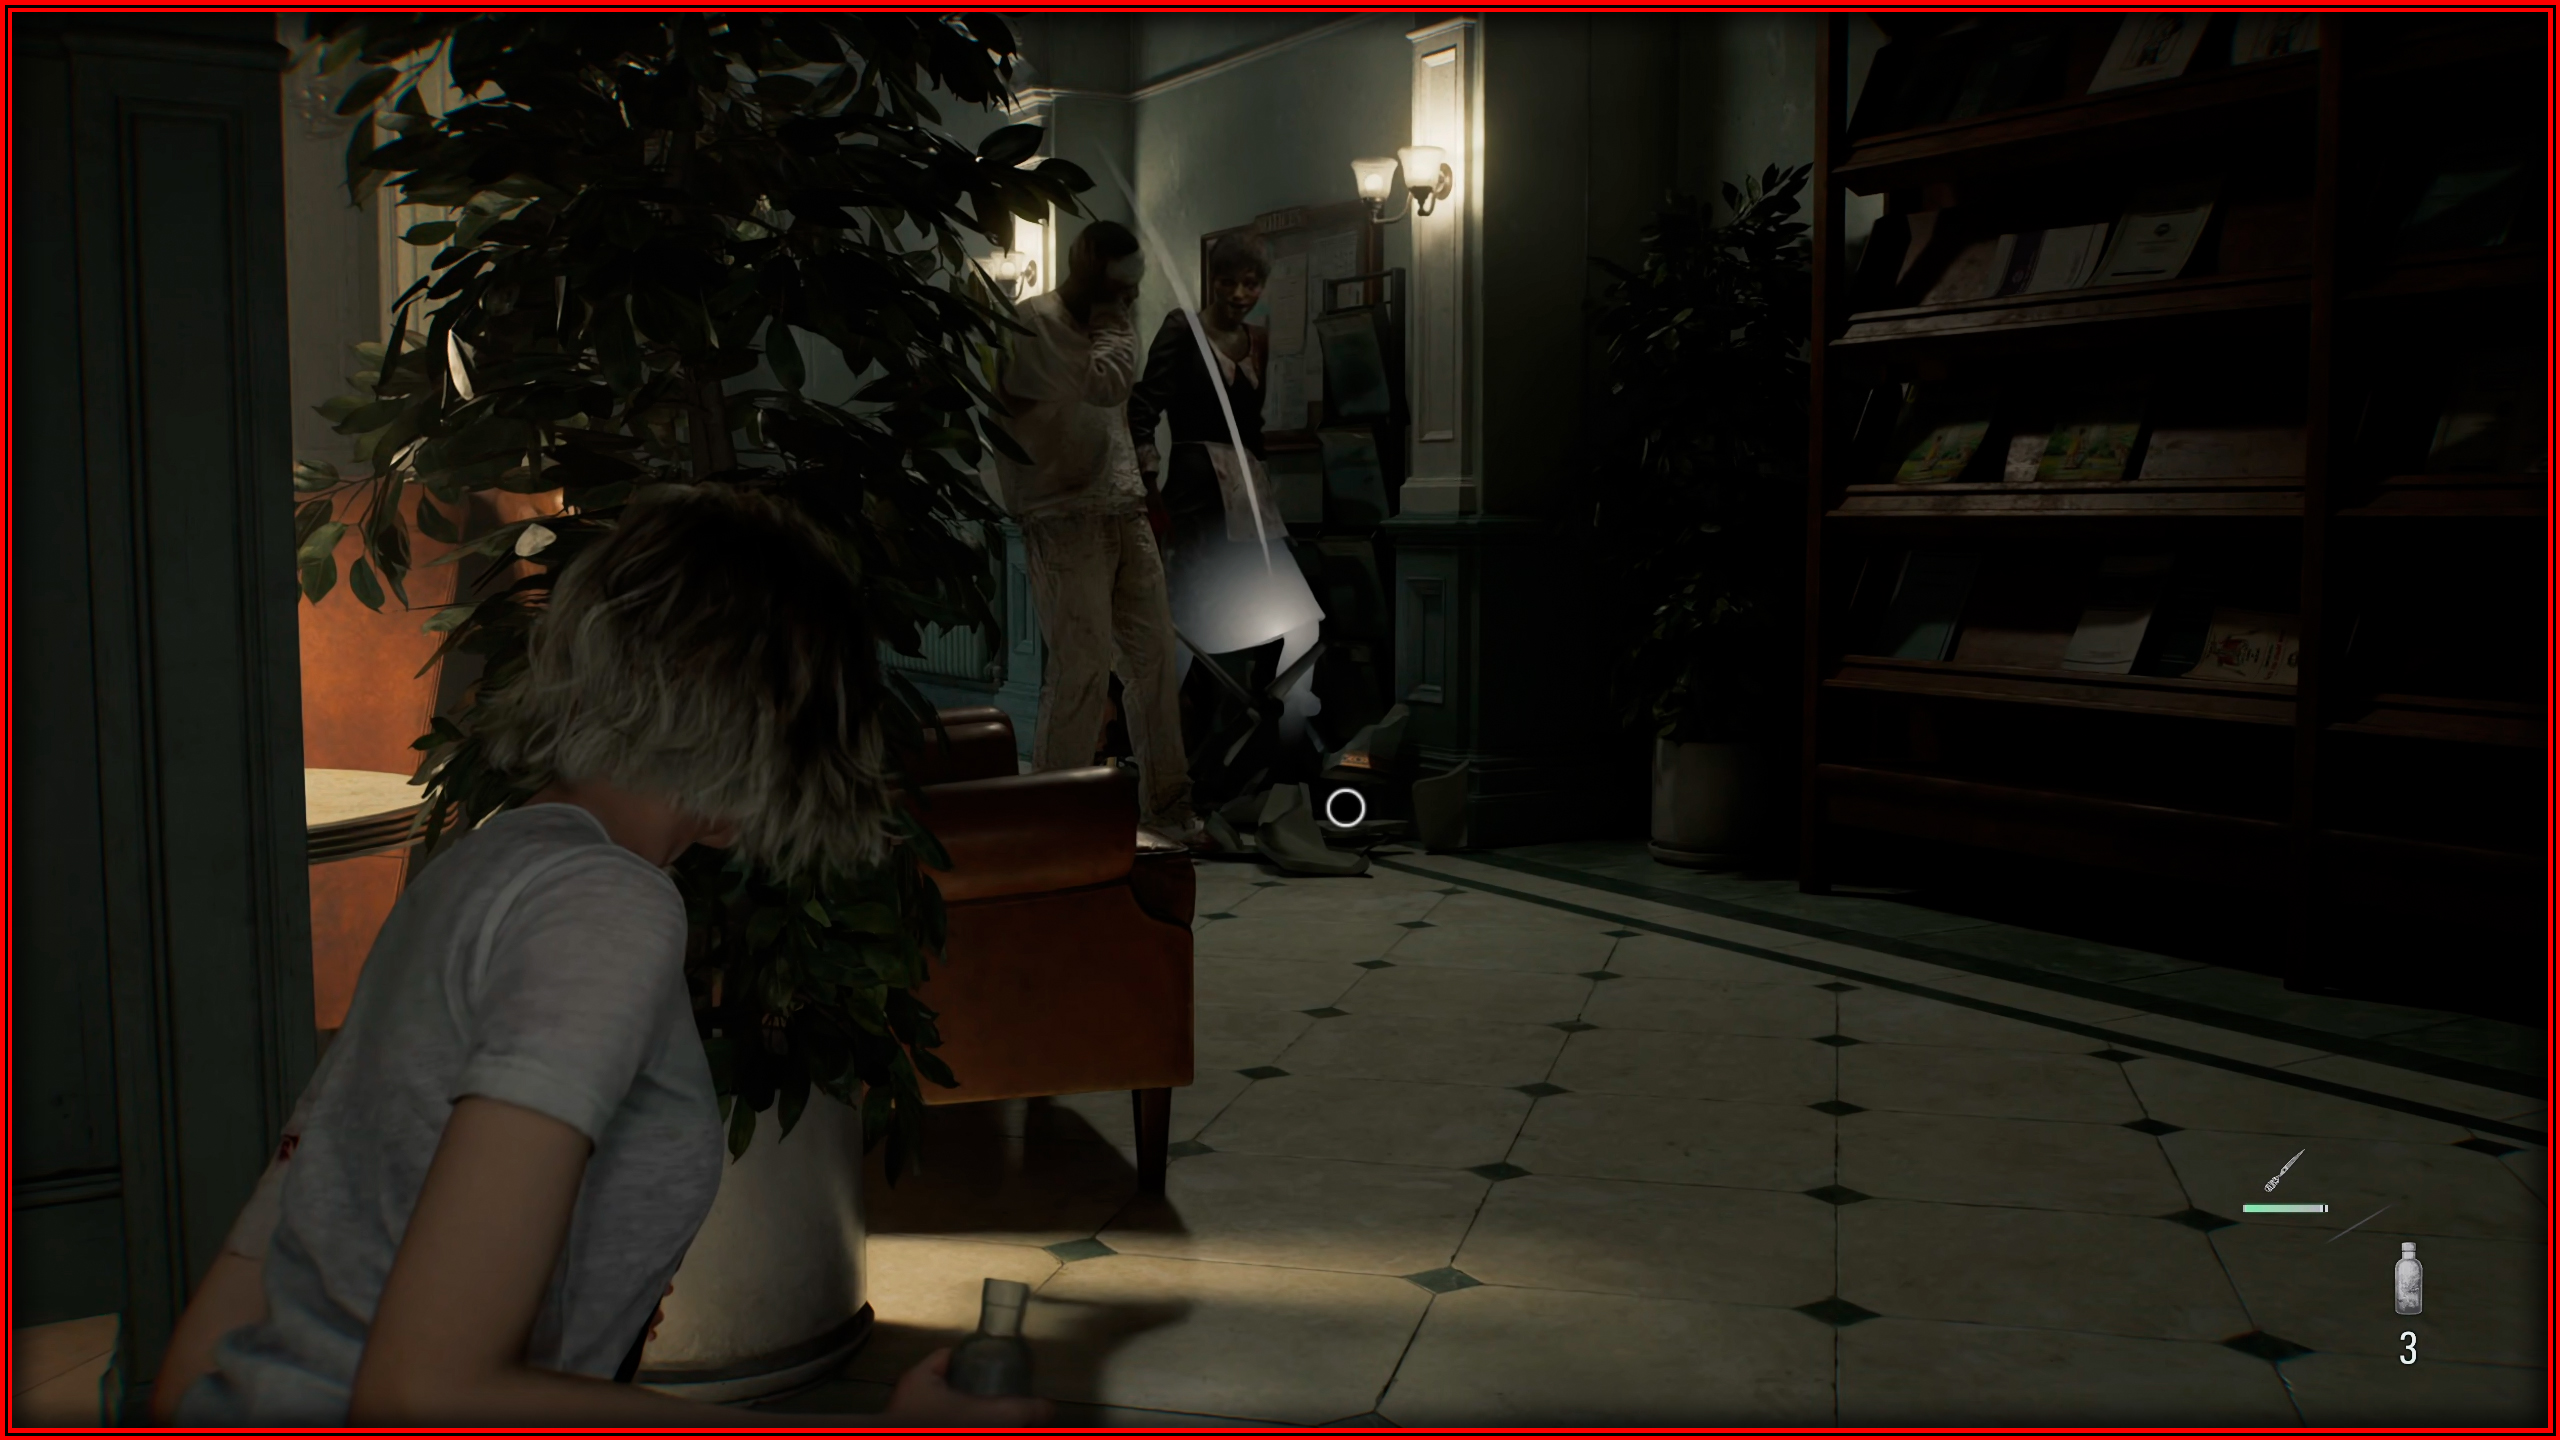
Seasoned Pro
 Self-explanatory, you will practically get this as you progress through the Main Story.
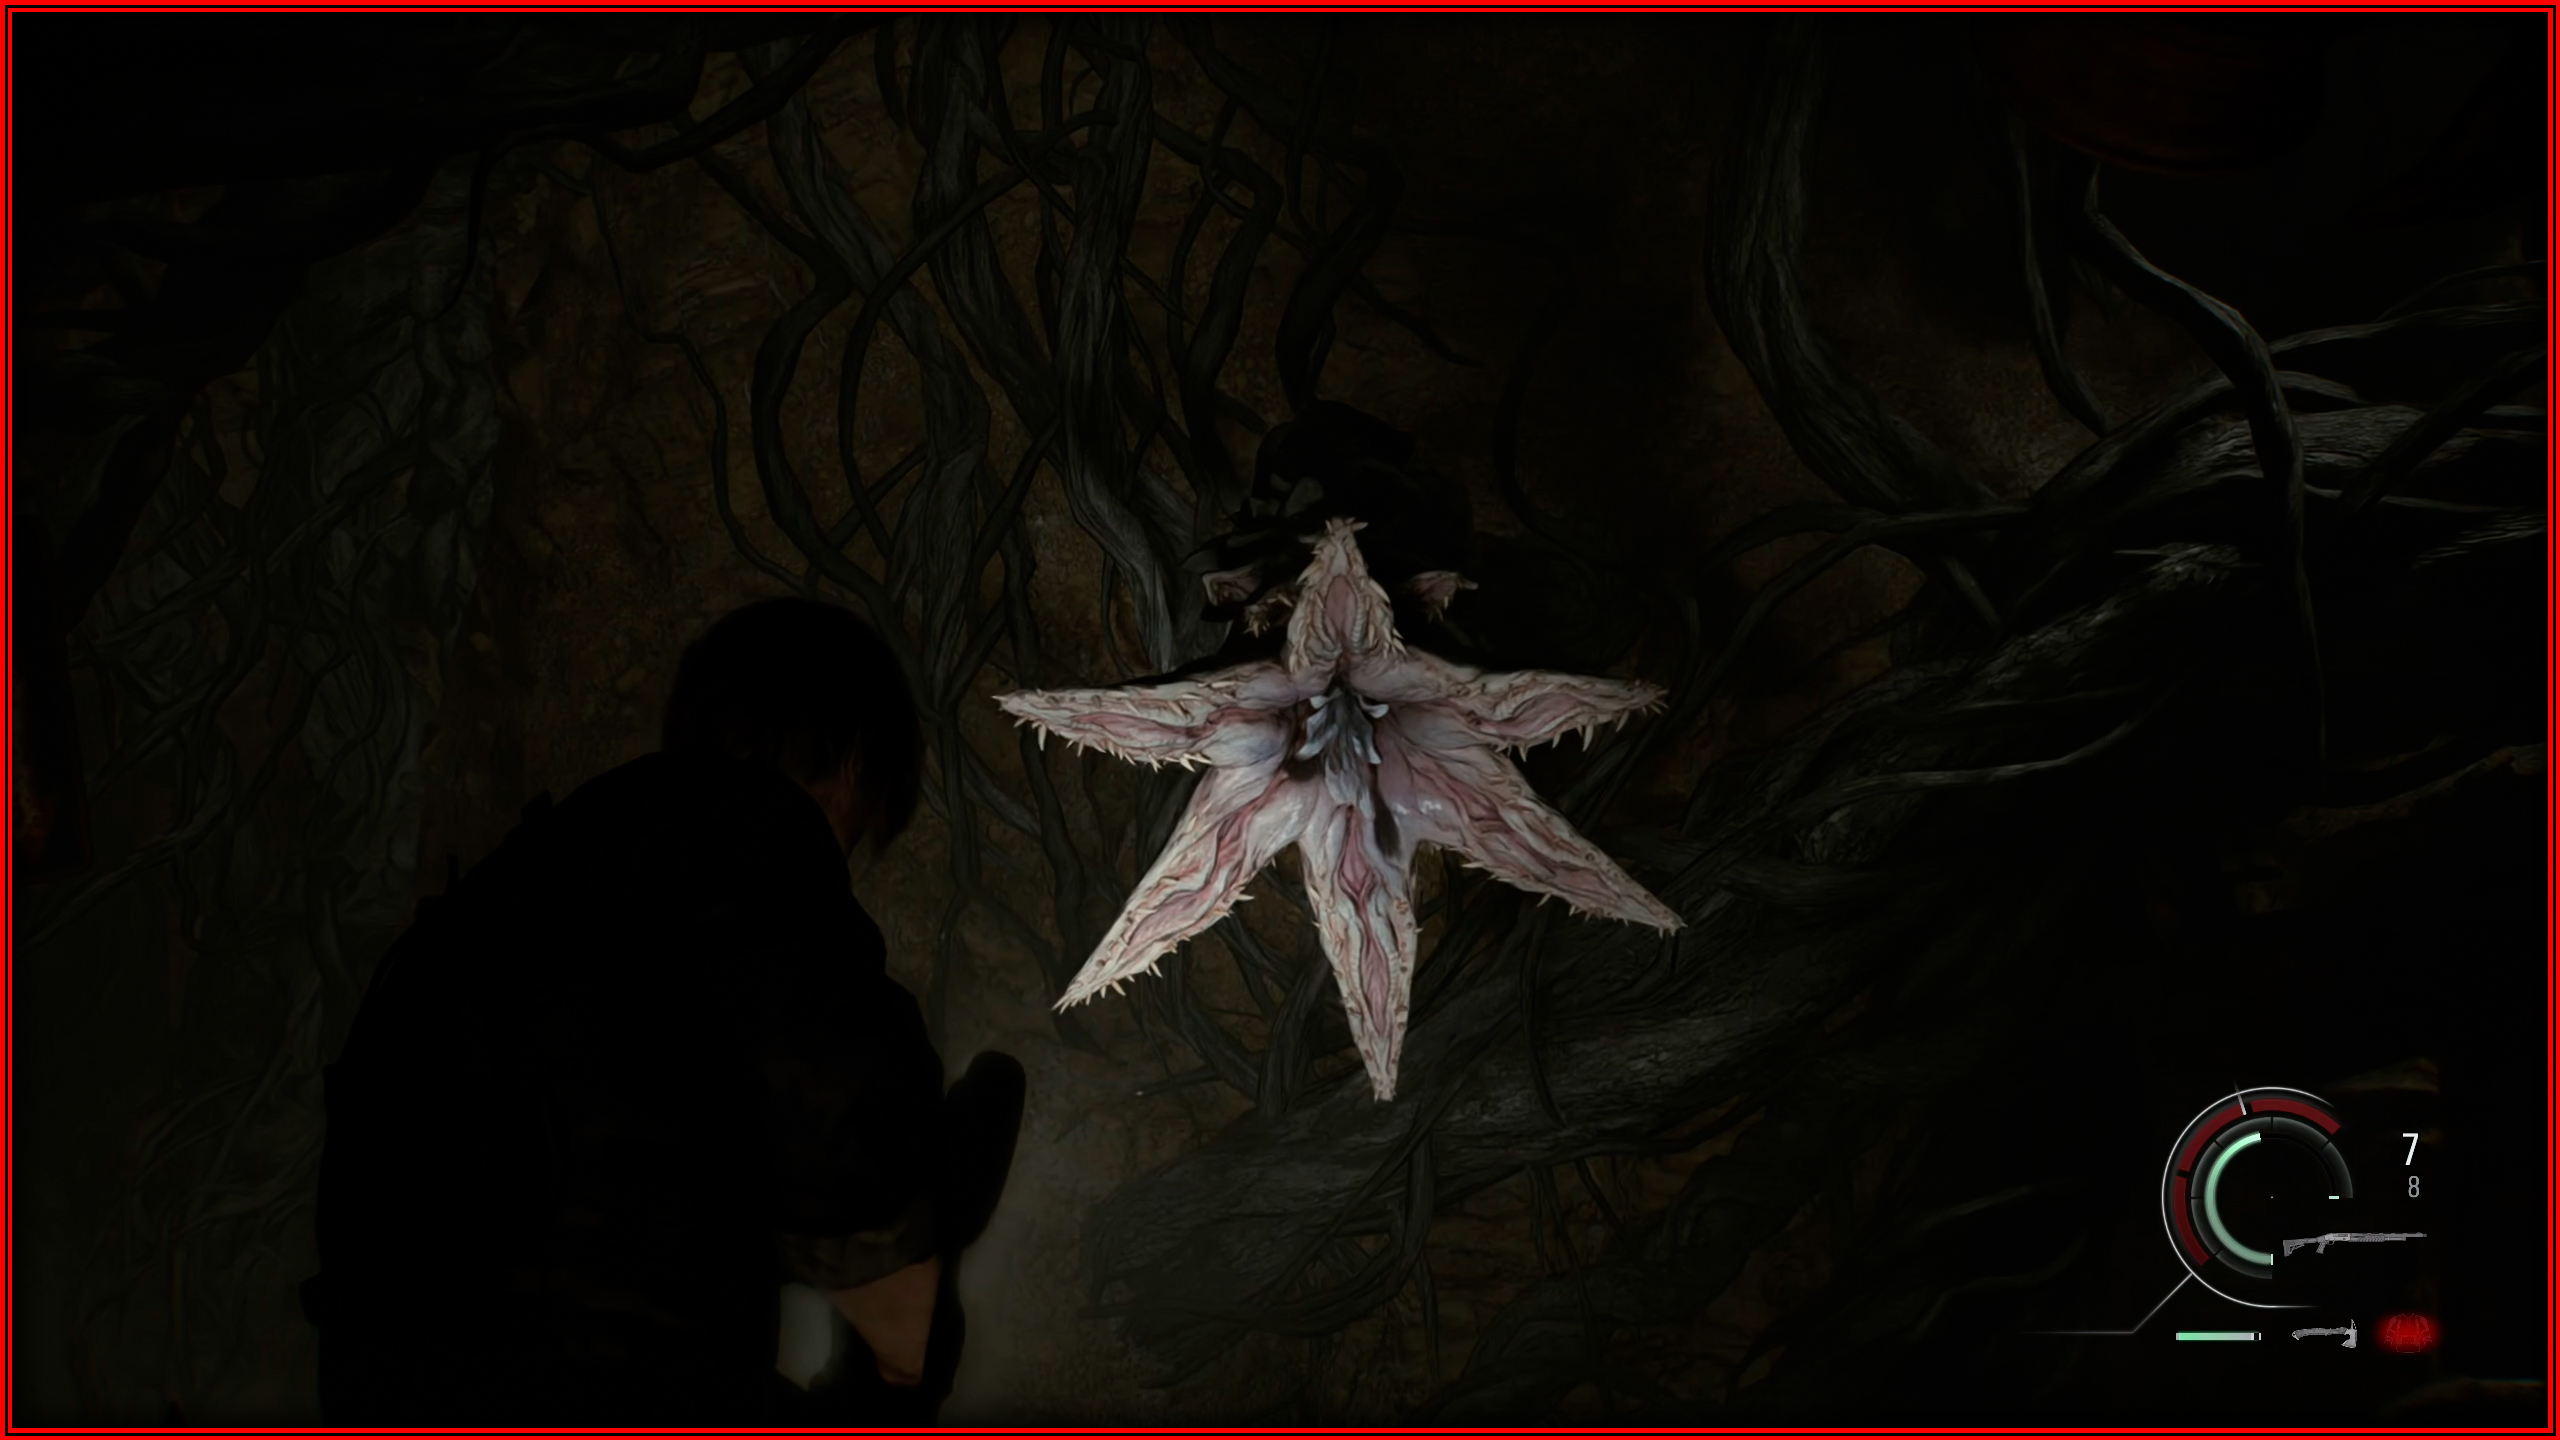
Not Today, Buds!
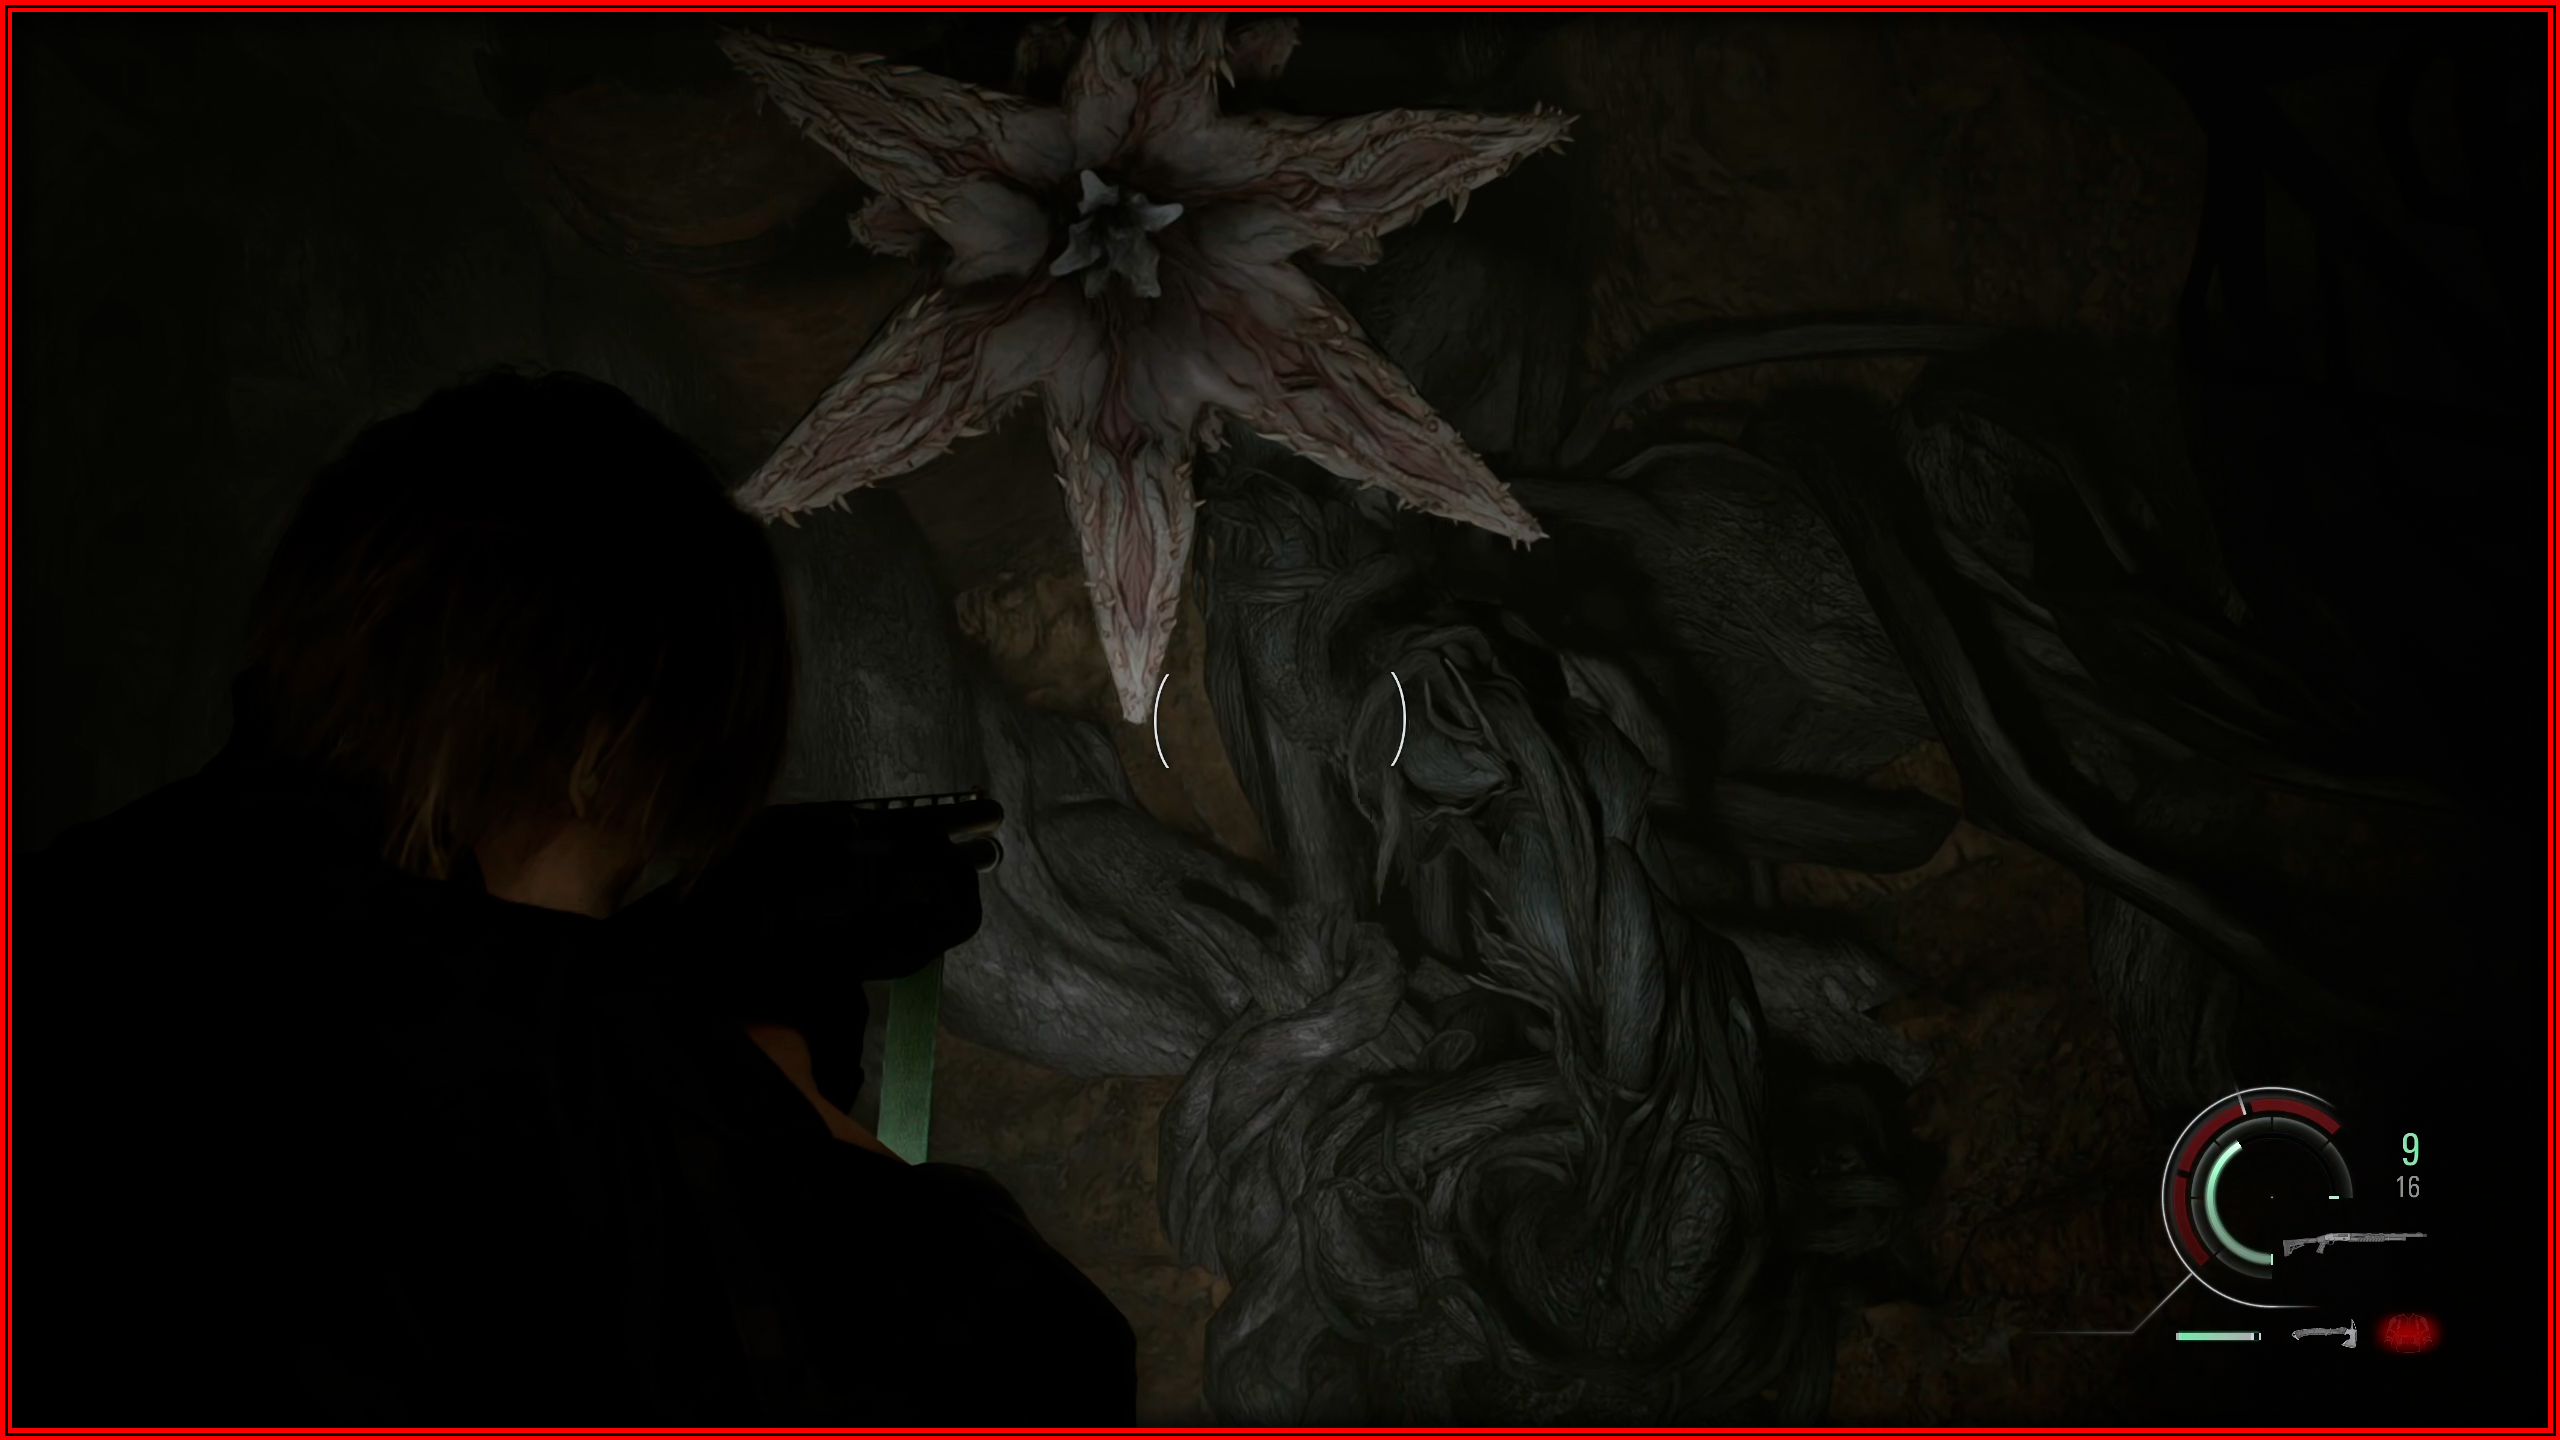
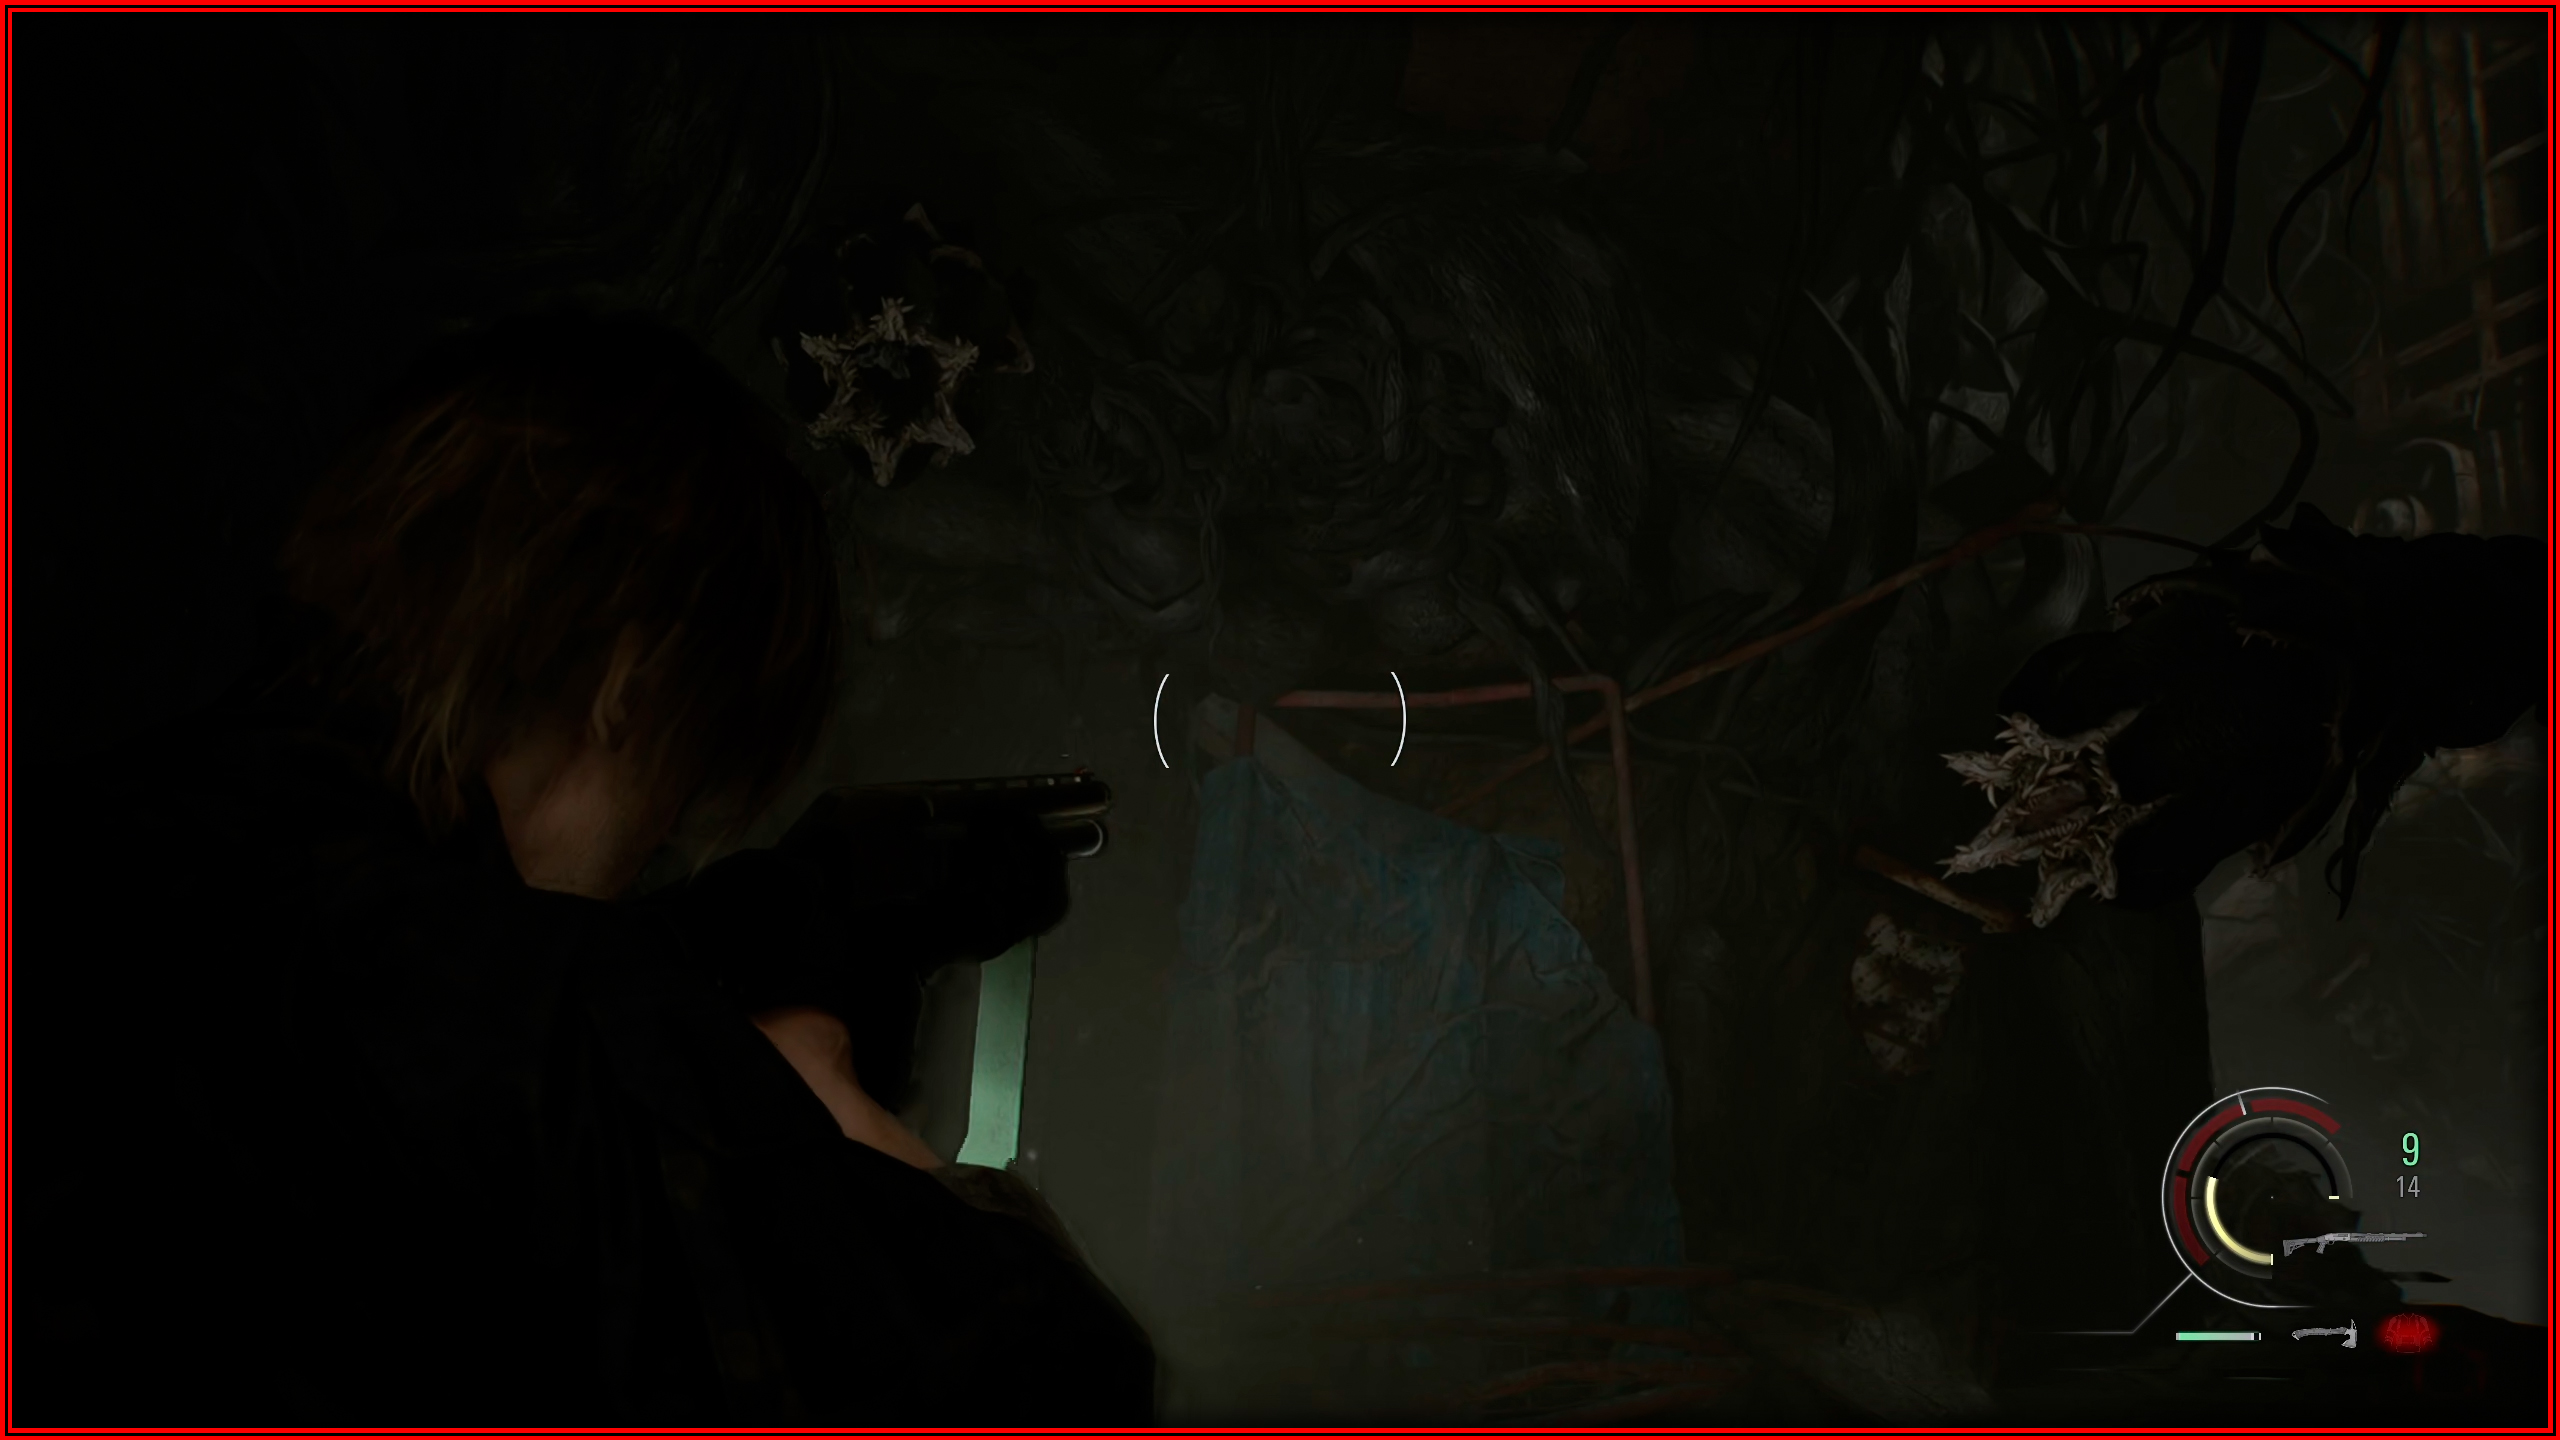
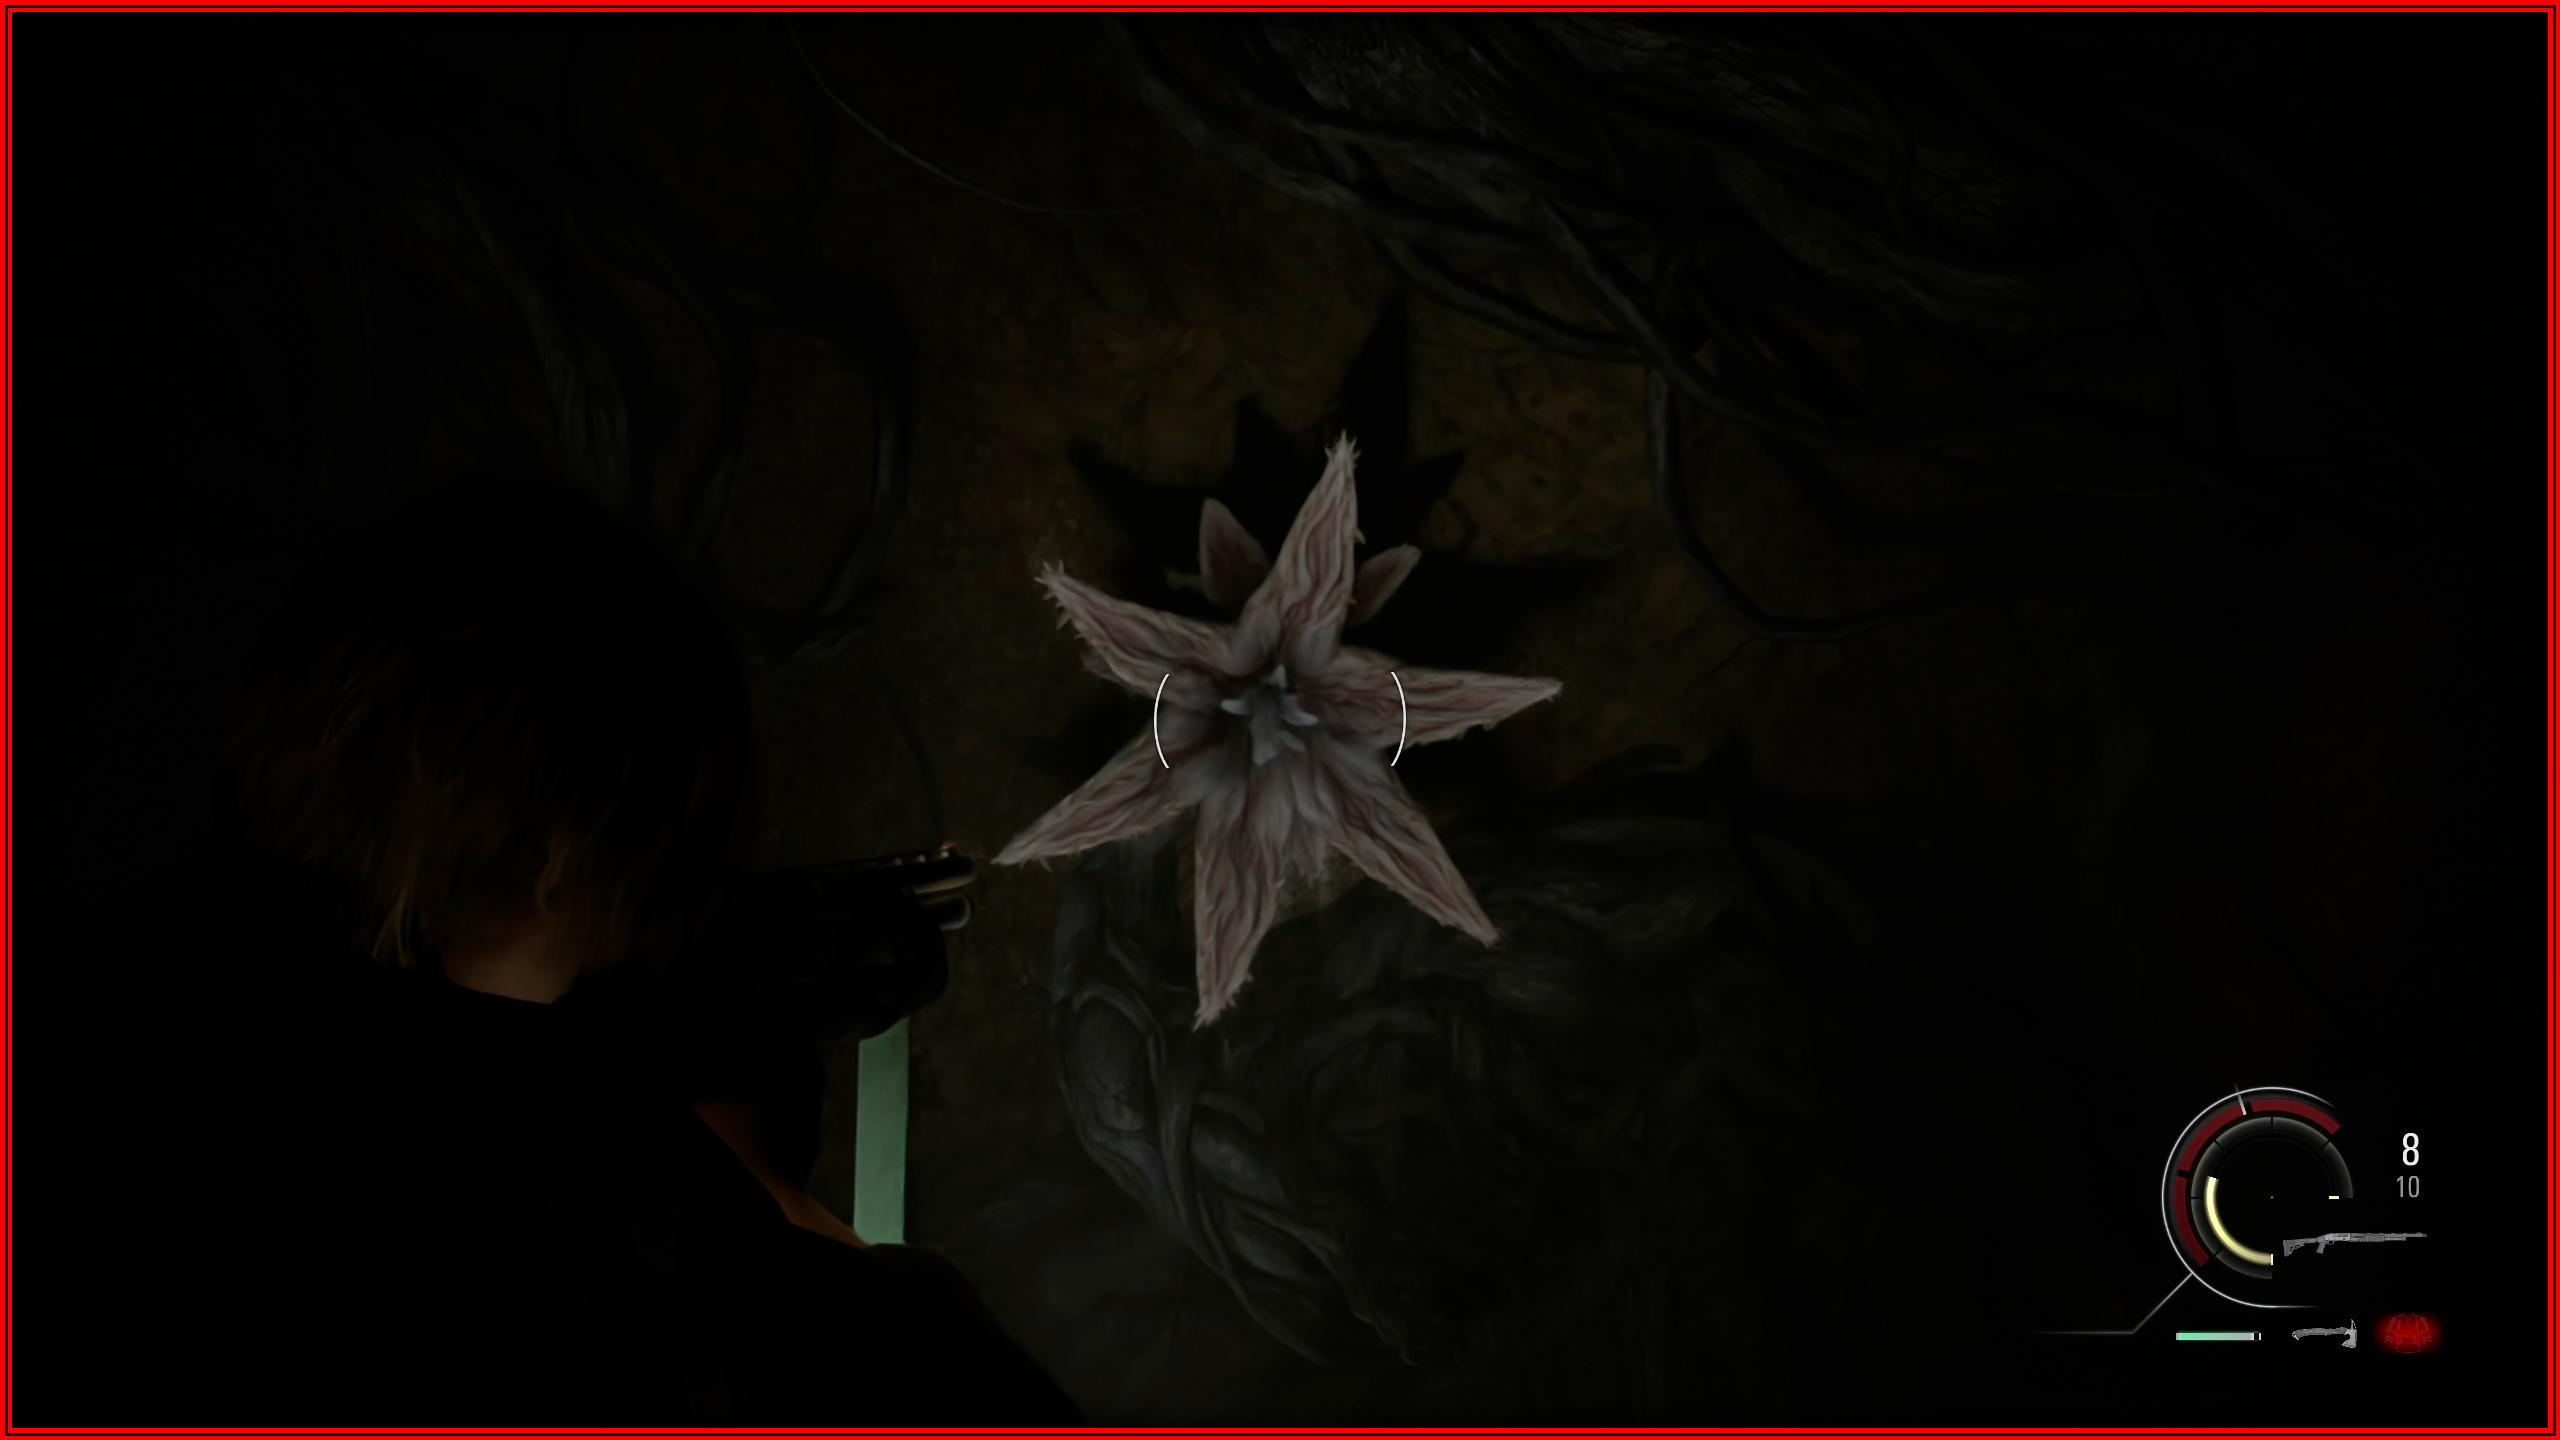
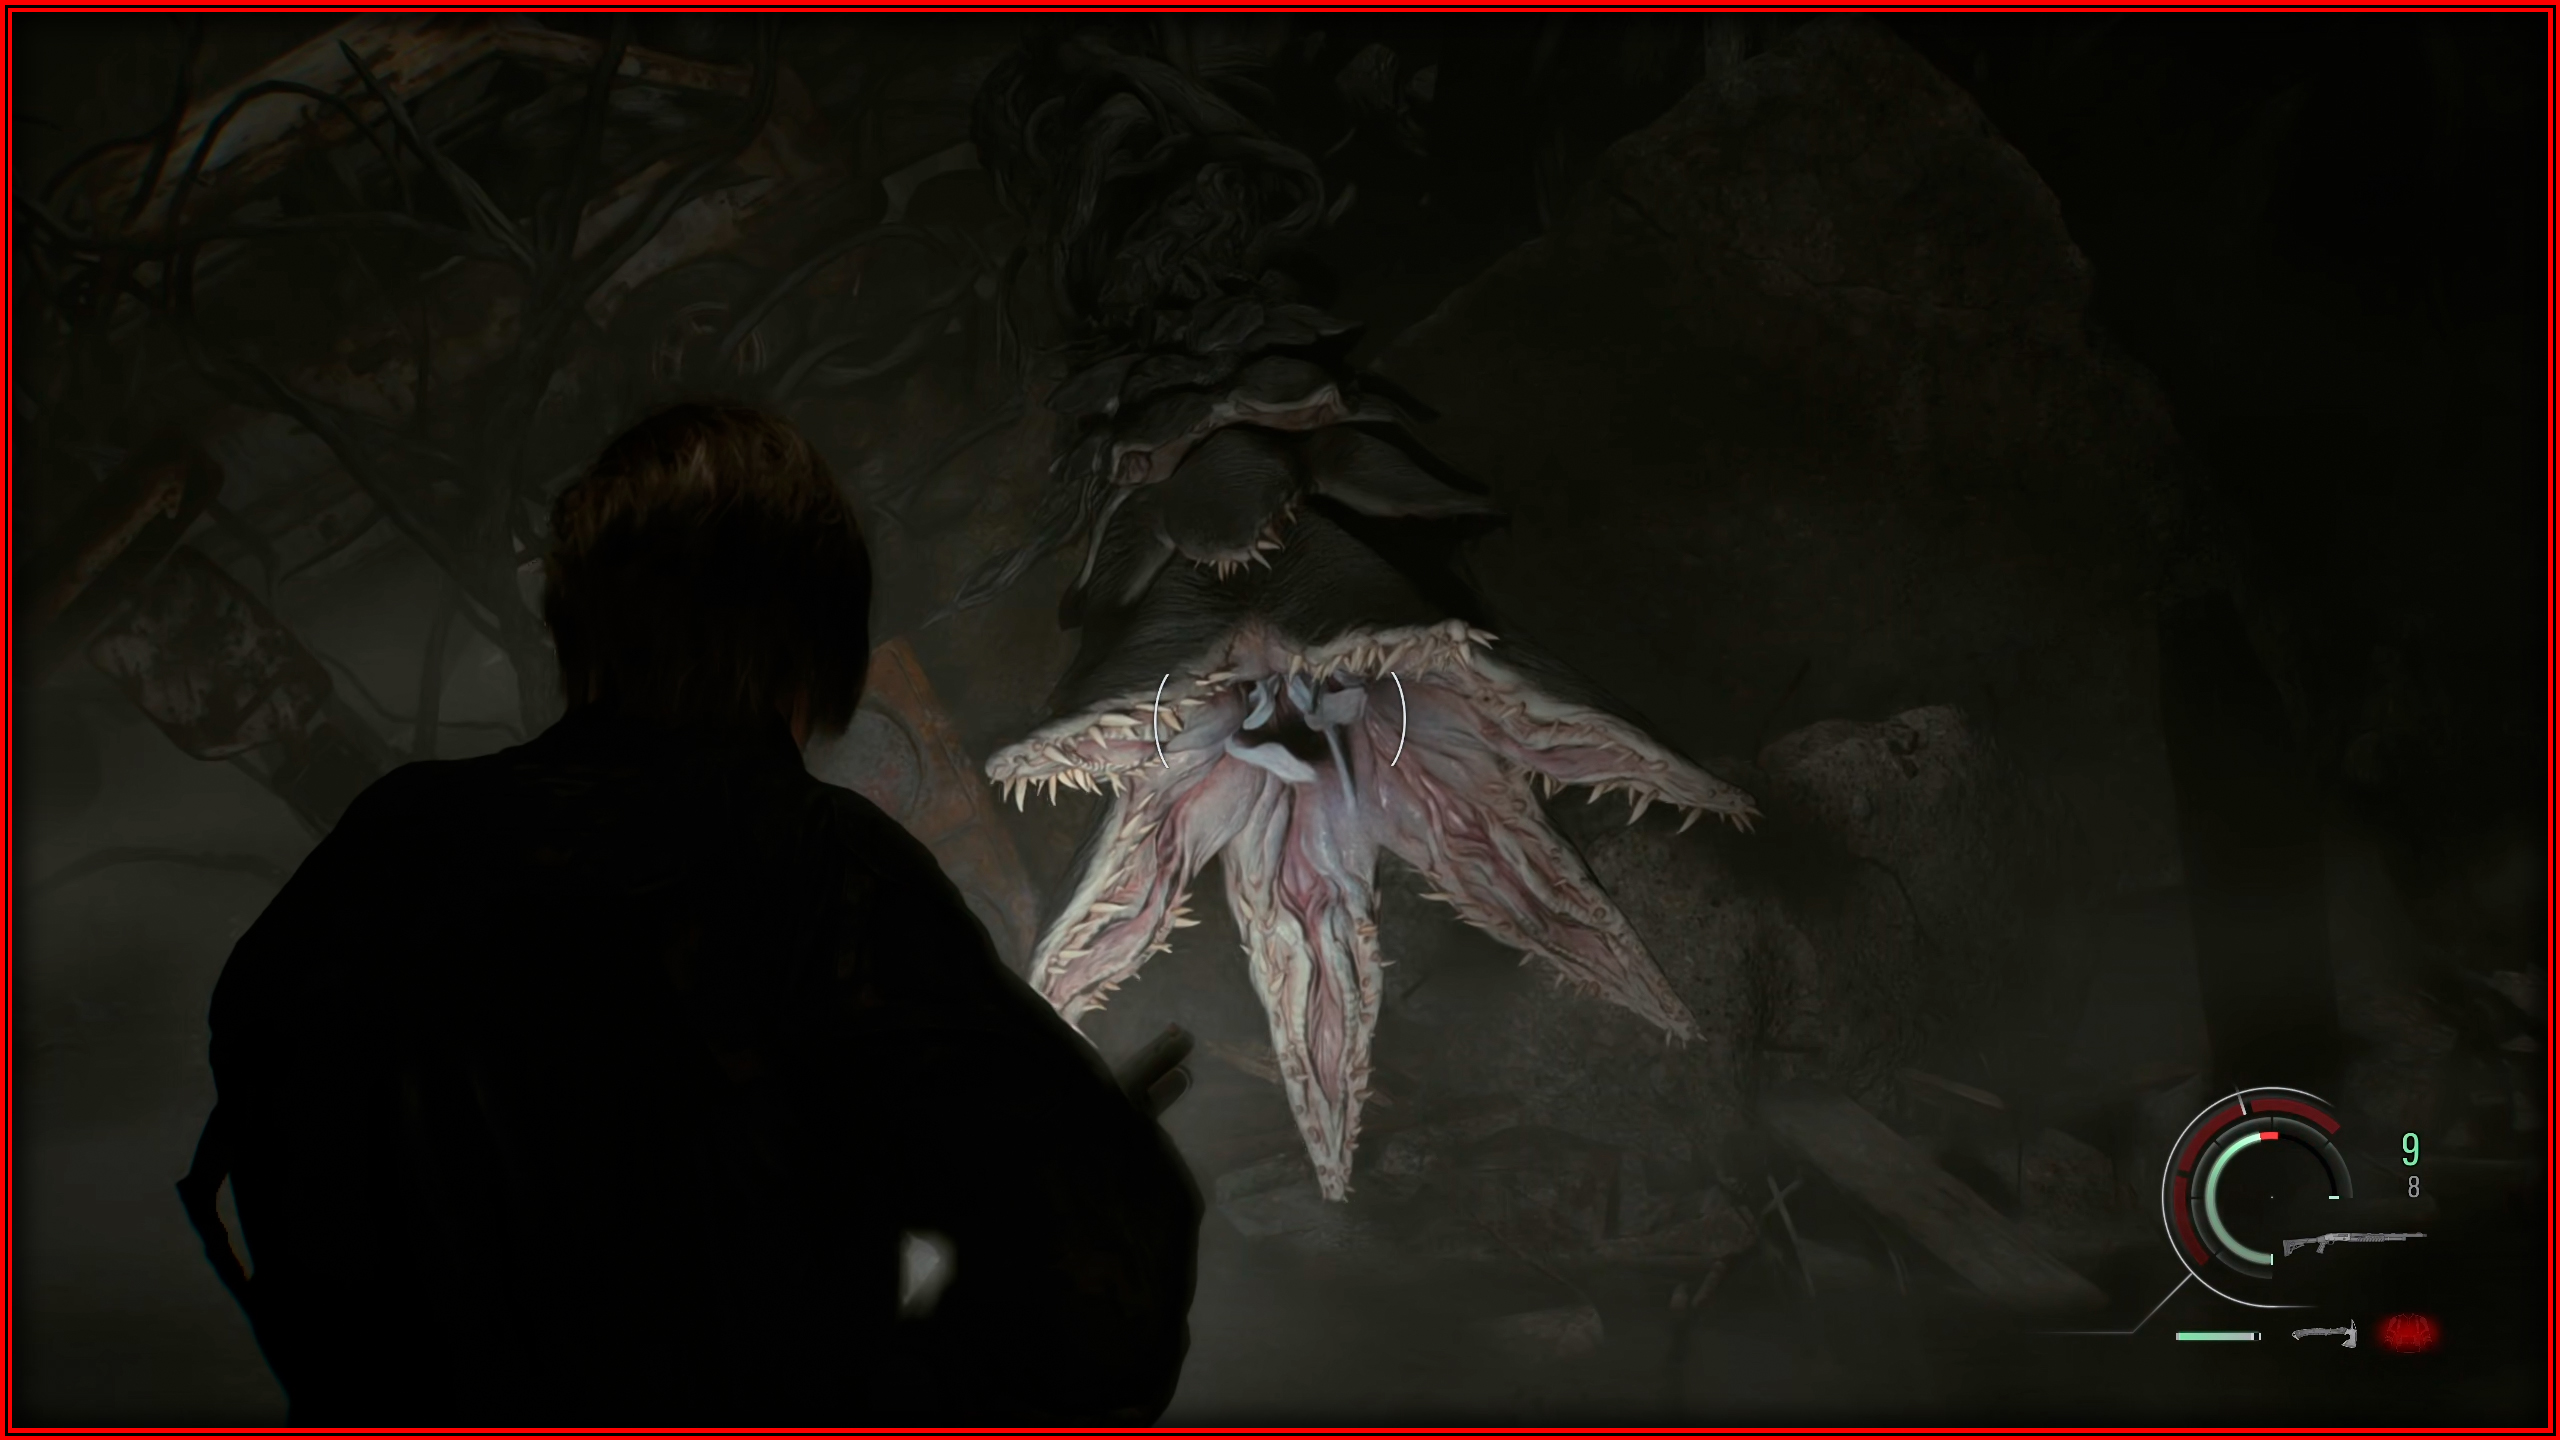
 In the Raccoon City Center after defeating the Super Tyrant, past the Orphanage, you will face the Plant 43 Seedlings. There are 9 in total. The first one you face inside the train and it cannot be missed, and the others are inside the cave.

Plant 43 Seedling 2
On the main path at the cave entrance.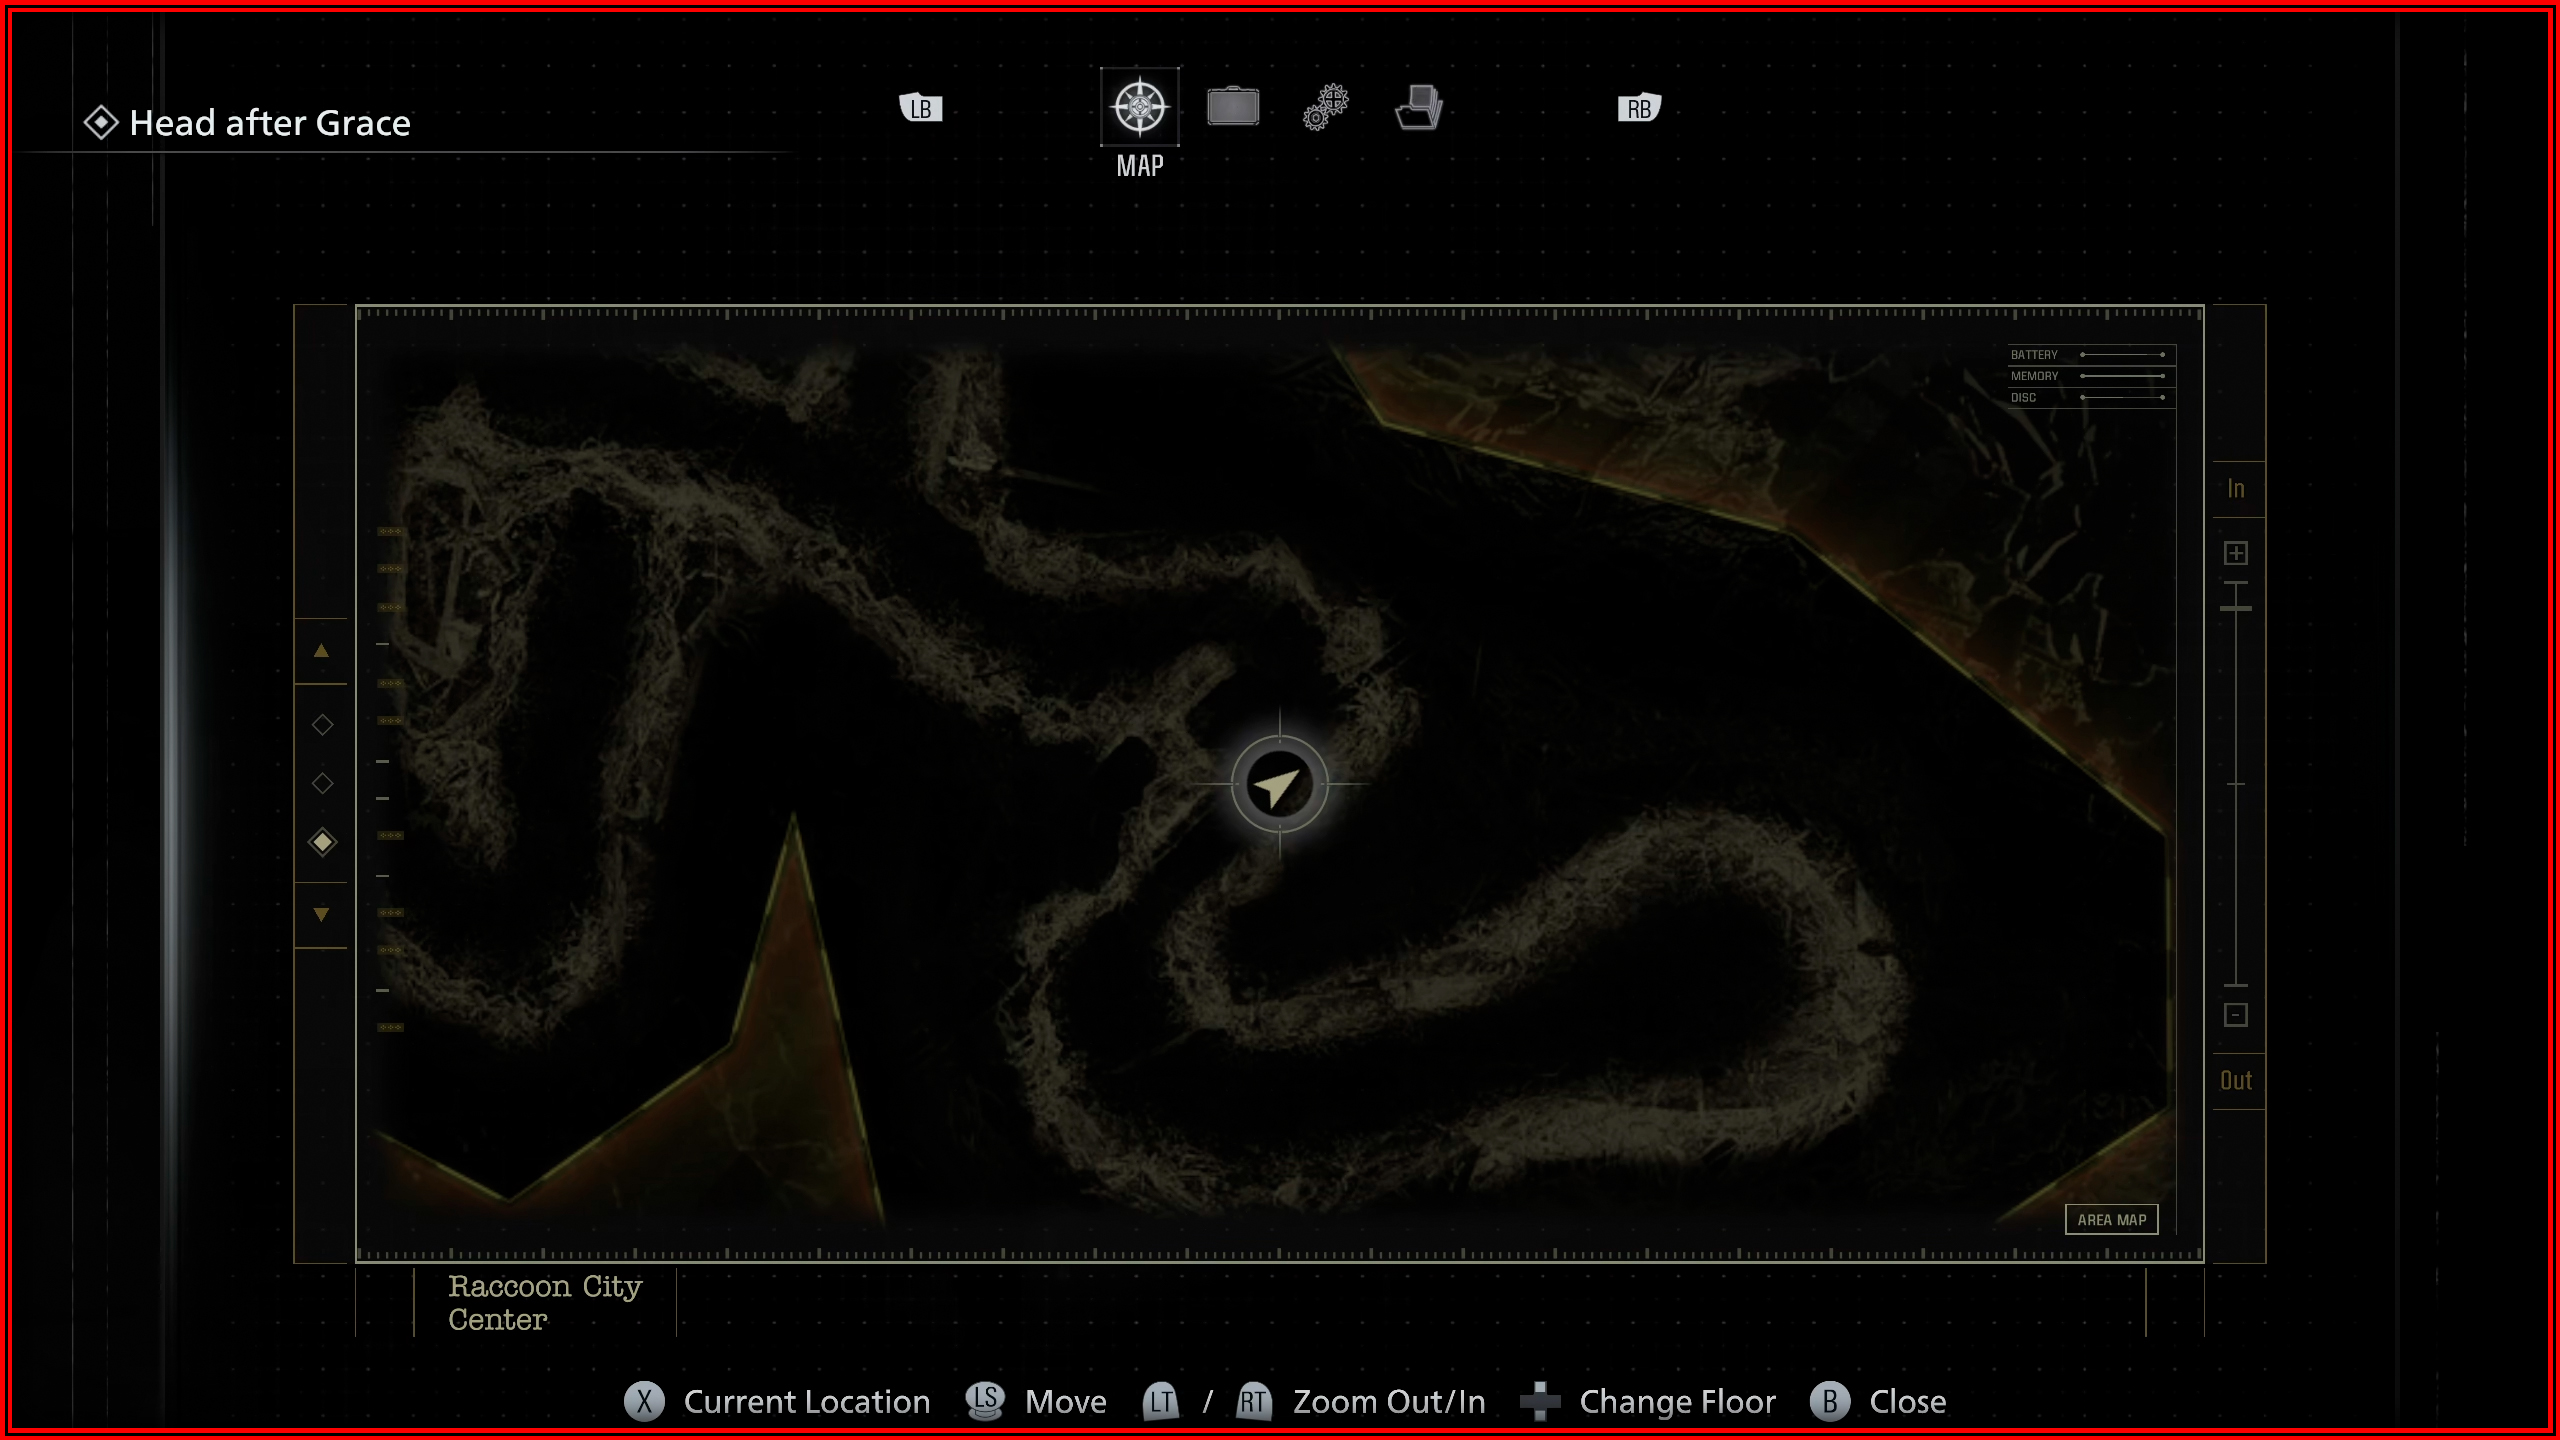
Plant 43 Seedling 3 and 4
On the main path after seedling 2.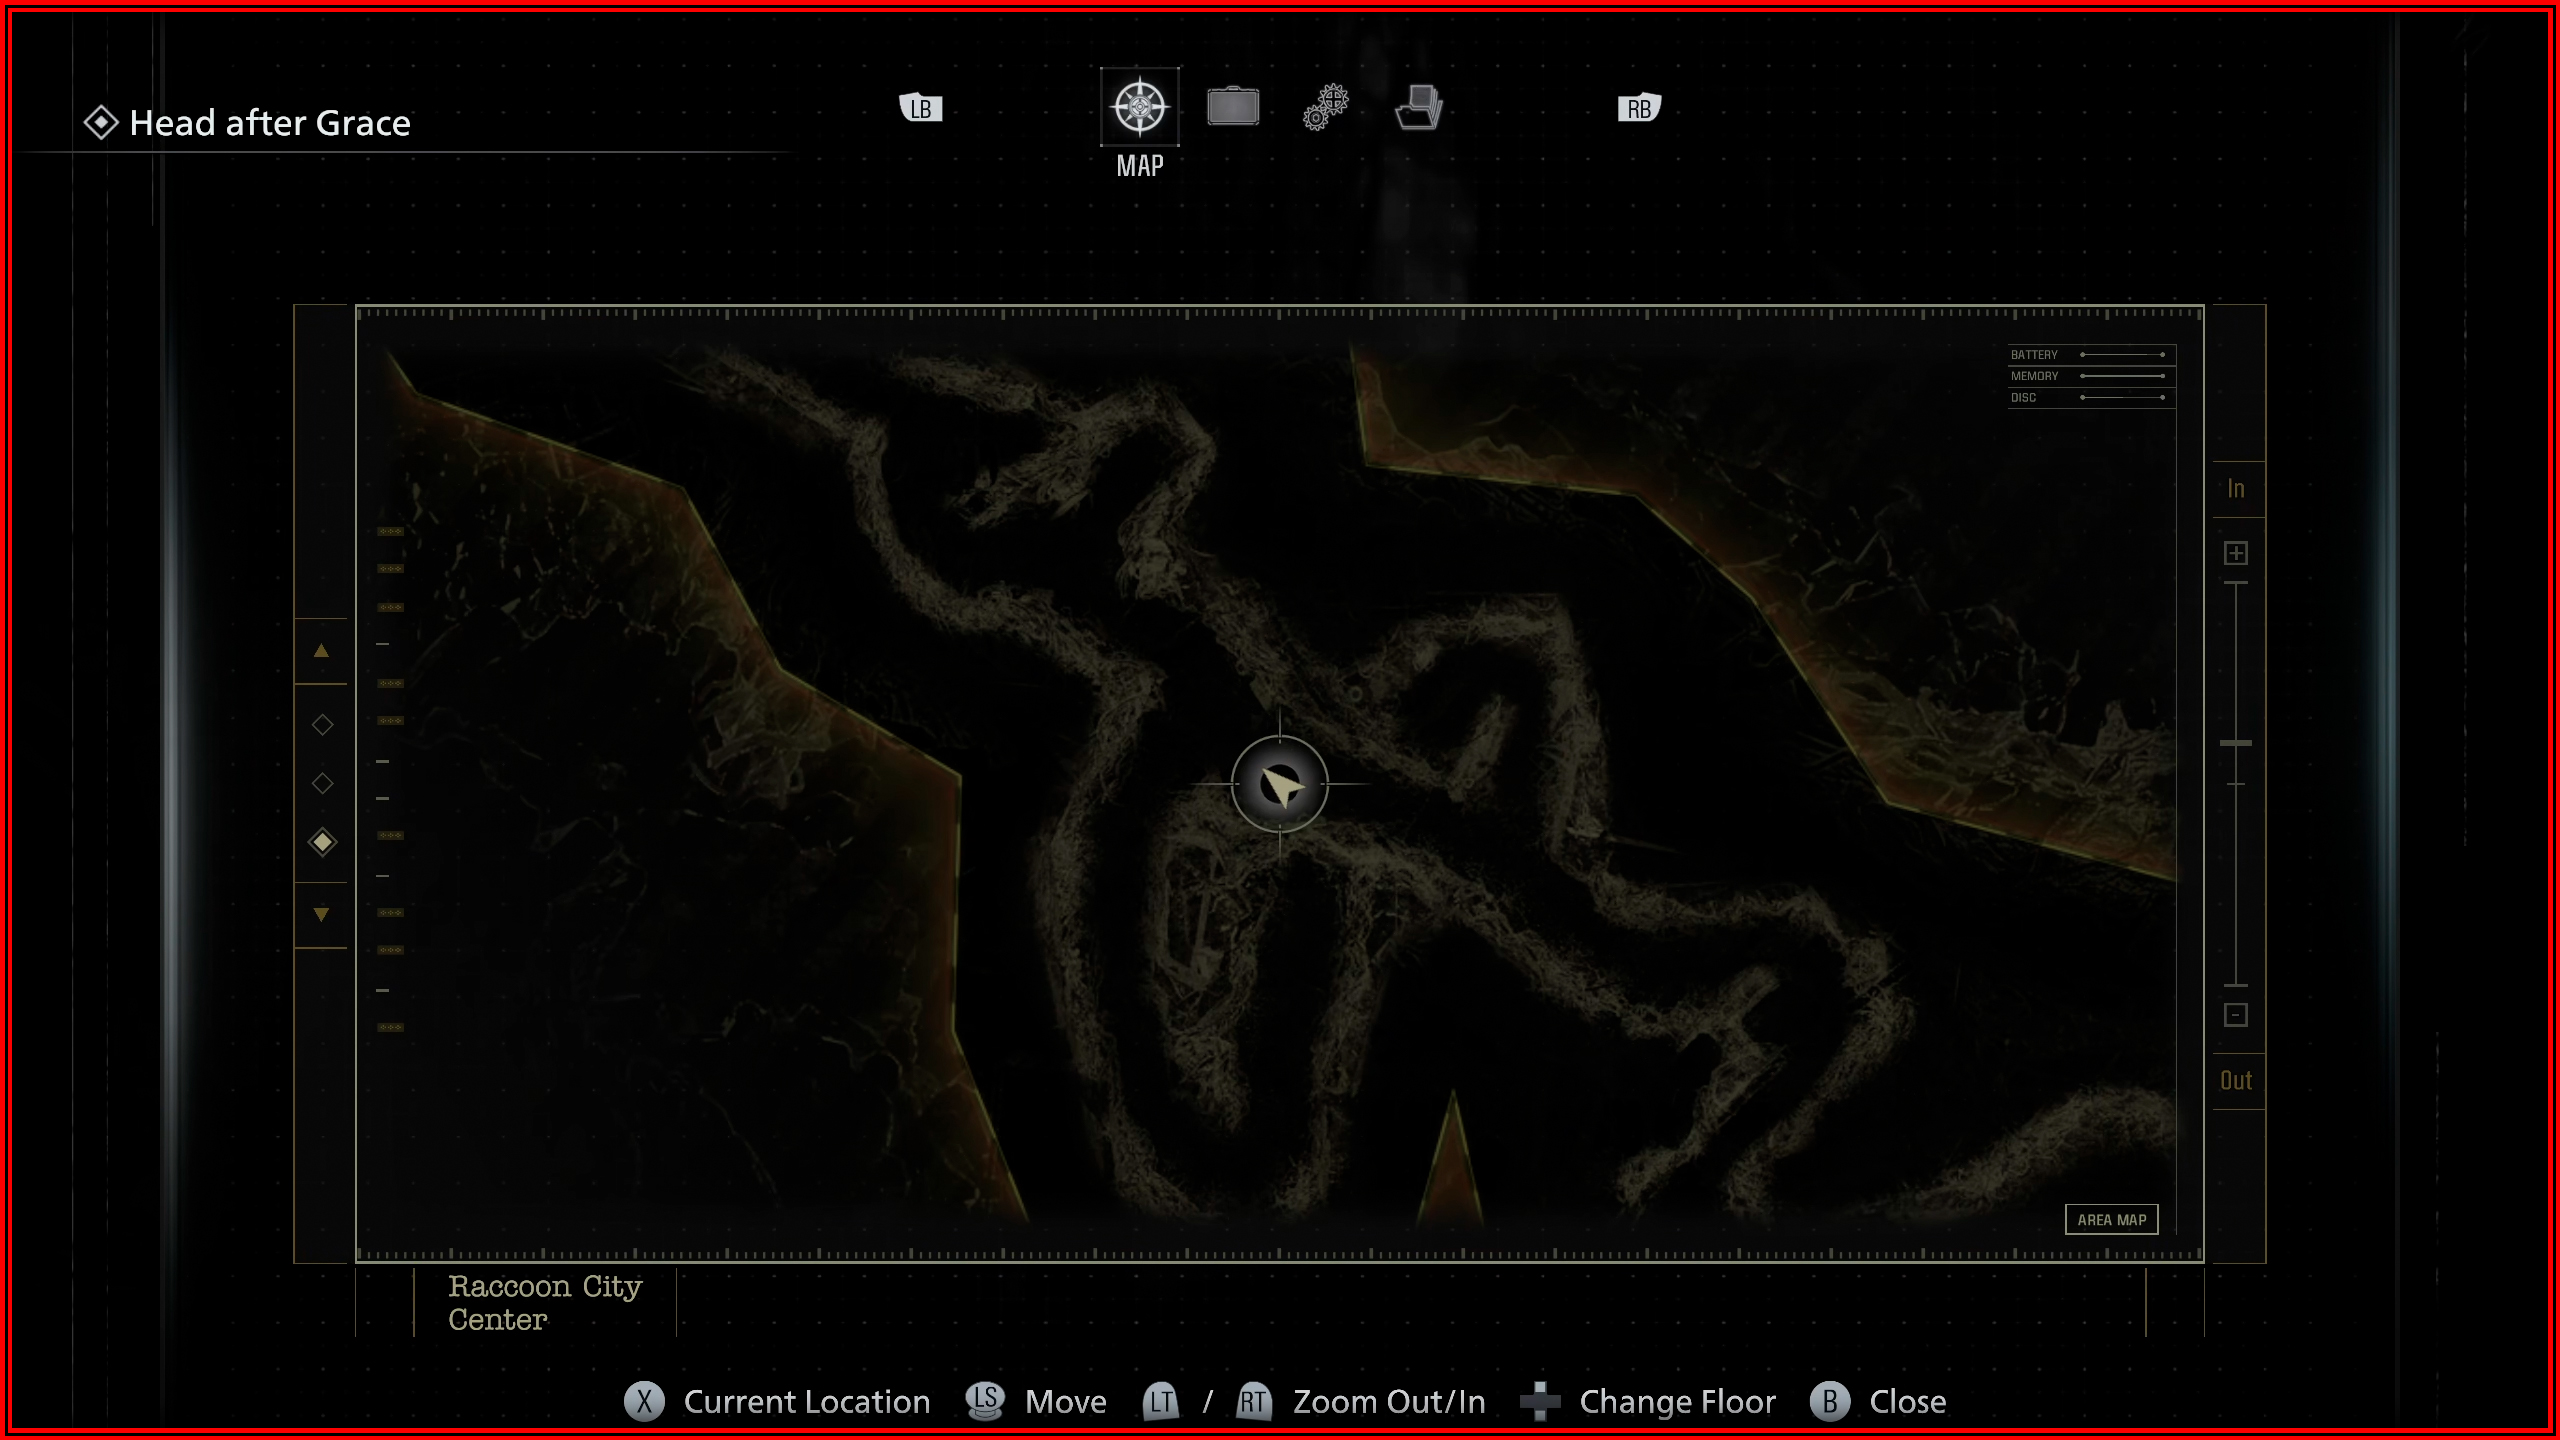
Plant 43 Seedling 5
On the side path to the left of the previous two.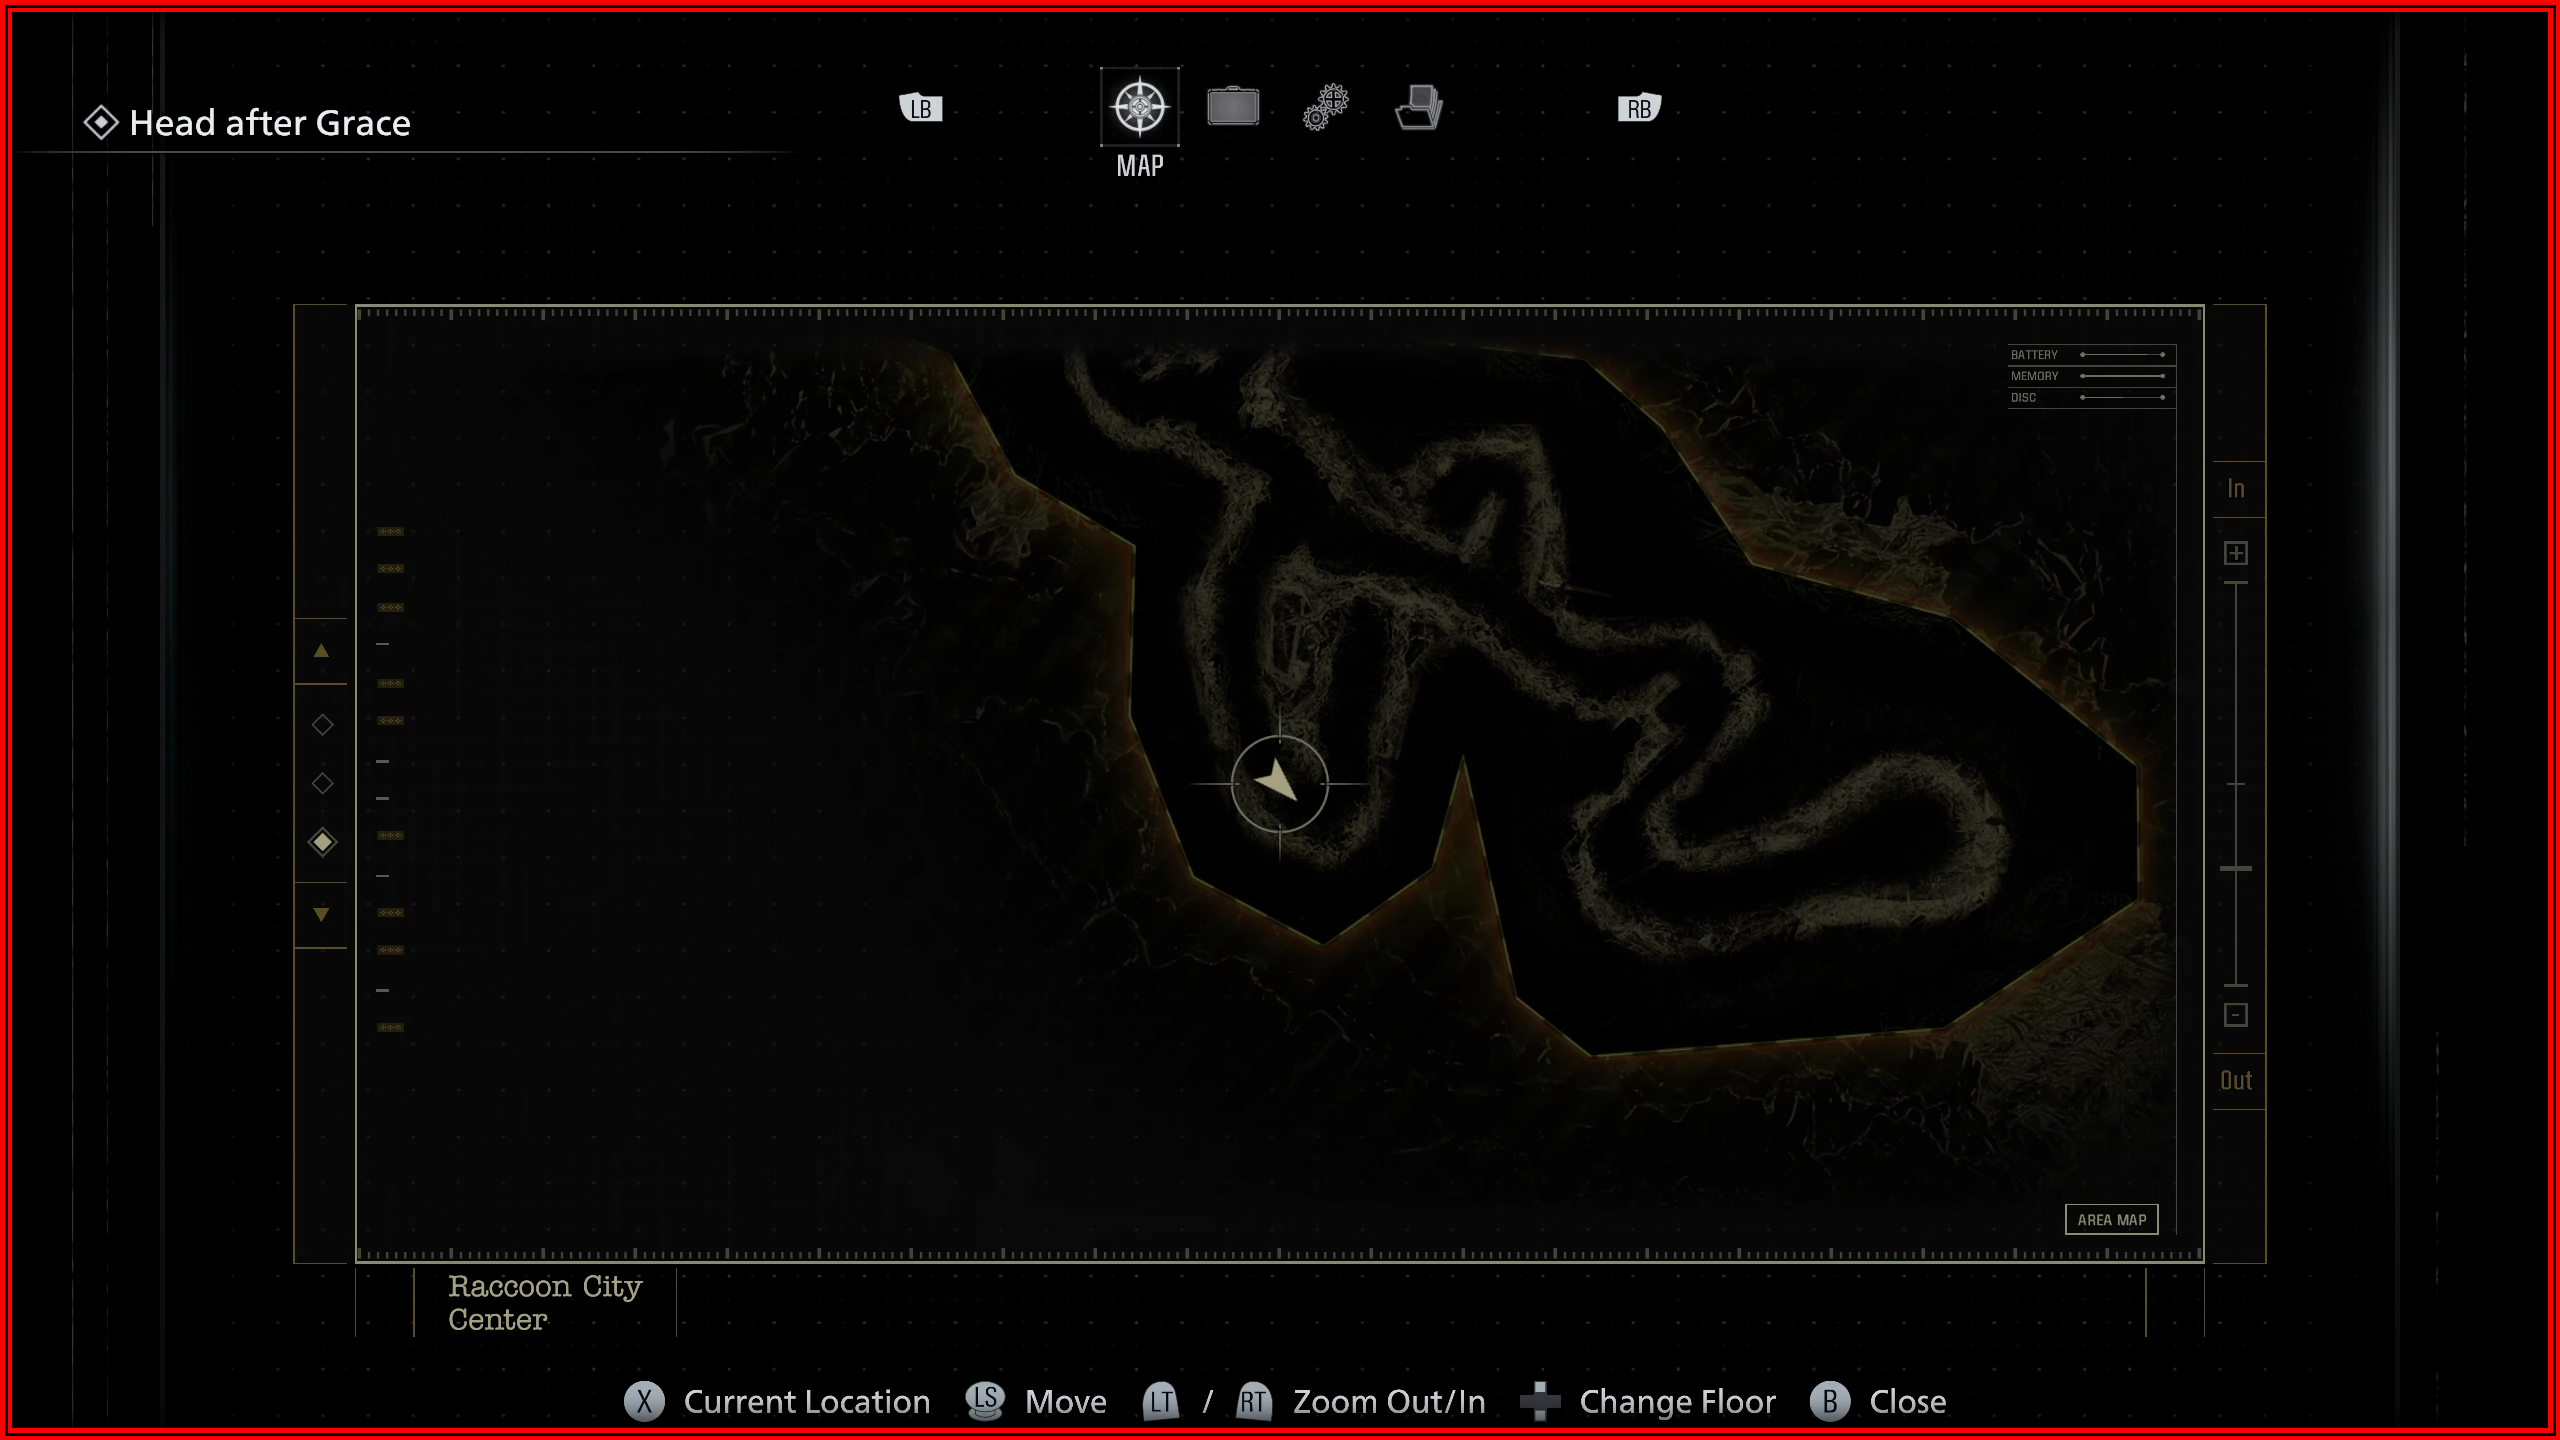
Plant 43 Seedling 6
On the main path after seedling 3 and 4.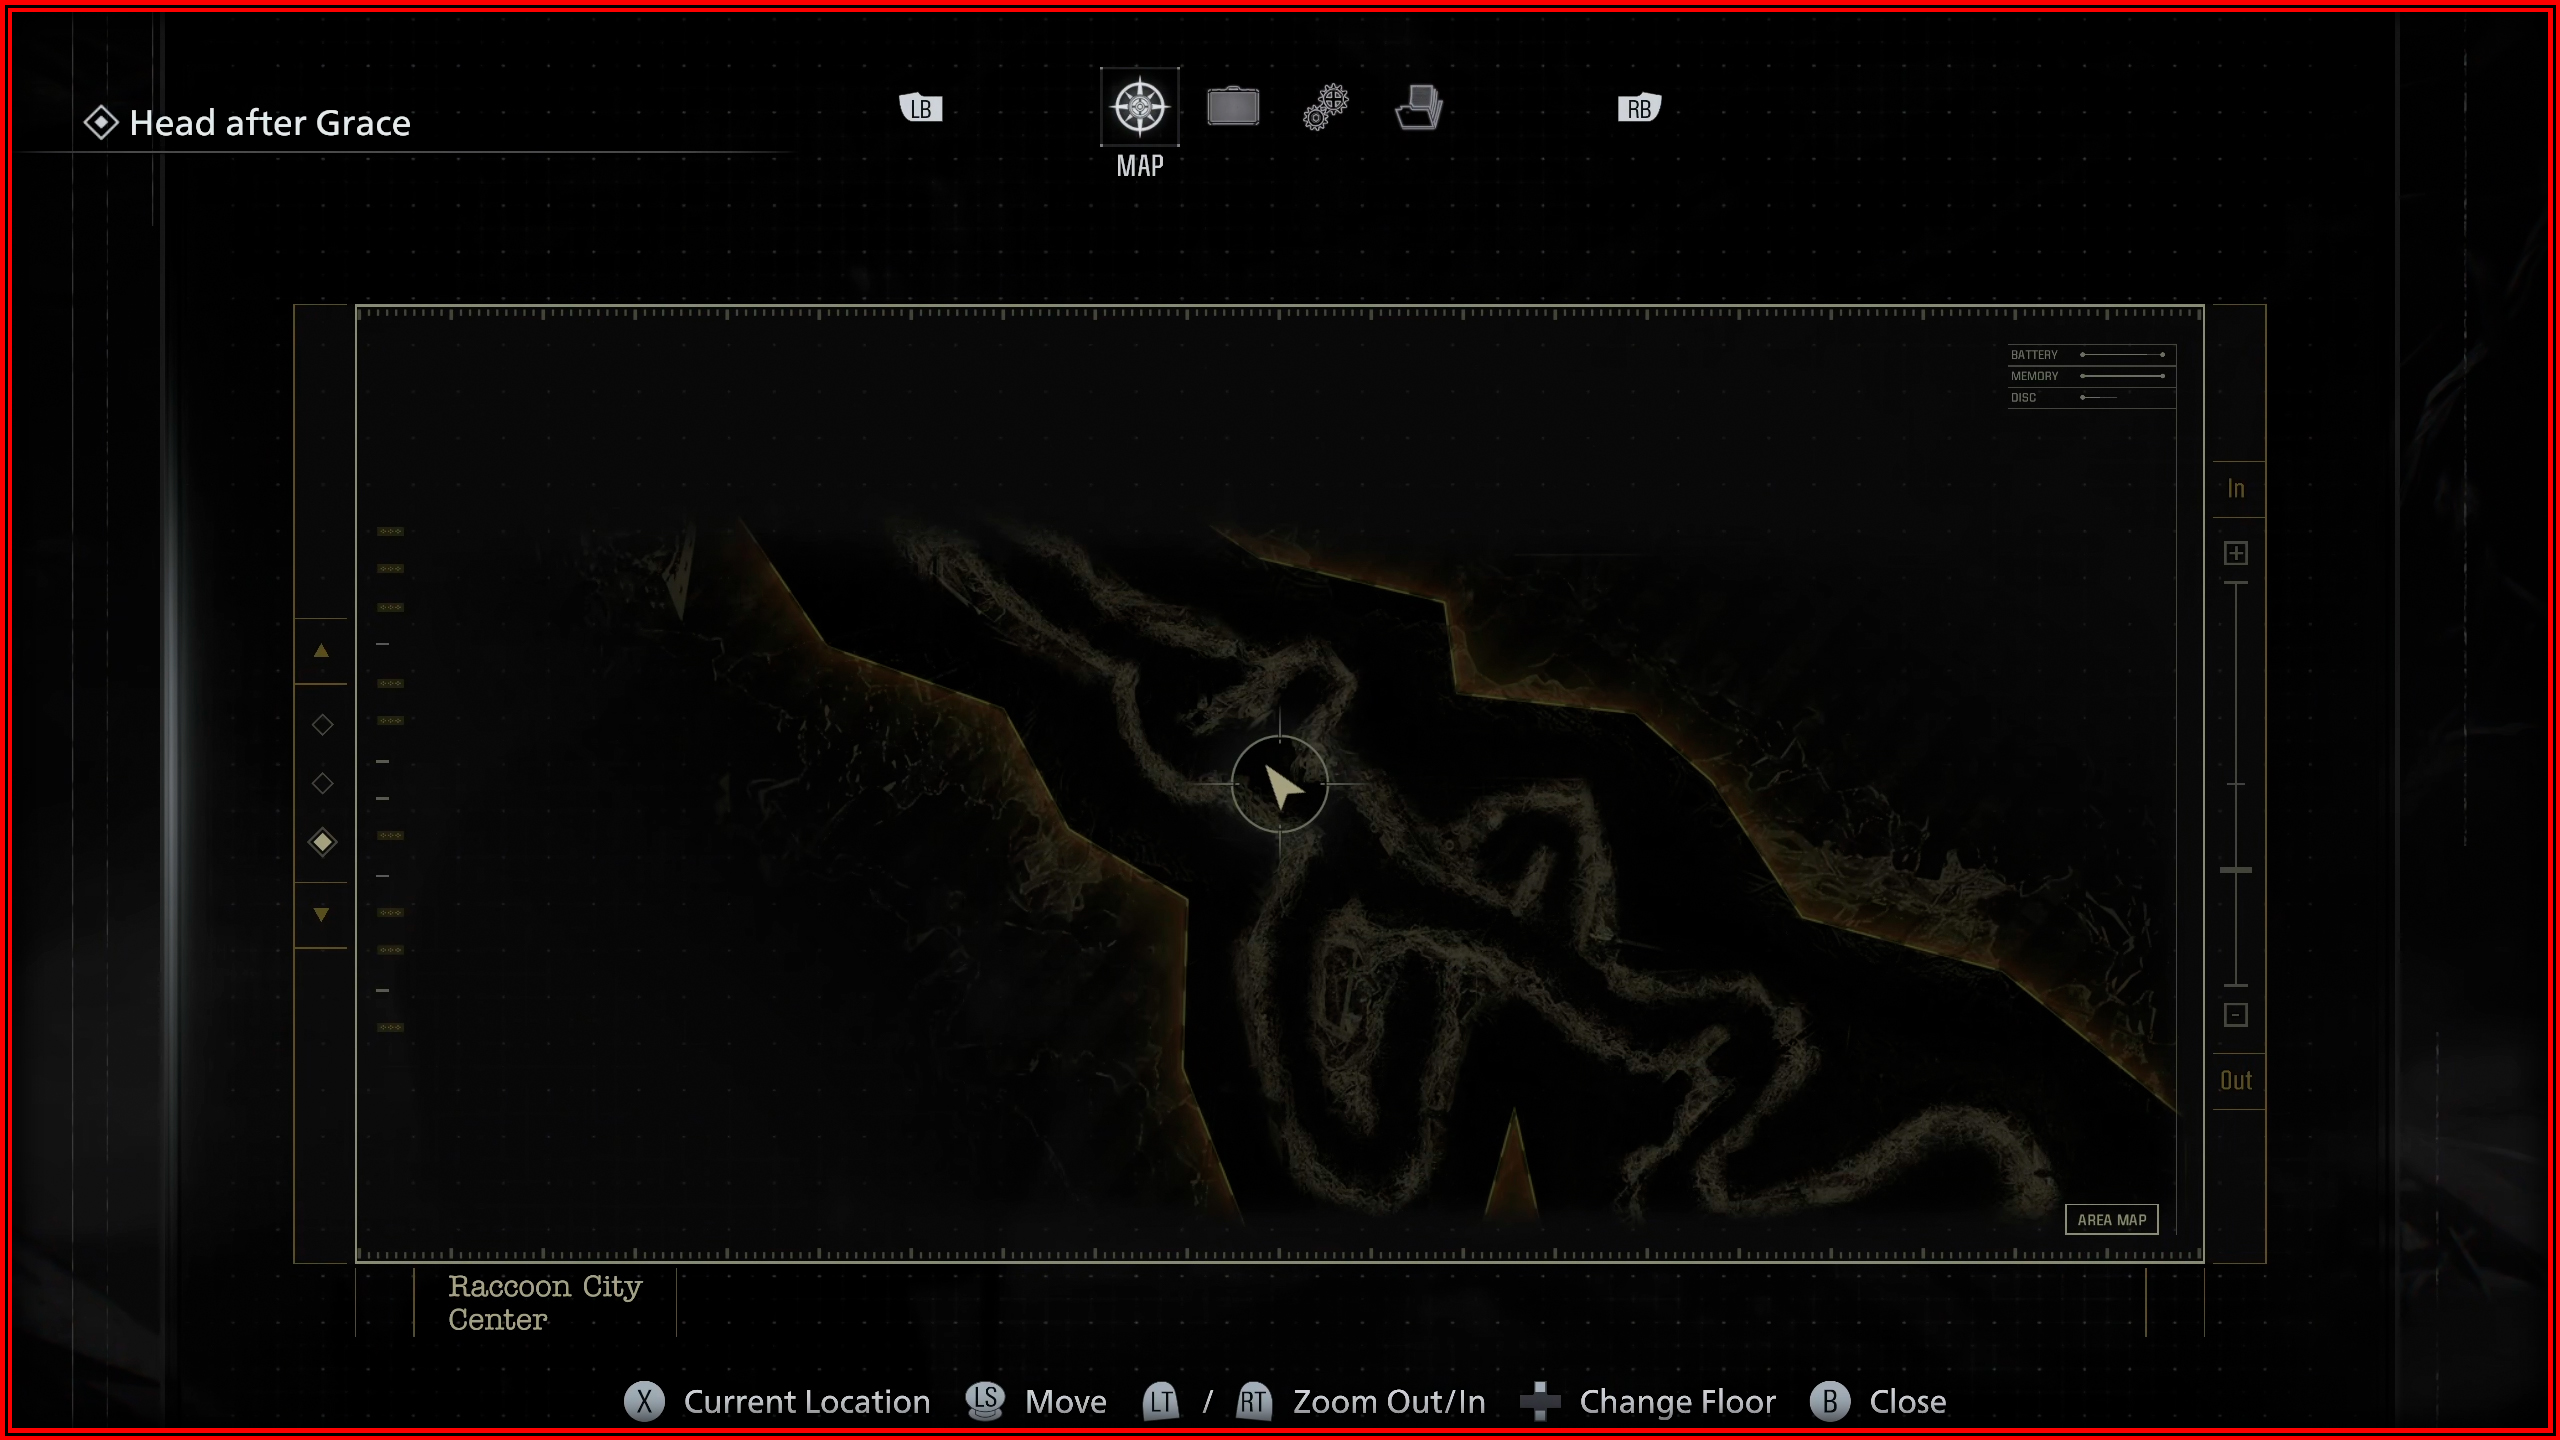
Plant 43 Seedling 7
On the main path directly to the left of the previous one.
Plant 43 Seedling 8 and 9
On the main path directly after the previous one when heading toward the end of the cave.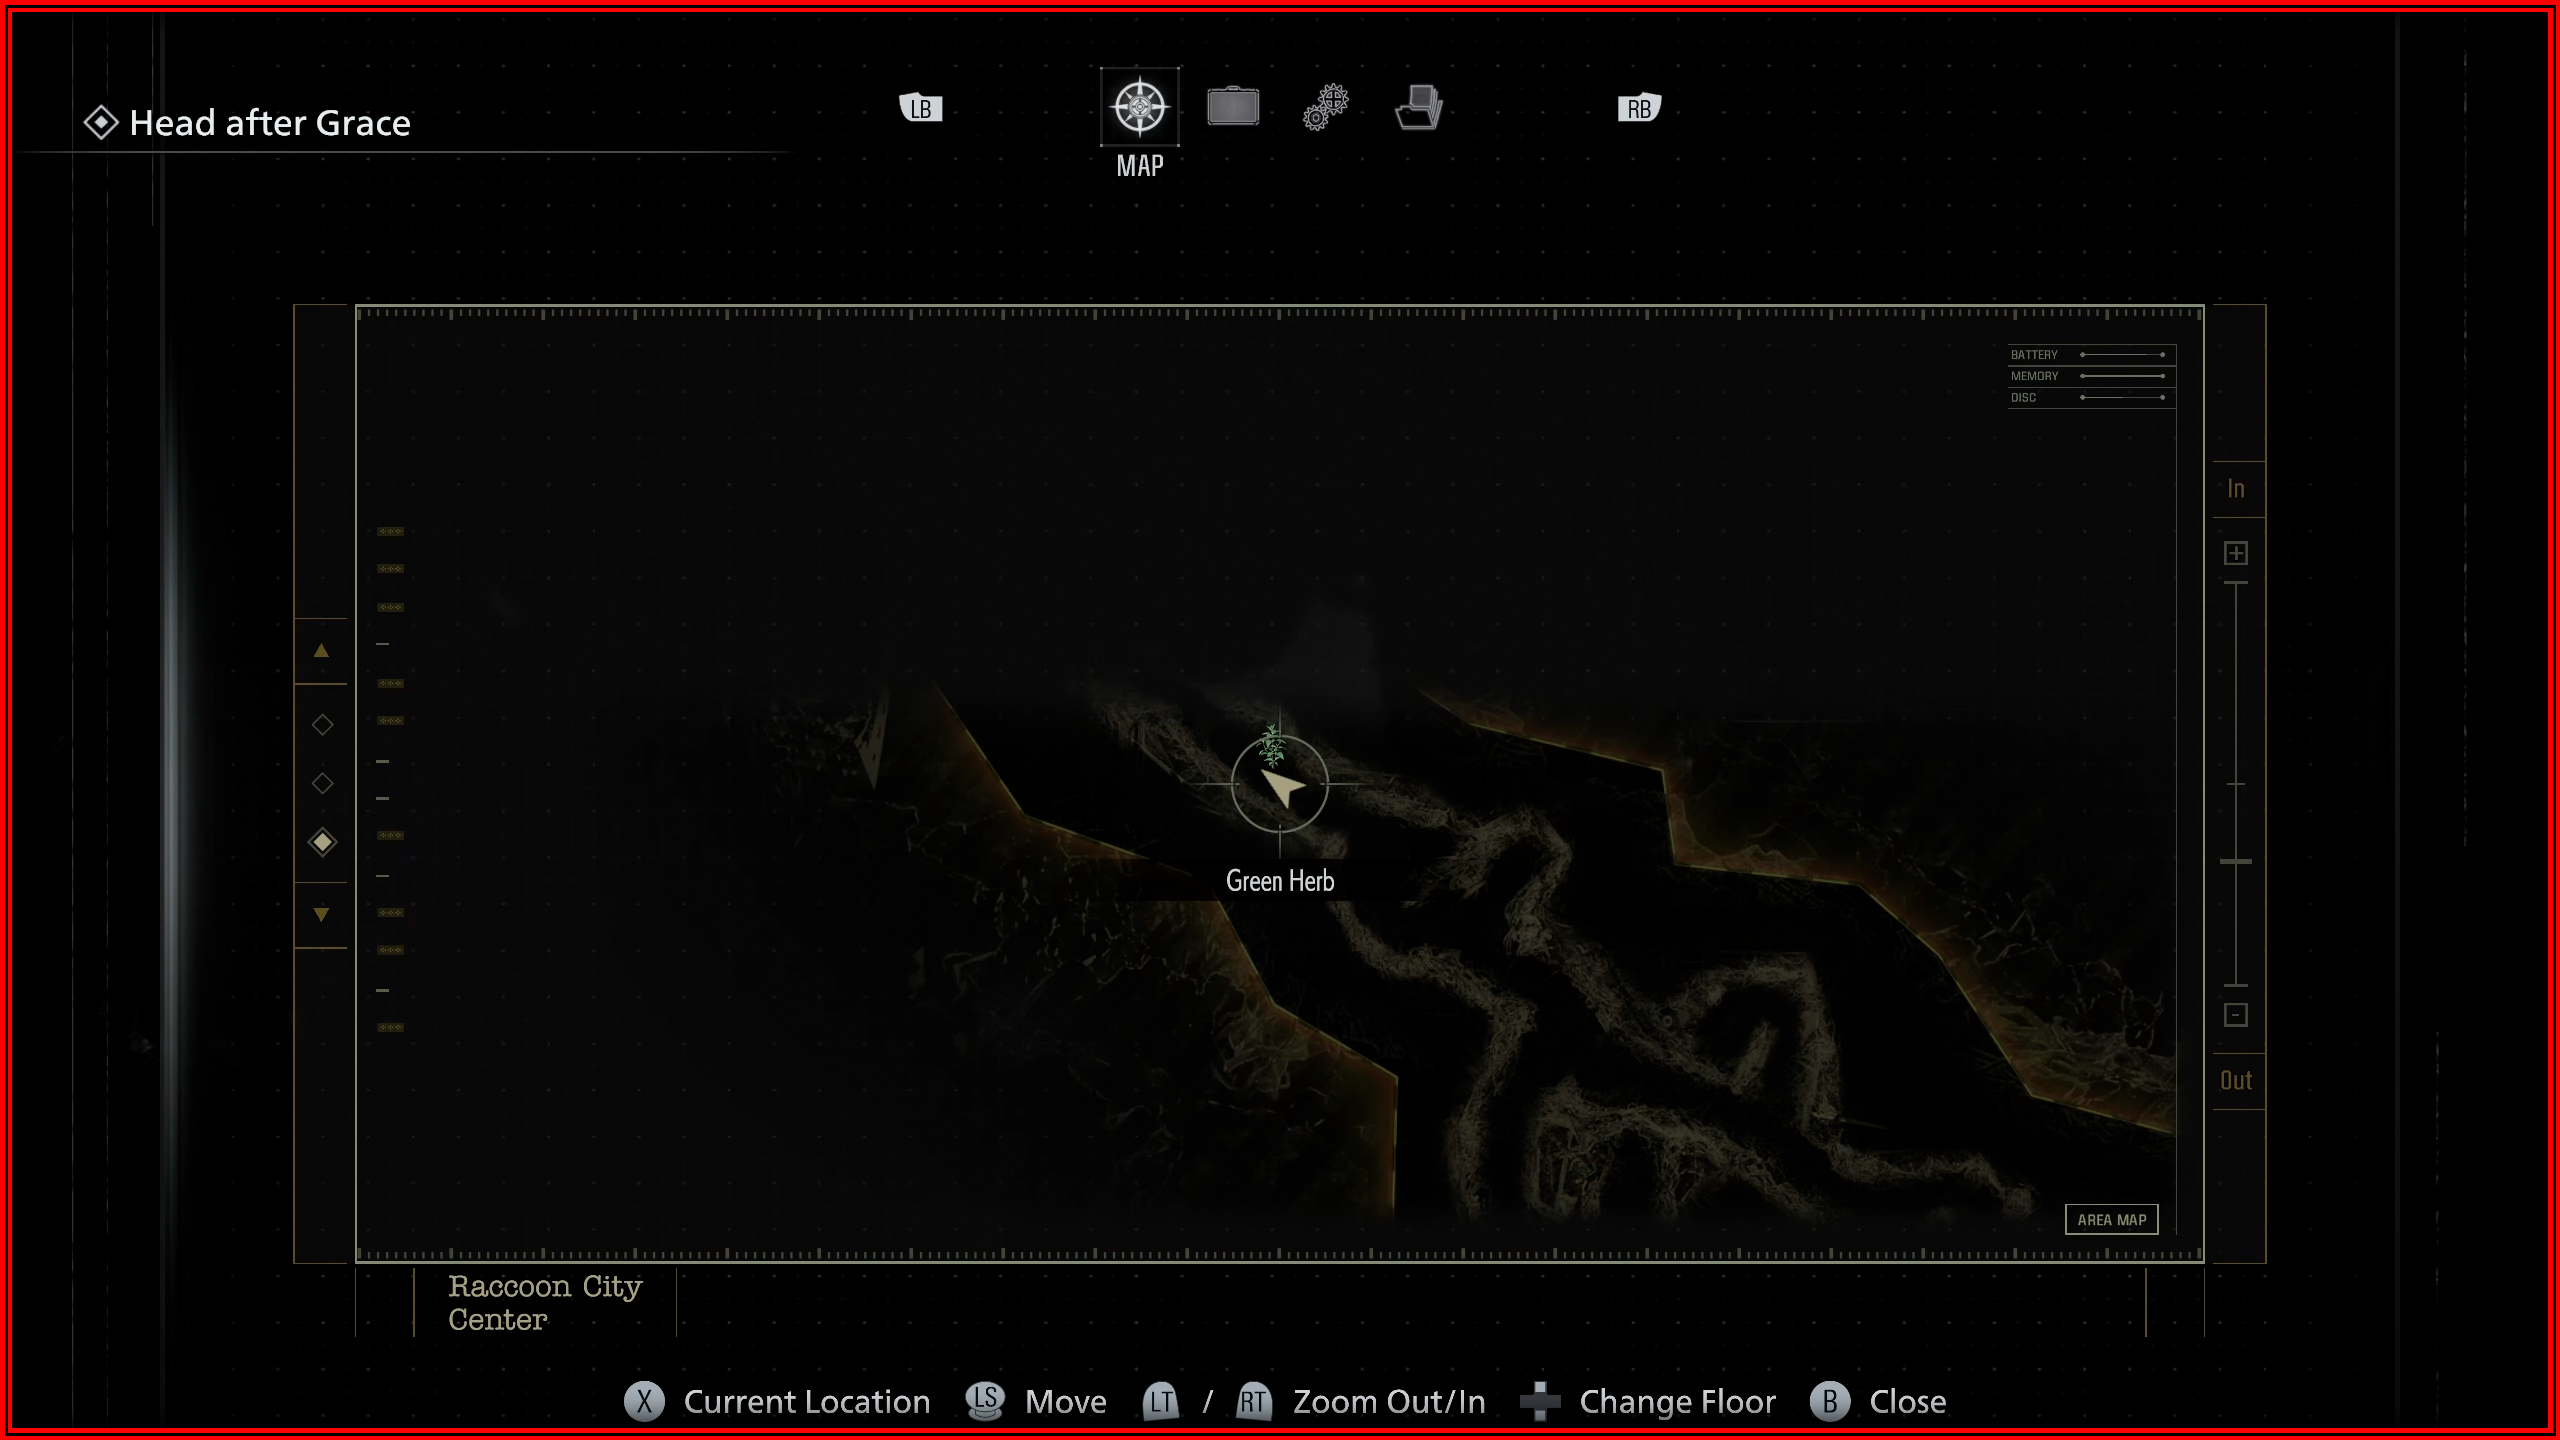

Credit Where Credit Is Due

After obtaining the Tactical Tracker in East Raccoon City, every enemy you defeat will give you Credits. The count is updated every time you open the Supply Box. The total count carries over across playthroughs so you will obtain it naturally while trying to complete the game.
Bloodlust

After obtaining the Blood Collector, all the blood you collect will count. This carries over across playthroughs and you can also farm it by collecting blood and reloading your save. After finishing the game once, you can see your progress in the Challenges tab in the menu.

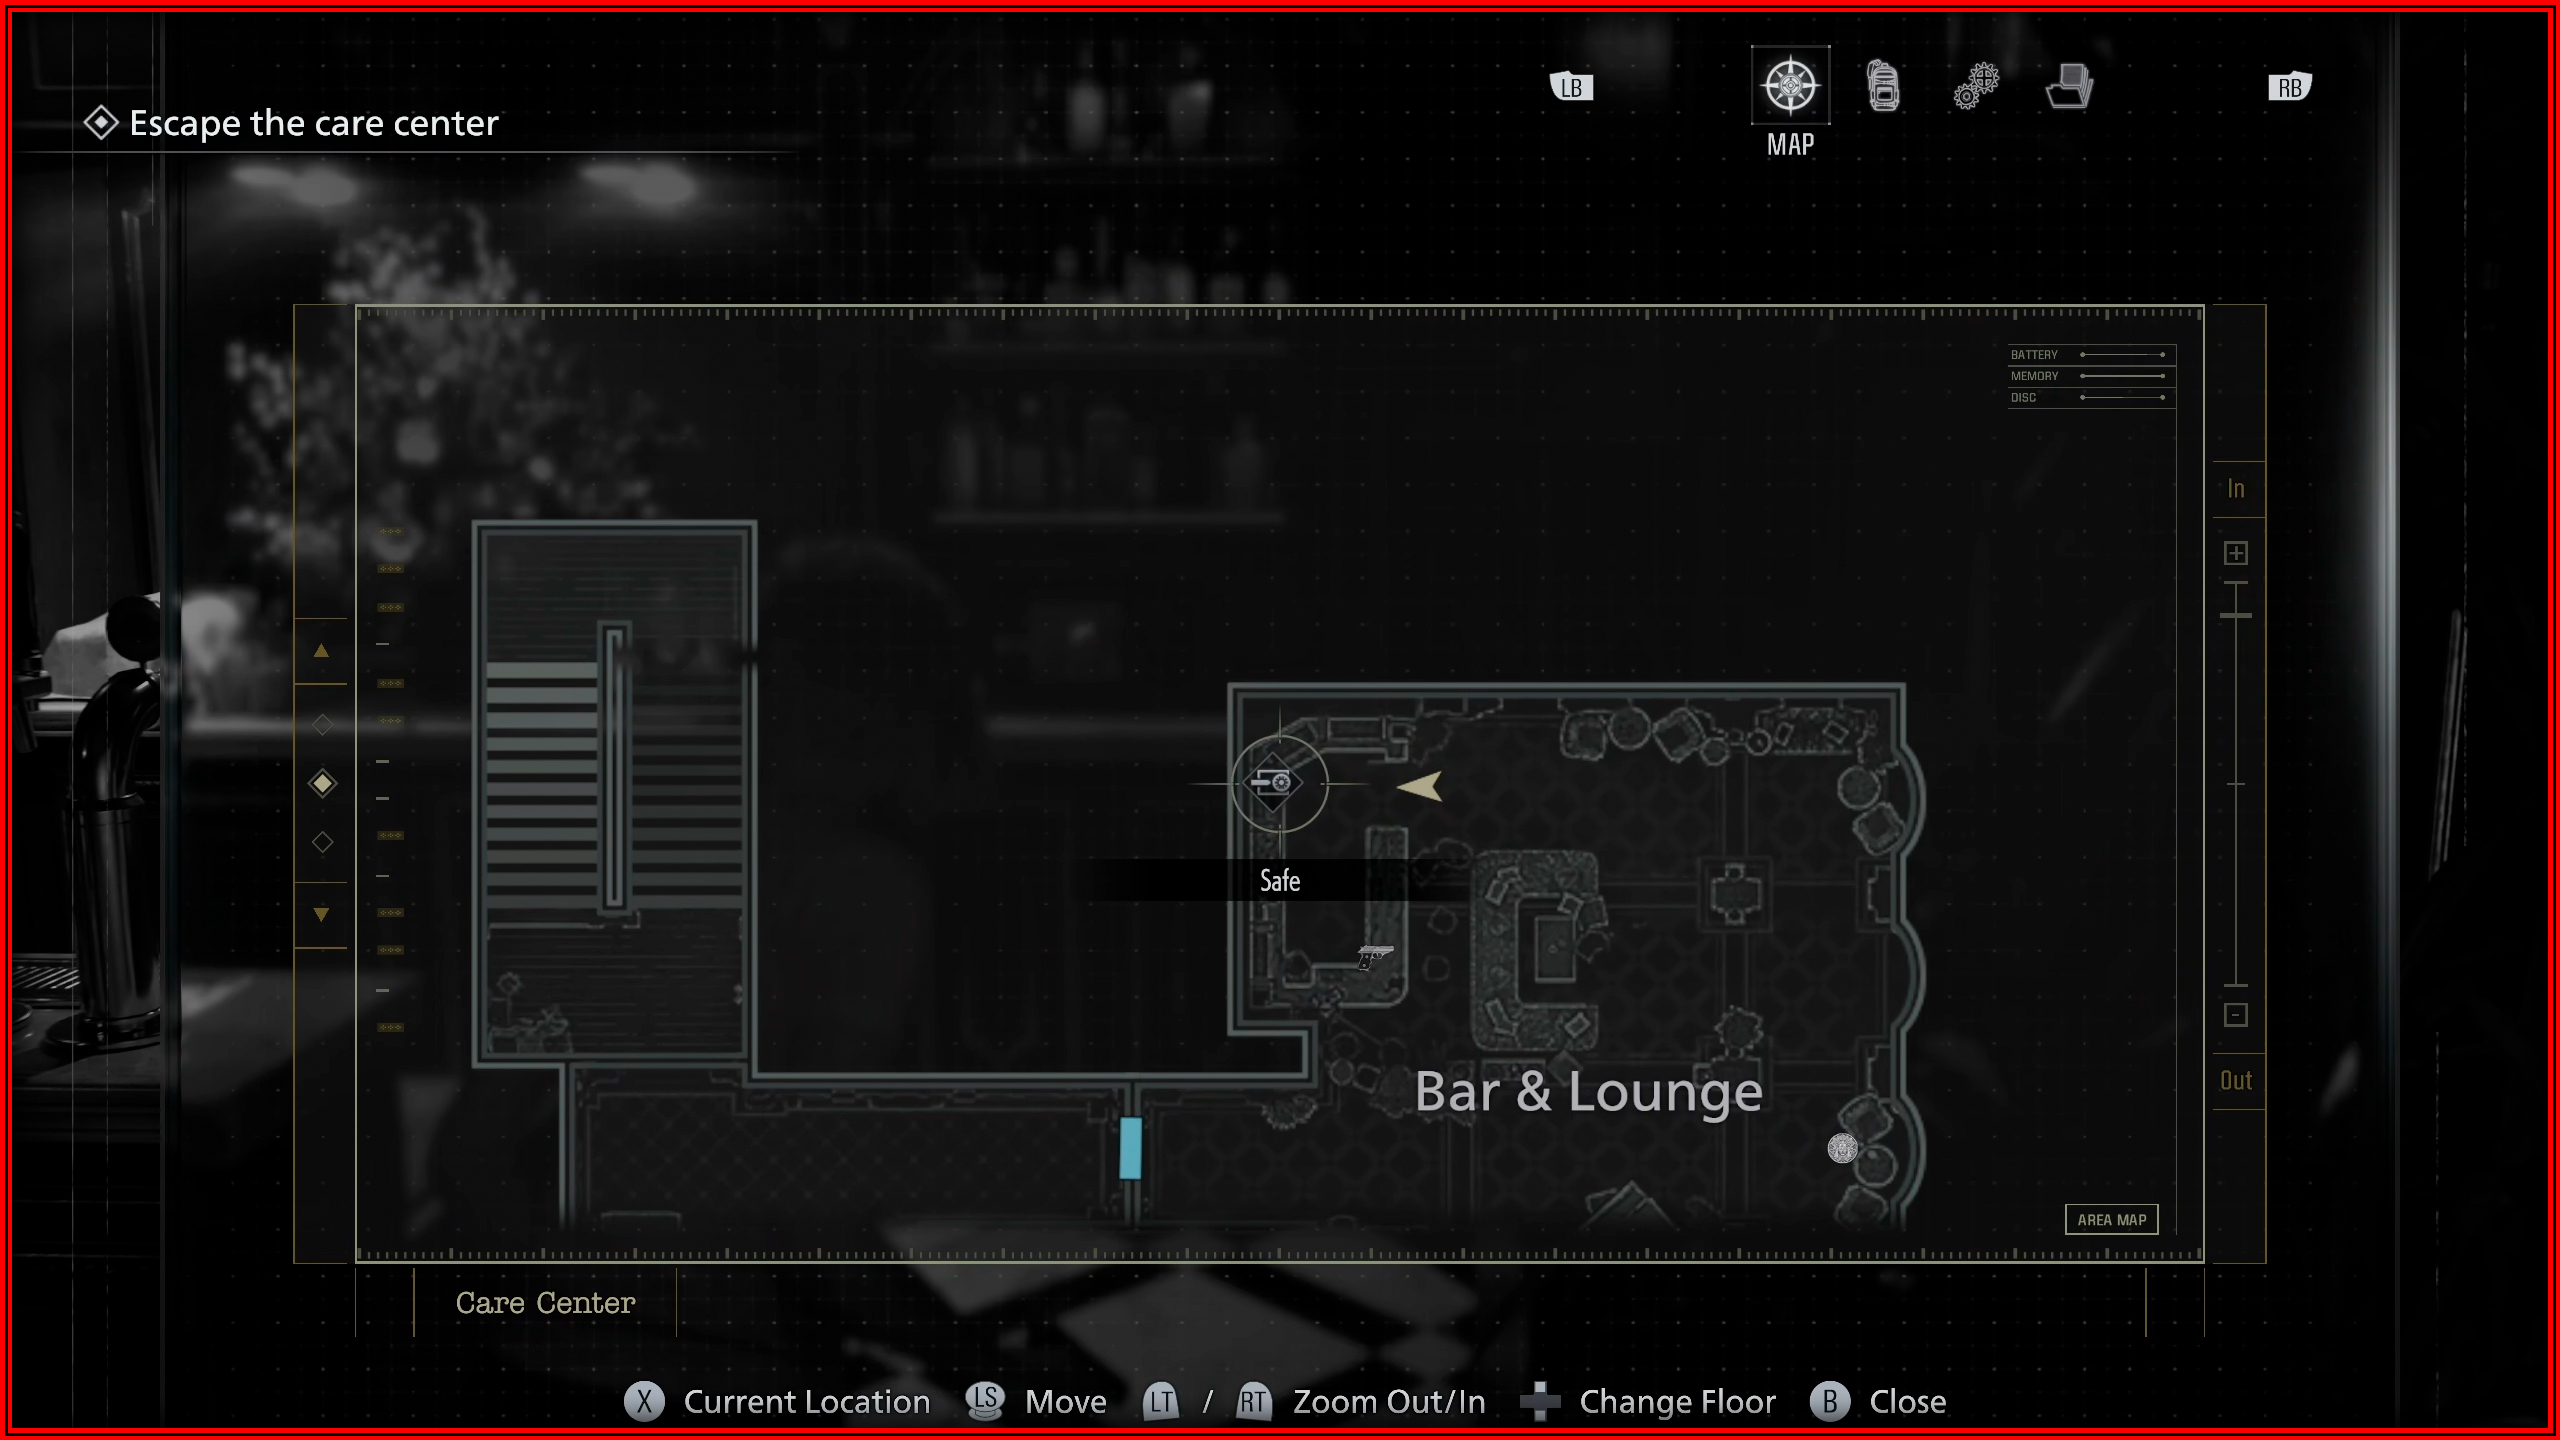
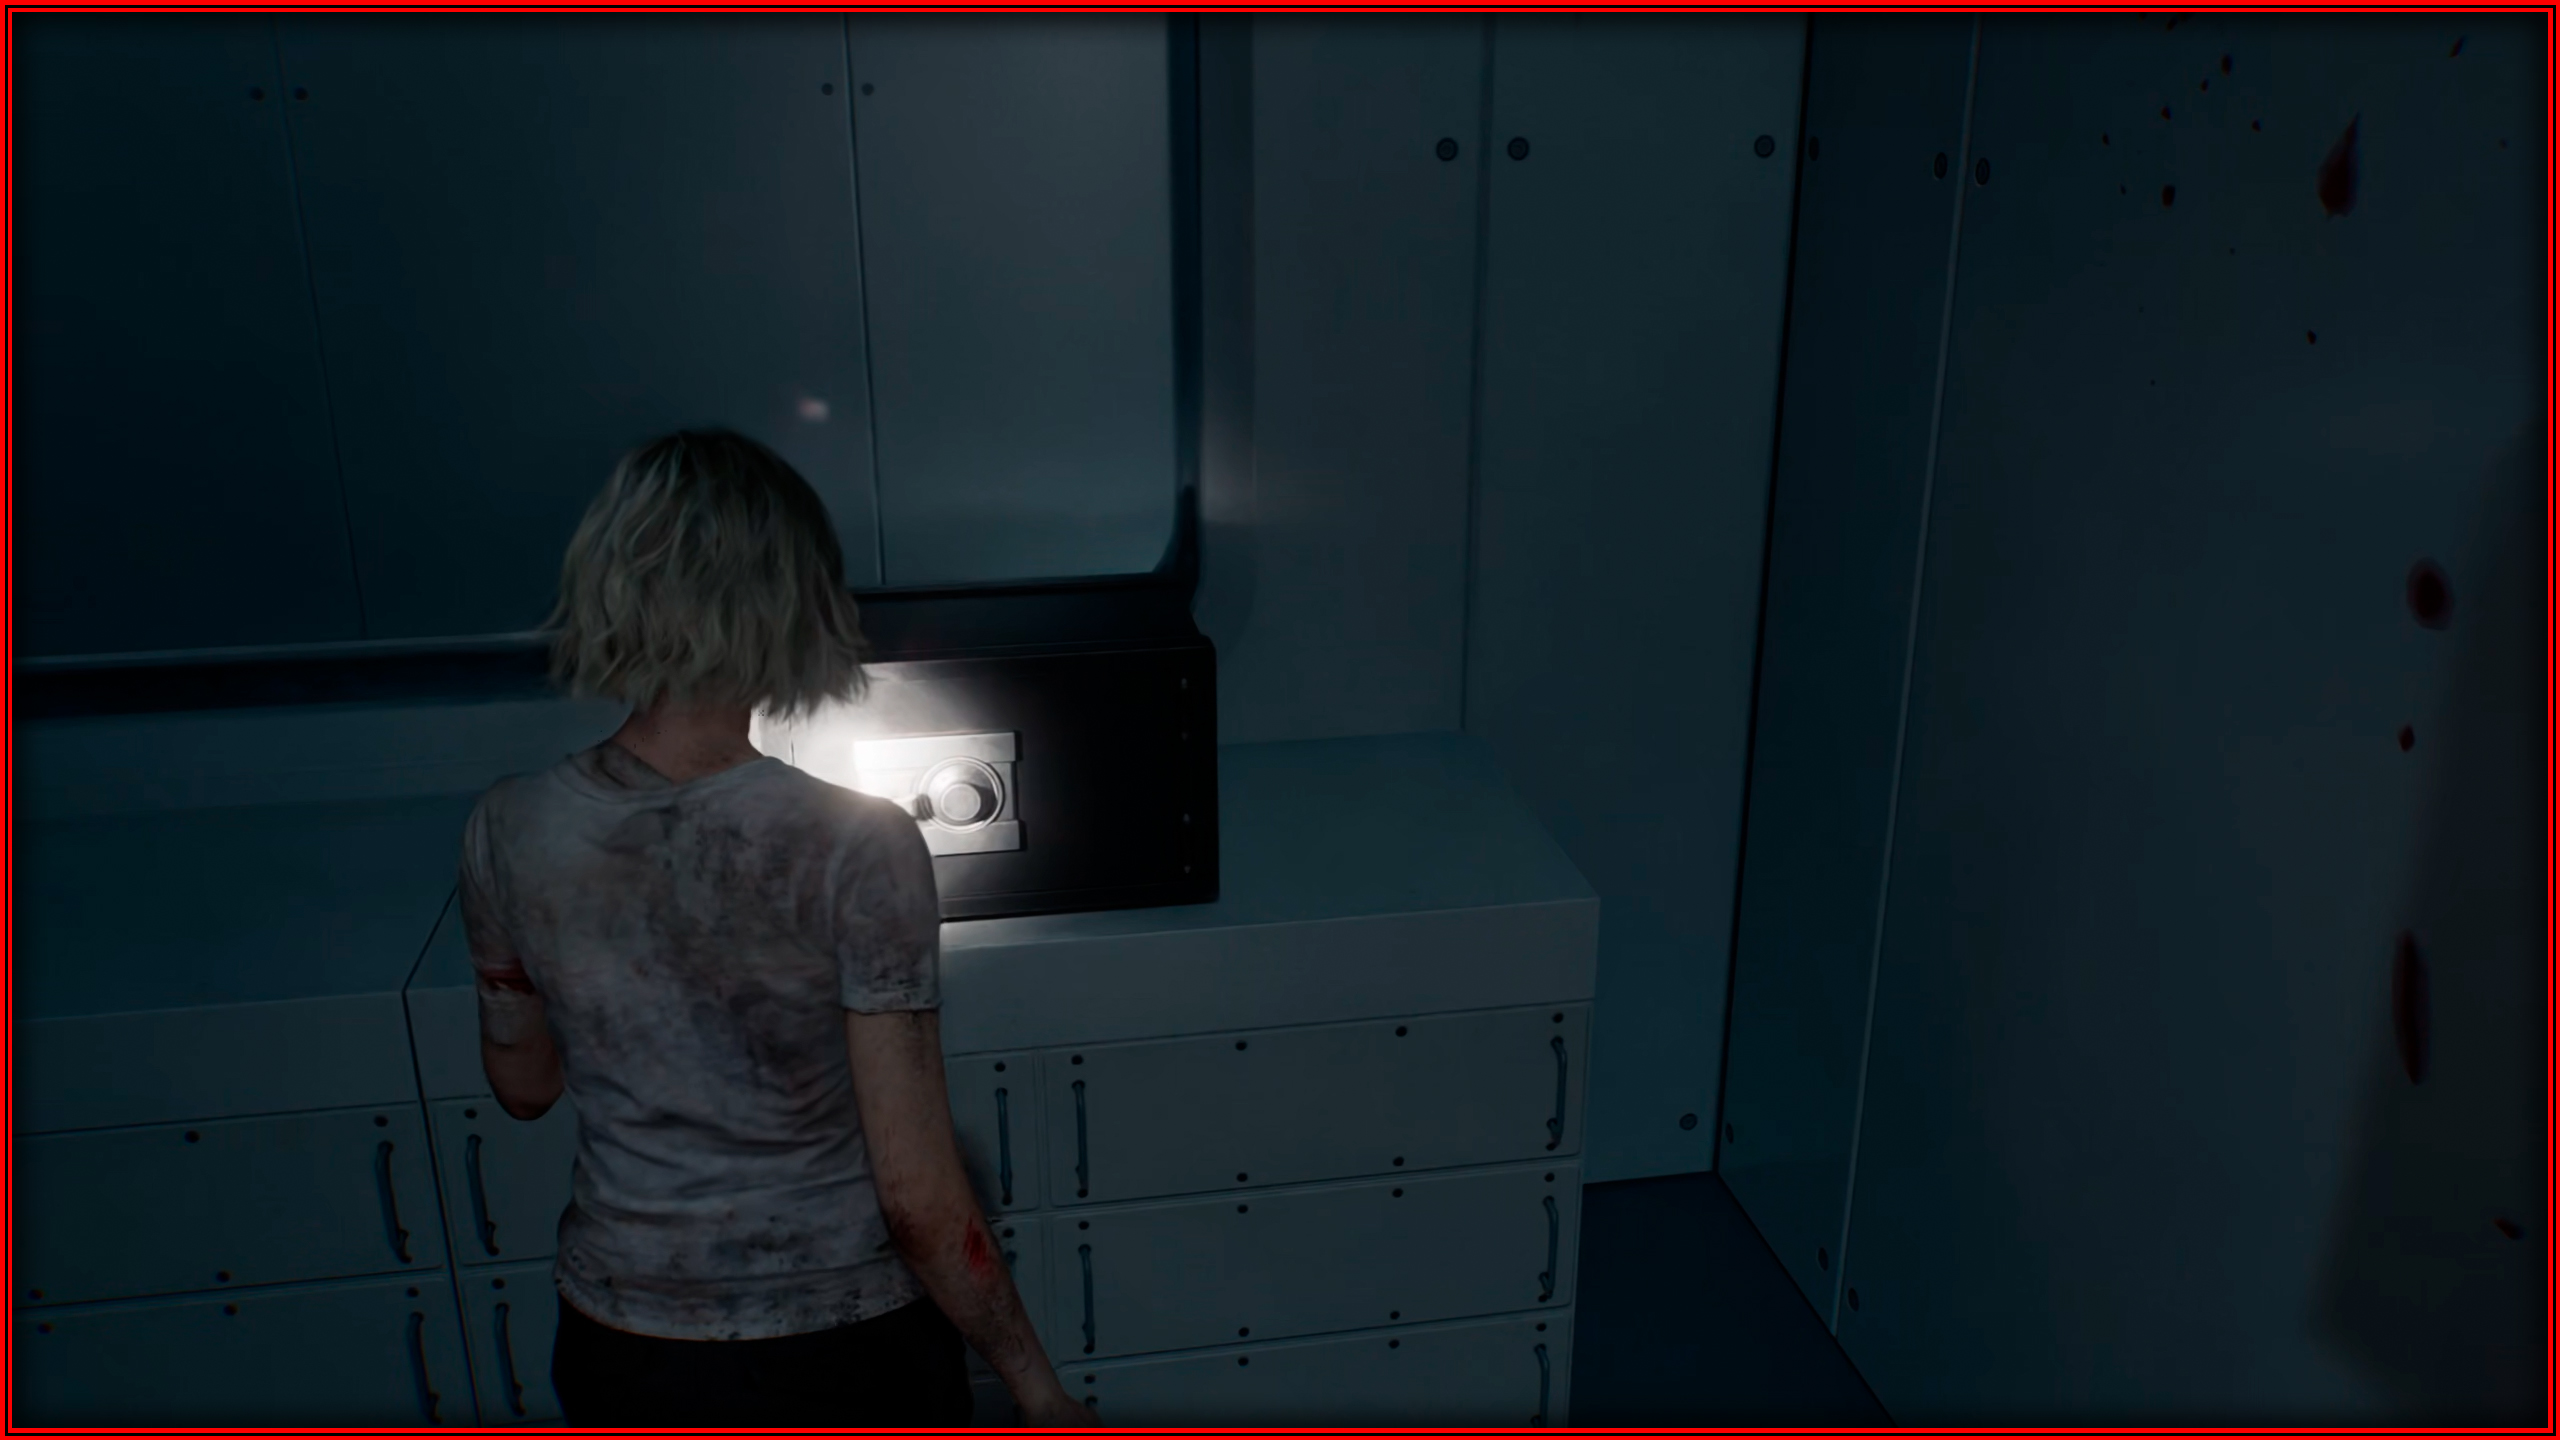
No Safe is Safe

There are 5 Safes throughout the game and all of them are opened by Grace. Below, I will leave the location and combination for each Safe.
Safe 1: Care Center - Bar & Lounge
Casual Difficulty: Left 10 – Right 80 – Left 30.Insanity Difficulty: Right 20 – Left 50 – Right 30.
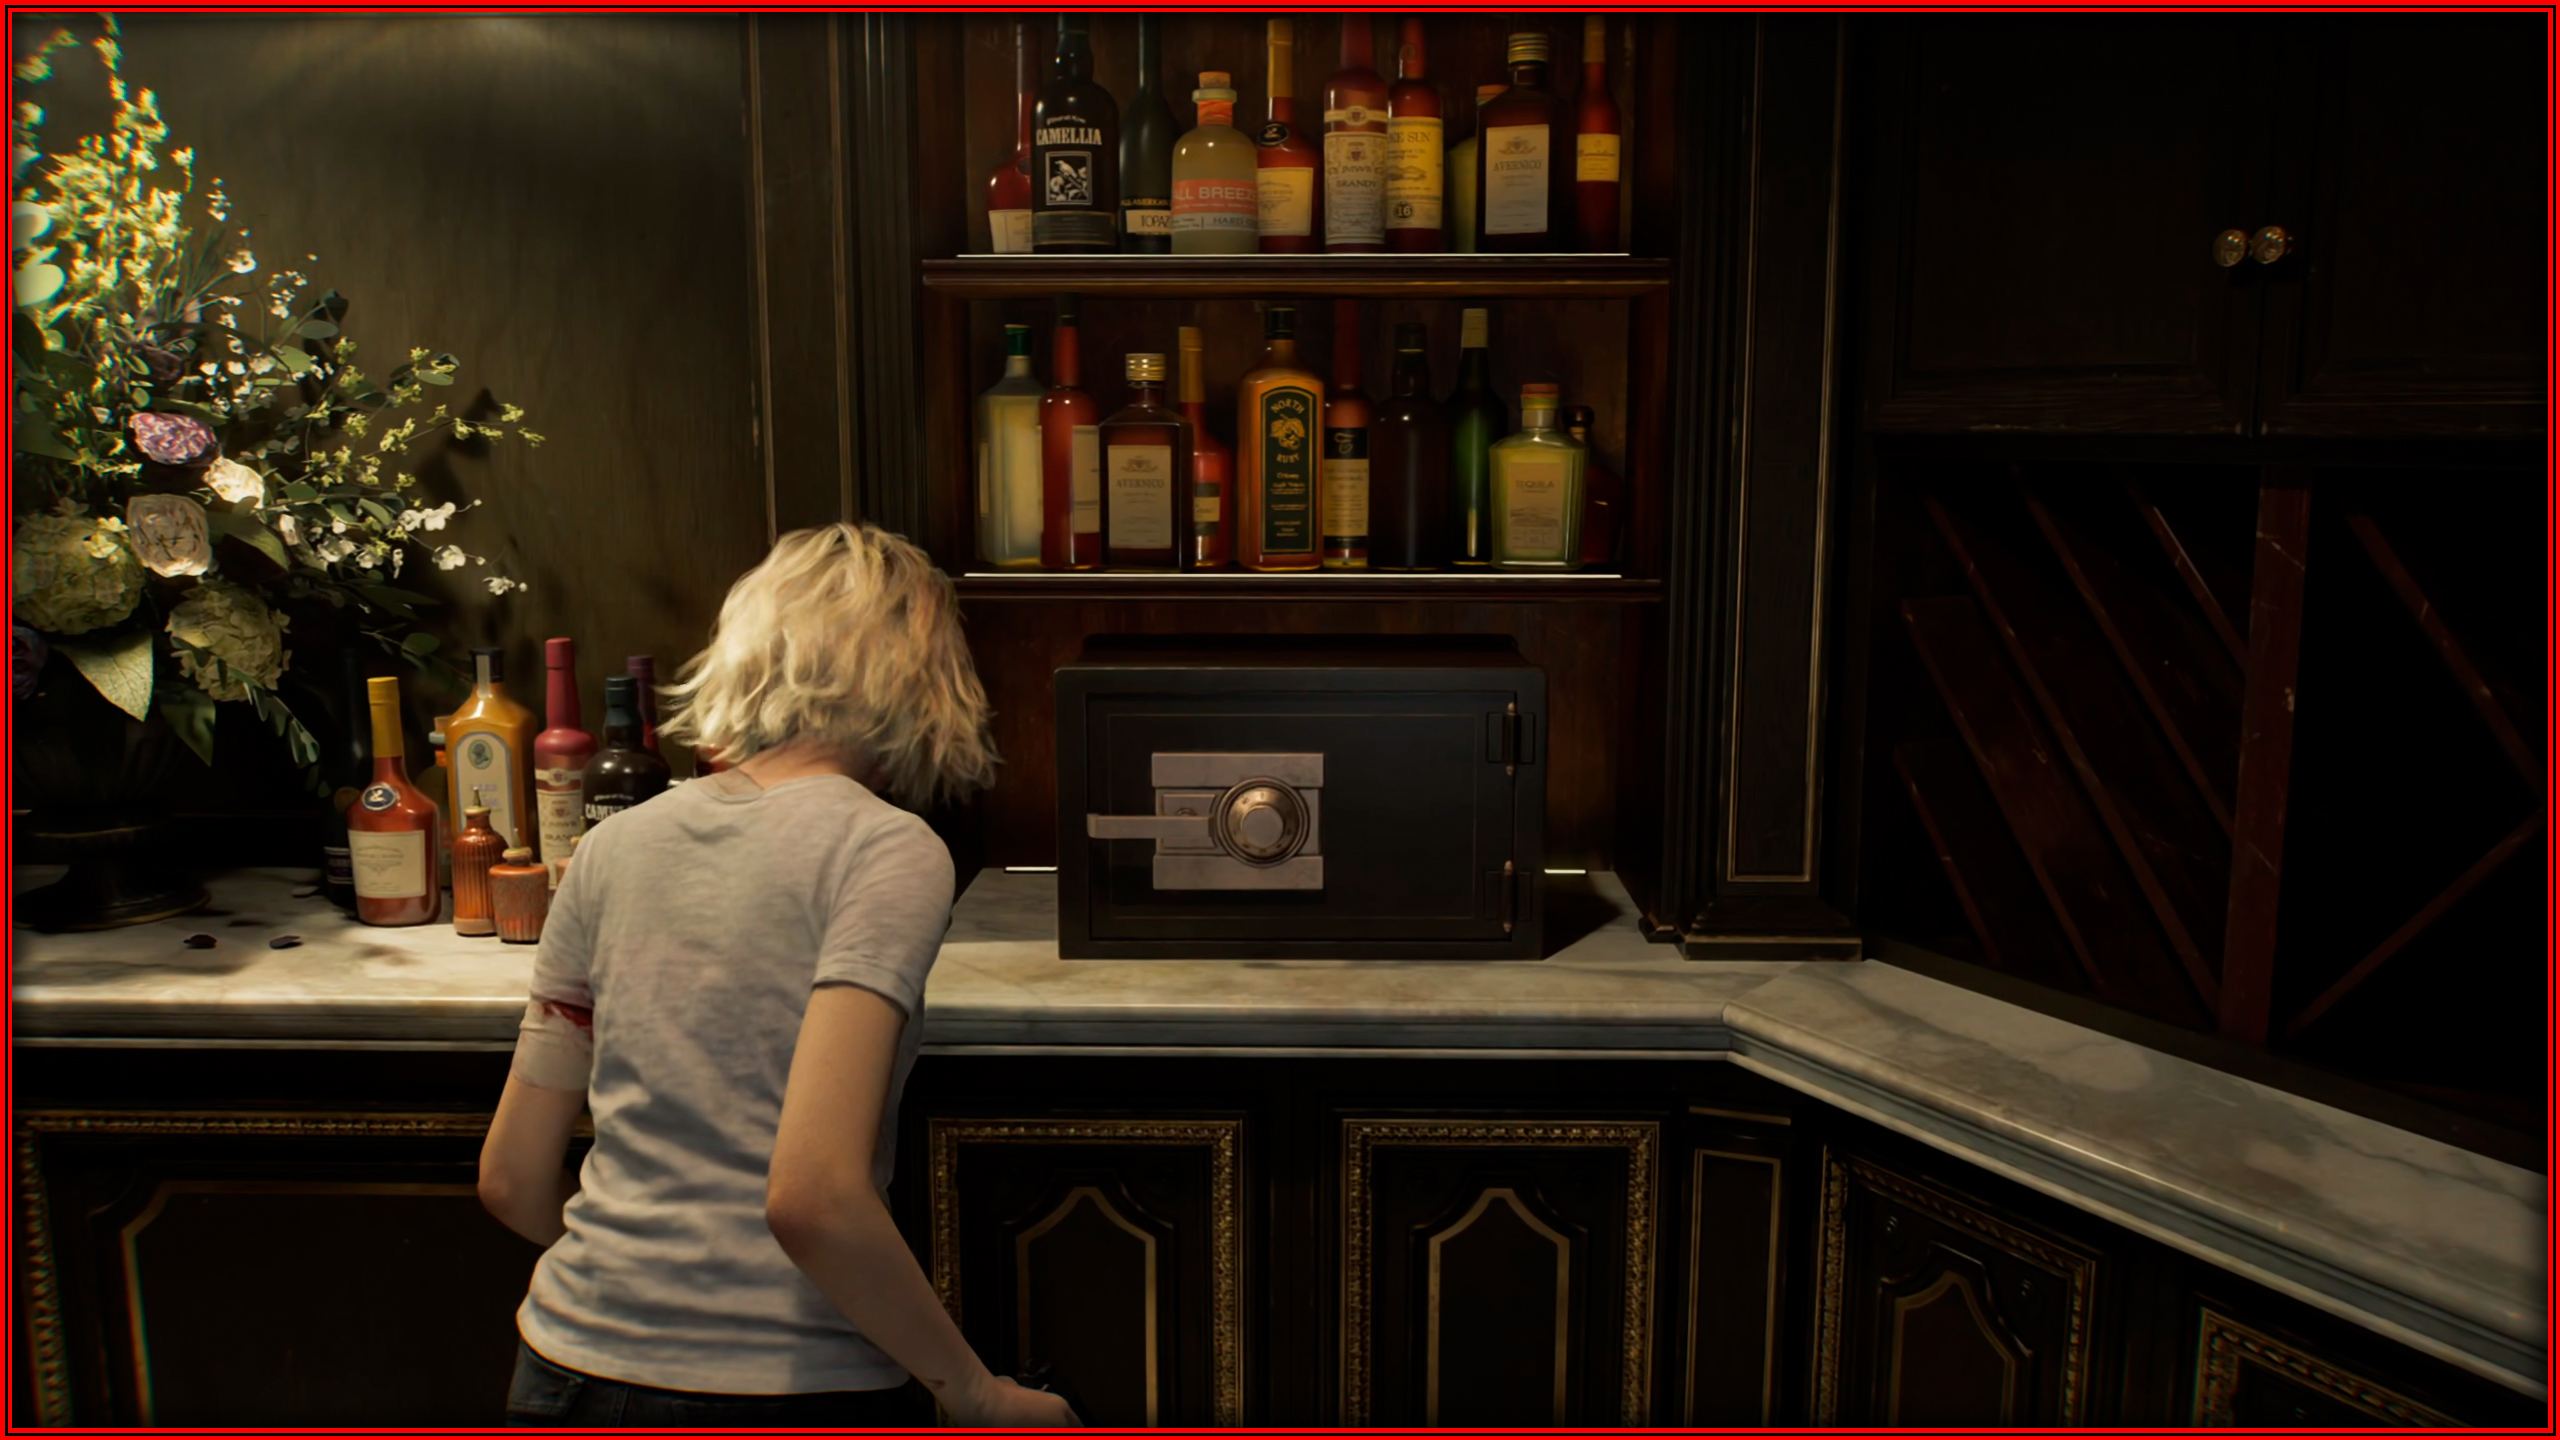
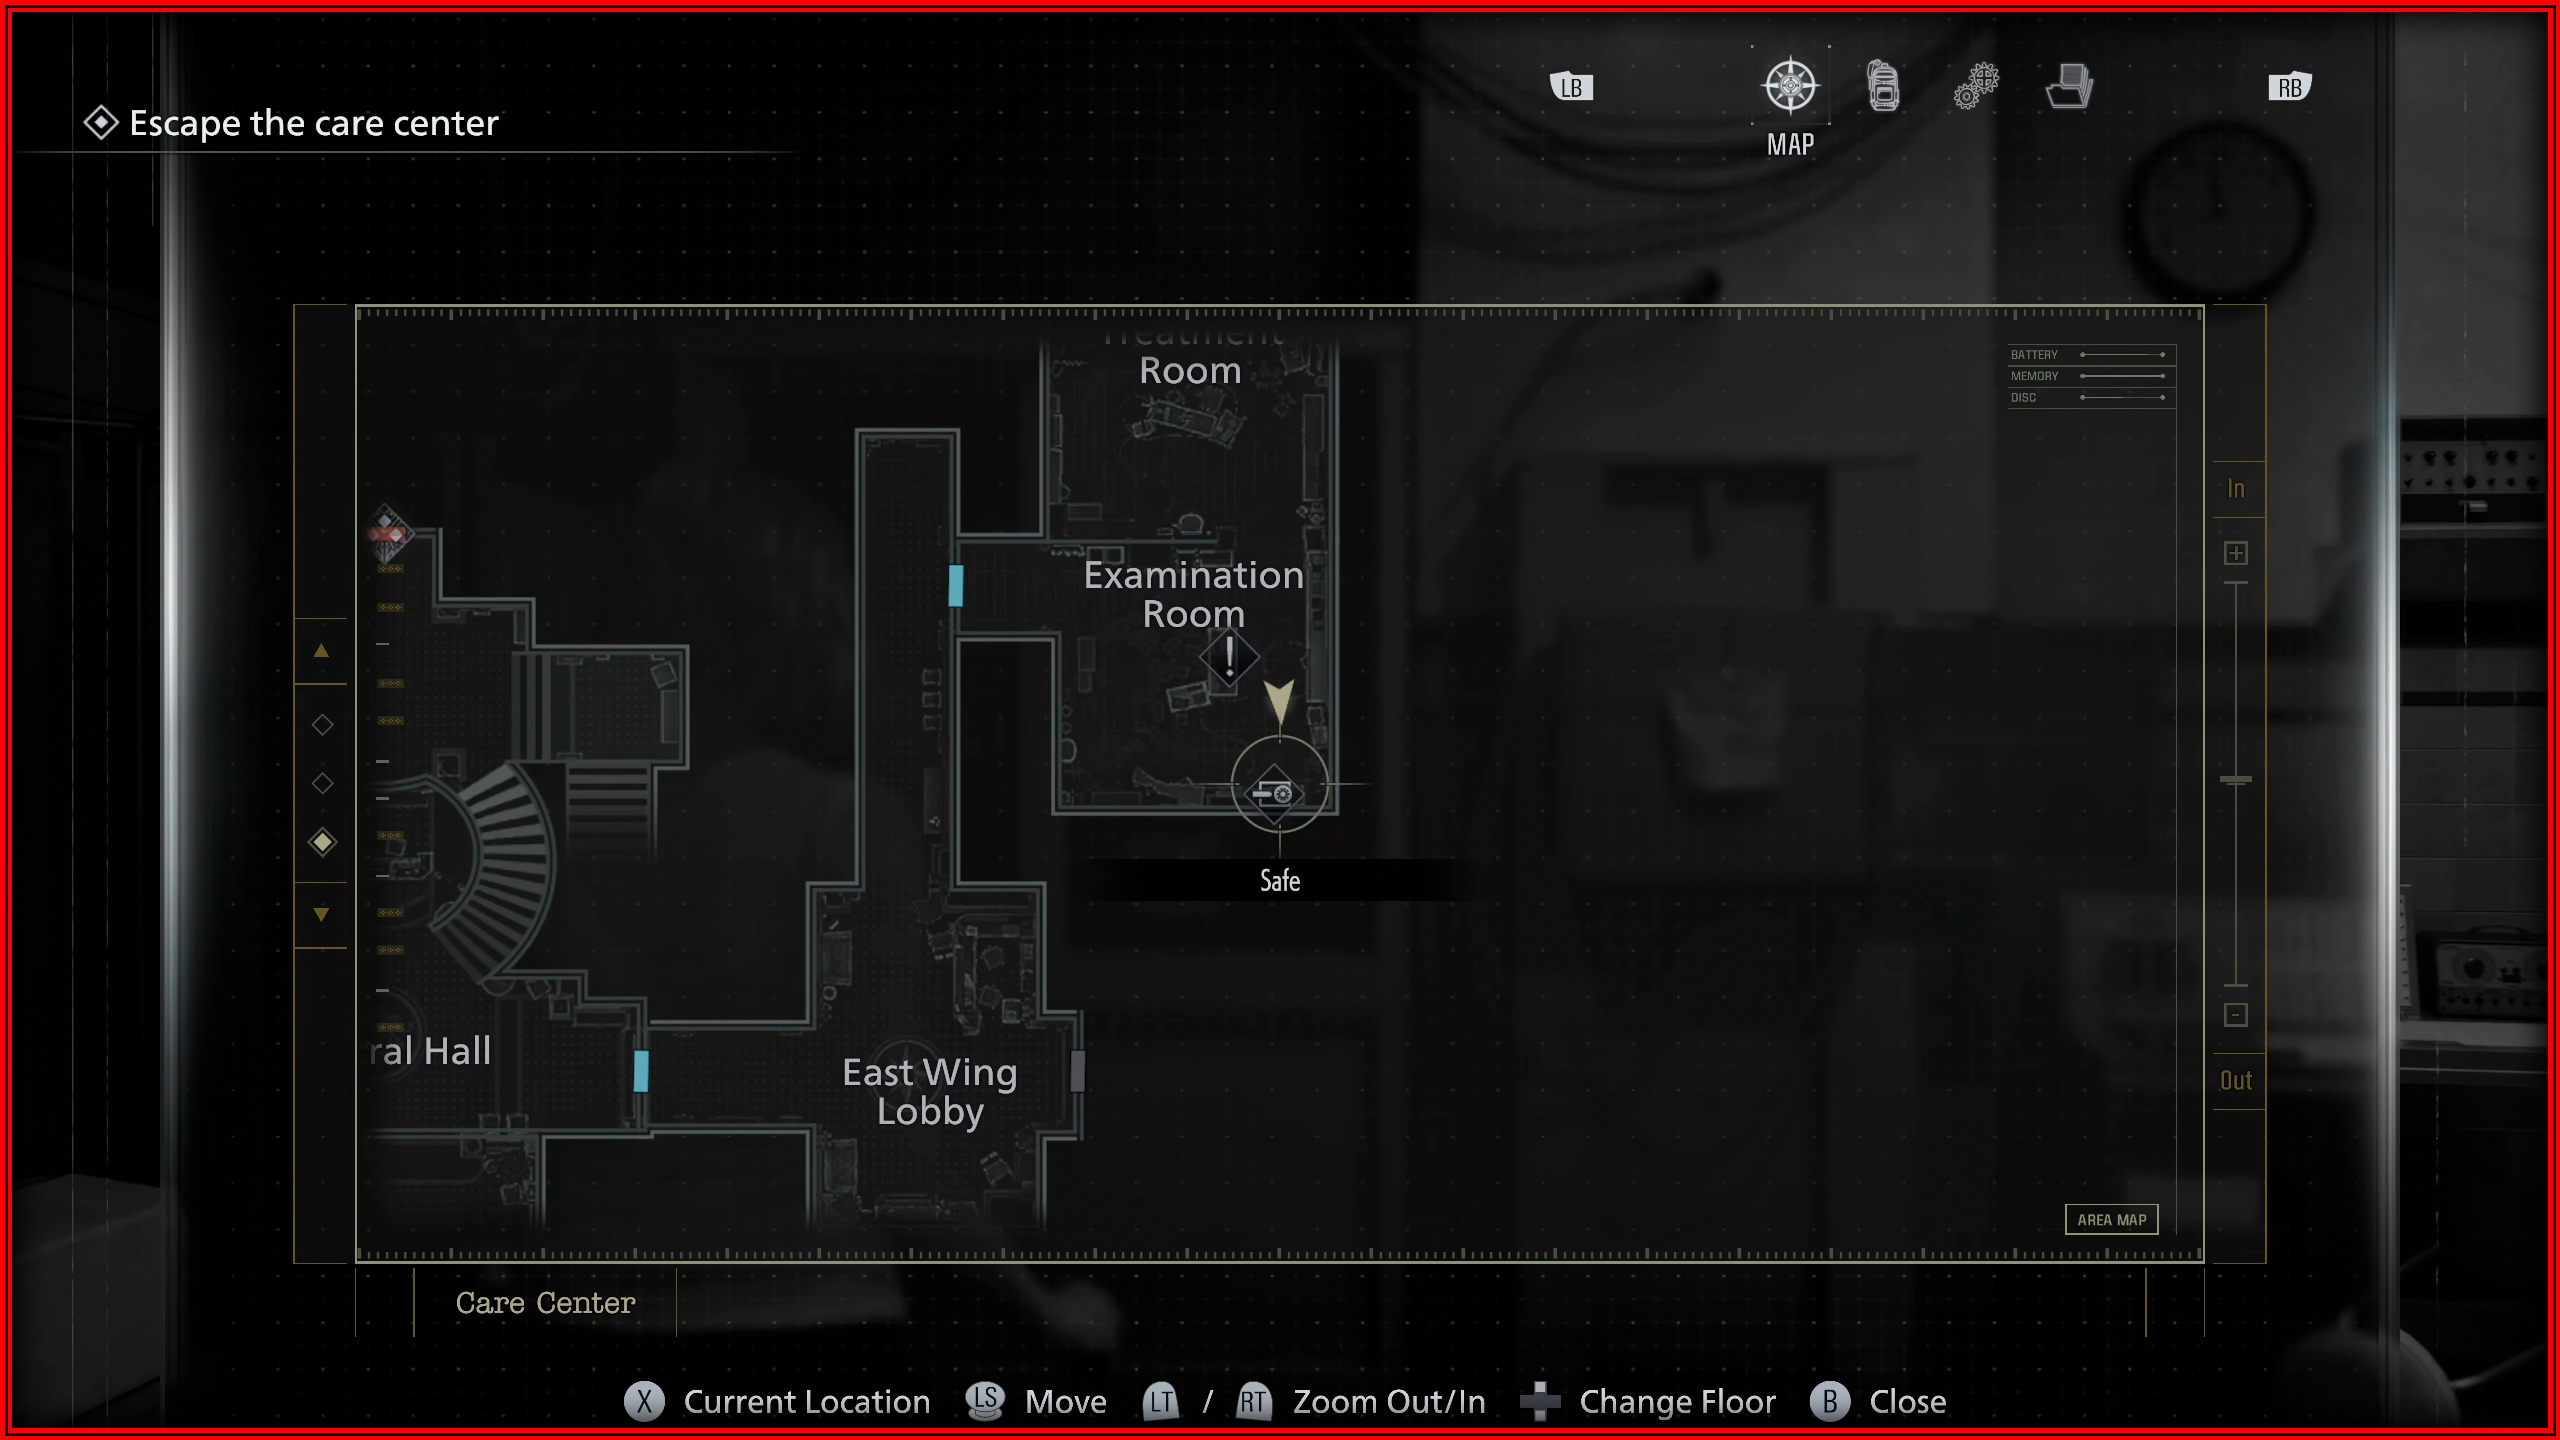
Safe 2: Care Center - Examination Room
Casual Difficulty: Right 30 – Left 10 – Right 50.Insanity Difficulty: Left 50 – Right 30 – Left 90.

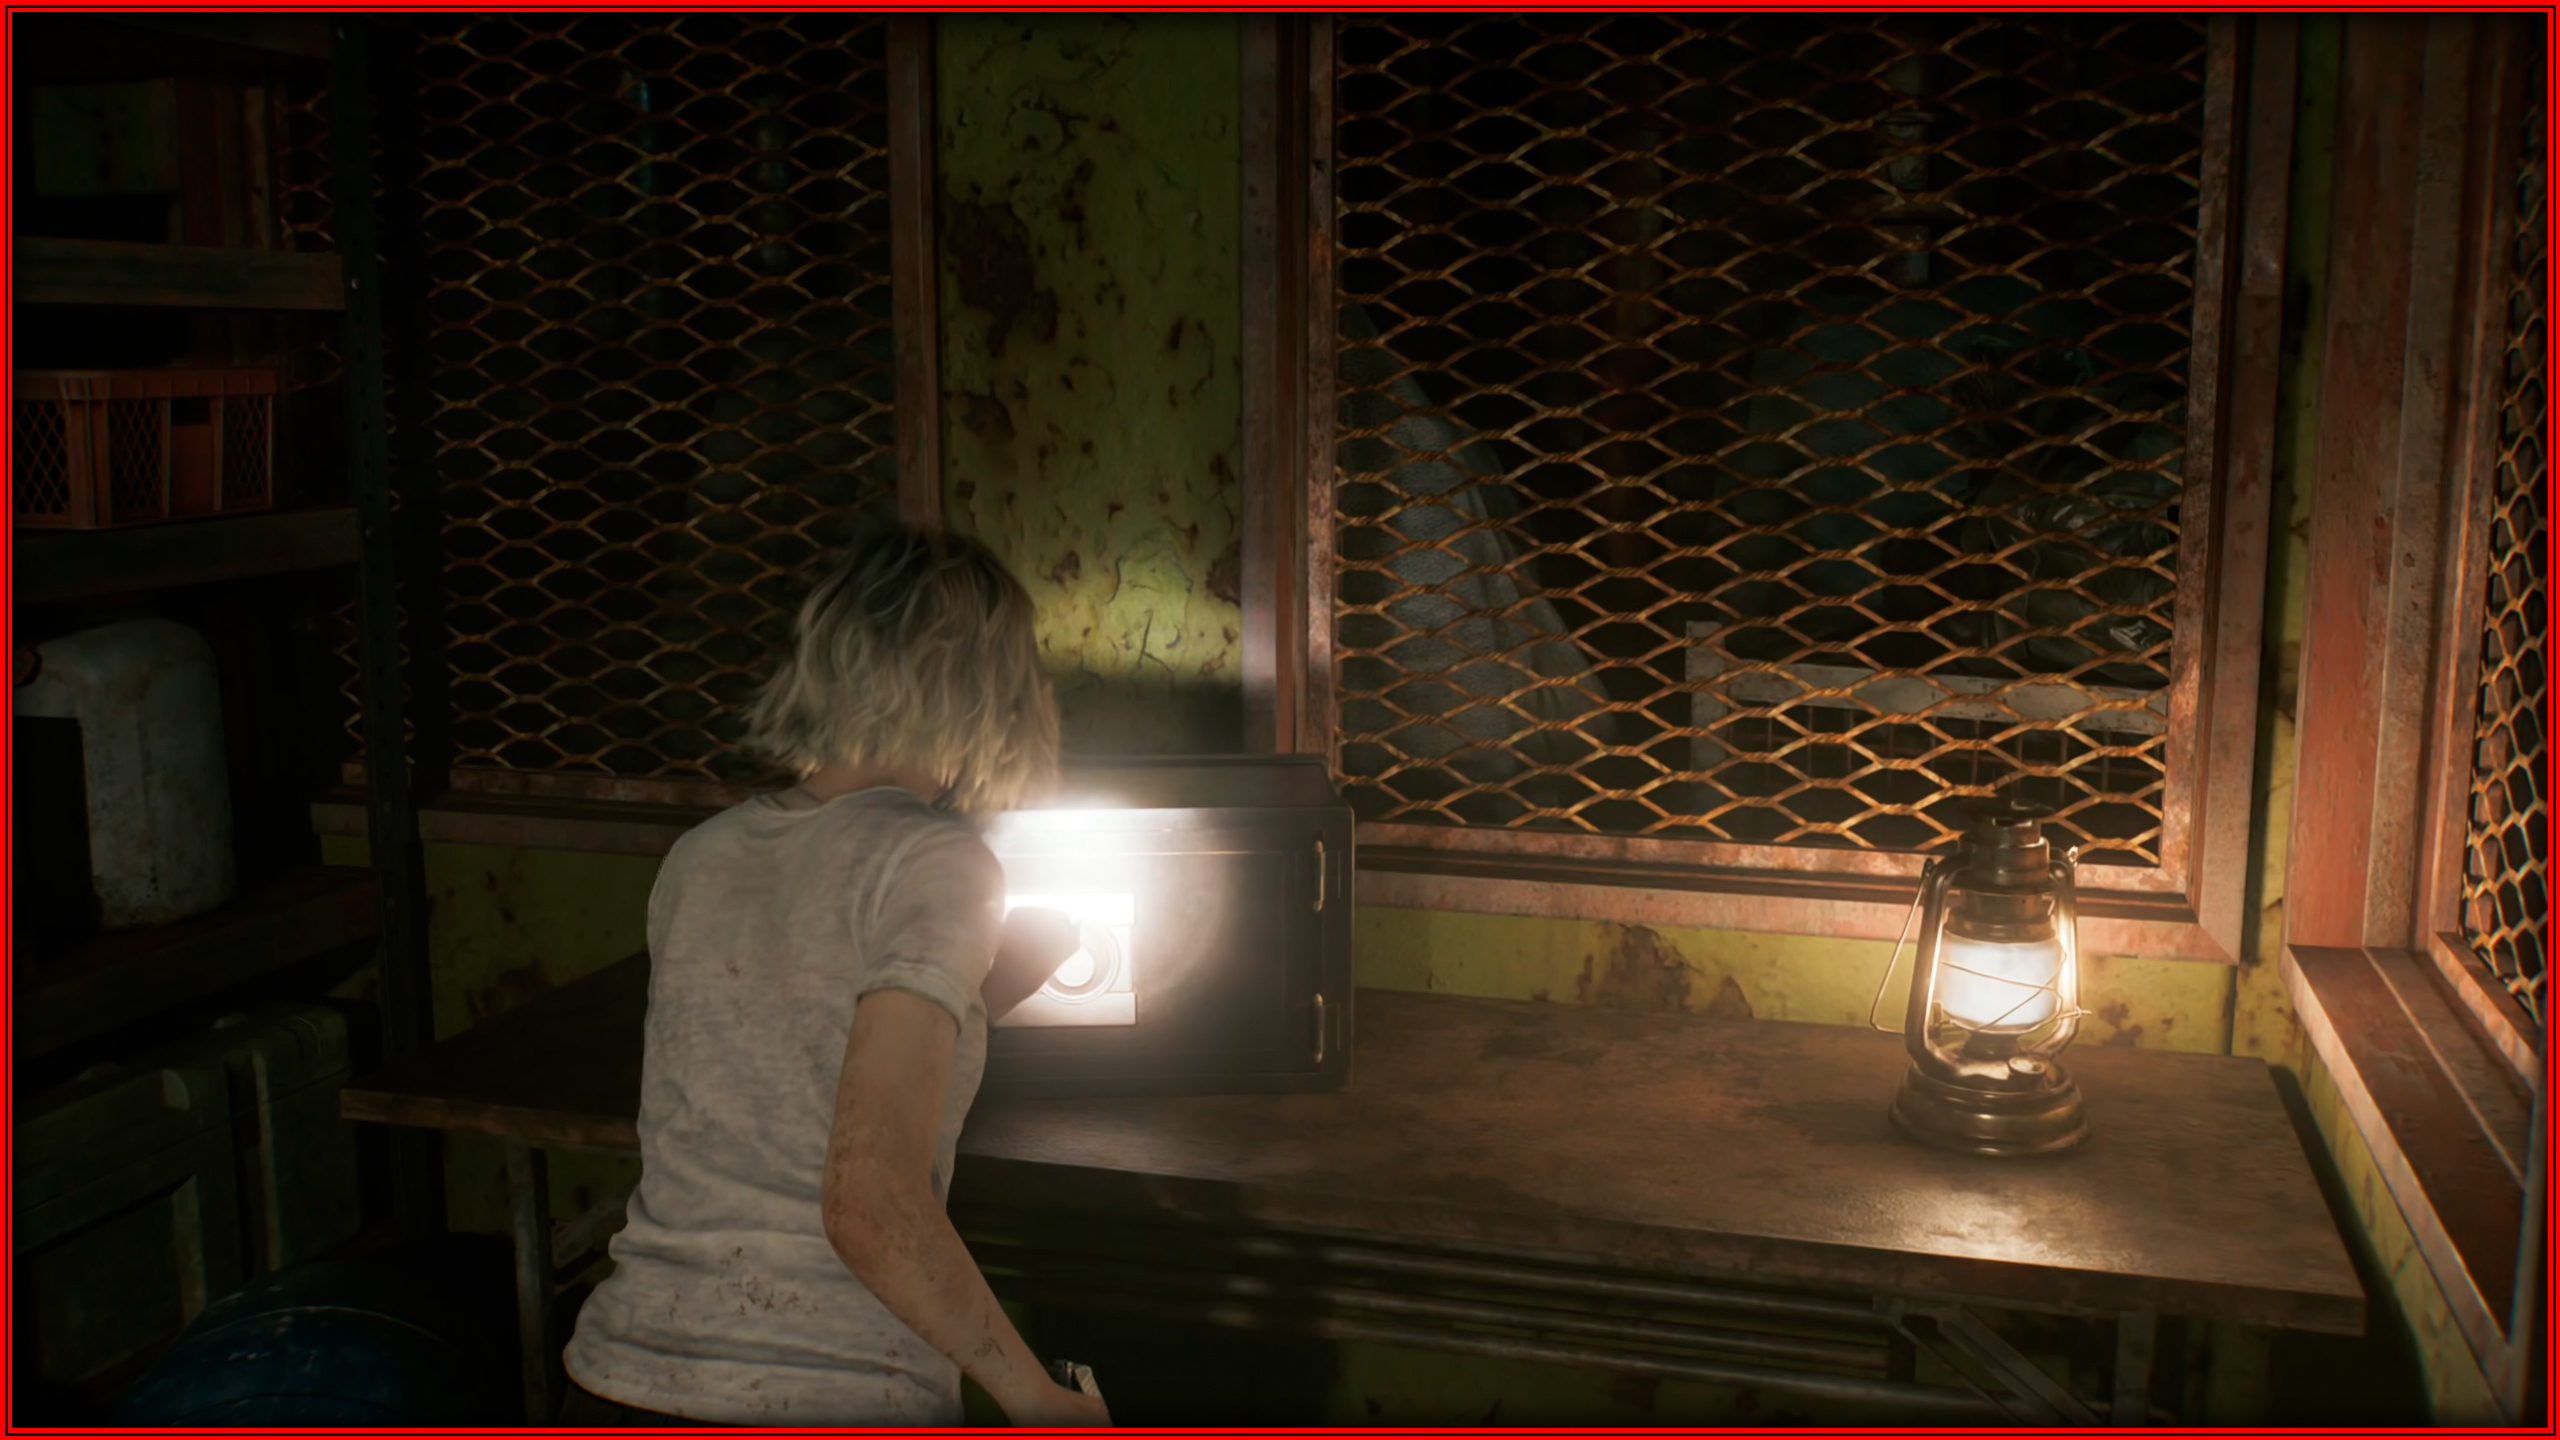
Safe 3: Care Center Basement - Furnace
Casual Difficulty: Right 60 – Left 40 – Right 80.Insanity Difficulty: Left 70 – Right 50 – Left 20.
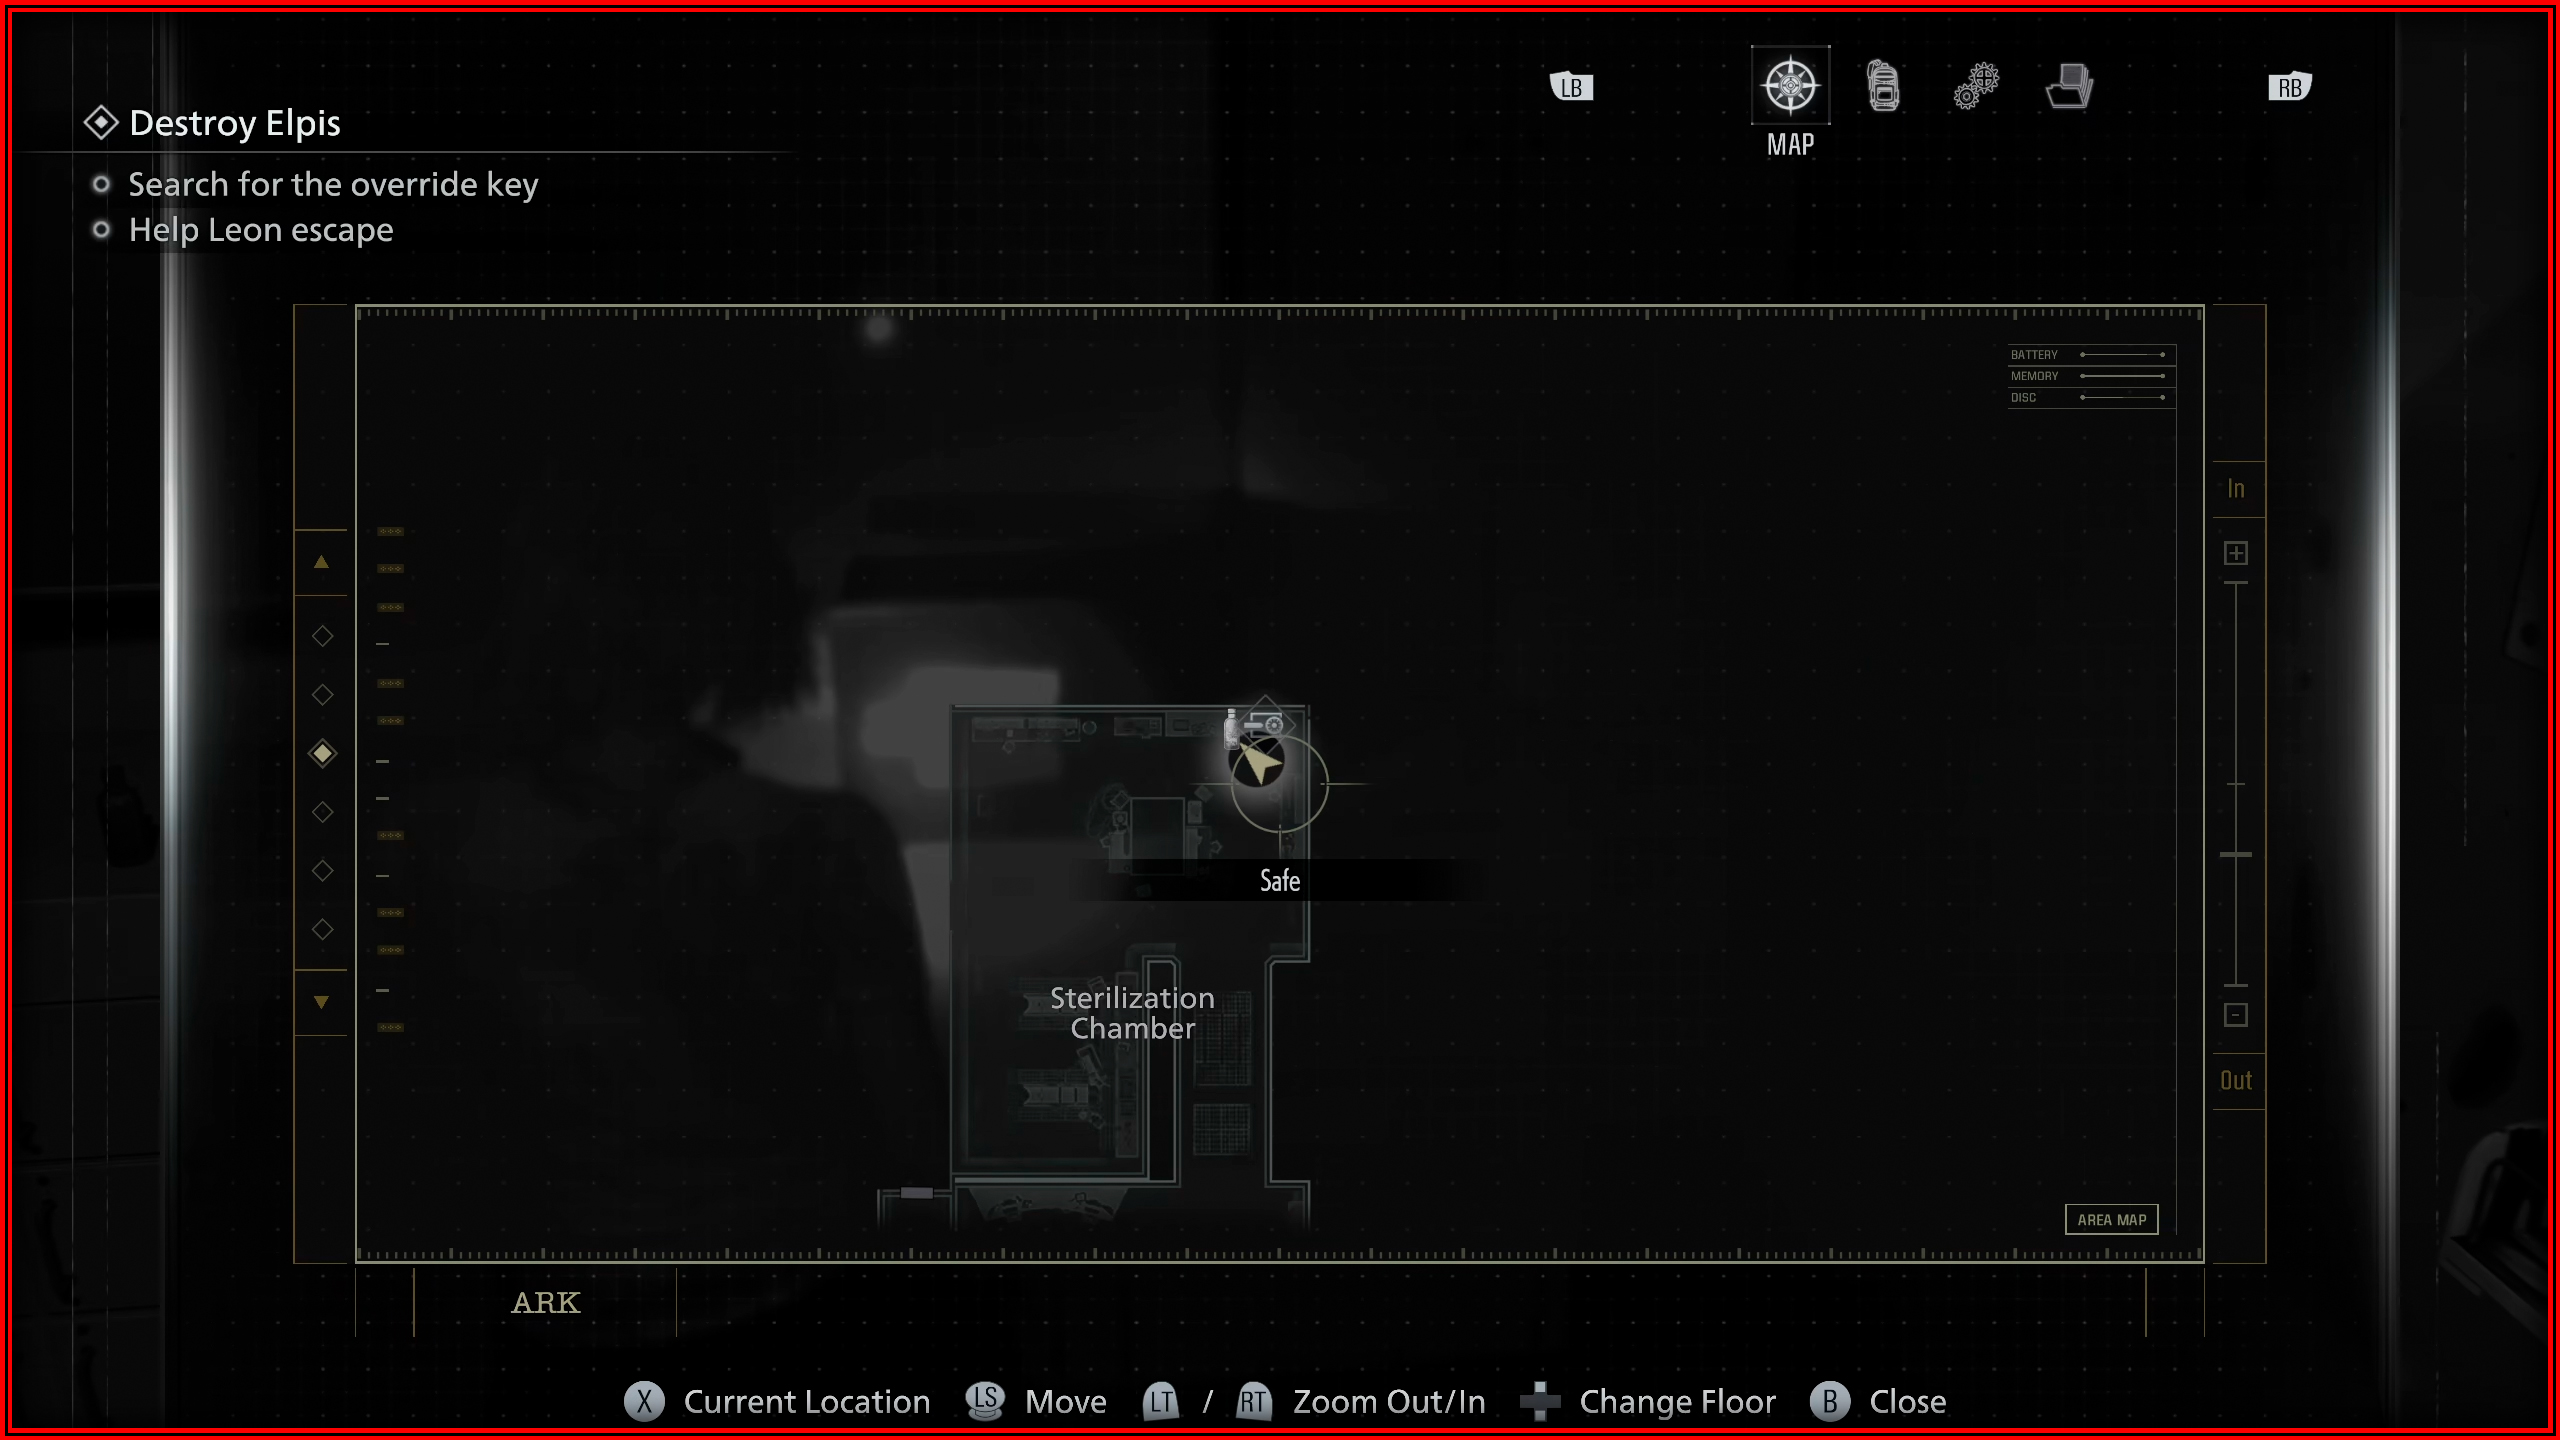
Safe 4: ARK - Sterilization Chamber
Casual Difficulty: Right 10 – Left 90 – Right 20.Insanity Difficulty: Left 80 – Right 50 – Left 0.
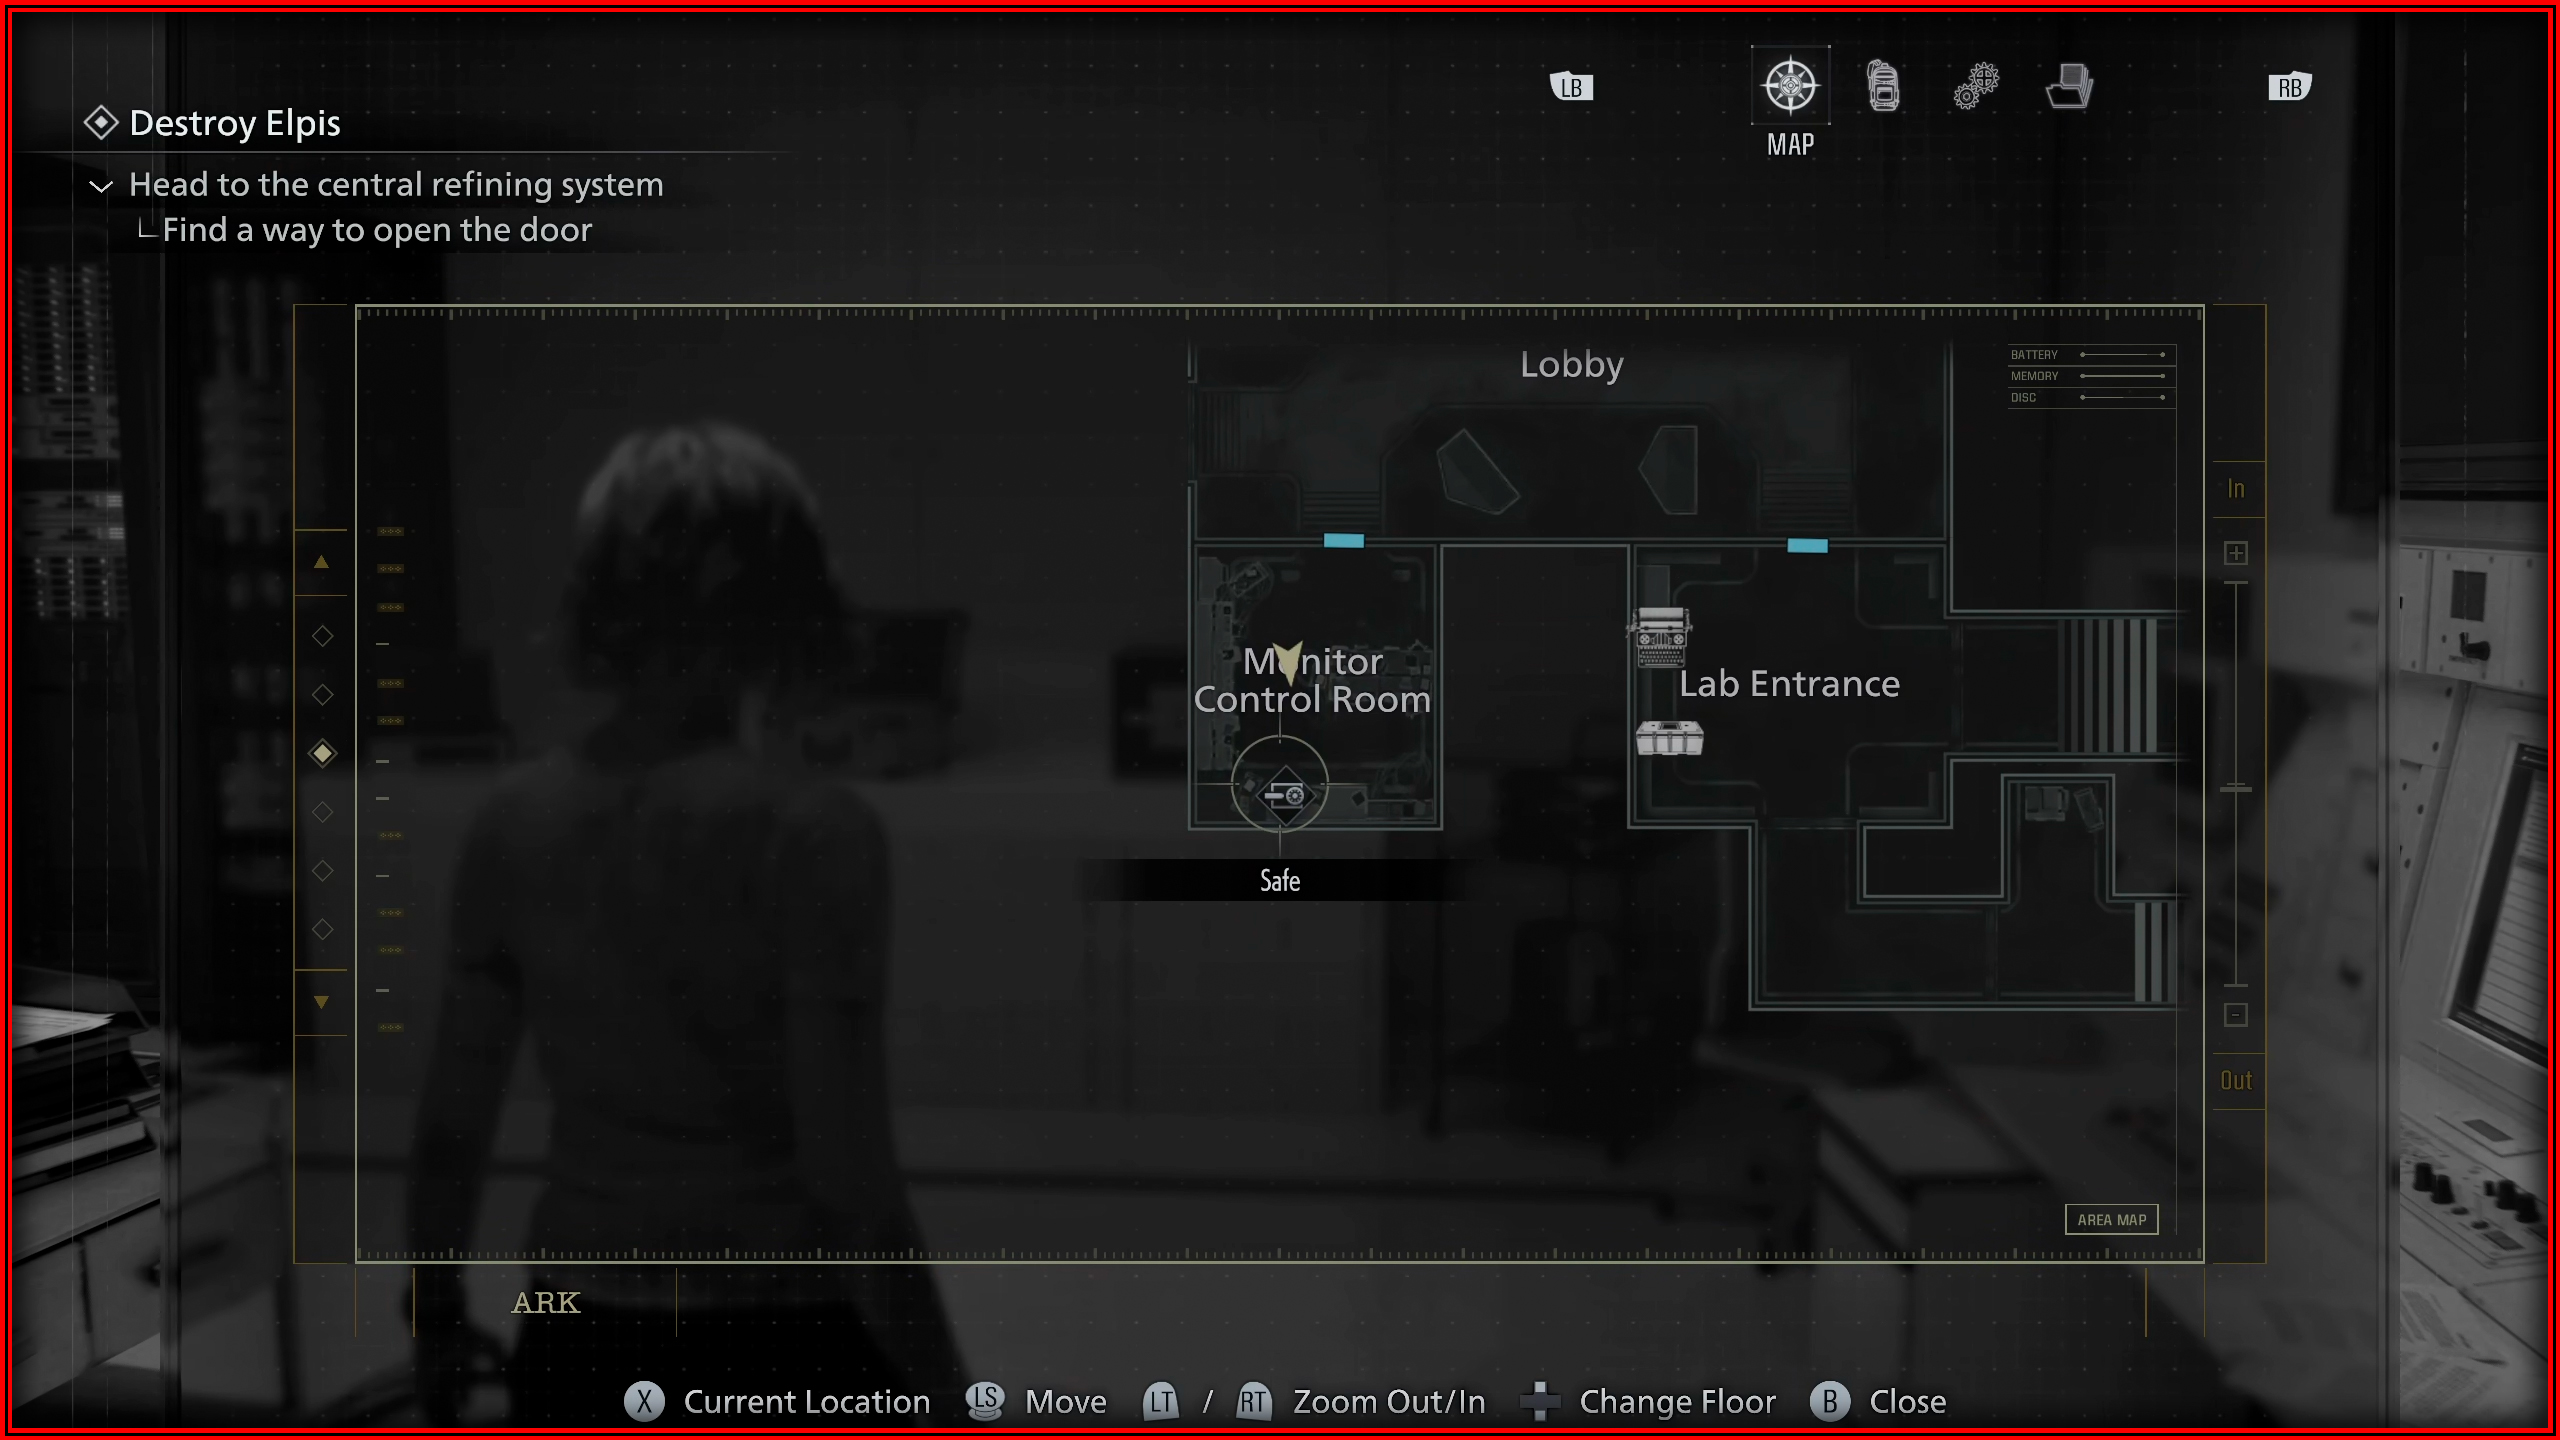
Safe 5: ARK - Monitor Control Room
Casual Difficulty: Left 50 – Right 60 – Left 80.Insanity Difficulty: Right 20 – Left 0 – Right 70.

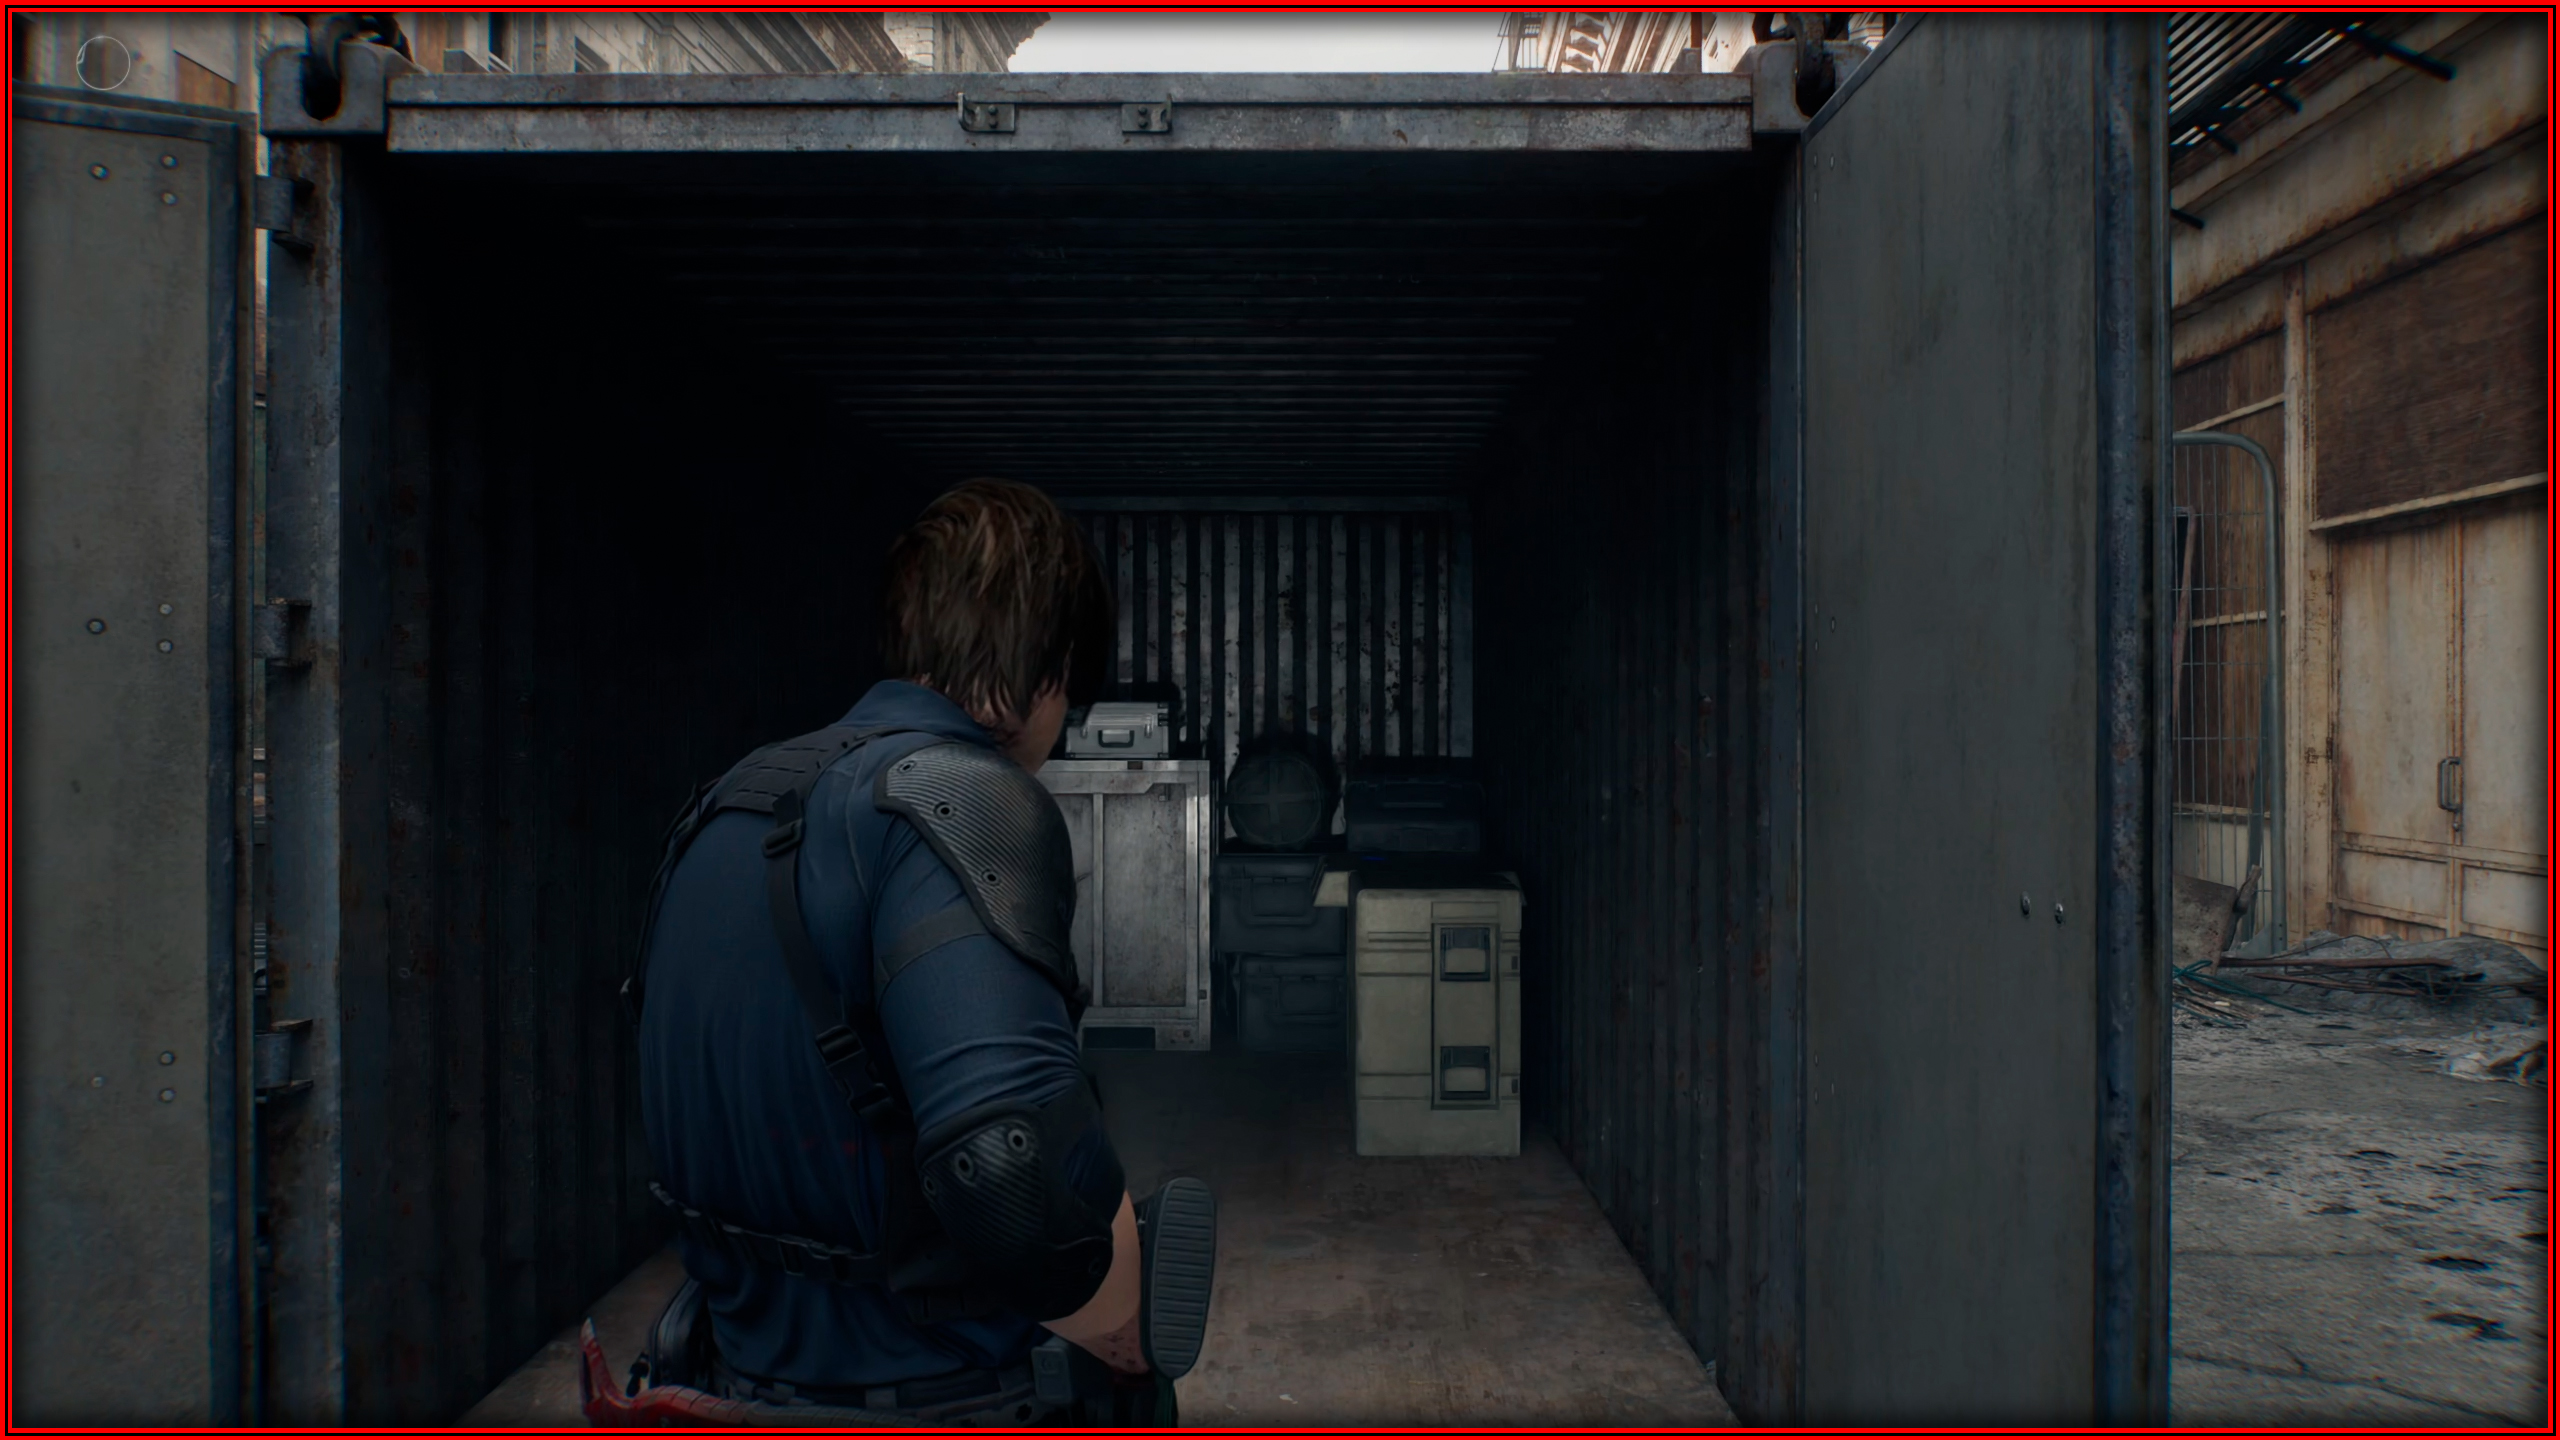
Crate Expectations

There are 3 BSAA Containers located in East Raccoon City. First, you must advance in the Main Story until you obtain the BSAA Container Key.
BSAA container 1
East Raccoon City - near the Gas Station.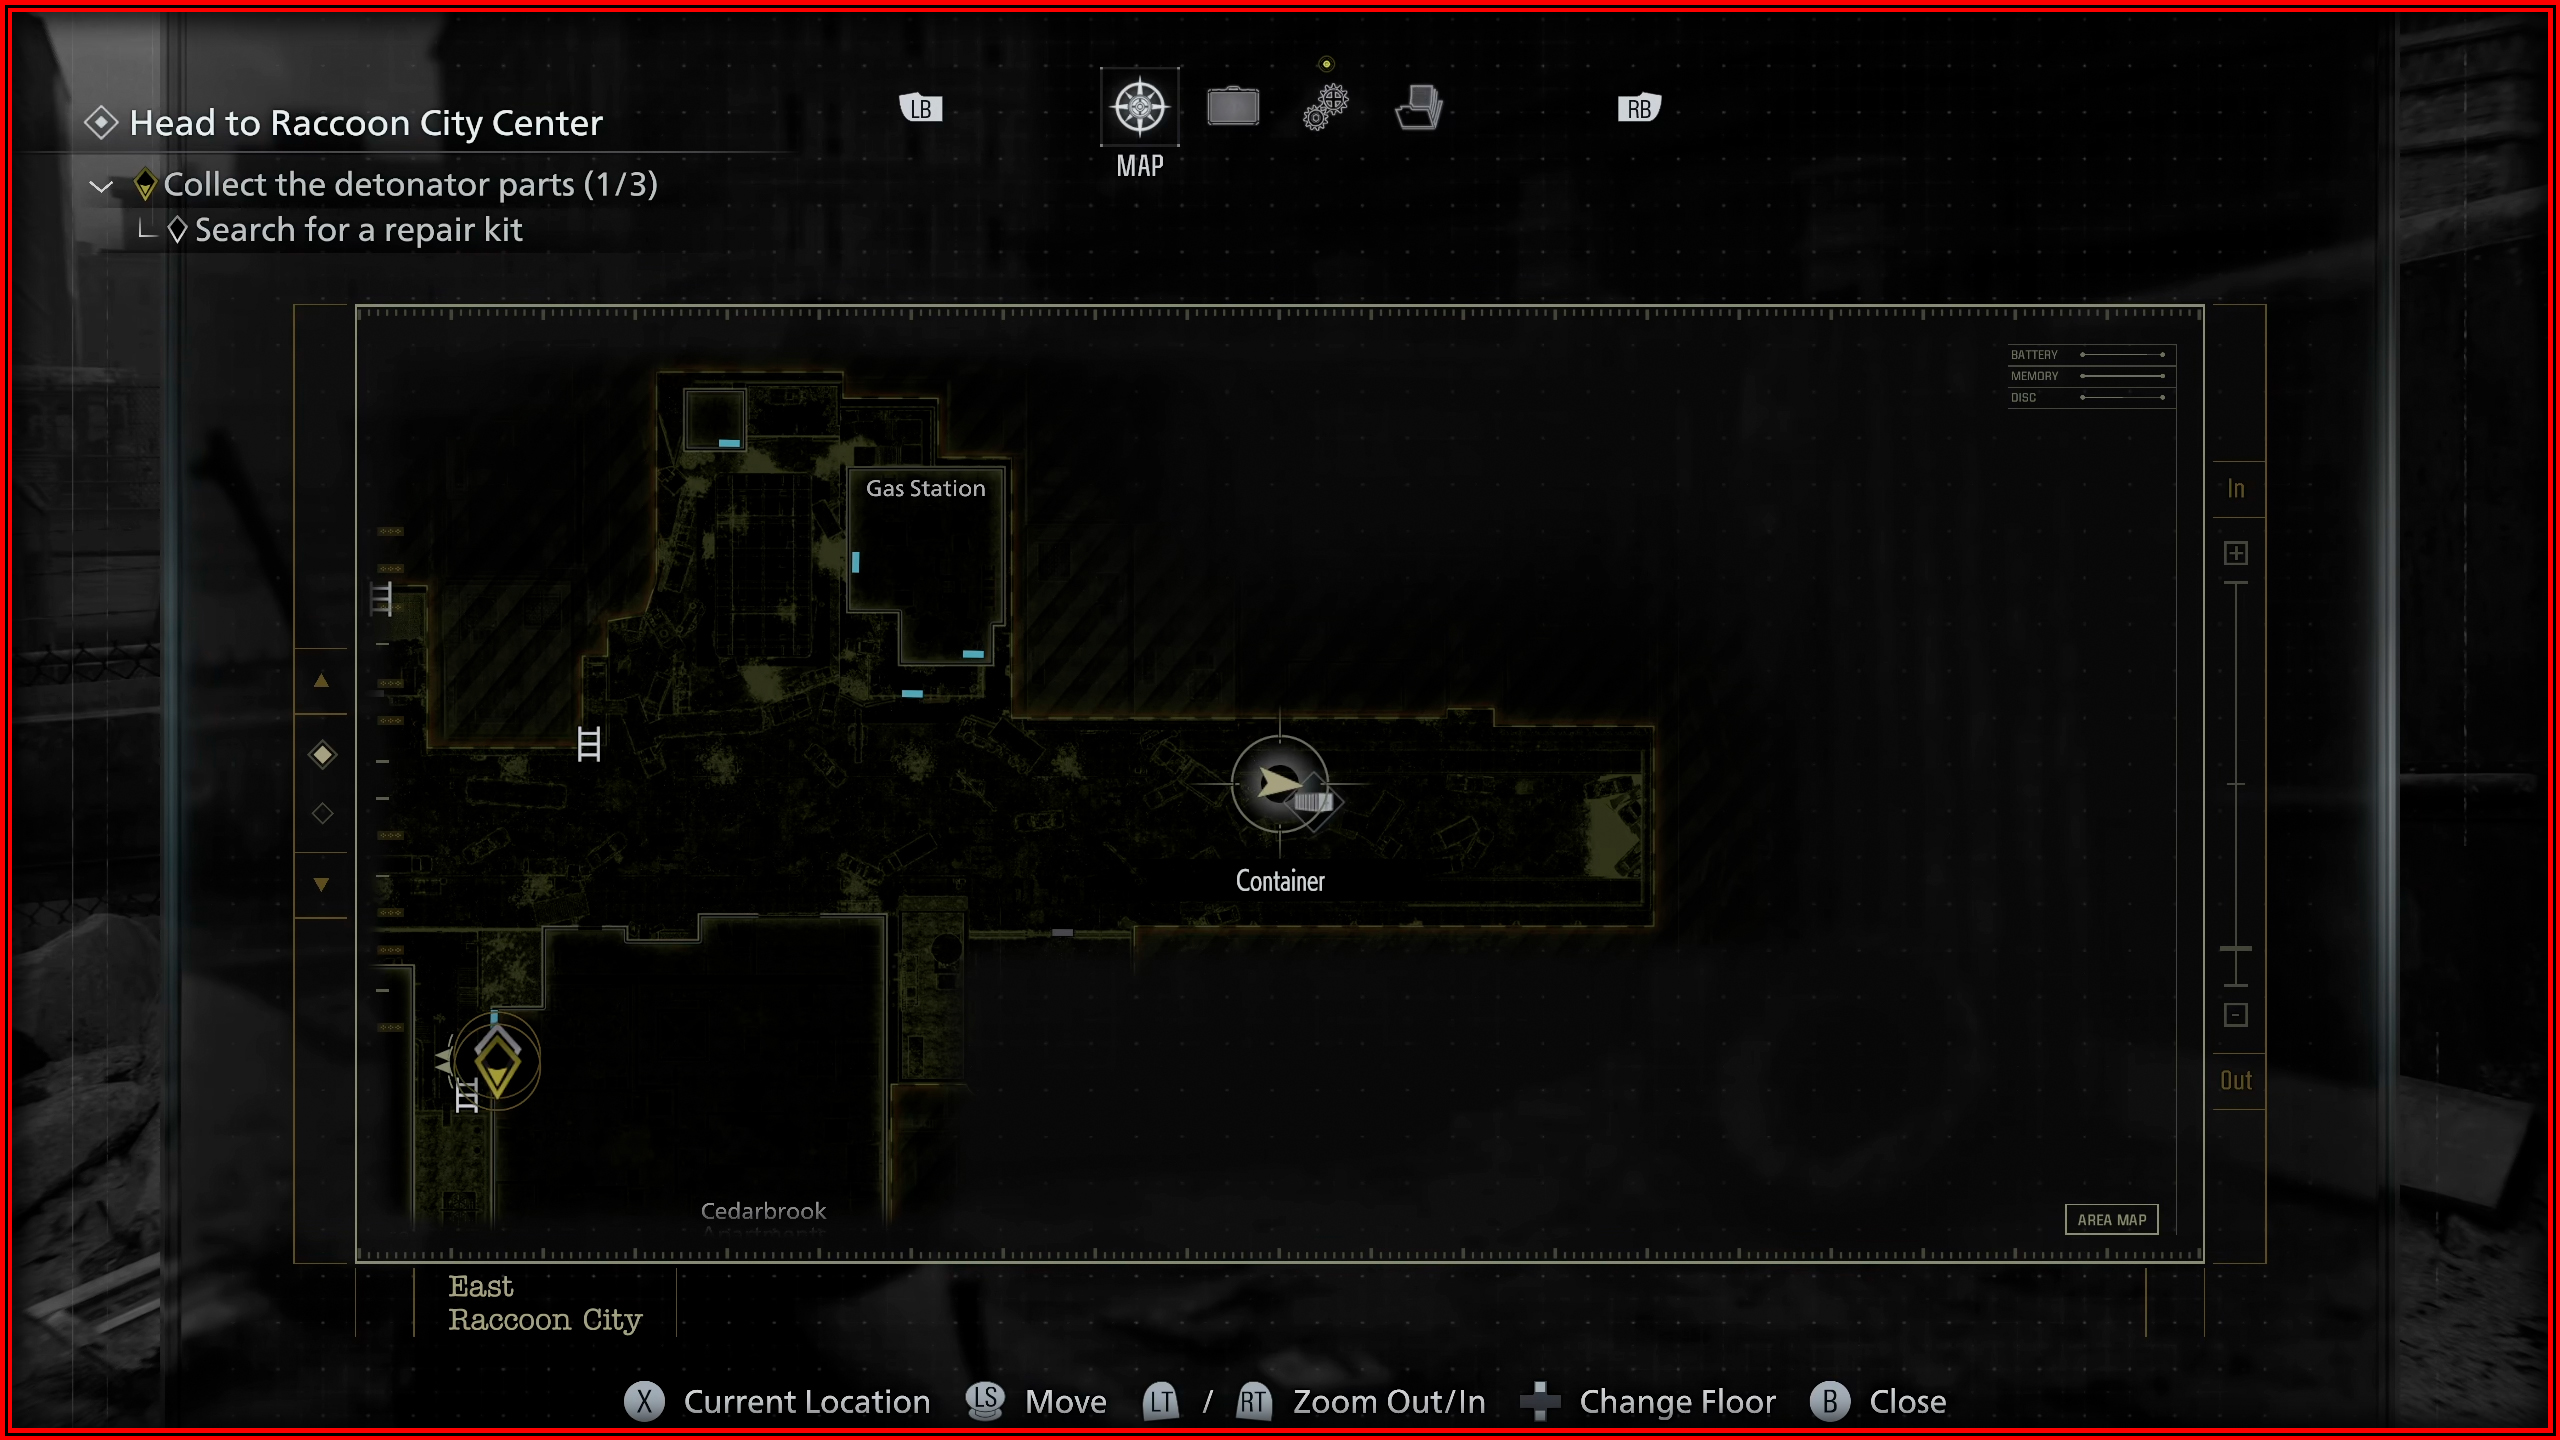
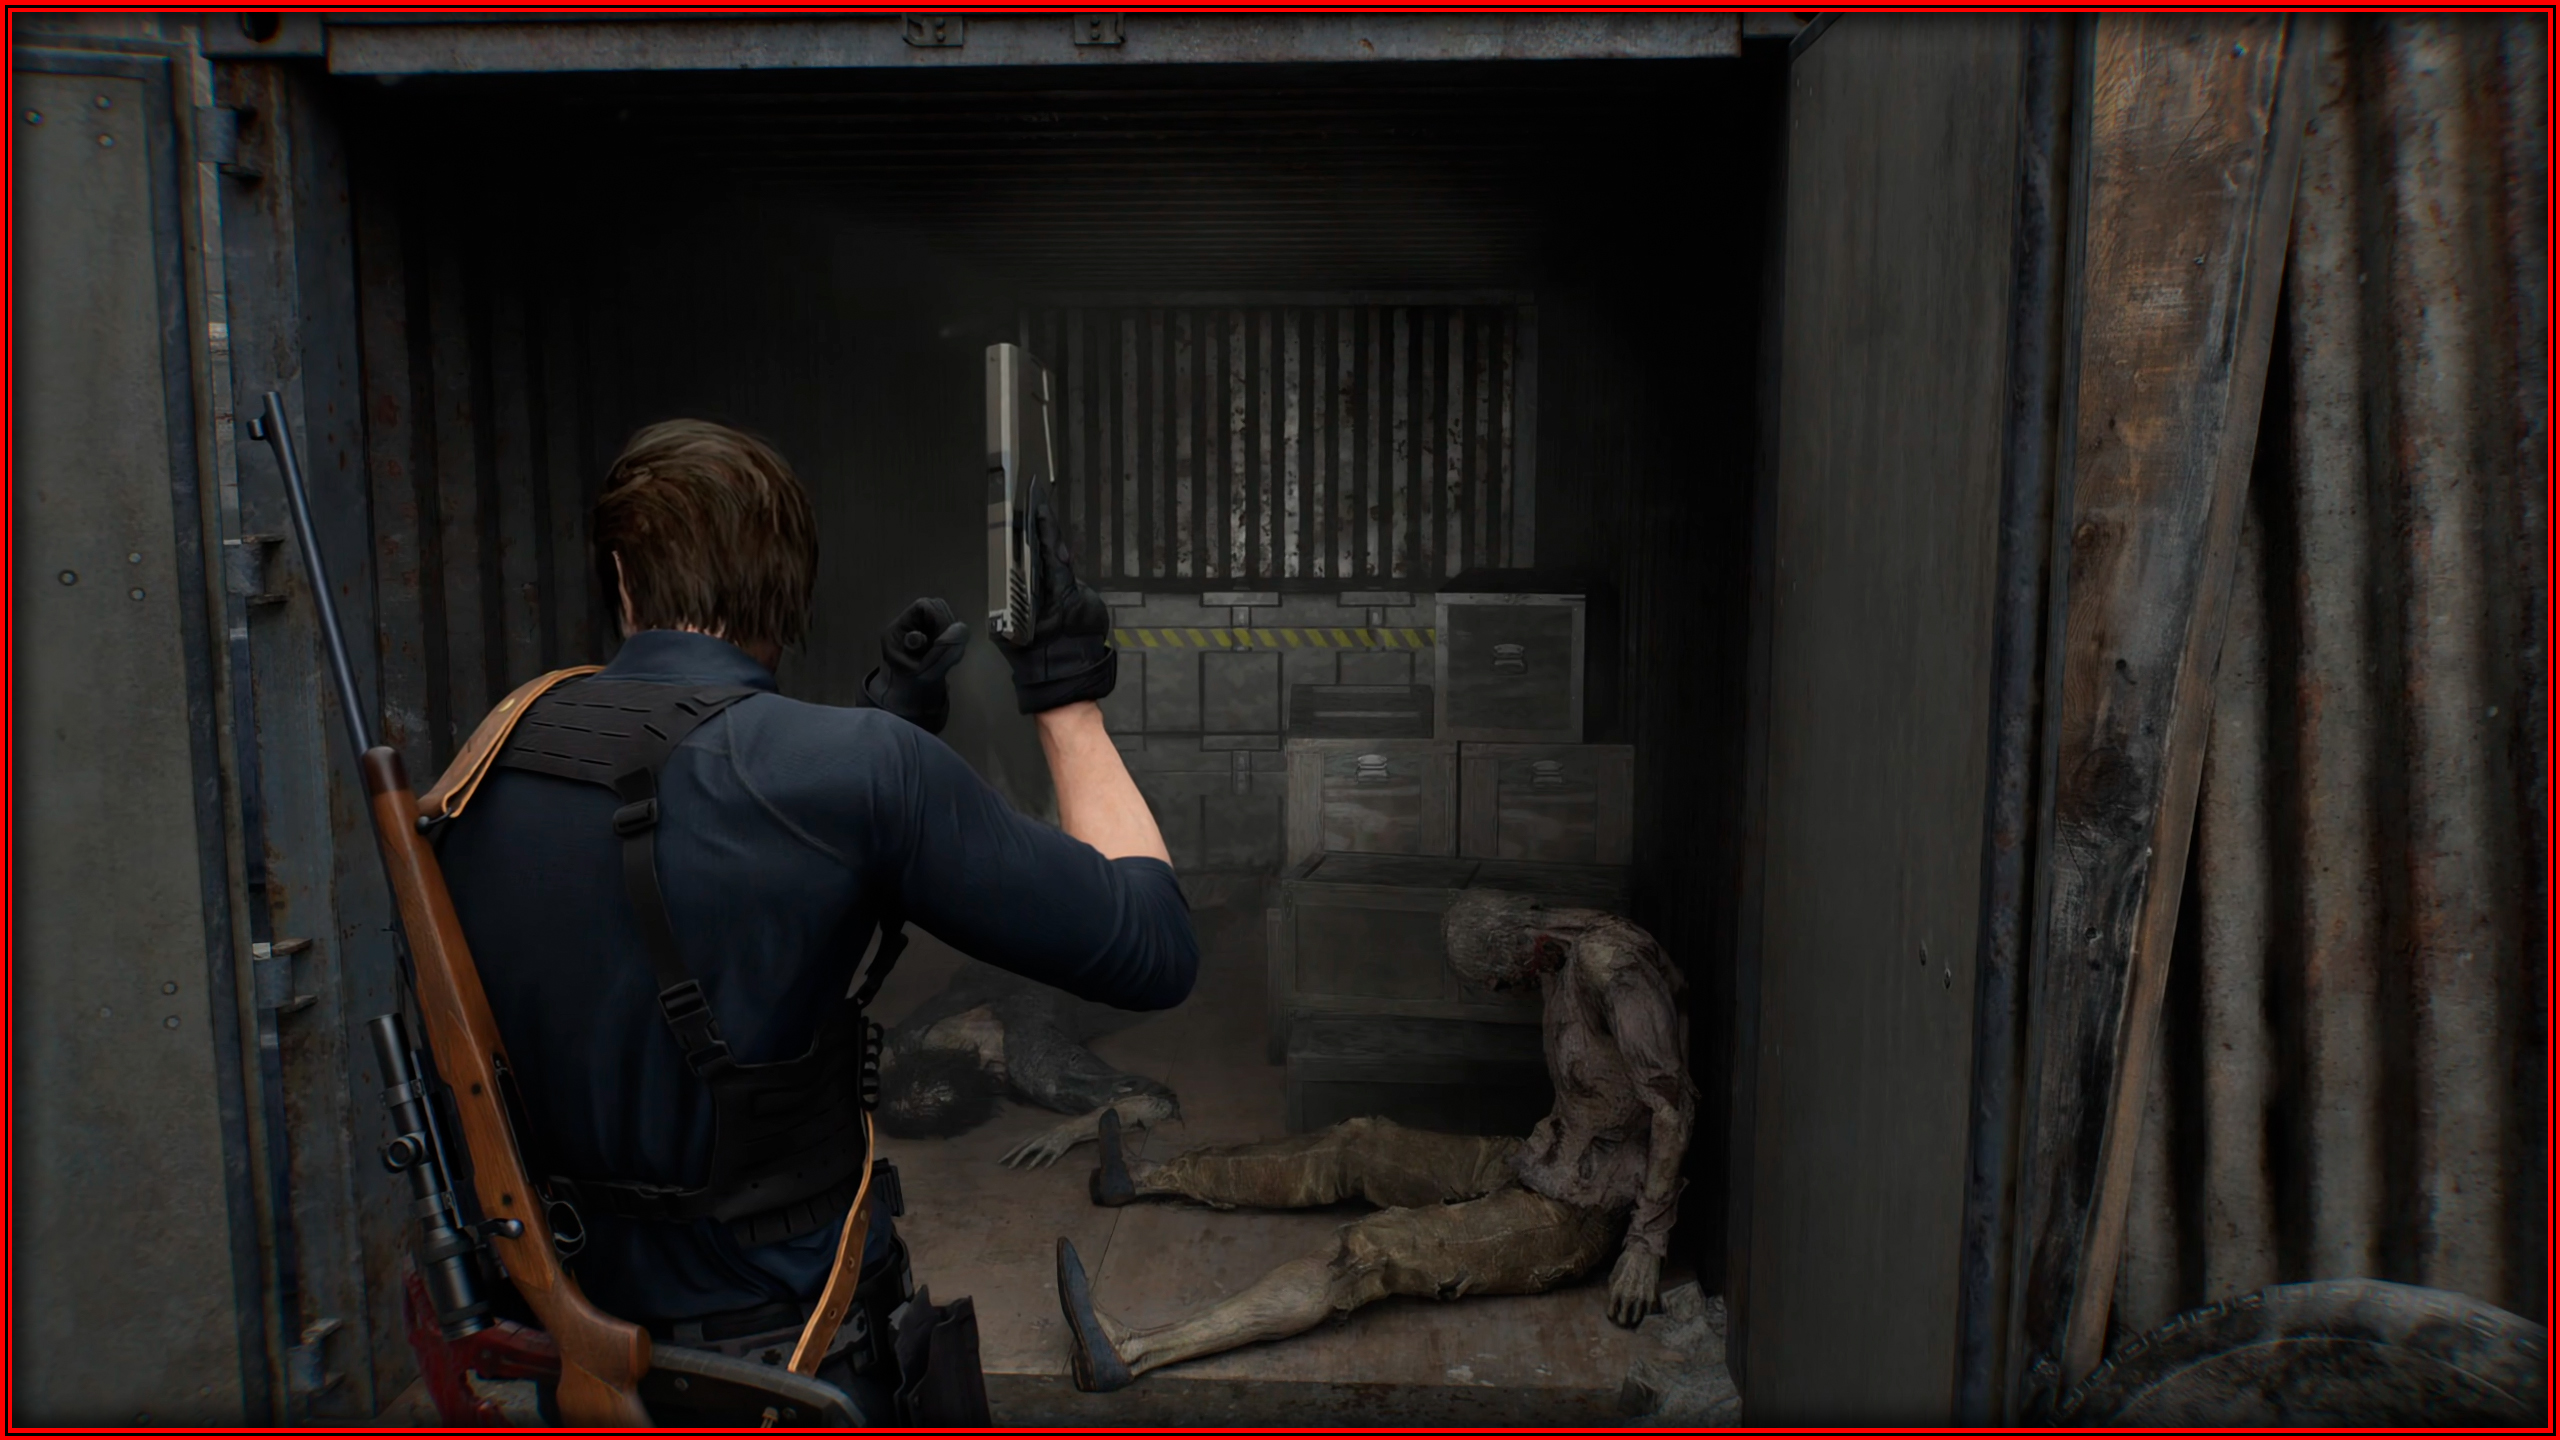
BSAA container 2
East Raccoon City - Central Camp.
BSAA container 3
East Raccoon City - near The Applegate Hotel.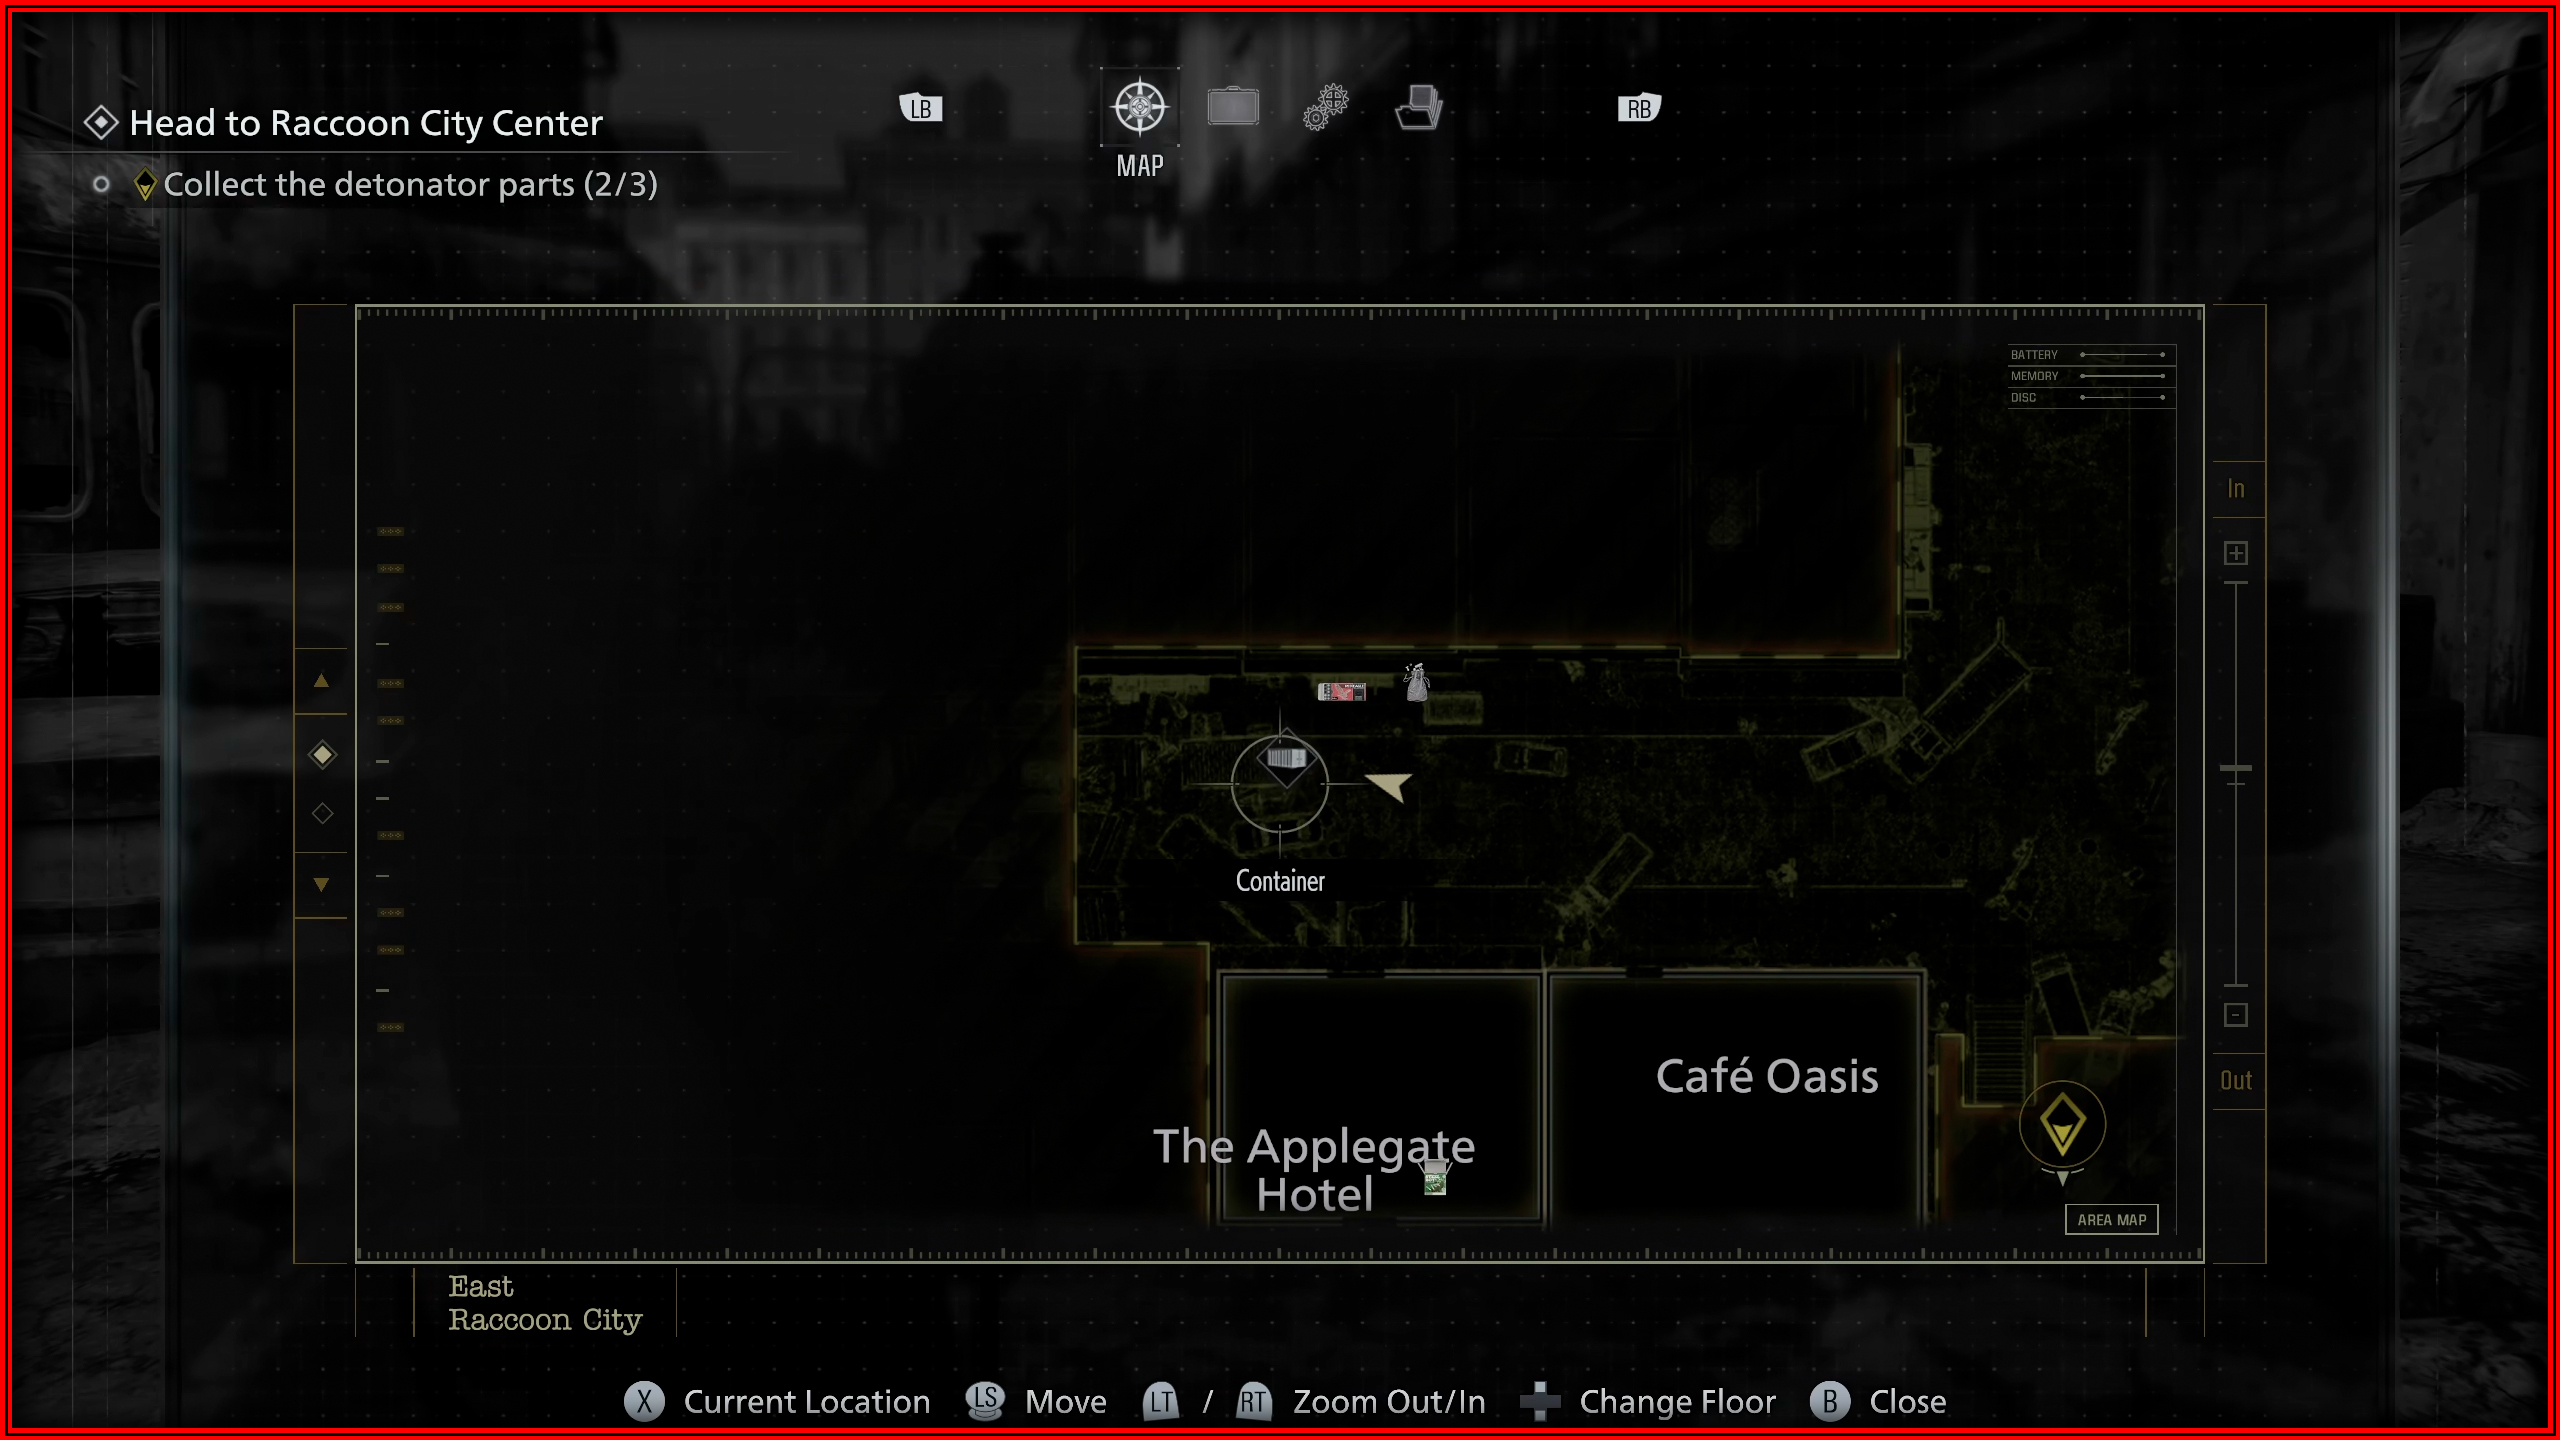
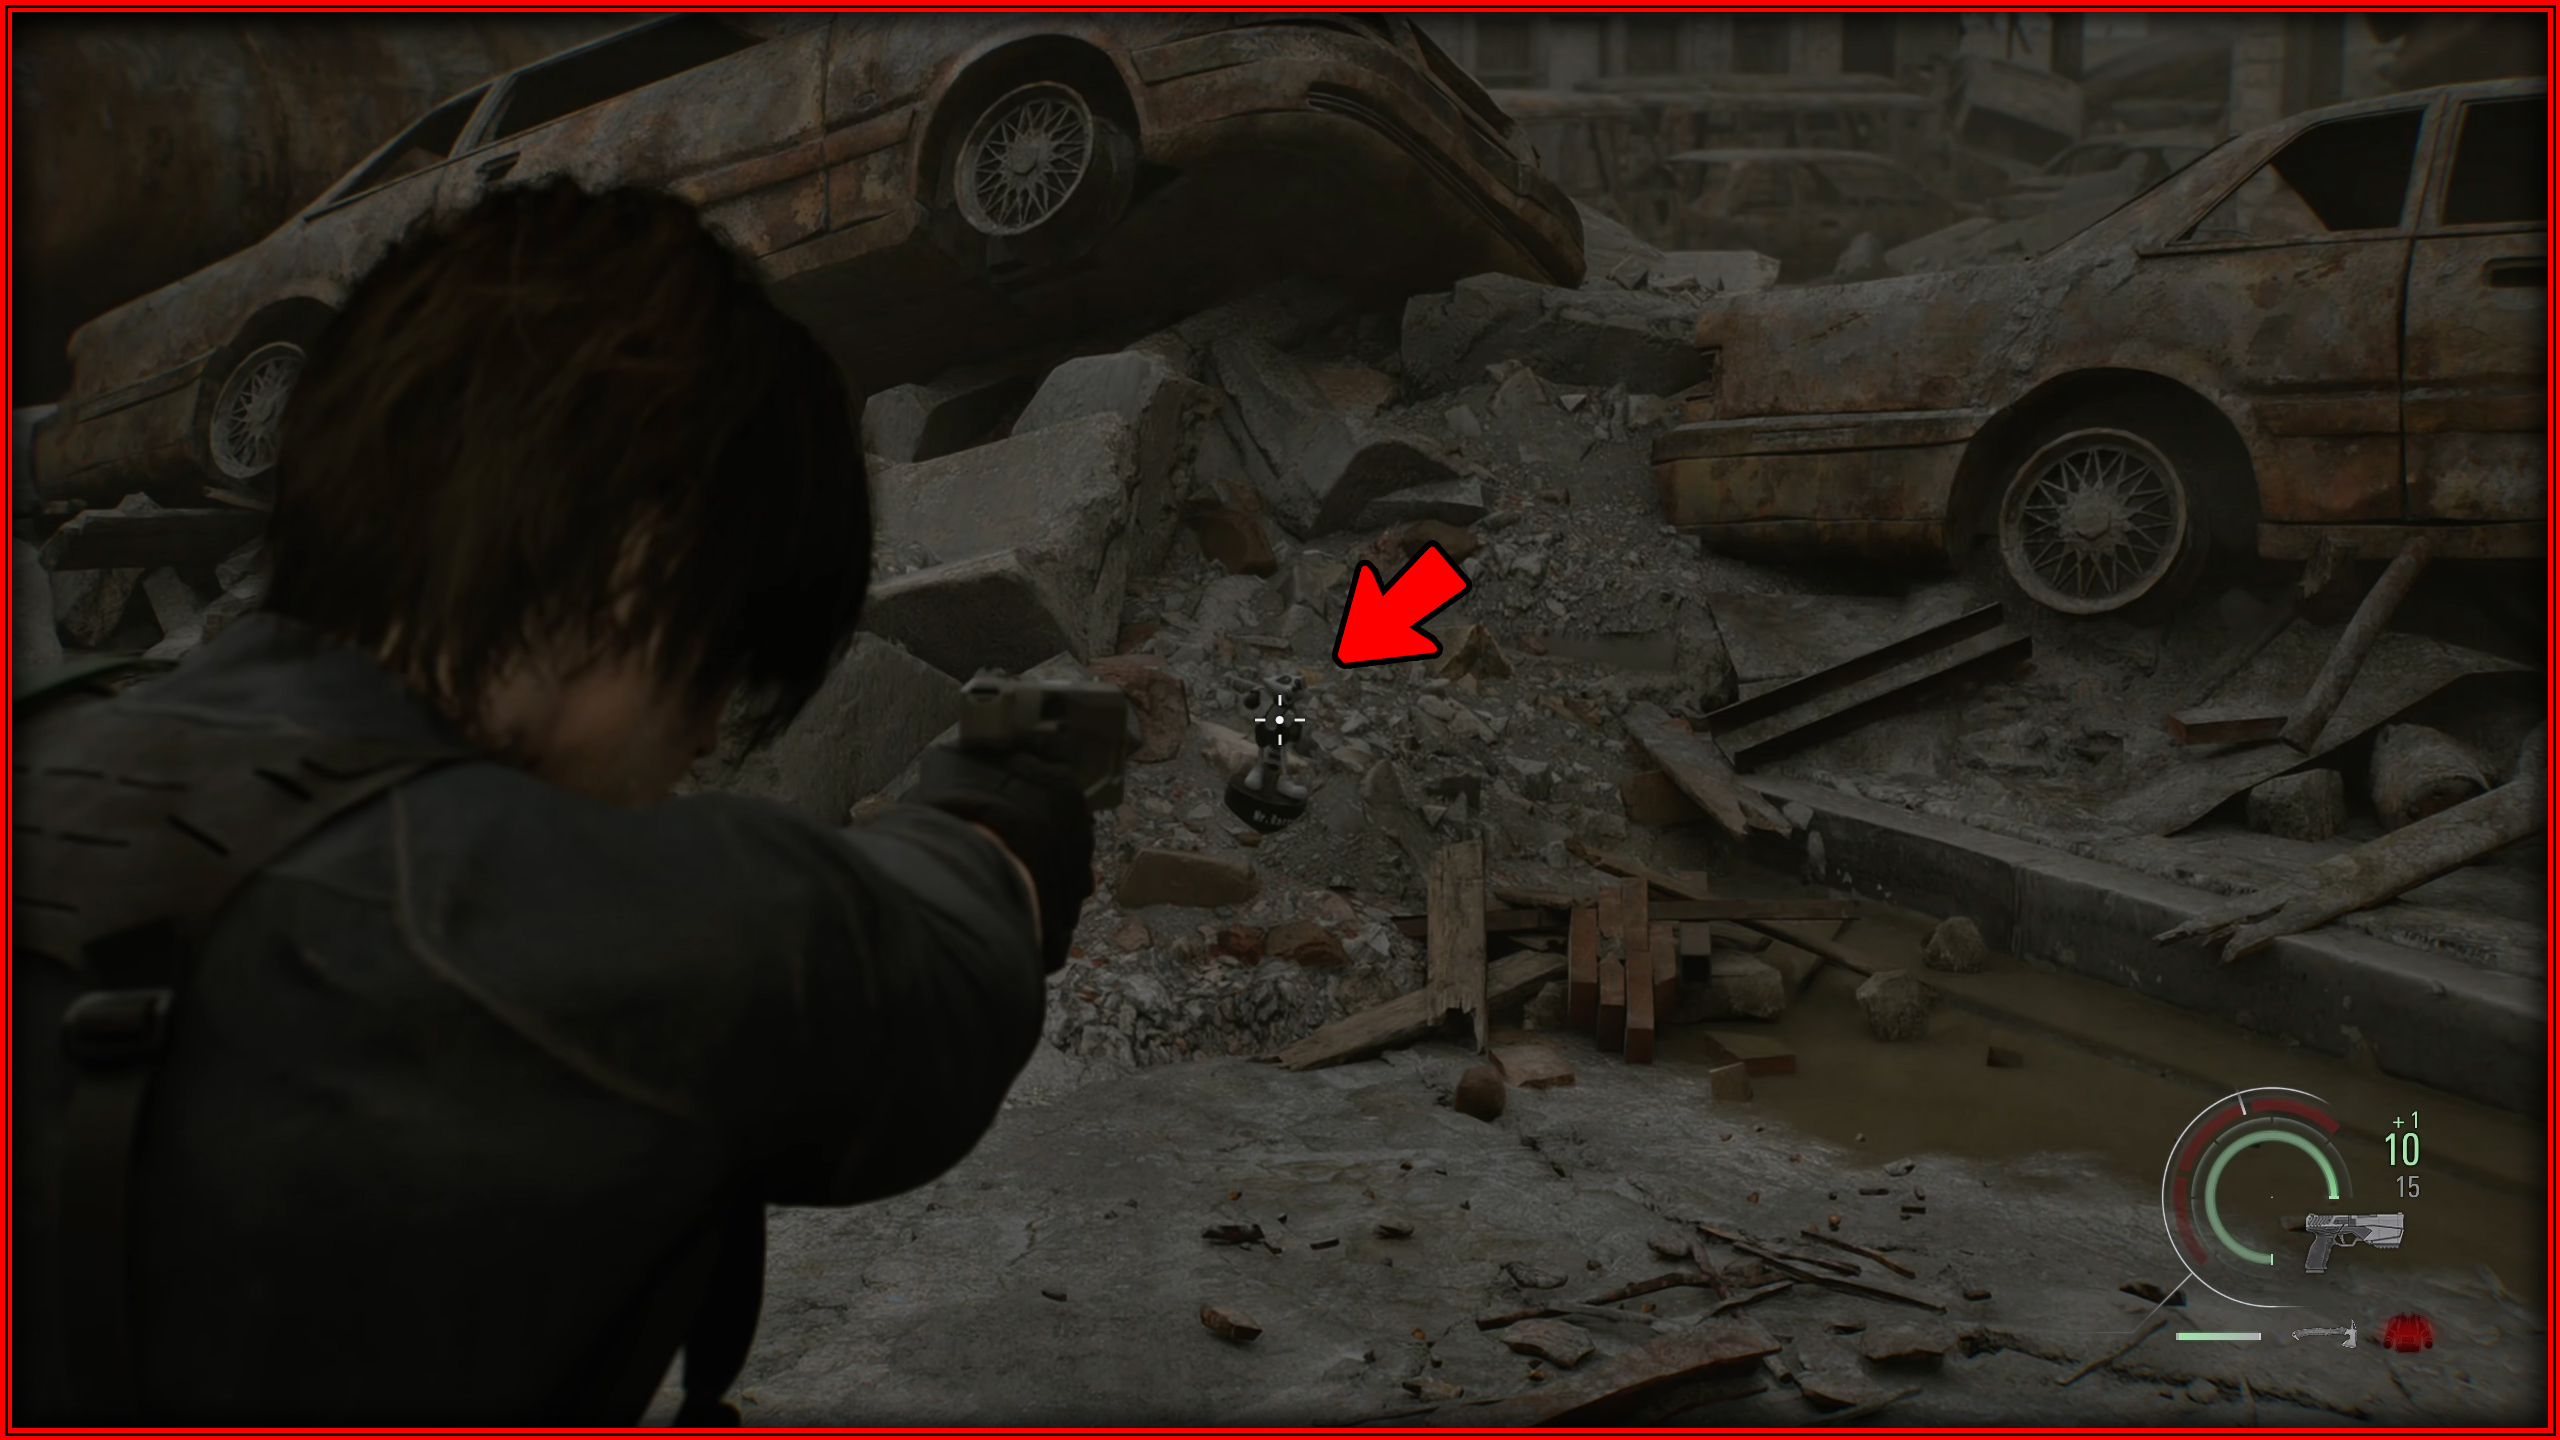
The Hunt Begins
 Obtained by destroying a Mr. Raccoon memoriam, see the achievement below.
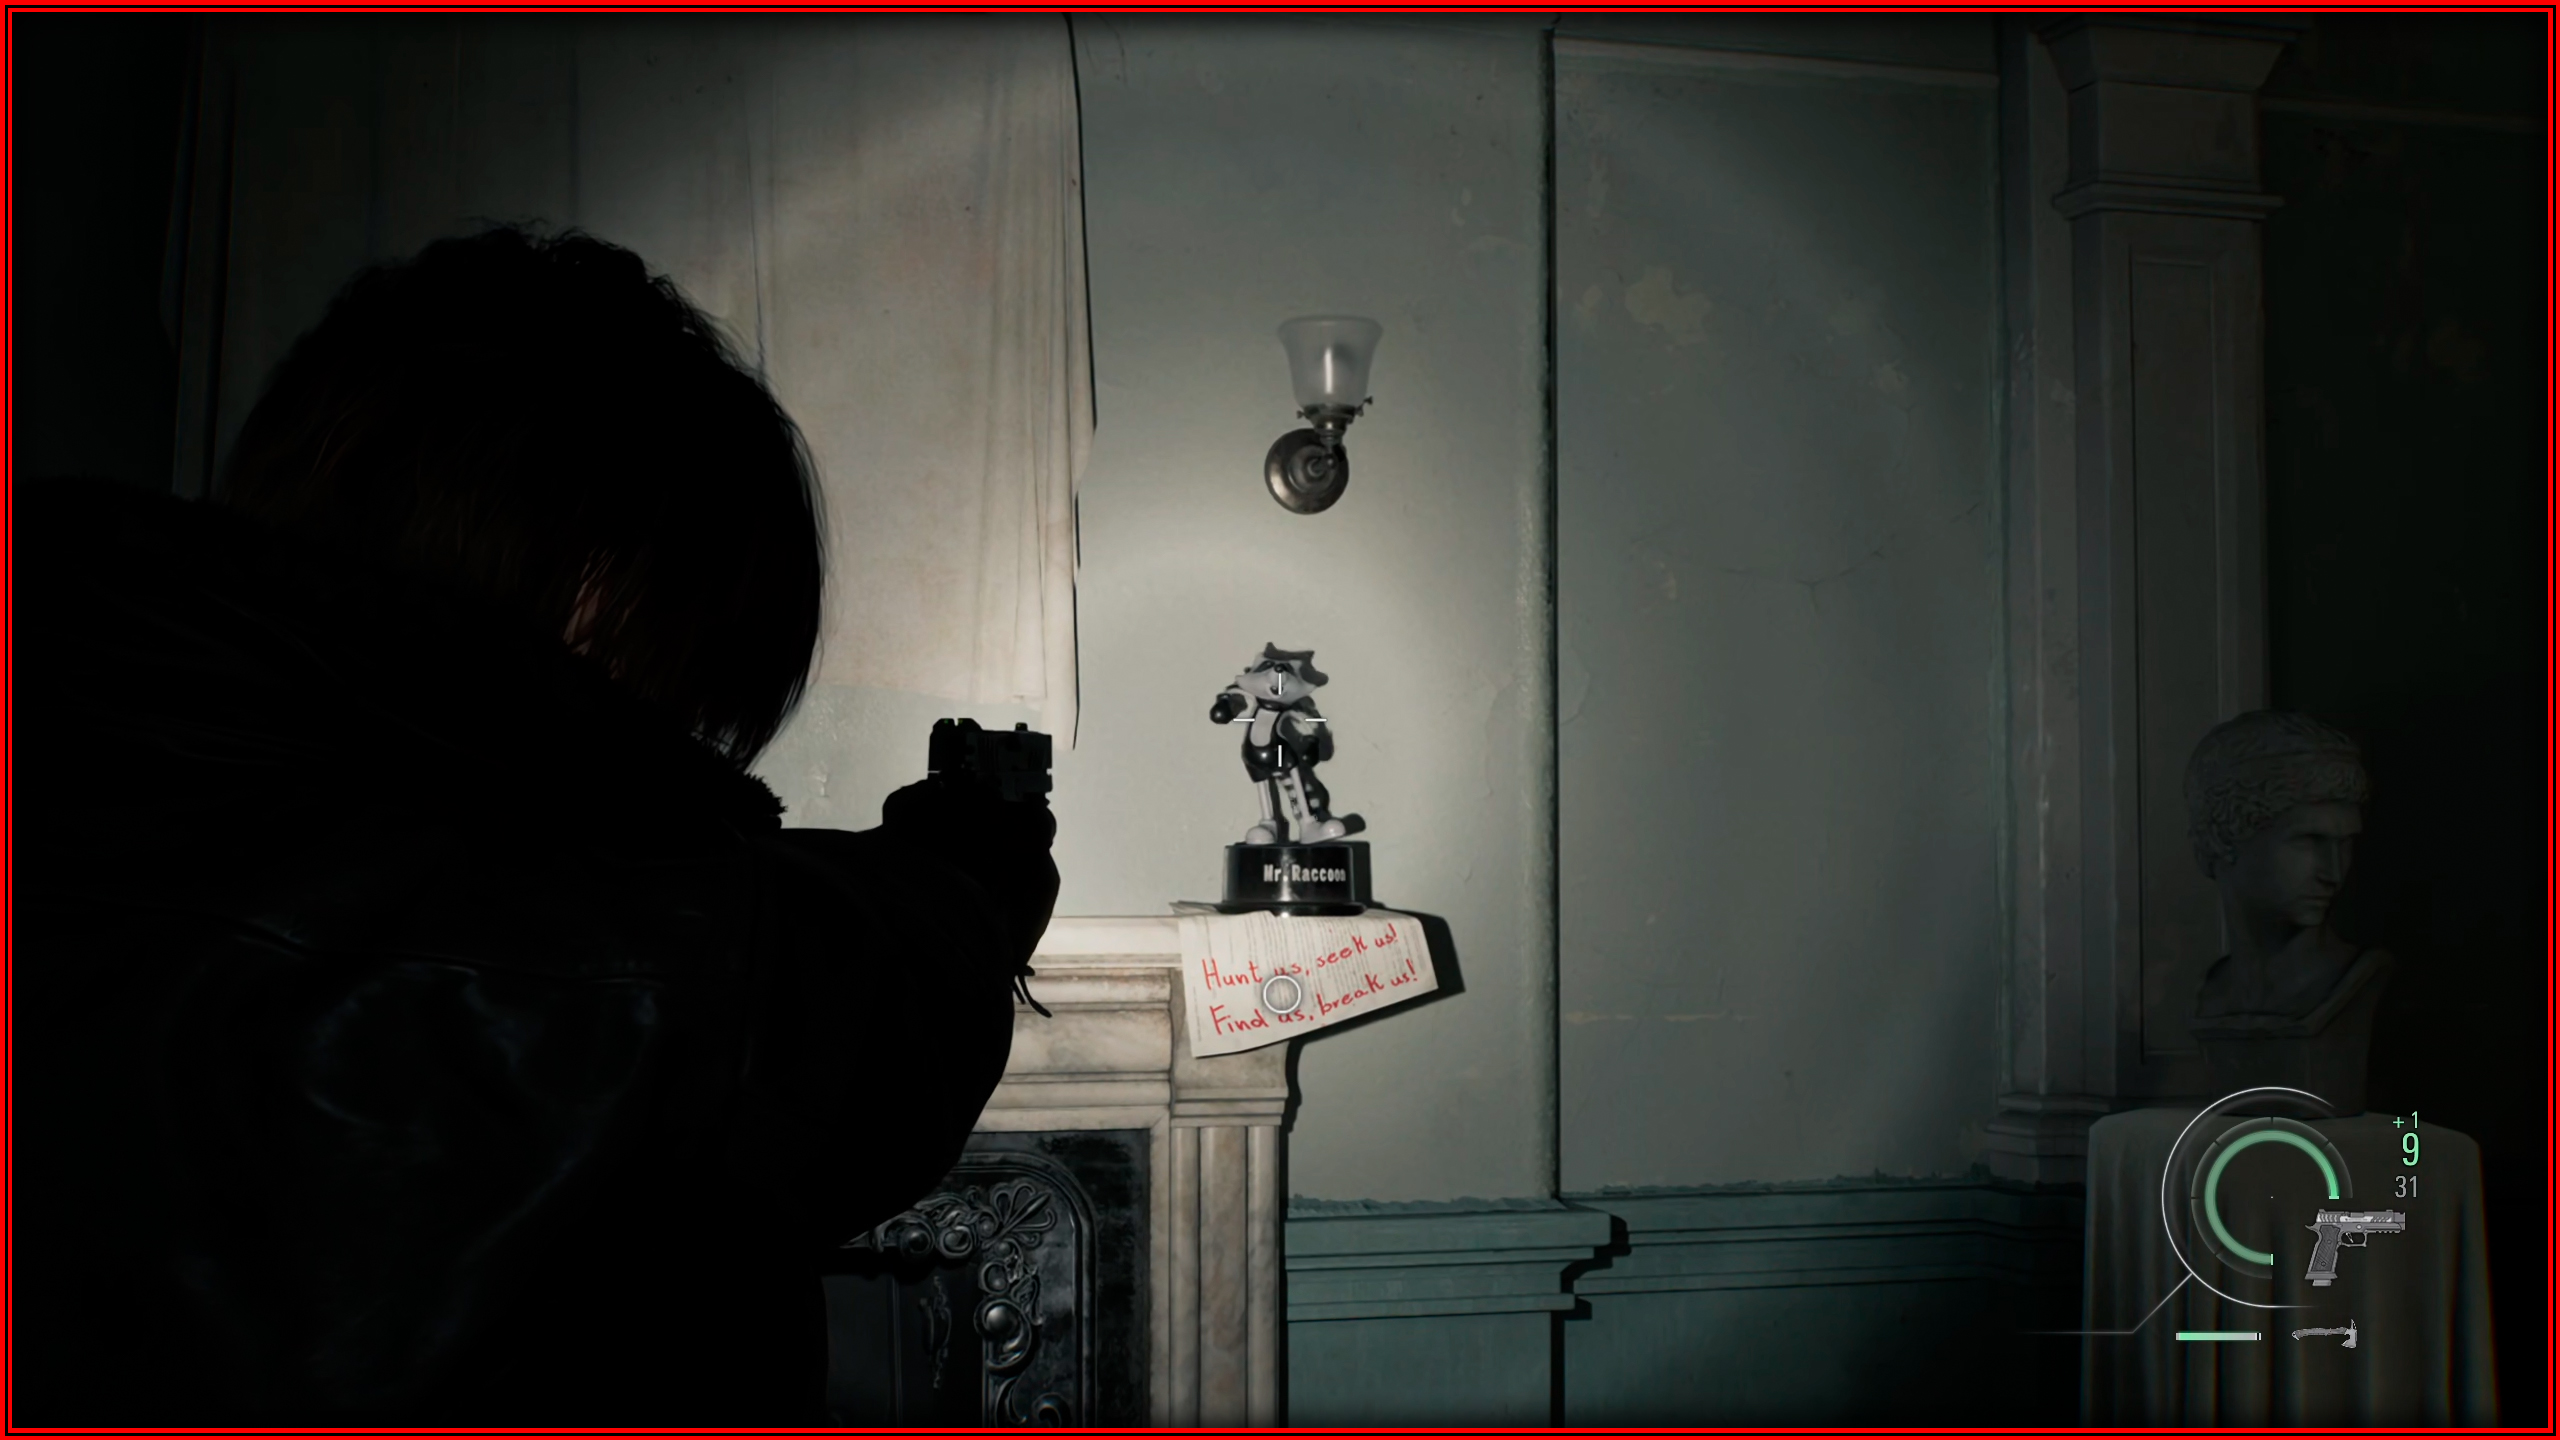
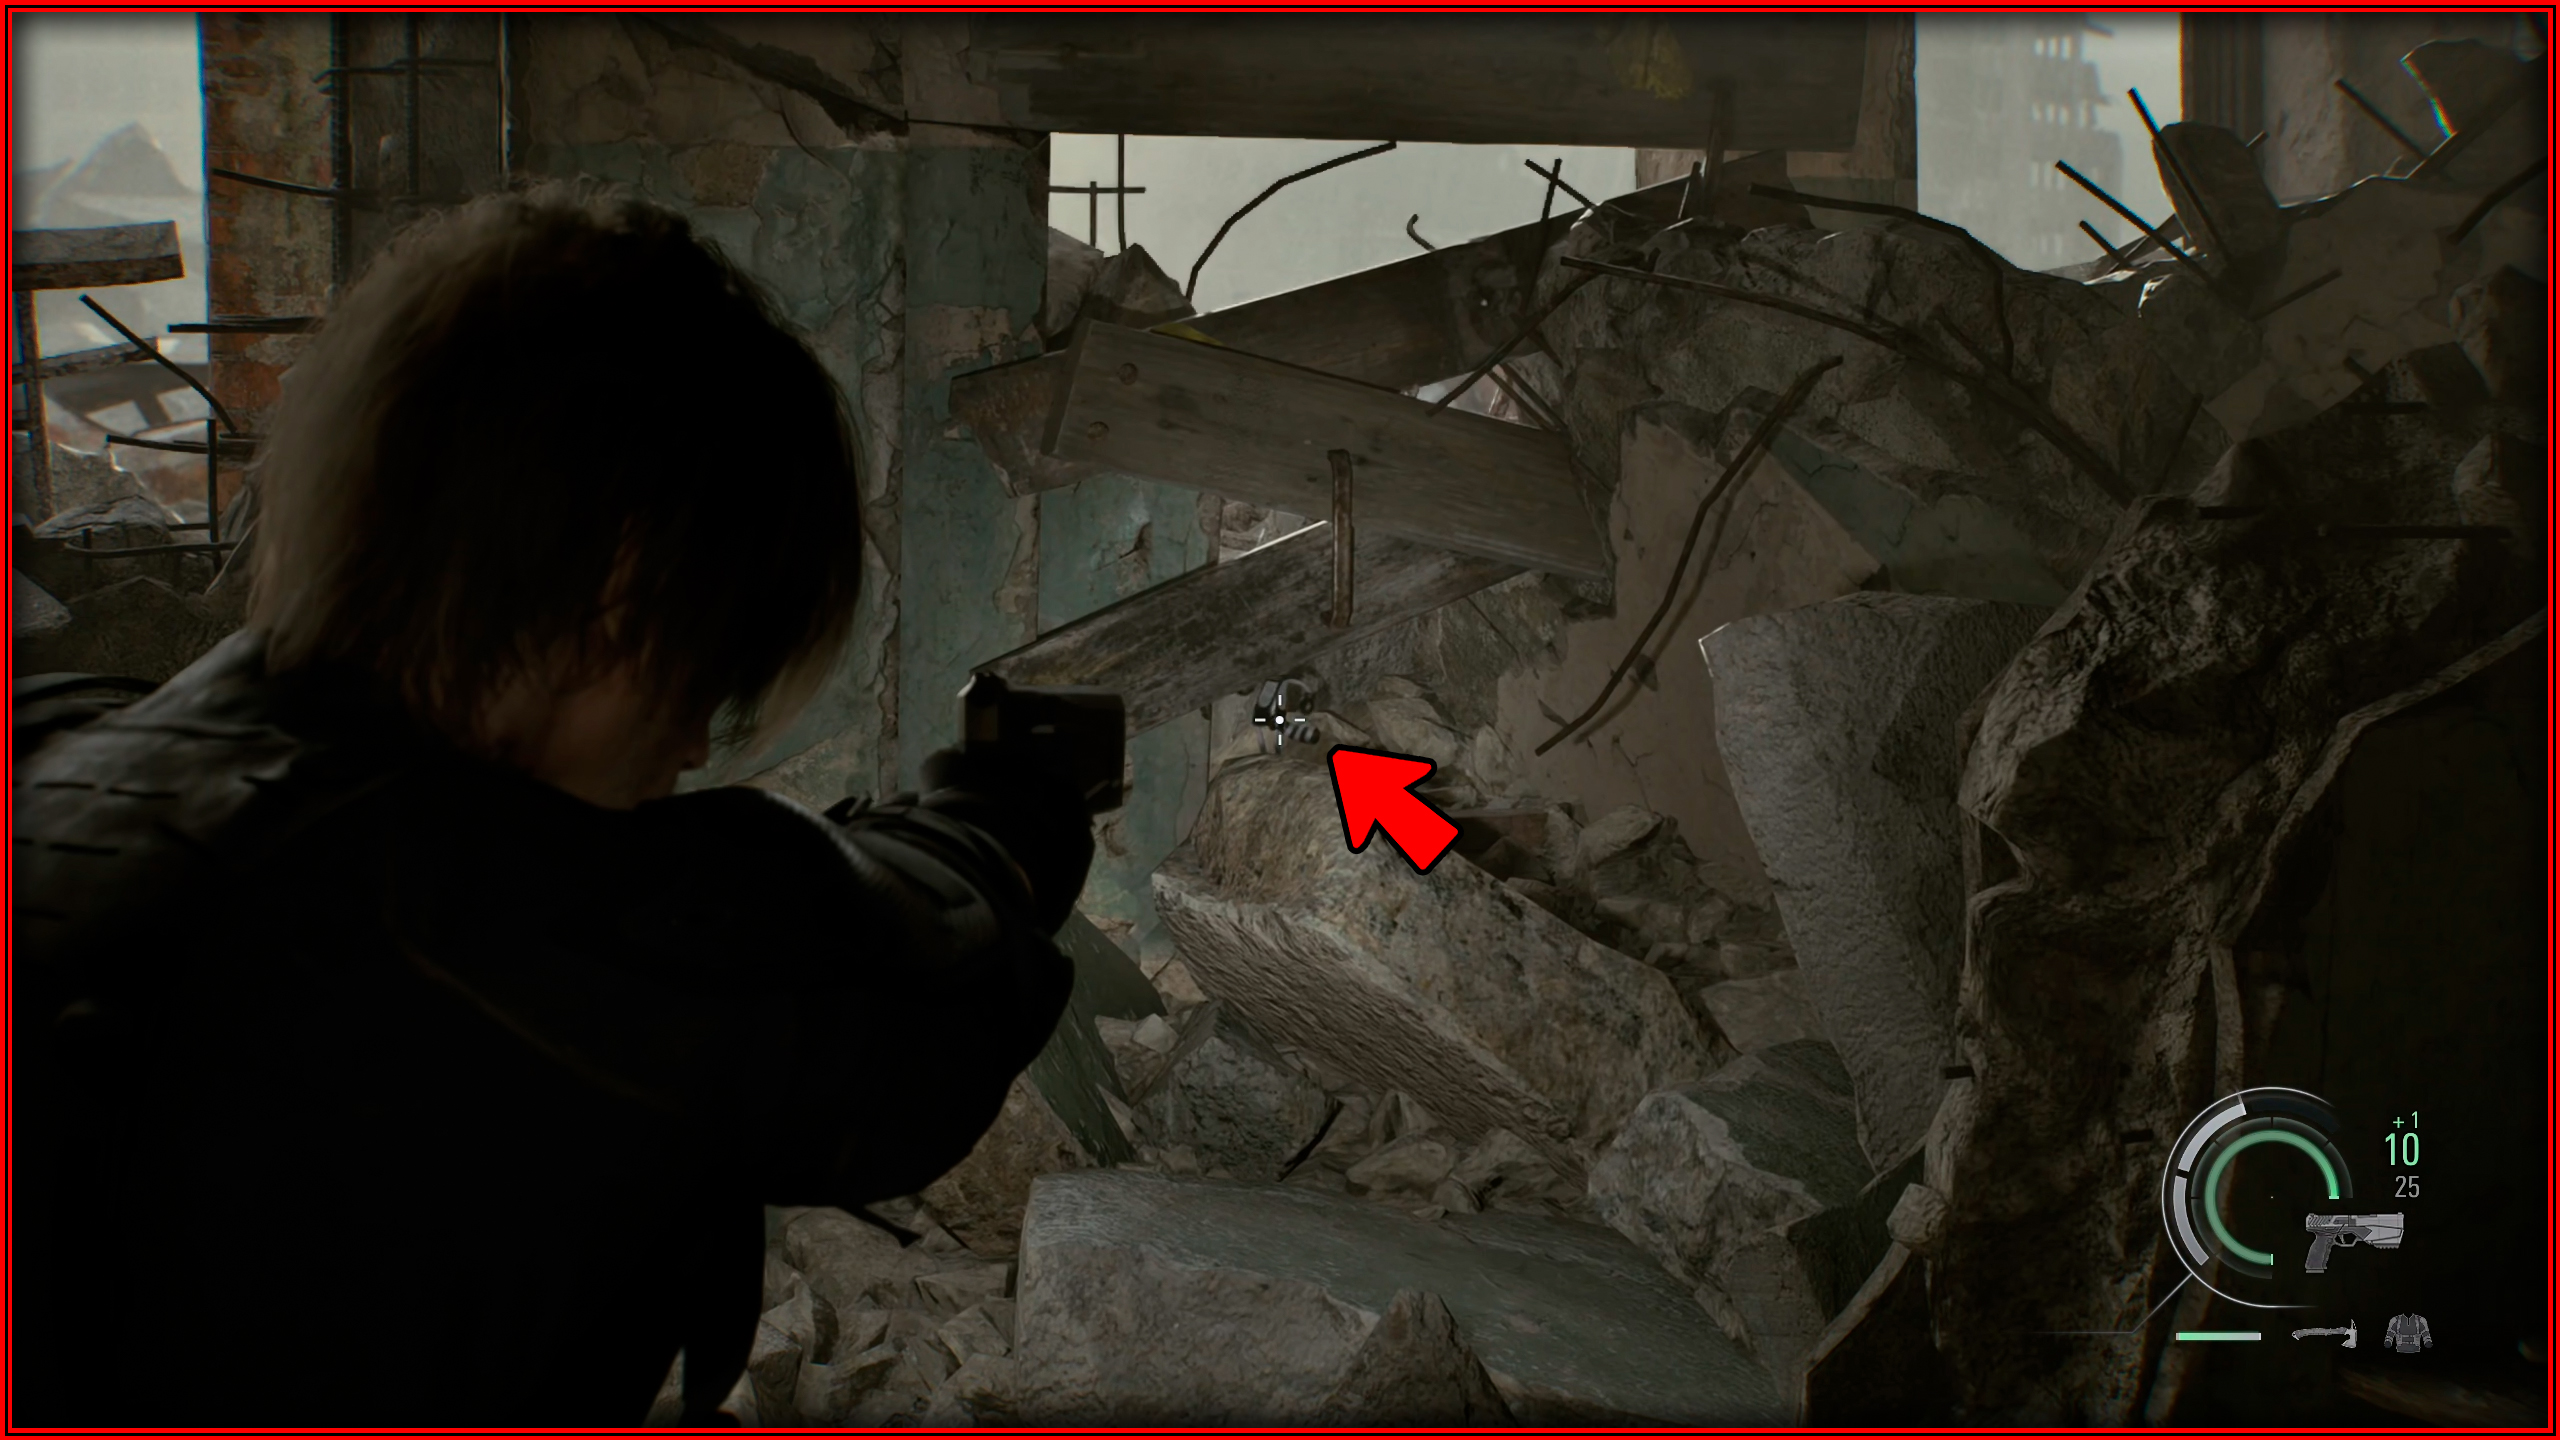
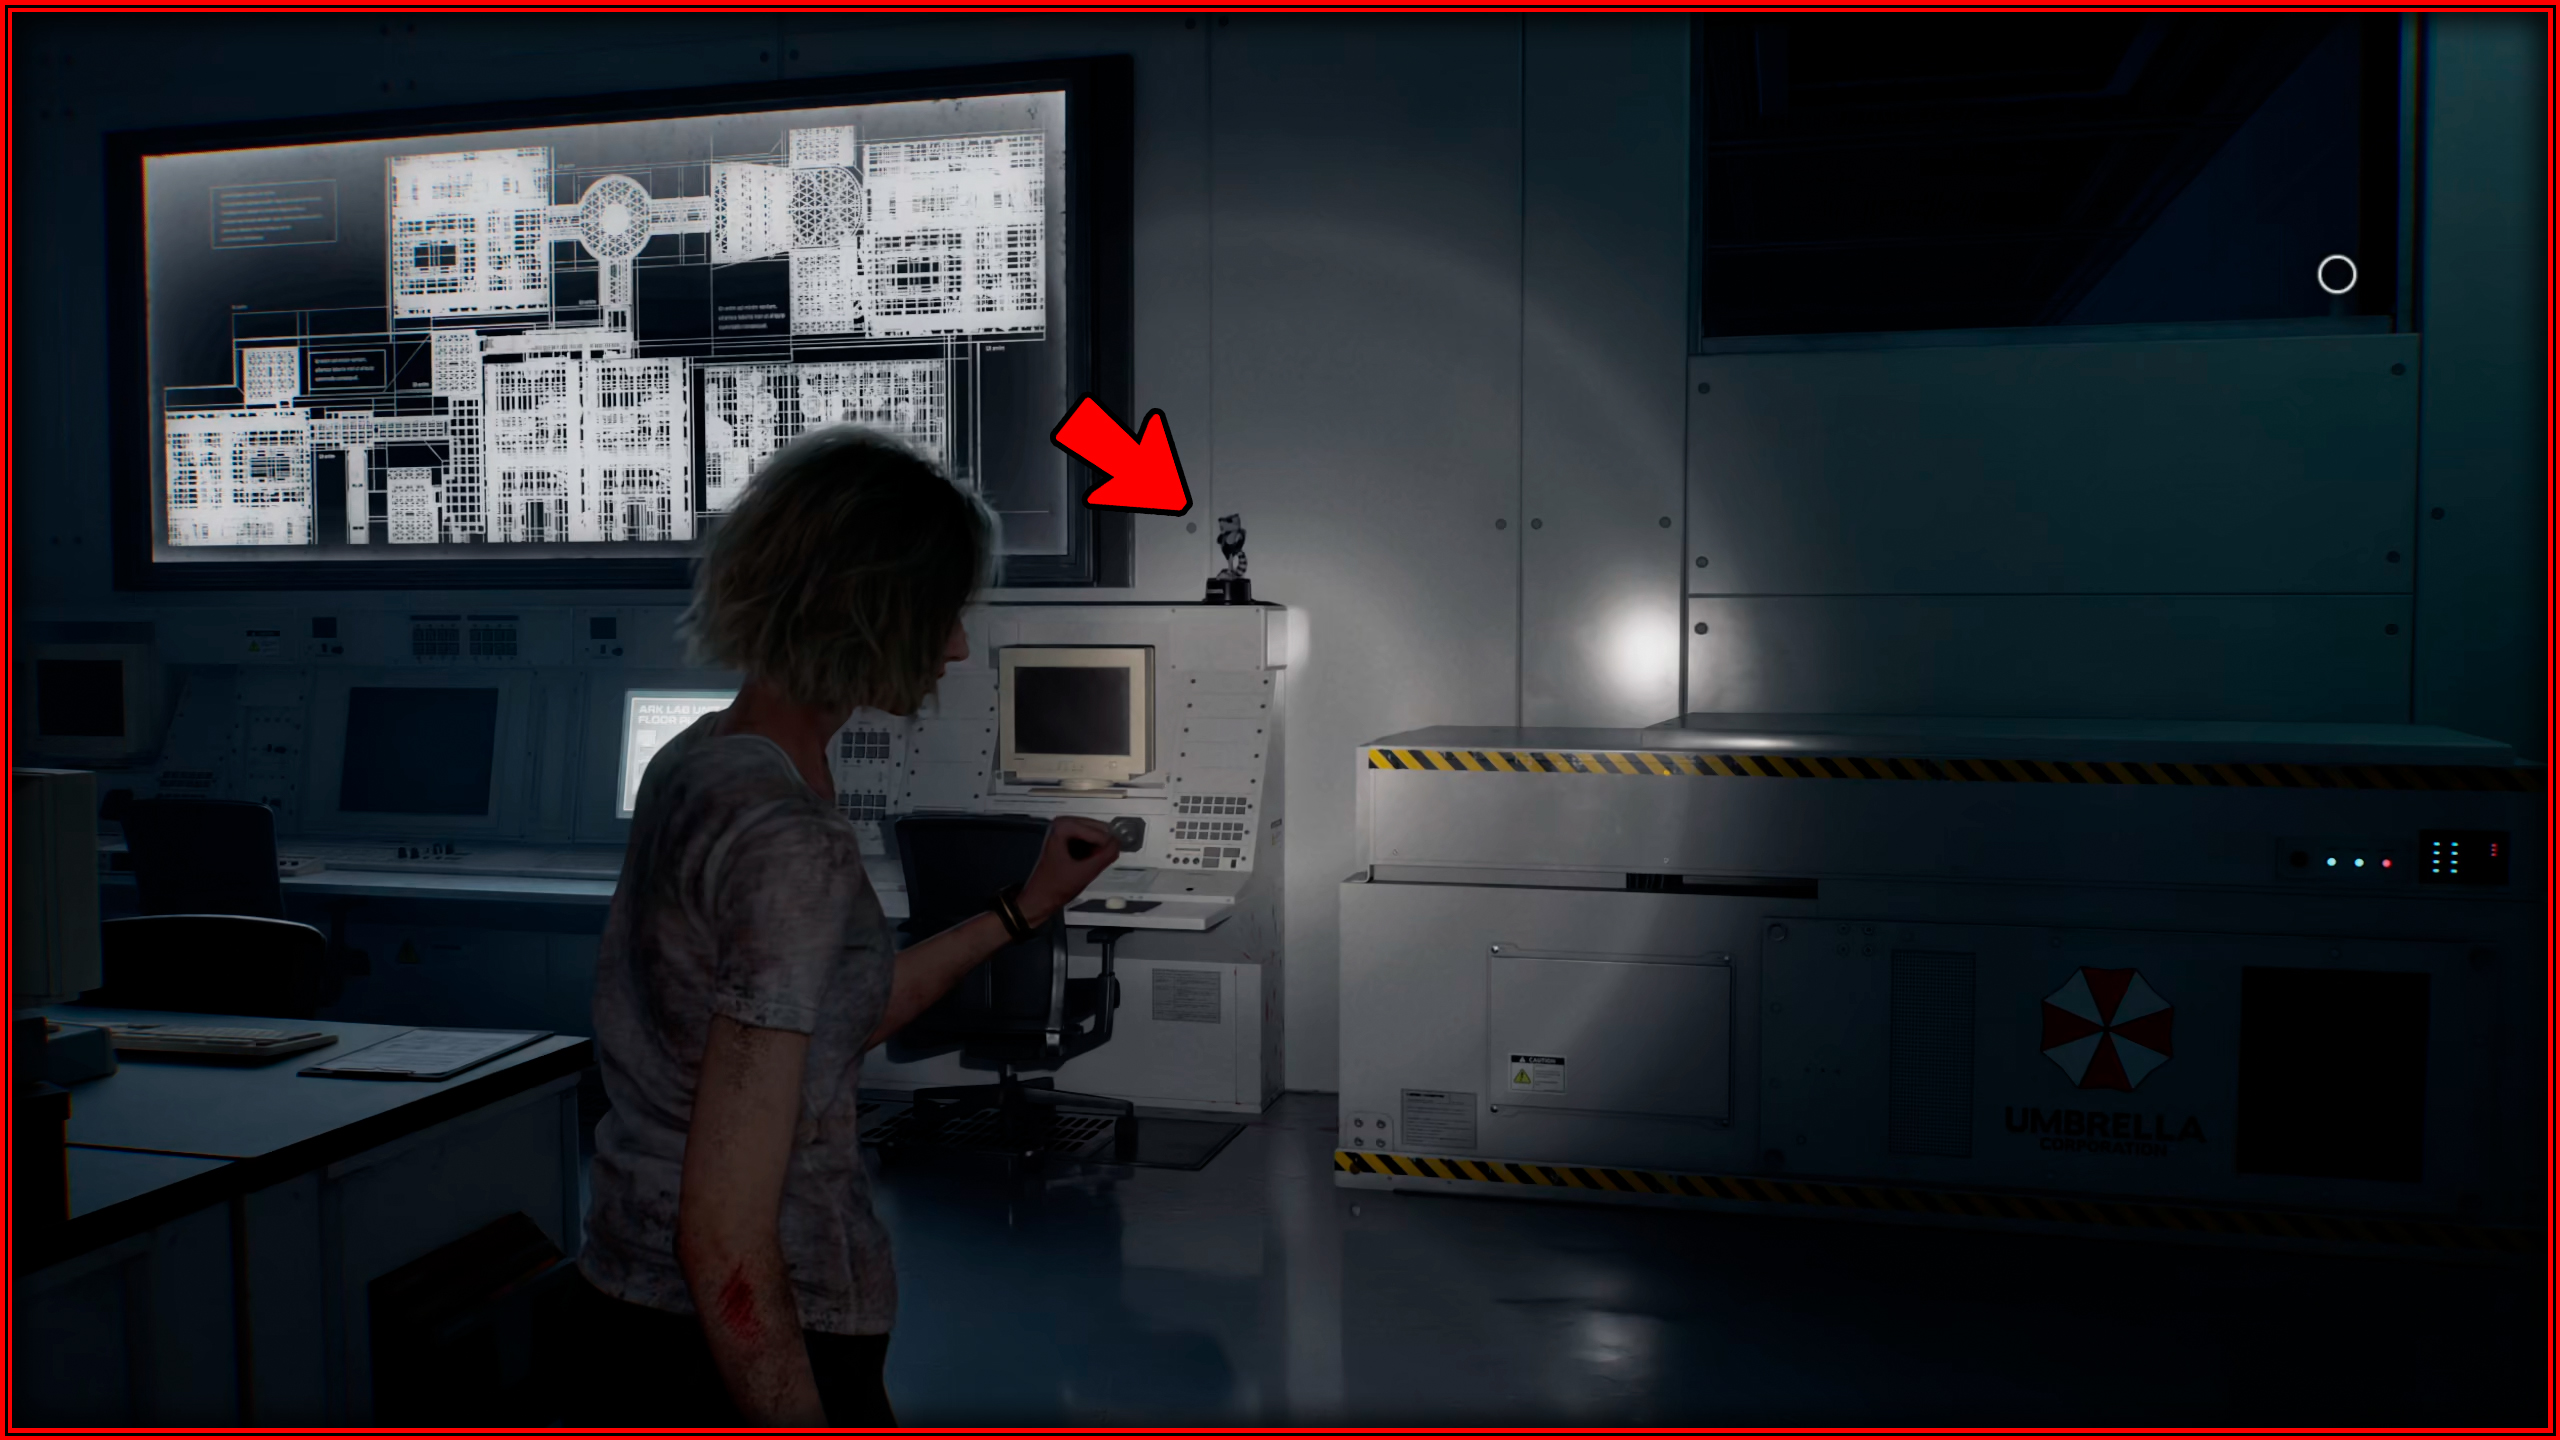
You Little Rascal!
 There are 25 Mr. Raccoon Memoriams throughout the game. Destroy them all to obtain it.
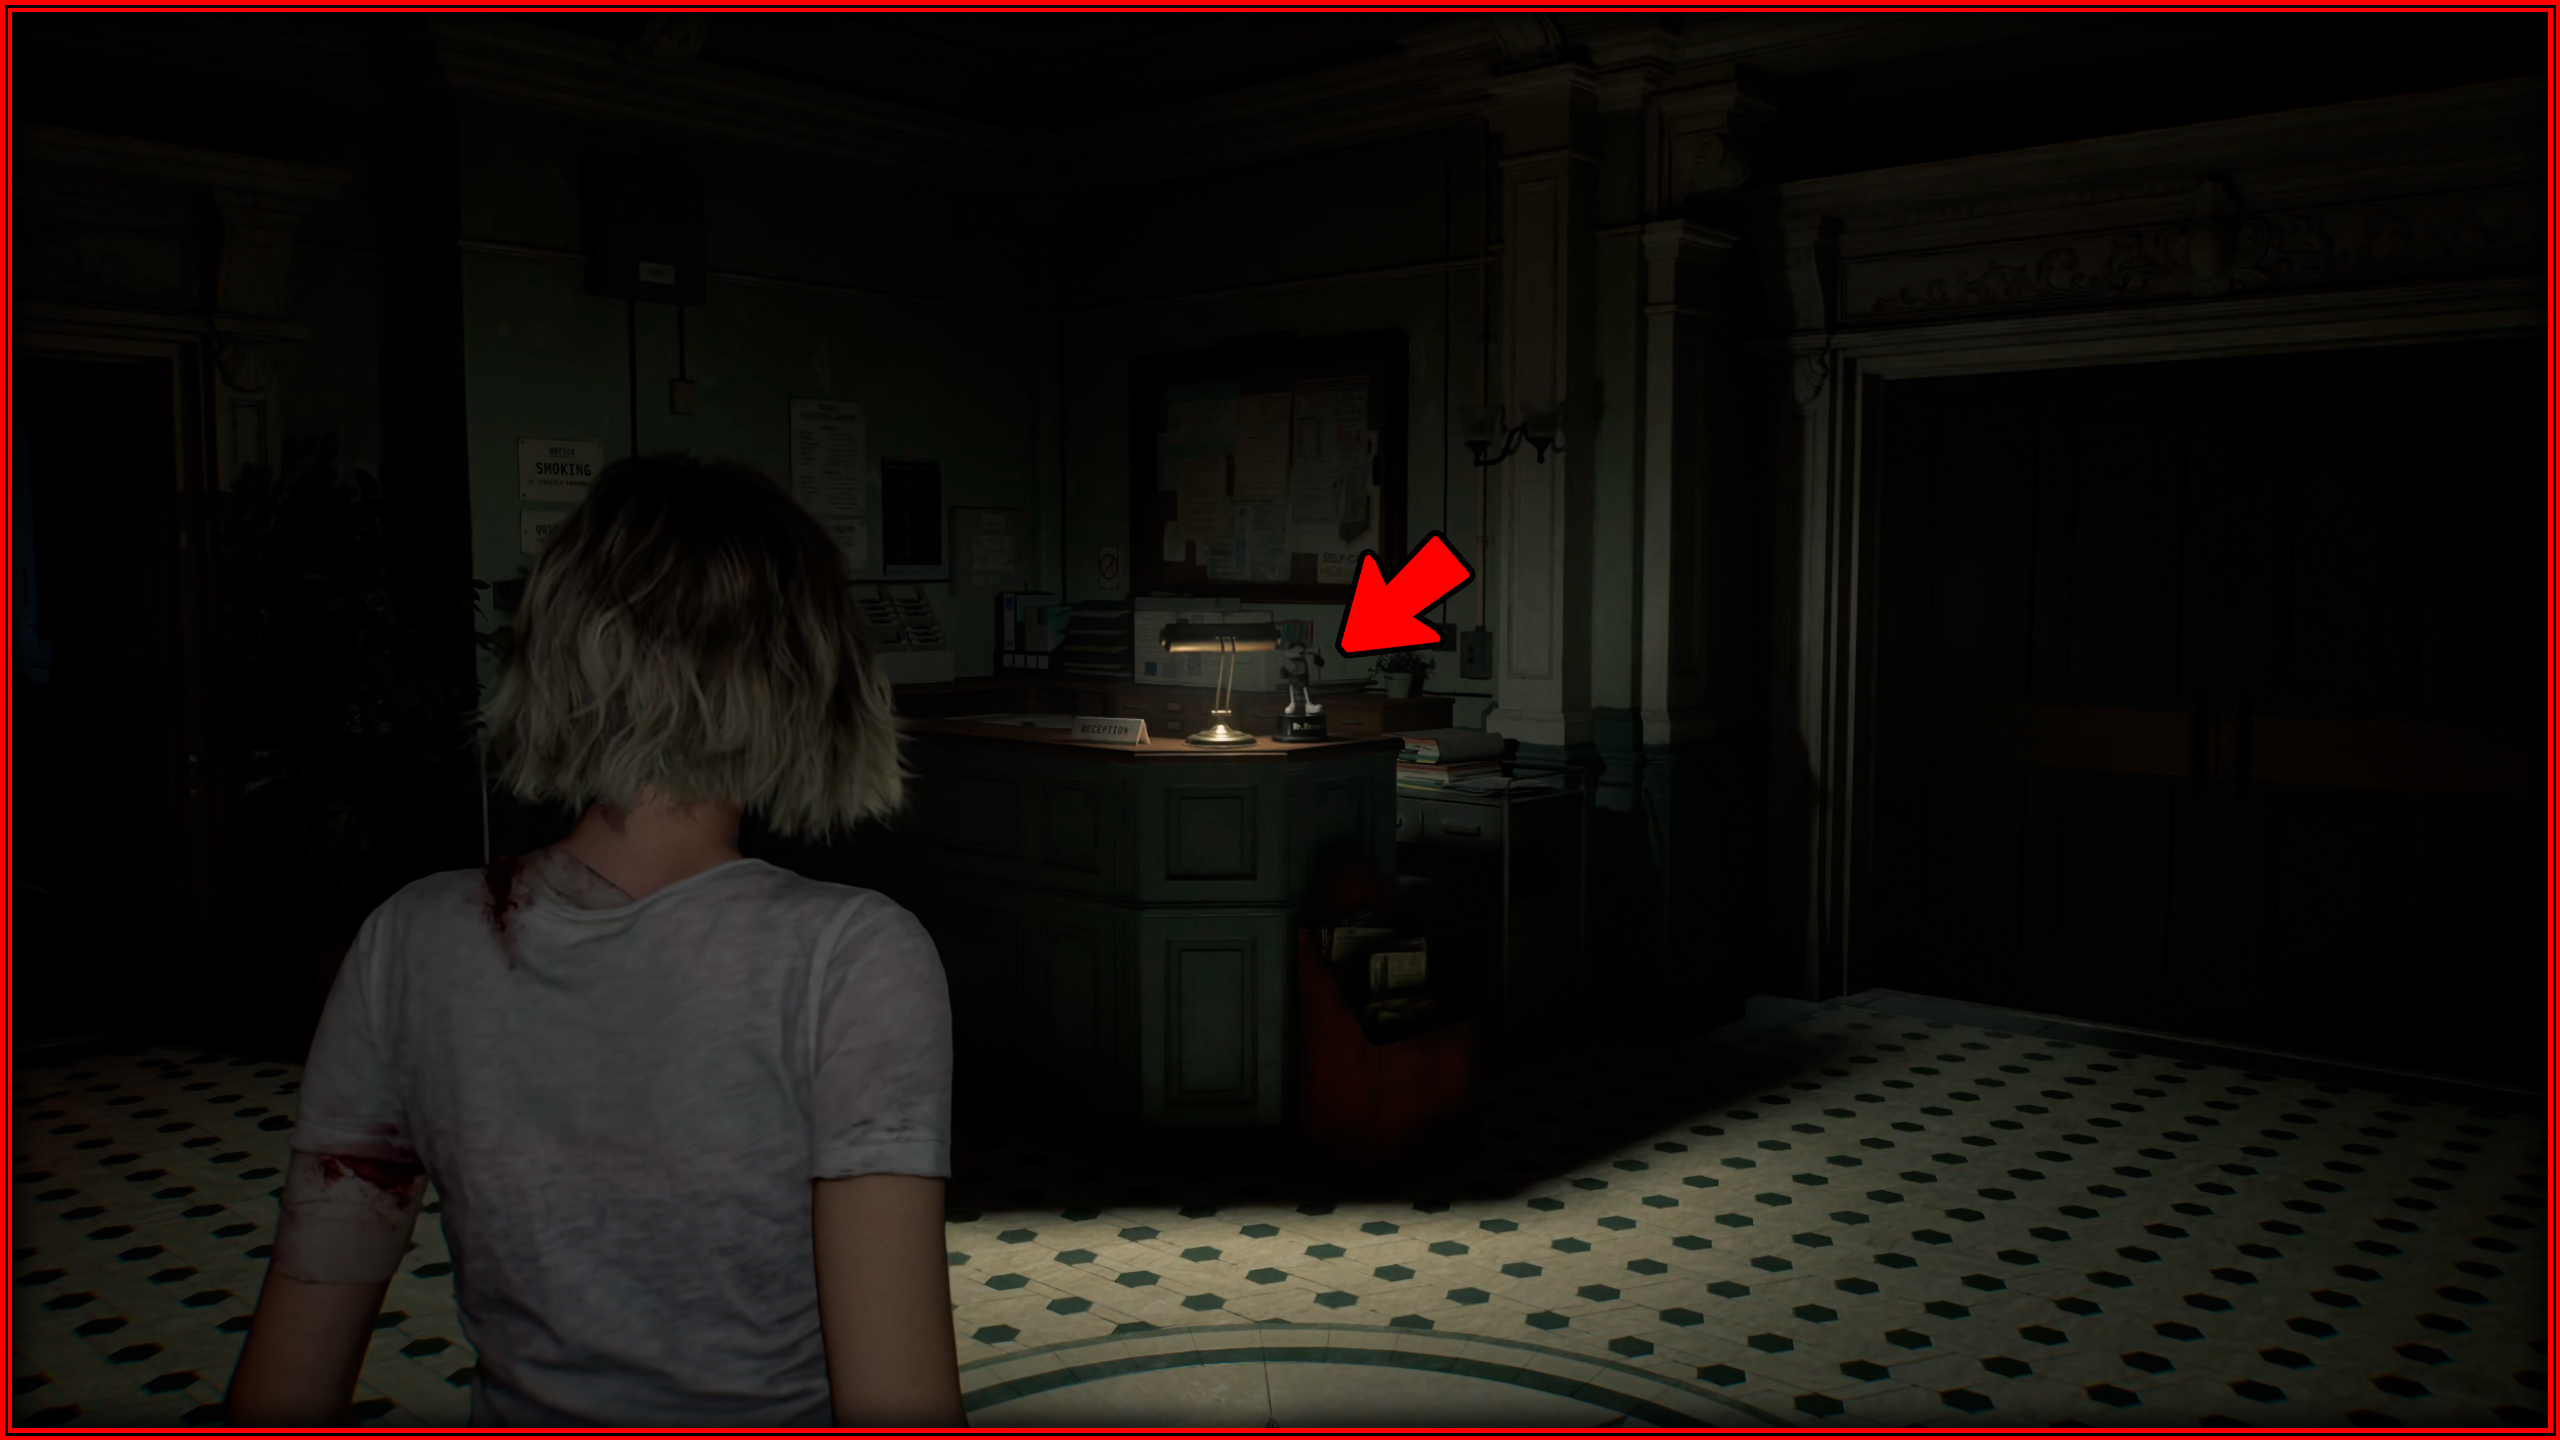
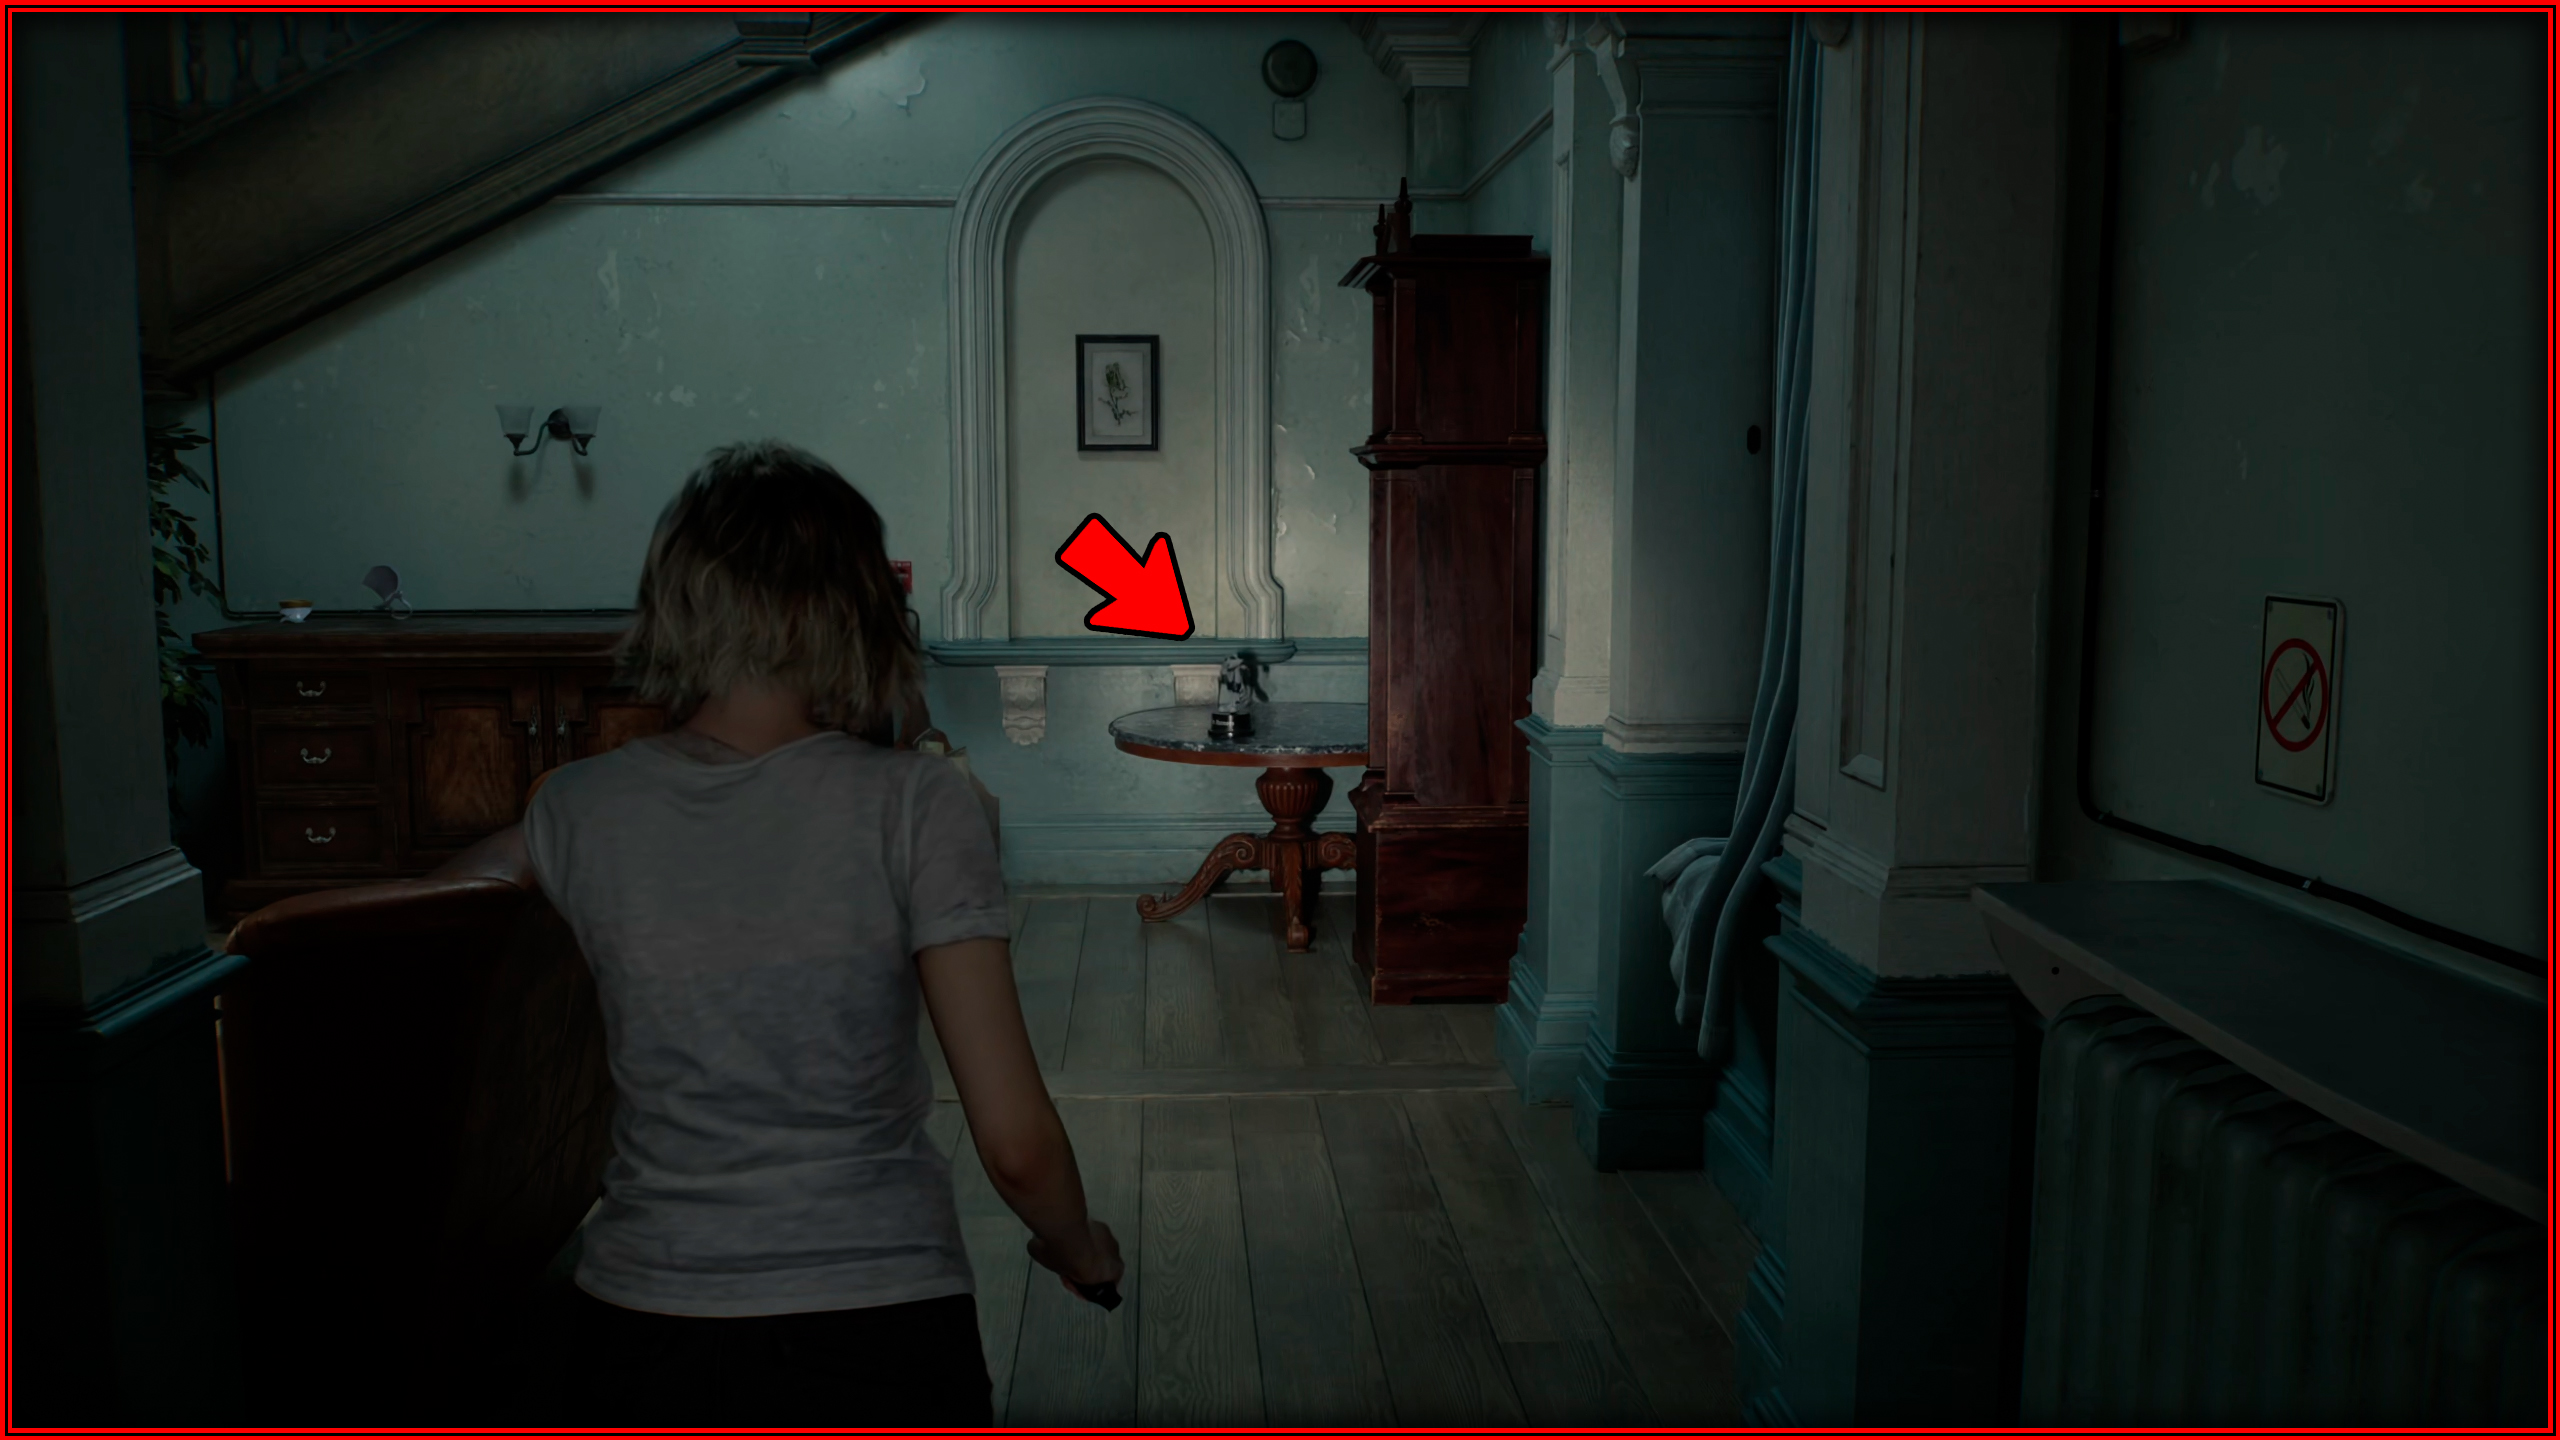
Care Center
Mr. Raccoon memoriam 1
After defeating the enemies in the Rehabilitation Ward, once you have opened the door using the chainsaw, you will see it next to a window before climbing the stairs.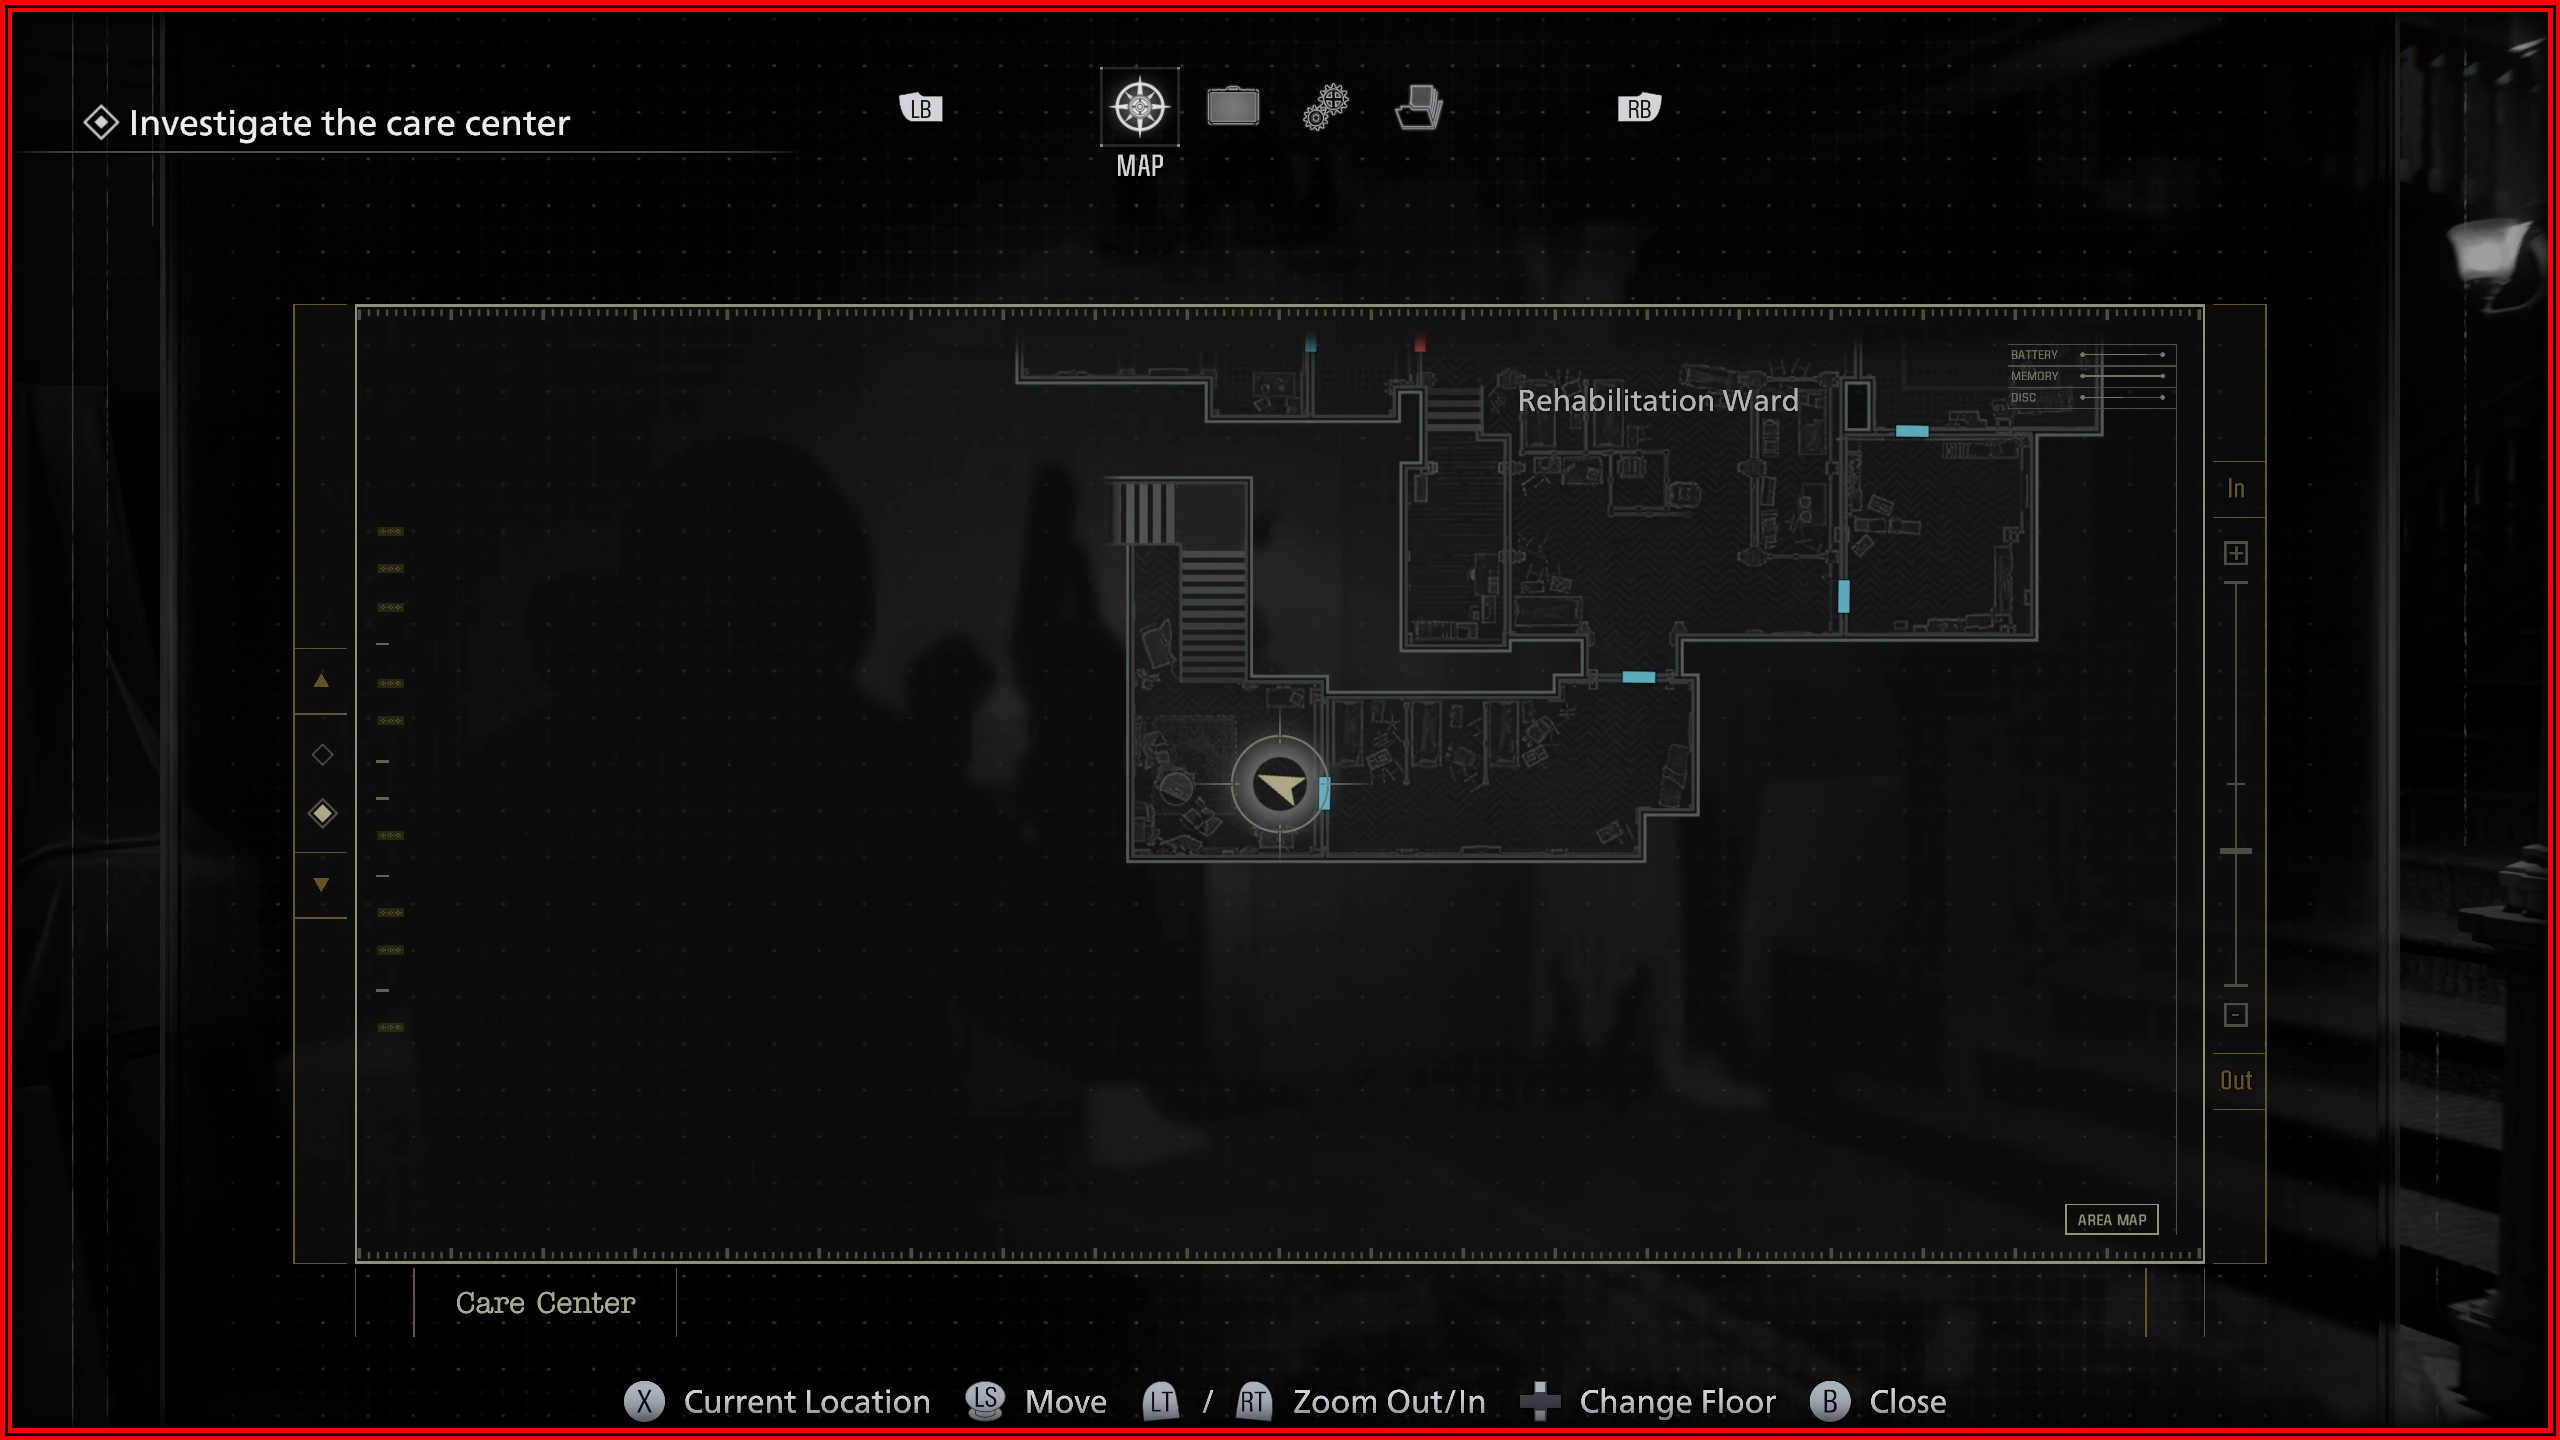
Mr. Raccoon memoriam 2
In the East Wing Lobby, Mr. Raccoon will be on top of the reception desk.
Mr. Raccoon memoriam 3
After leaving the Blood Lab, go down the hallway and you’ll see this Mr. Raccoon next to the stairs.
Mr. Raccoon memoriam 4
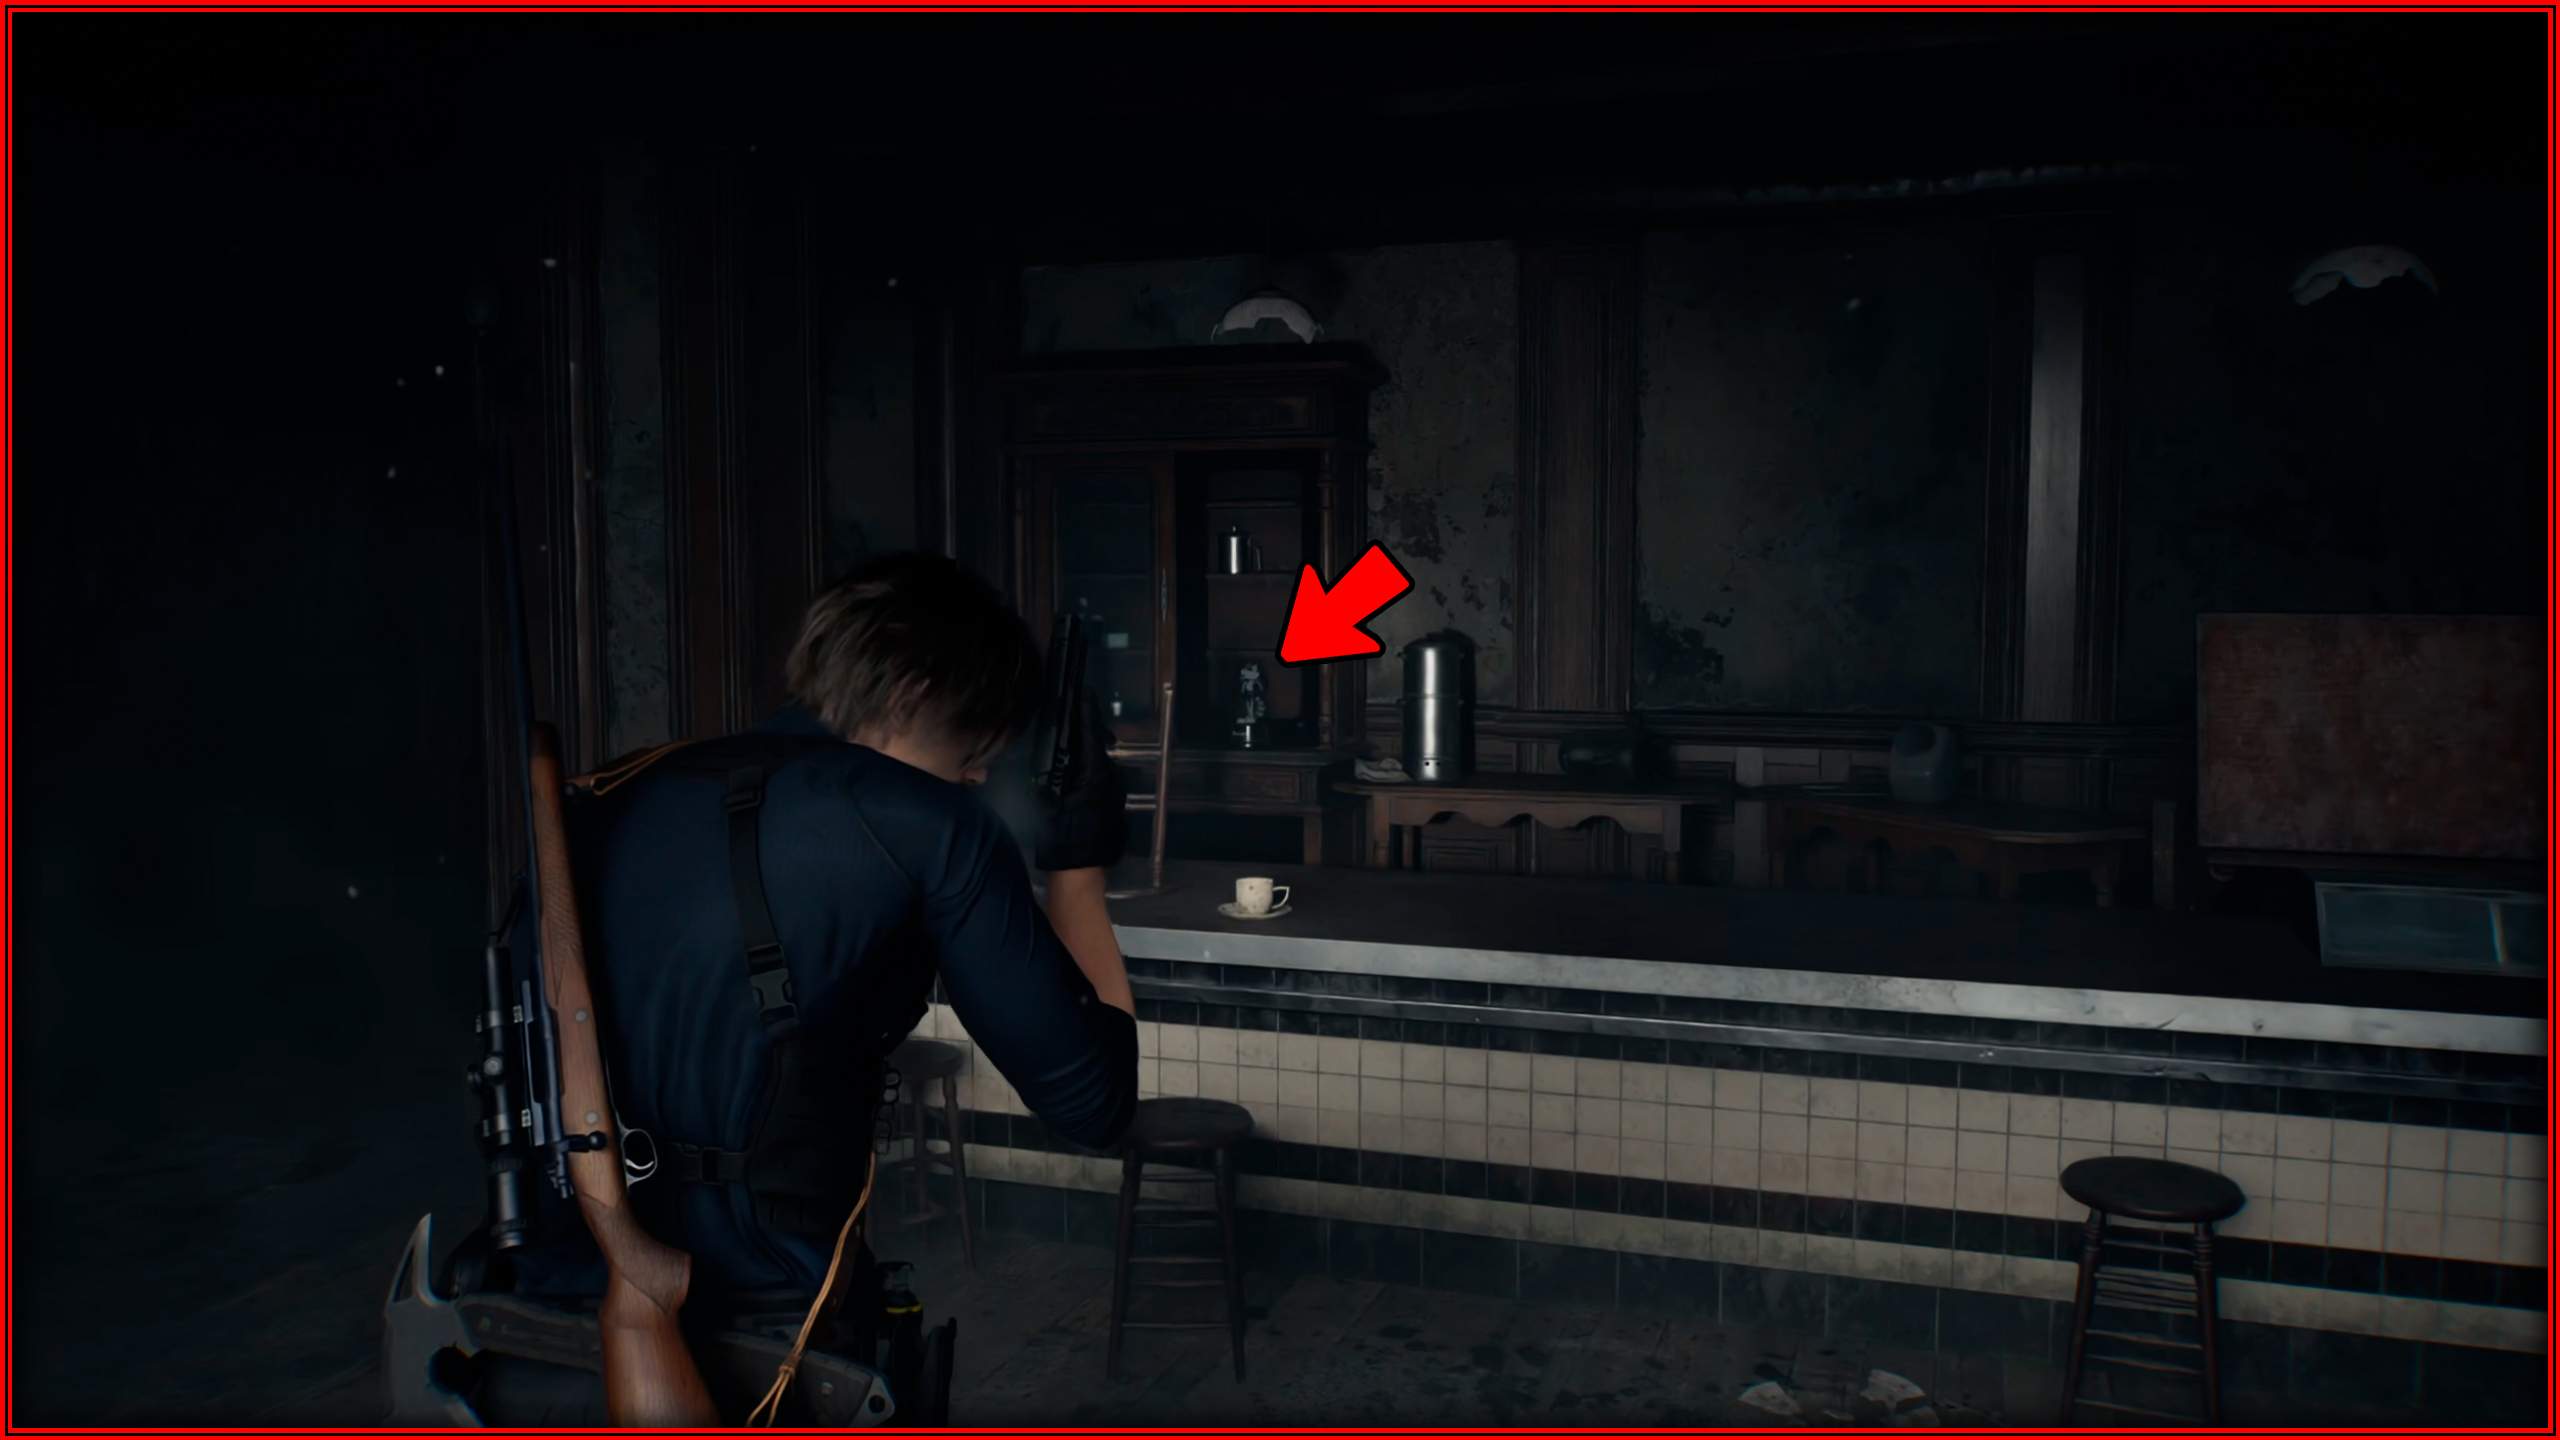
In the office, on top of the coffee maker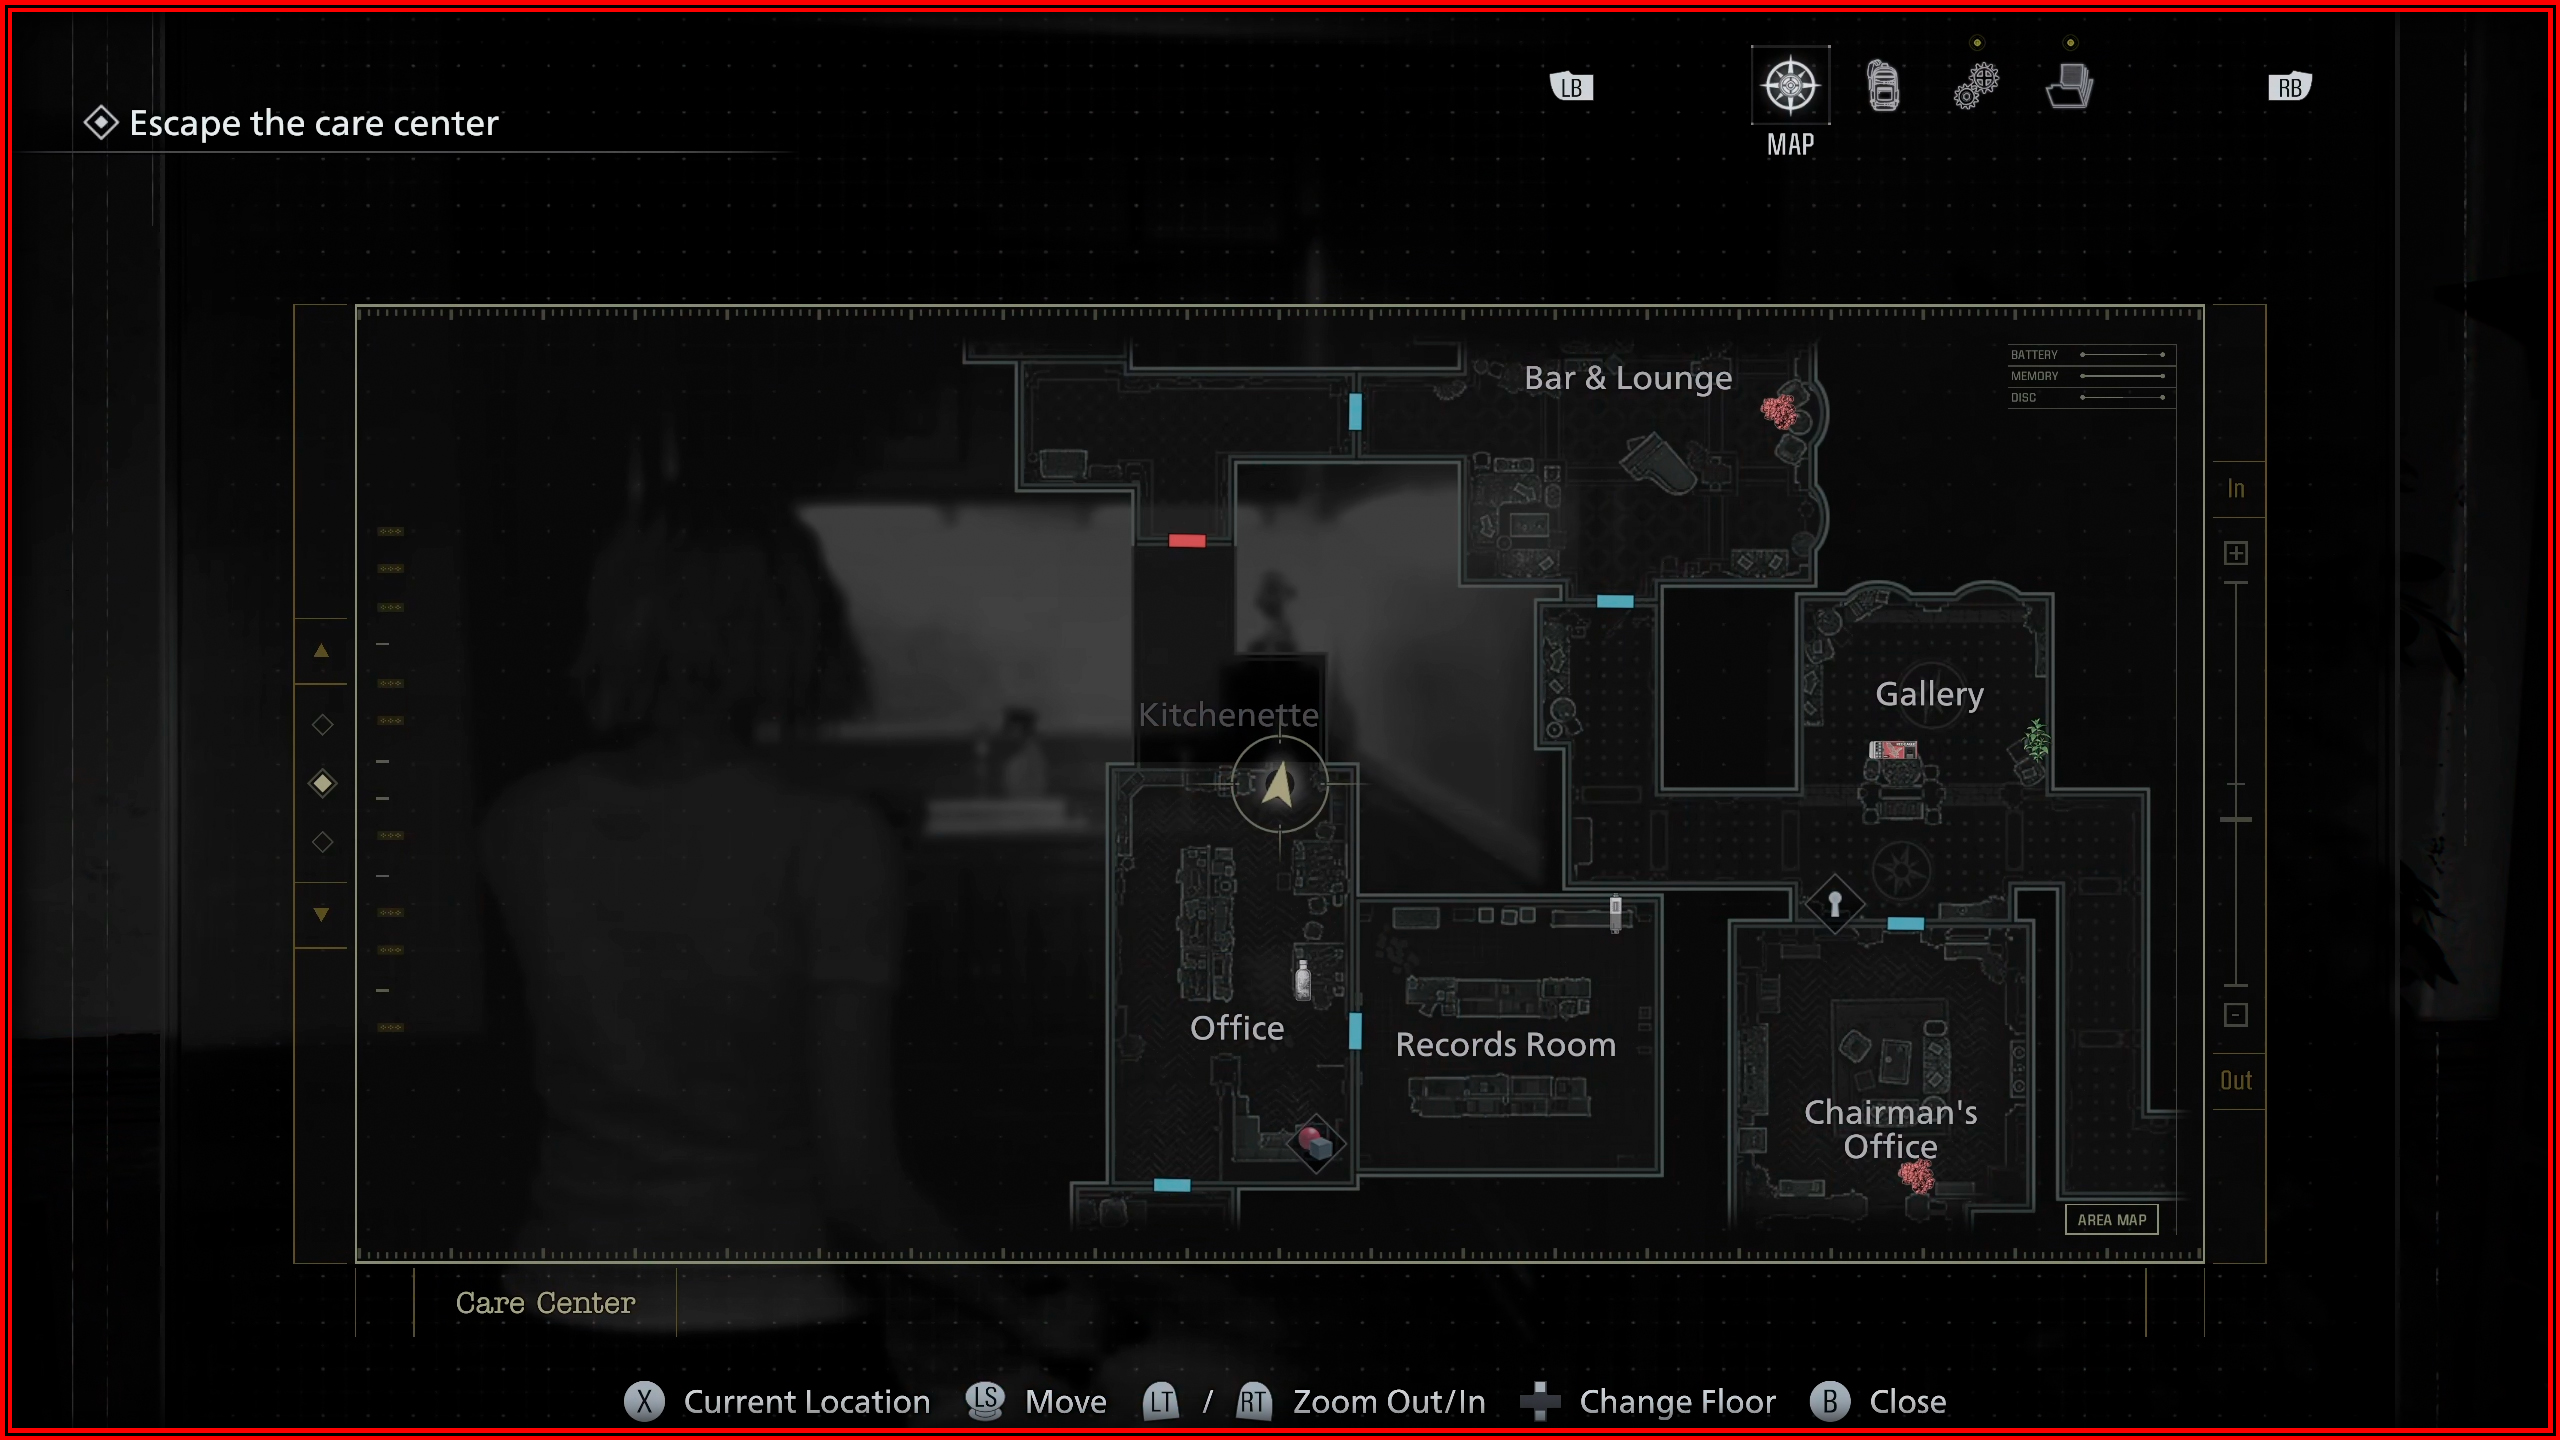
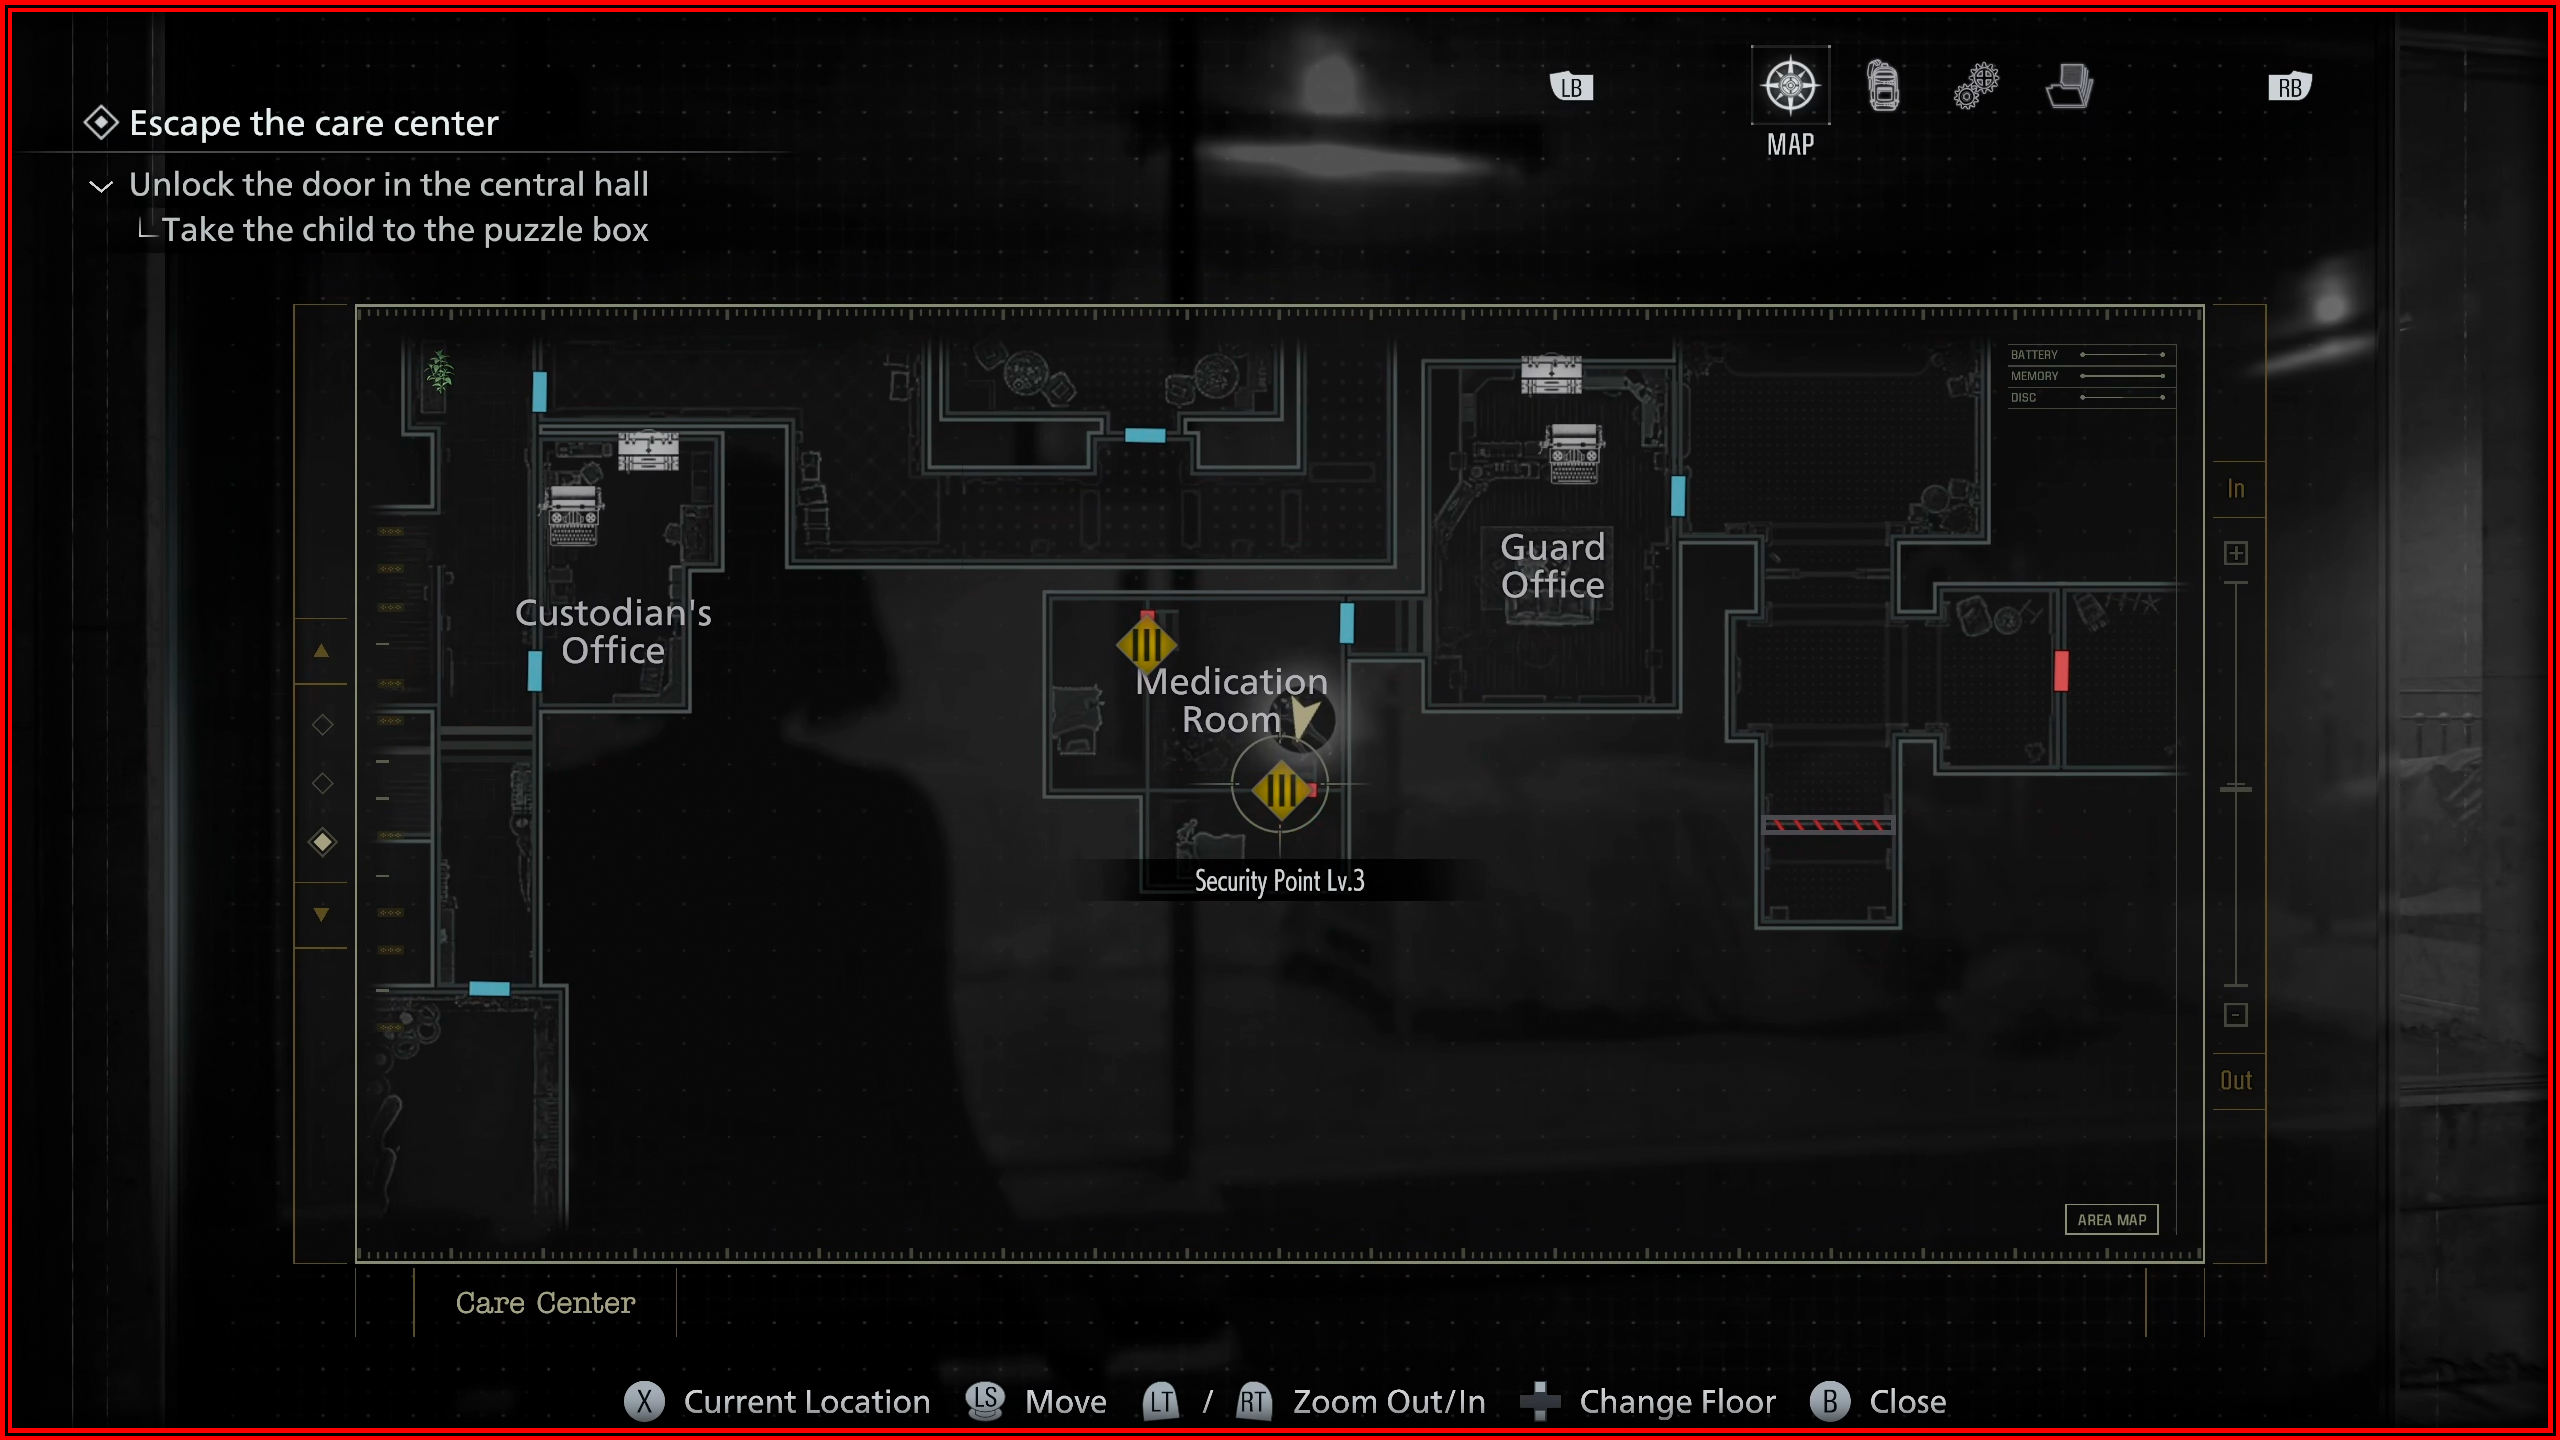
Mr. Raccoon memoriam 5
After obtaining the ID Wristband (Level 3), return to the Medication Room and enter the room you couldn’t access earlier. This Mr. Raccoon will be next to the bed.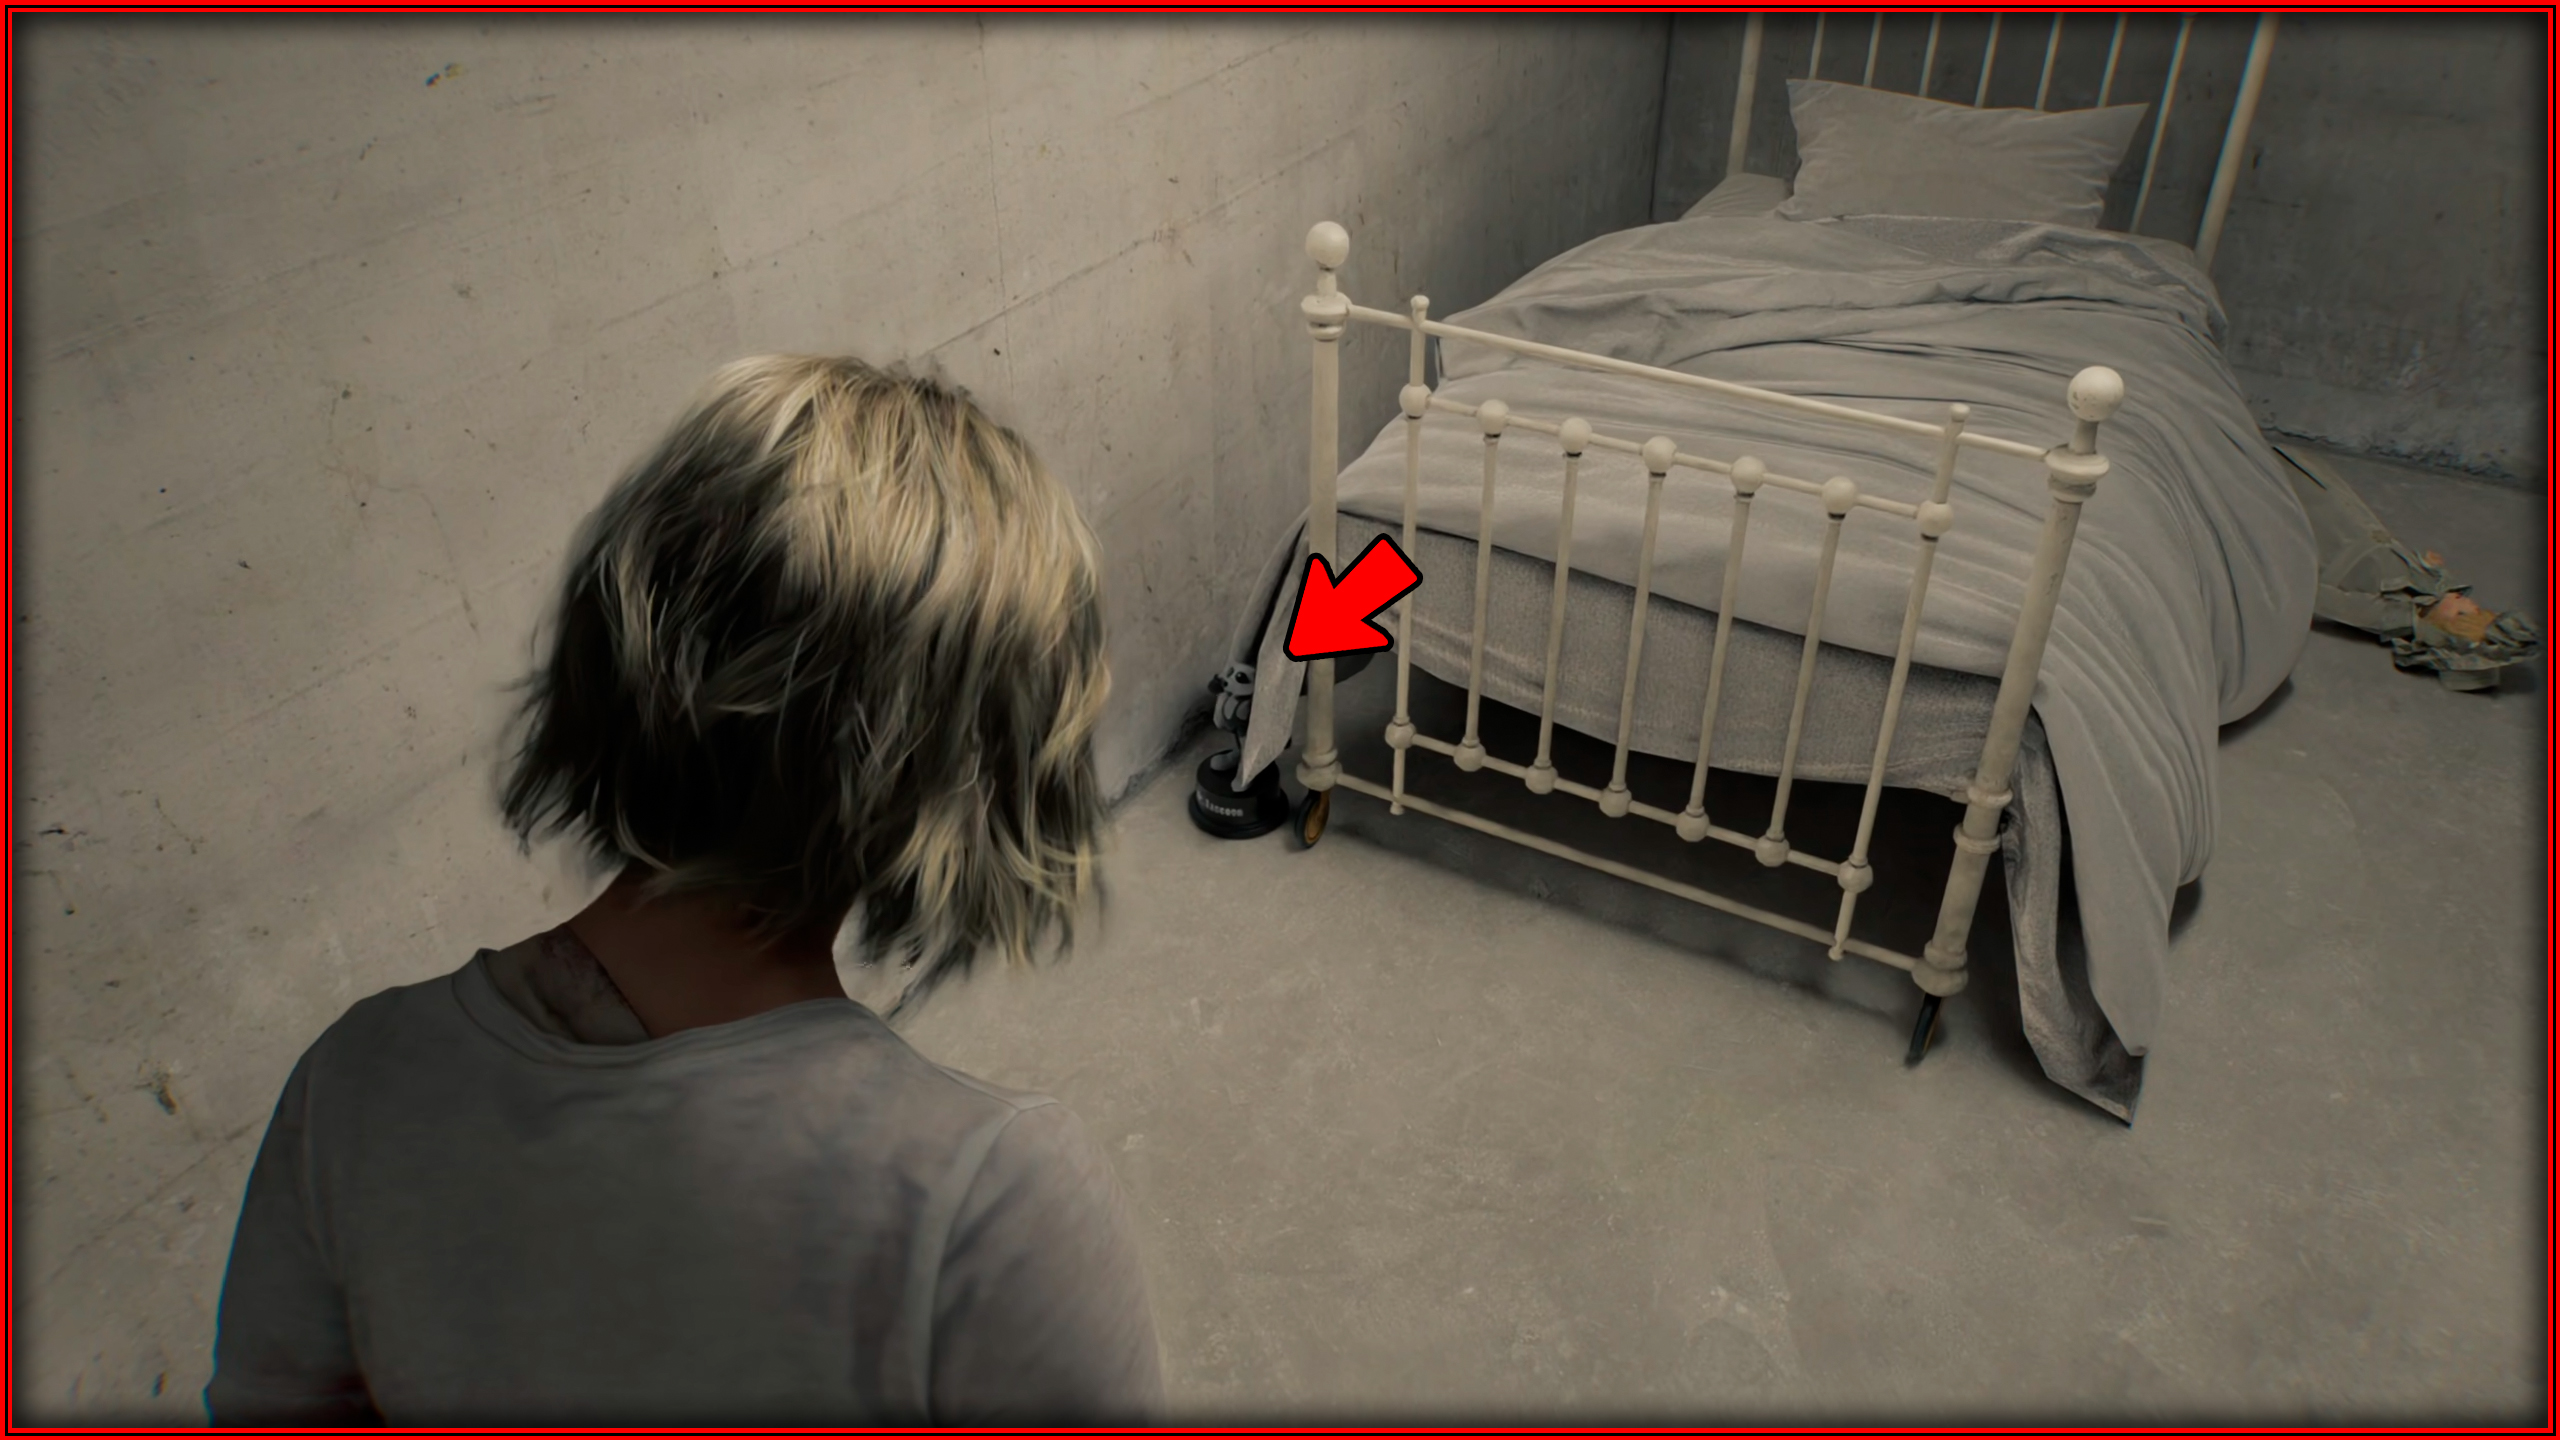
Mr. Raccoon memoriam 6
Inside a cabinet that only Leon can open in the records room.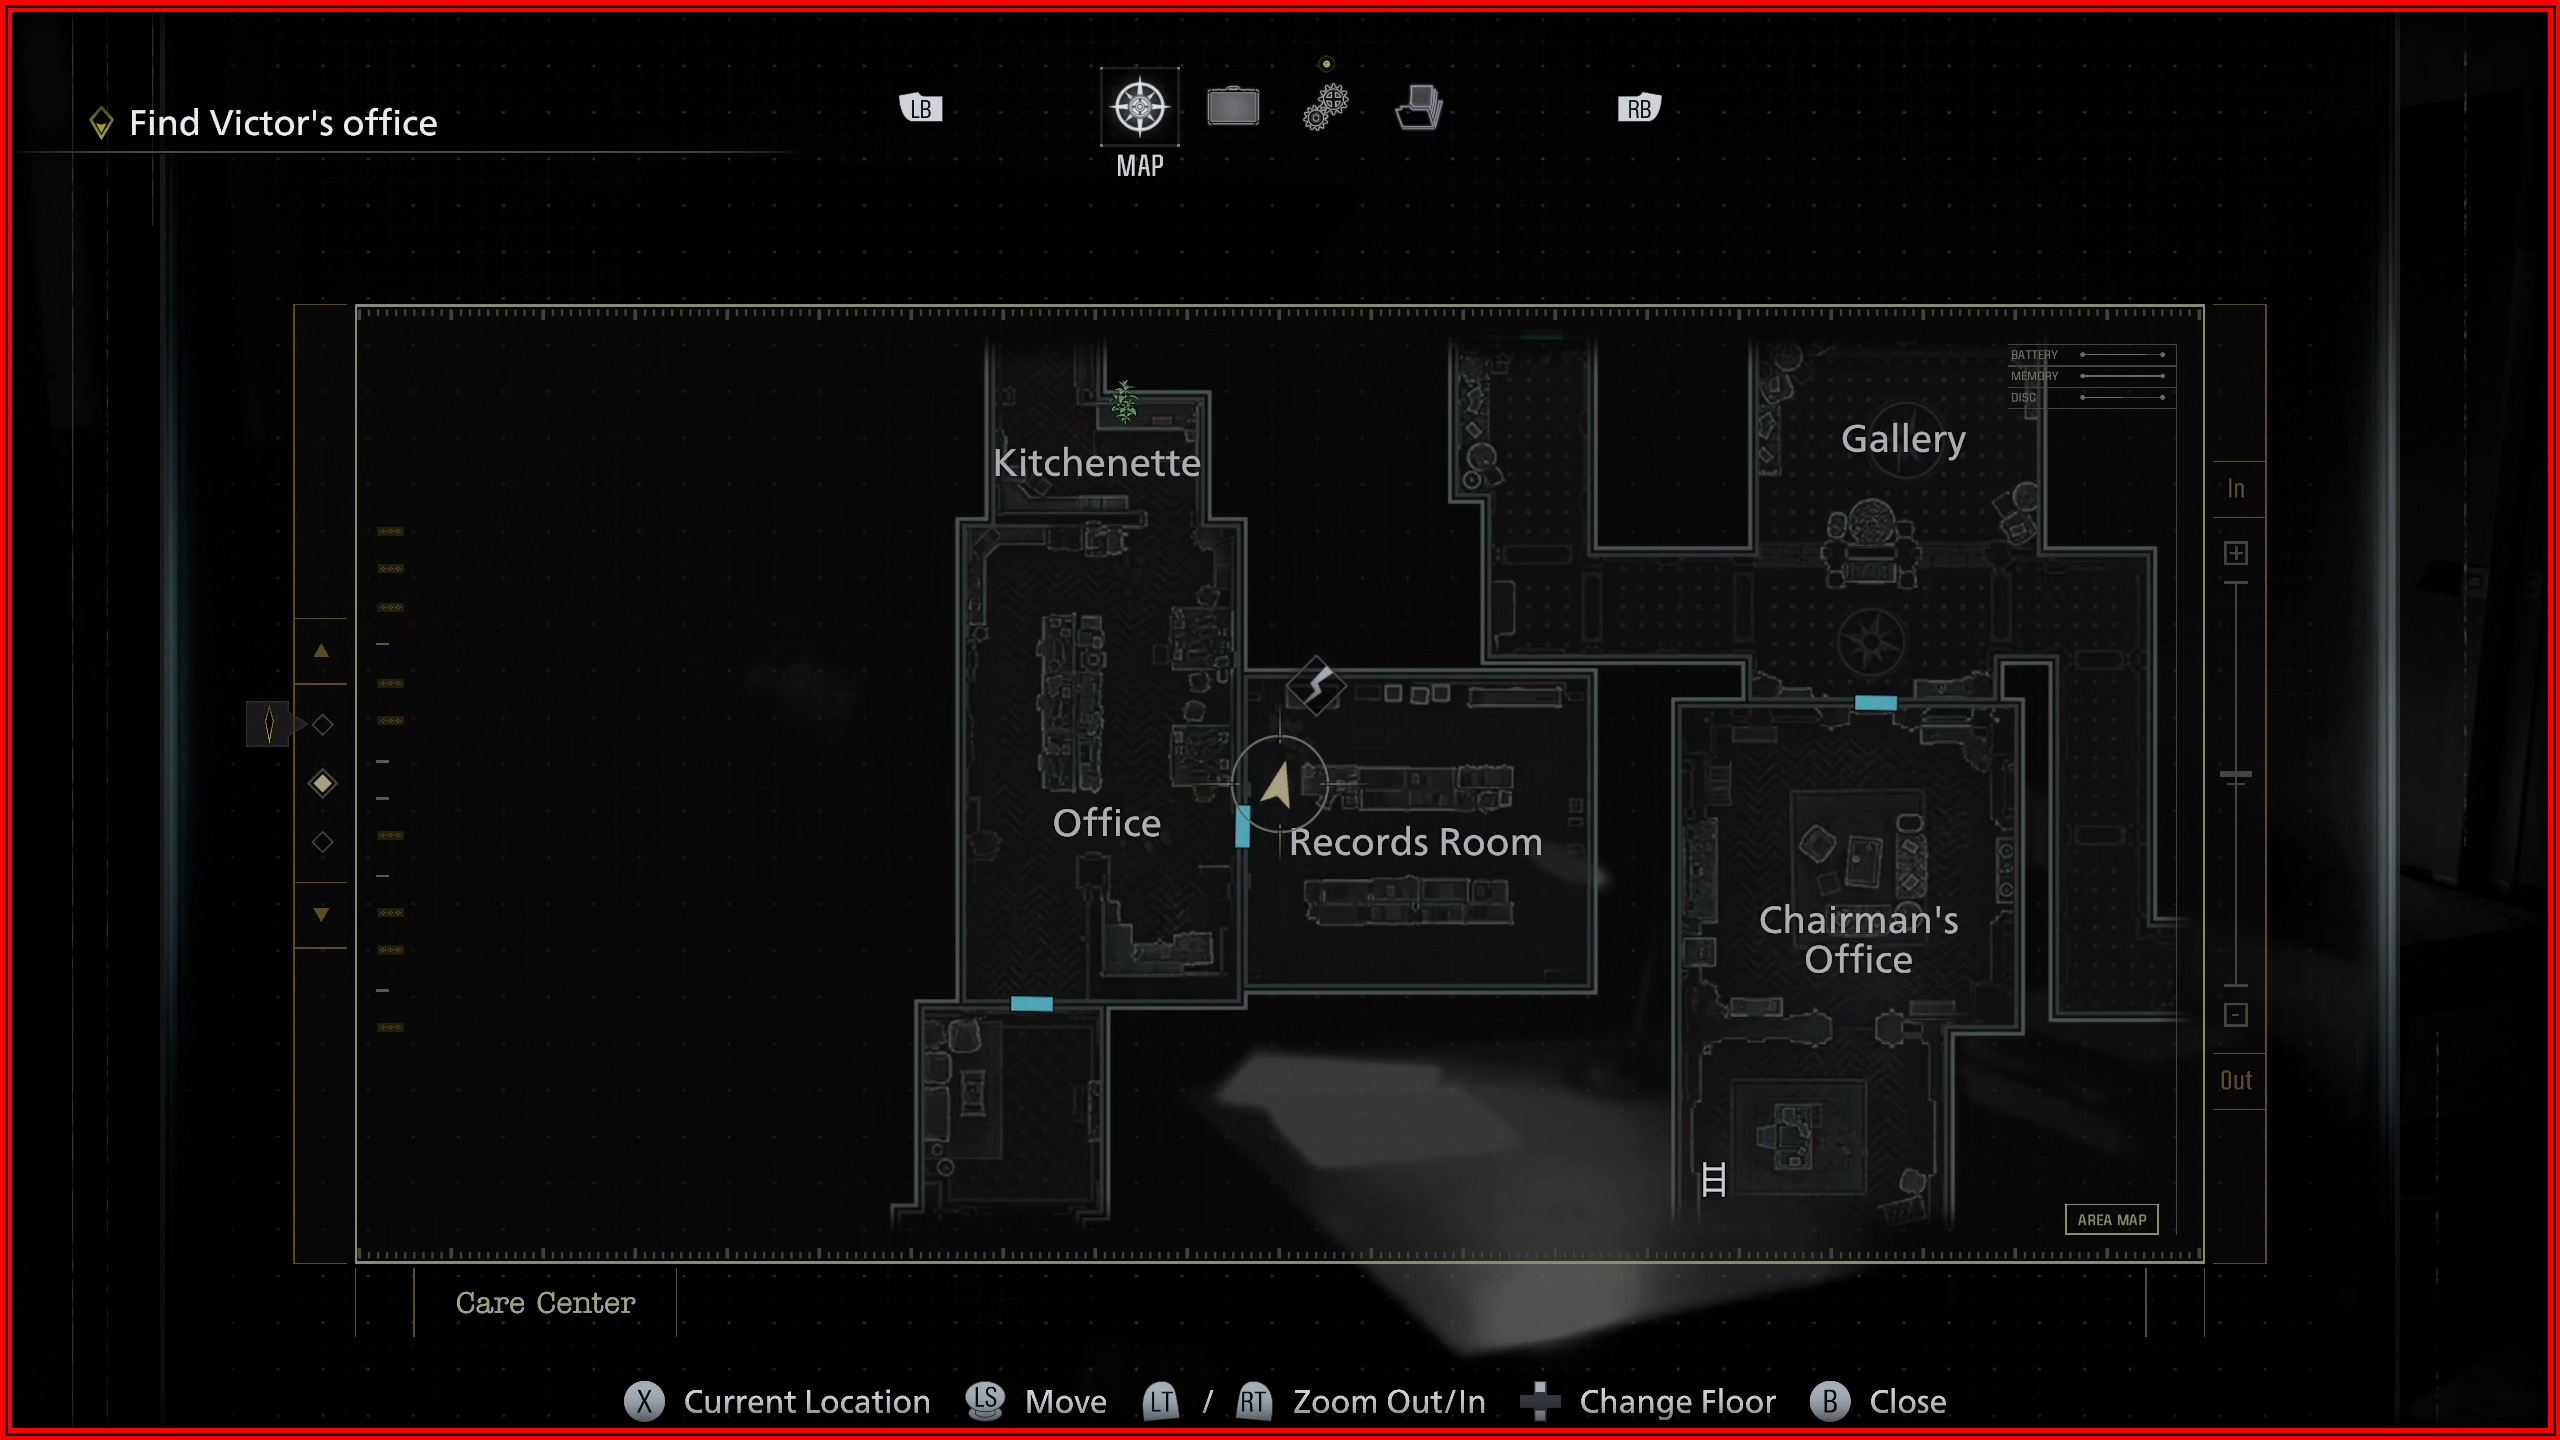
Care Center Basement
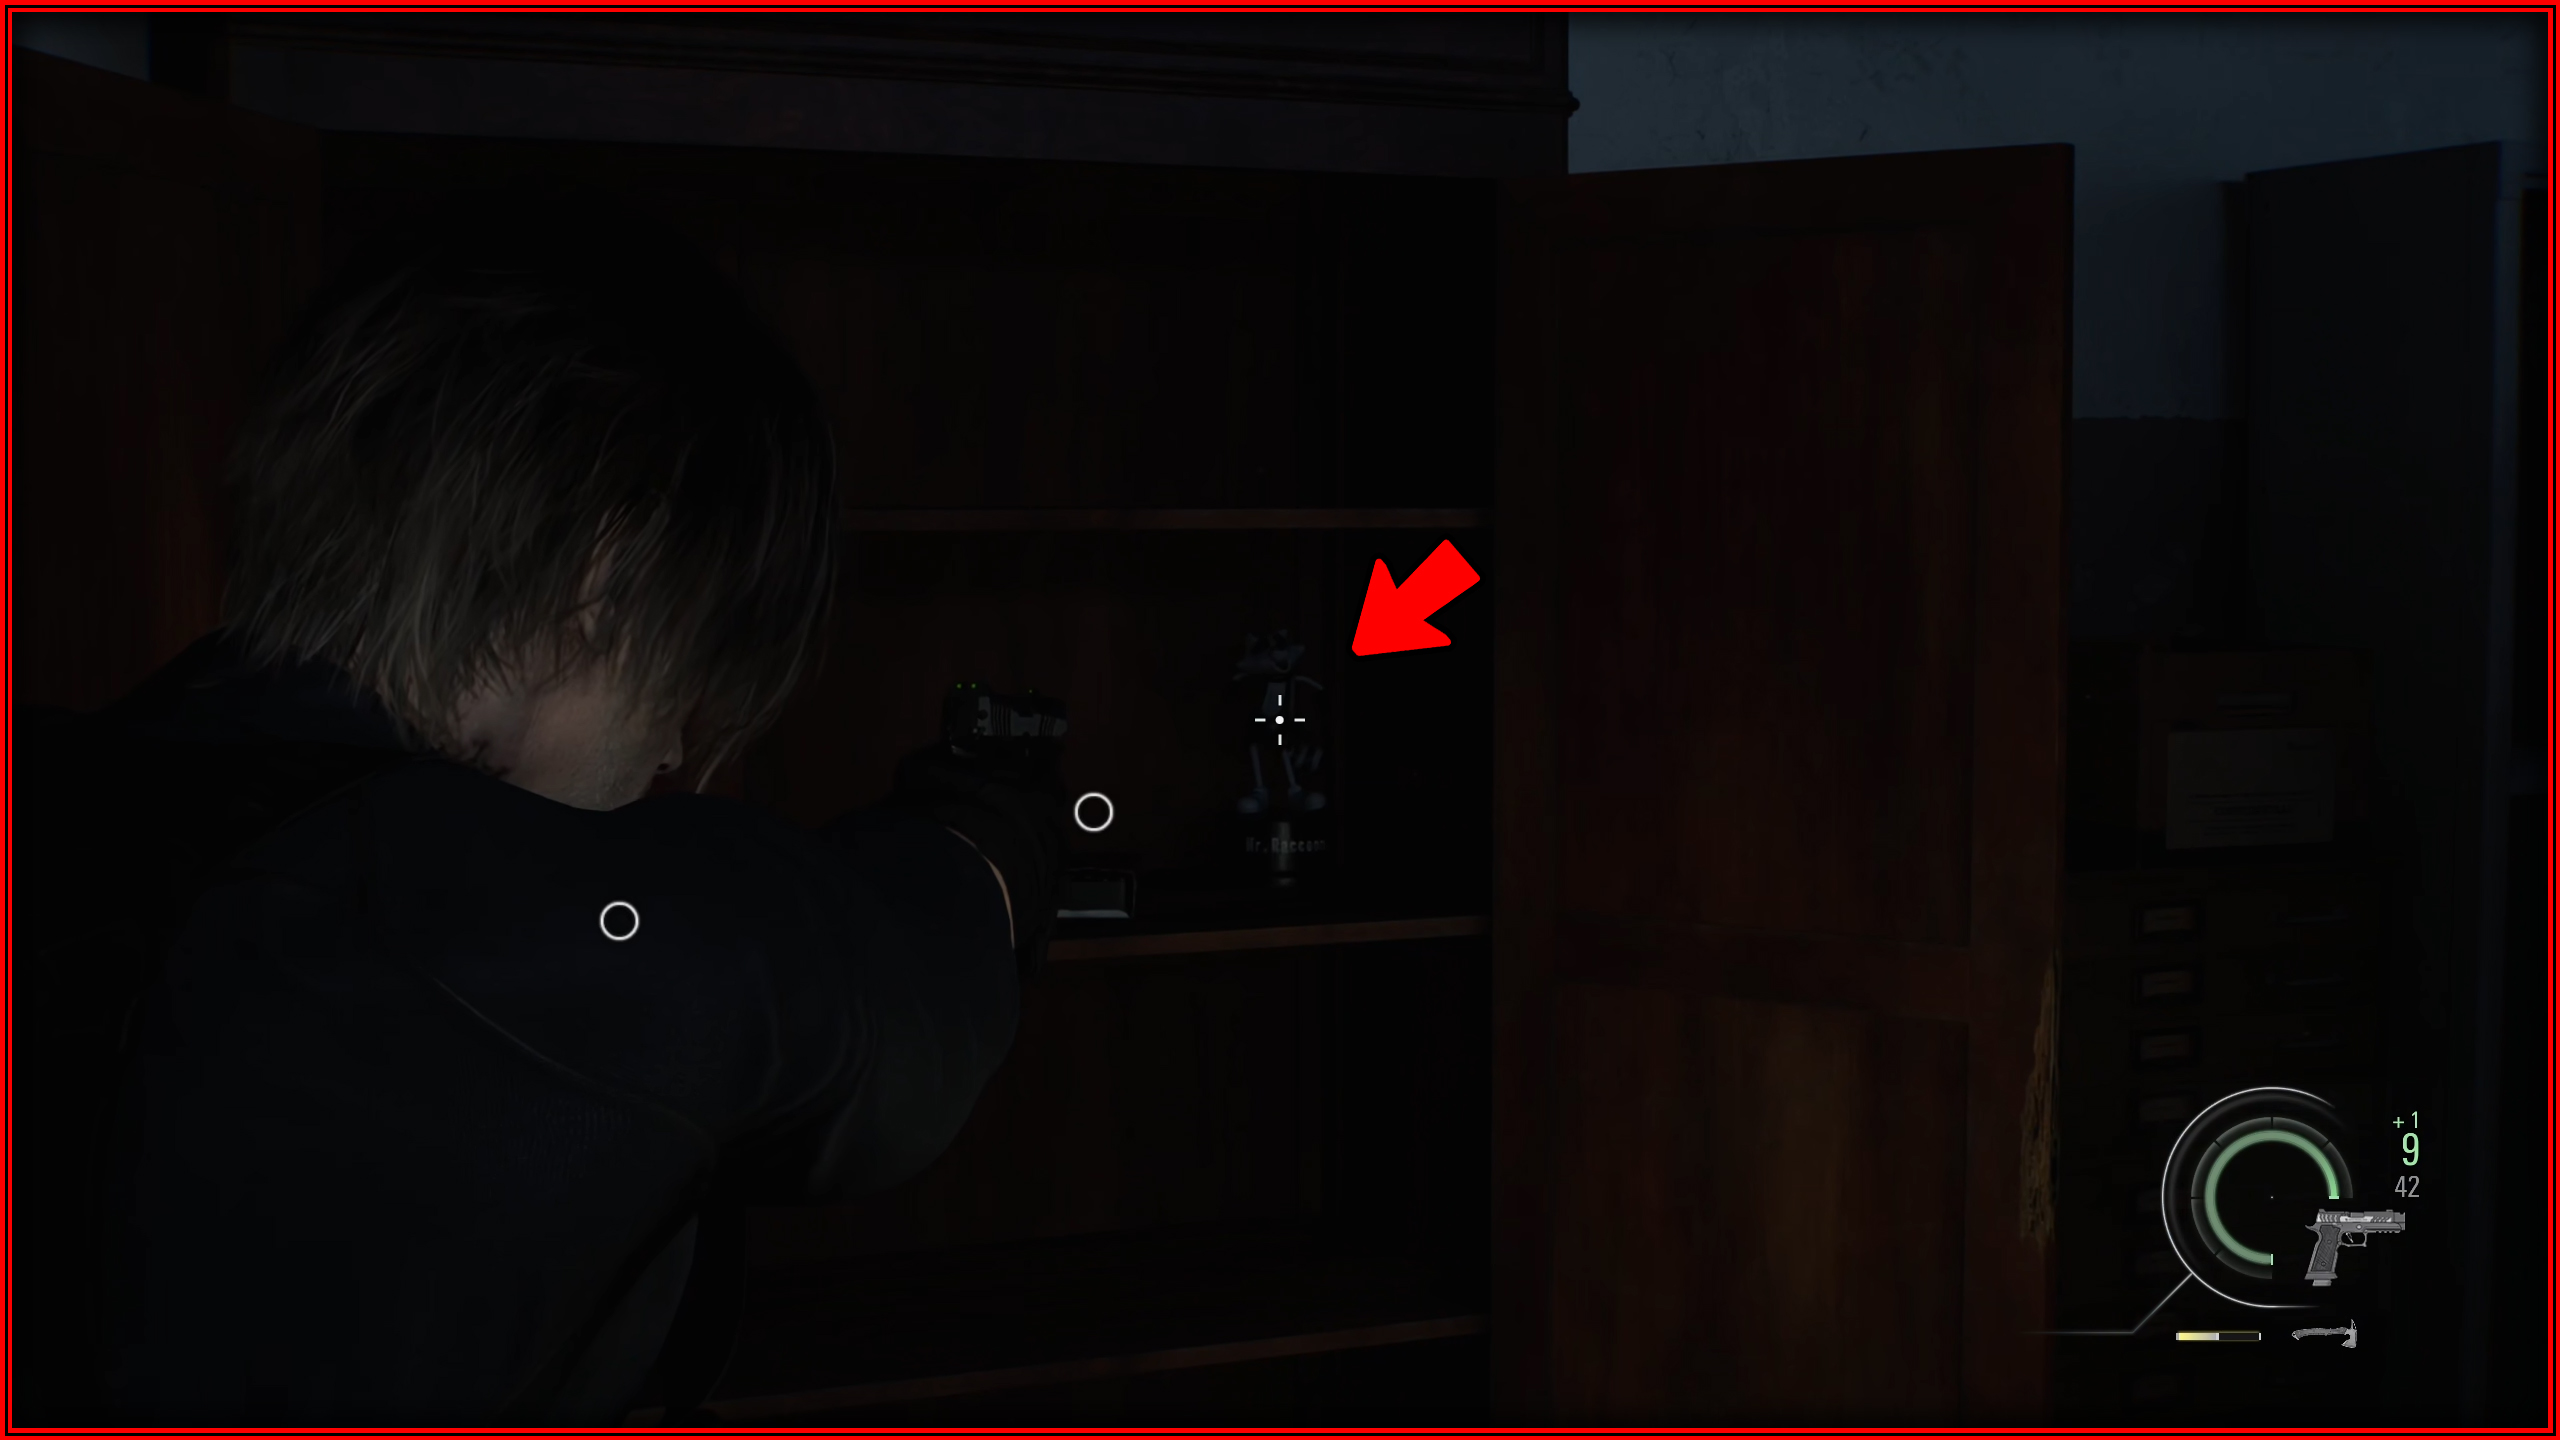
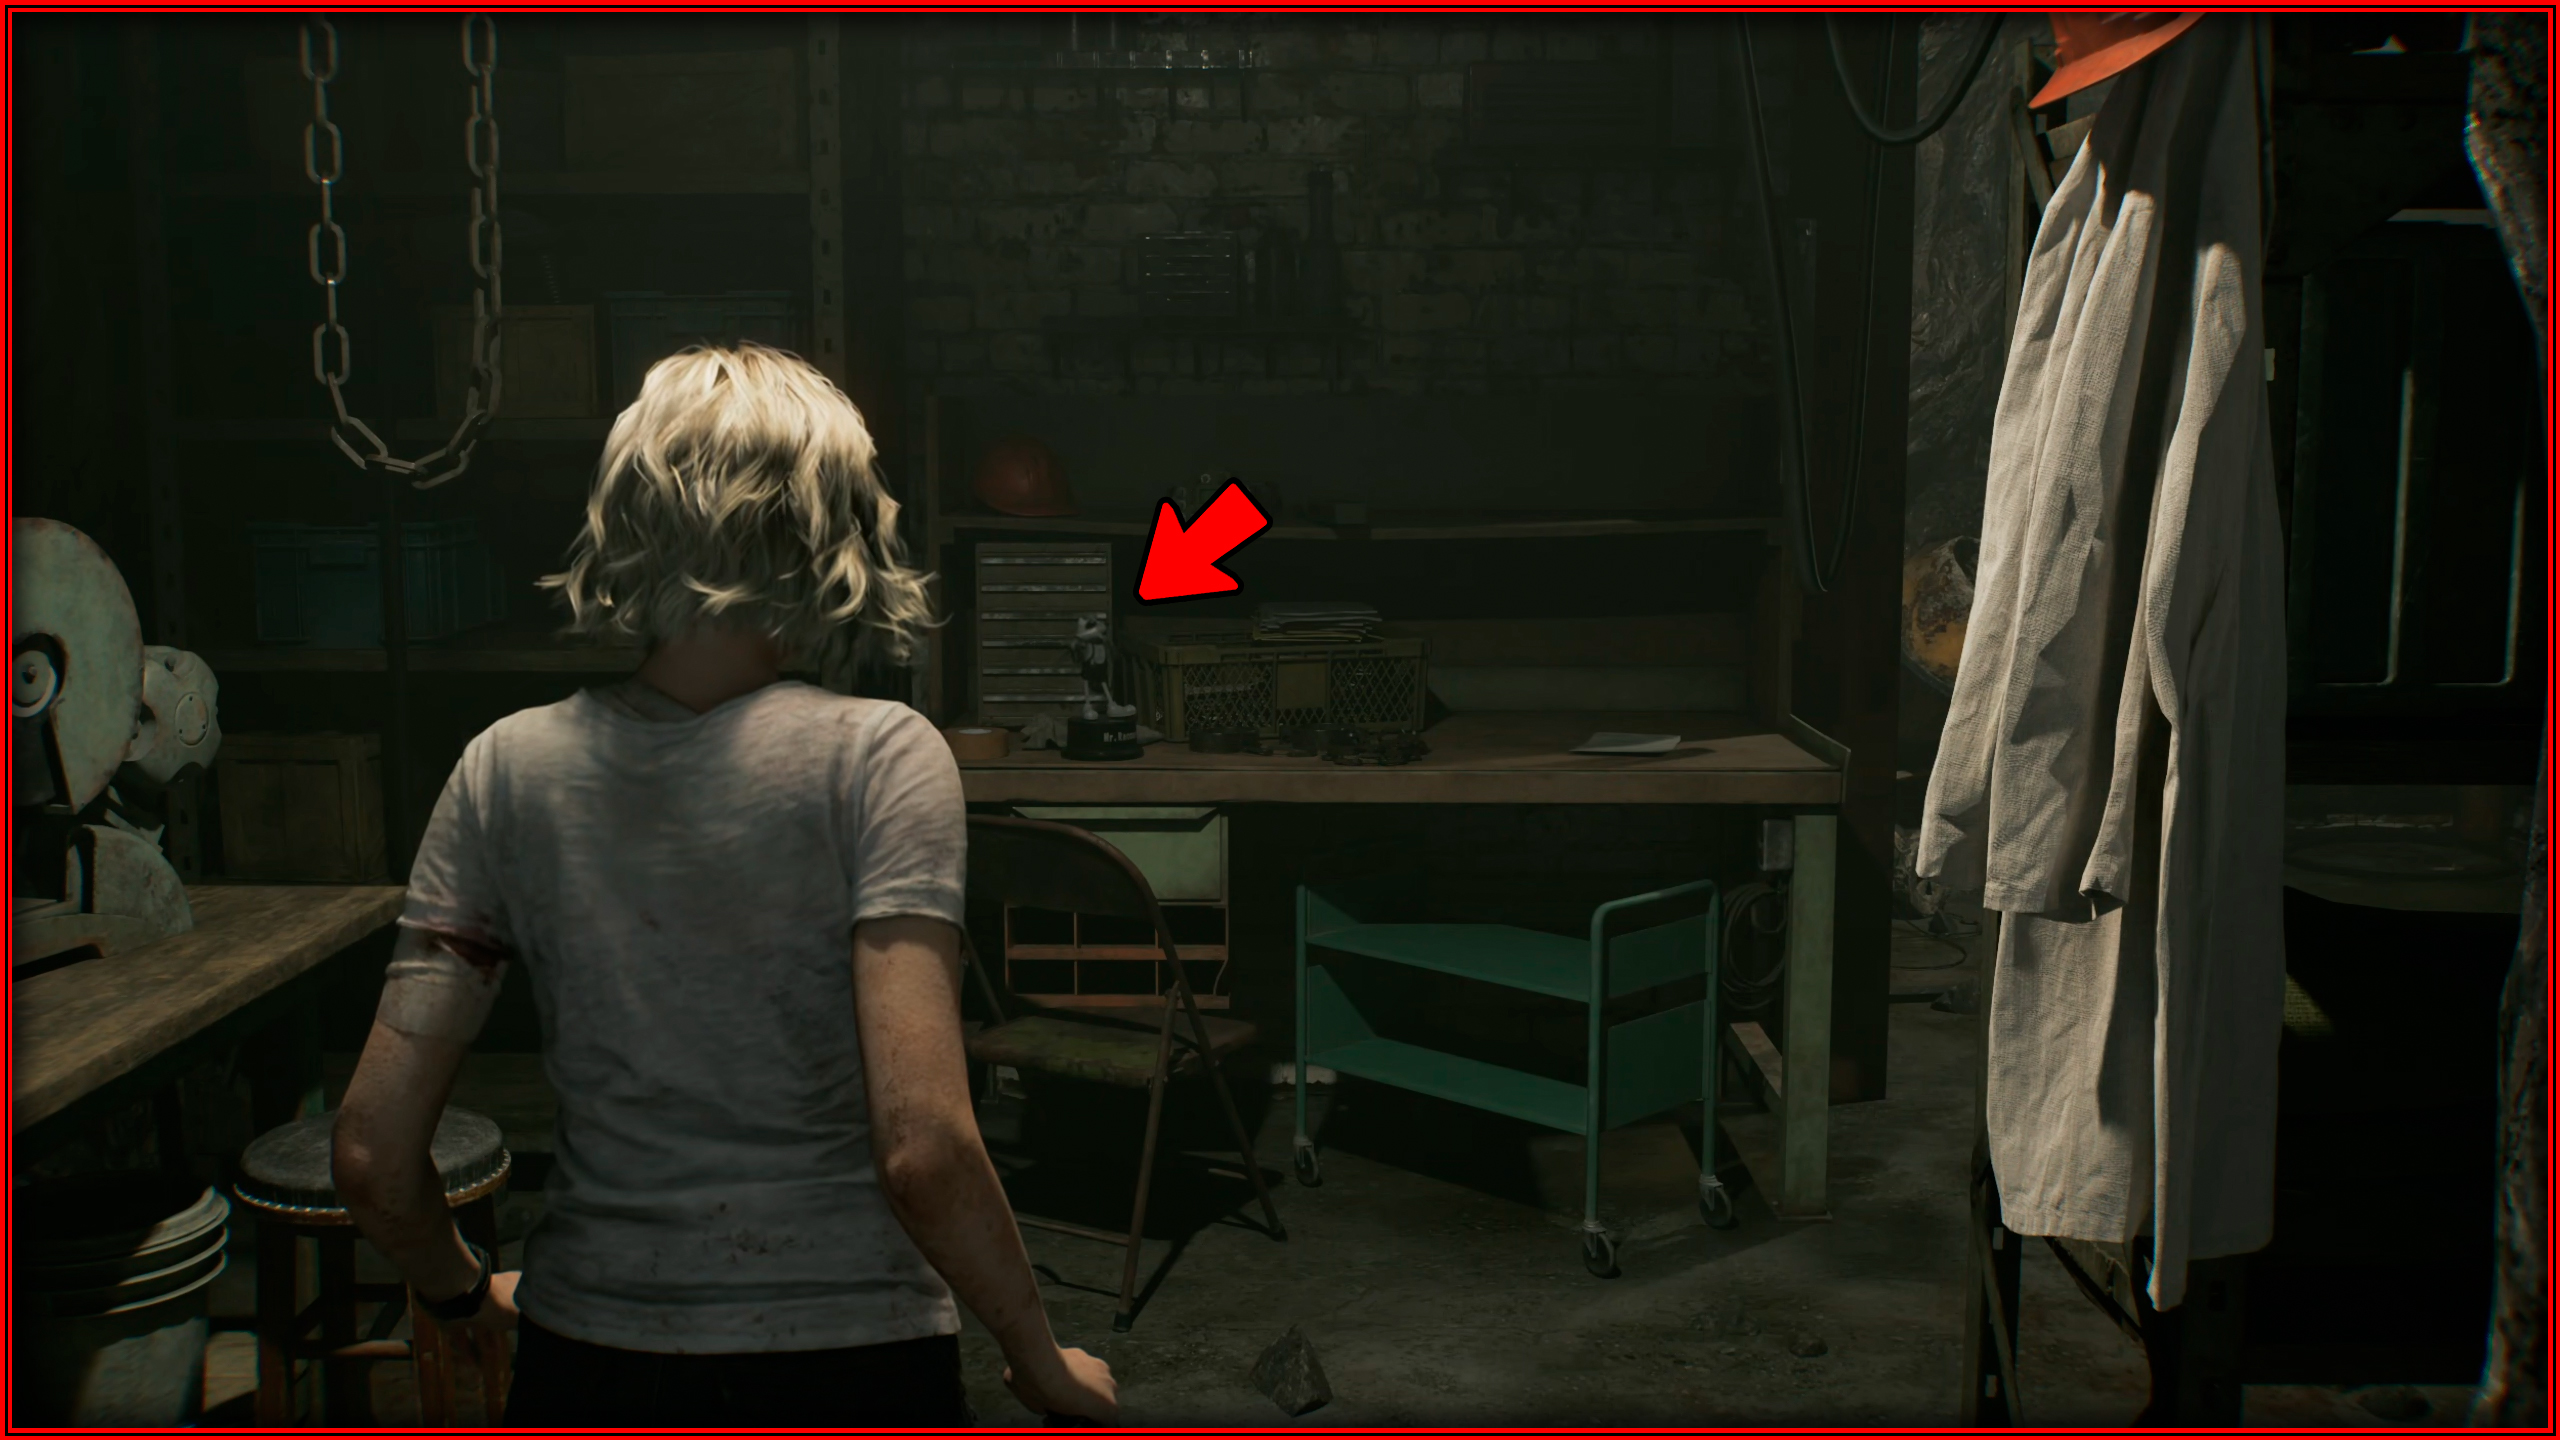
Mr. Raccoon memoriam 7
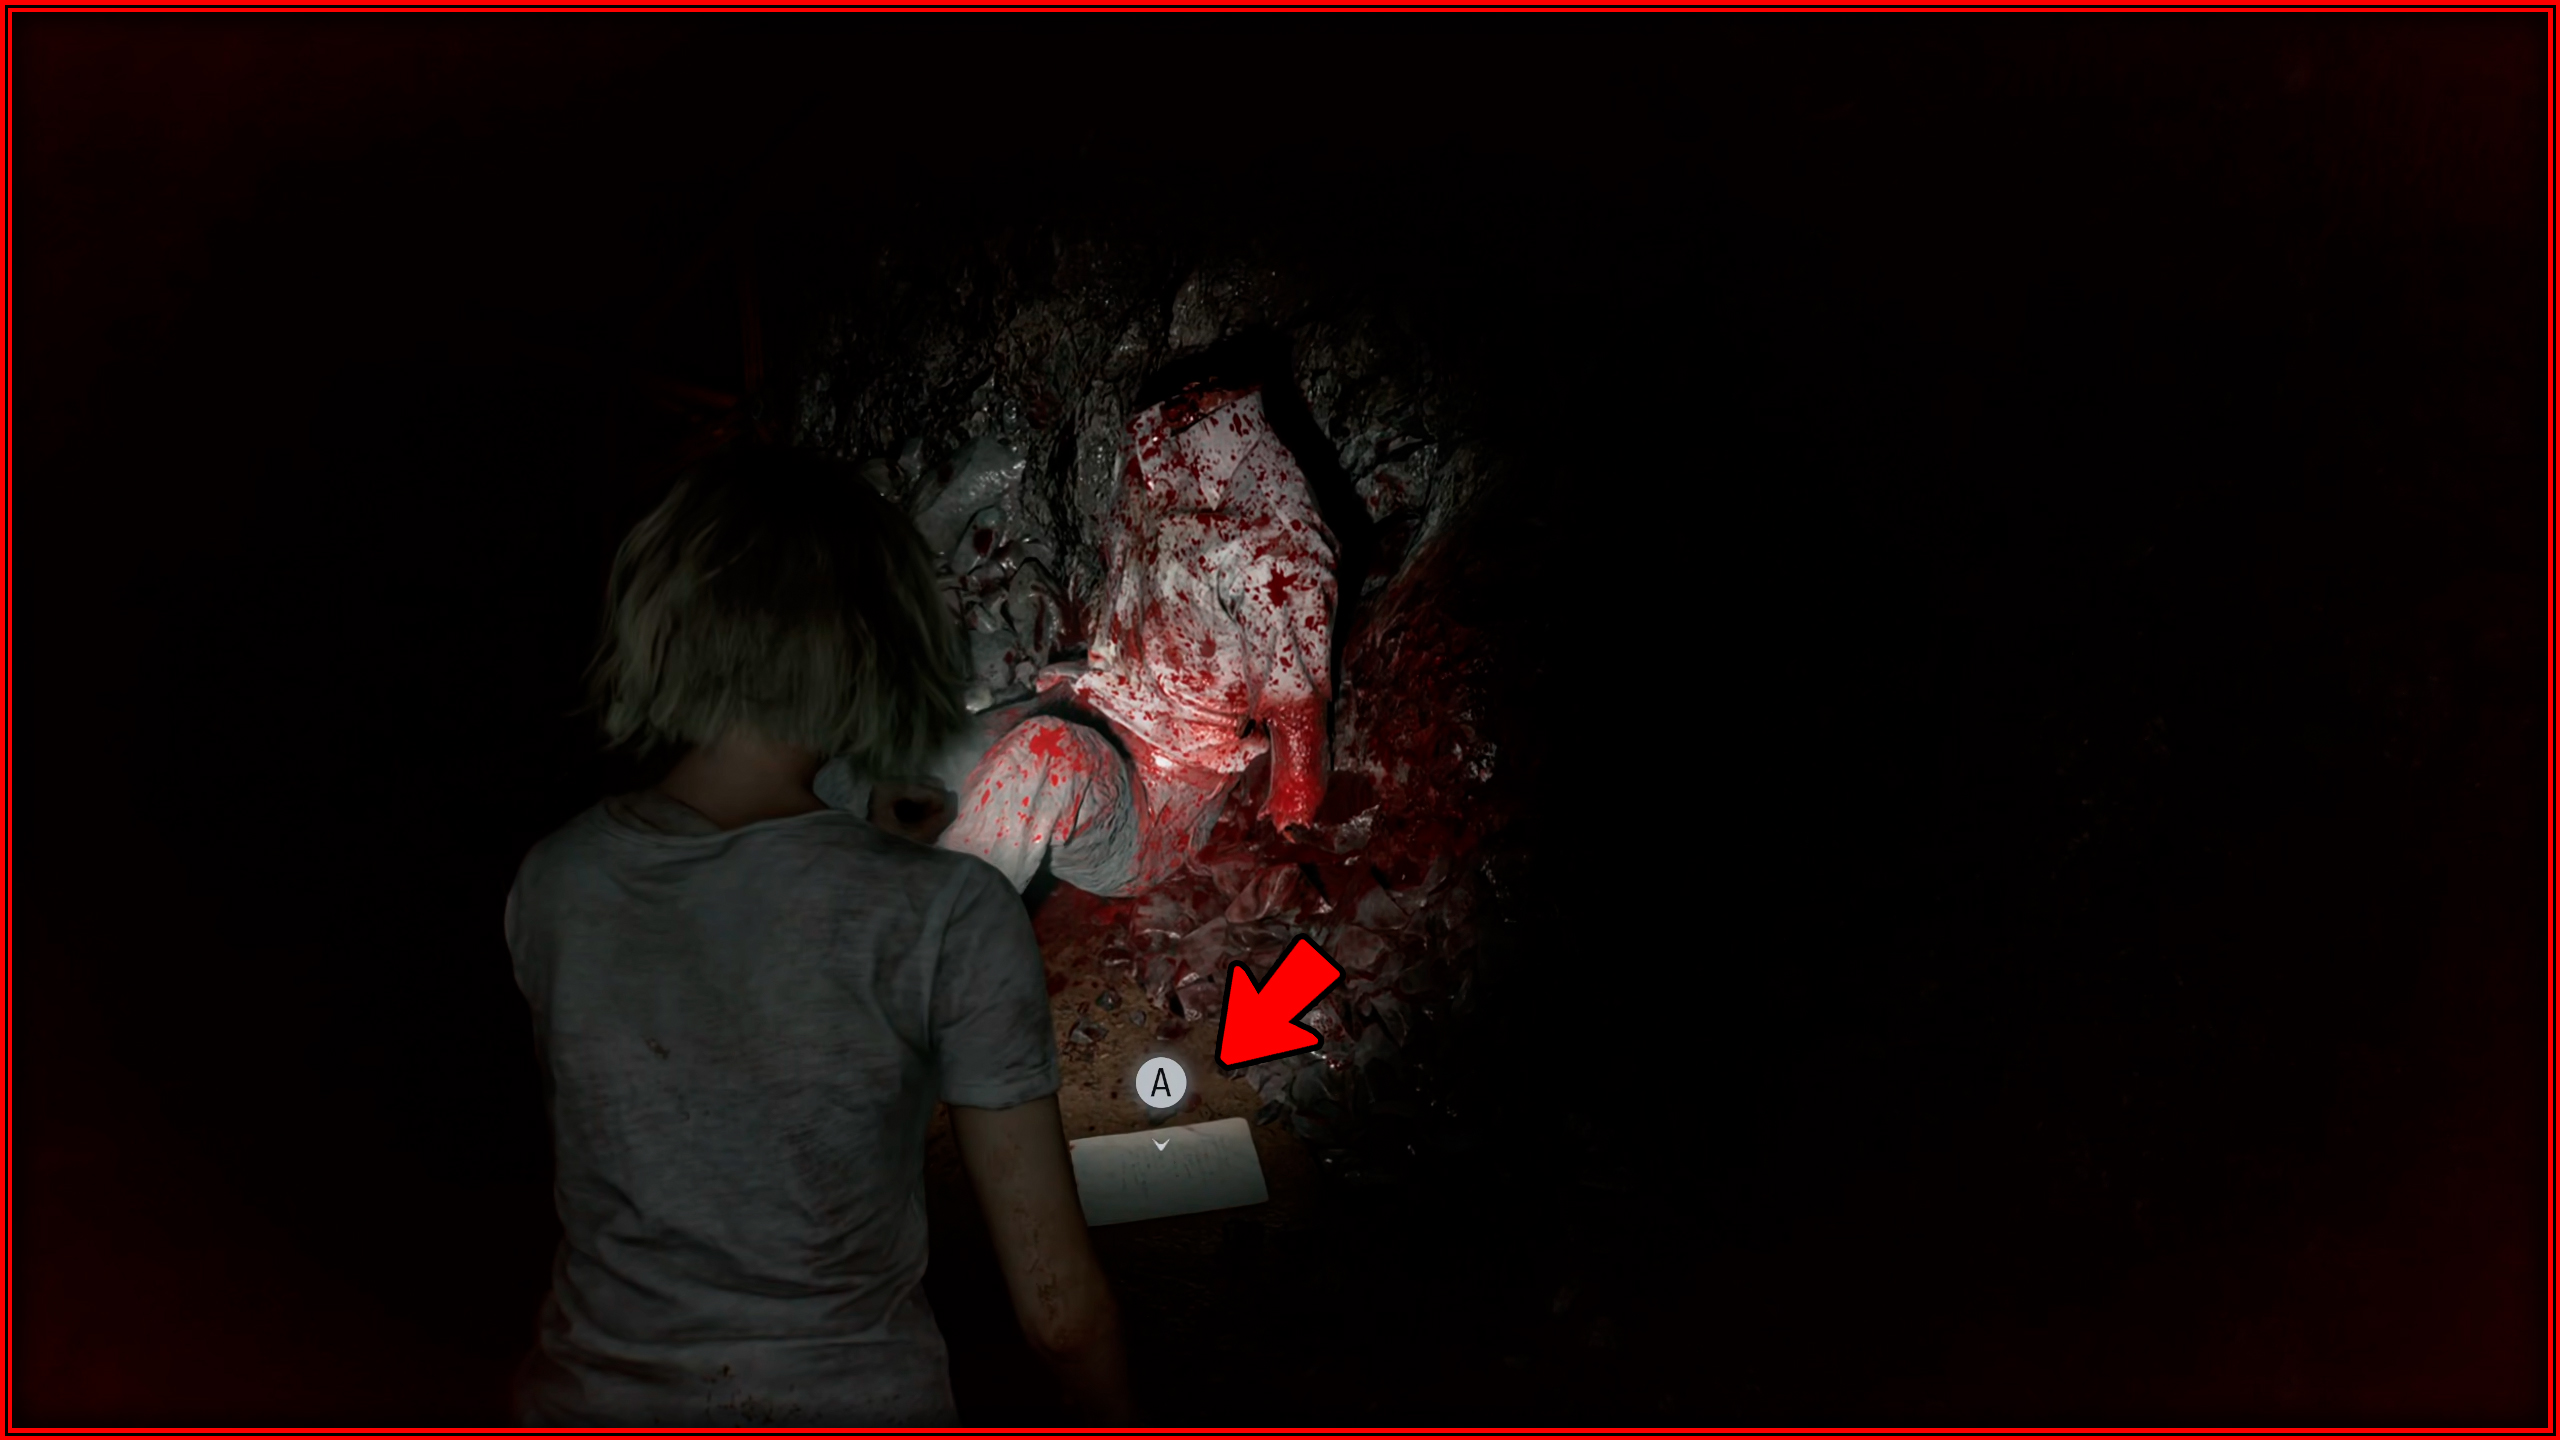
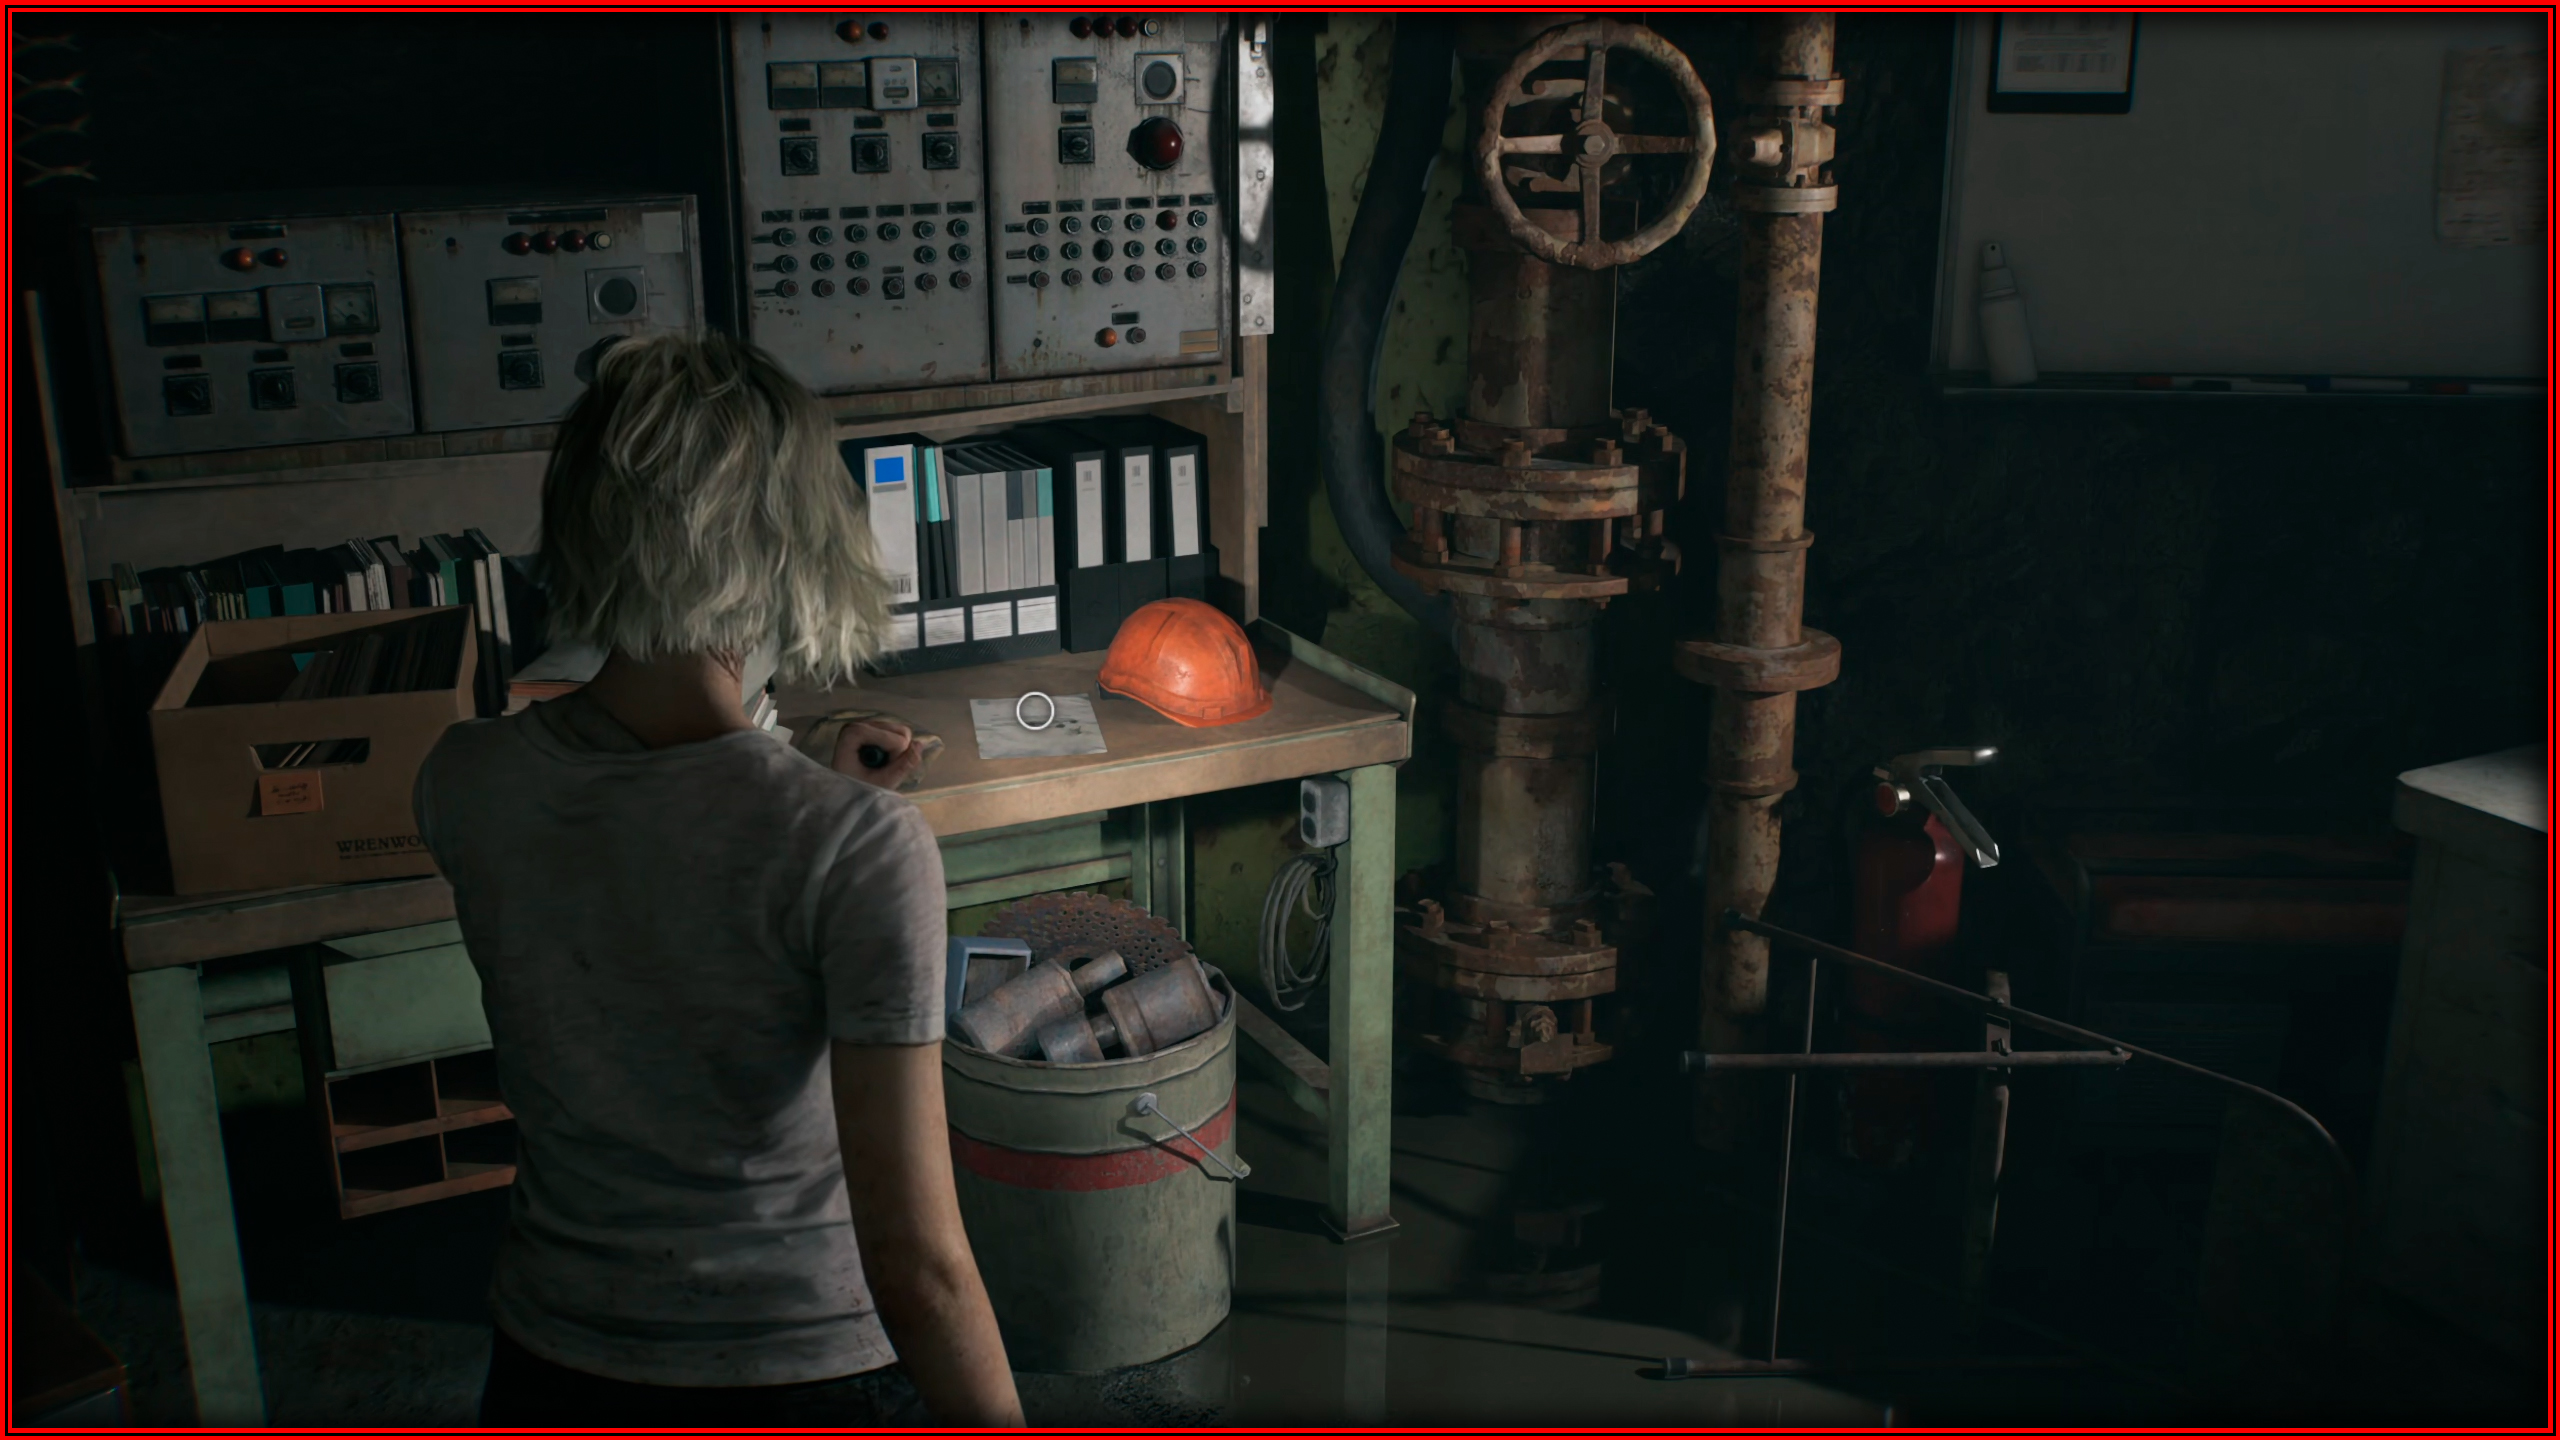
At the end of the Holding Cells corridor, inside the workshop room, on top of a workbench.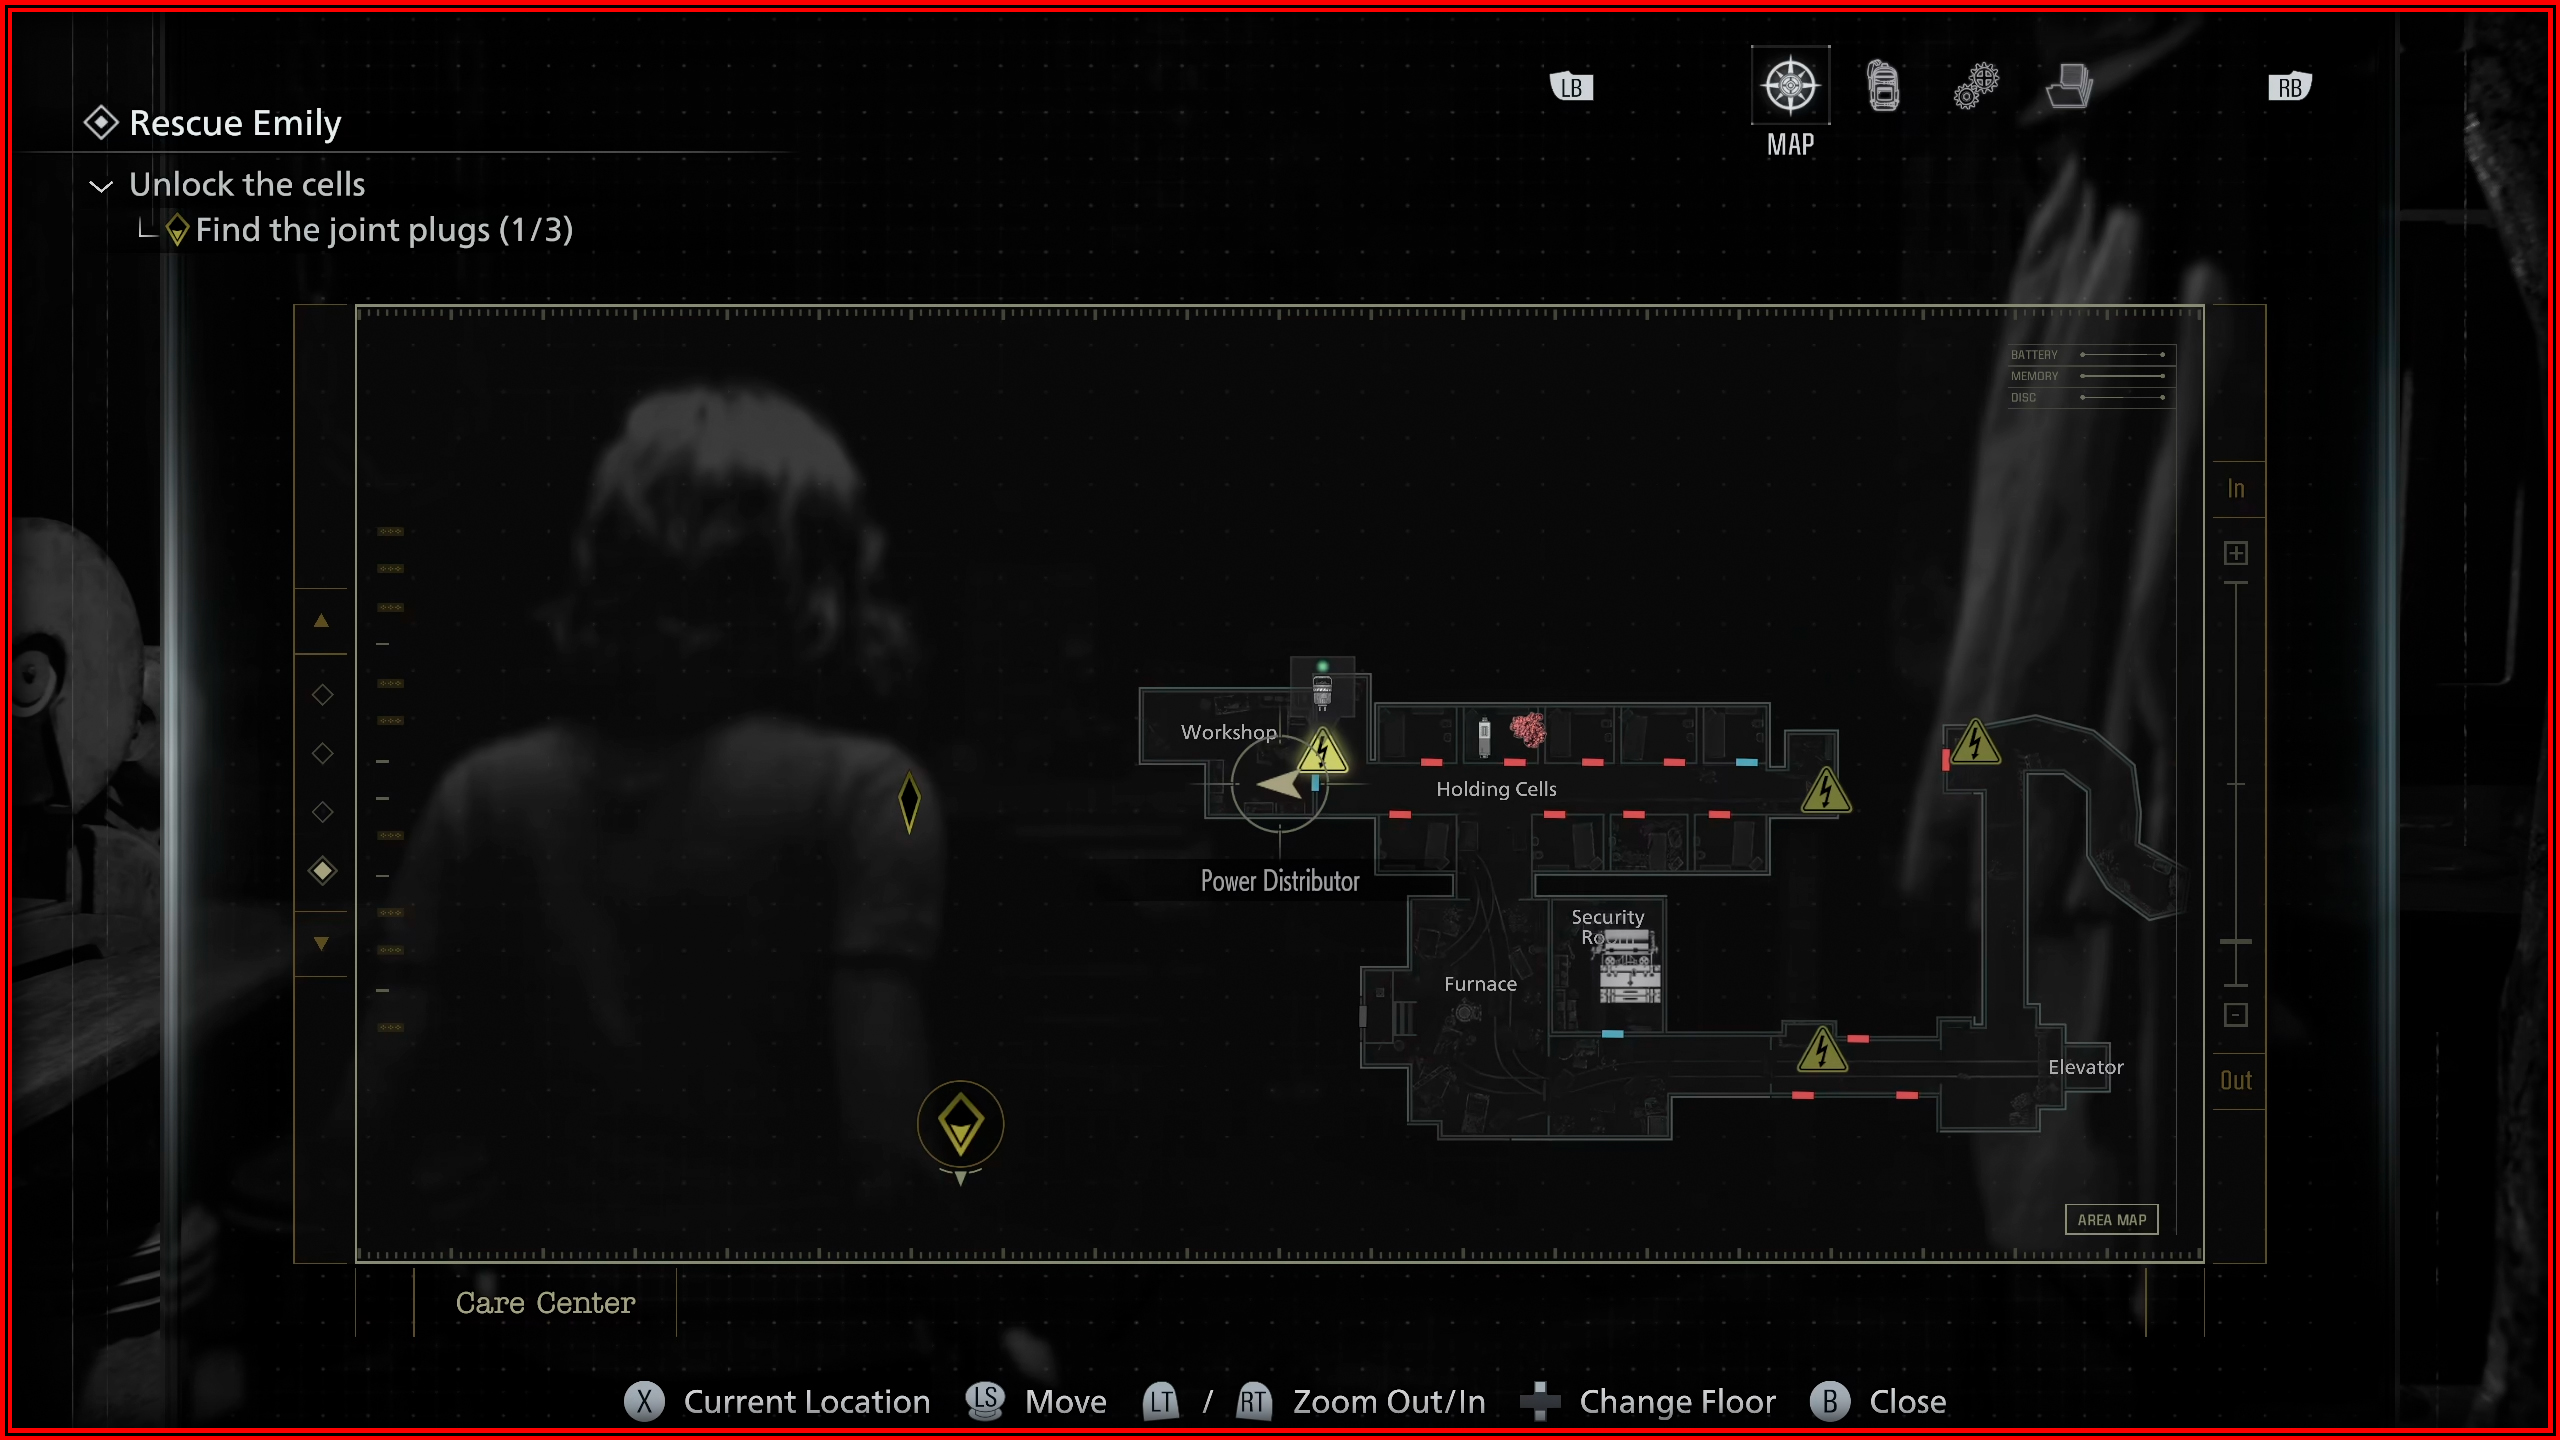
Mr. Raccoon memoriam 8
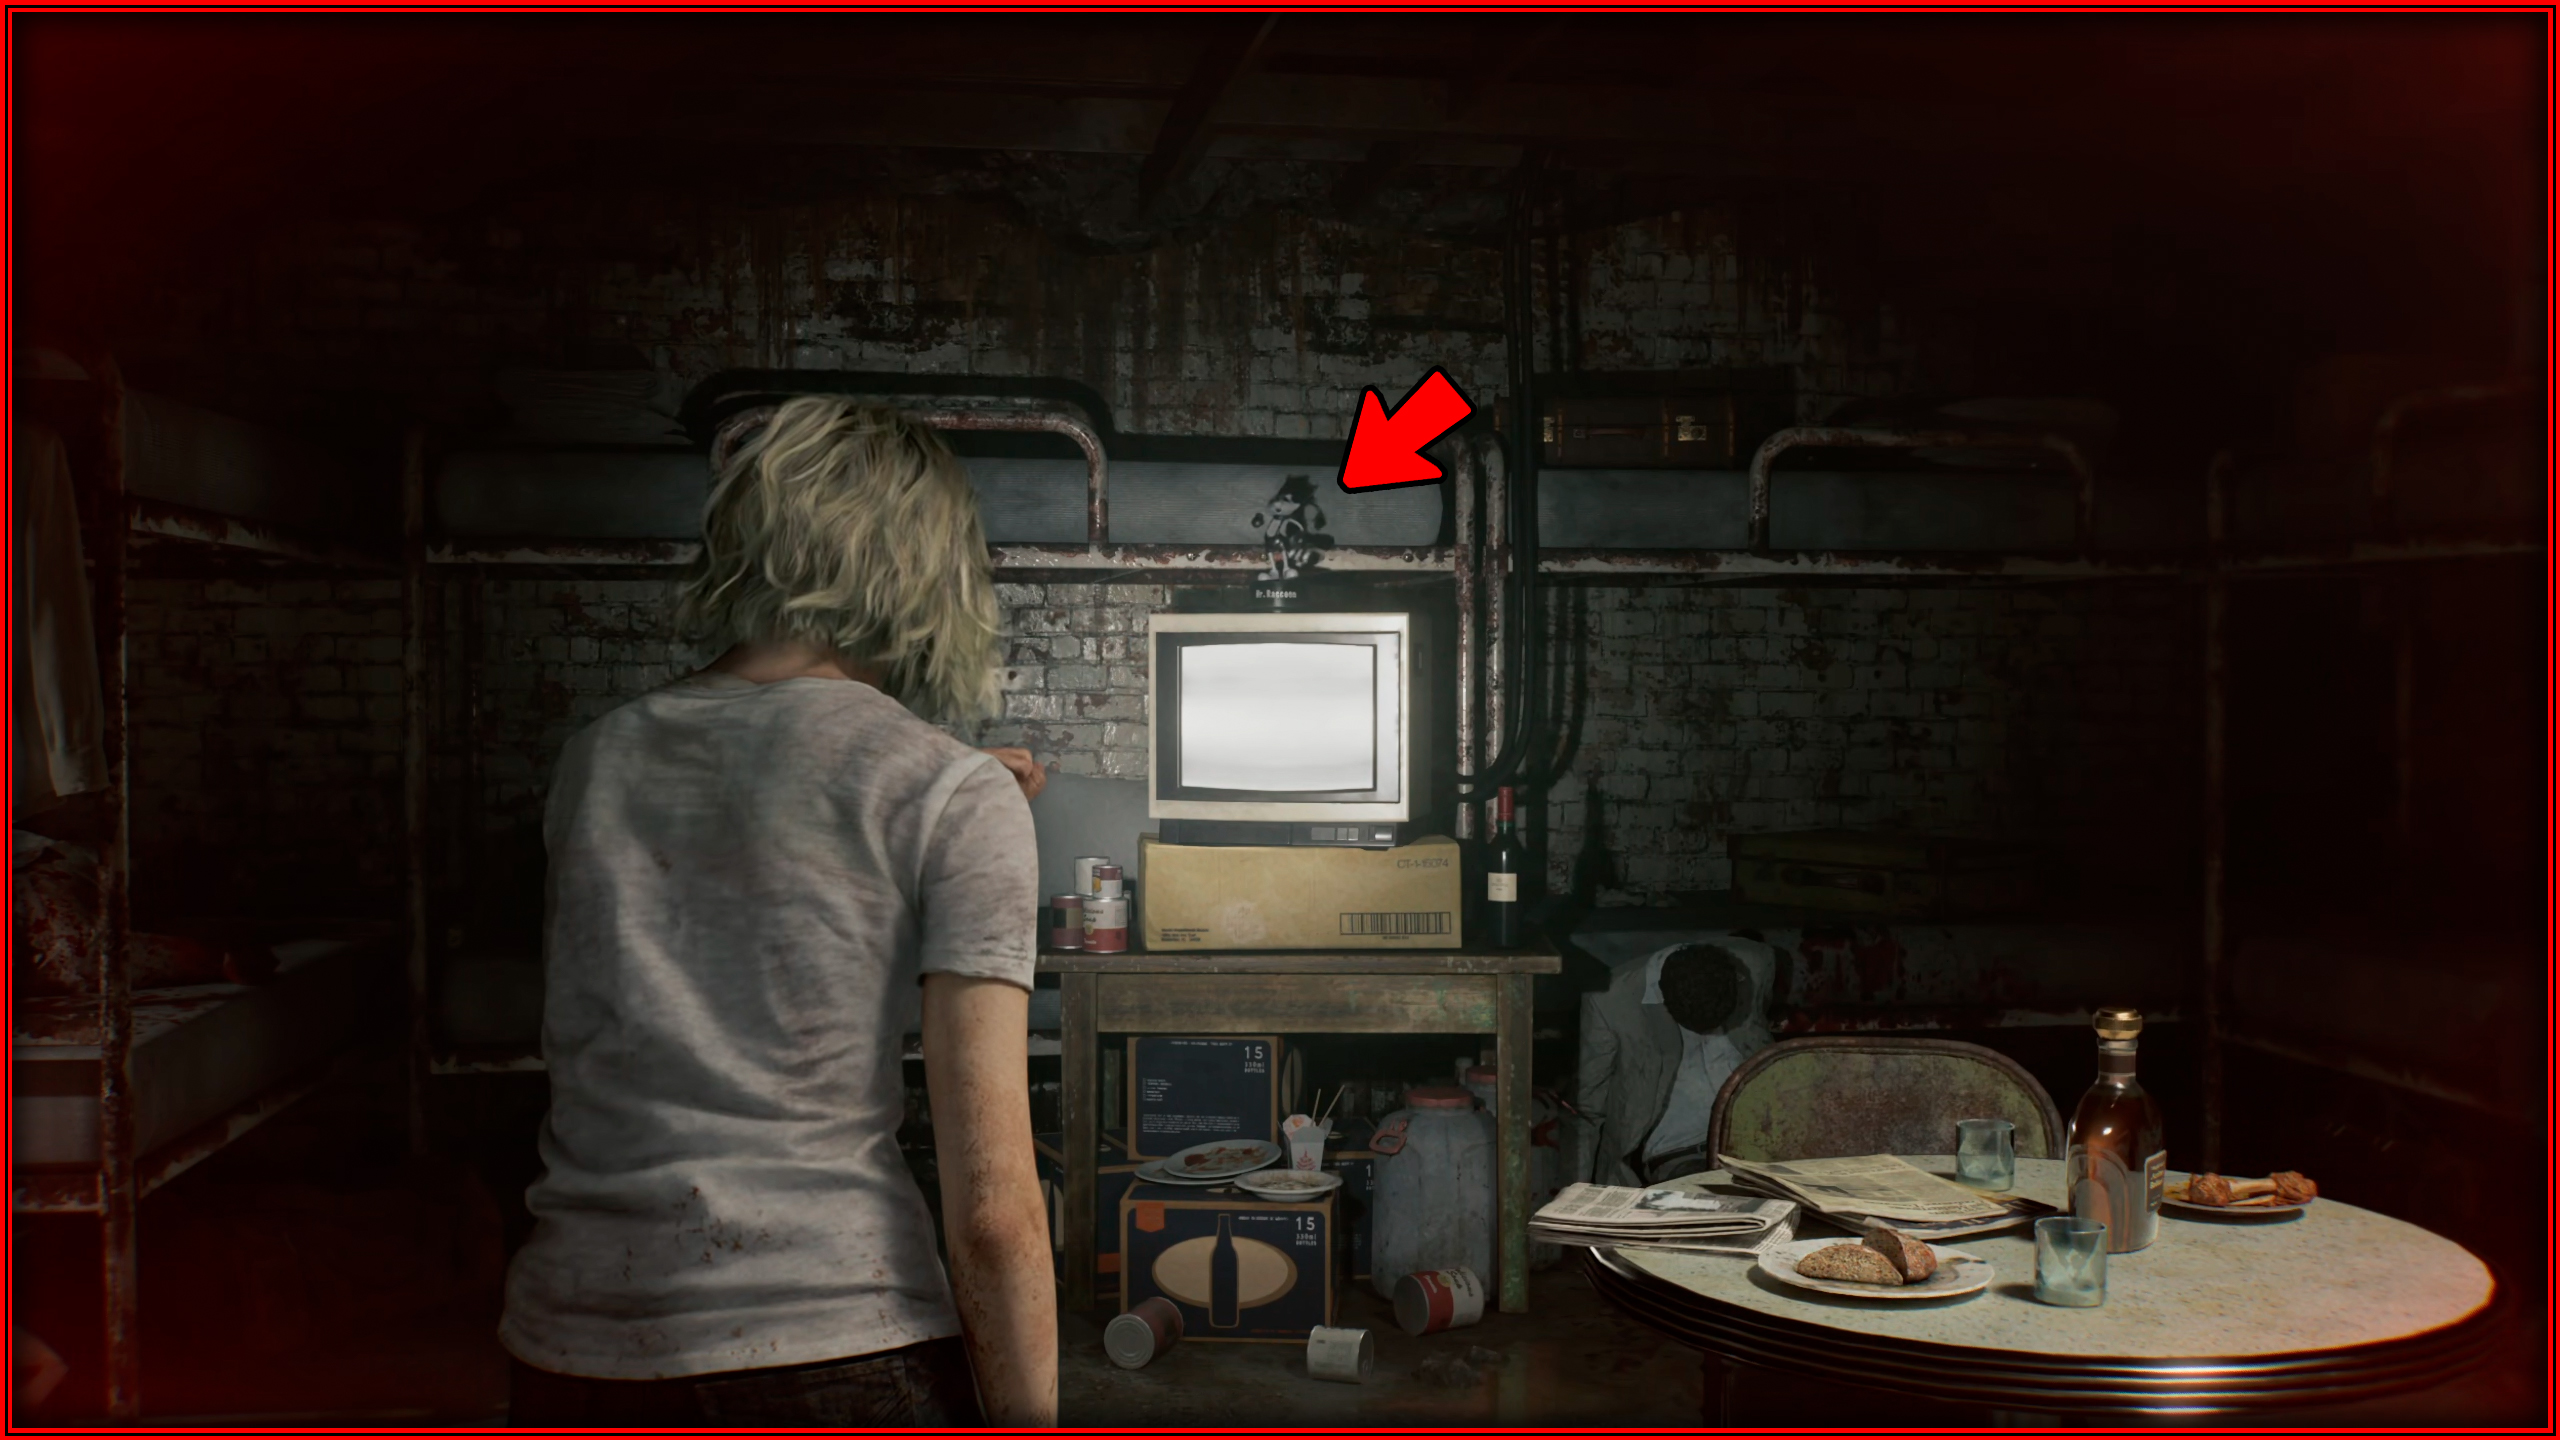
On top of a TV inside the bunkroom.
Care Center Courtyard
Mr. Raccoon memoriam 9
After going down to the underground base, inside the Private Lab room on top of a desk.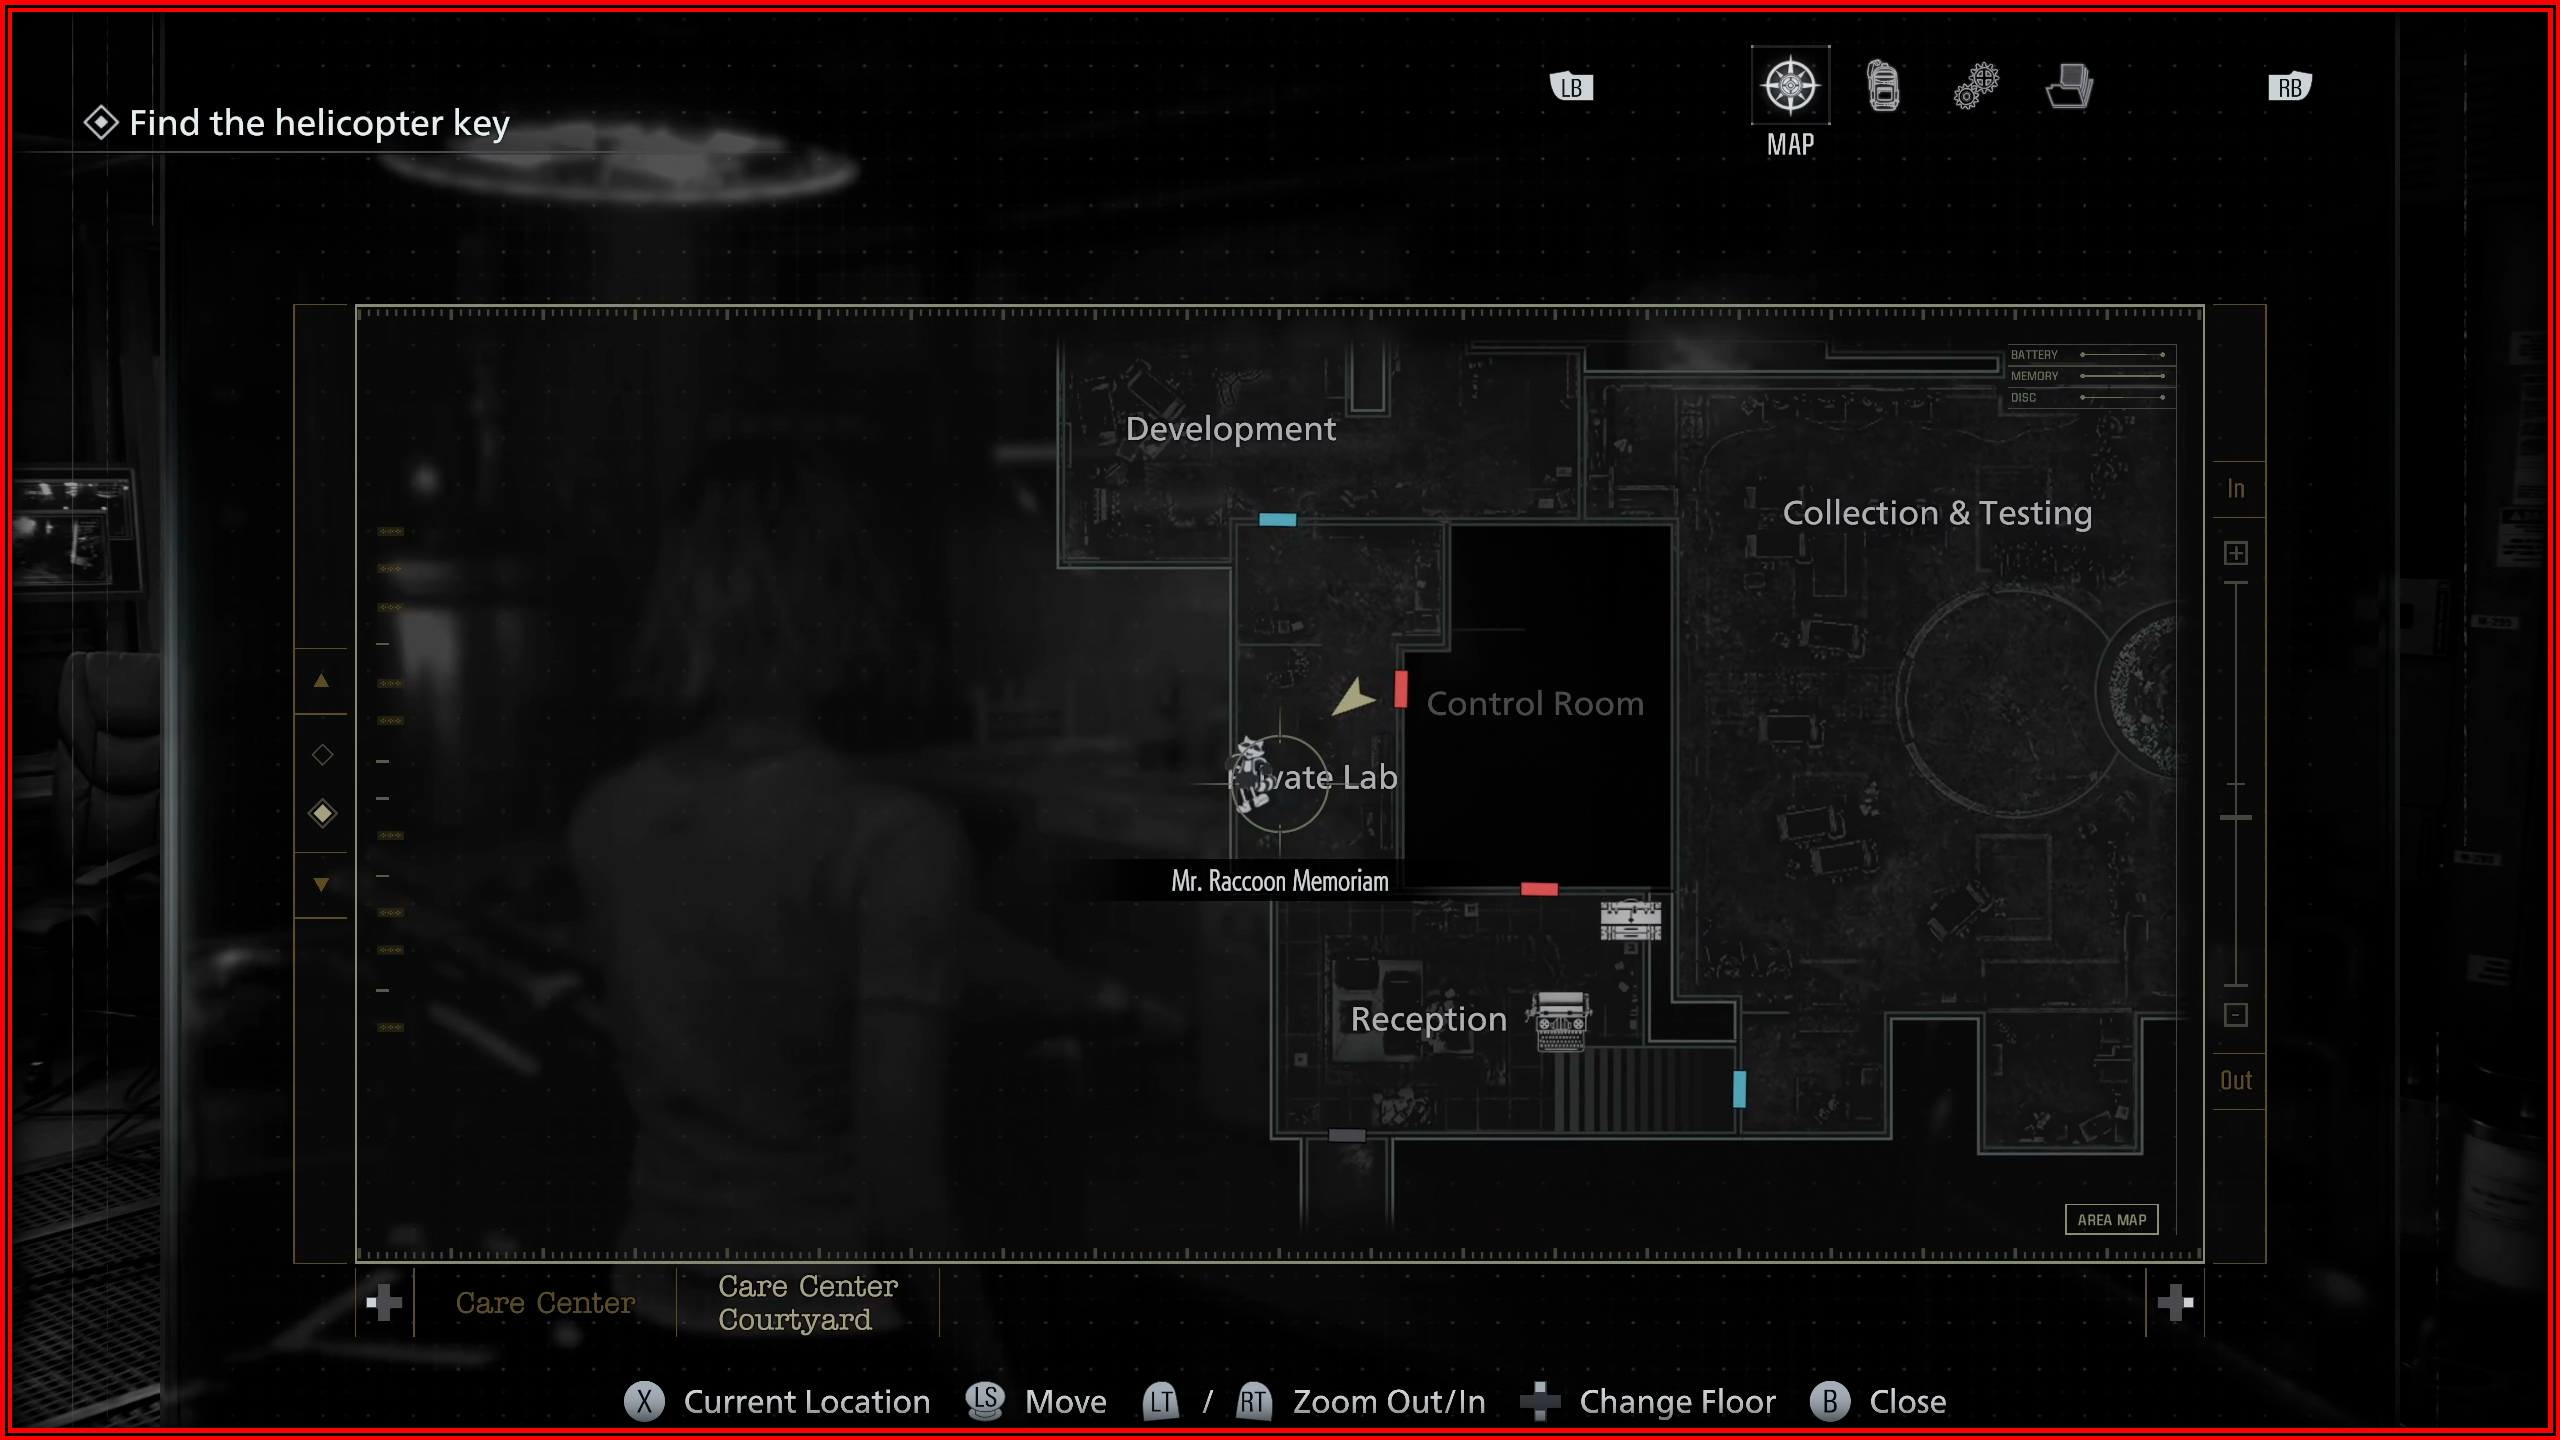
Mr. Raccoon memoriam 10
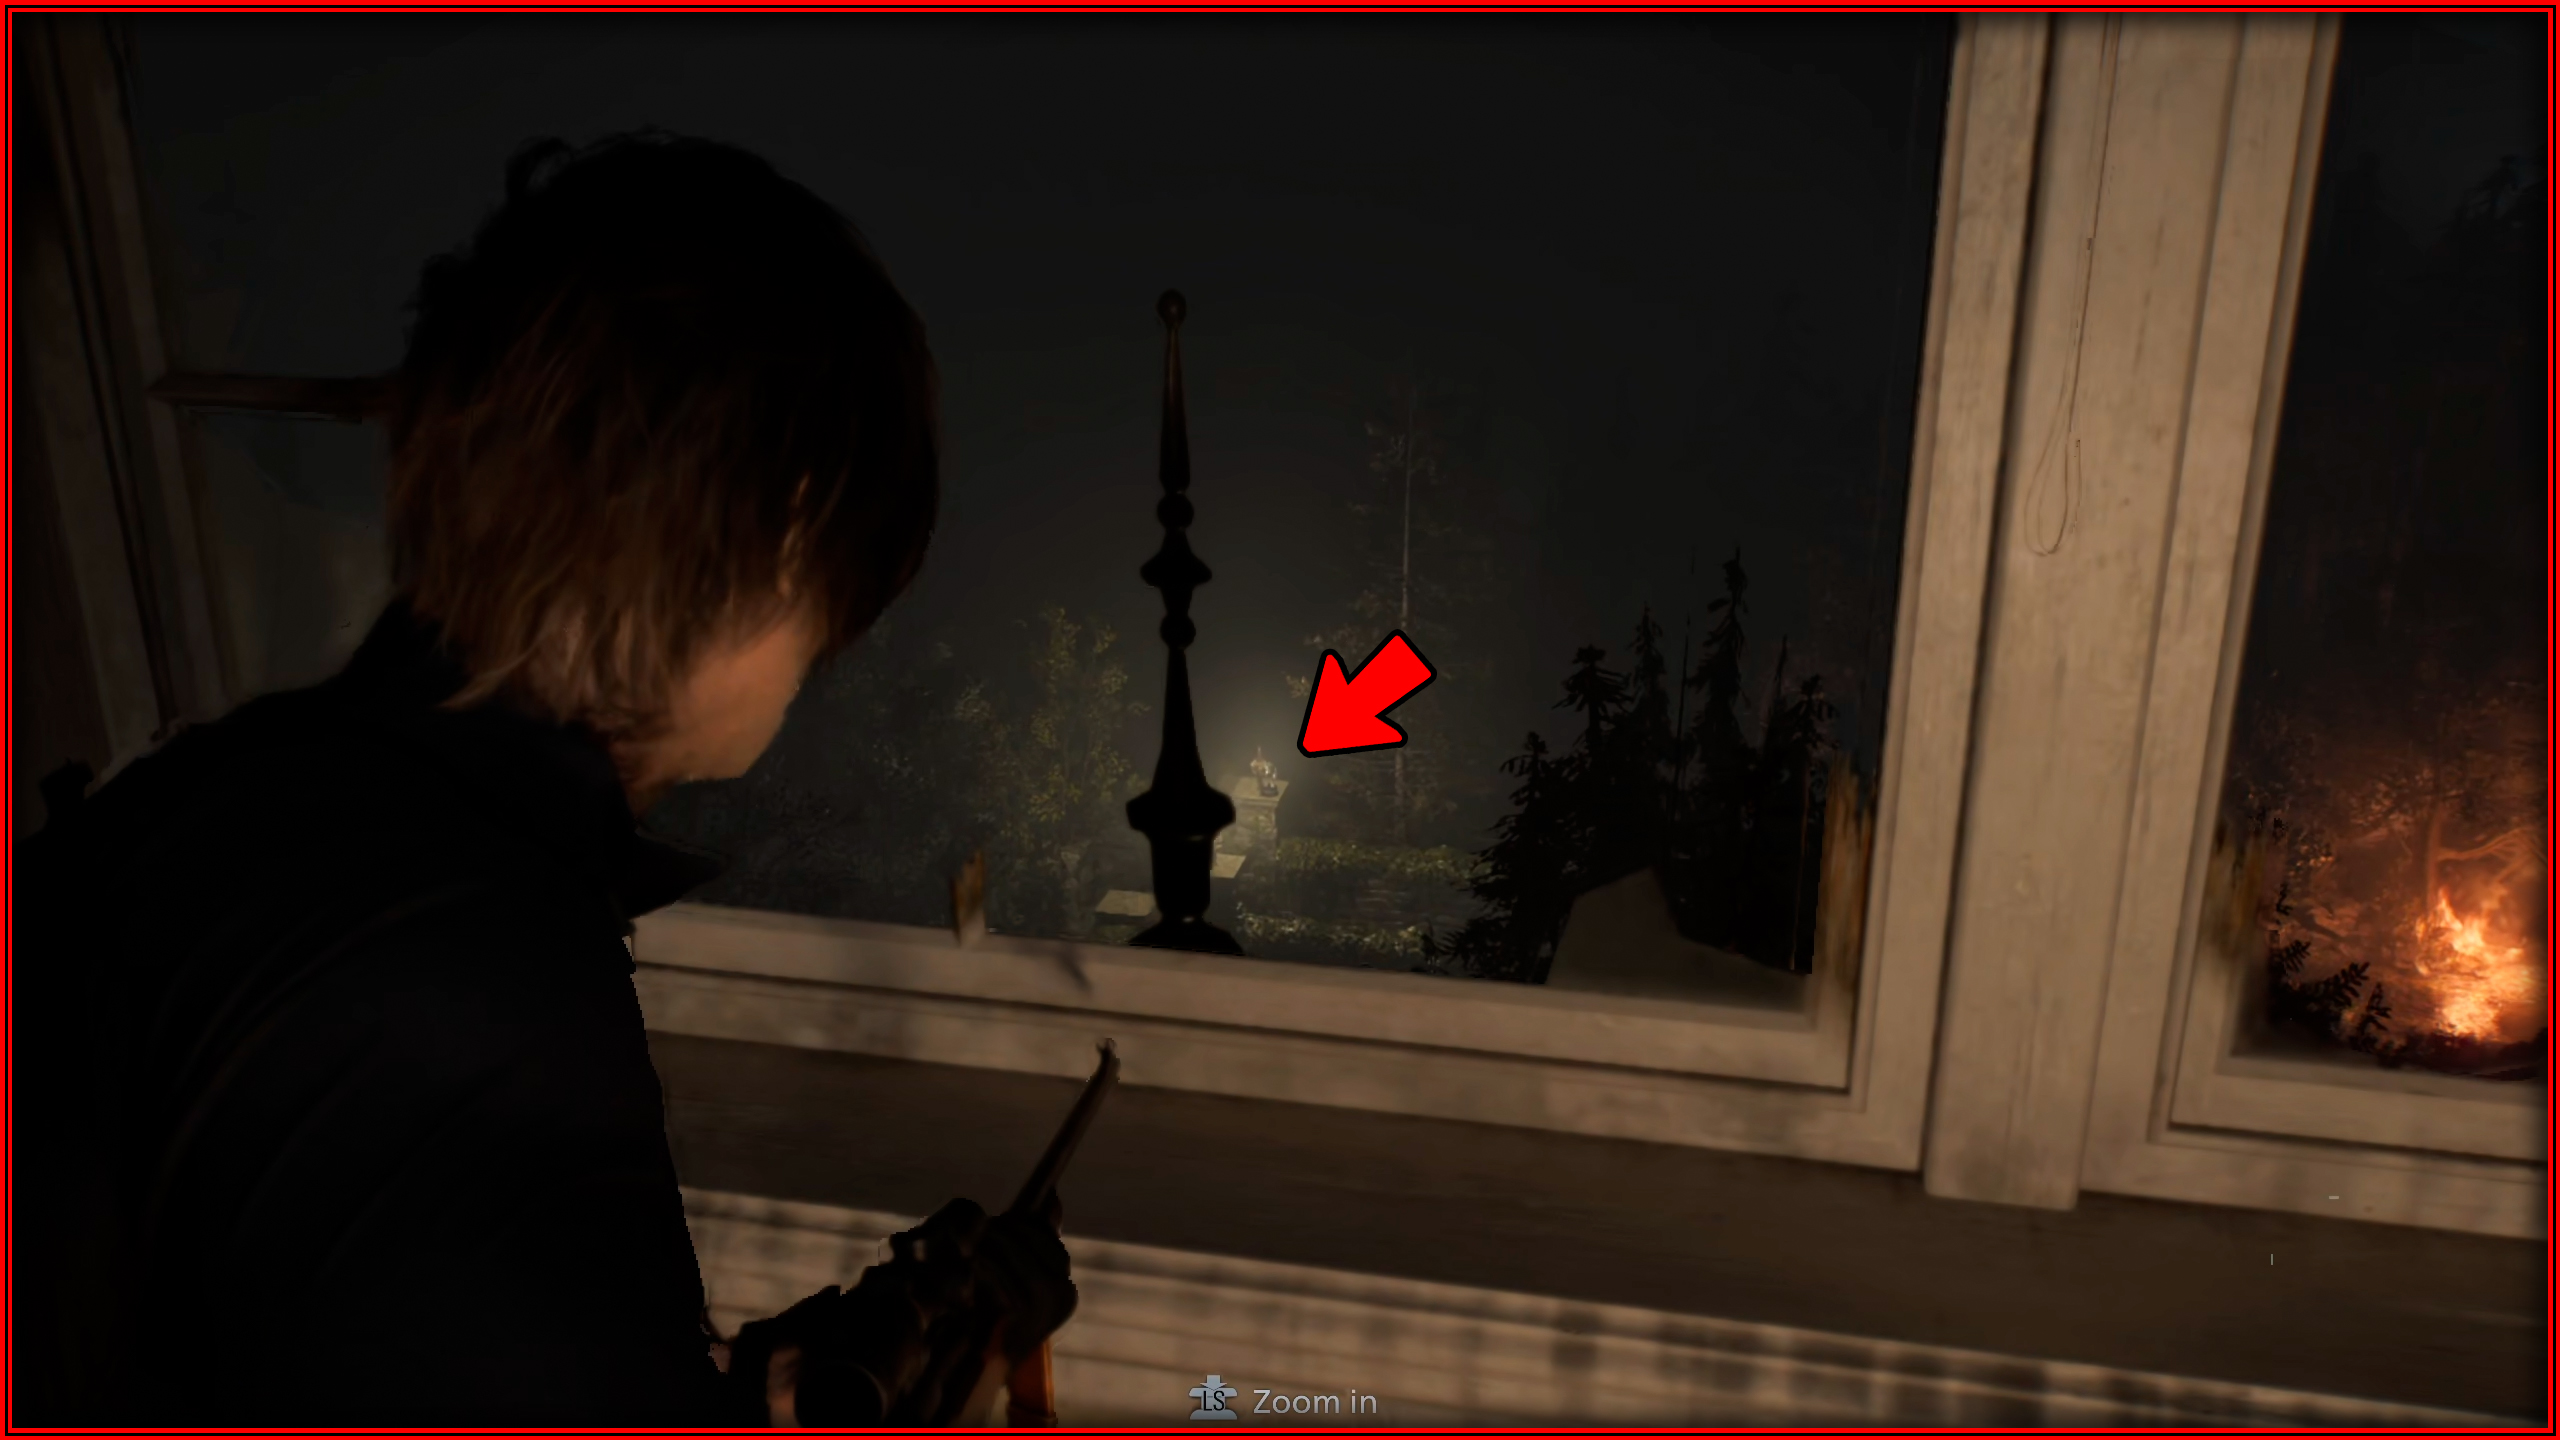
After the helicopter scene, when you return to playing as Leon, go up the stairs and look to the left. It is located in the garden near a lamp.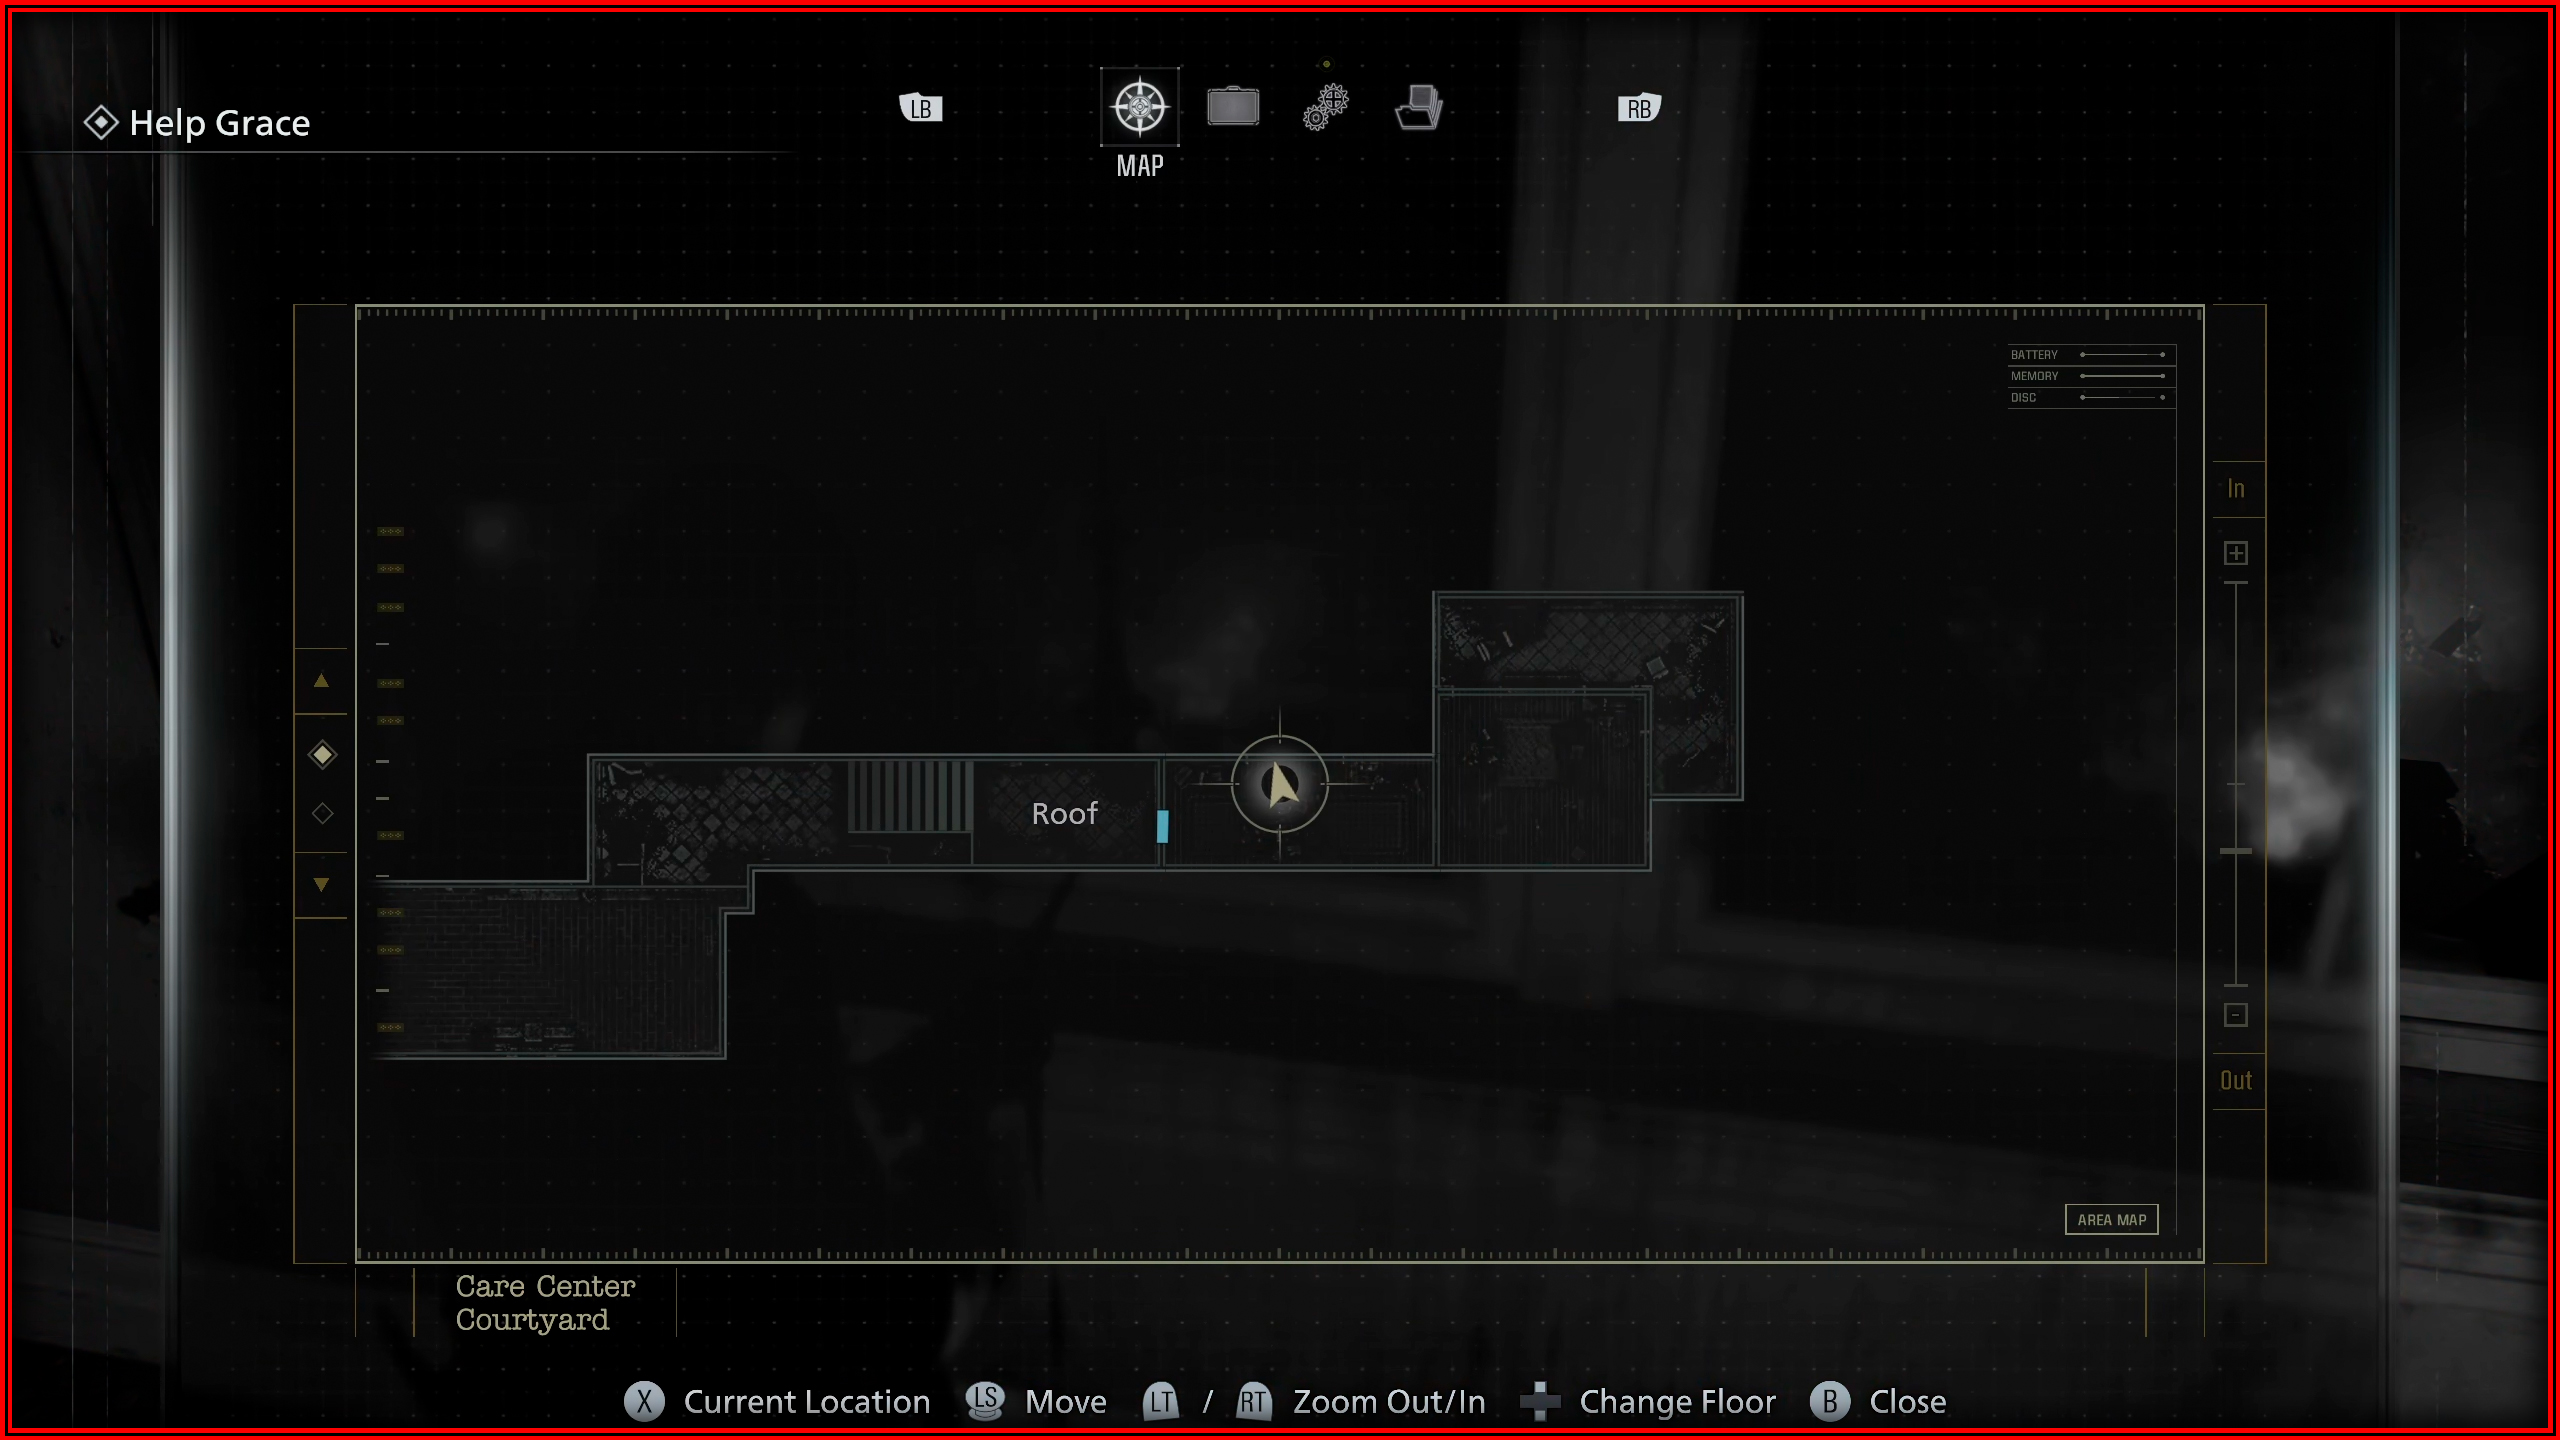
East Raccoon City
Mr. Raccoon memoriam 11
As soon as you arrive in East Raccoon City, inside Café Oasis.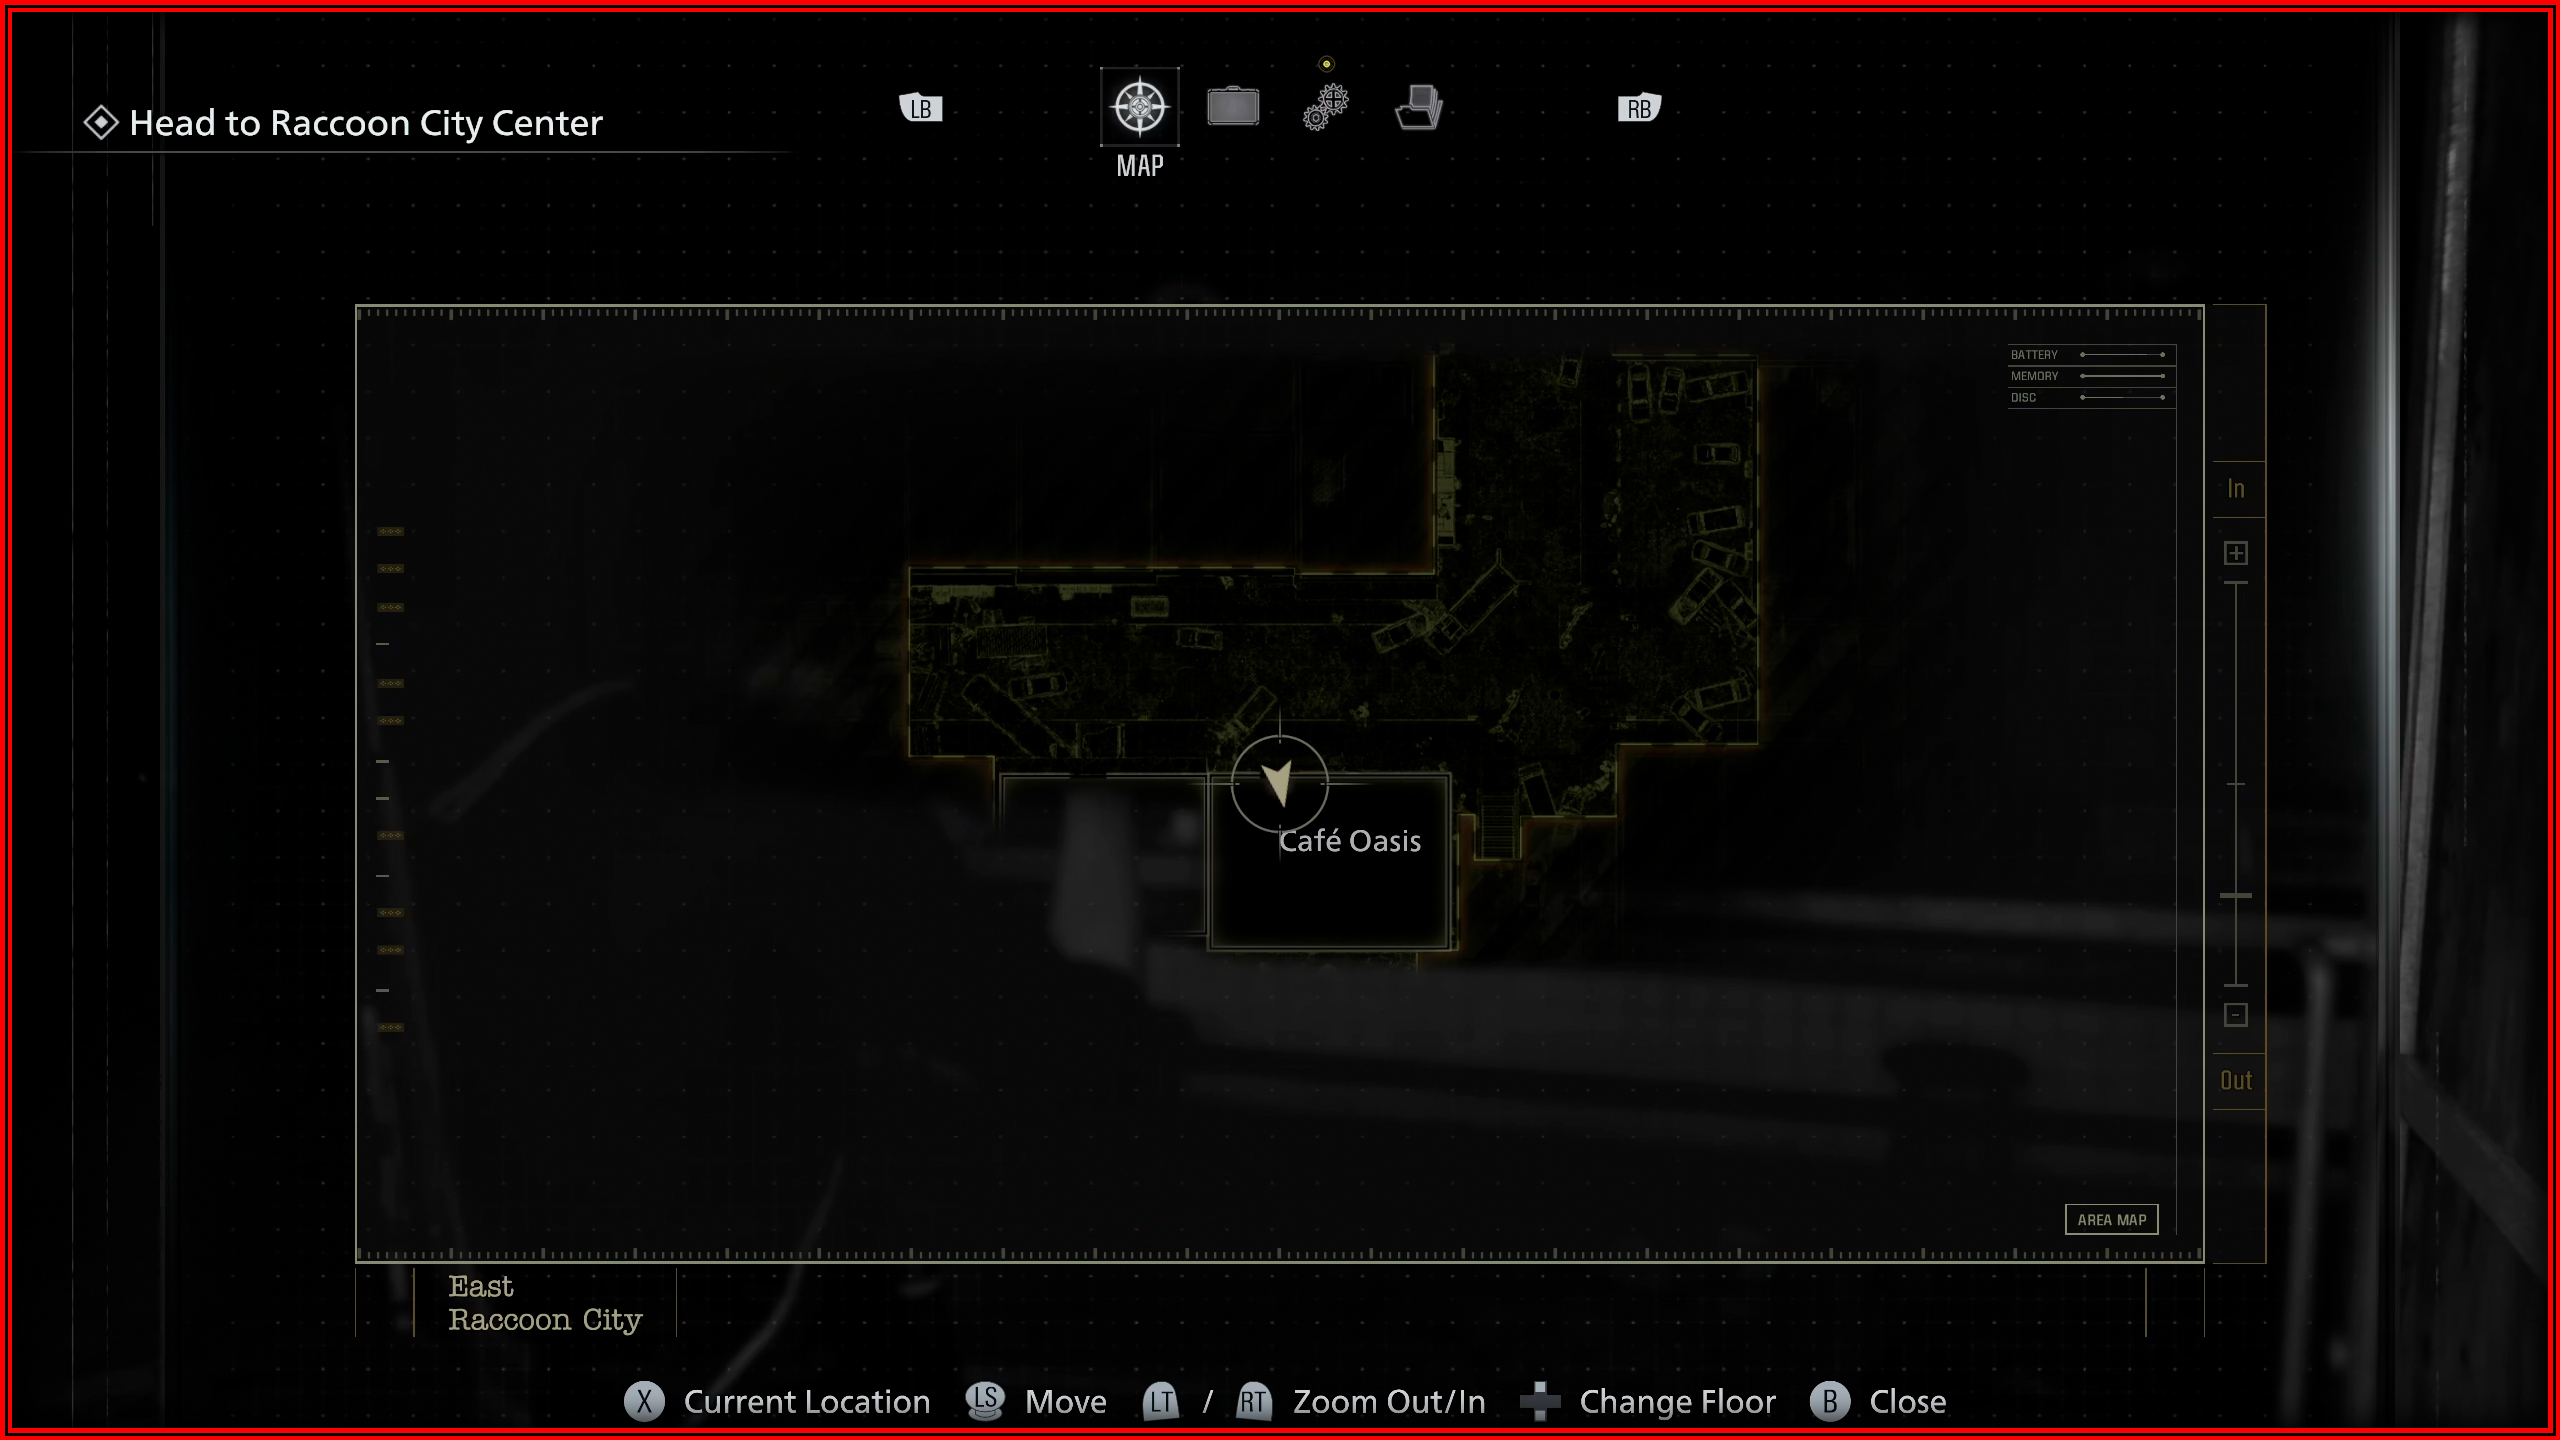
Mr. Raccoon memoriam 12
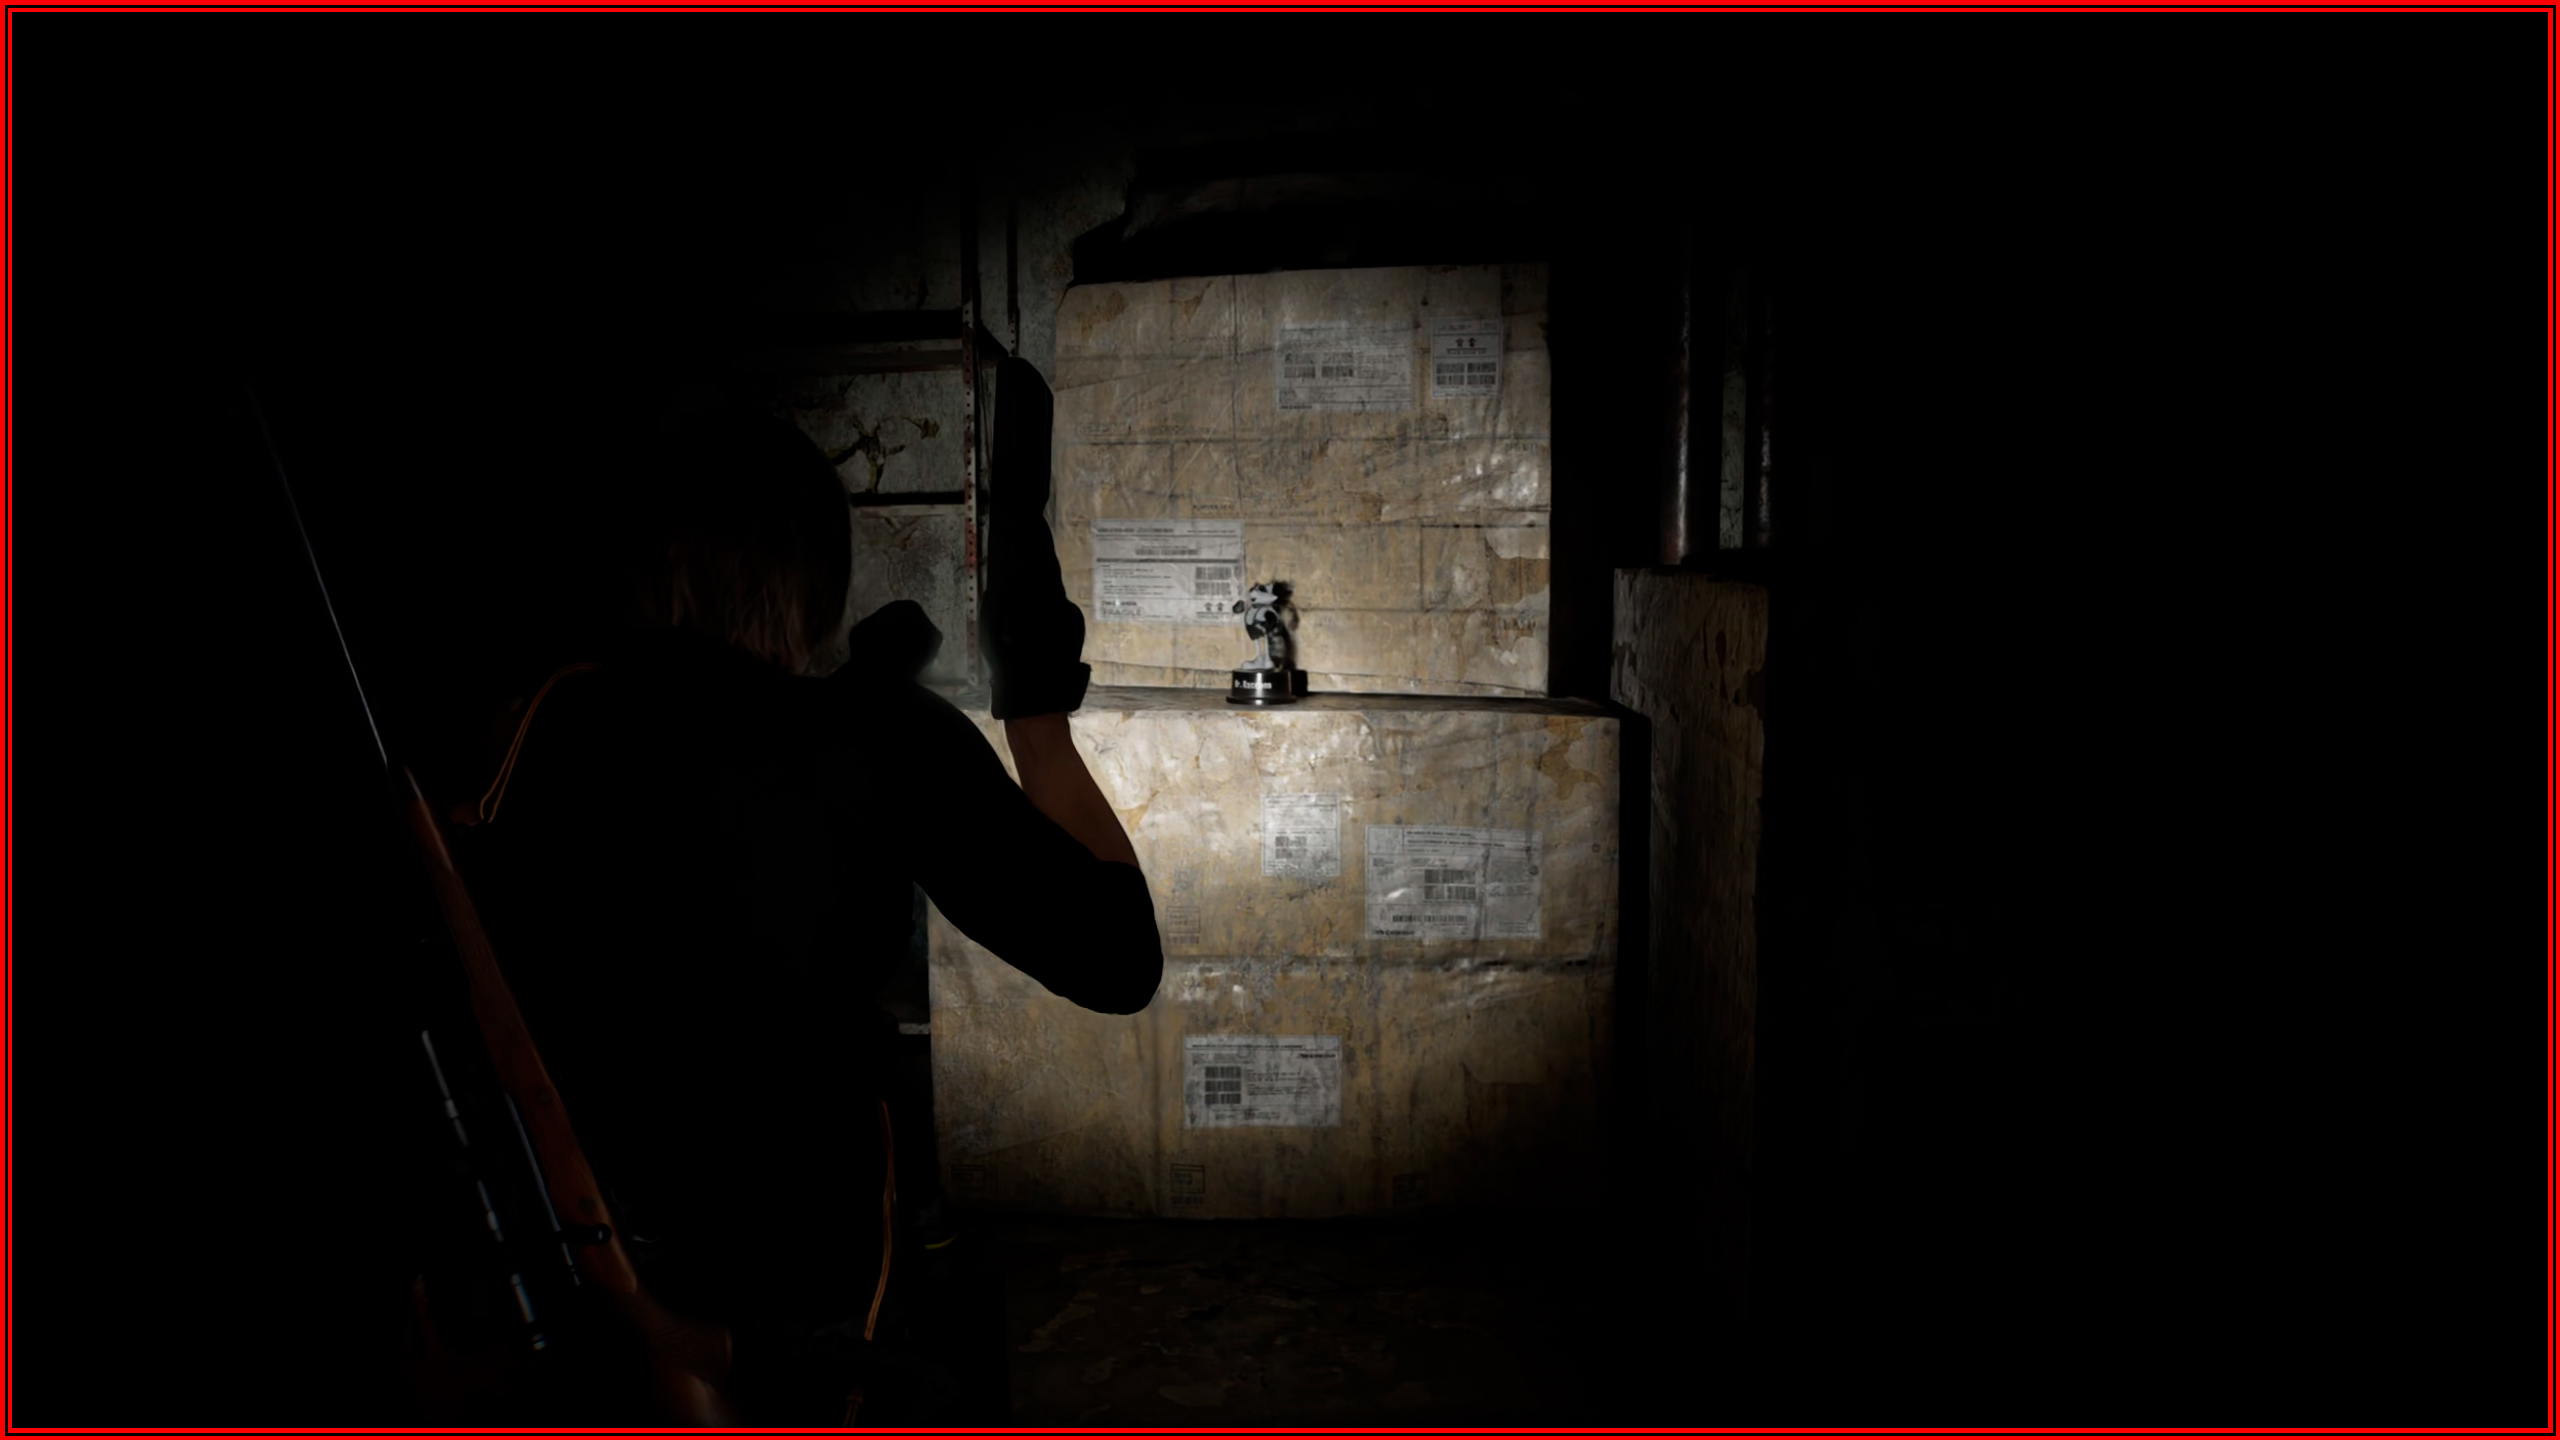
After picking up the Distributor at the Logistics Warehouse Roof, look to the left toward the central camp, on top of a car on the highway.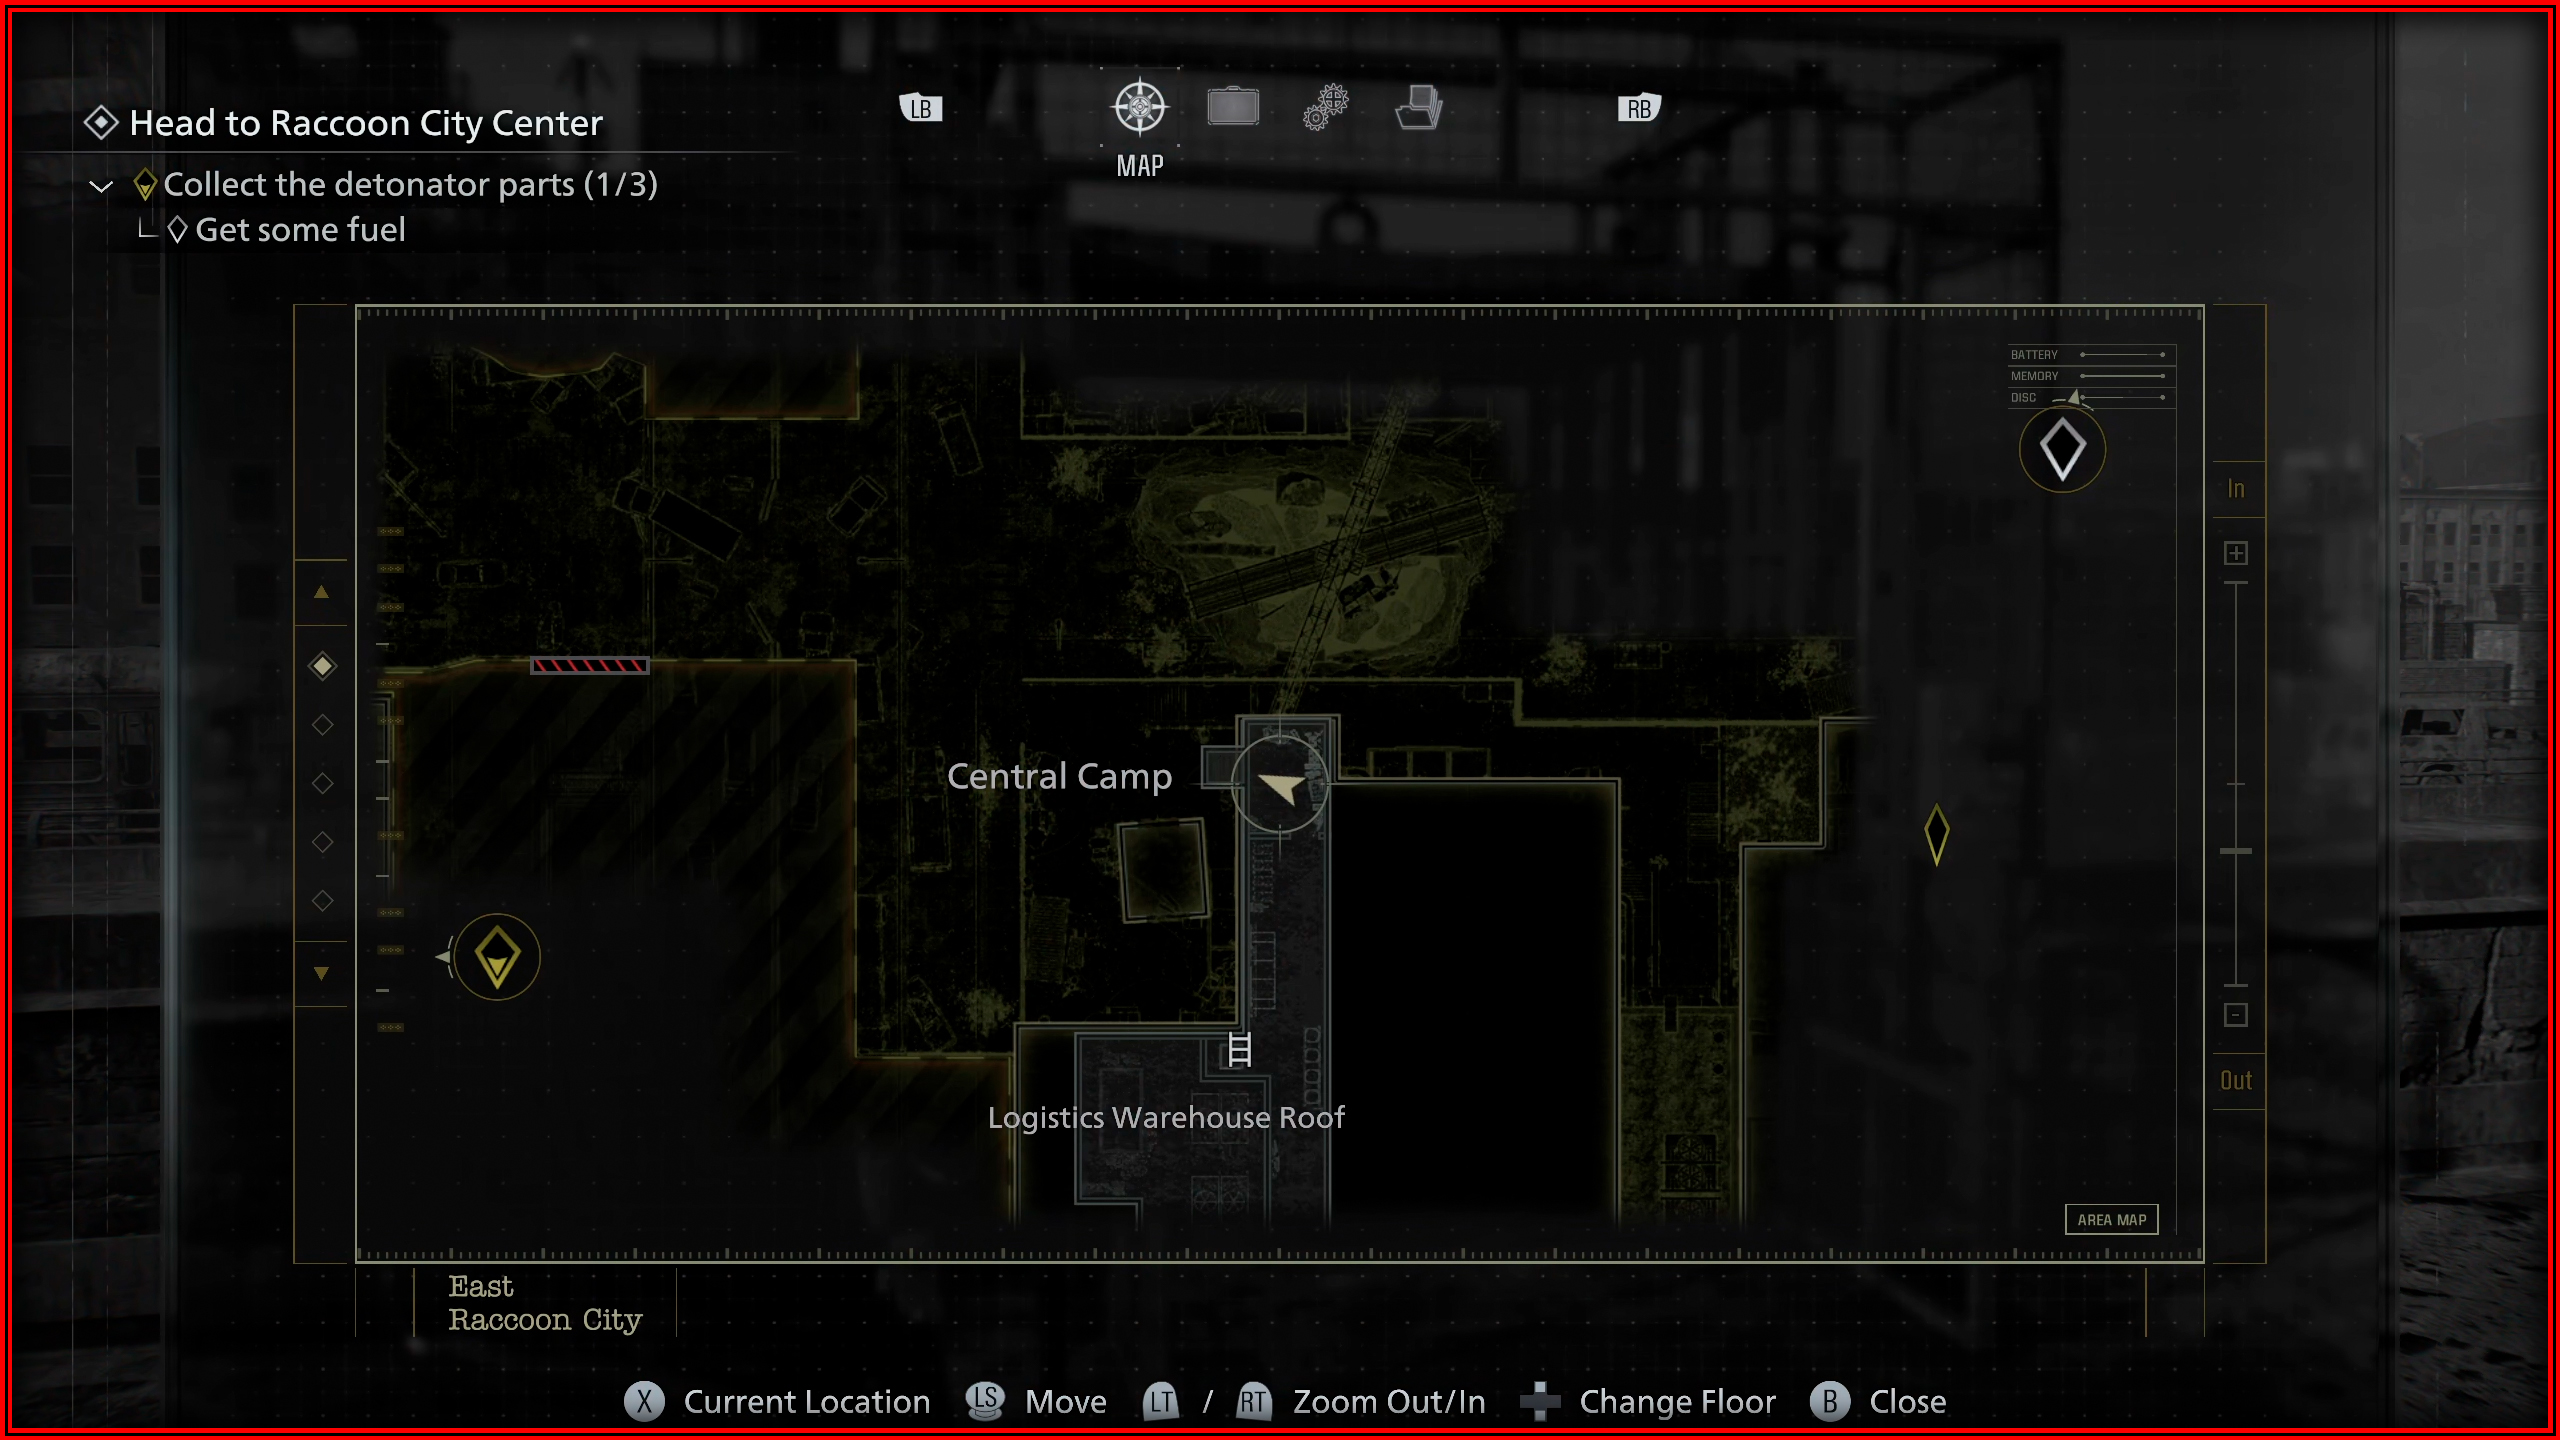
Mr. Raccoon memoriam 13
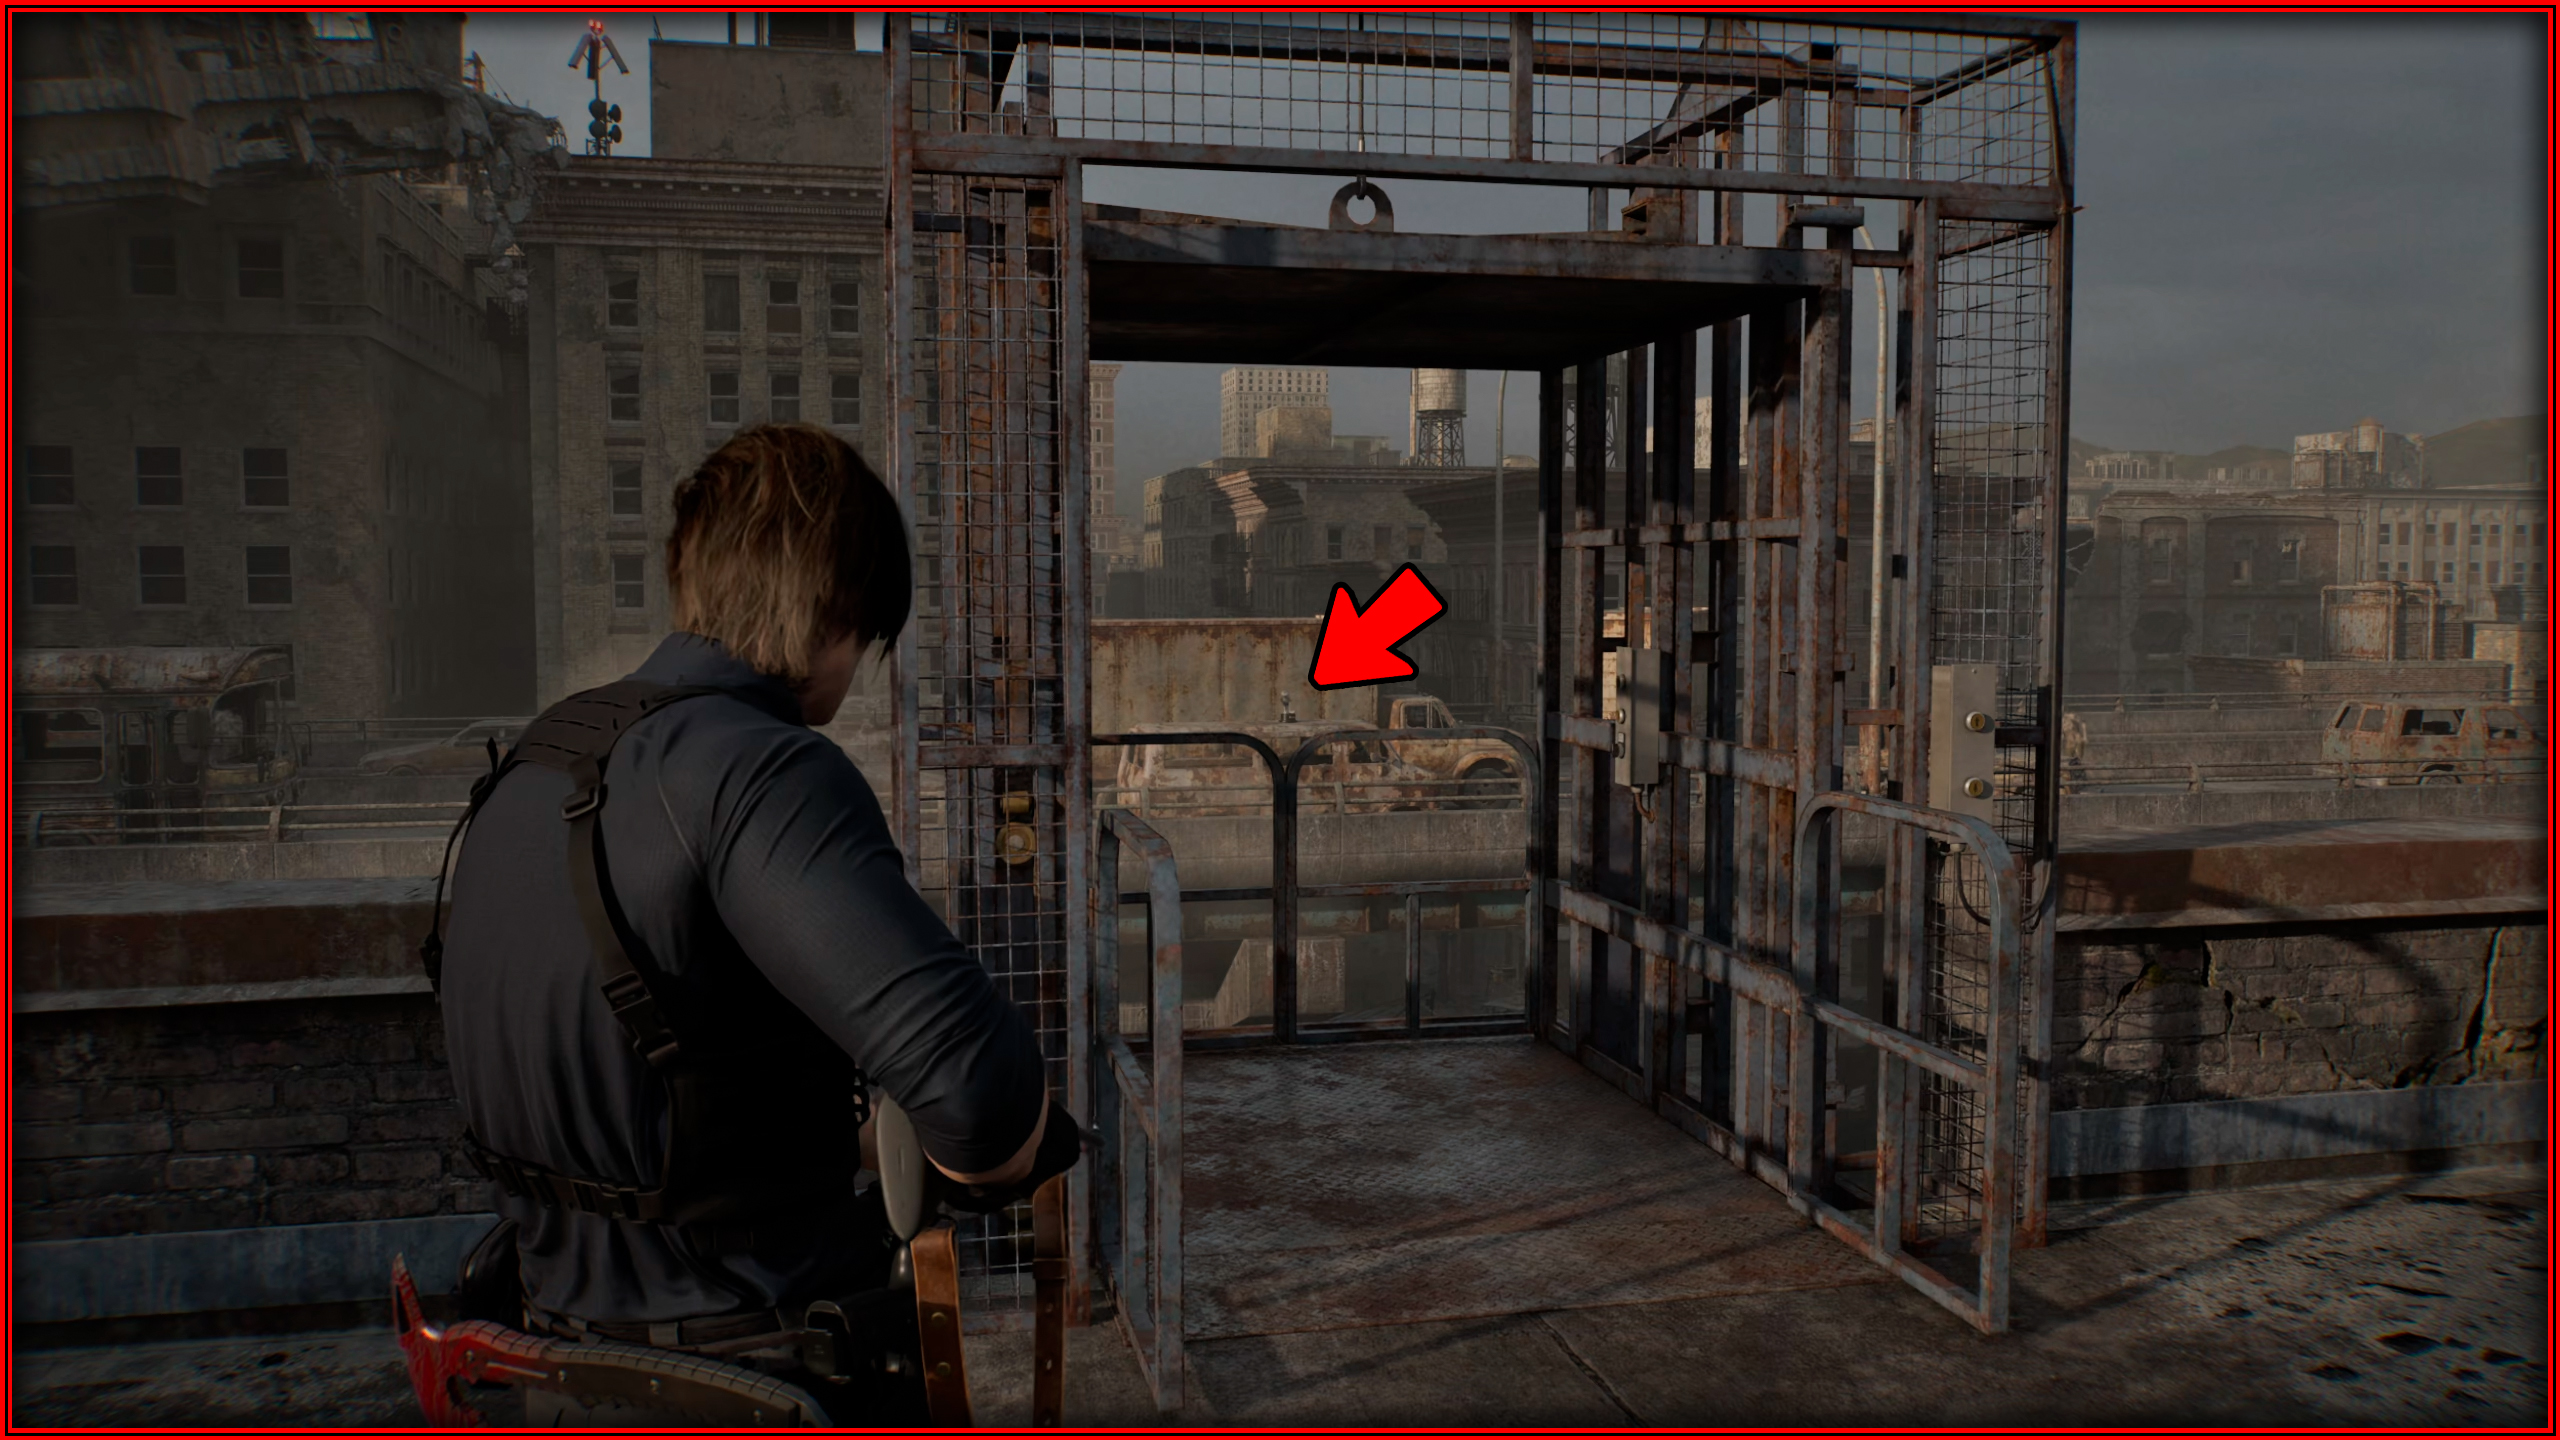
After picking up the Cedarbrook Apartments Key, use it on the gate near the central camp, go to the Underground Parking Garage, in a room to the left of the first zombie.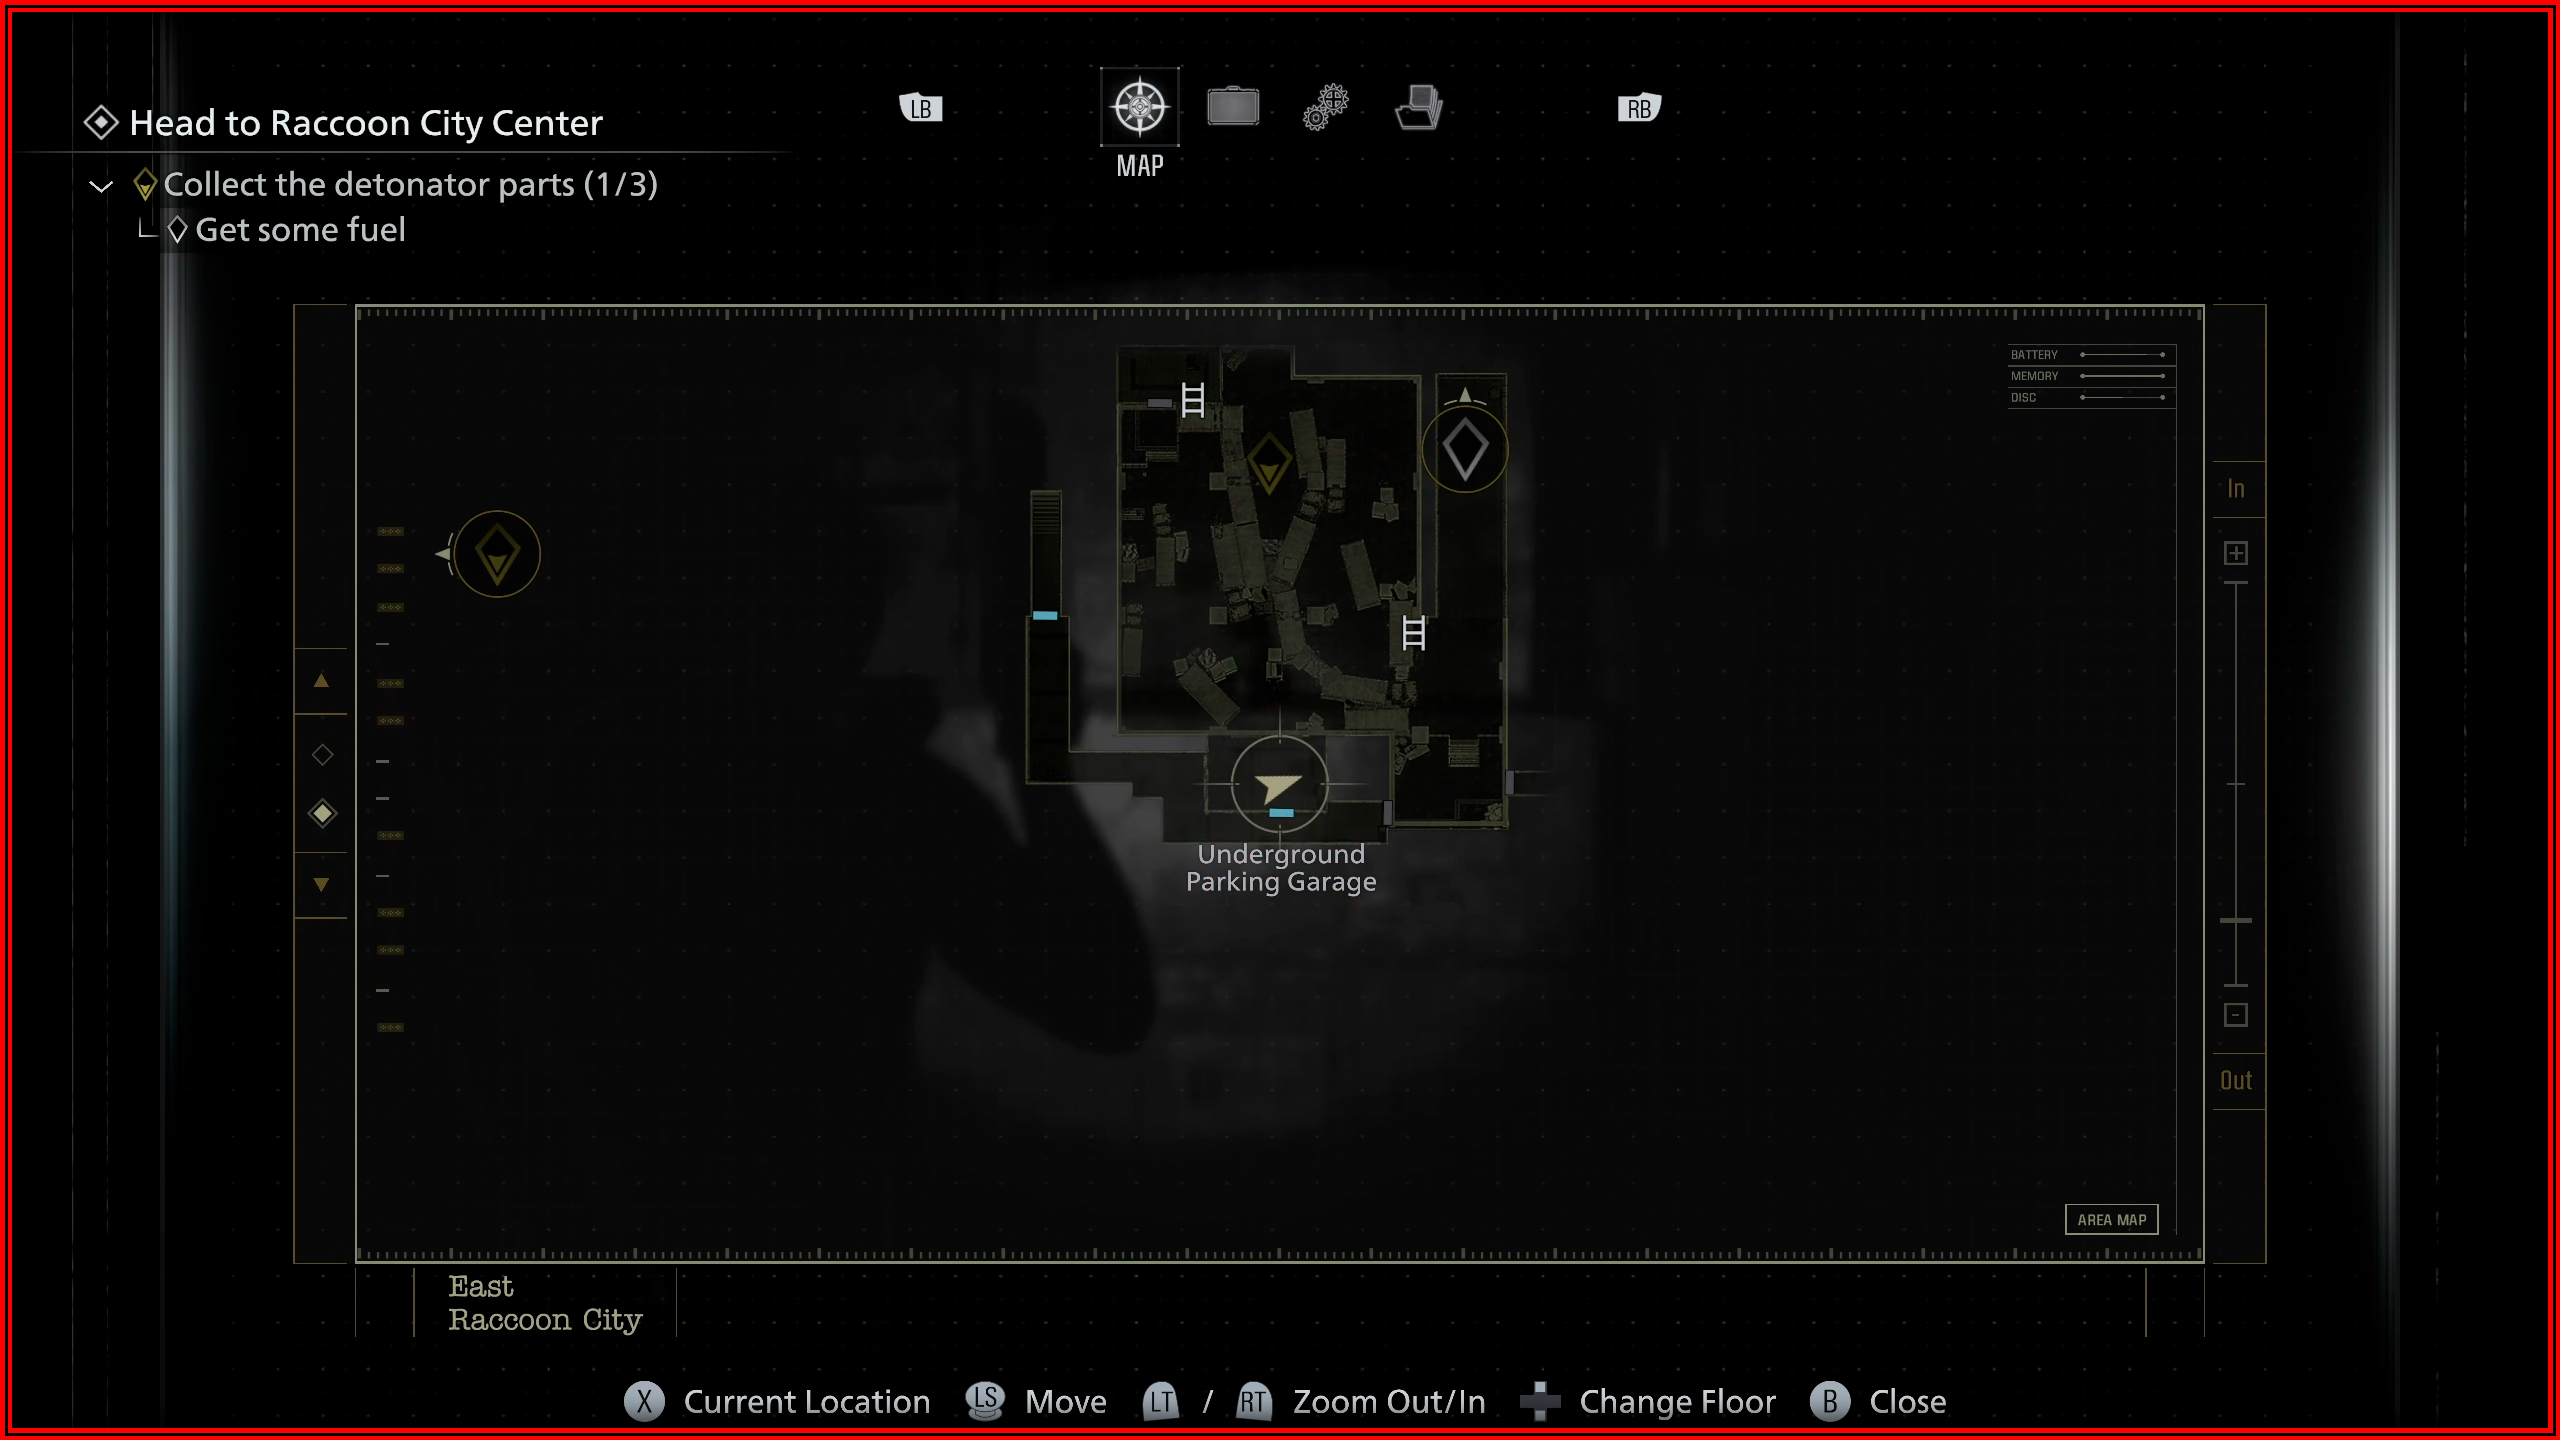
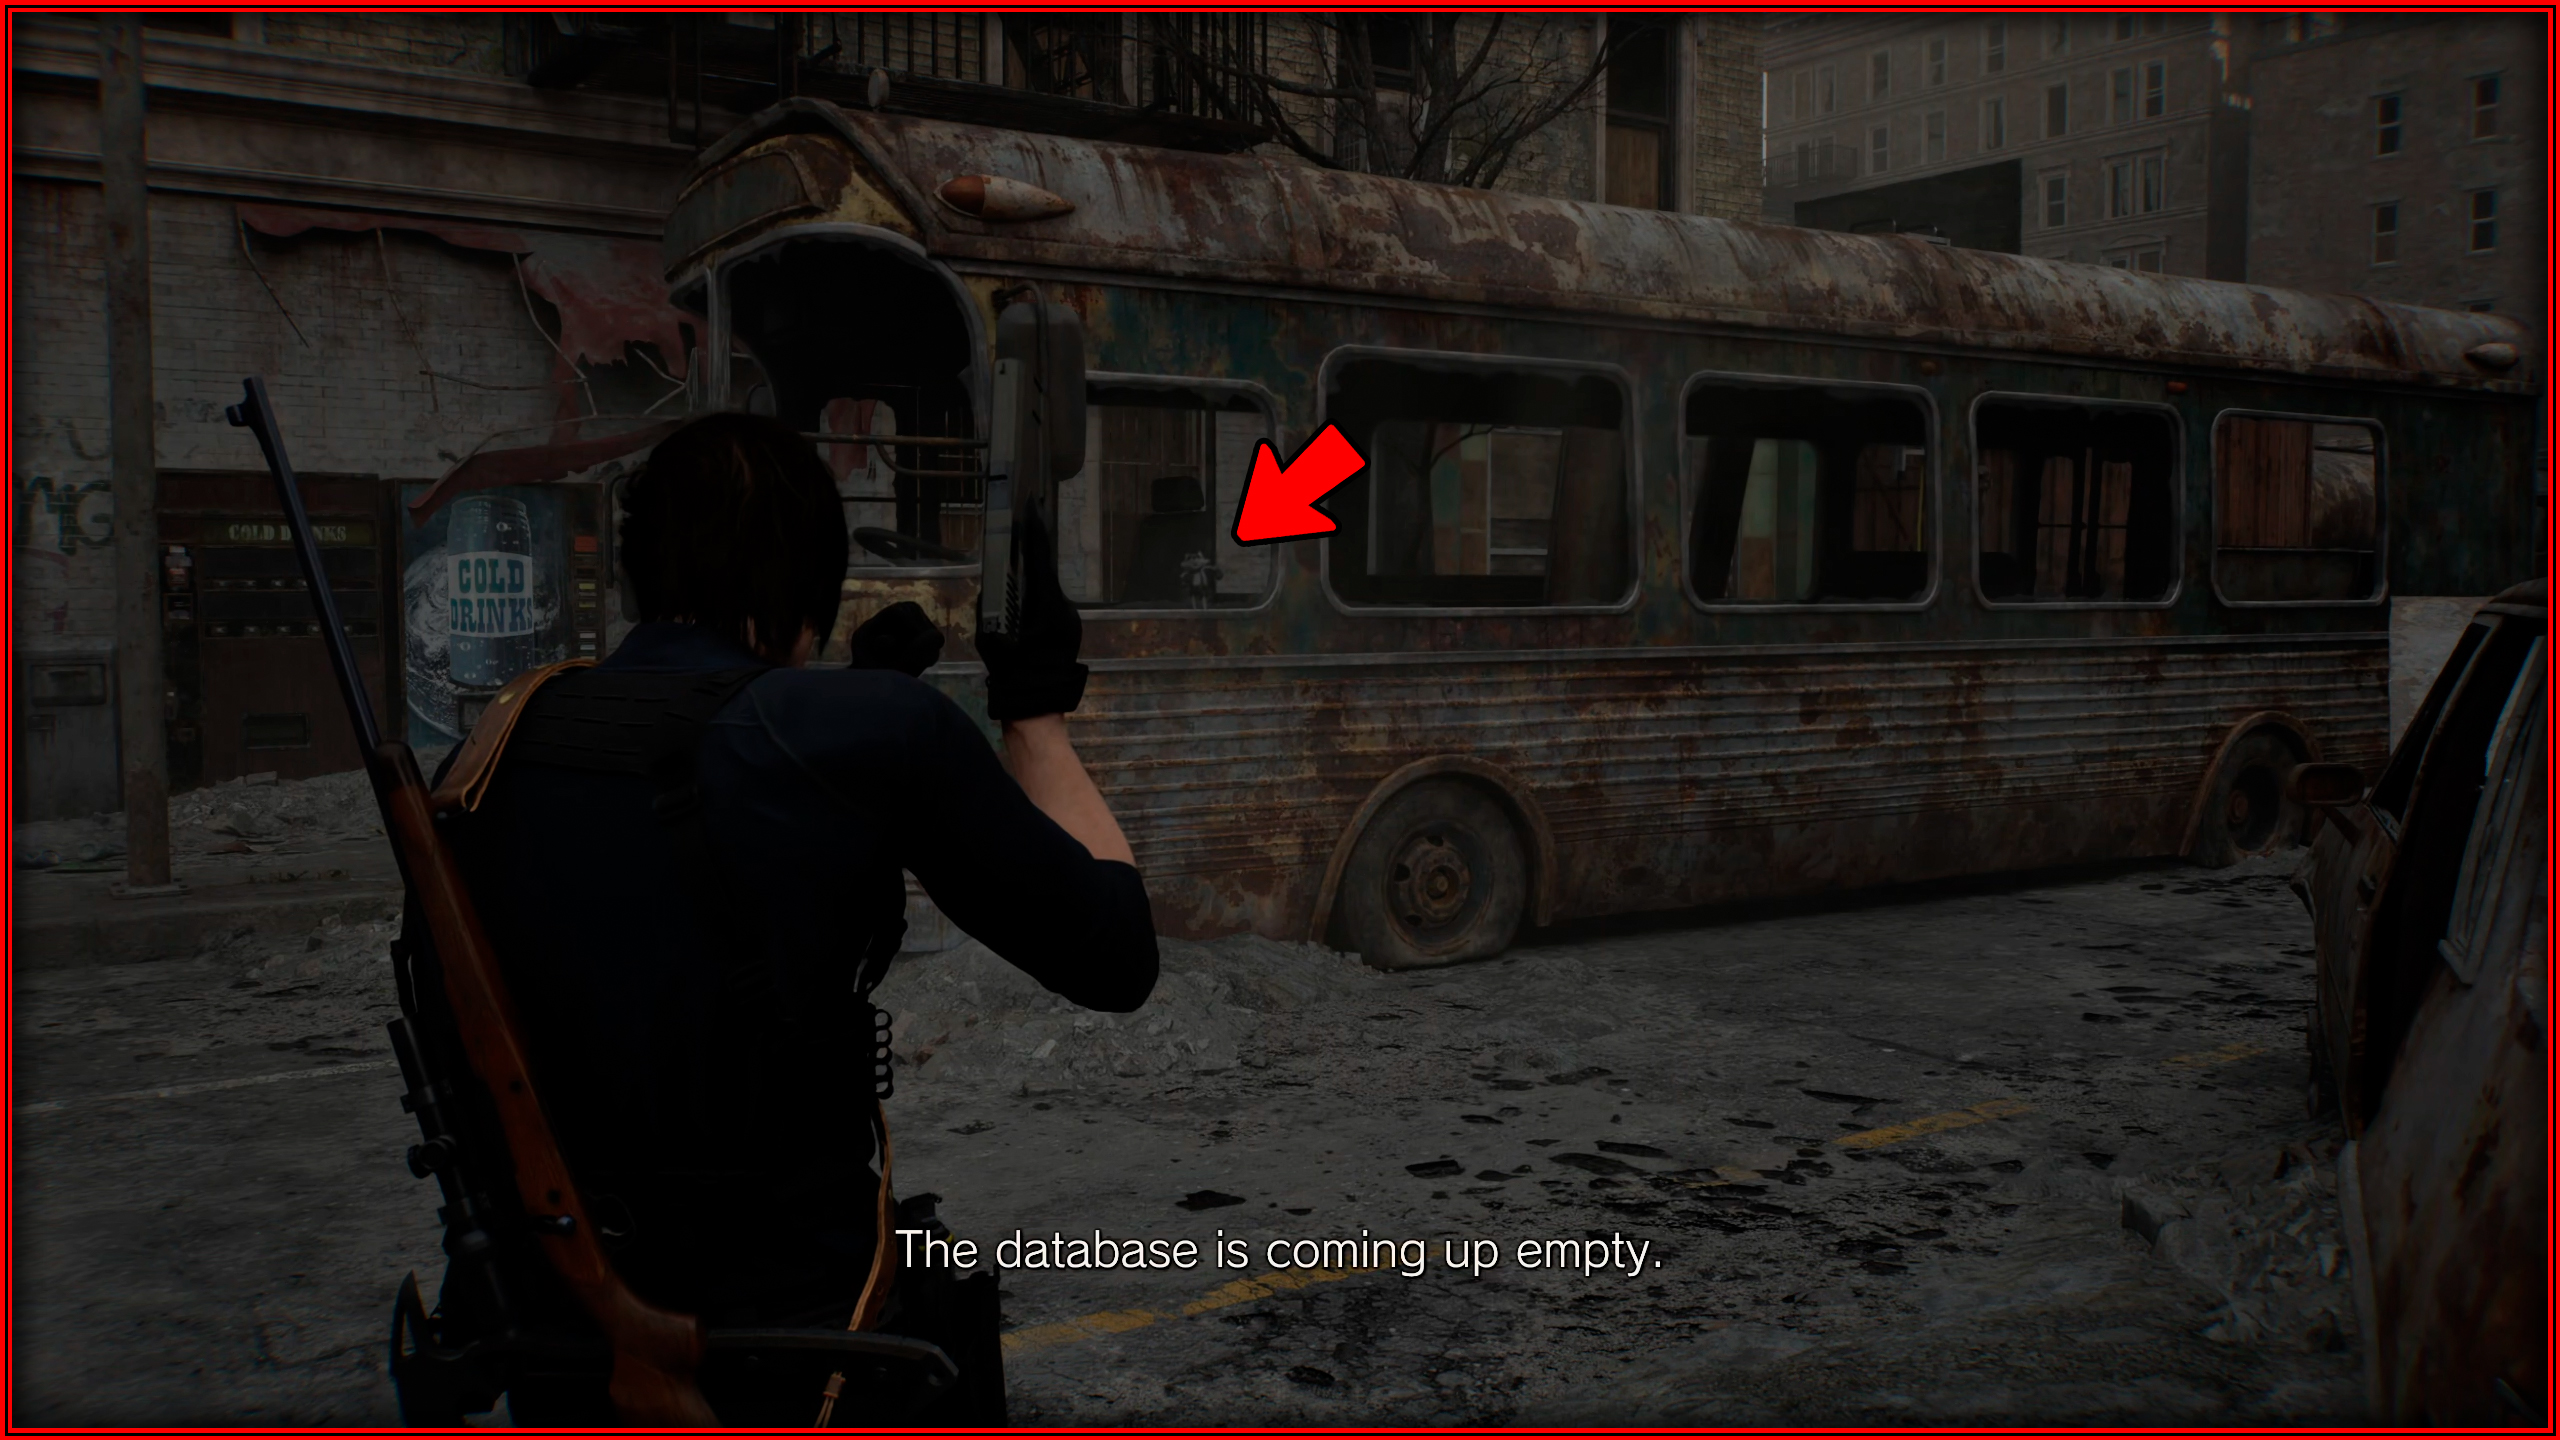
Mr. Raccoon memoriam 14
After obtaining BSAA Container Keys, on the main street inside a bus.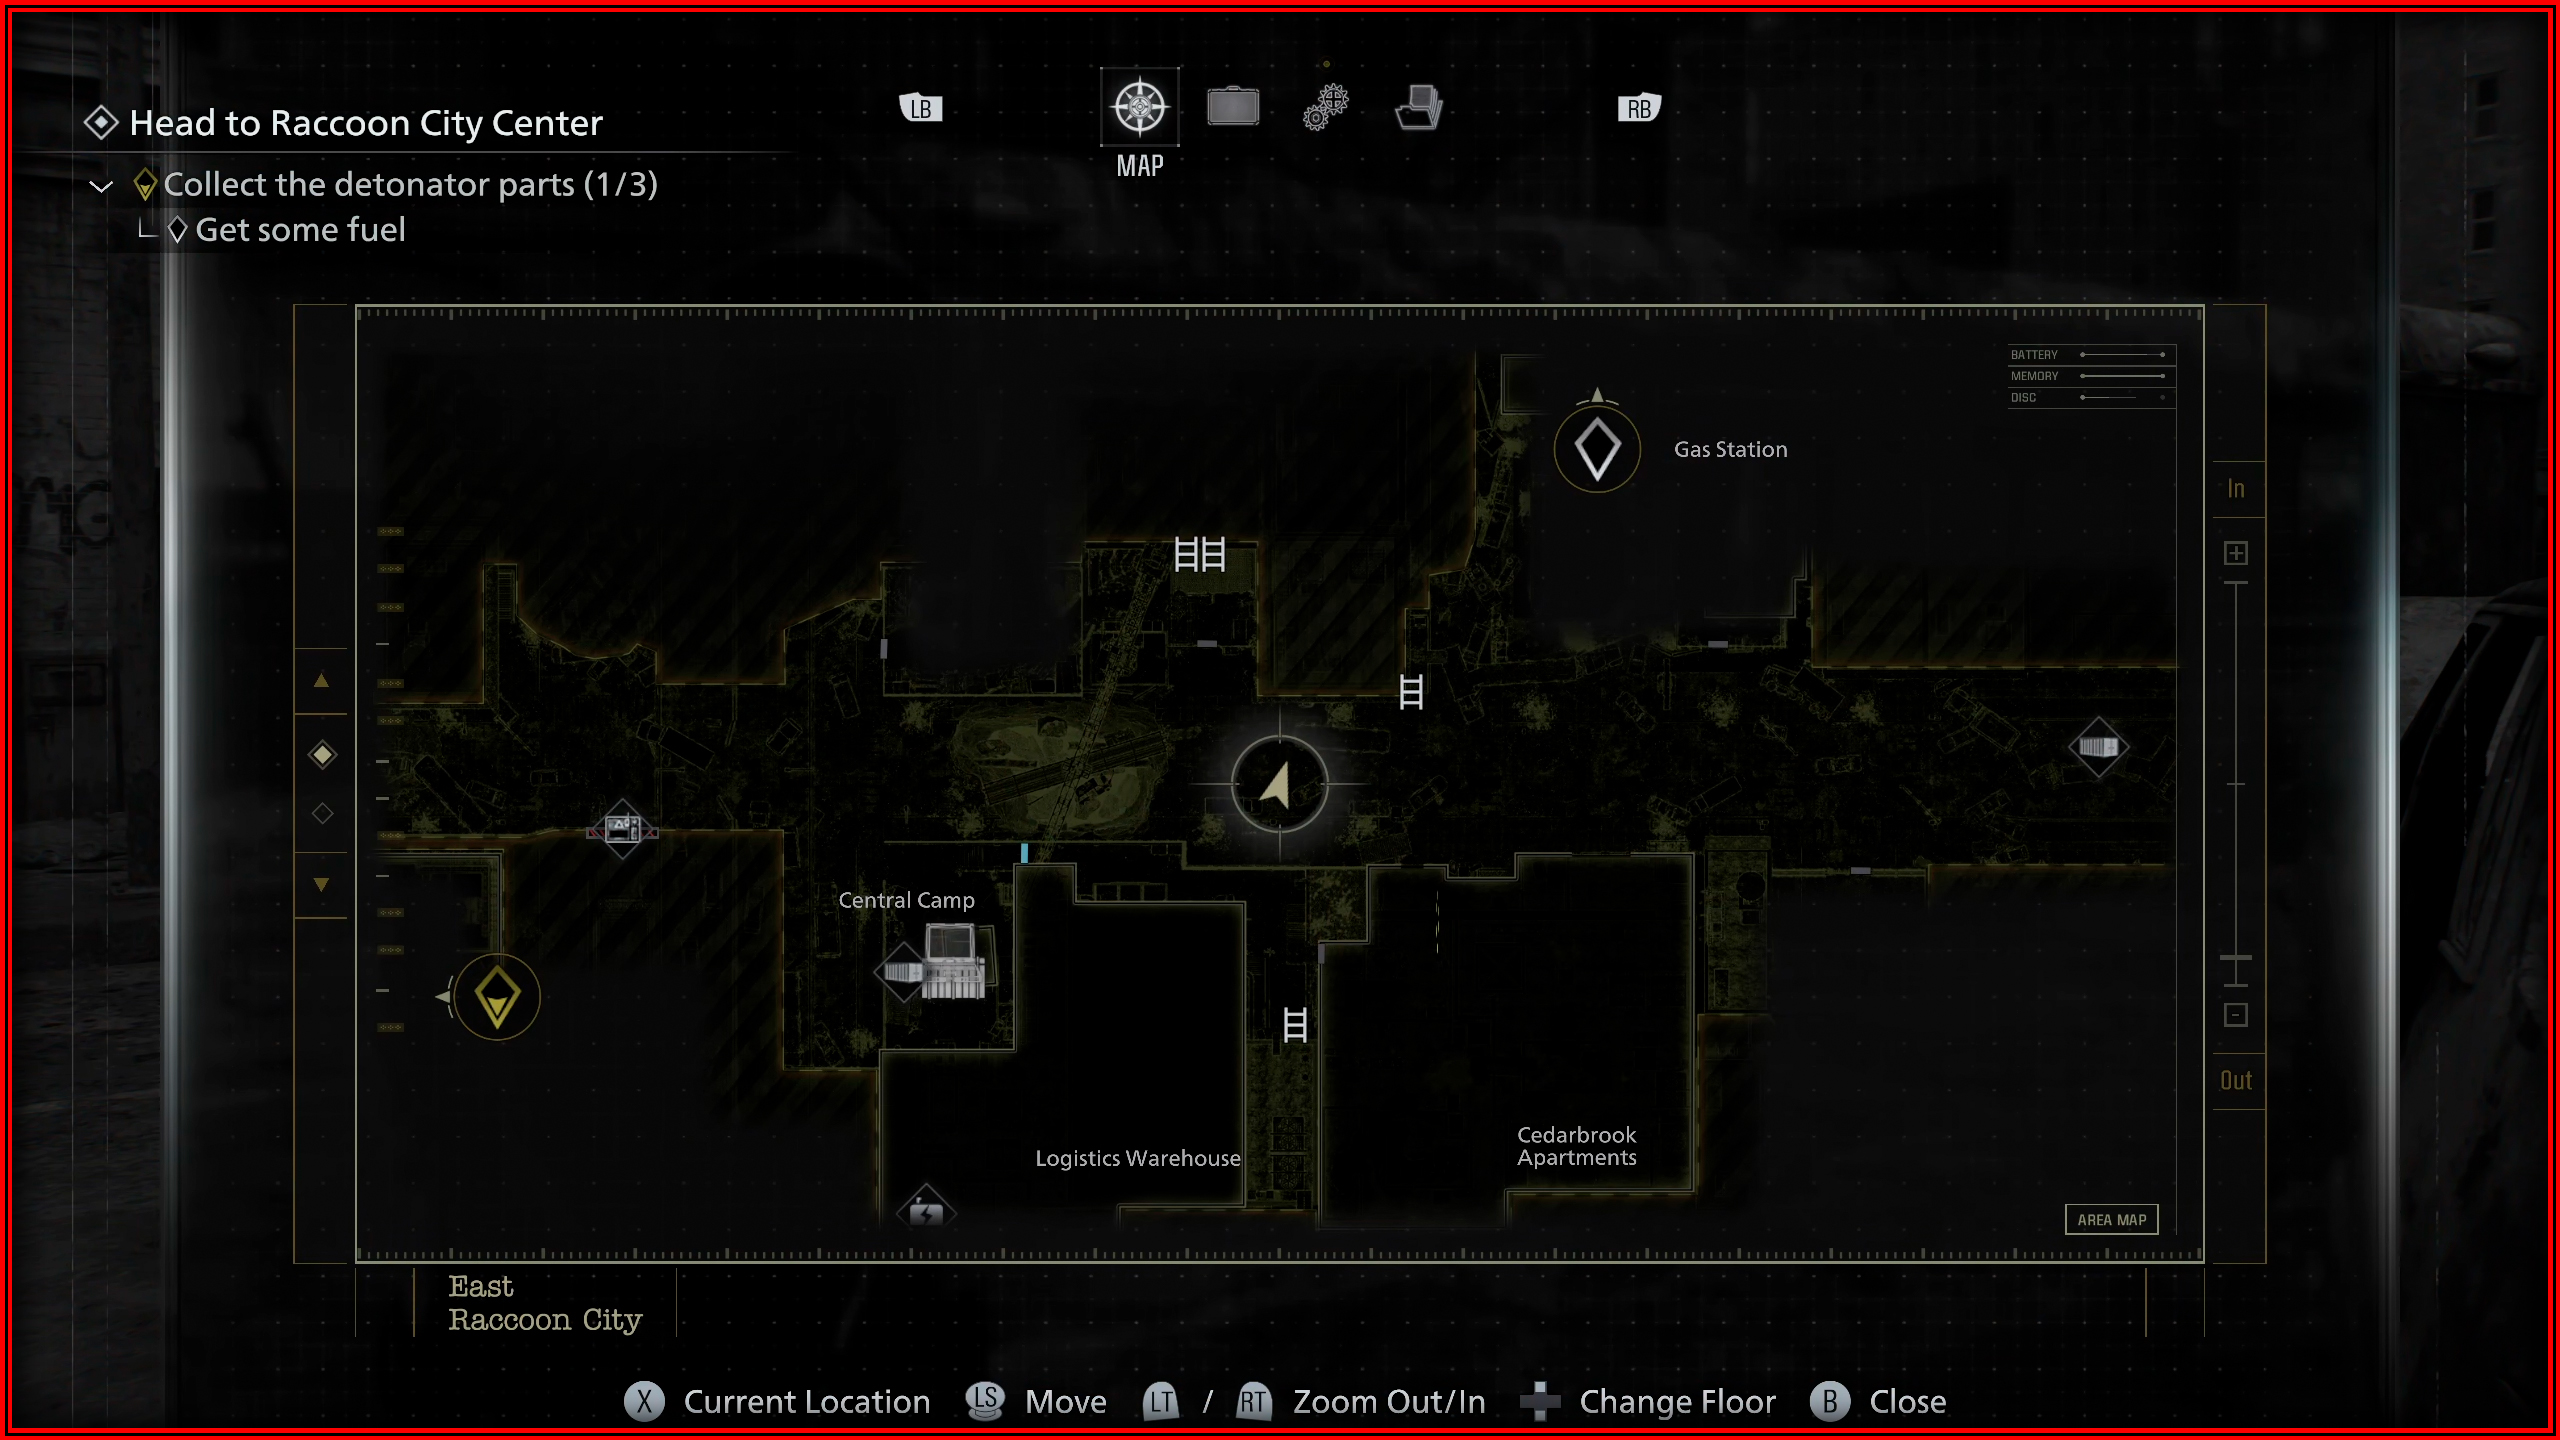
Mr. Raccoon memoriam 15
At the top of the staircase inside Cedarbrook Apartments, before reaching the roof.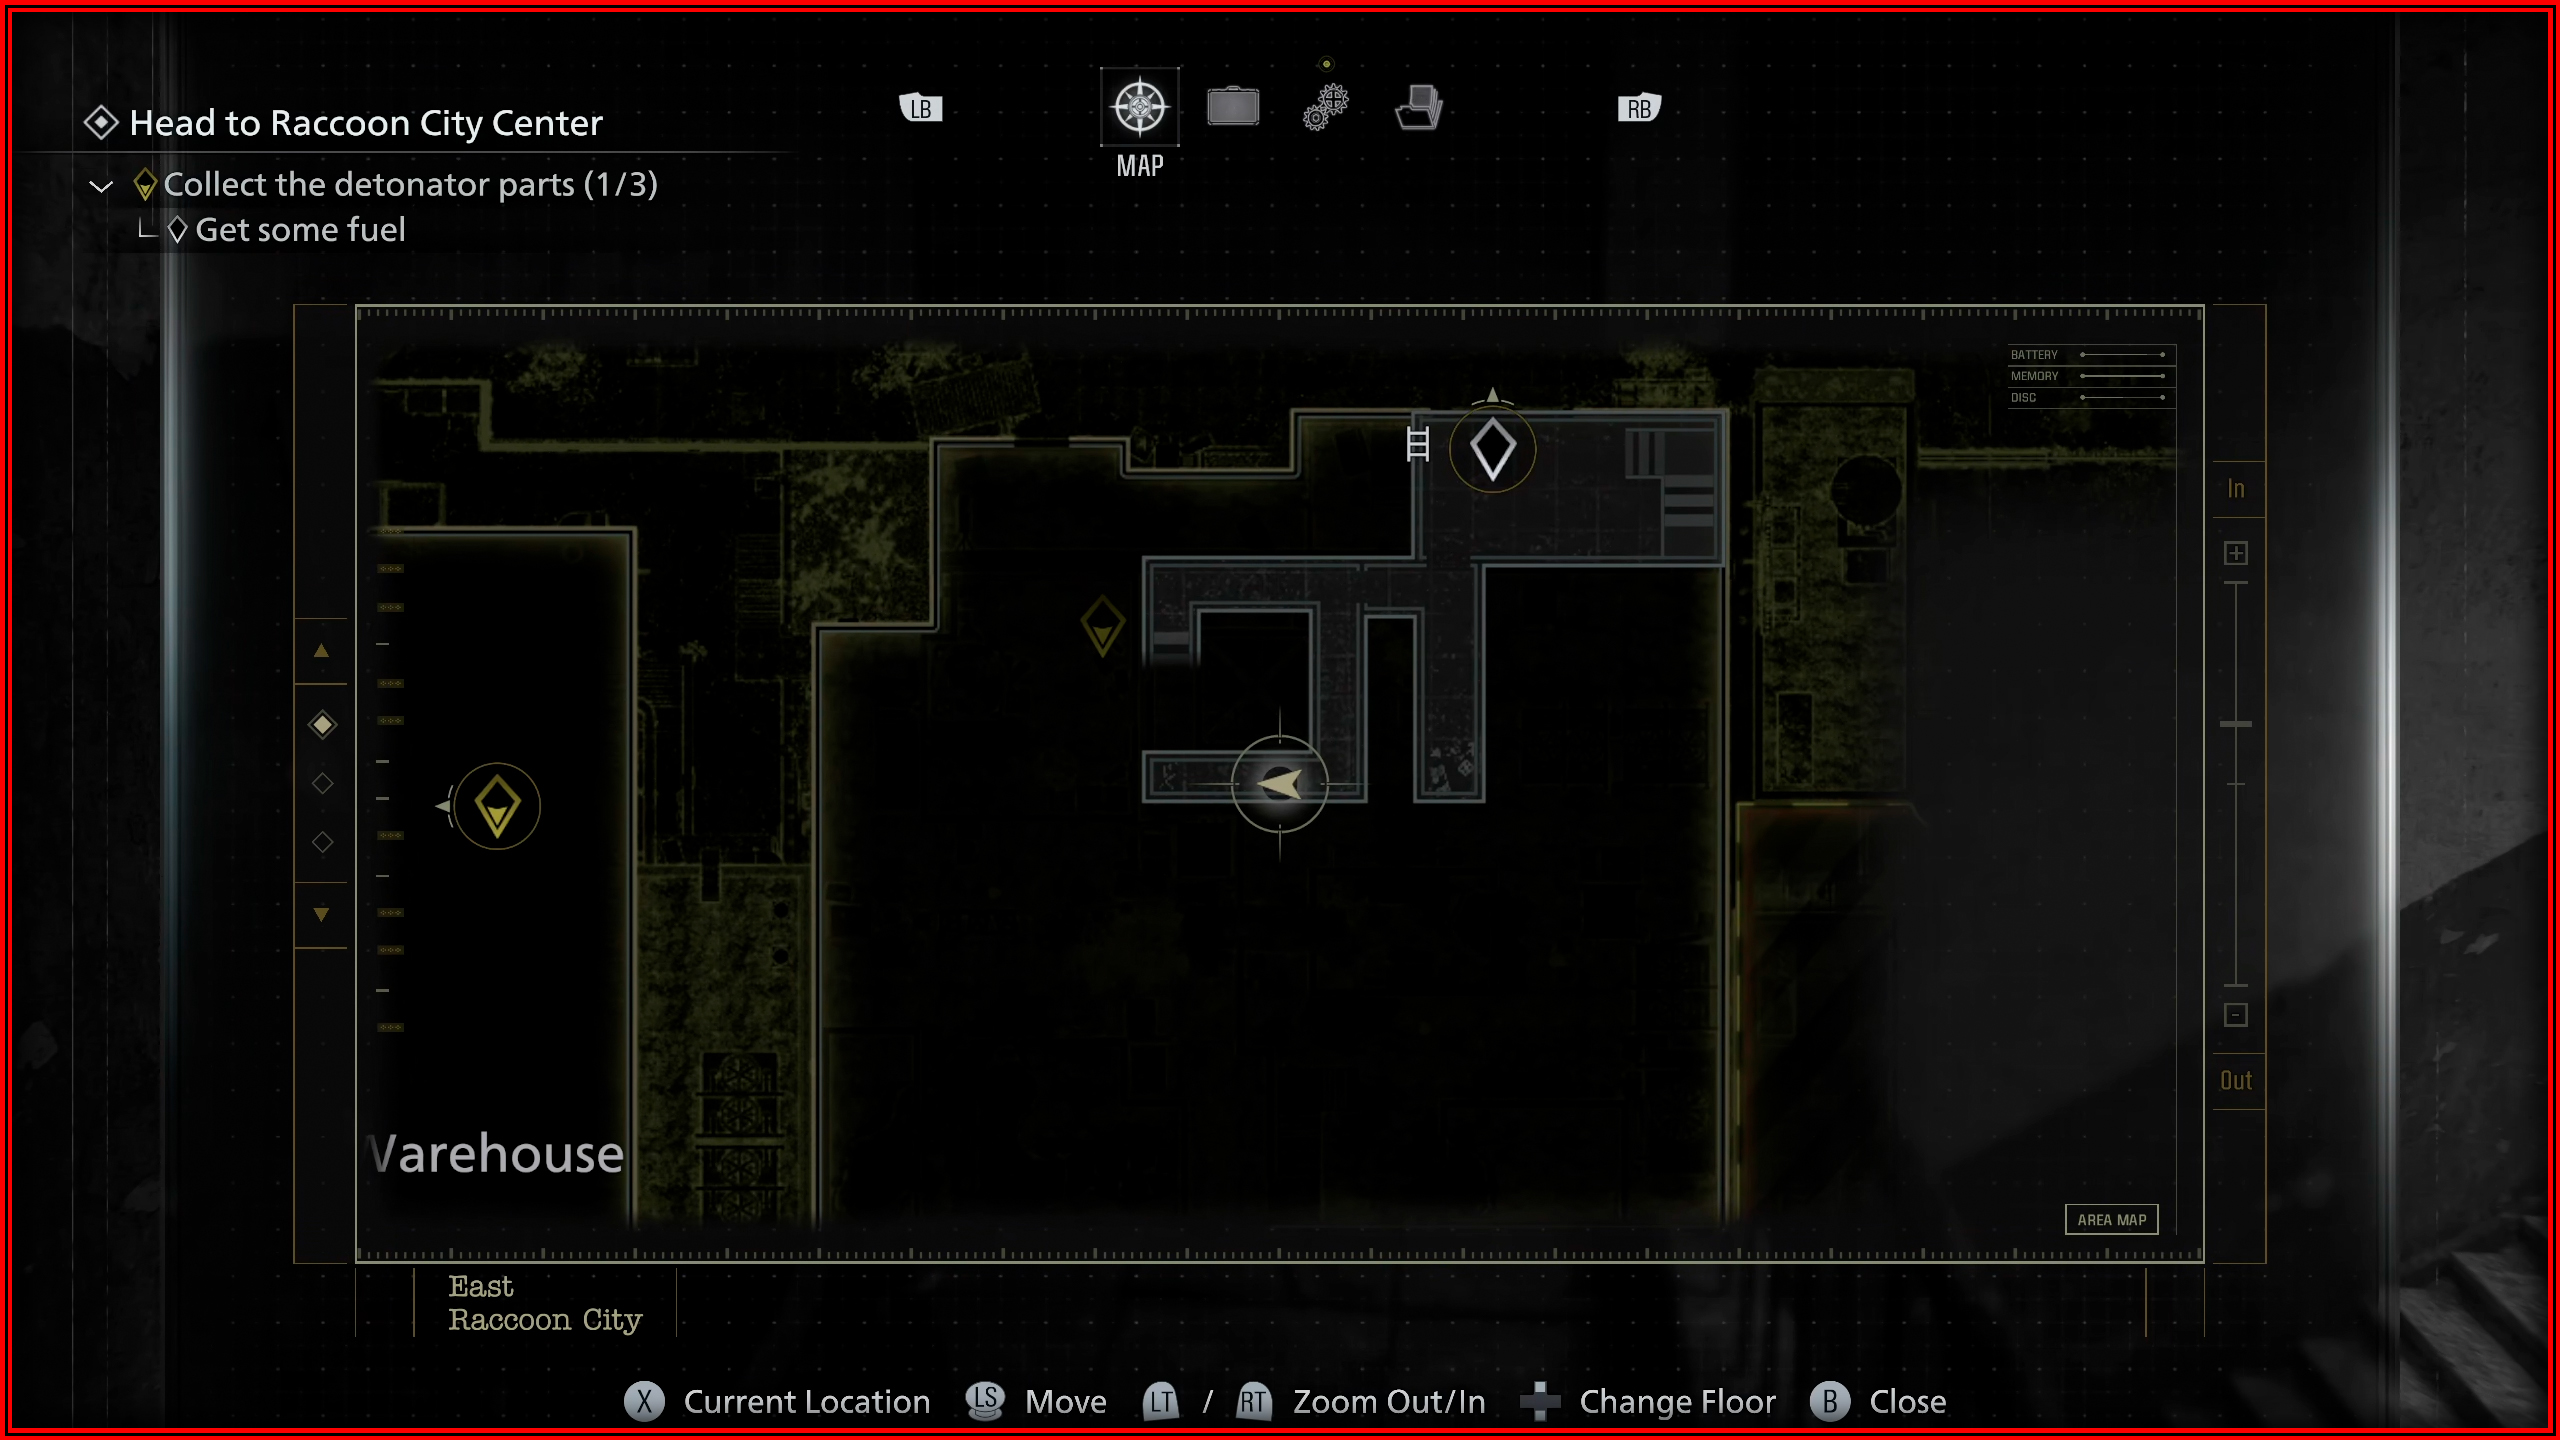
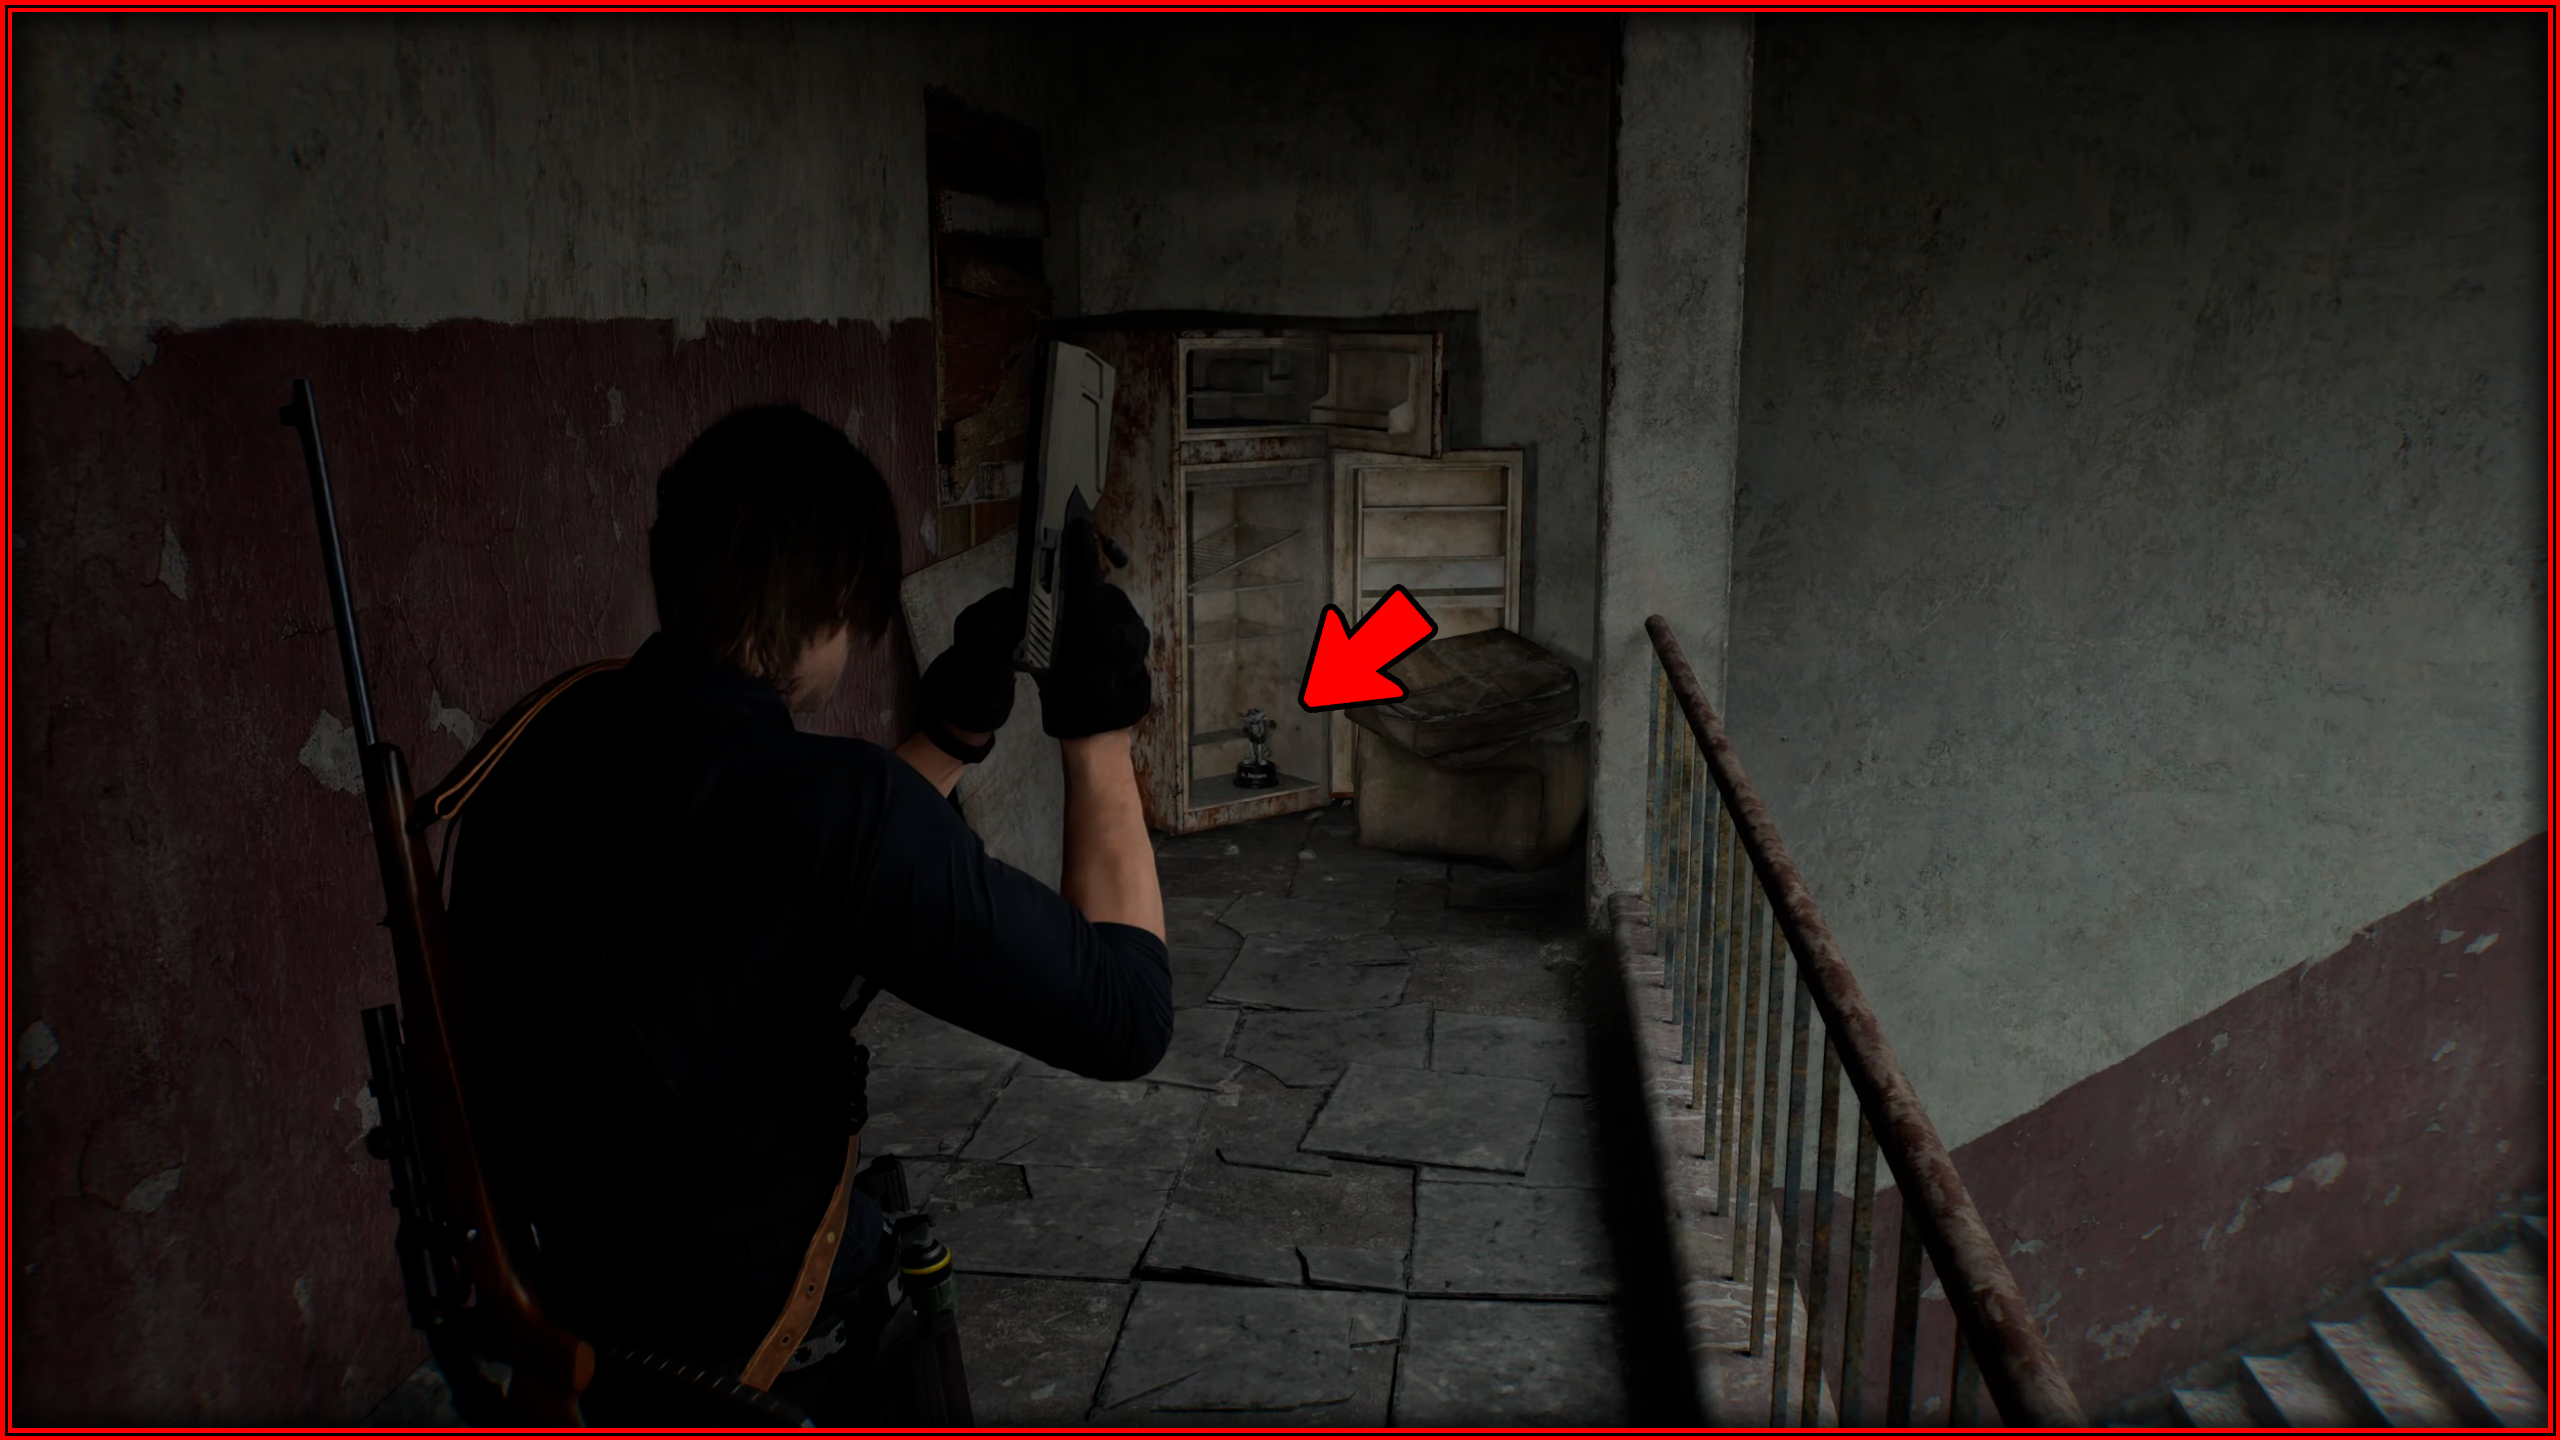
Mr. Raccoon memoriam 16
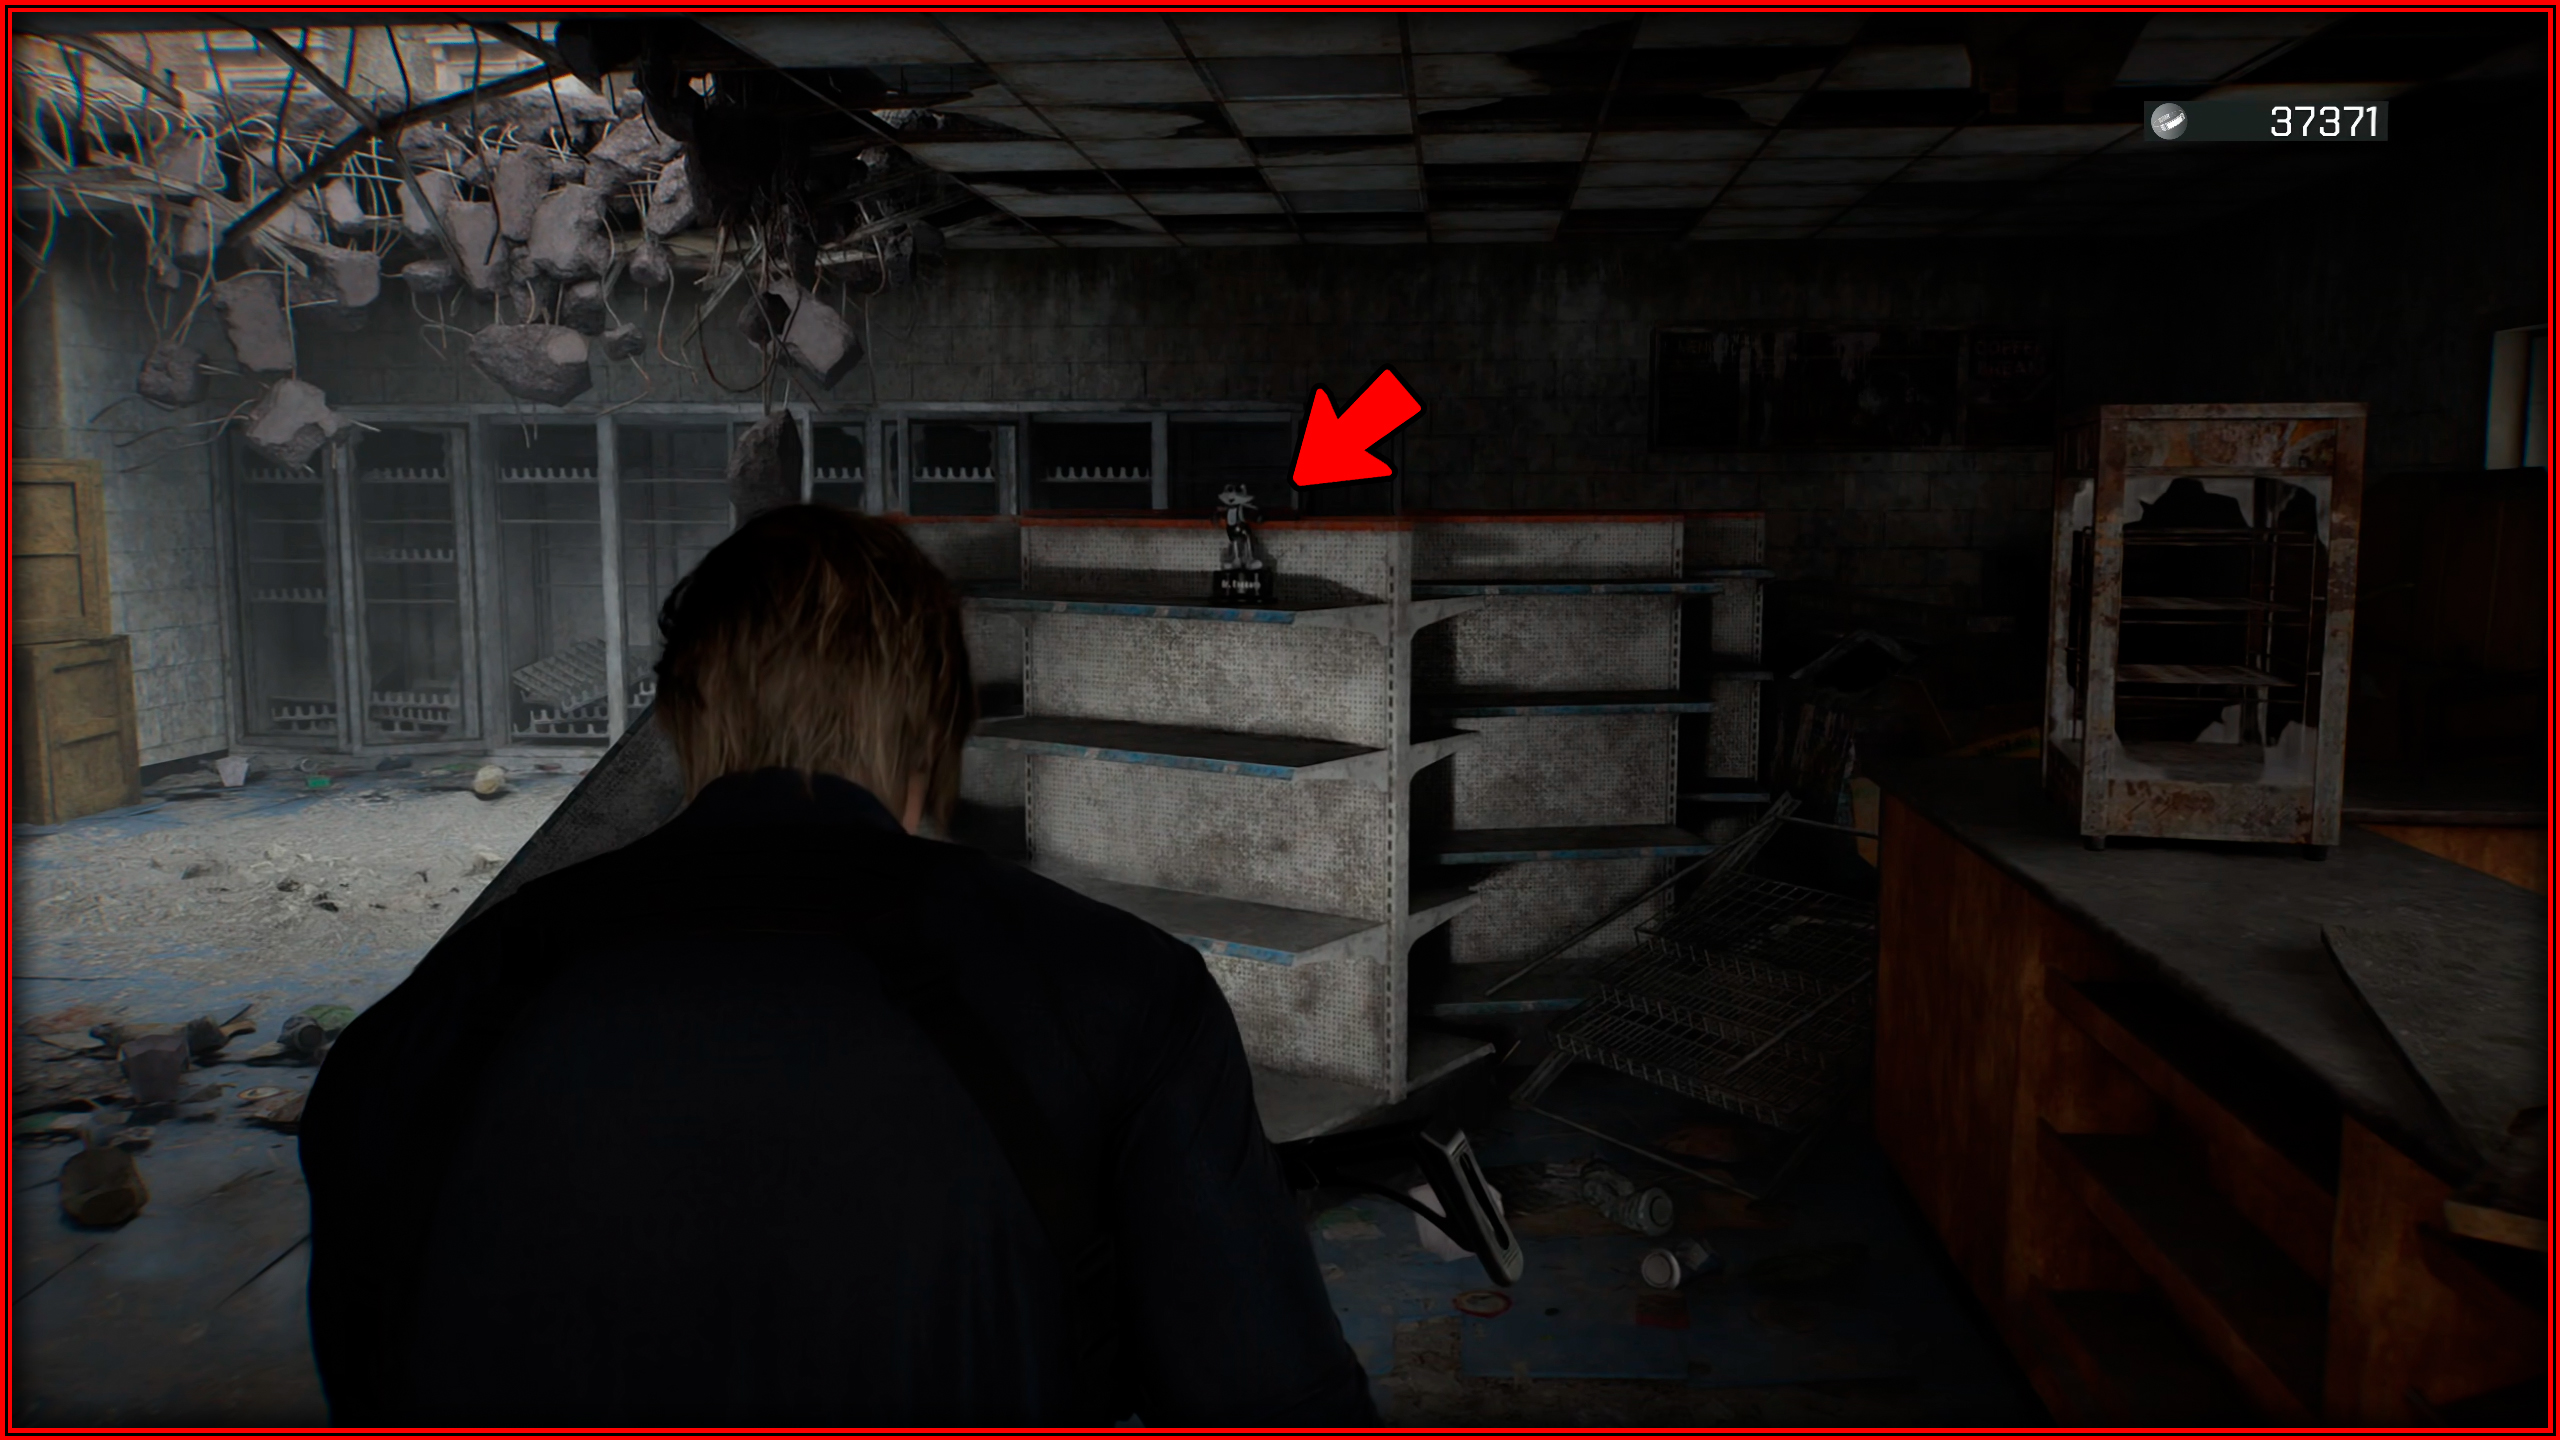
On top of a shelf inside the Gas Station.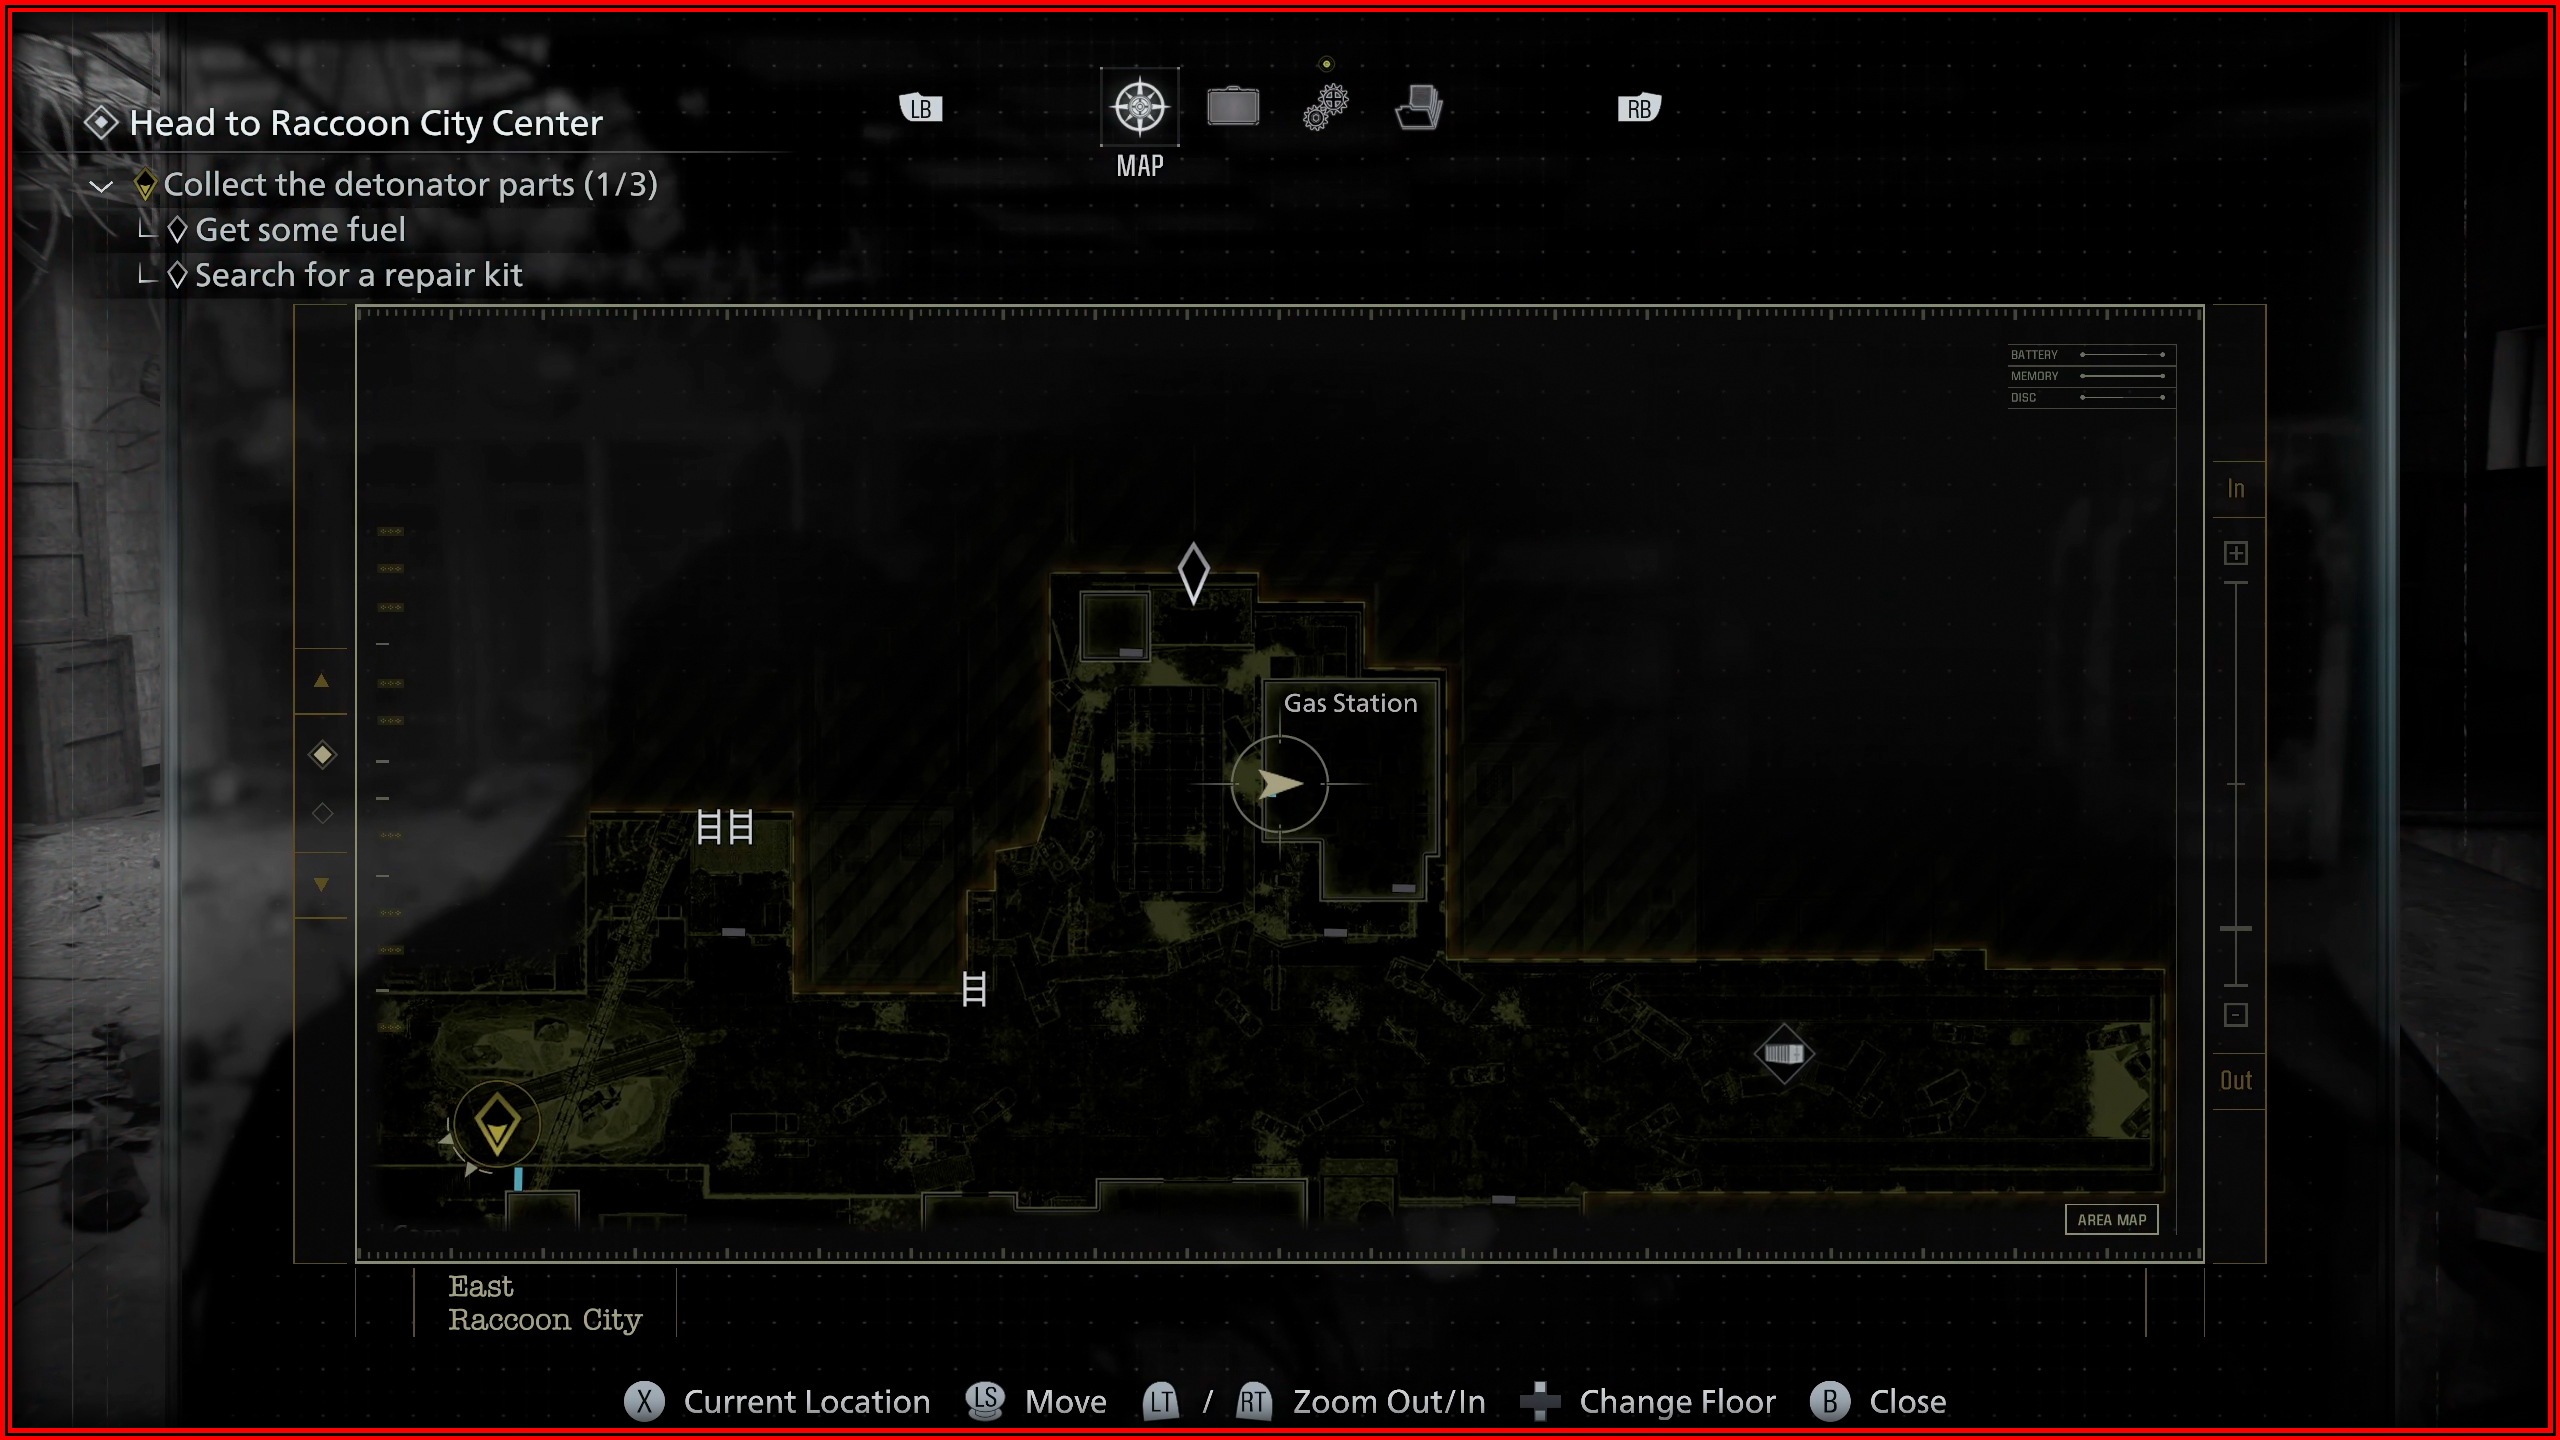
Mr. Raccoon memoriam 17
At the end of the main street, where you unlock a shortcut to the central camp, inside a pipe.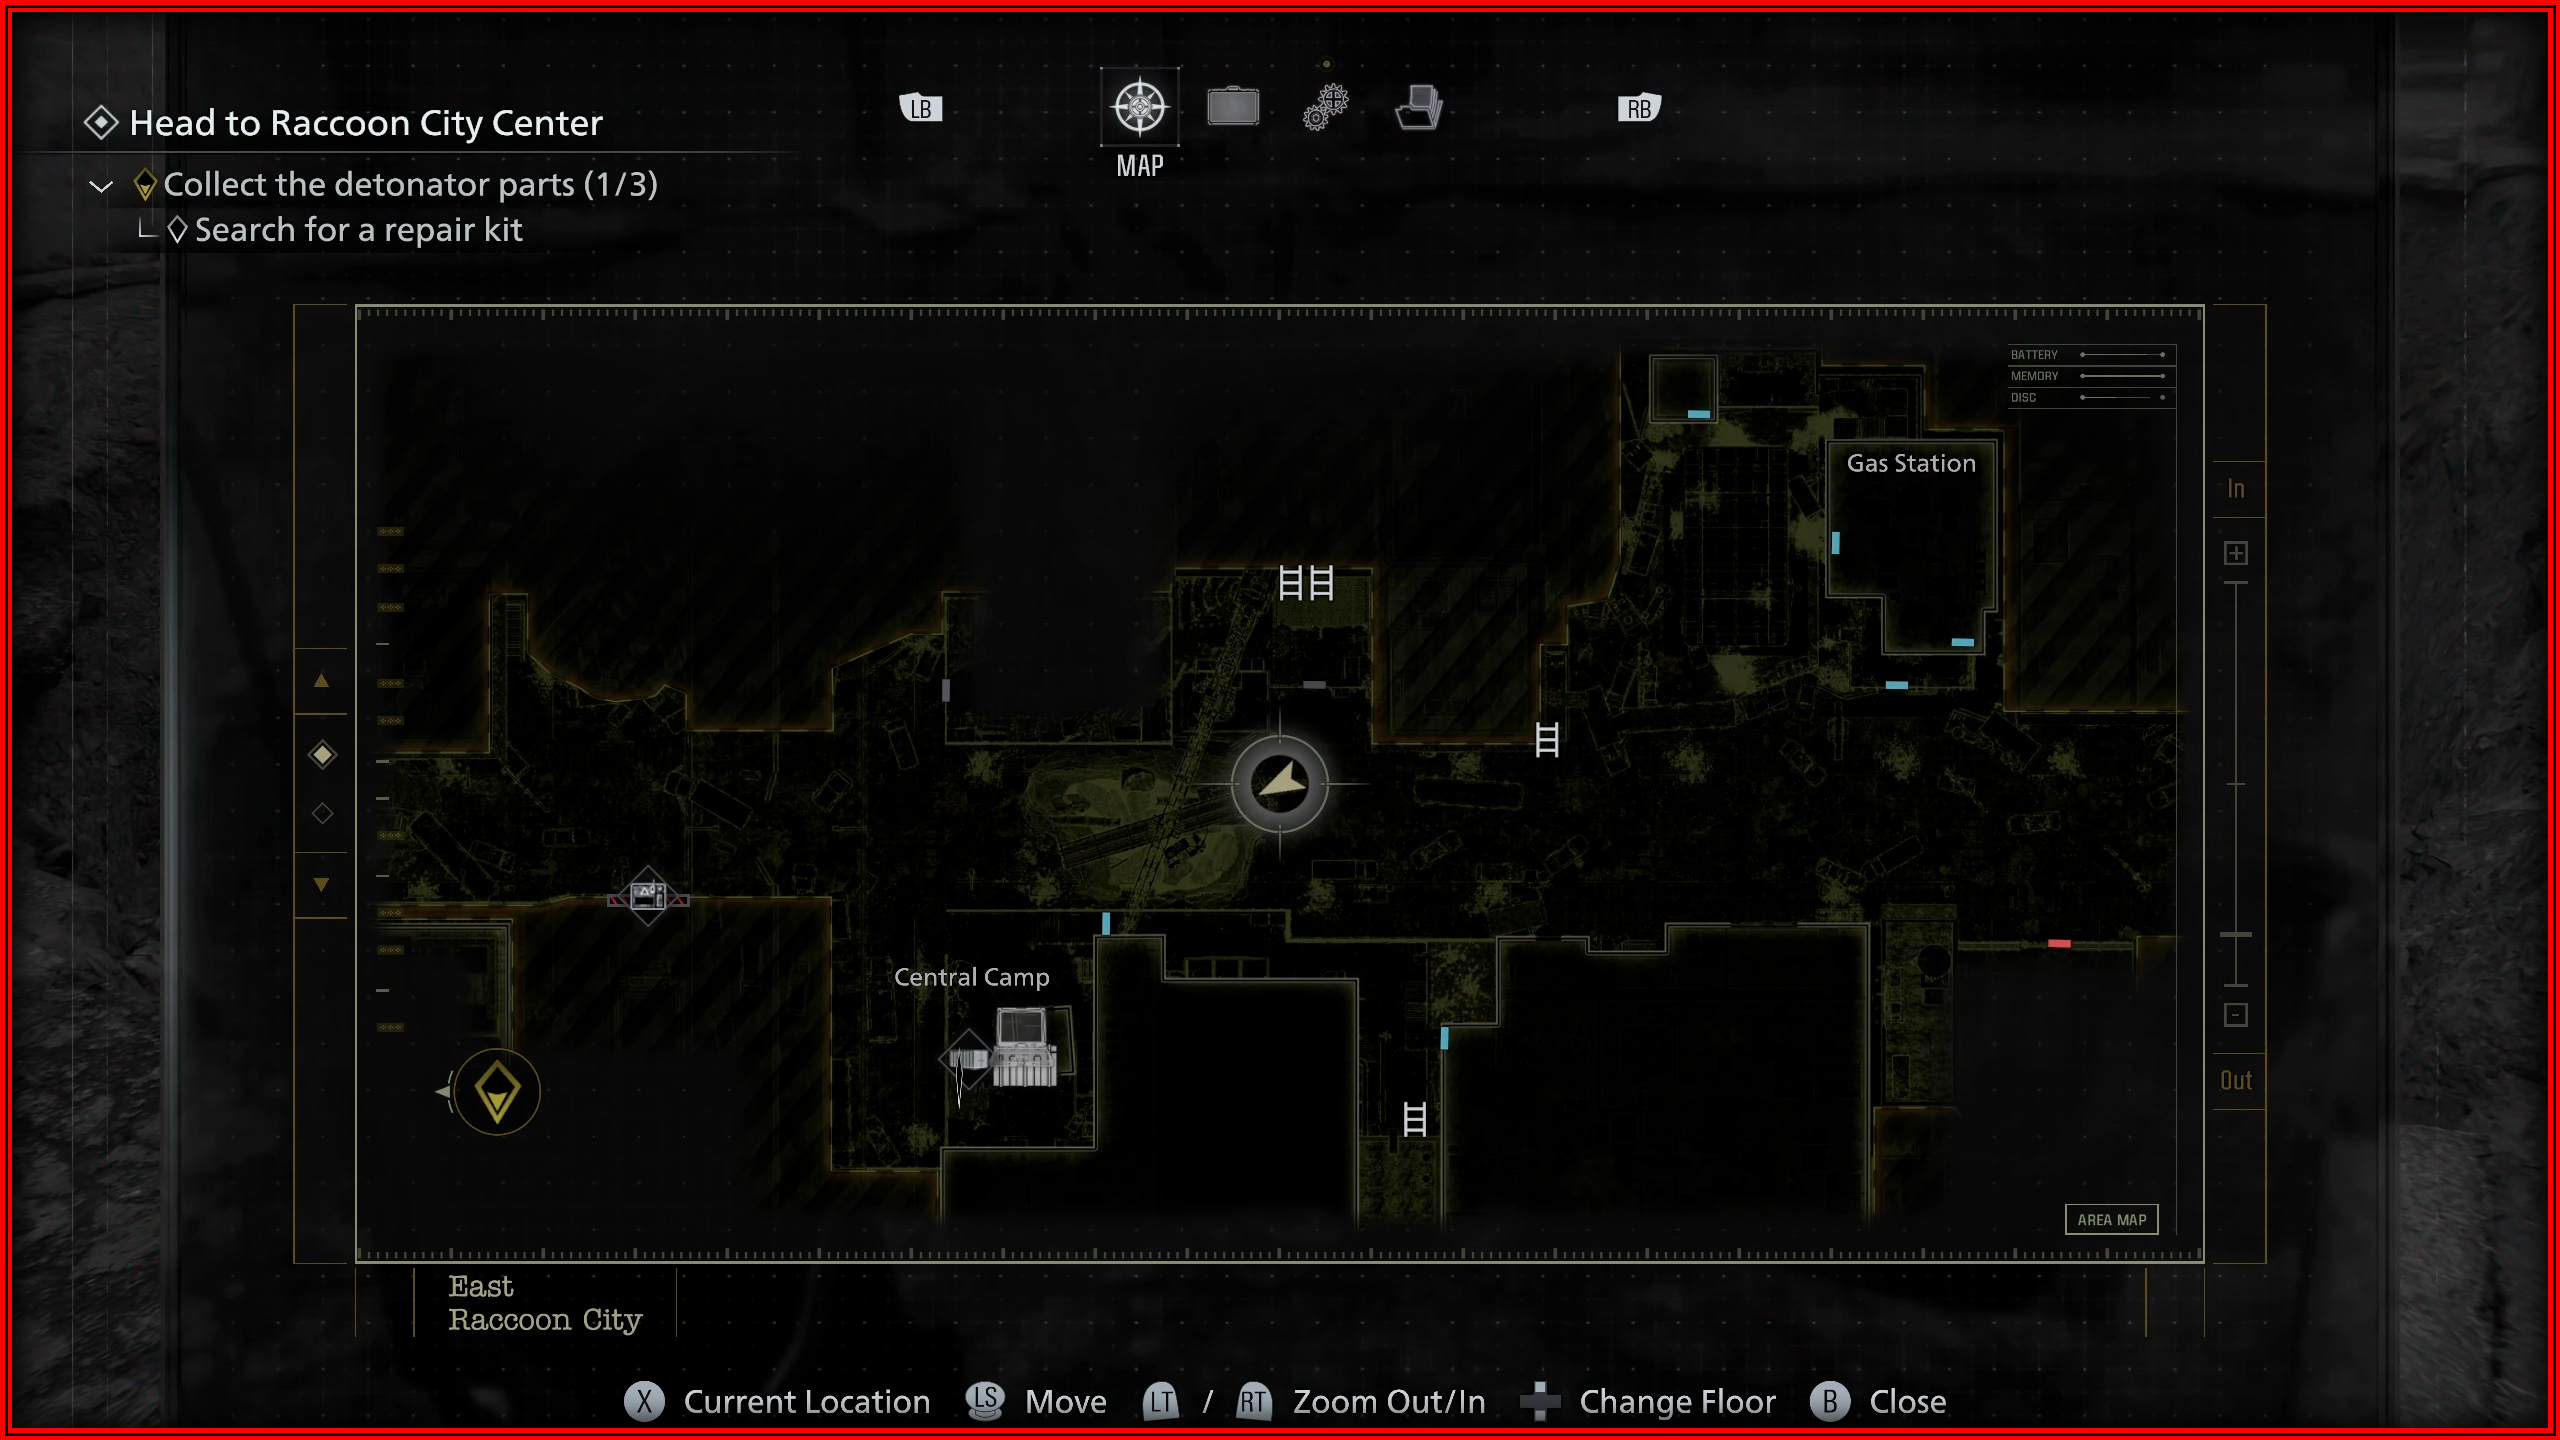

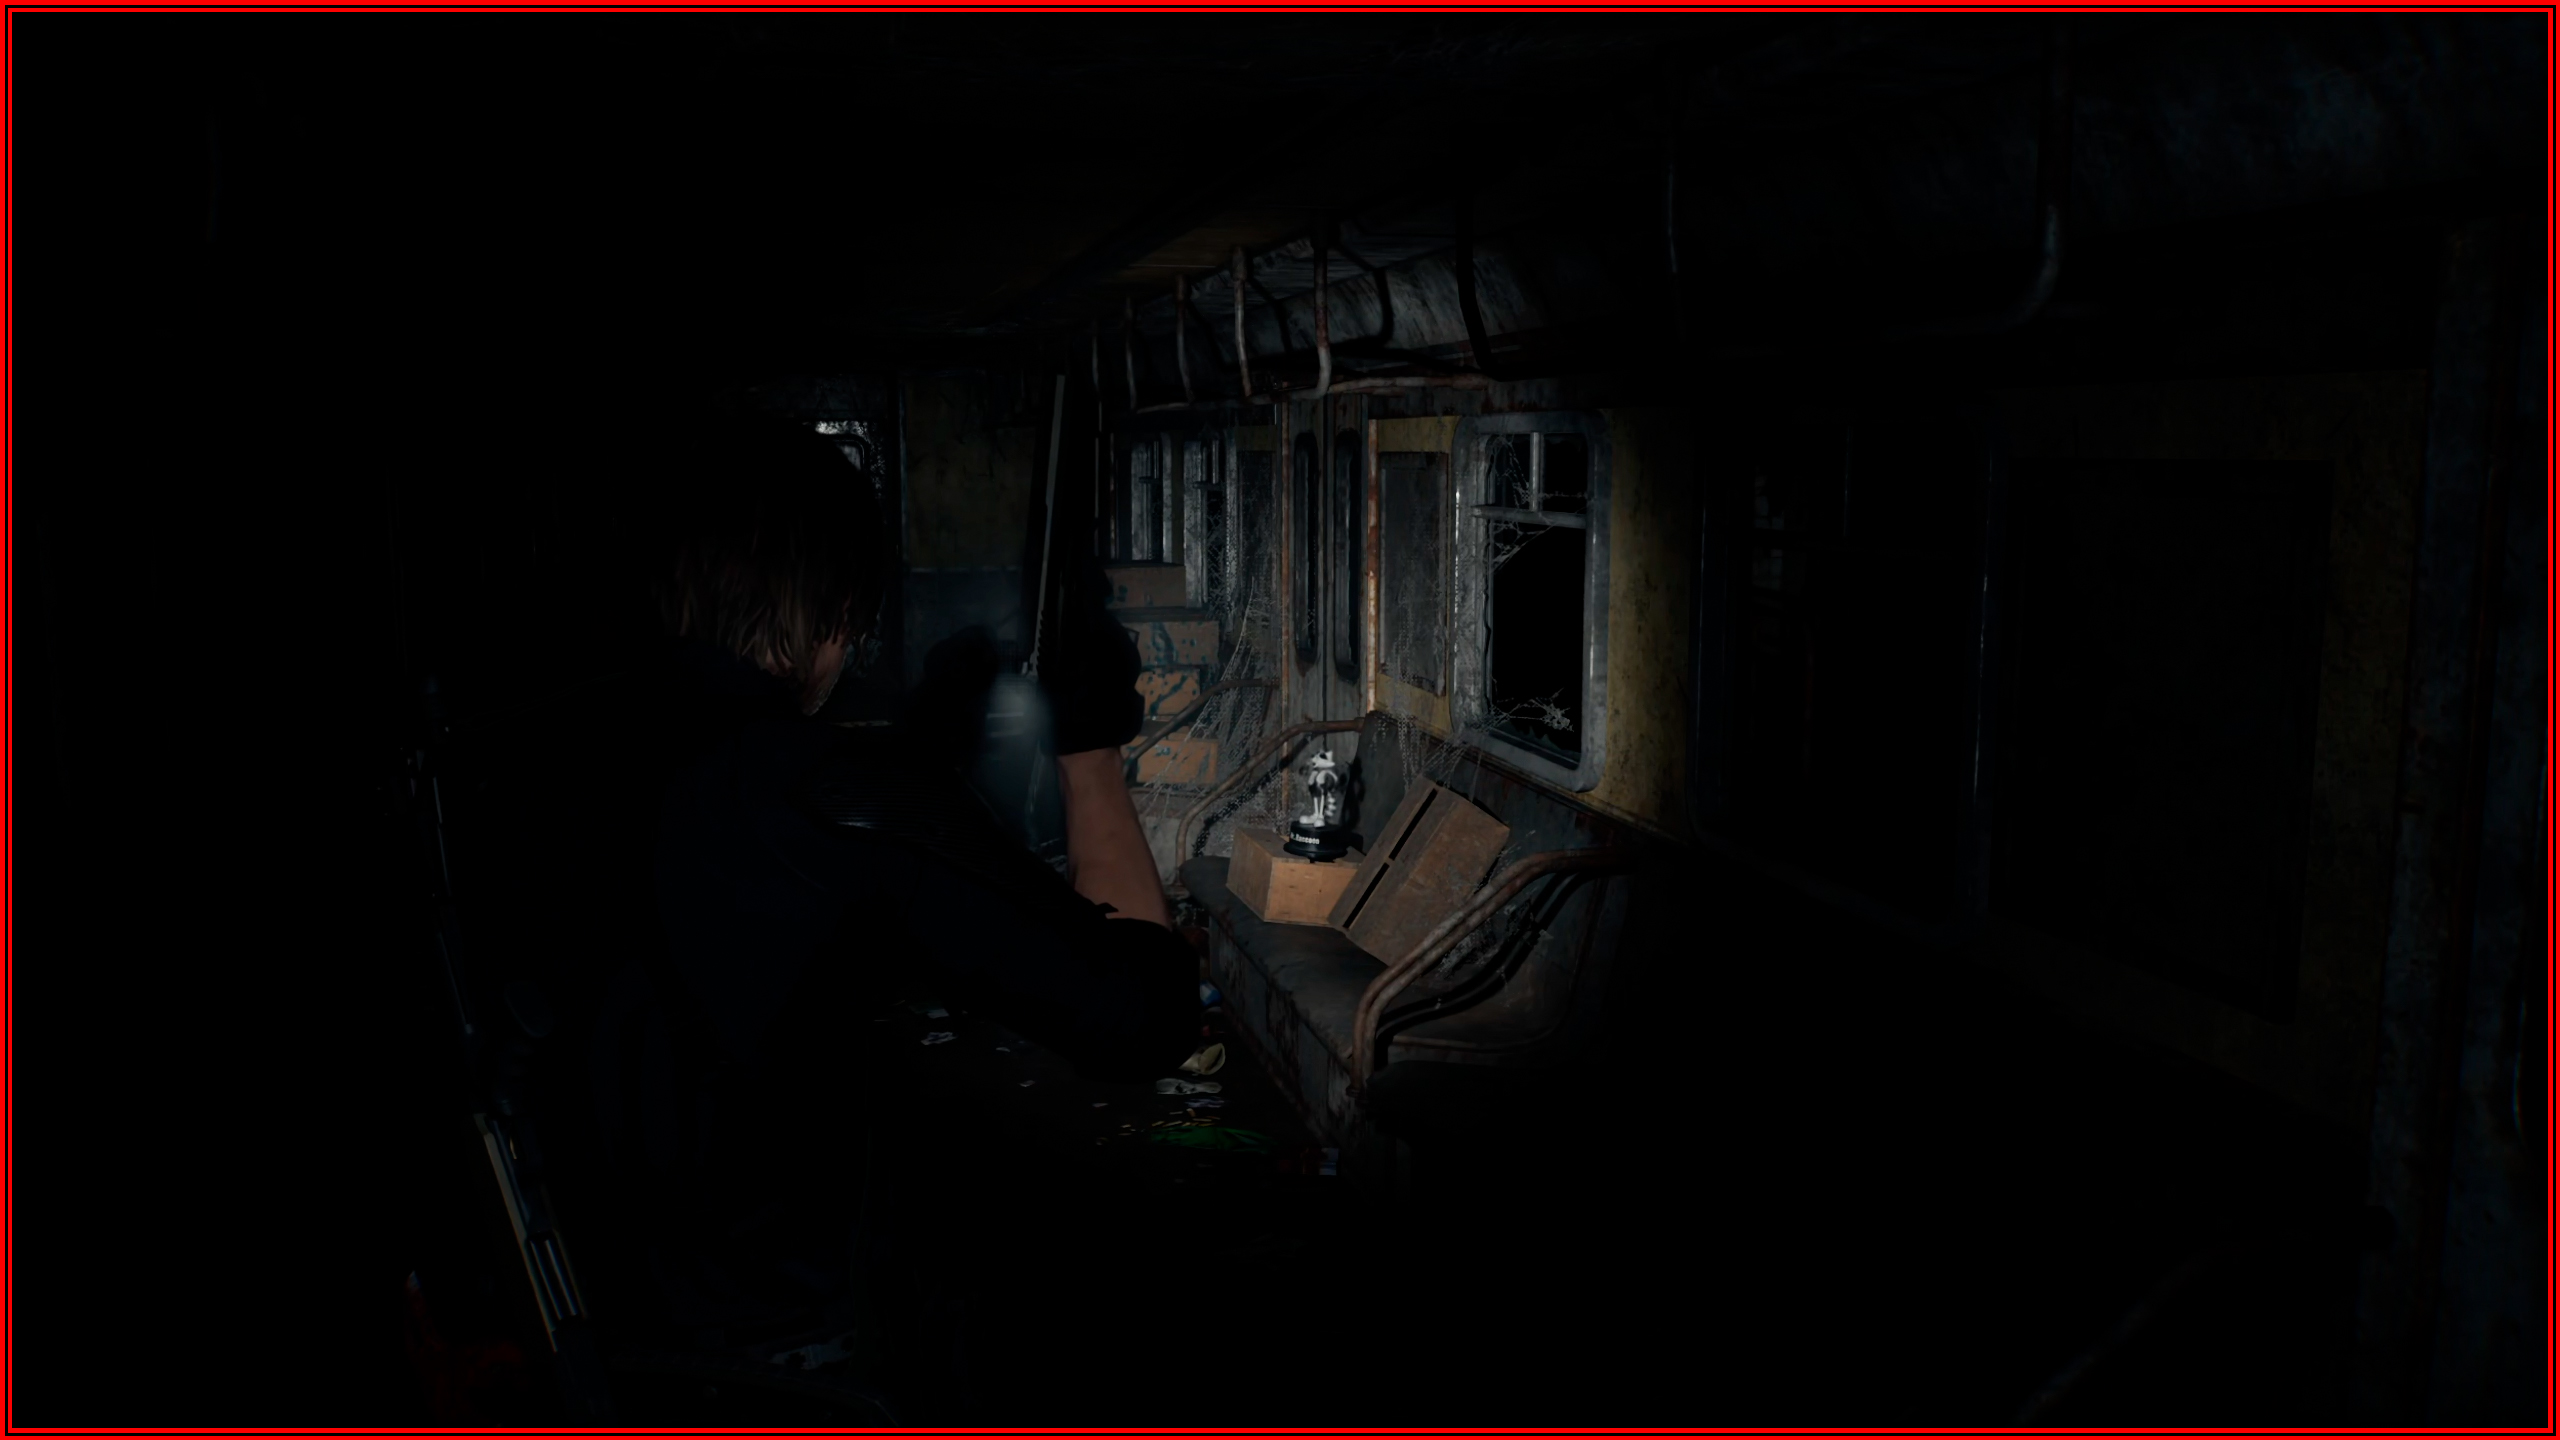
Mr. Raccoon memoriam 18
Inside a train at Ridgewood Station, you arrive at this location after refueling the generator between the Gas Station and Central Camp.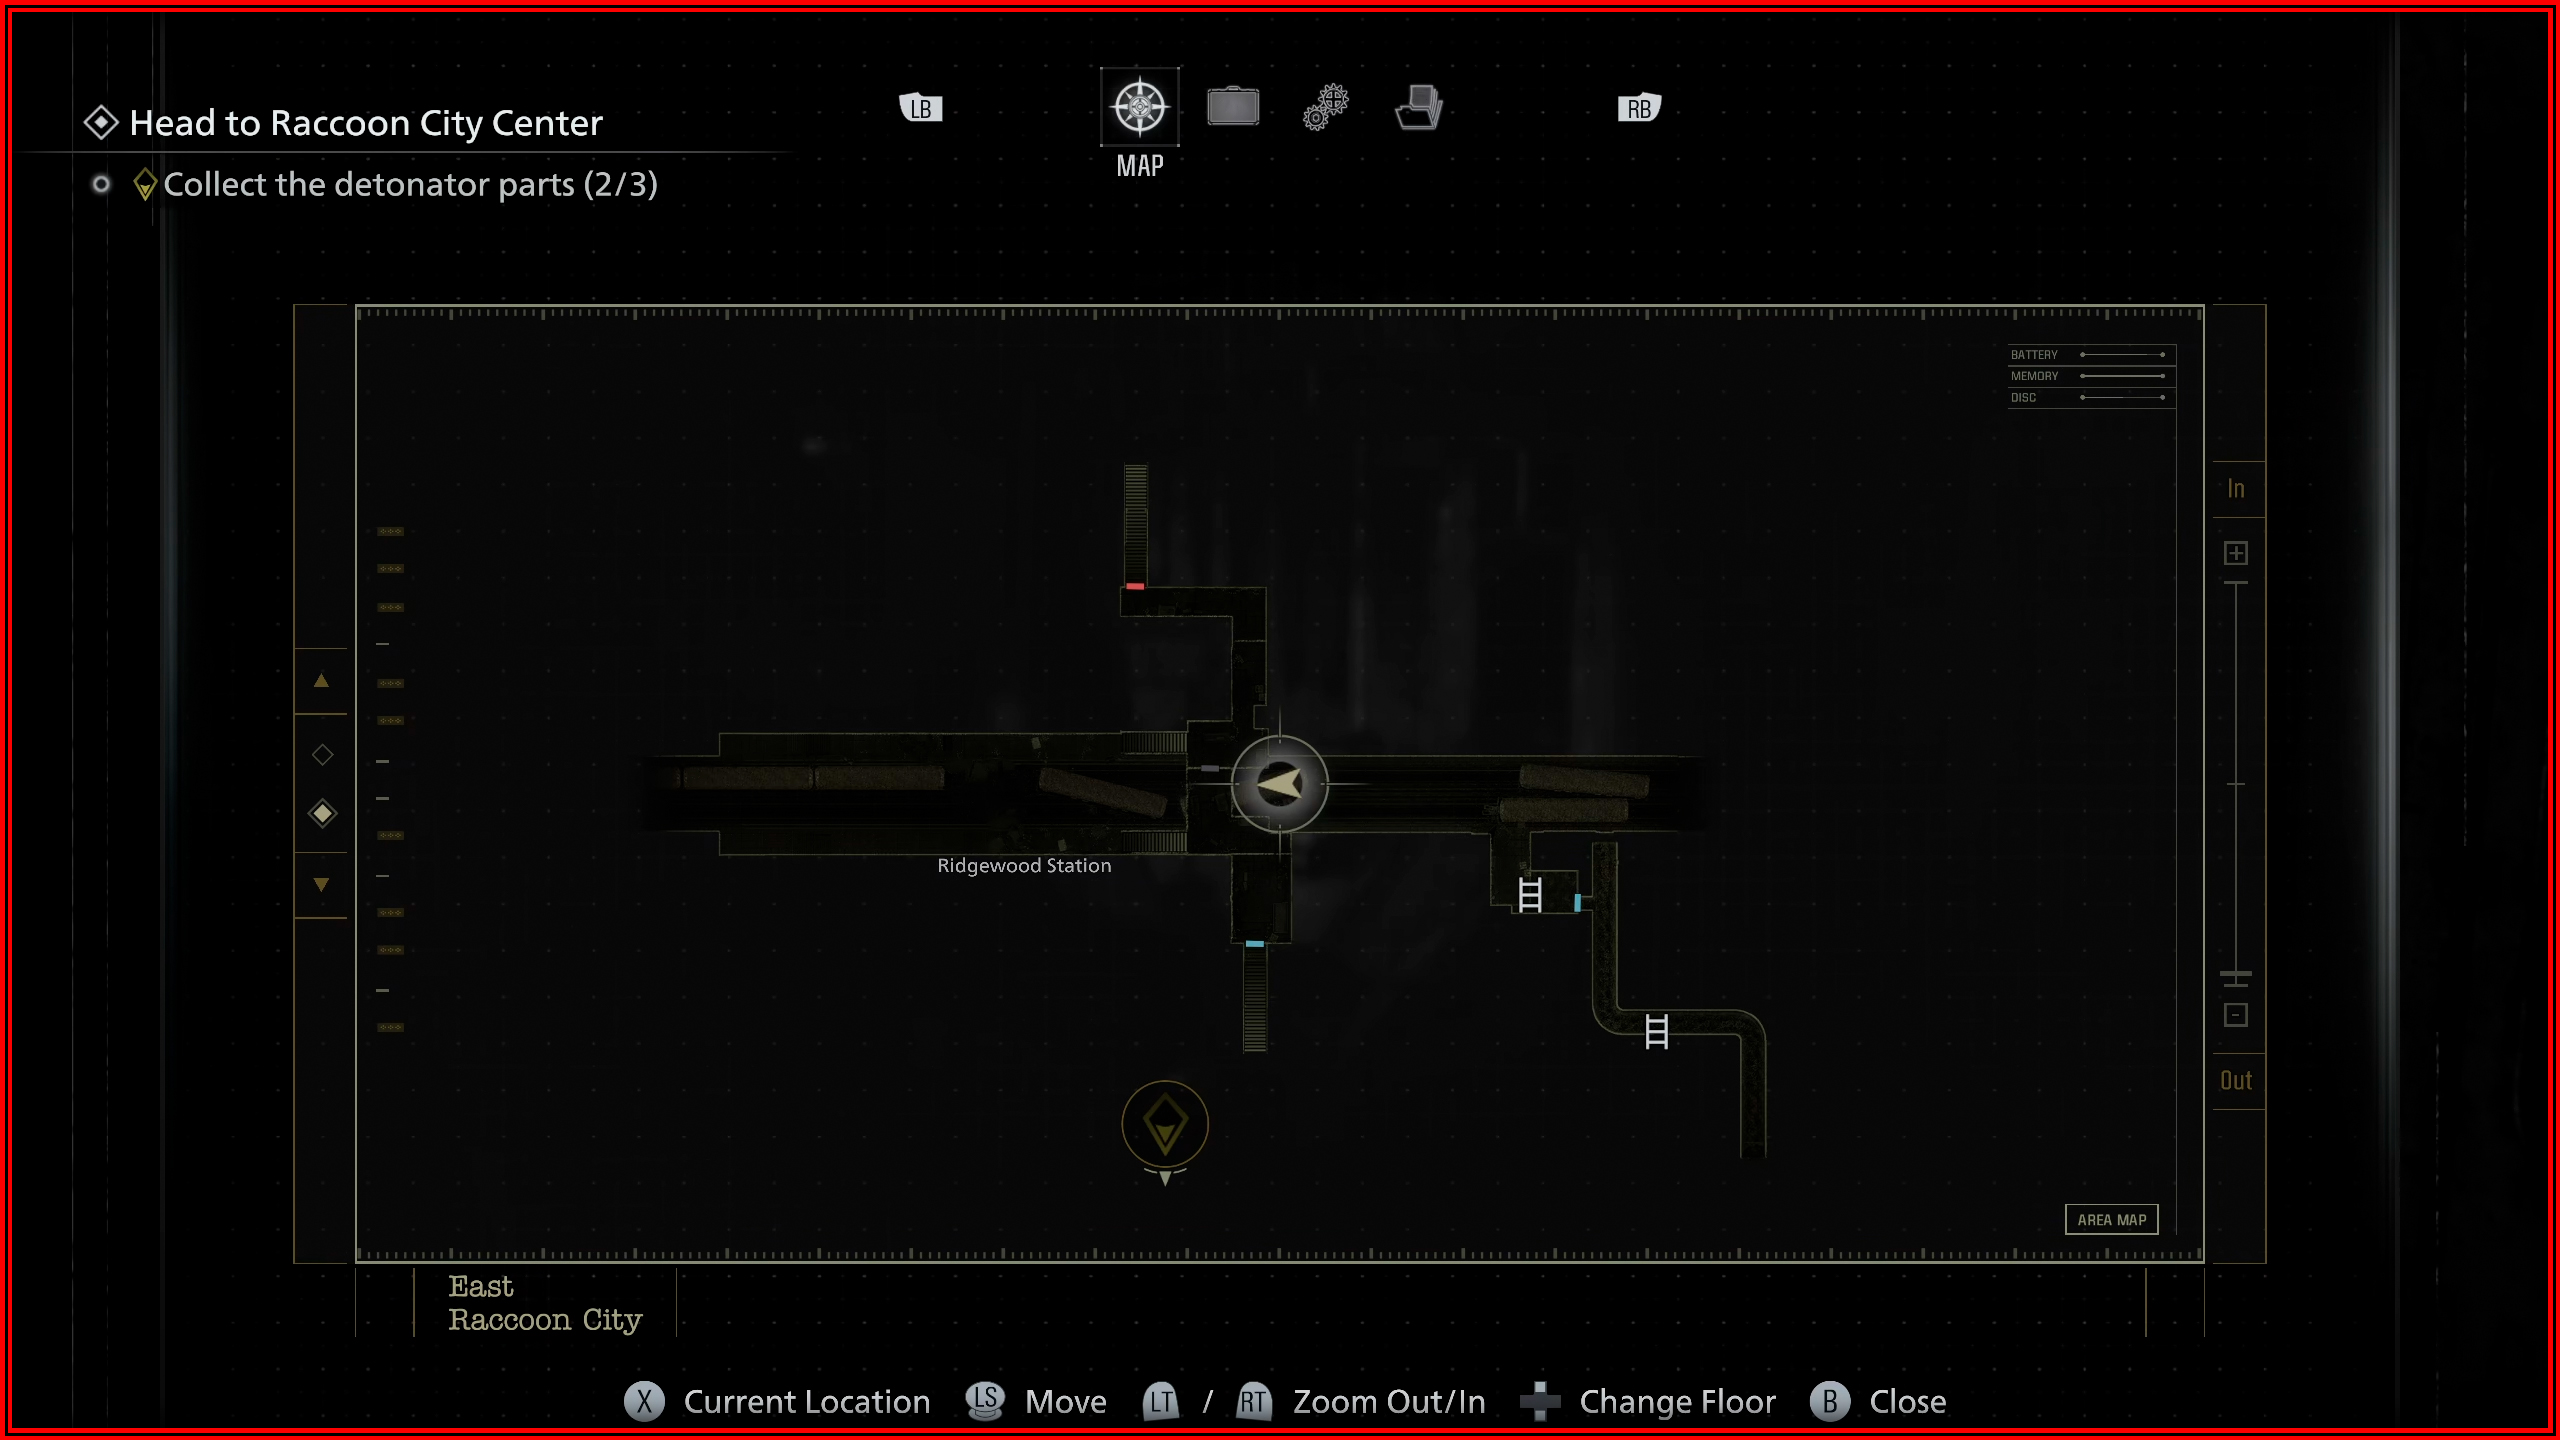
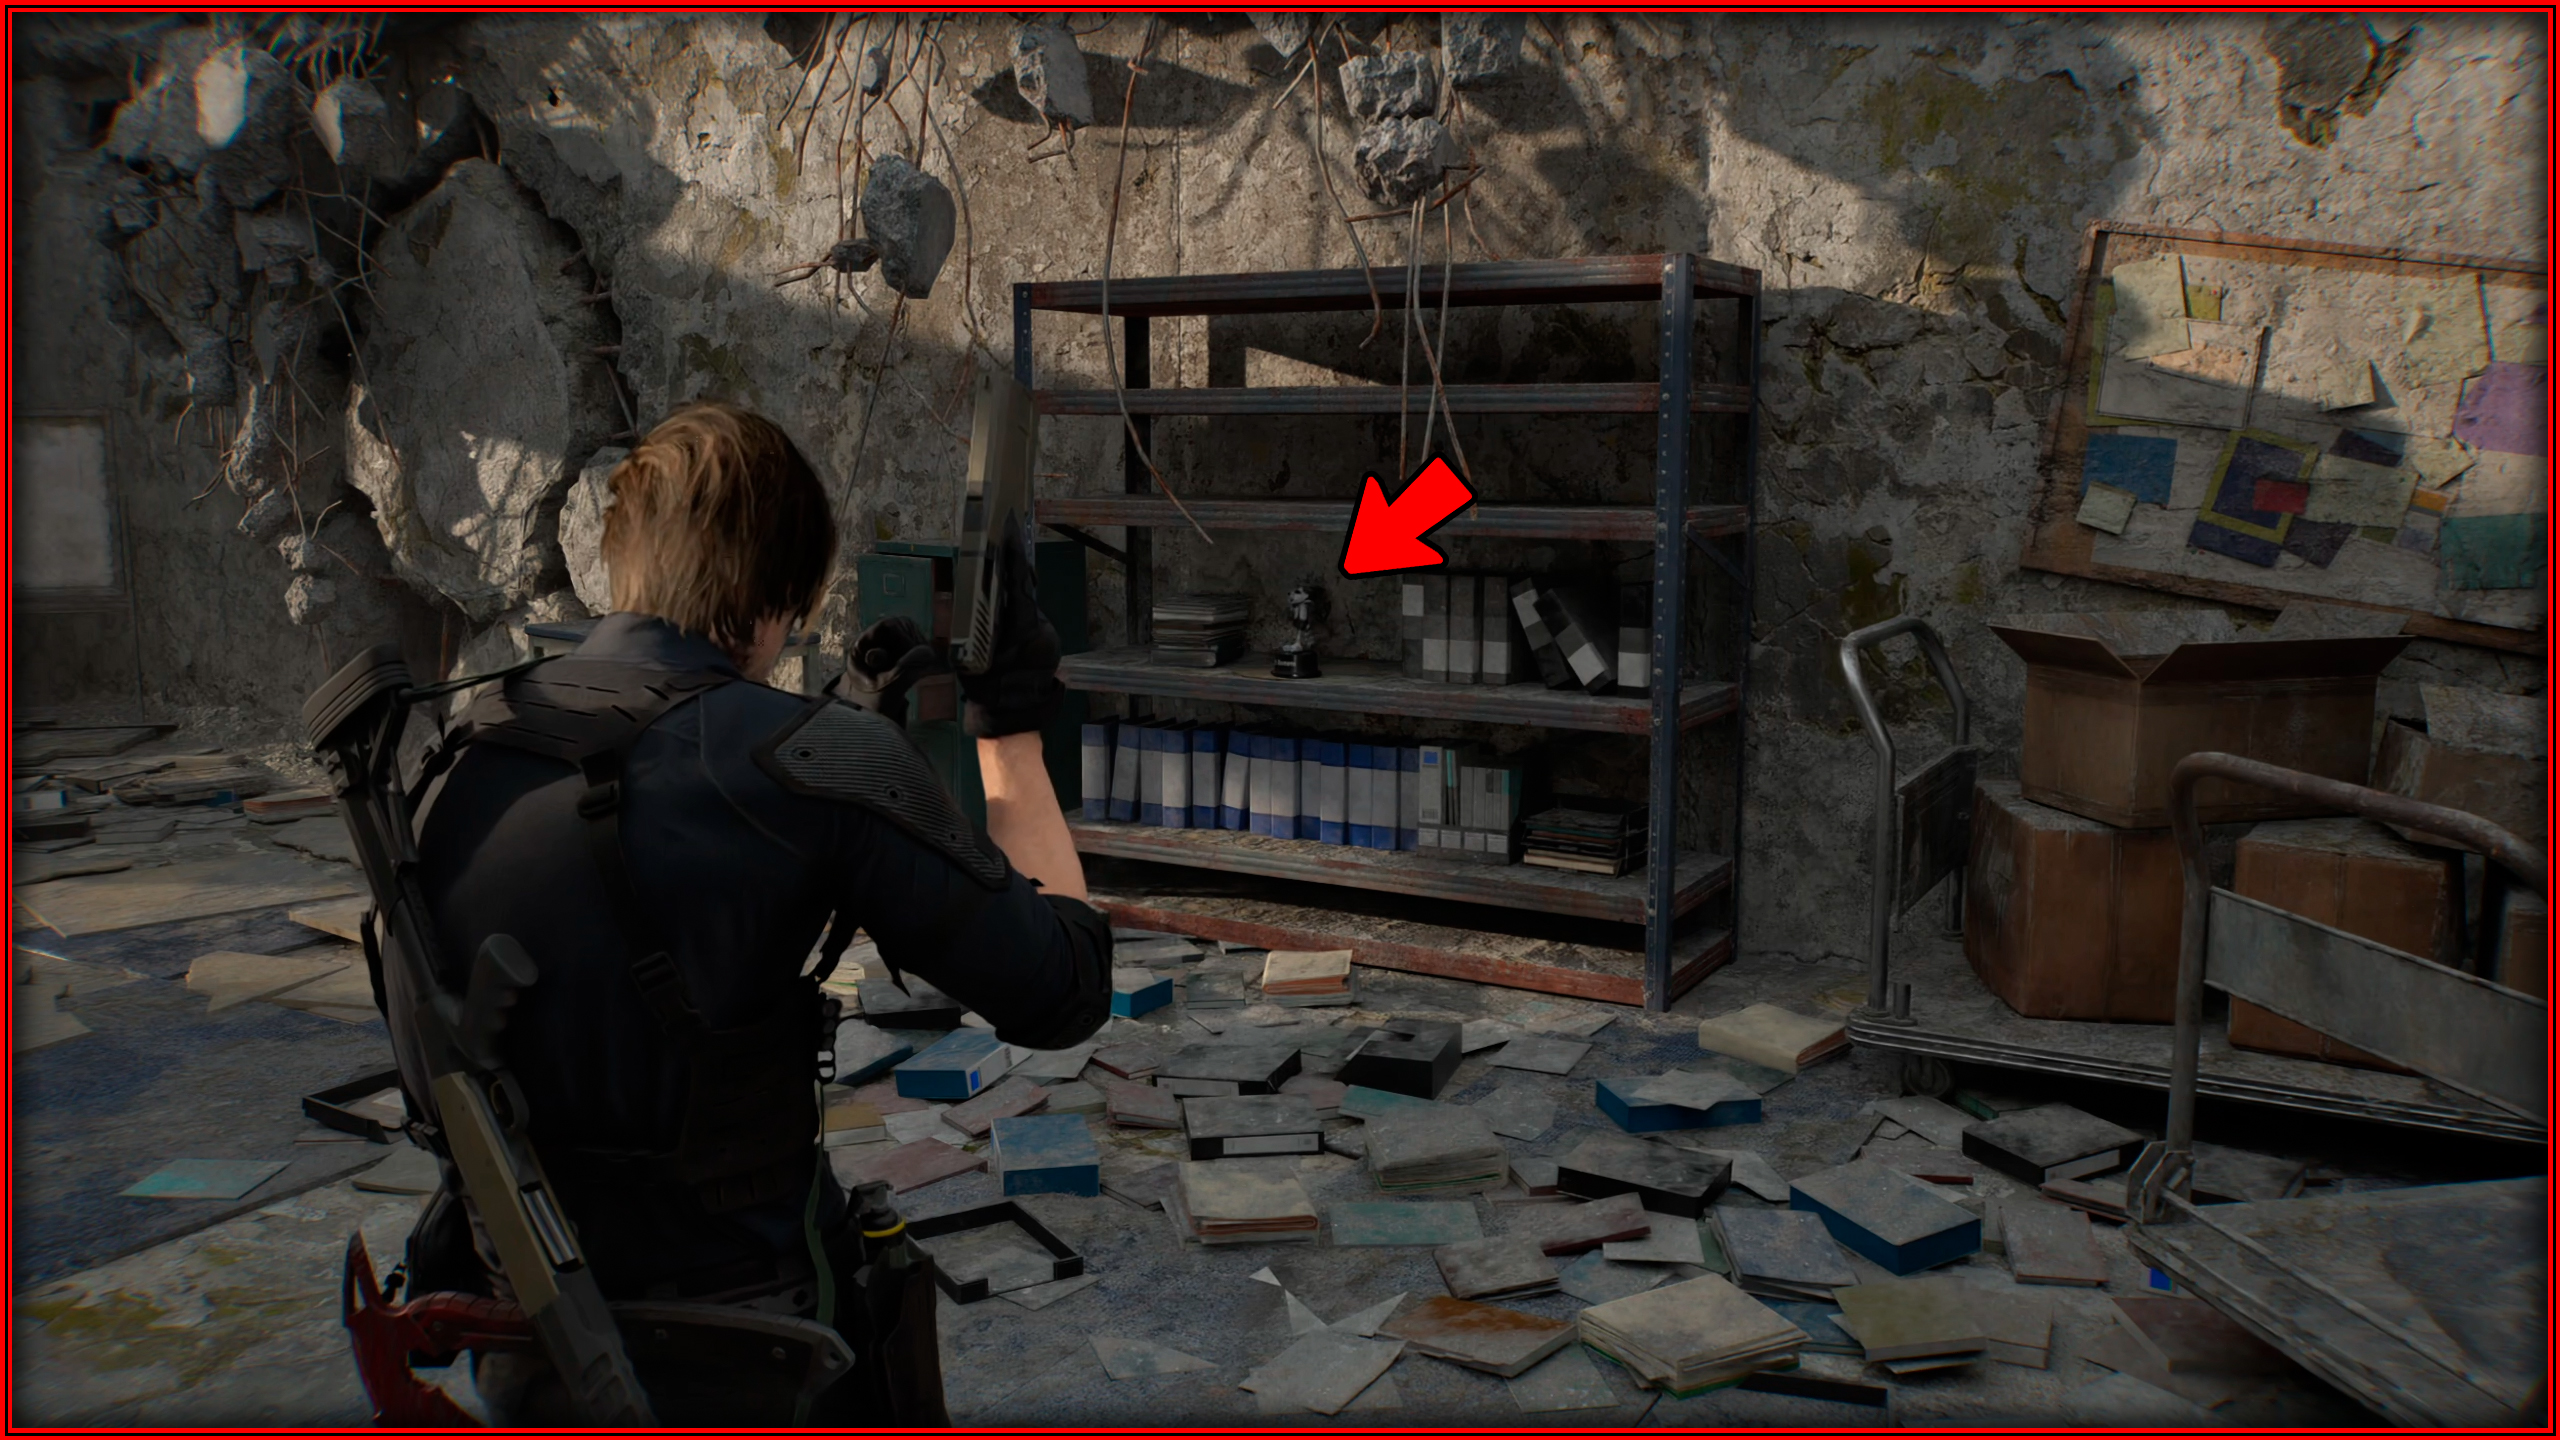
Mr. Raccoon memoriam 19
After using the zipline to reach the Willis Tower, on a shelf.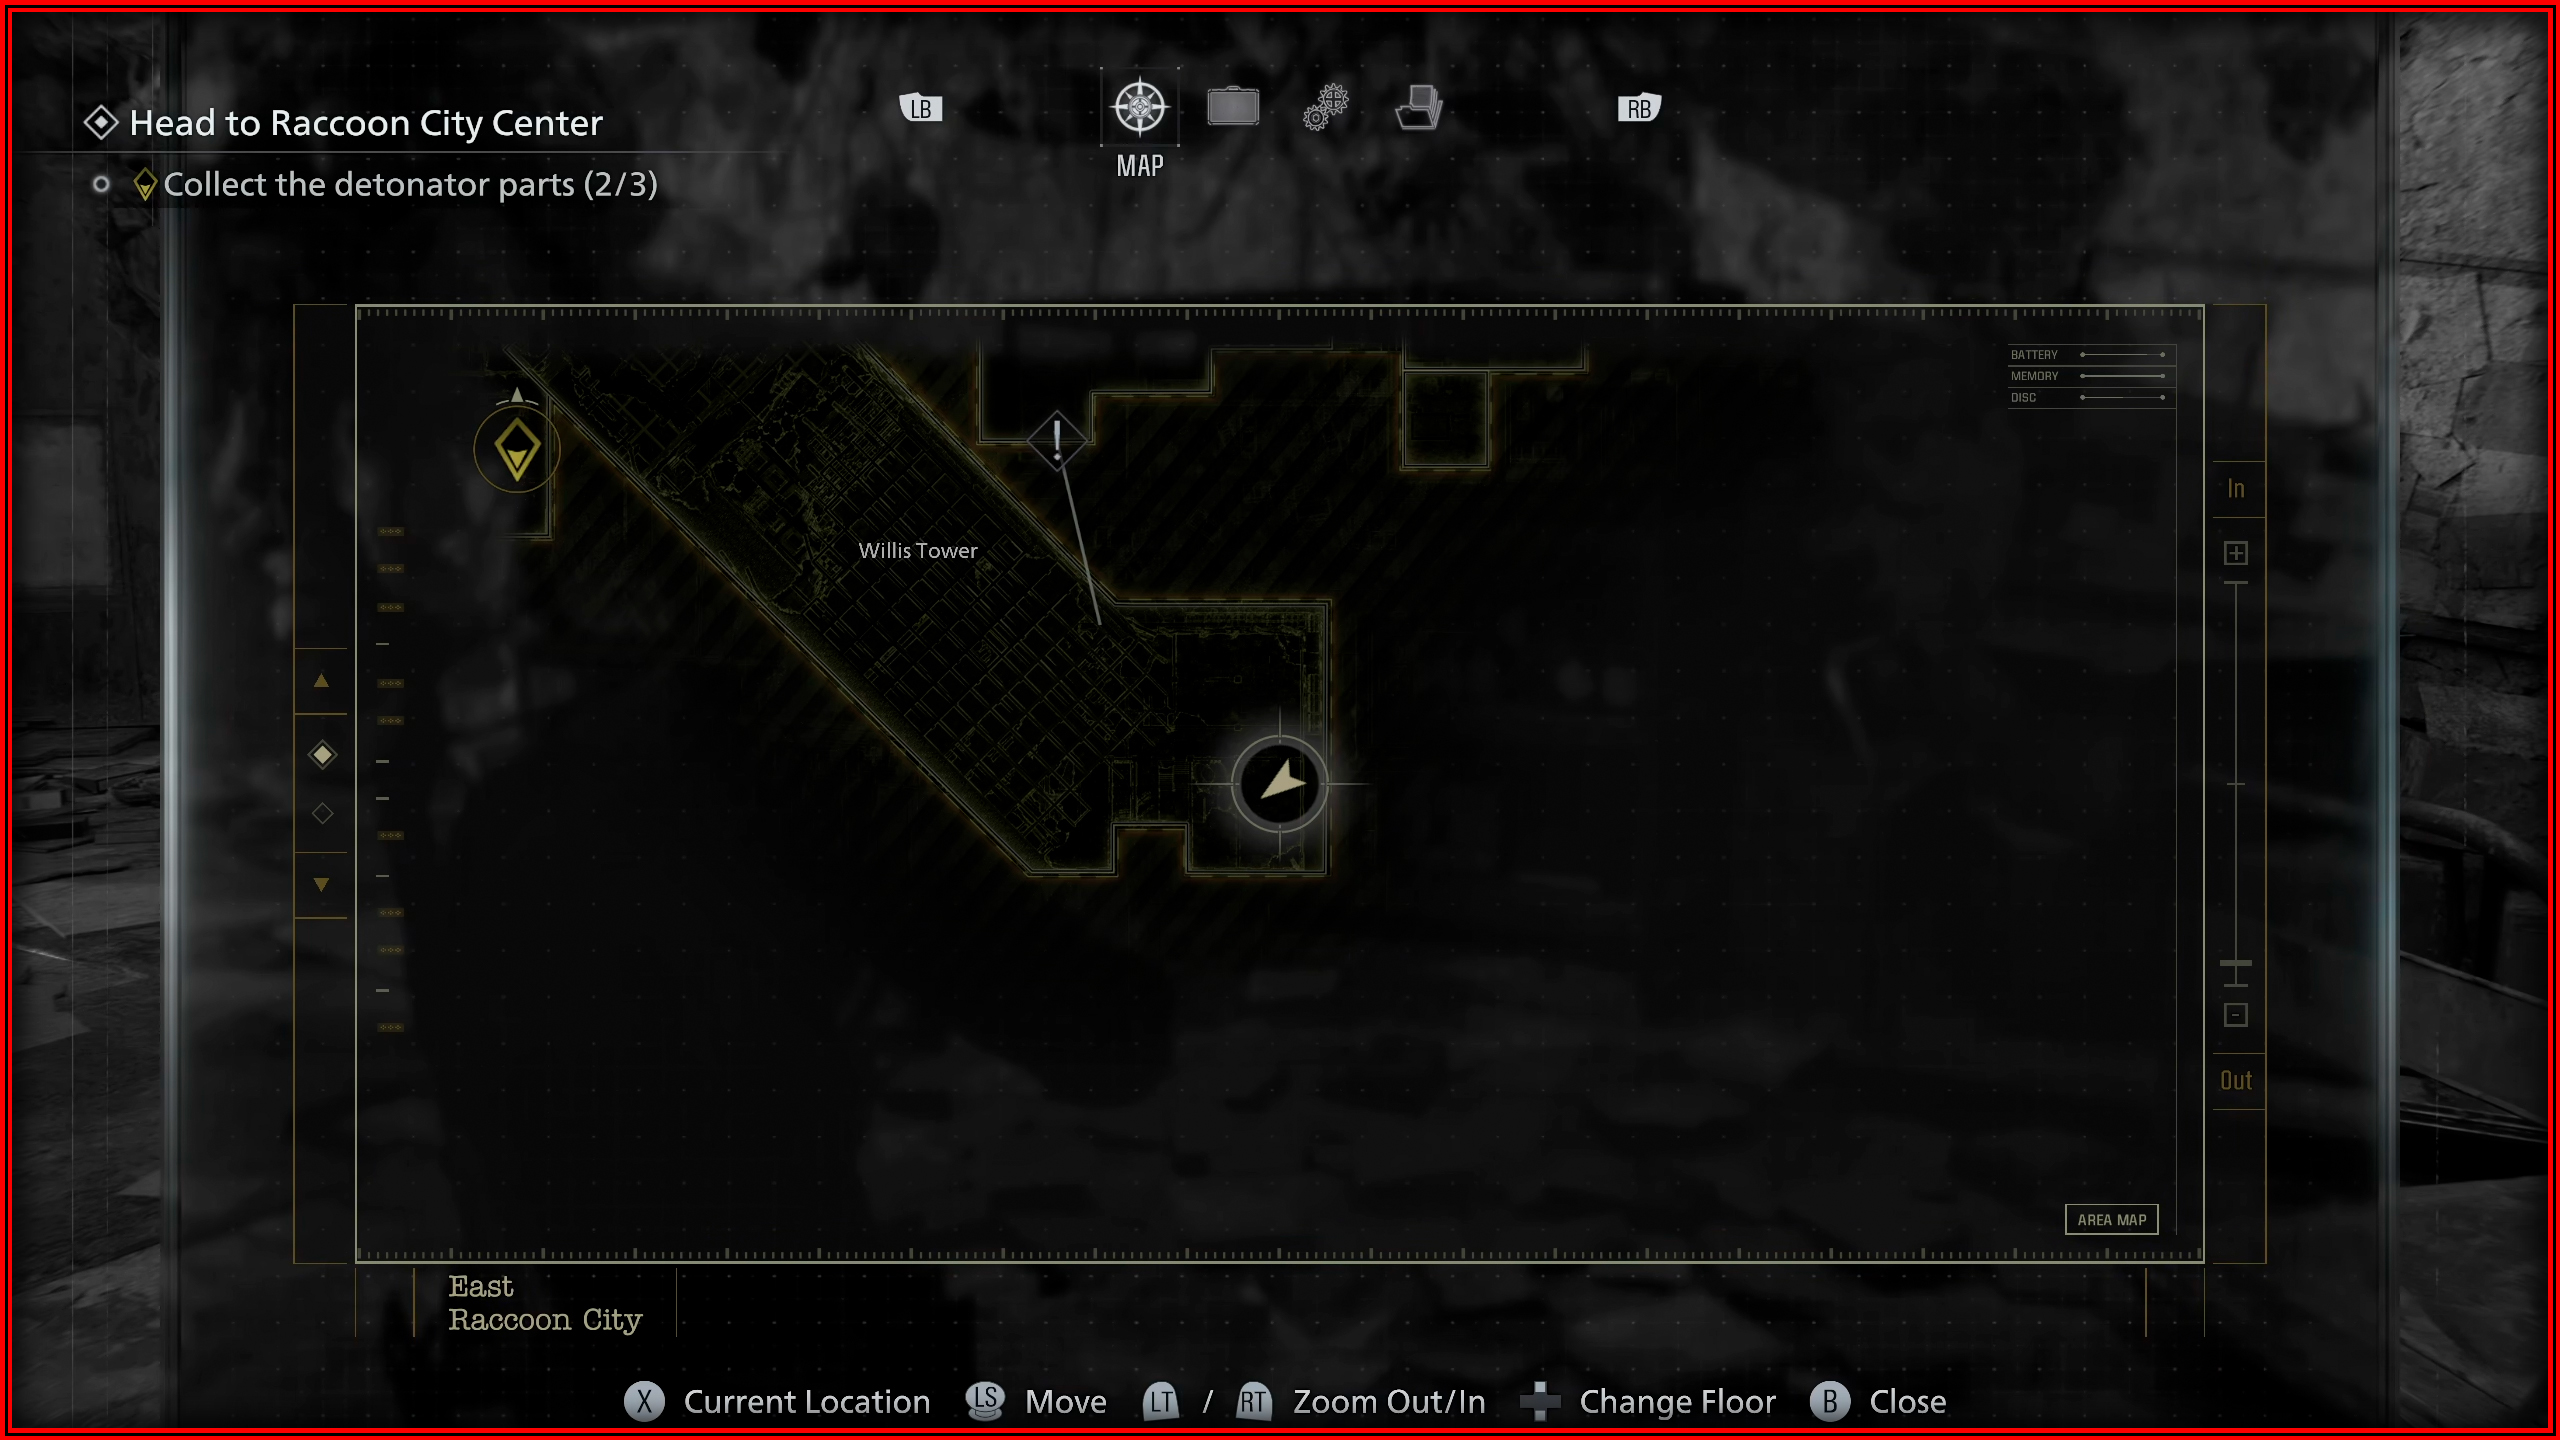
Raccoon City Center
Mr. Raccoon memoriam 20
After the section with the motorcycle, on the left near a destroyed tank.
Mr. Raccoon memoriam 21
Inside the Operations Room behind a wooden barricade.
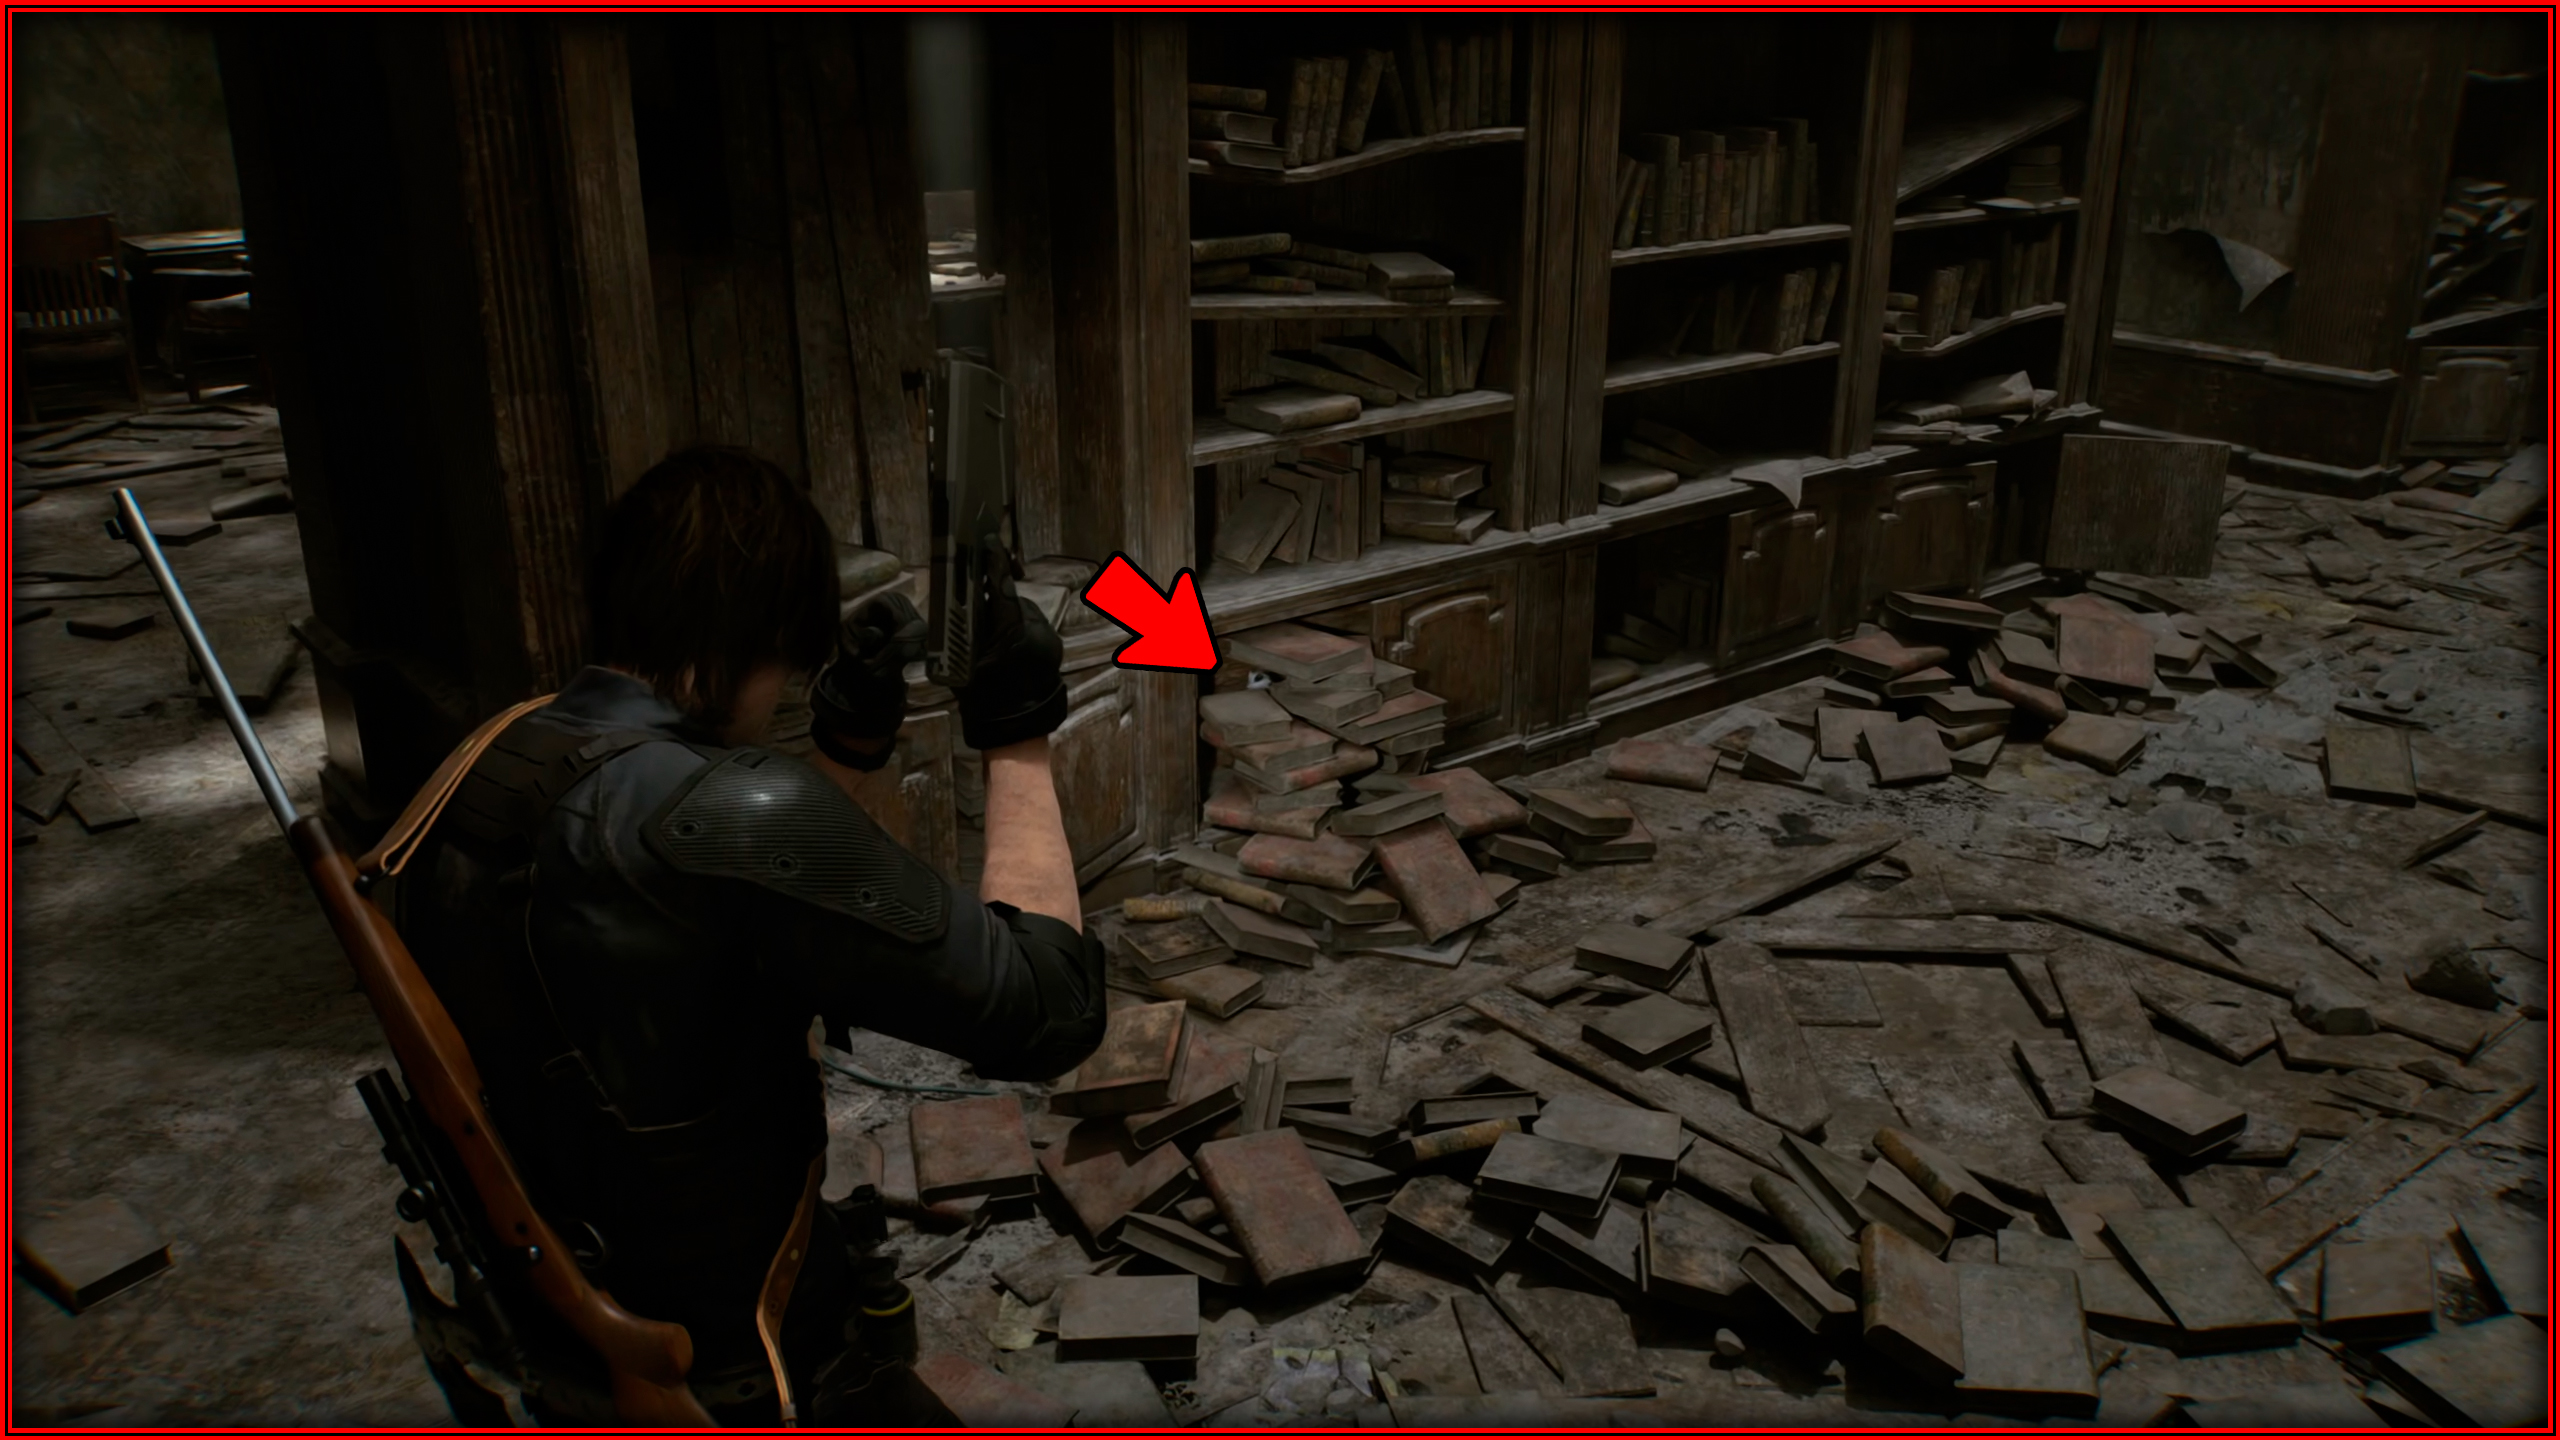
Mr. Raccoon memoriam 22
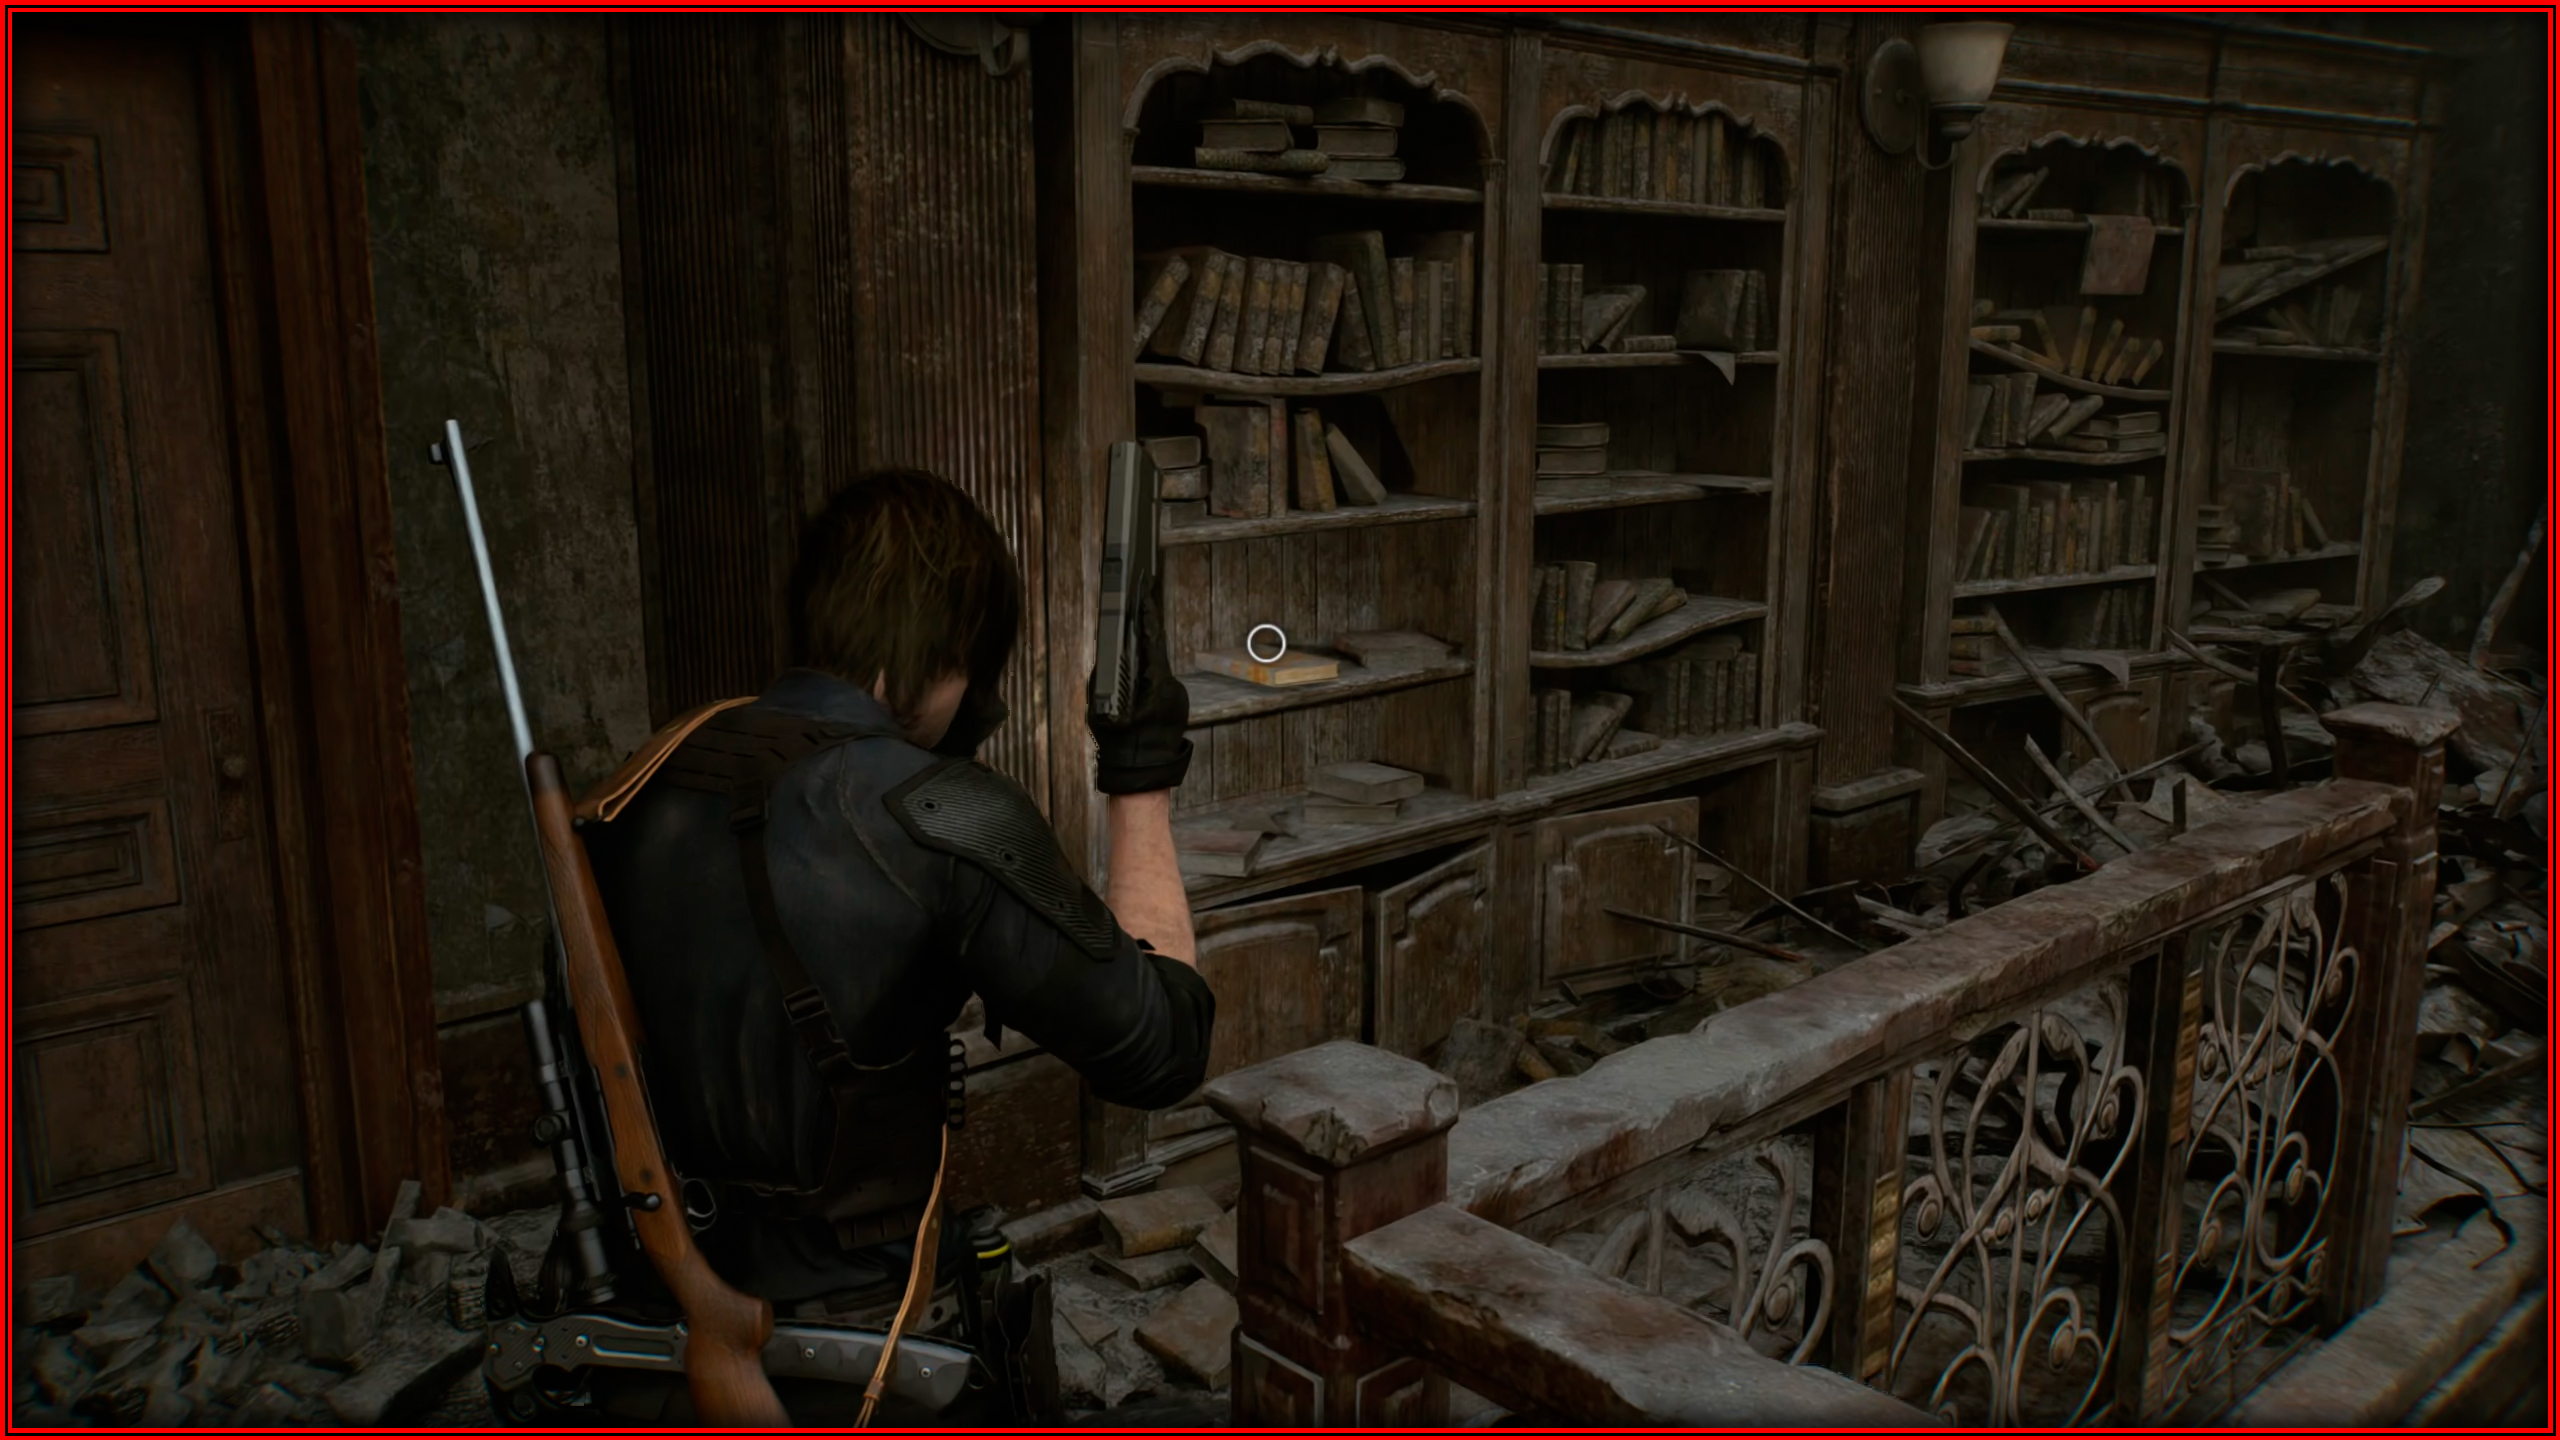
In the library, at the bottom of a bookshelf behind some books.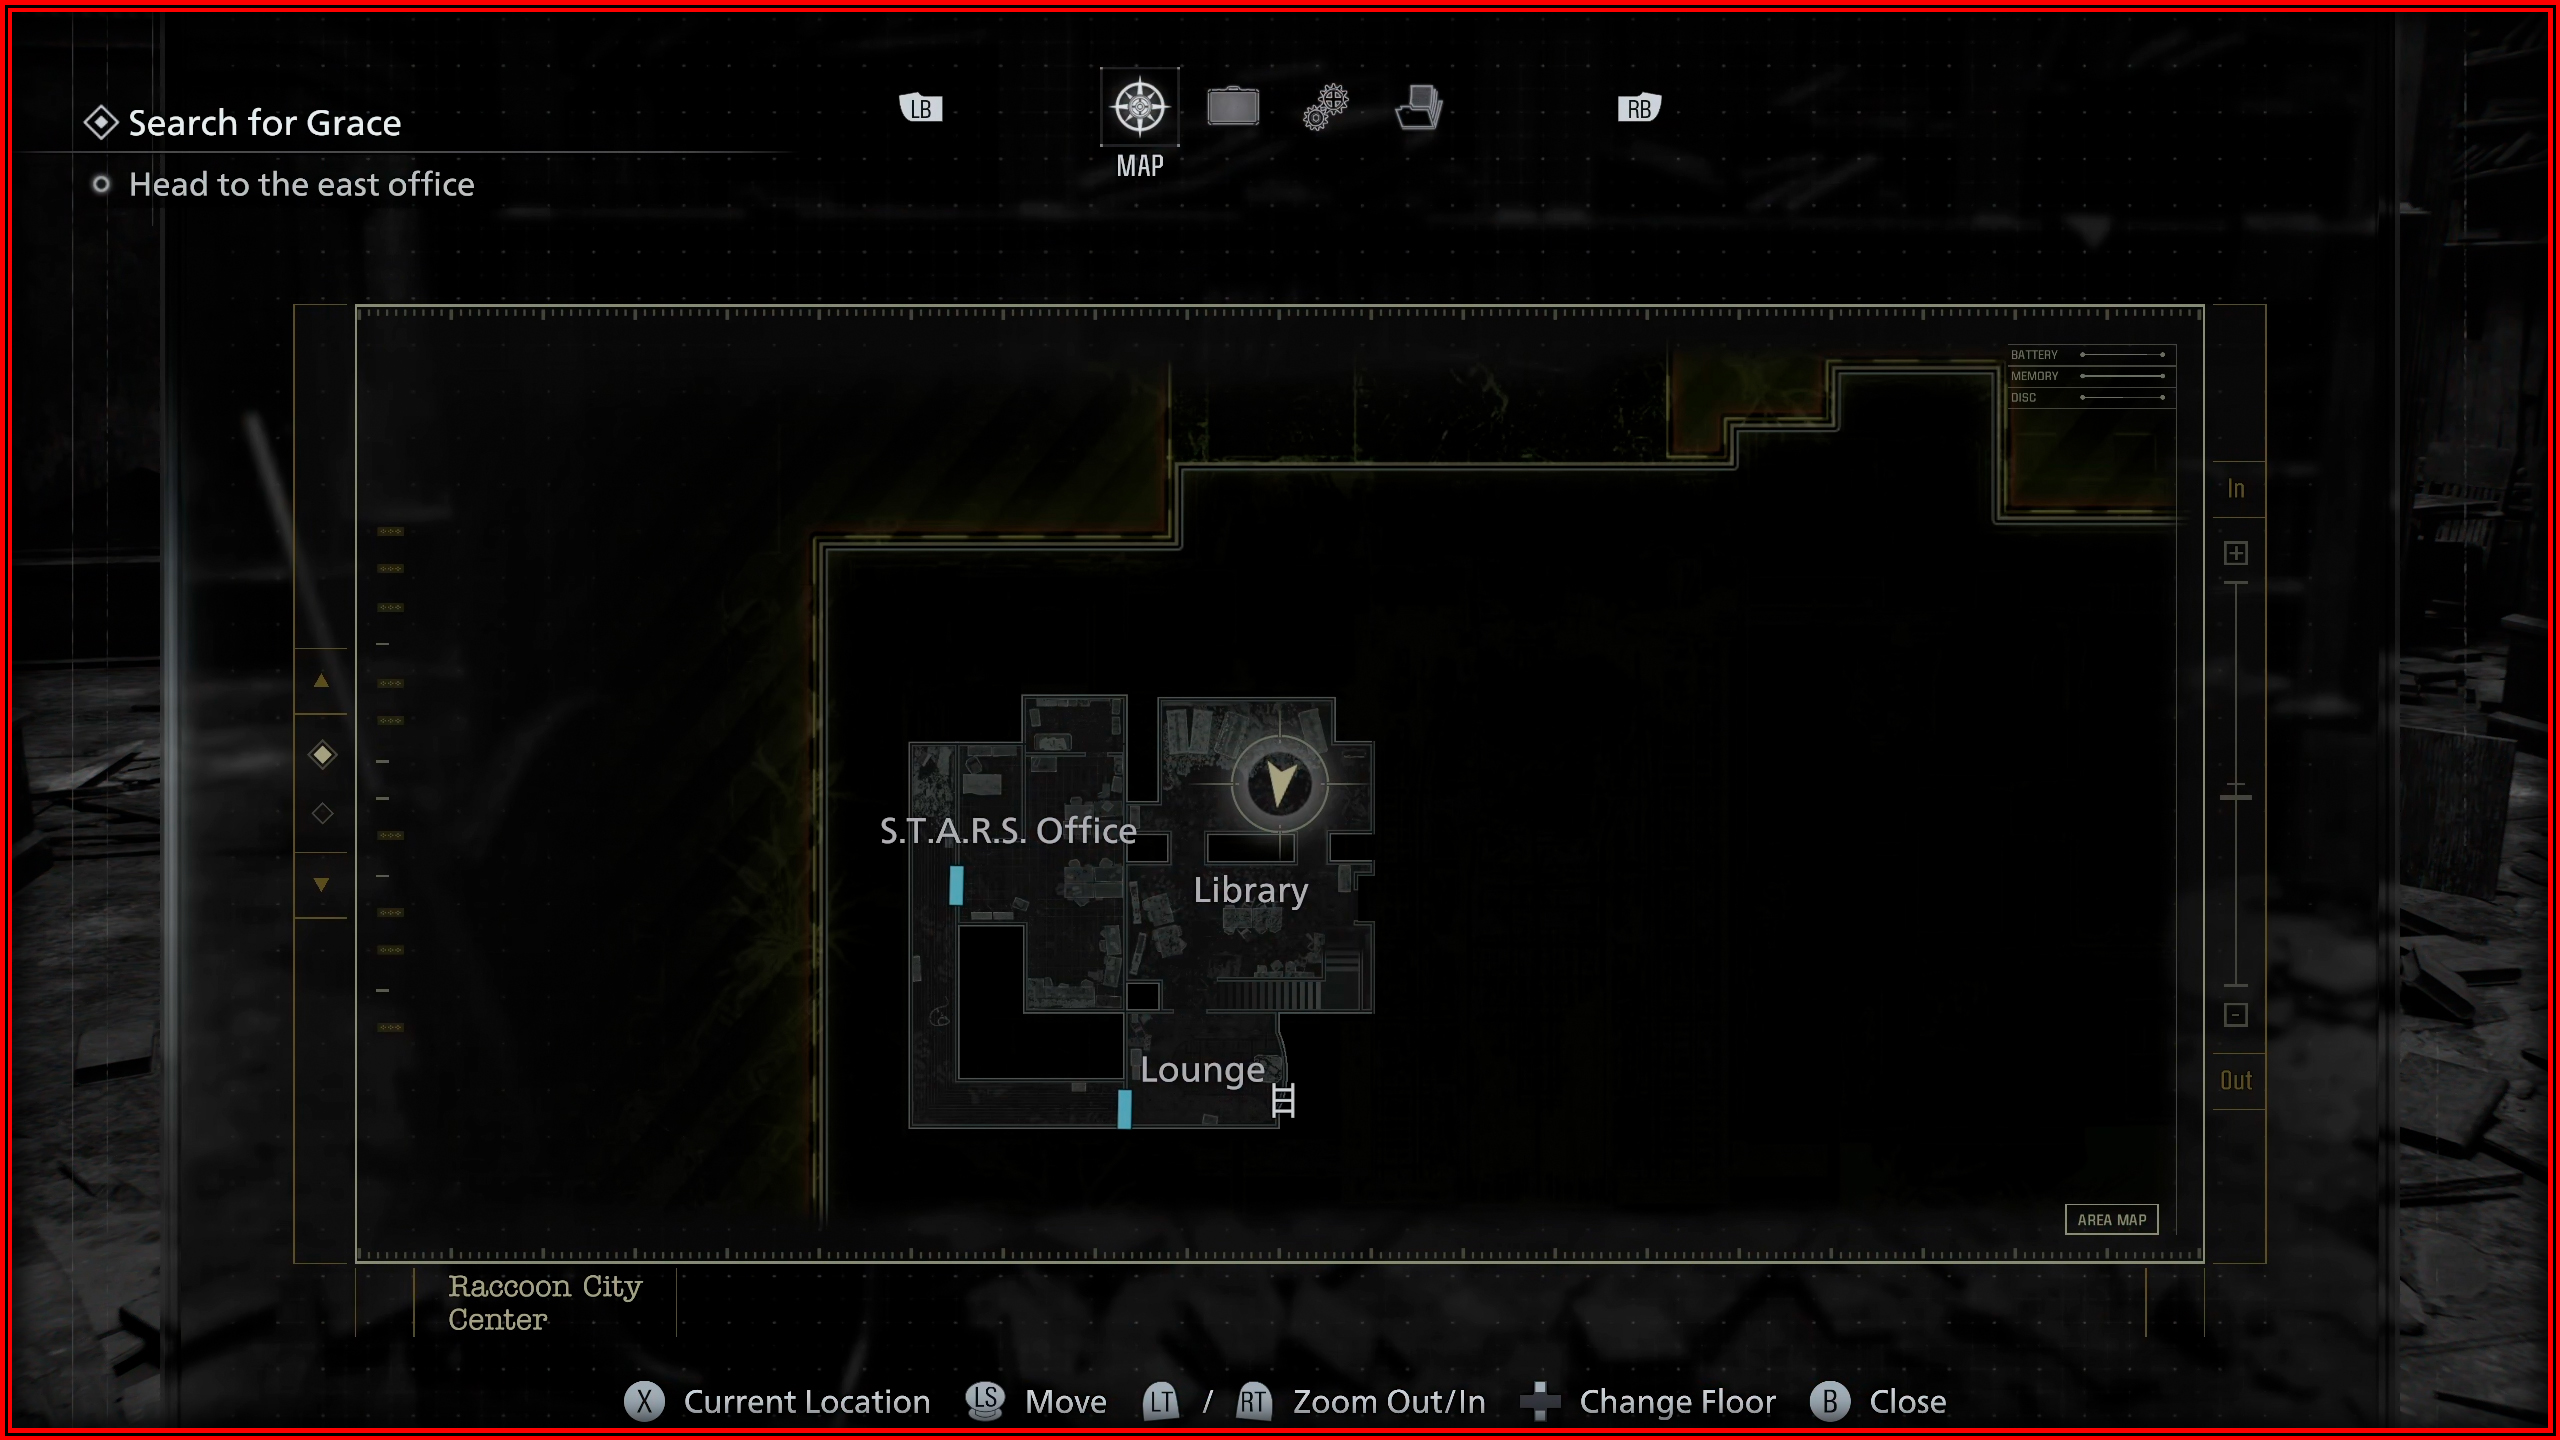
Mr. Raccoon memoriam 23
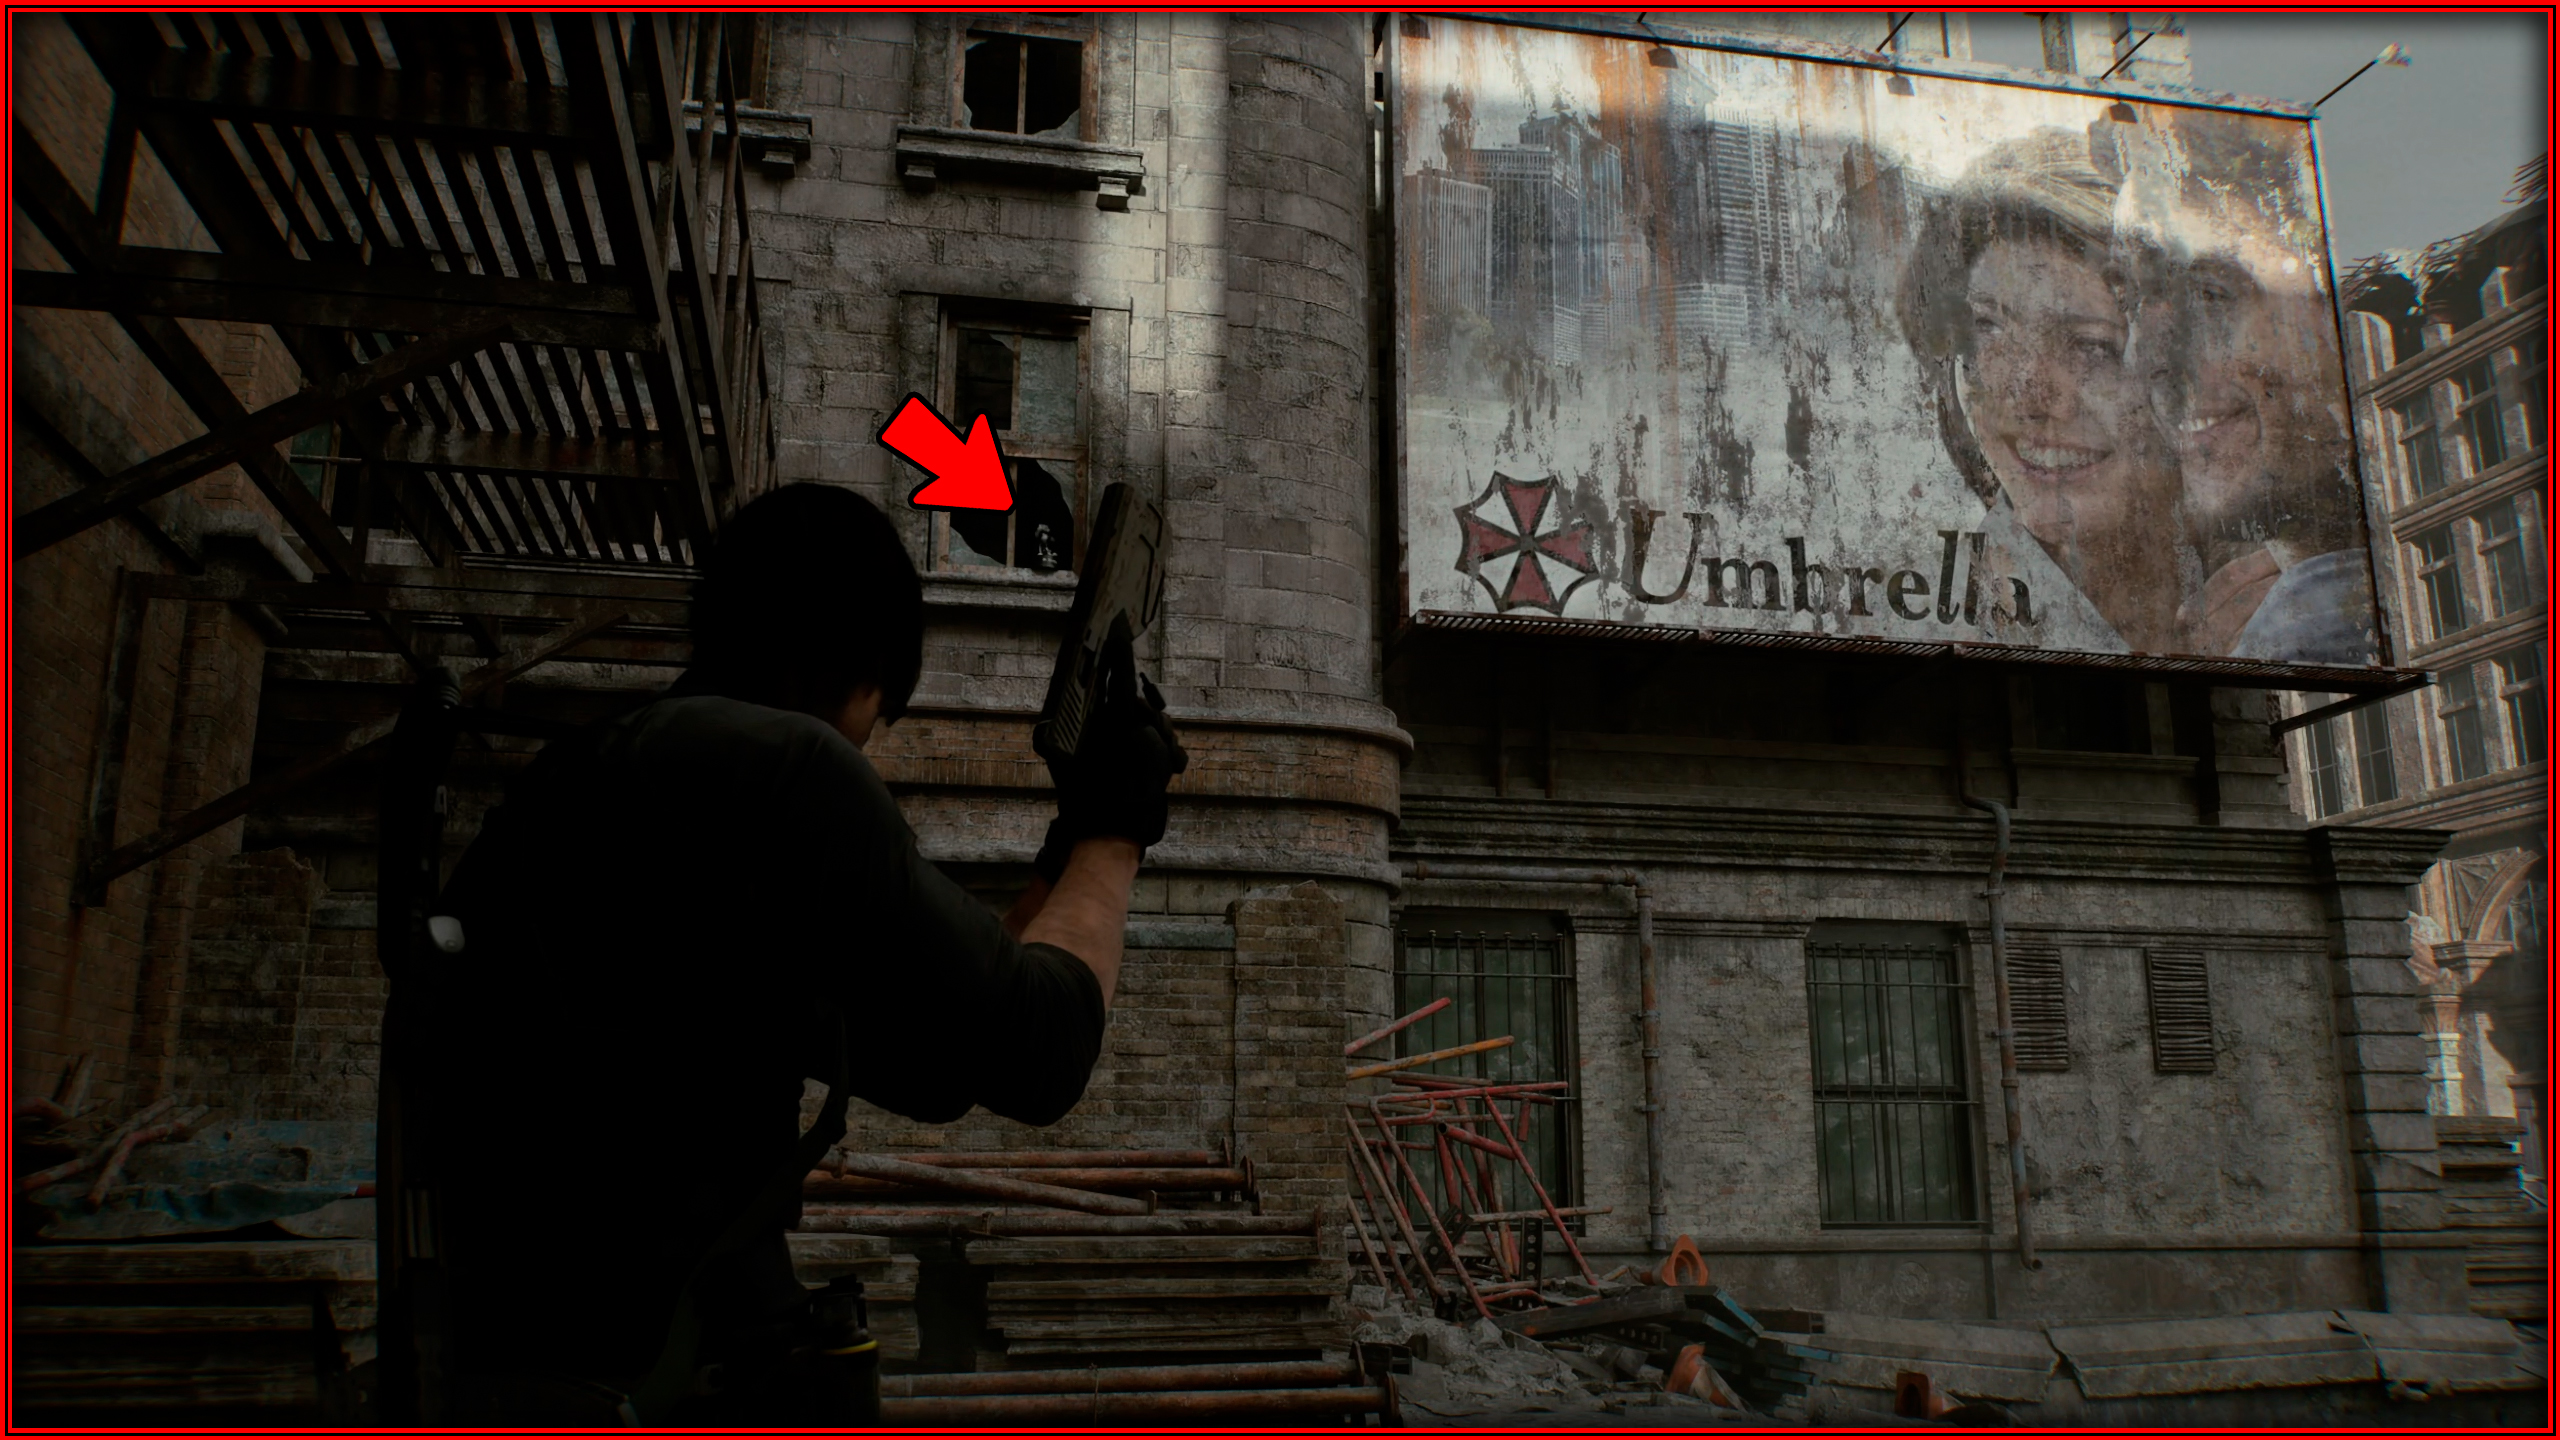
After the cutscene in Gun Shop Kendo, in a window next to an Umbrella banner.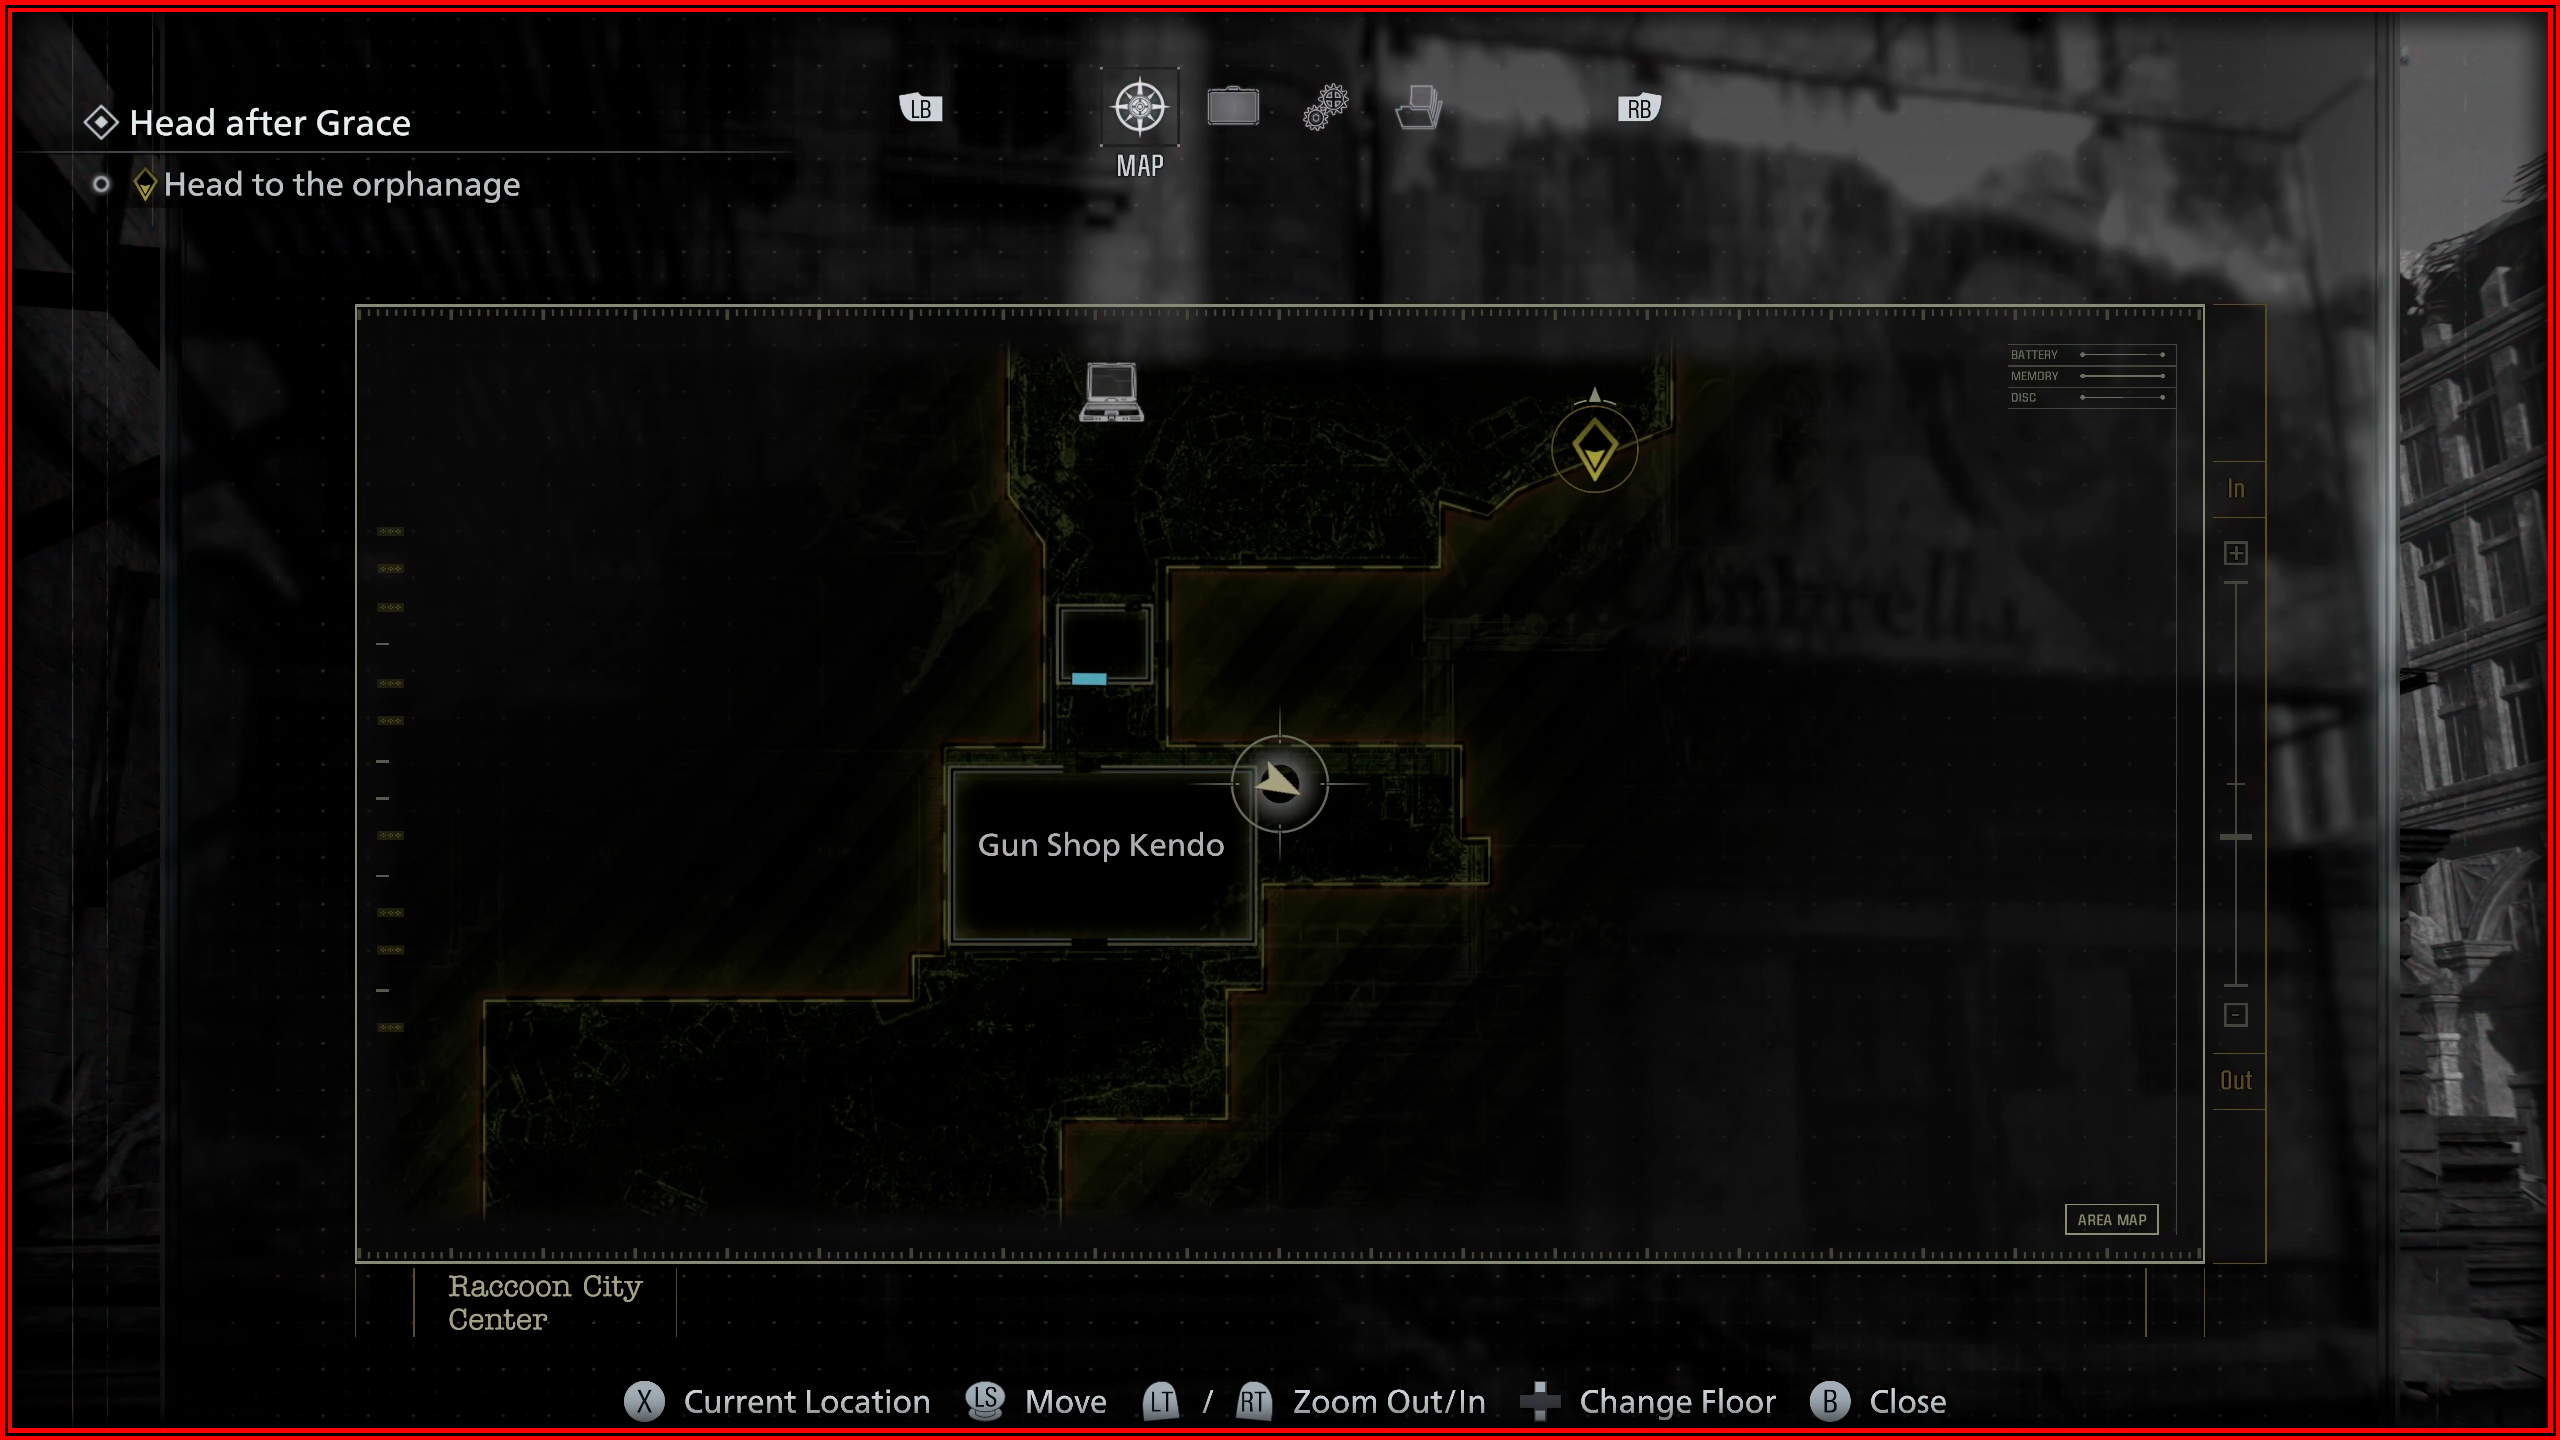
ARK
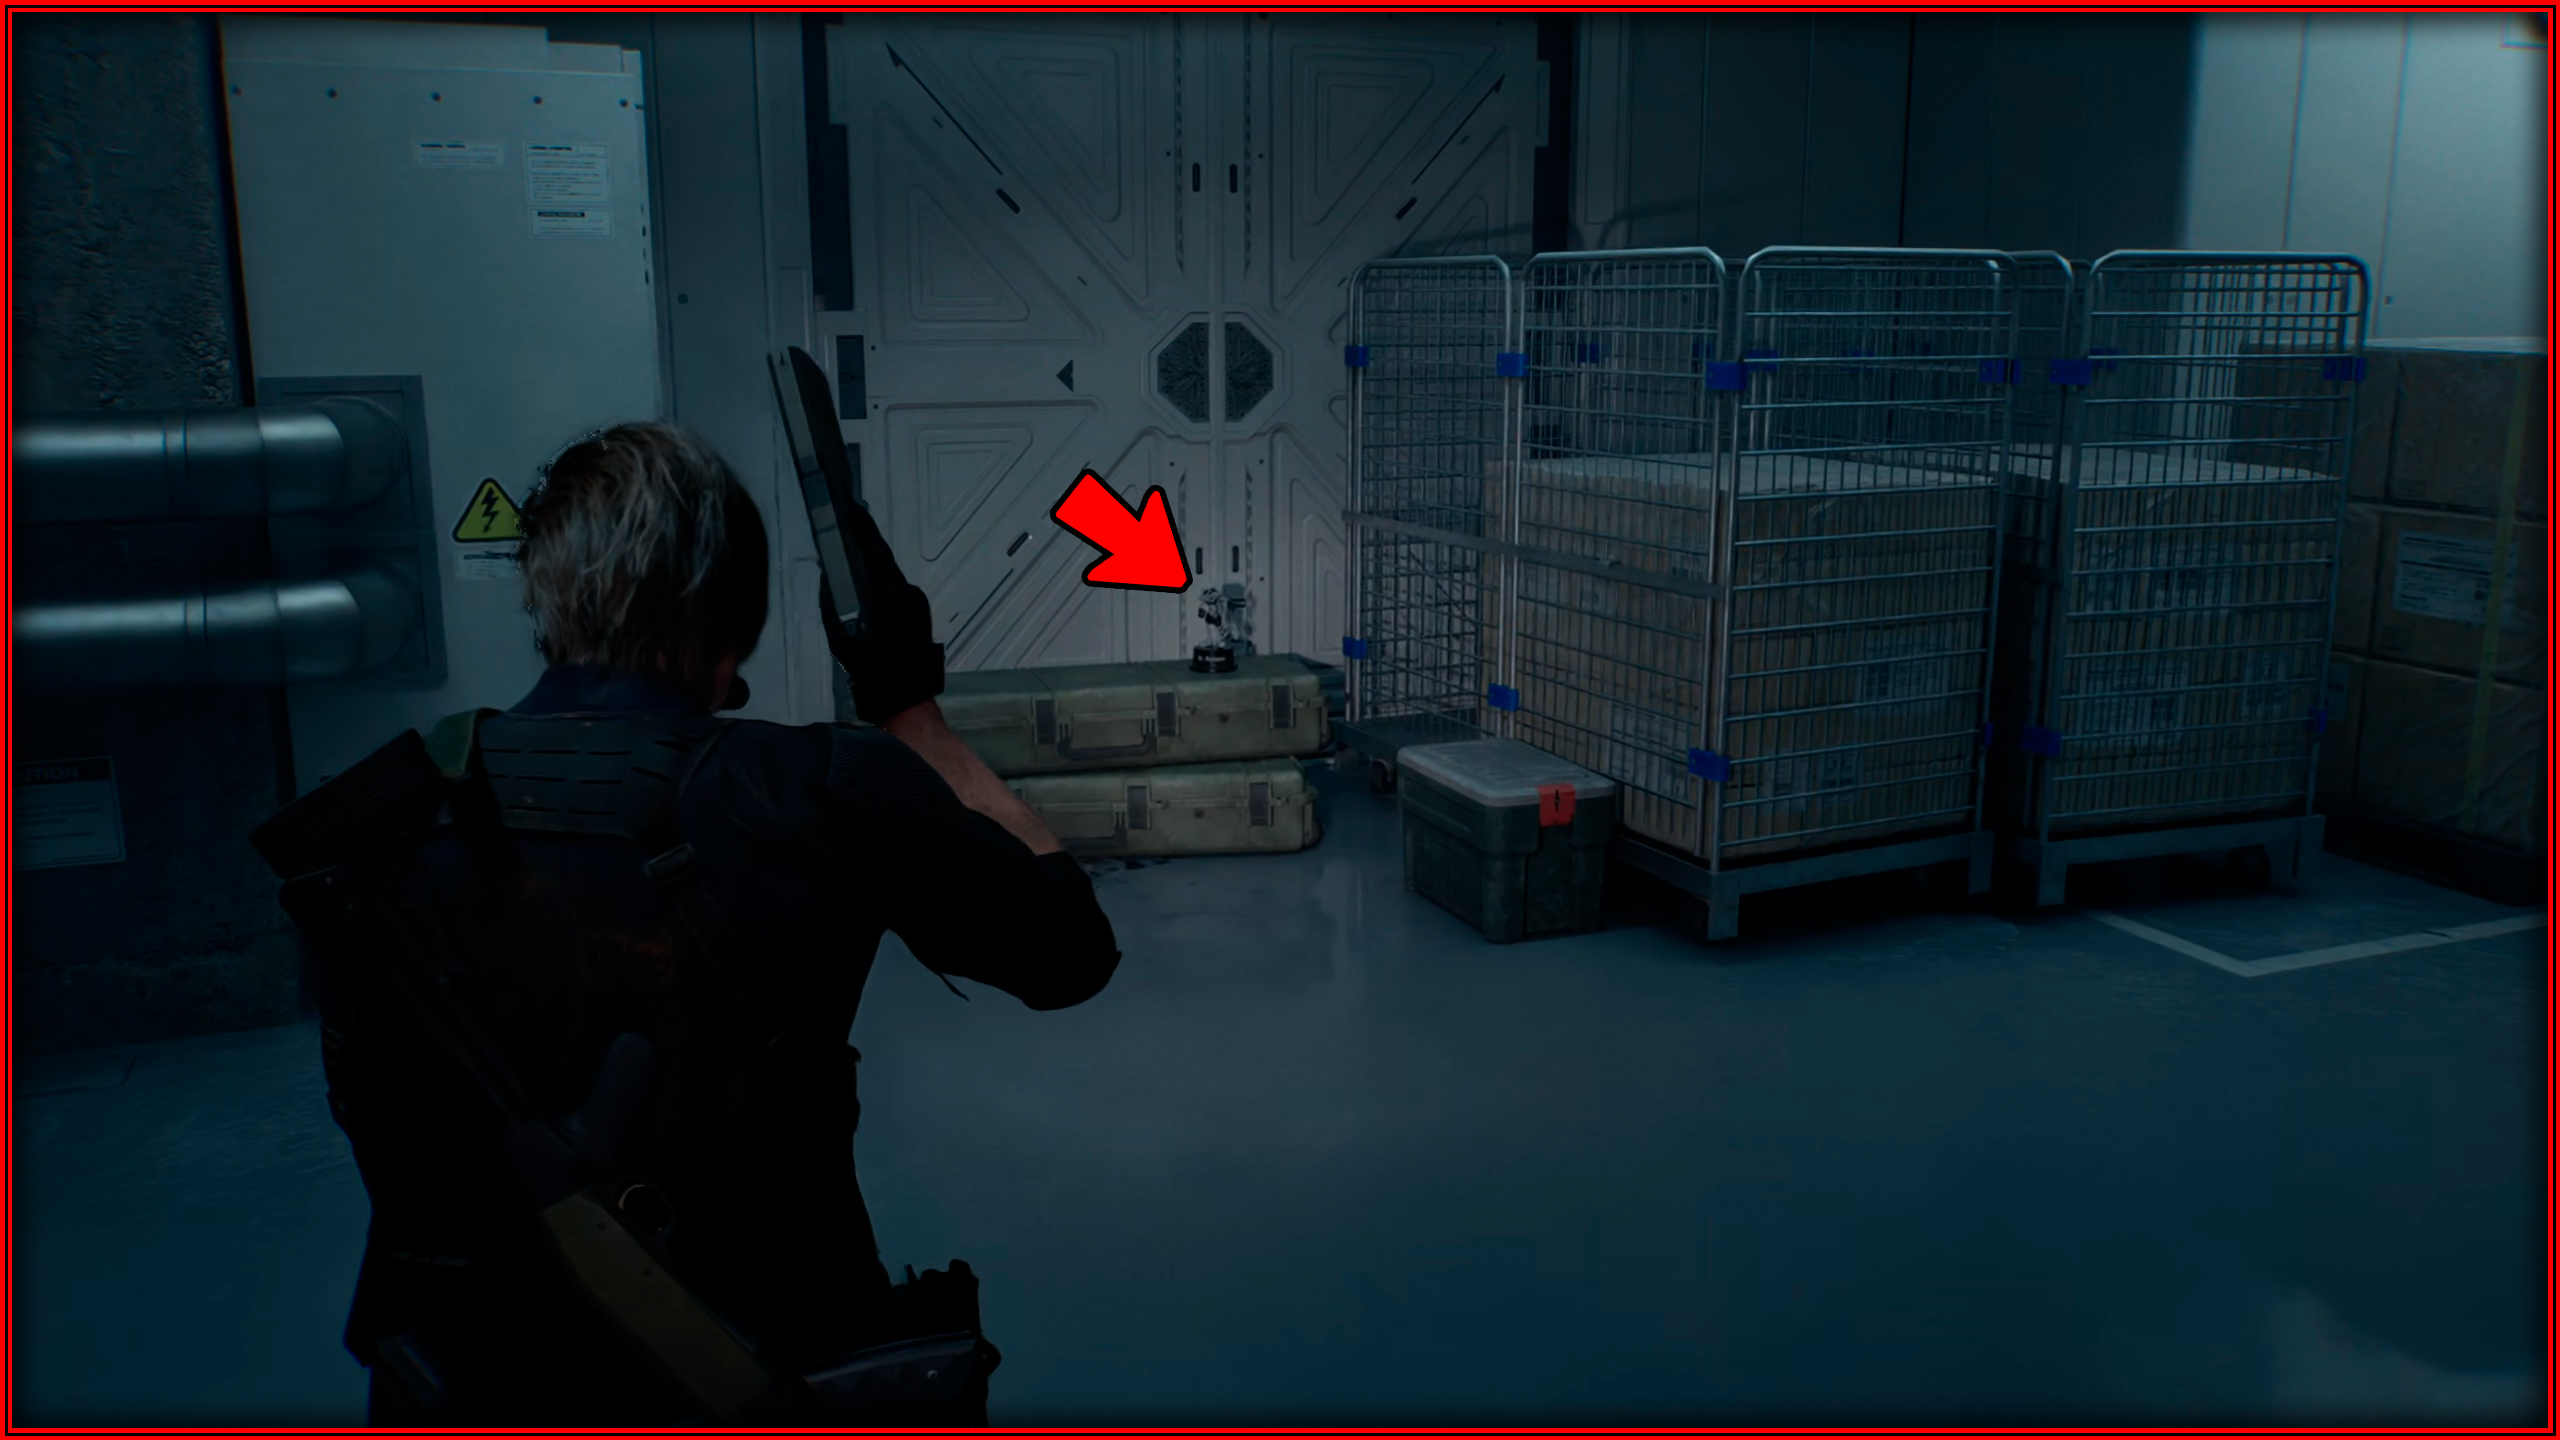
Mr. Raccoon memoriam 24
As soon as you enter Ark, after the decontamination corridor, turn right, and you will be standing on top of some boxes at the end of the corridor.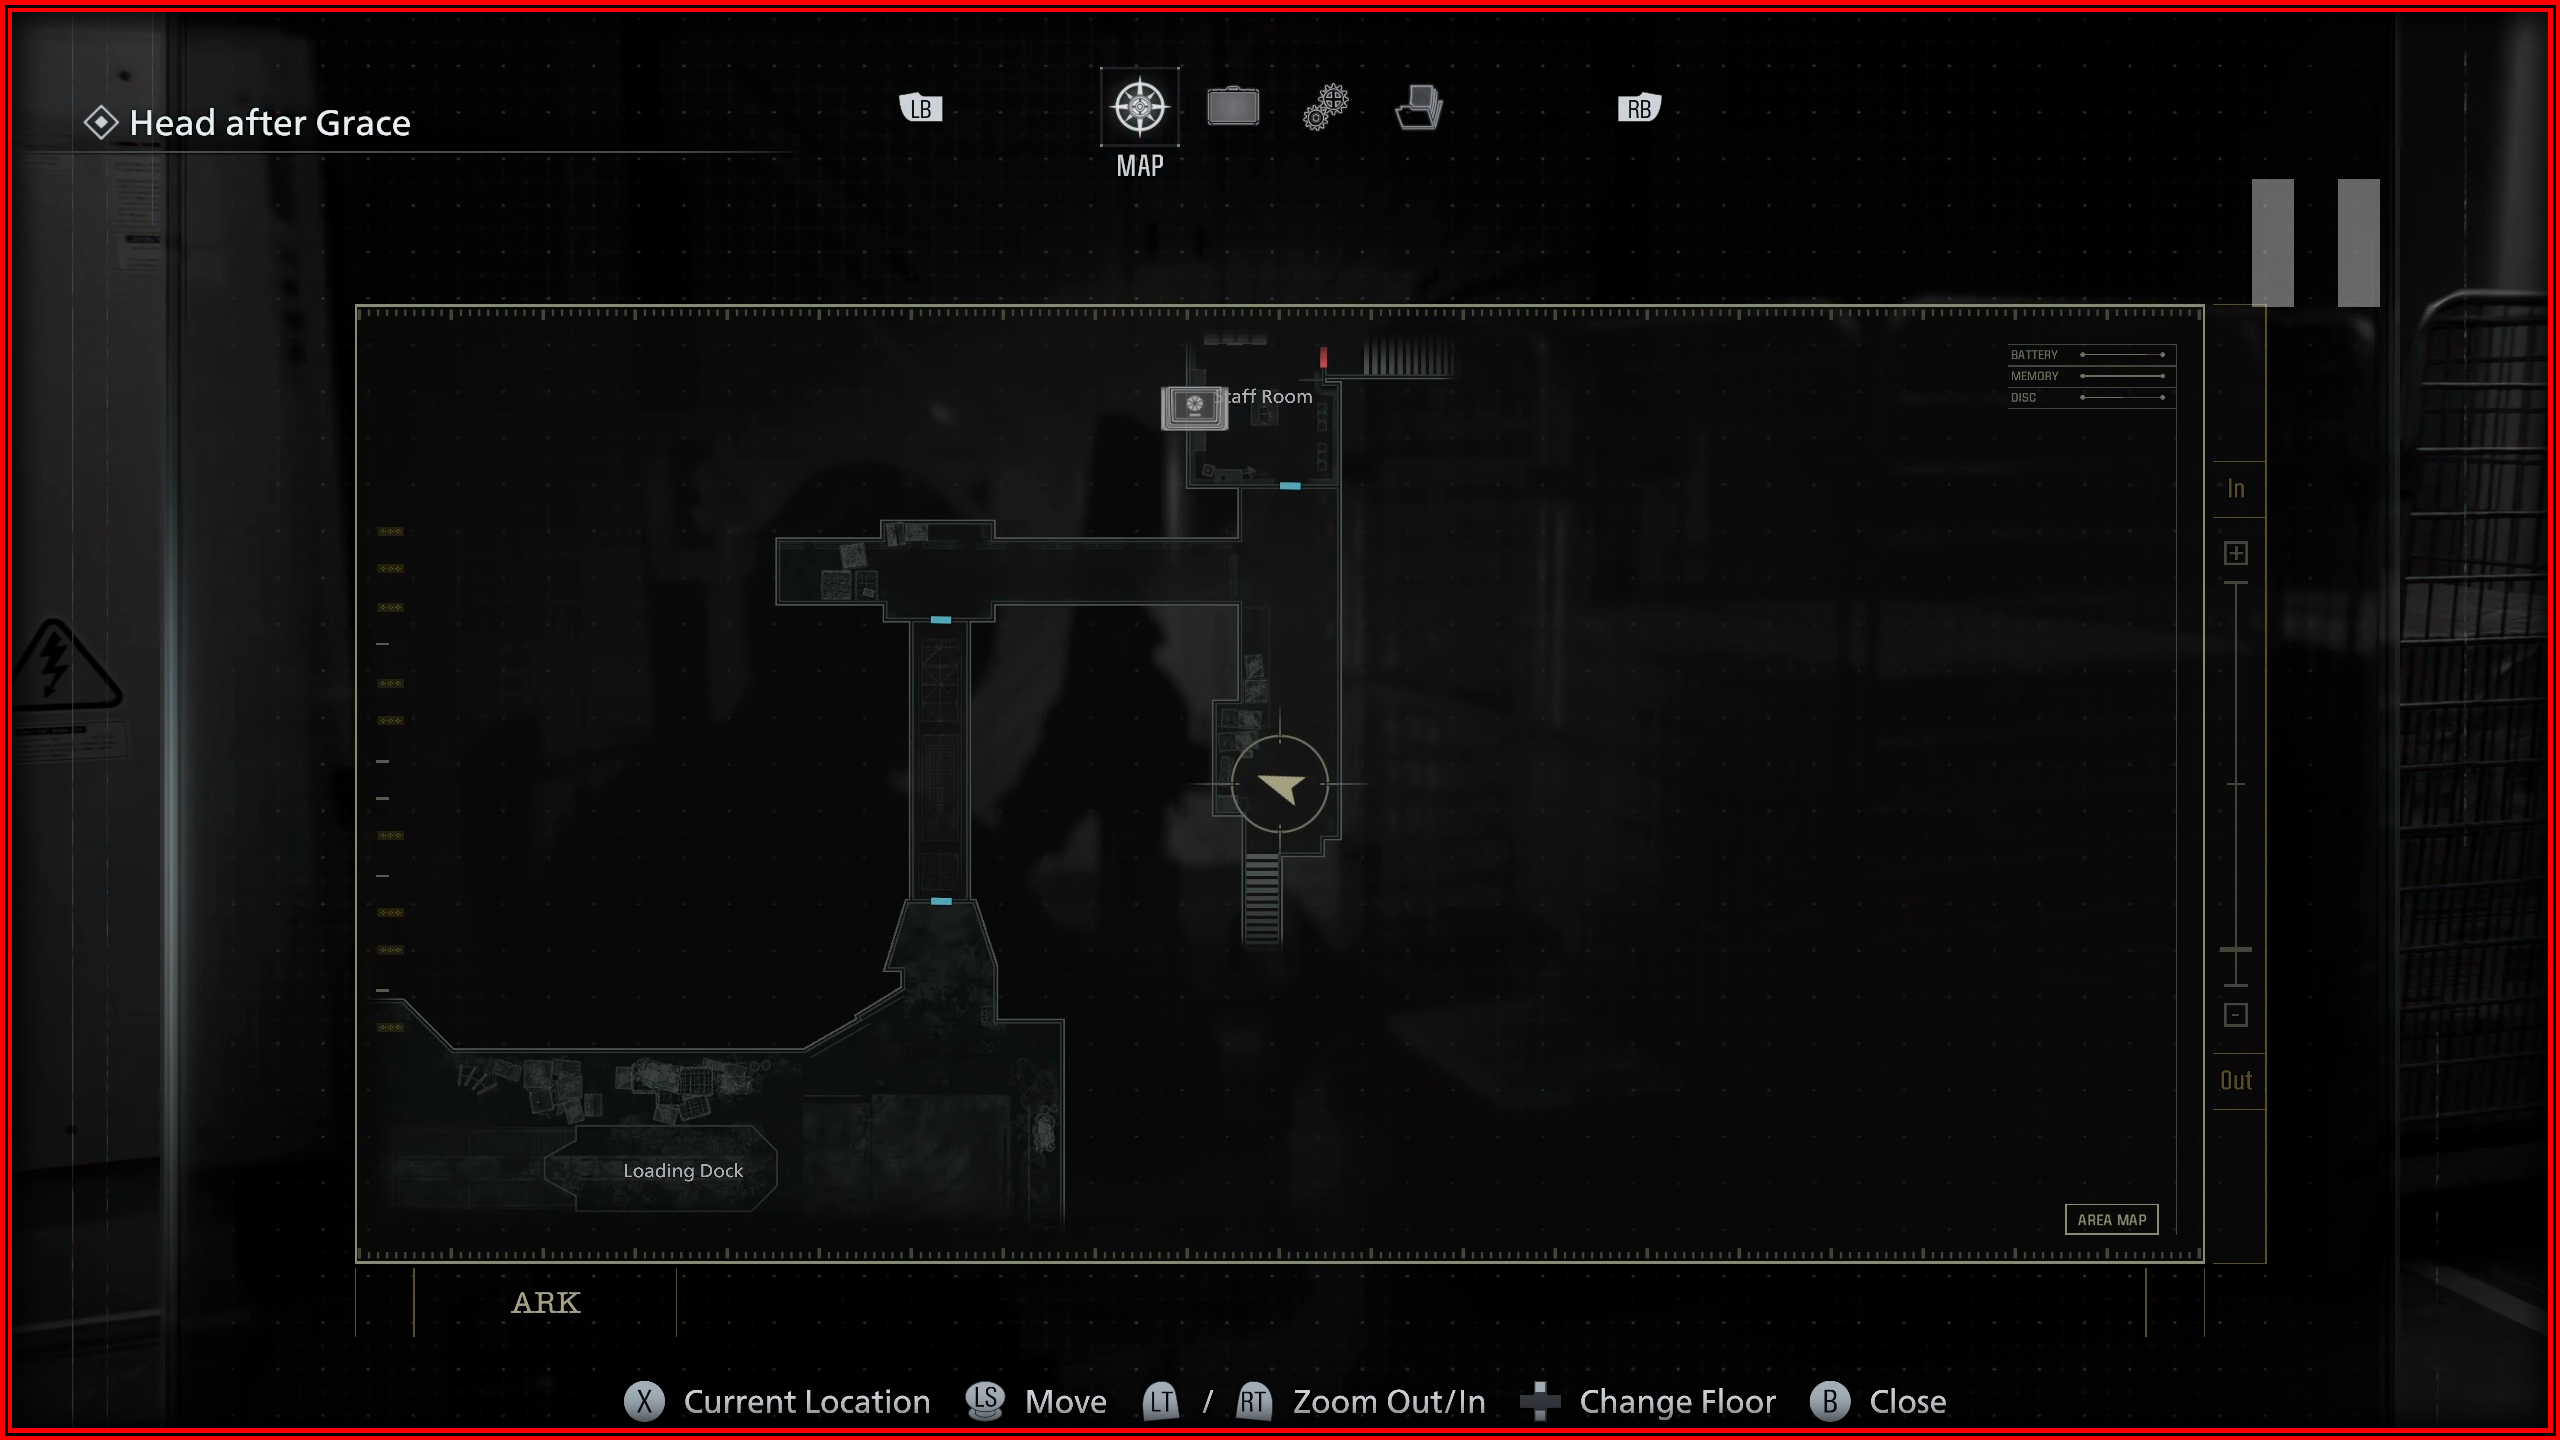
Mr. Raccoon memoriam 25
On top of a control panel inside the Operations Room.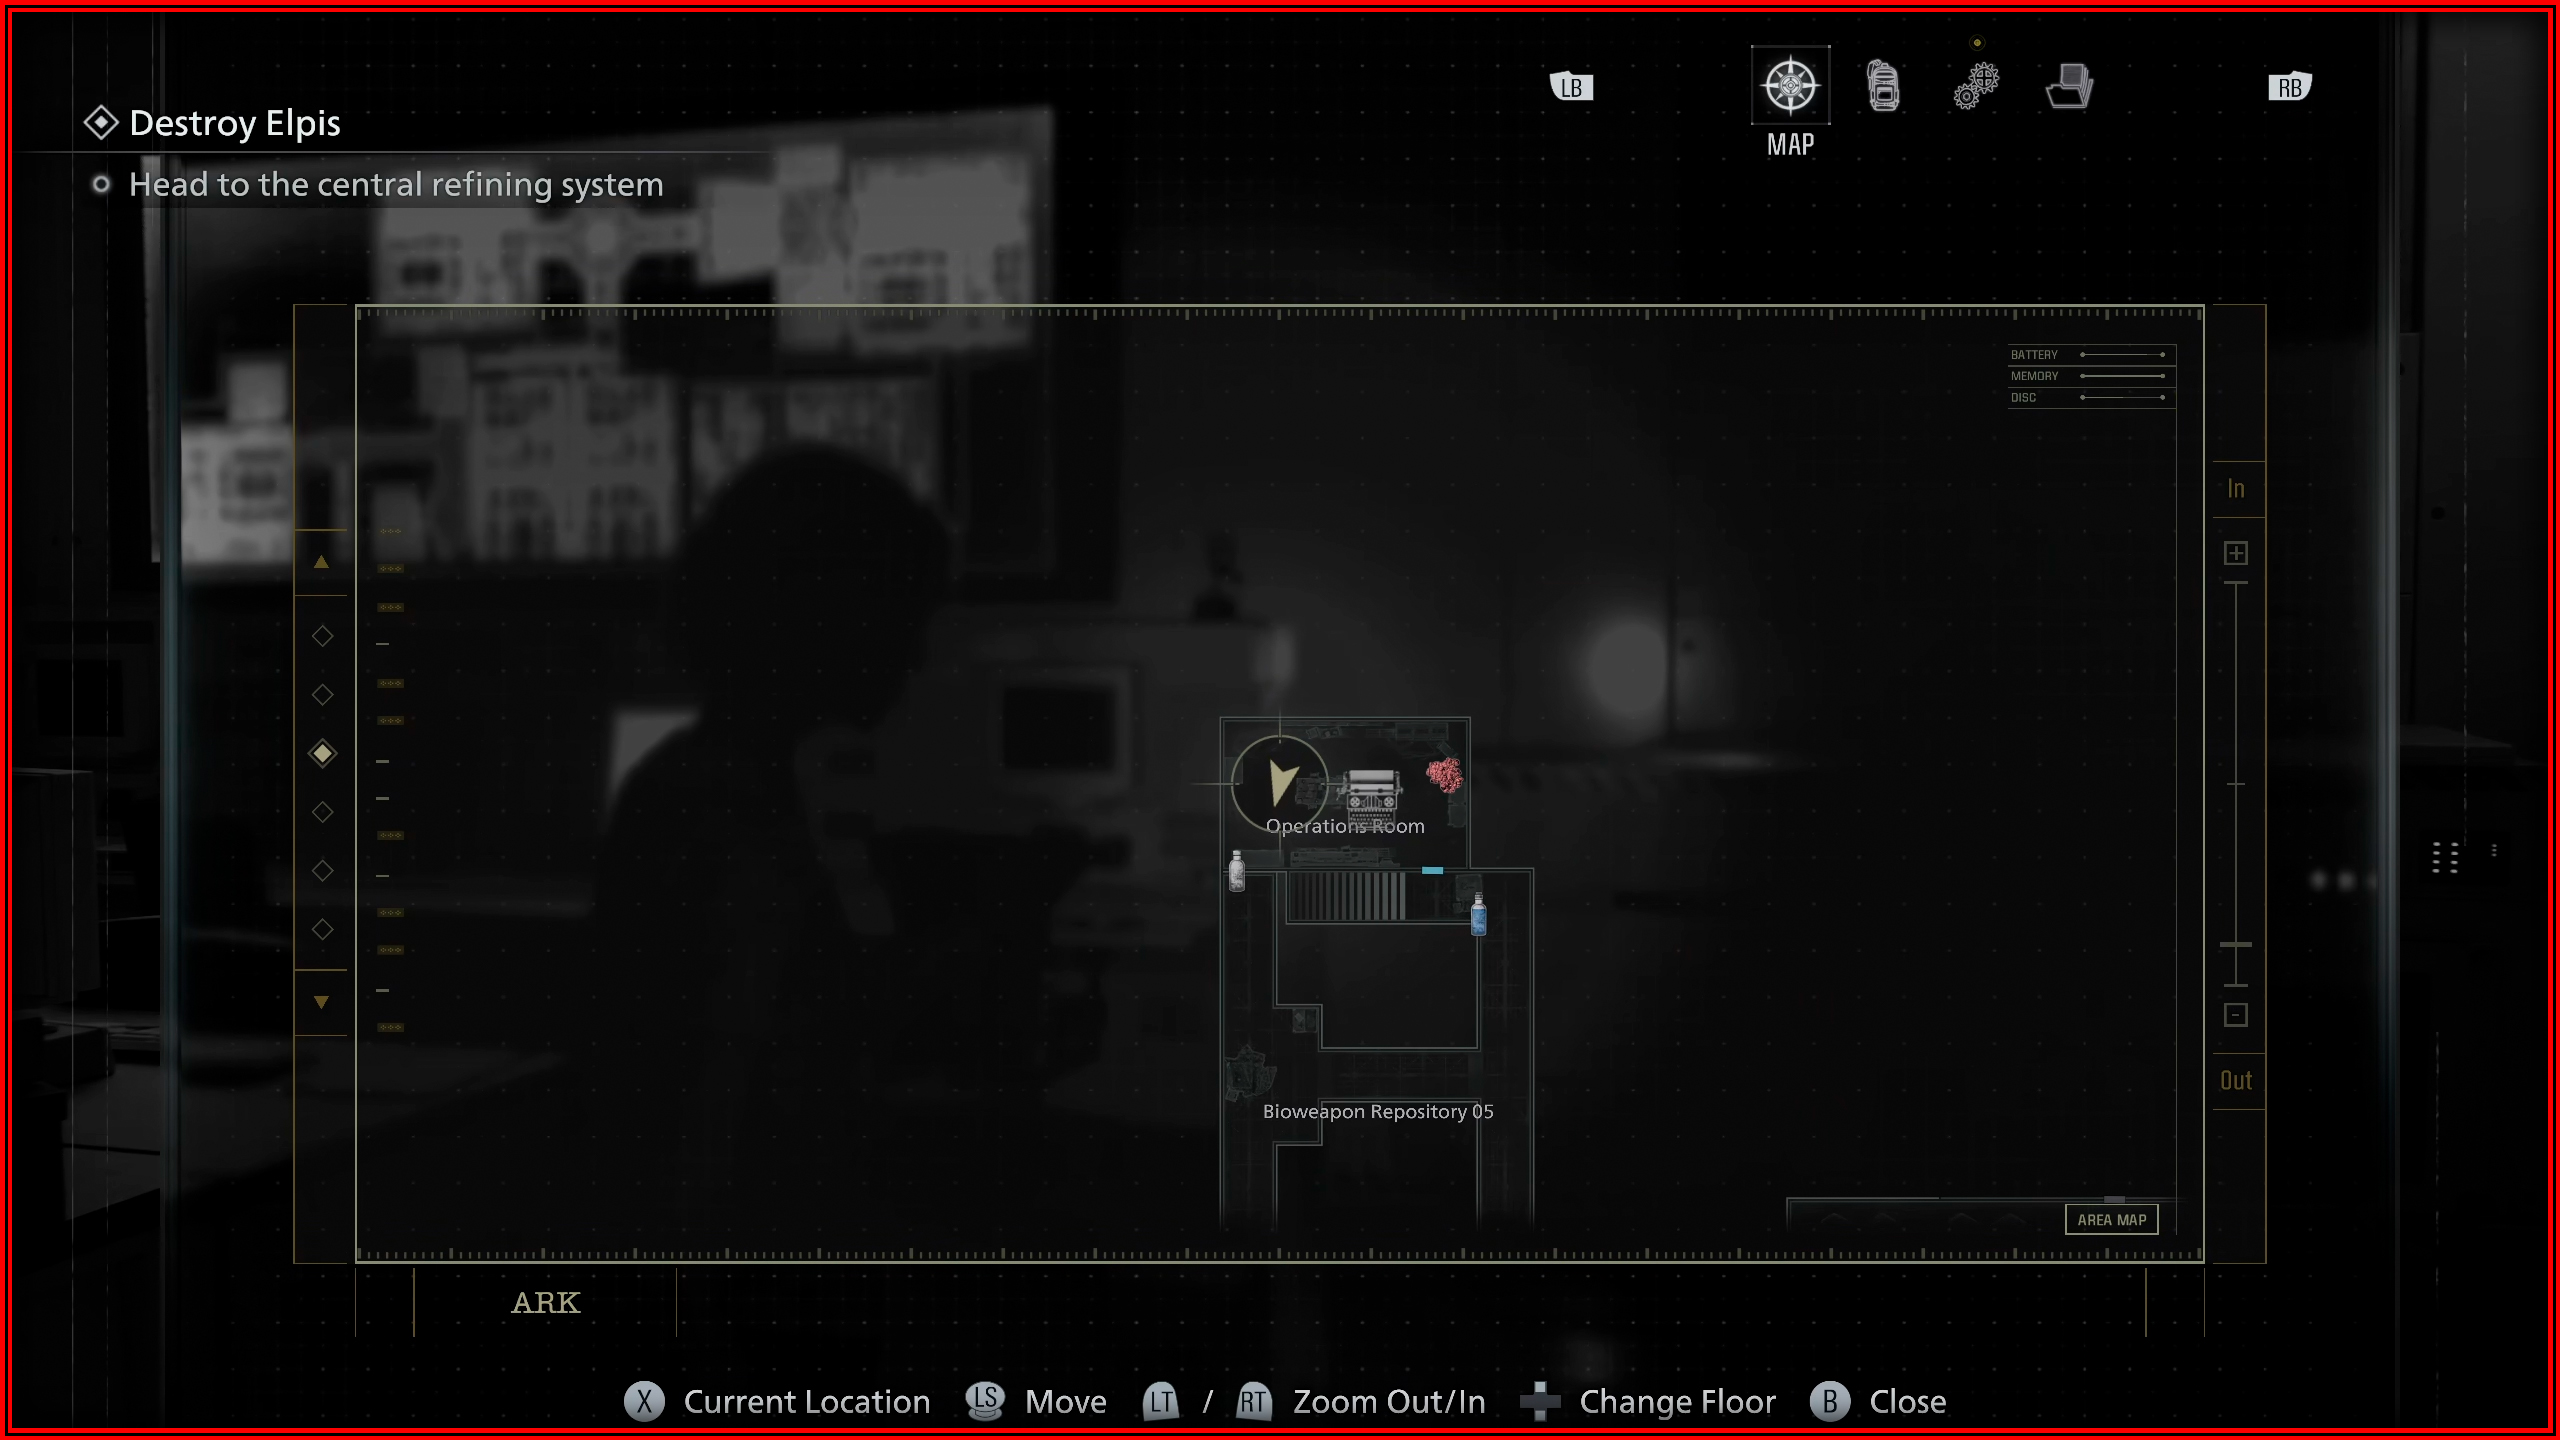
Case Closed

You will need to collect 75 "files" scattered throughout the game, below I will leave the location of each one
Wrenwood - Grace
File 1/75 – Investigation Report
Automatically in your inventory at the start of the game.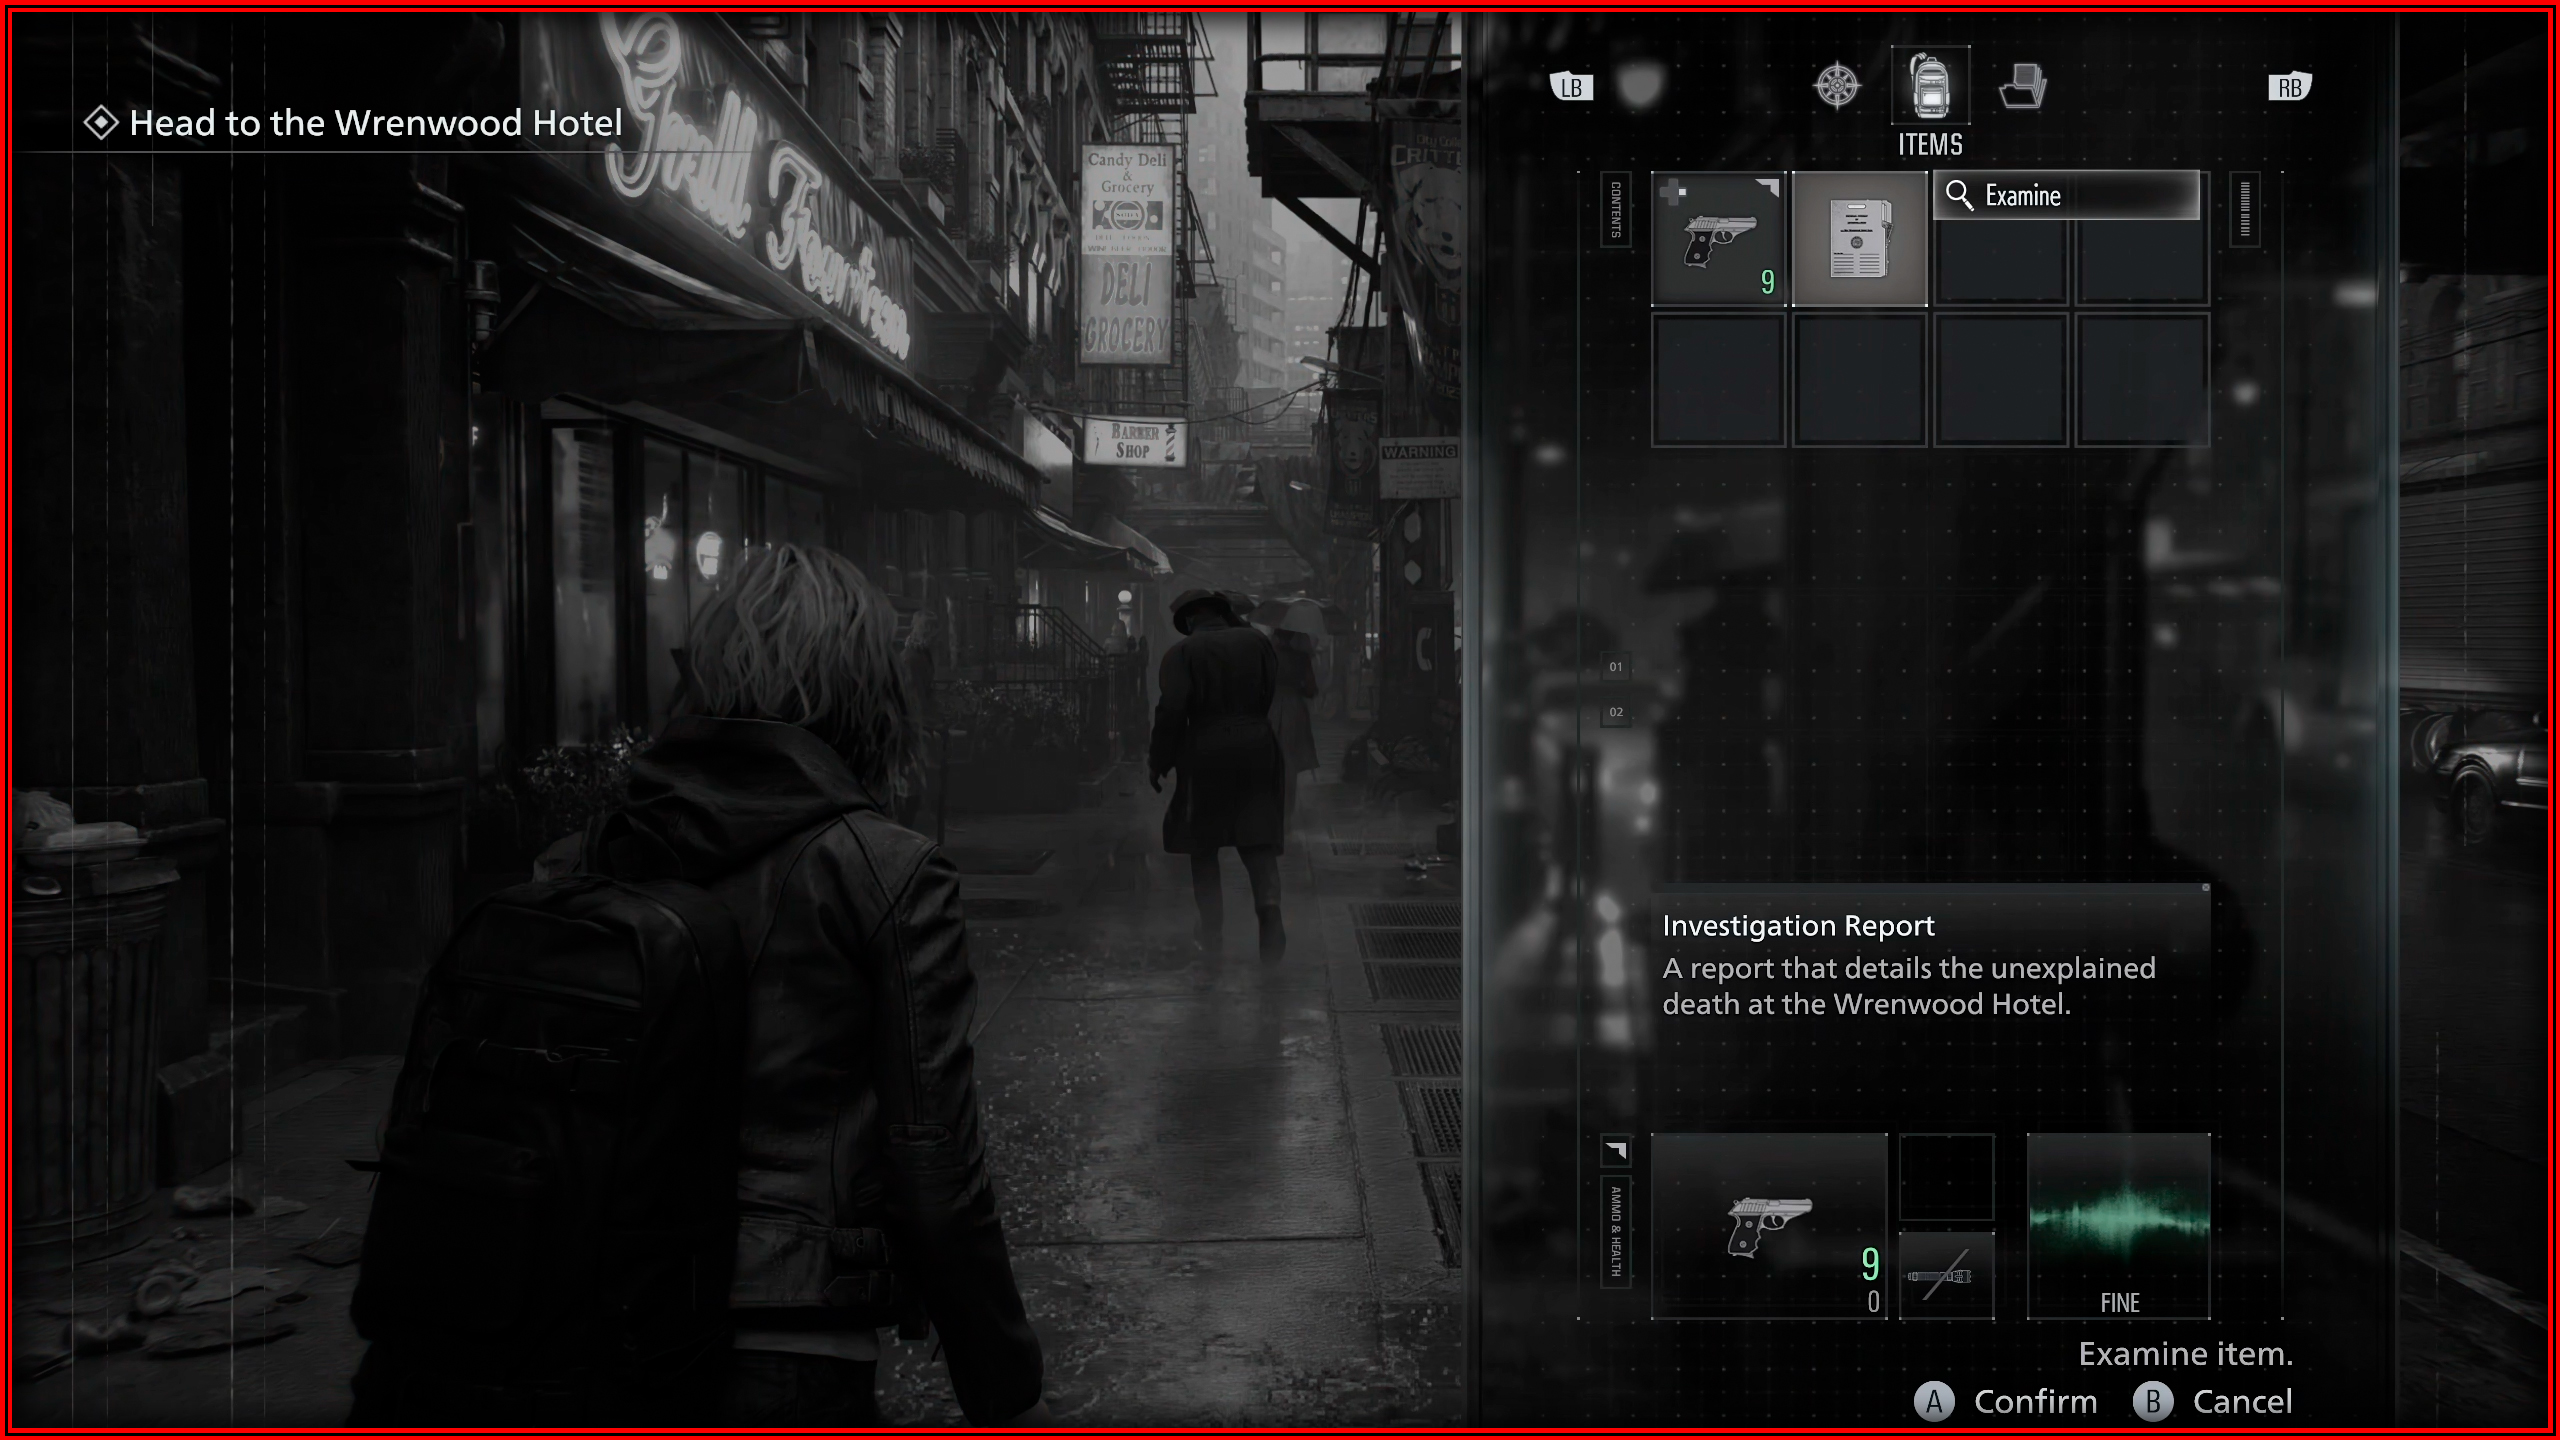

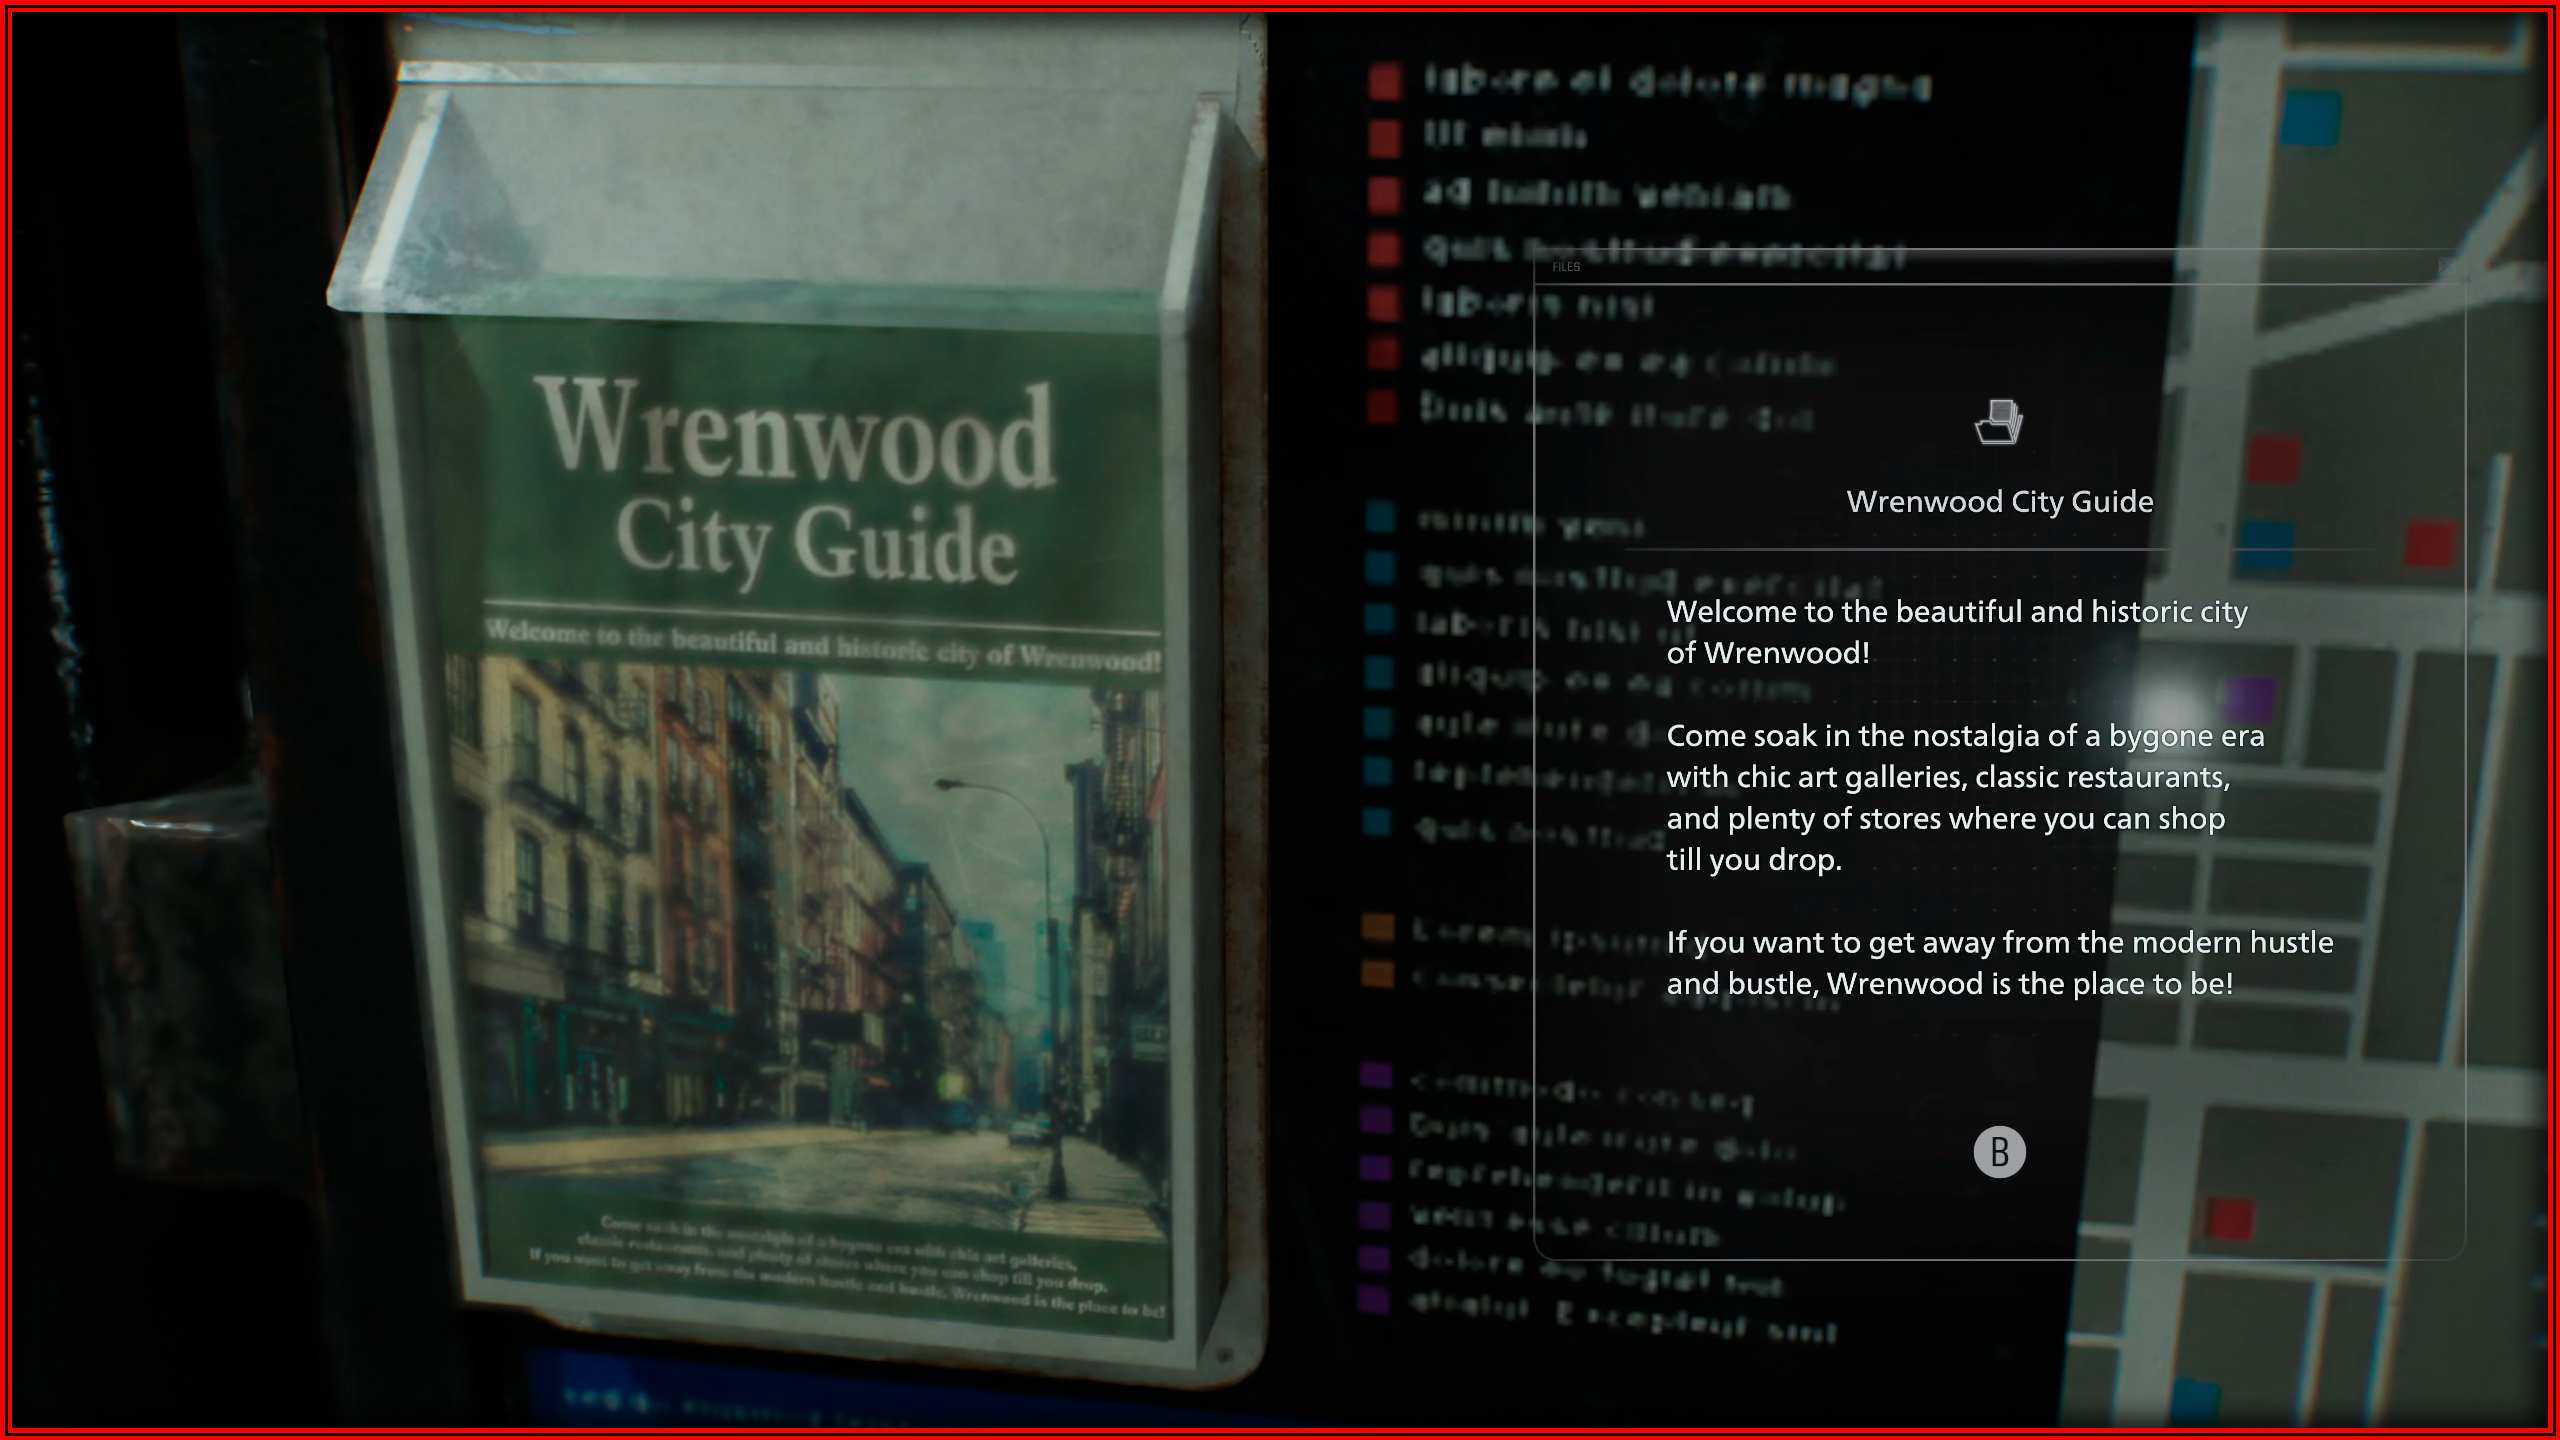
File 2/75 – Wrenwood City Guide
After starting the game, on the City Map to the right.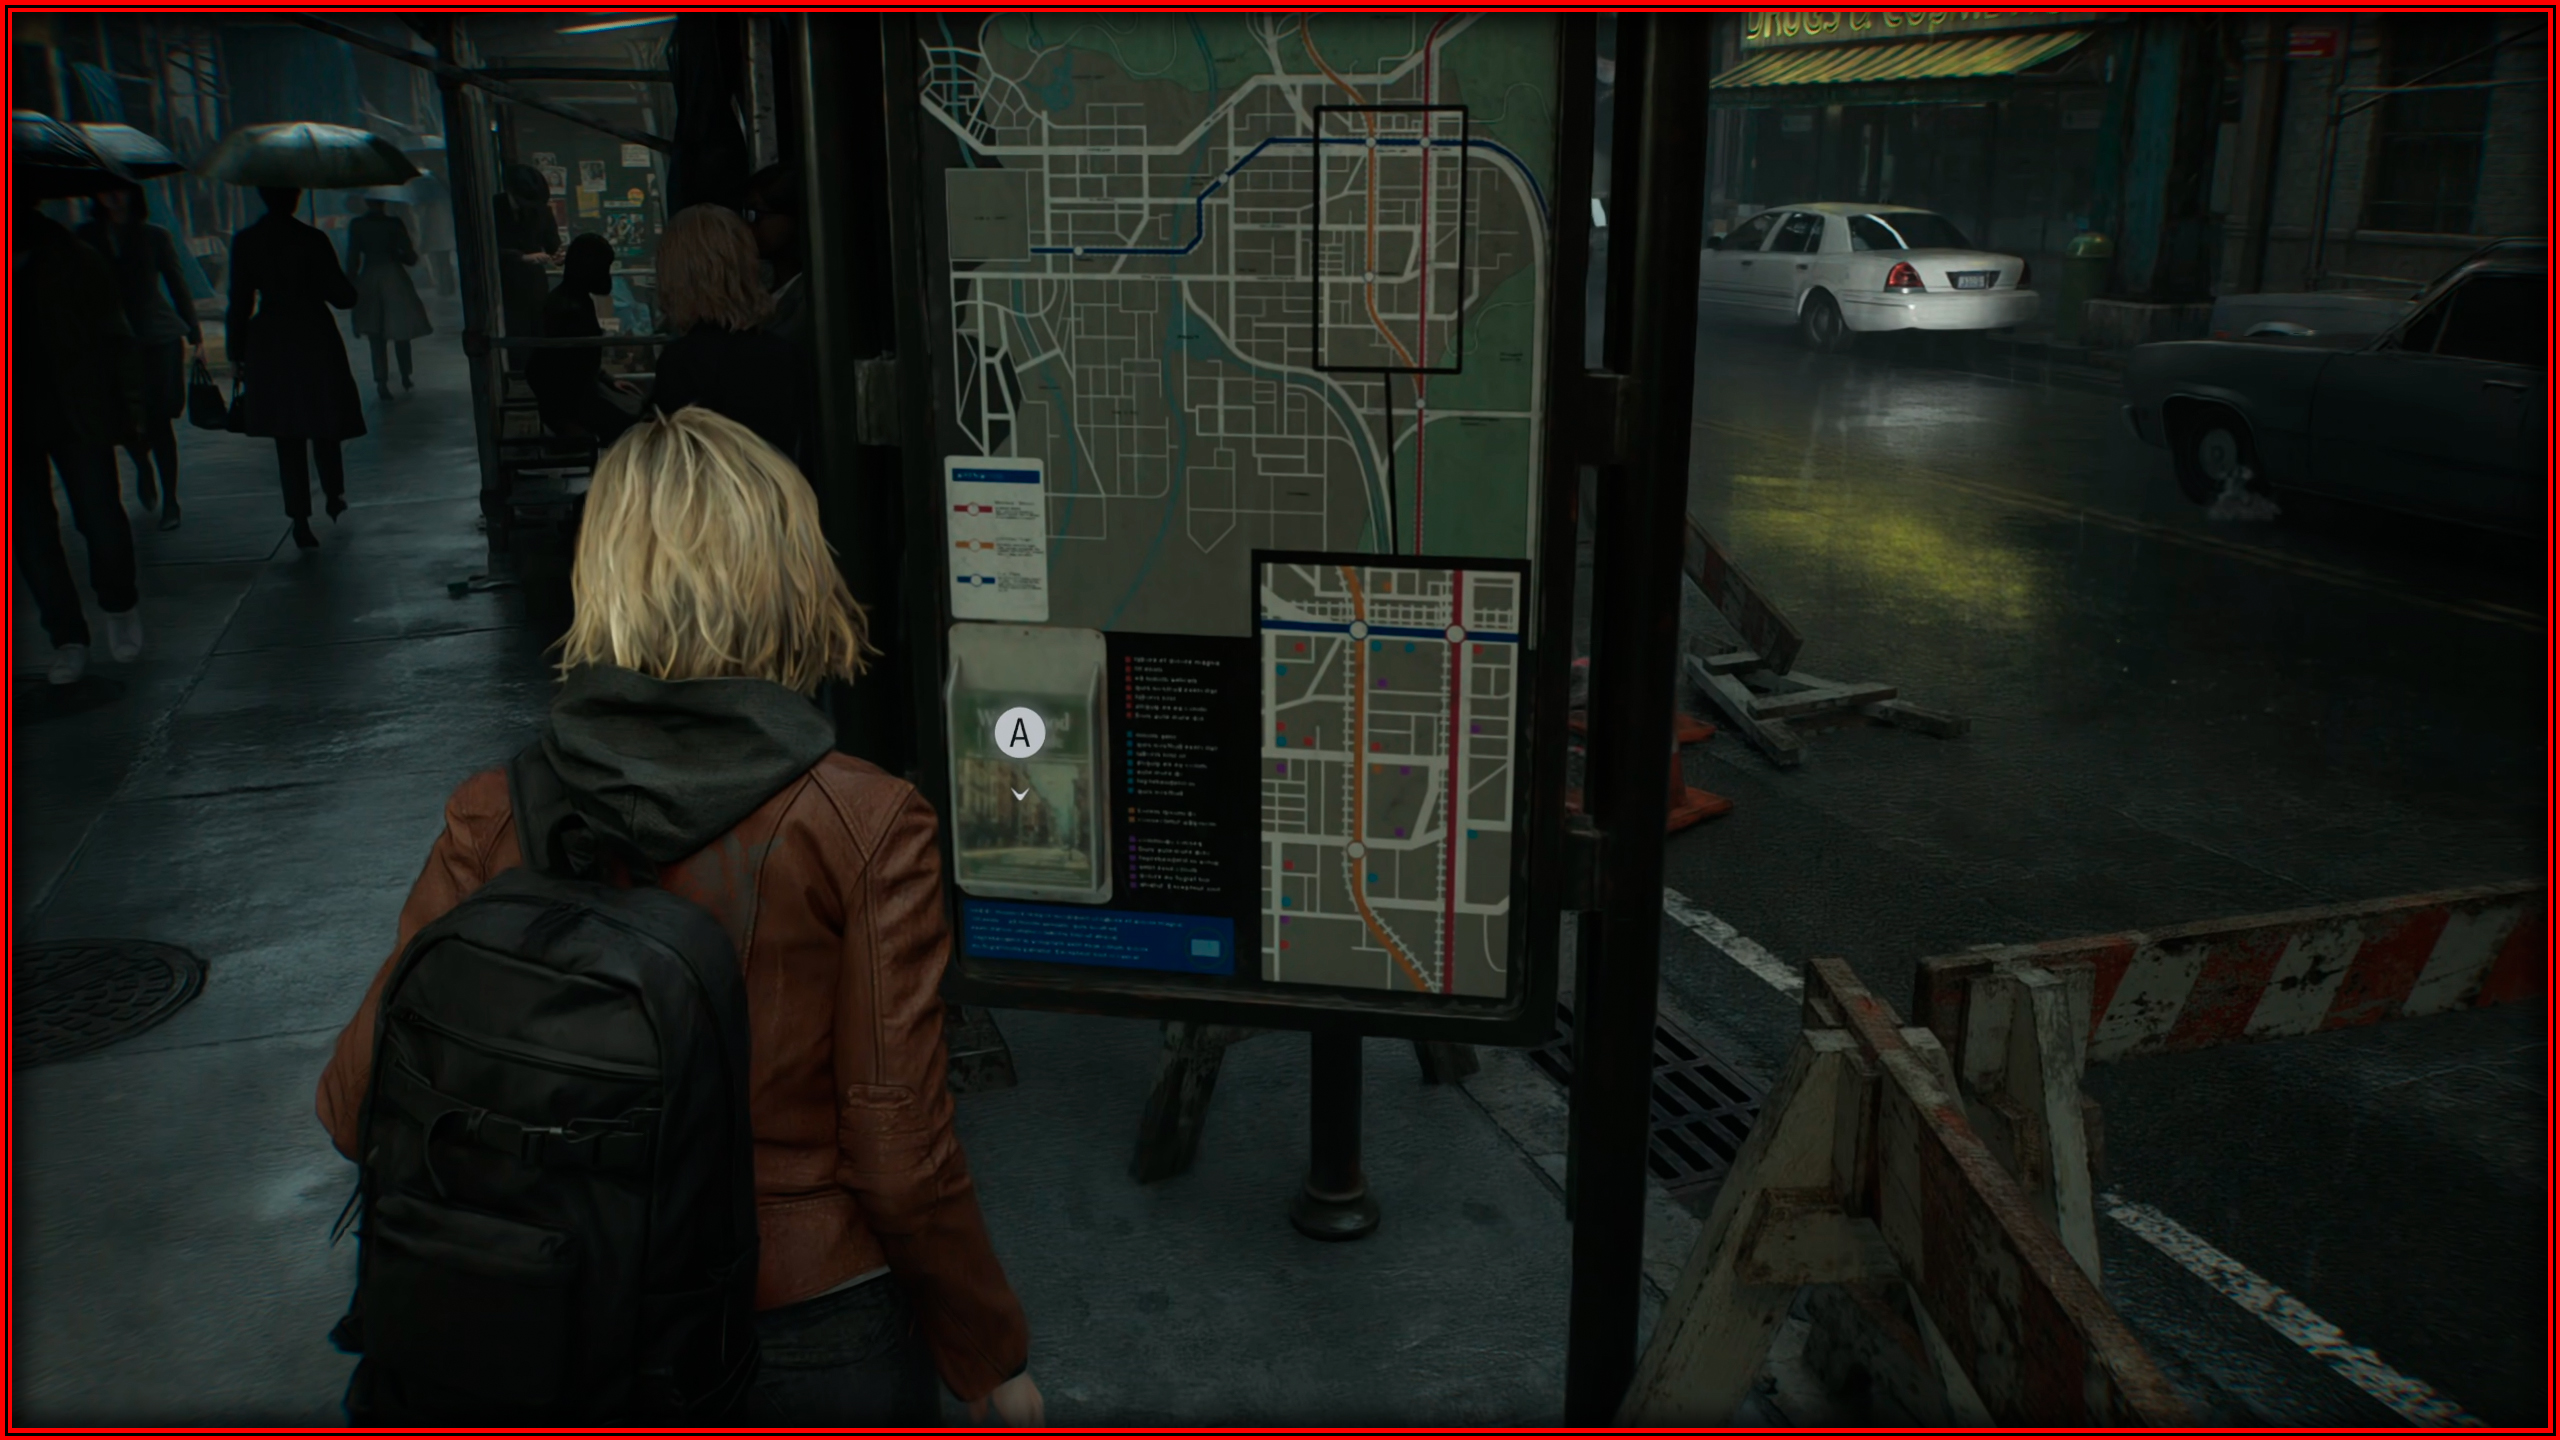
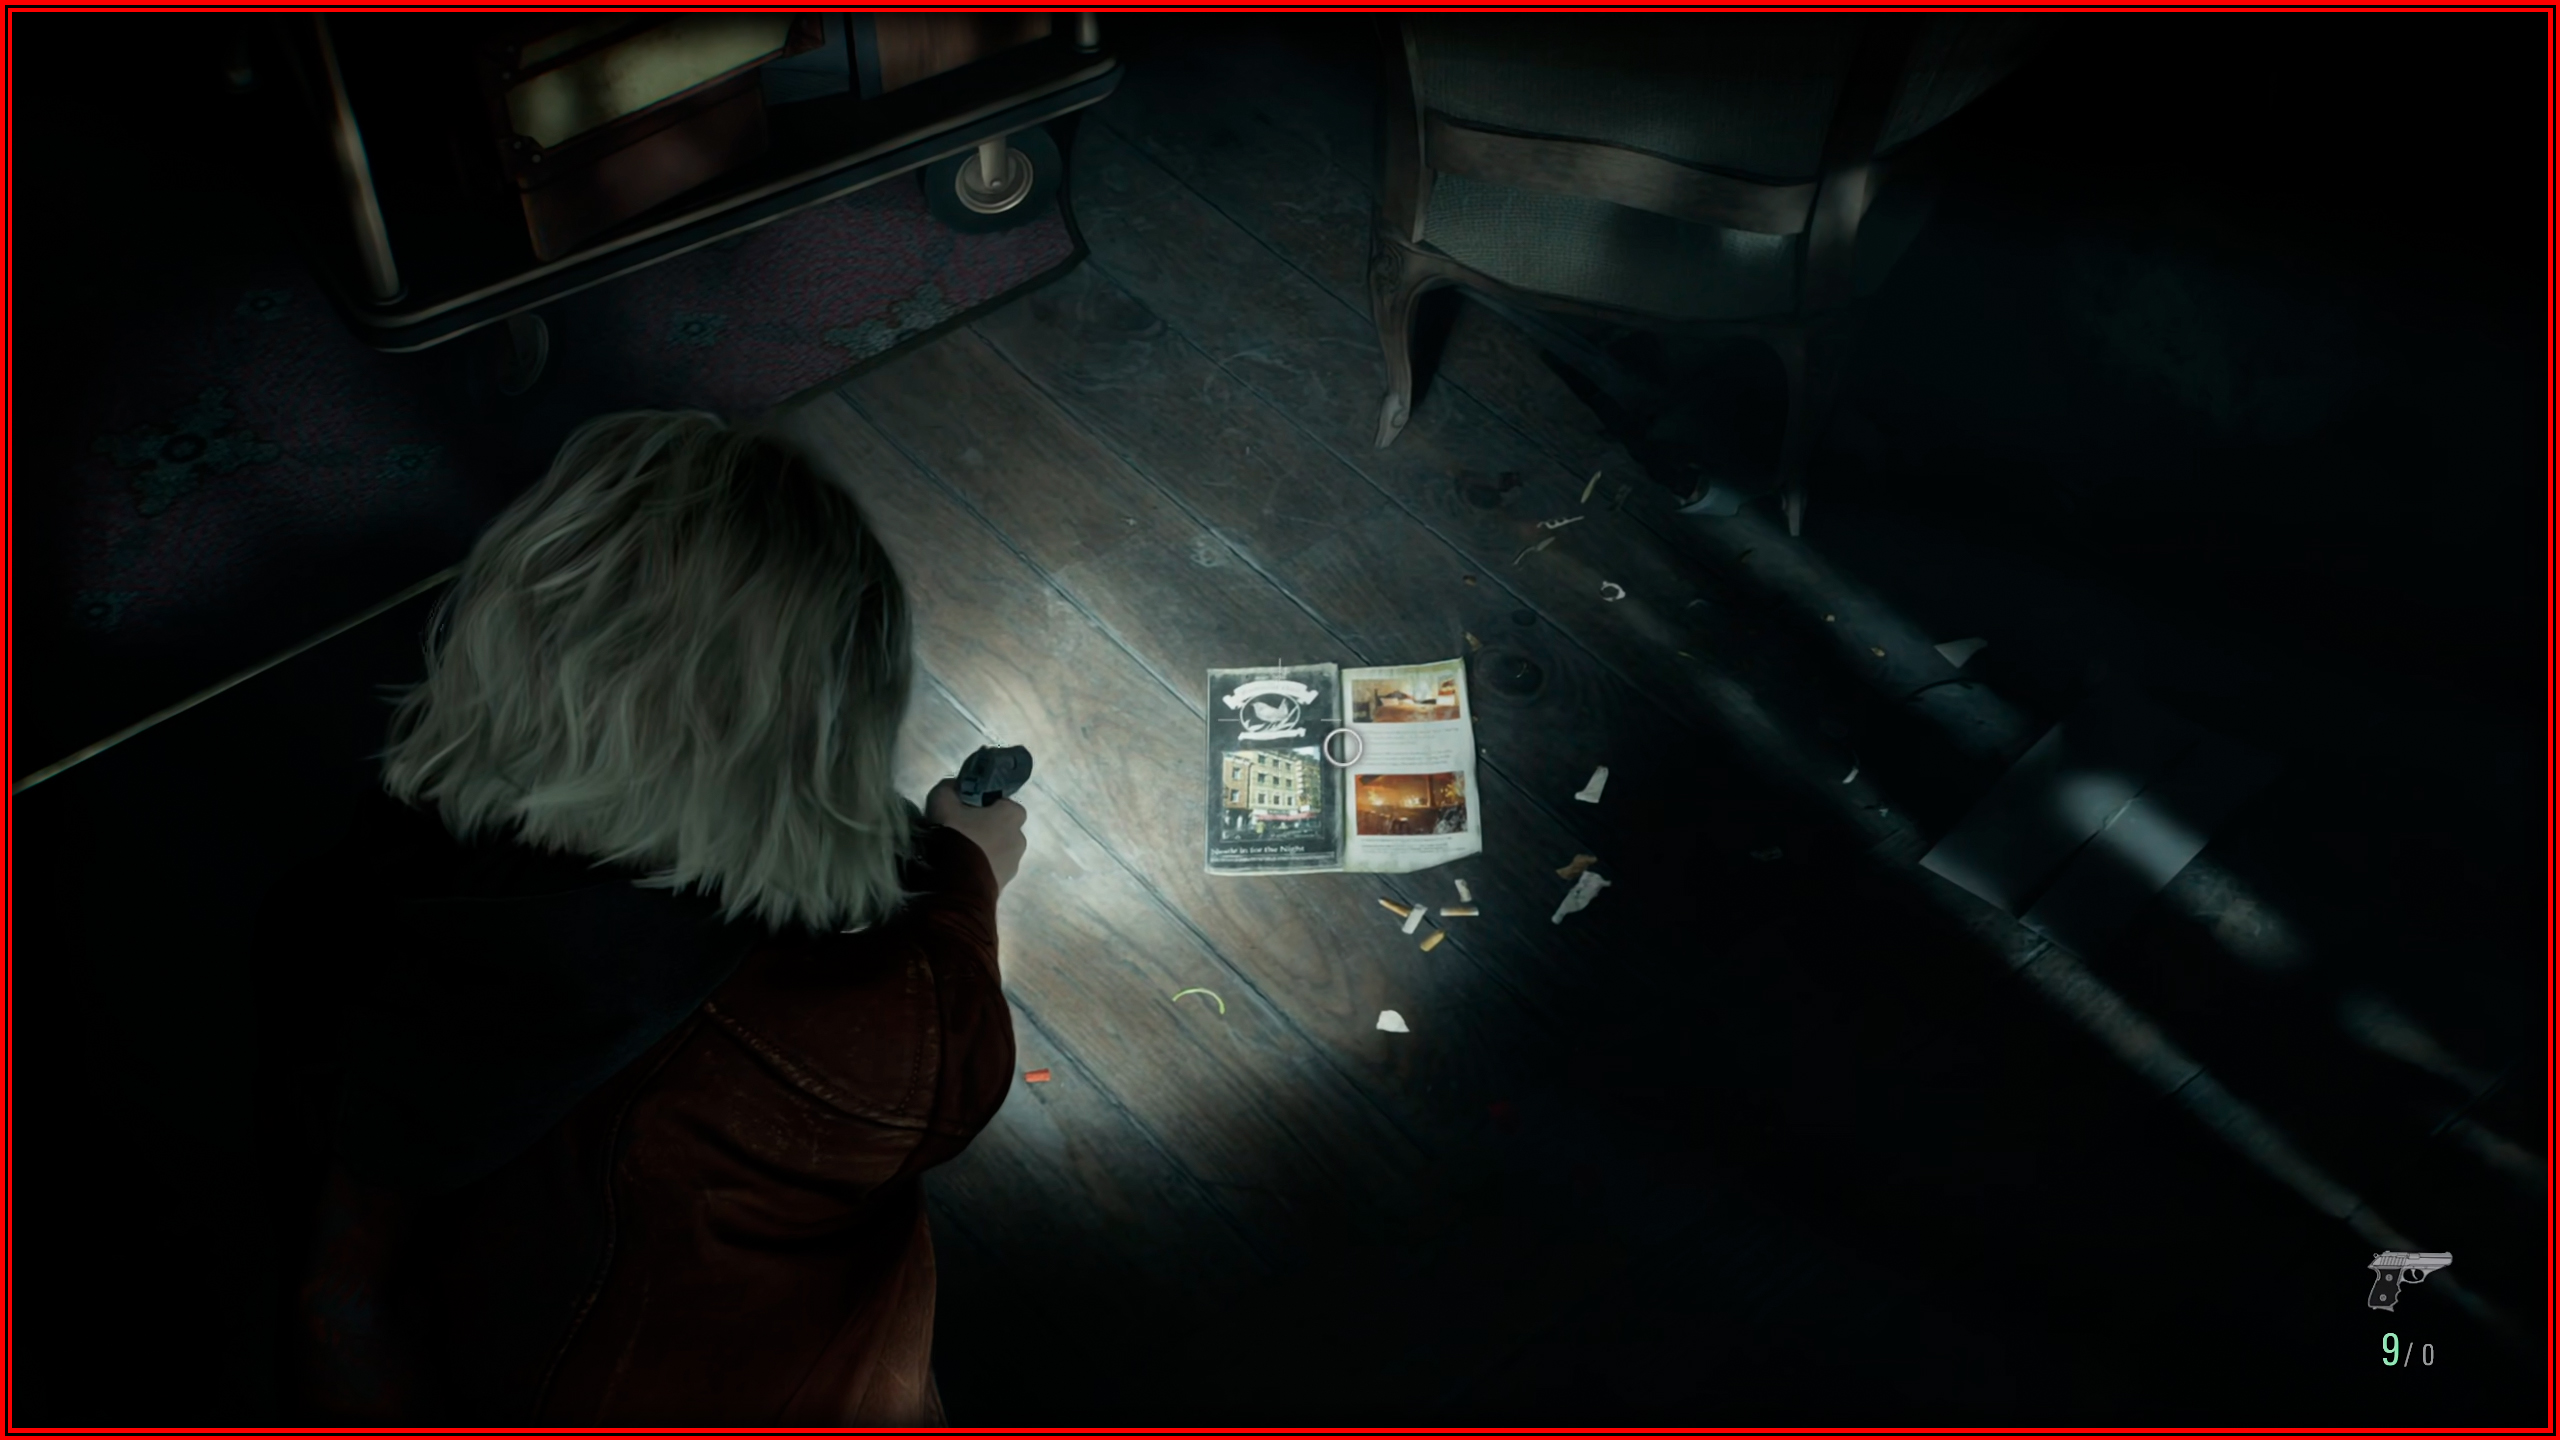
File 3/75 – Hotel Pamphlet
Once you unlock the door with the old key, proceed straight ahead until you reach a room containing a staircase.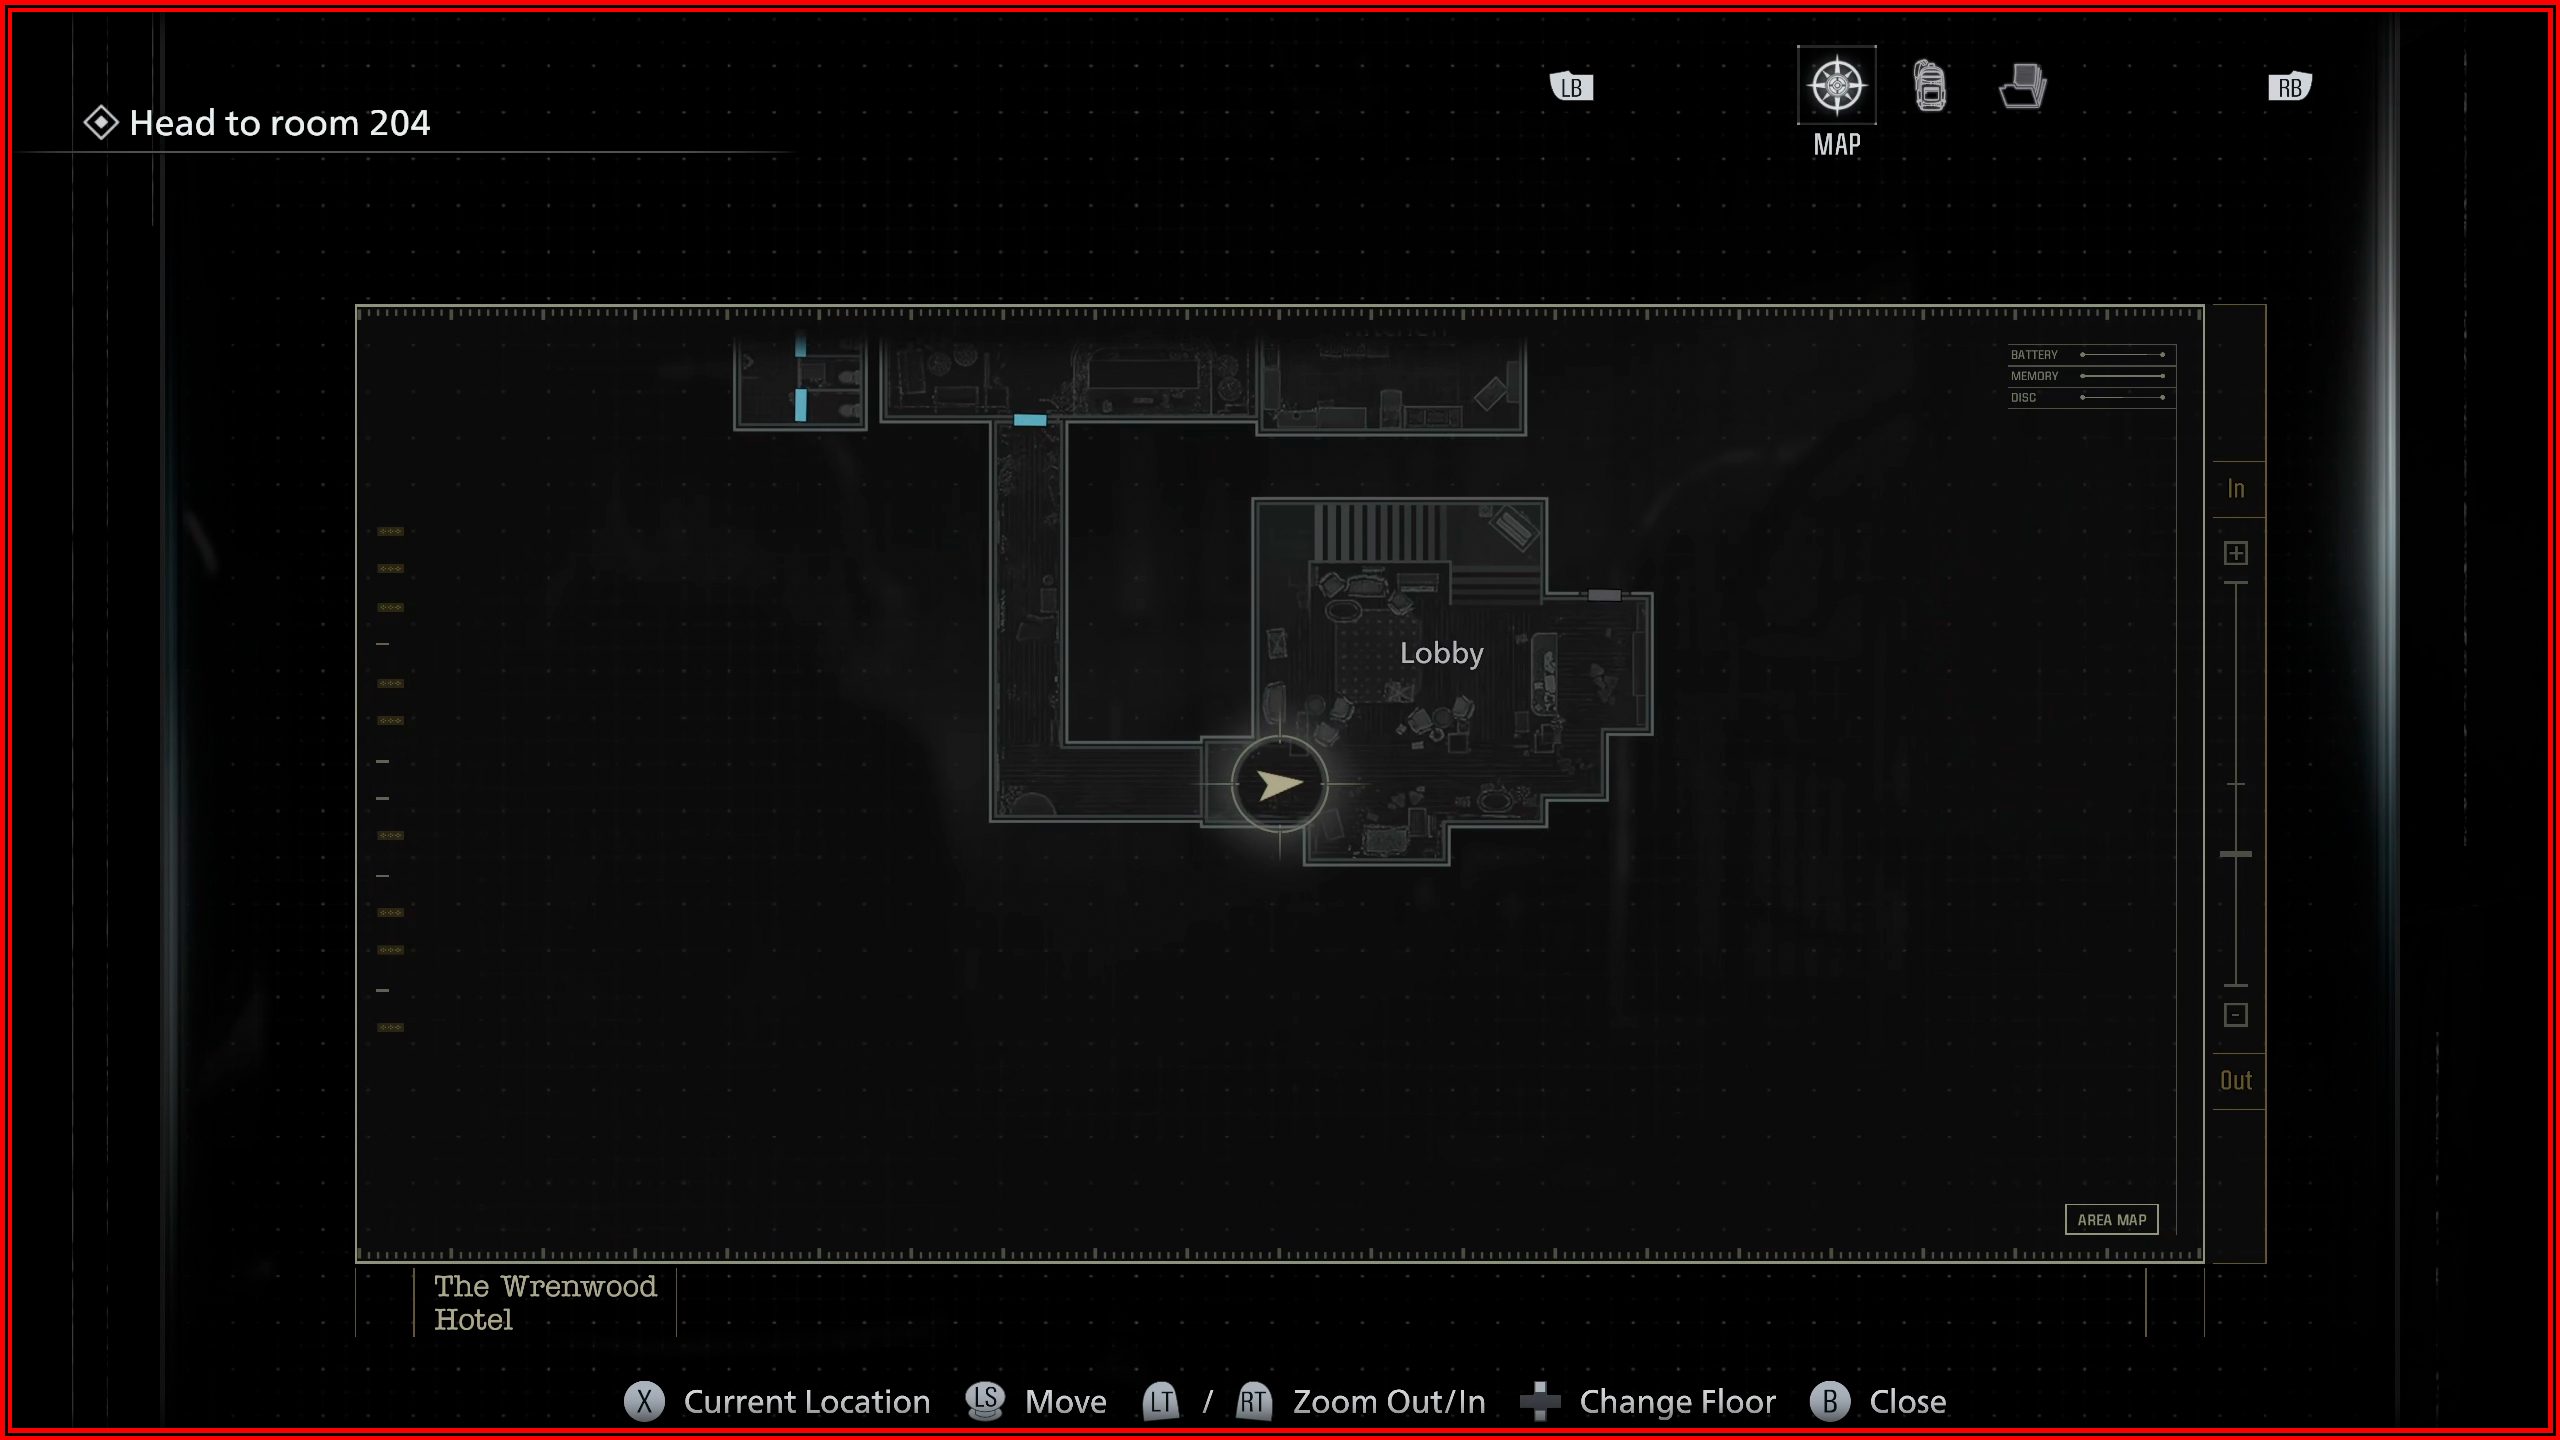
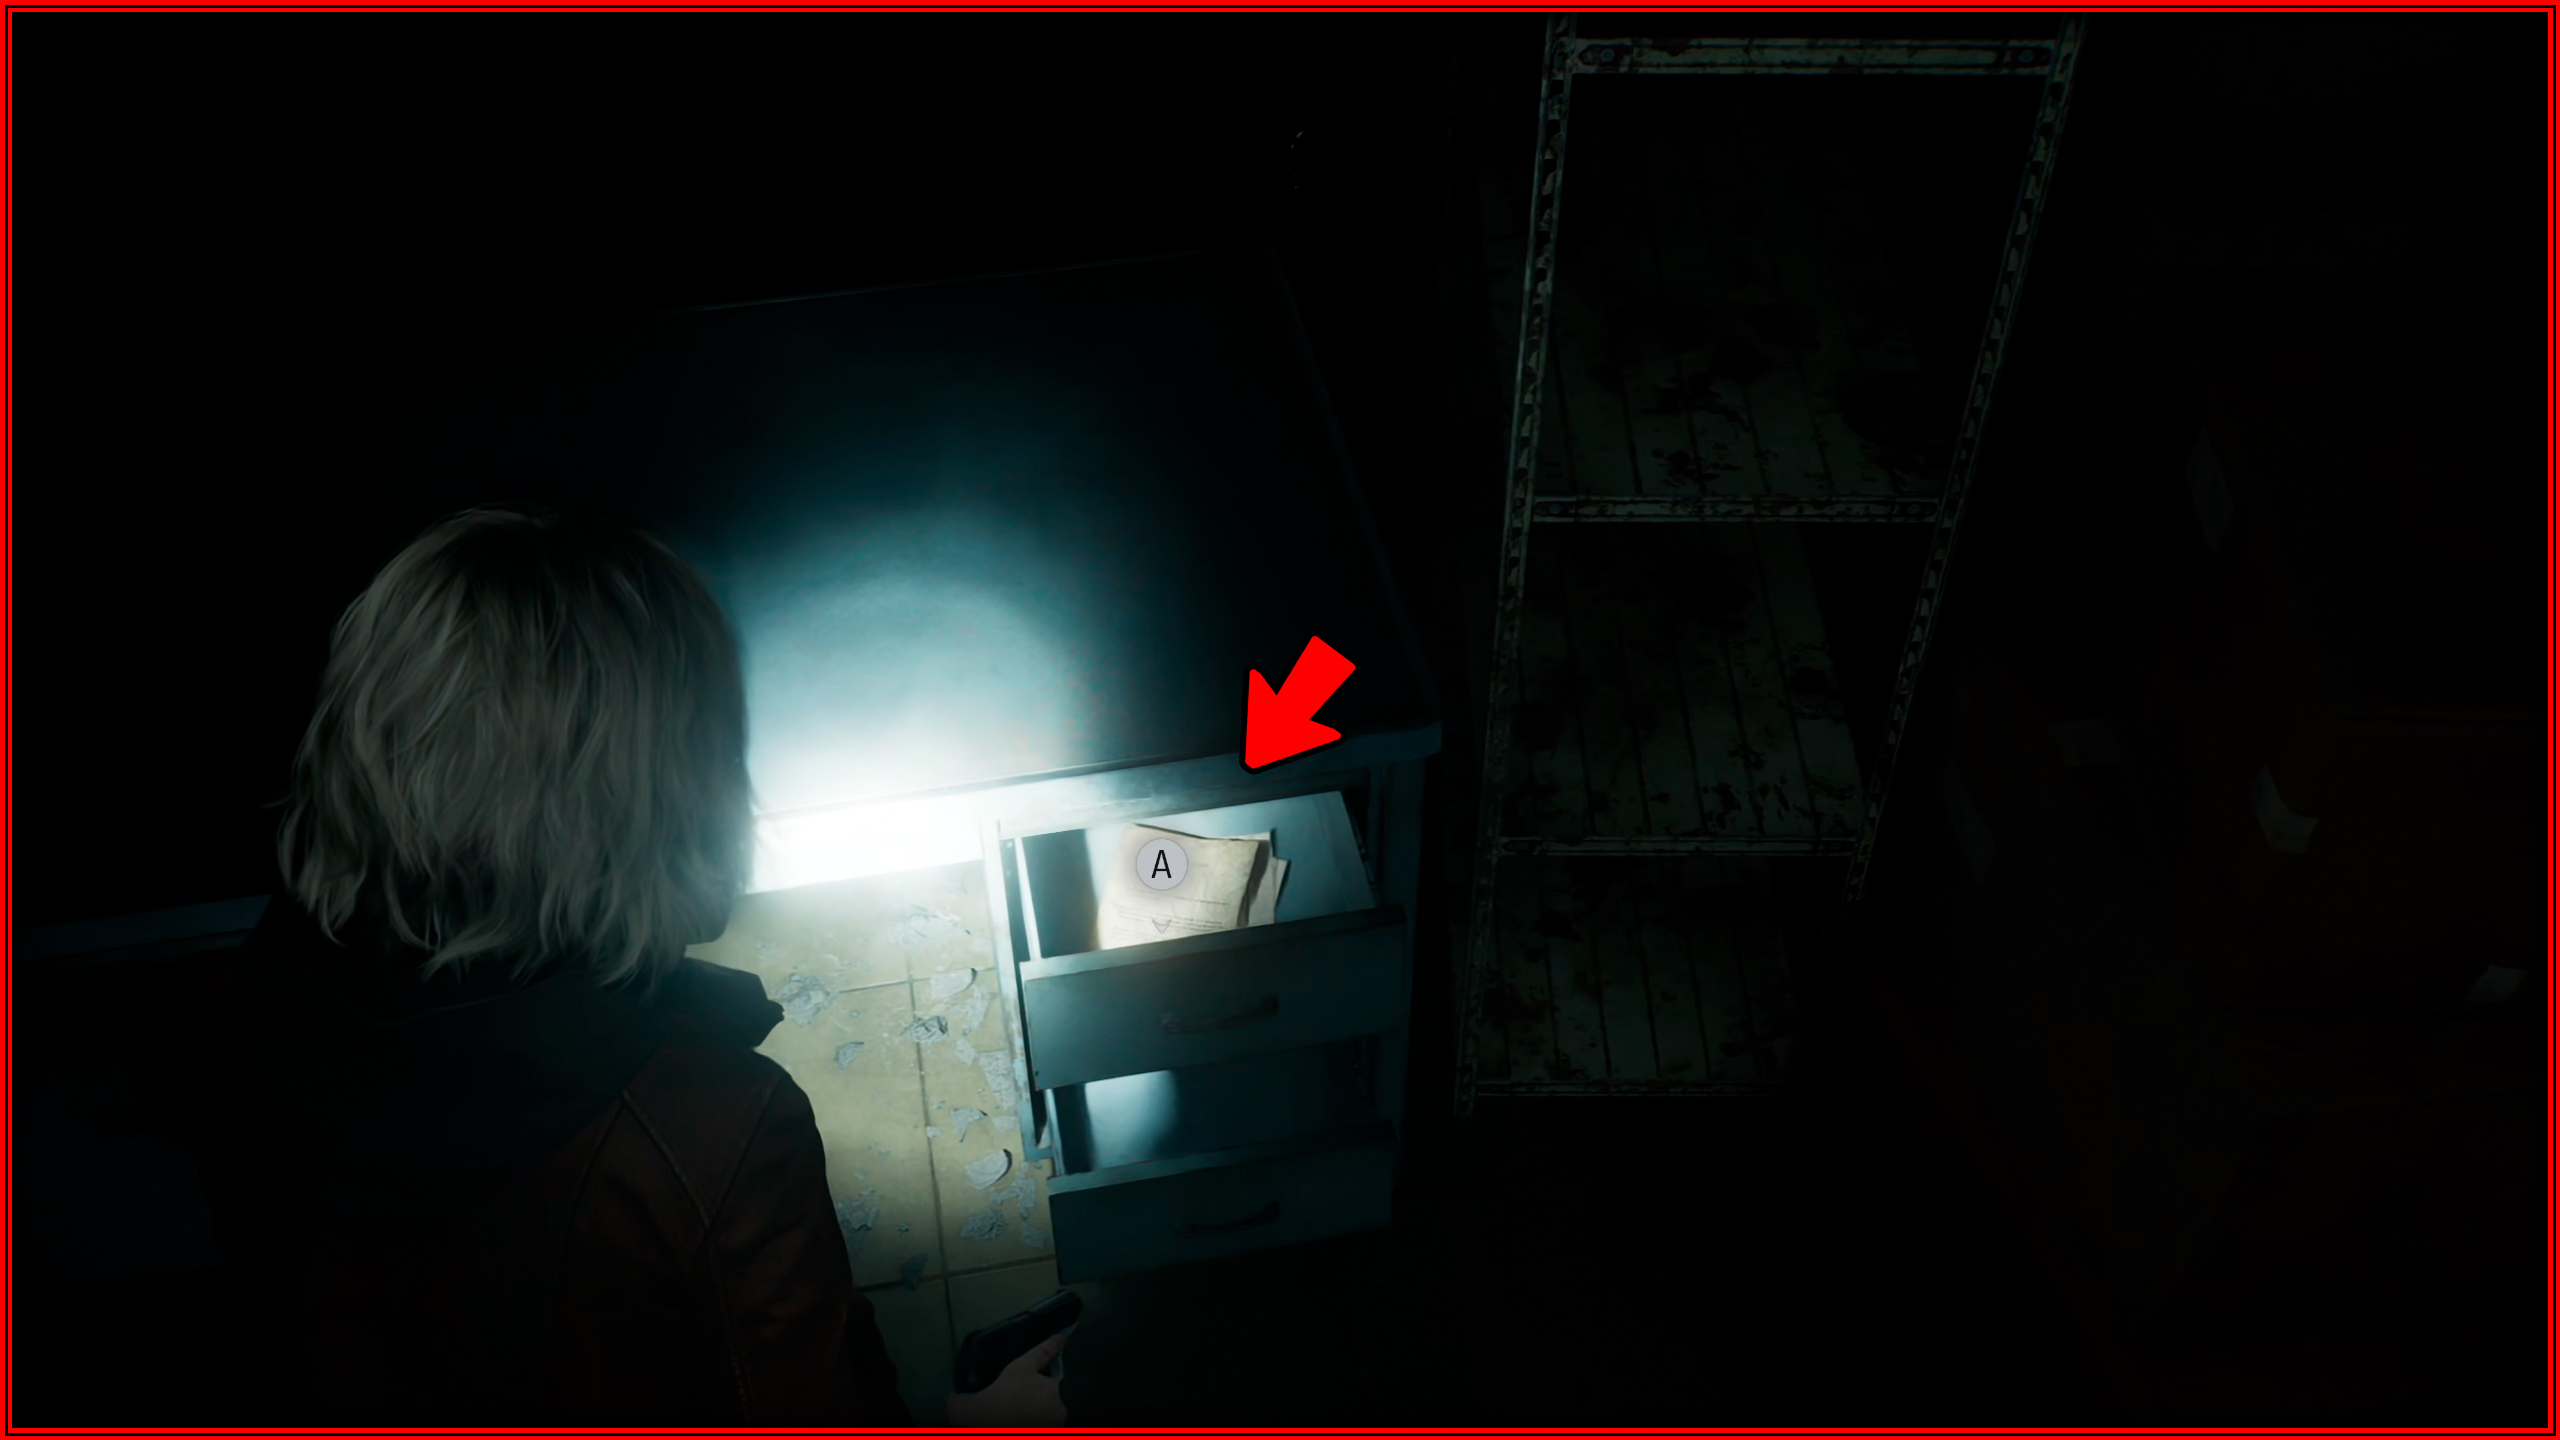
File 4/75 – Notice of Closure
Head behind the reception desk and navigate the hallway leading into the backroom. Once there, open the blue drawer.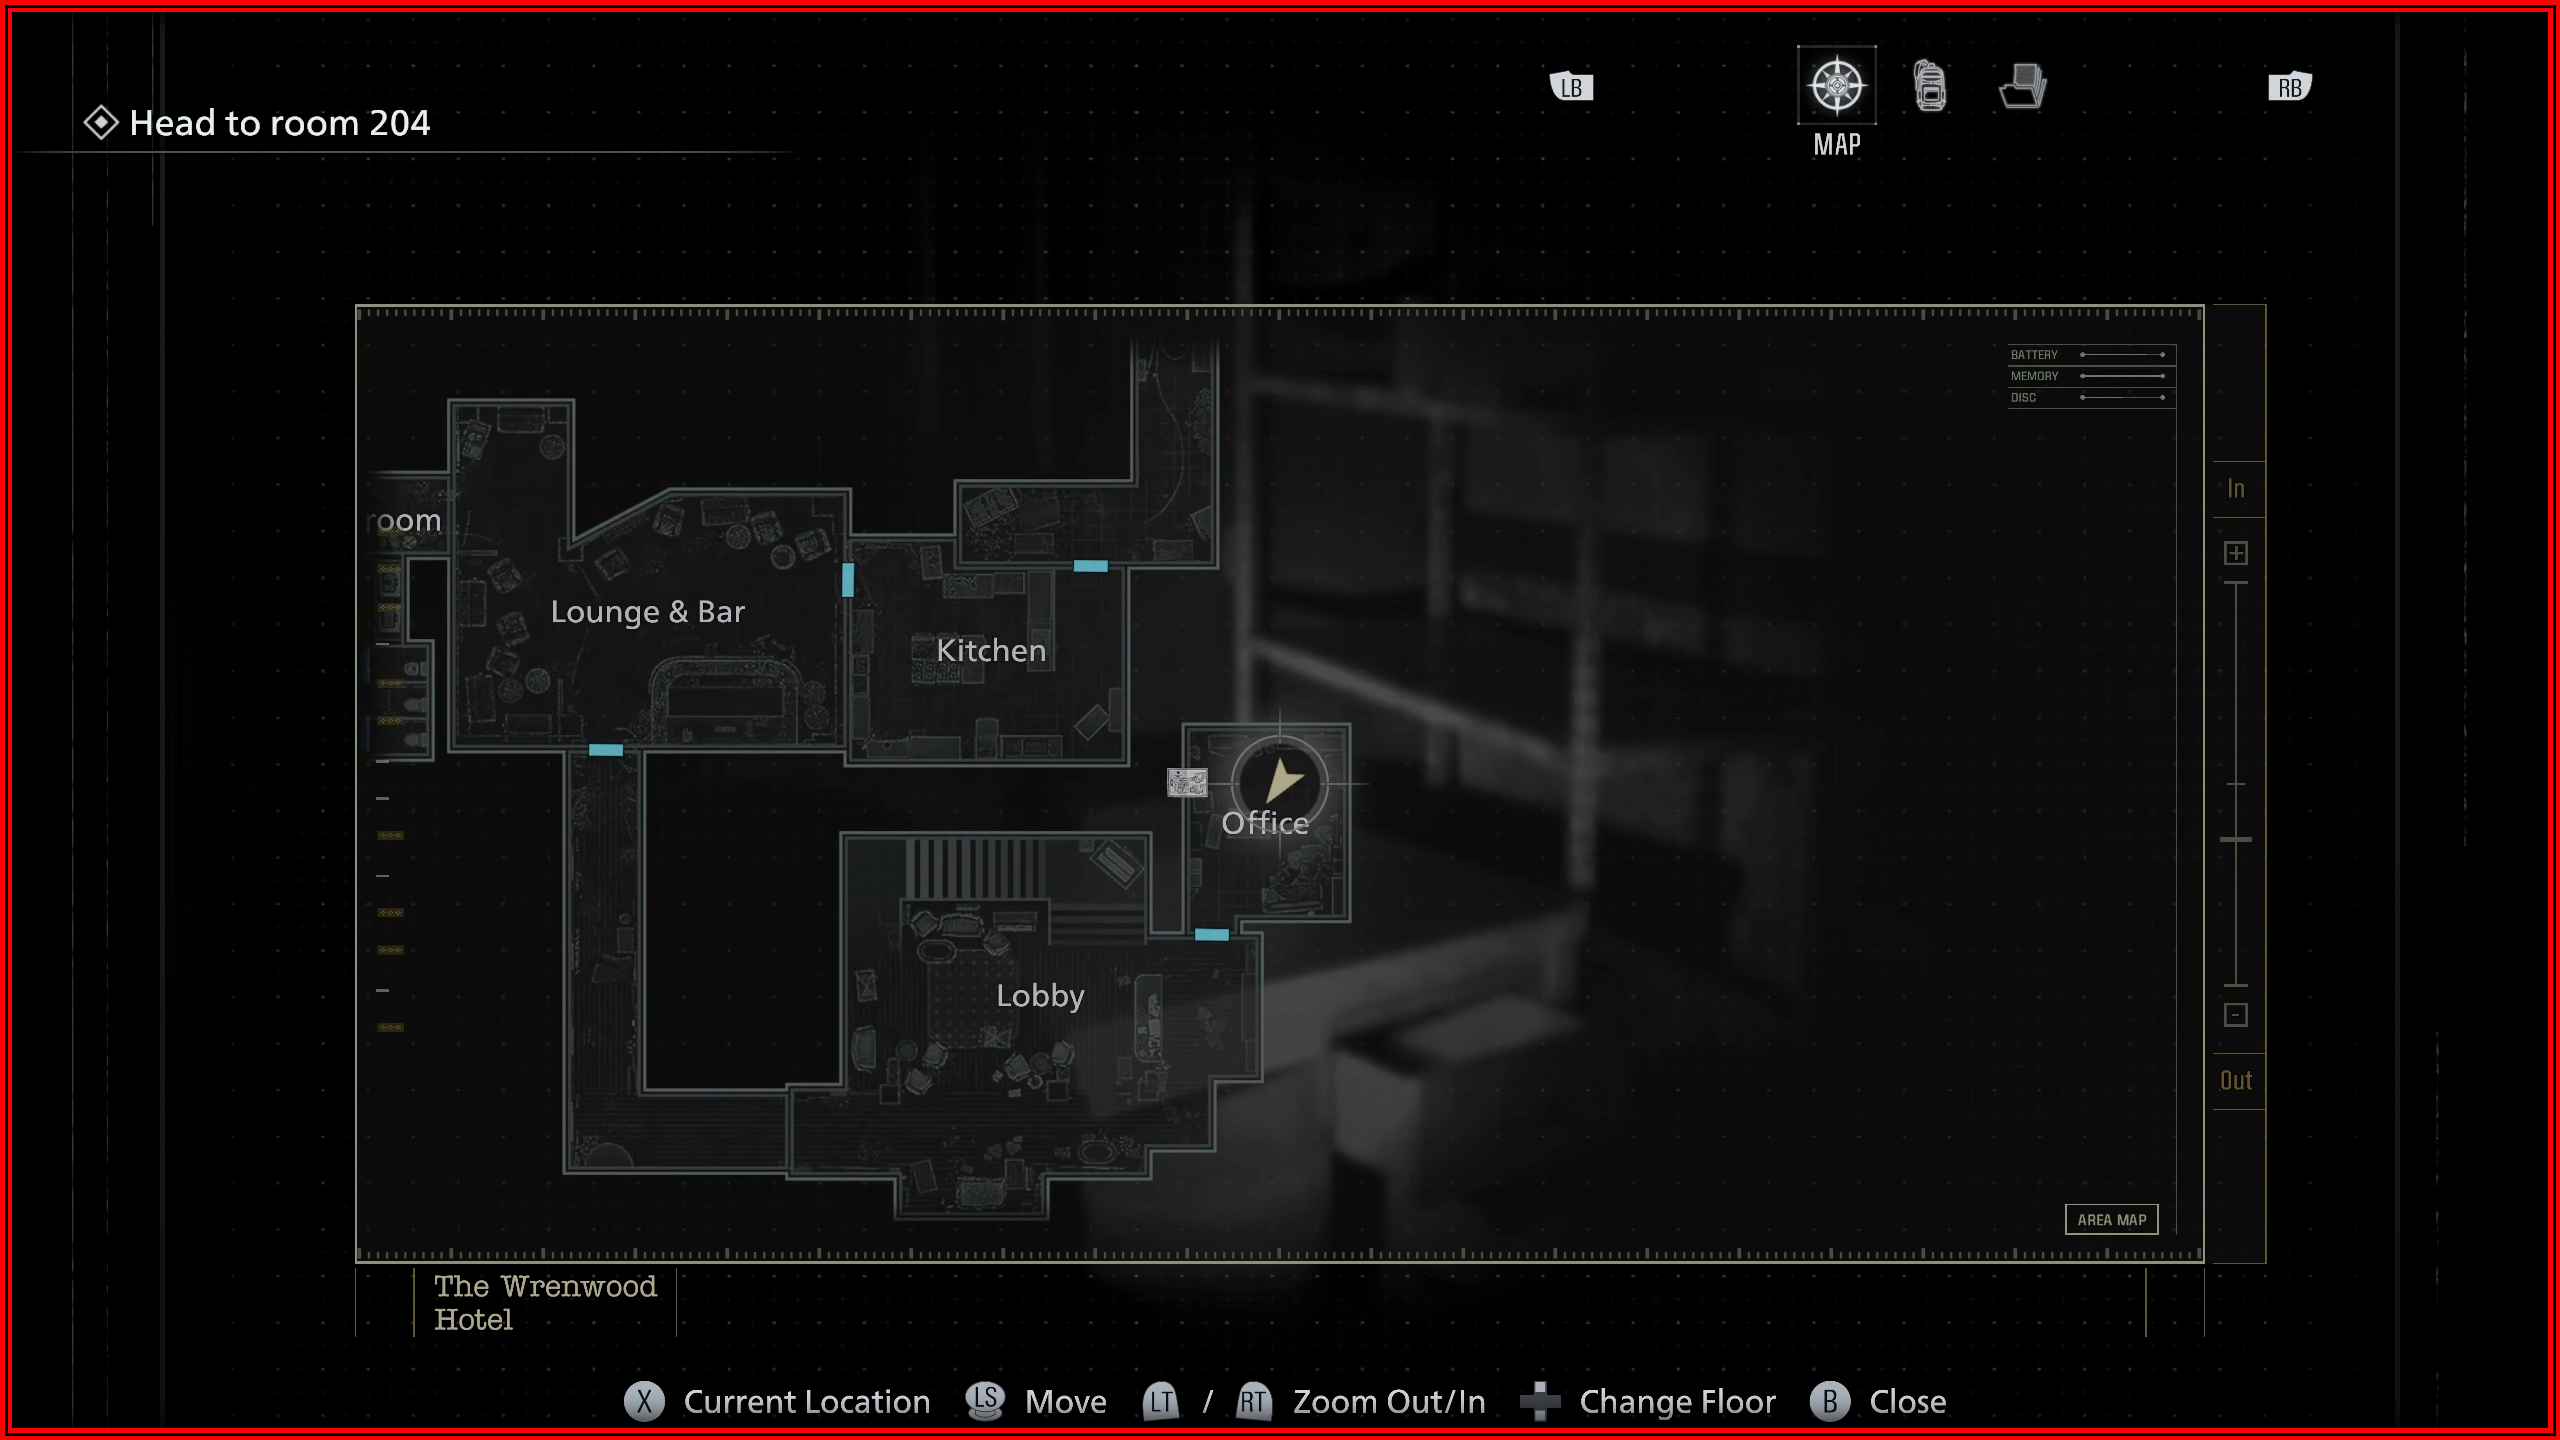
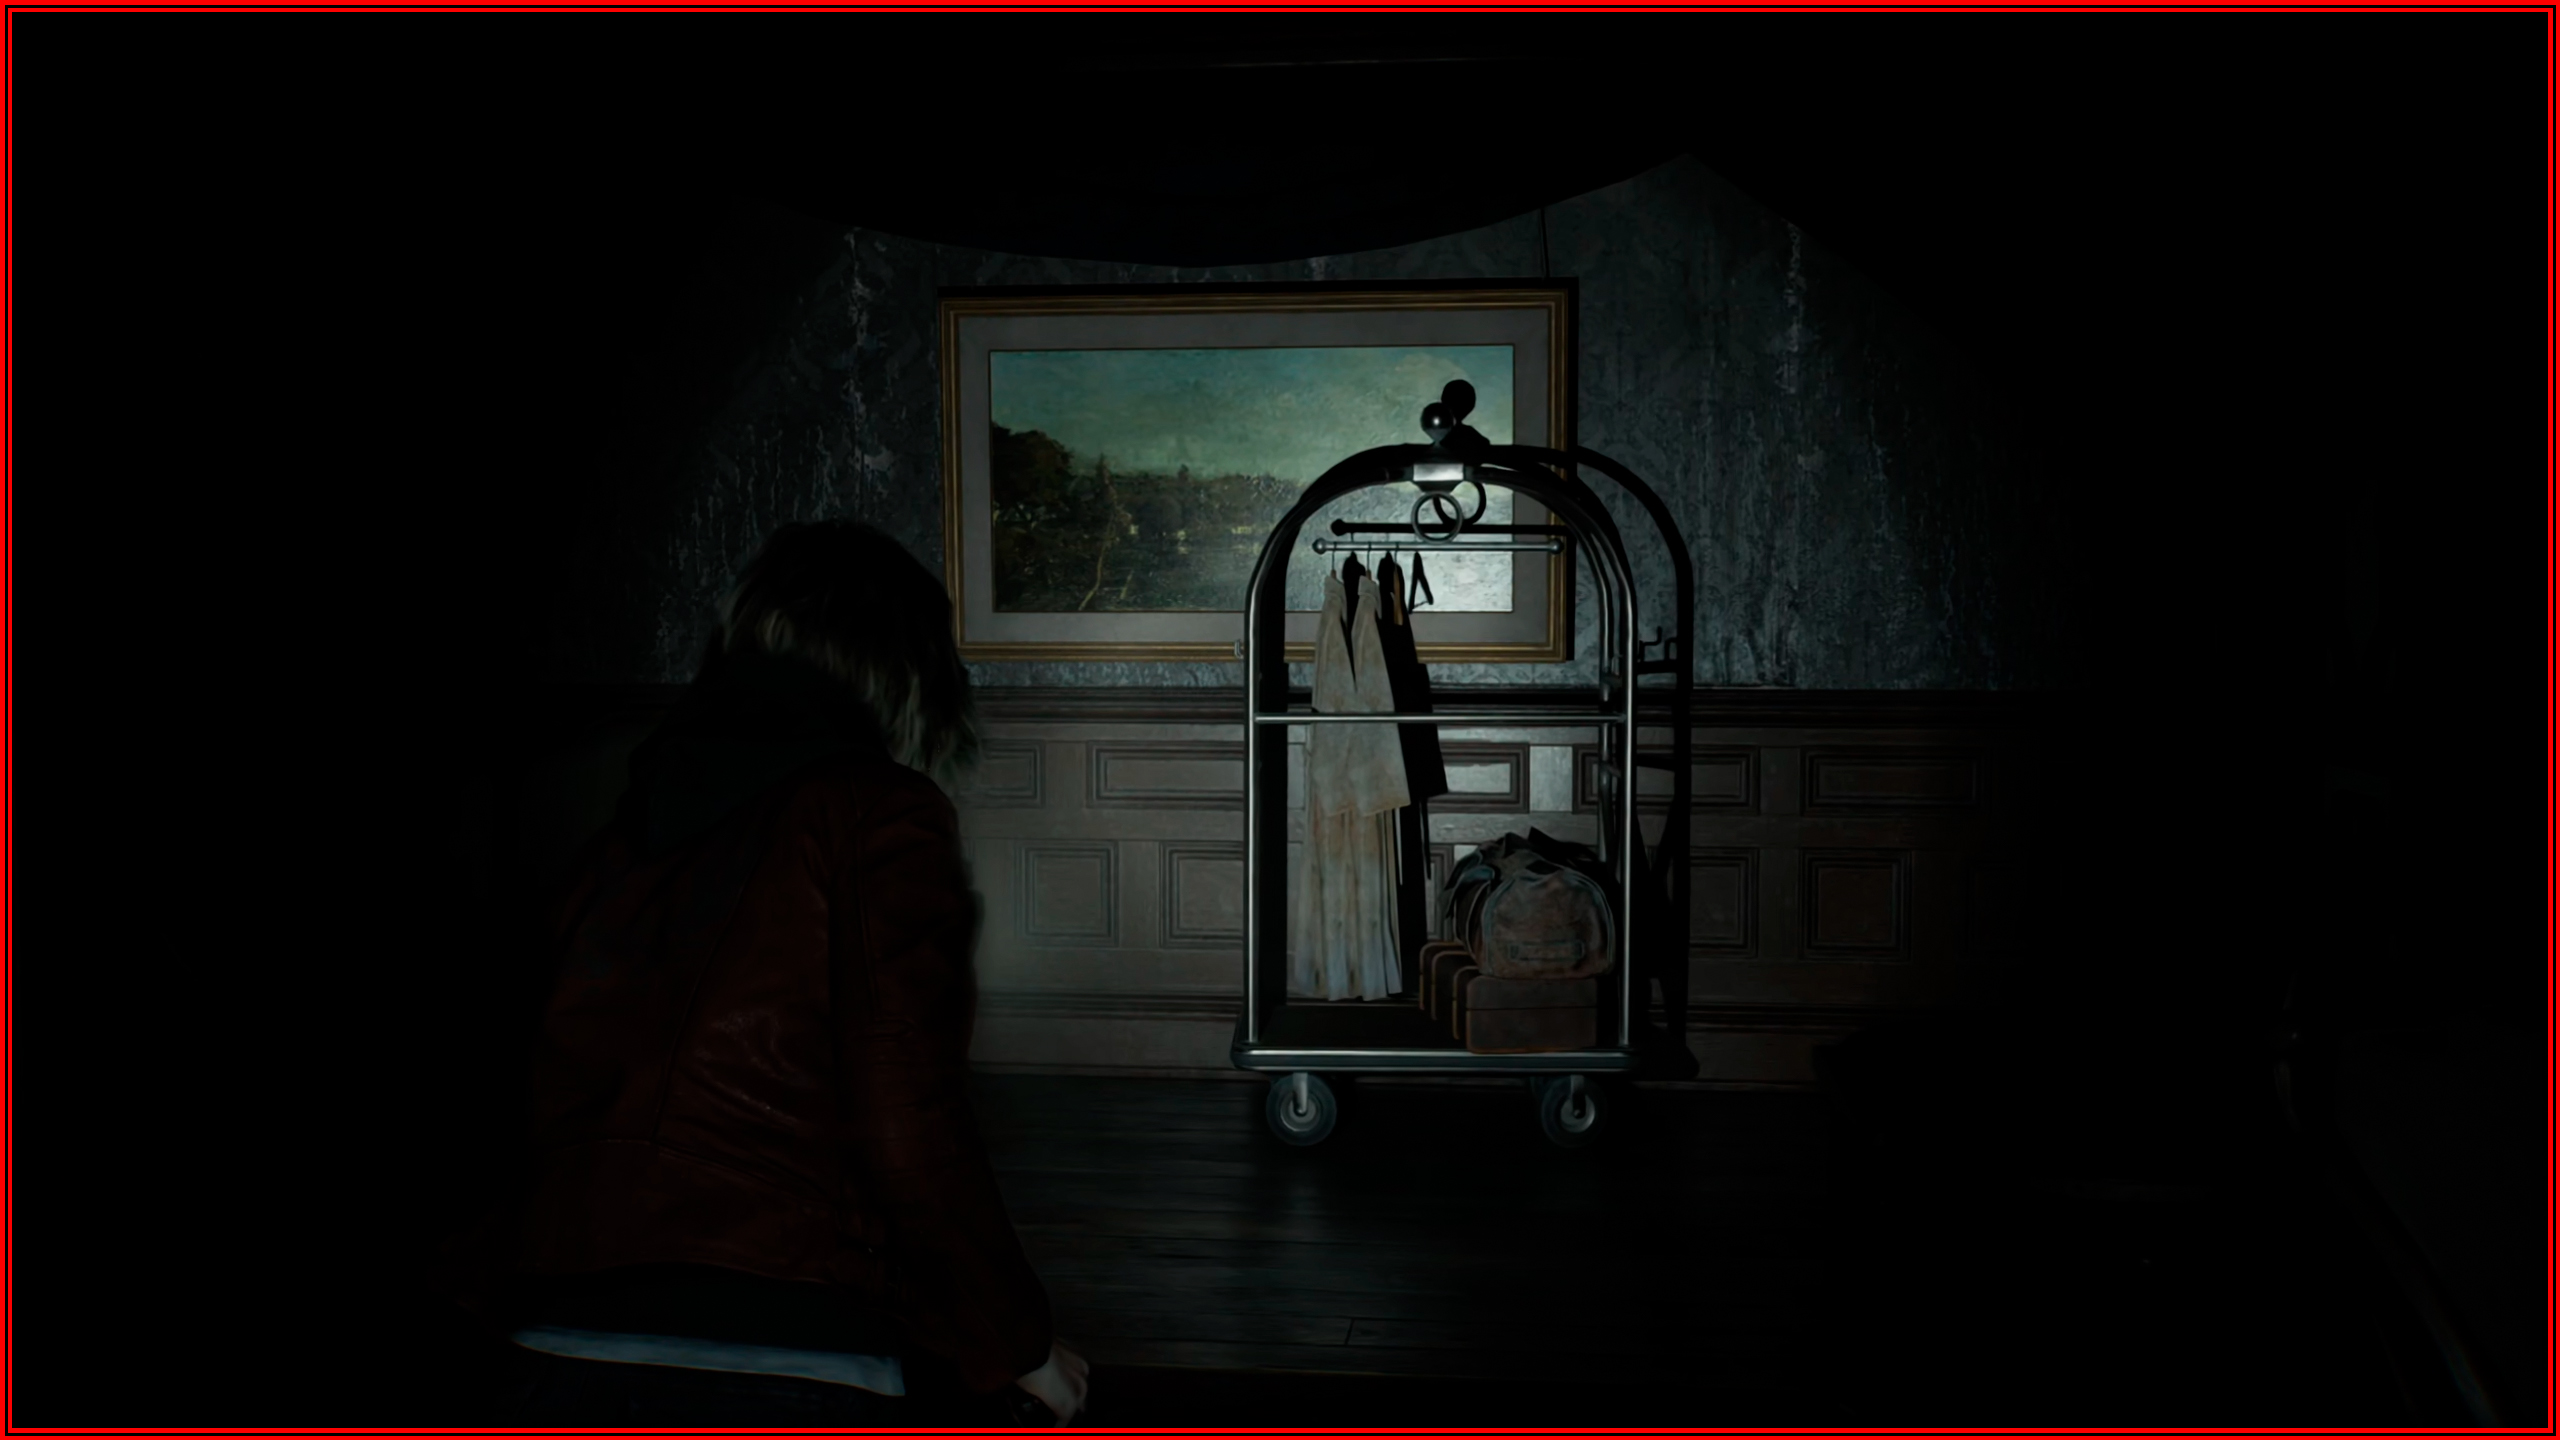
File 5/75 – Alyssa’s Journal
Automatic from story, behind the painting.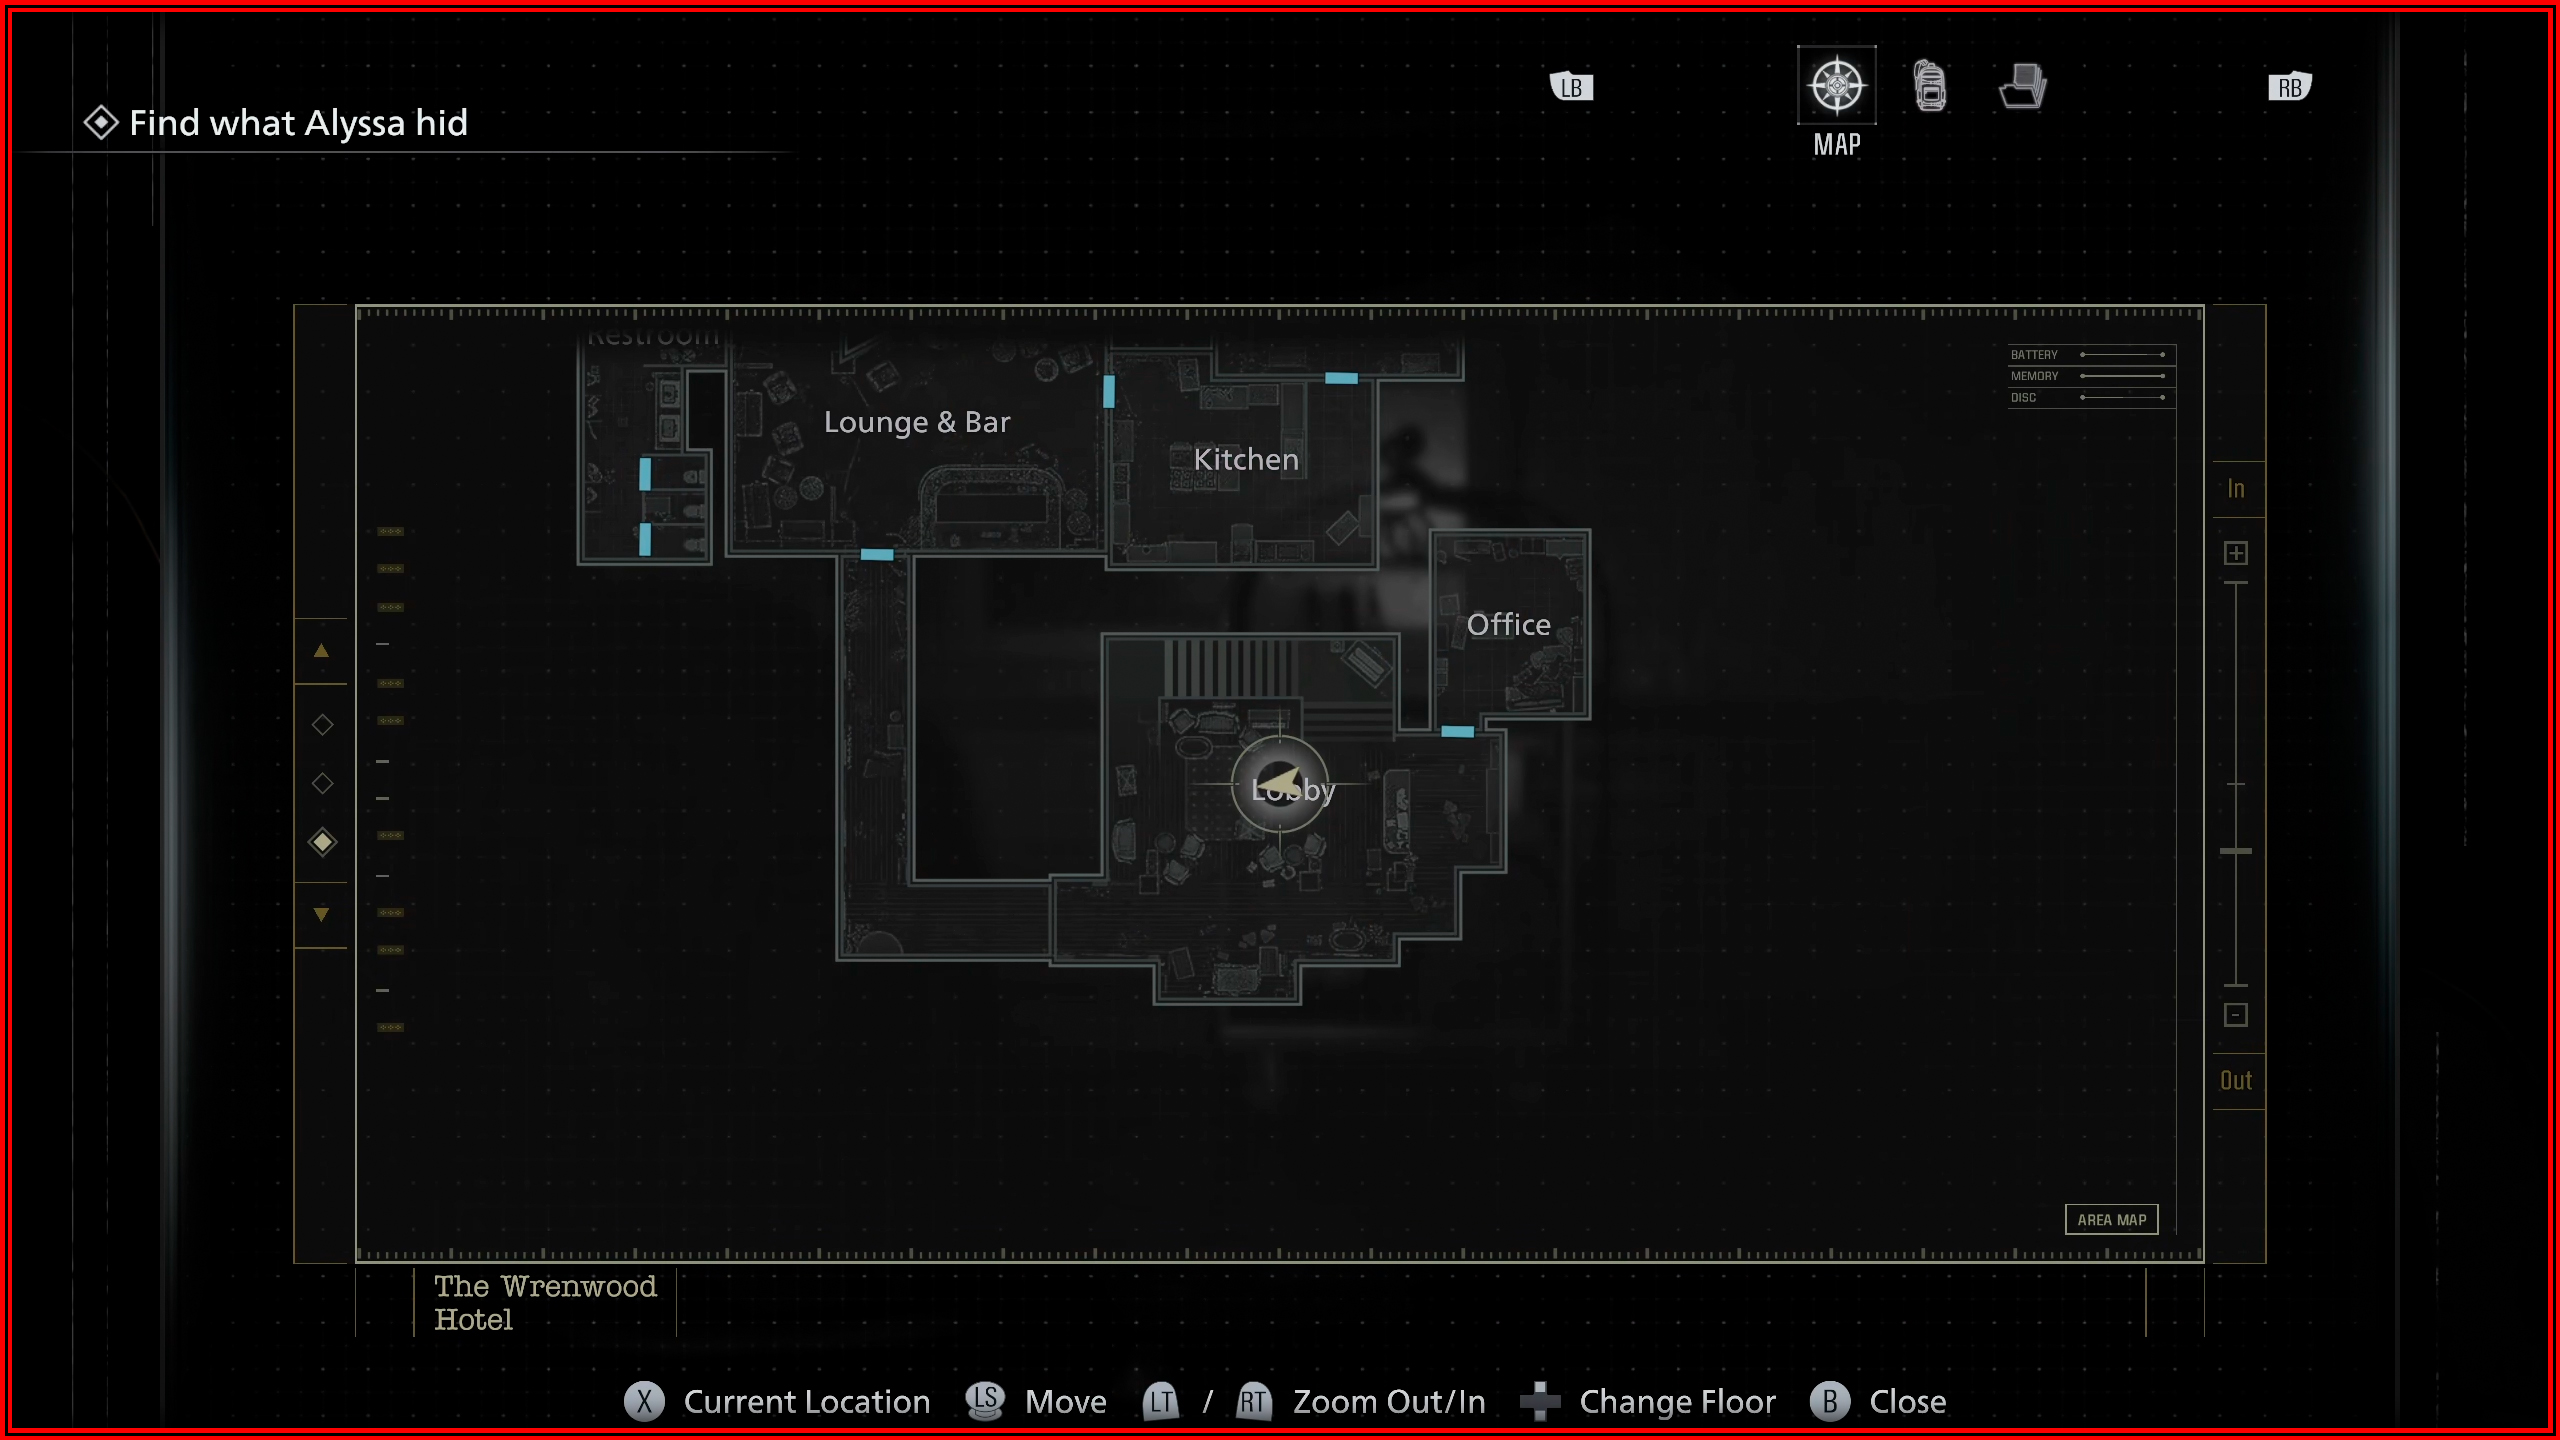
Wrenwood – Leon
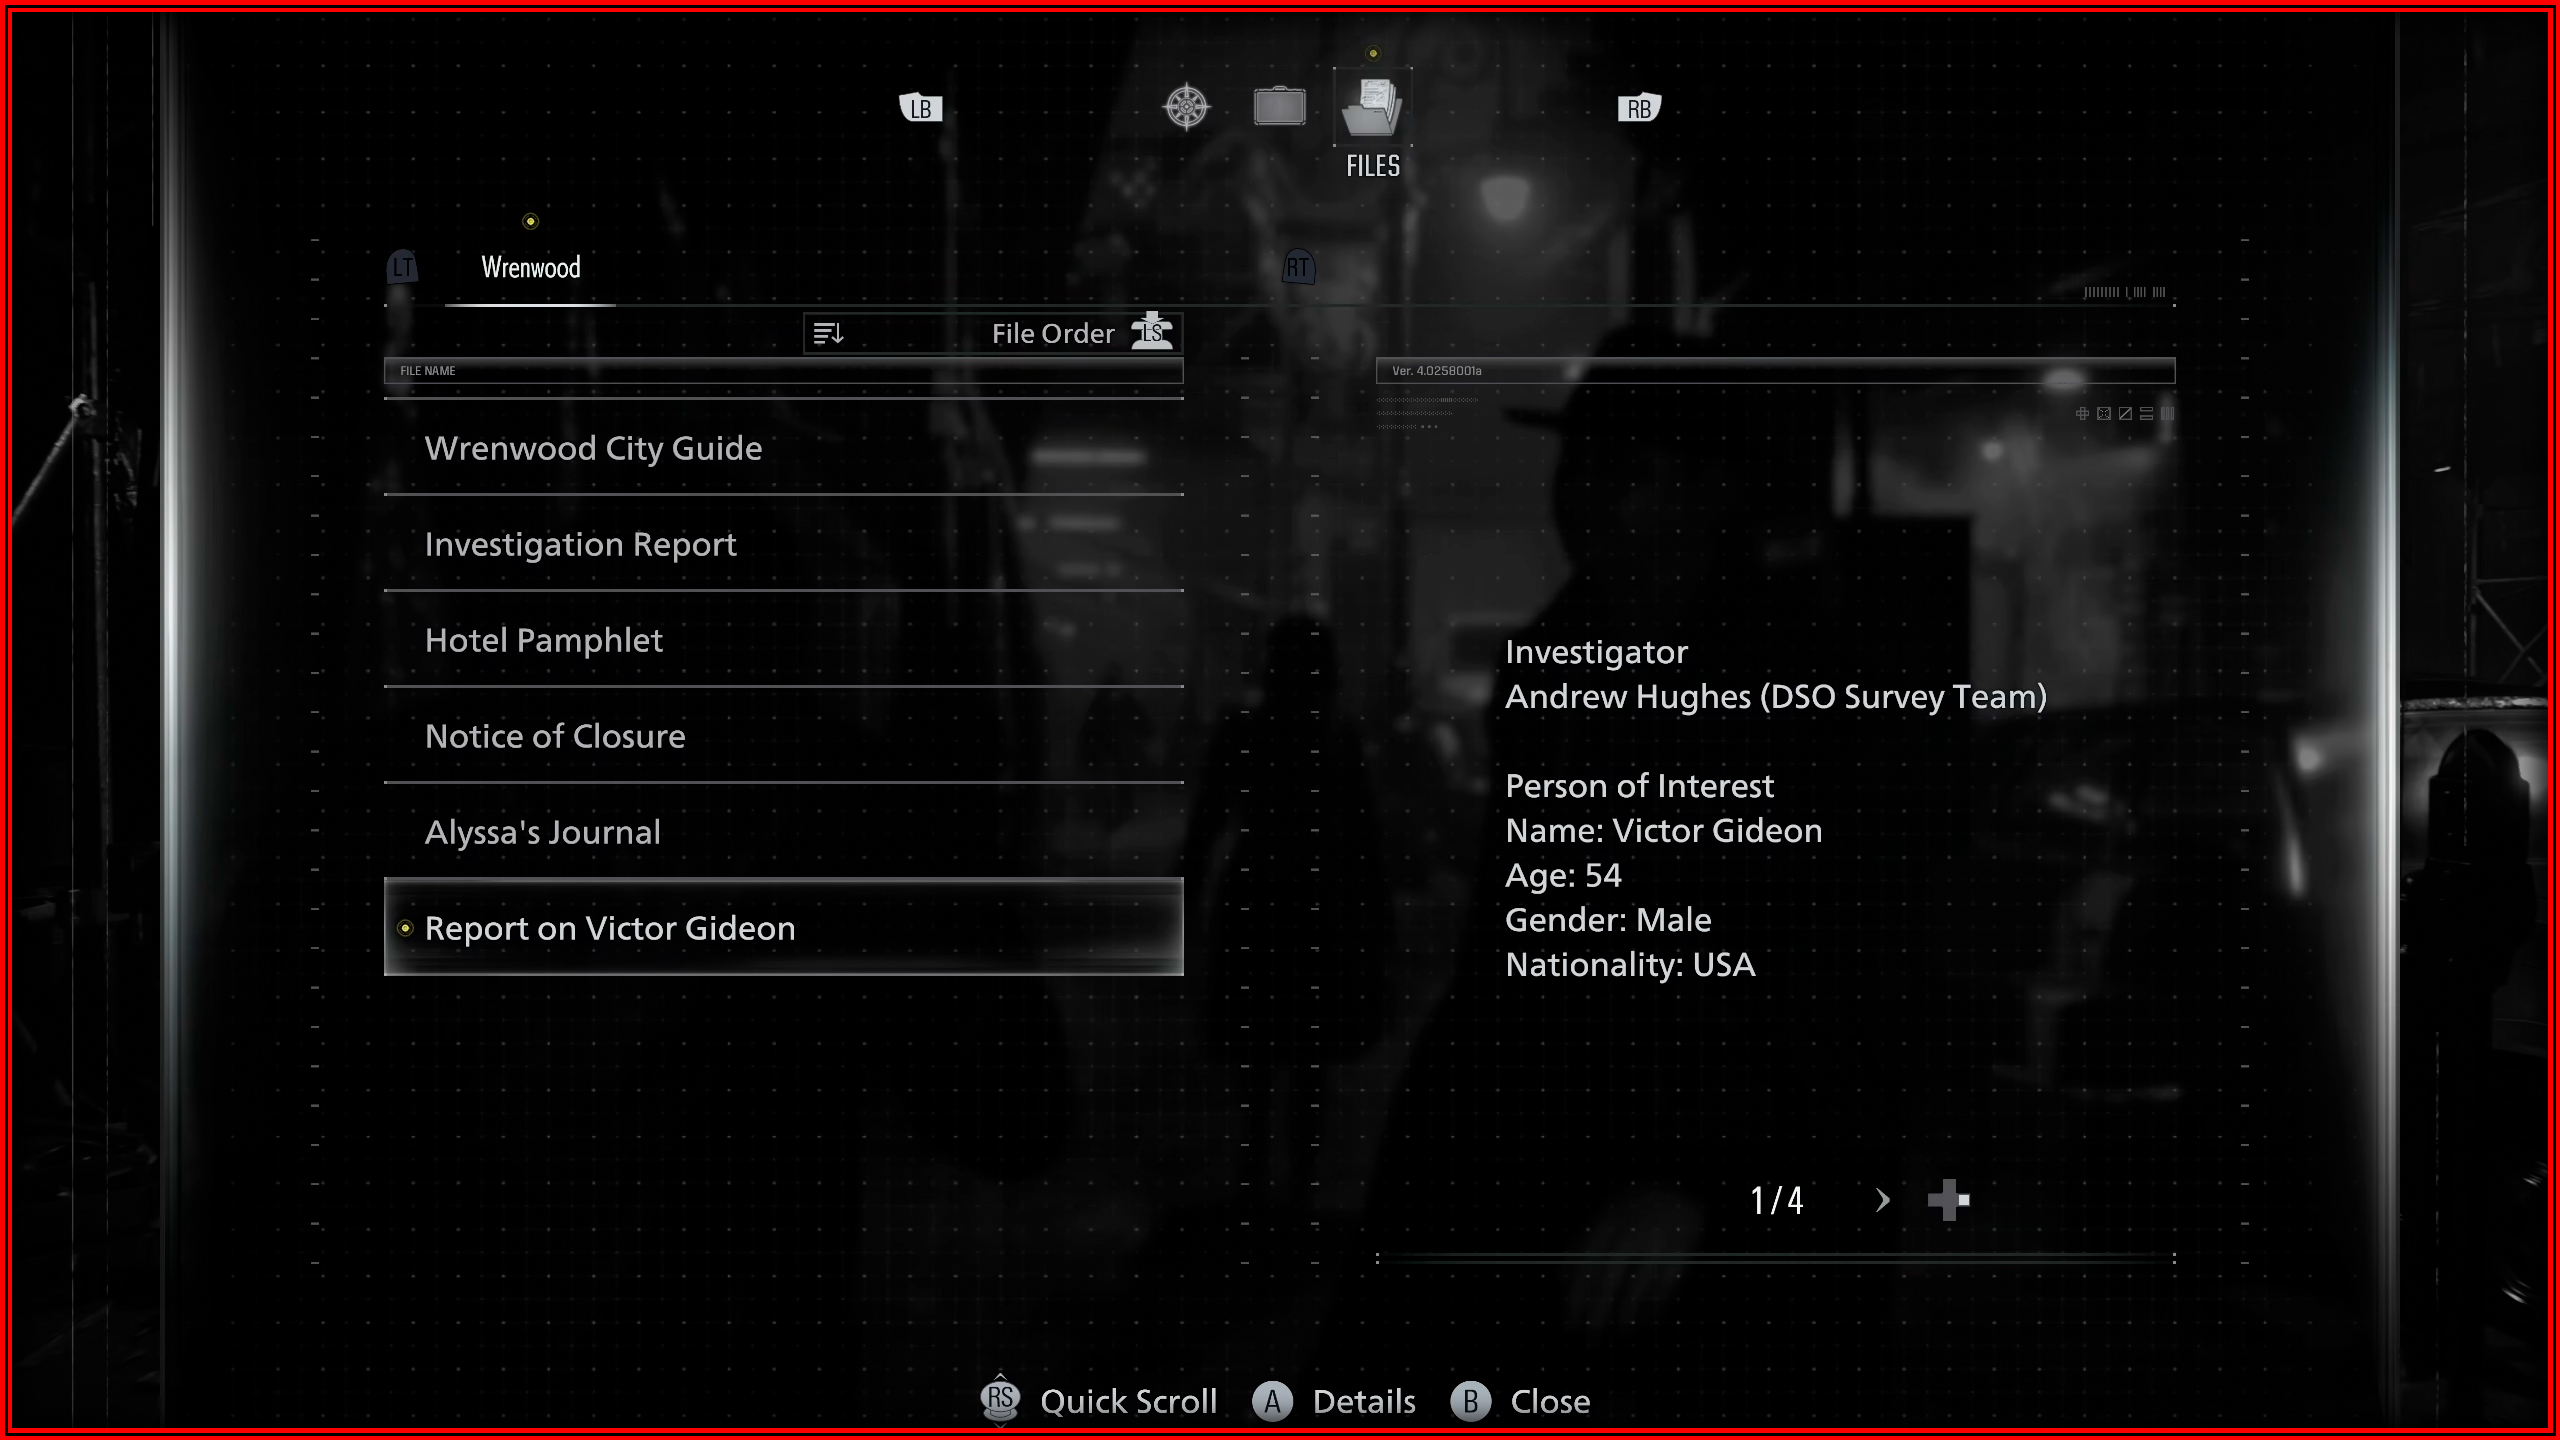
File 6/75 – Report on Victor Gideon
Automatically in your inventory when playing as Leon for the first time.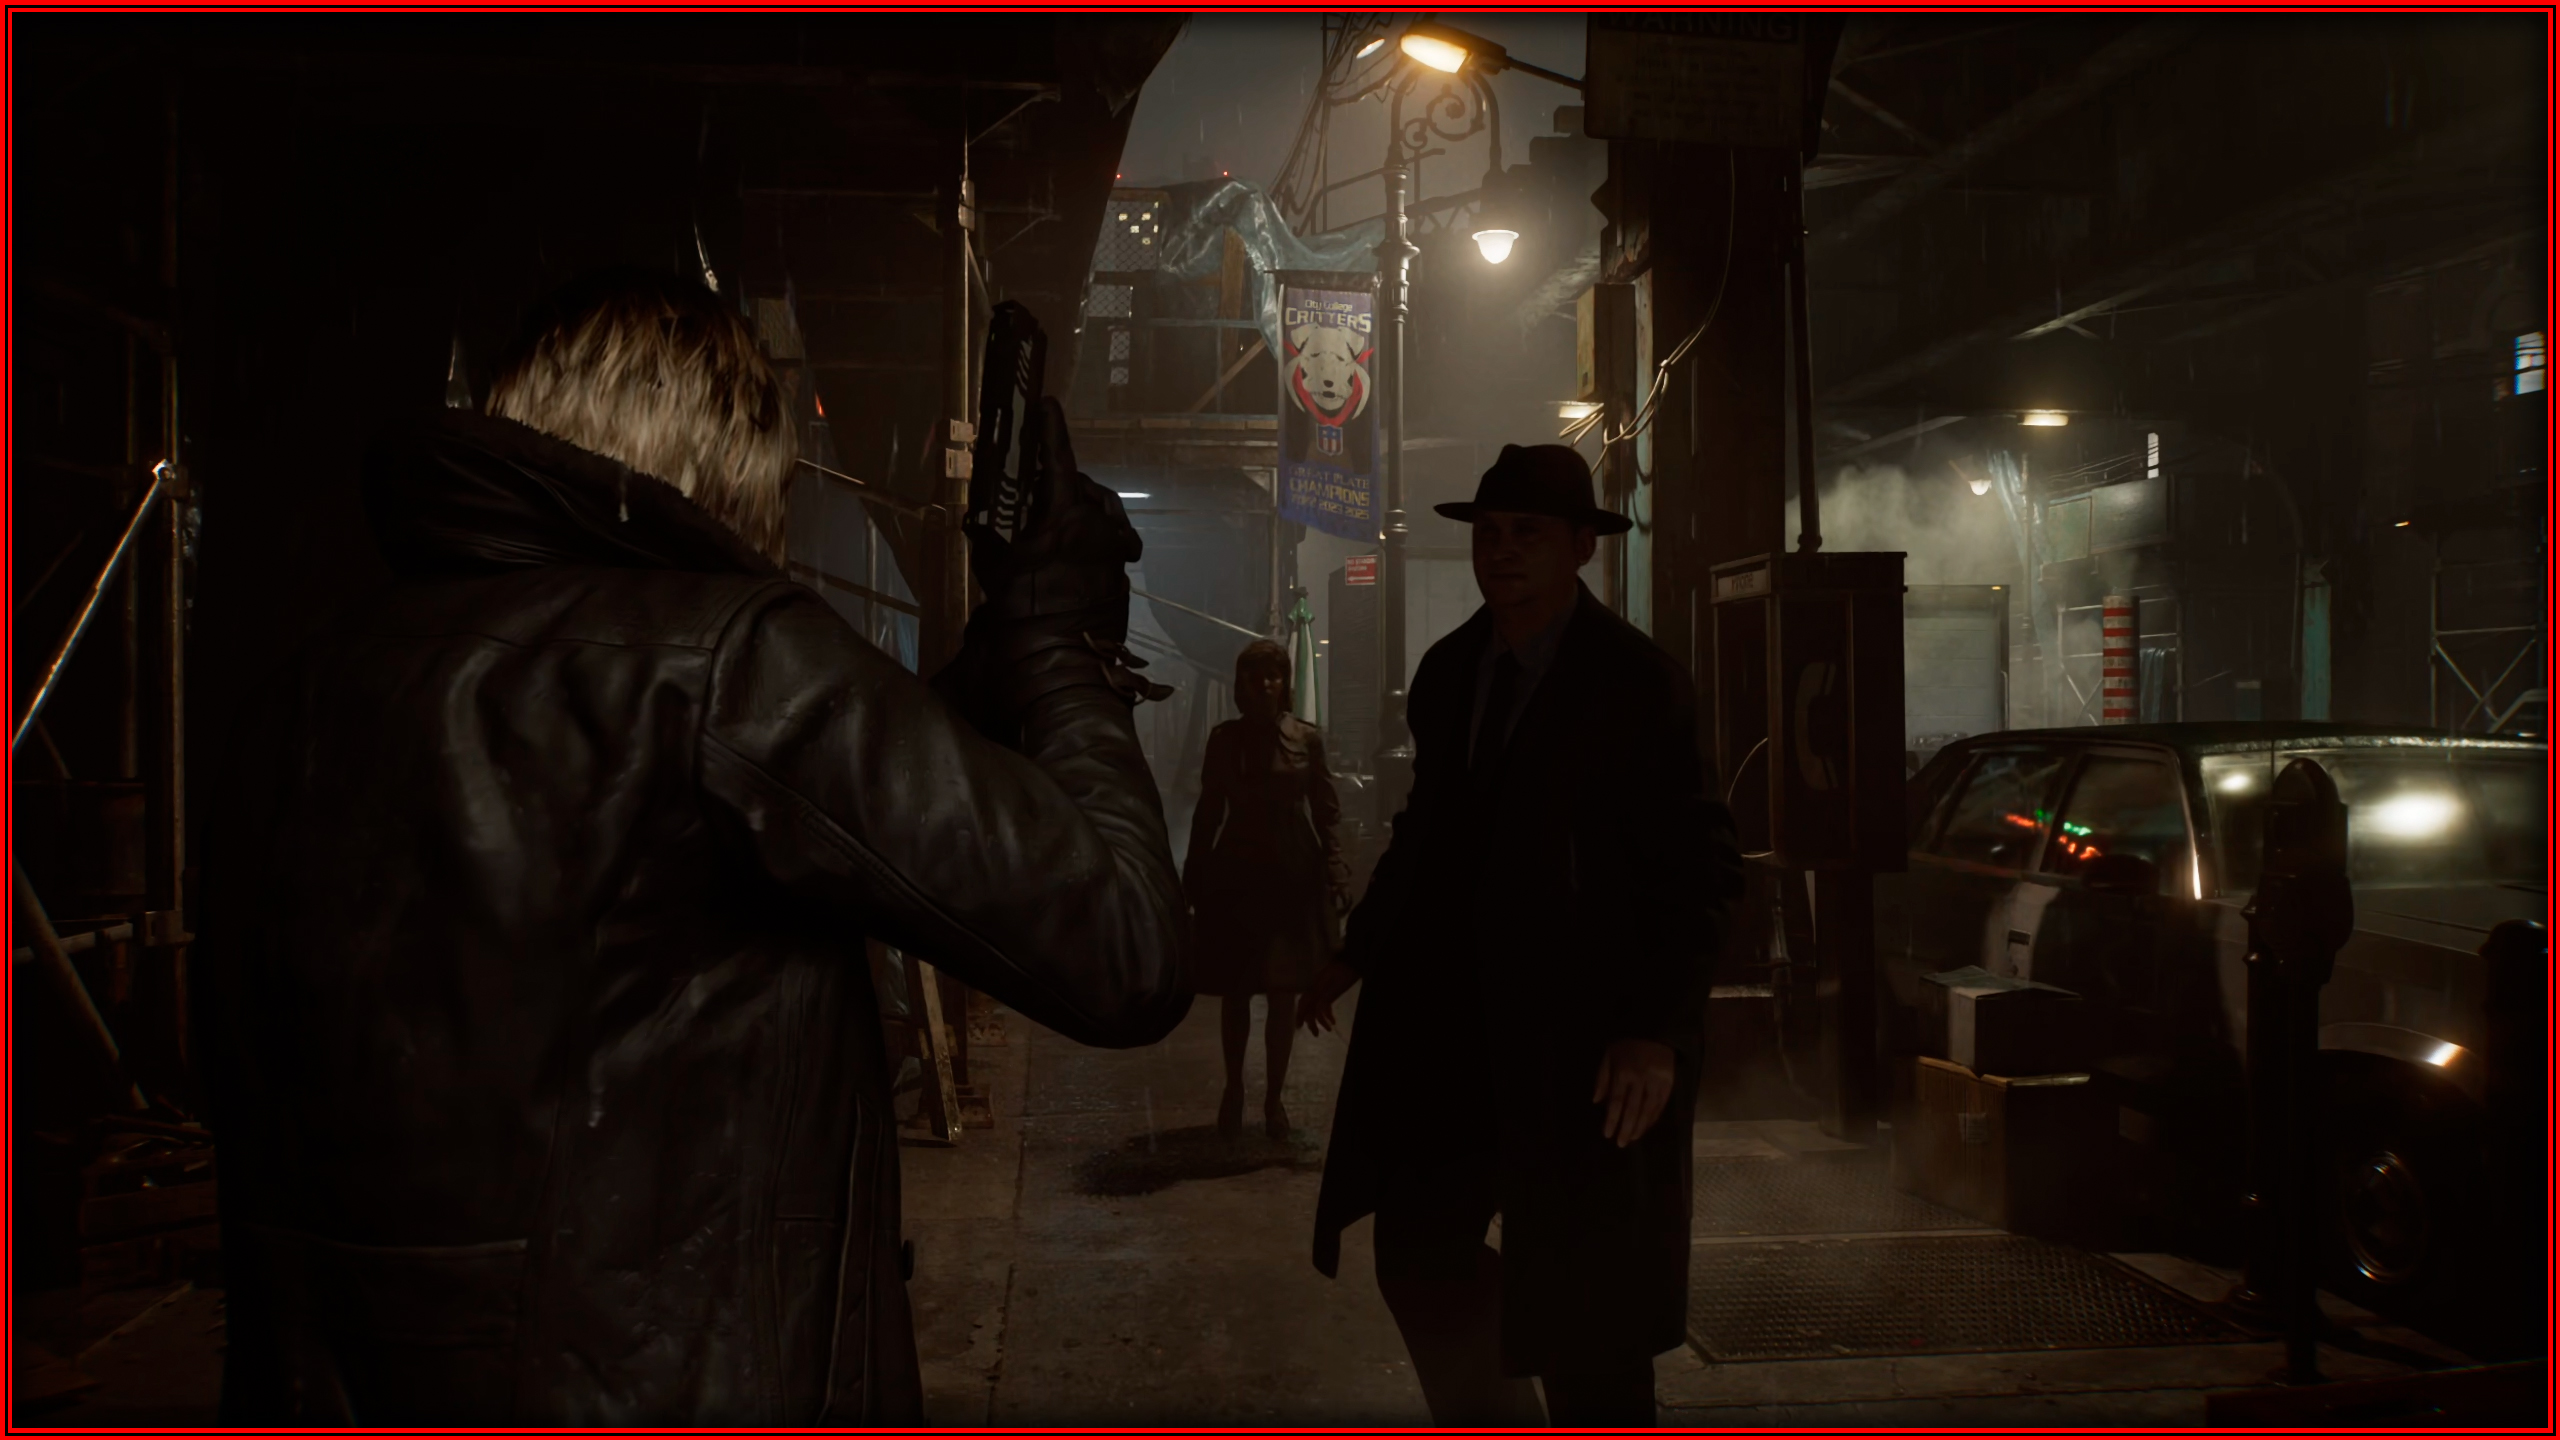
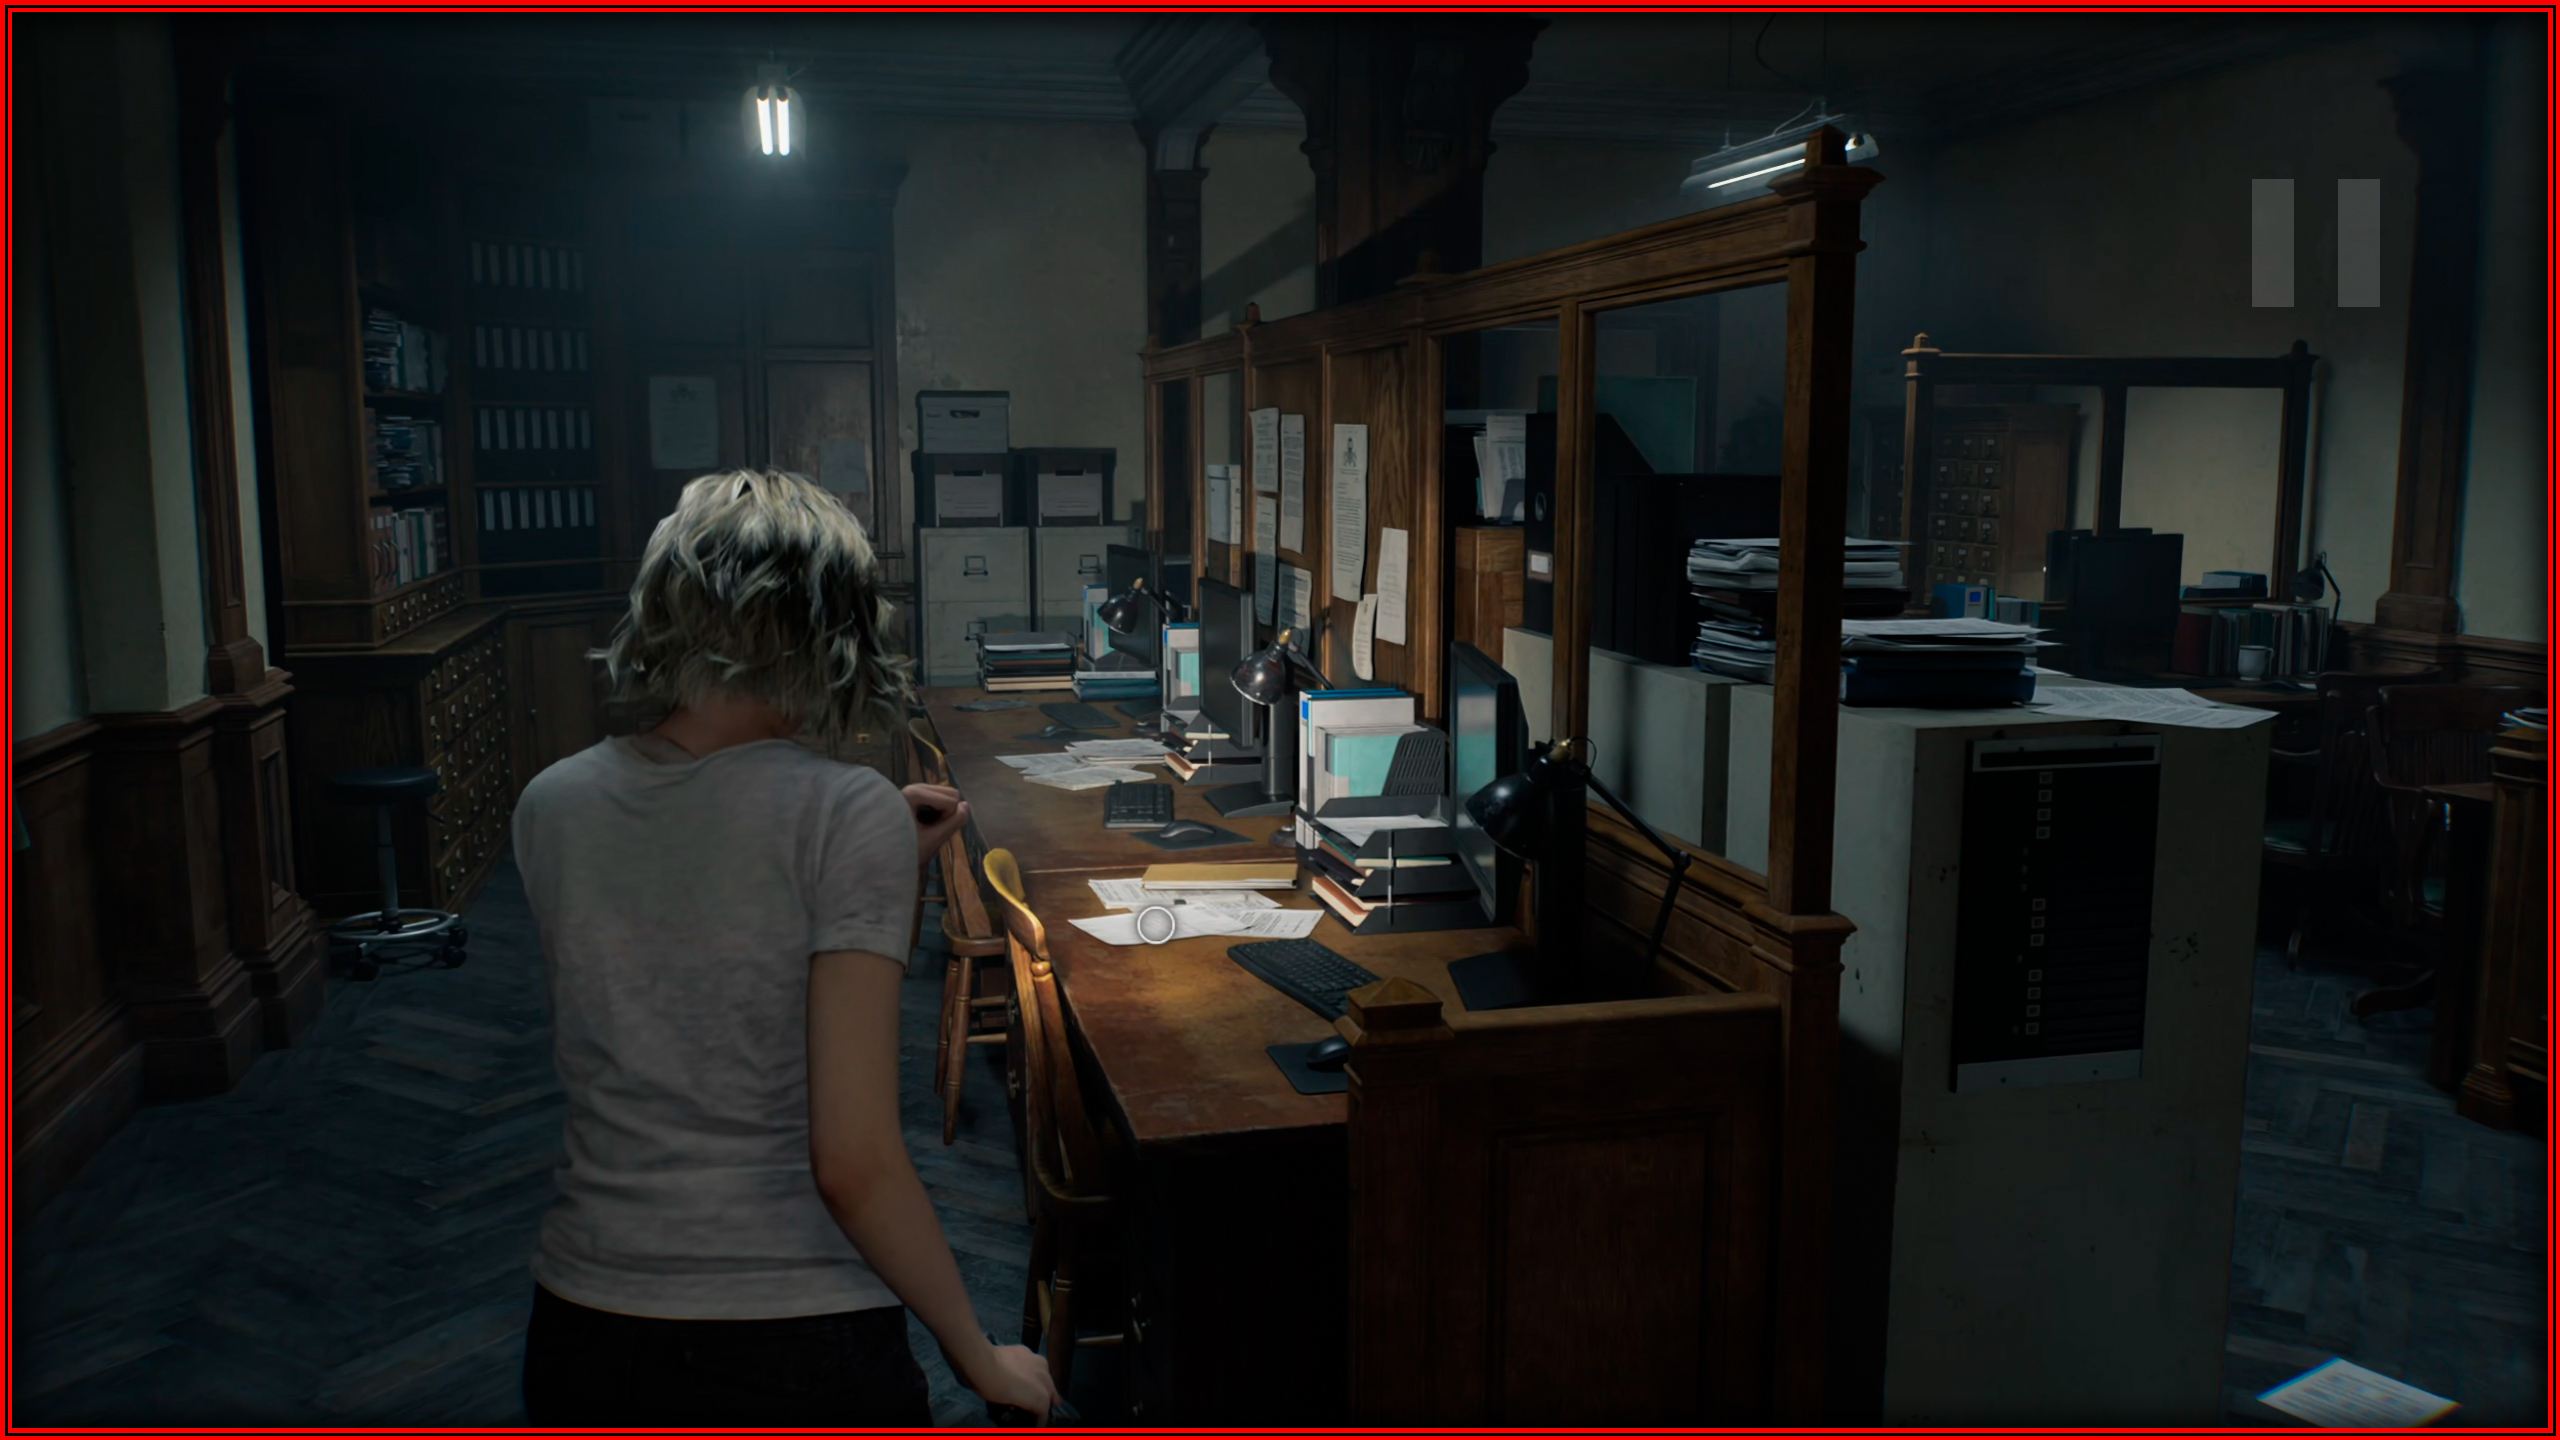
Care Center – Grace
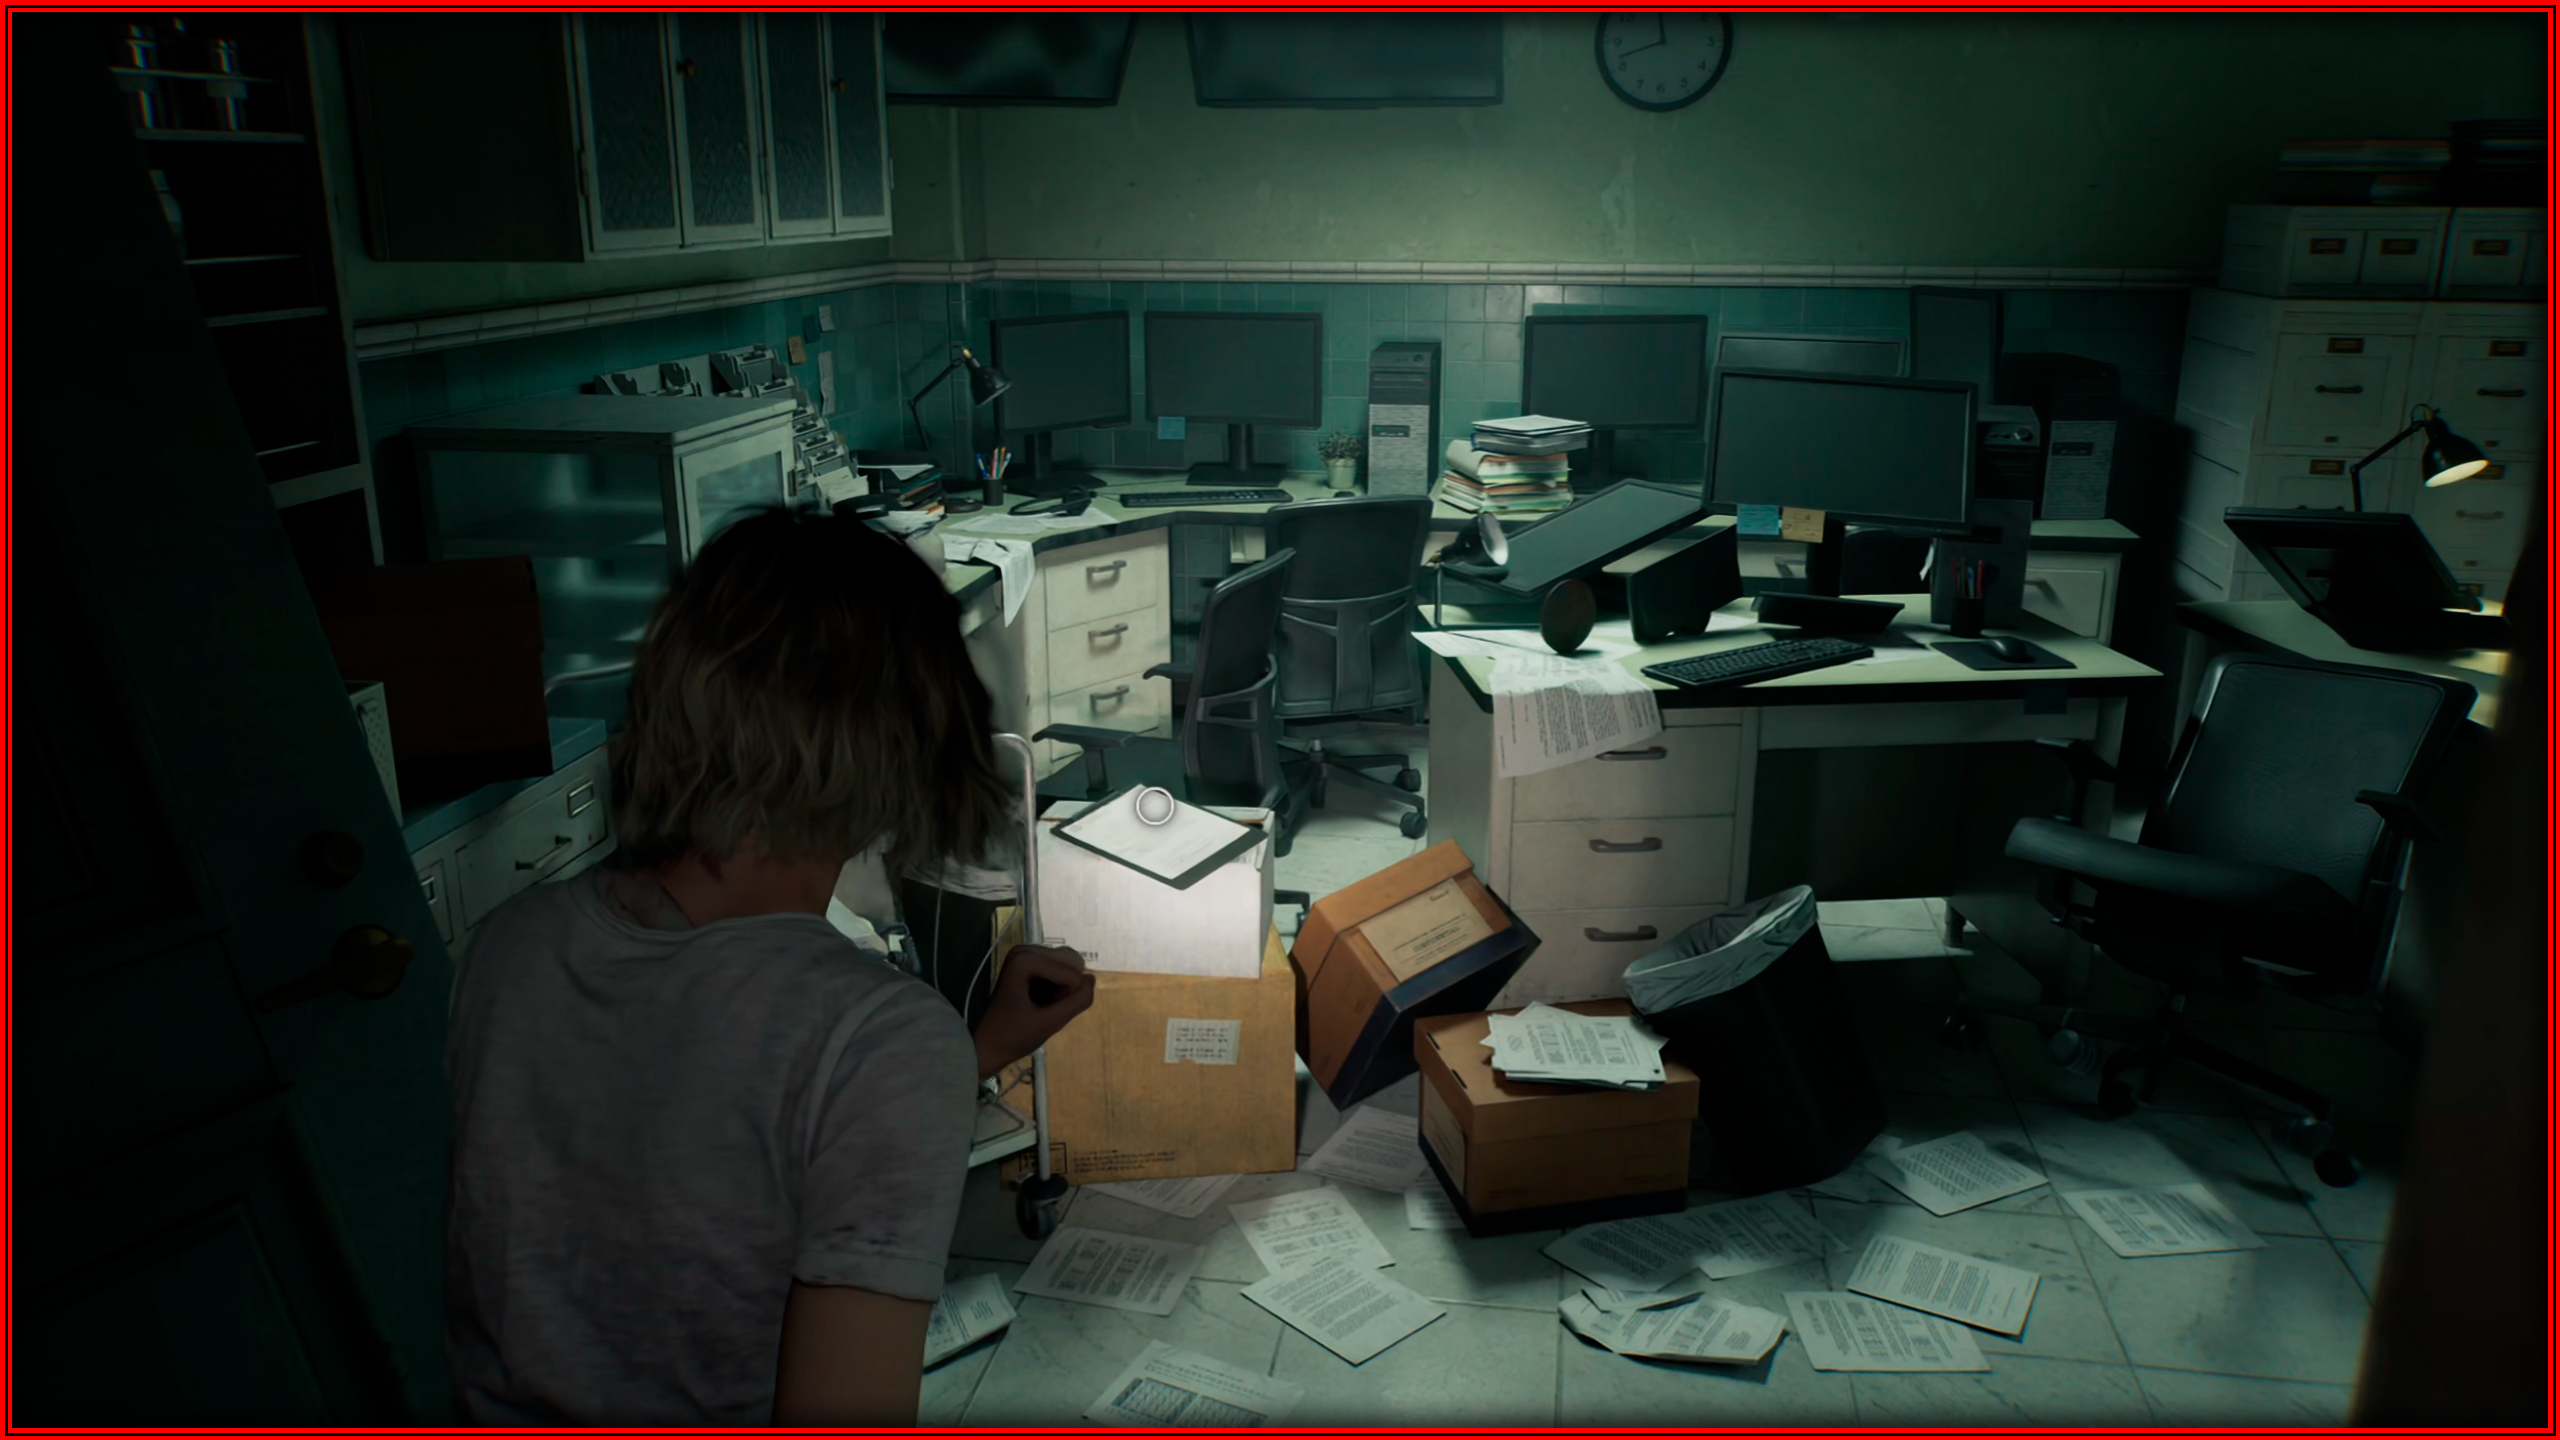
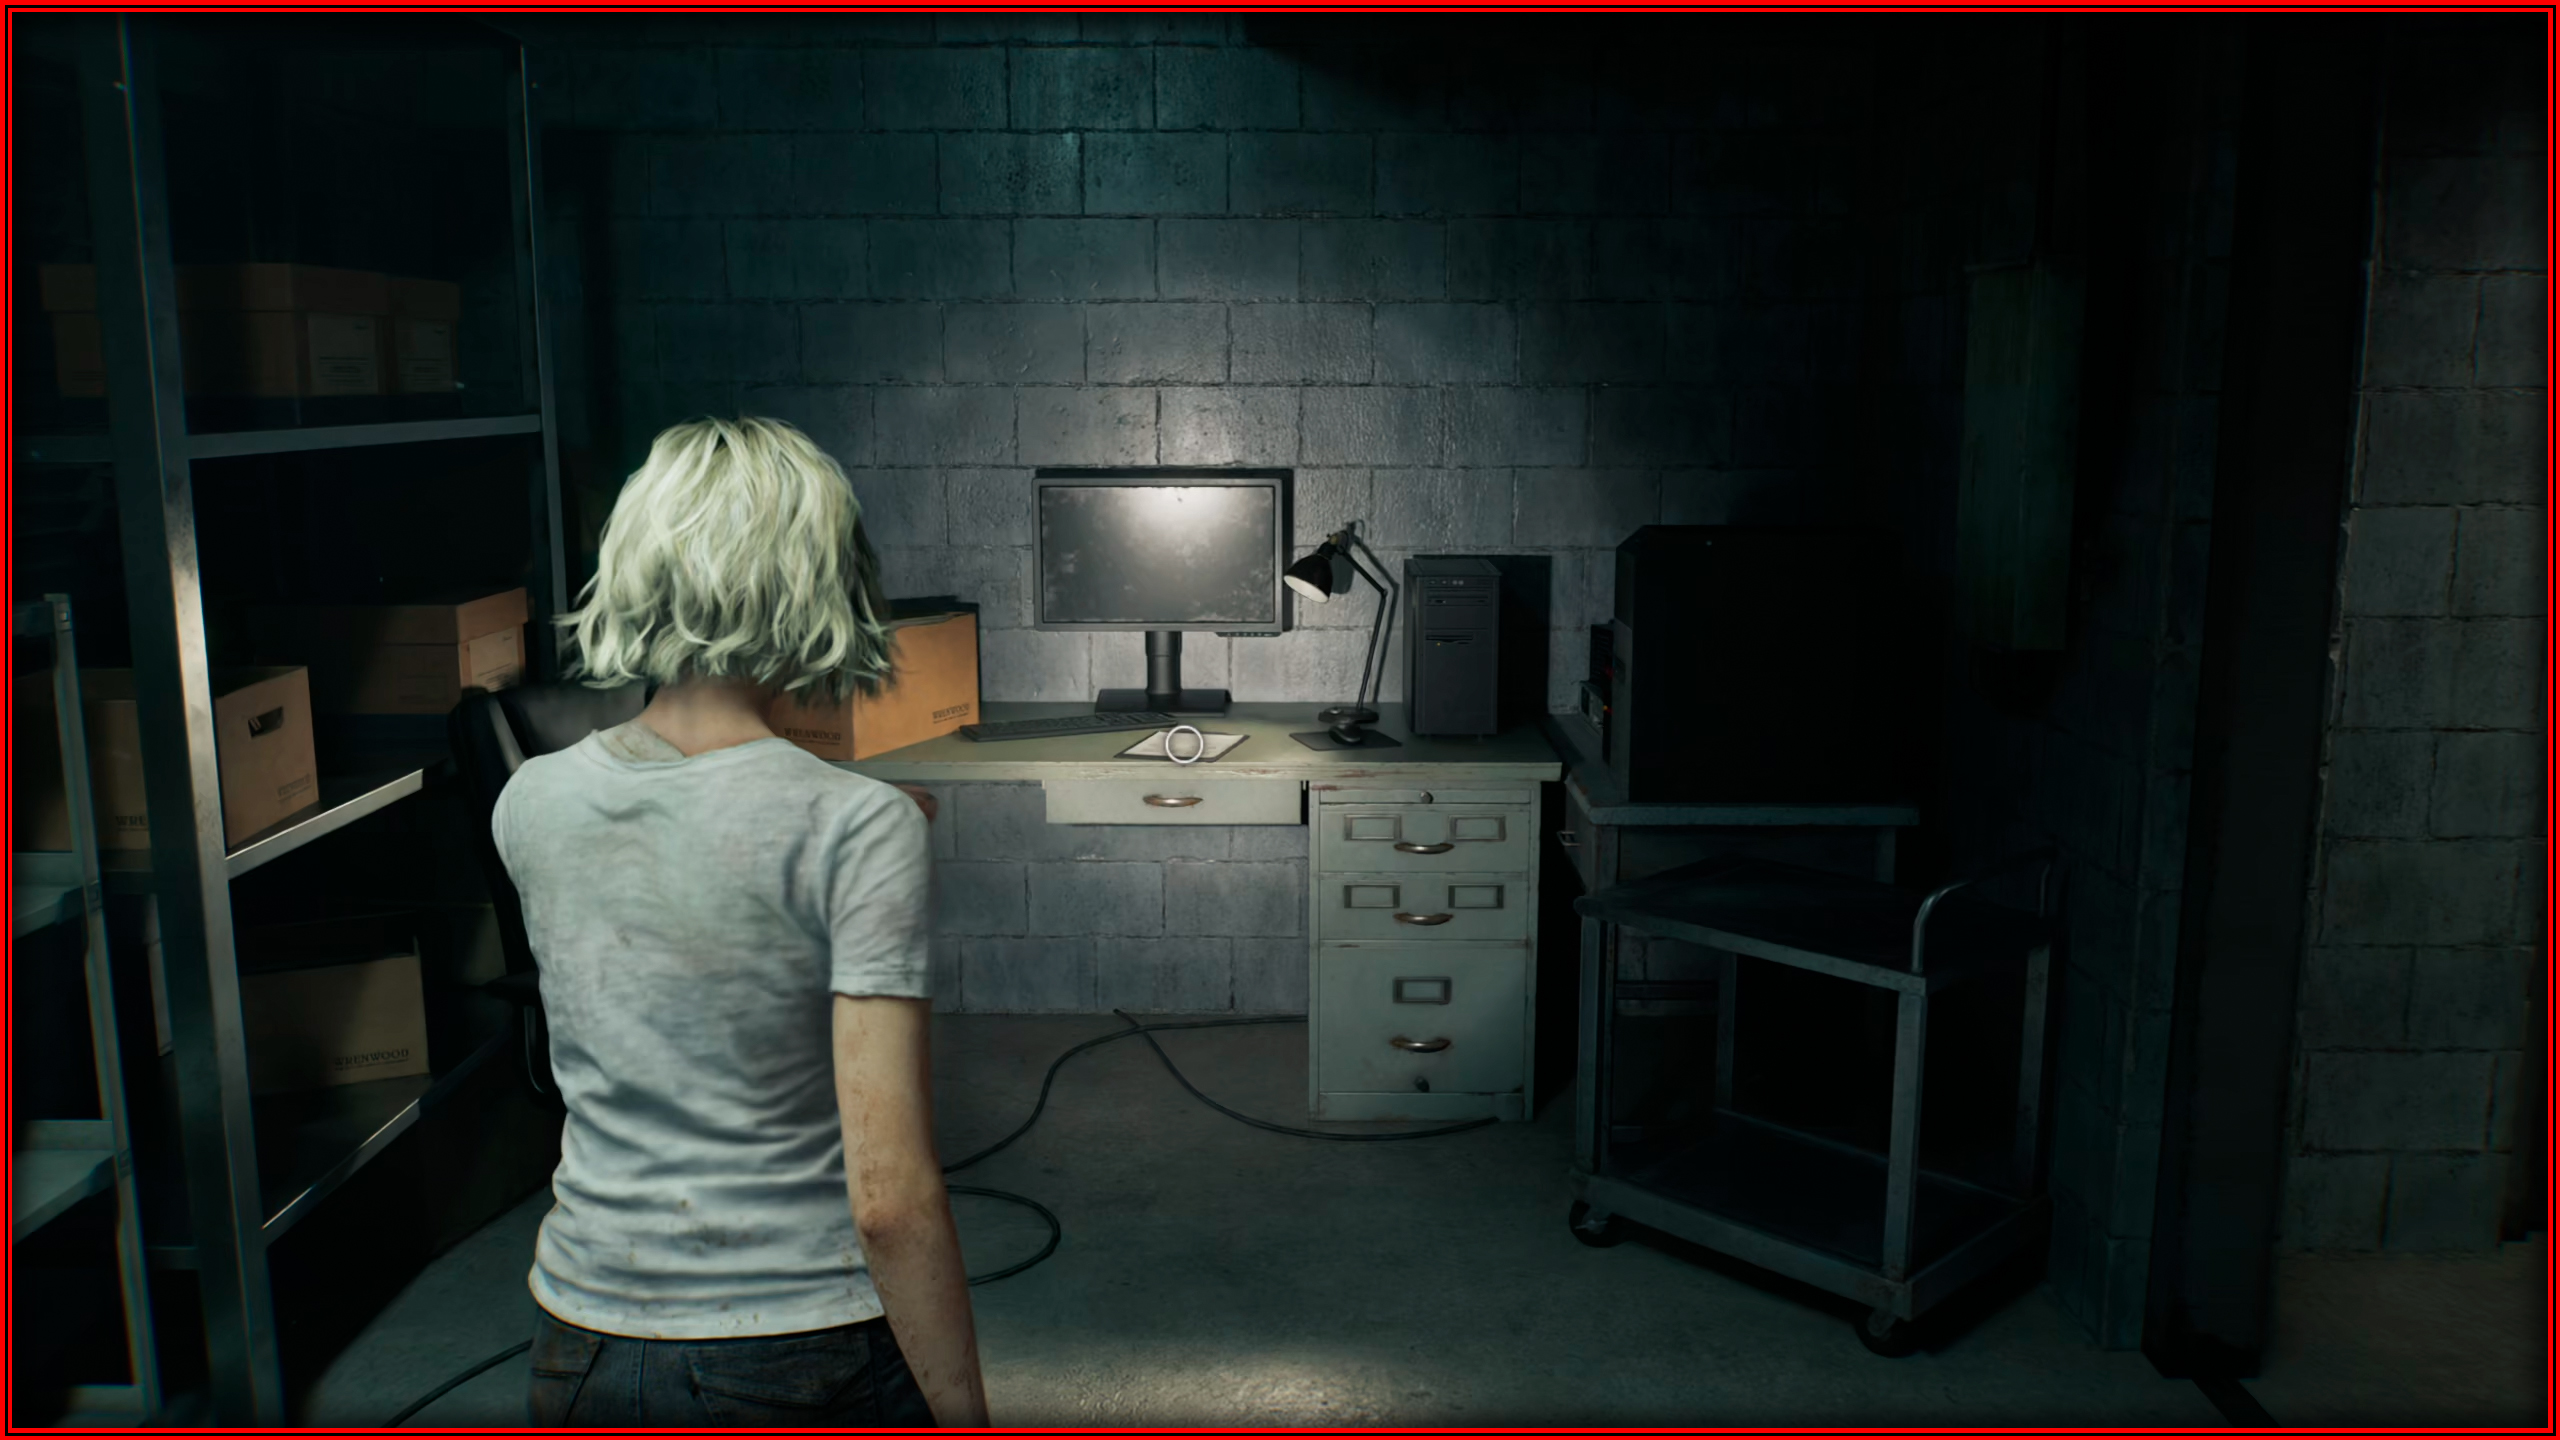
File 7/75 - Progress Notes
As soon as you regain control of Grace, check the small table inside the room to find it.
File 8/75 - Note on Cardboard Box
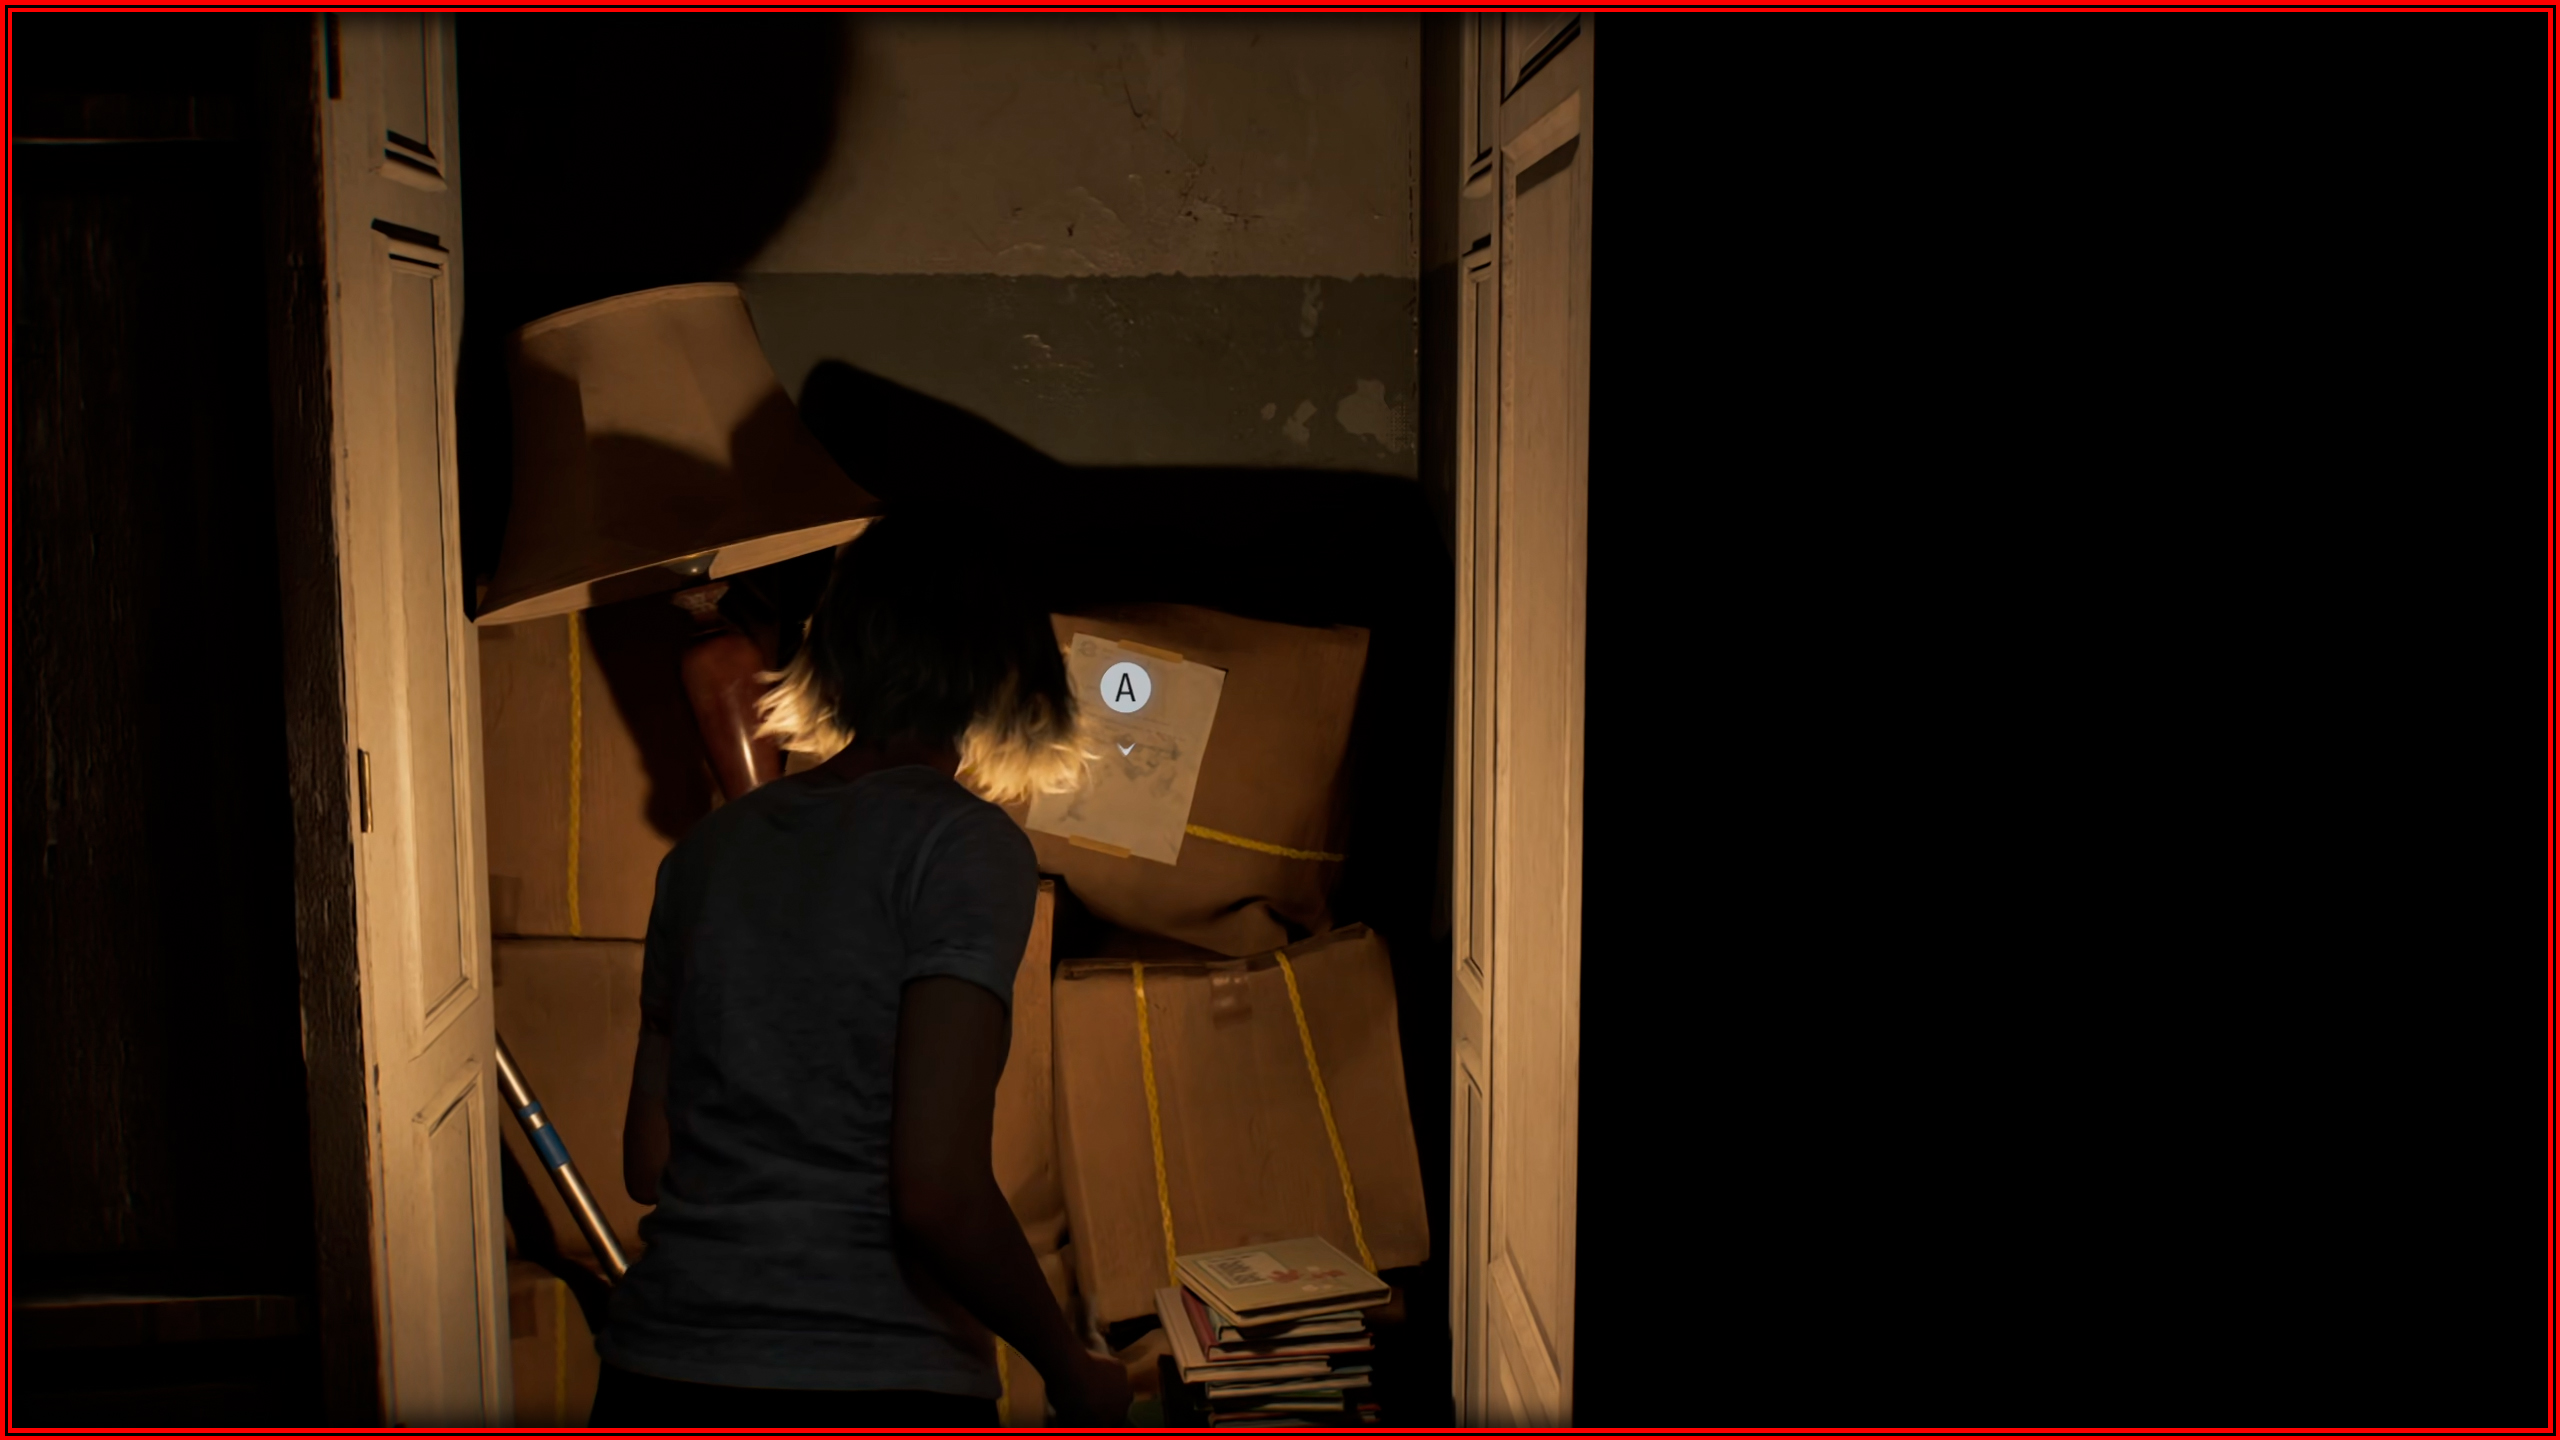
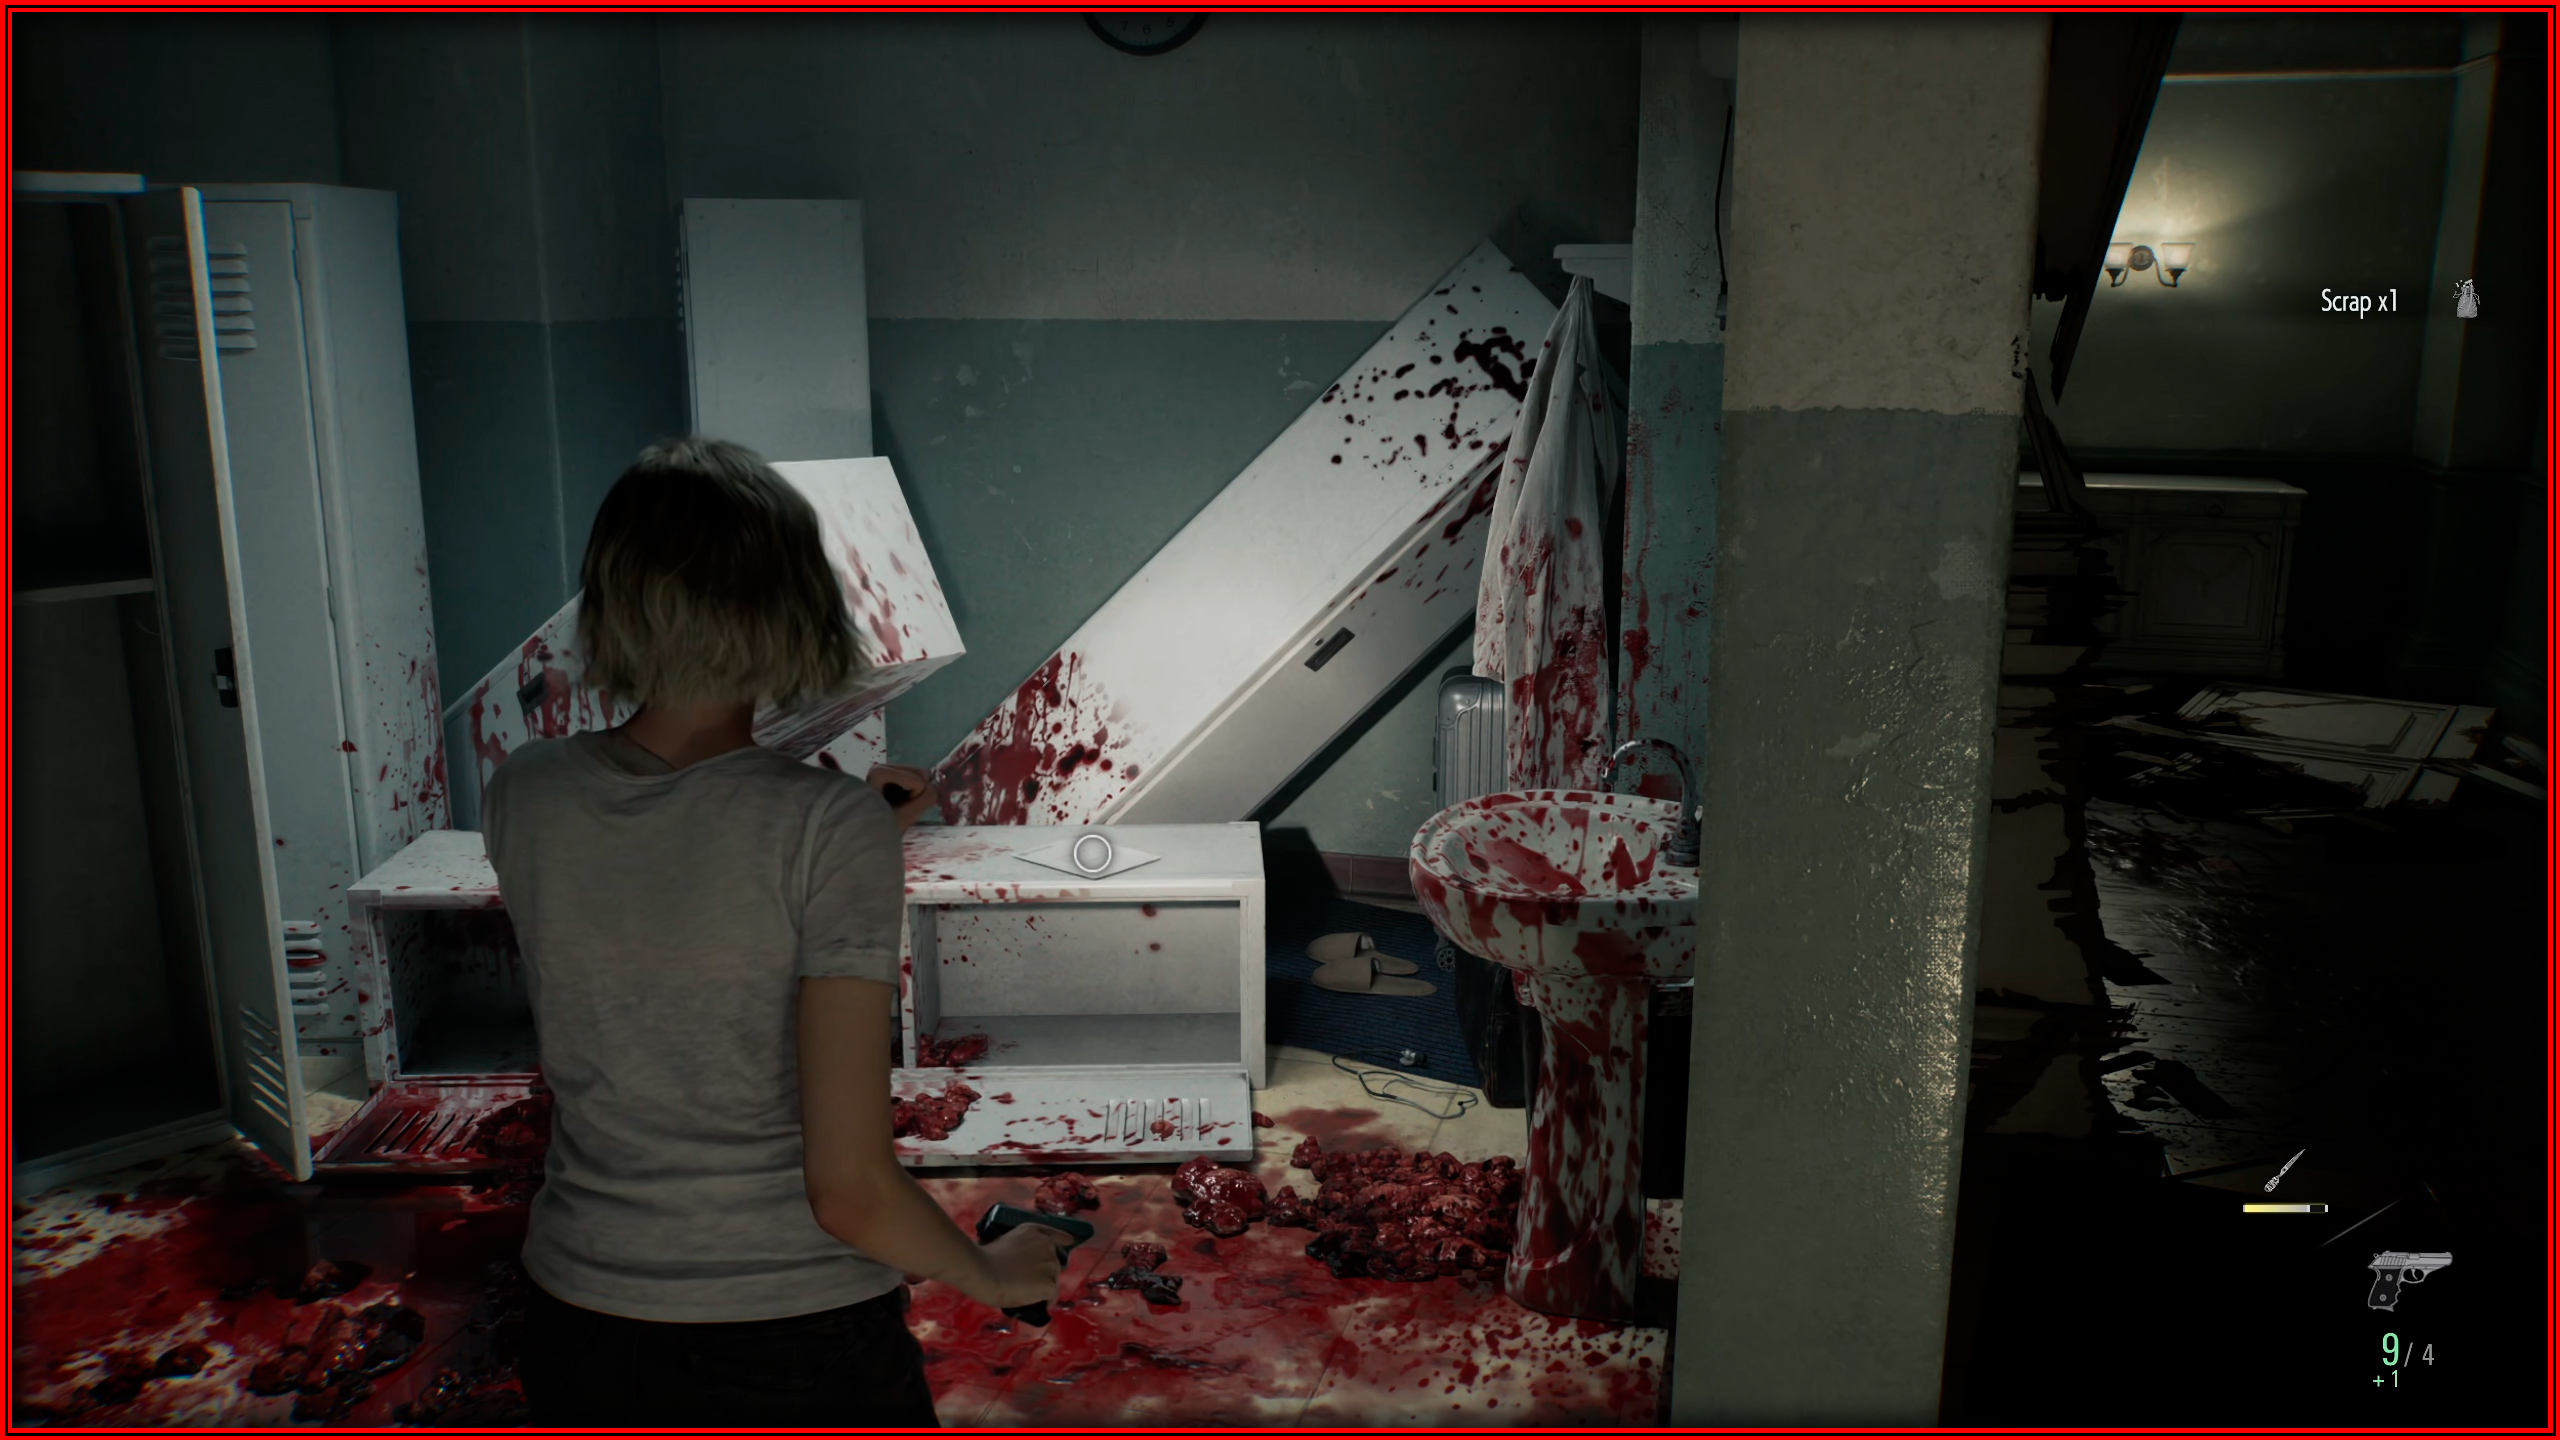
Search inside the closet in Room 202 after you retrieve the Lighter from Room 201.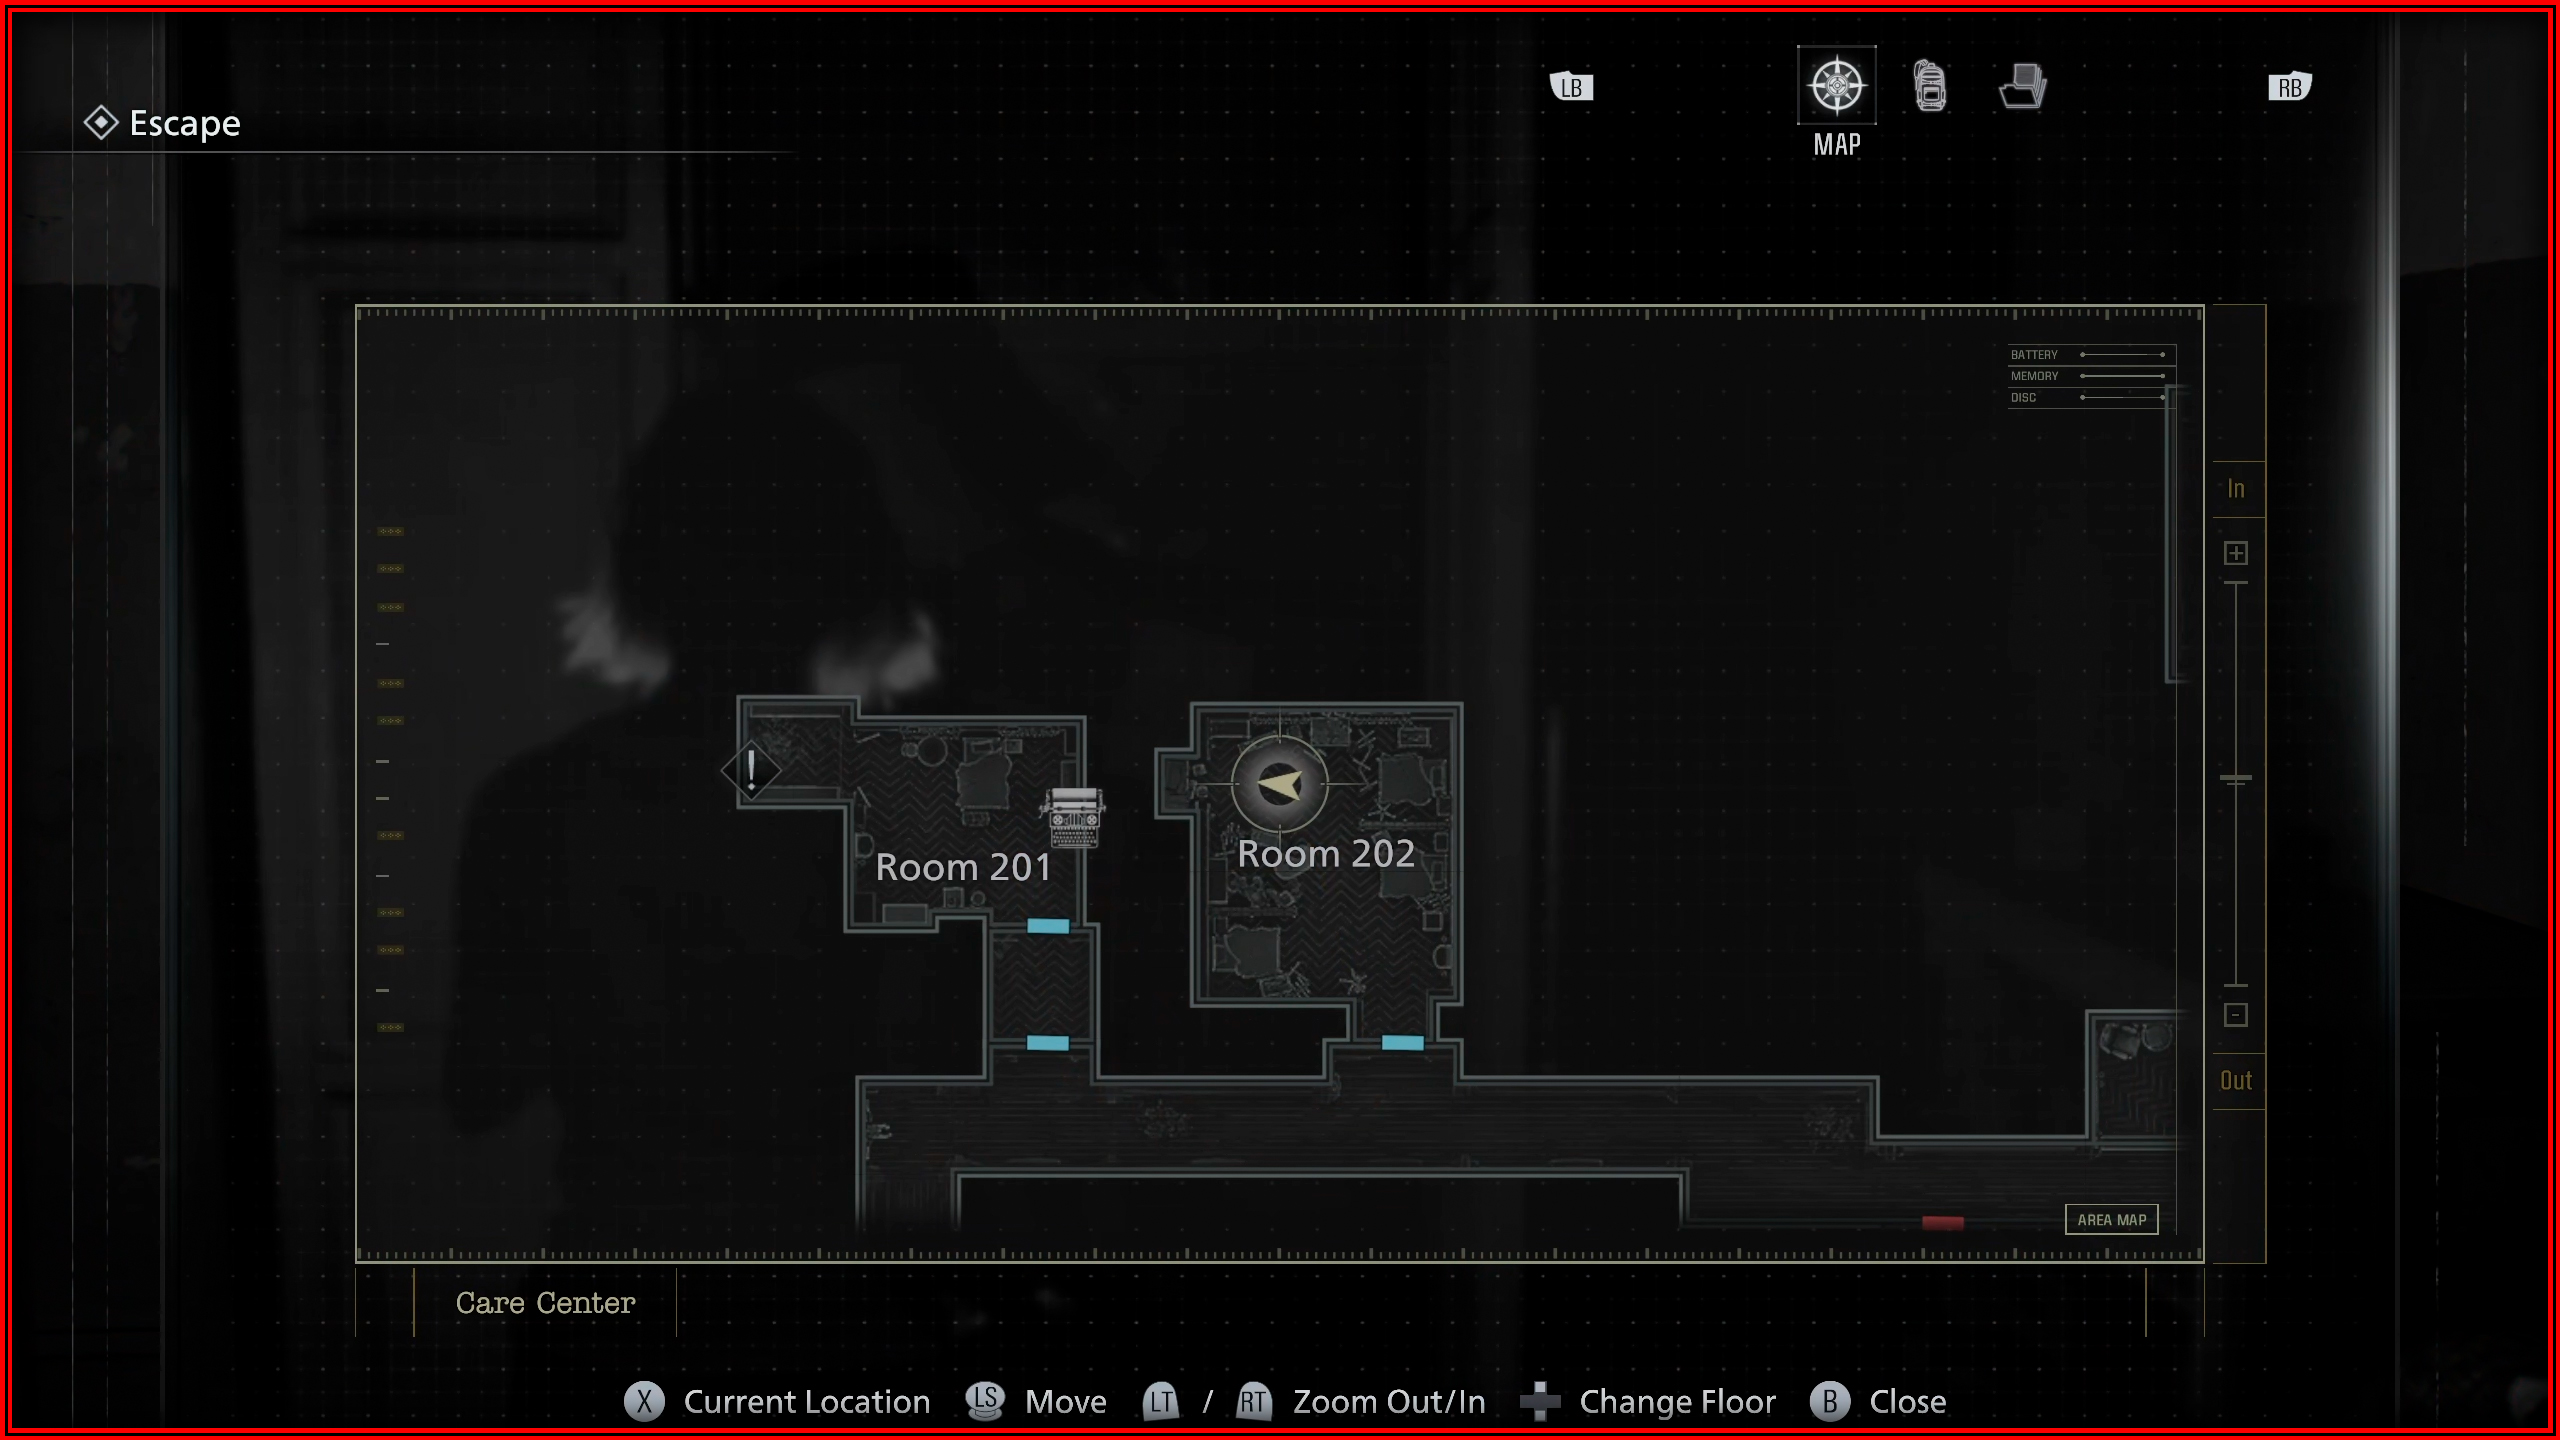
File 9/75 - Care Center Pamphlet
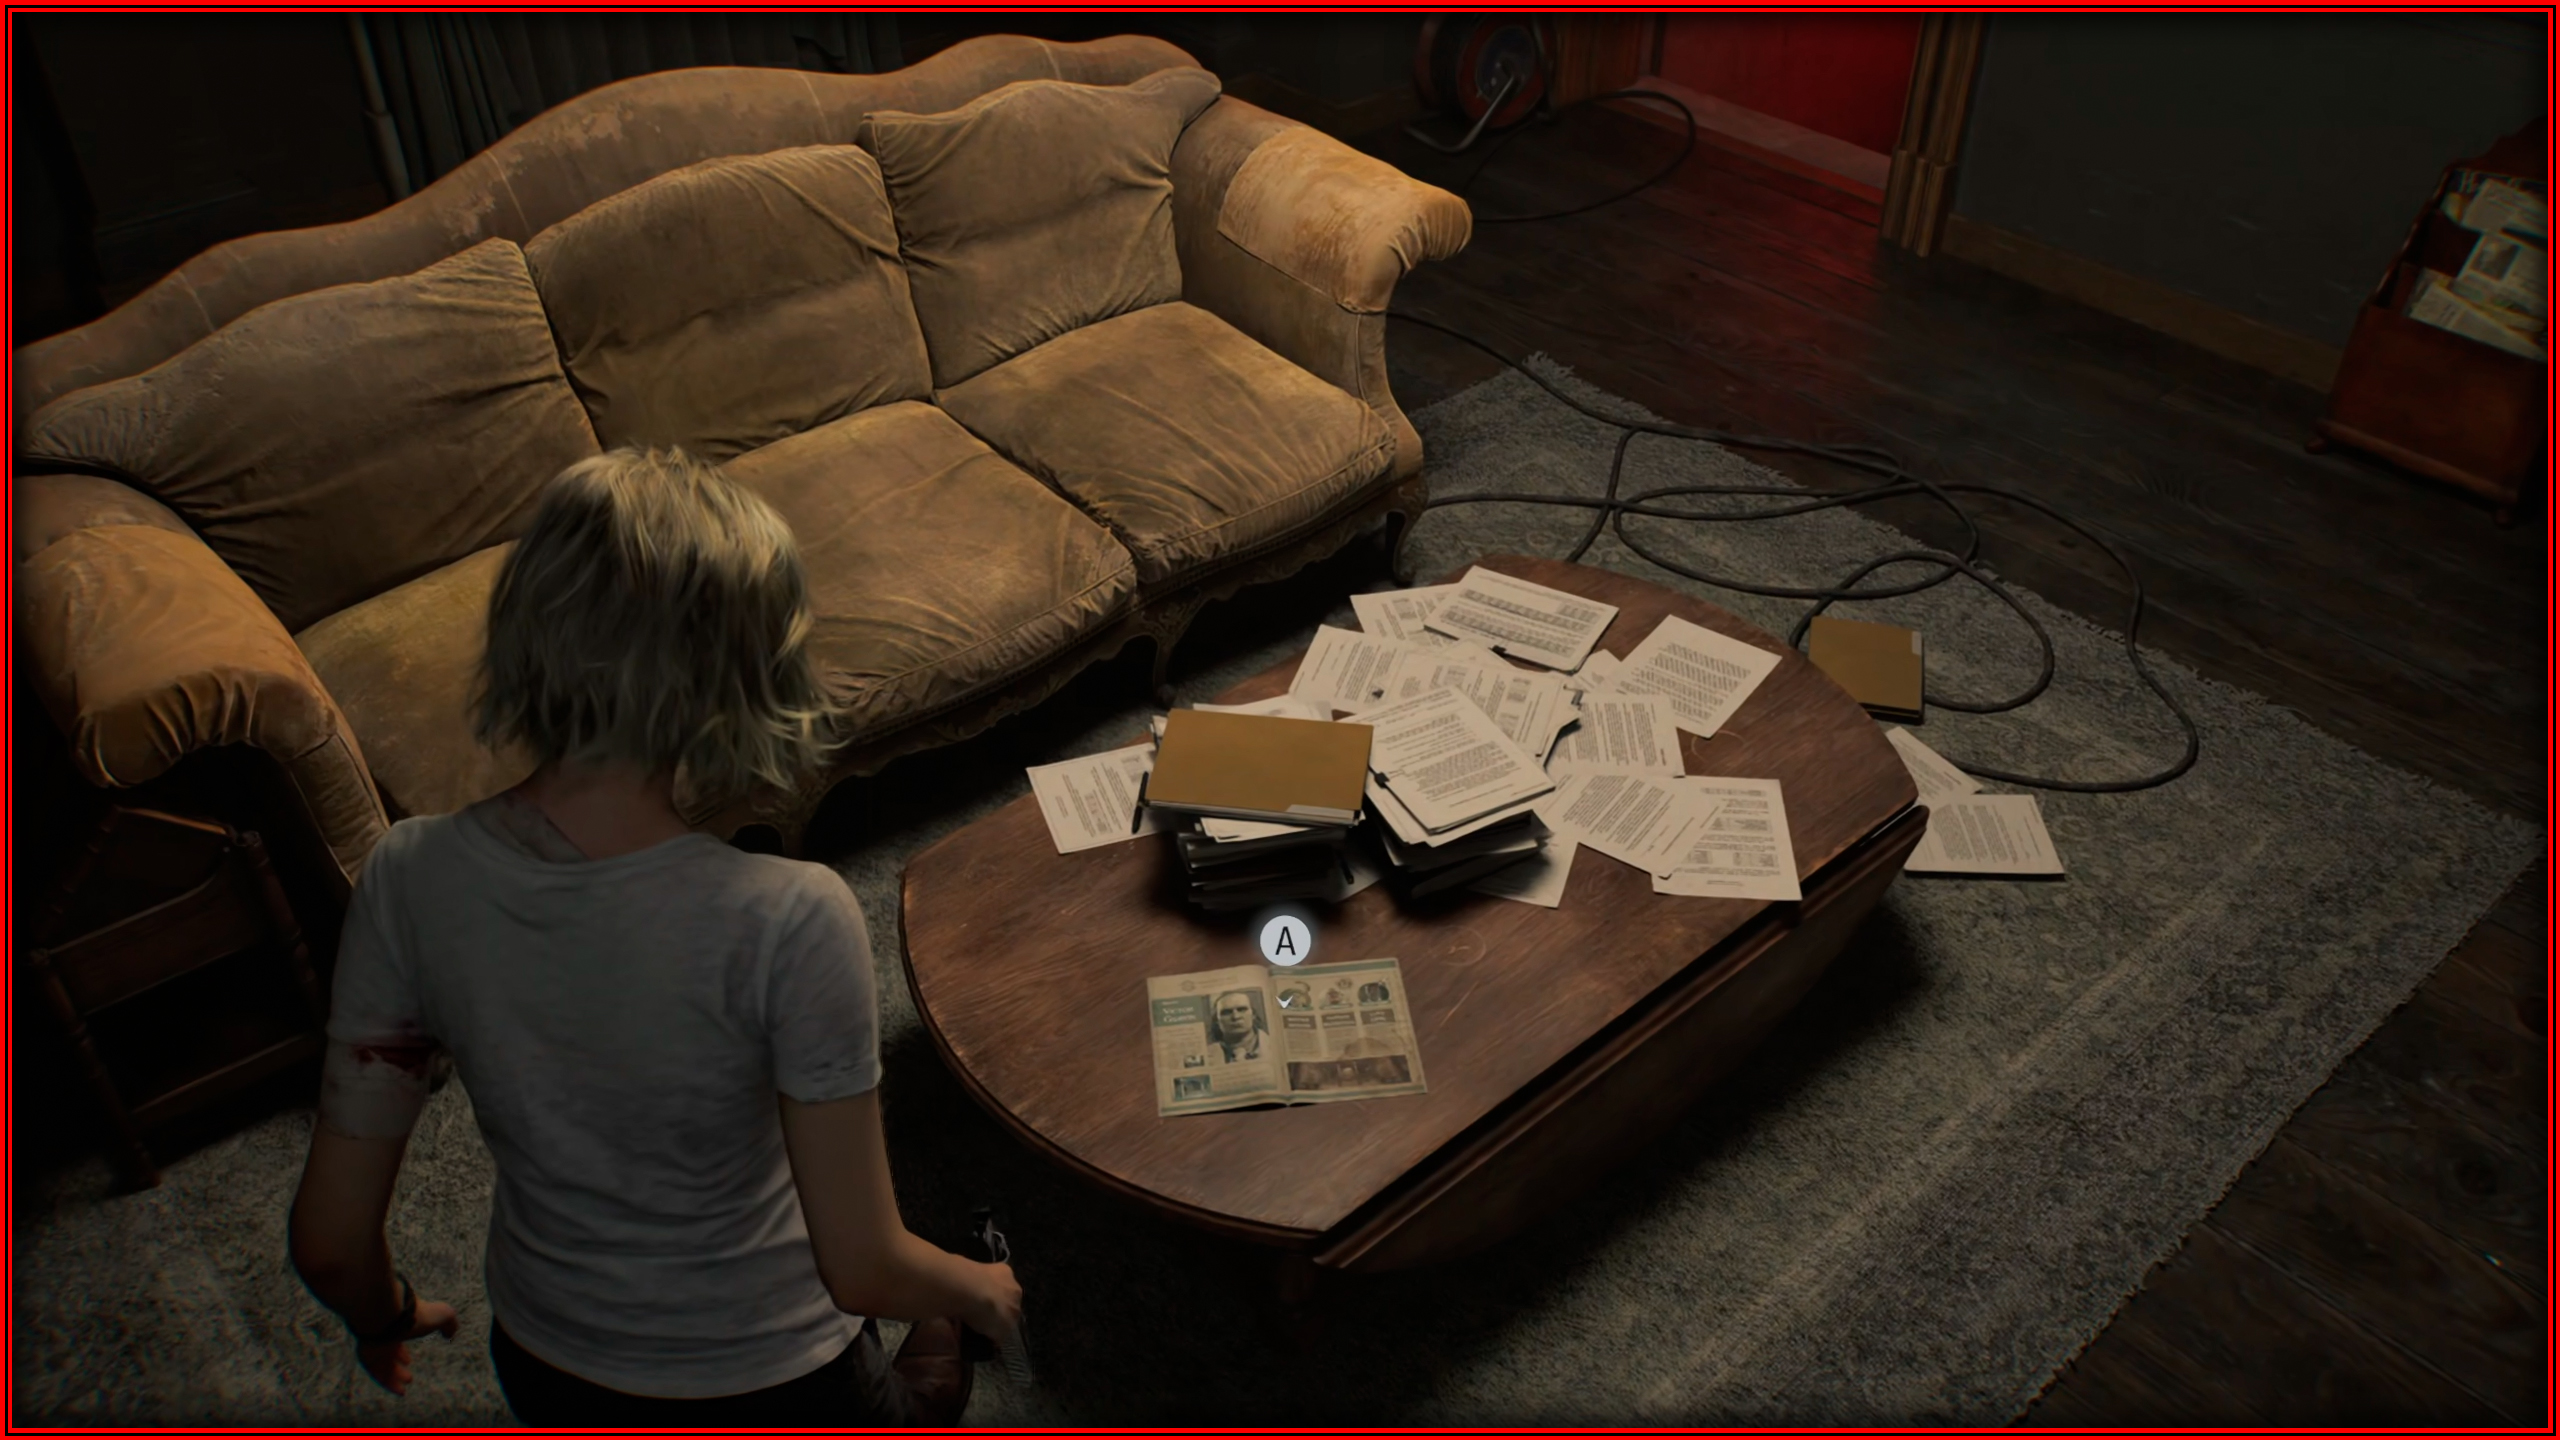
Guard Office: In the Safe Room where the typewriter is located, and check the couch table to find it.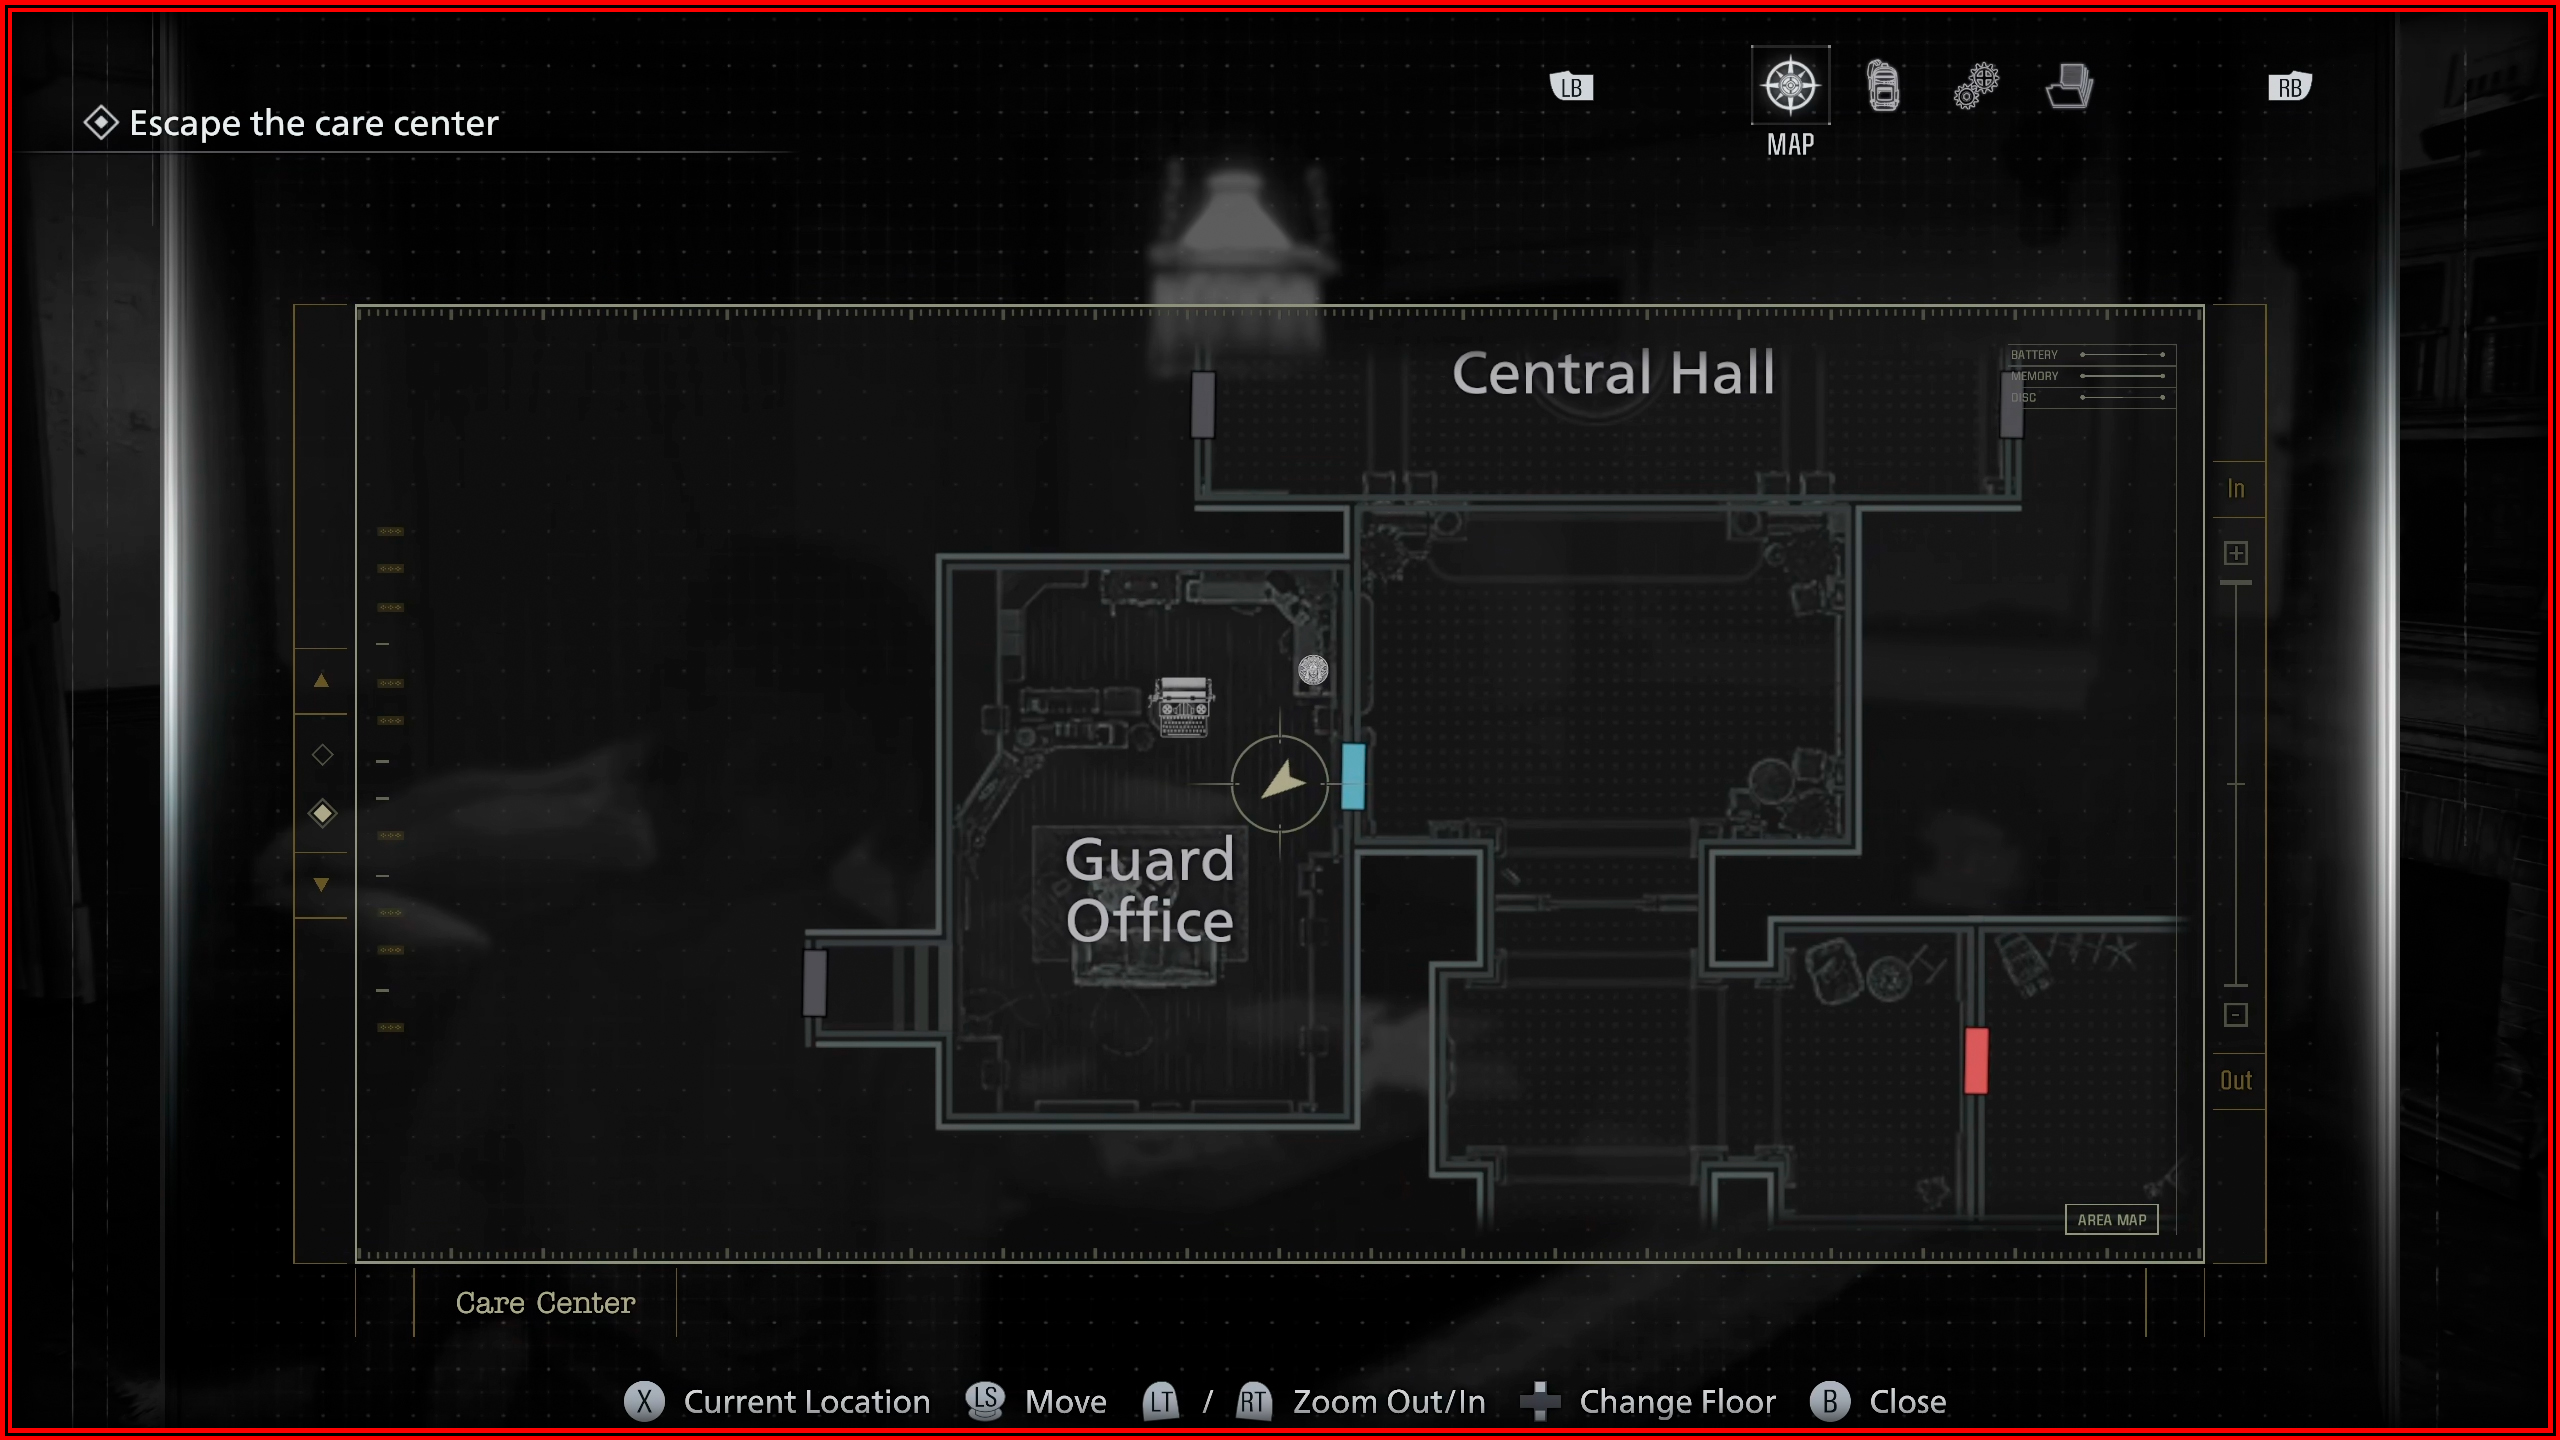
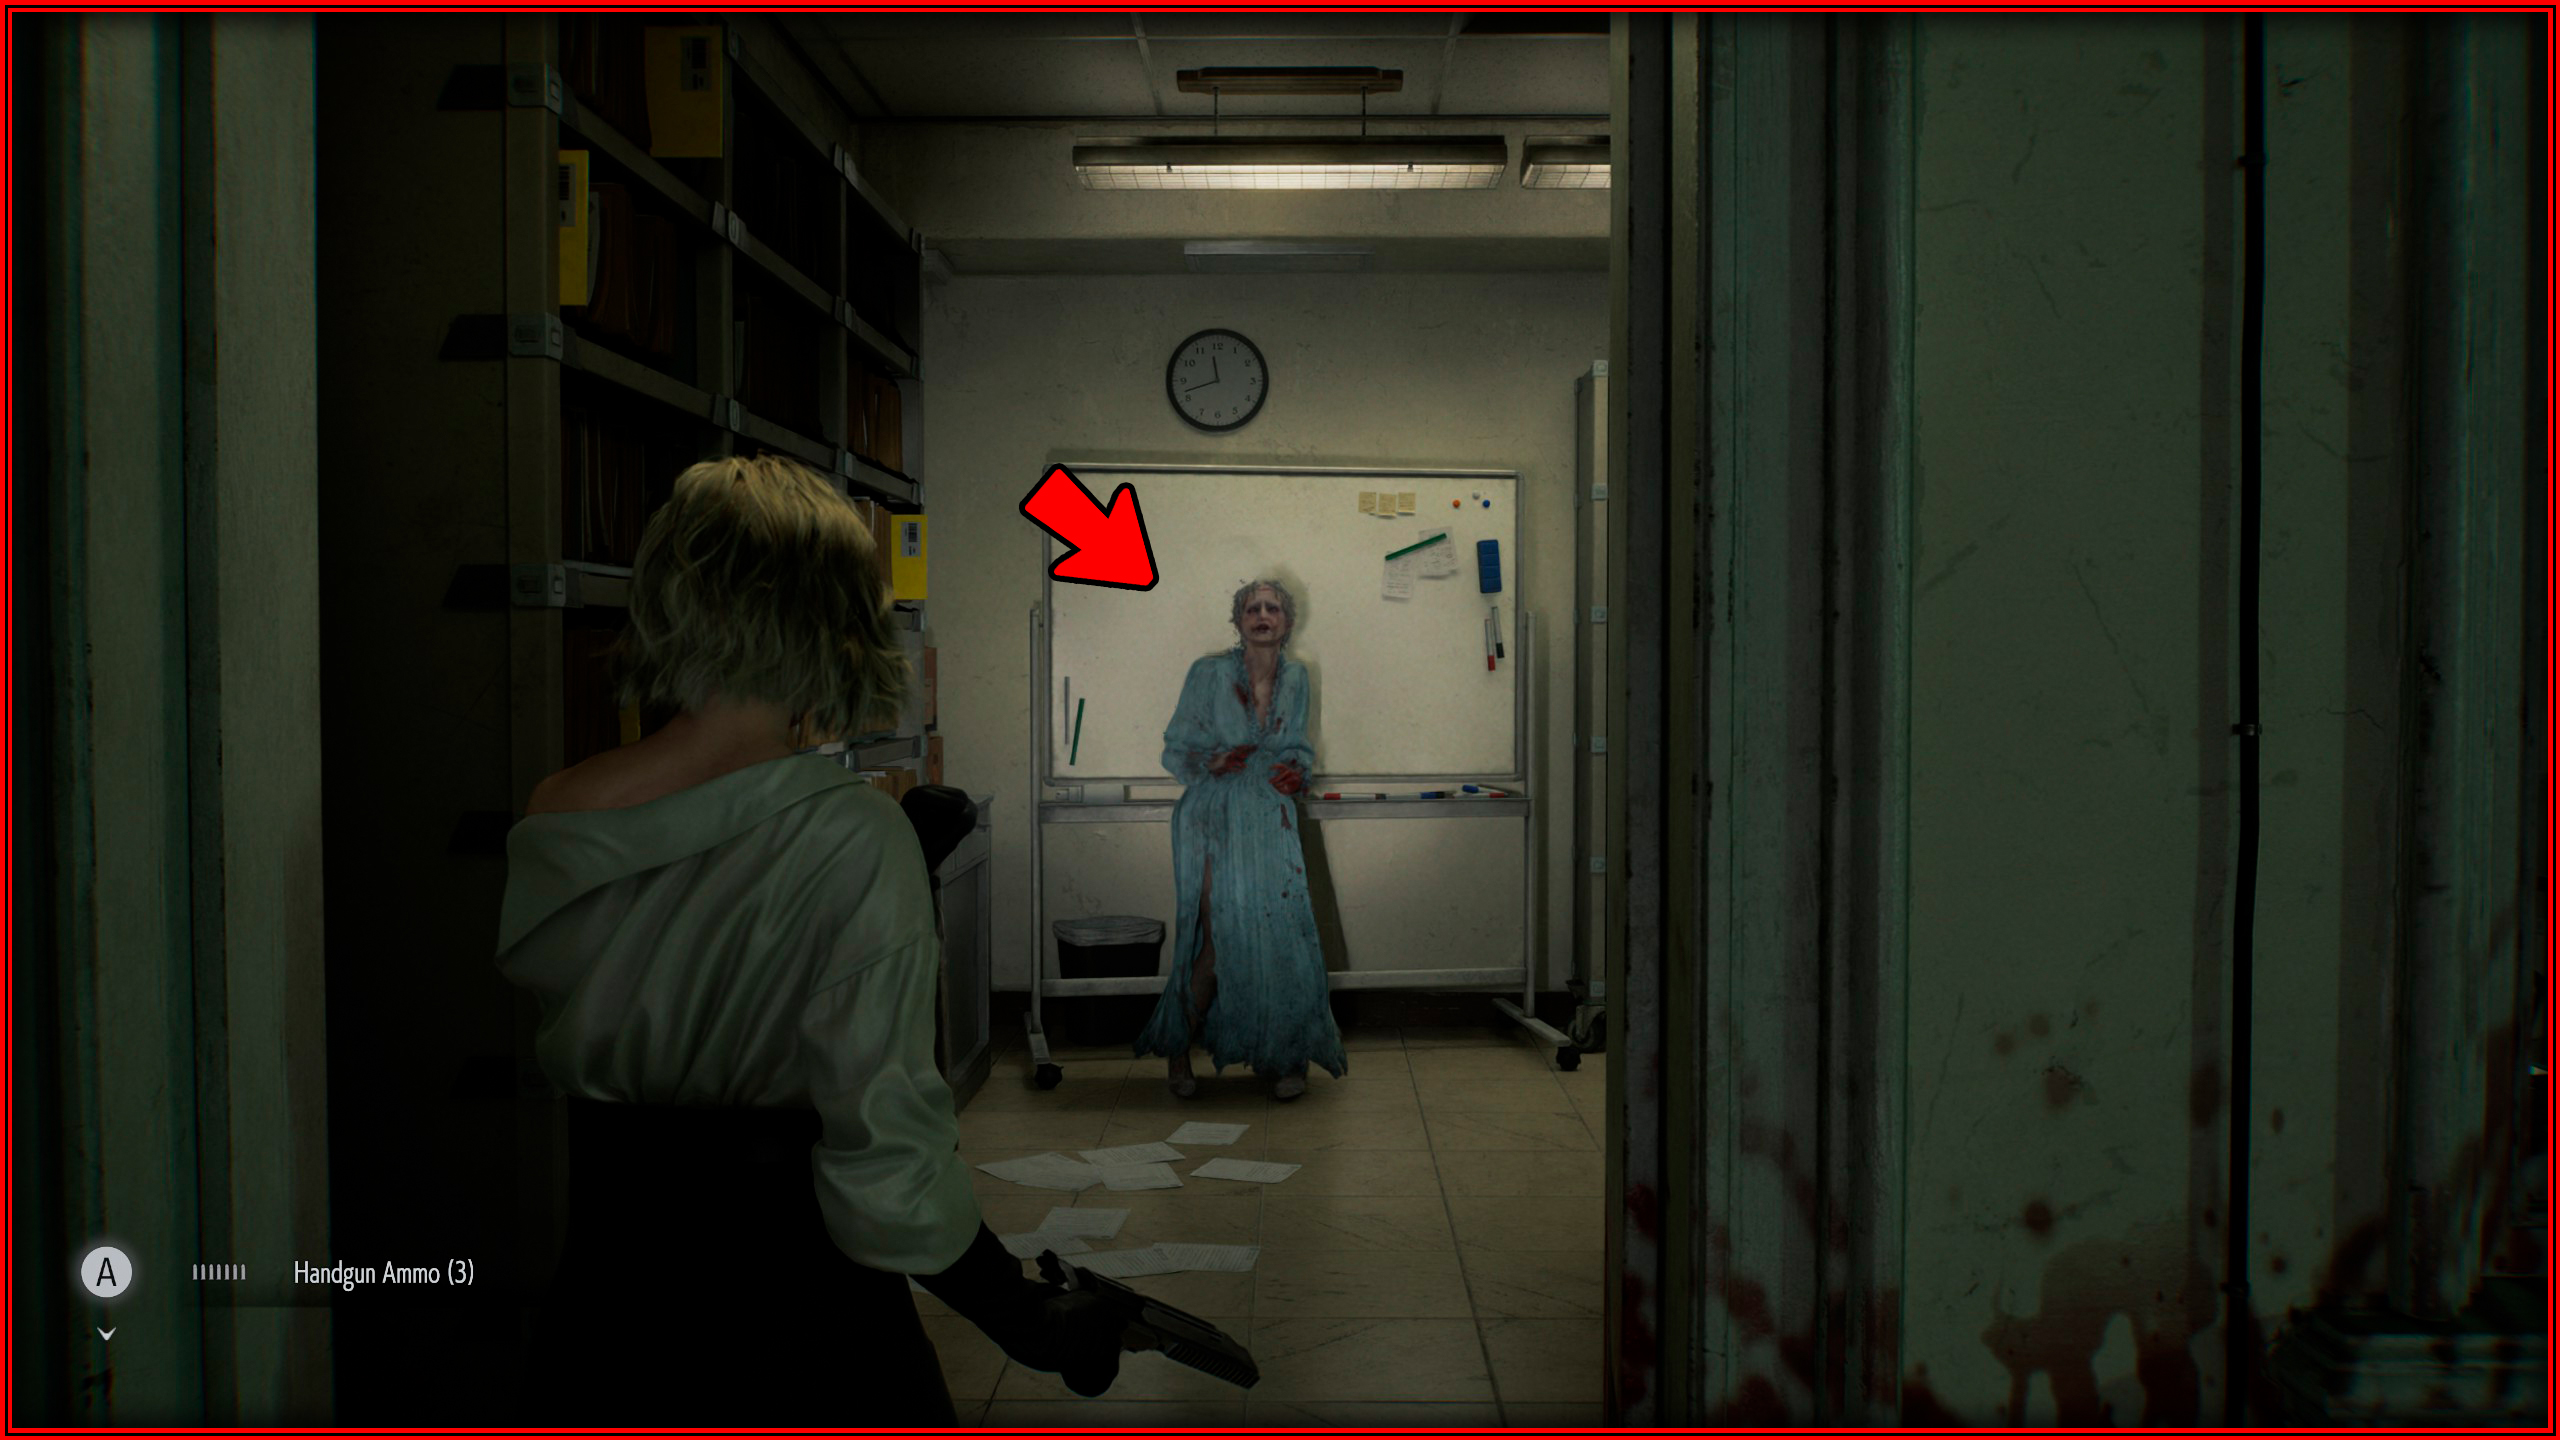
File 10/75 - Whiteboard Scrawl
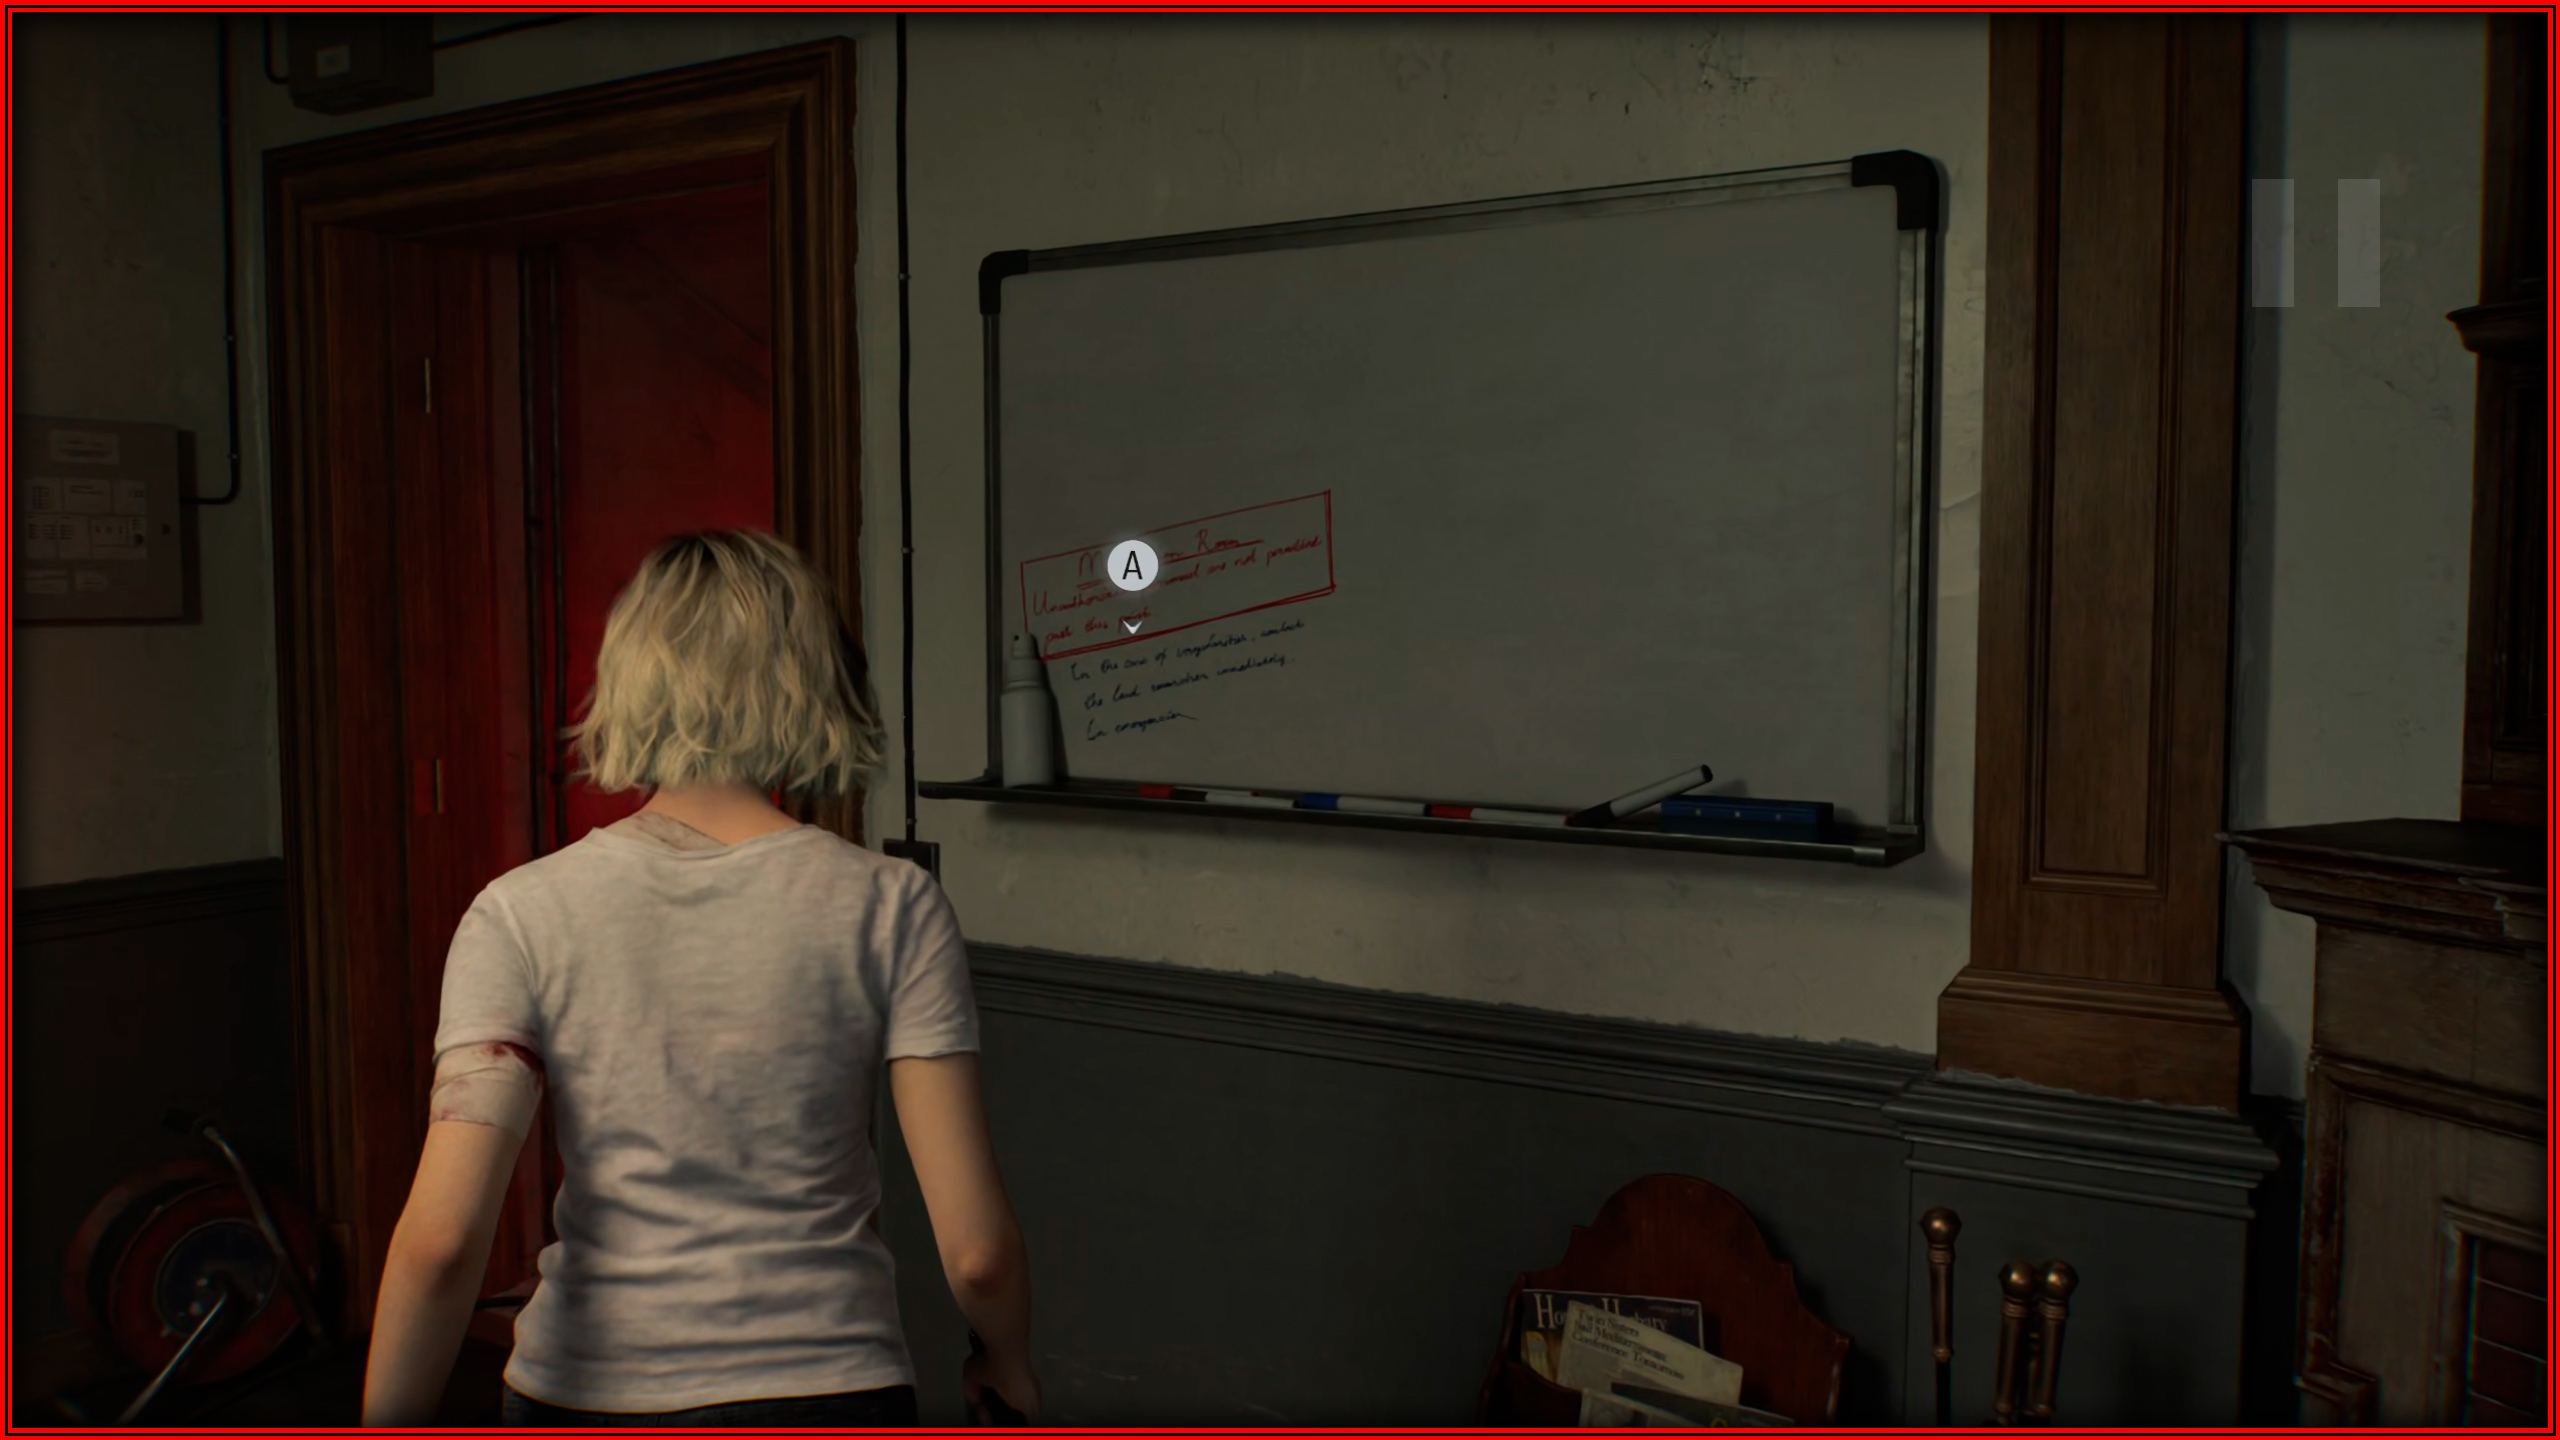
Guard Office: On the wall on whiteboard.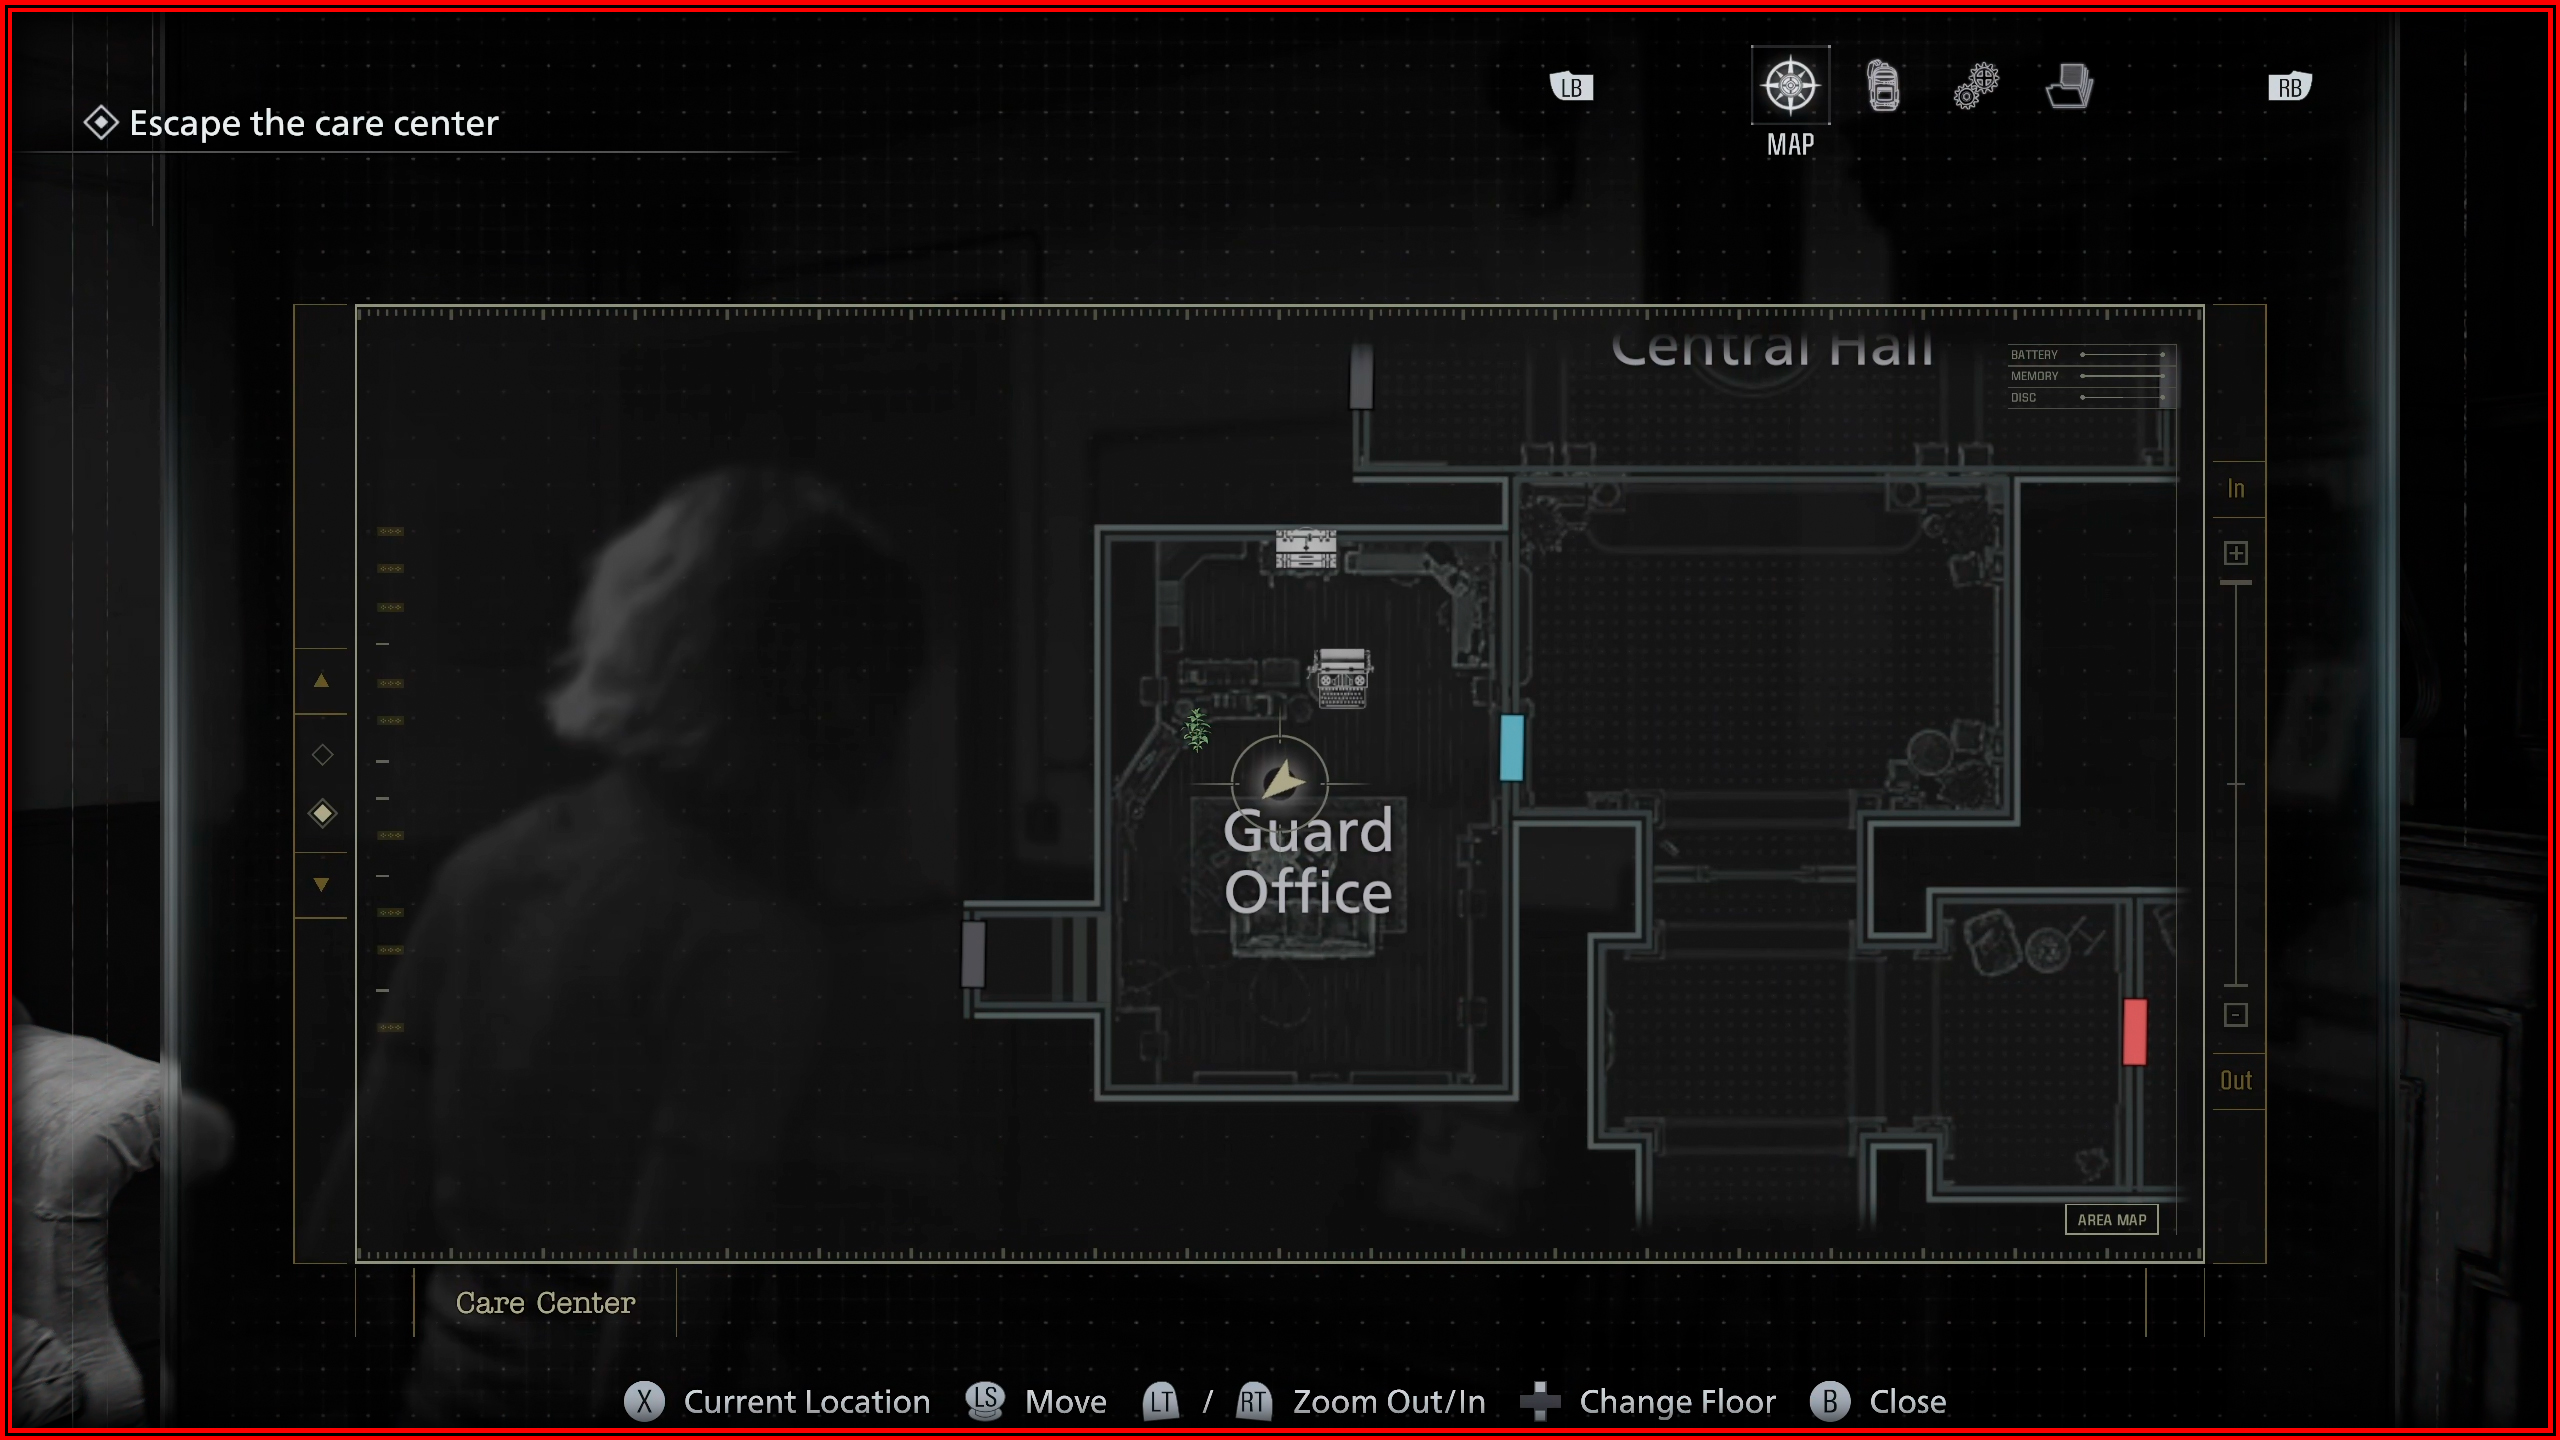
File 11/75 - Folded Note
Gallery: After passing through the Bar & Lounge, continue down the corridor, take a left, and examine the white coat hanging on the wall.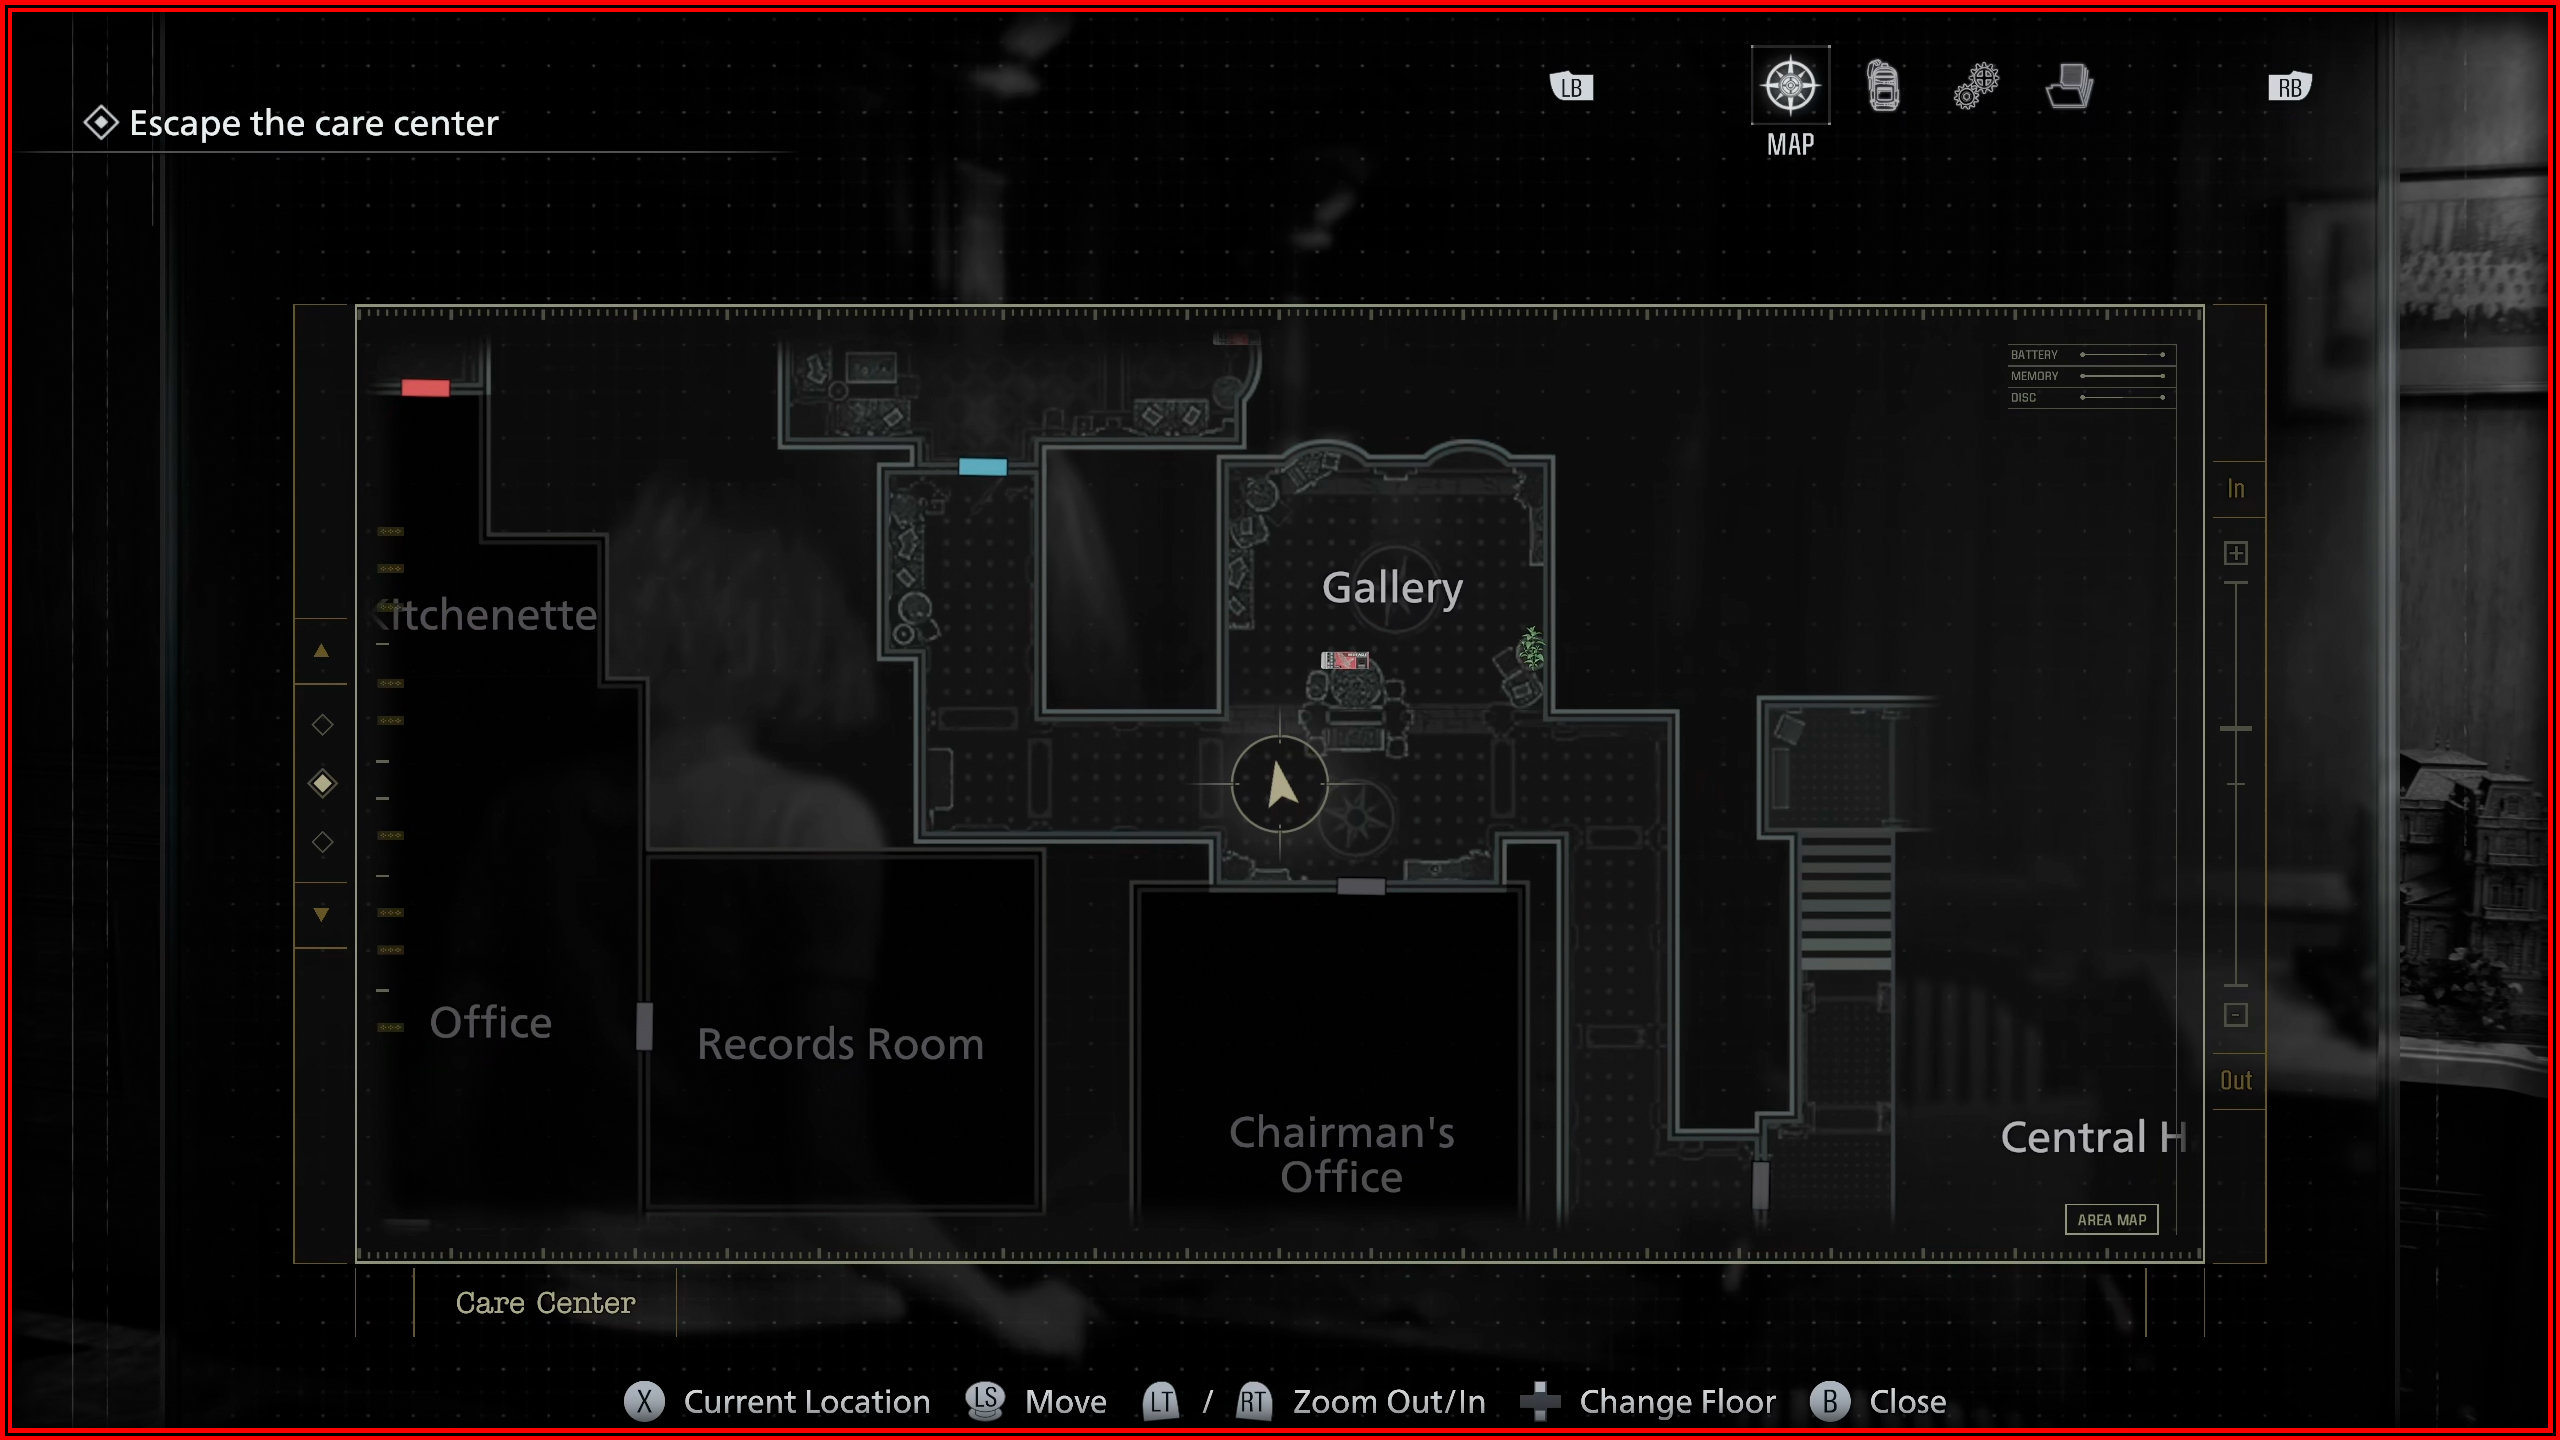

File 12/75 - Copy of an Email to a Manager
Chairman’s Office: On the cupboard.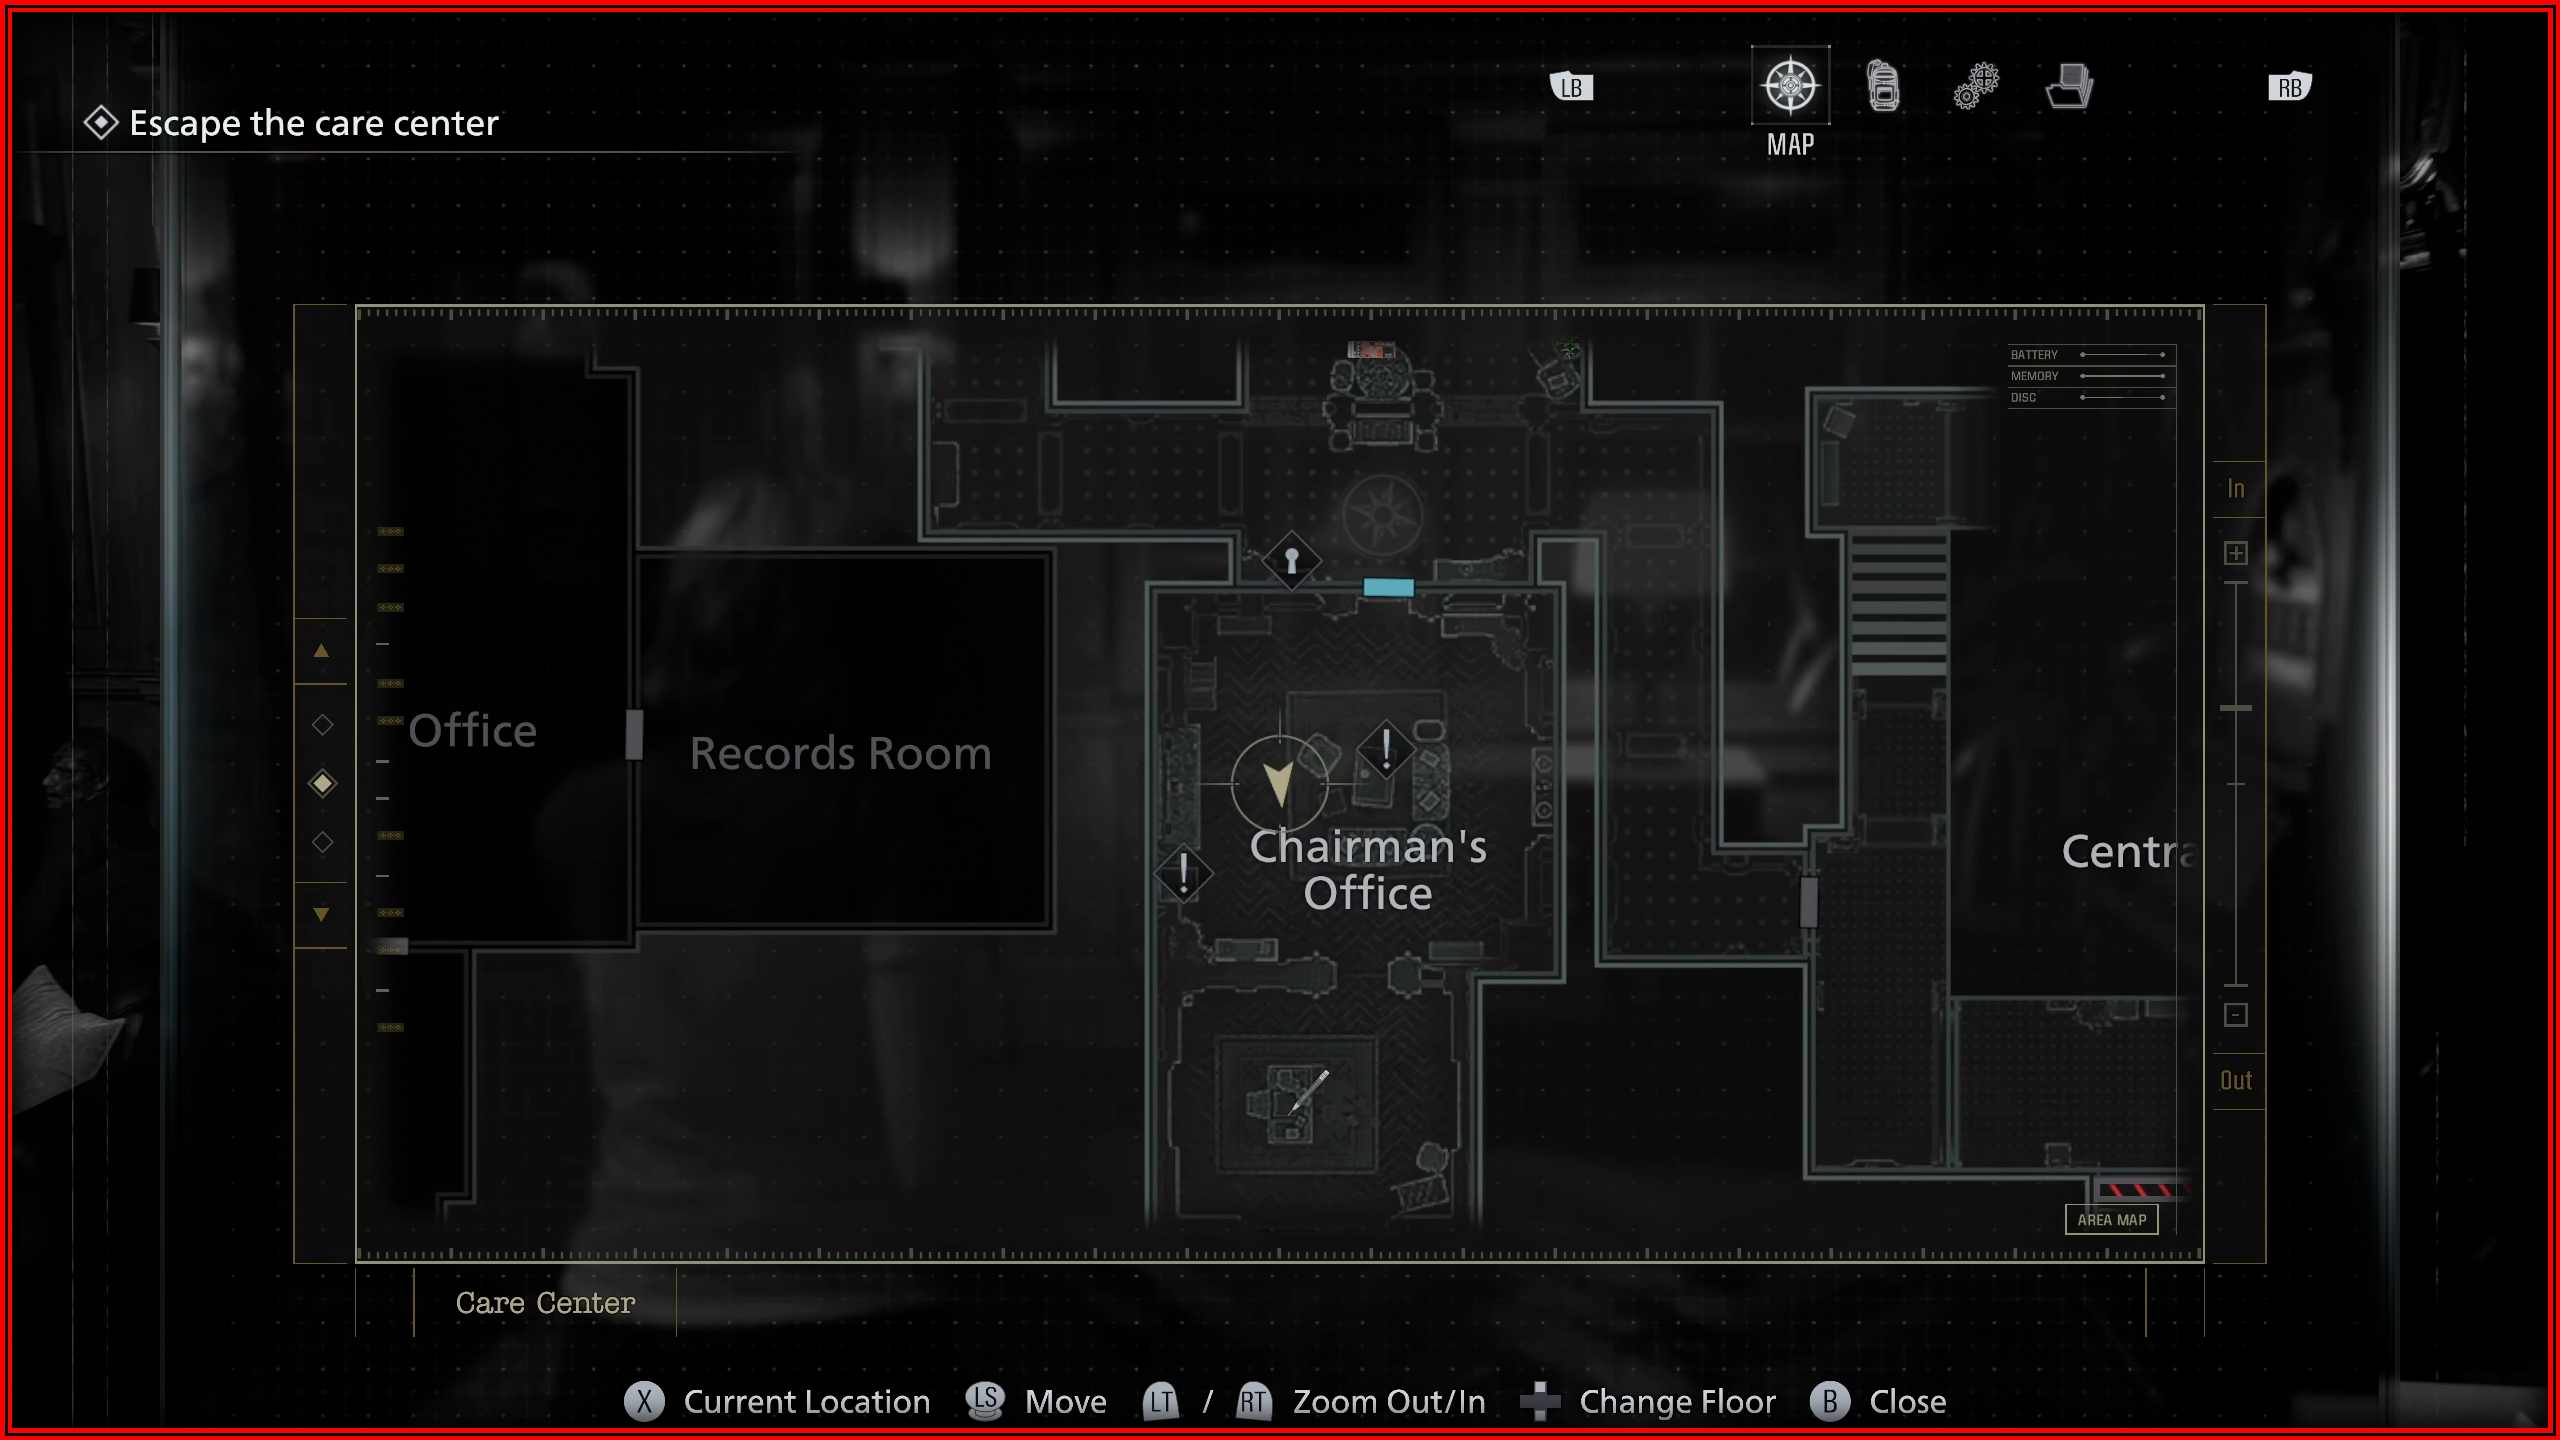
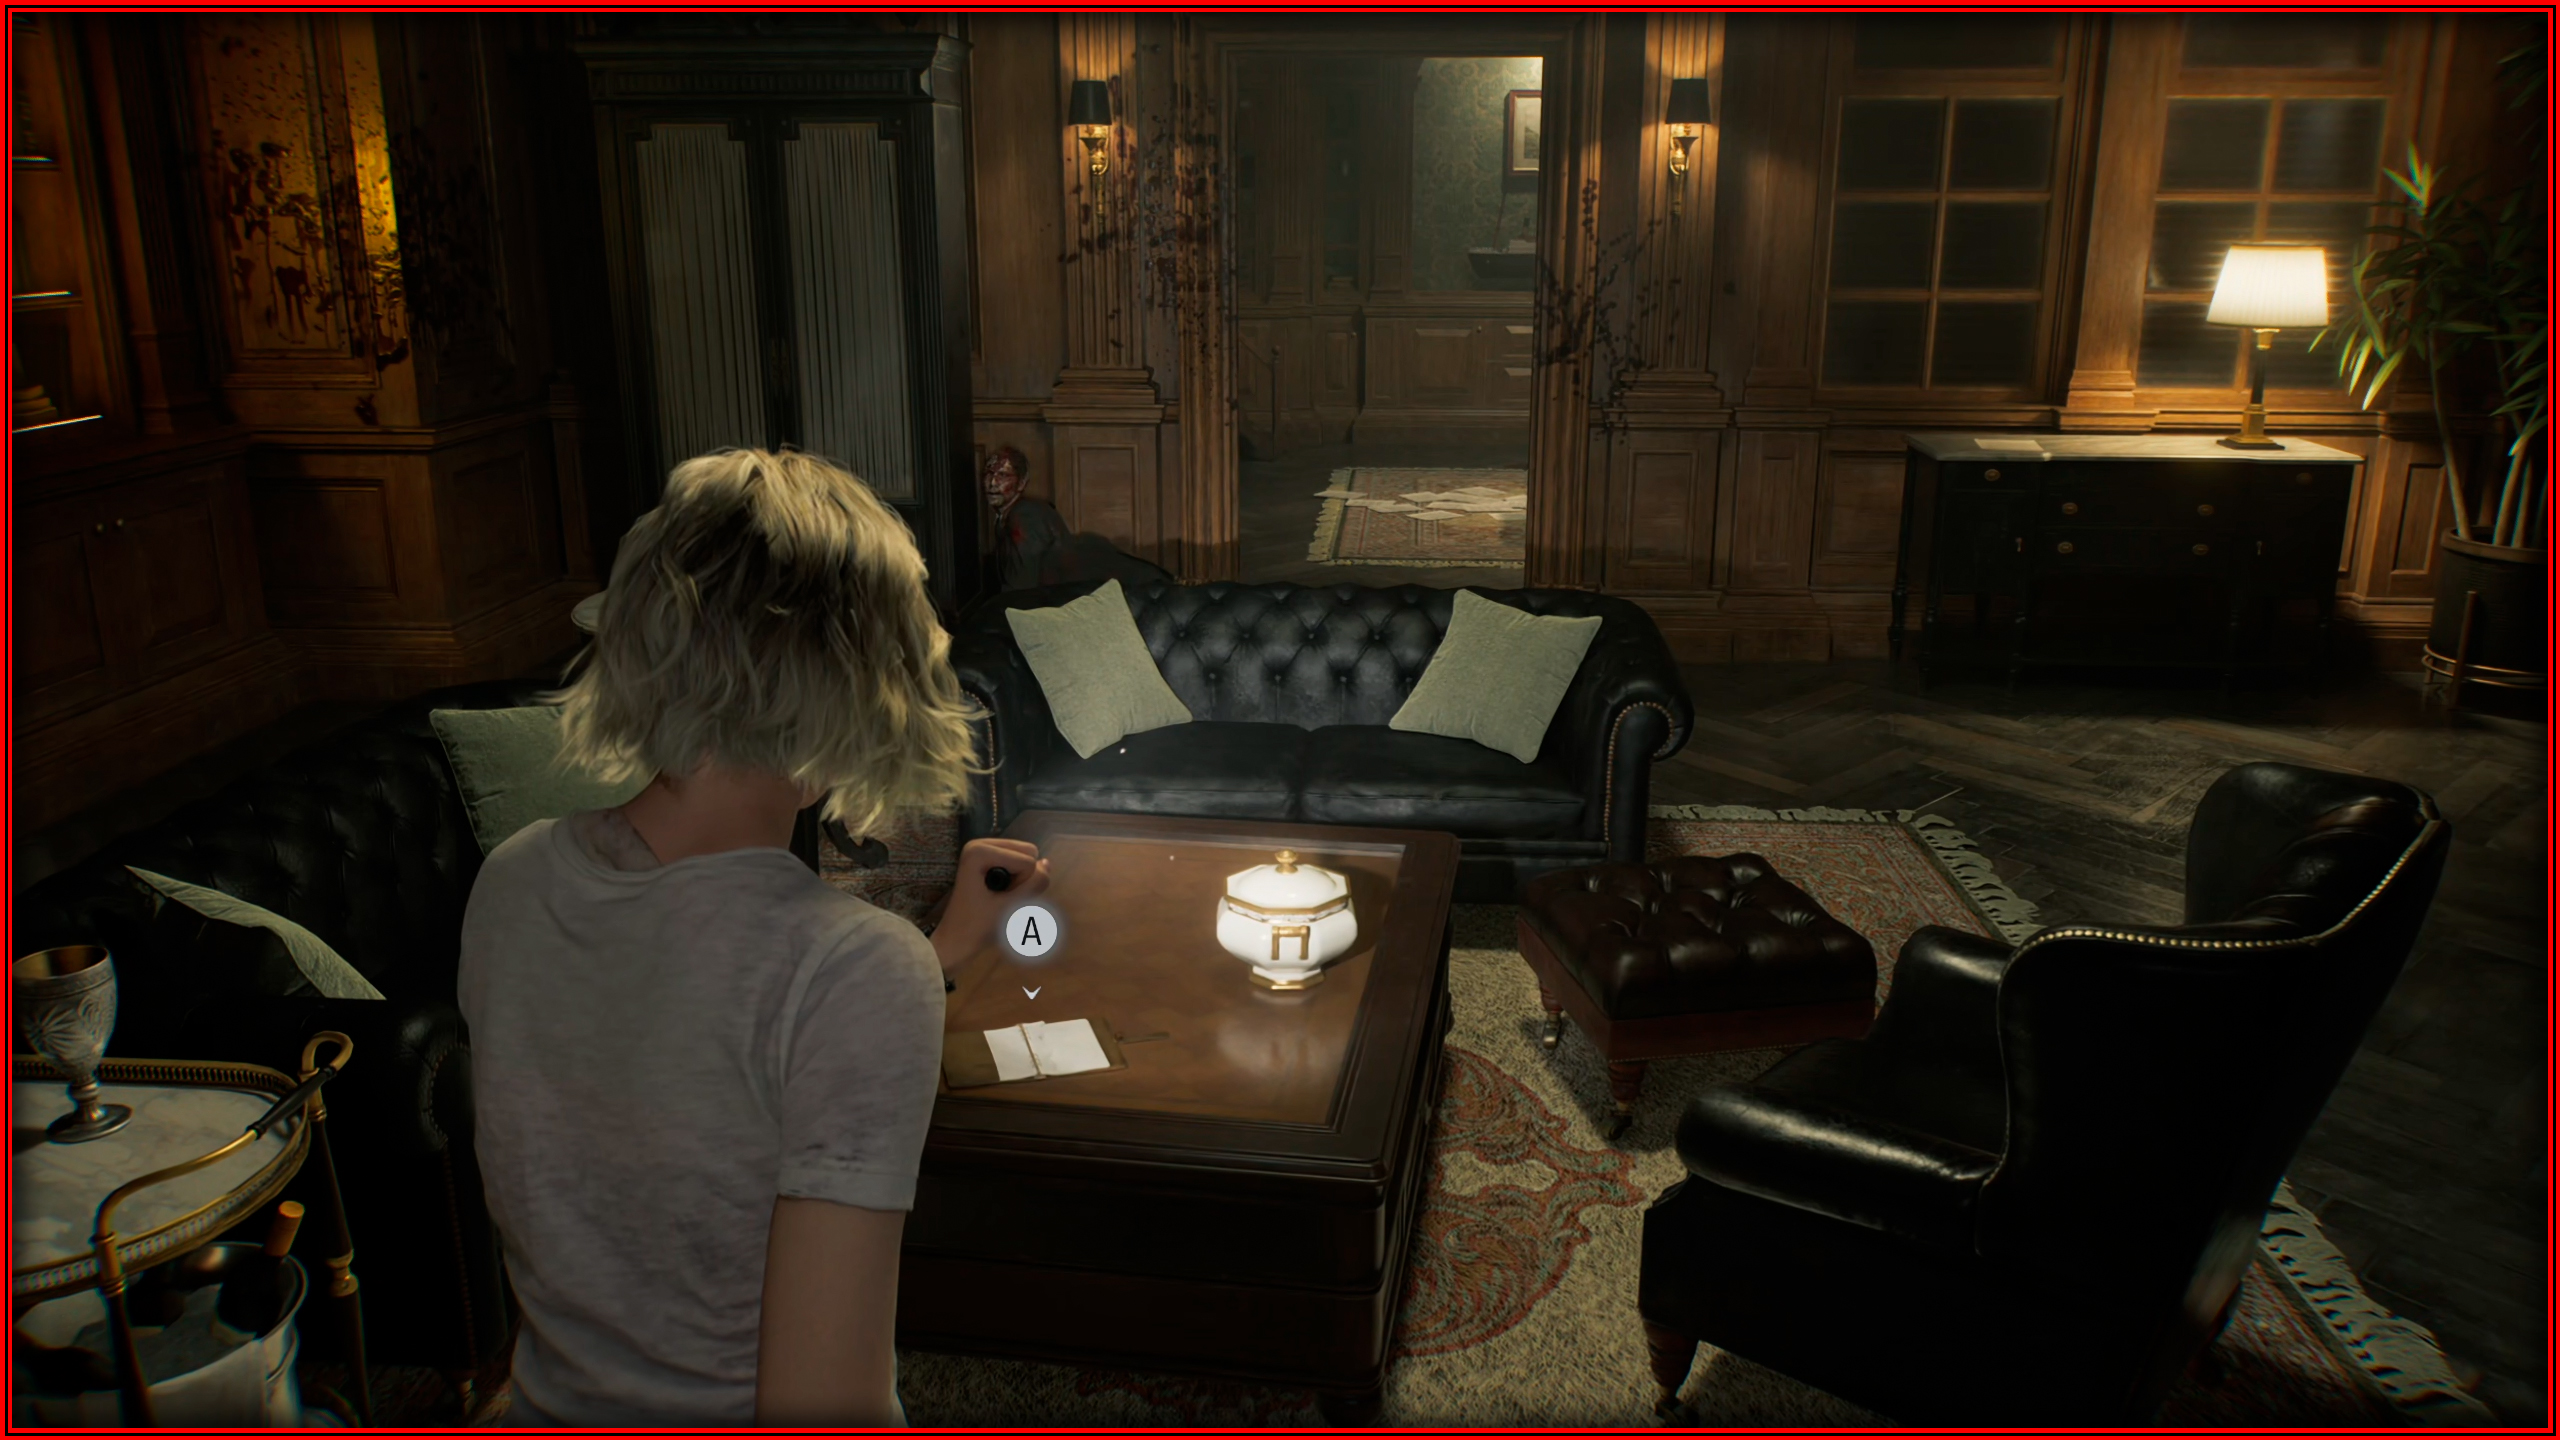
File 13/75 - Note to a Chairman
Head into the backroom of the Chairman’s Office, where you will encounter a zombie, and check inside the trash bin.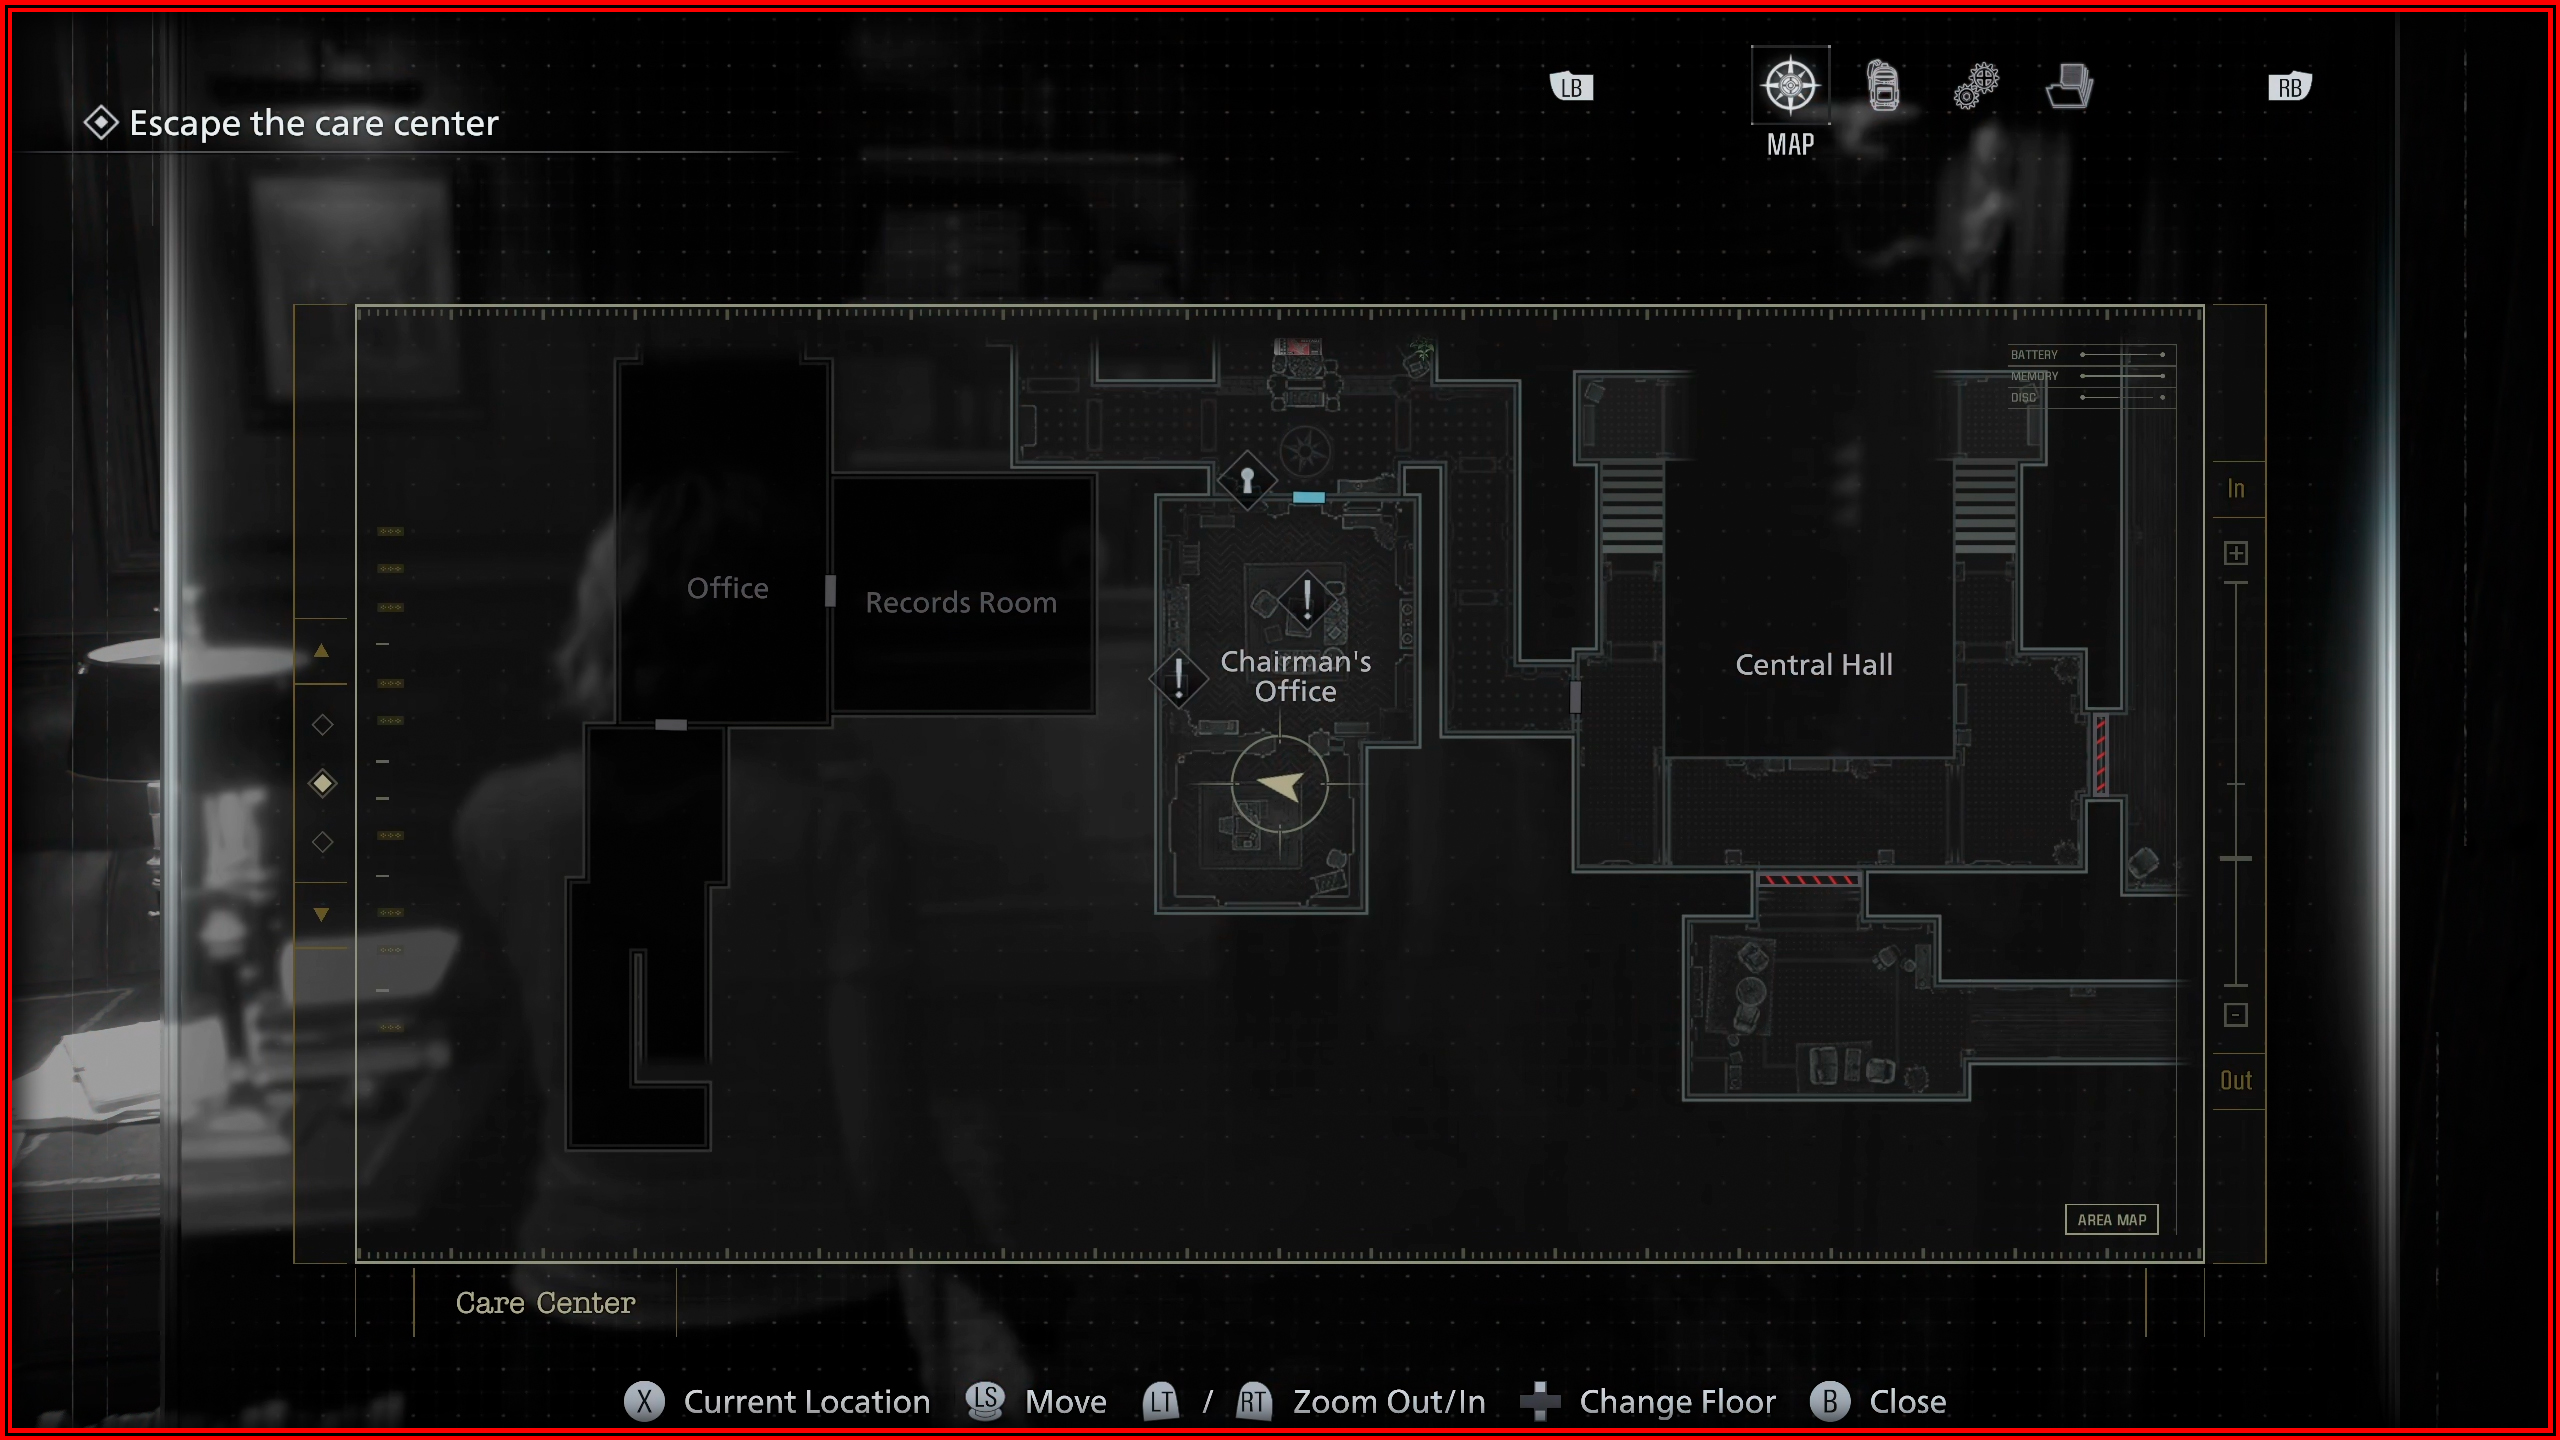
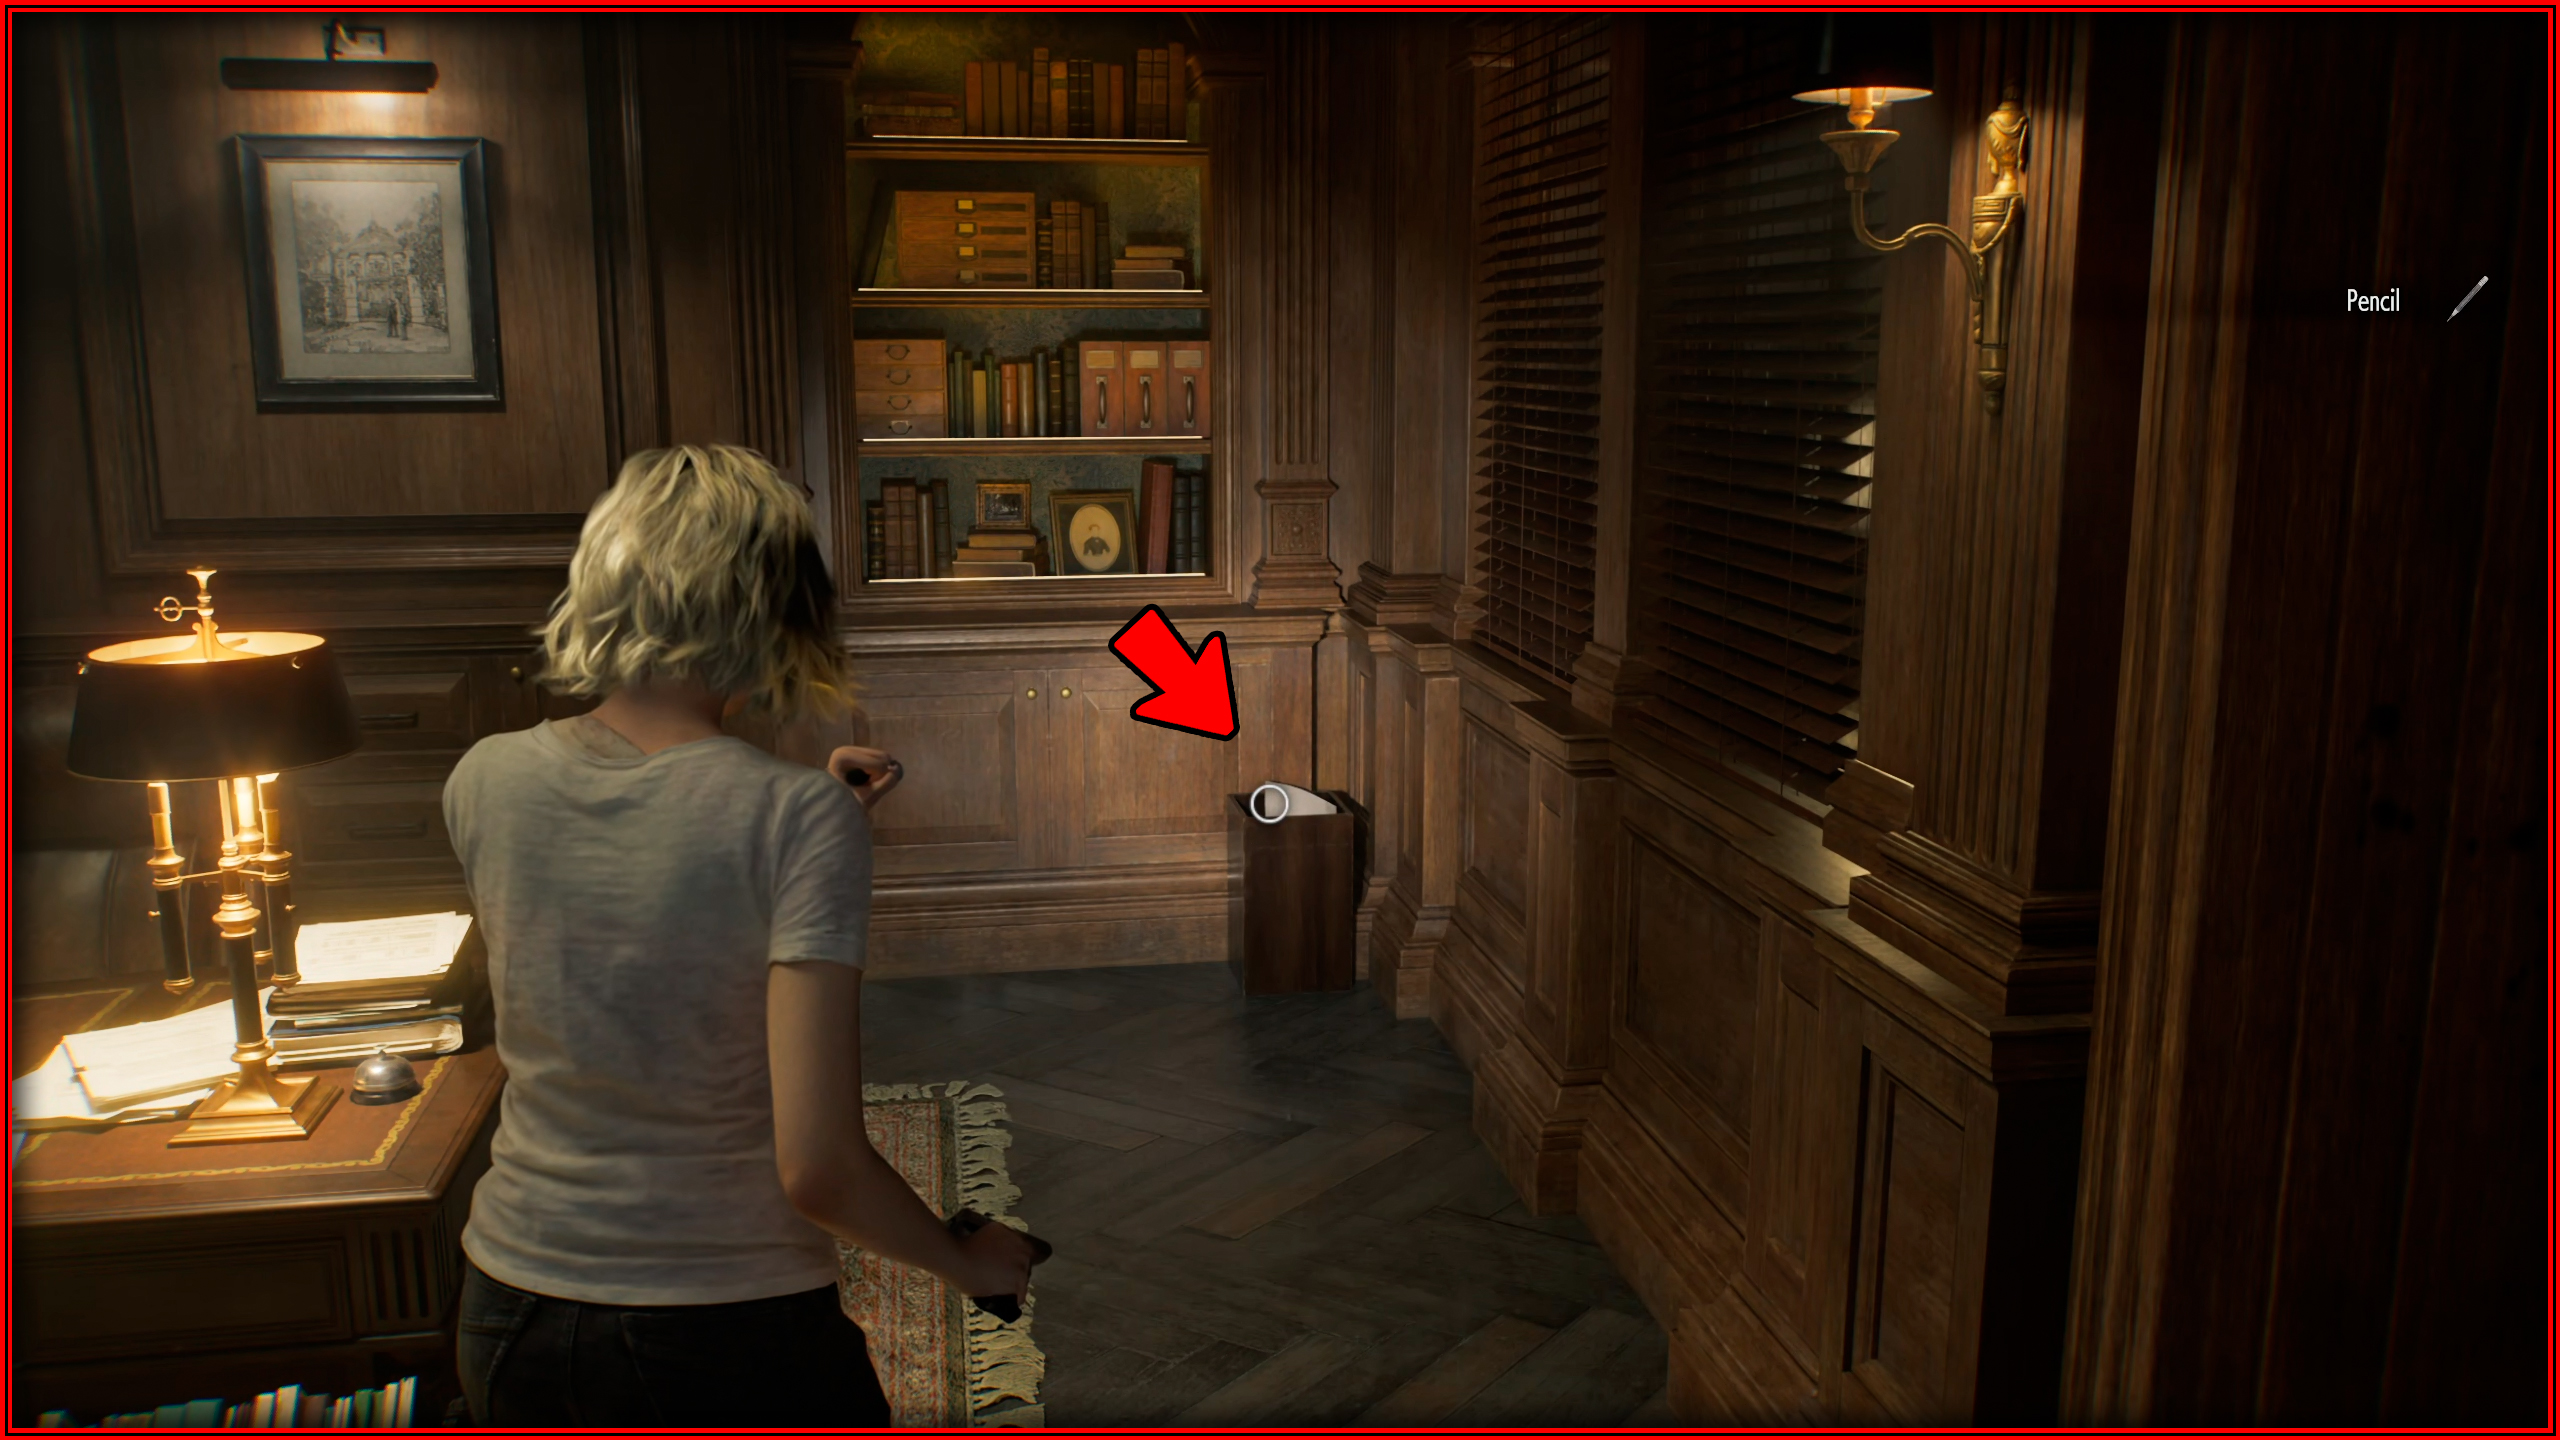
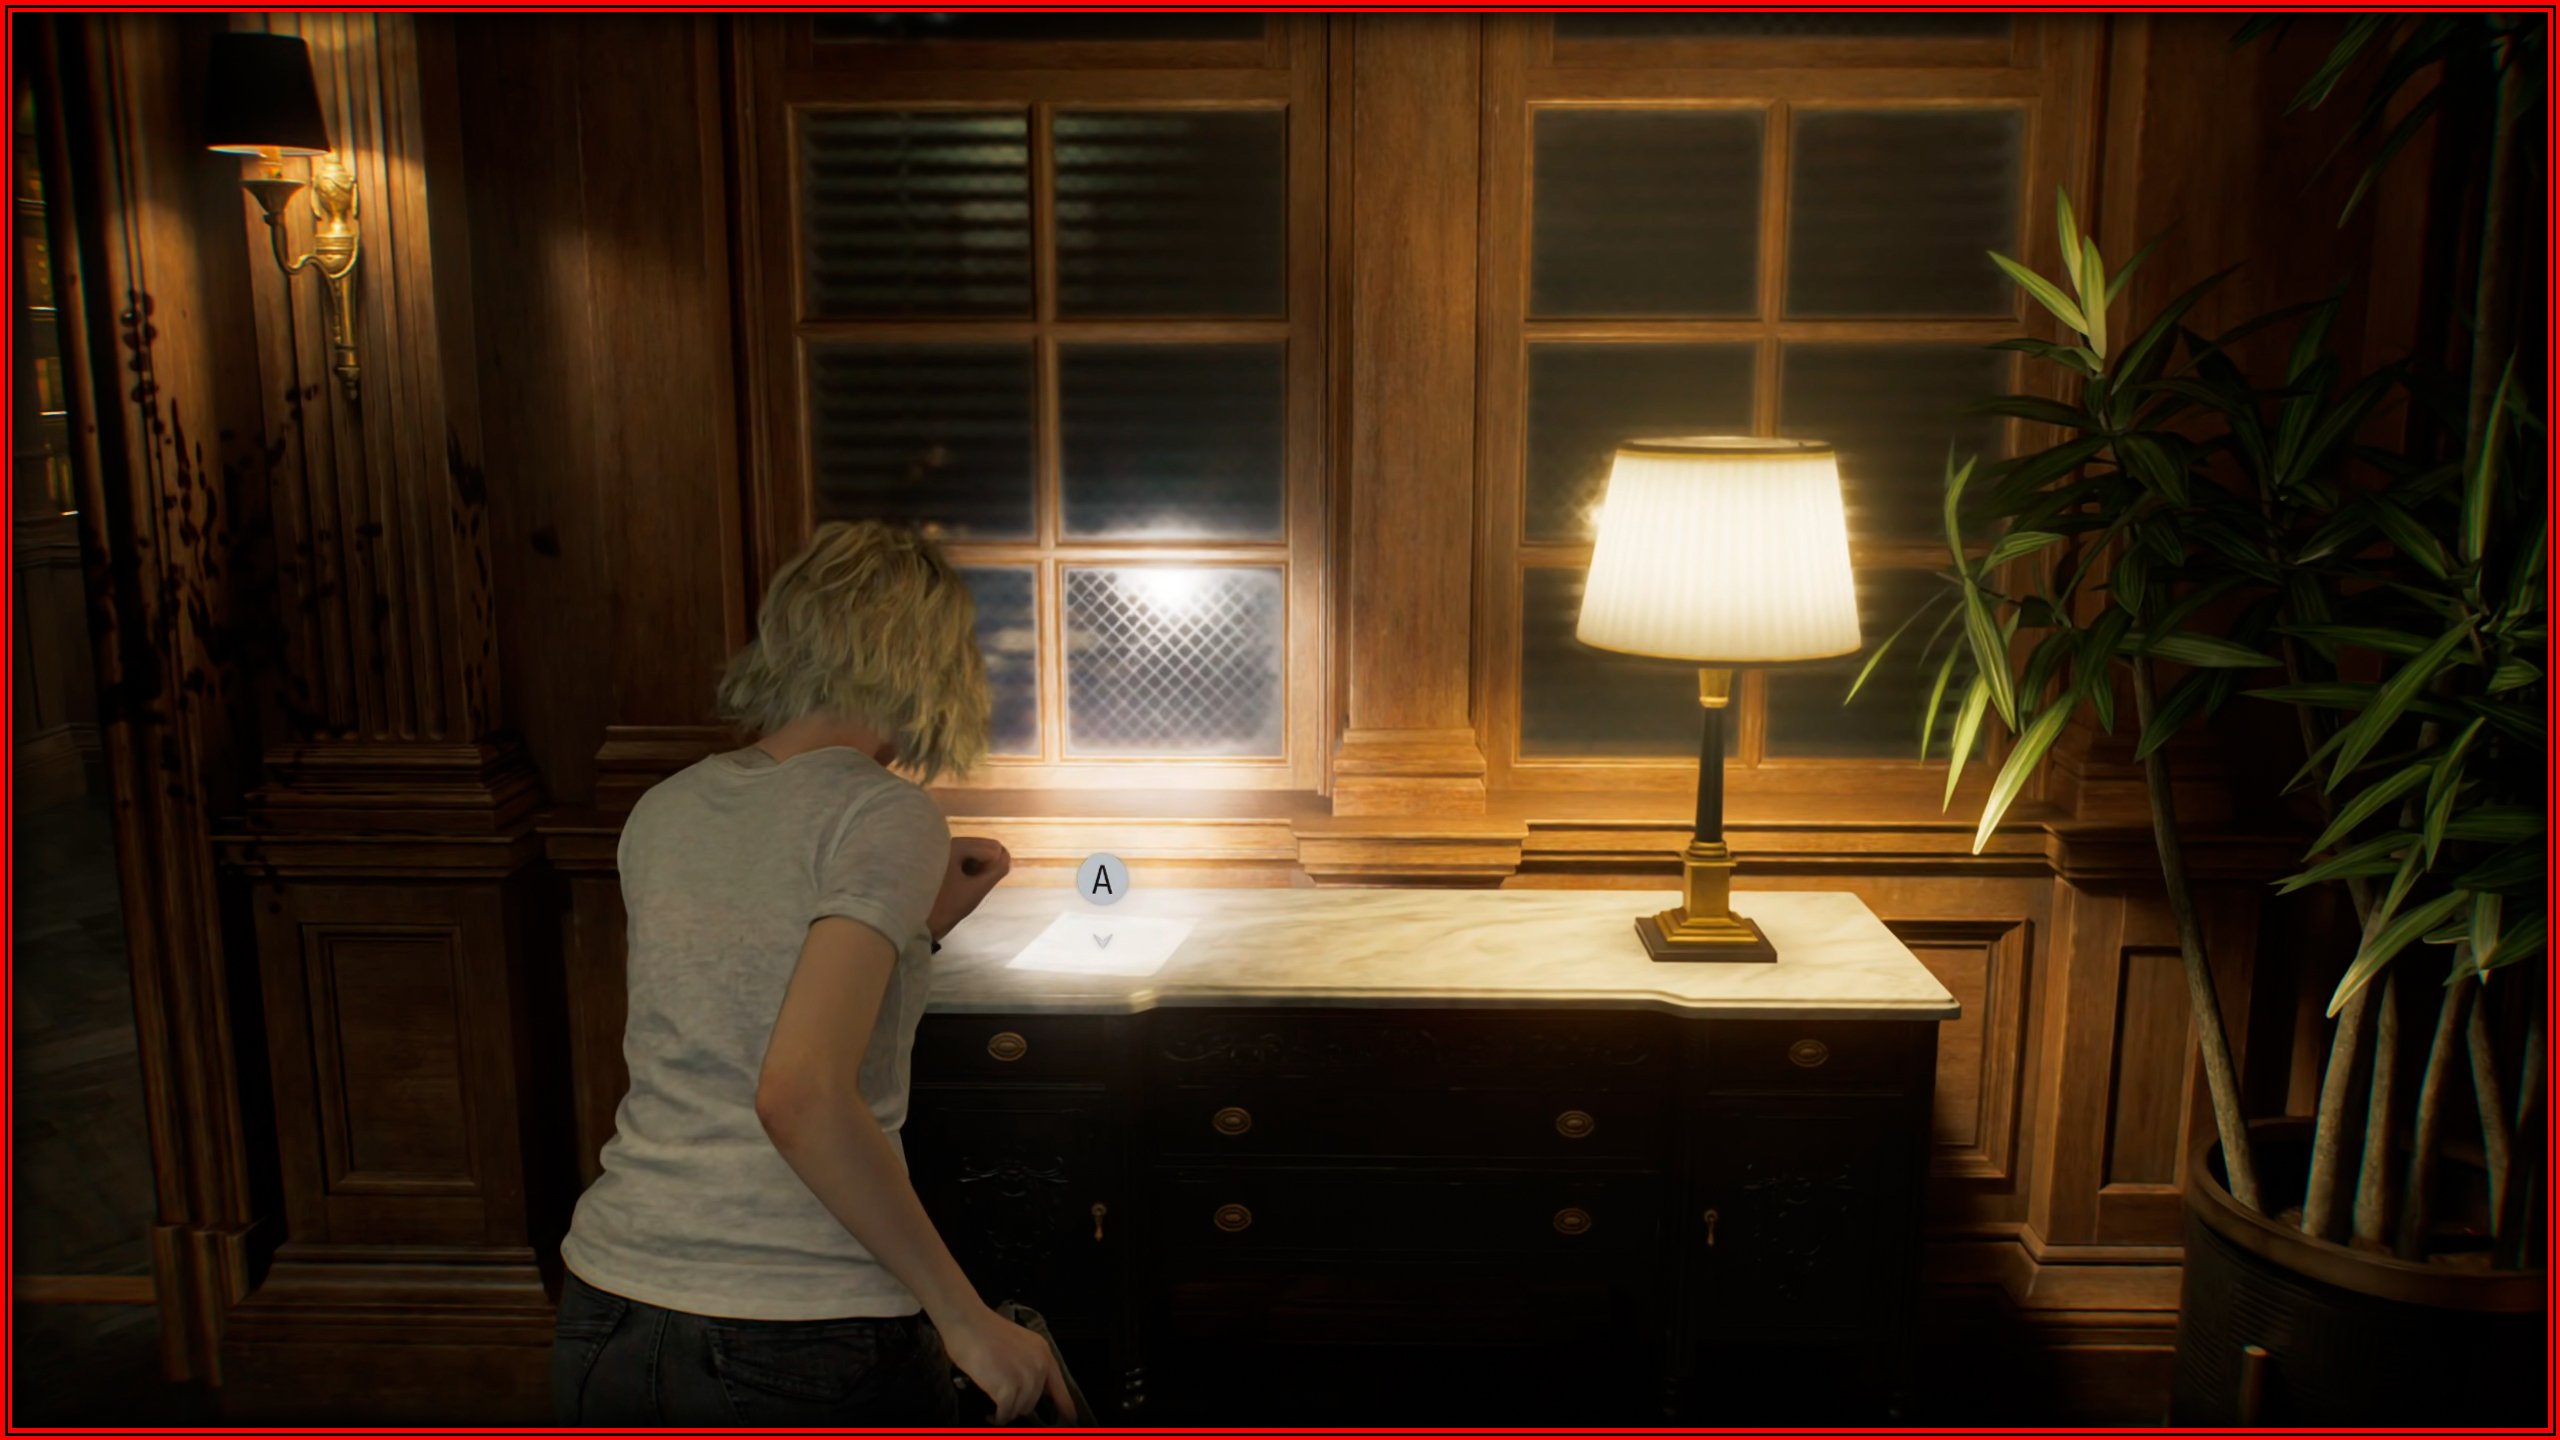
File 14/75 - Chairman’s Note
Chairman’s Office: You will receive it after using the Pencil to shade in the note.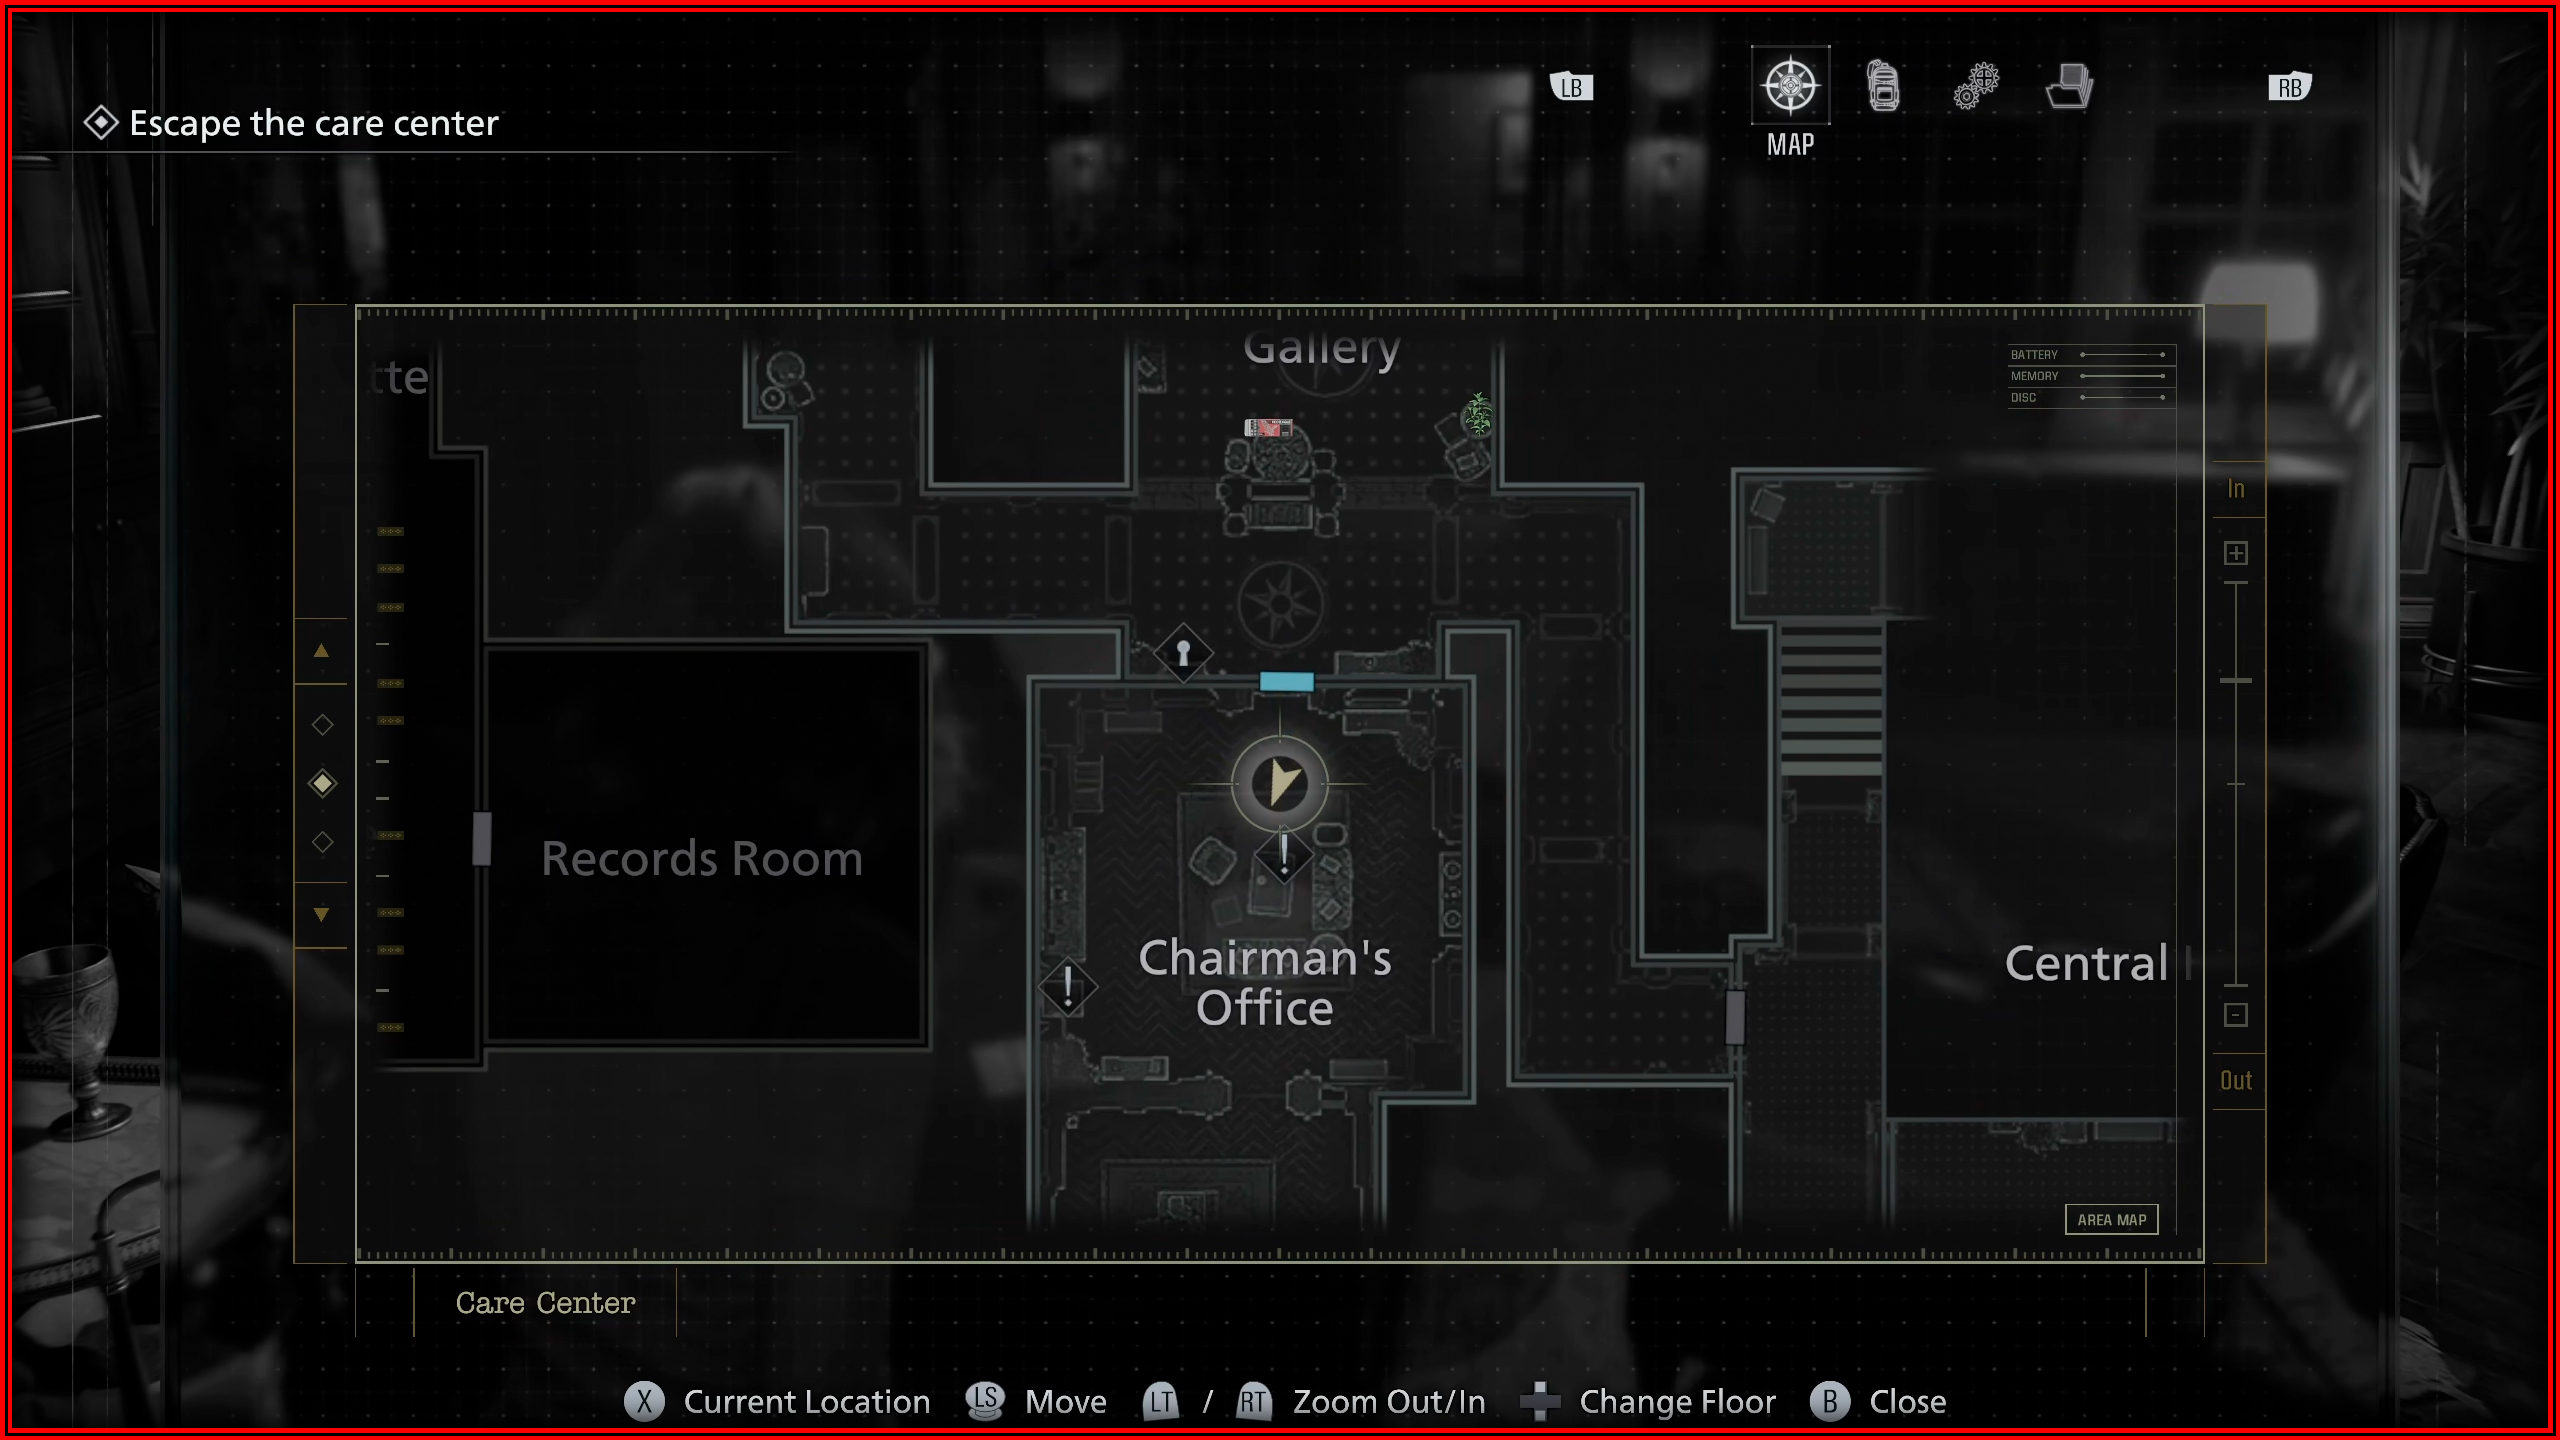
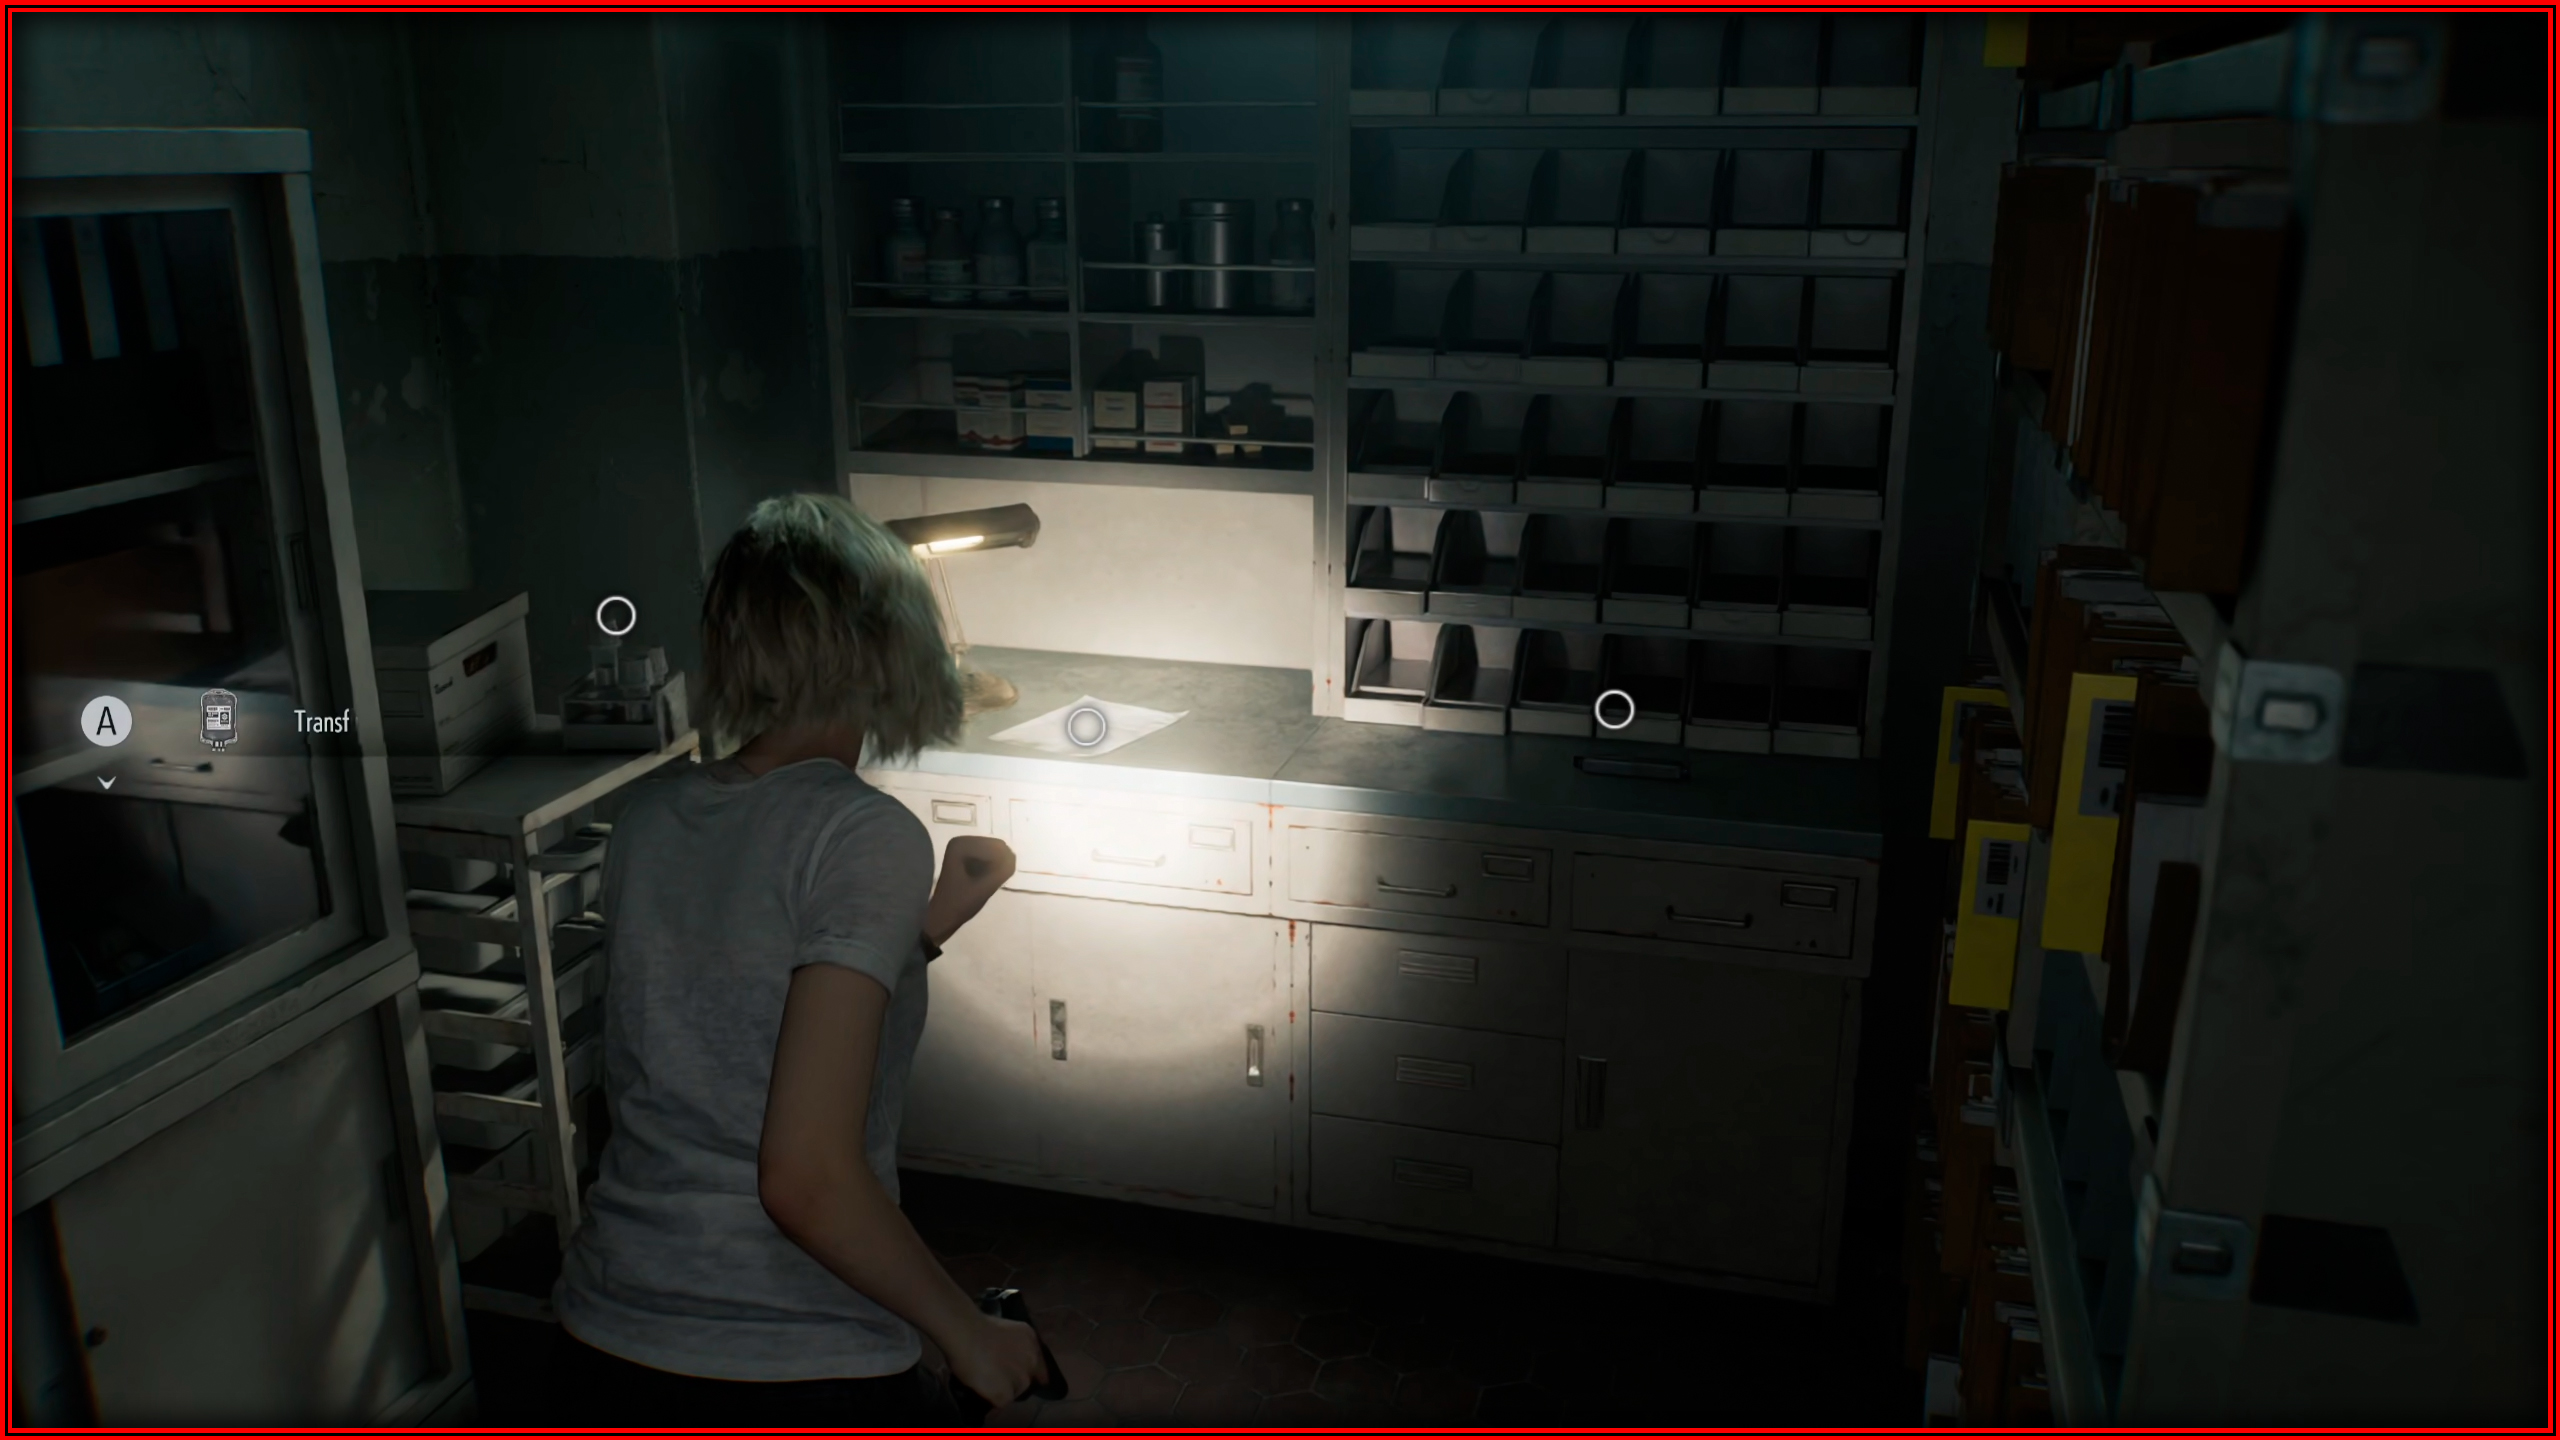
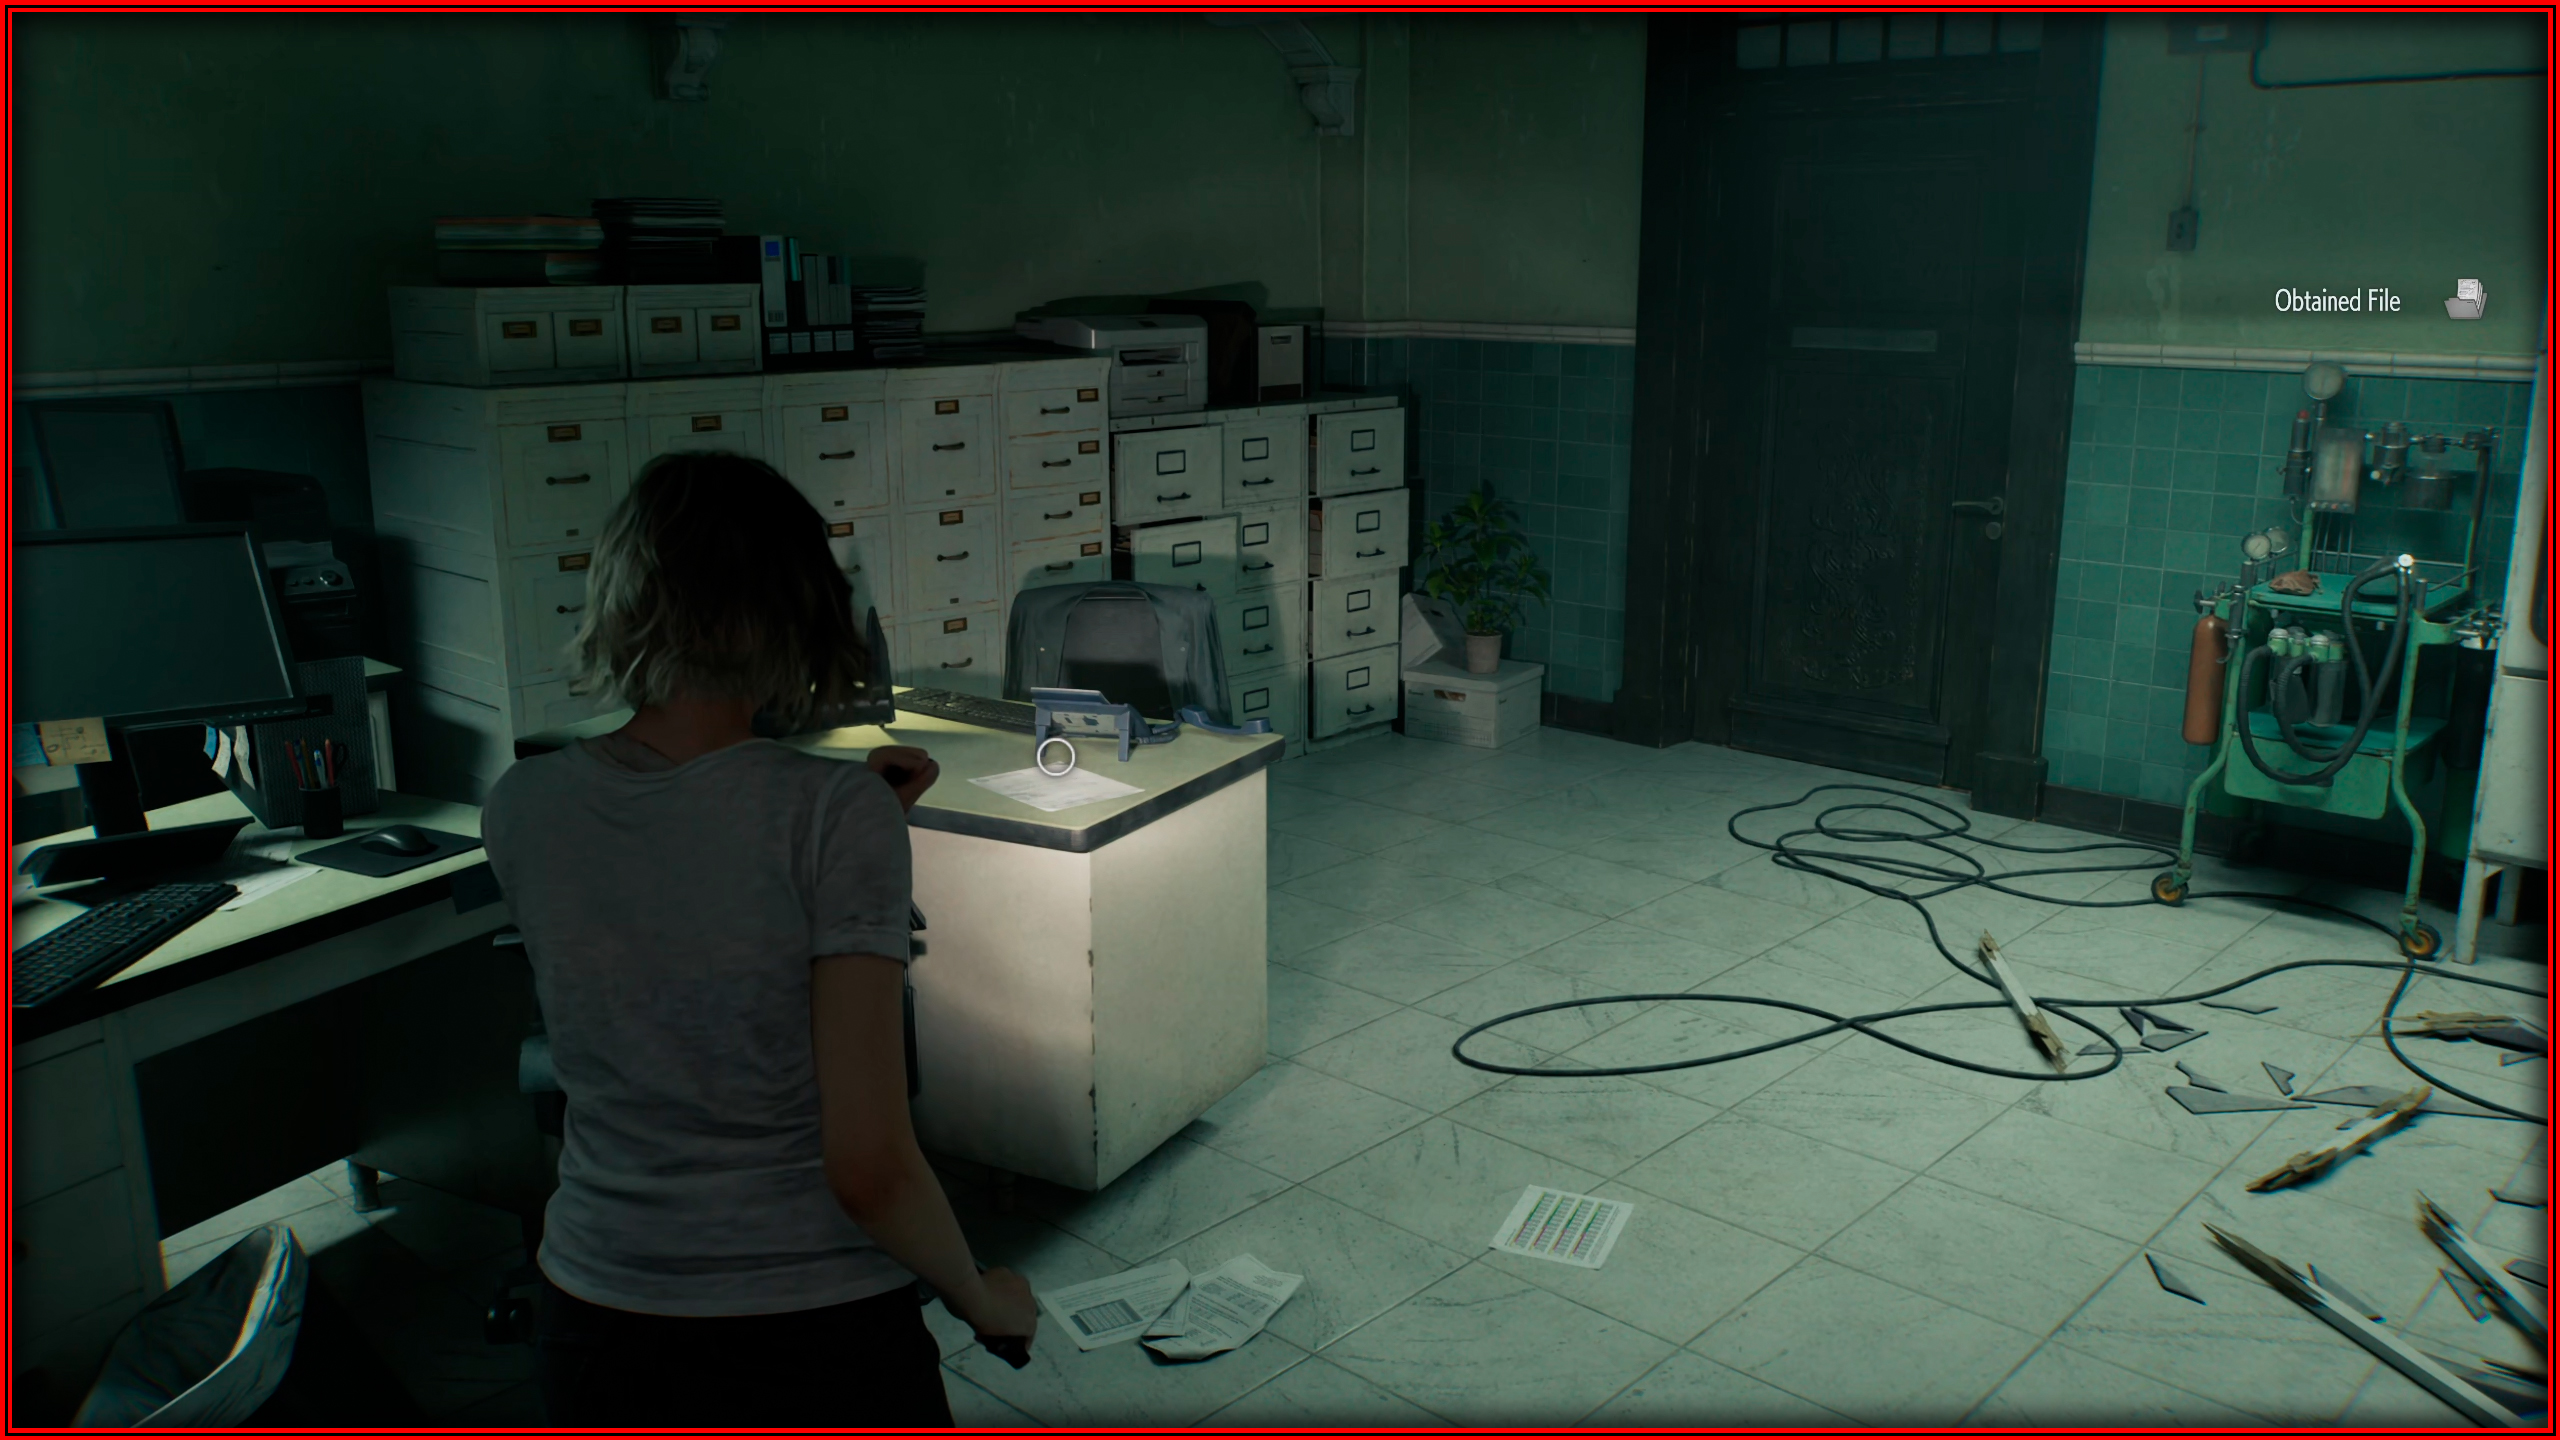
File 15/75 - Blood Compound Synthesis
Blood Lab: Once you unlock the East Wing from the Central Hall using the key, proceed through the Examination Room. At the far end of the resulting hallway, step into the Blood Lab and check the table to collect it.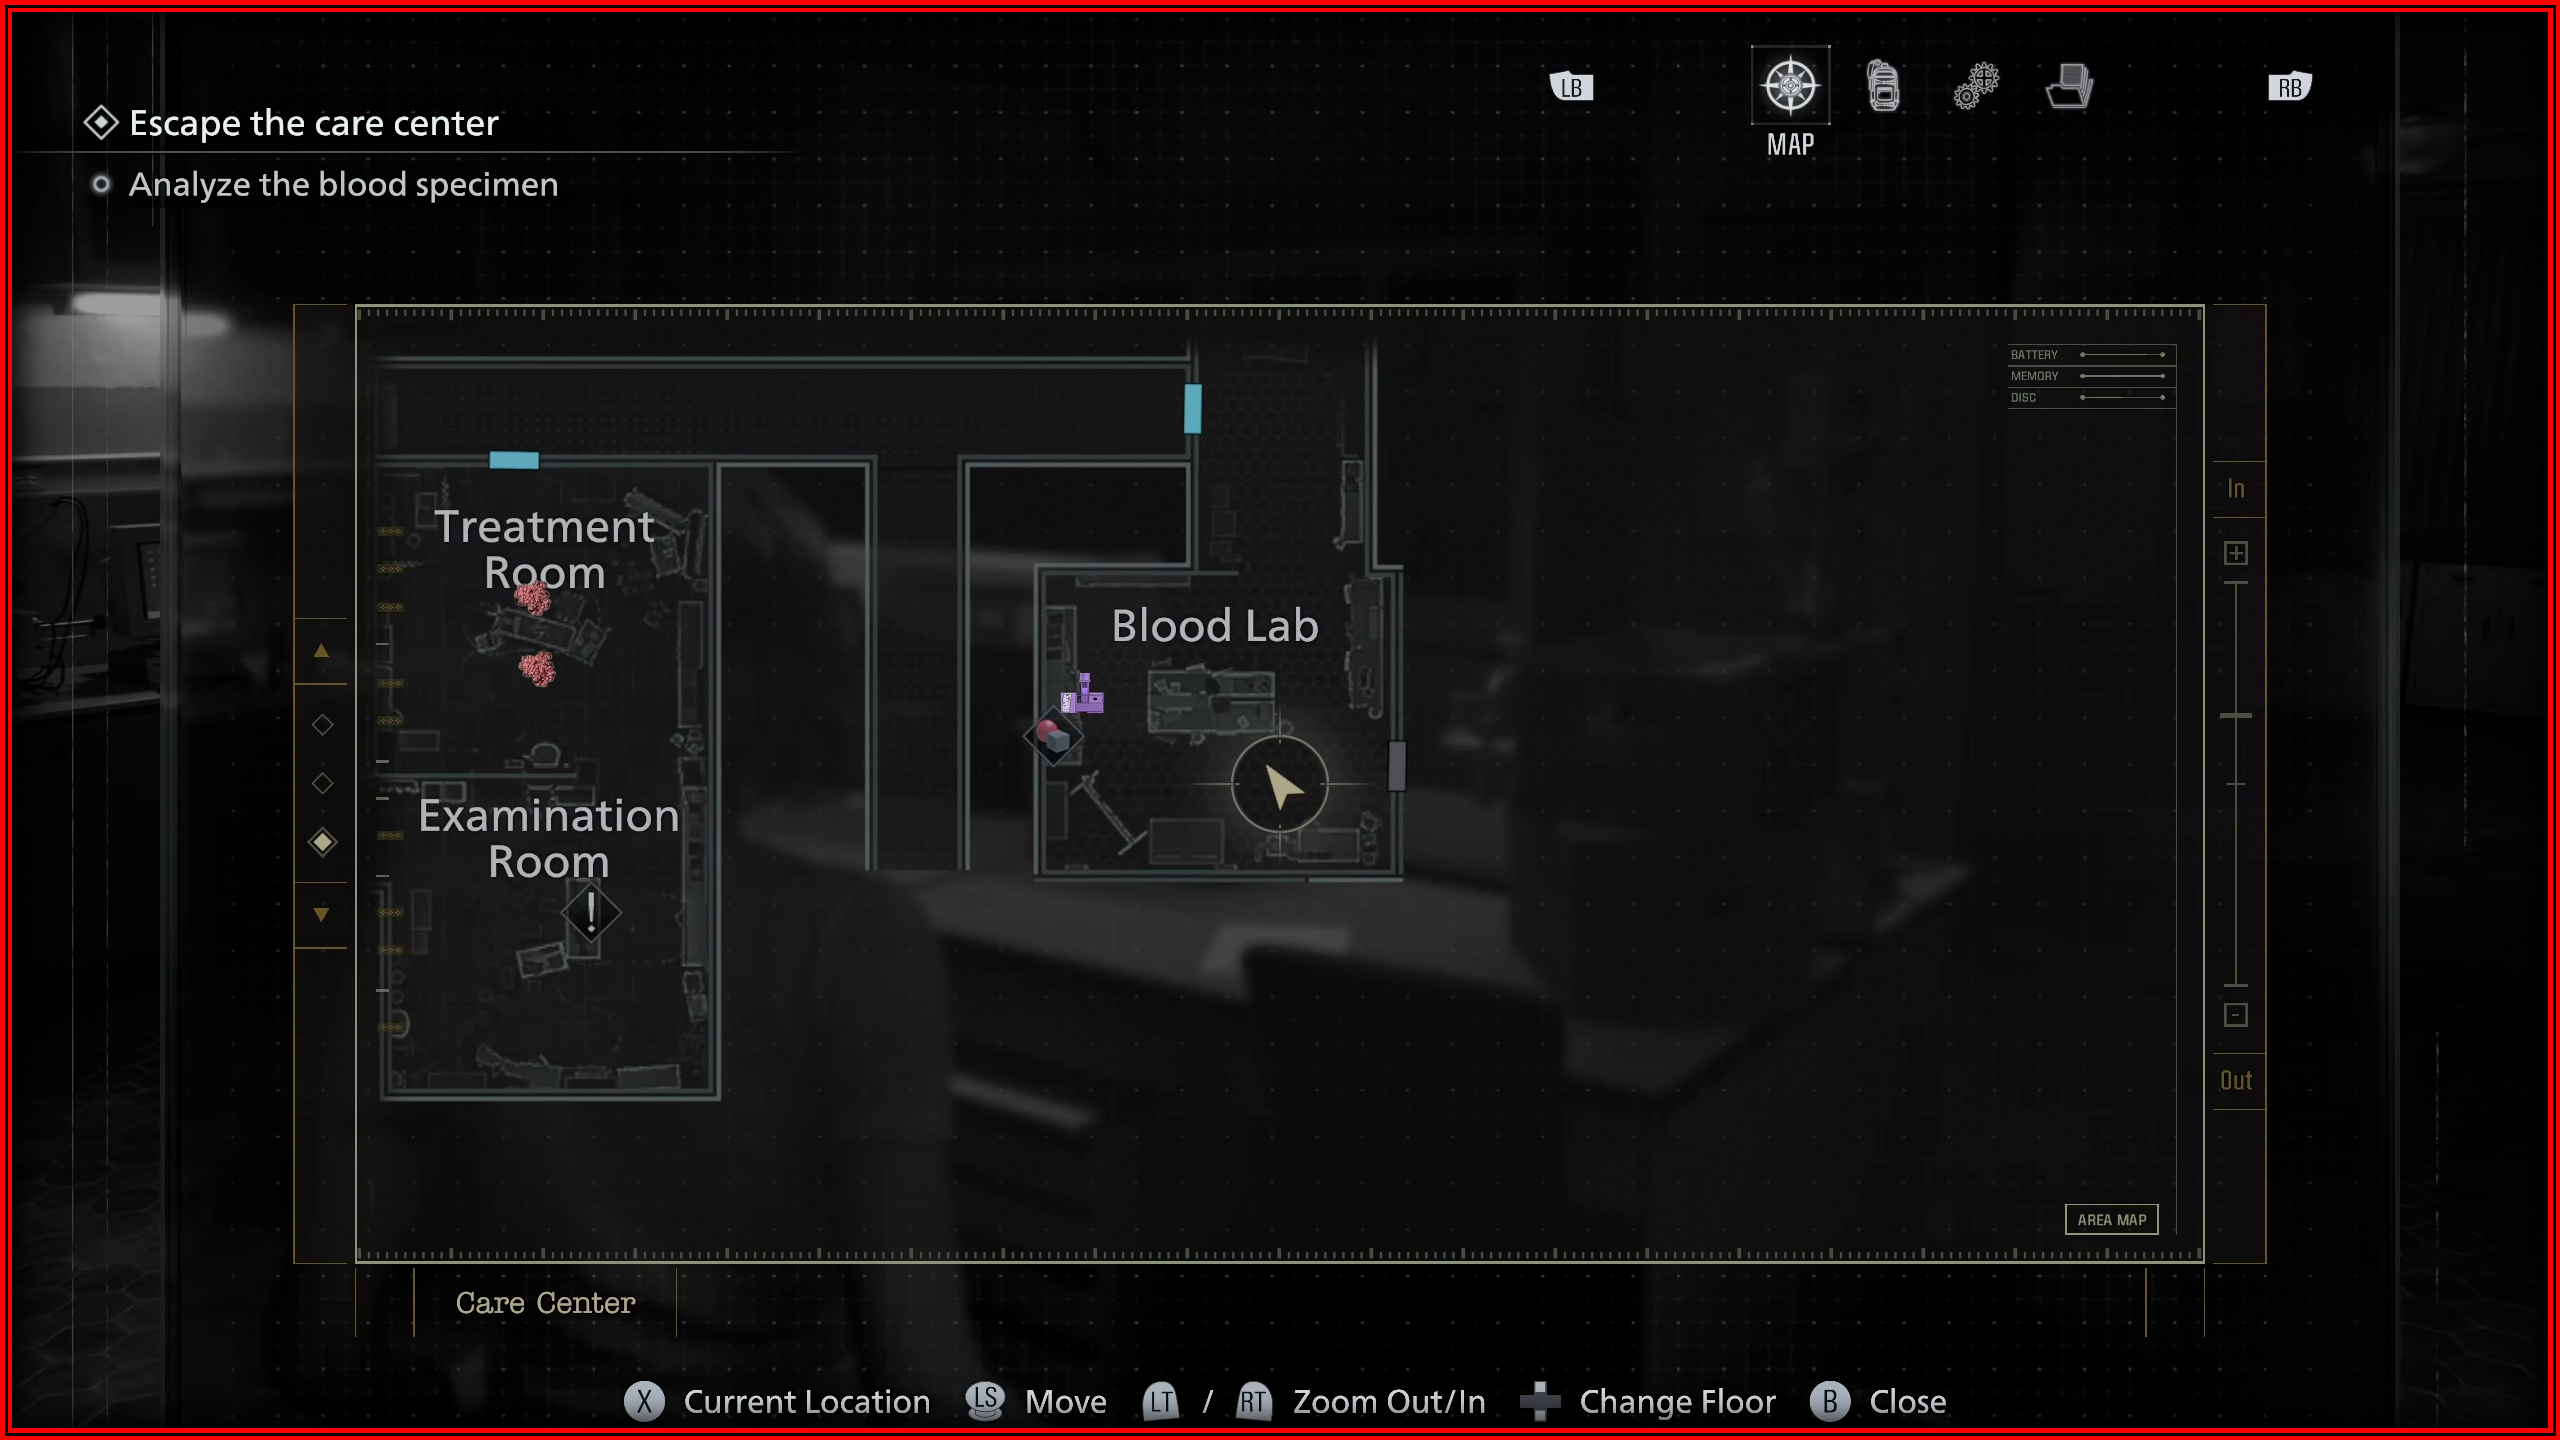
File 16/75 - Safe Replacements
Waiting Room: Next to a open safe.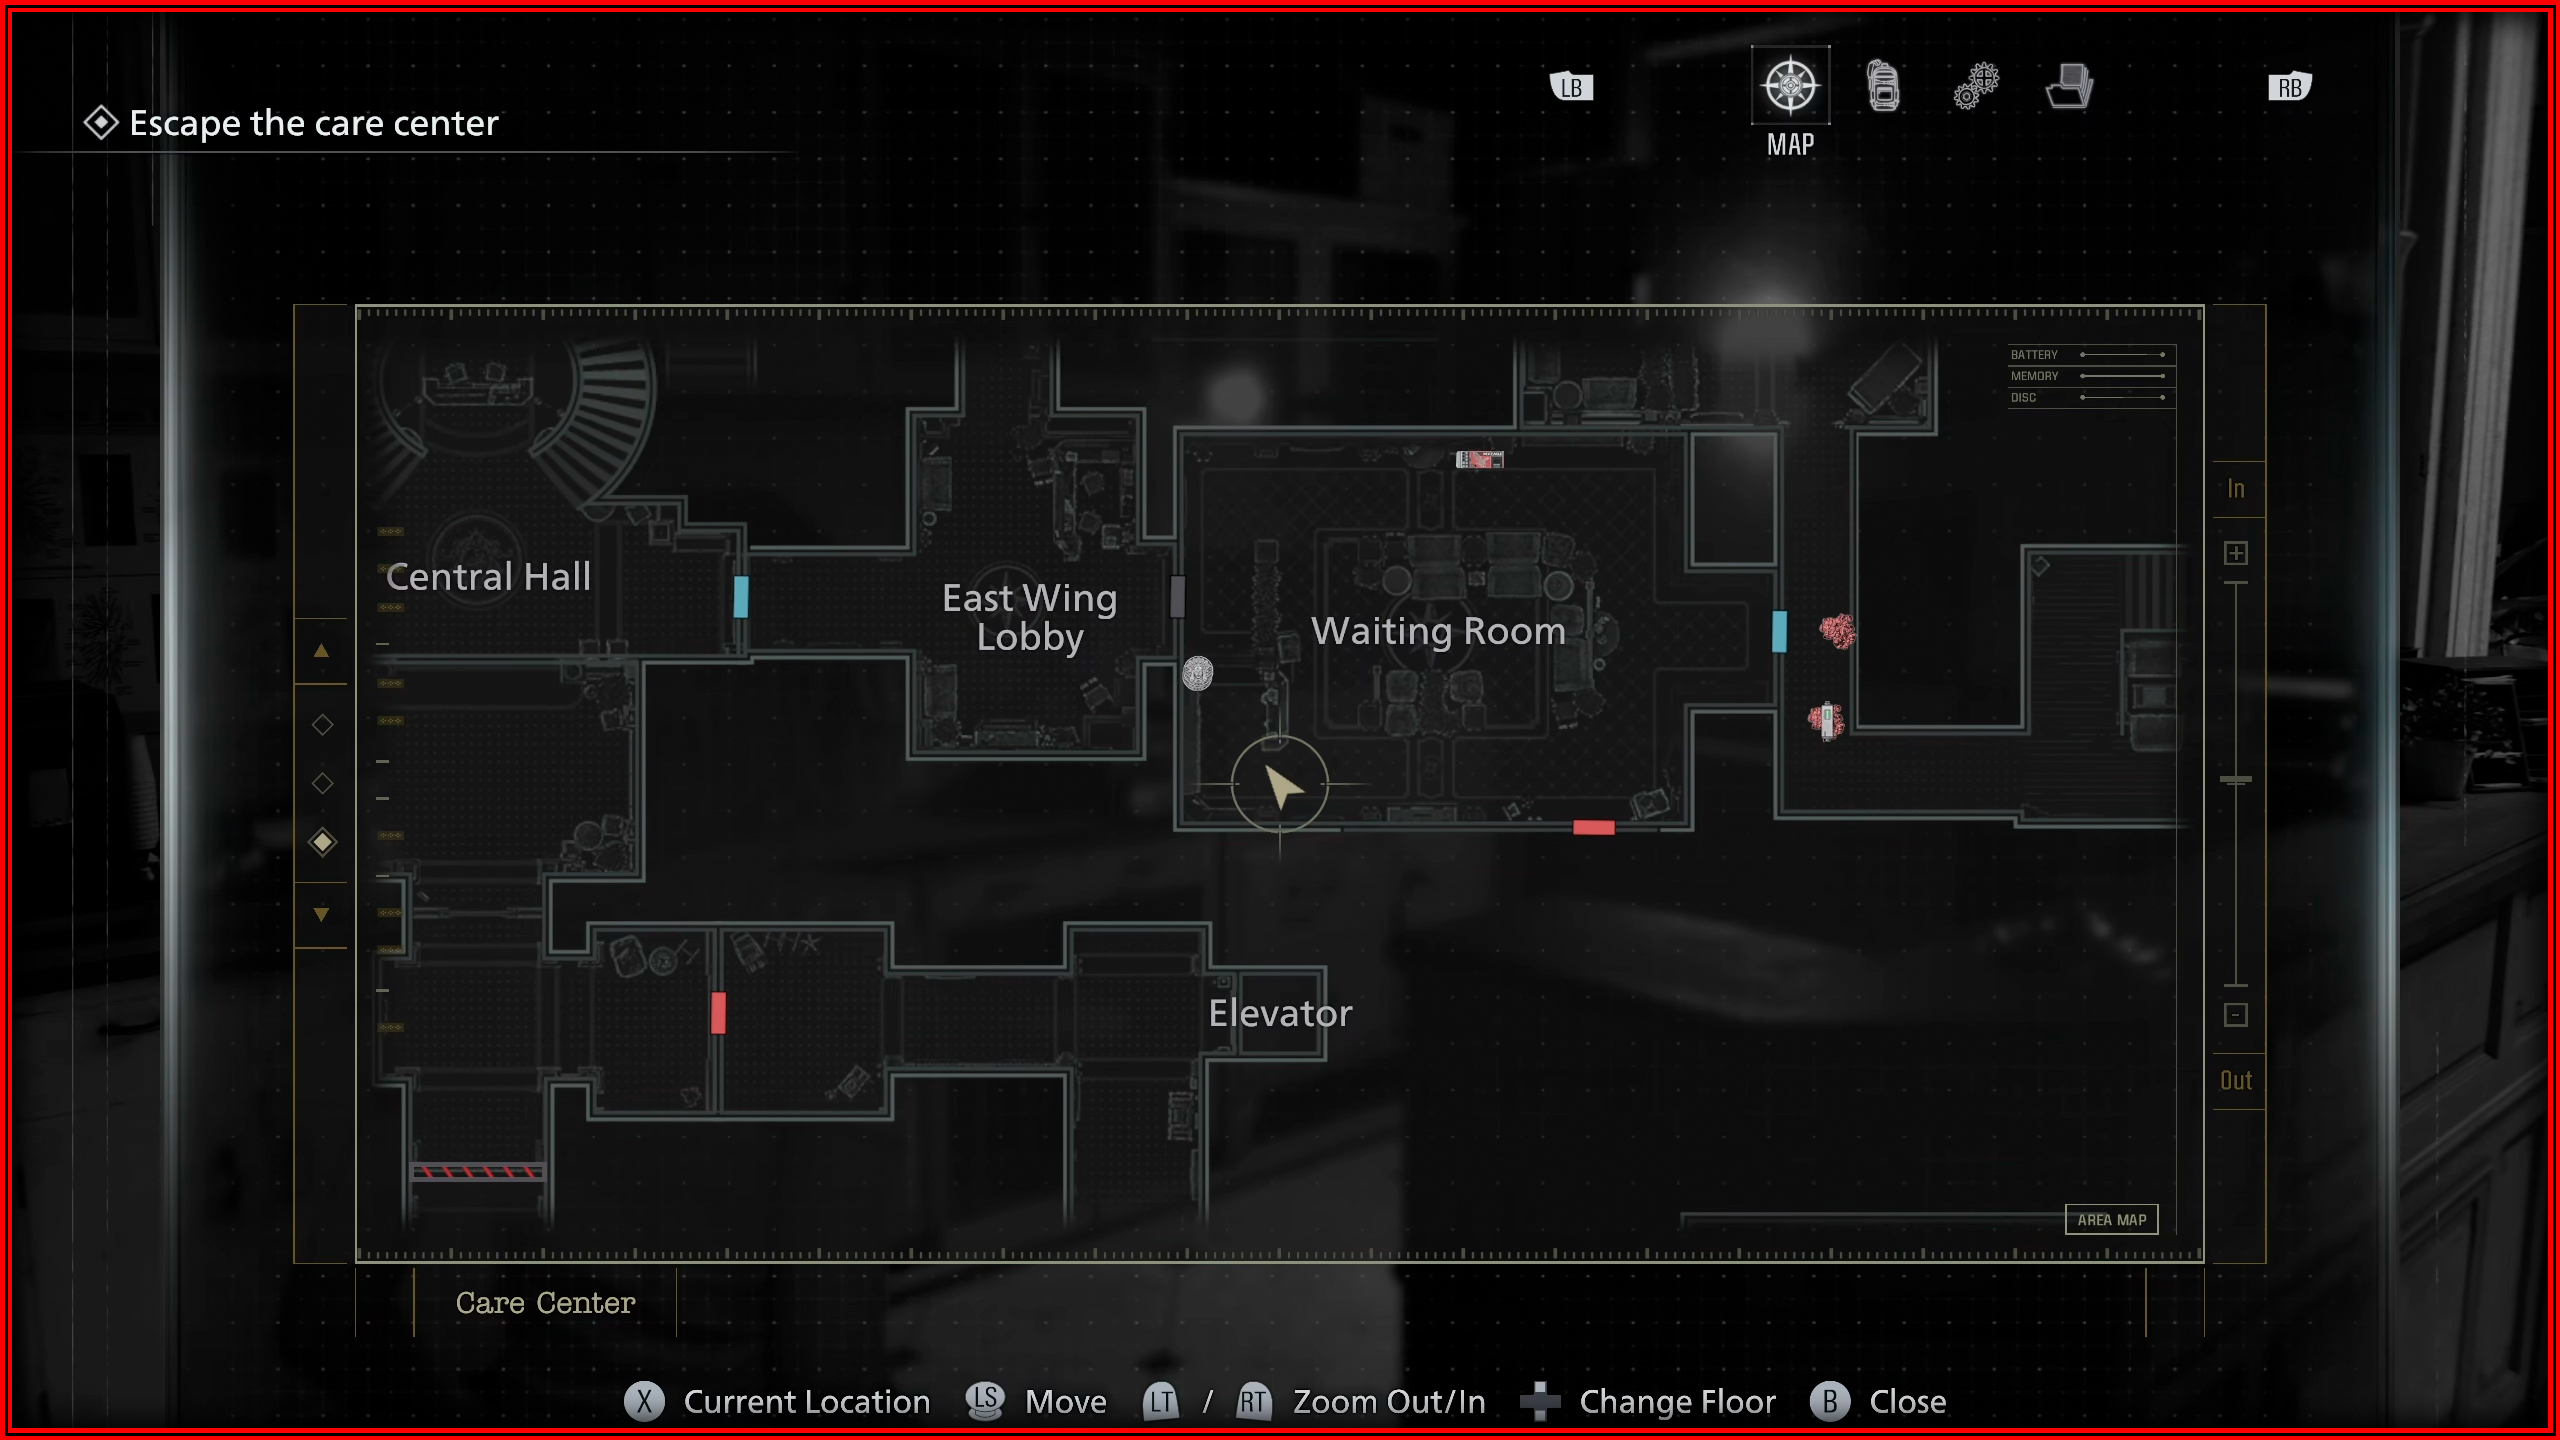

File 17/75 - Lead Researcher’s Message
Lead Researcher’s Office: Head up to the safe room on the 2nd floor, proceed into the back room, and check the cupboard to find this.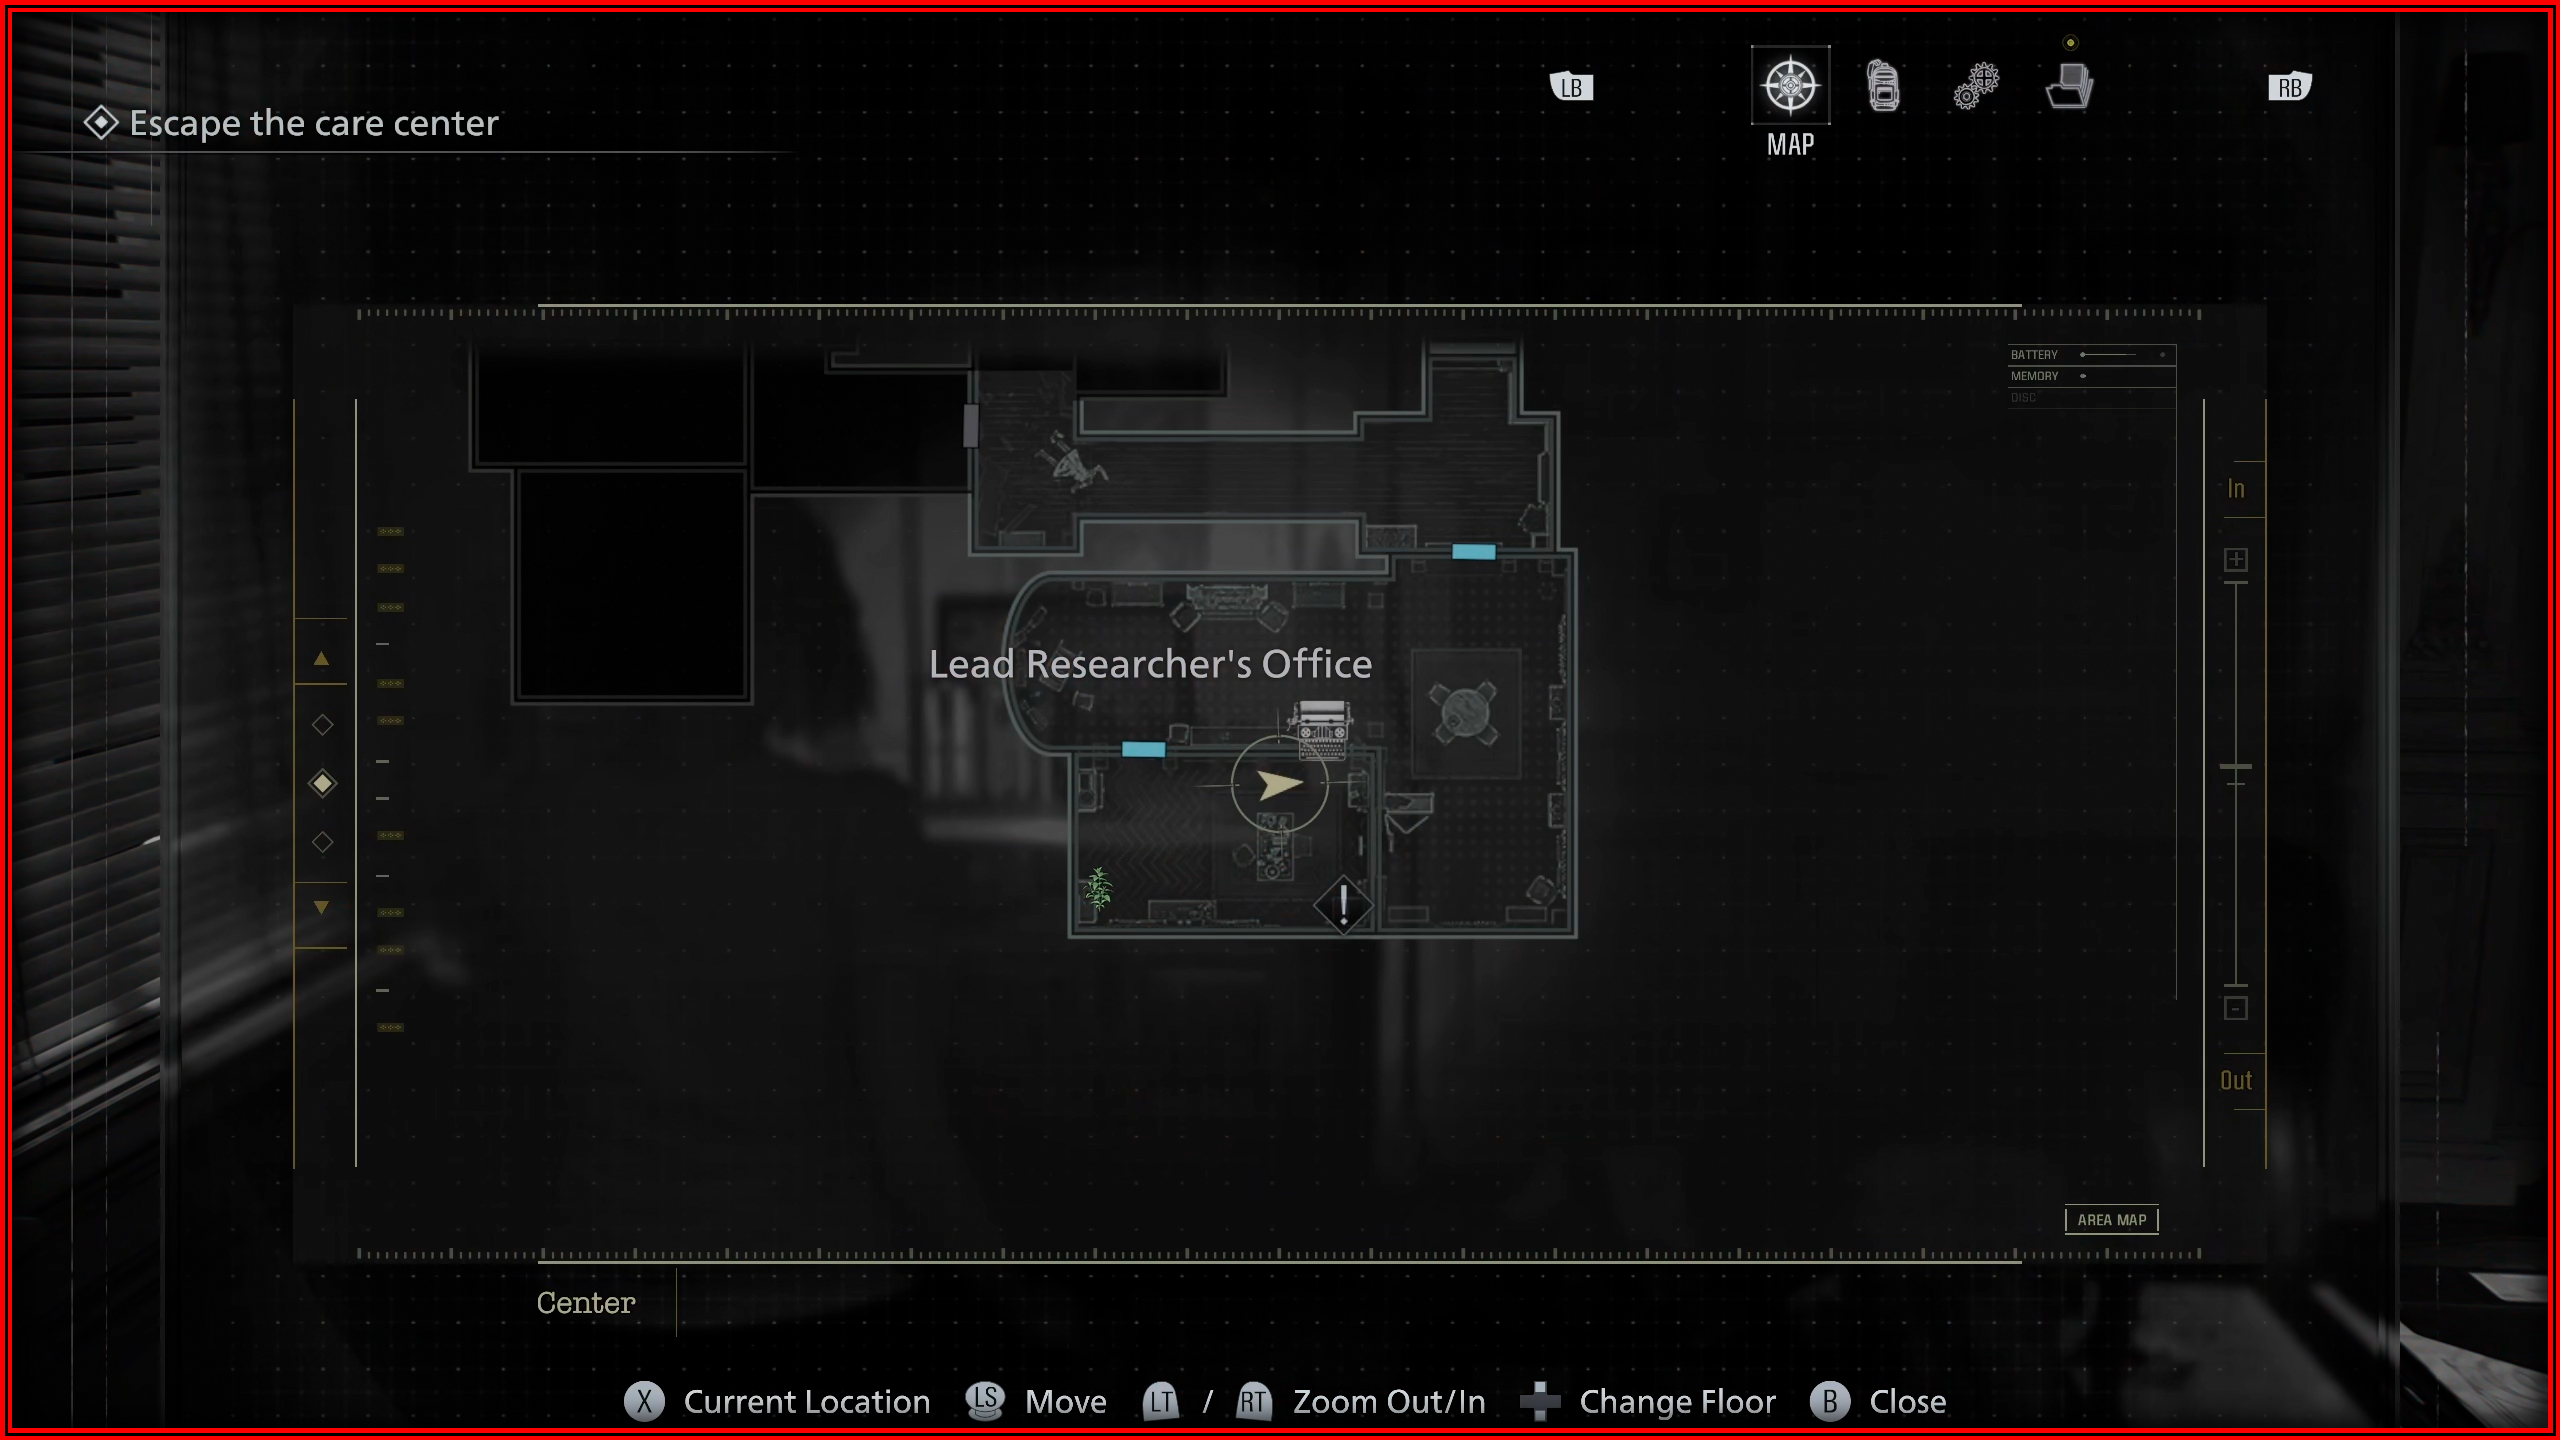

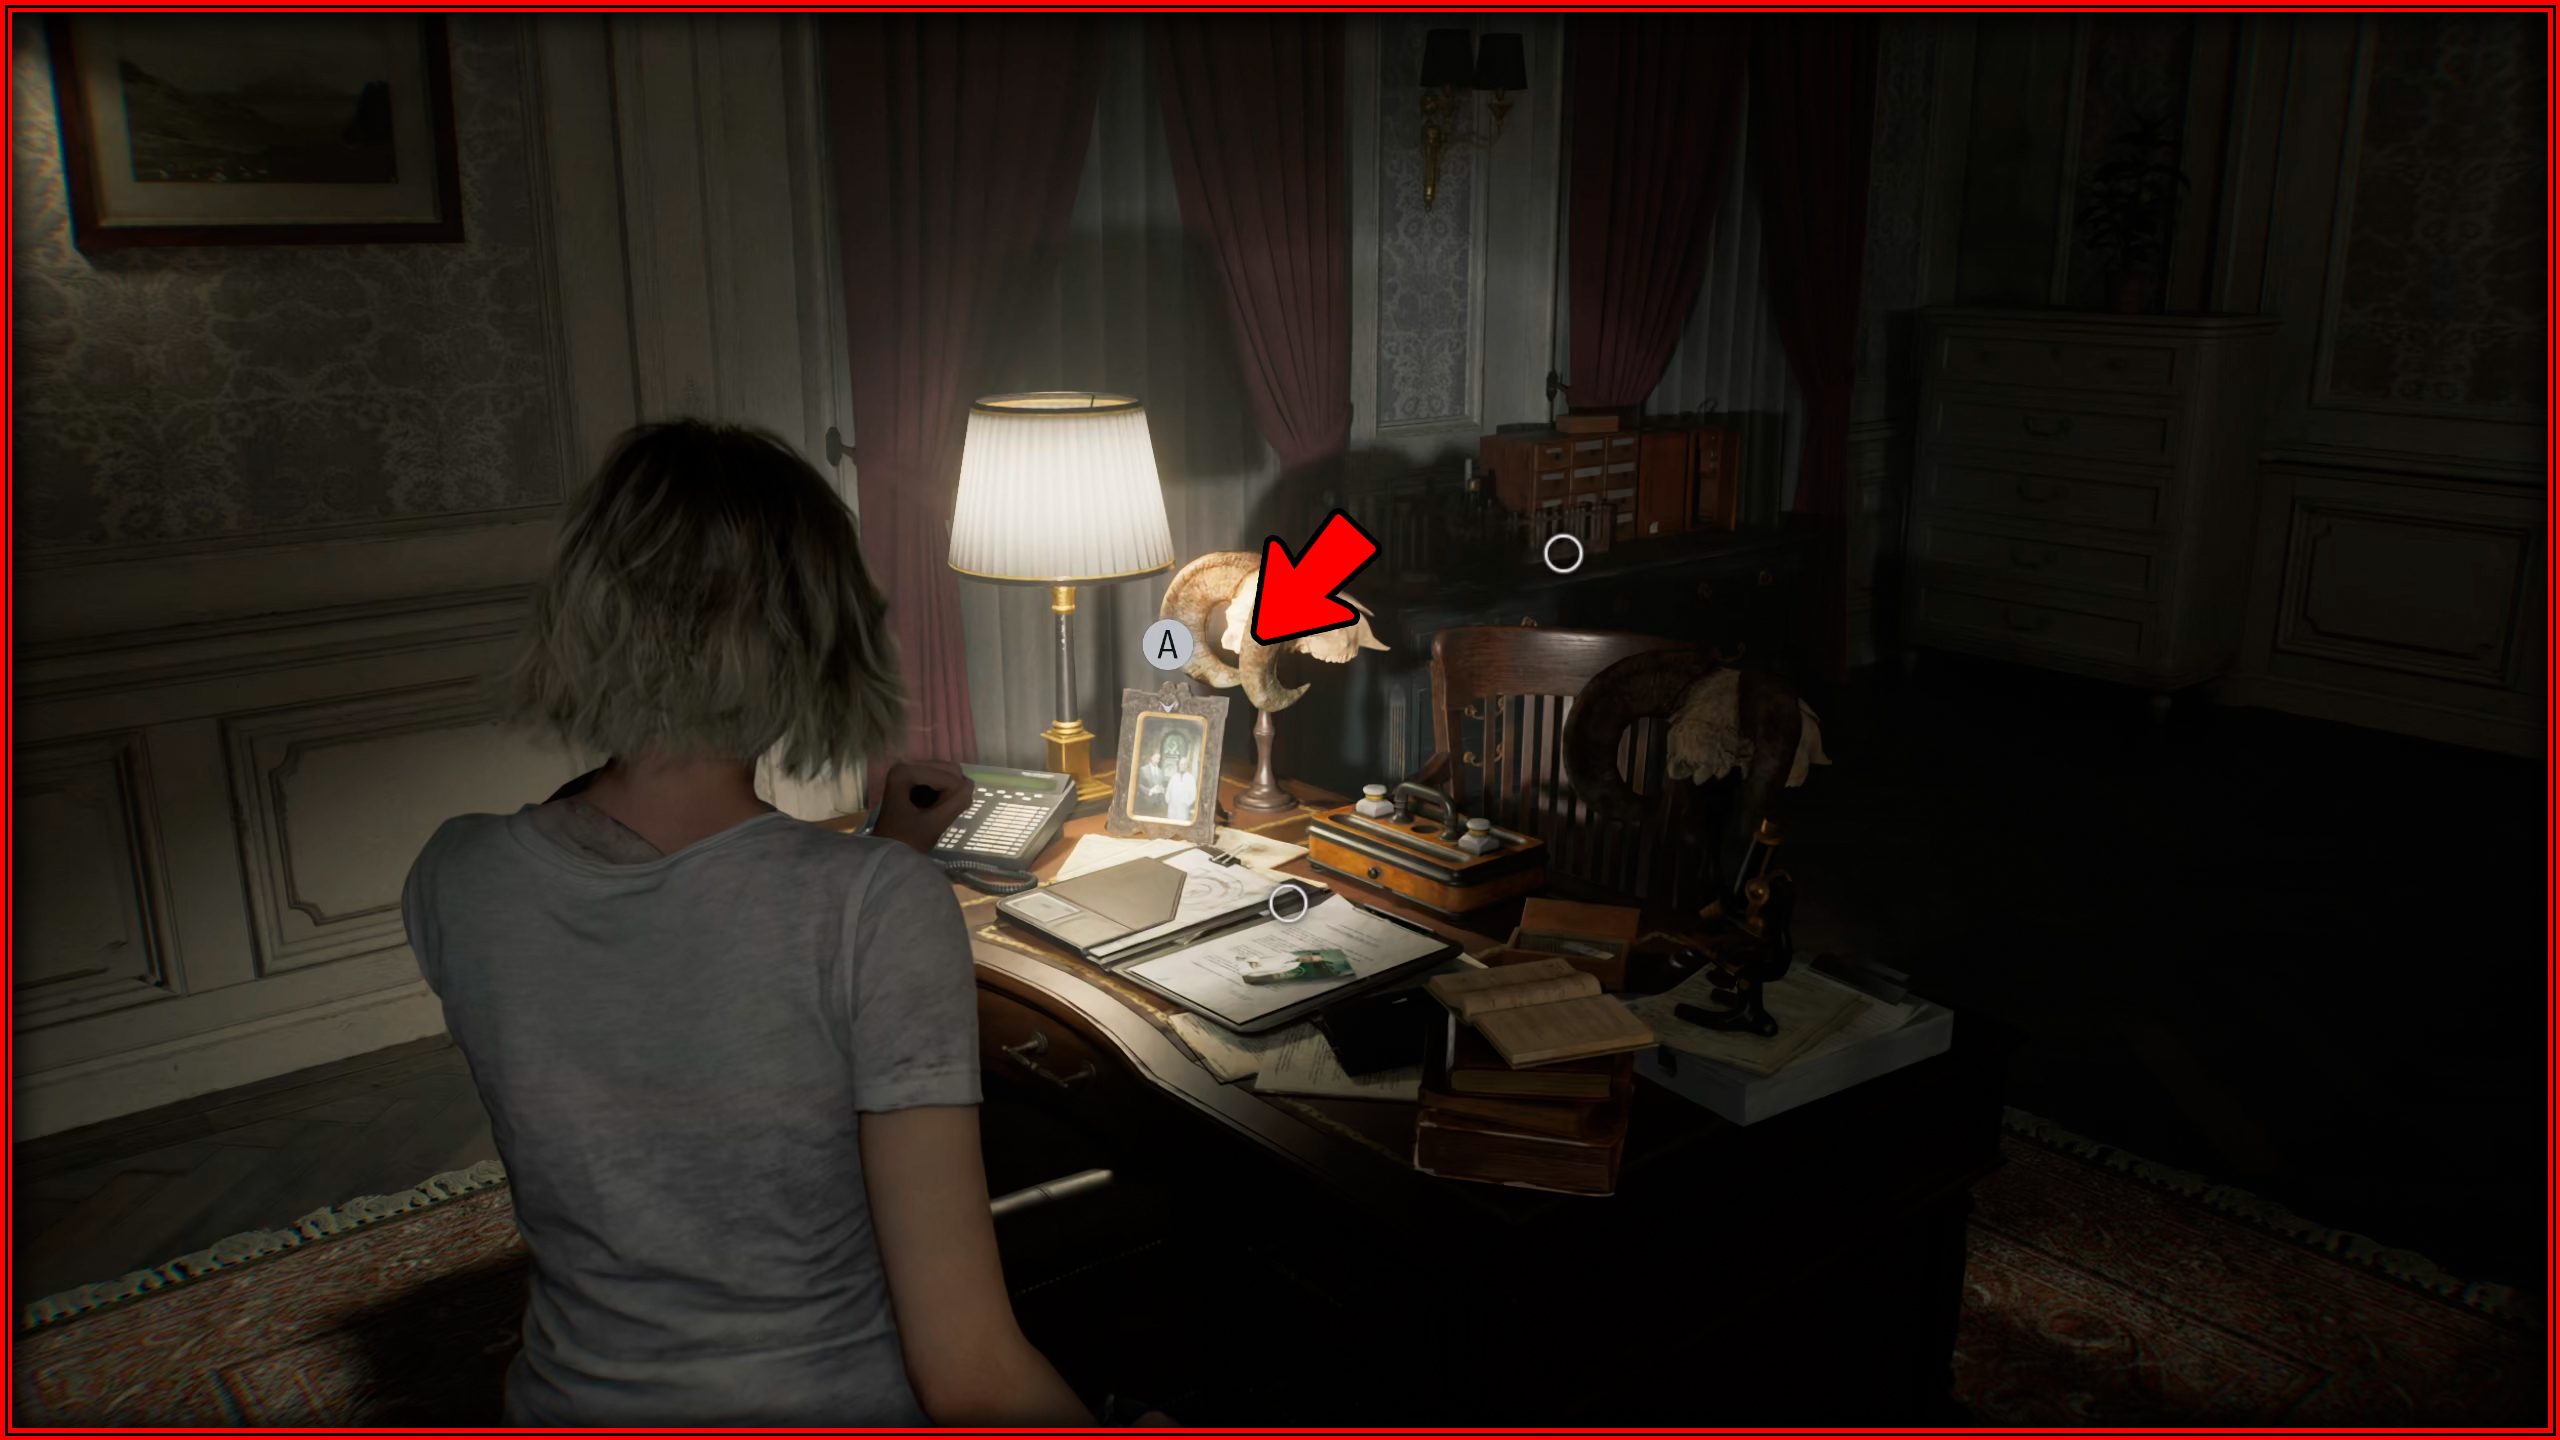
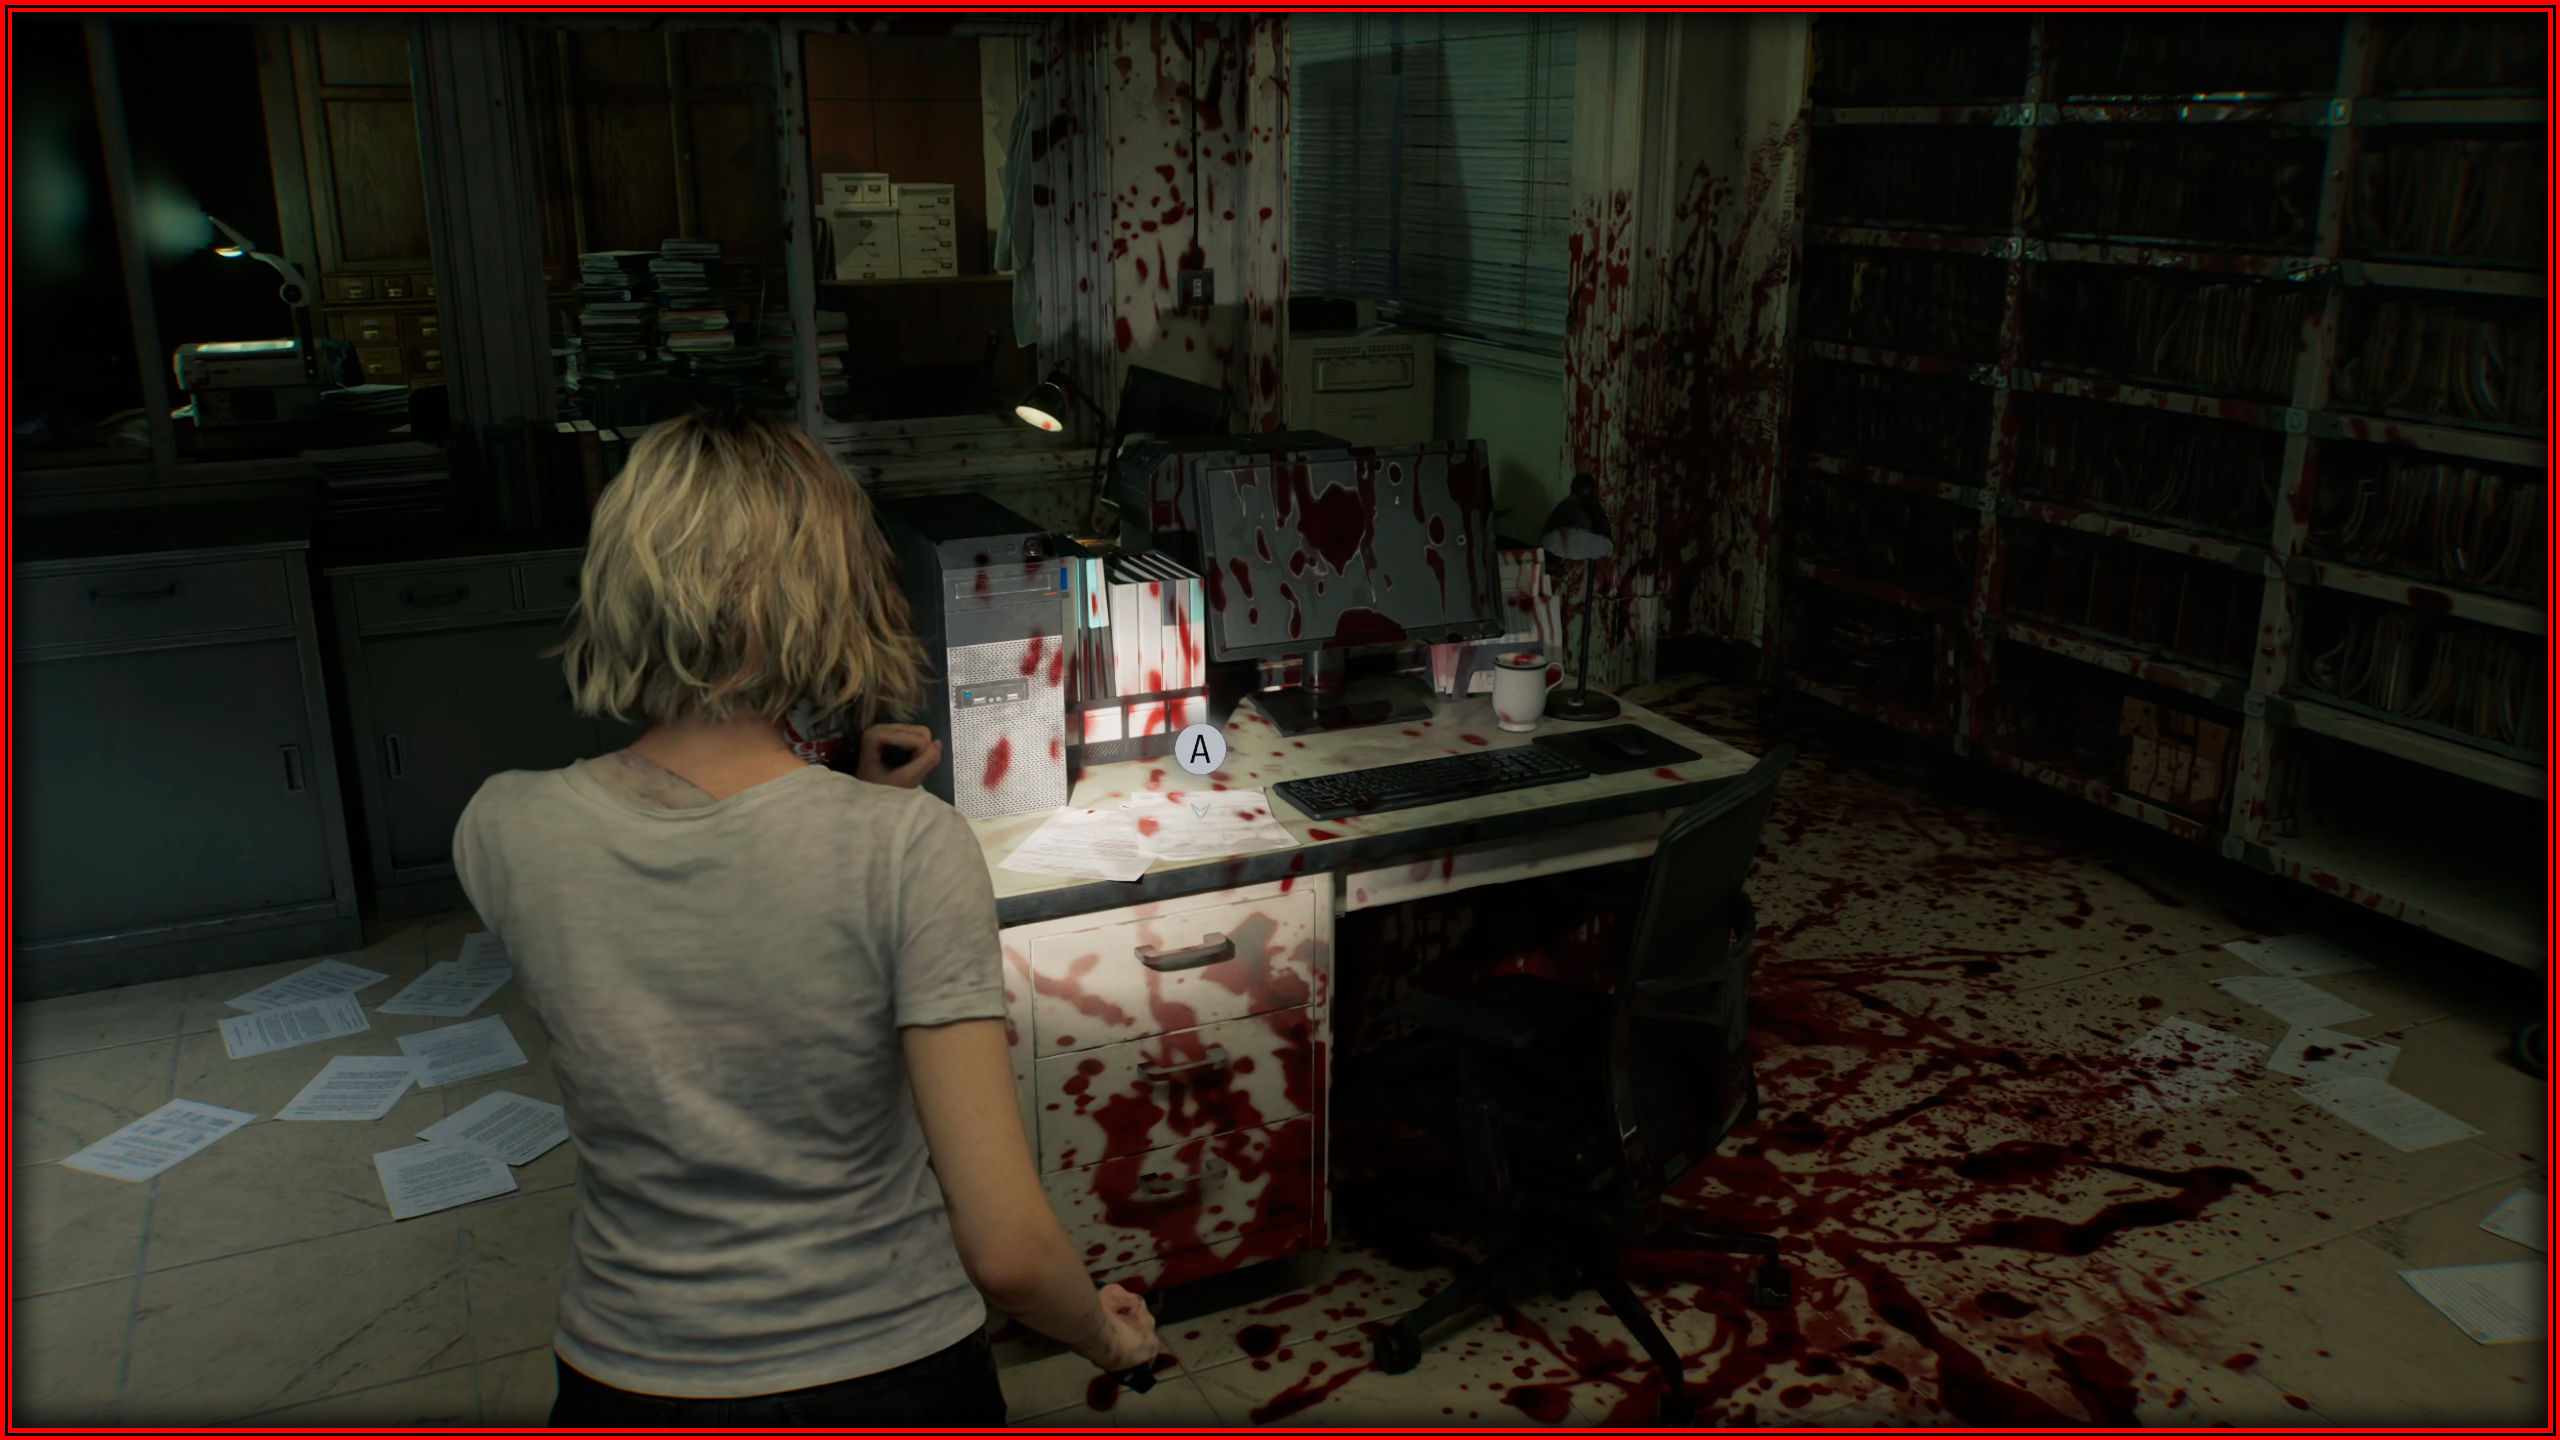
File 18/75 - Lead Researcher’s Picture 1
Lead Researcher’s Office: On the desk, inside the framed picture.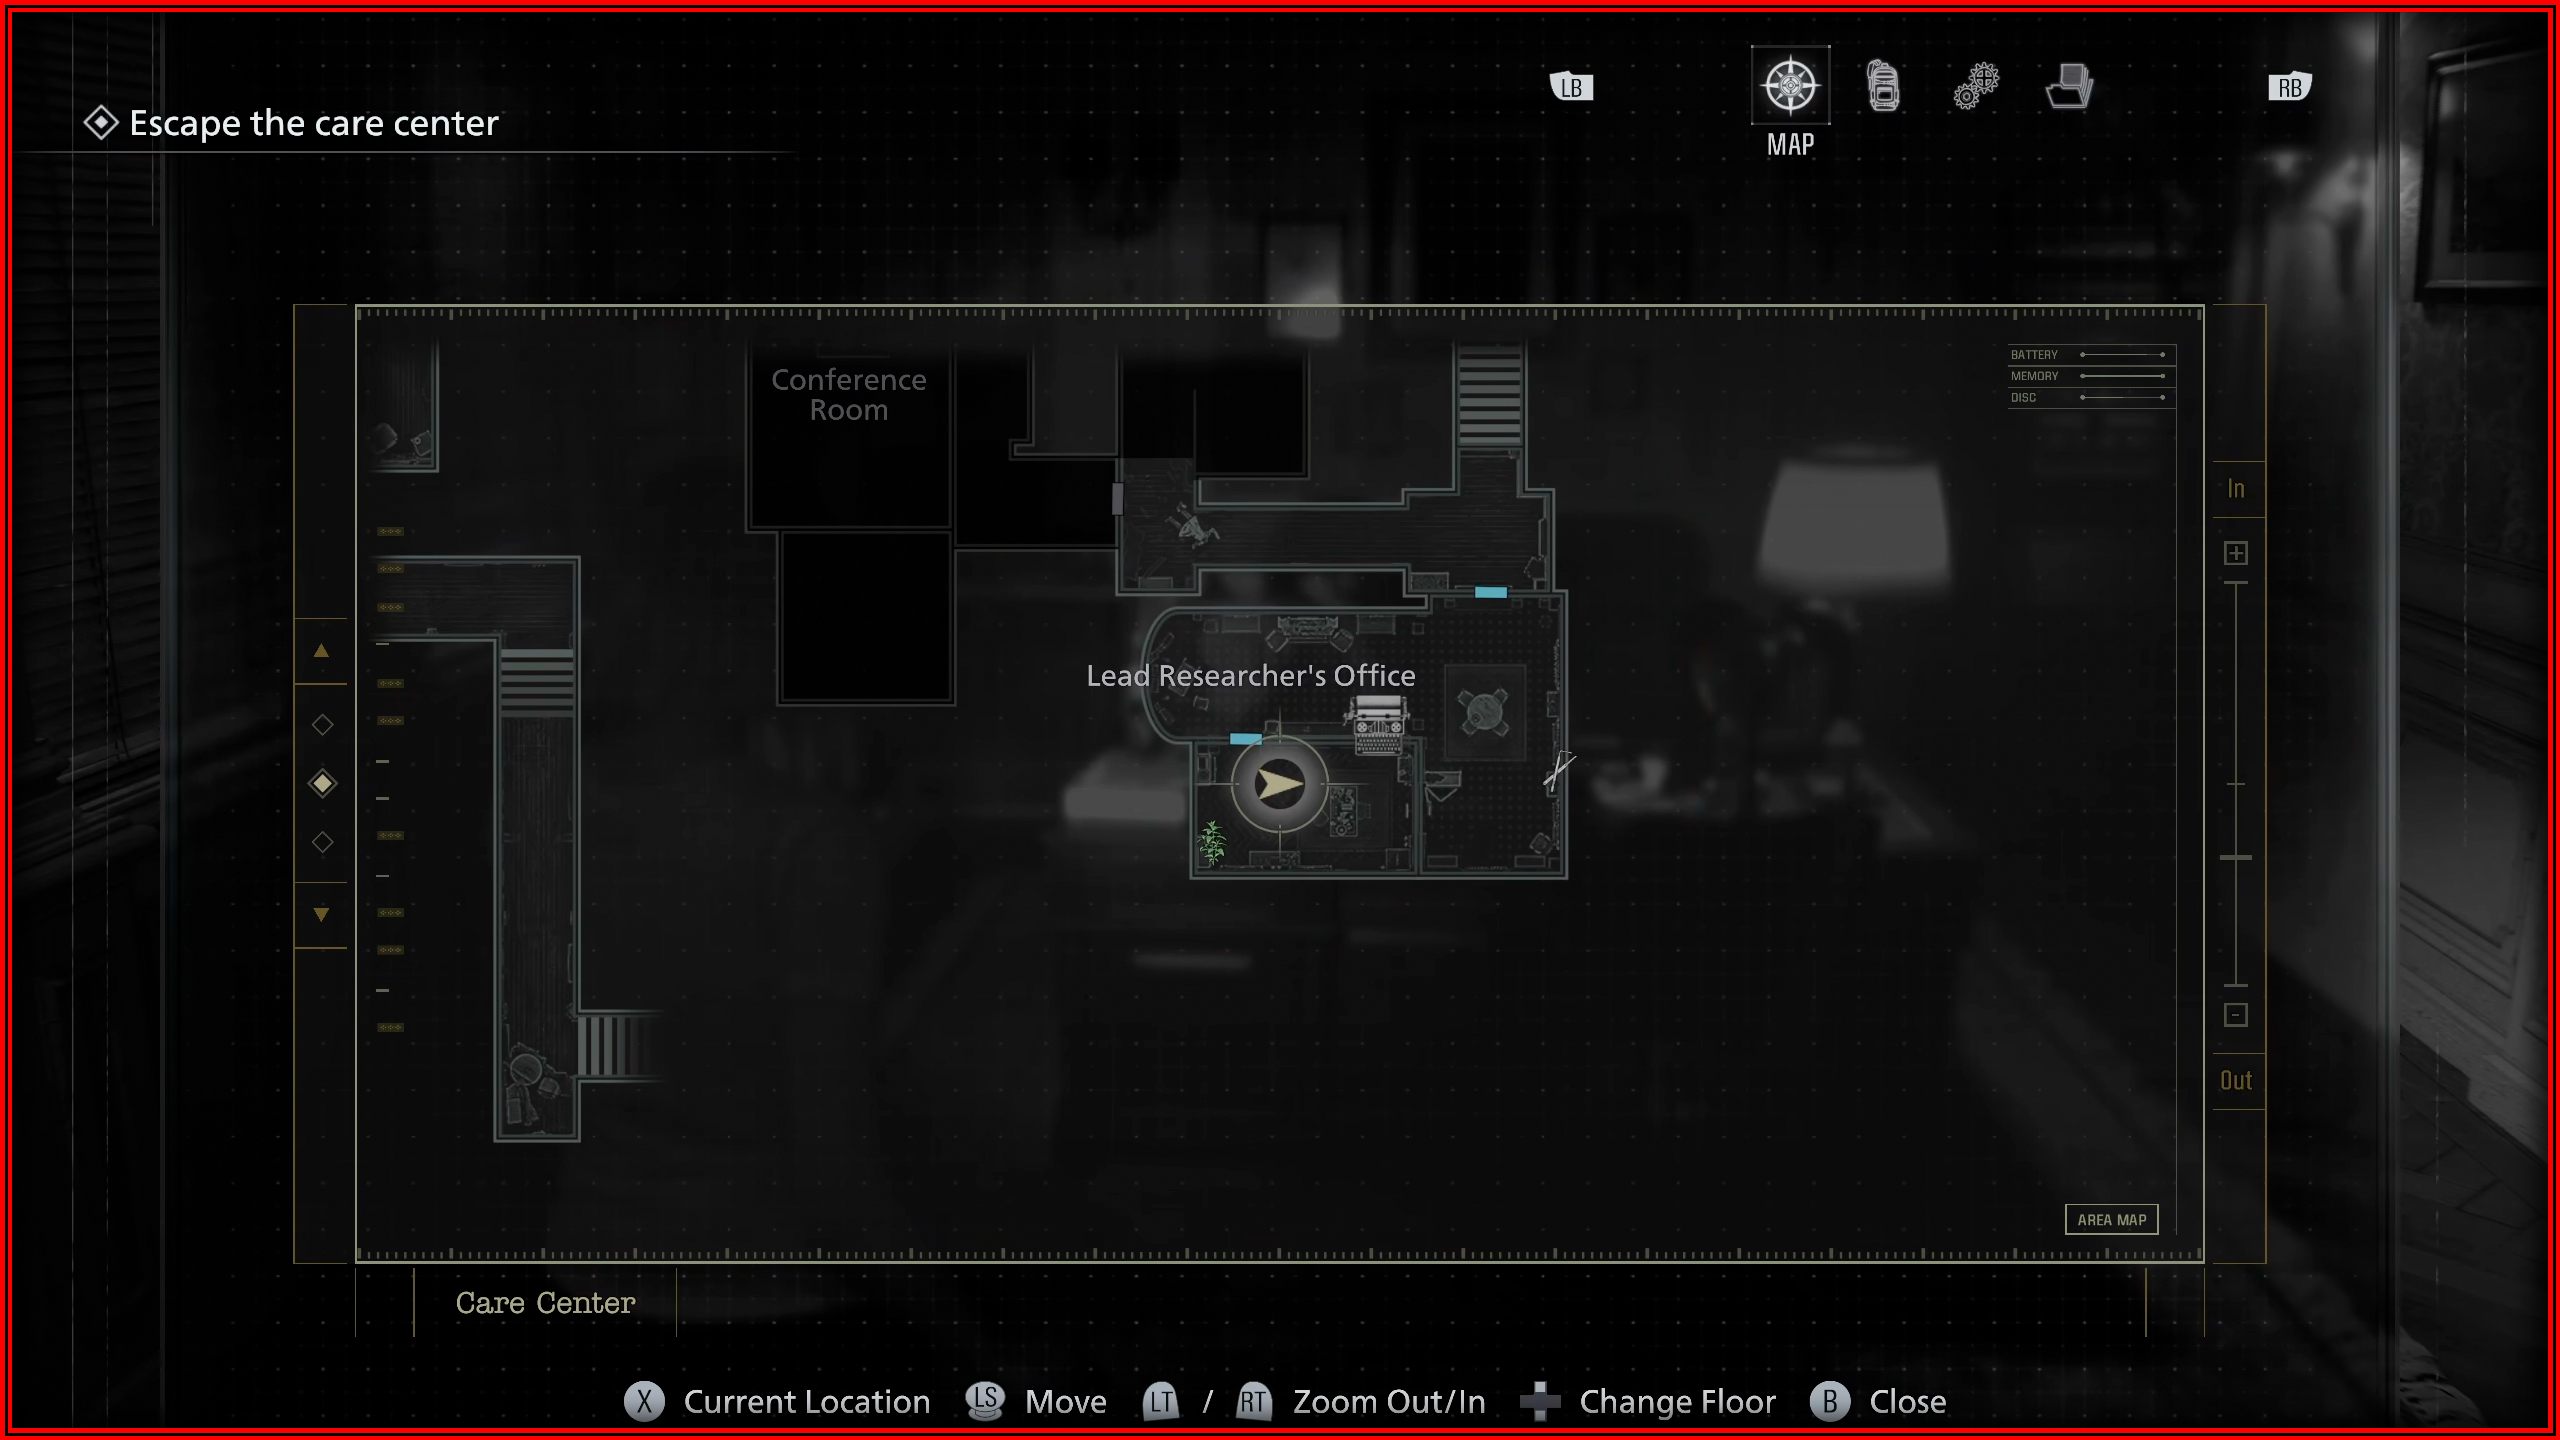
File 19/75 - Lead Researcher’s Picture 2
Lead Researcher’s Office: On top of a desk on the right side of the room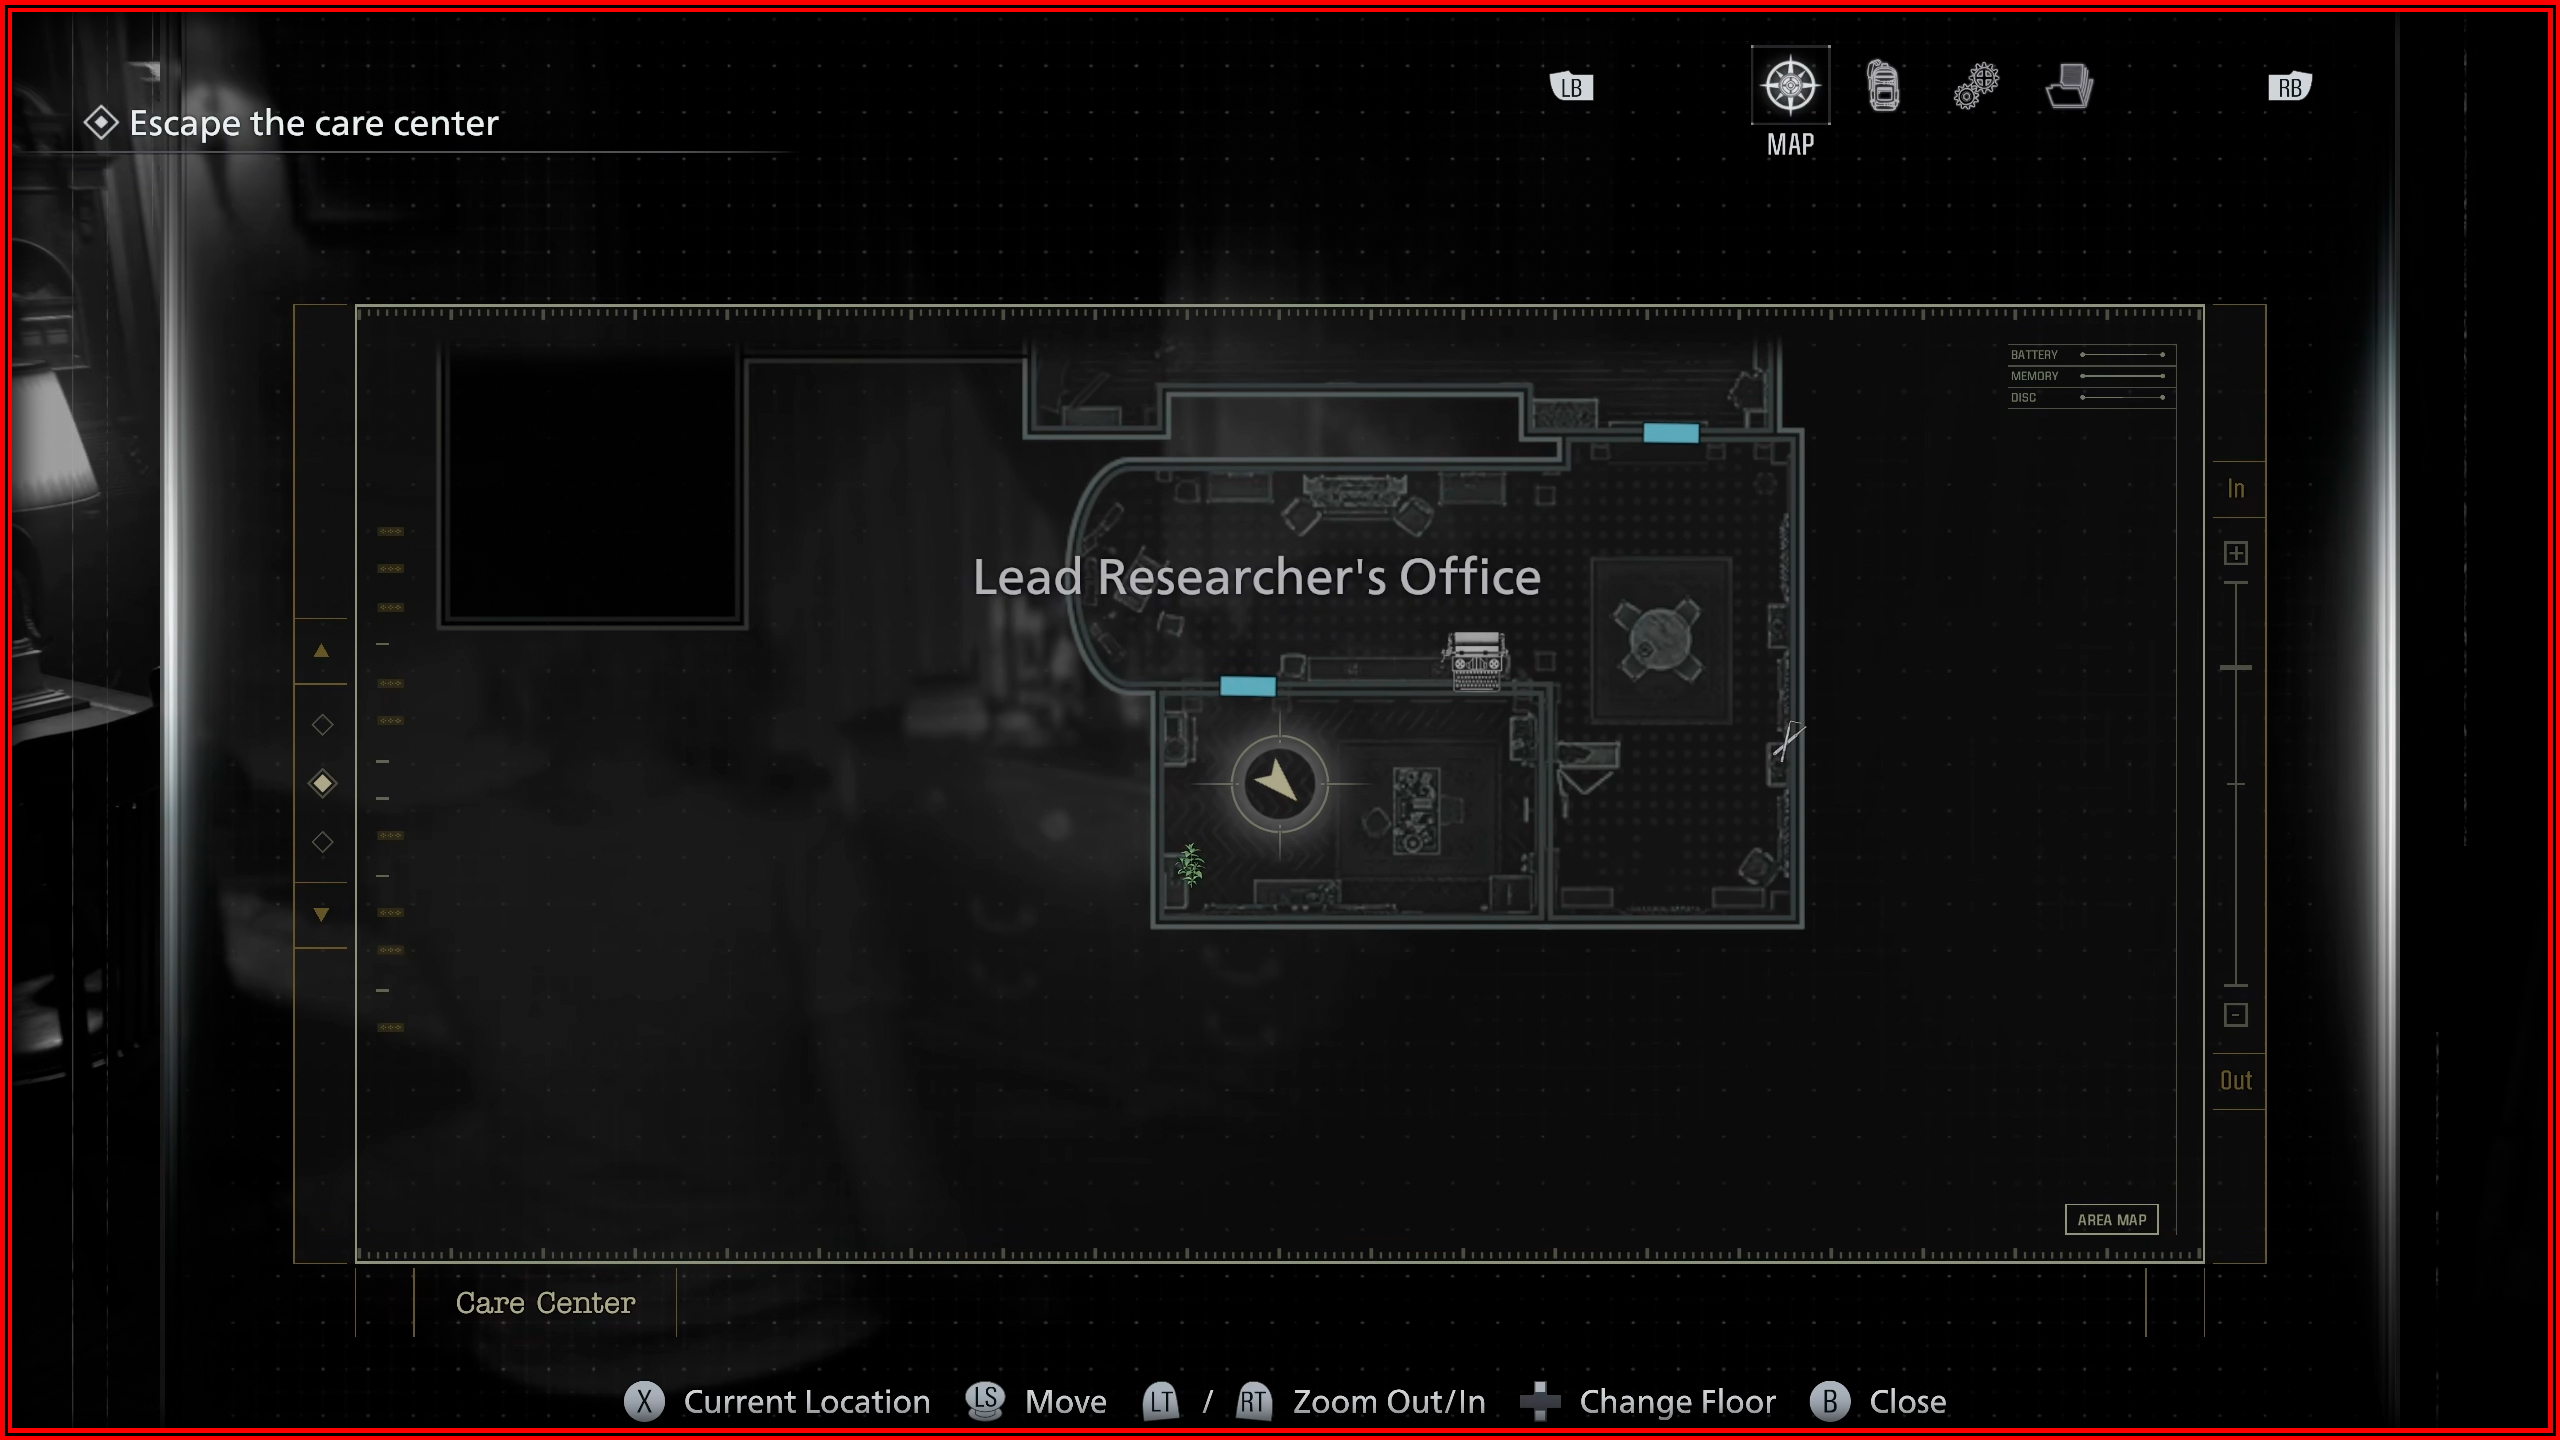
File 20/75 - Lead Researcher’s Picture 3
Lead Researcher’s Office: On the desk, inside the framed picture.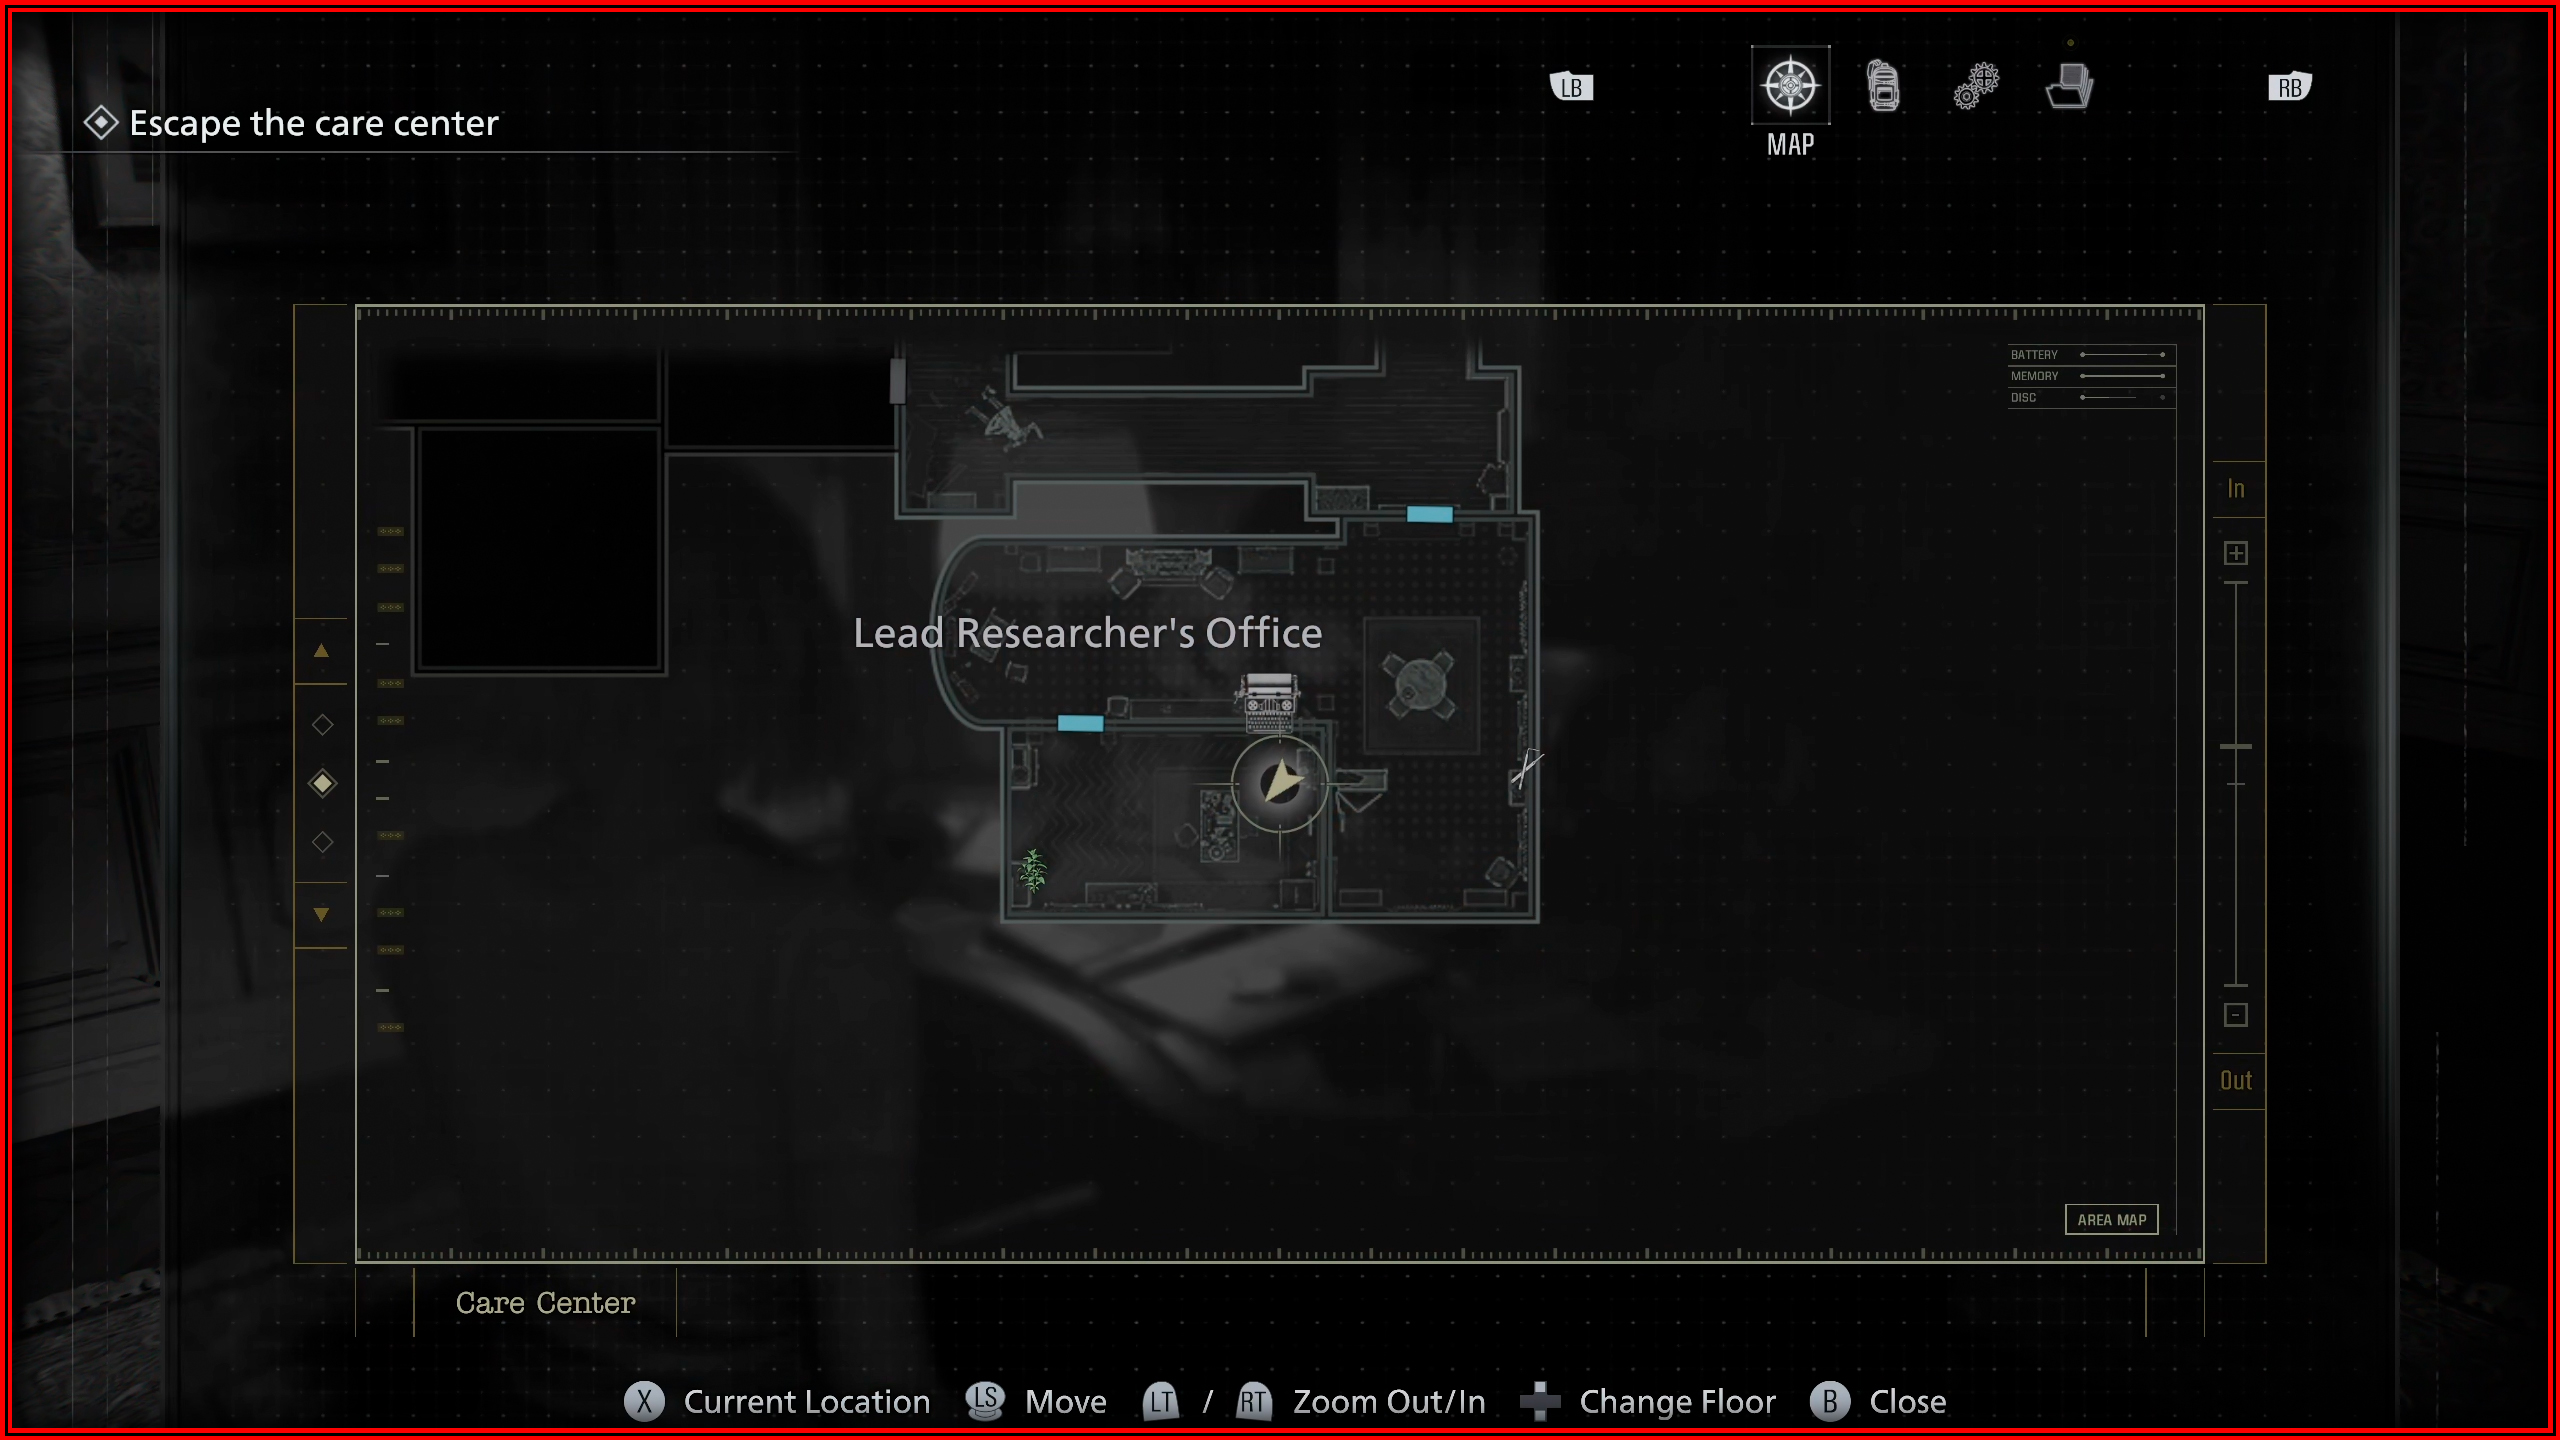
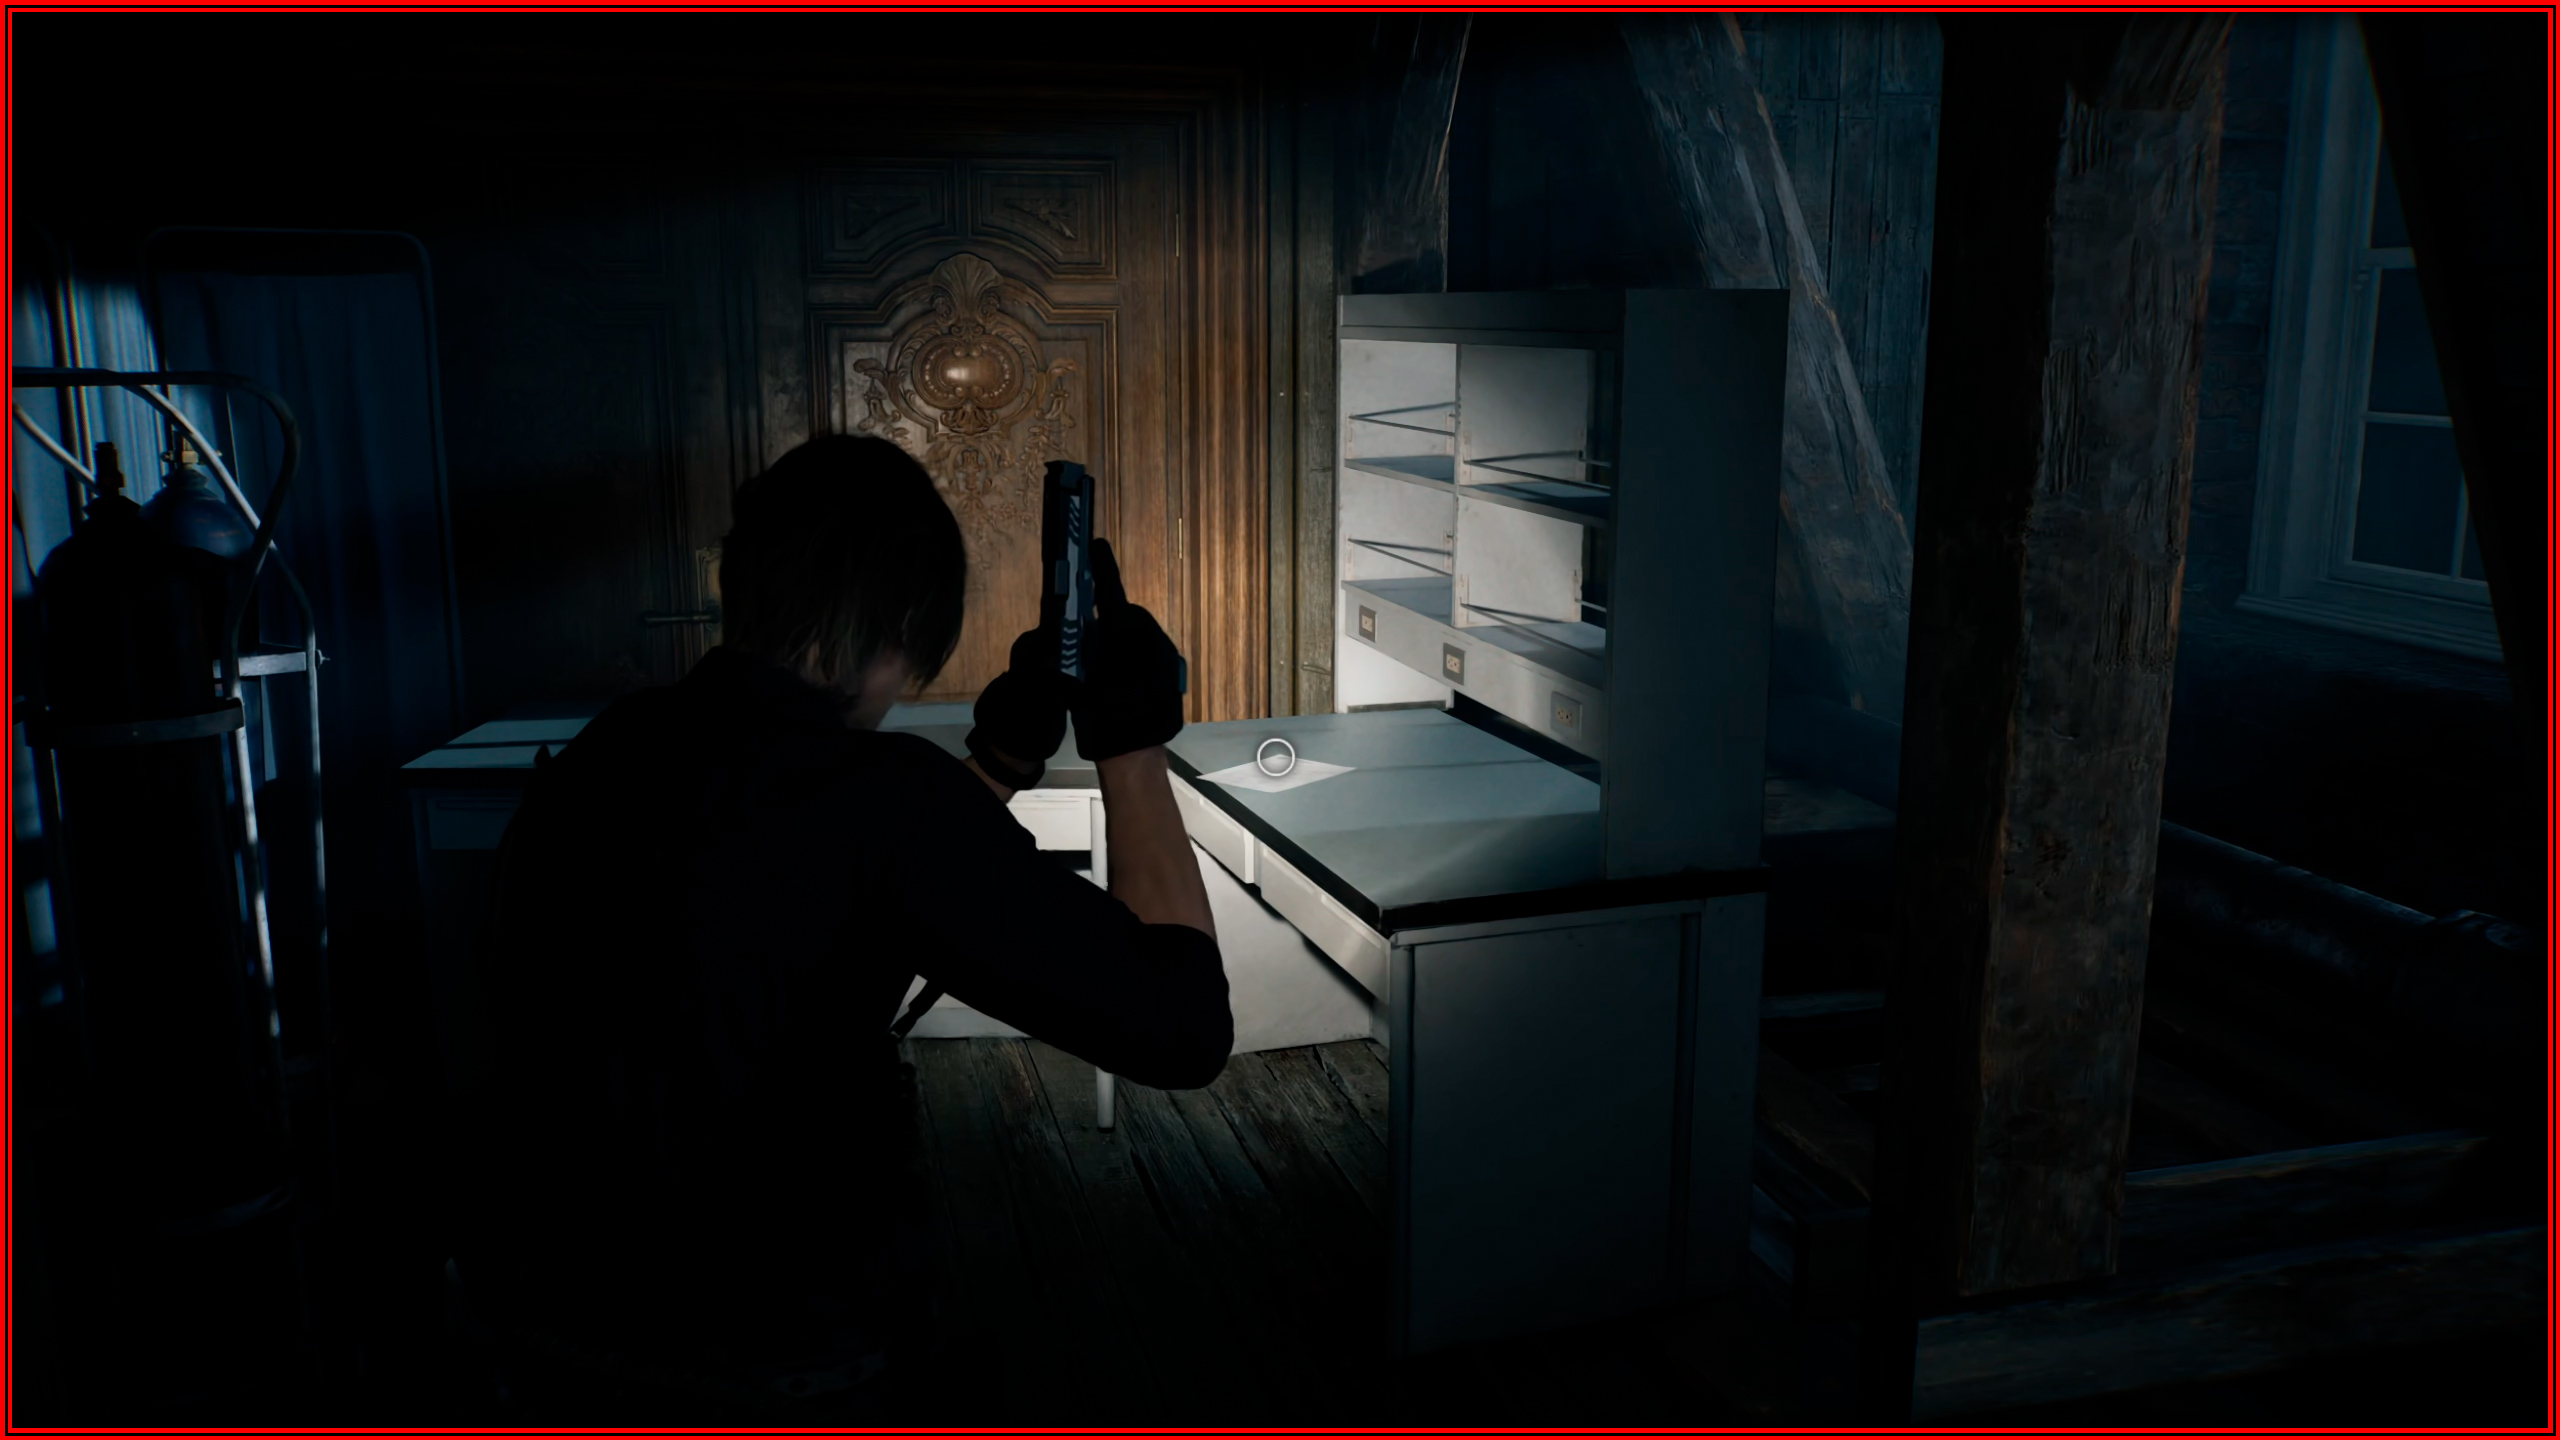
File 21/75 - Victor’s Journal Entry
Blood Lab: Use the Level 1 ID Wristband to find this on a table.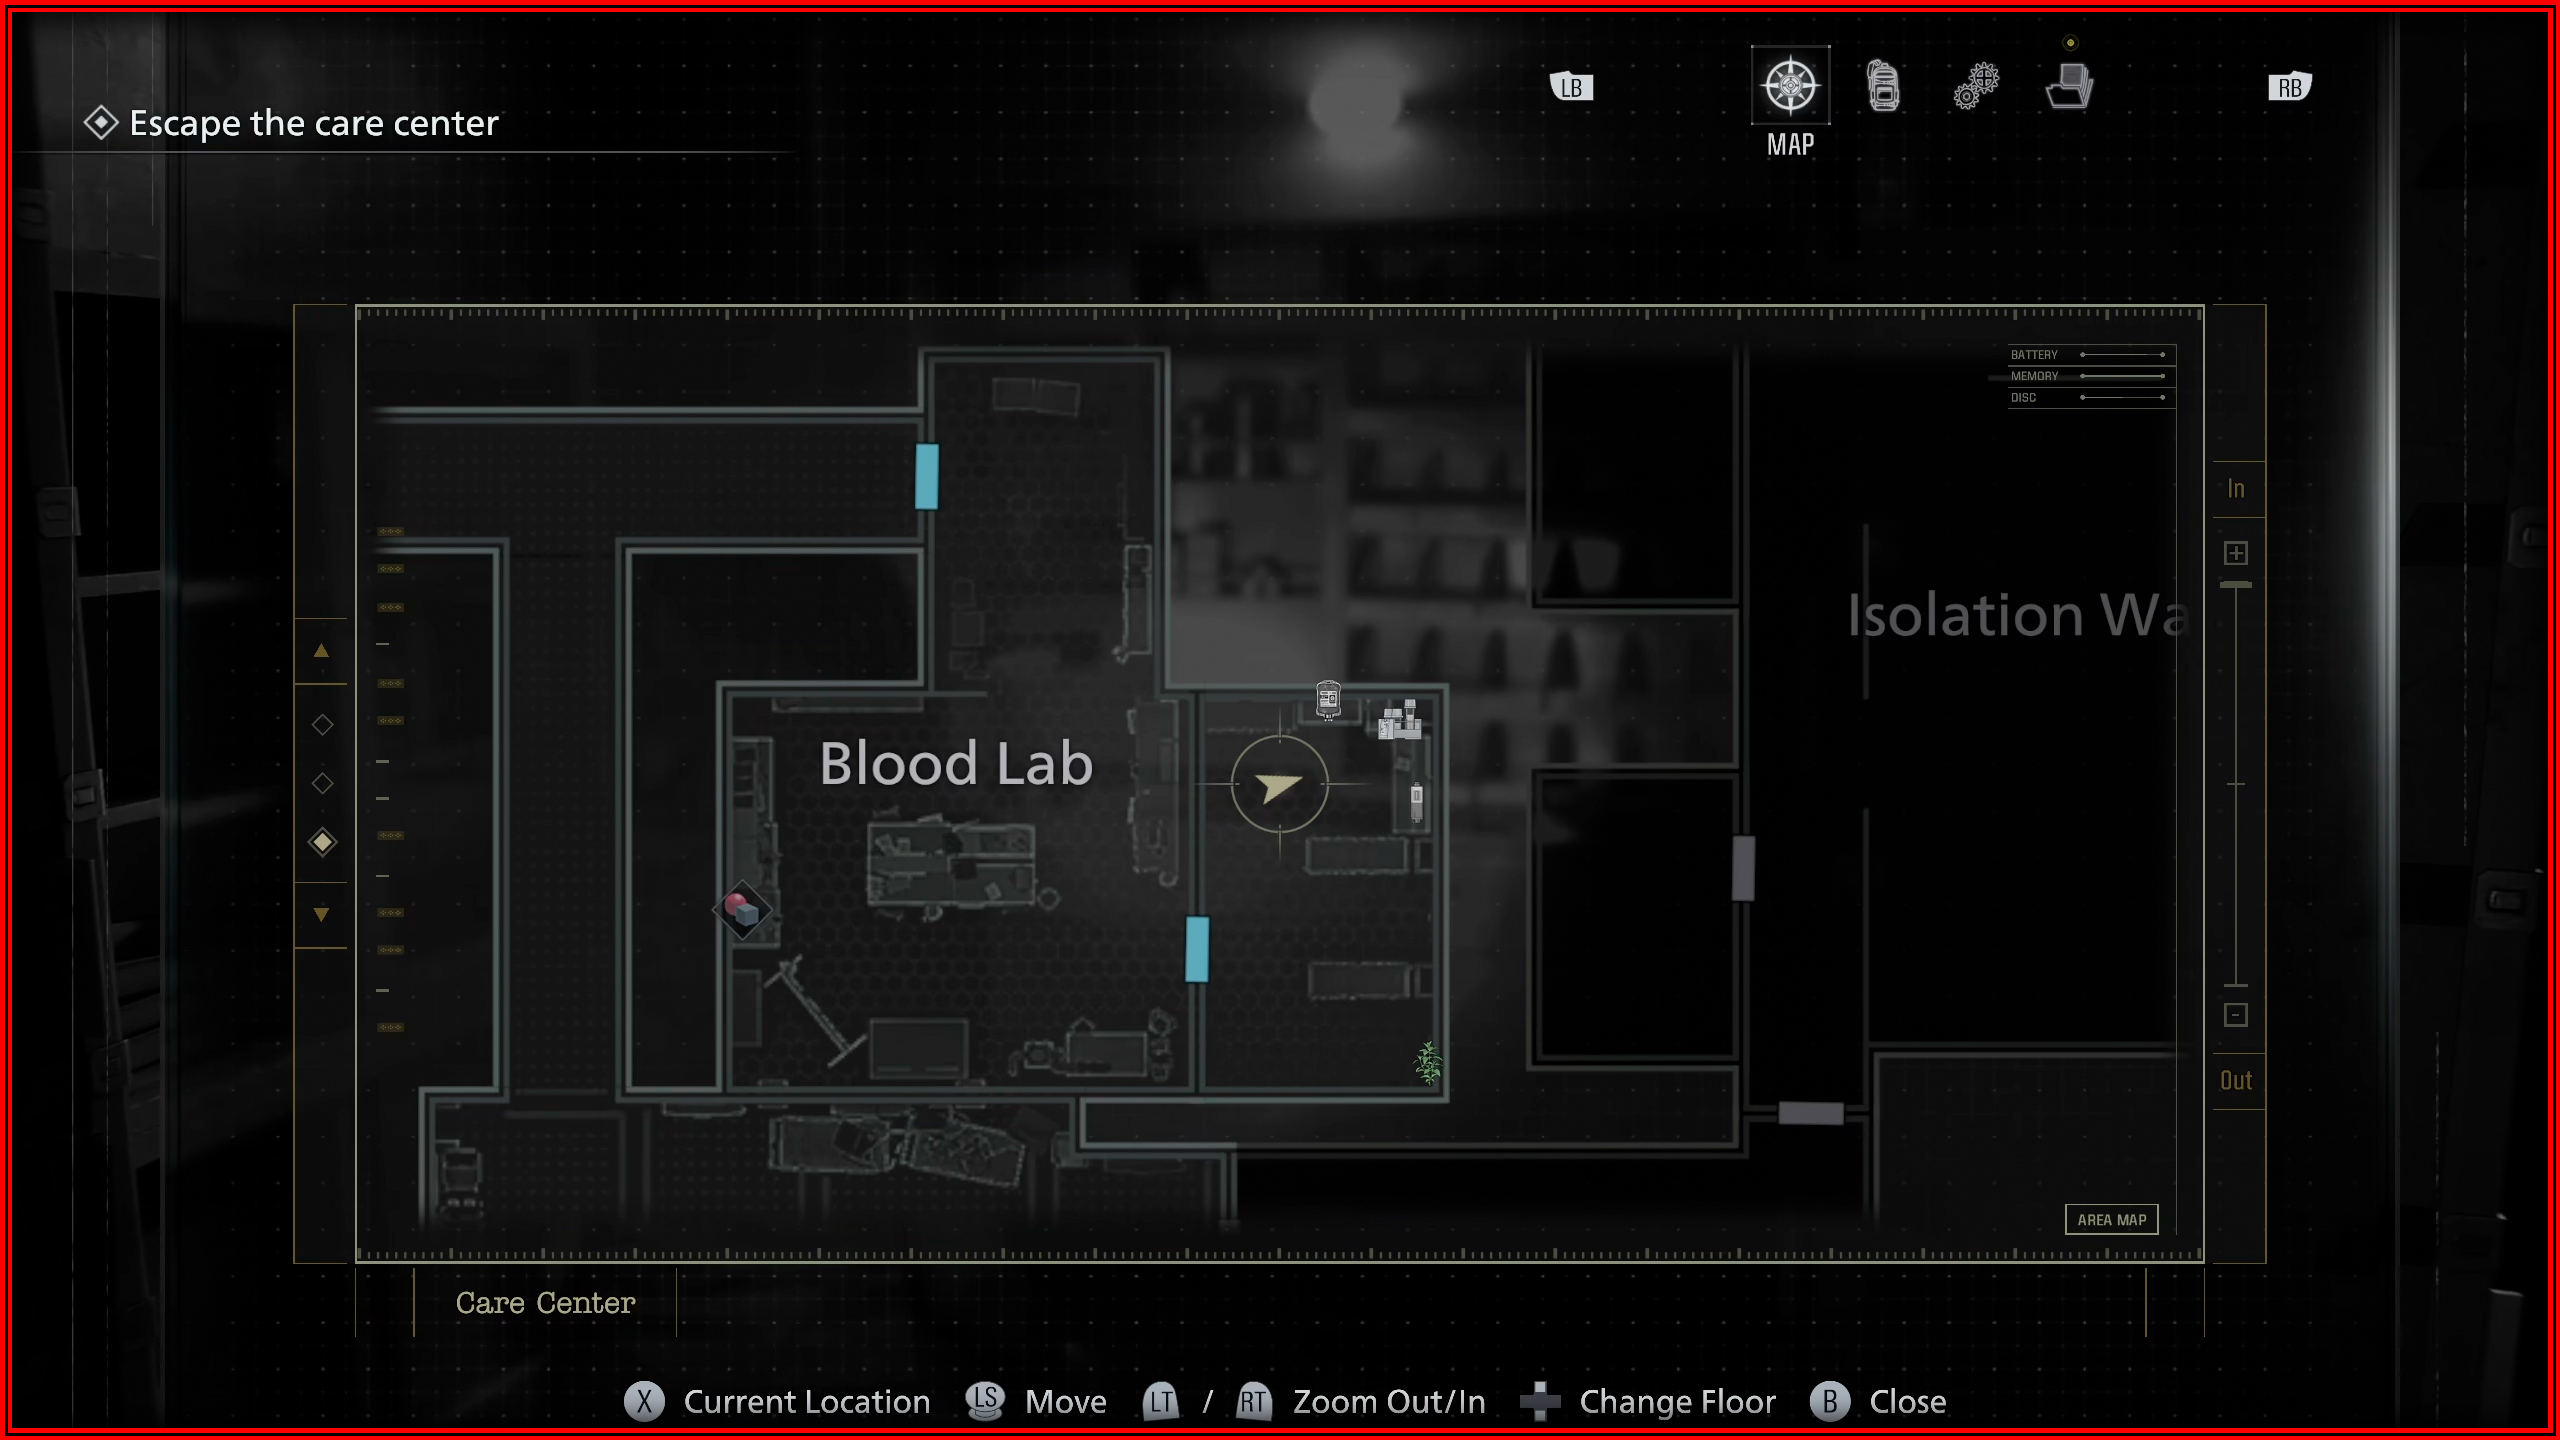
File 22/75 - Construction Notice
Custodian’s Office: Head to the West Wing and navigate the corridor south of the Kitchen. Use the Level 1 ID Wristband to unlock the gate, and as you enter the following hallway, look for it on a whiteboard to your right.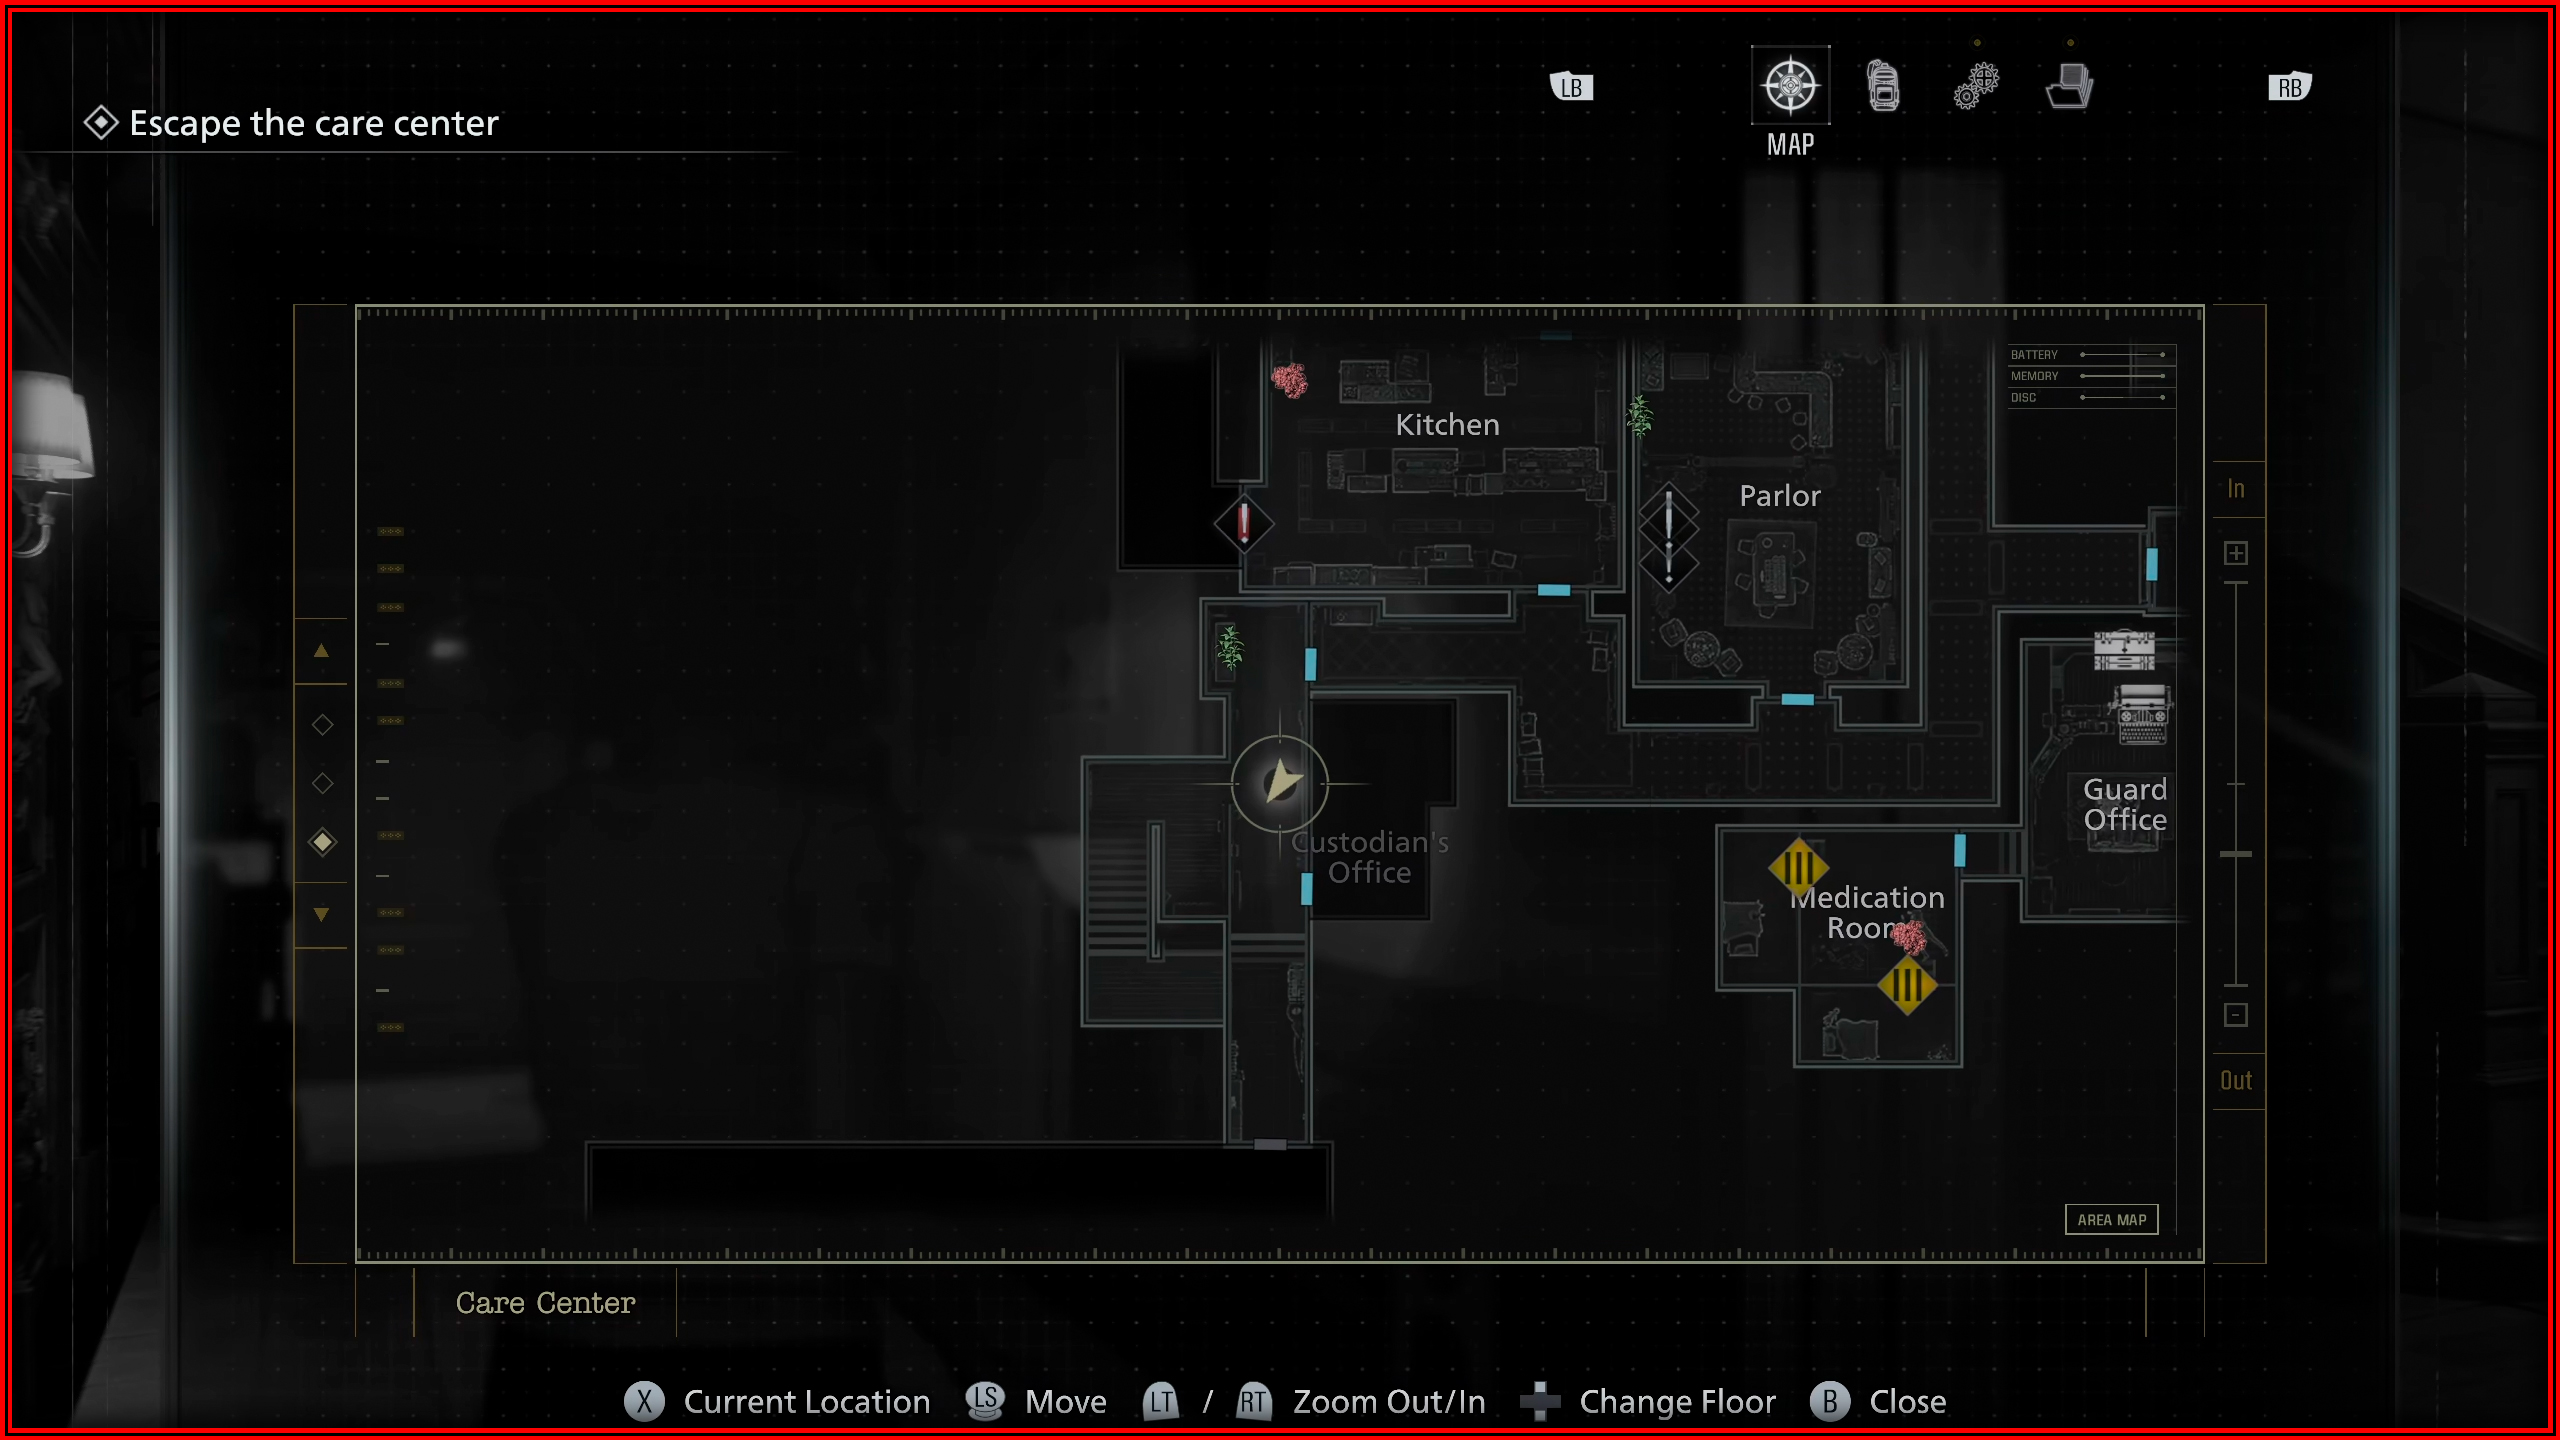

File 23/75 - Bar & Lounge Safe Code
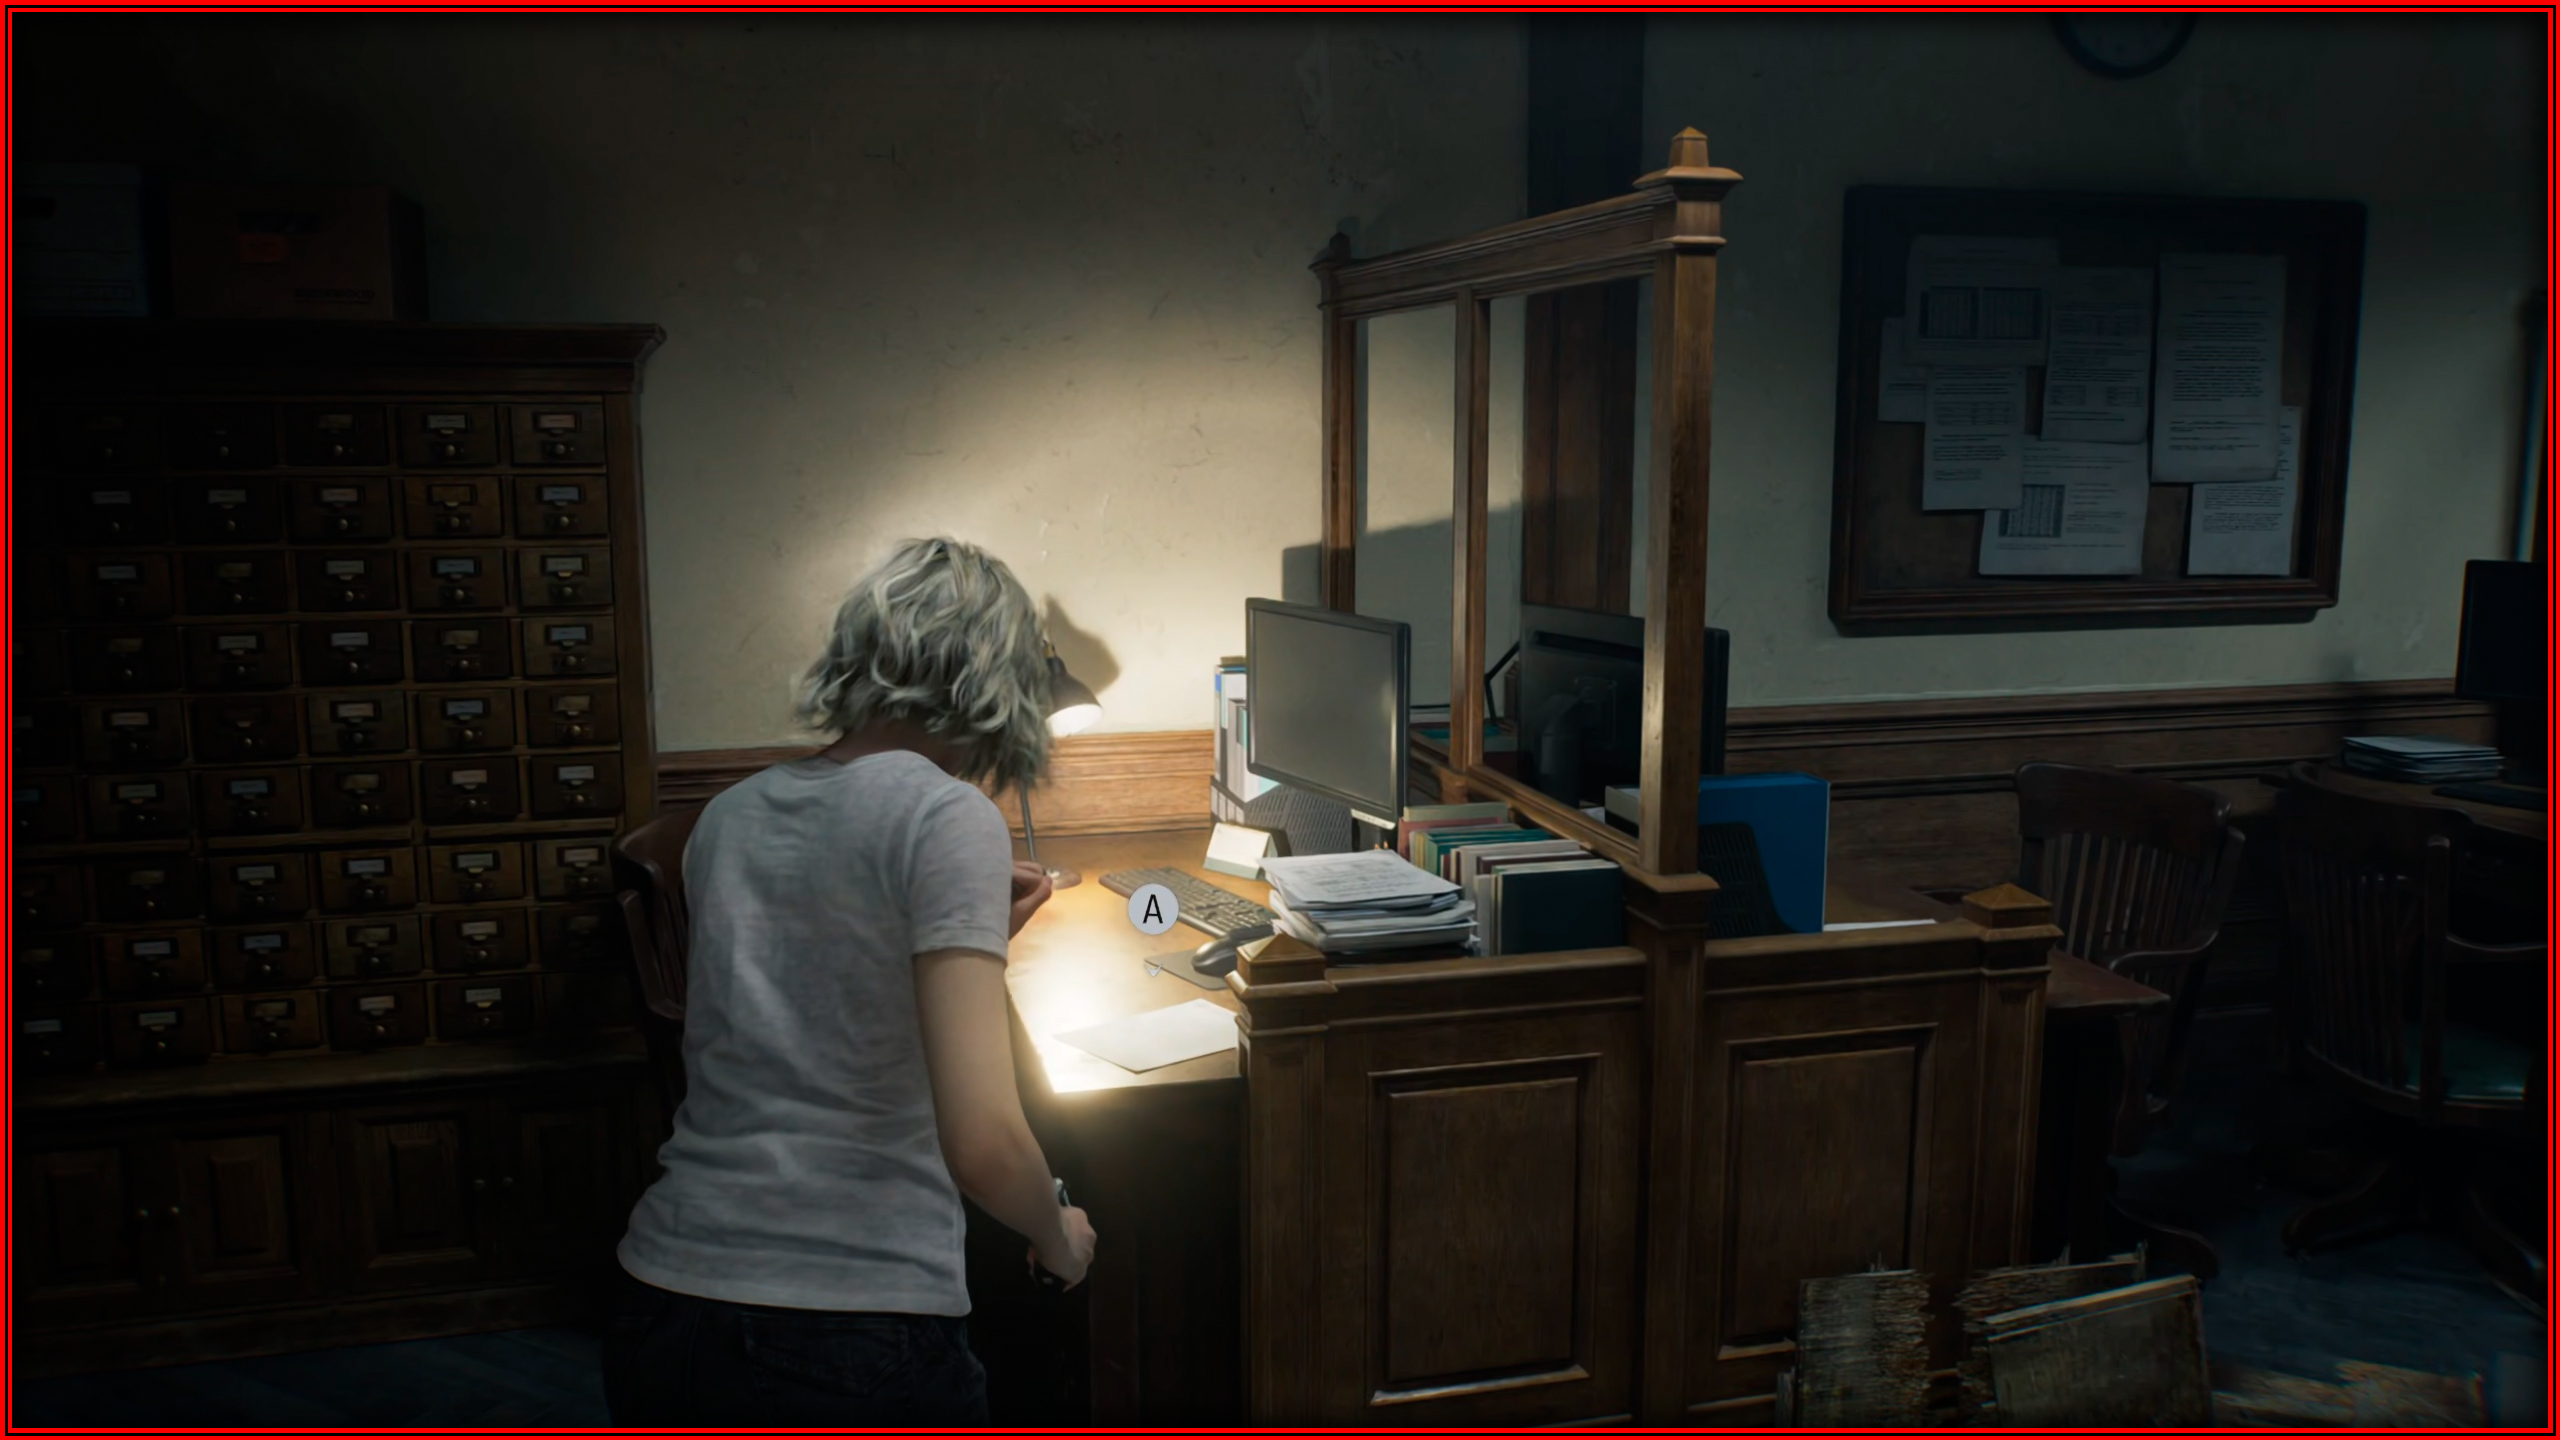
Office: On the first desk.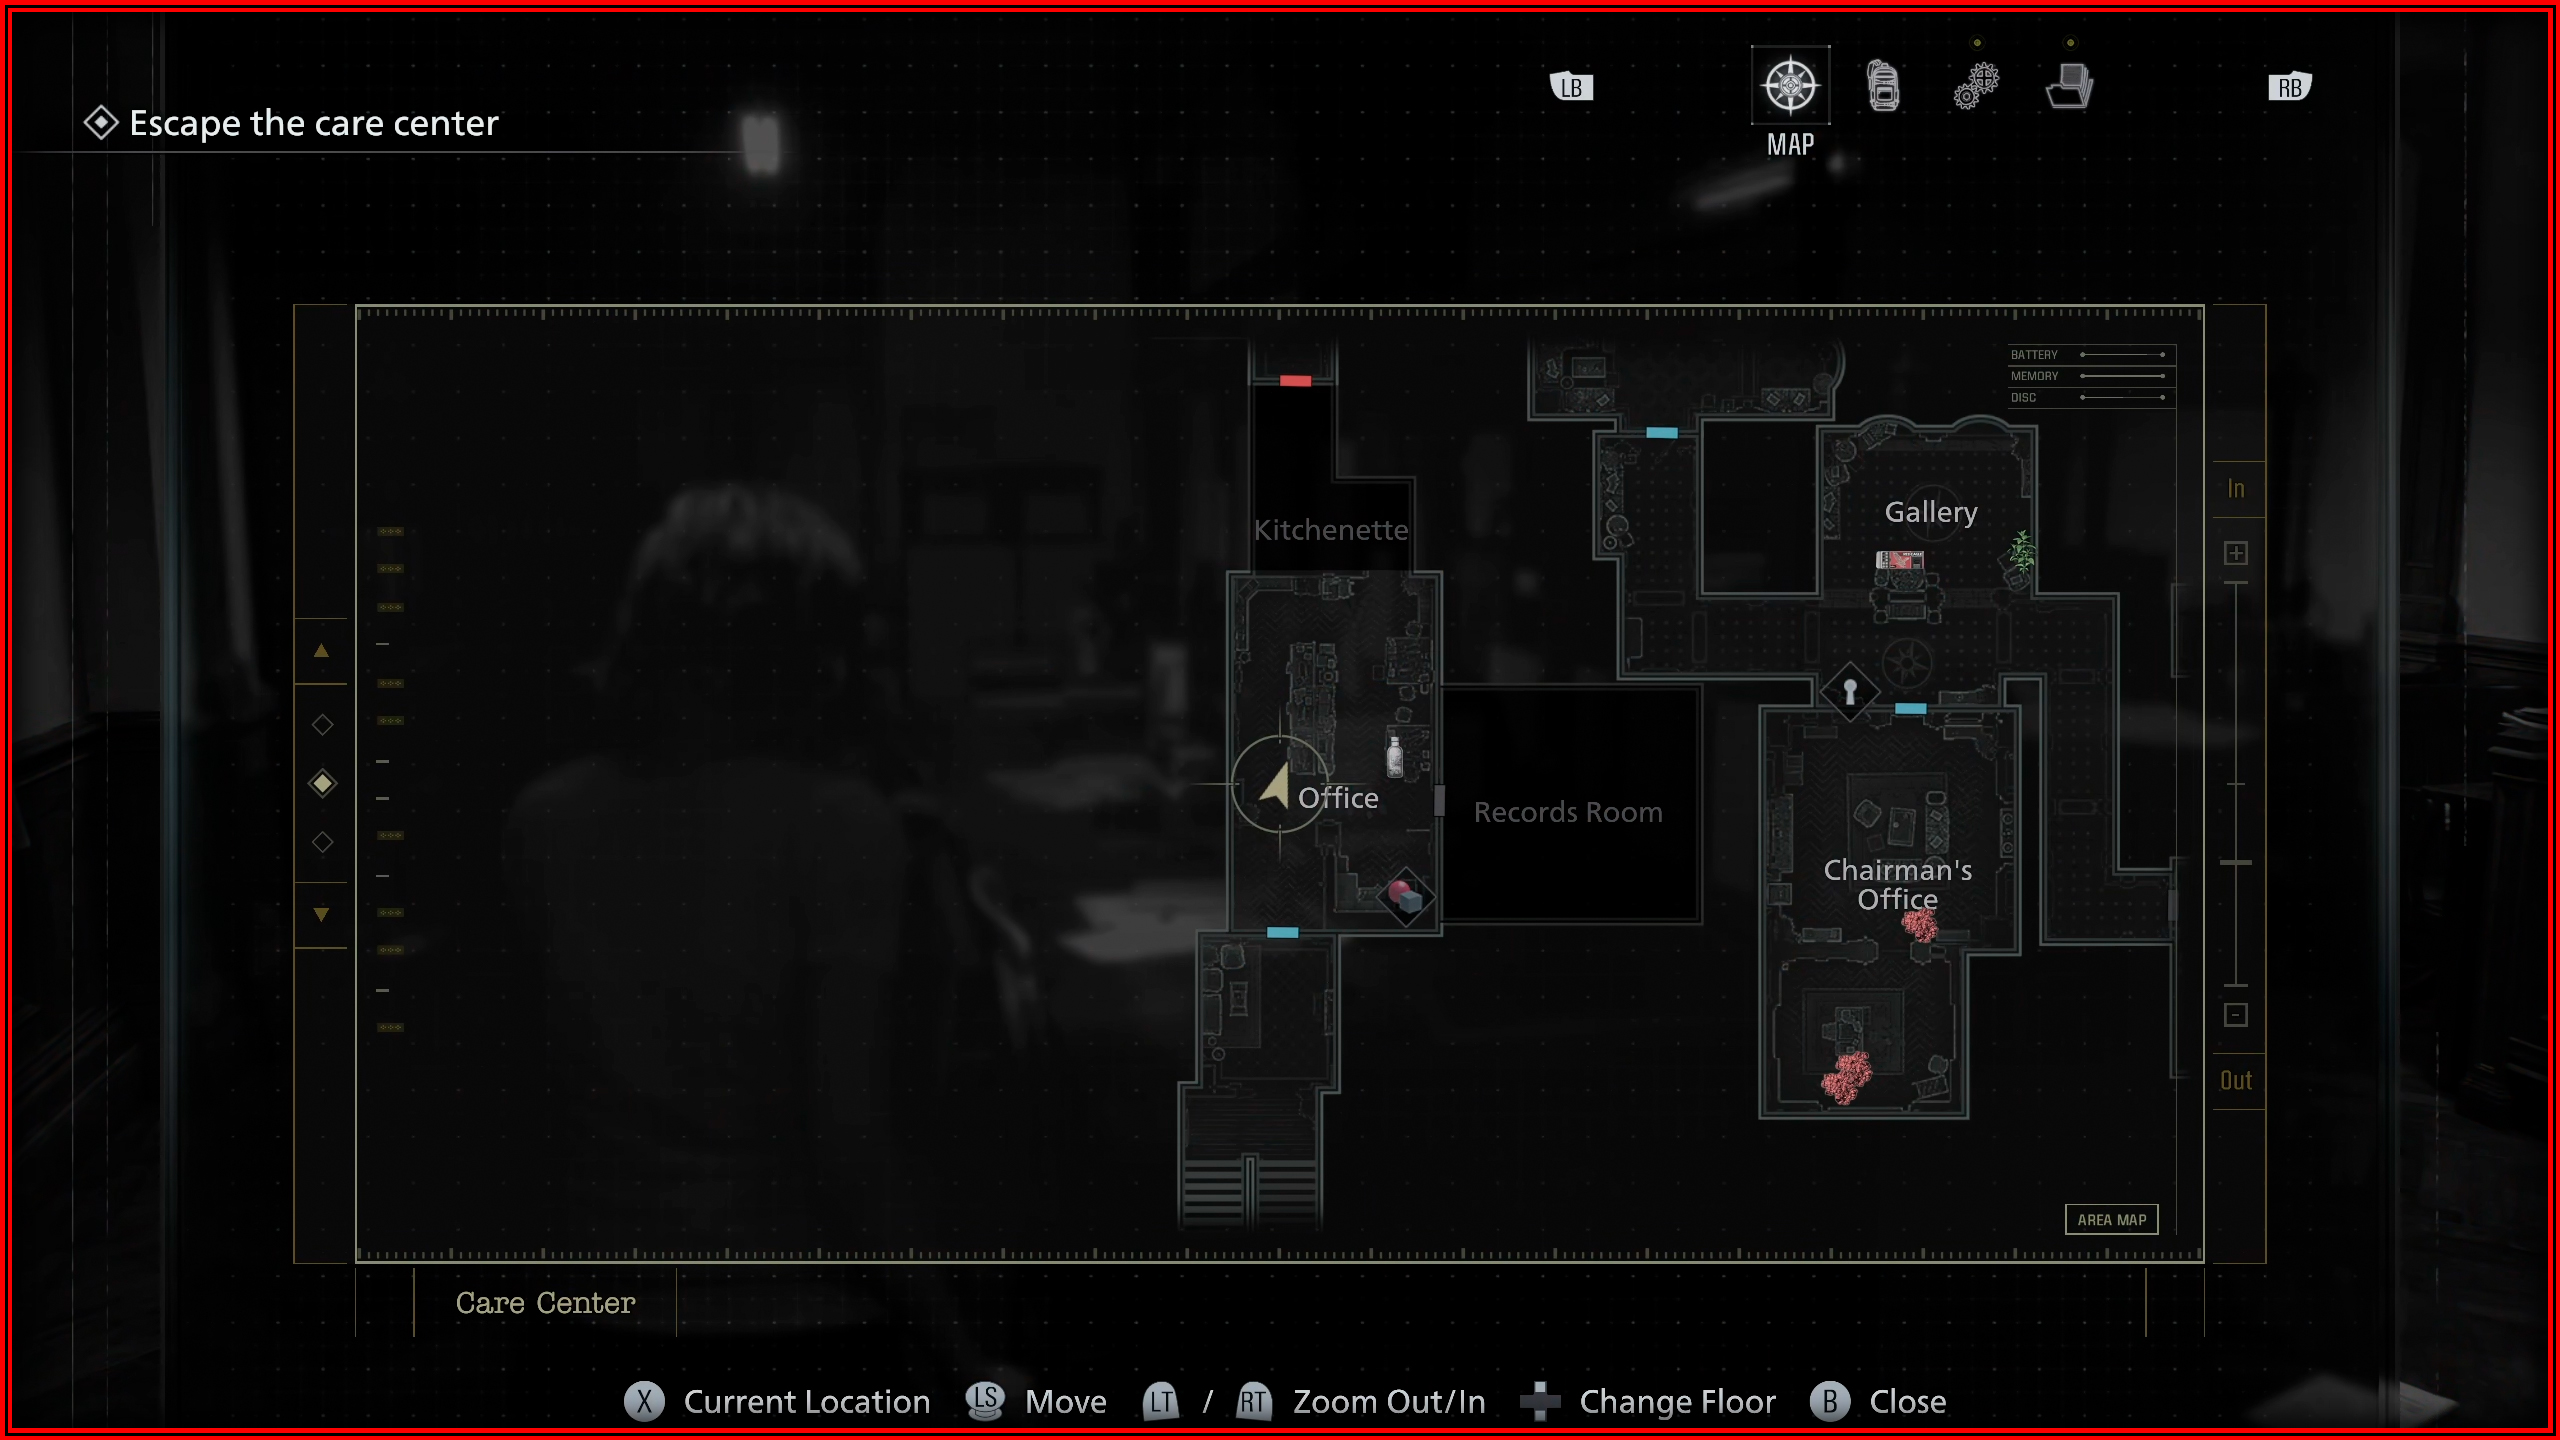
File 24/75 - Background Check
Office: On the desk in back right corner.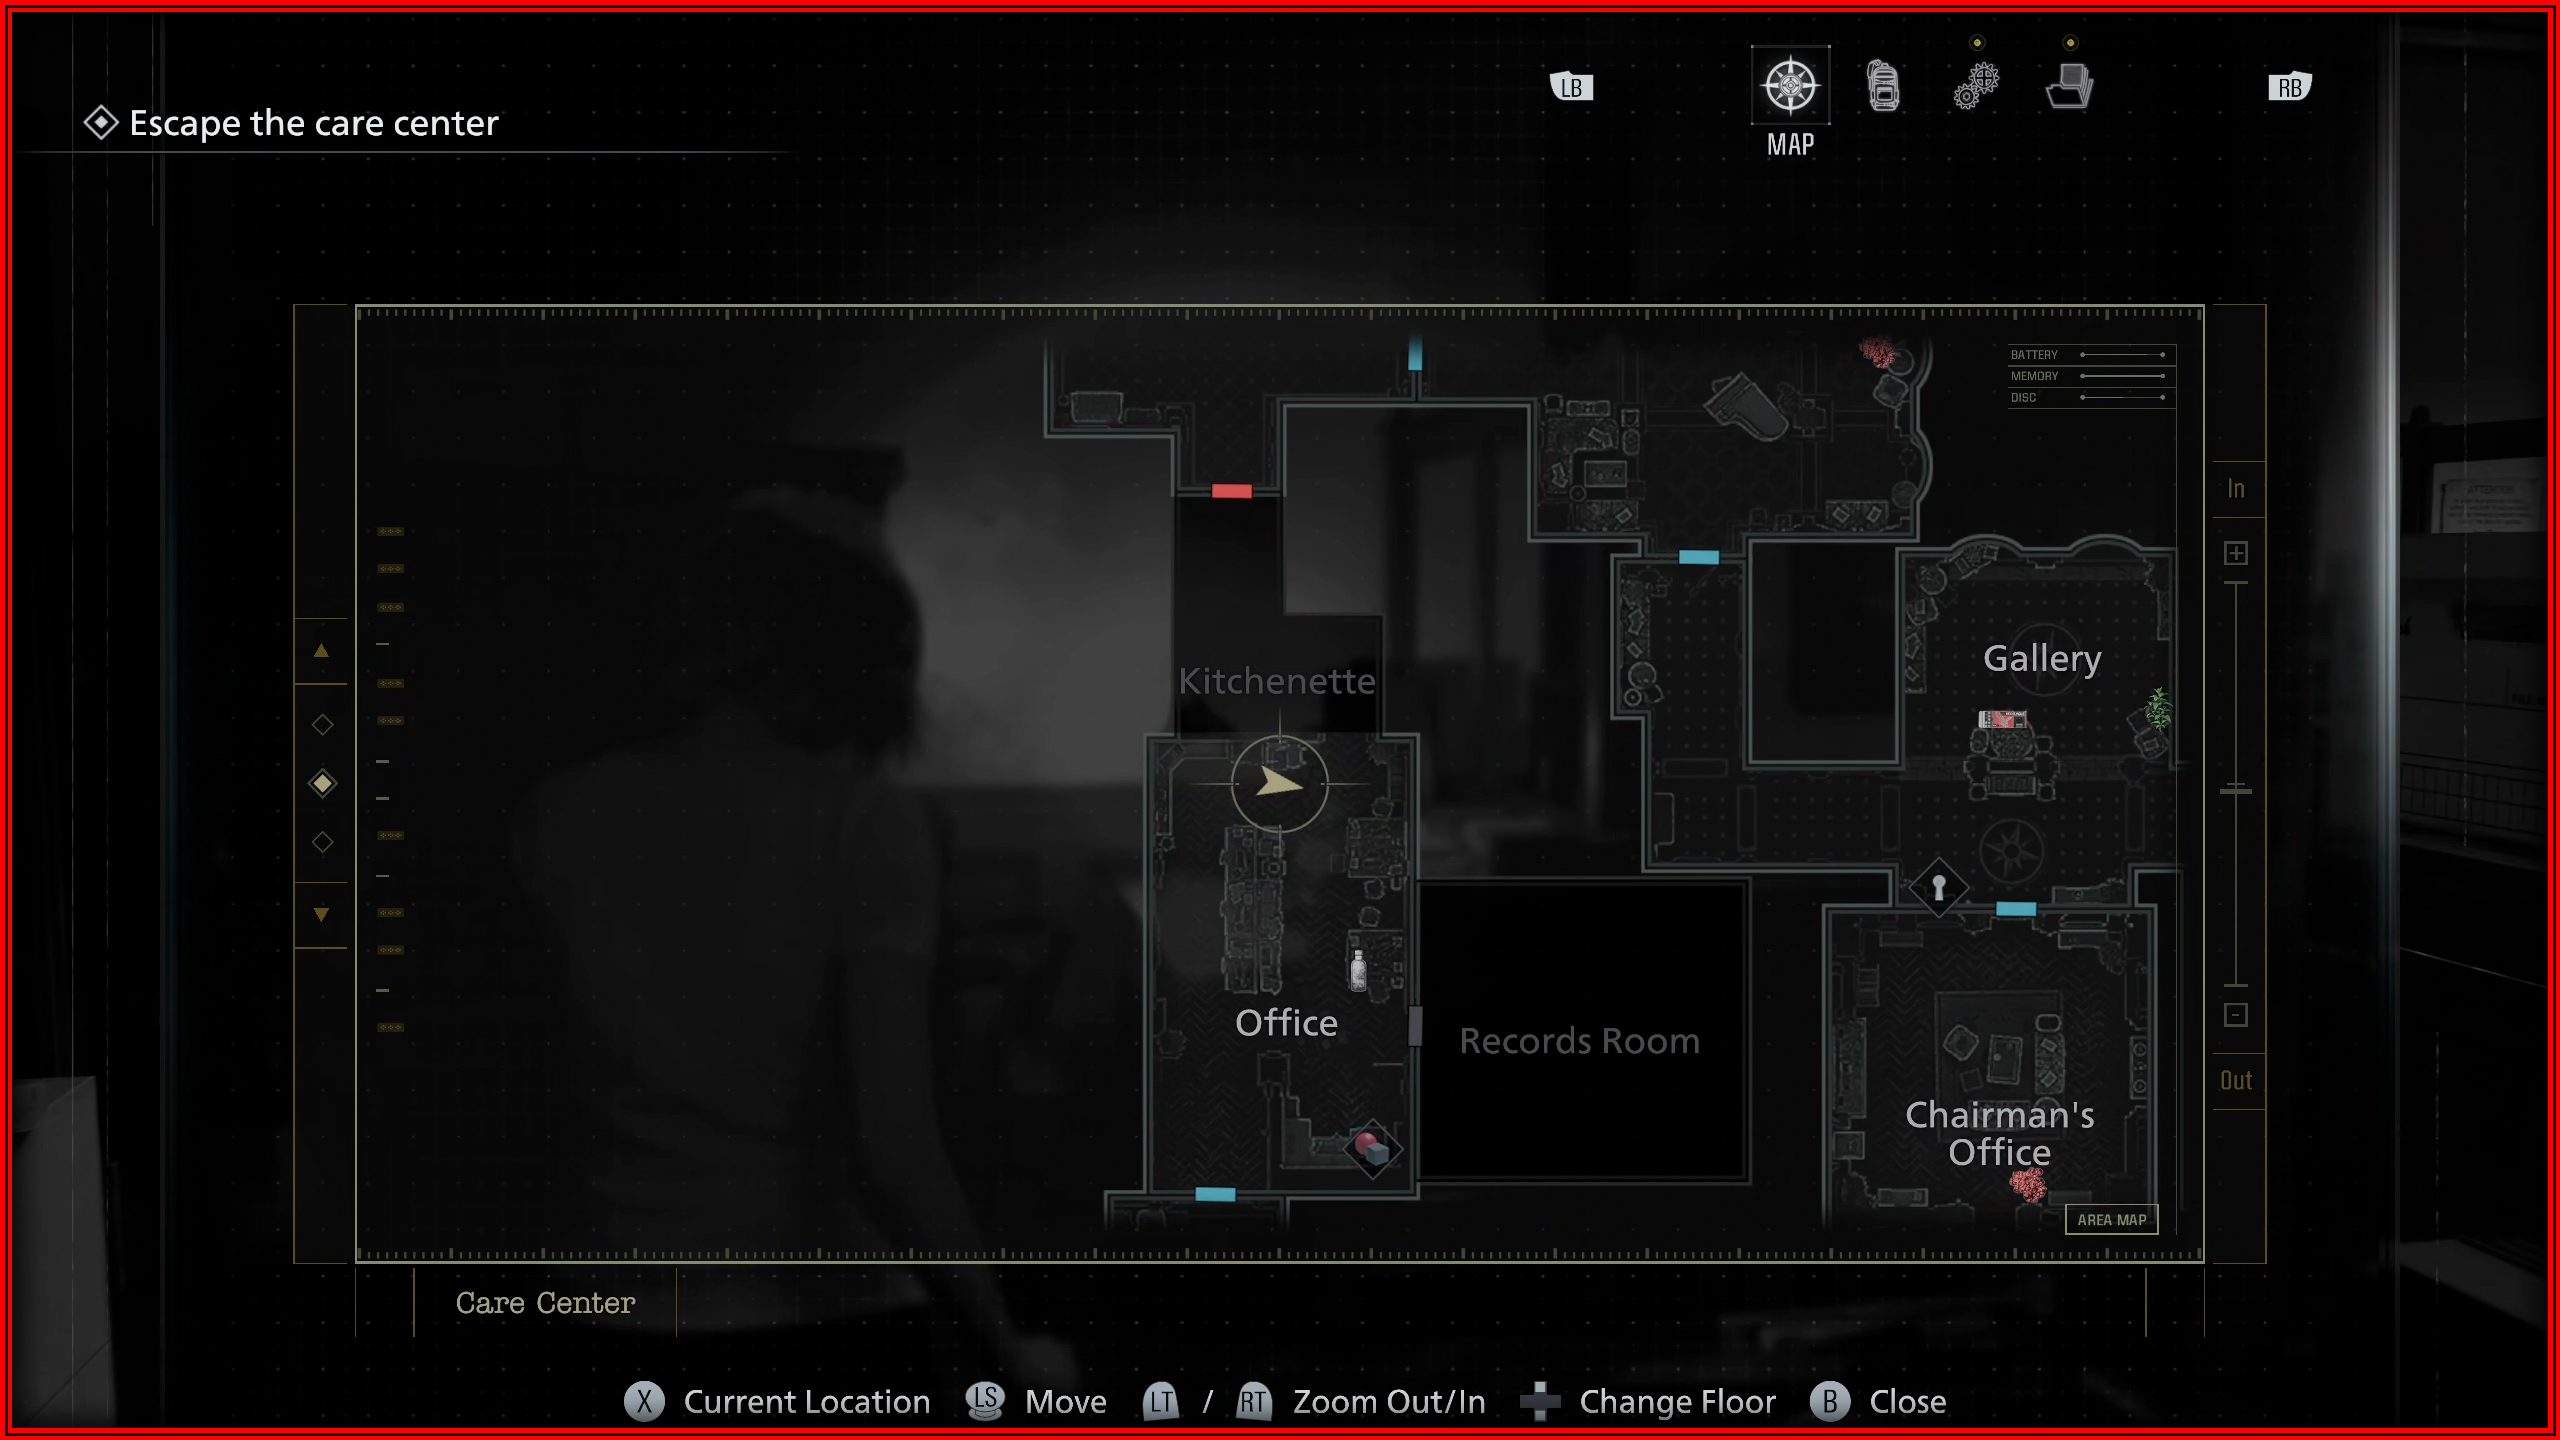
File 25/75 - Disposal Team Report
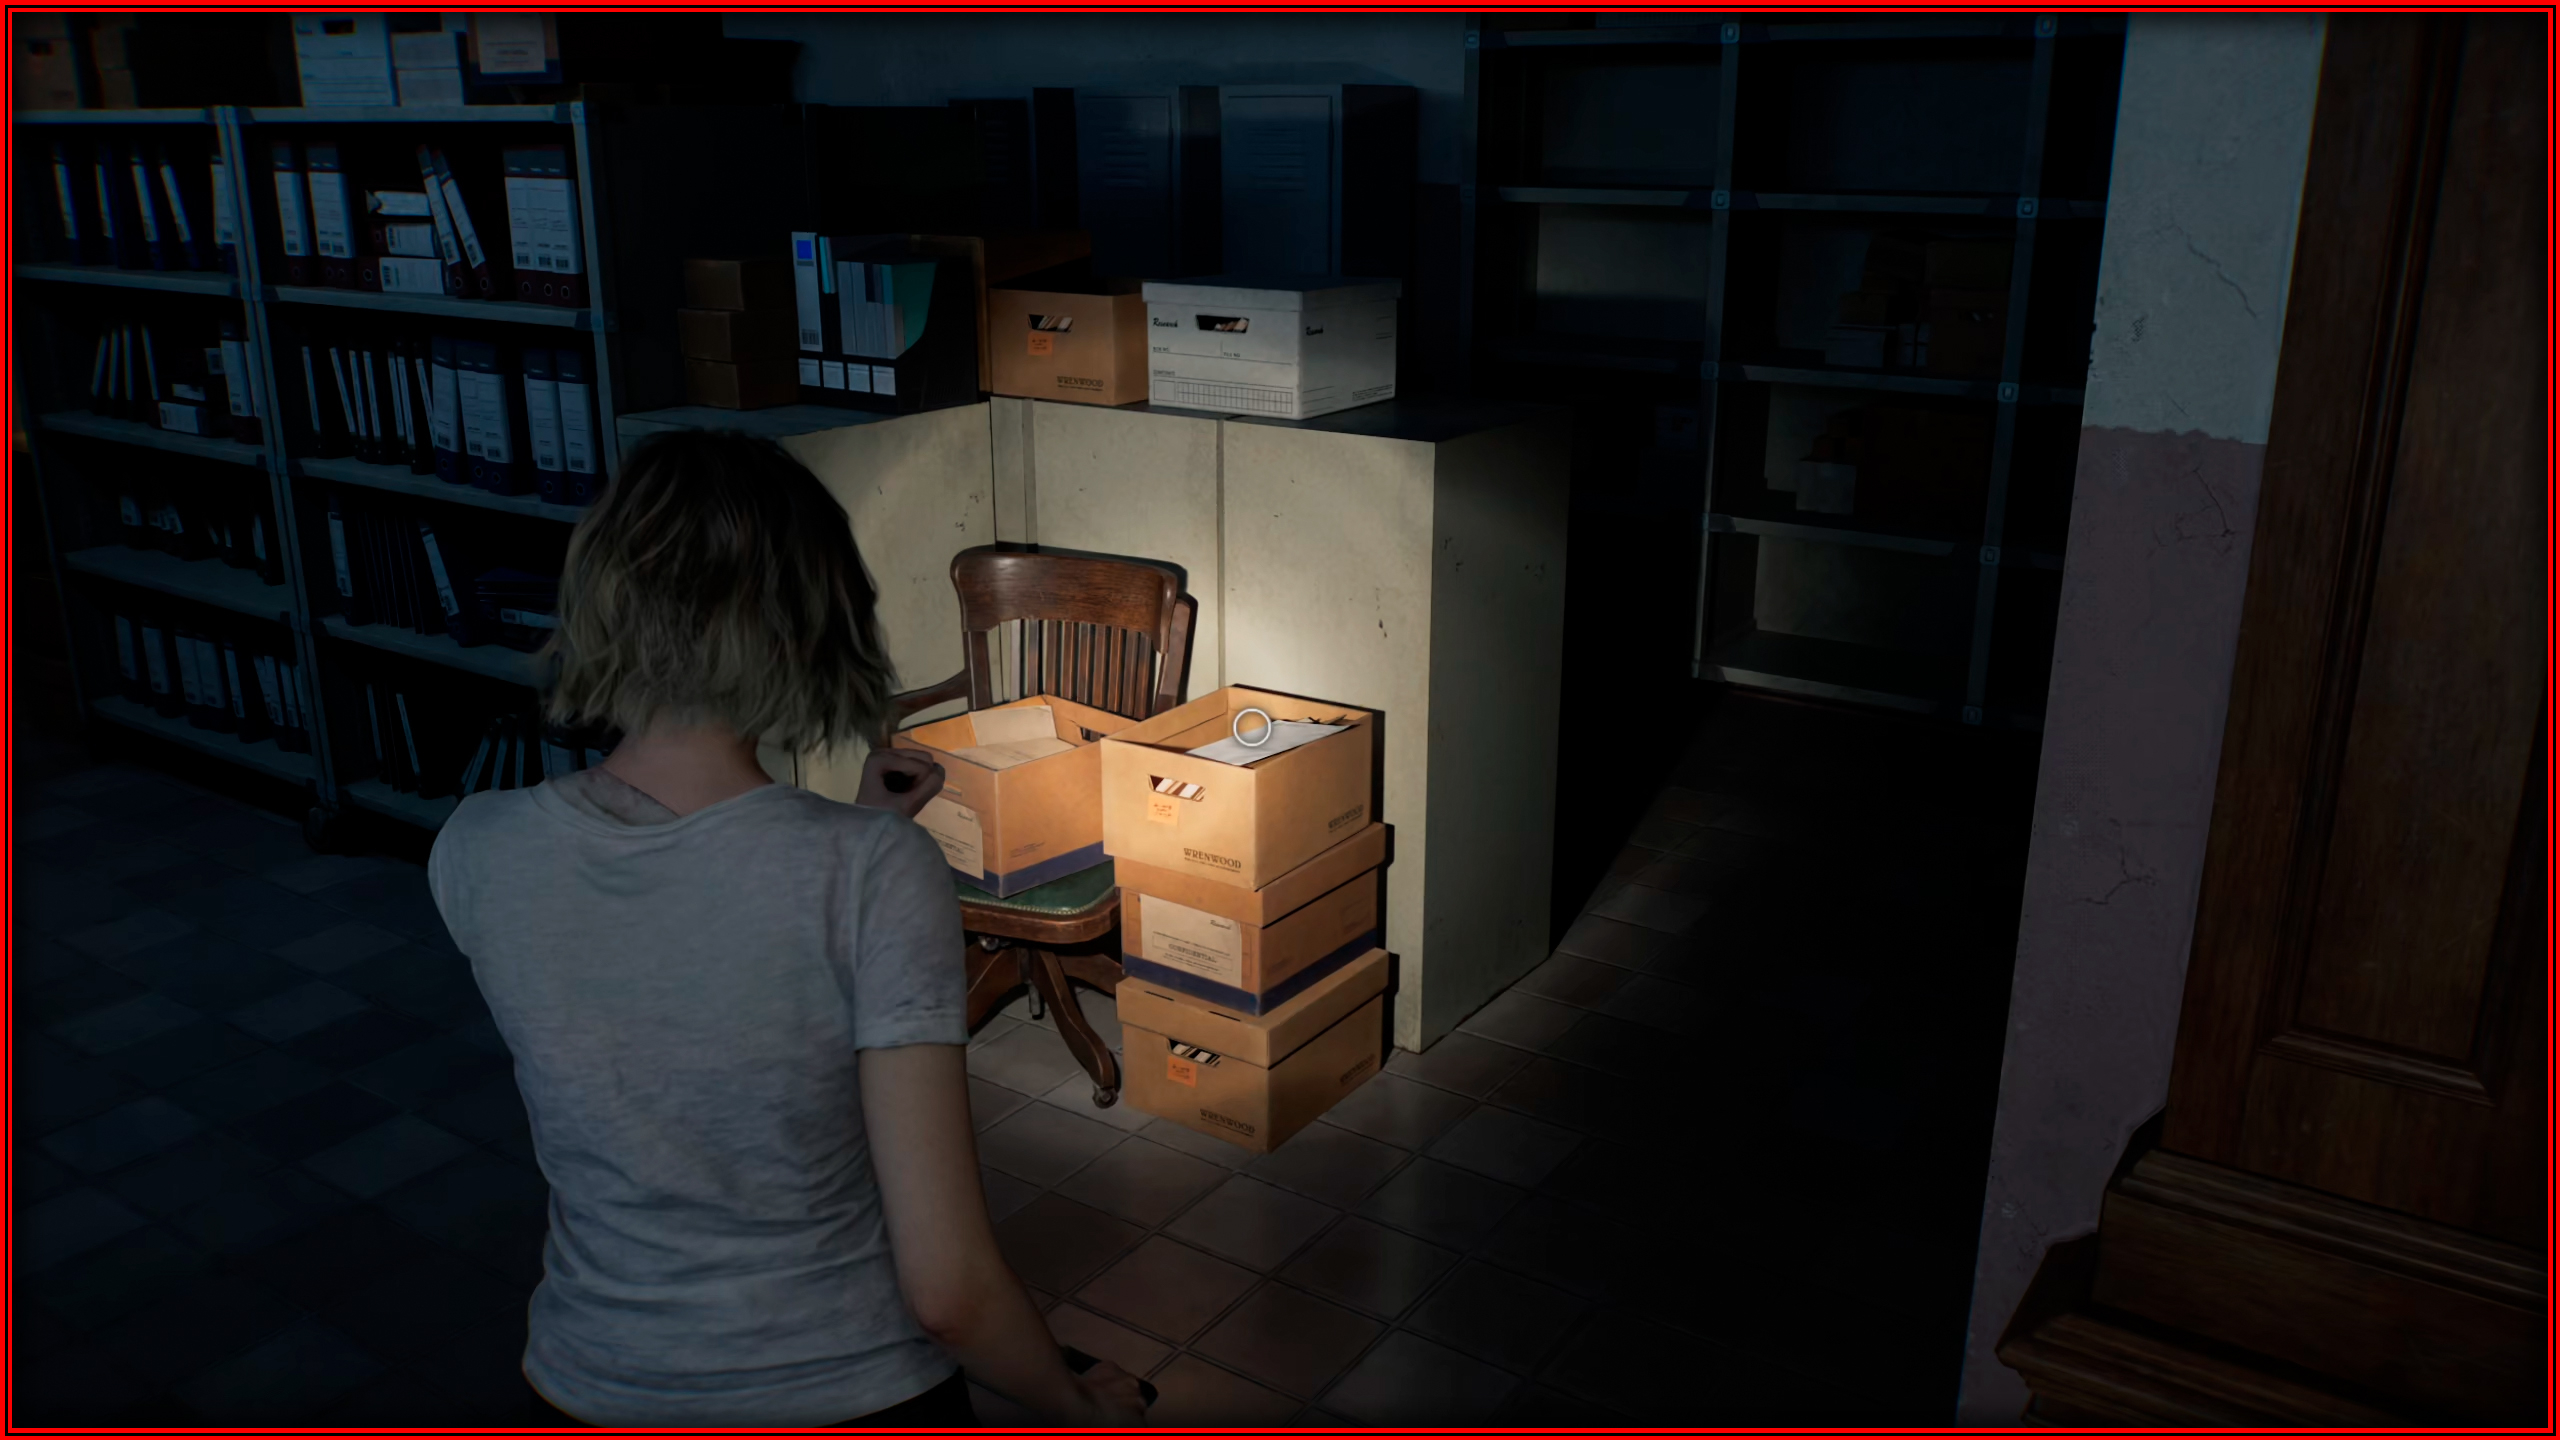
Records Room: Inside a cardboard box.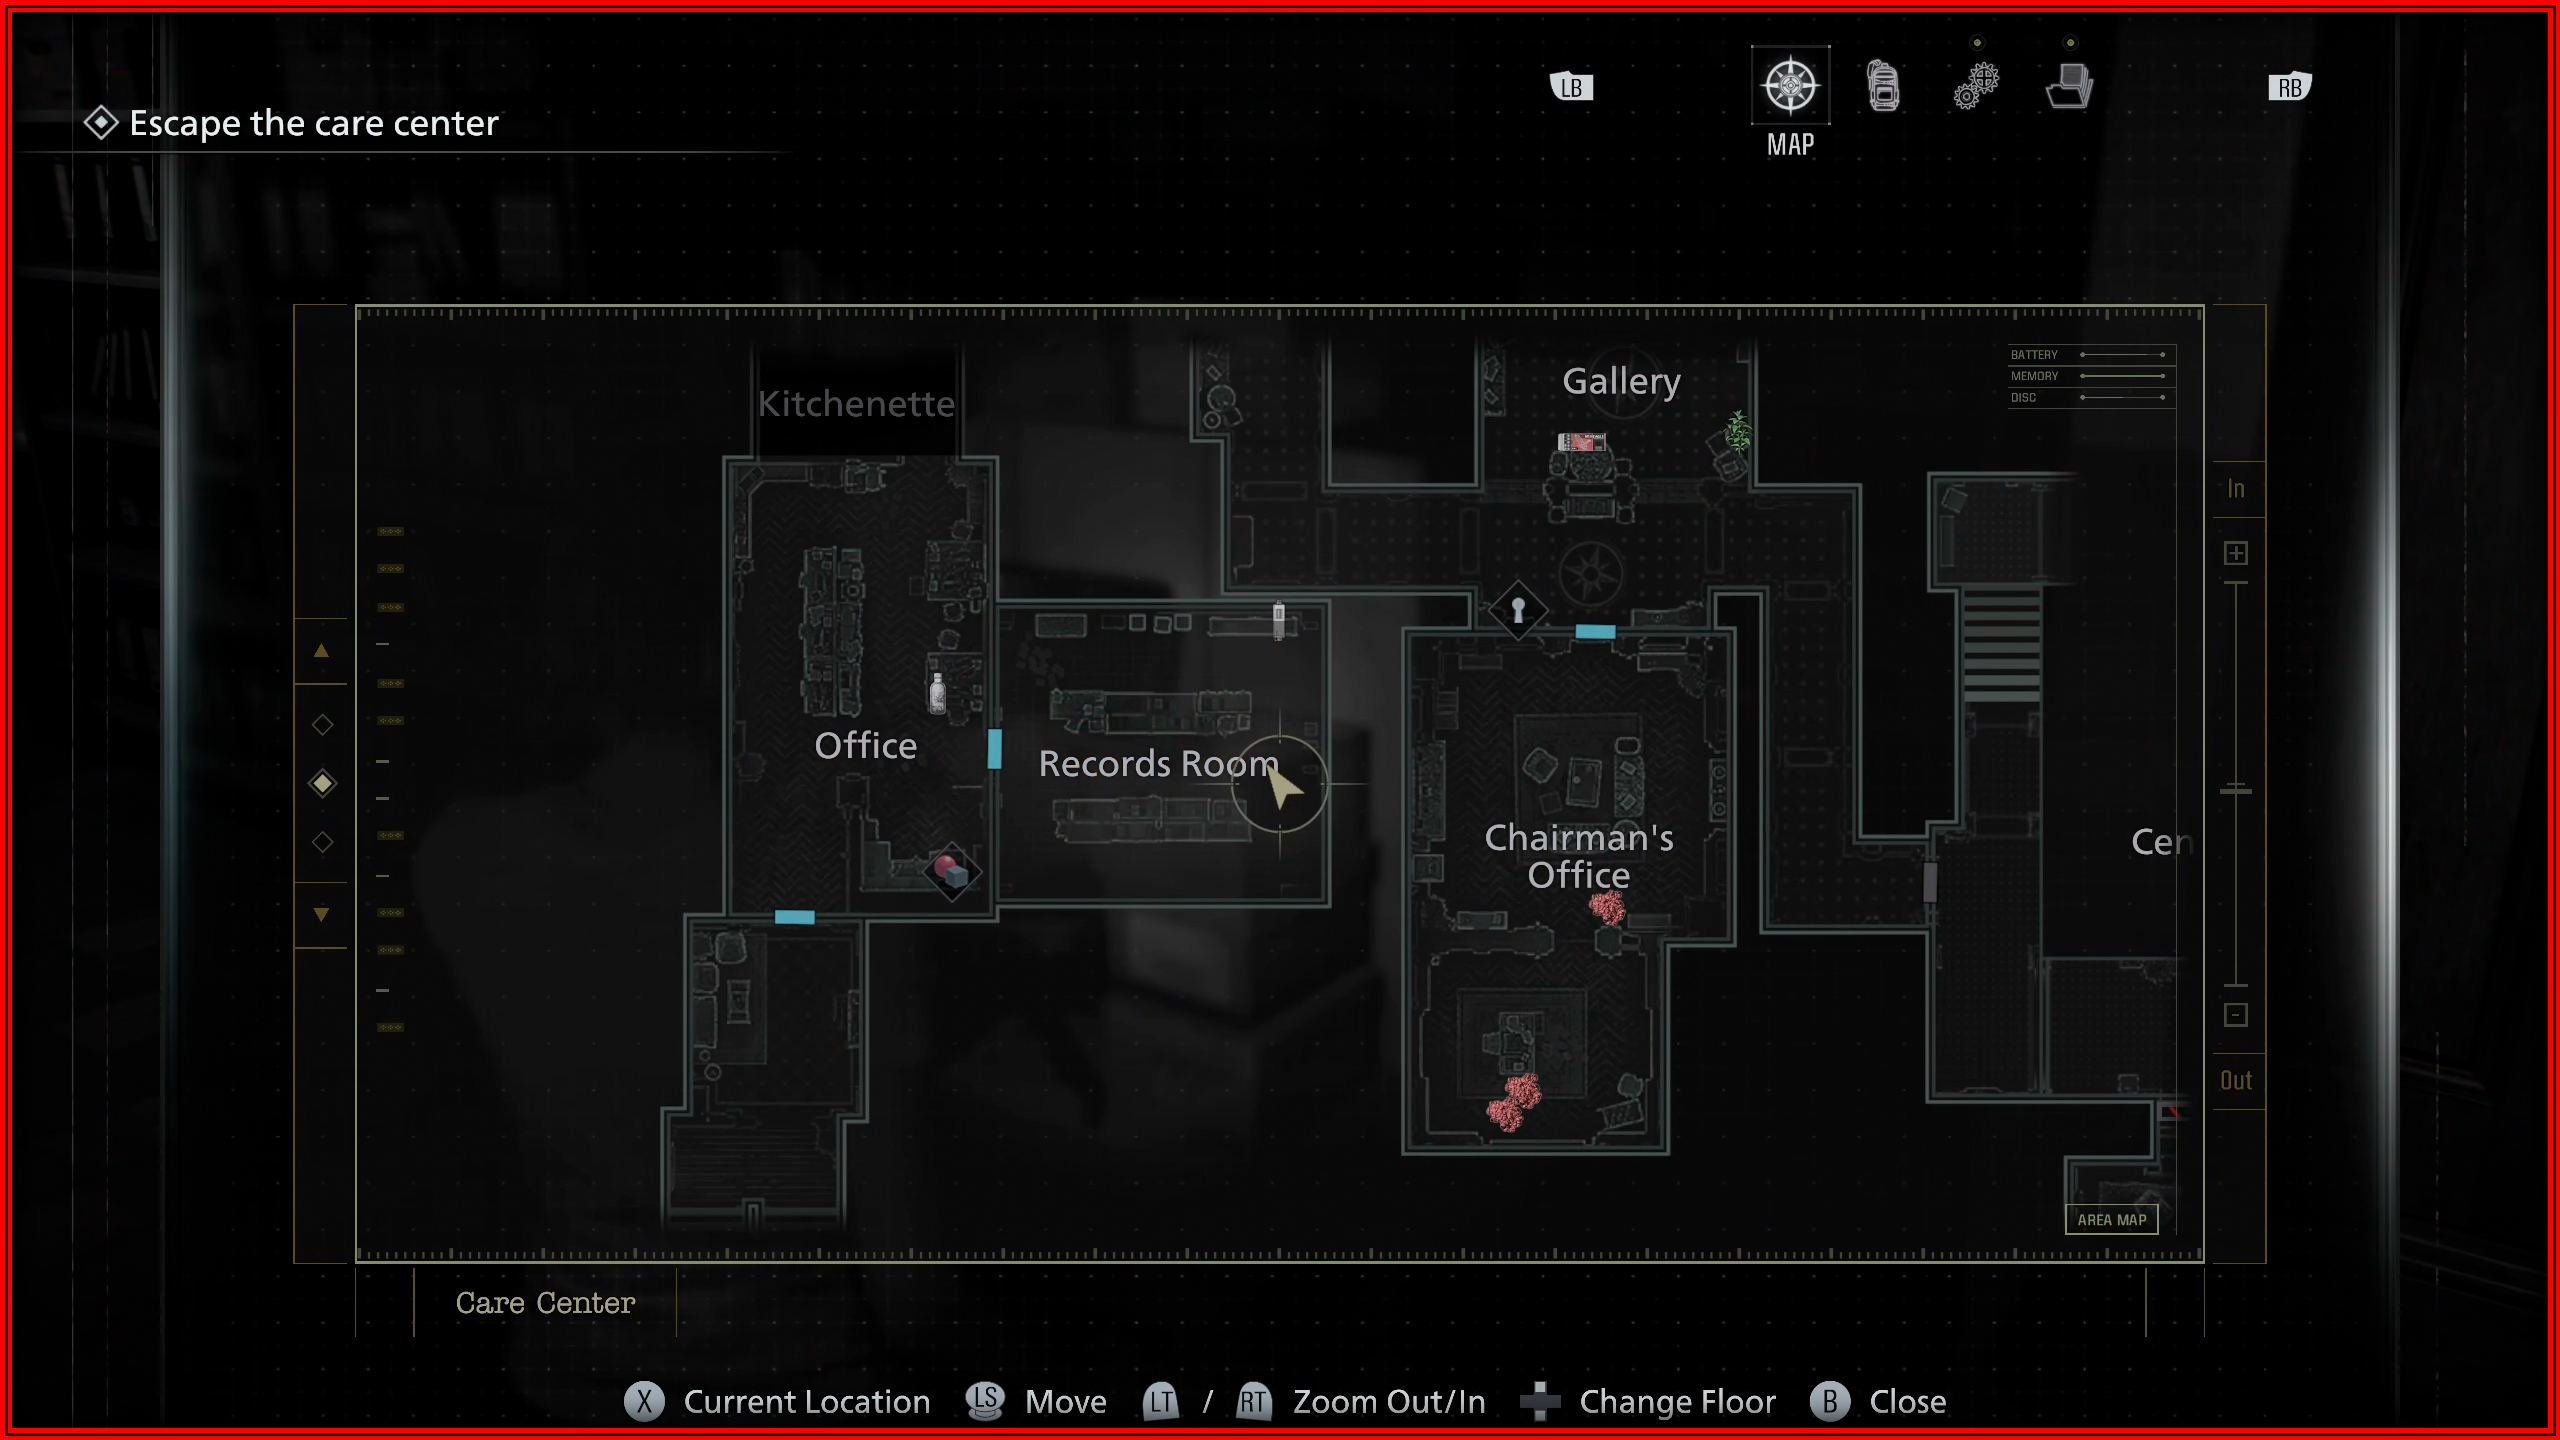
Case Closed - 2
File 26/75 - Examination Room Safe Code
East Wing 2nd Floor: Where you first met the Chunk and found the ID Wristband Level 1. 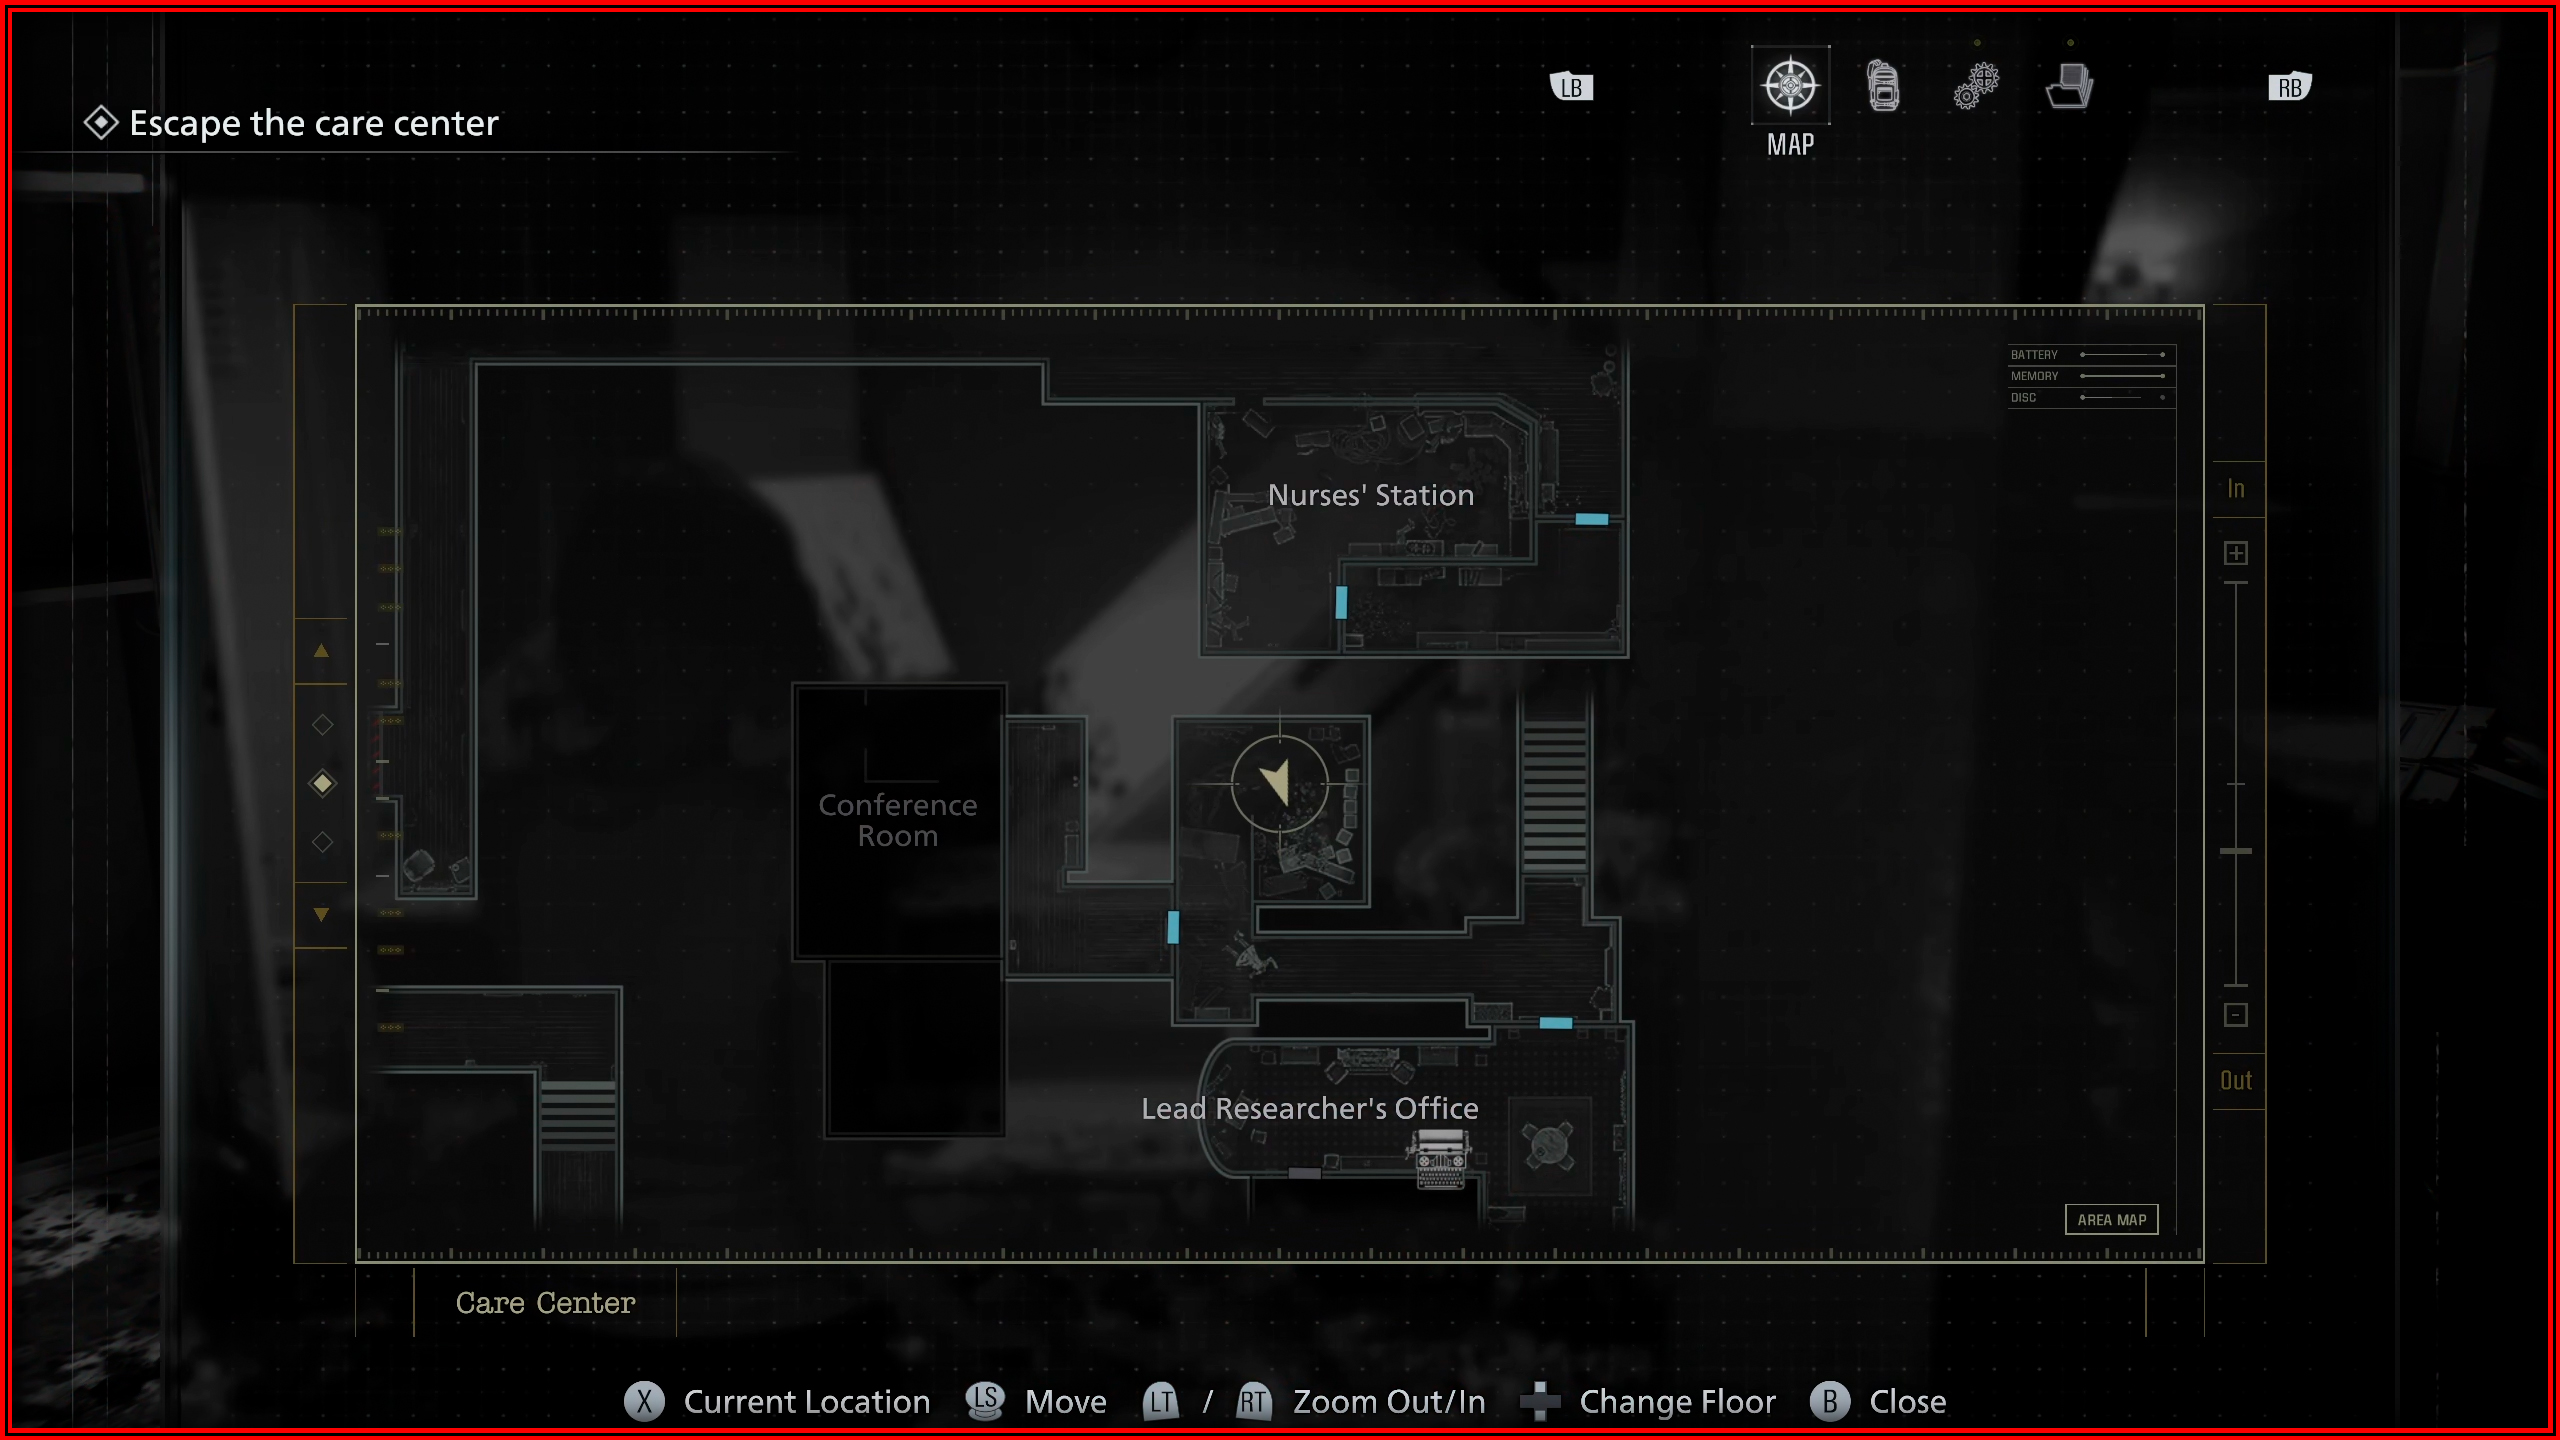
File 27/75 - Patient Medical Records
Conference Room: On the desk.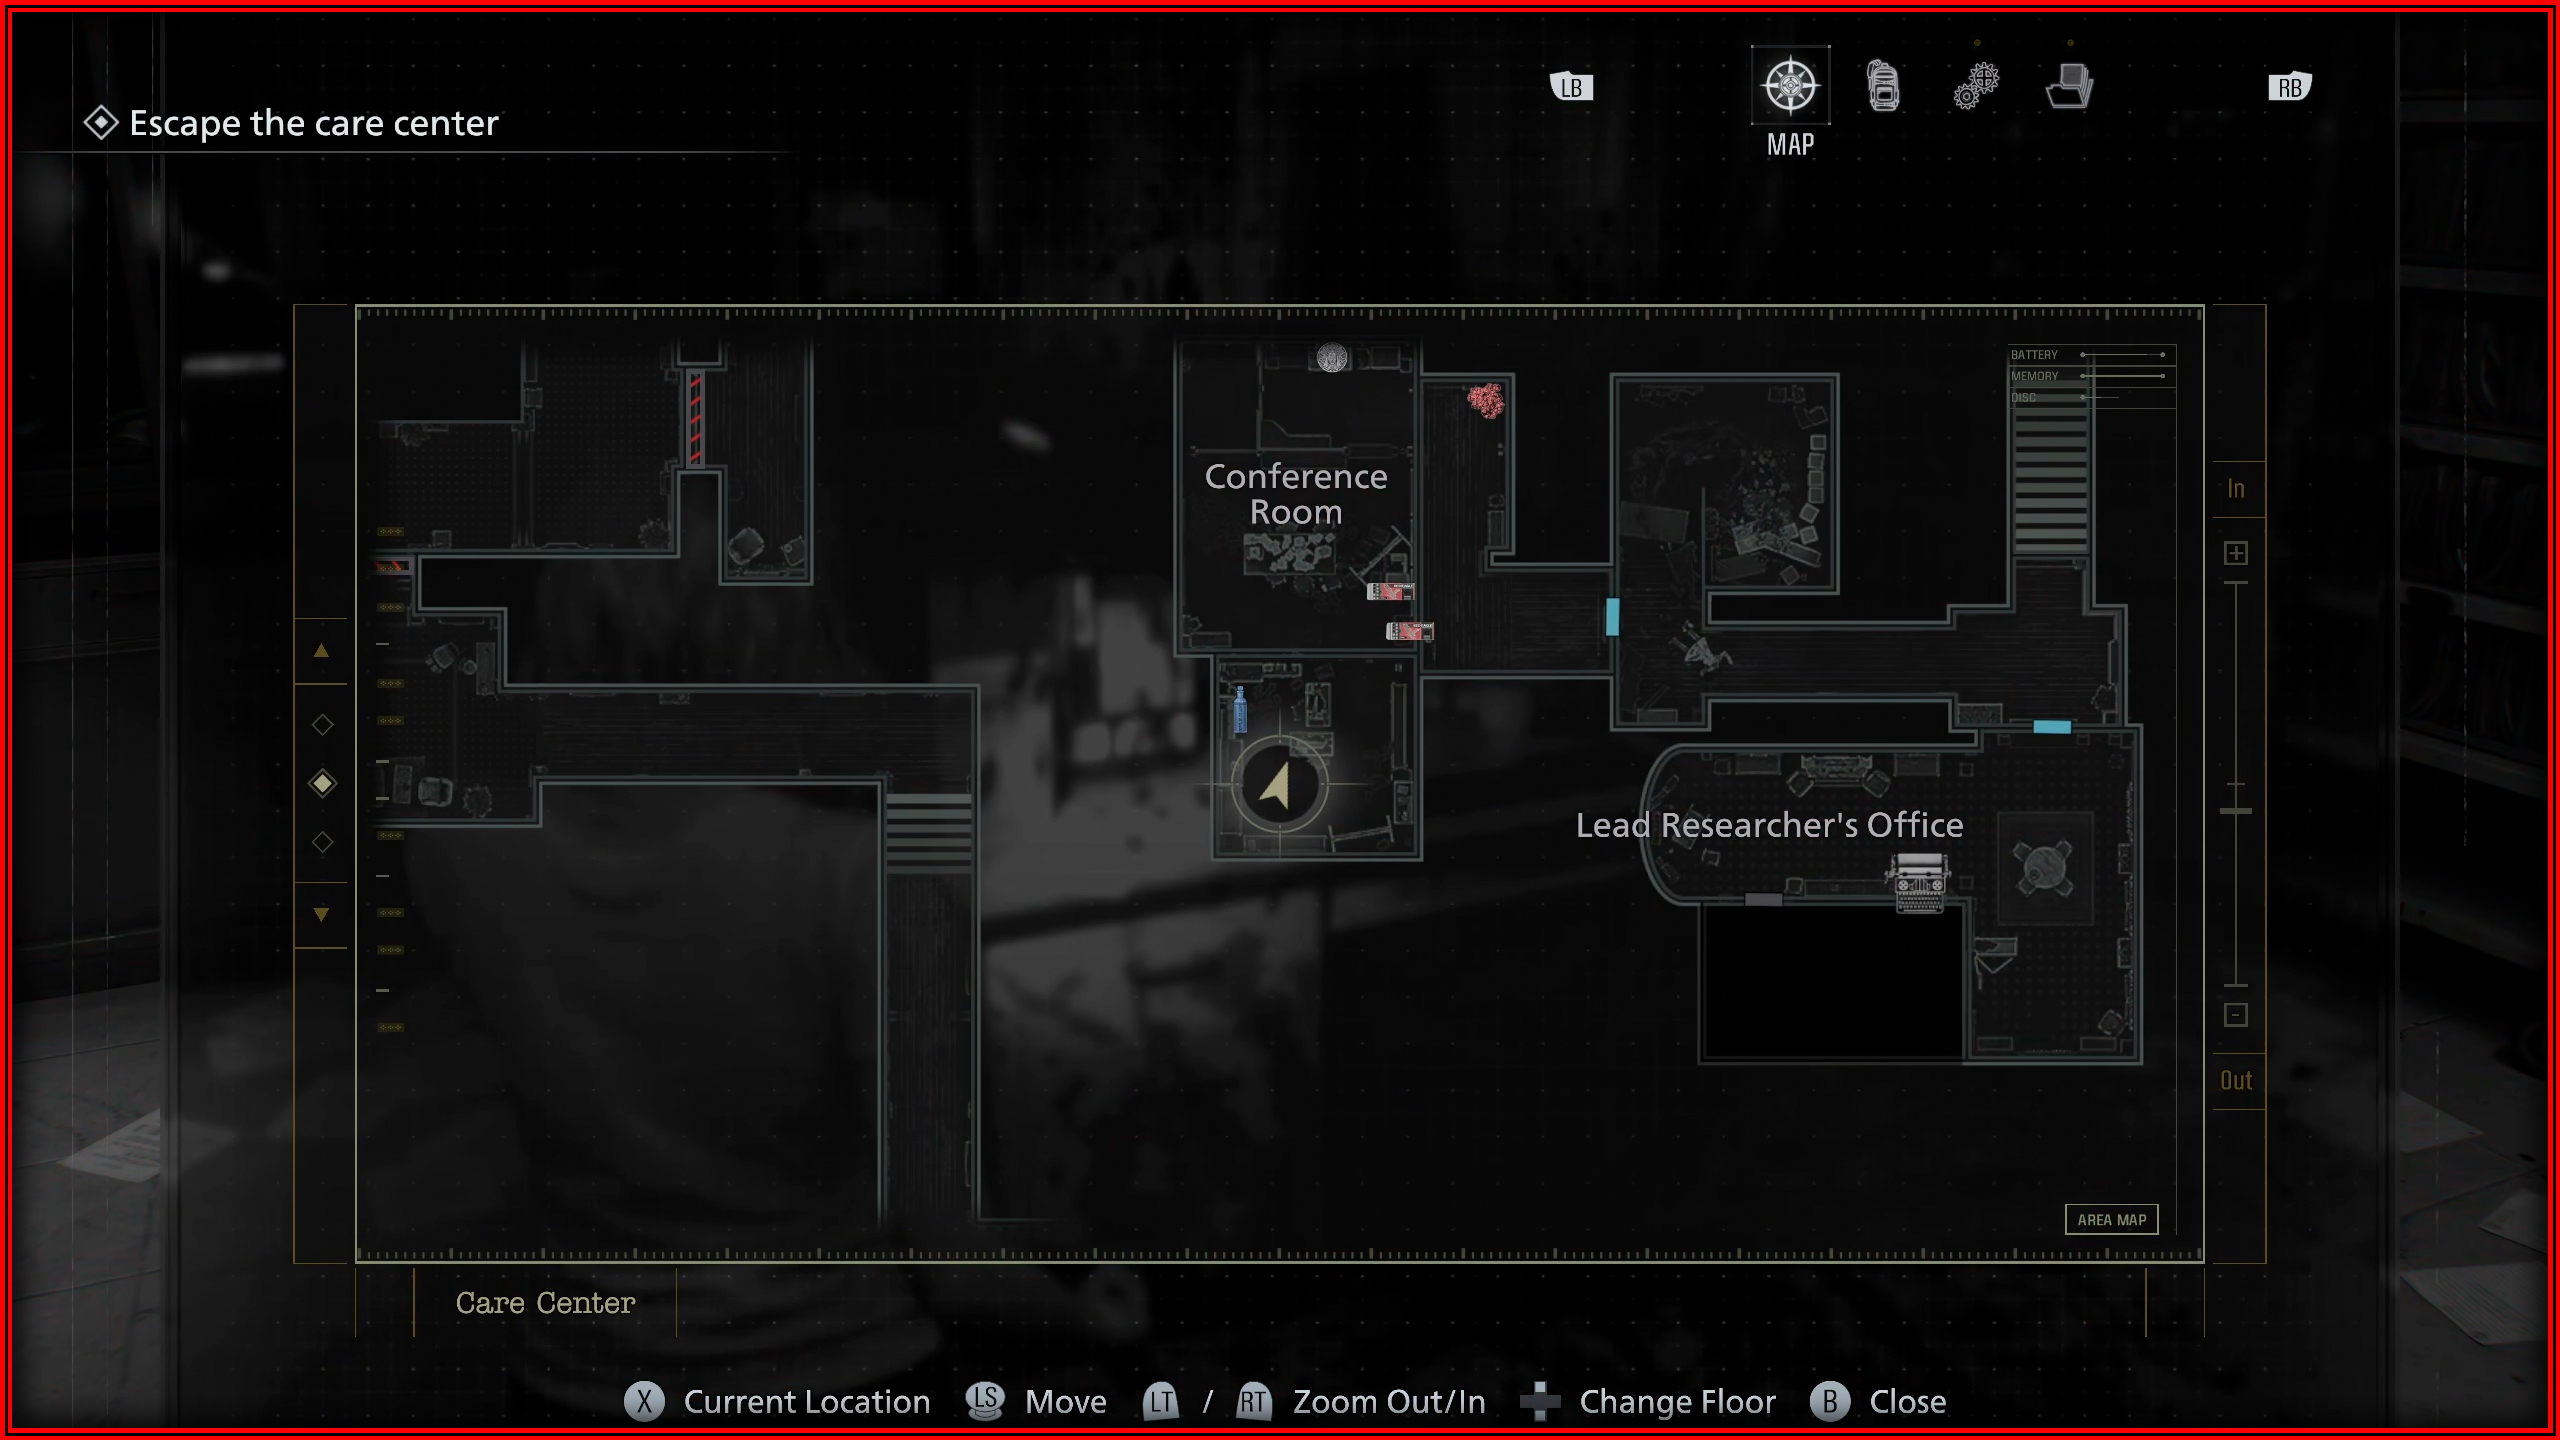
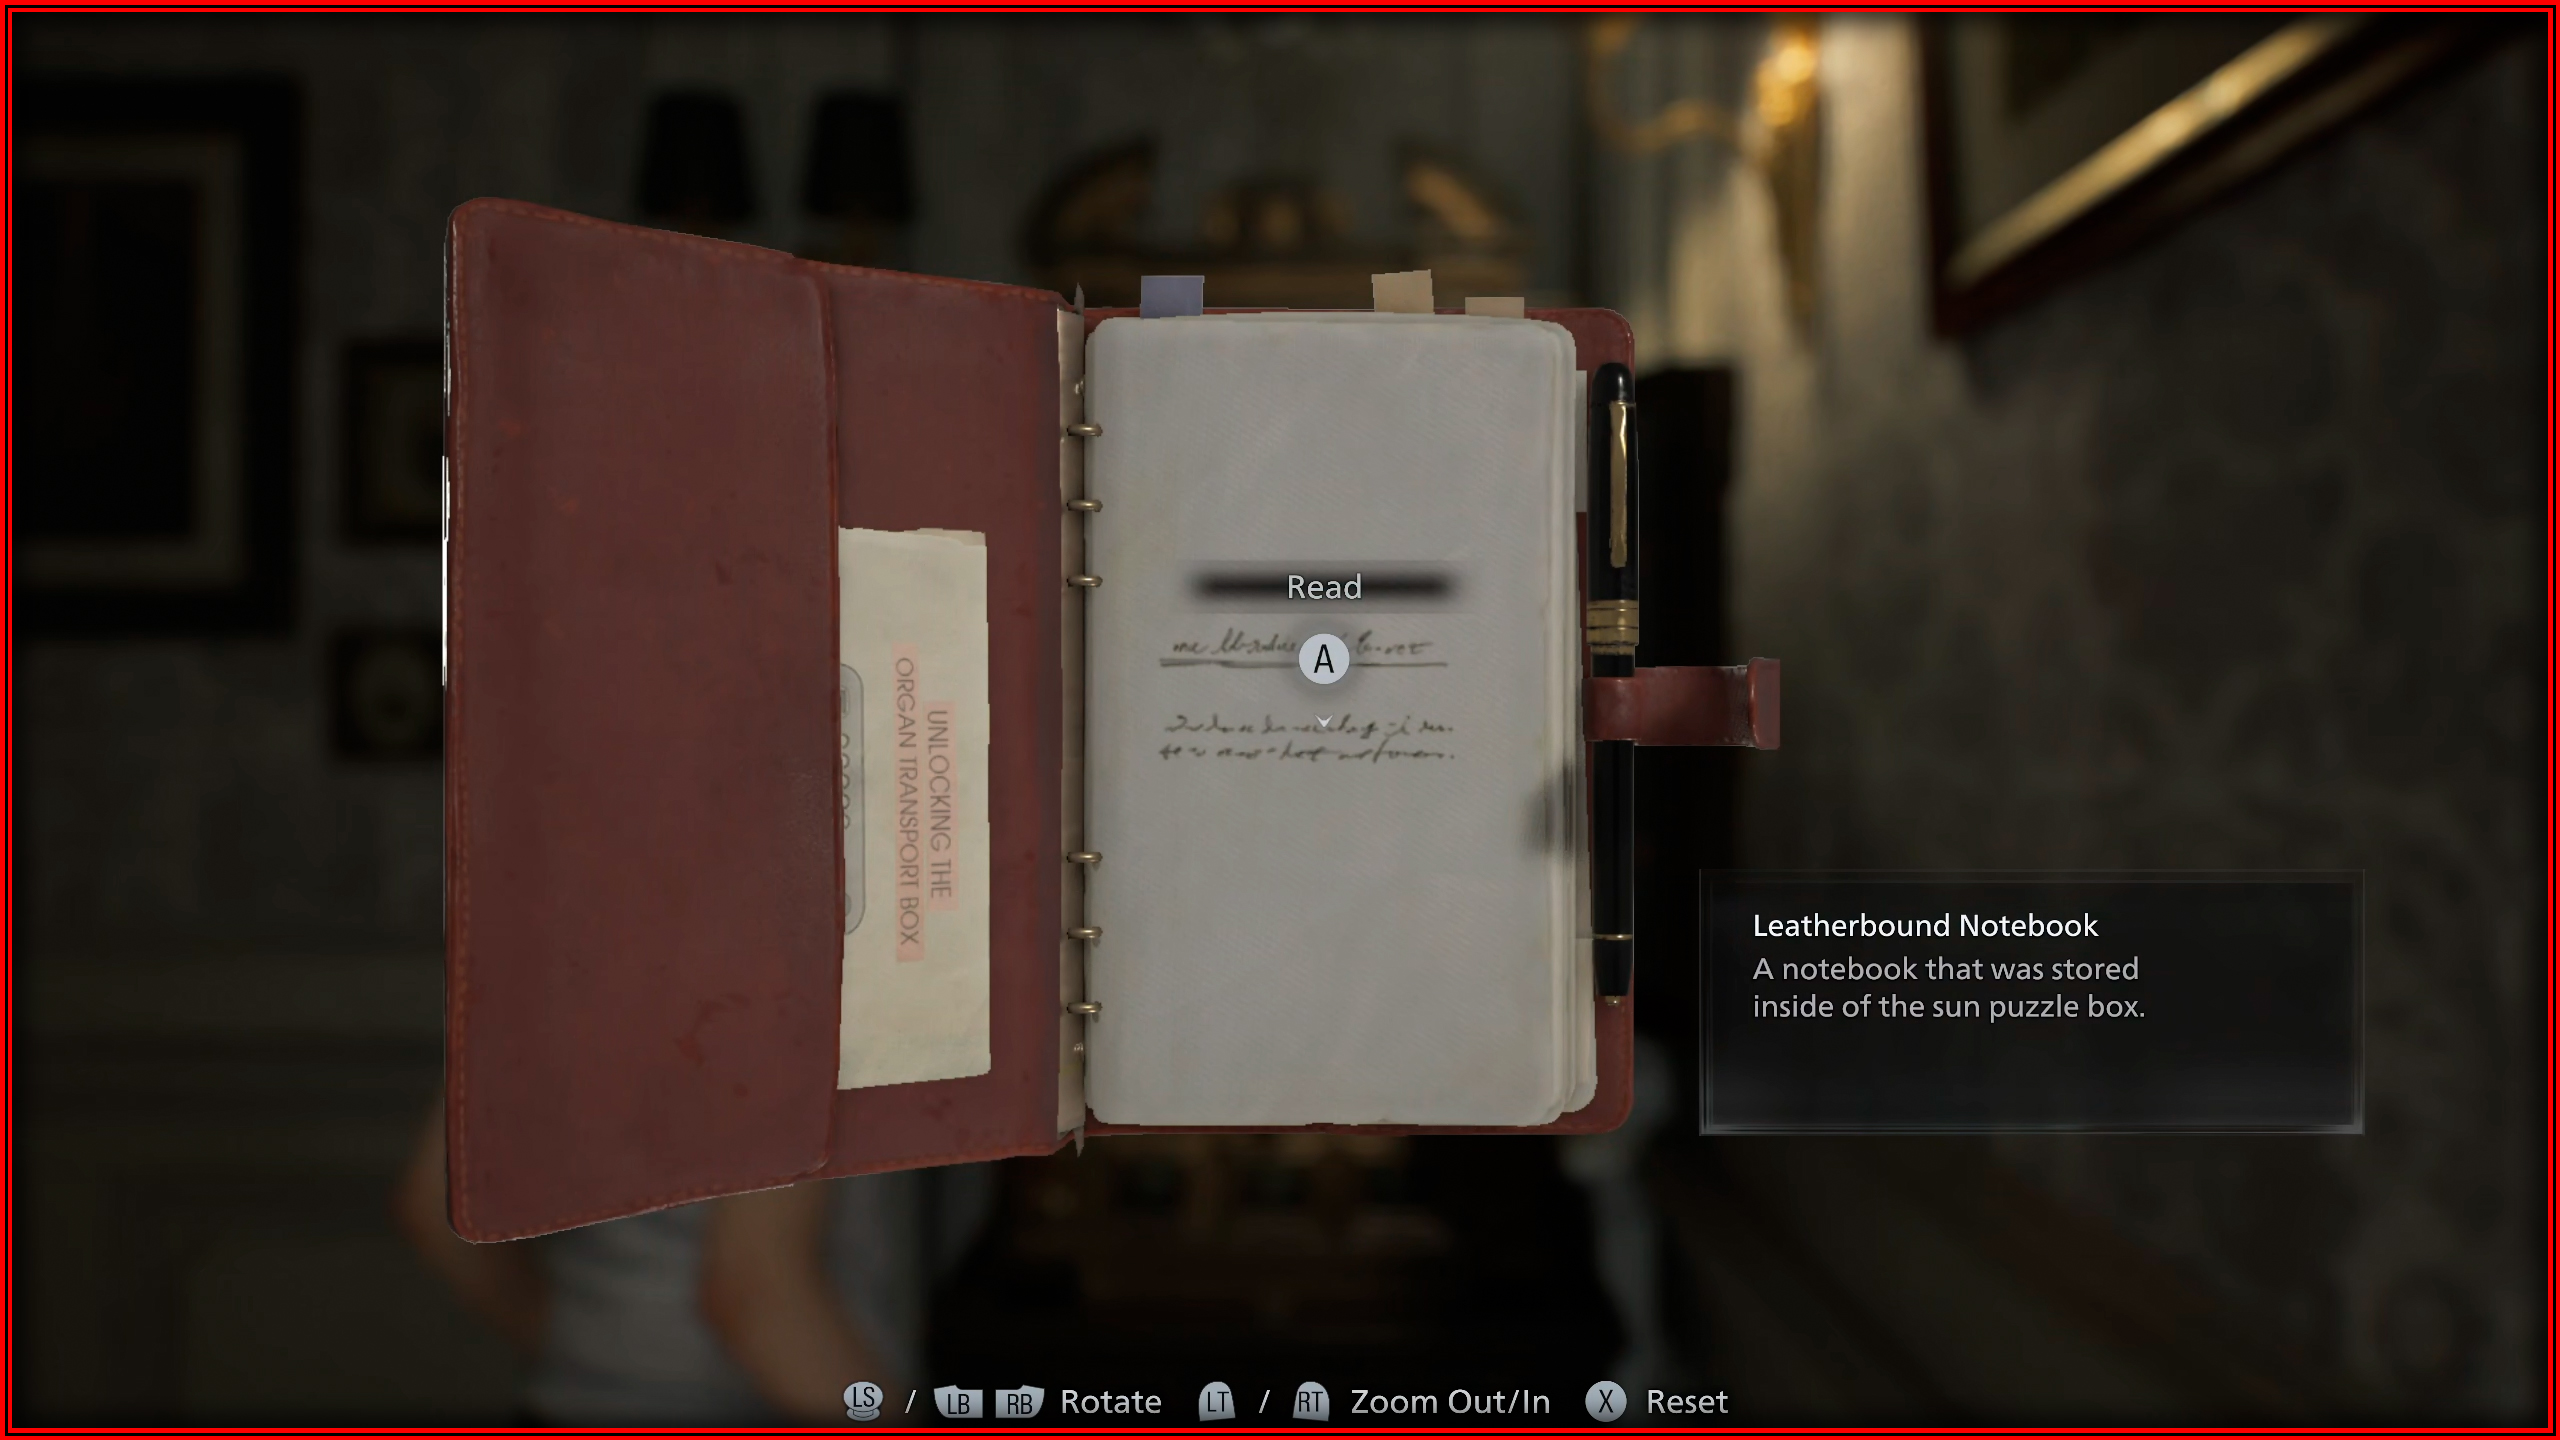
File 28/75 - Unlocking the Organ Transport BoxI
Lead Researcher’s Office: Inside the puzzle box after using the corrosive substance on the packlock.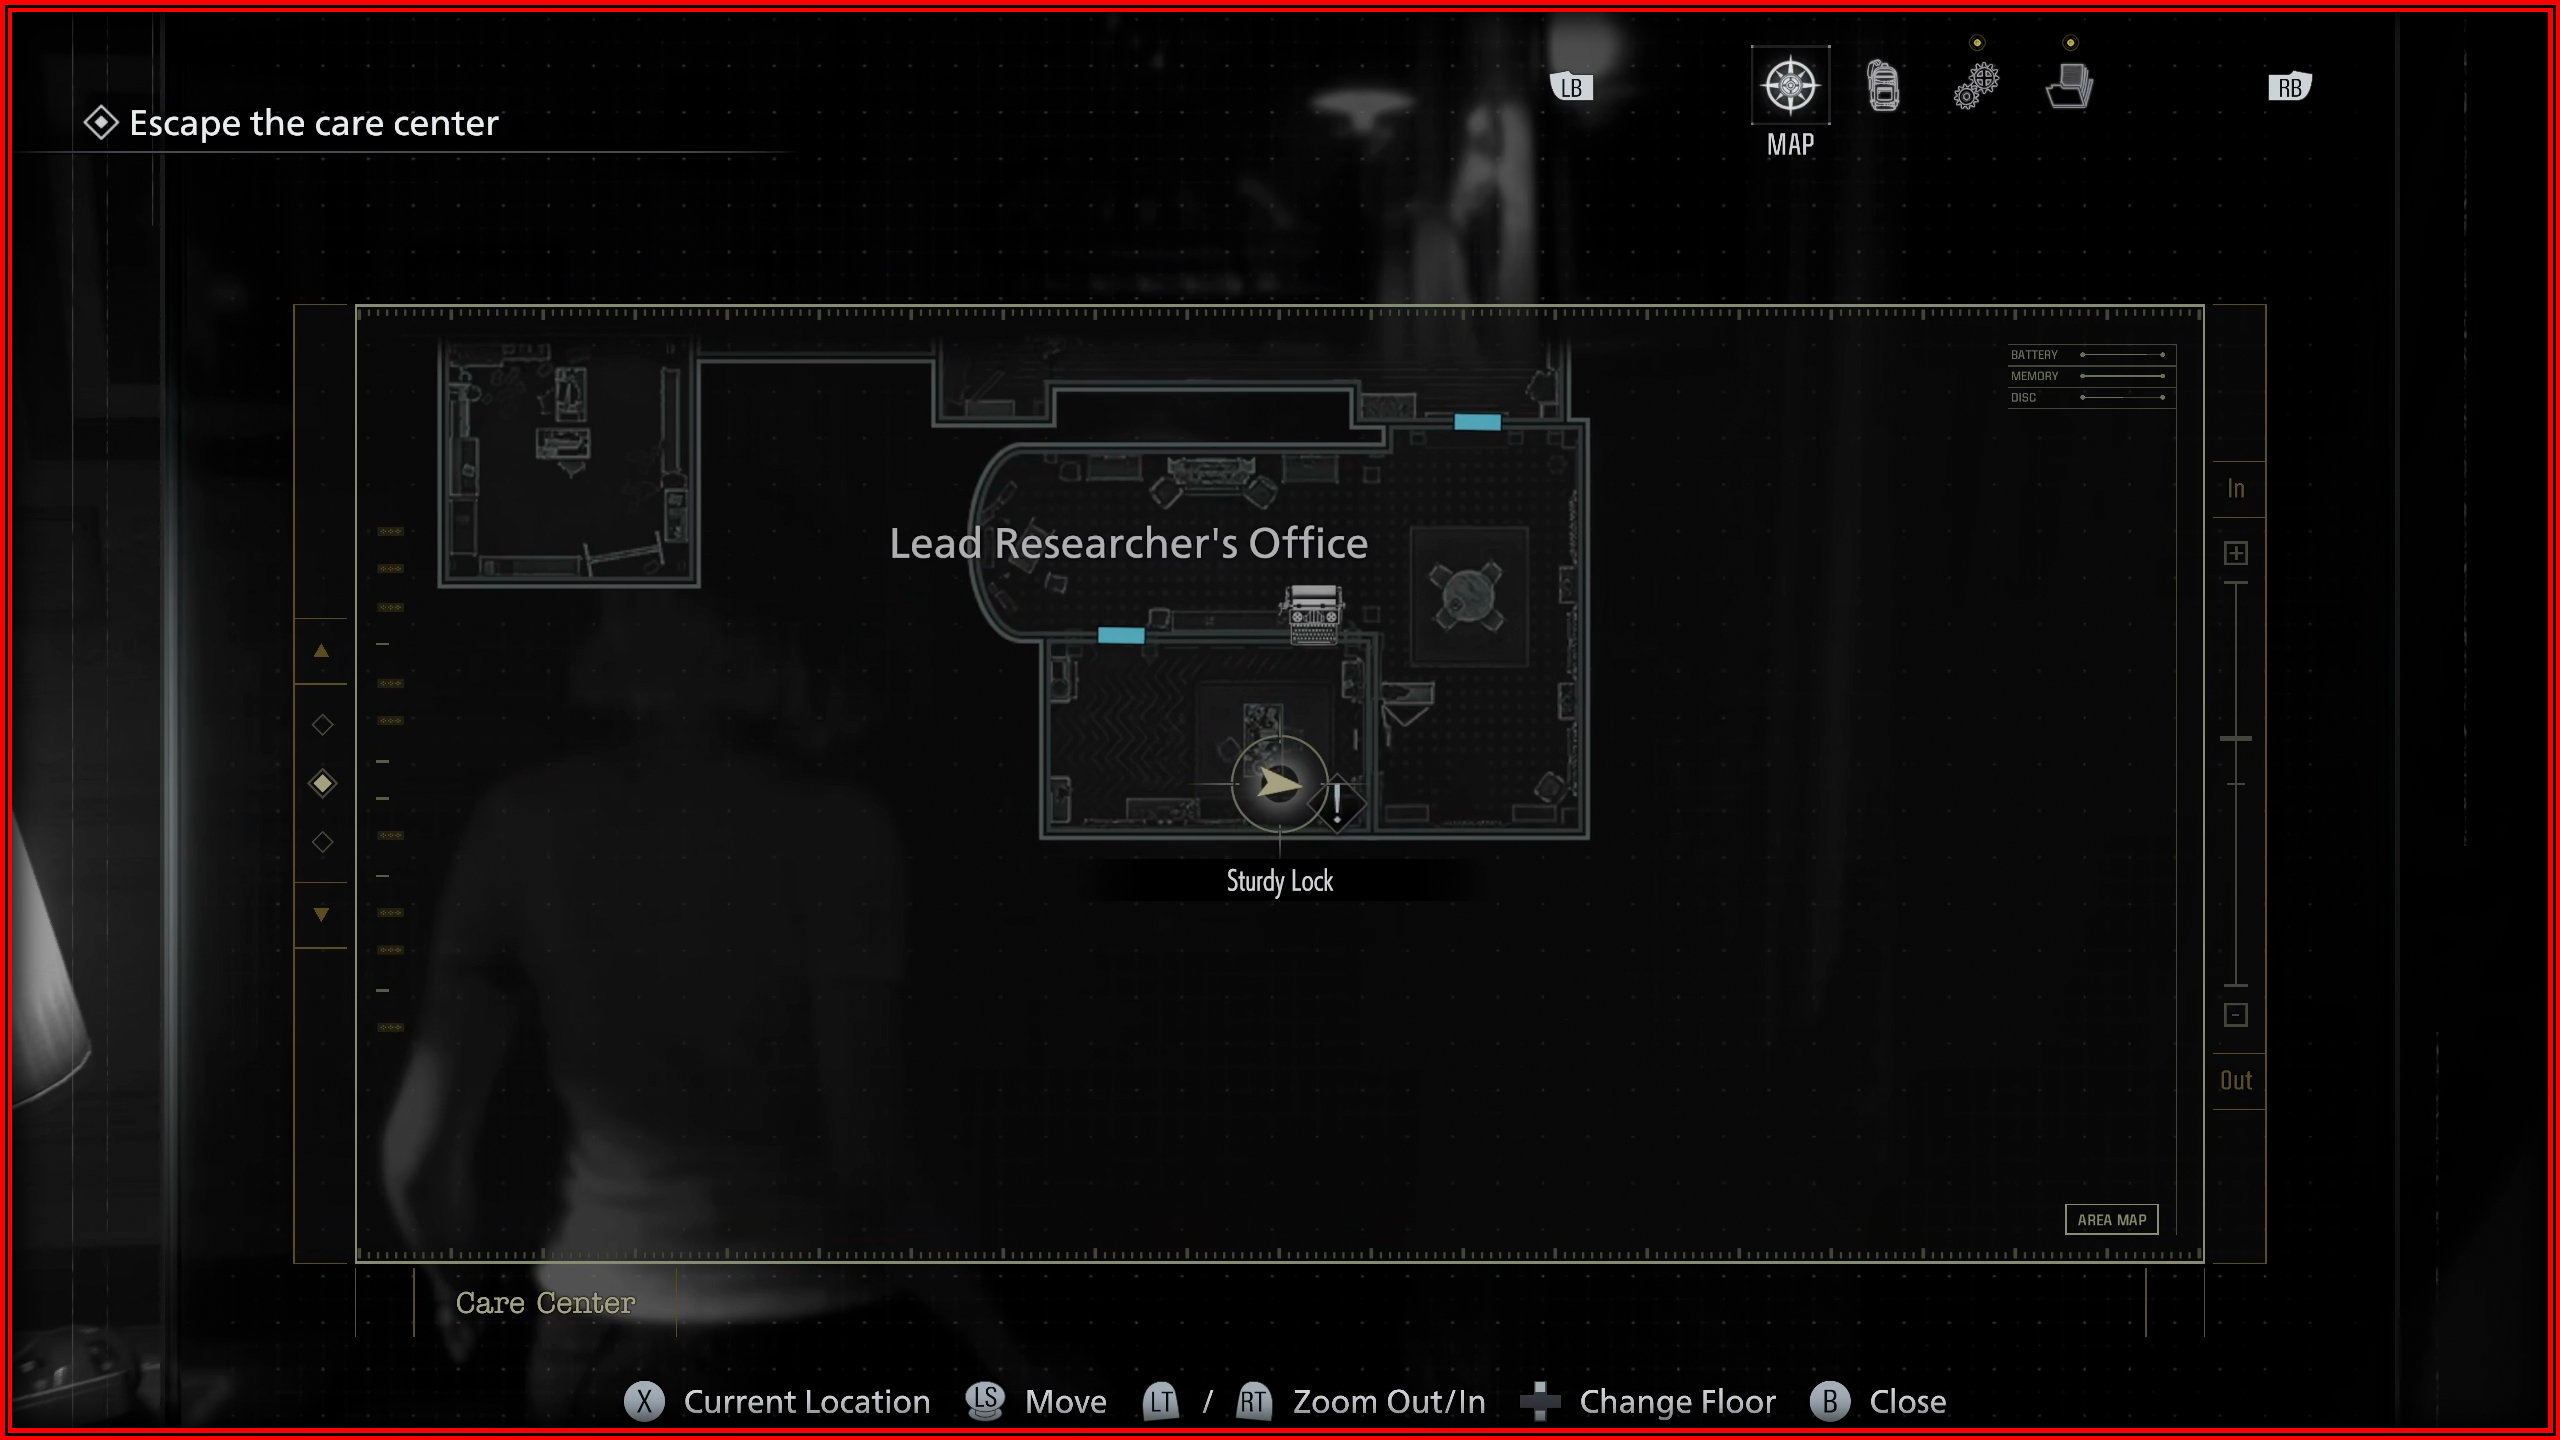
File 29/75 - Spencer’s Research I
Lead Researcher’s Office: Same as above, inside the puzzle box after using the corrosive substance on the packlock.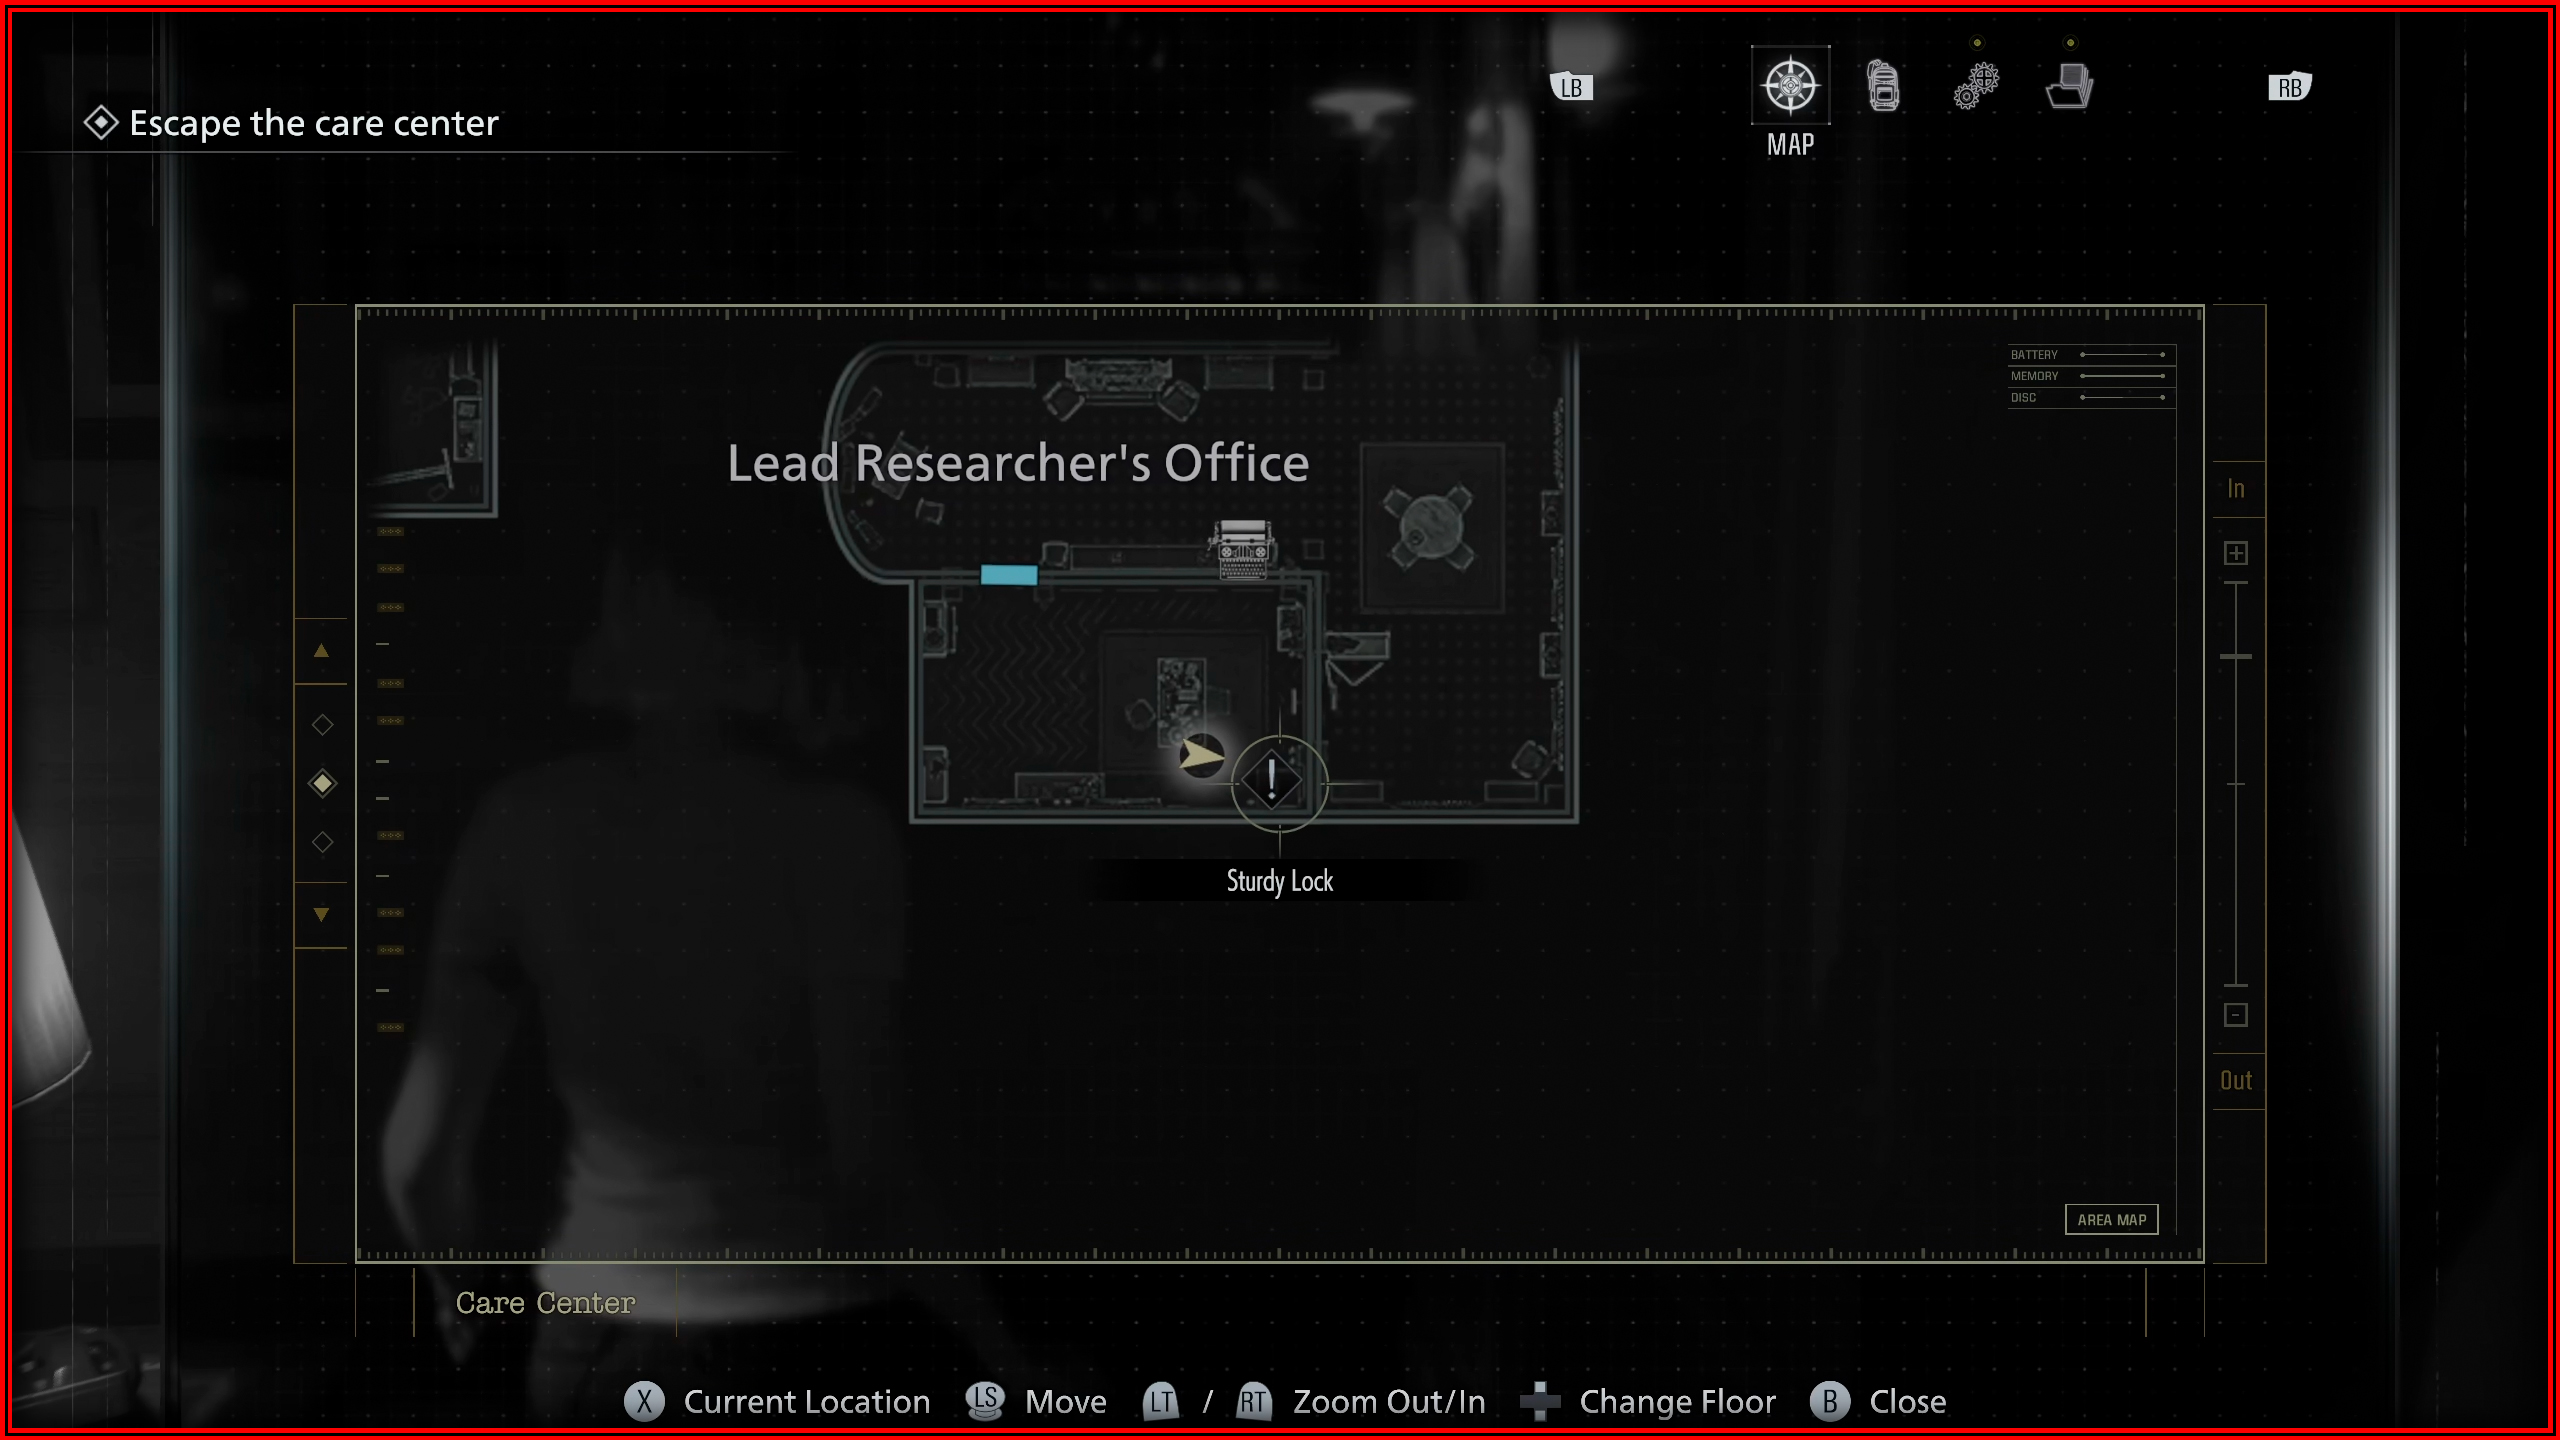
File 30/75 - Double Mutation
Isolation Ward: On top of some cardboard boxes.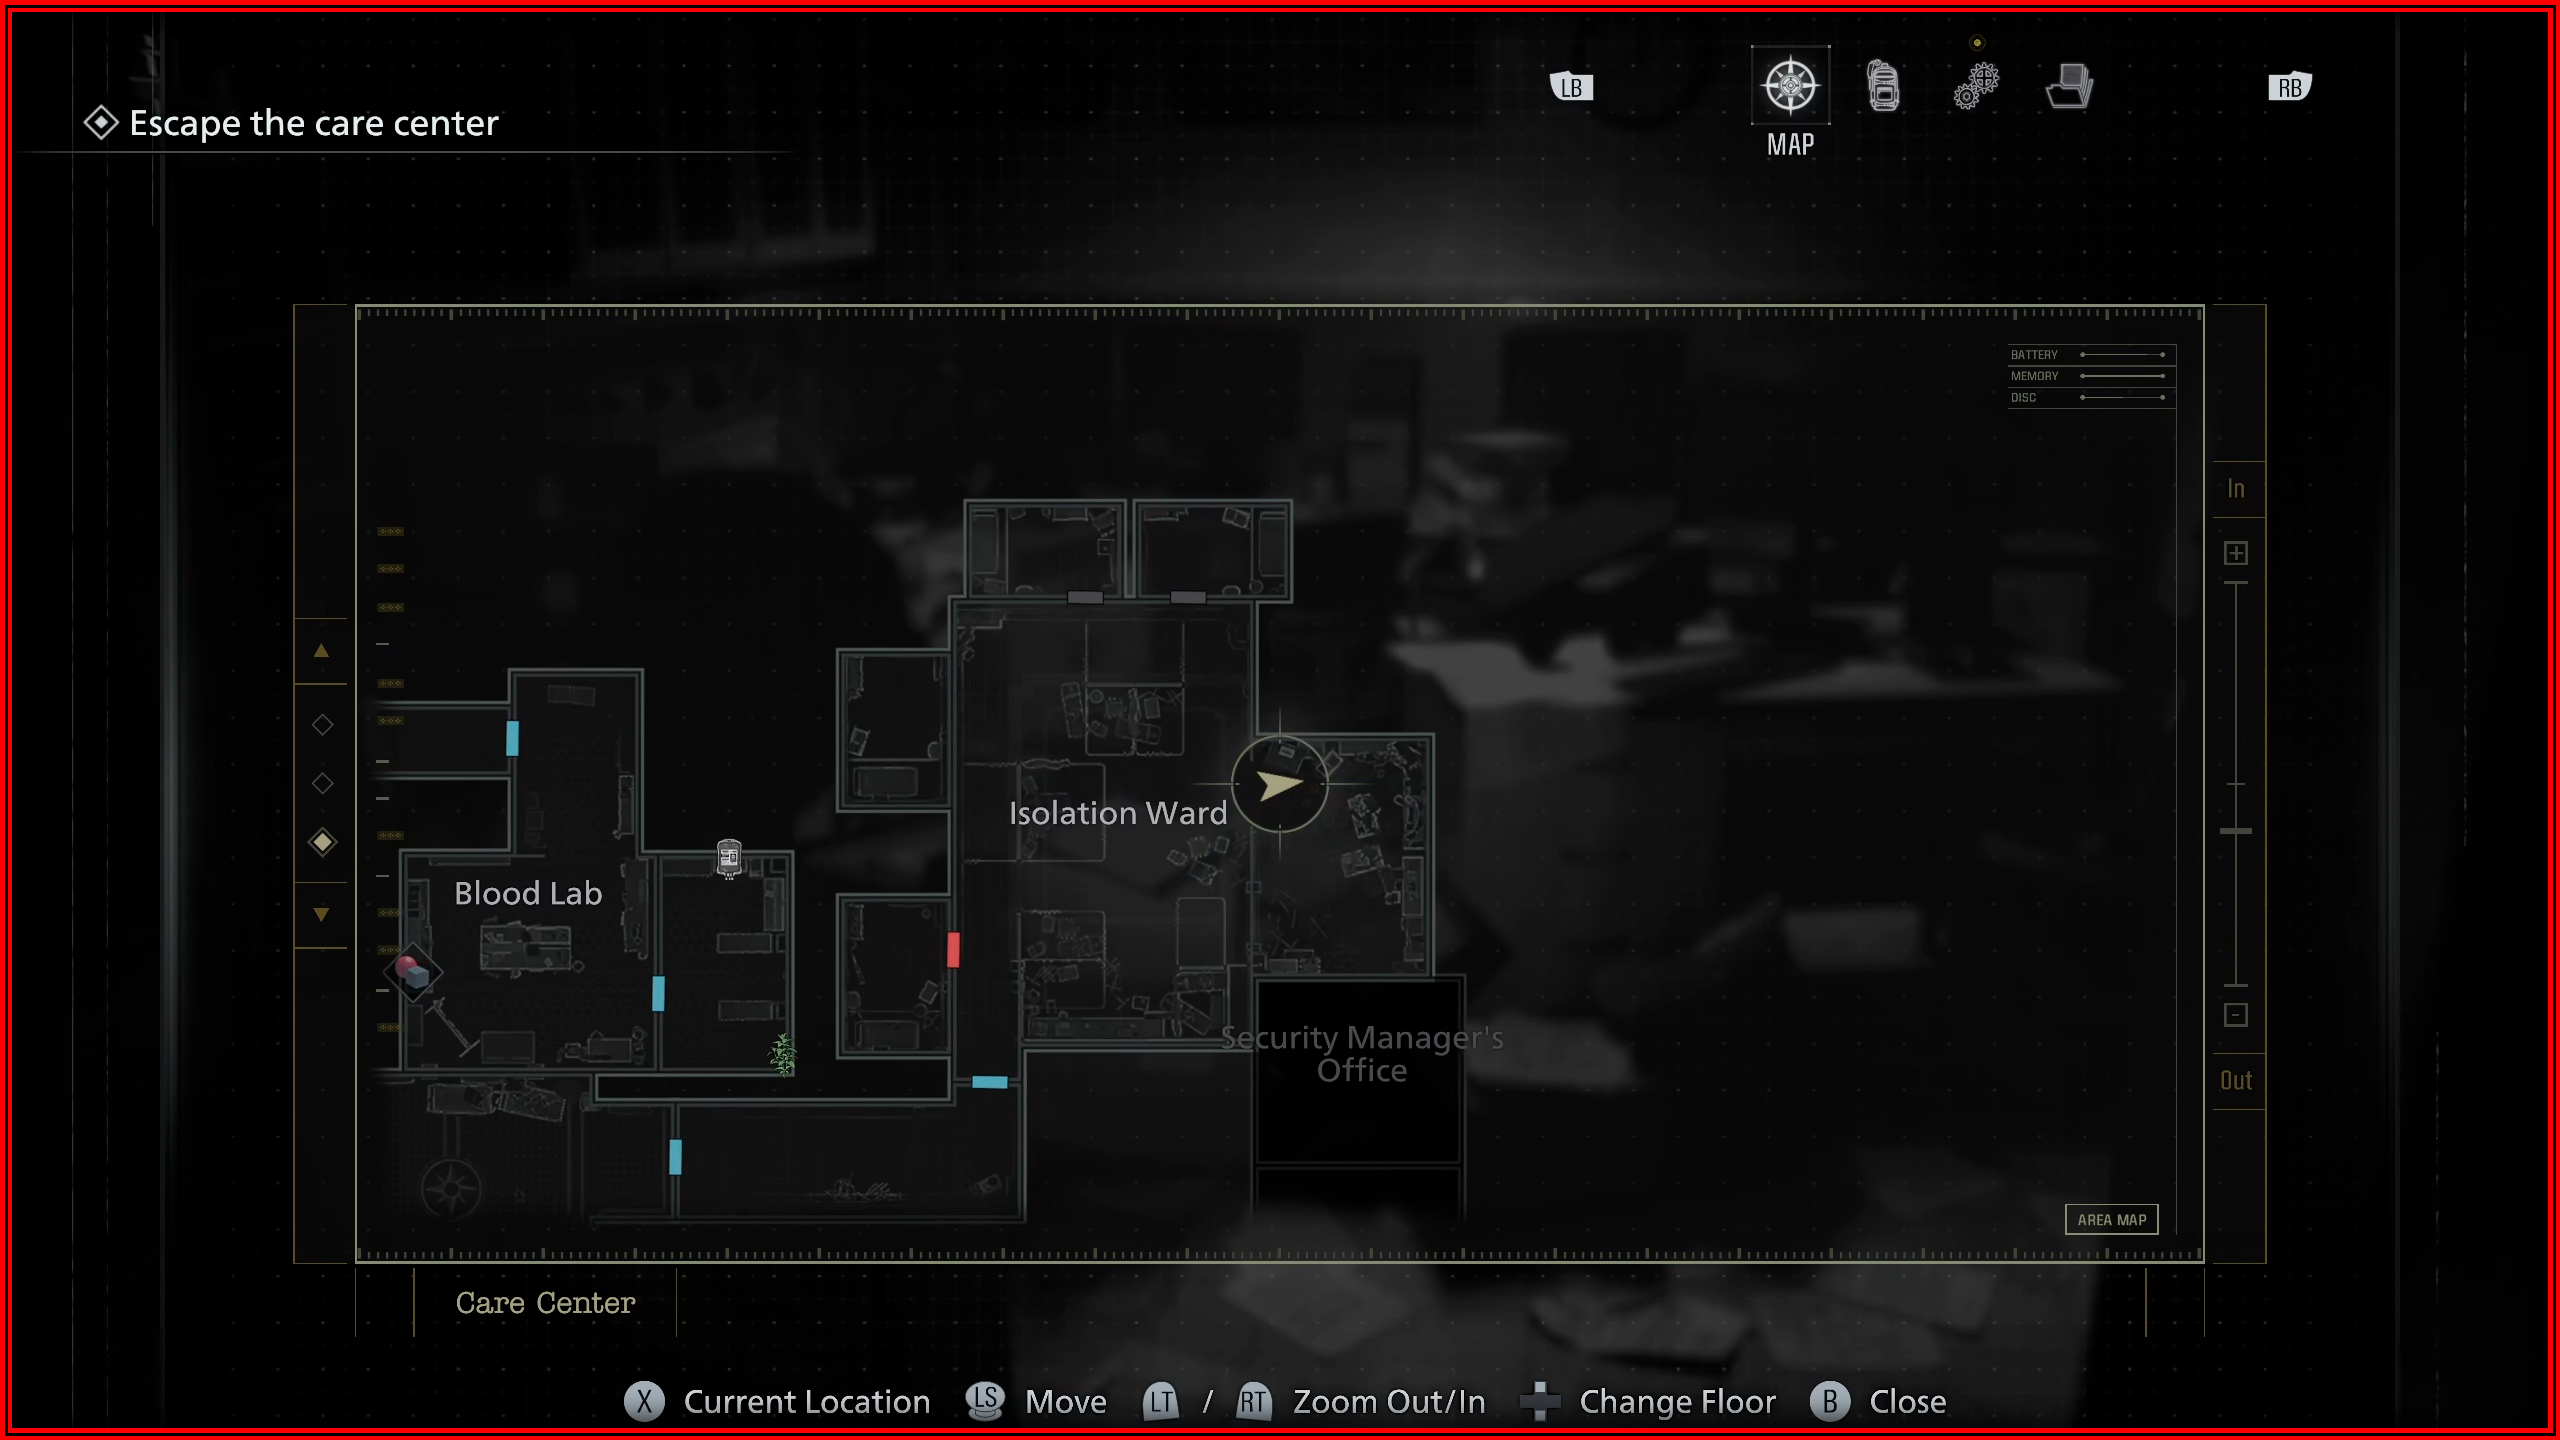
File 31/75 - Nurse’s Log
Isolation Ward: On the desk.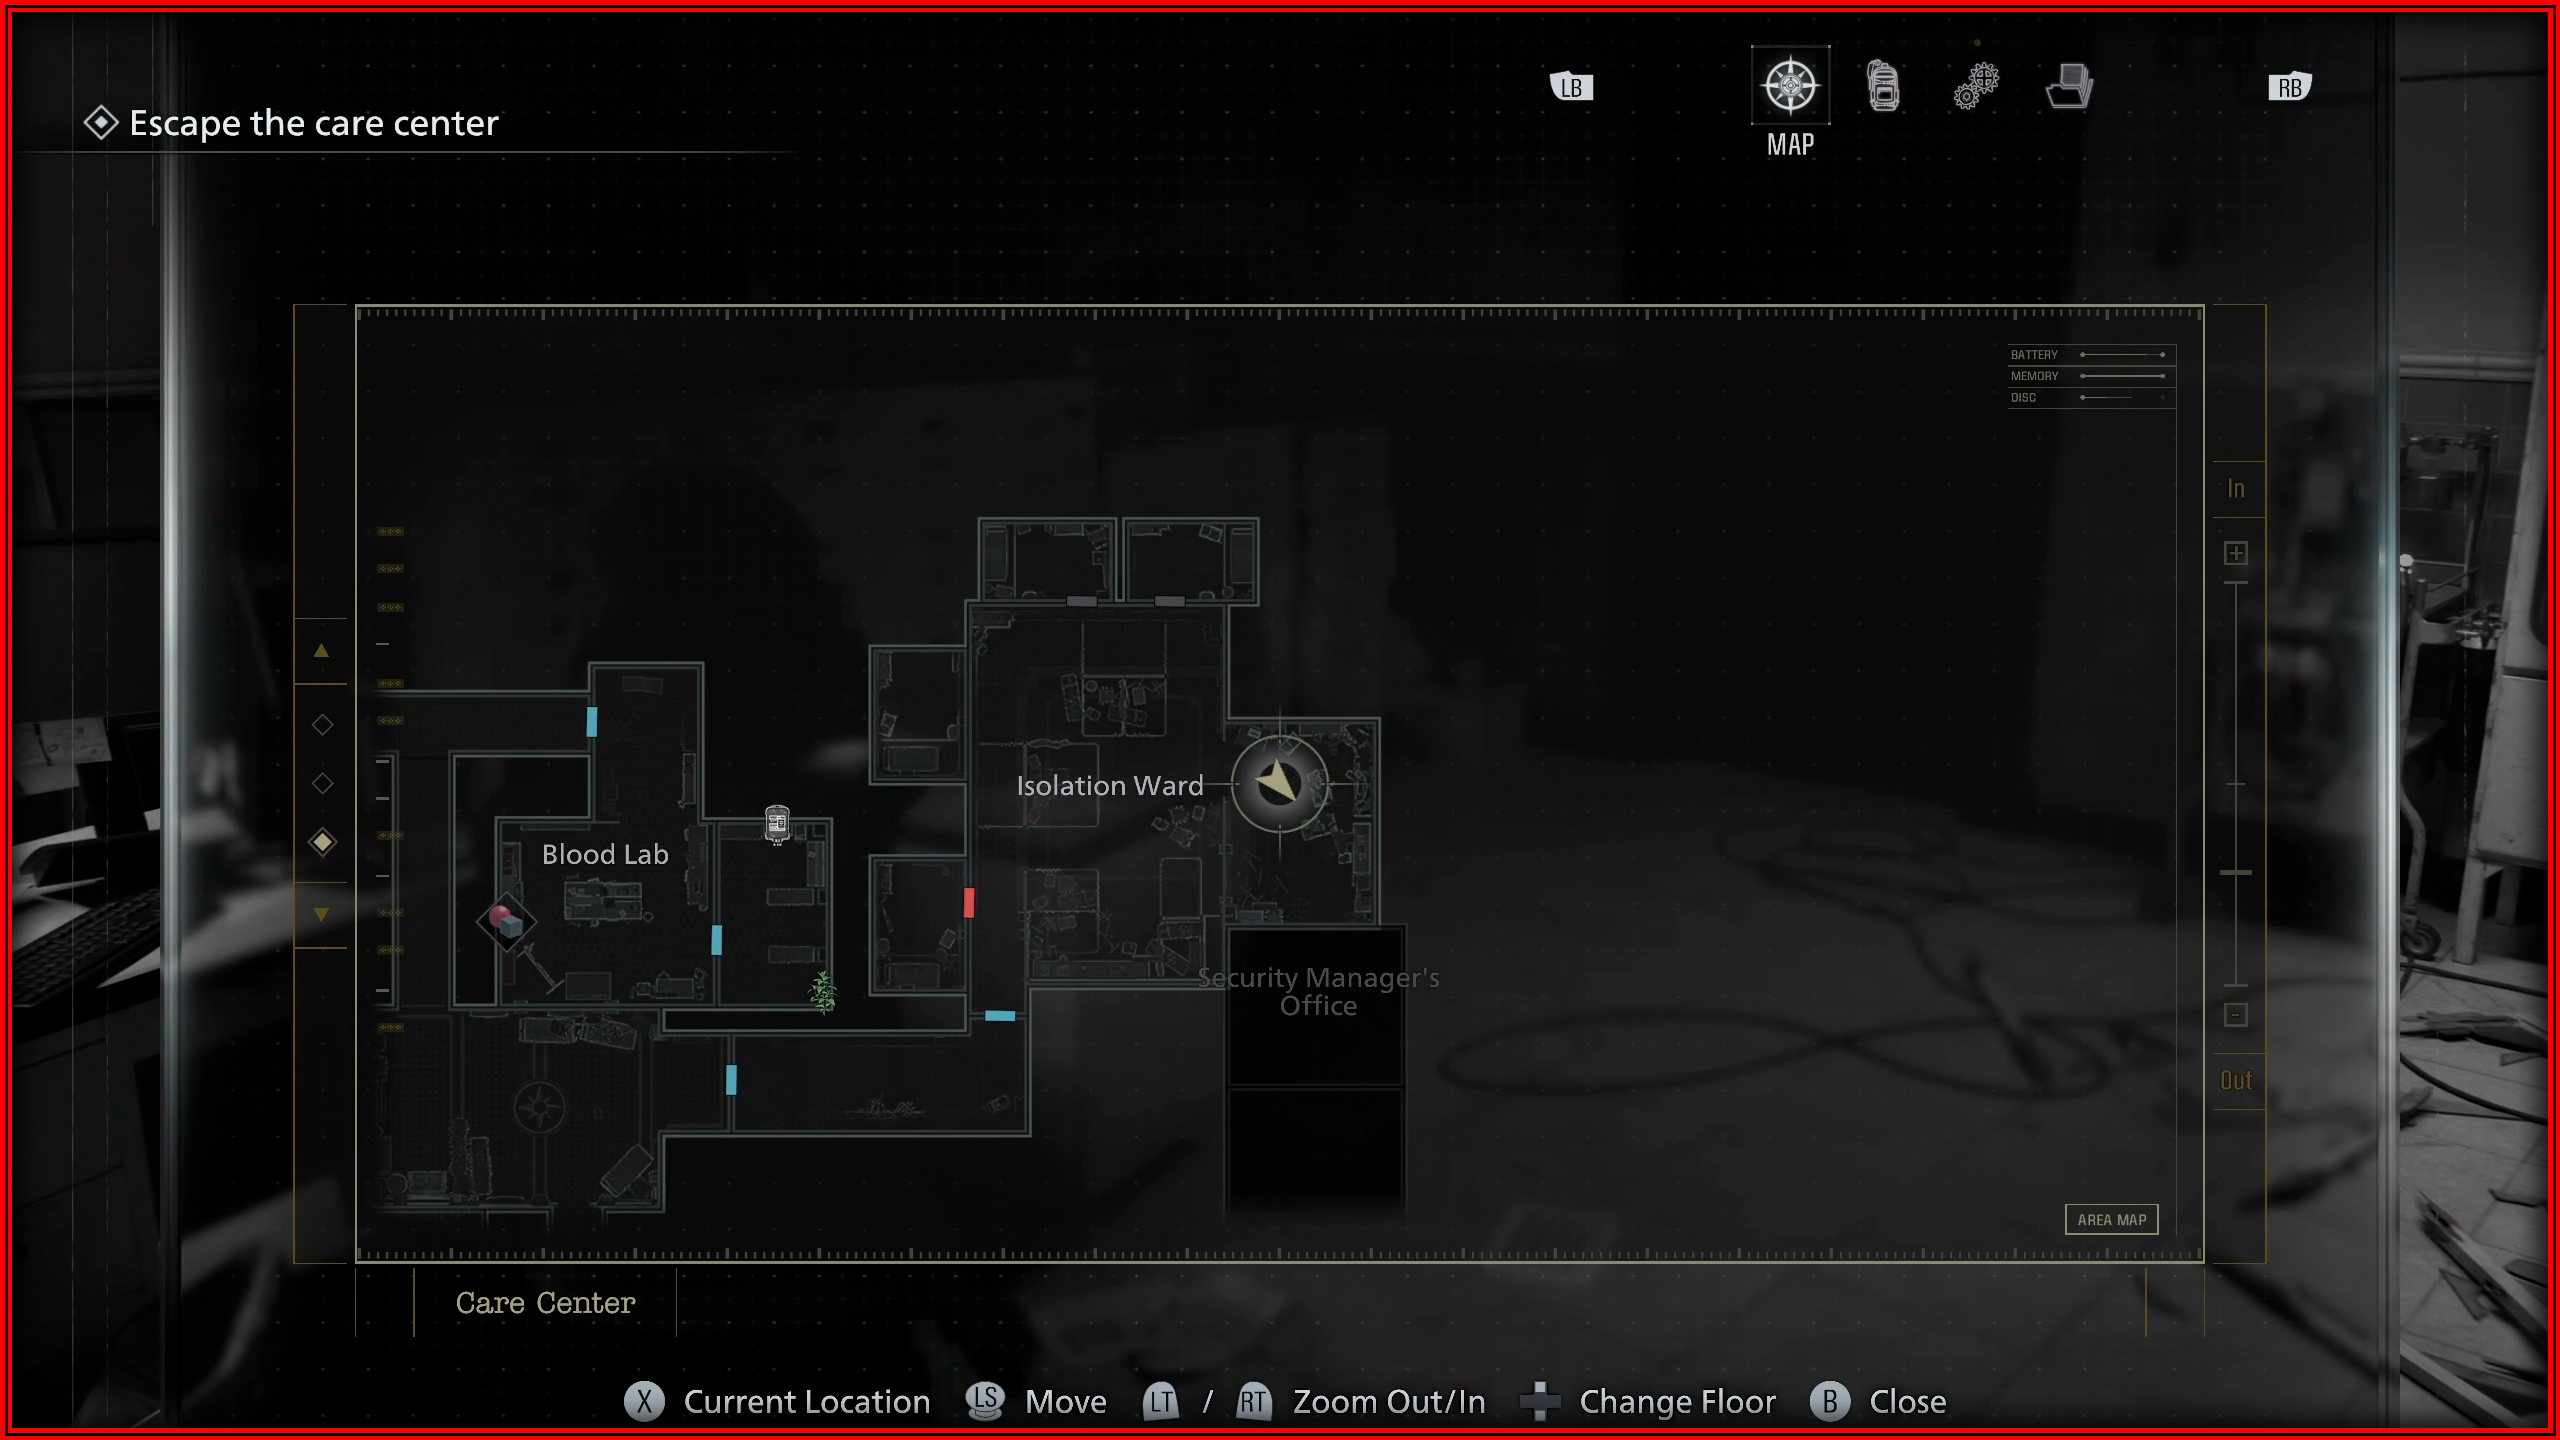
Care Center – Leon
File 32/75 - Satiety Suppression Medical Records
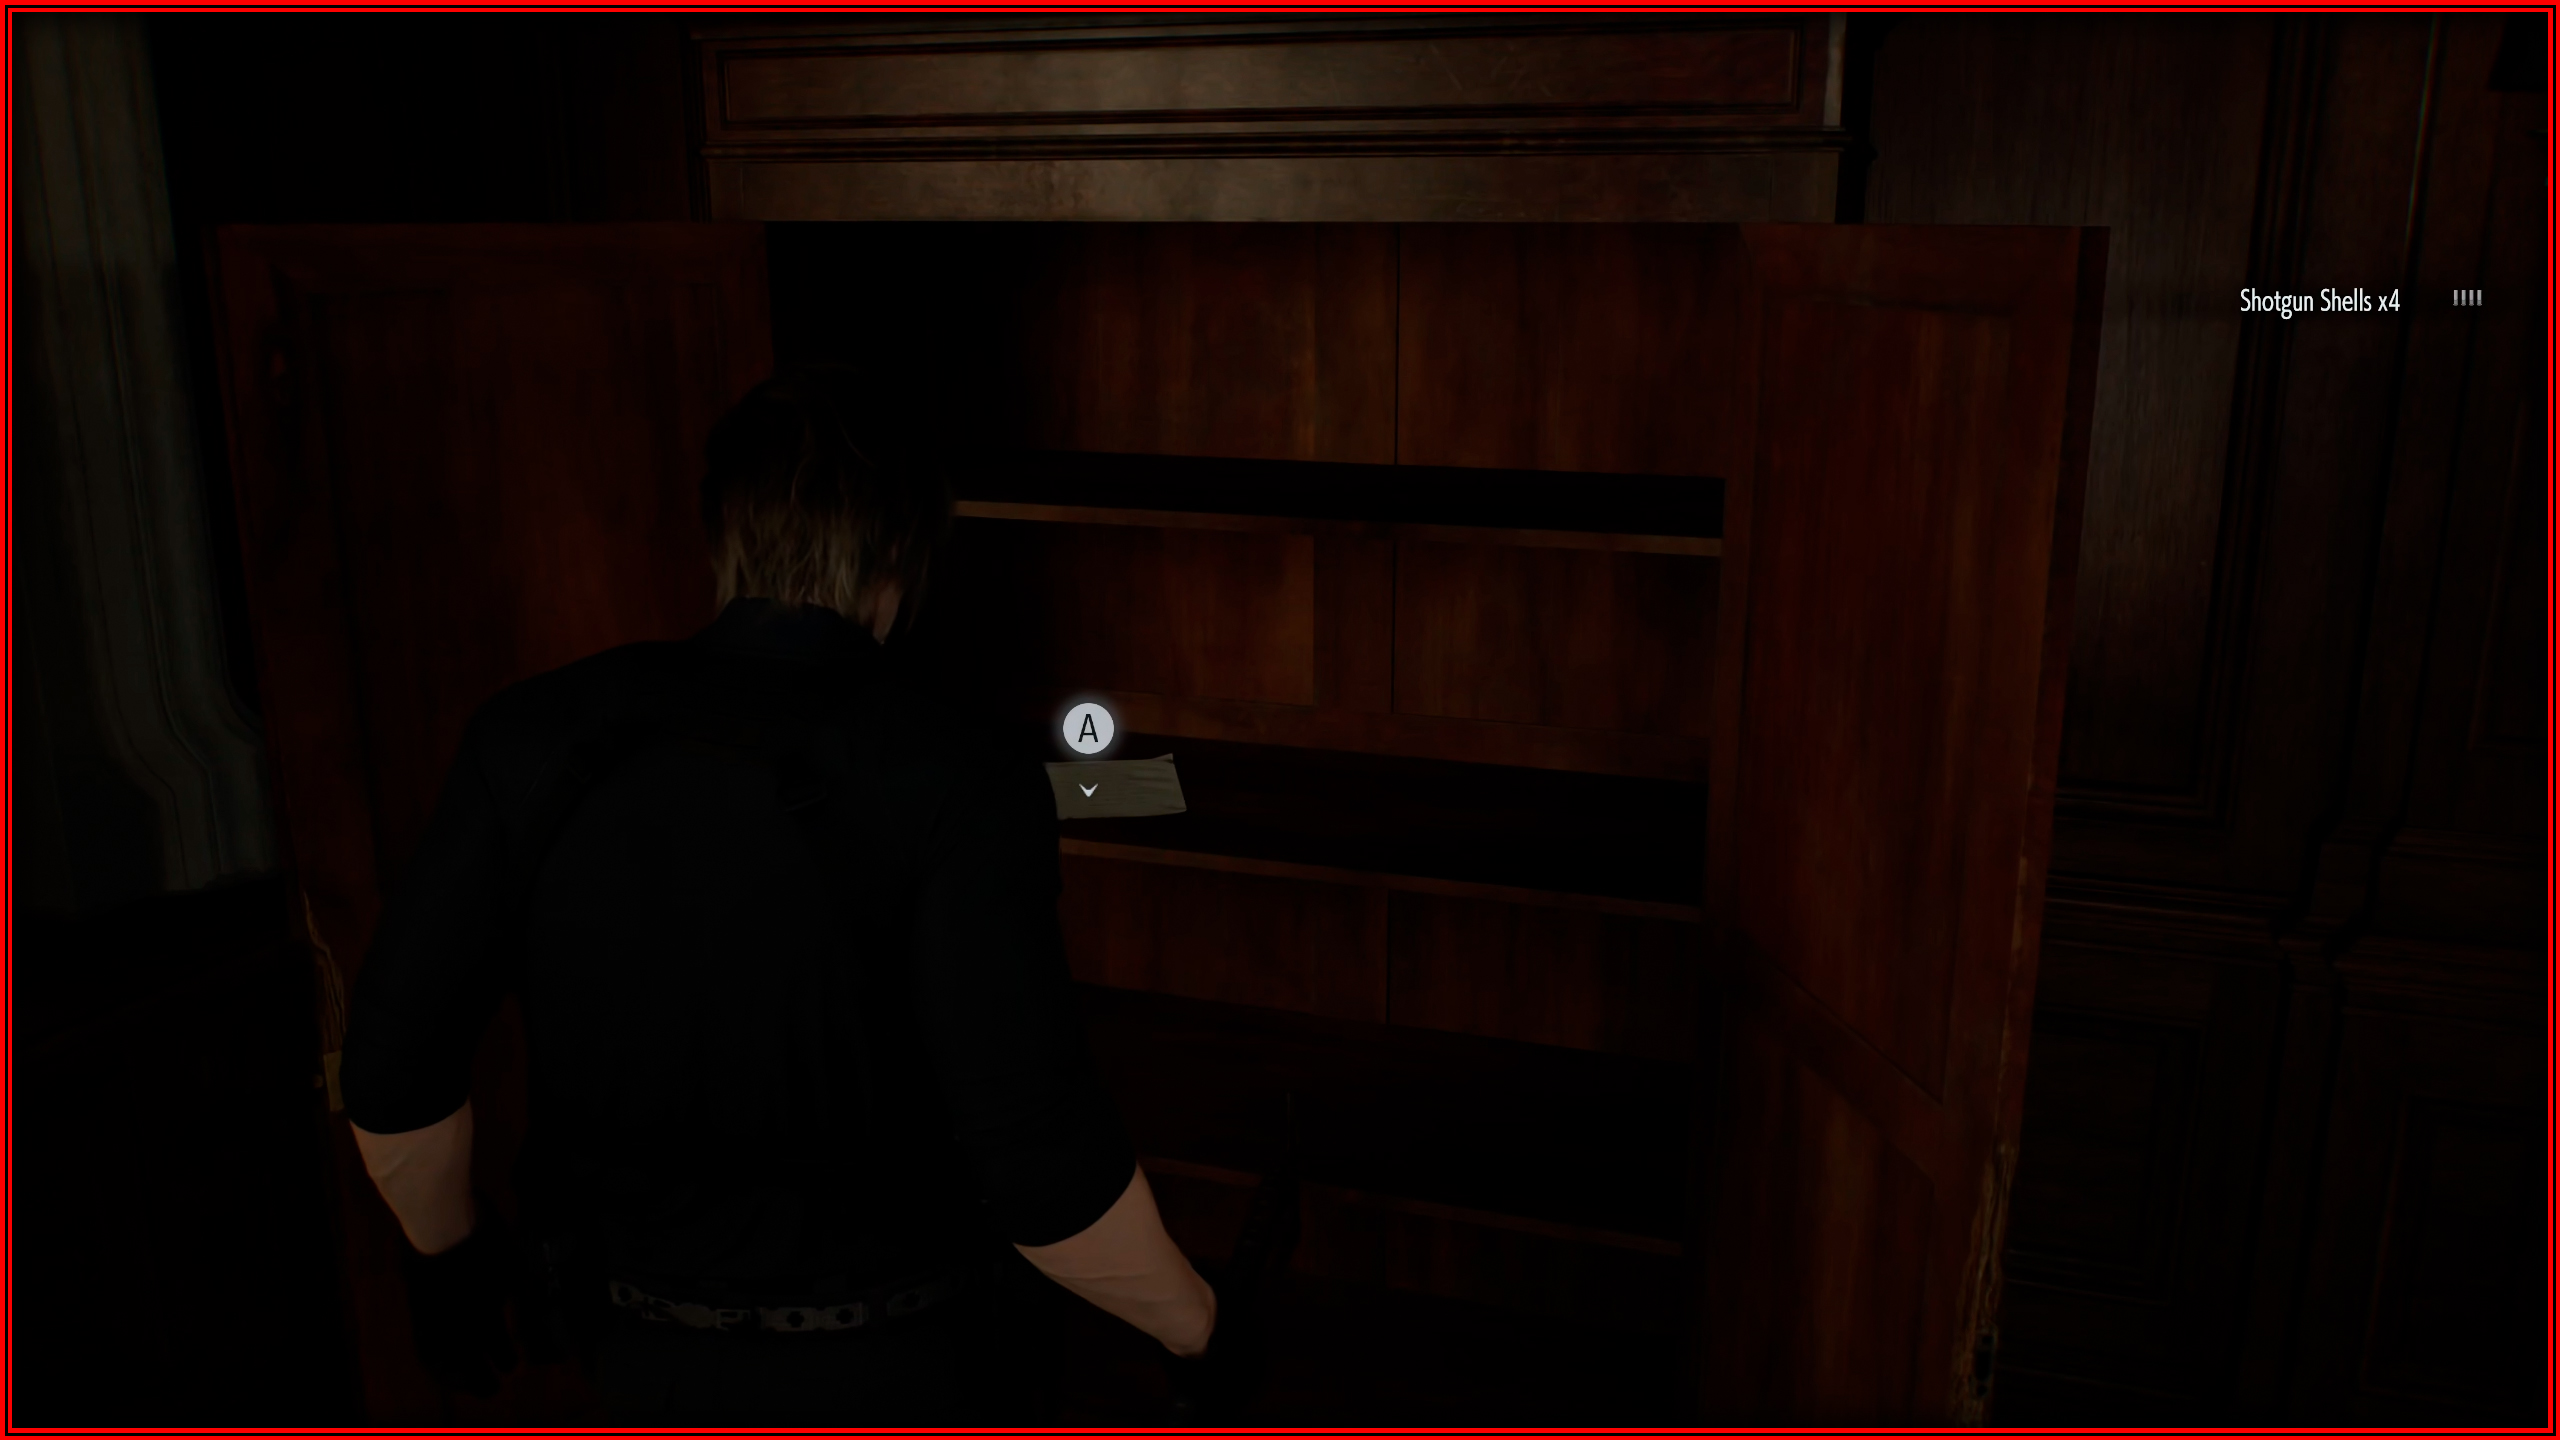
Attic: You find this in the back of the room, opposite the cupboard you push to progress.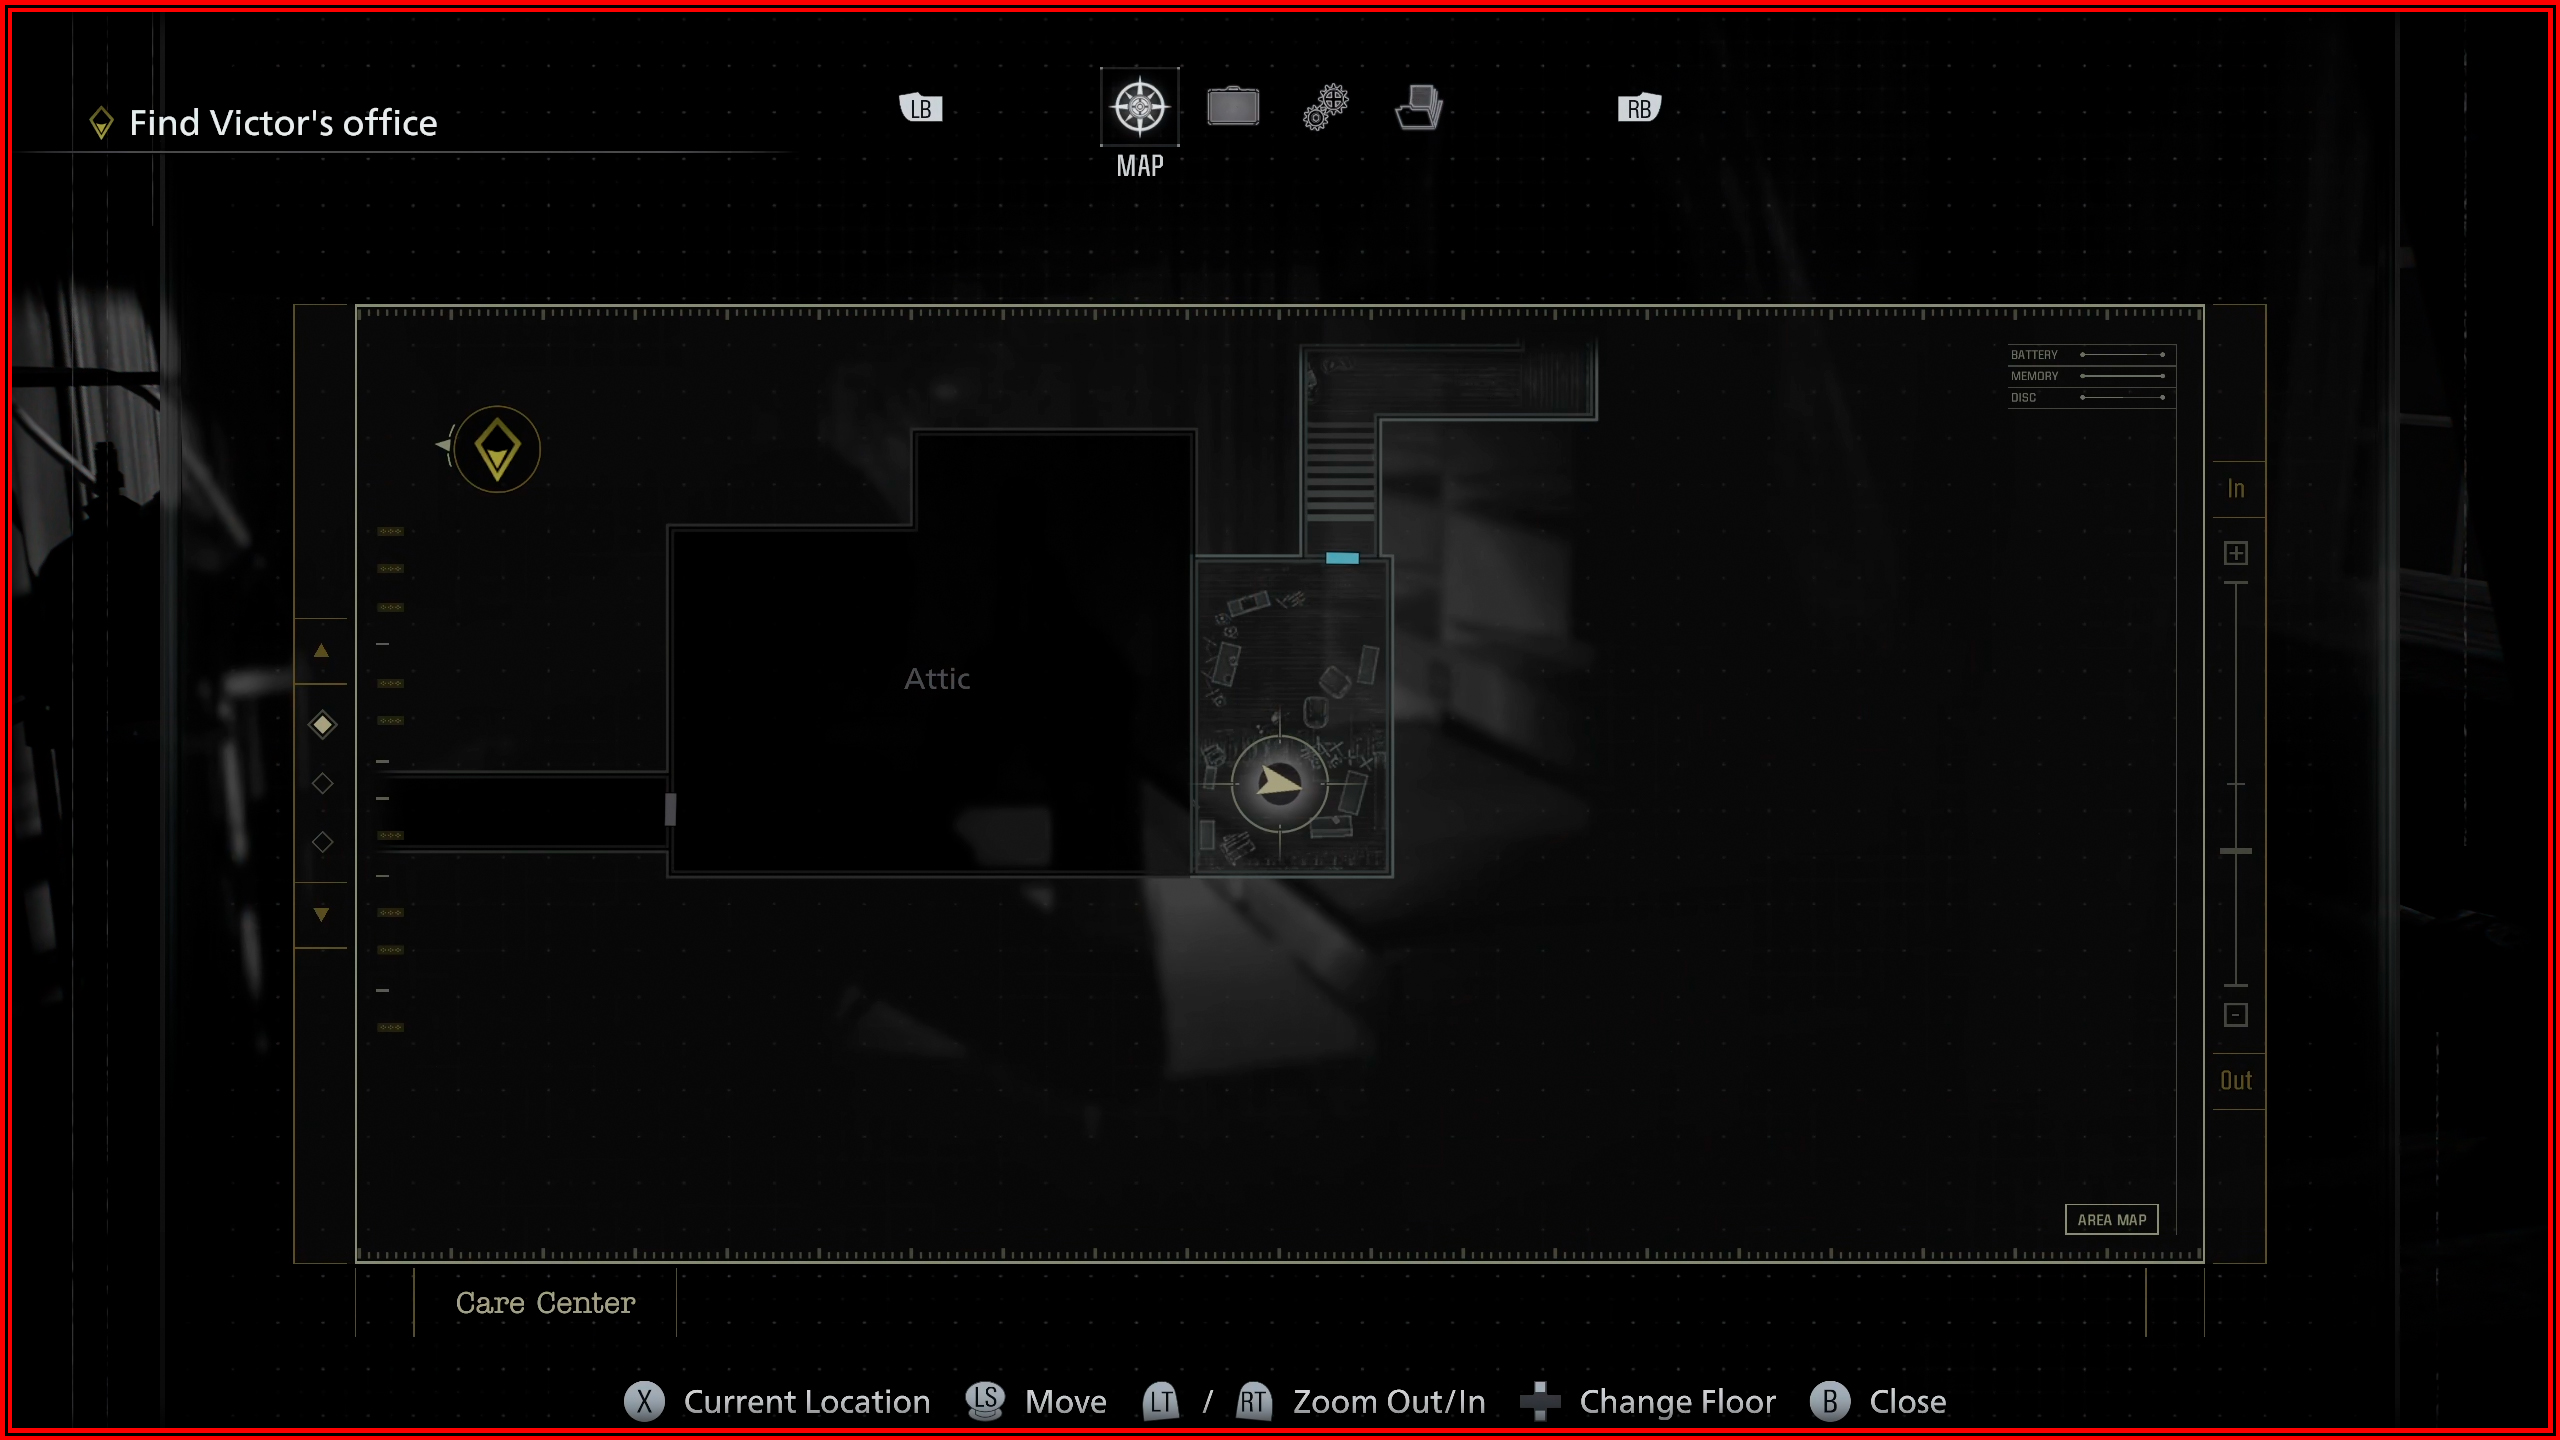
File 33/75 - Basement Safe Code
After leaving the Attic, inside the warped closet on the right.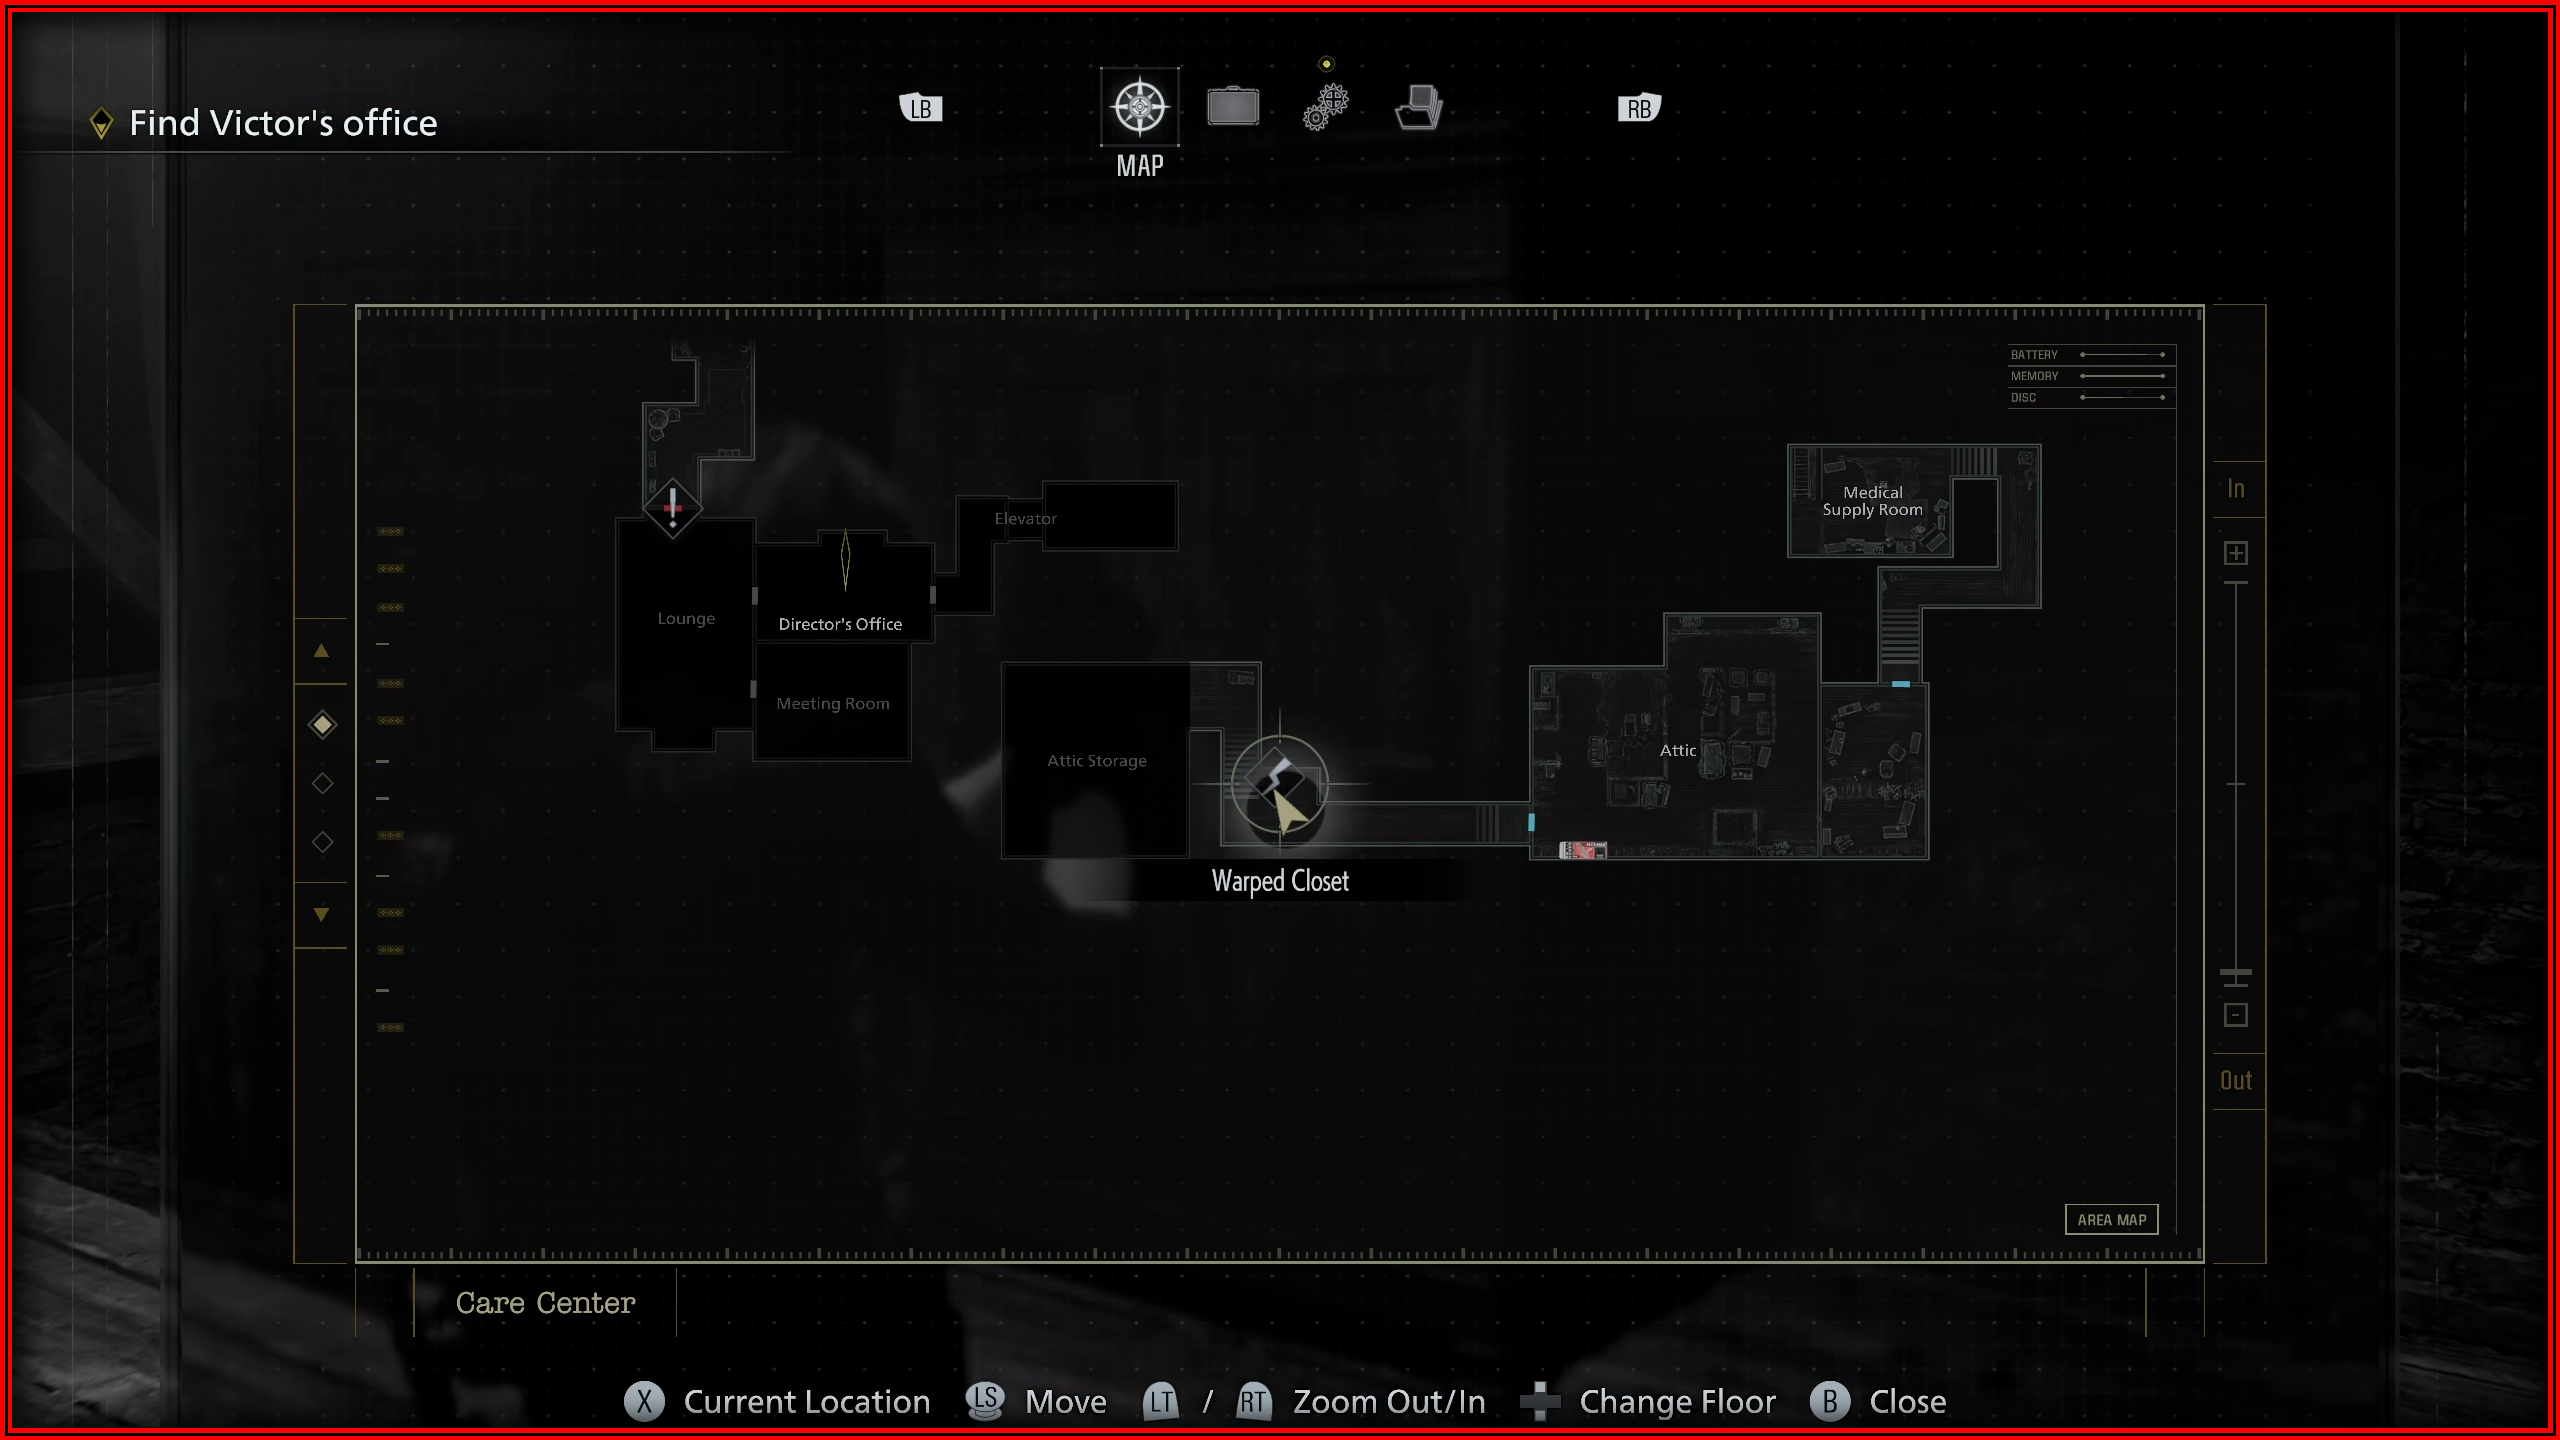
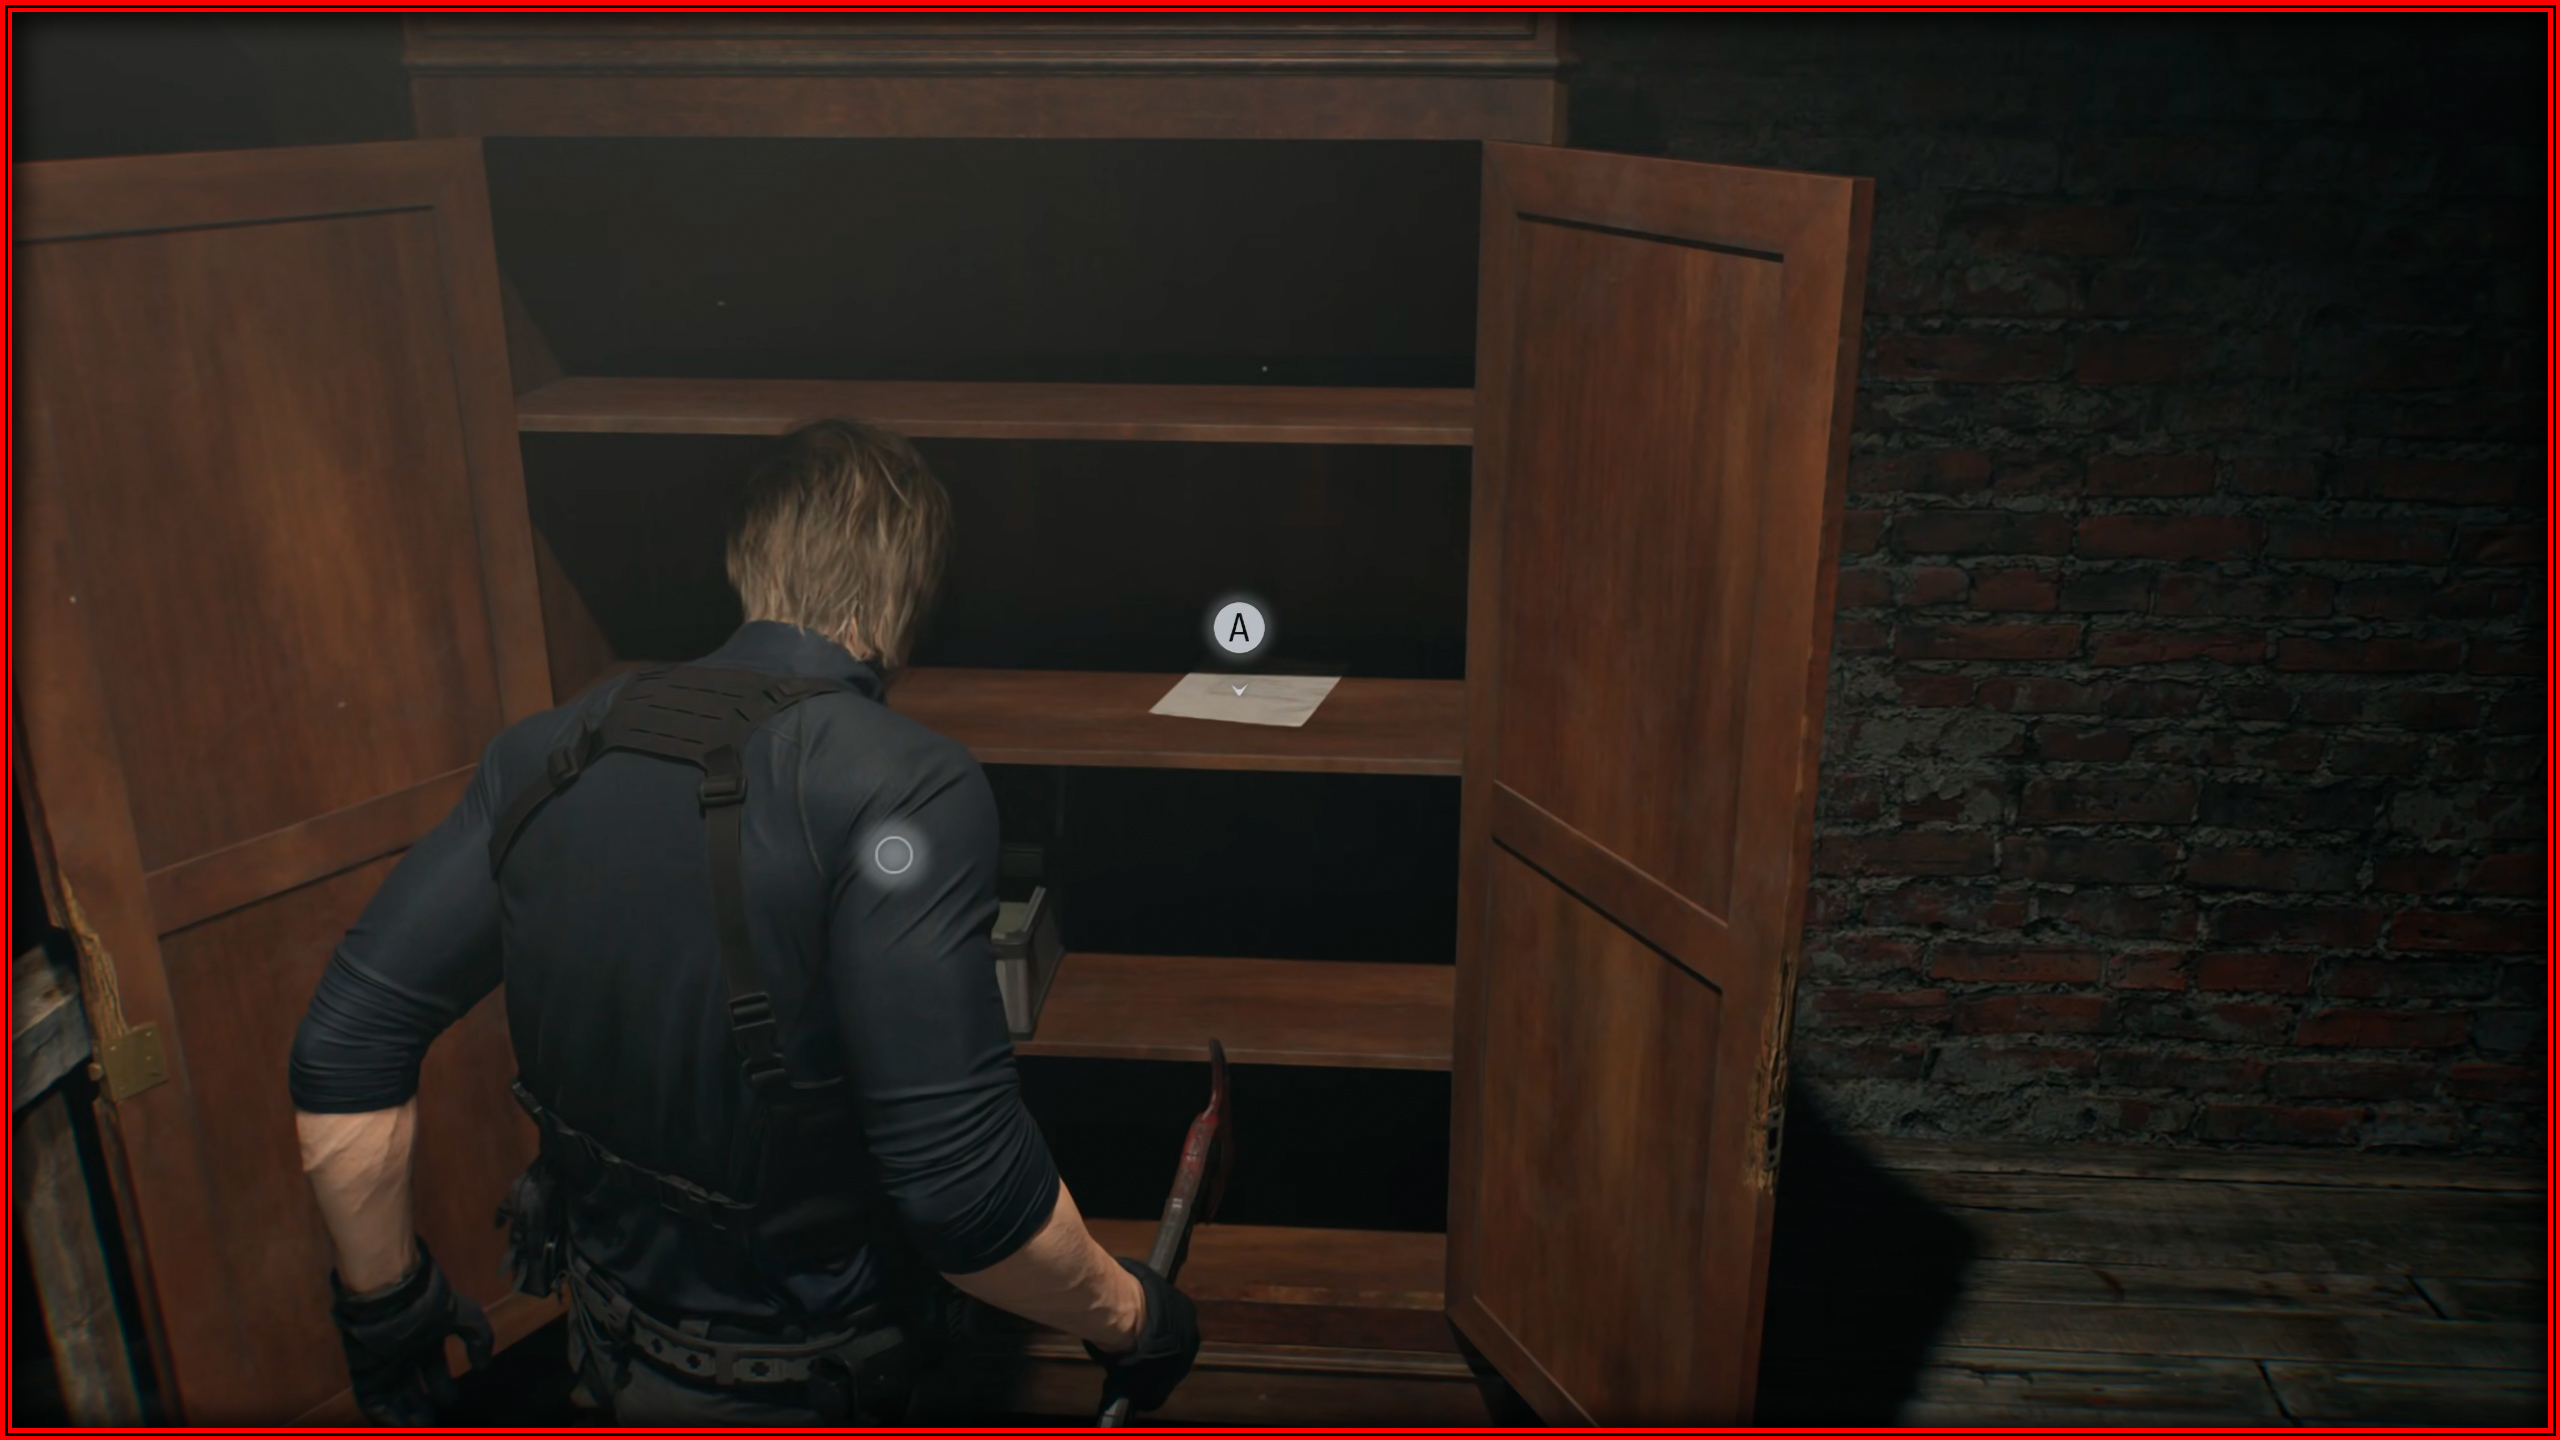
File 34/75 - Dishwasher’s Note
Found inside the warped closet when going left from Chairman’s Office.
Care Center Basement – Grace
File 35/75 - Special Directive for Raccoon City
Automatically in your inventory as you play as Grace again.
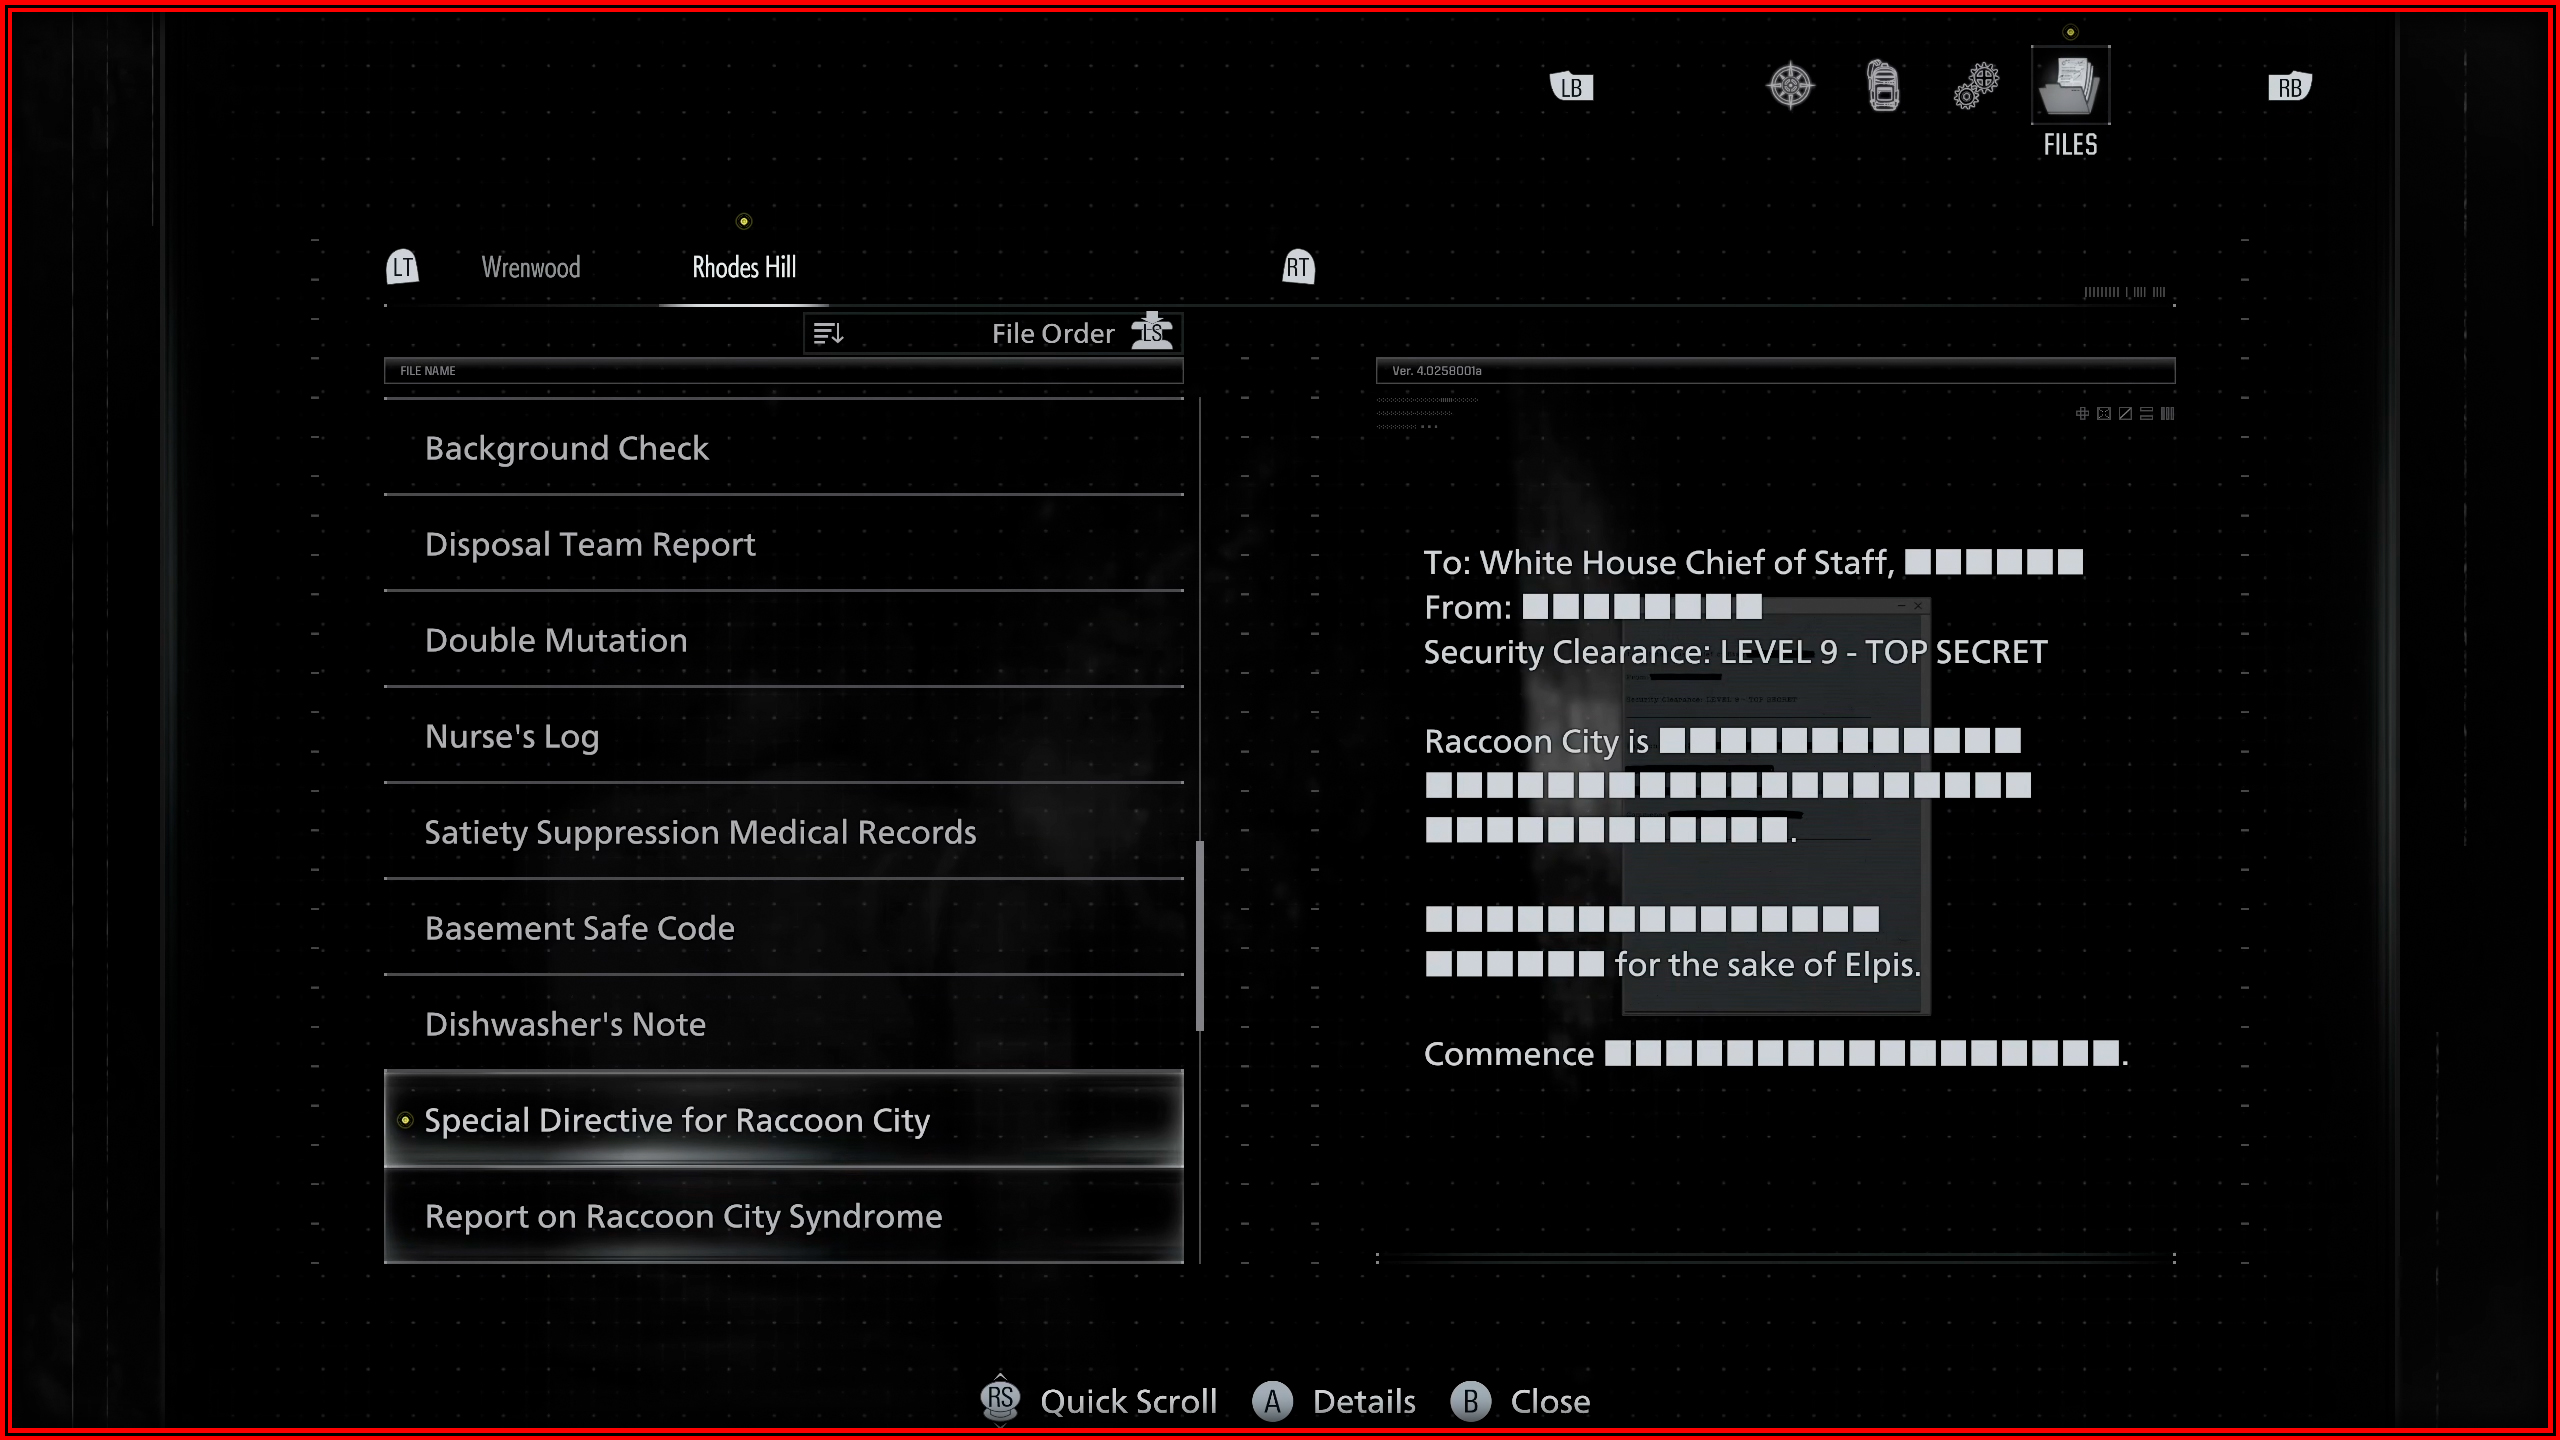
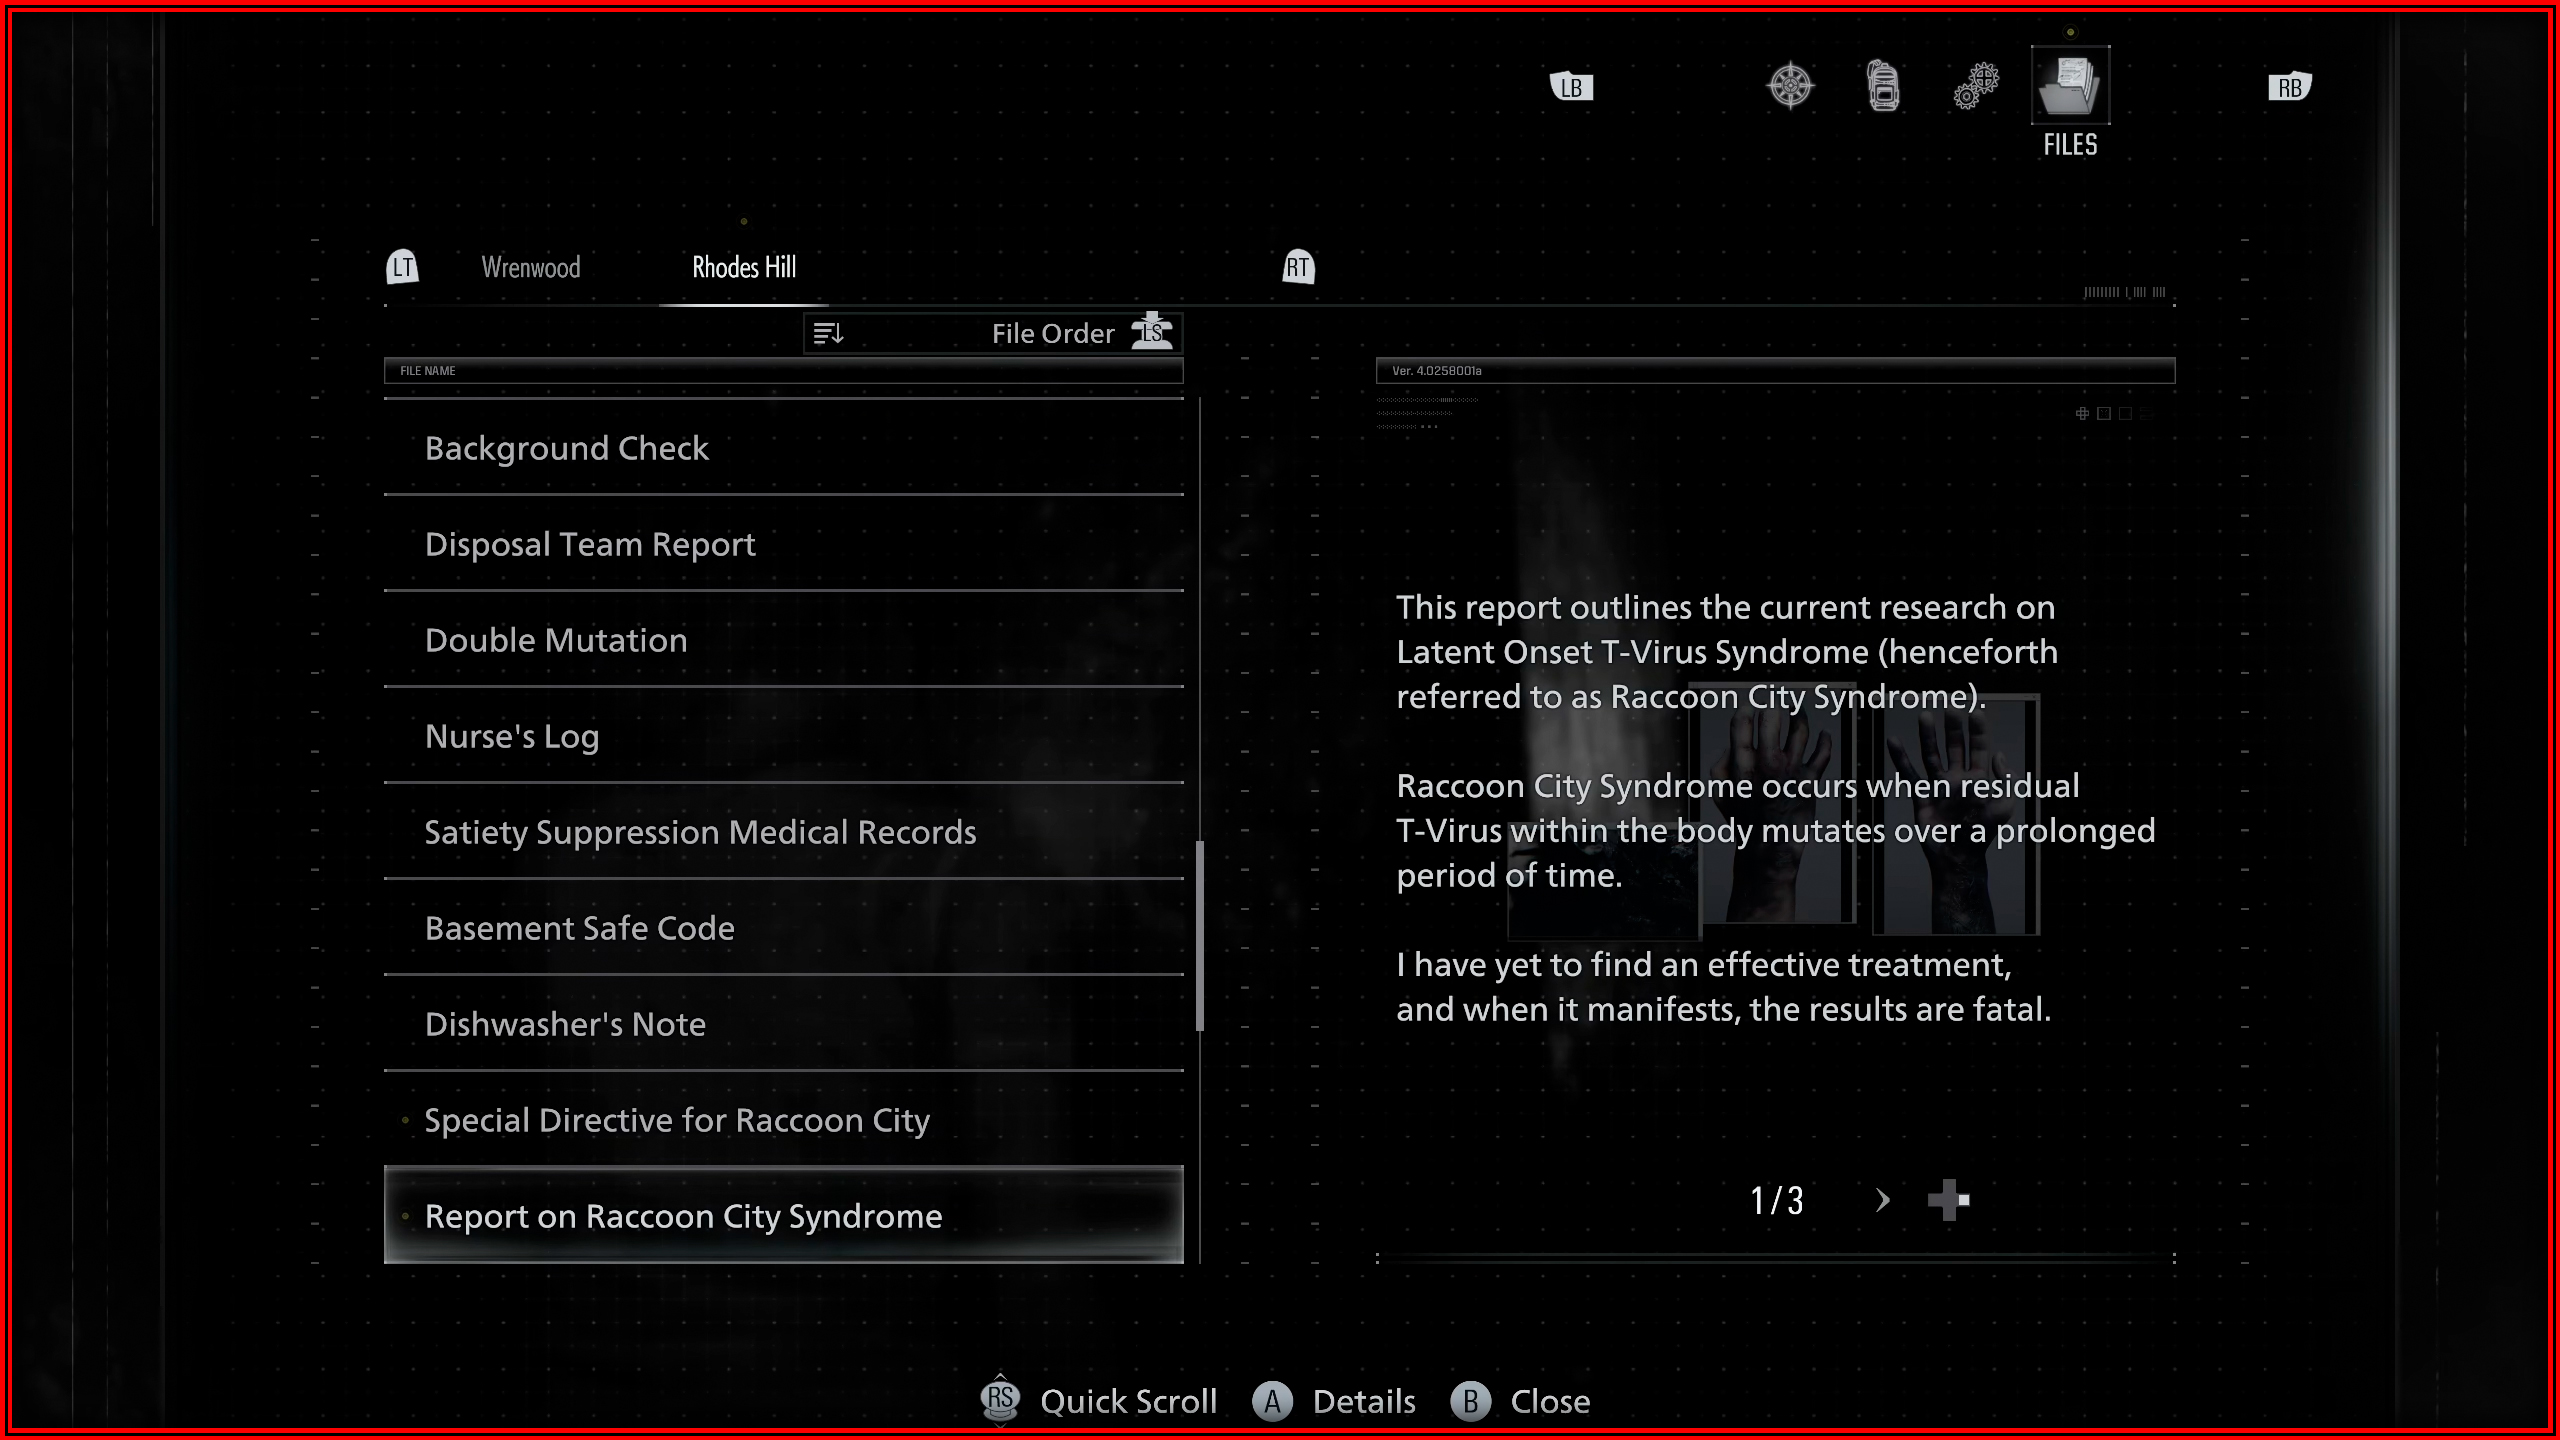
File 36/75 - Report on Raccoon City Syndrome
Automatically in your inventory as you play as Grace again.
File 37/75 - Staff Member’s Last Words
Immediately after you start playing as Grace, next to a corpse in the tunnel.
File 38/75 - Operation to Eliminate The Girl
Security Room: On the counter next to a safety helmet.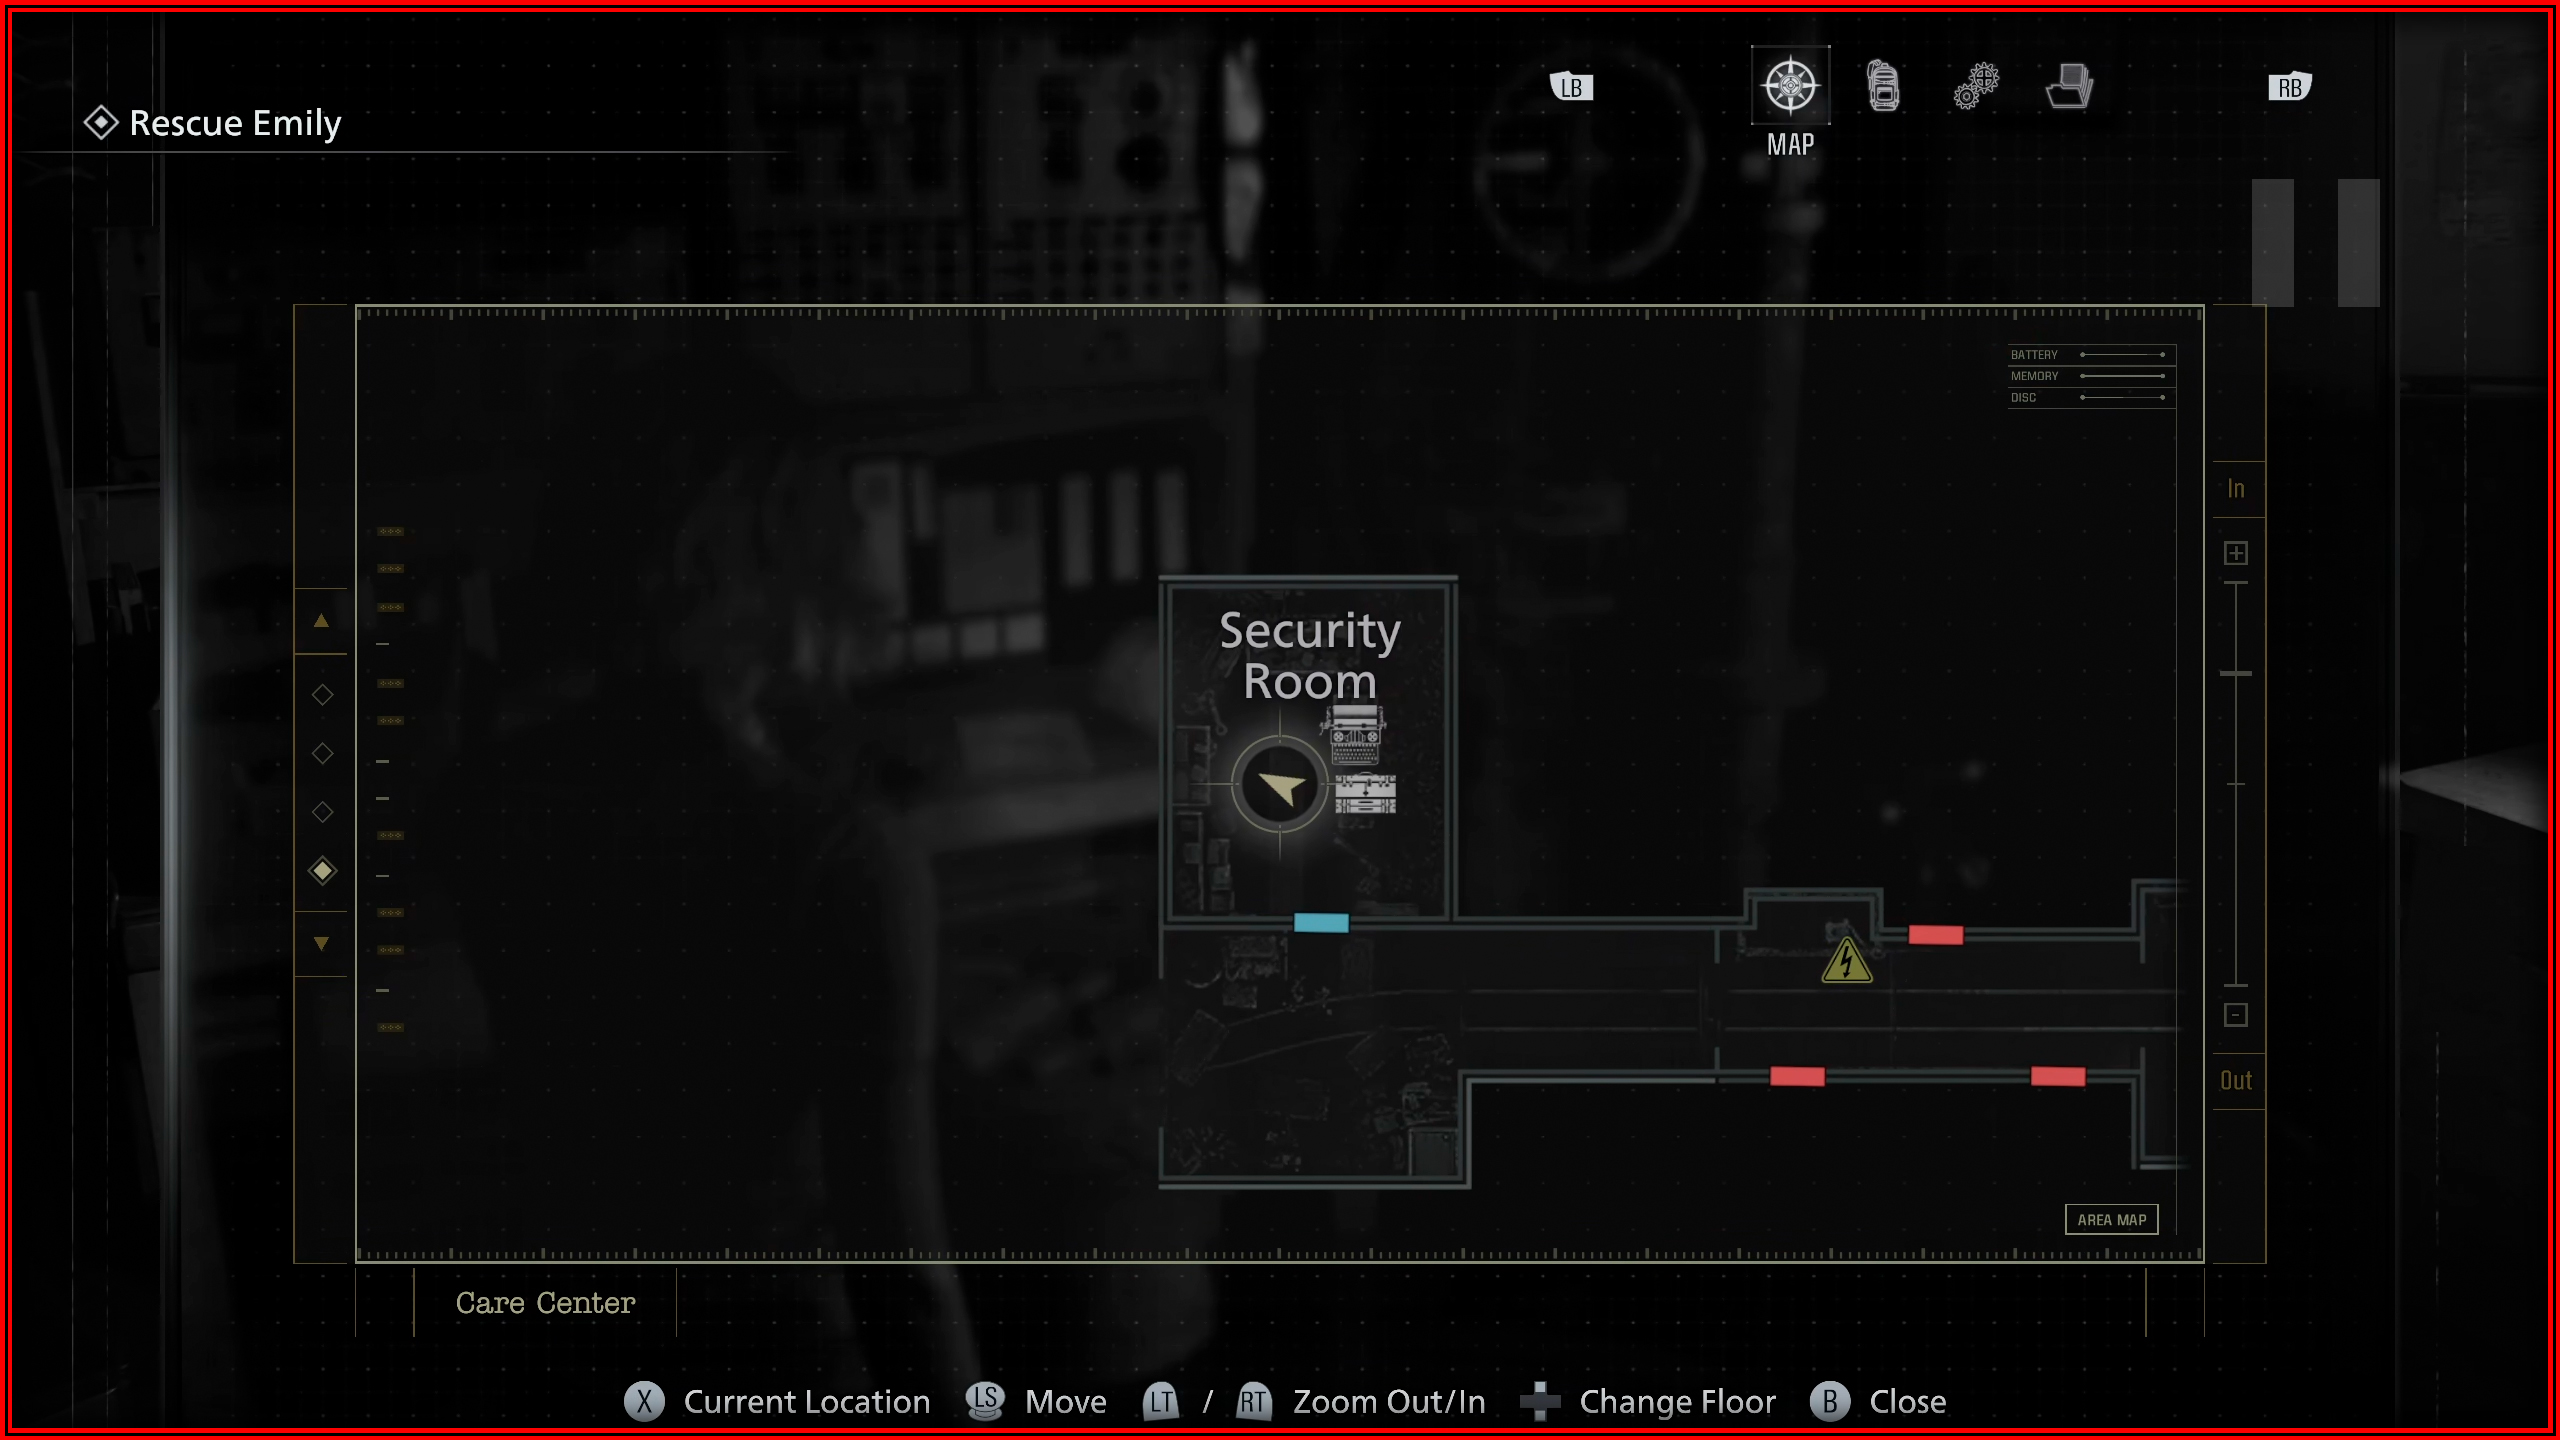
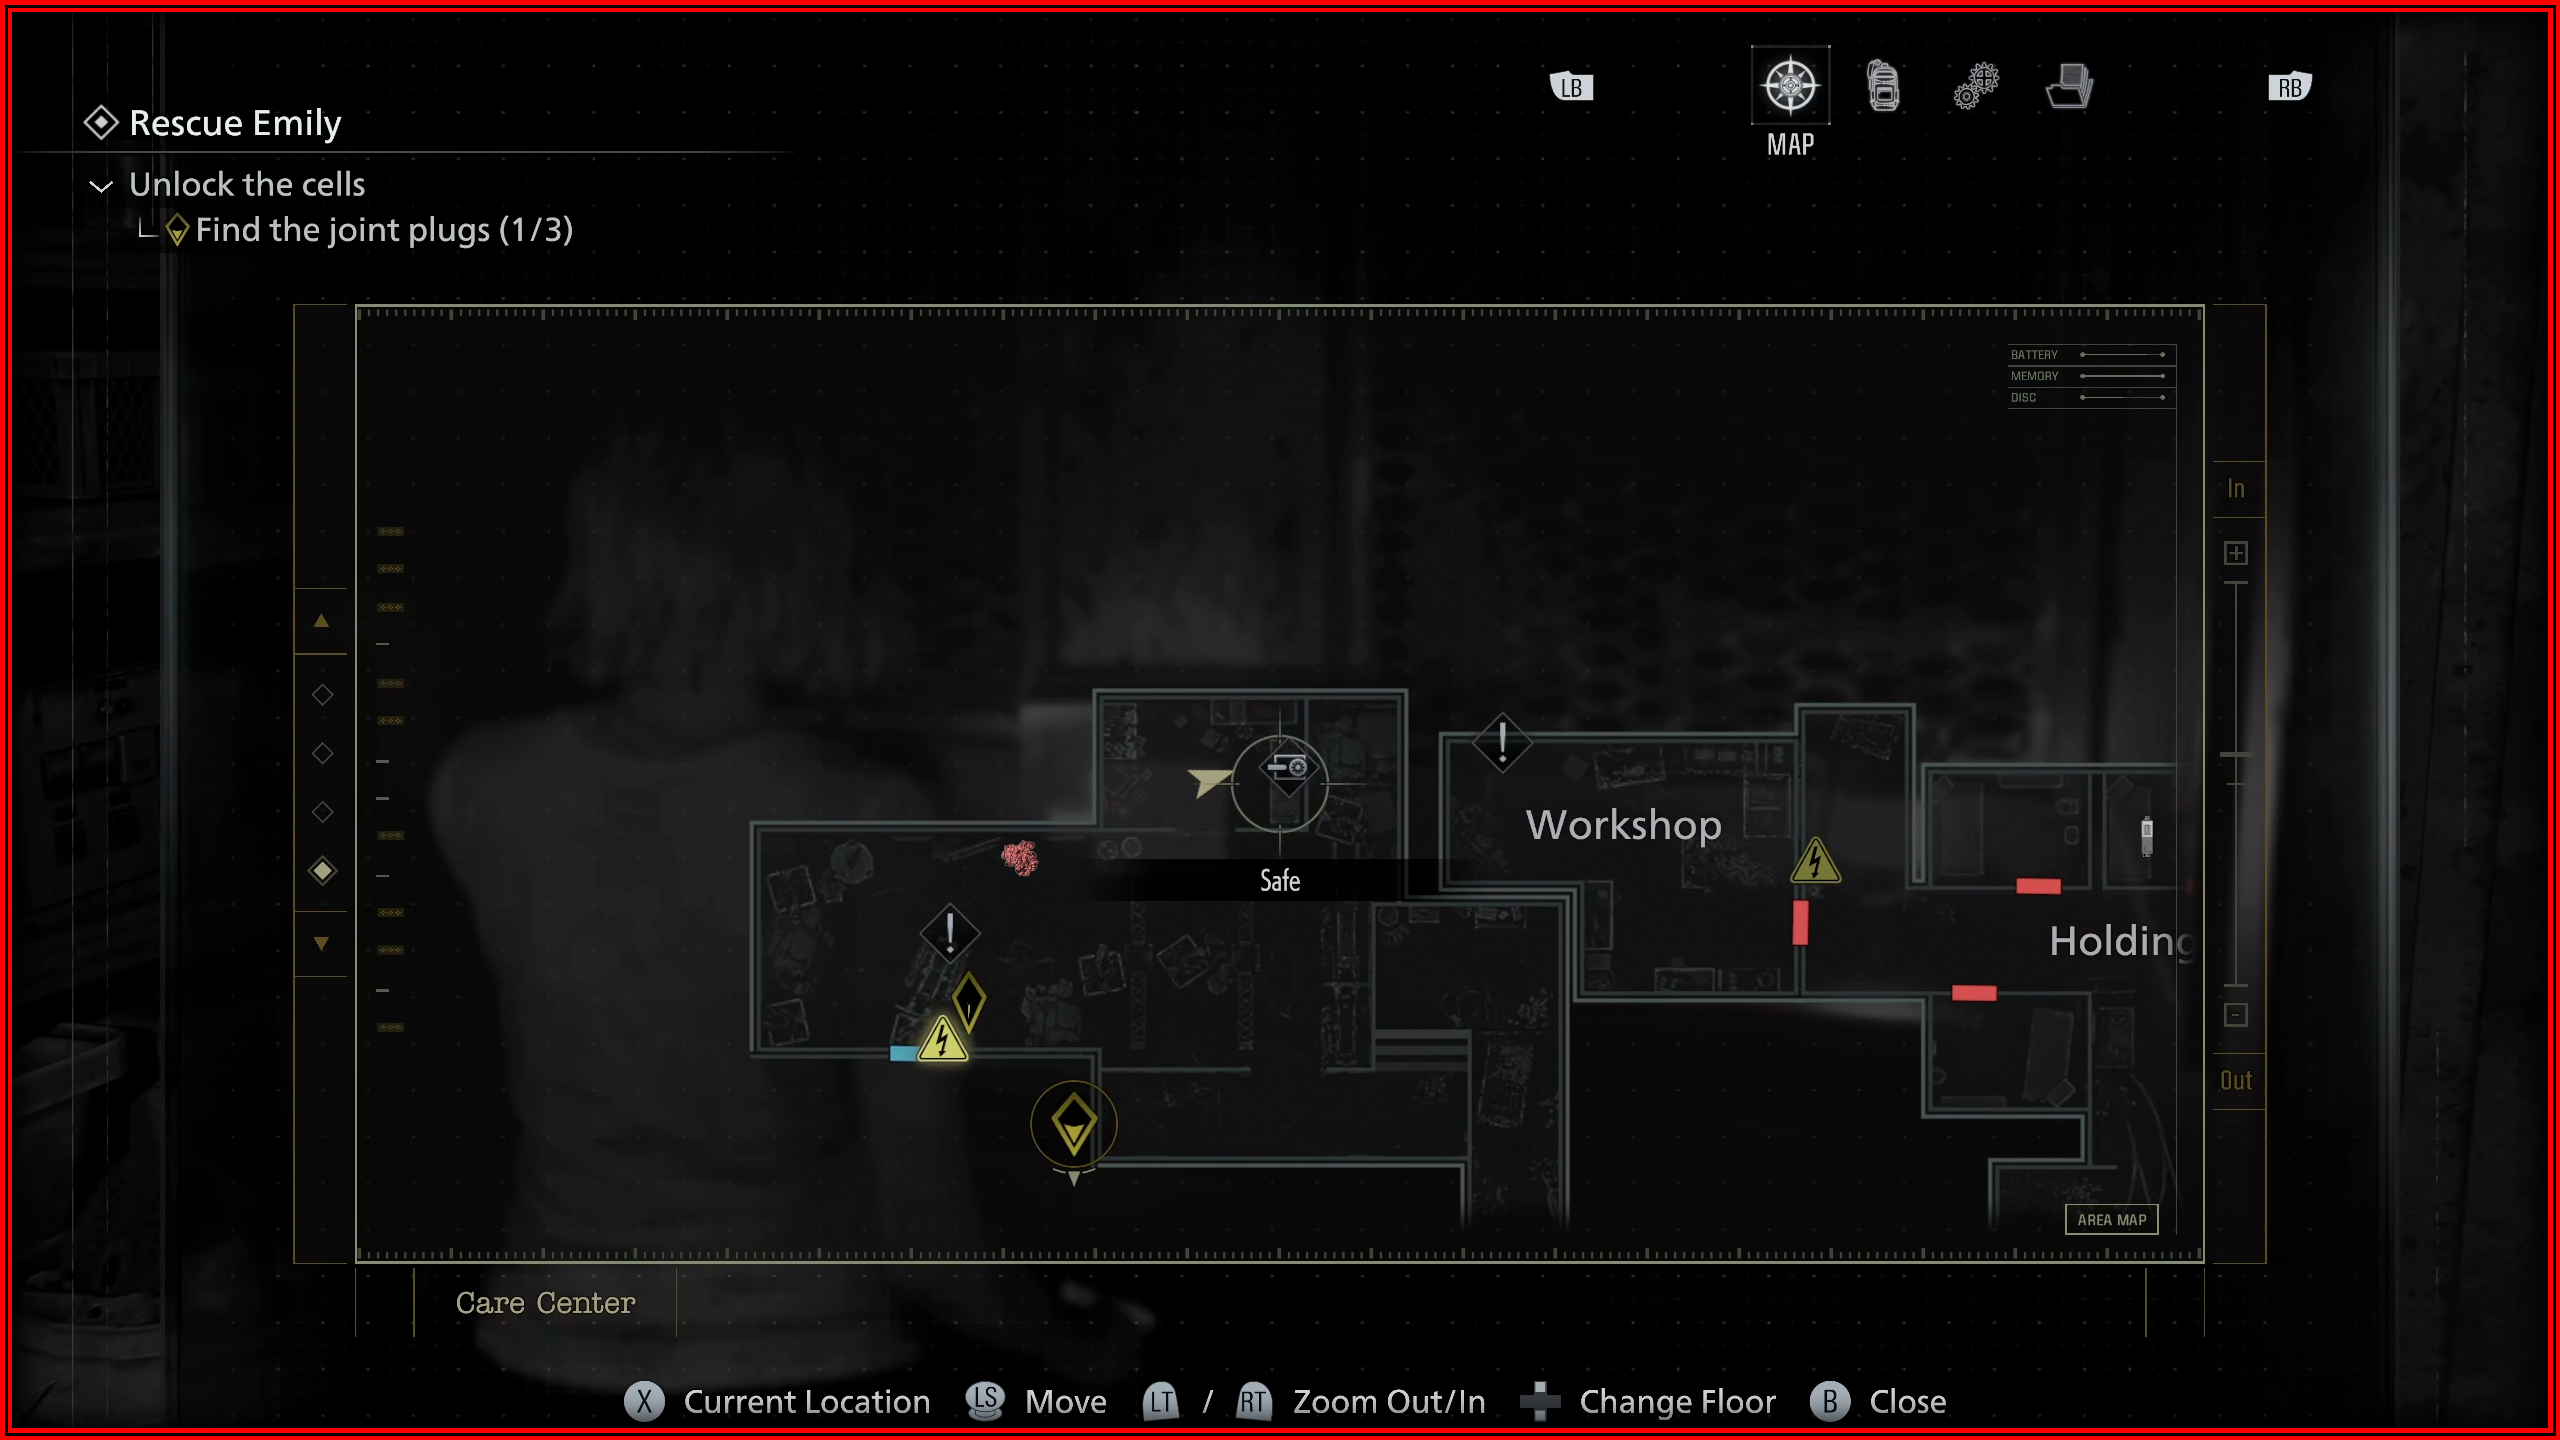
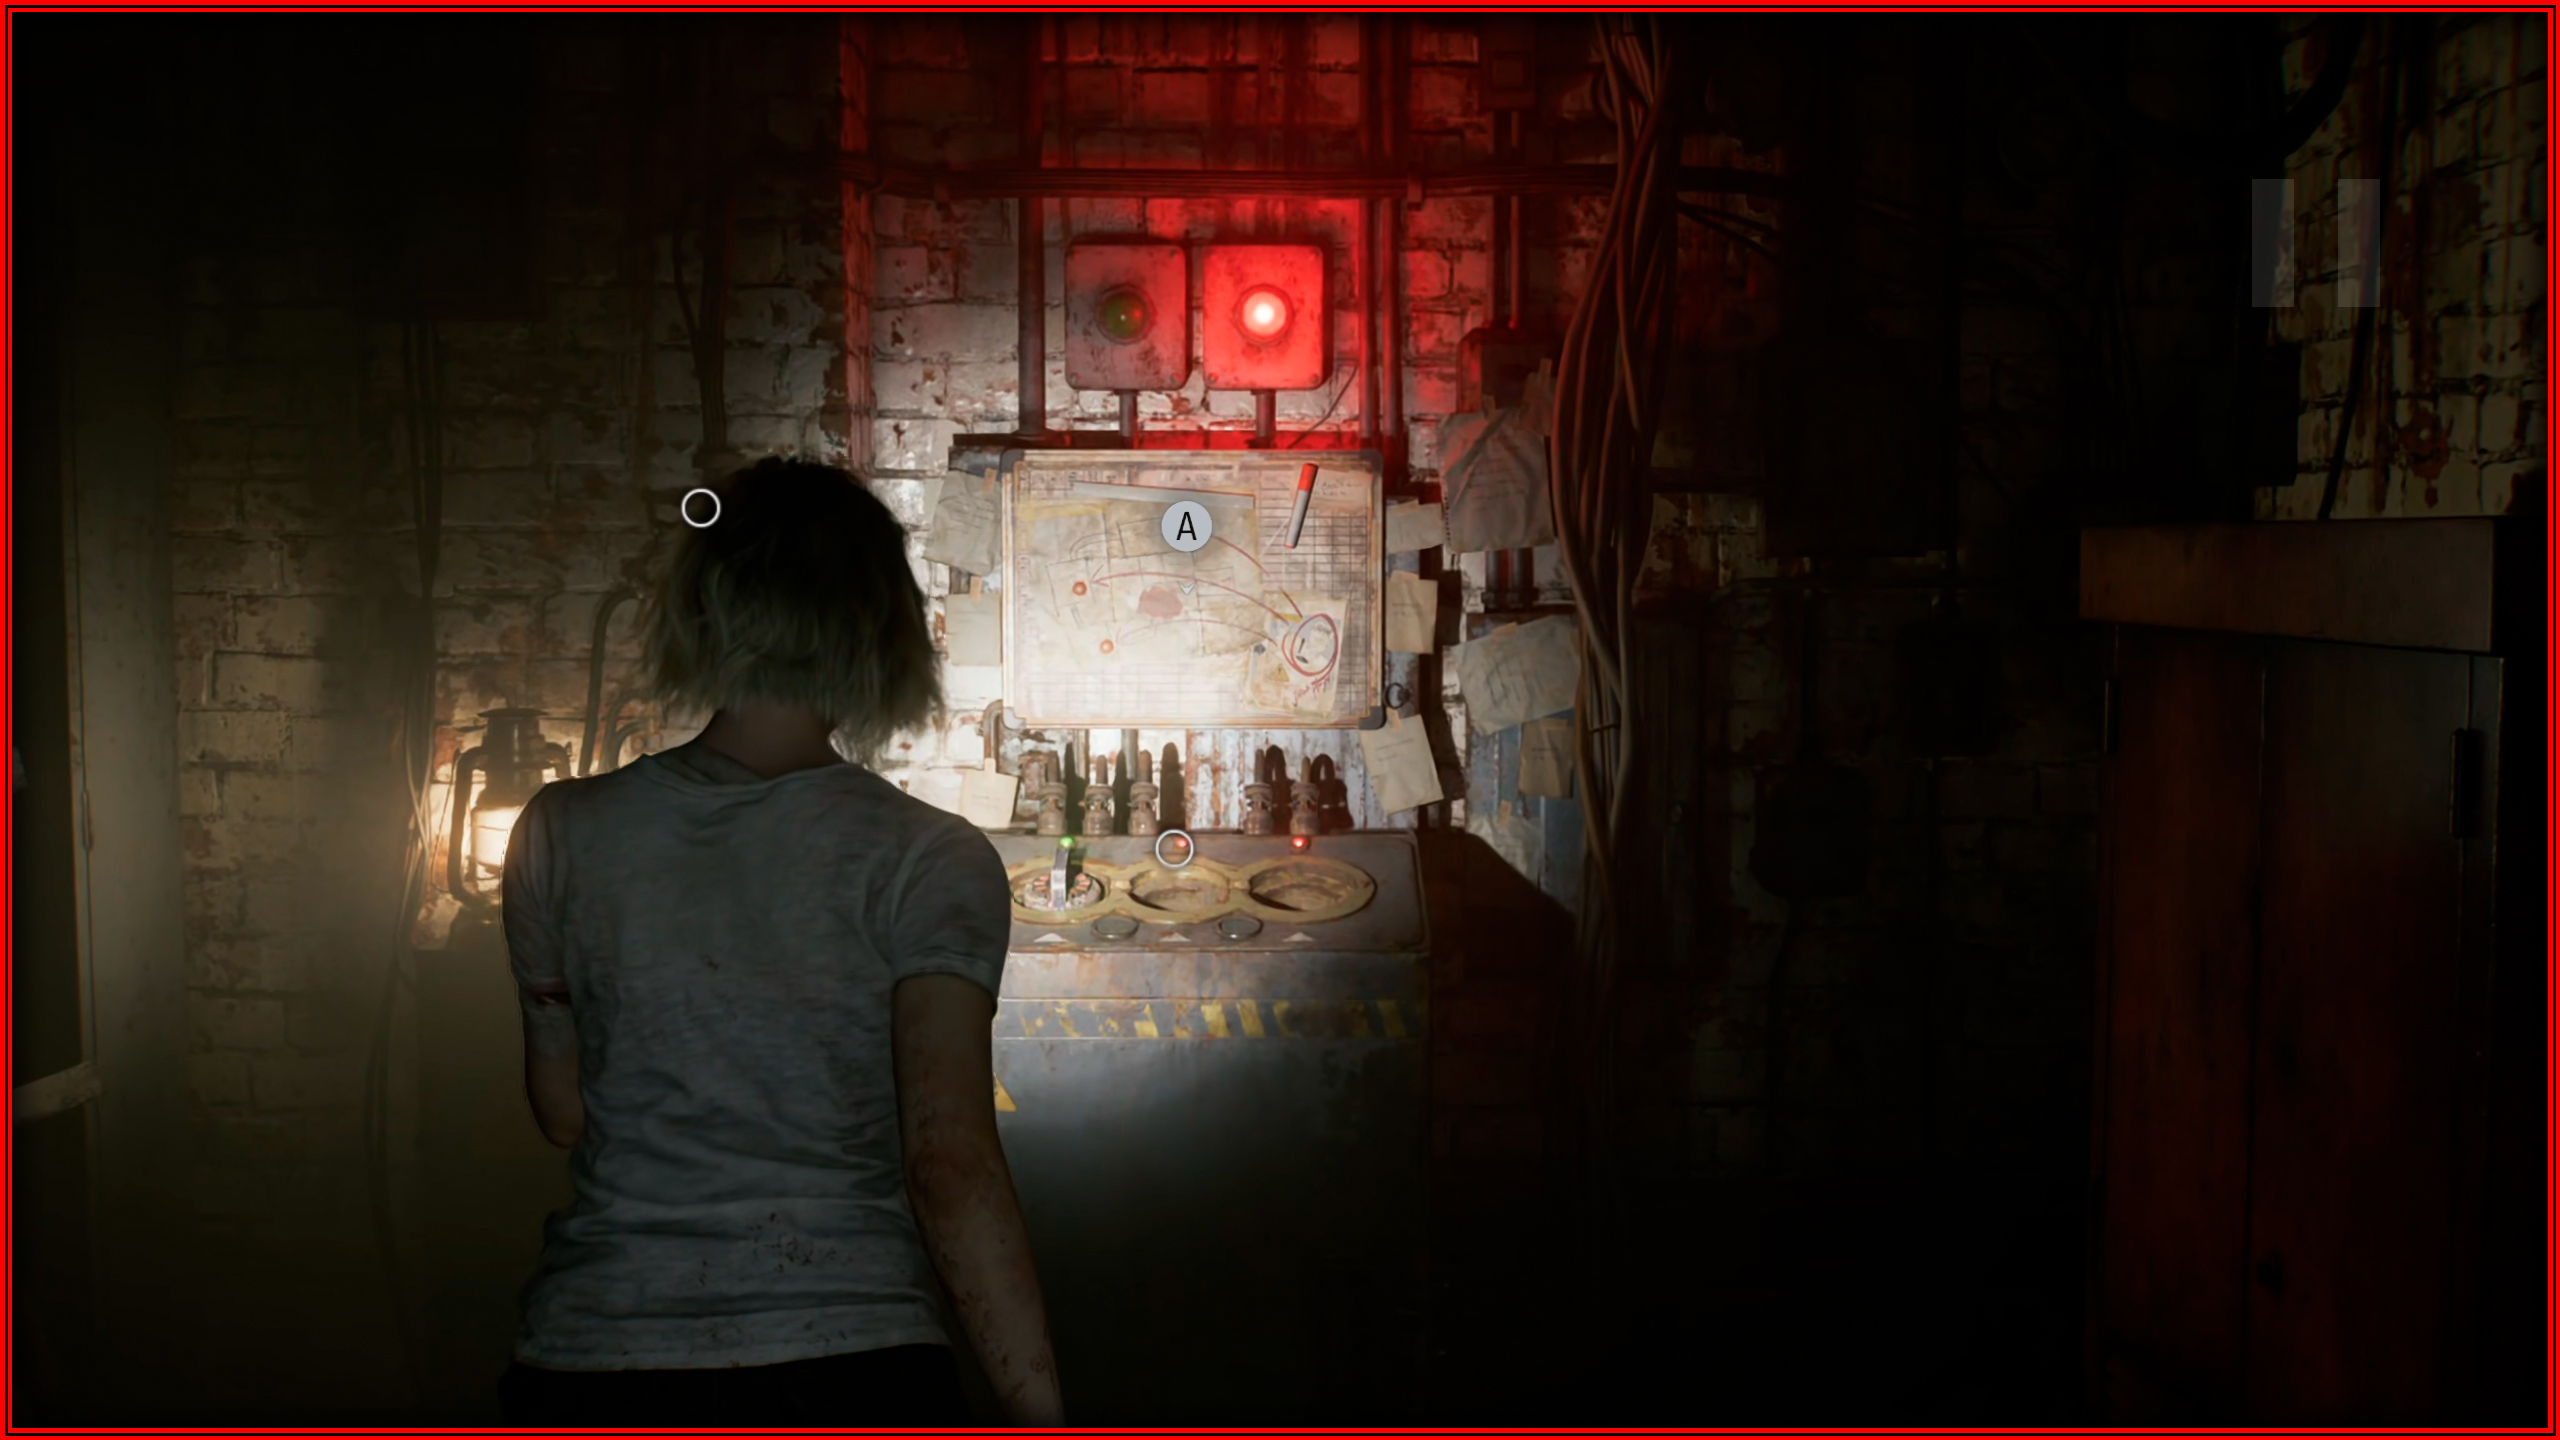
File 39/75 - Unlocking the Cells
Holding Cells: Above the power panel.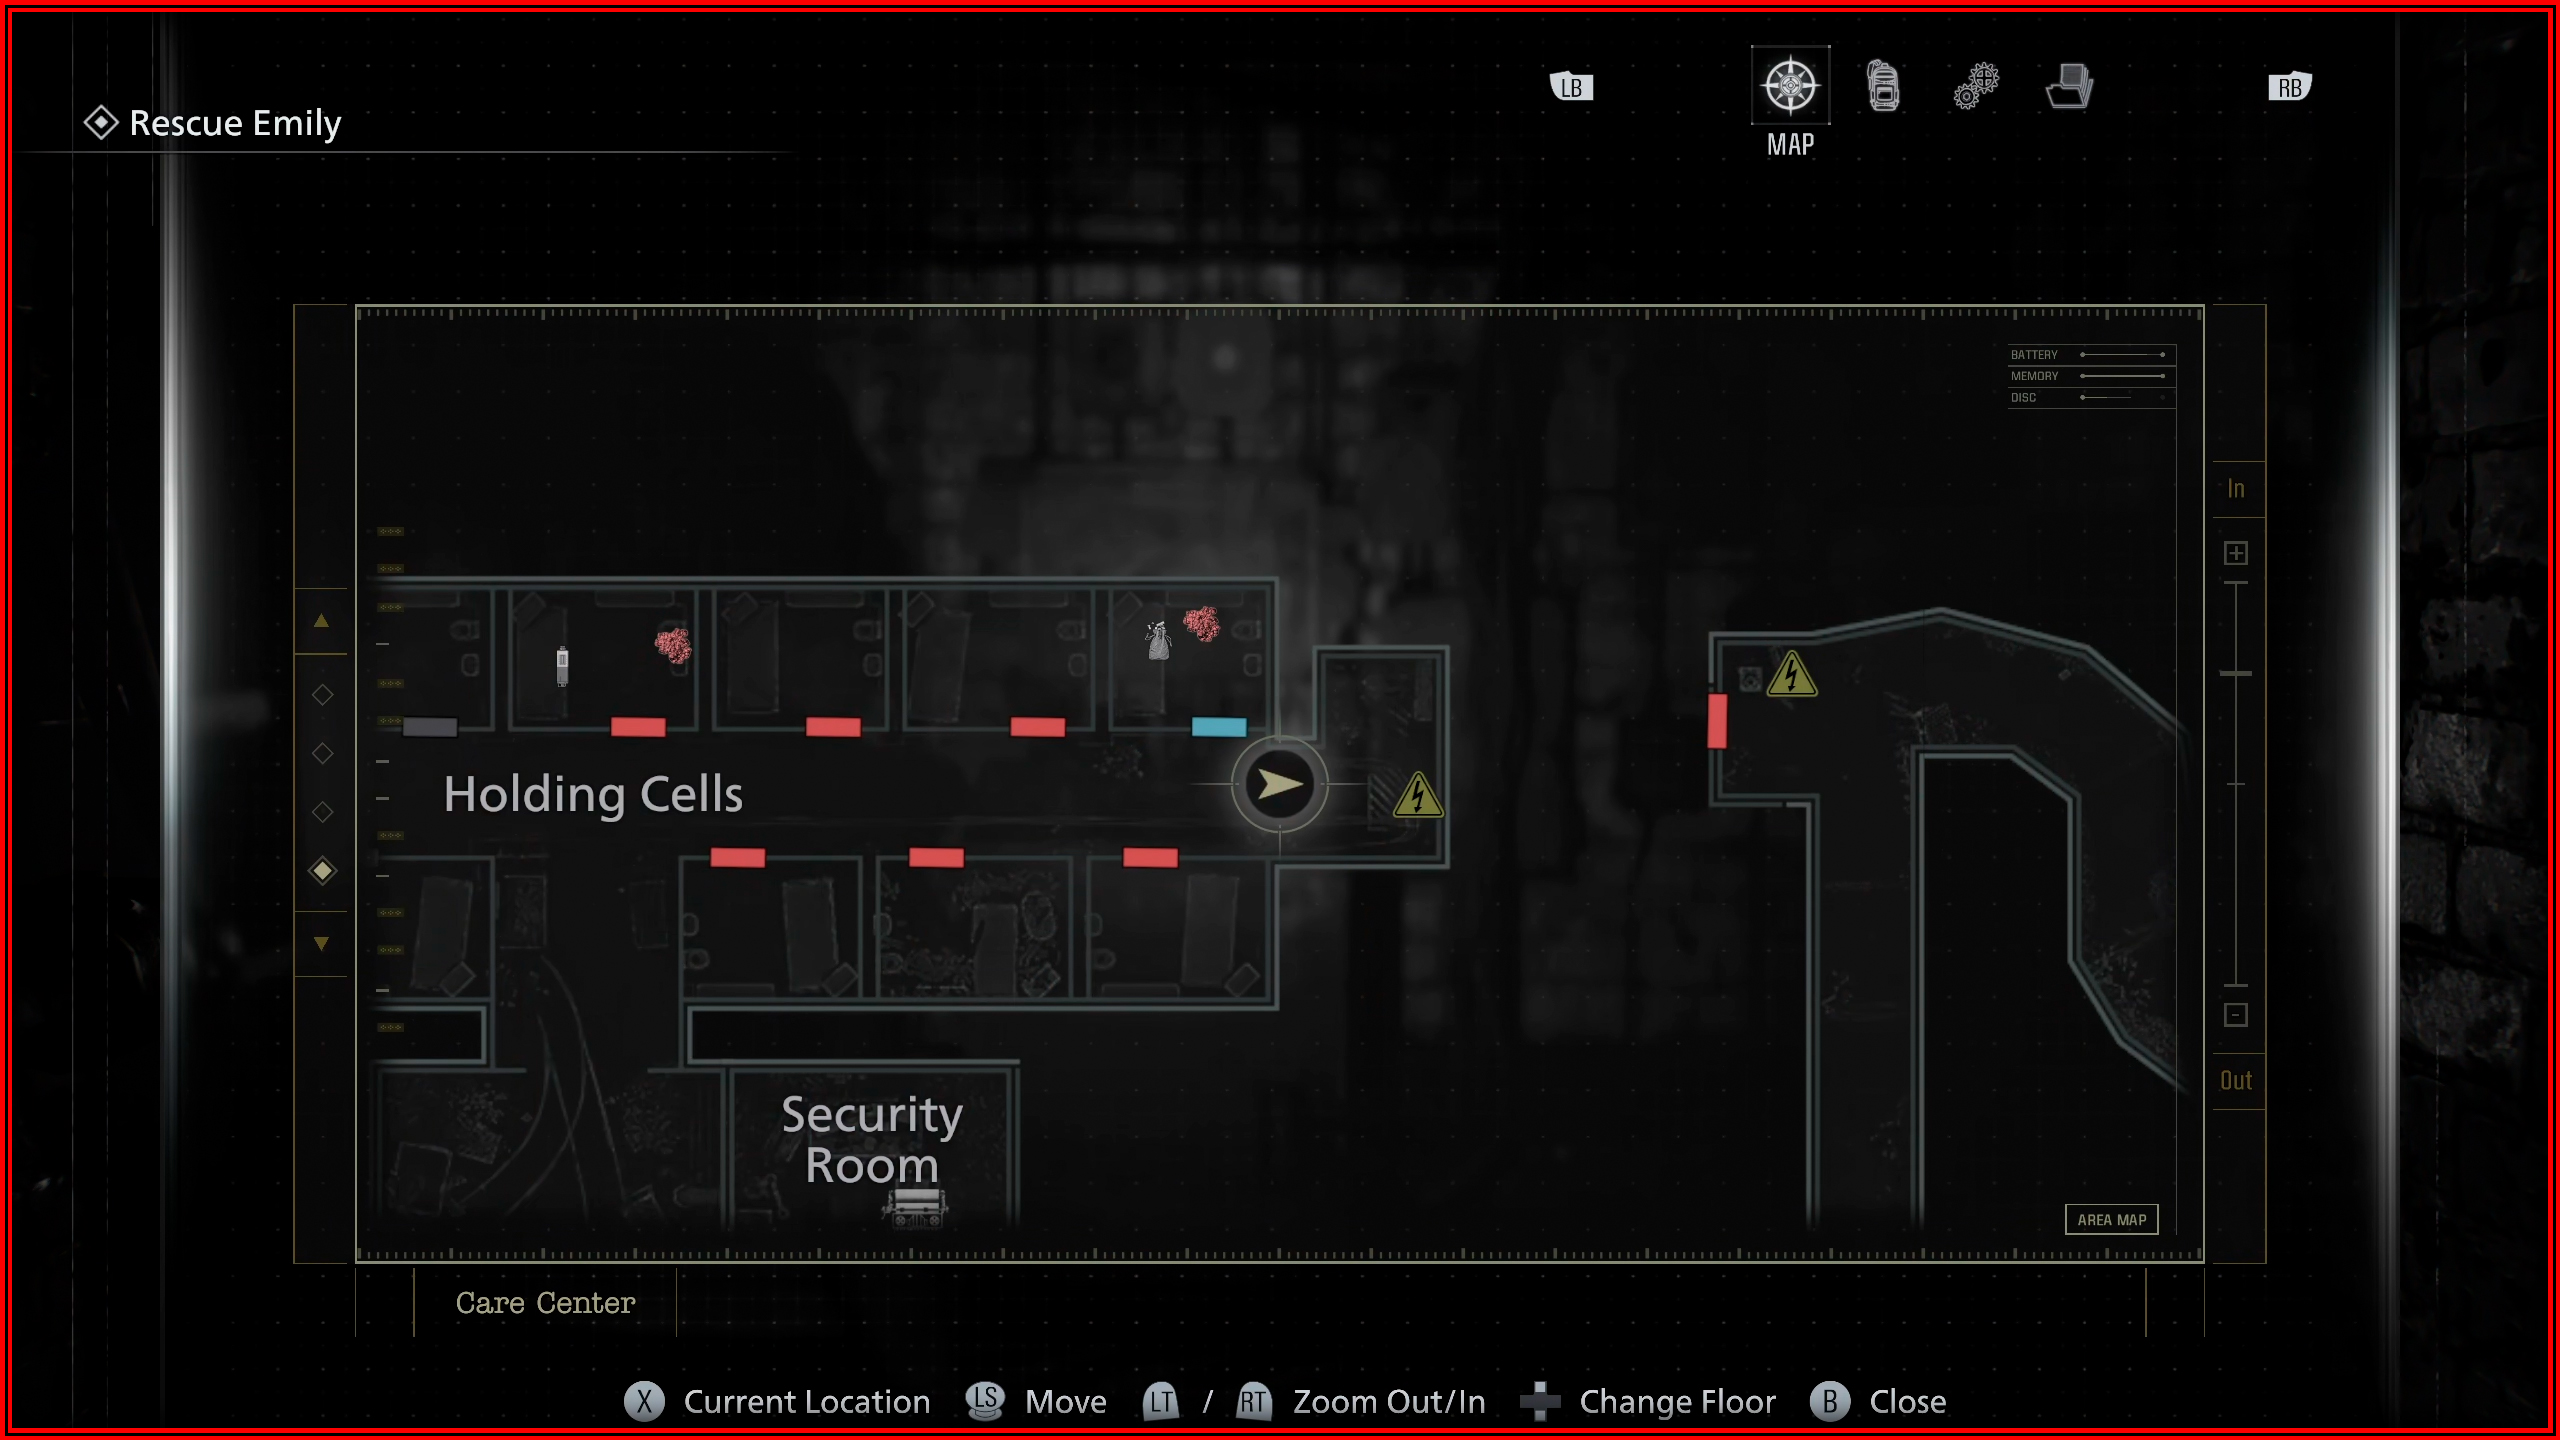
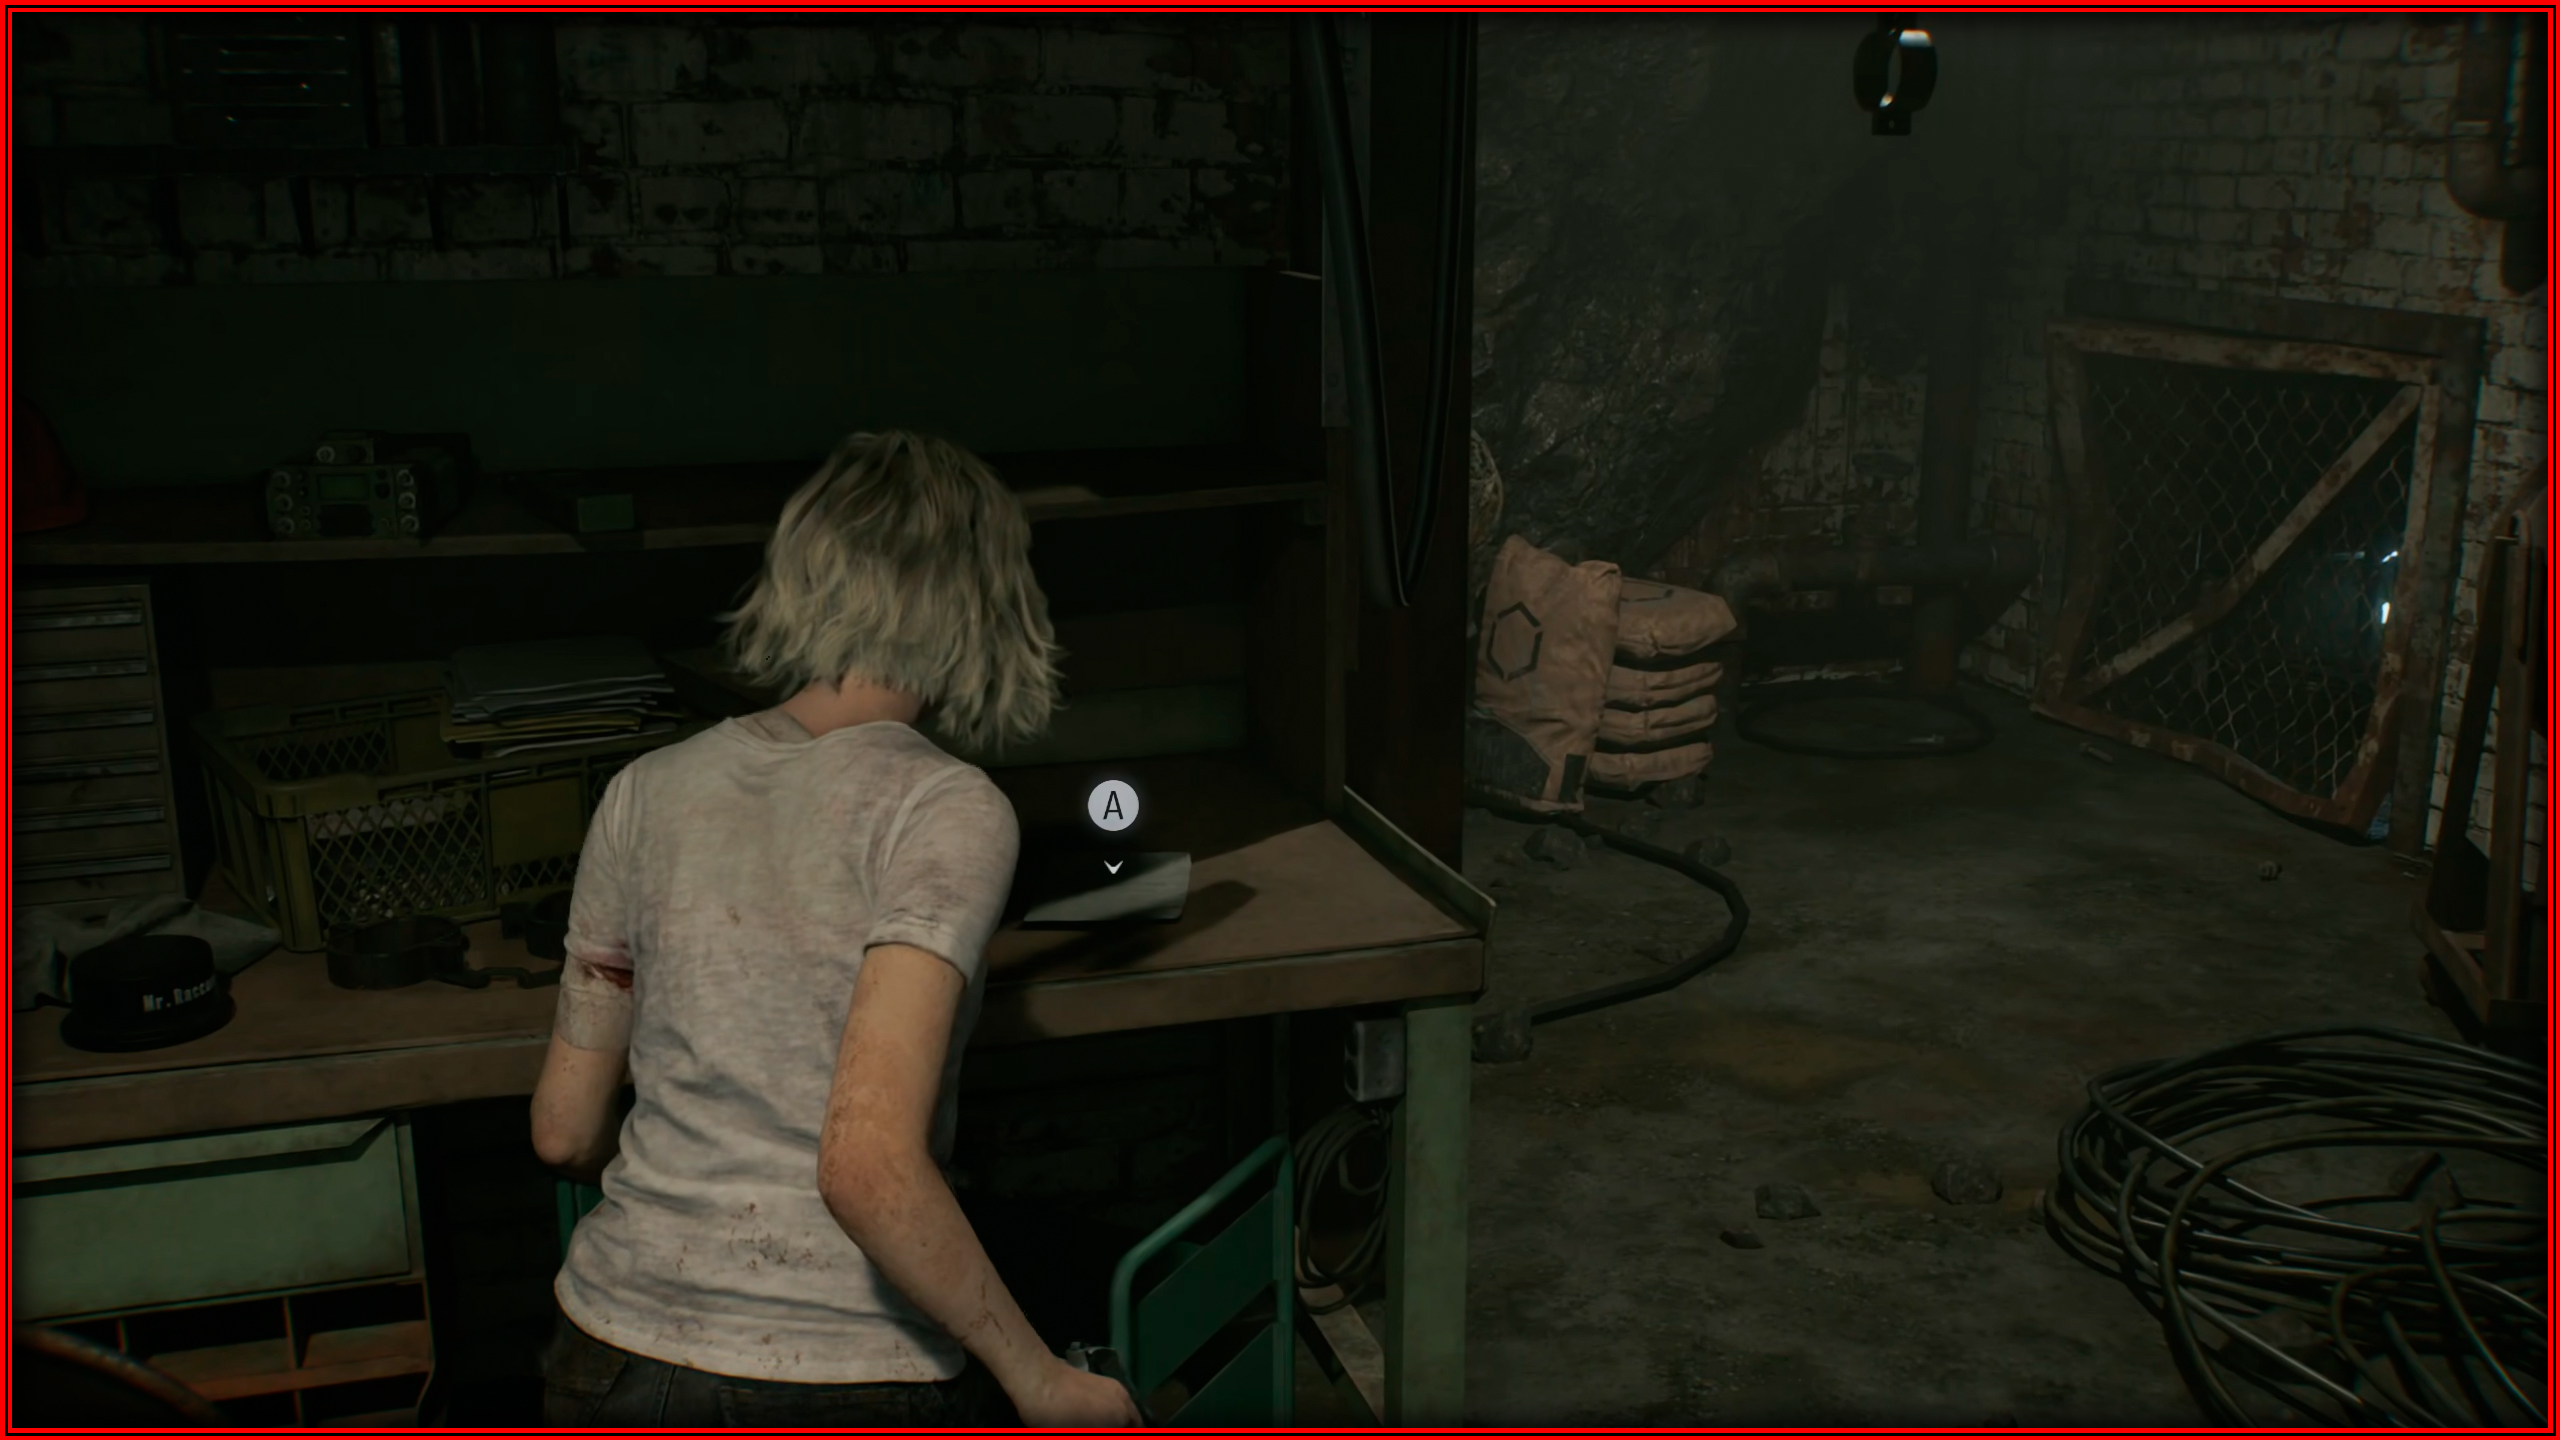
File 40/75 - Technician’s Note
Workshop: Once you grab the Joint Plug from the Holding Cells corridor, turn back and head to the opposite end of the hall. Enter the Workshop and check the workbench.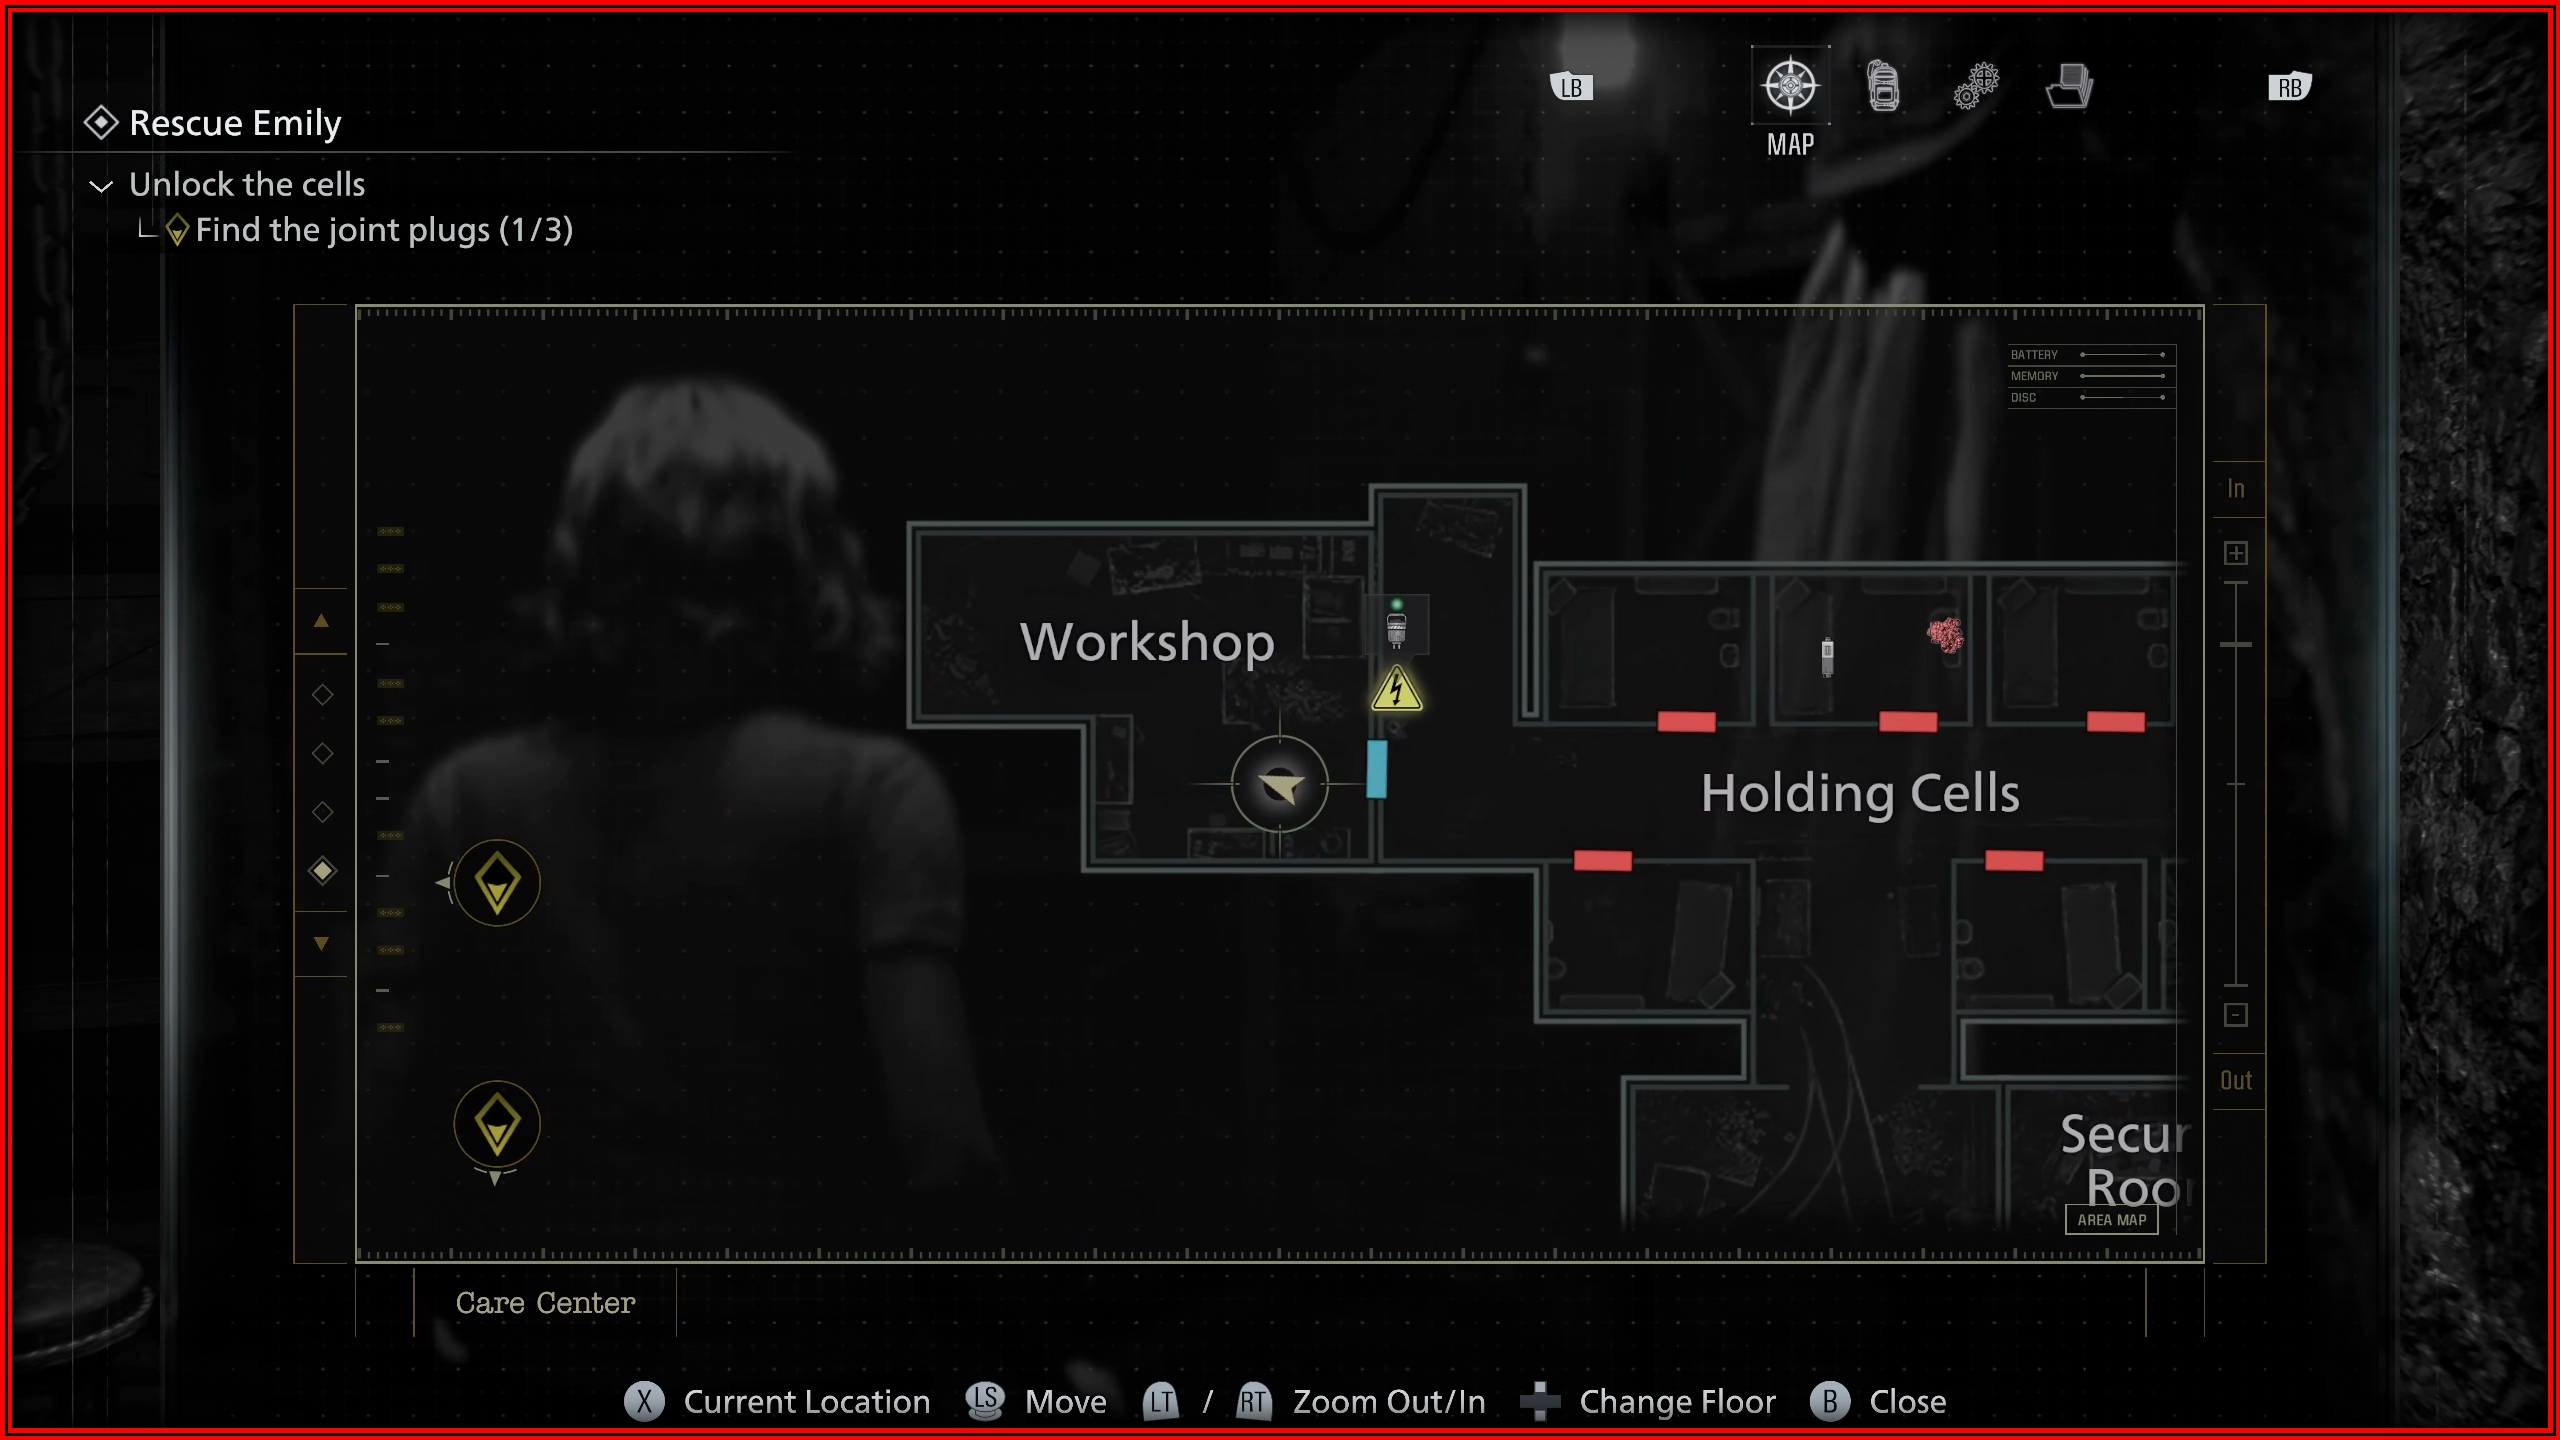
File 41/75 - Security Guard’s Report
Use the Joint Plug on the door leading to the Furnace, located in the central area near the safe room. Once inside, check the small side office to your right to find it.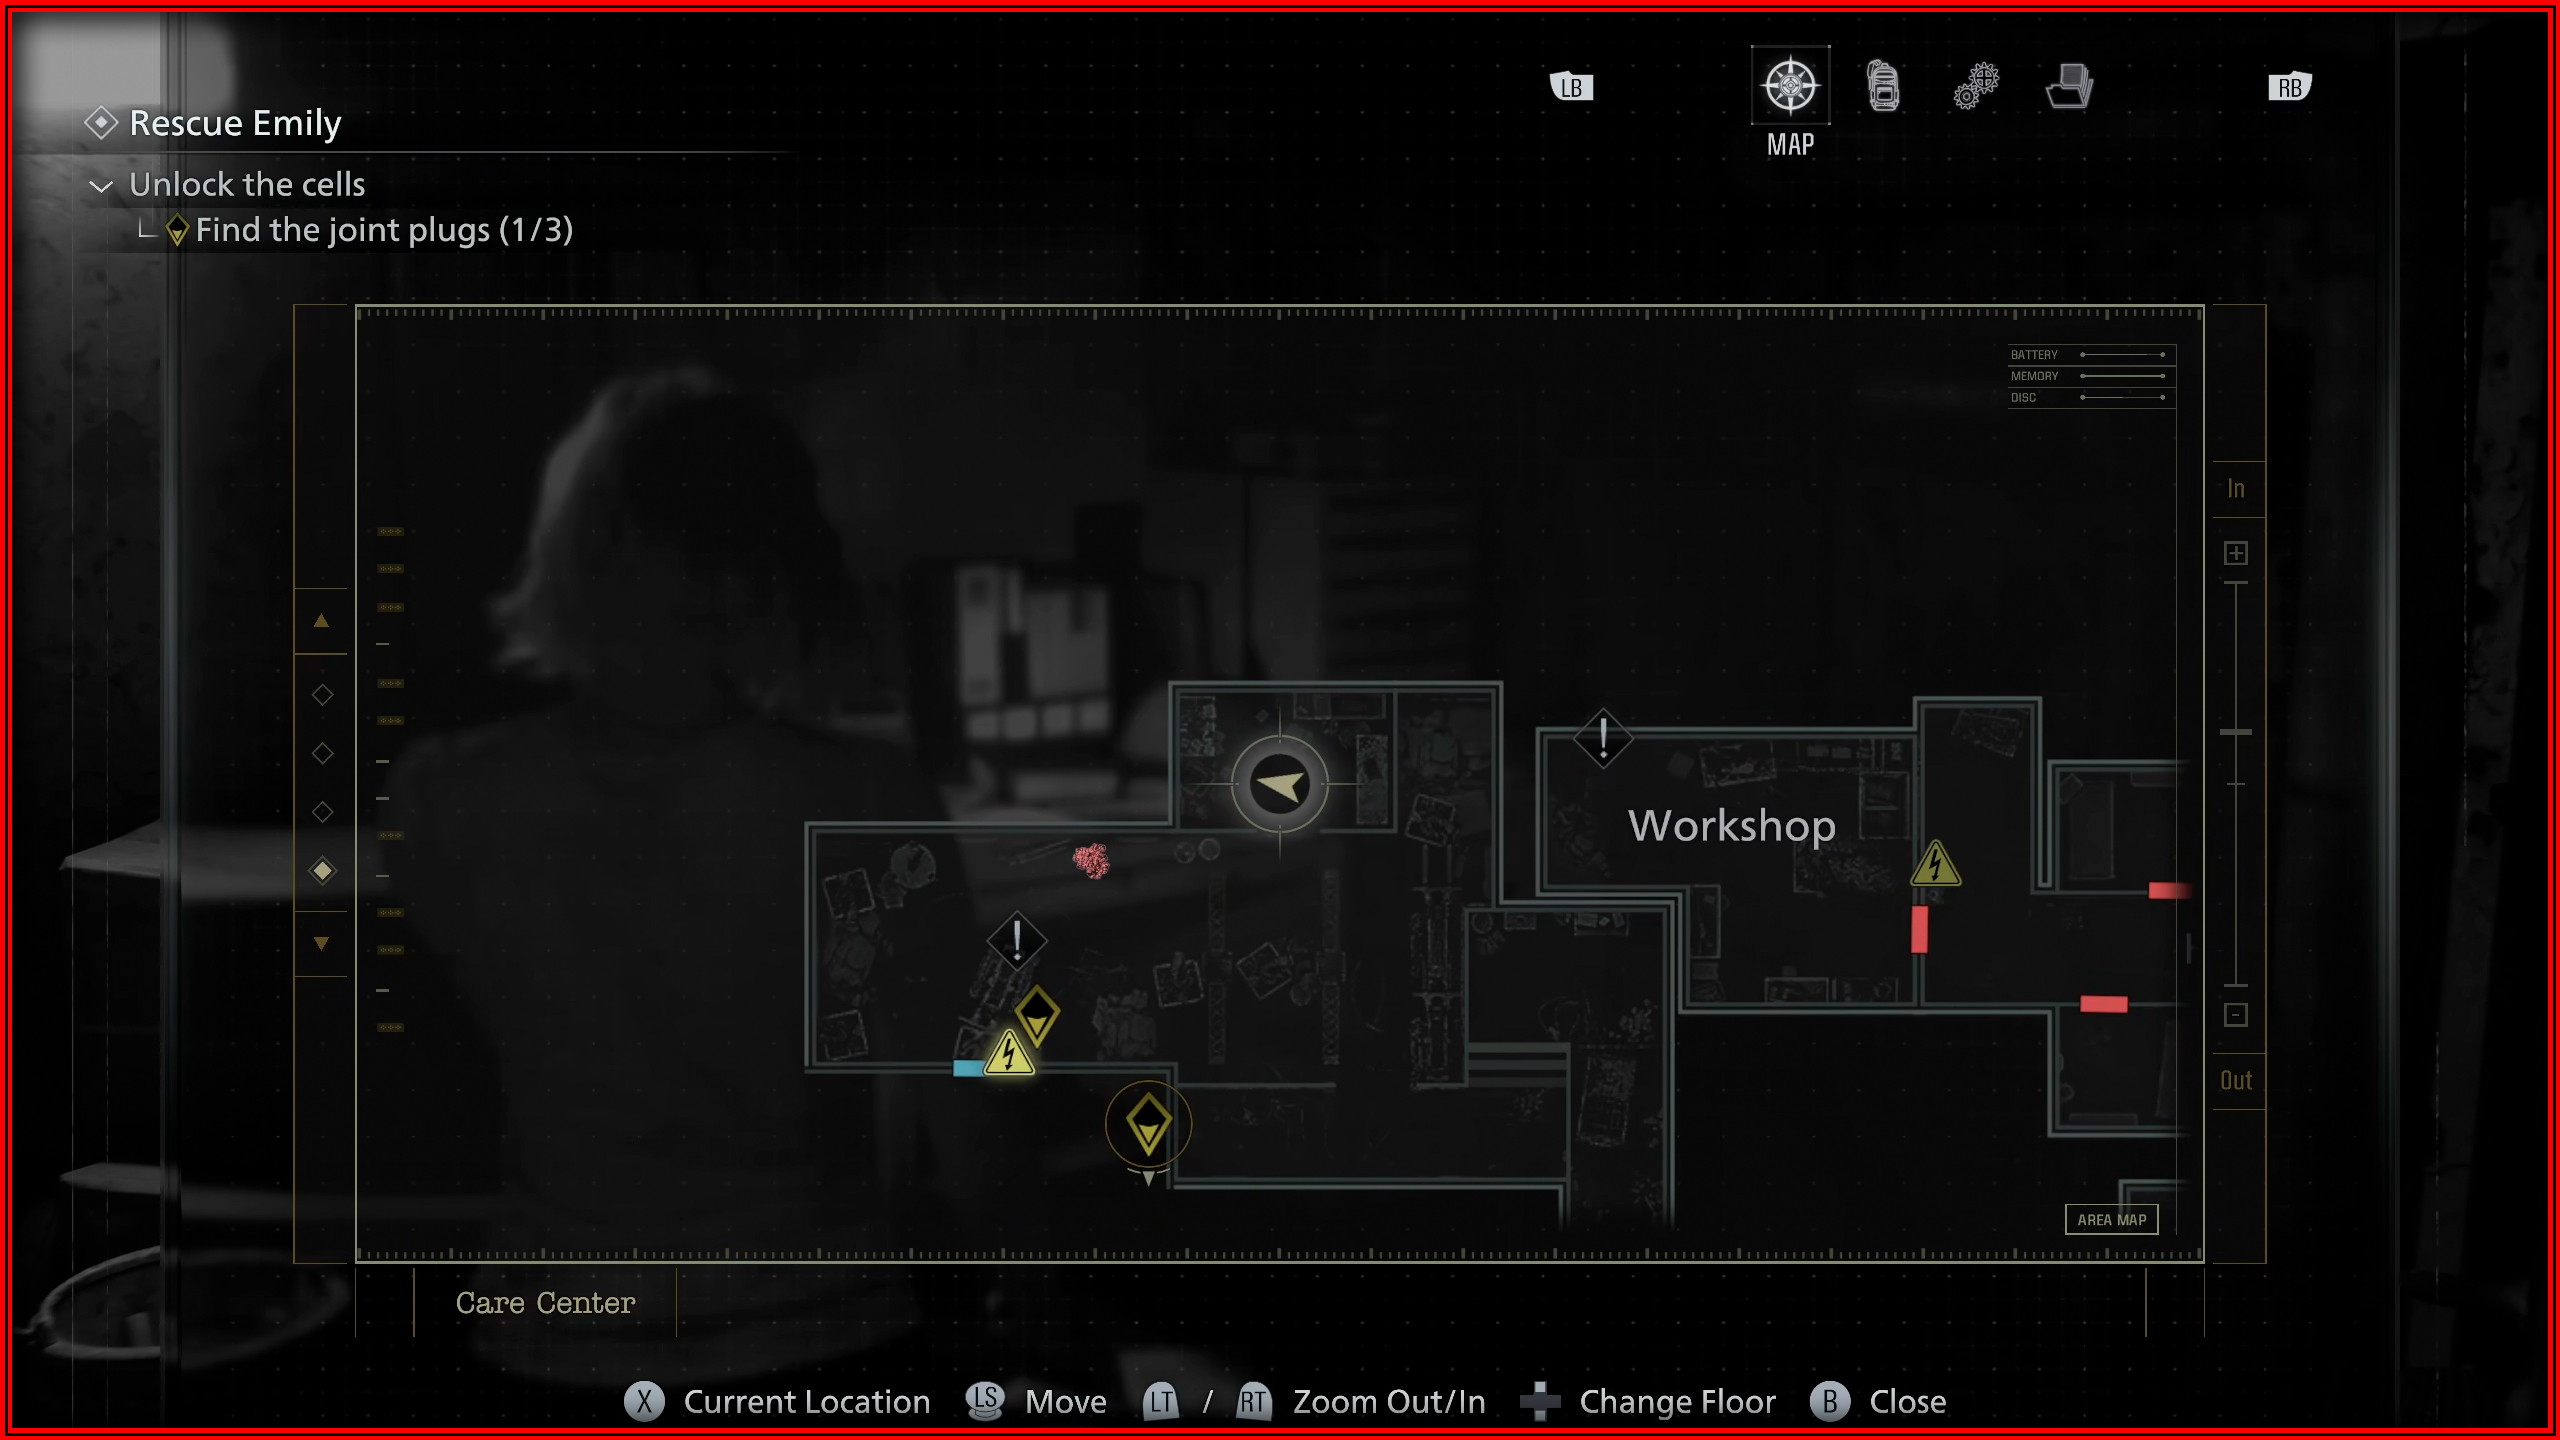
Care Center Courtyard – Grace
File 42/75 - Visitor Record
VIP Suite: On the wooden cupboard.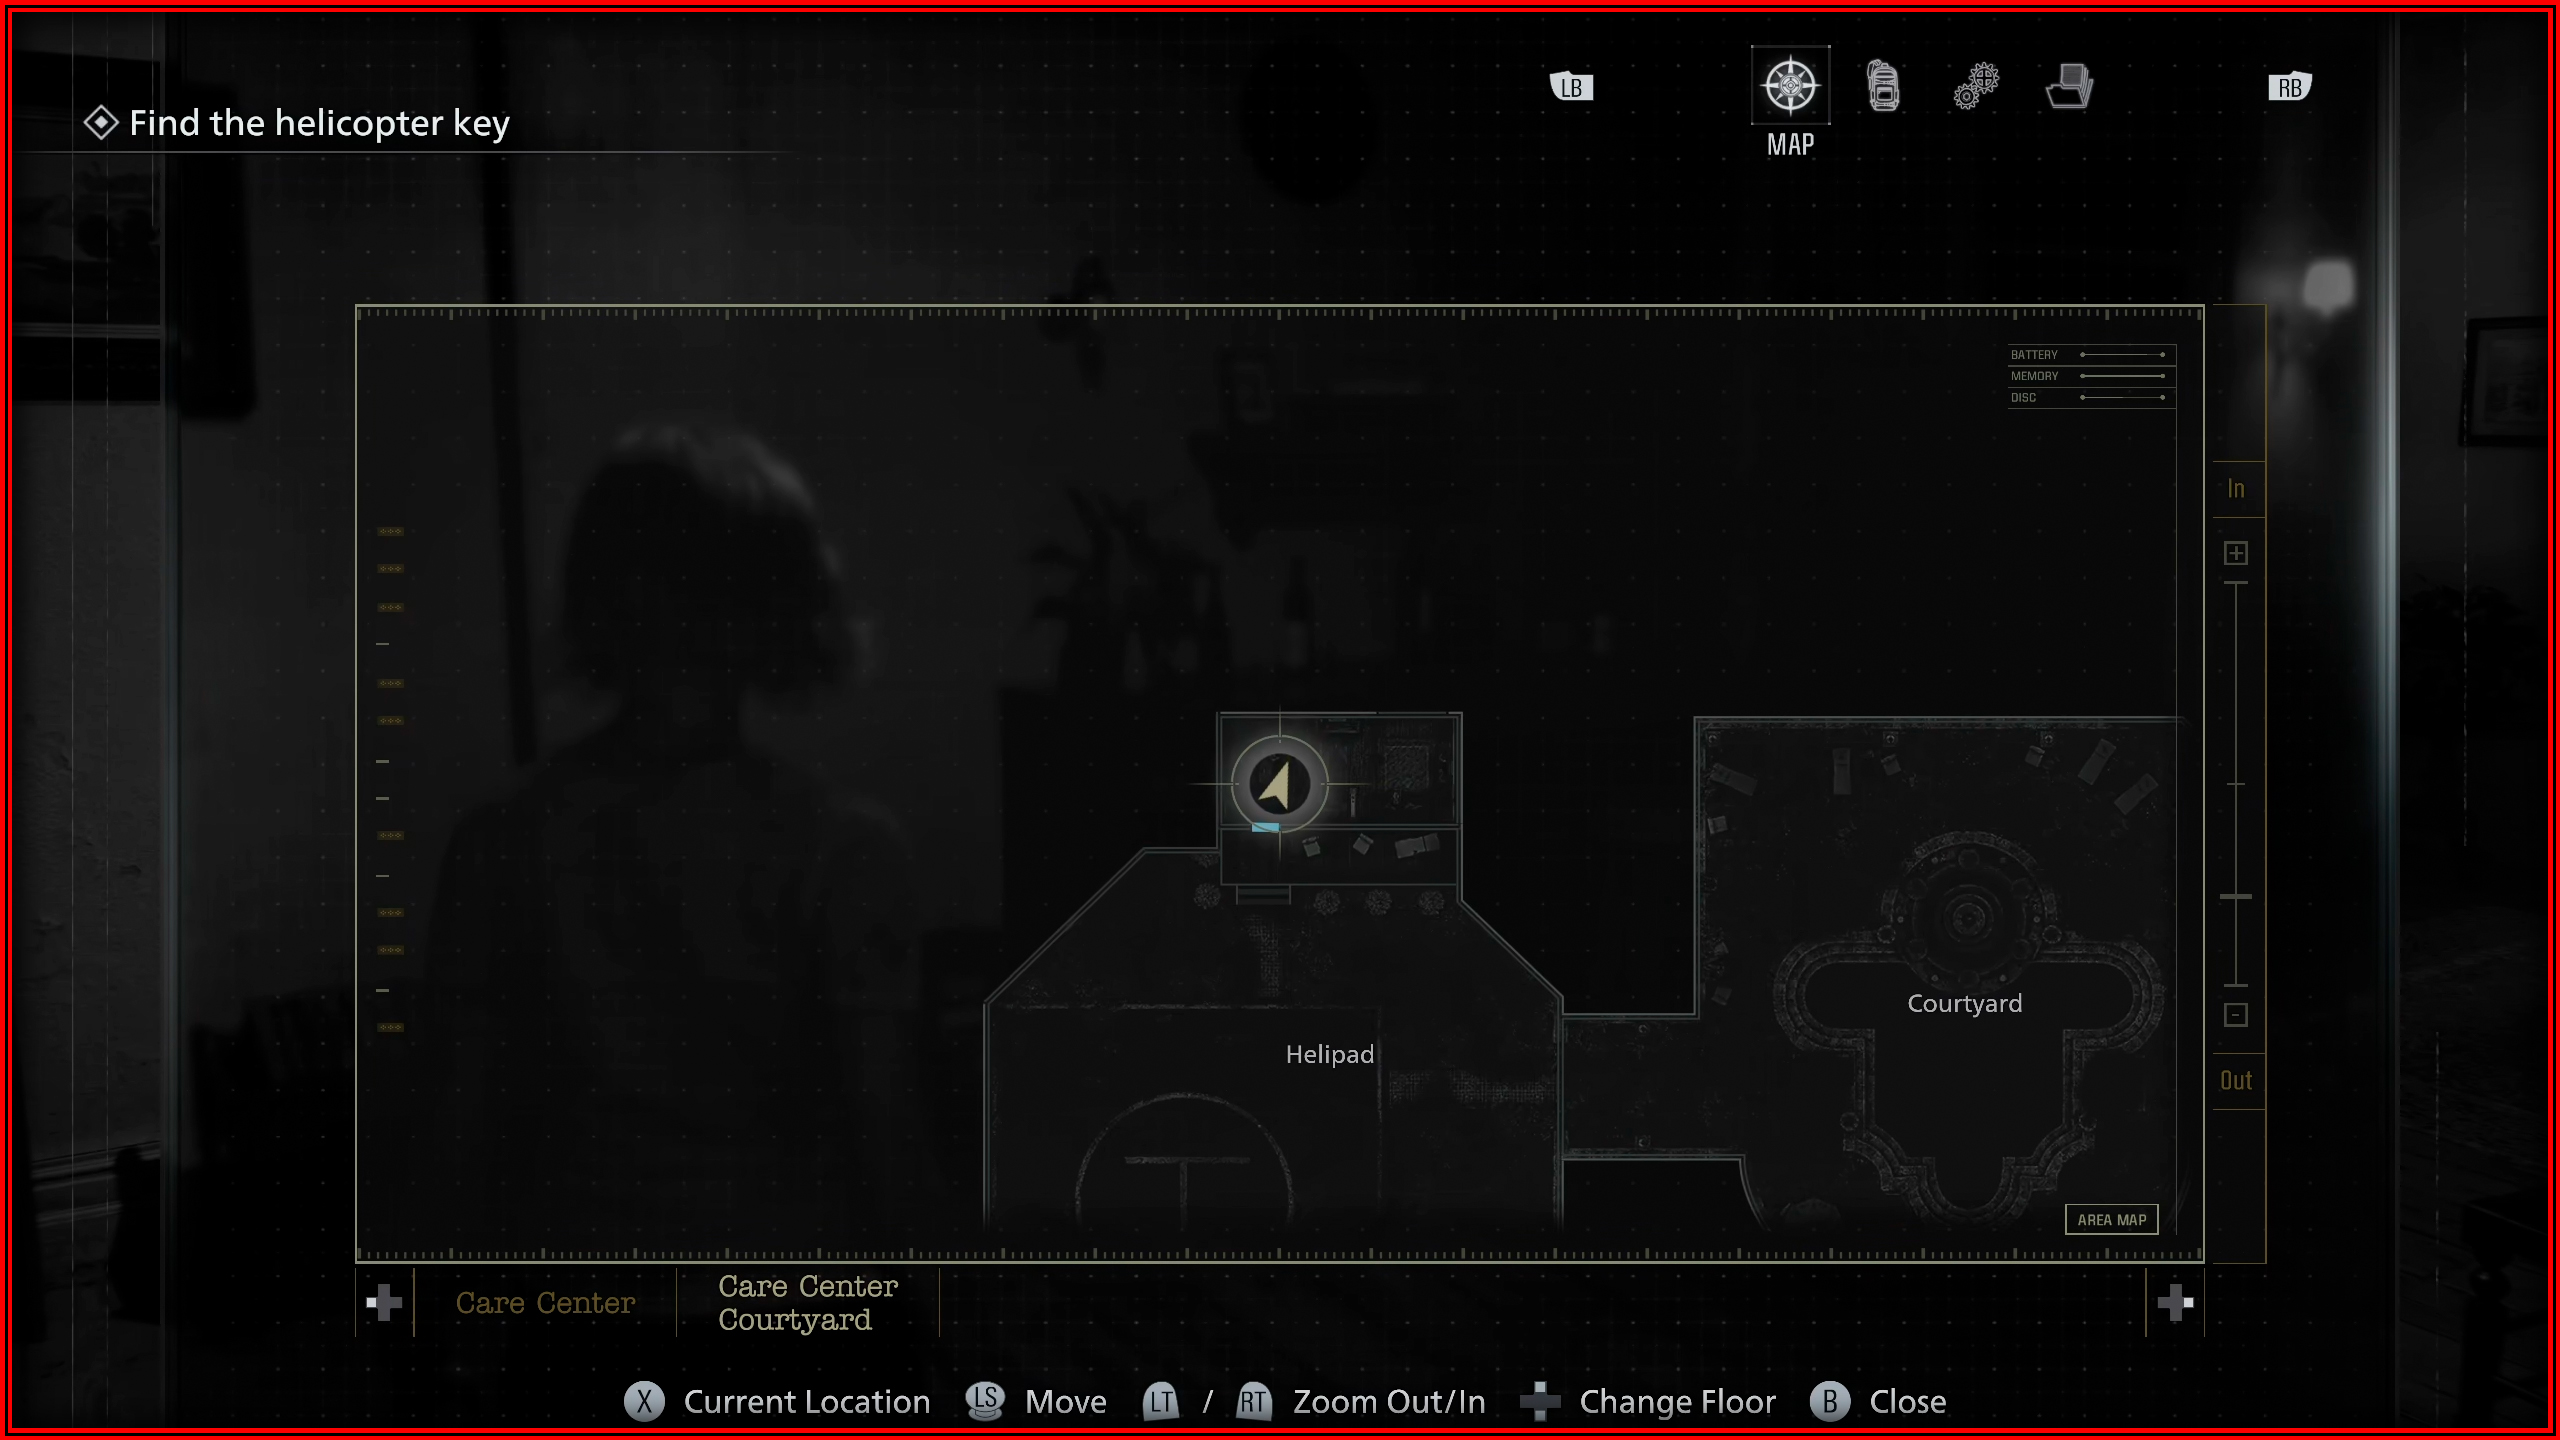
File 43/75 - Note Regarding Research Results
VIP Suite: On the main desk.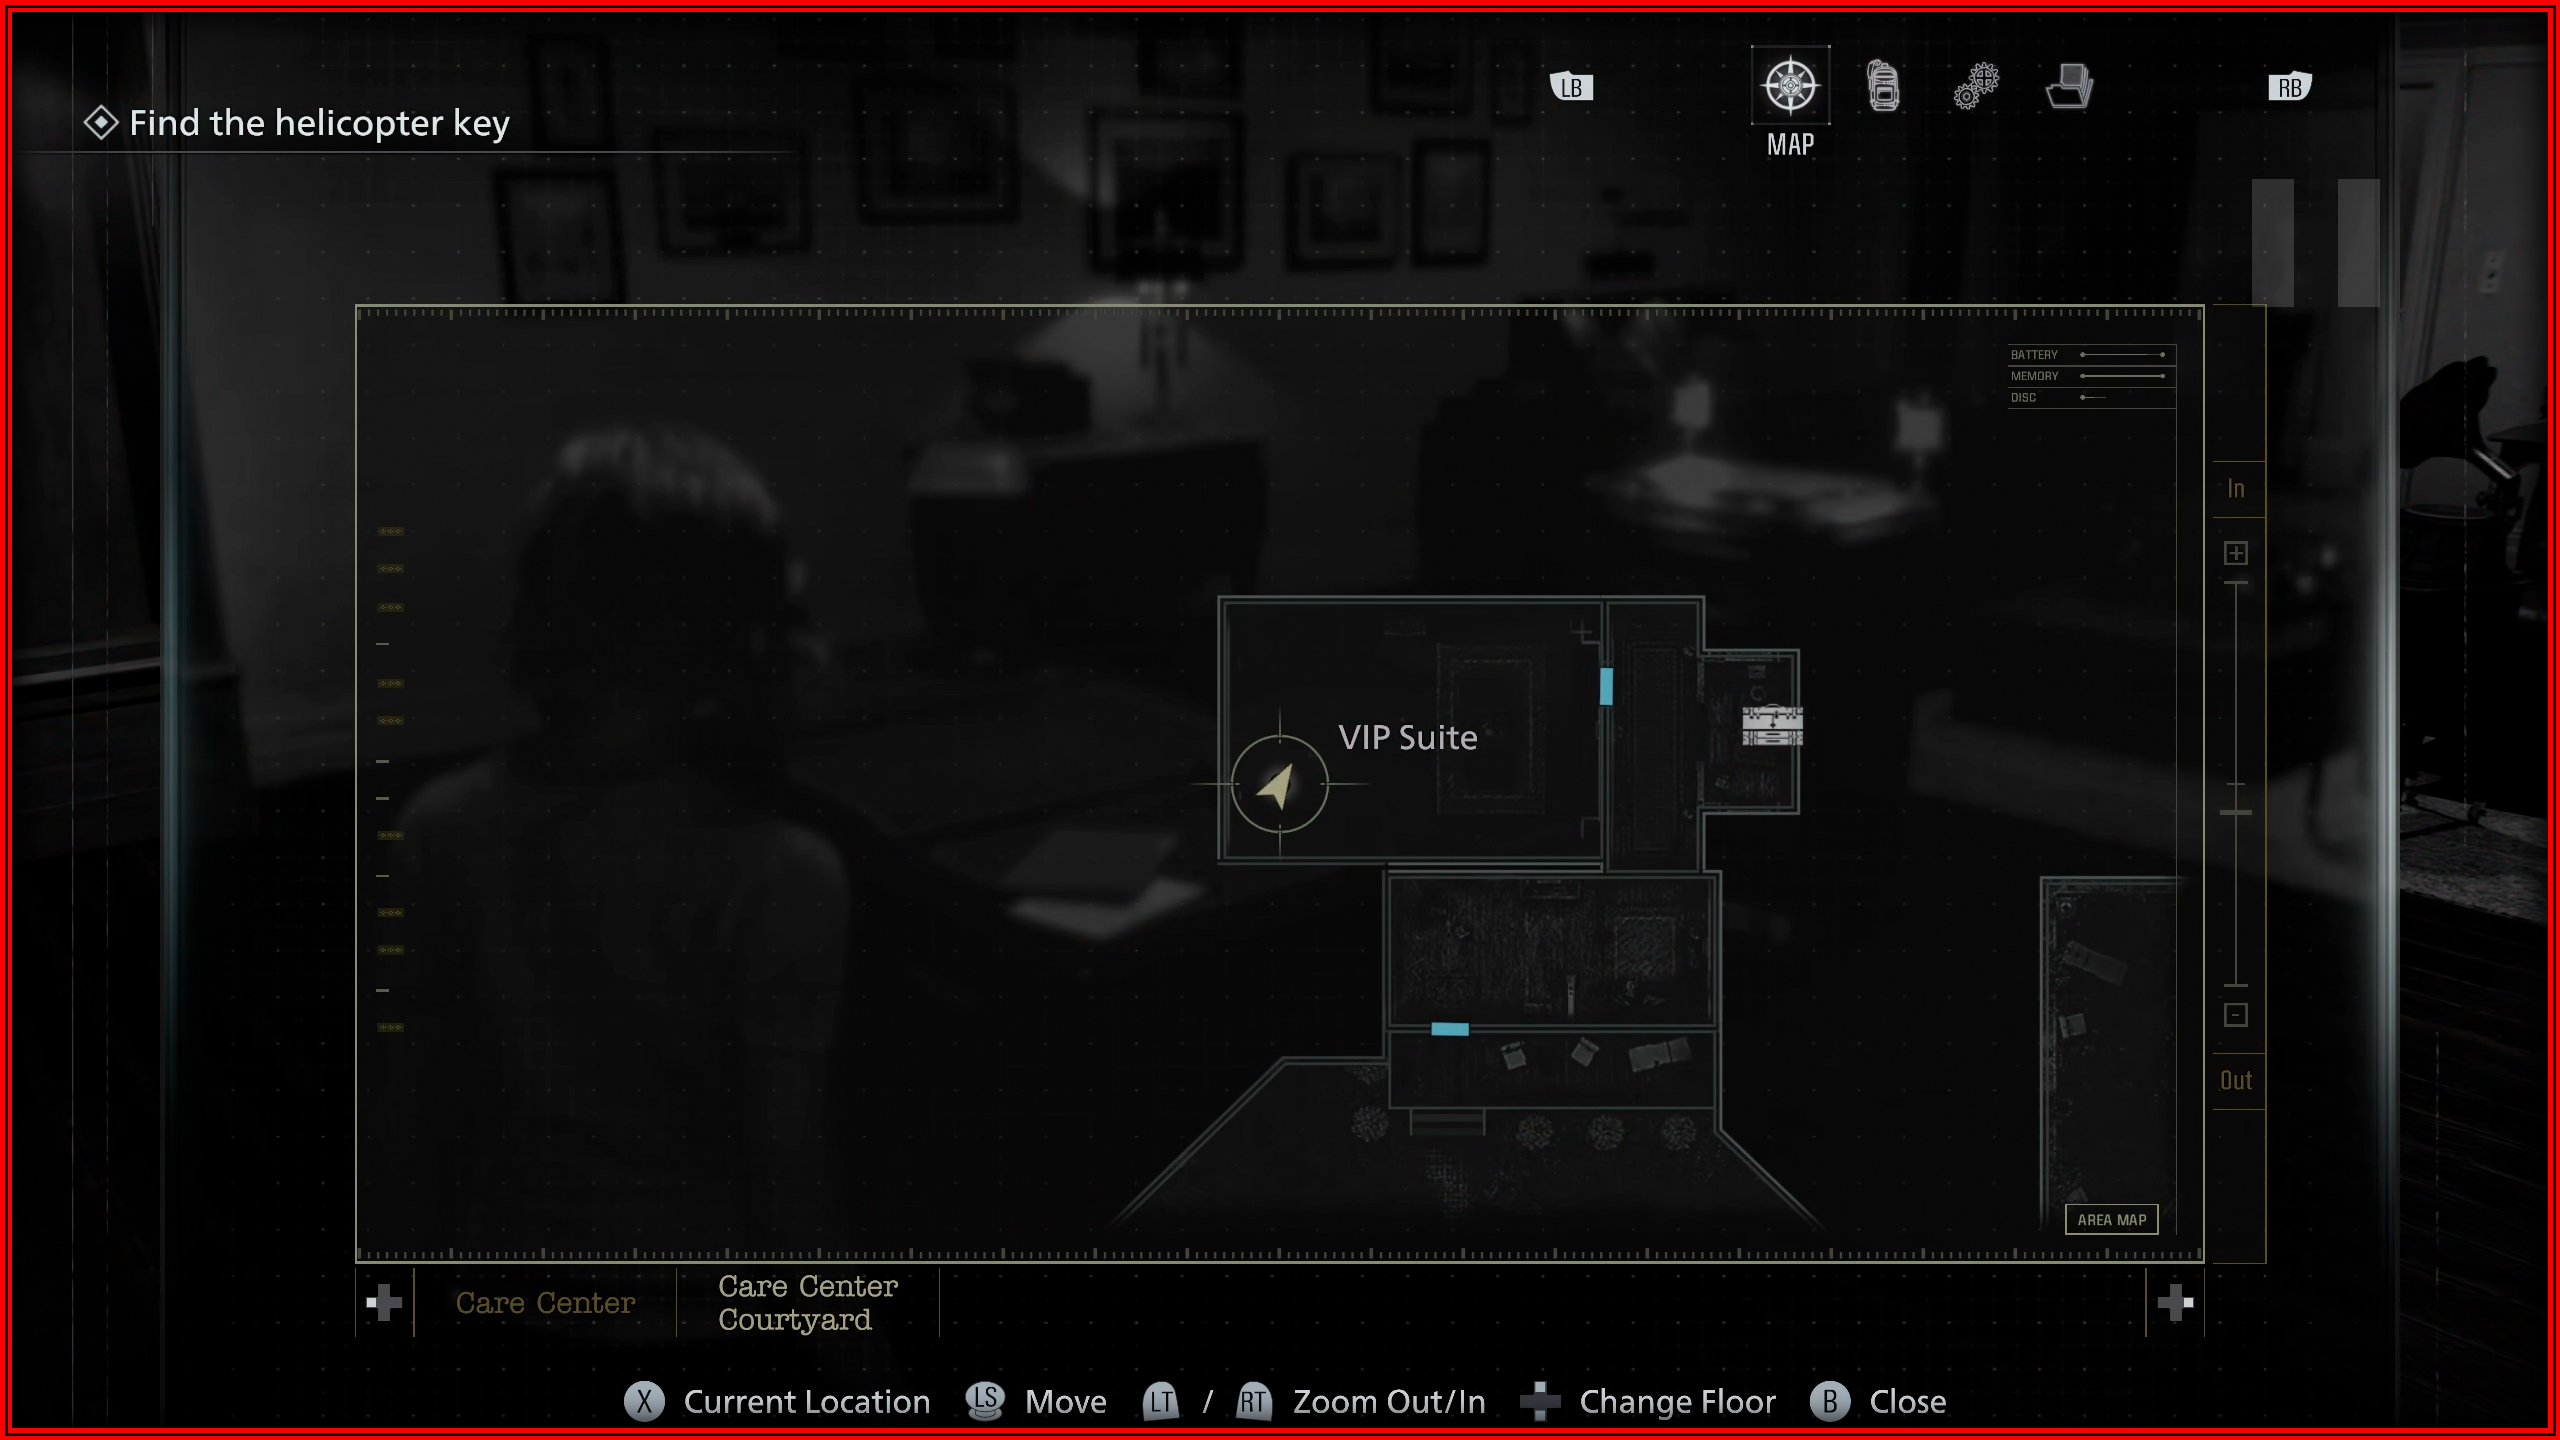
File 44/75 - Spencer’s Research II
Reception: After using the helix to activate the elevator, on the Reception desk.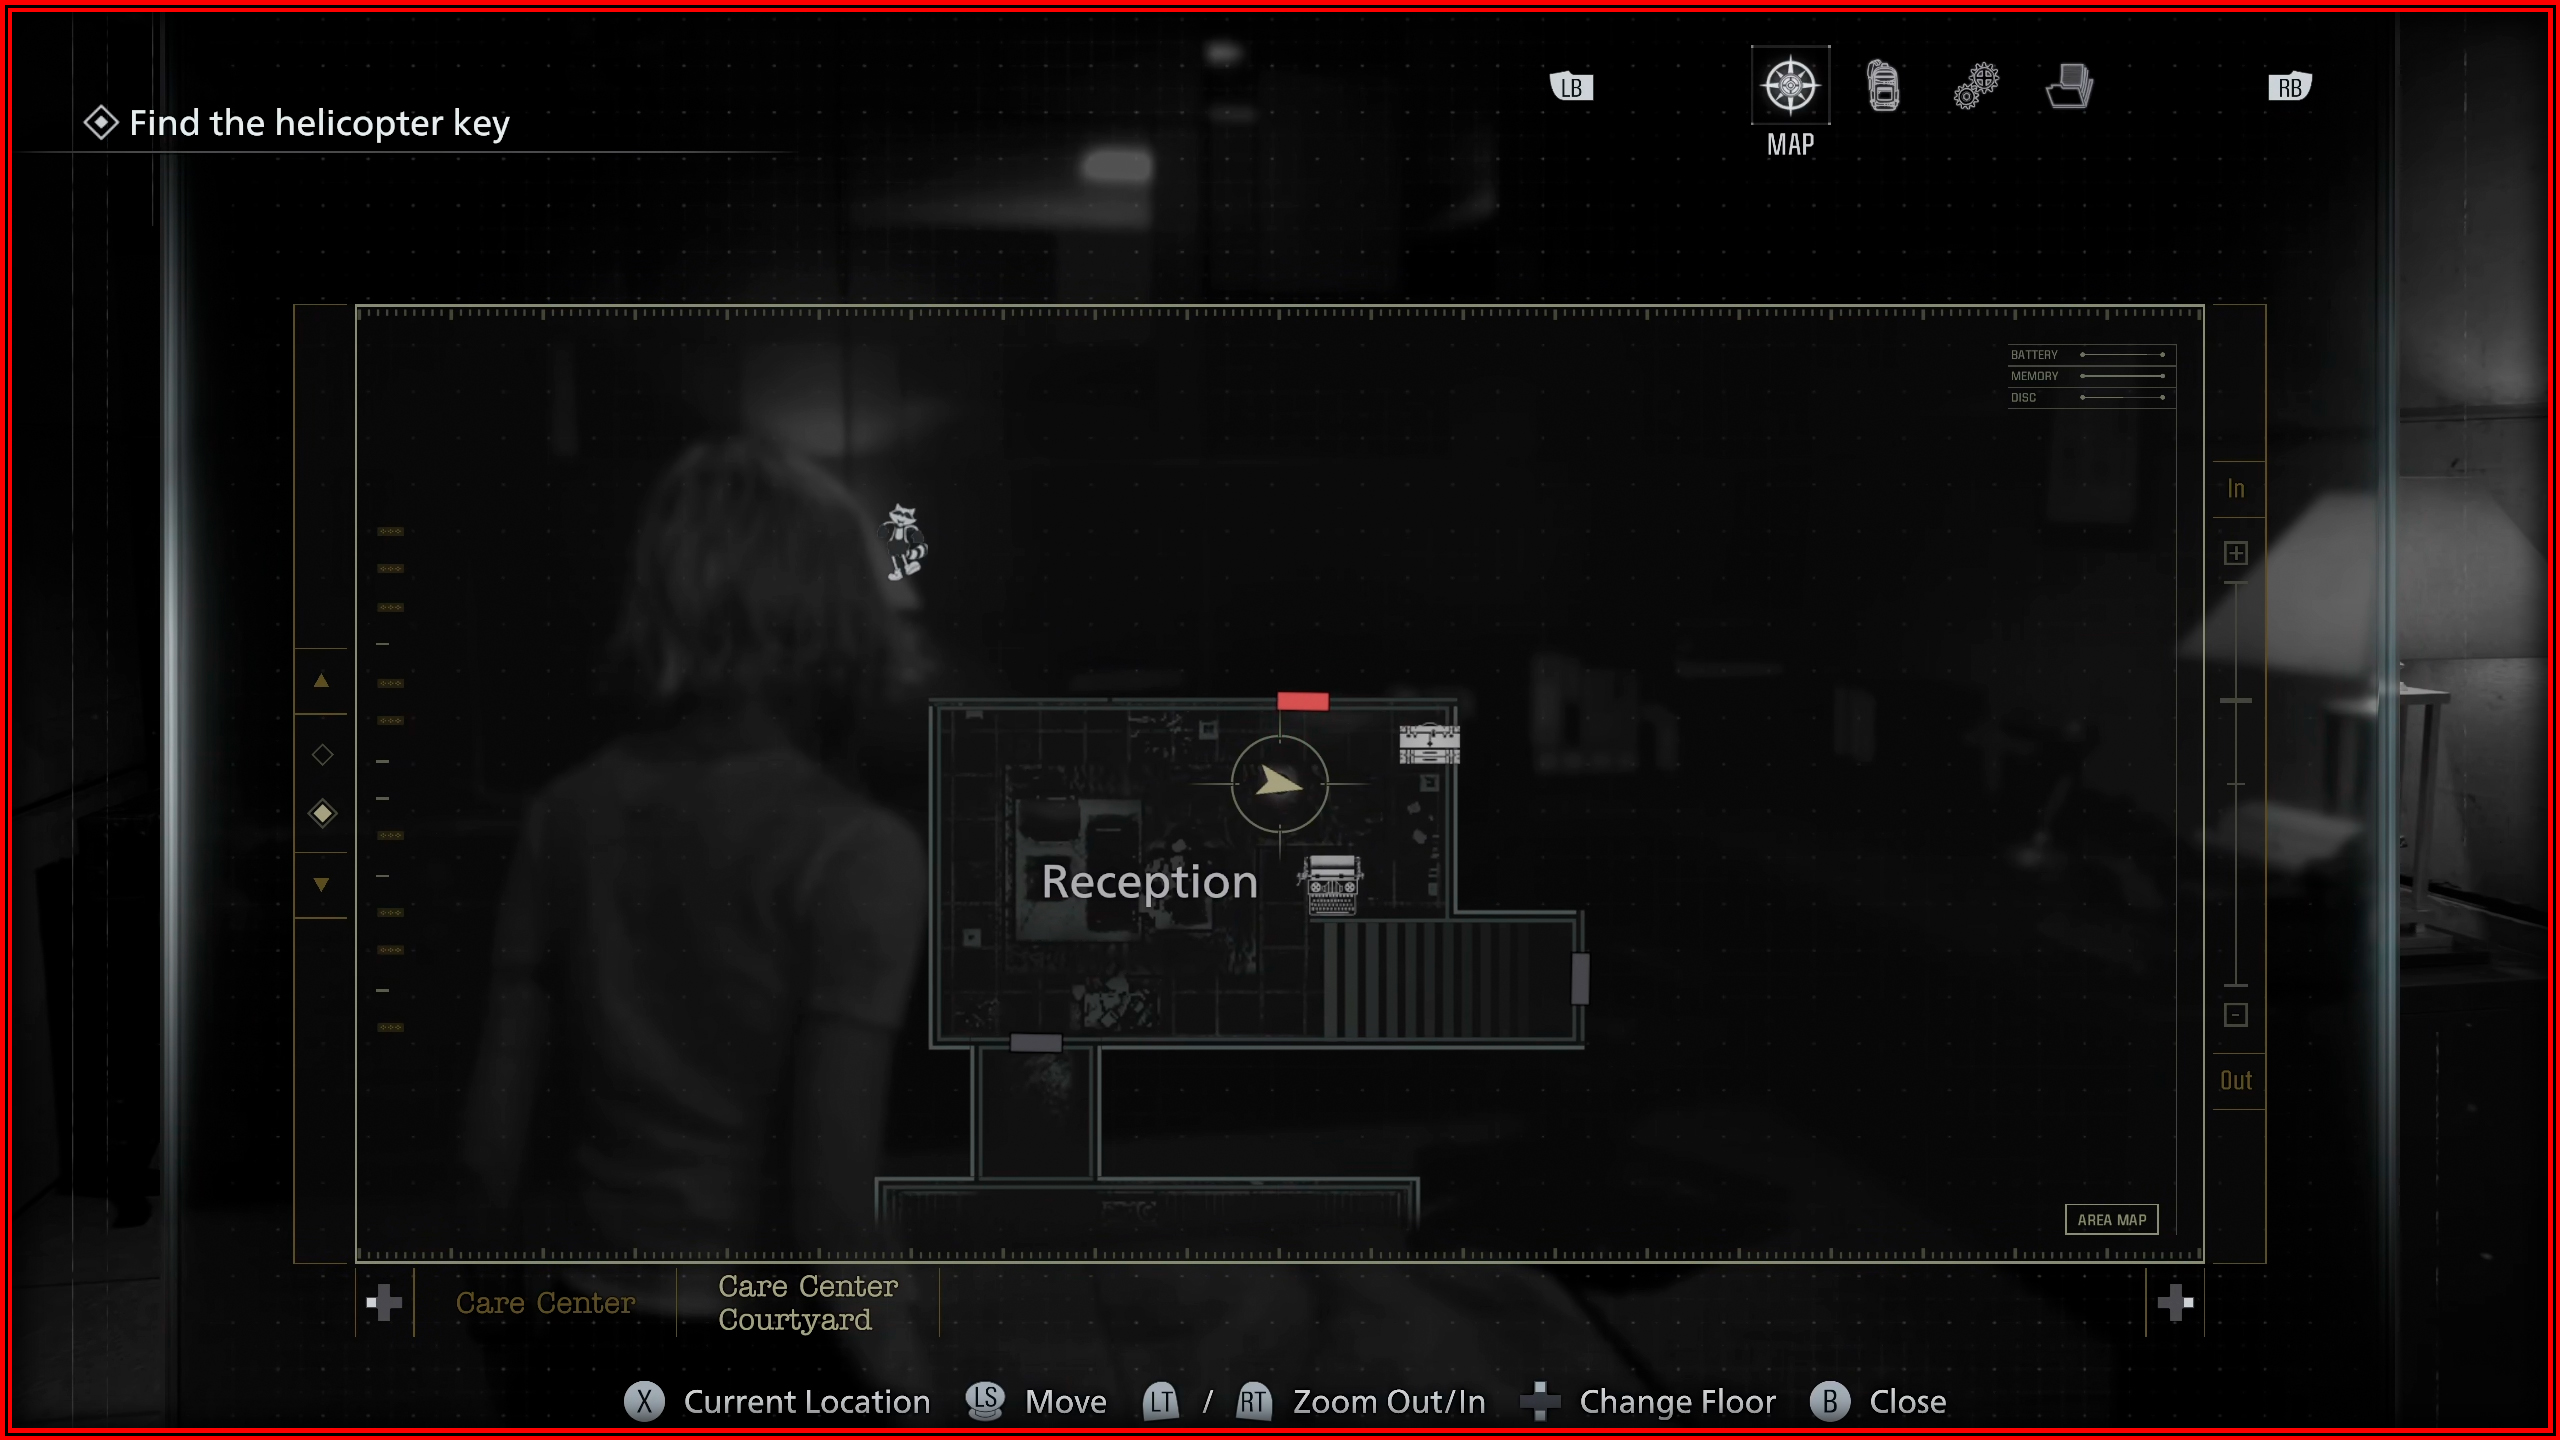

File 45/75 - Subject 170 Record
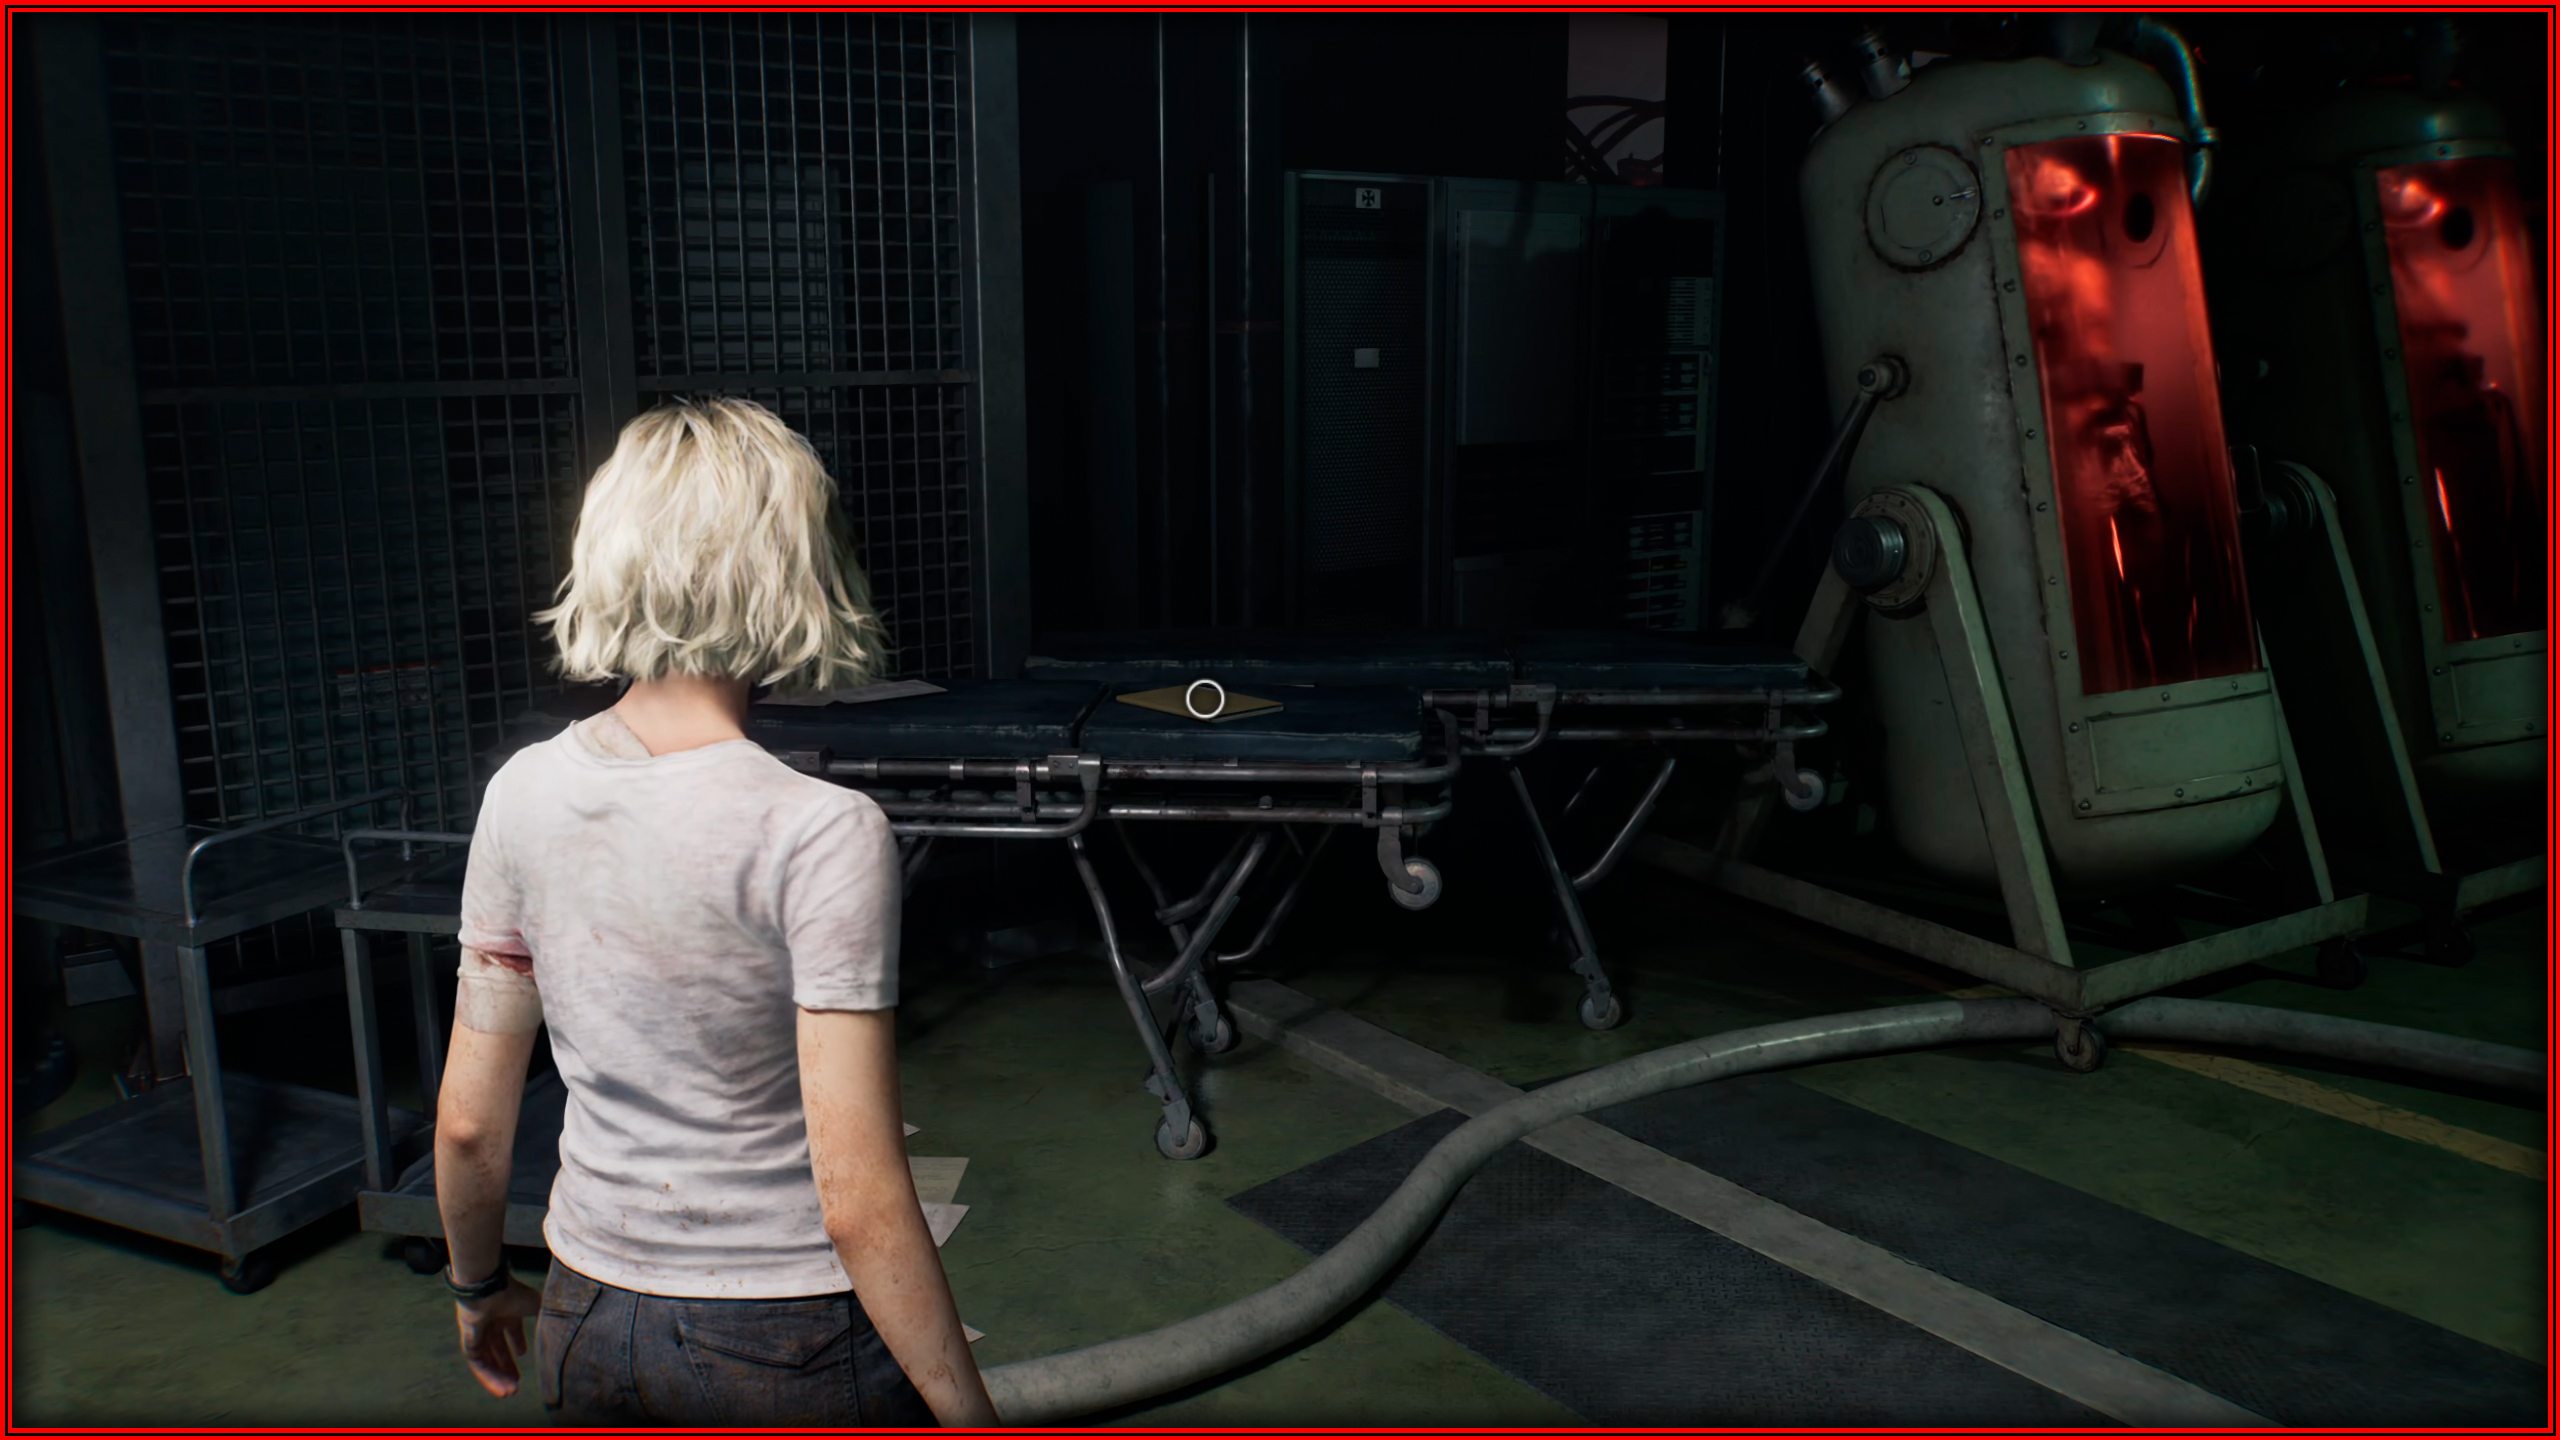
Collection & Testing: On a stretcher near the exit.
File 46/75 - Grace Ashcroft Blood Analysis Report
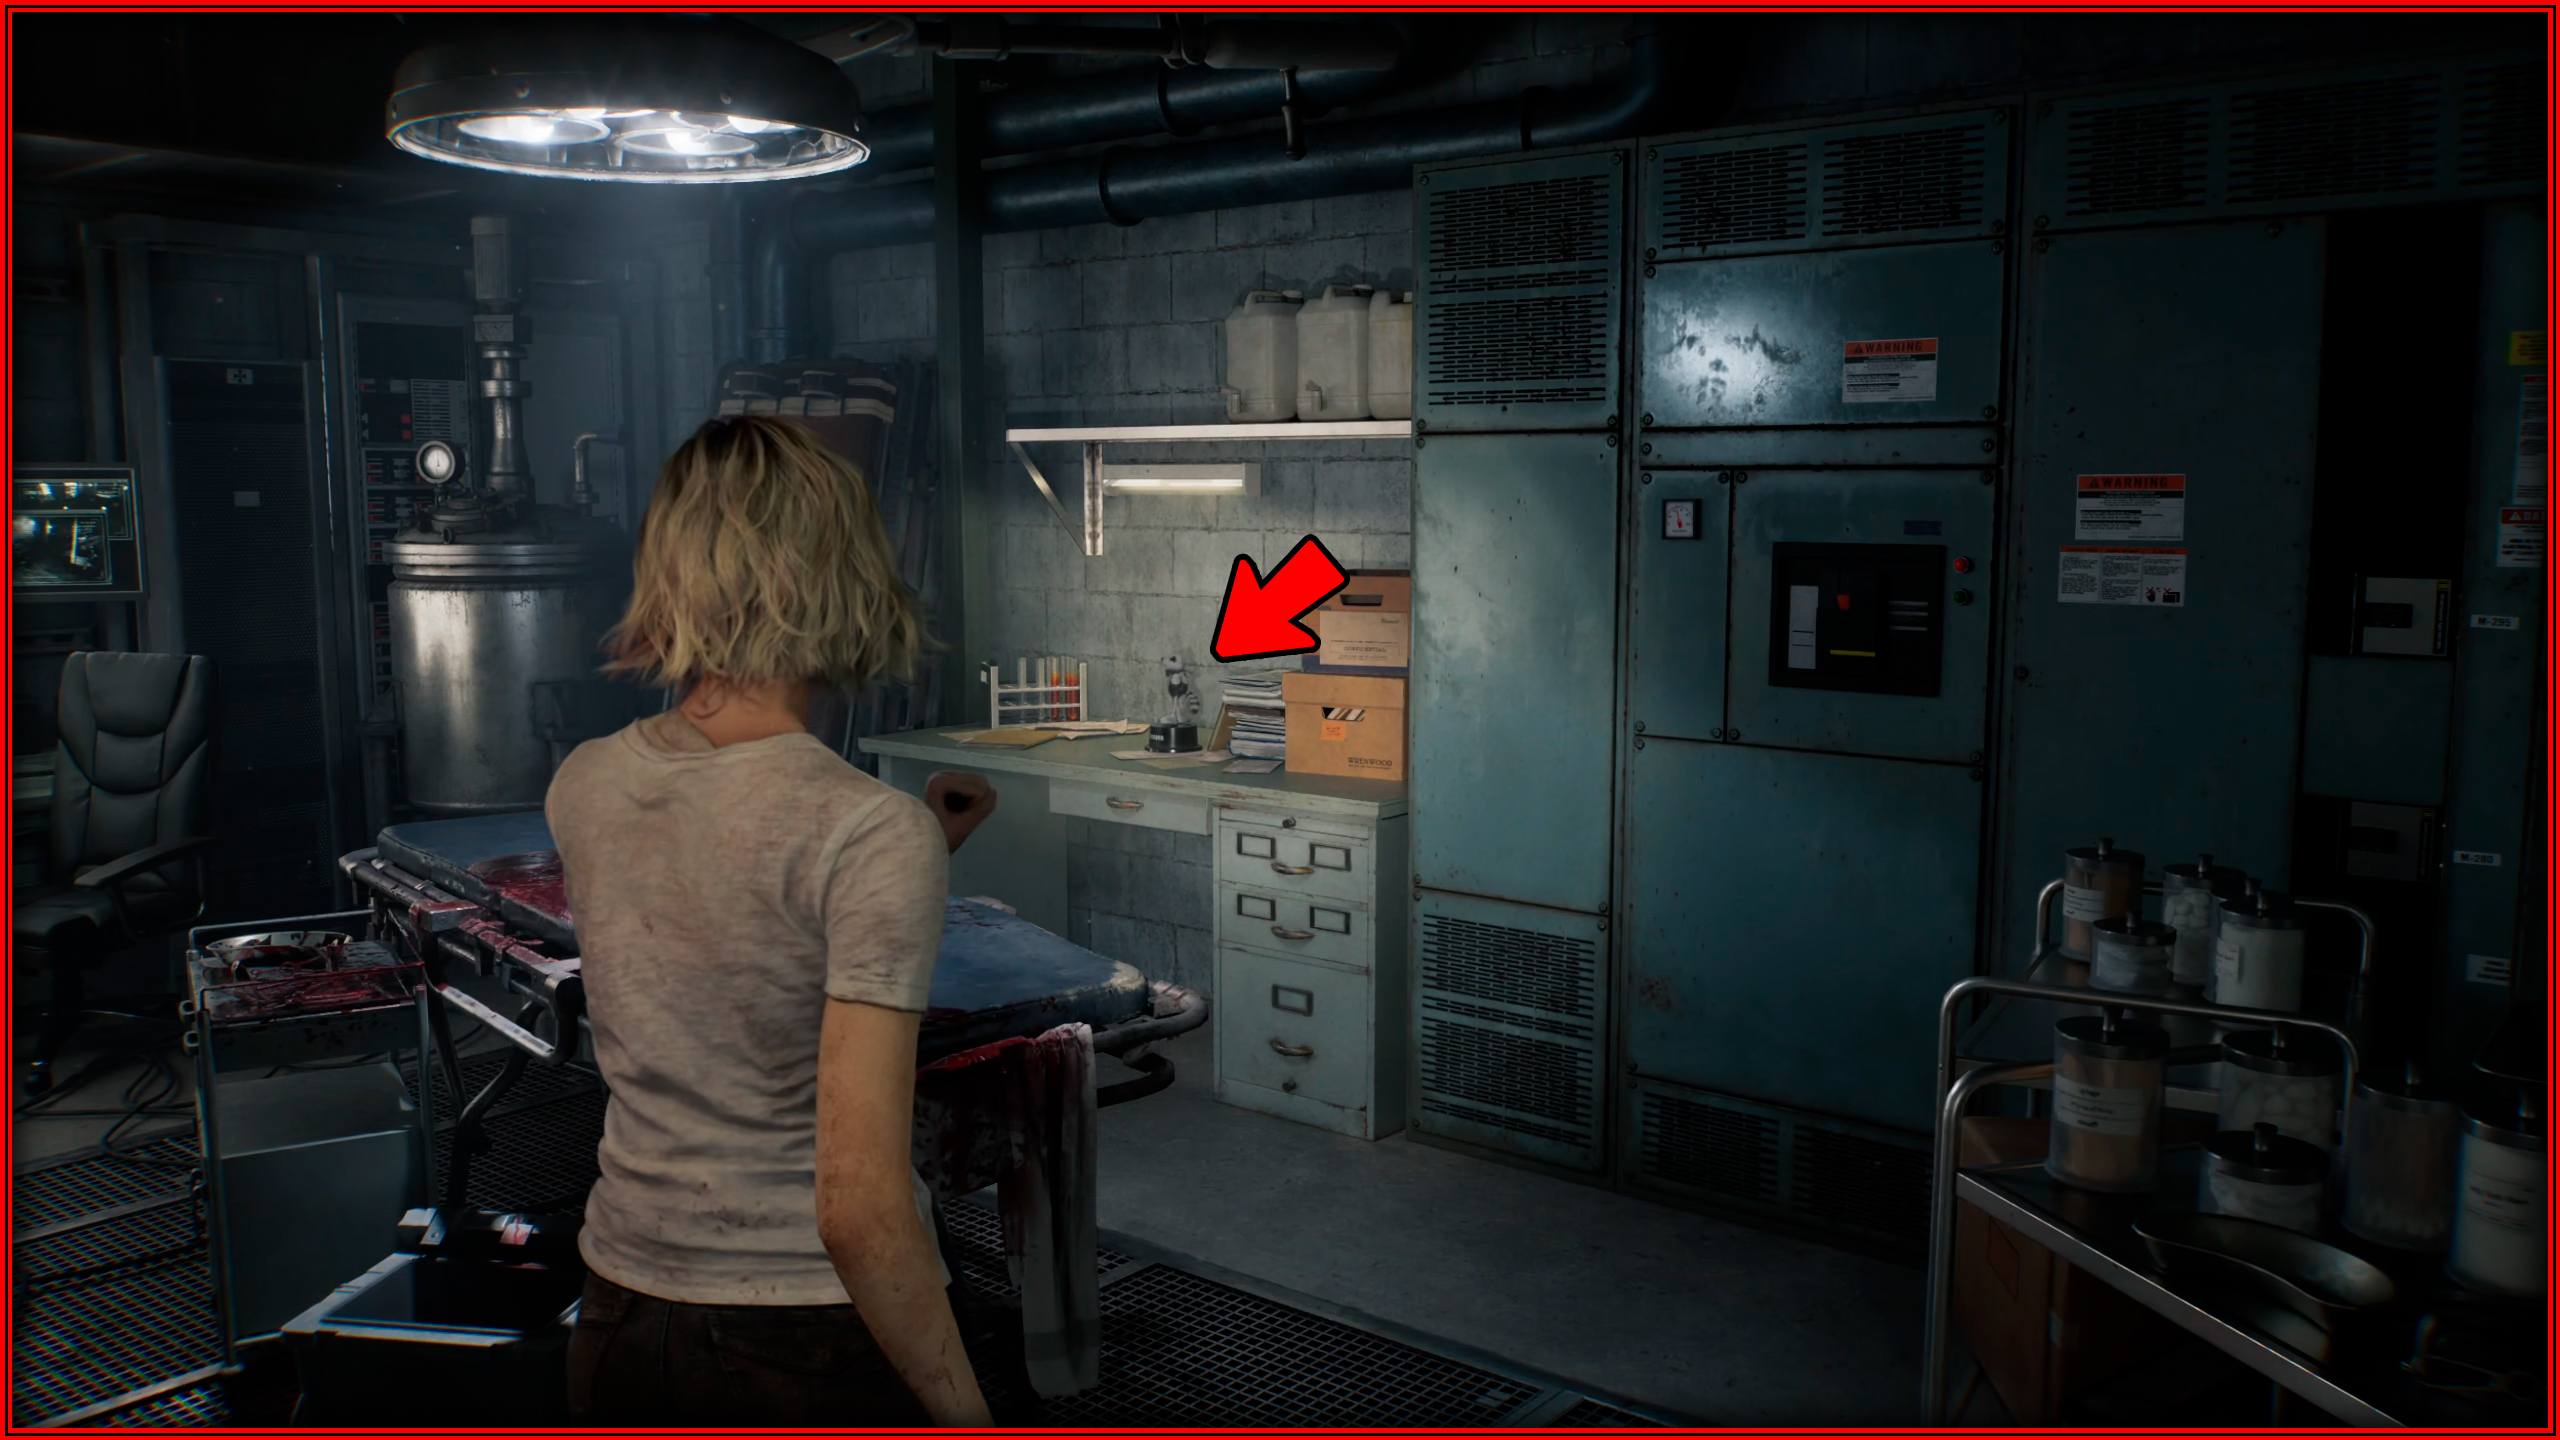
Private Lab: On the desk.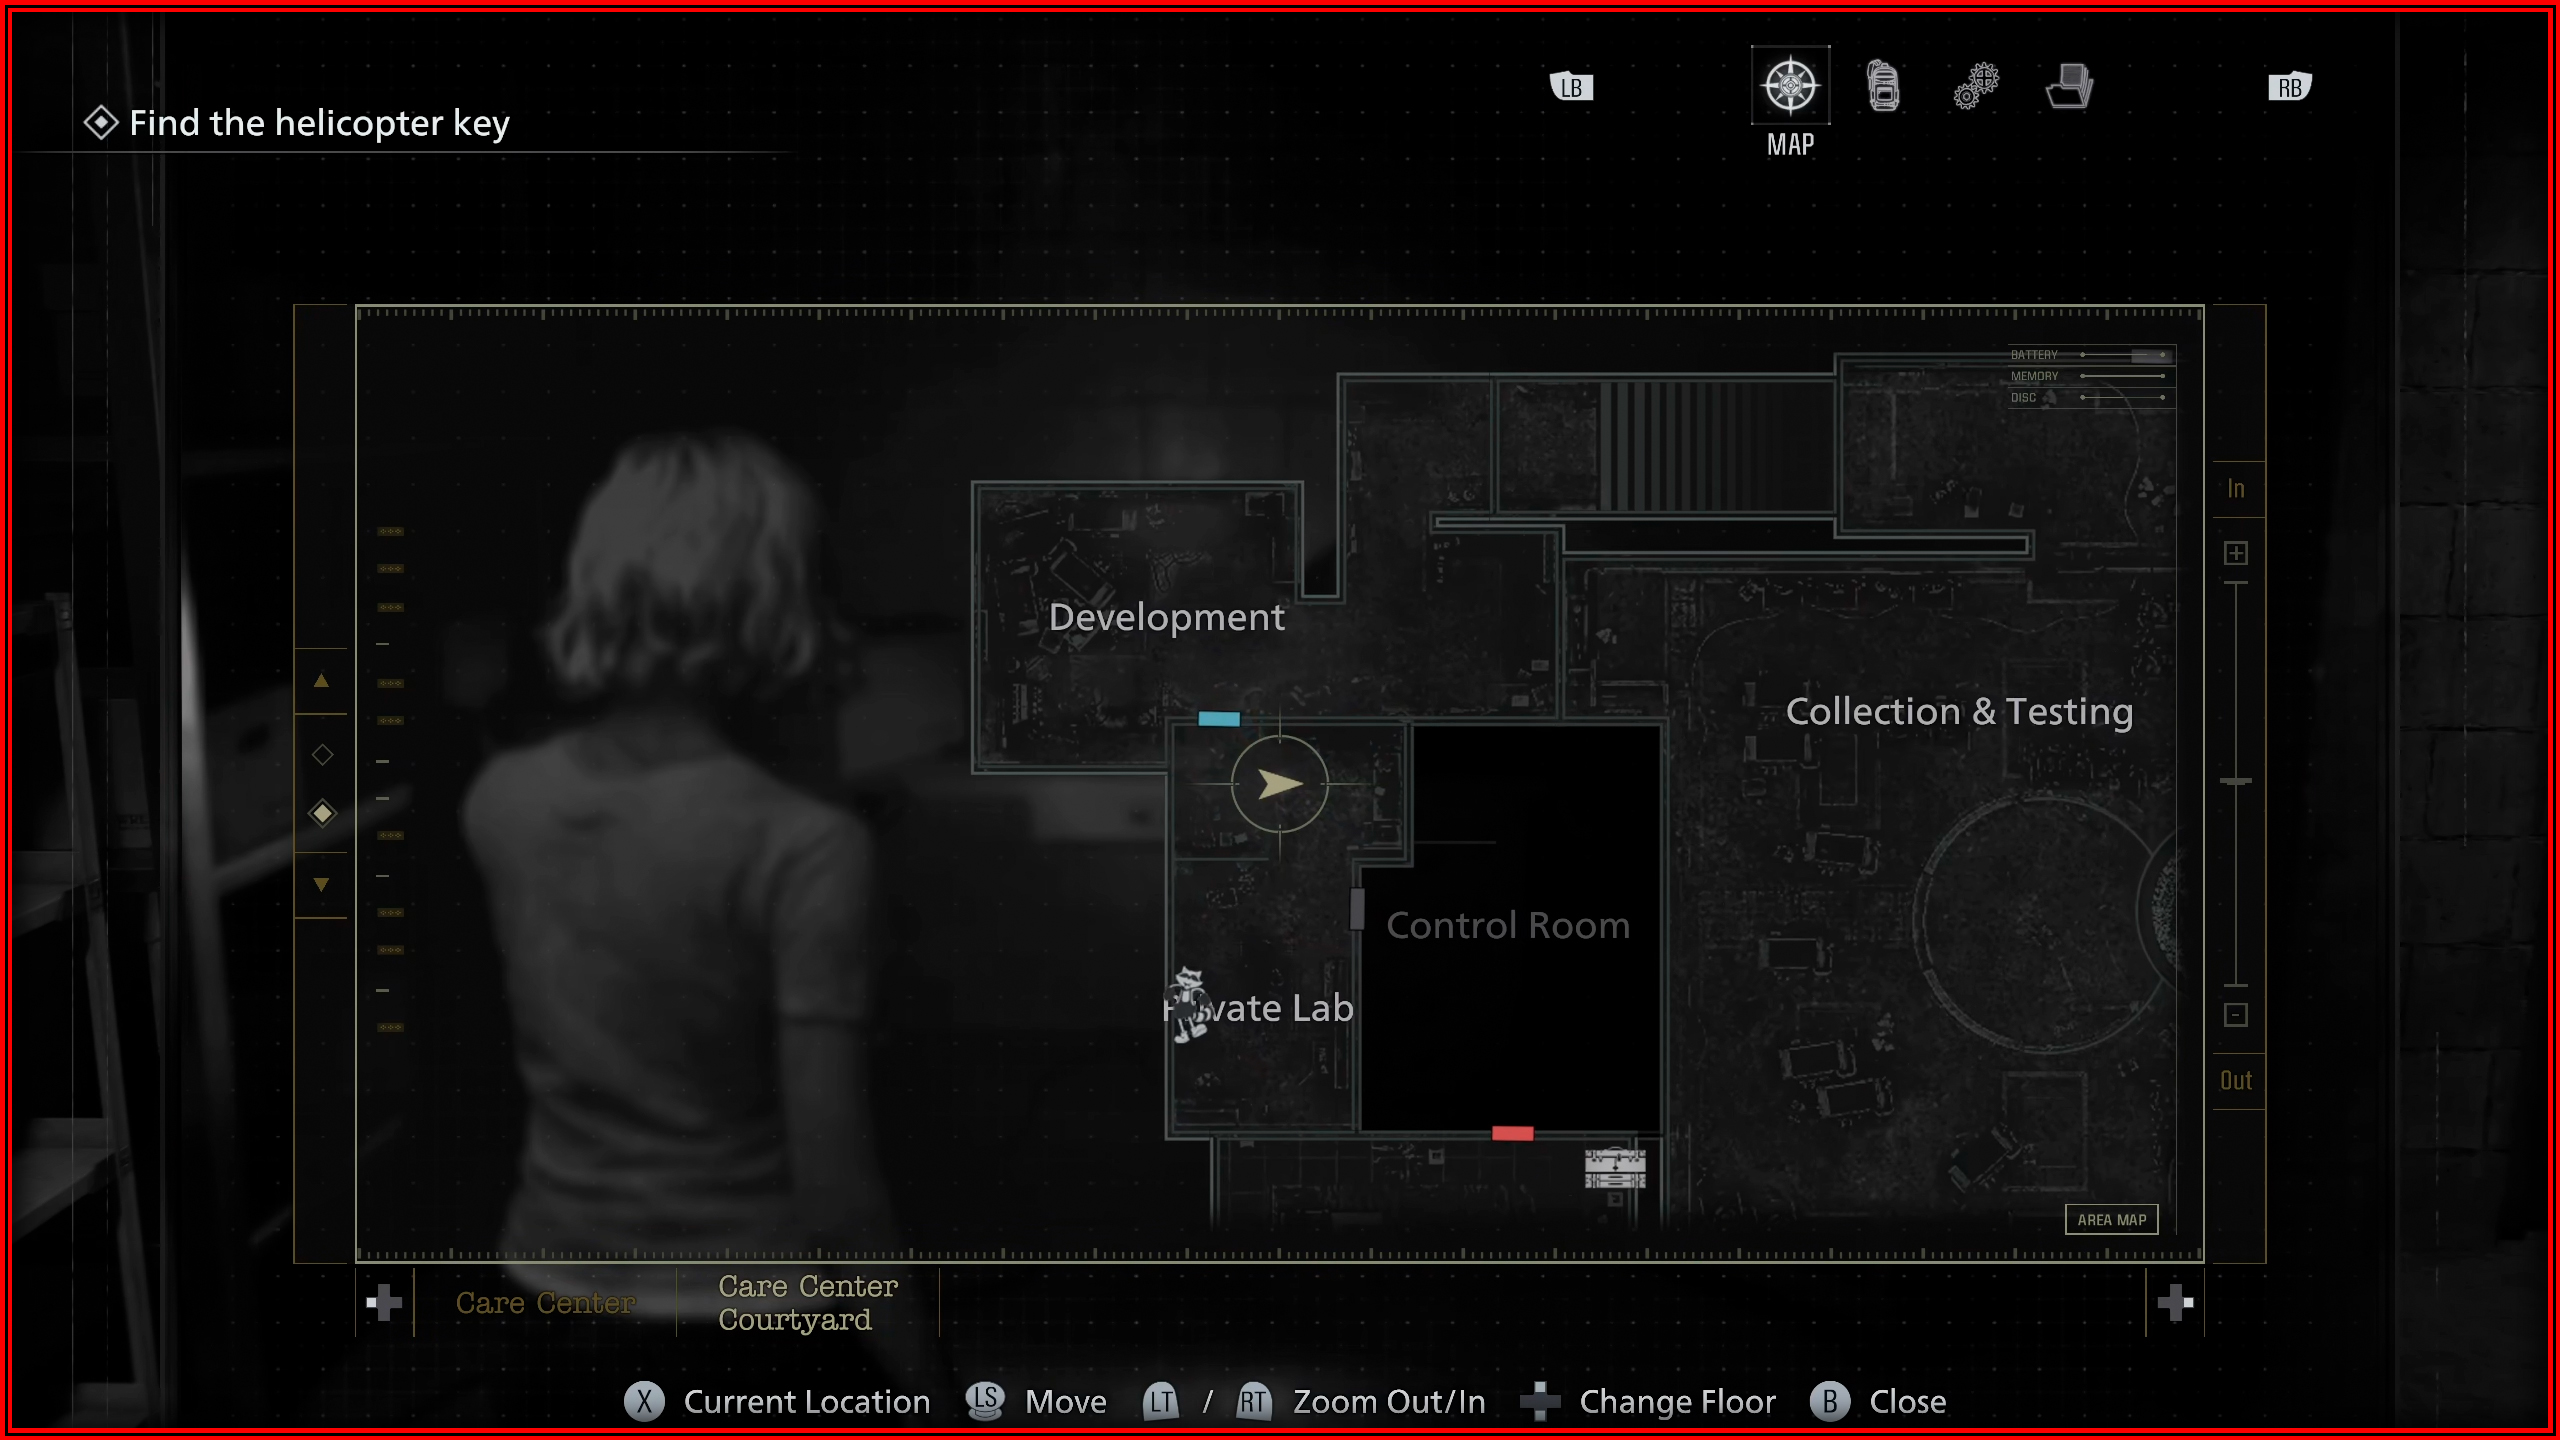
Water Treatment Plant – Grace
File 47/75 - Roof Hatch Manual
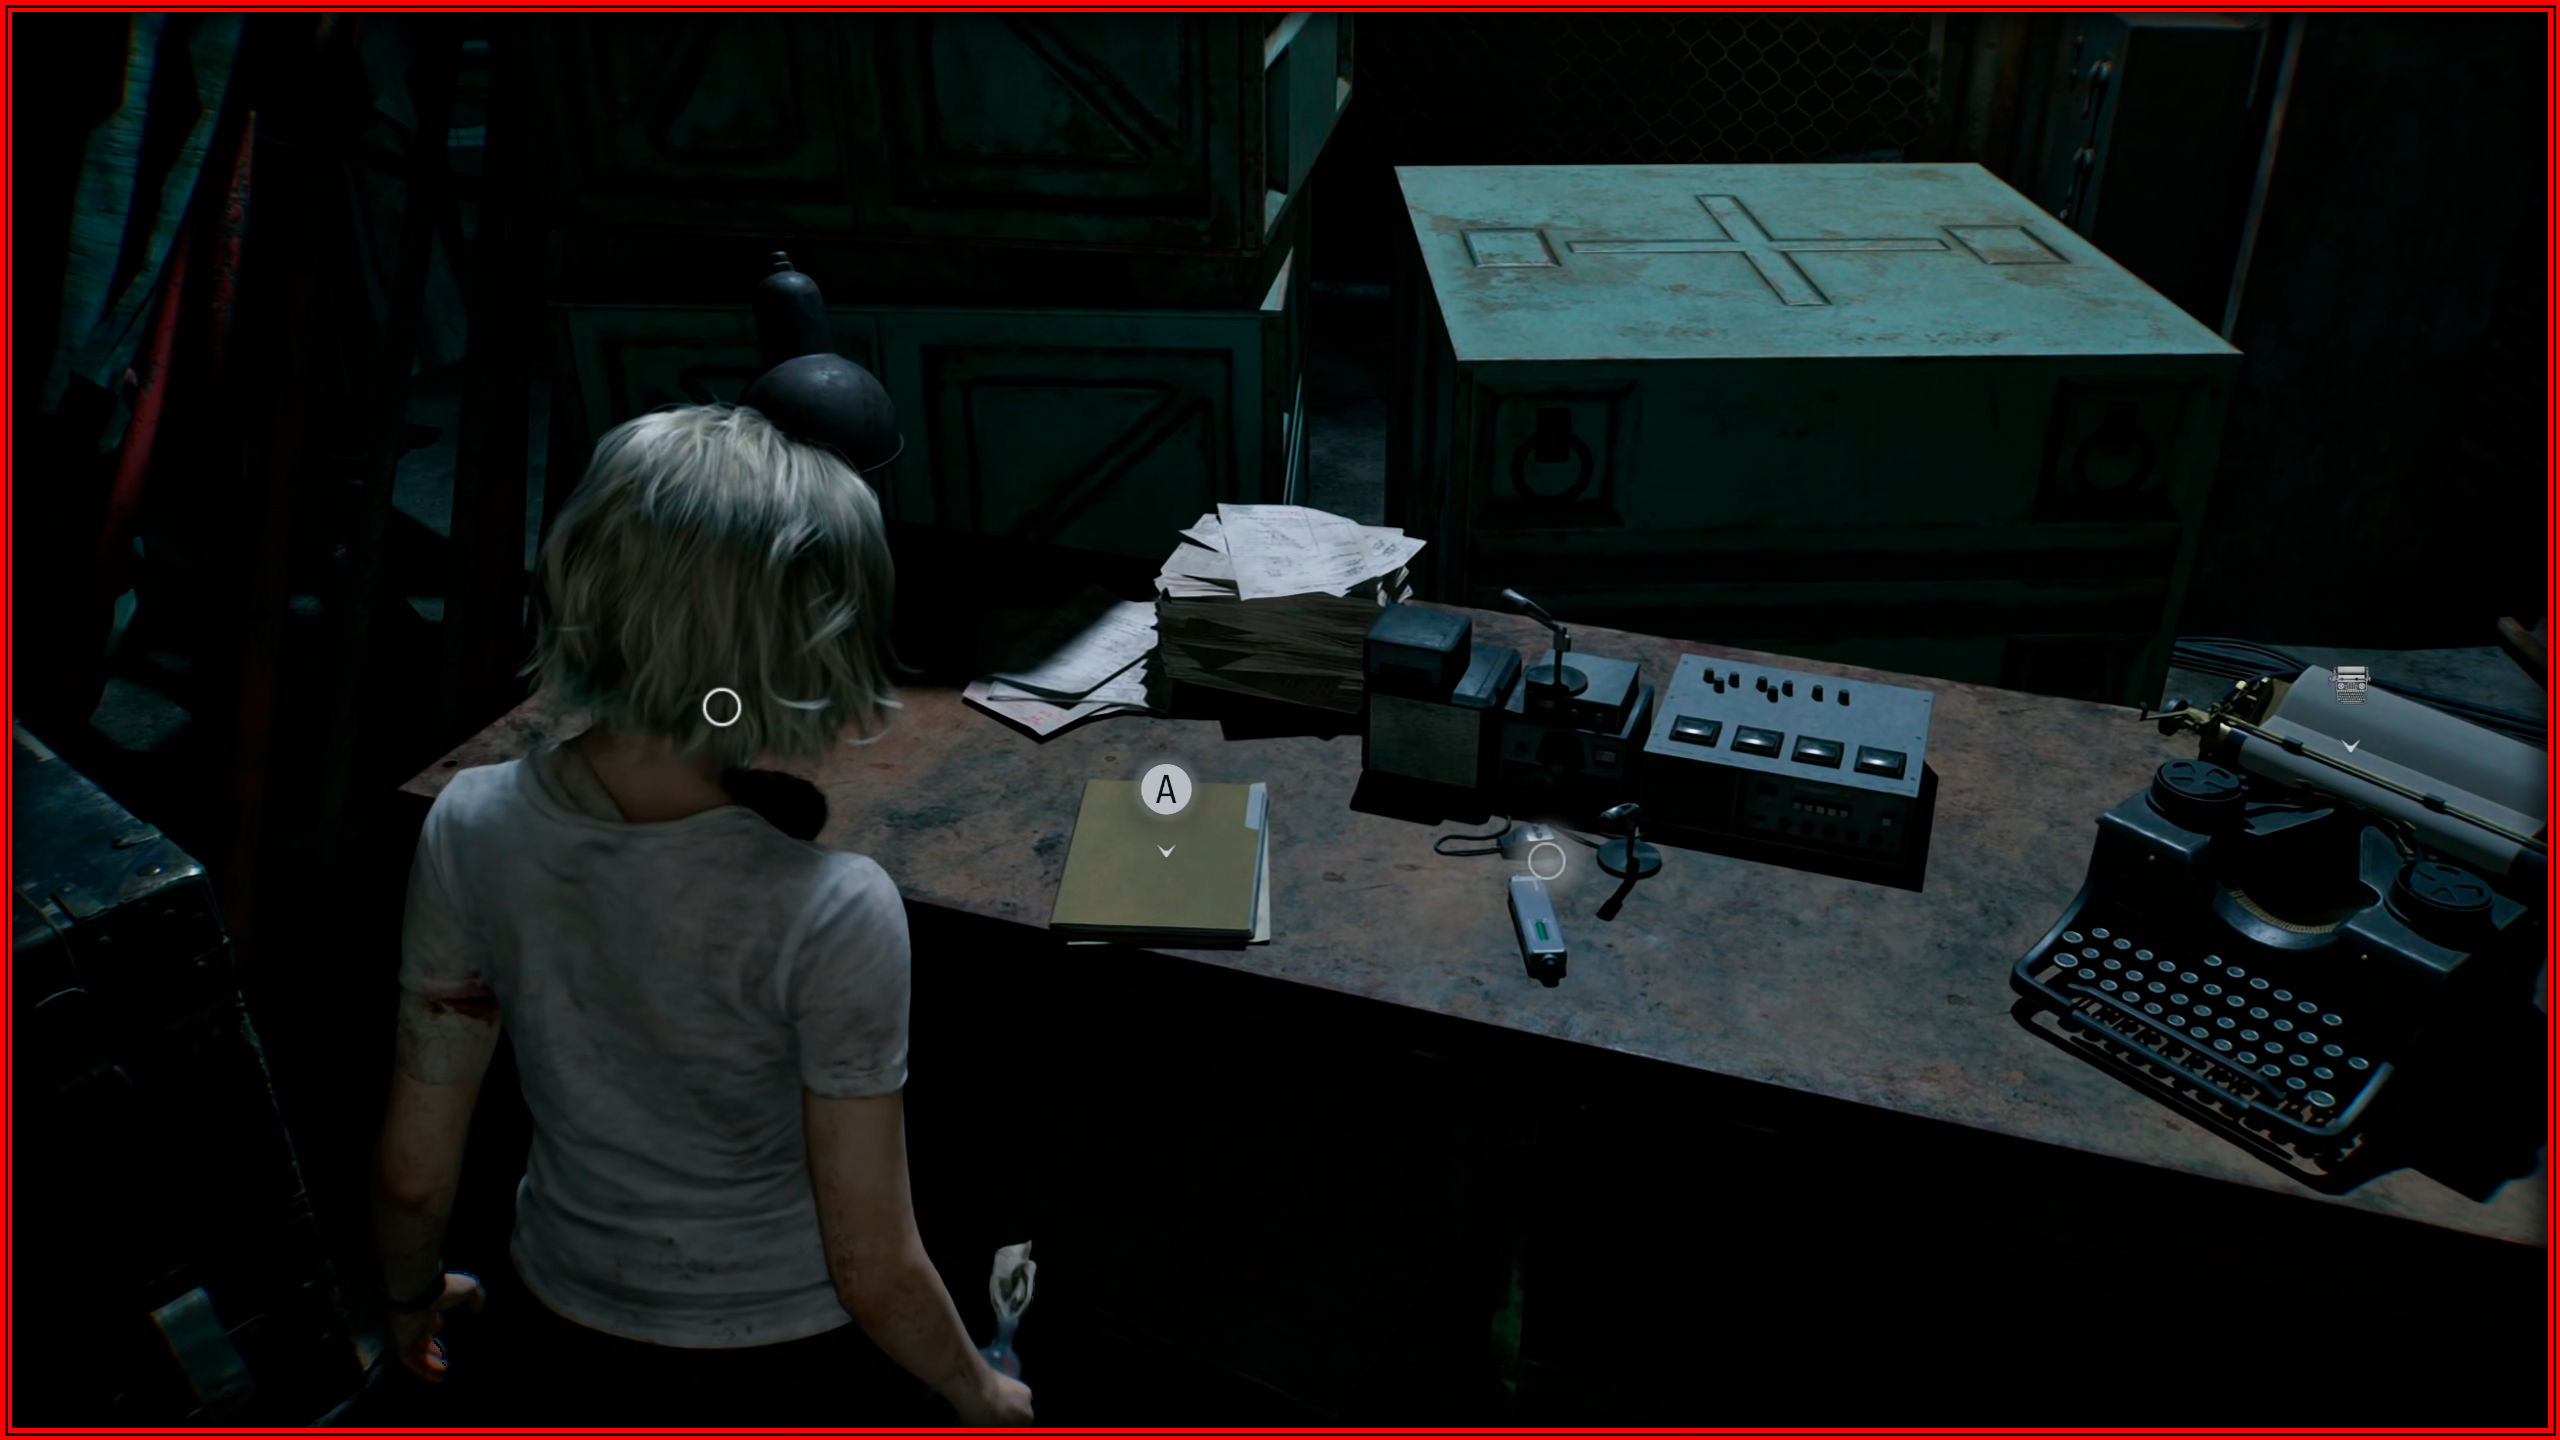
Storage Bay: On the desk next to the typewriter.
East Raccoon City – Leon
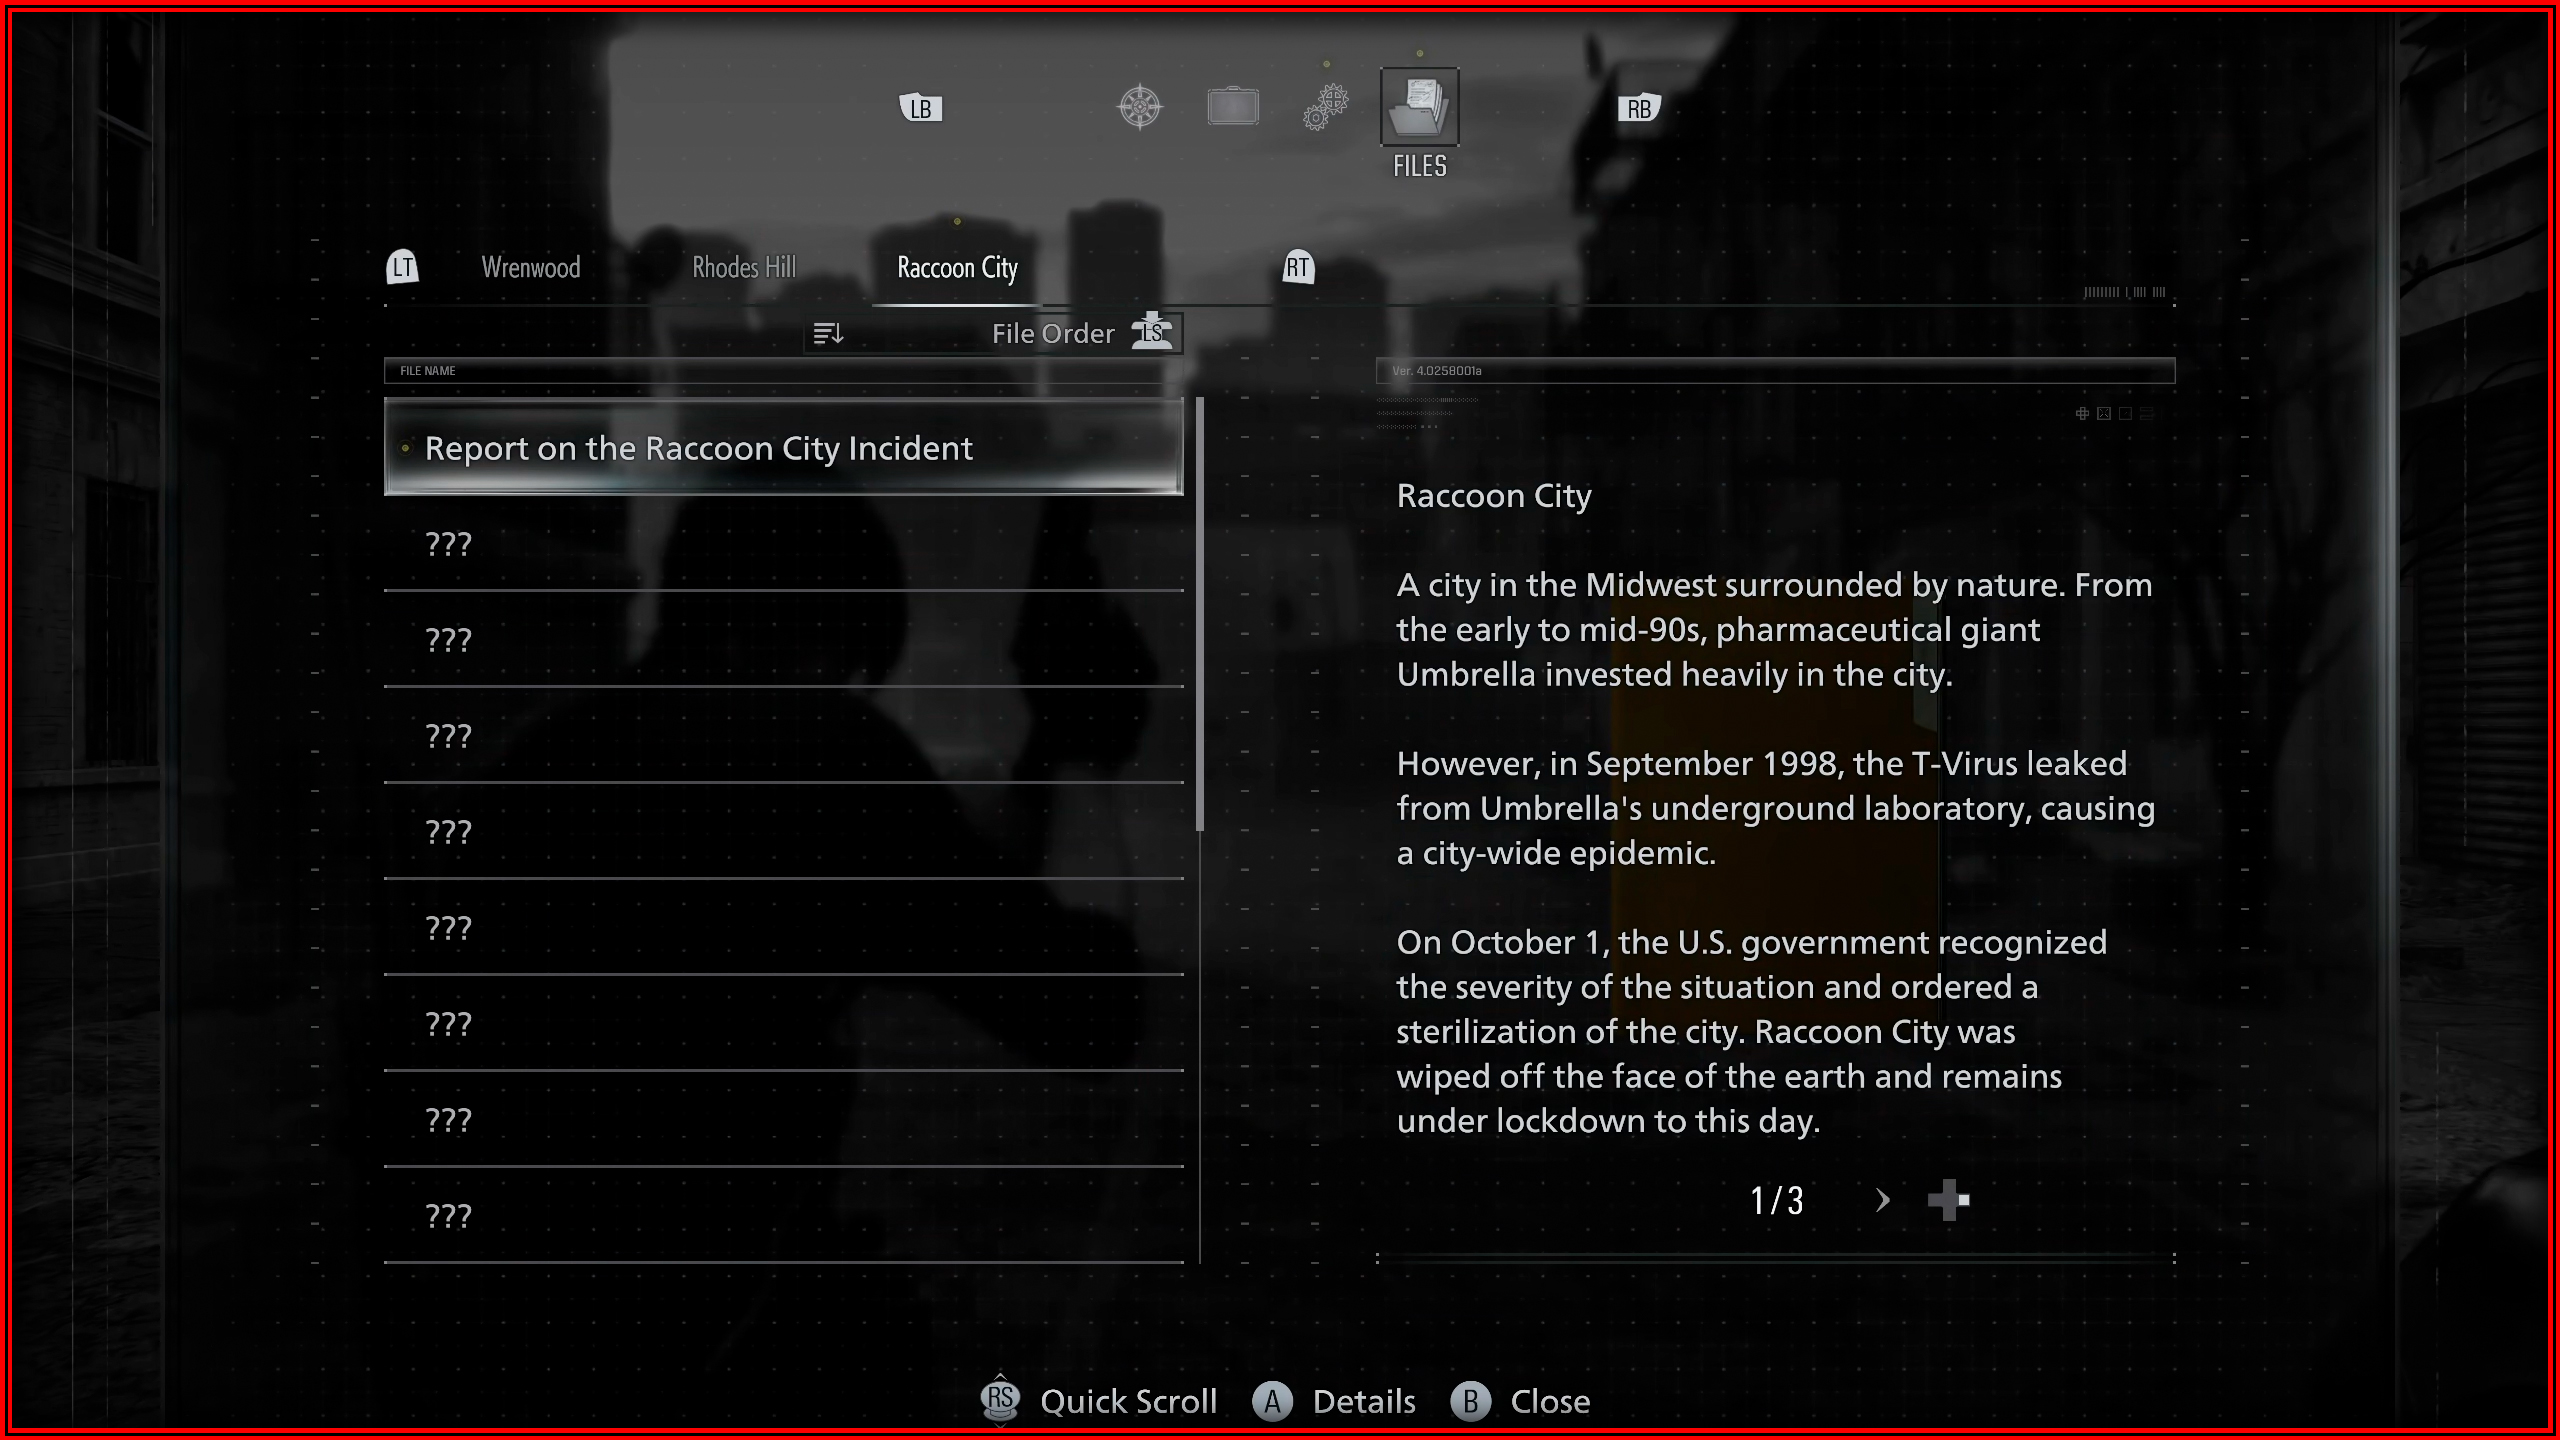
File 48/75 - Report on the Raccoon City Incident
Automatically obtained as you play as Leon in East Raccoon City.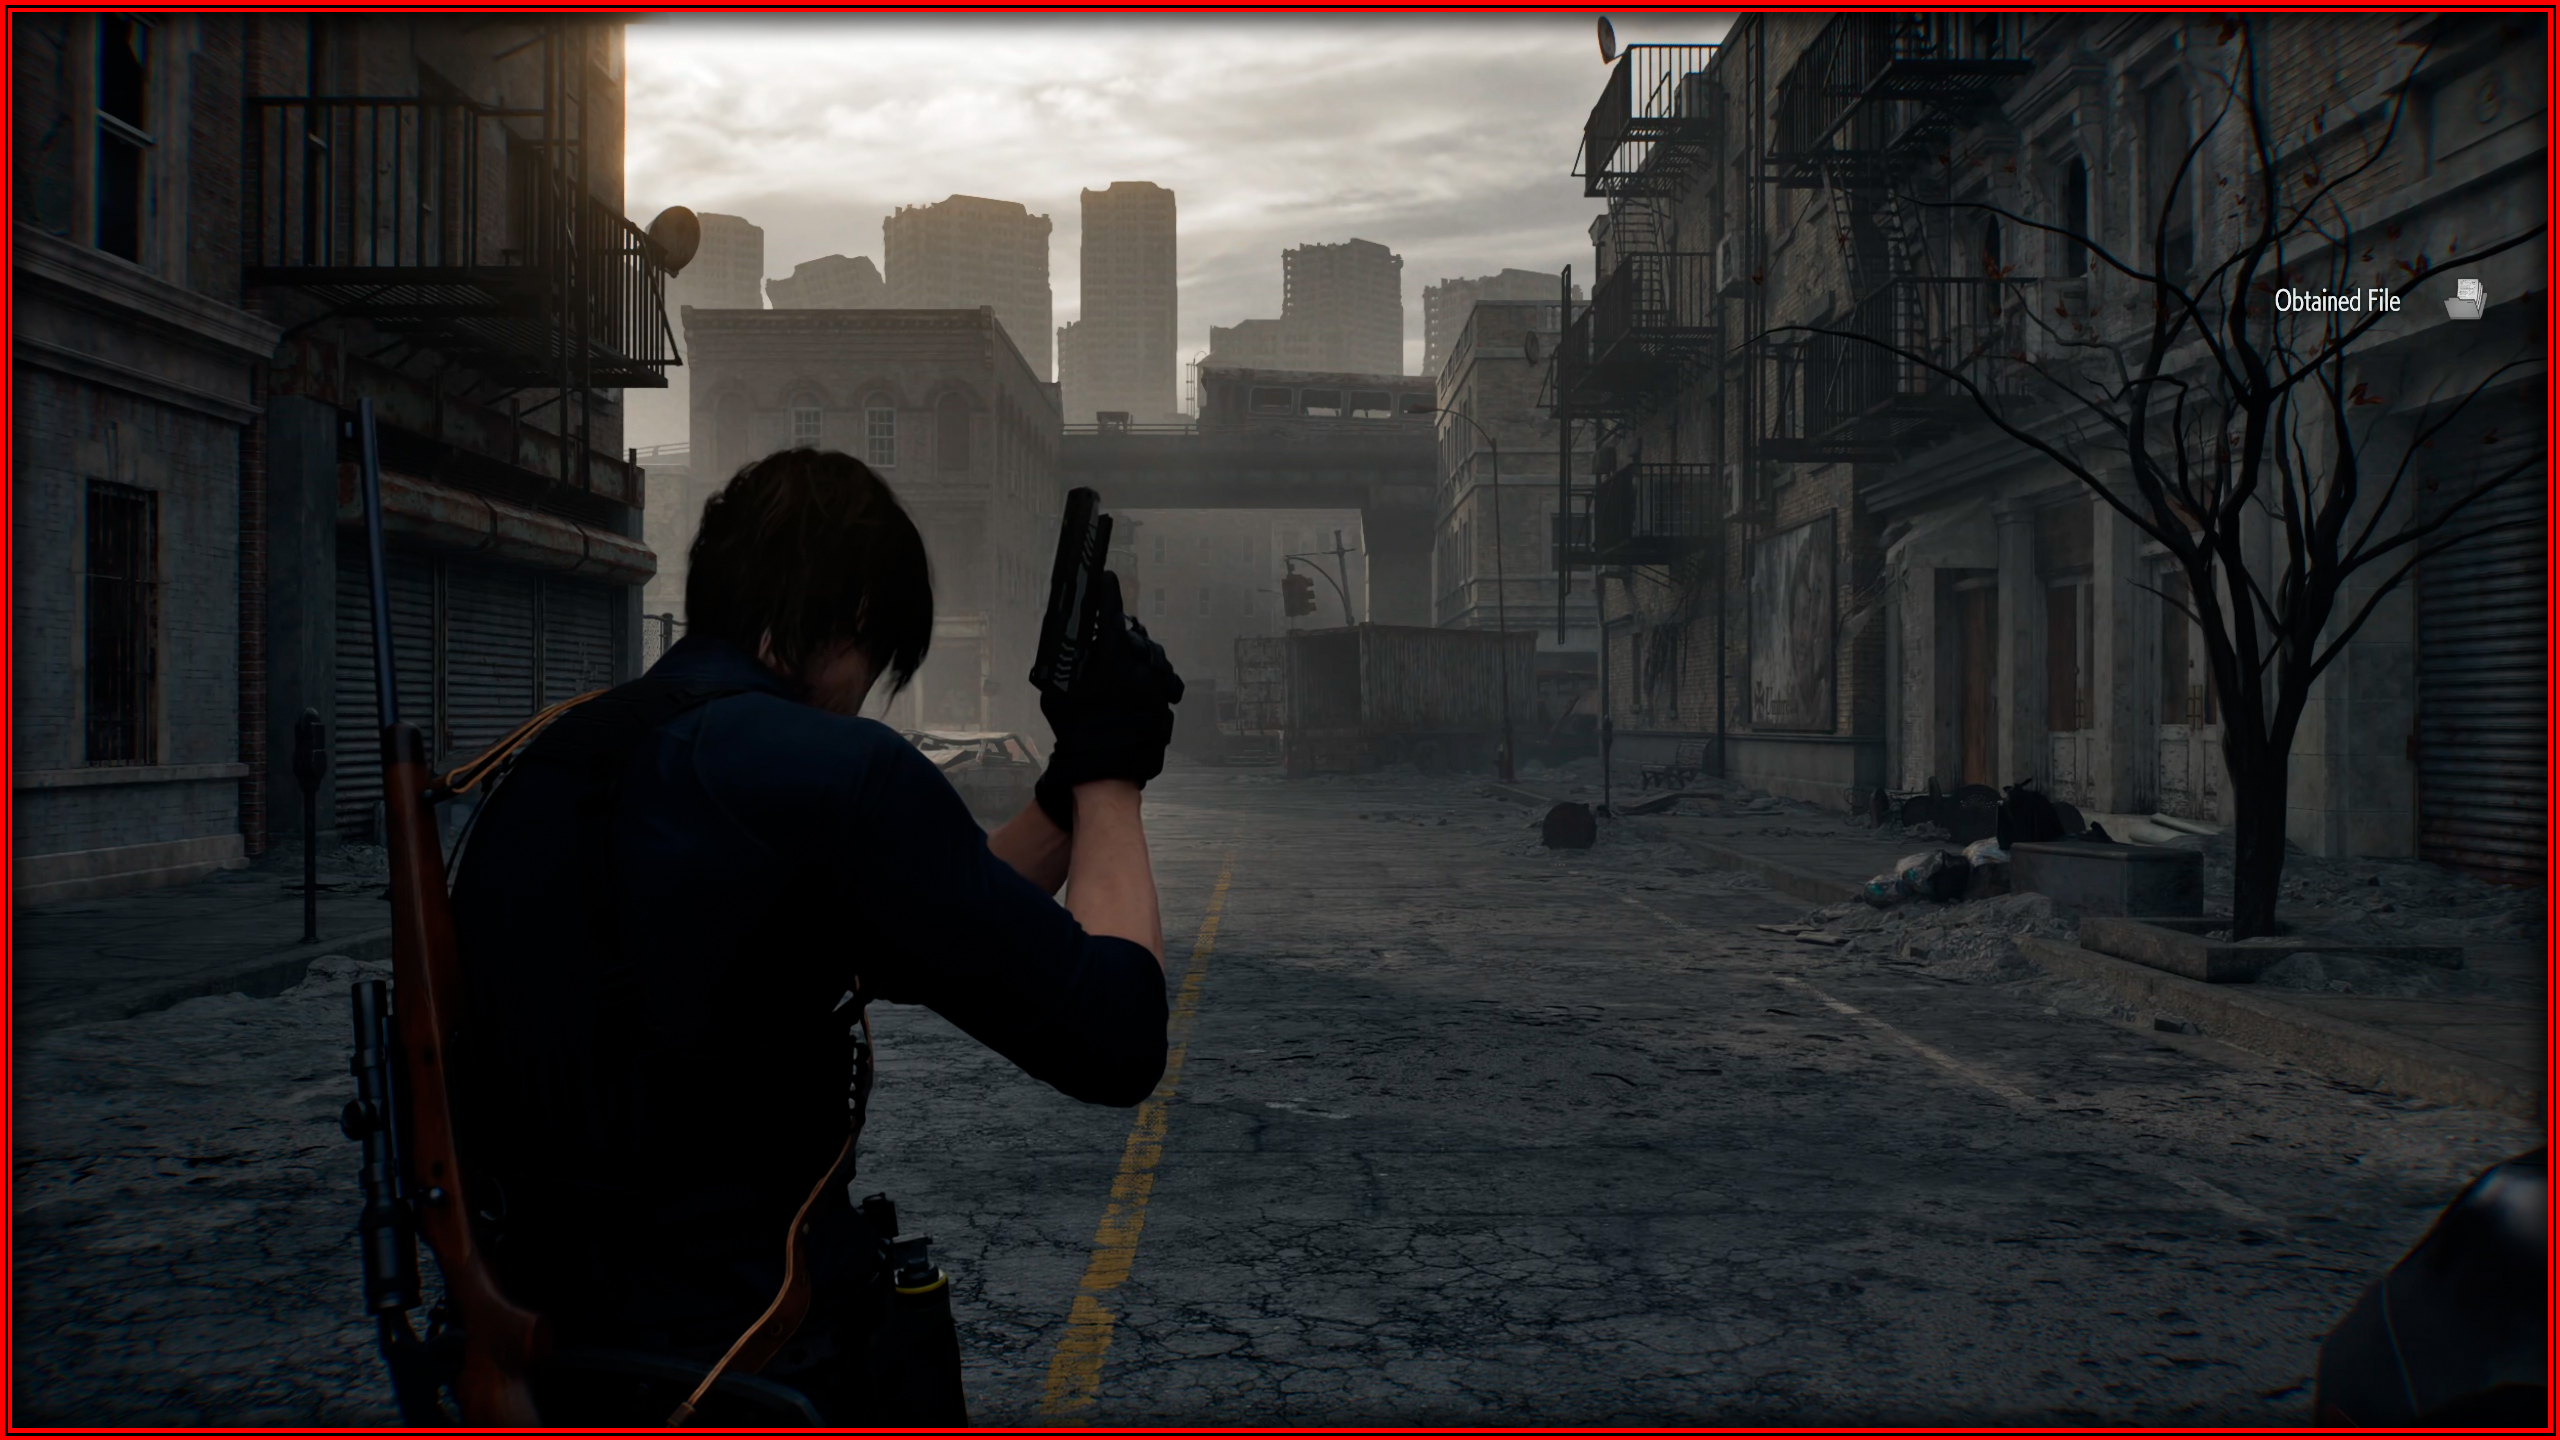
File 49/75 - Raccoon City Incident Newspaper
As soon as you start, a little ahead on the ground.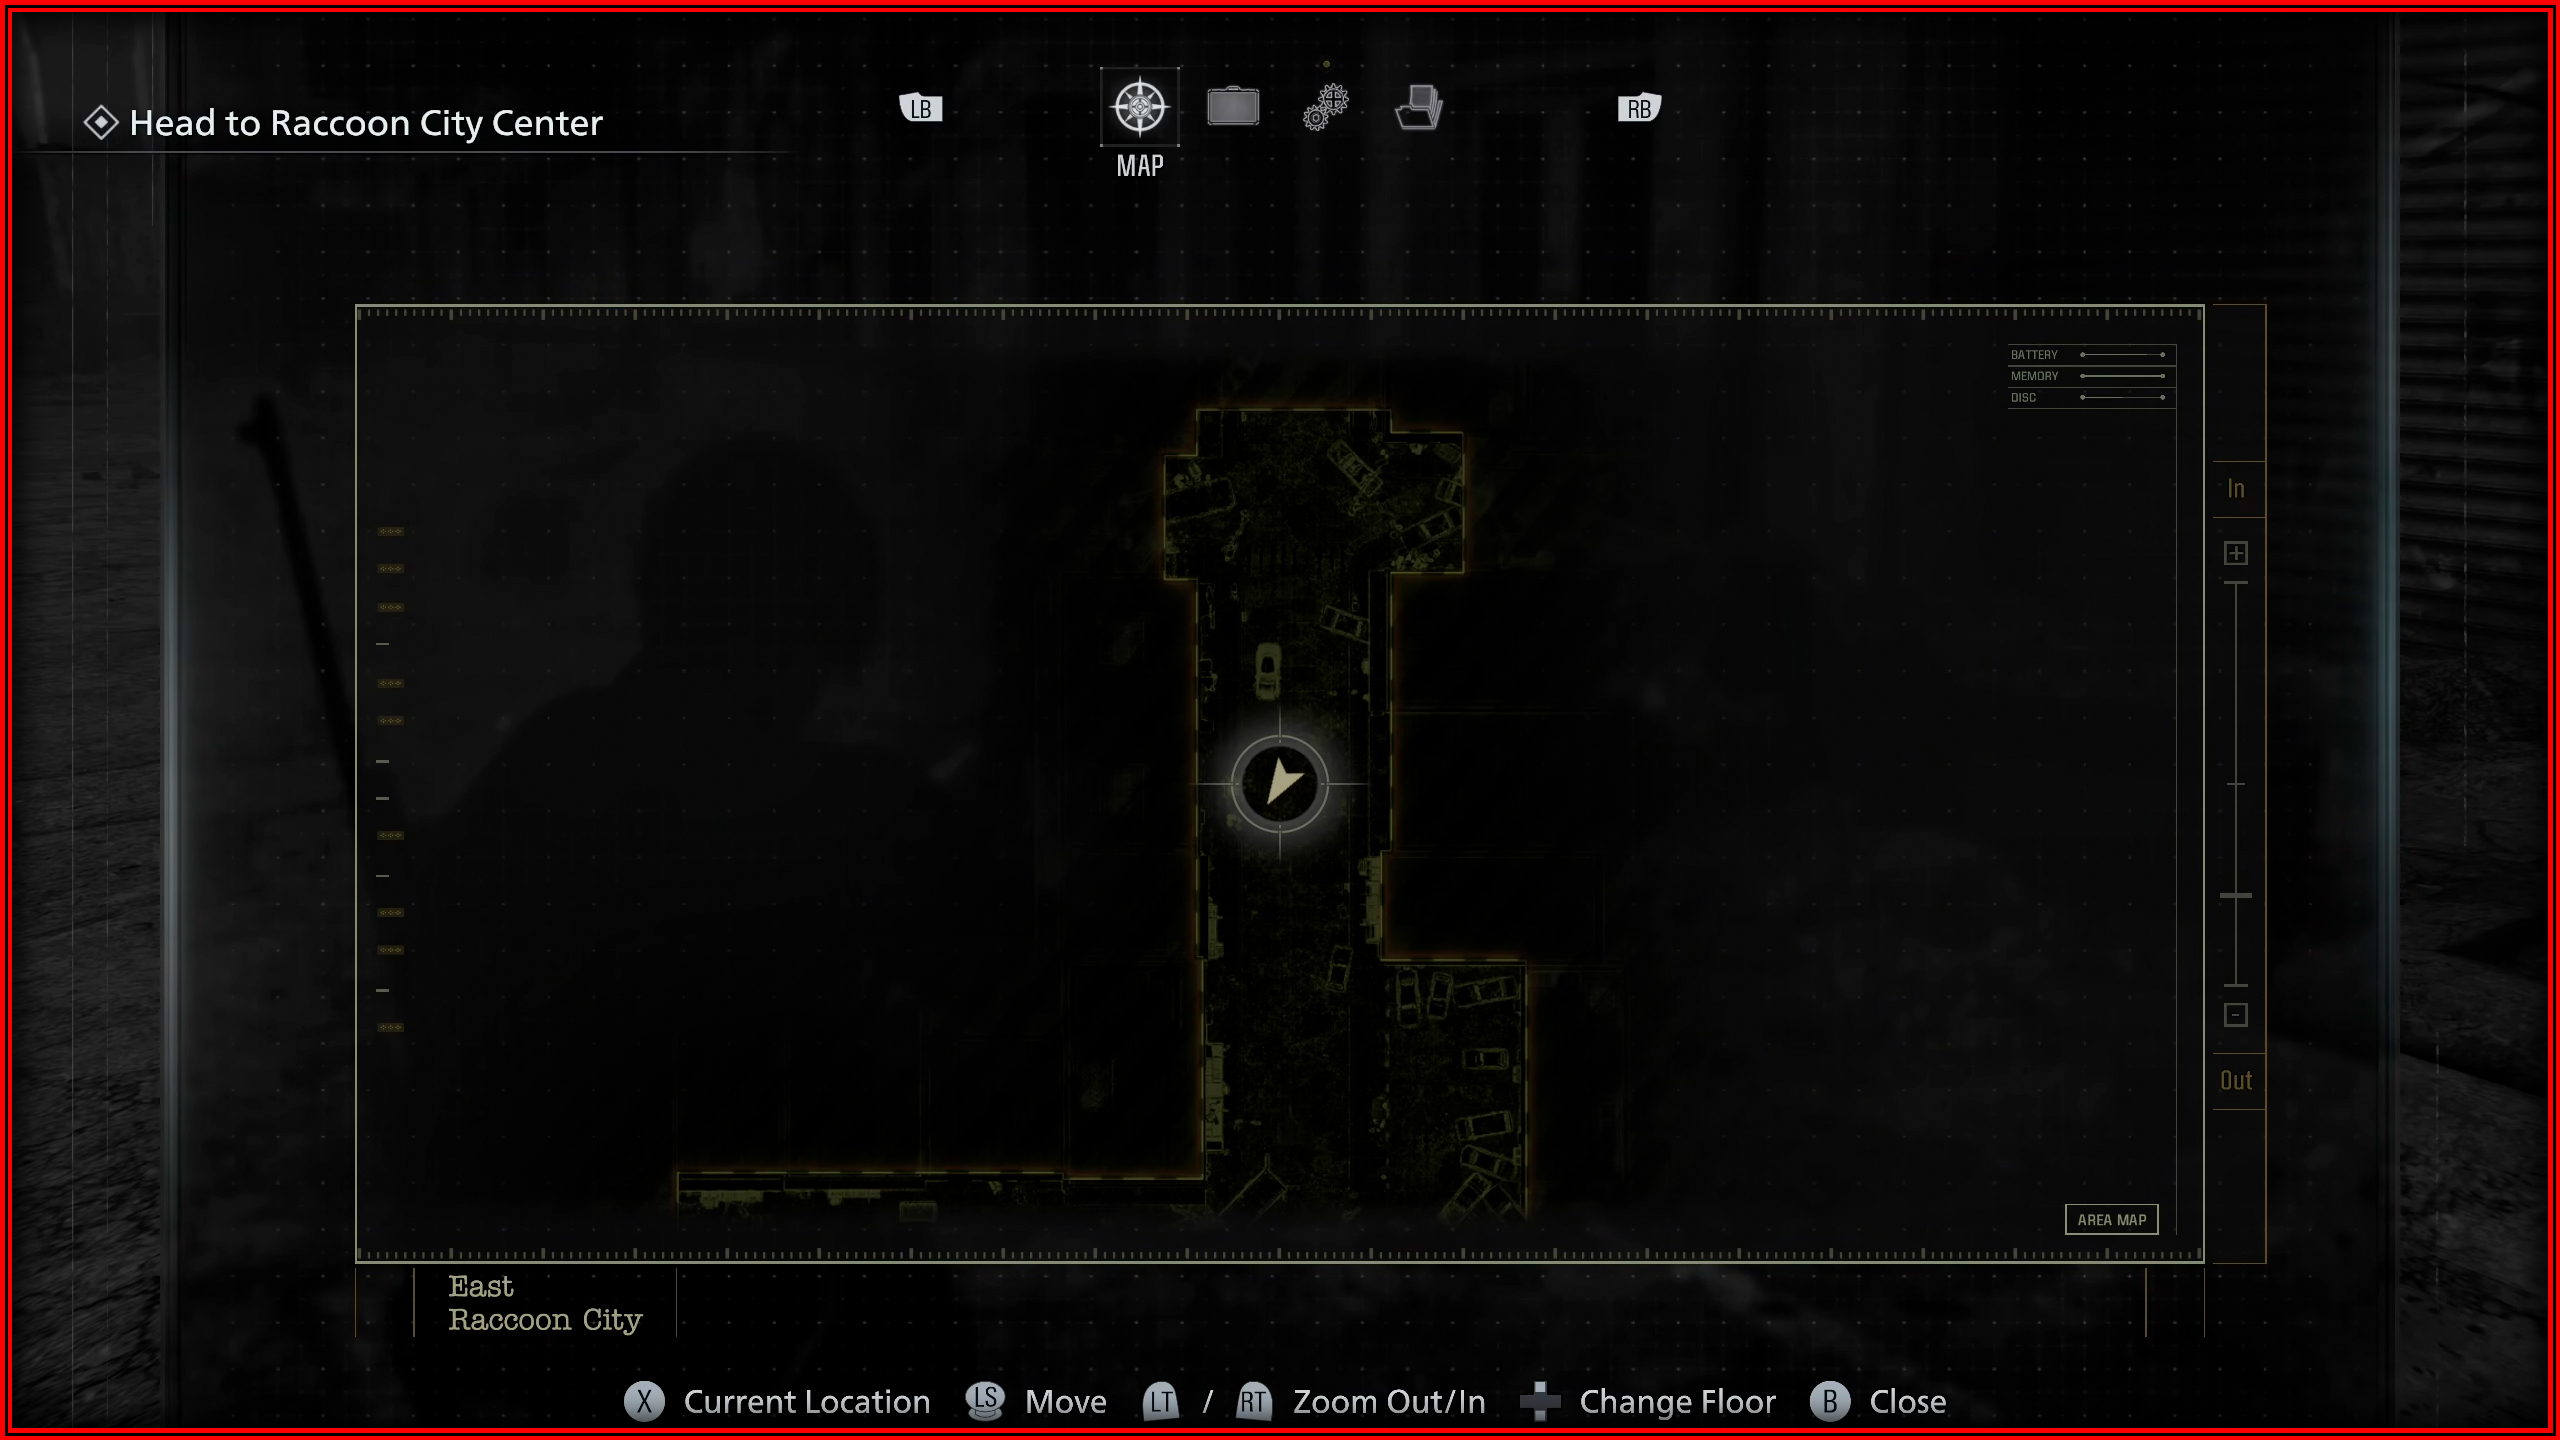
File 50/75 - Orders for the Engineer Corps
Central Camp: On the desk.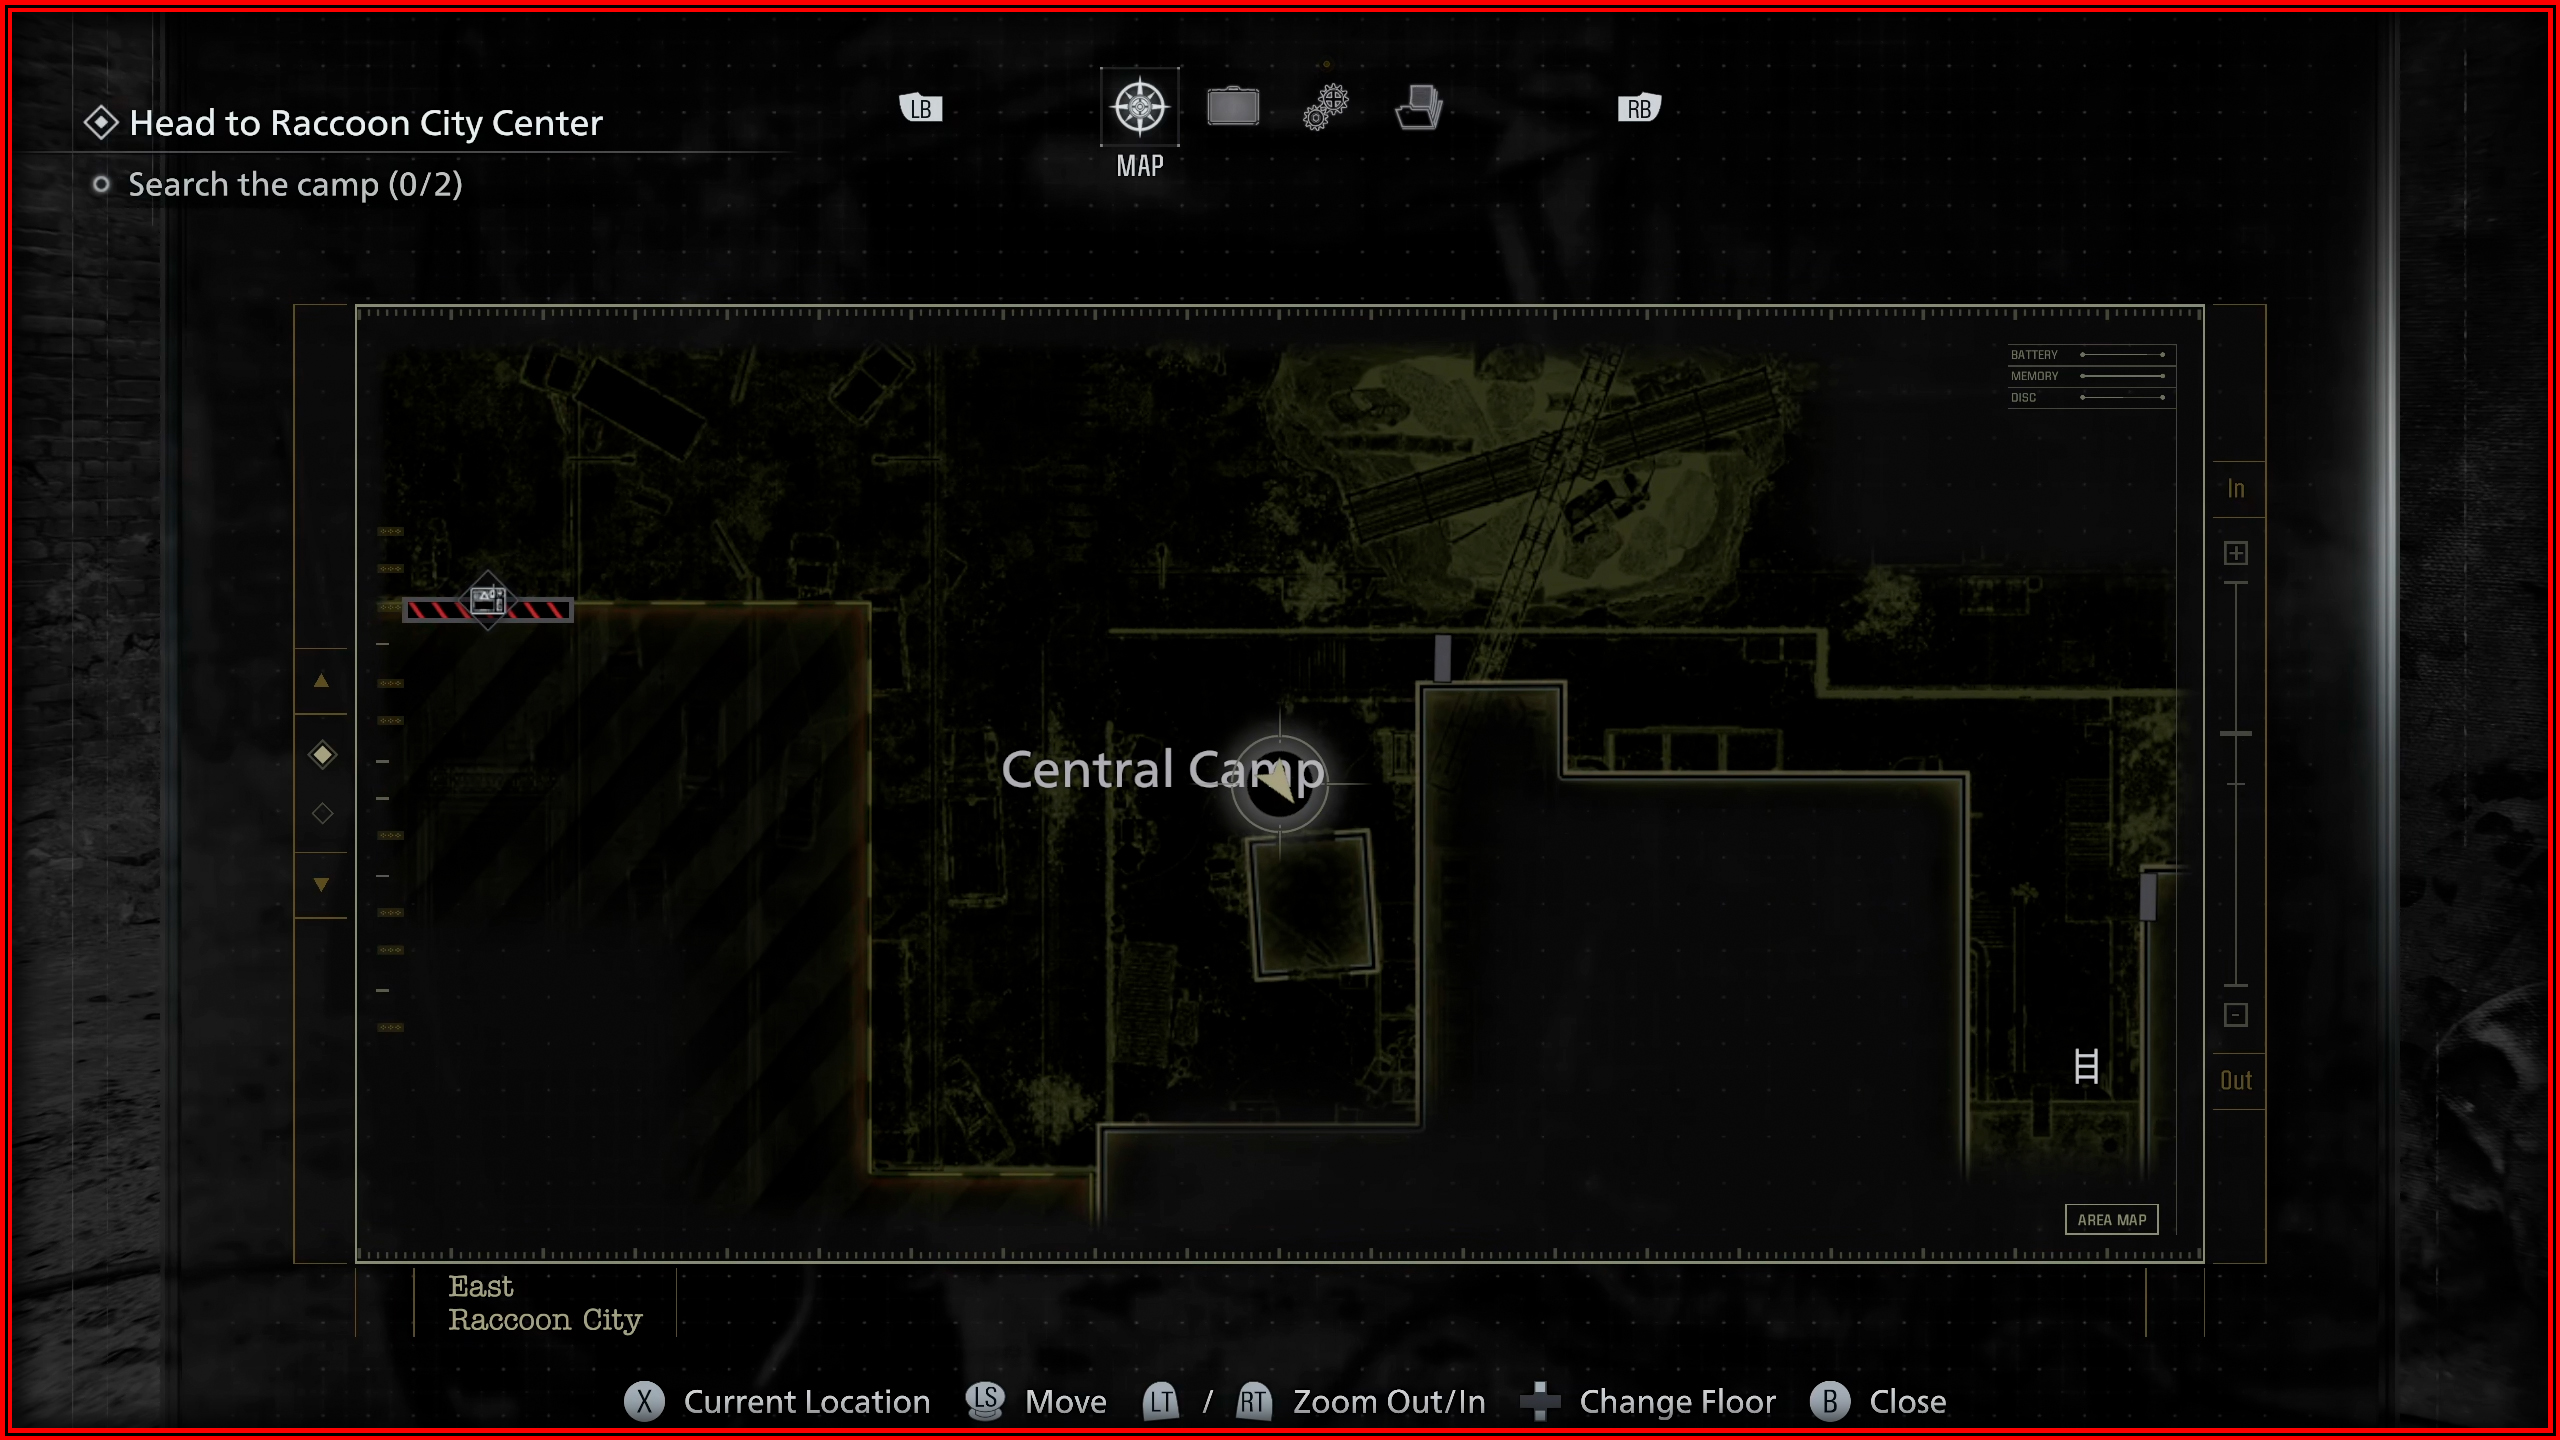
Case Closed - 3
File 51/75 - Battery Storage Locations
Underground Parking Garage: Next to the fuse box.
File 52/75 - Inventory List
After the cutscene where you get the BSAA Container Keys, in the open container.
File 53/75 - Engineer Corps Note
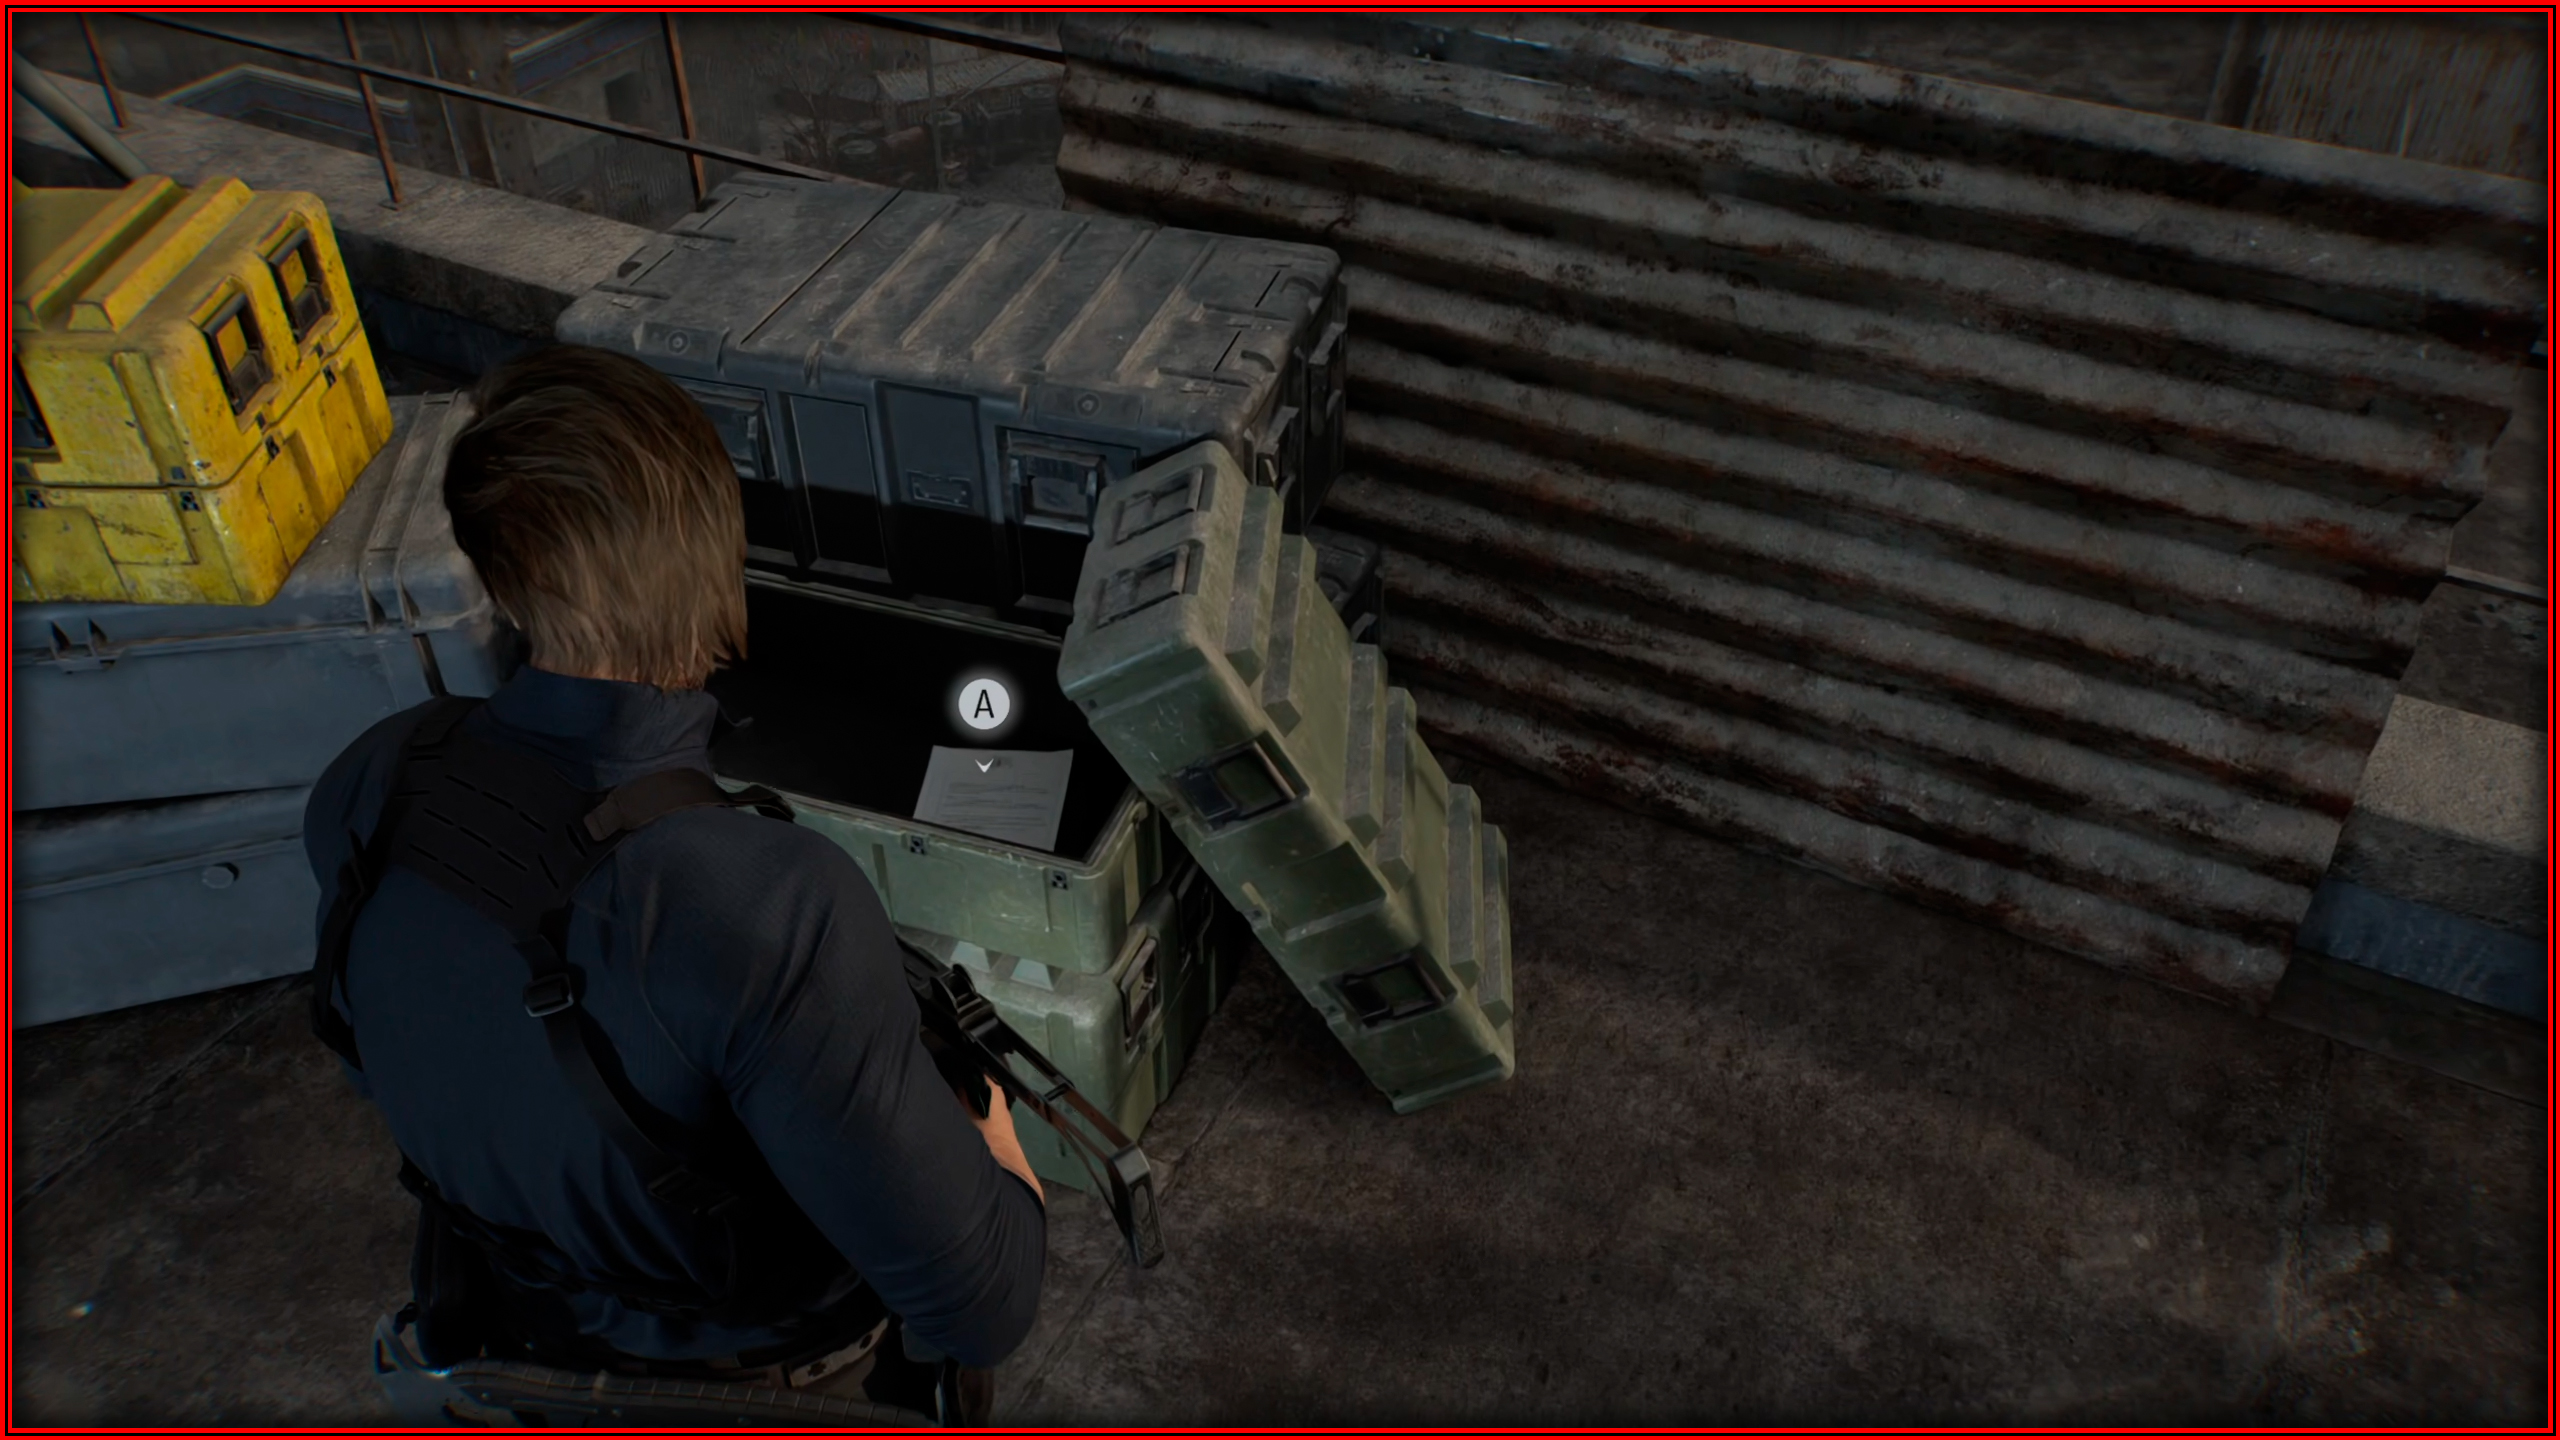
Cedarbrook Apartments Roof: Head up to the roof and look right beside the yellow box holding the Broken Signal Receiver.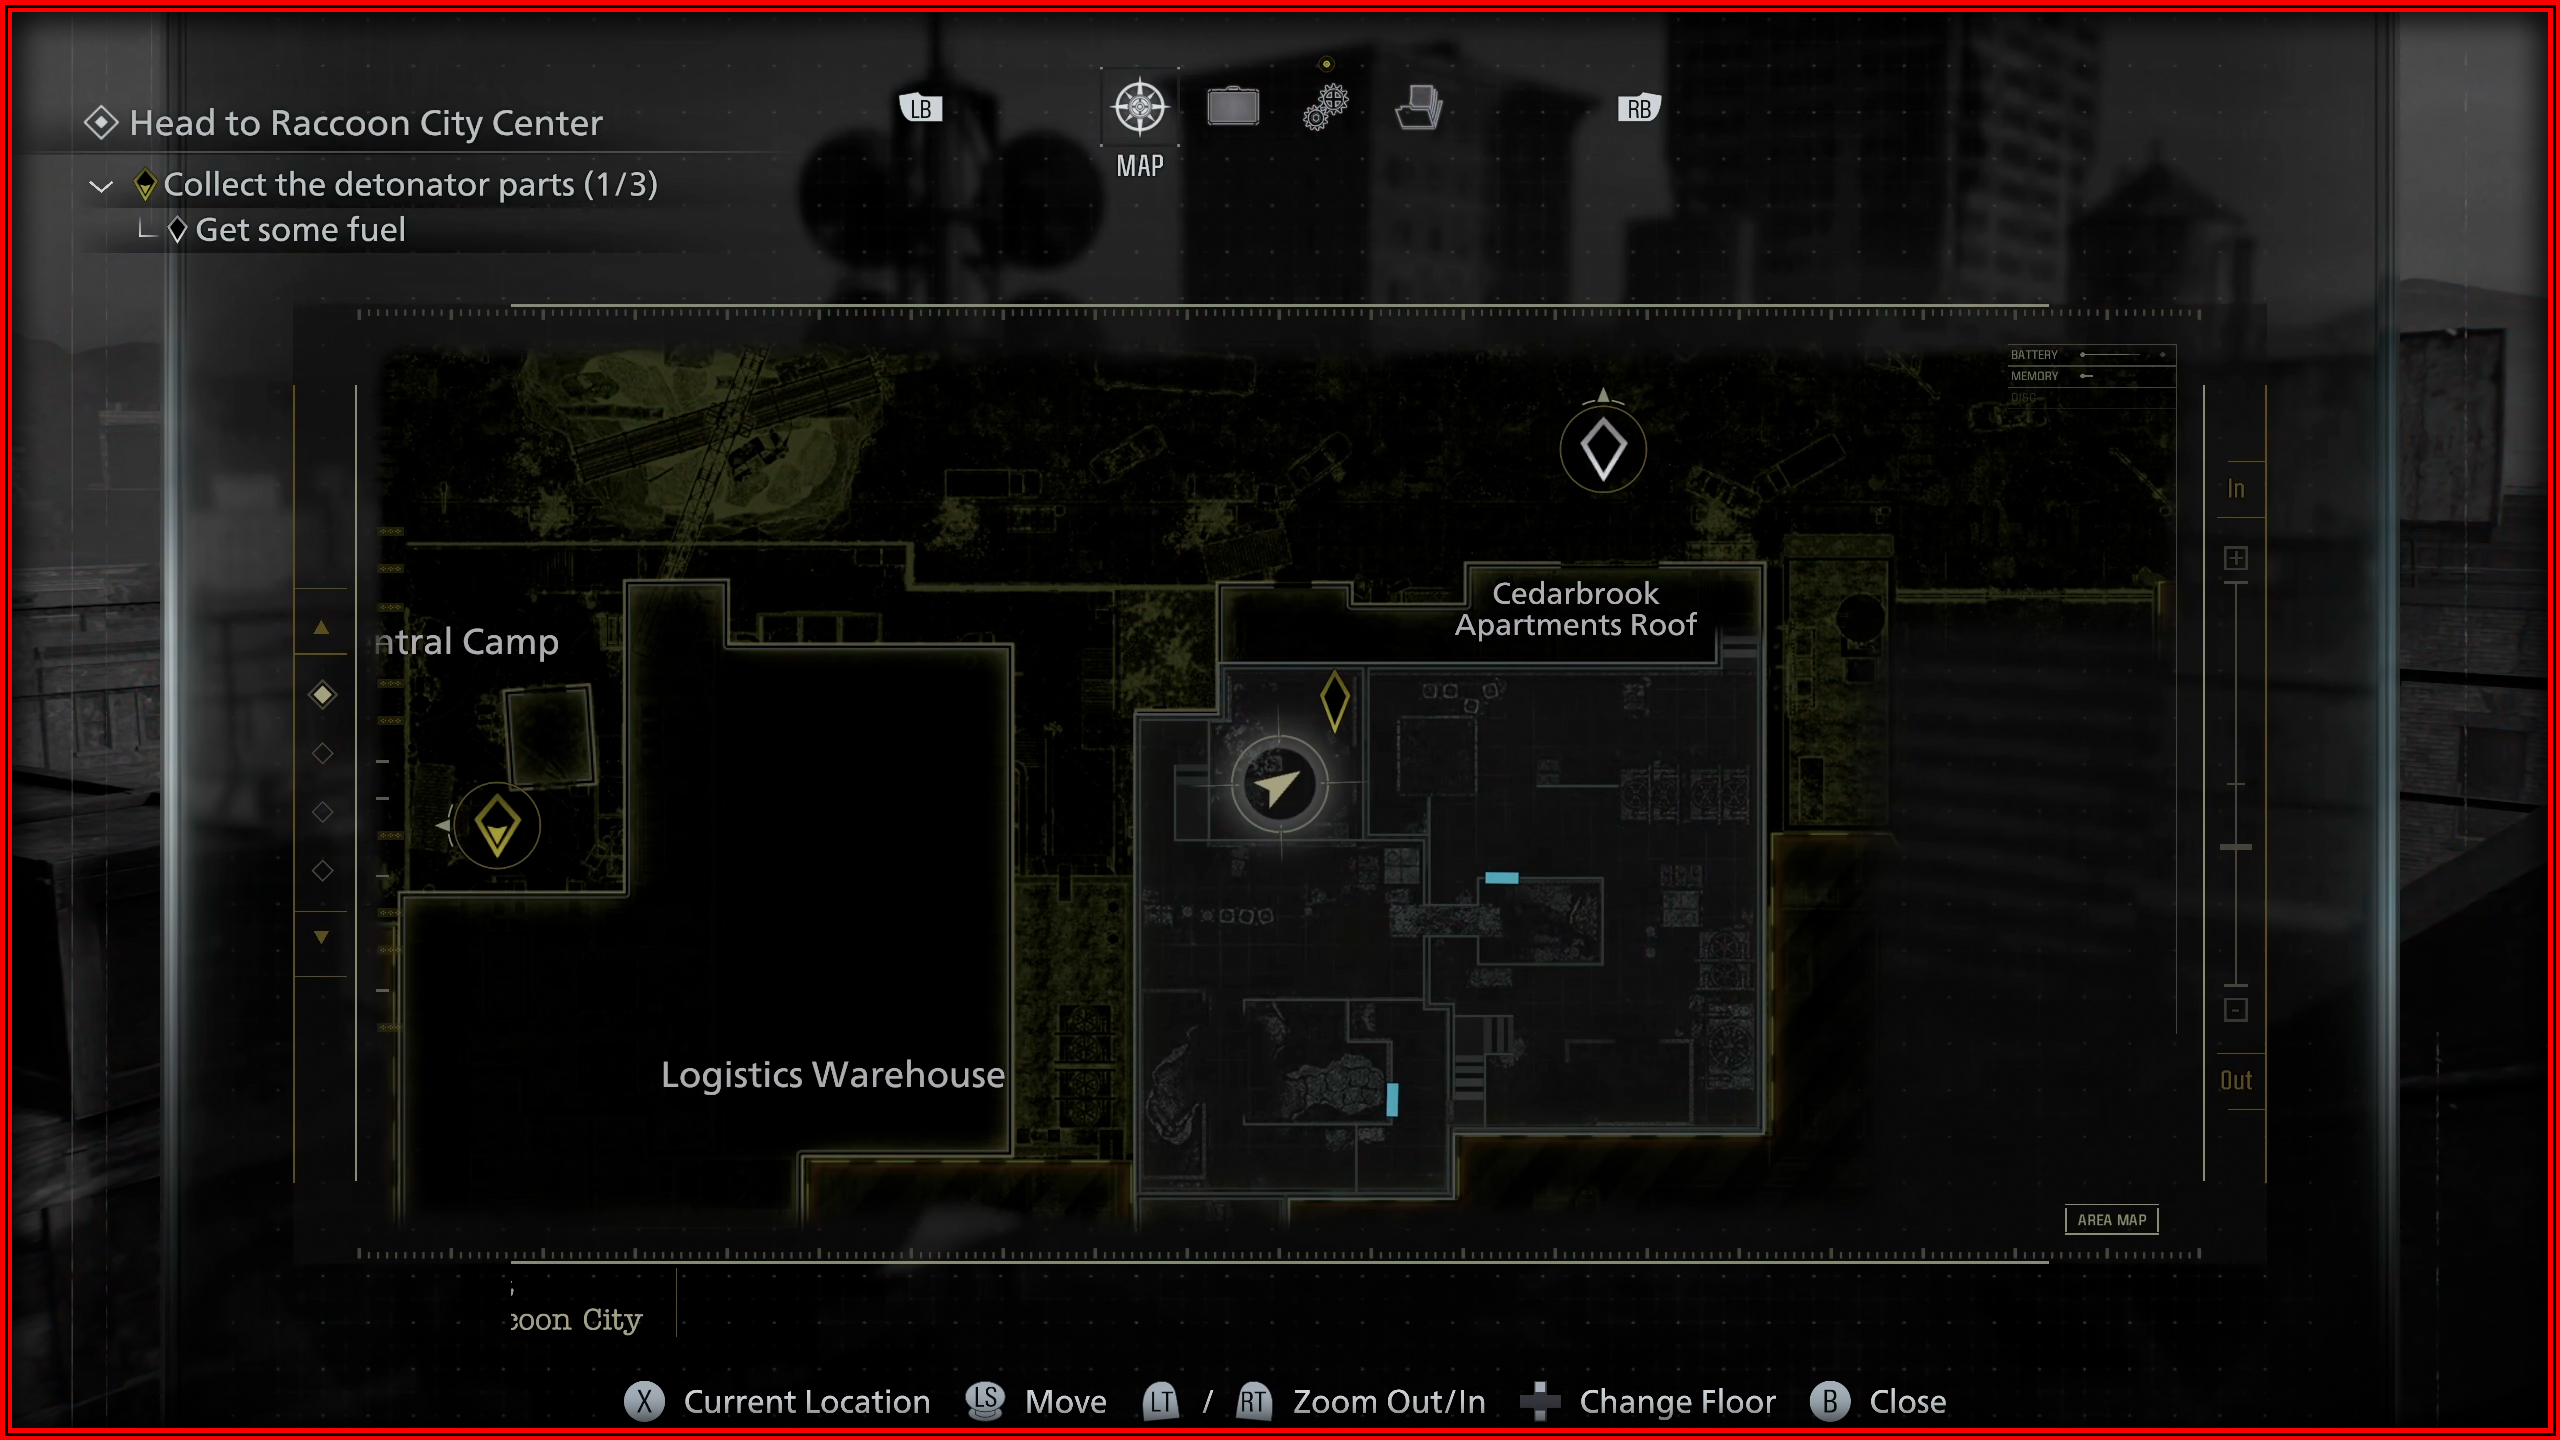
Raccoon City Center – Leon
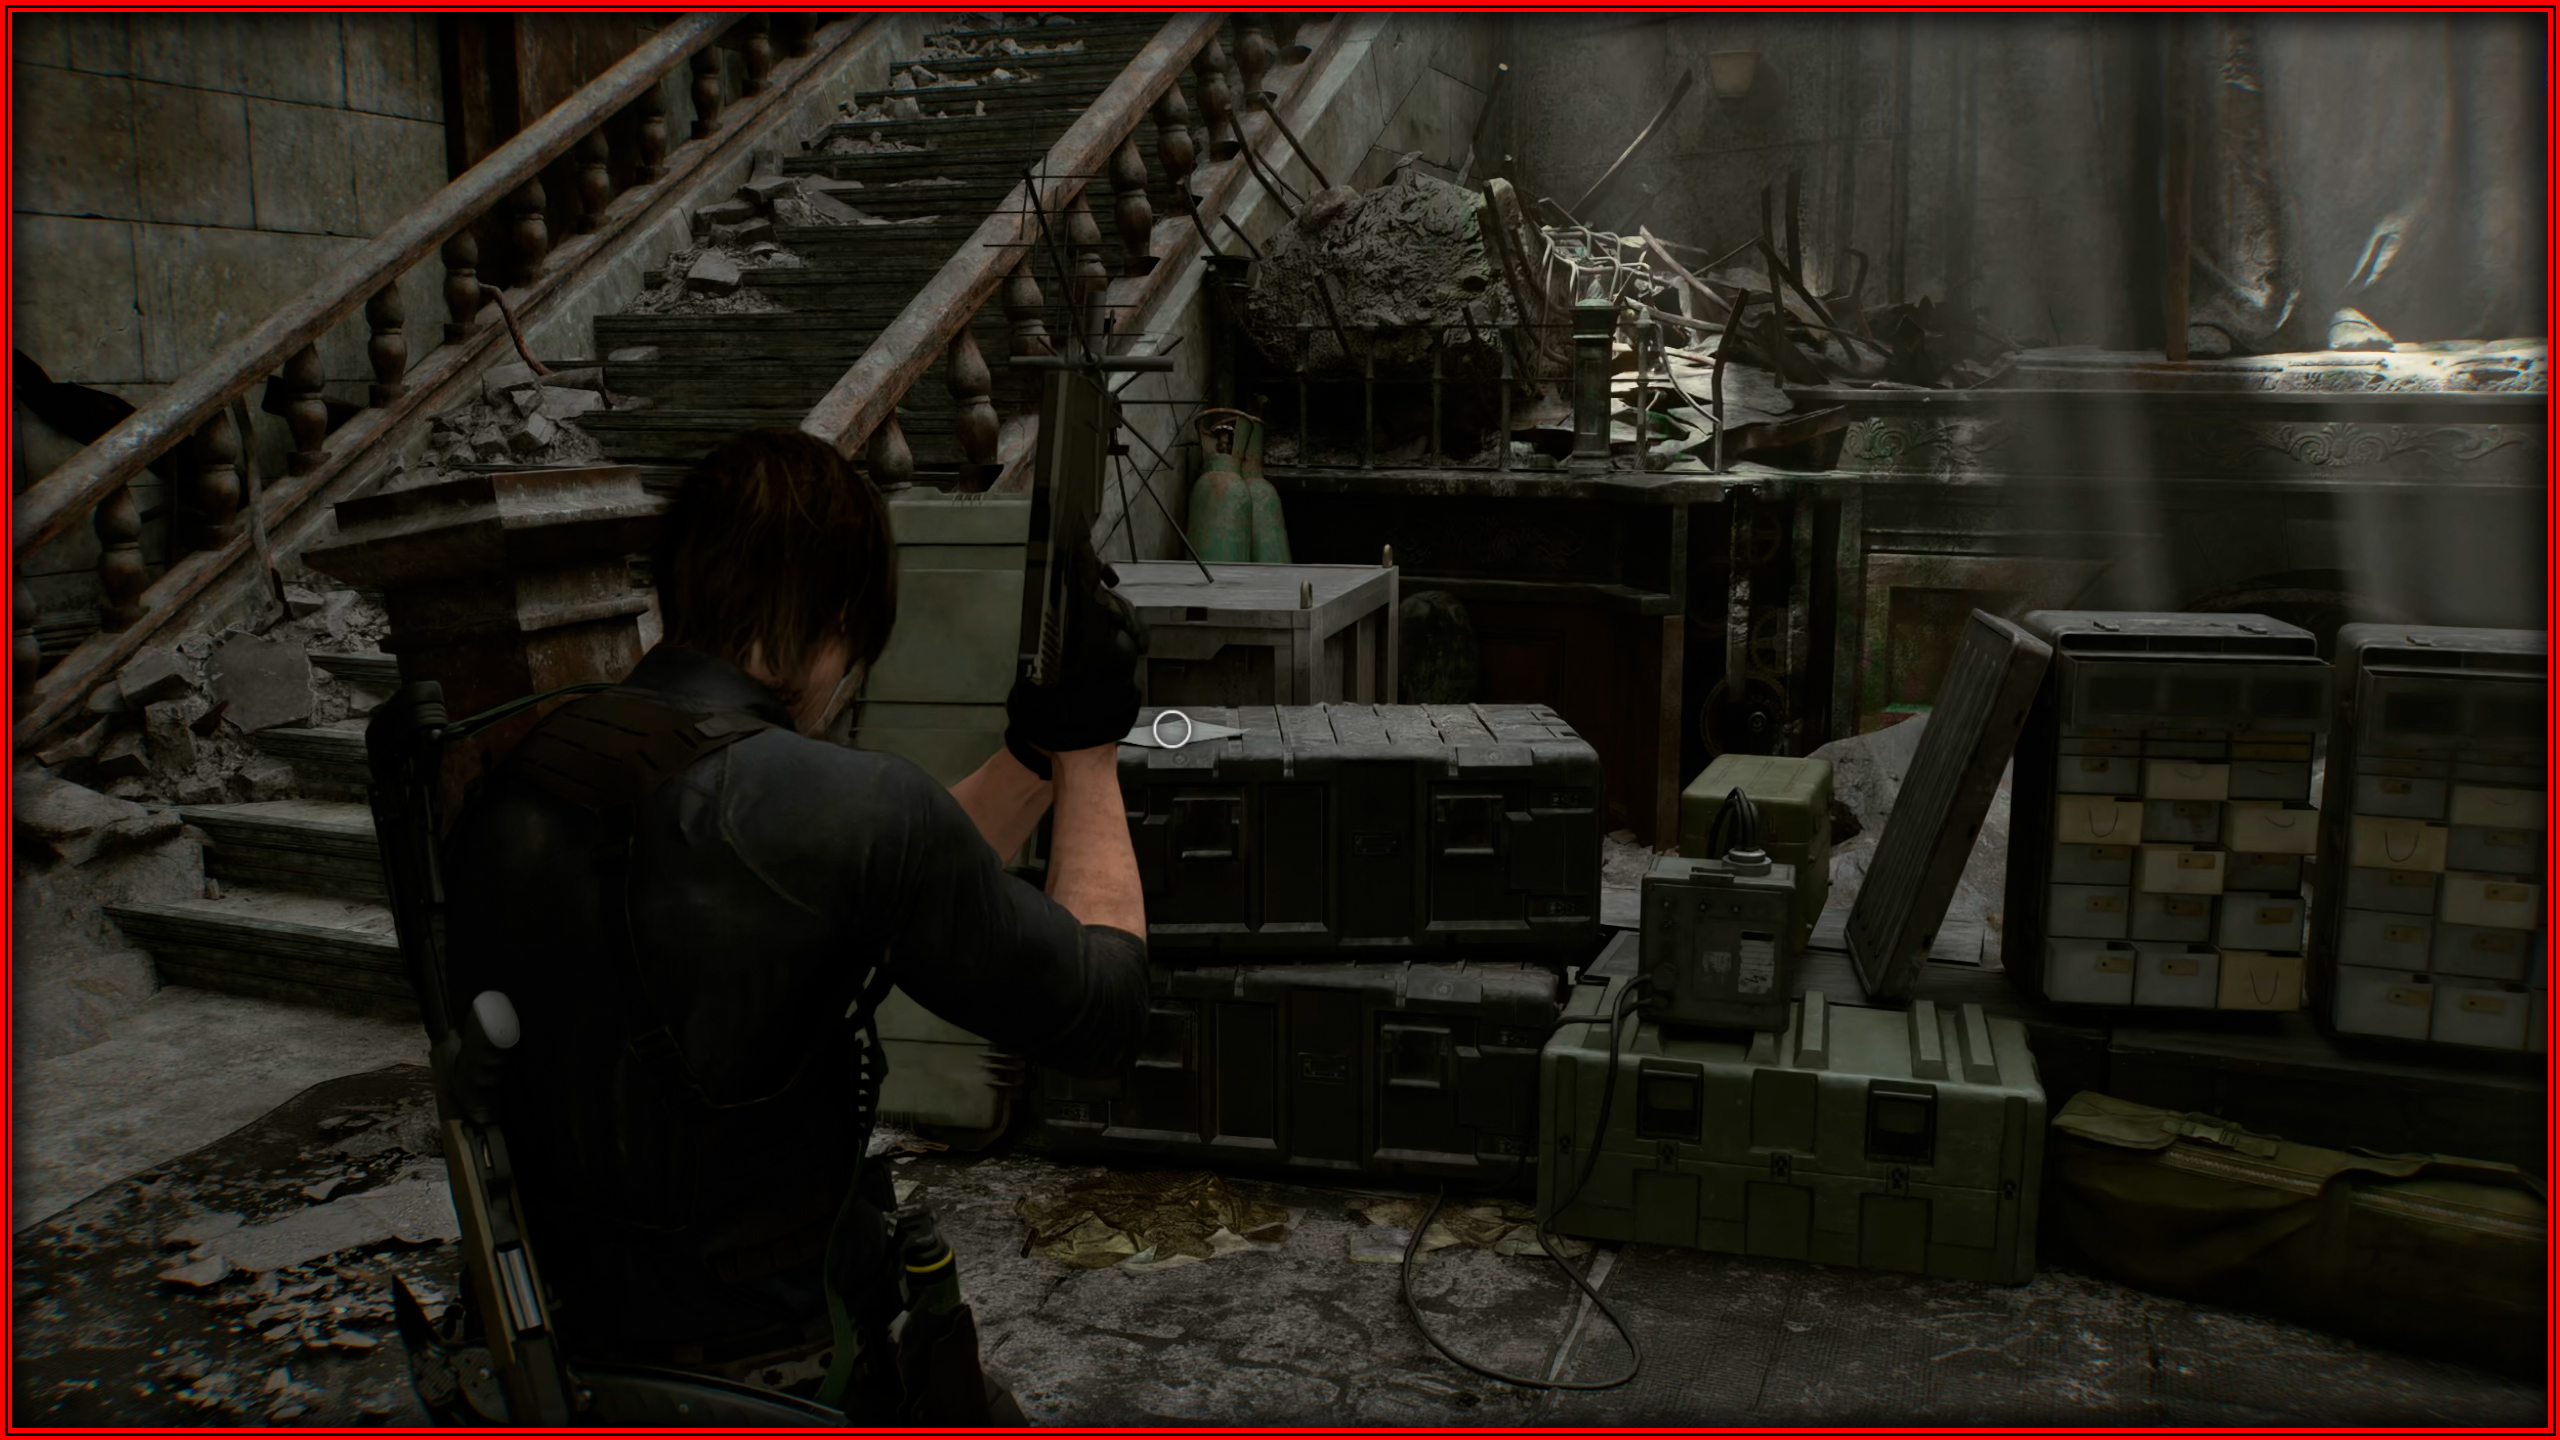
File 54/75 - R.P.D Perimeter Report
Main Hall: On top of a box.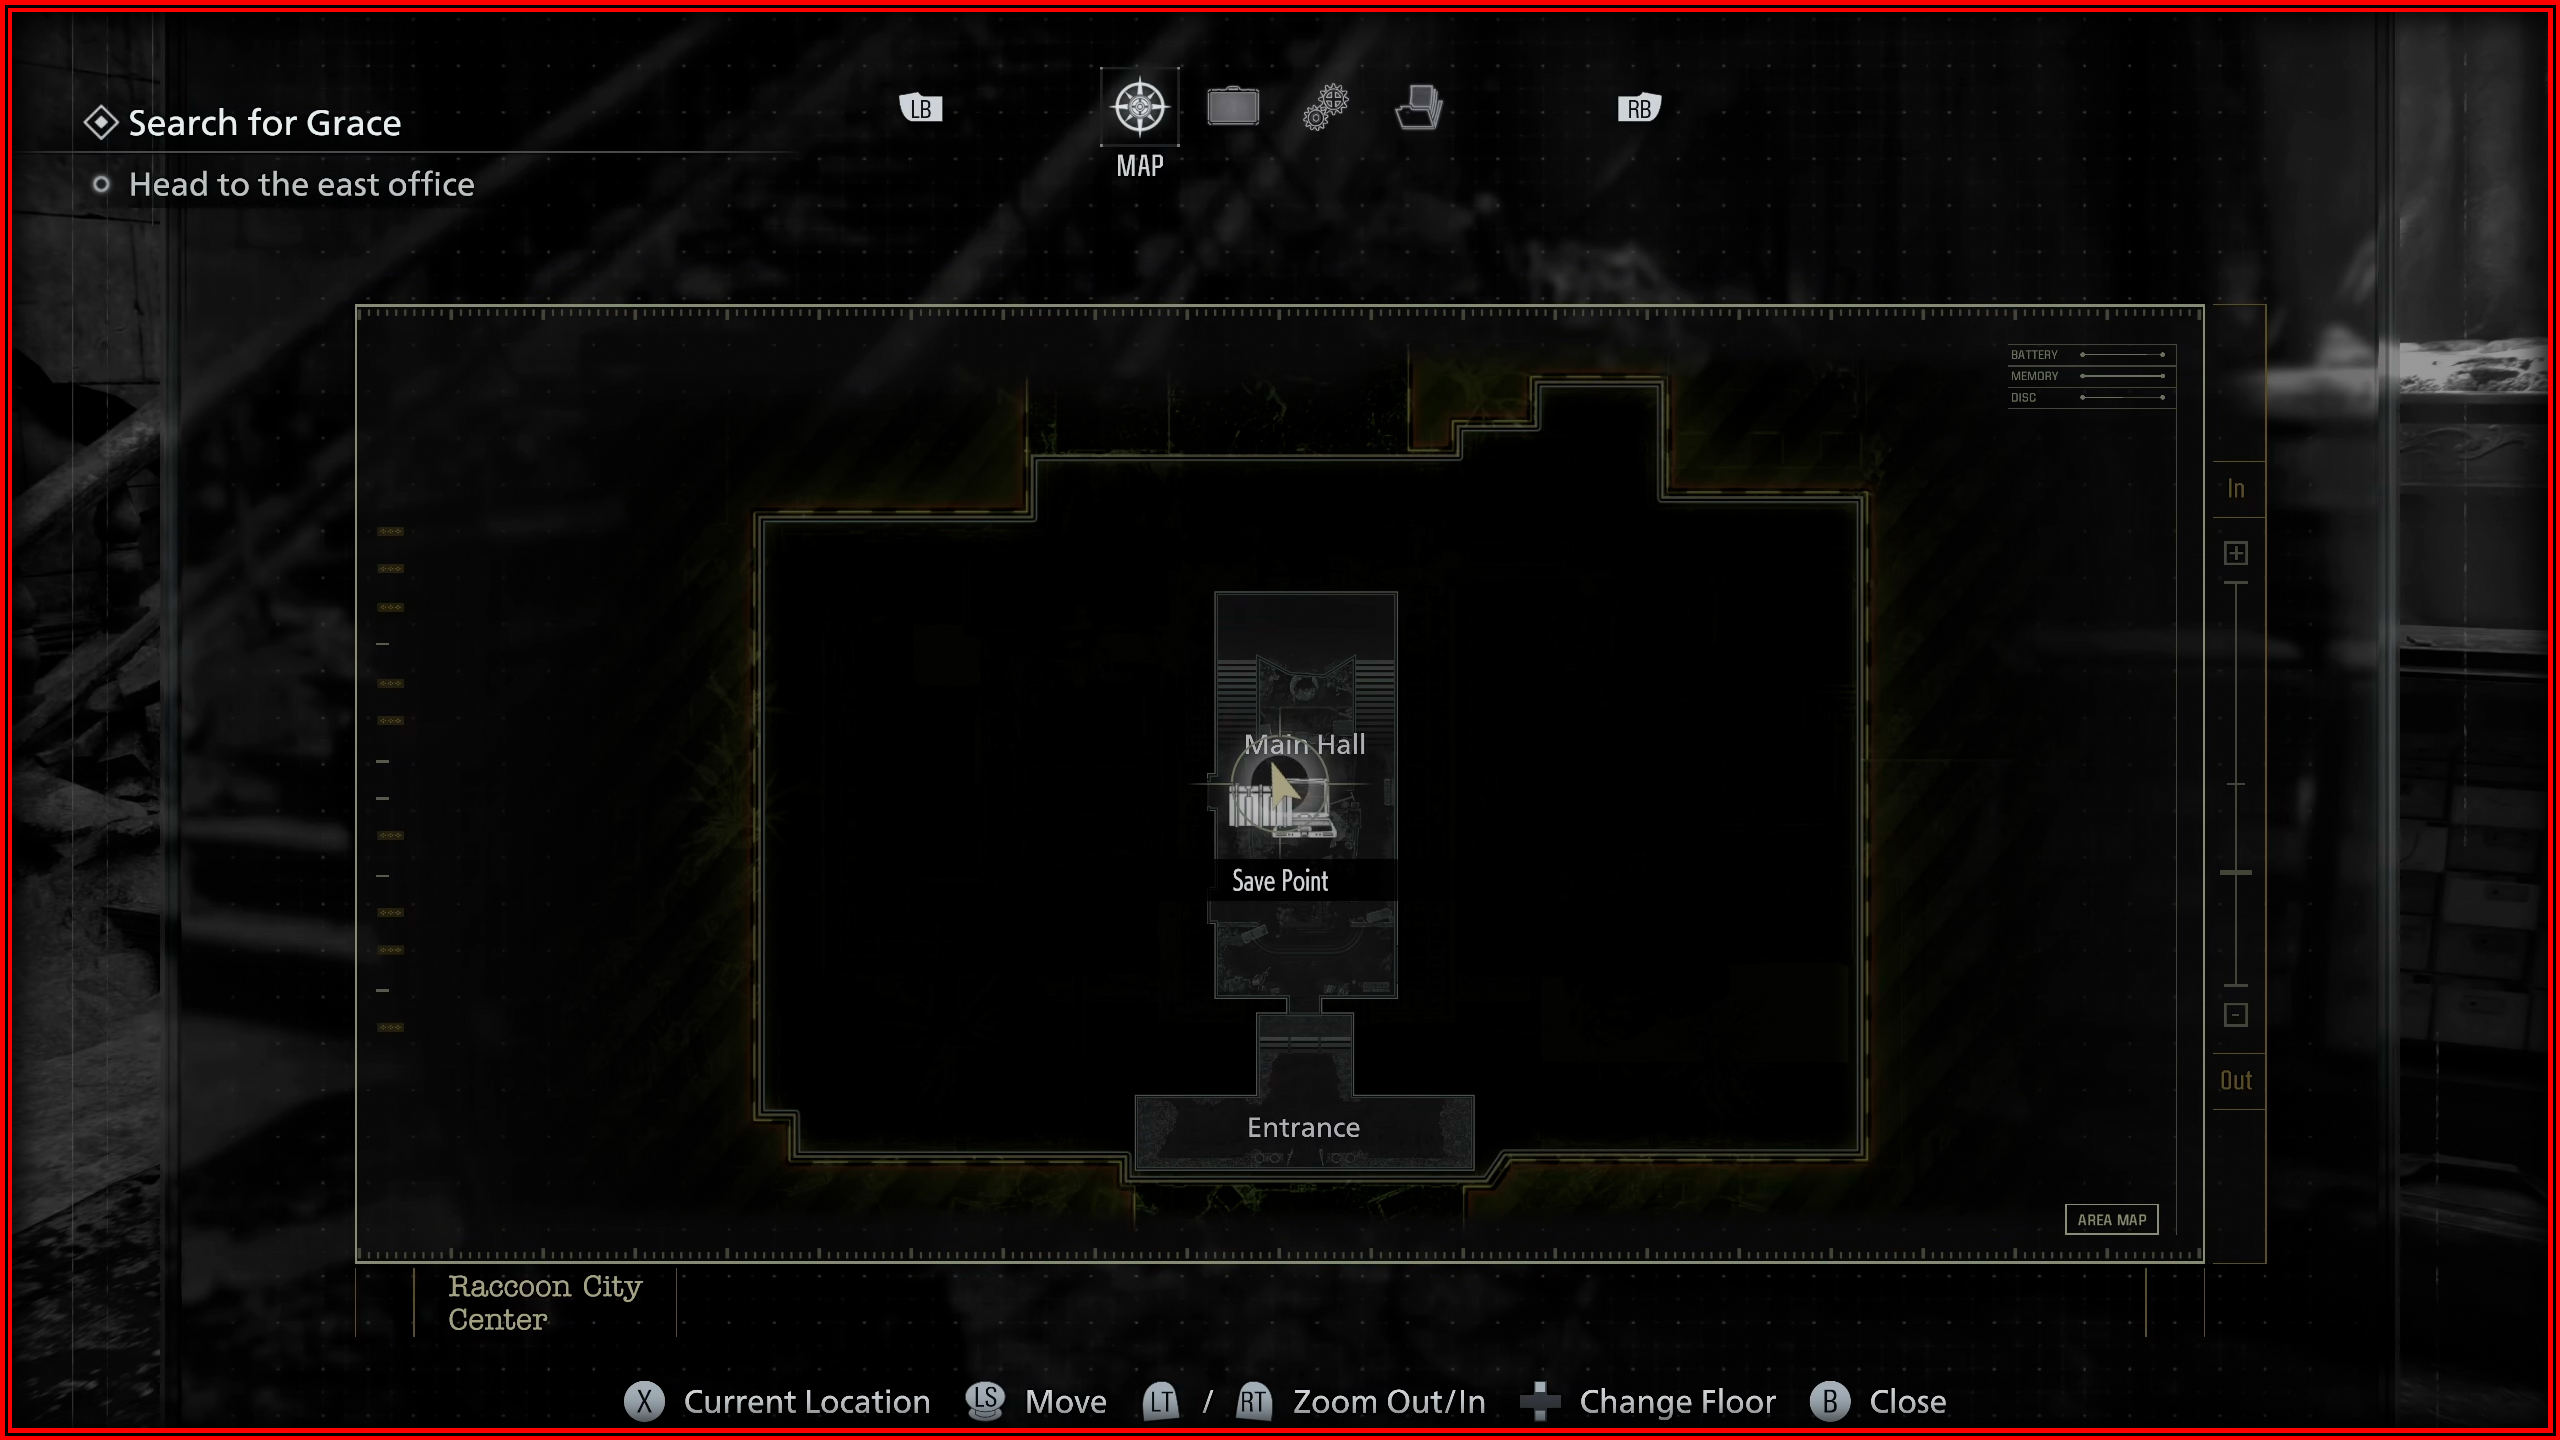
File 55/75 - Top Secret Operation
West Office: On the desk on the right.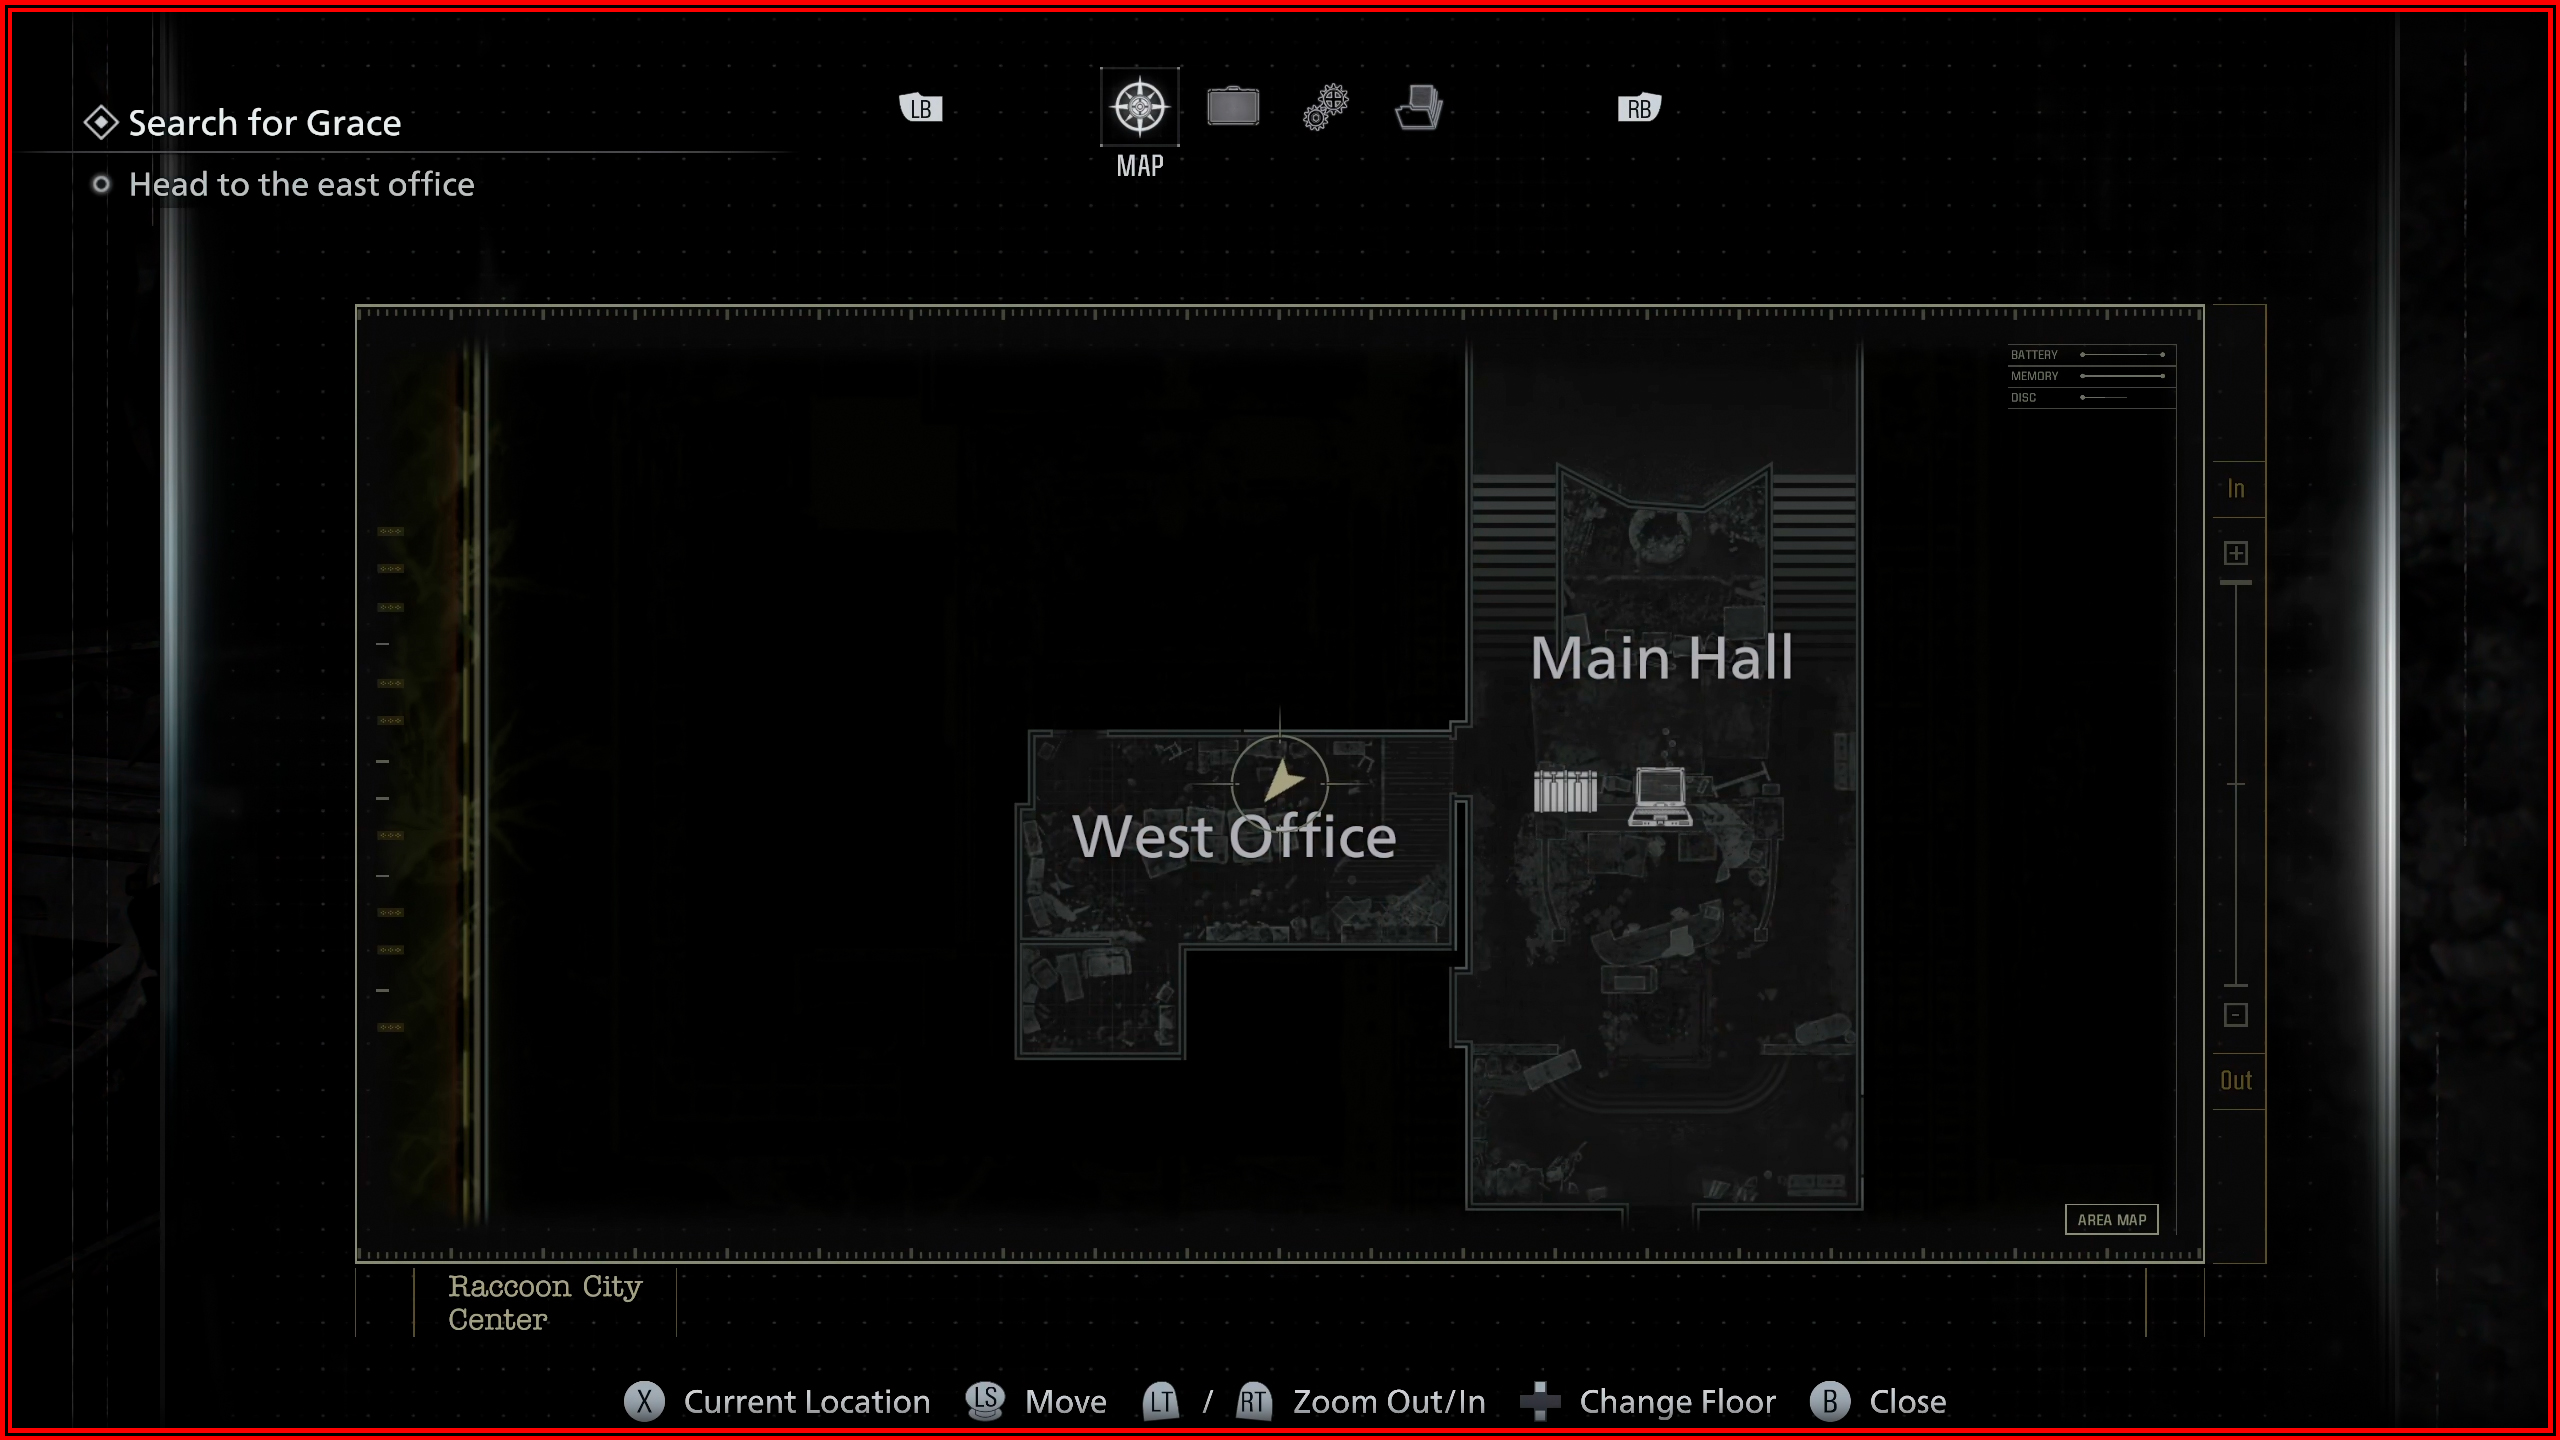

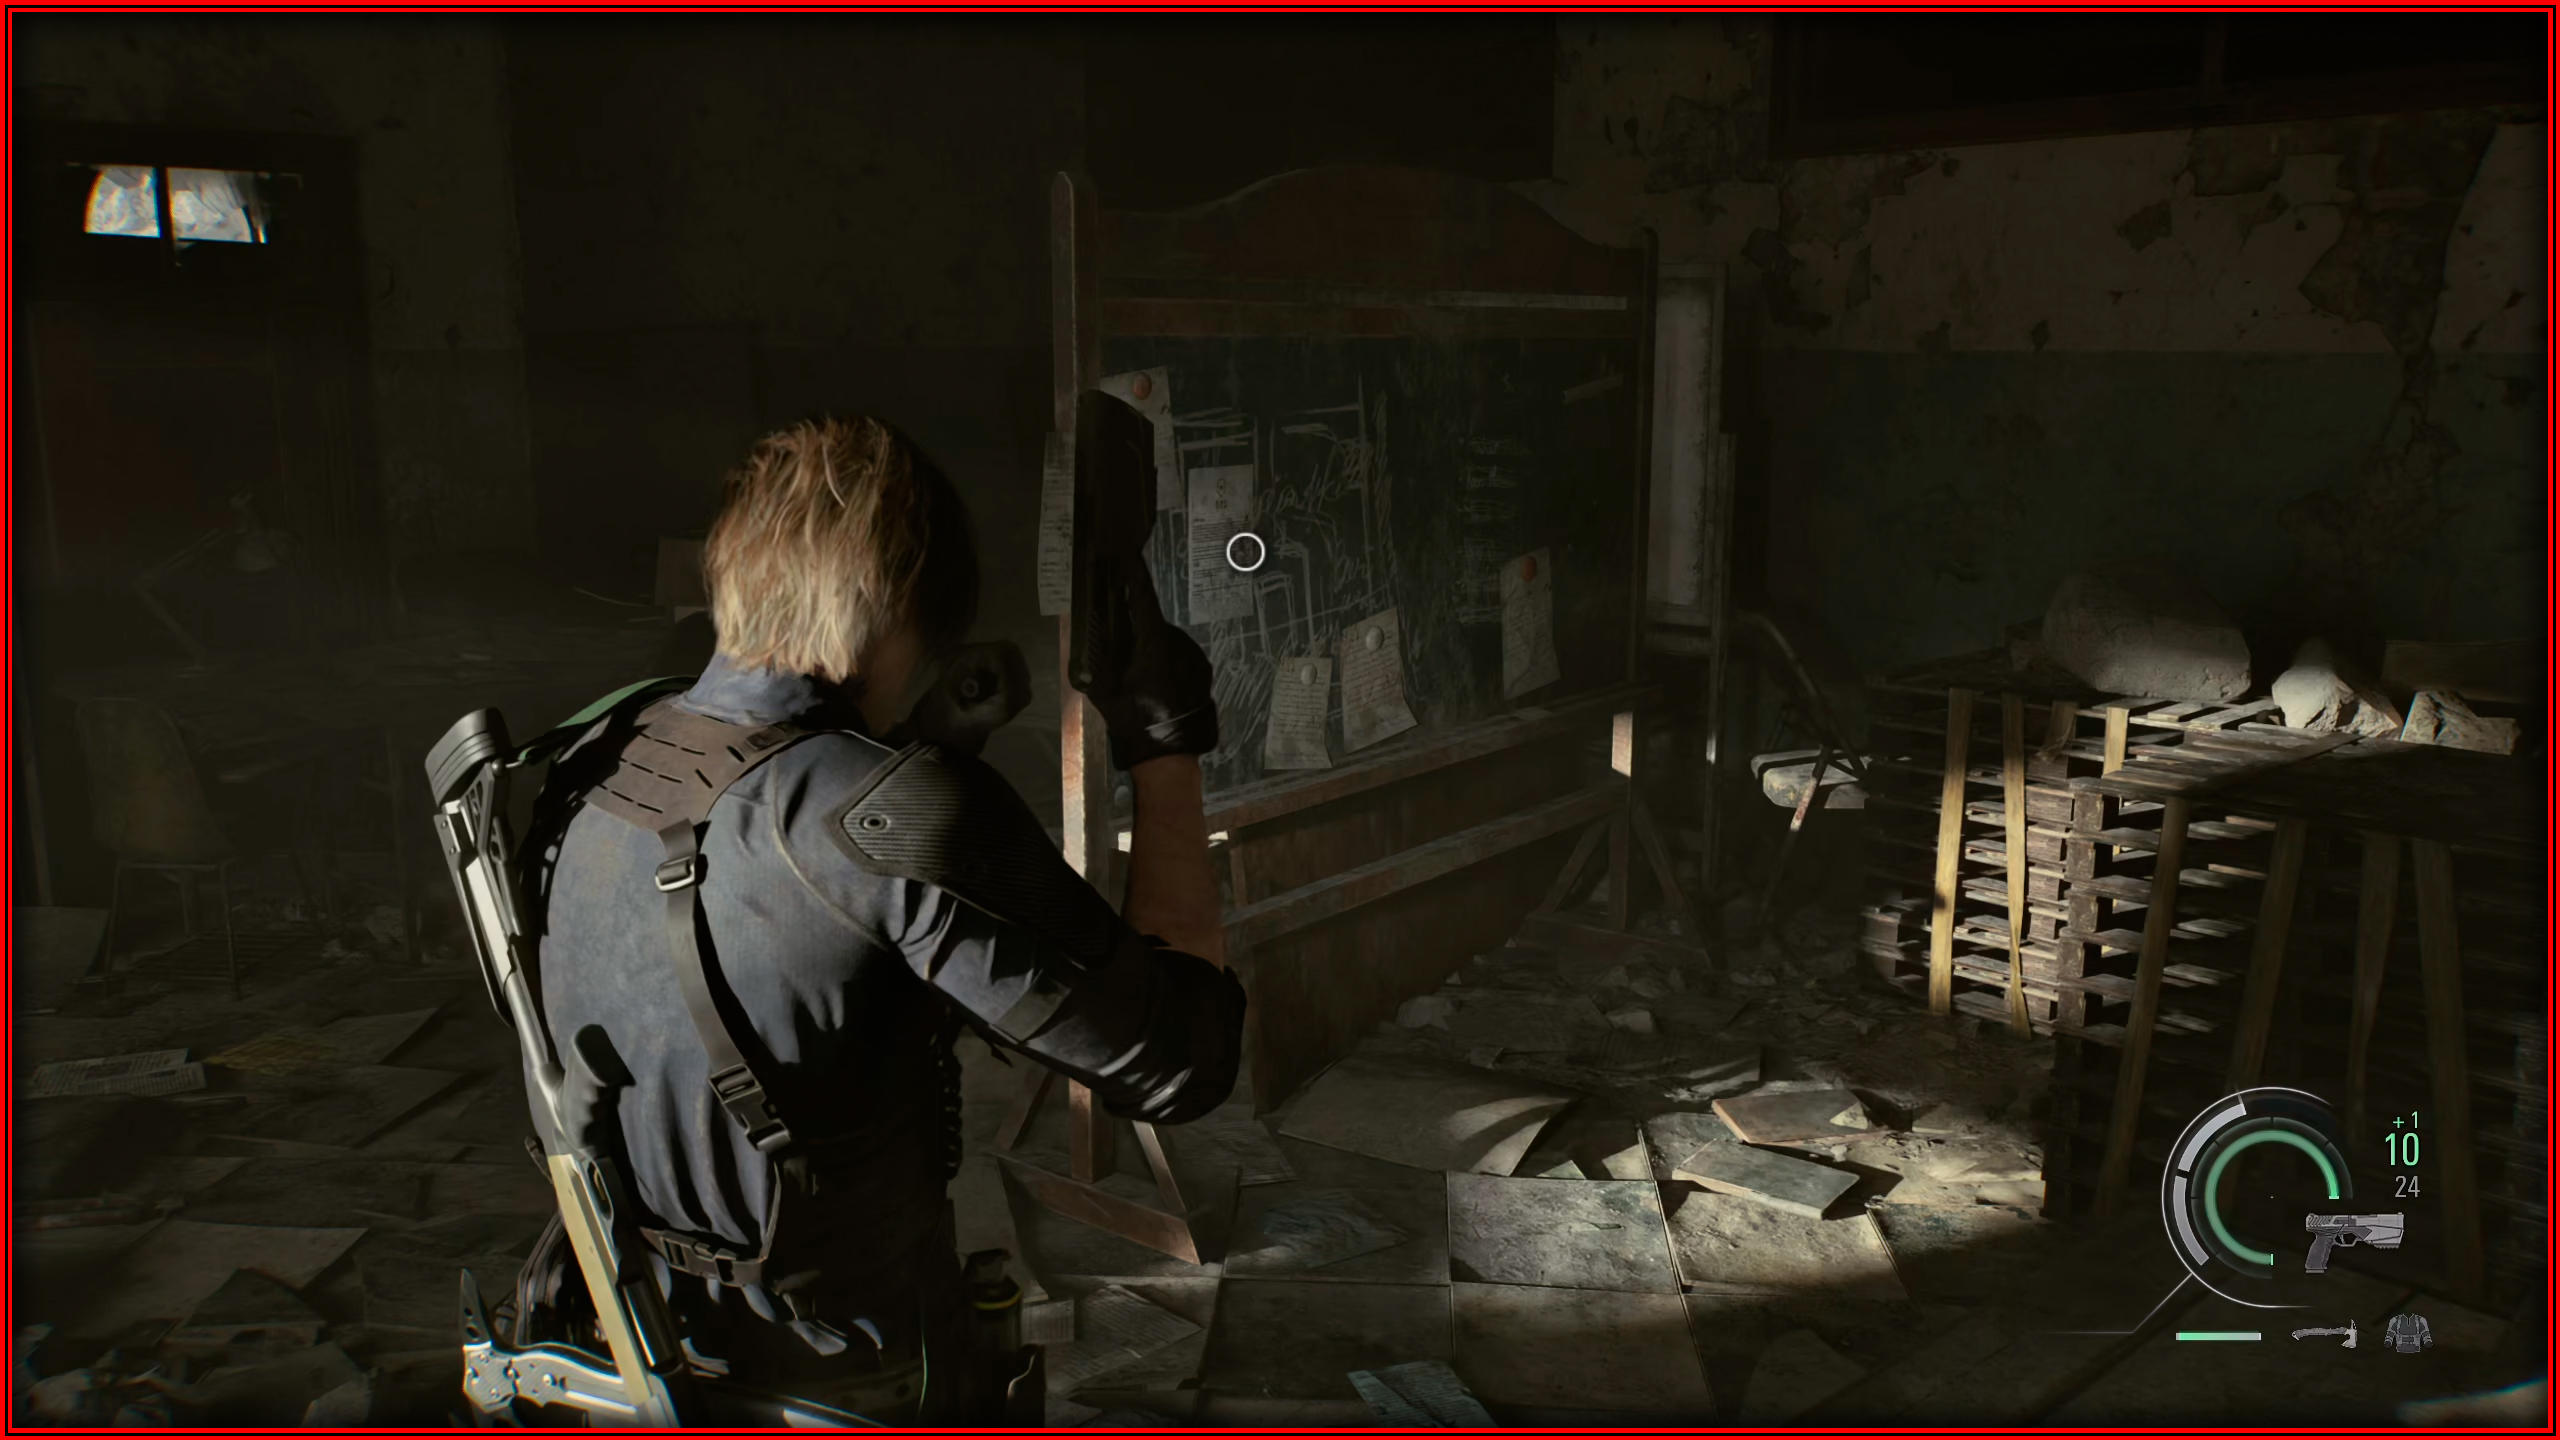
File 56/75 - Record of Events
Operations Room: On the chalkboard.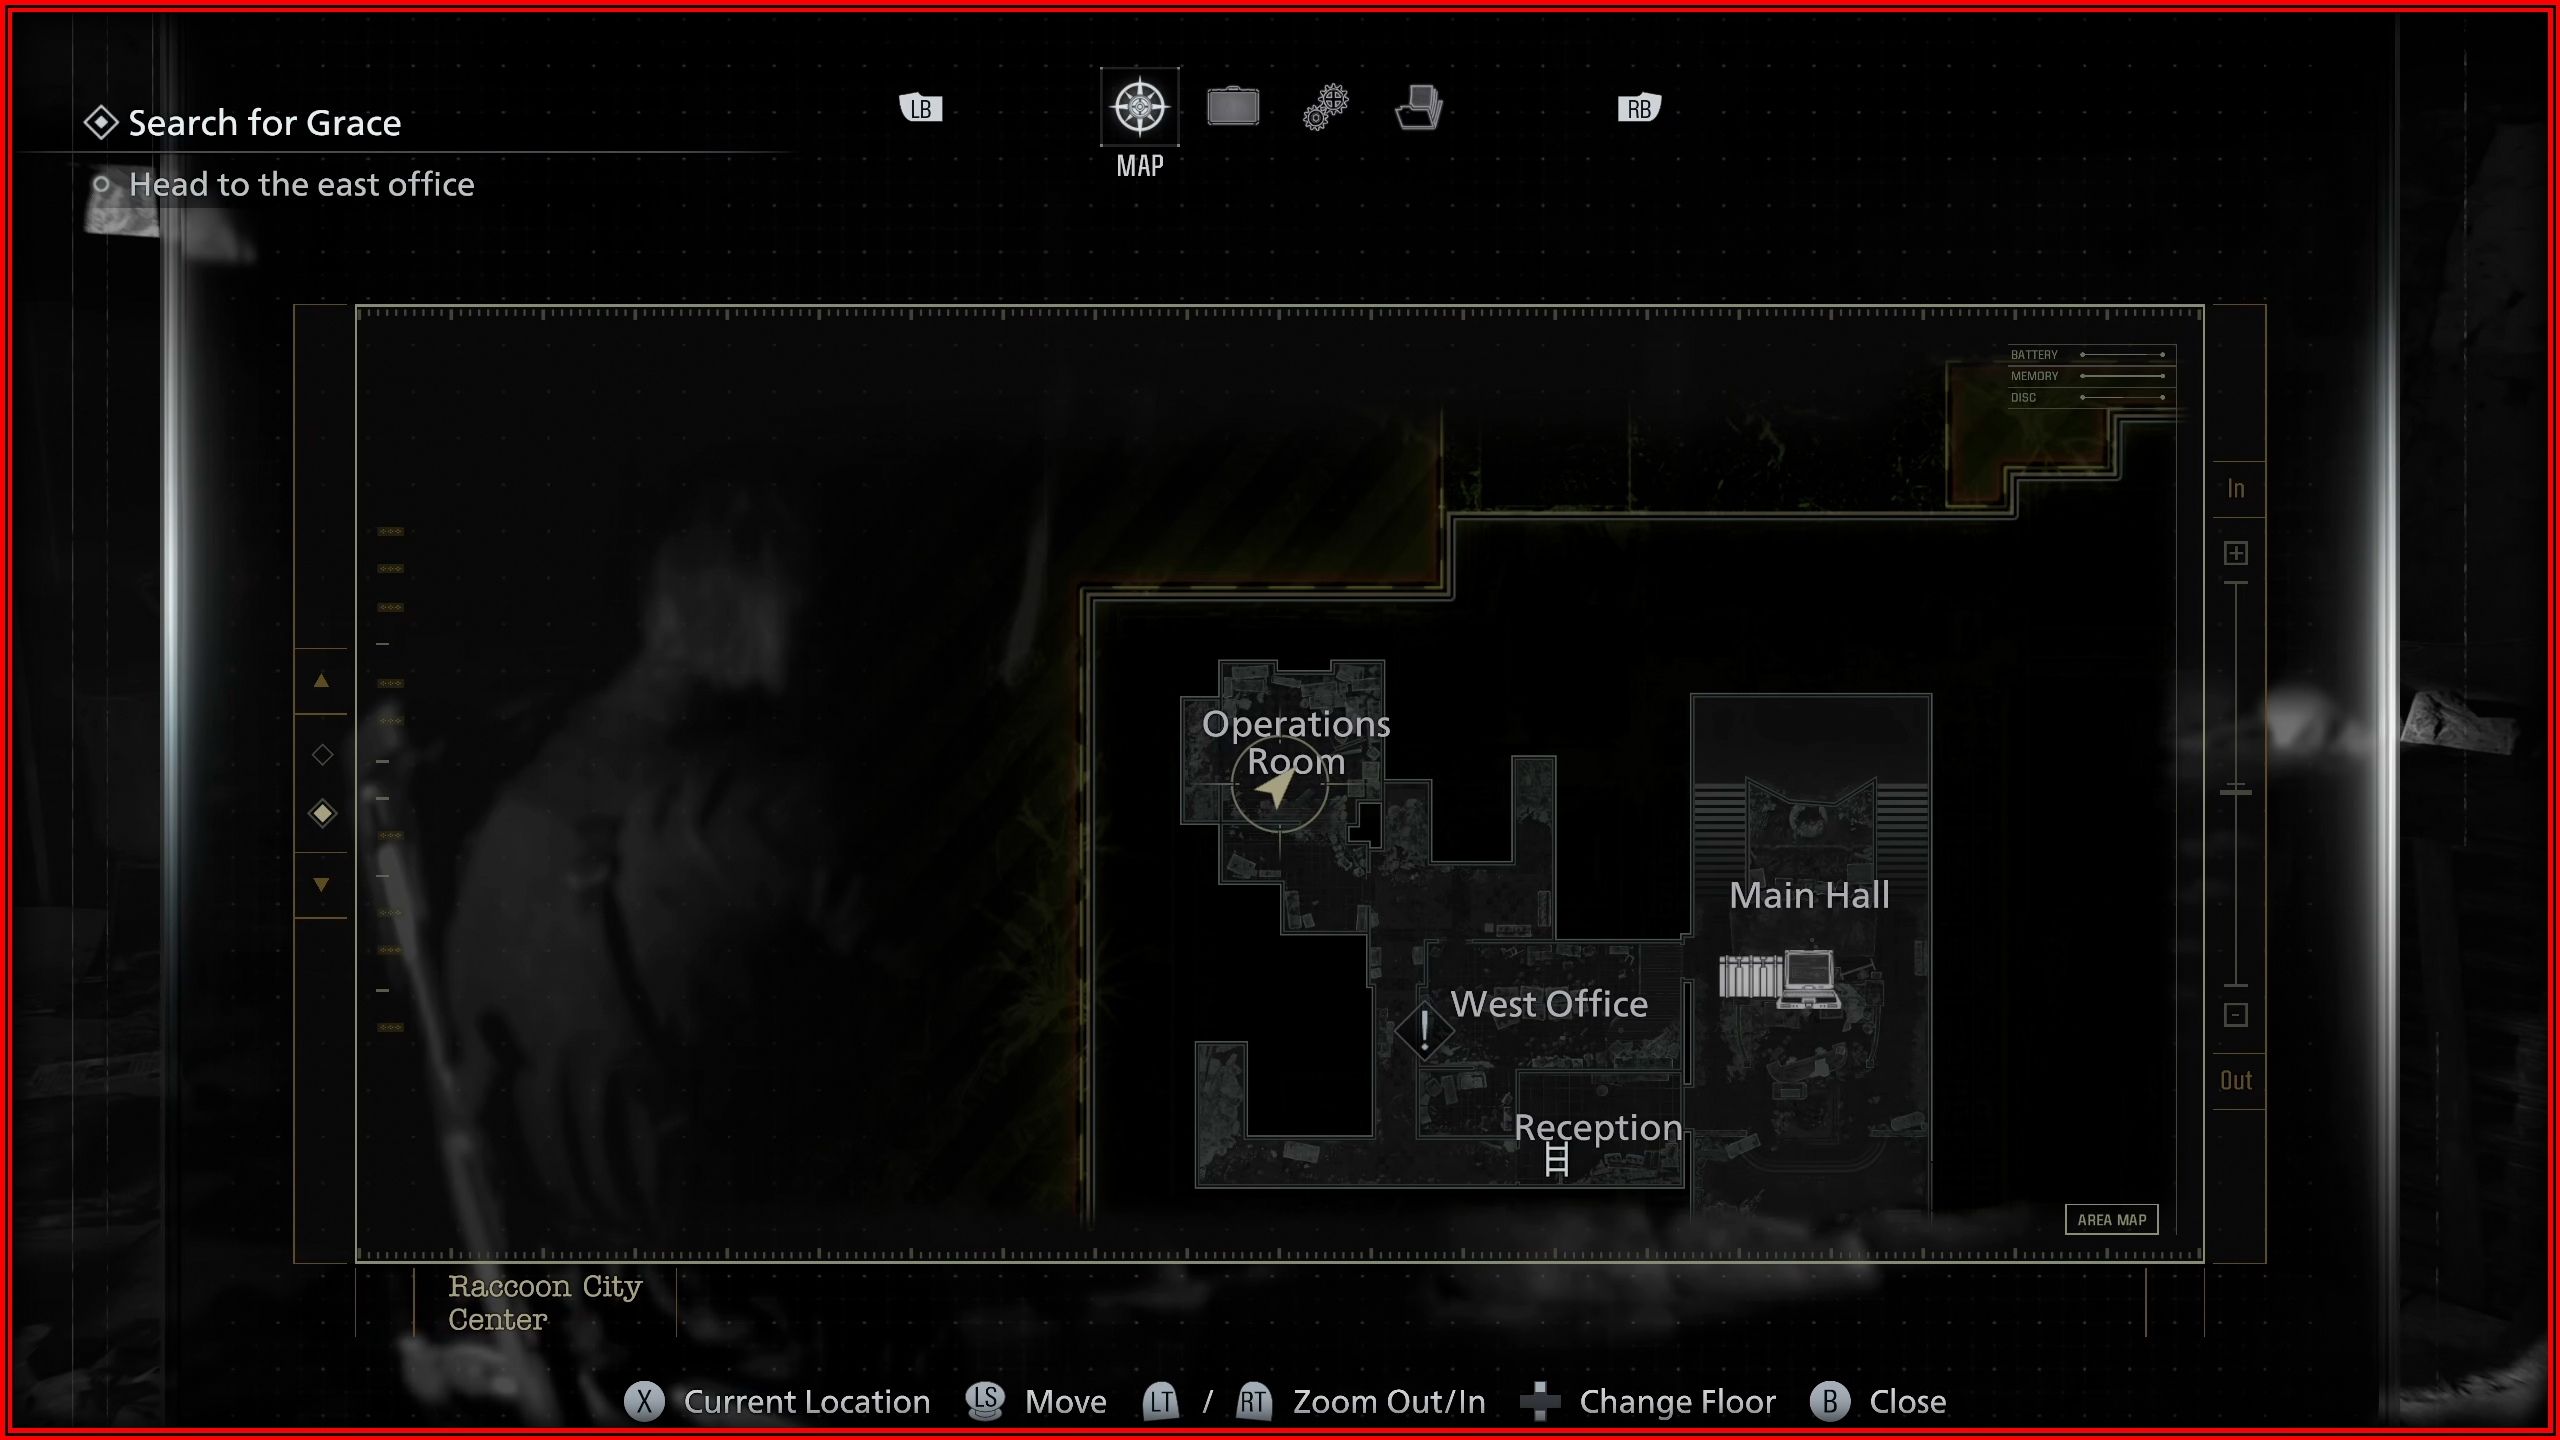
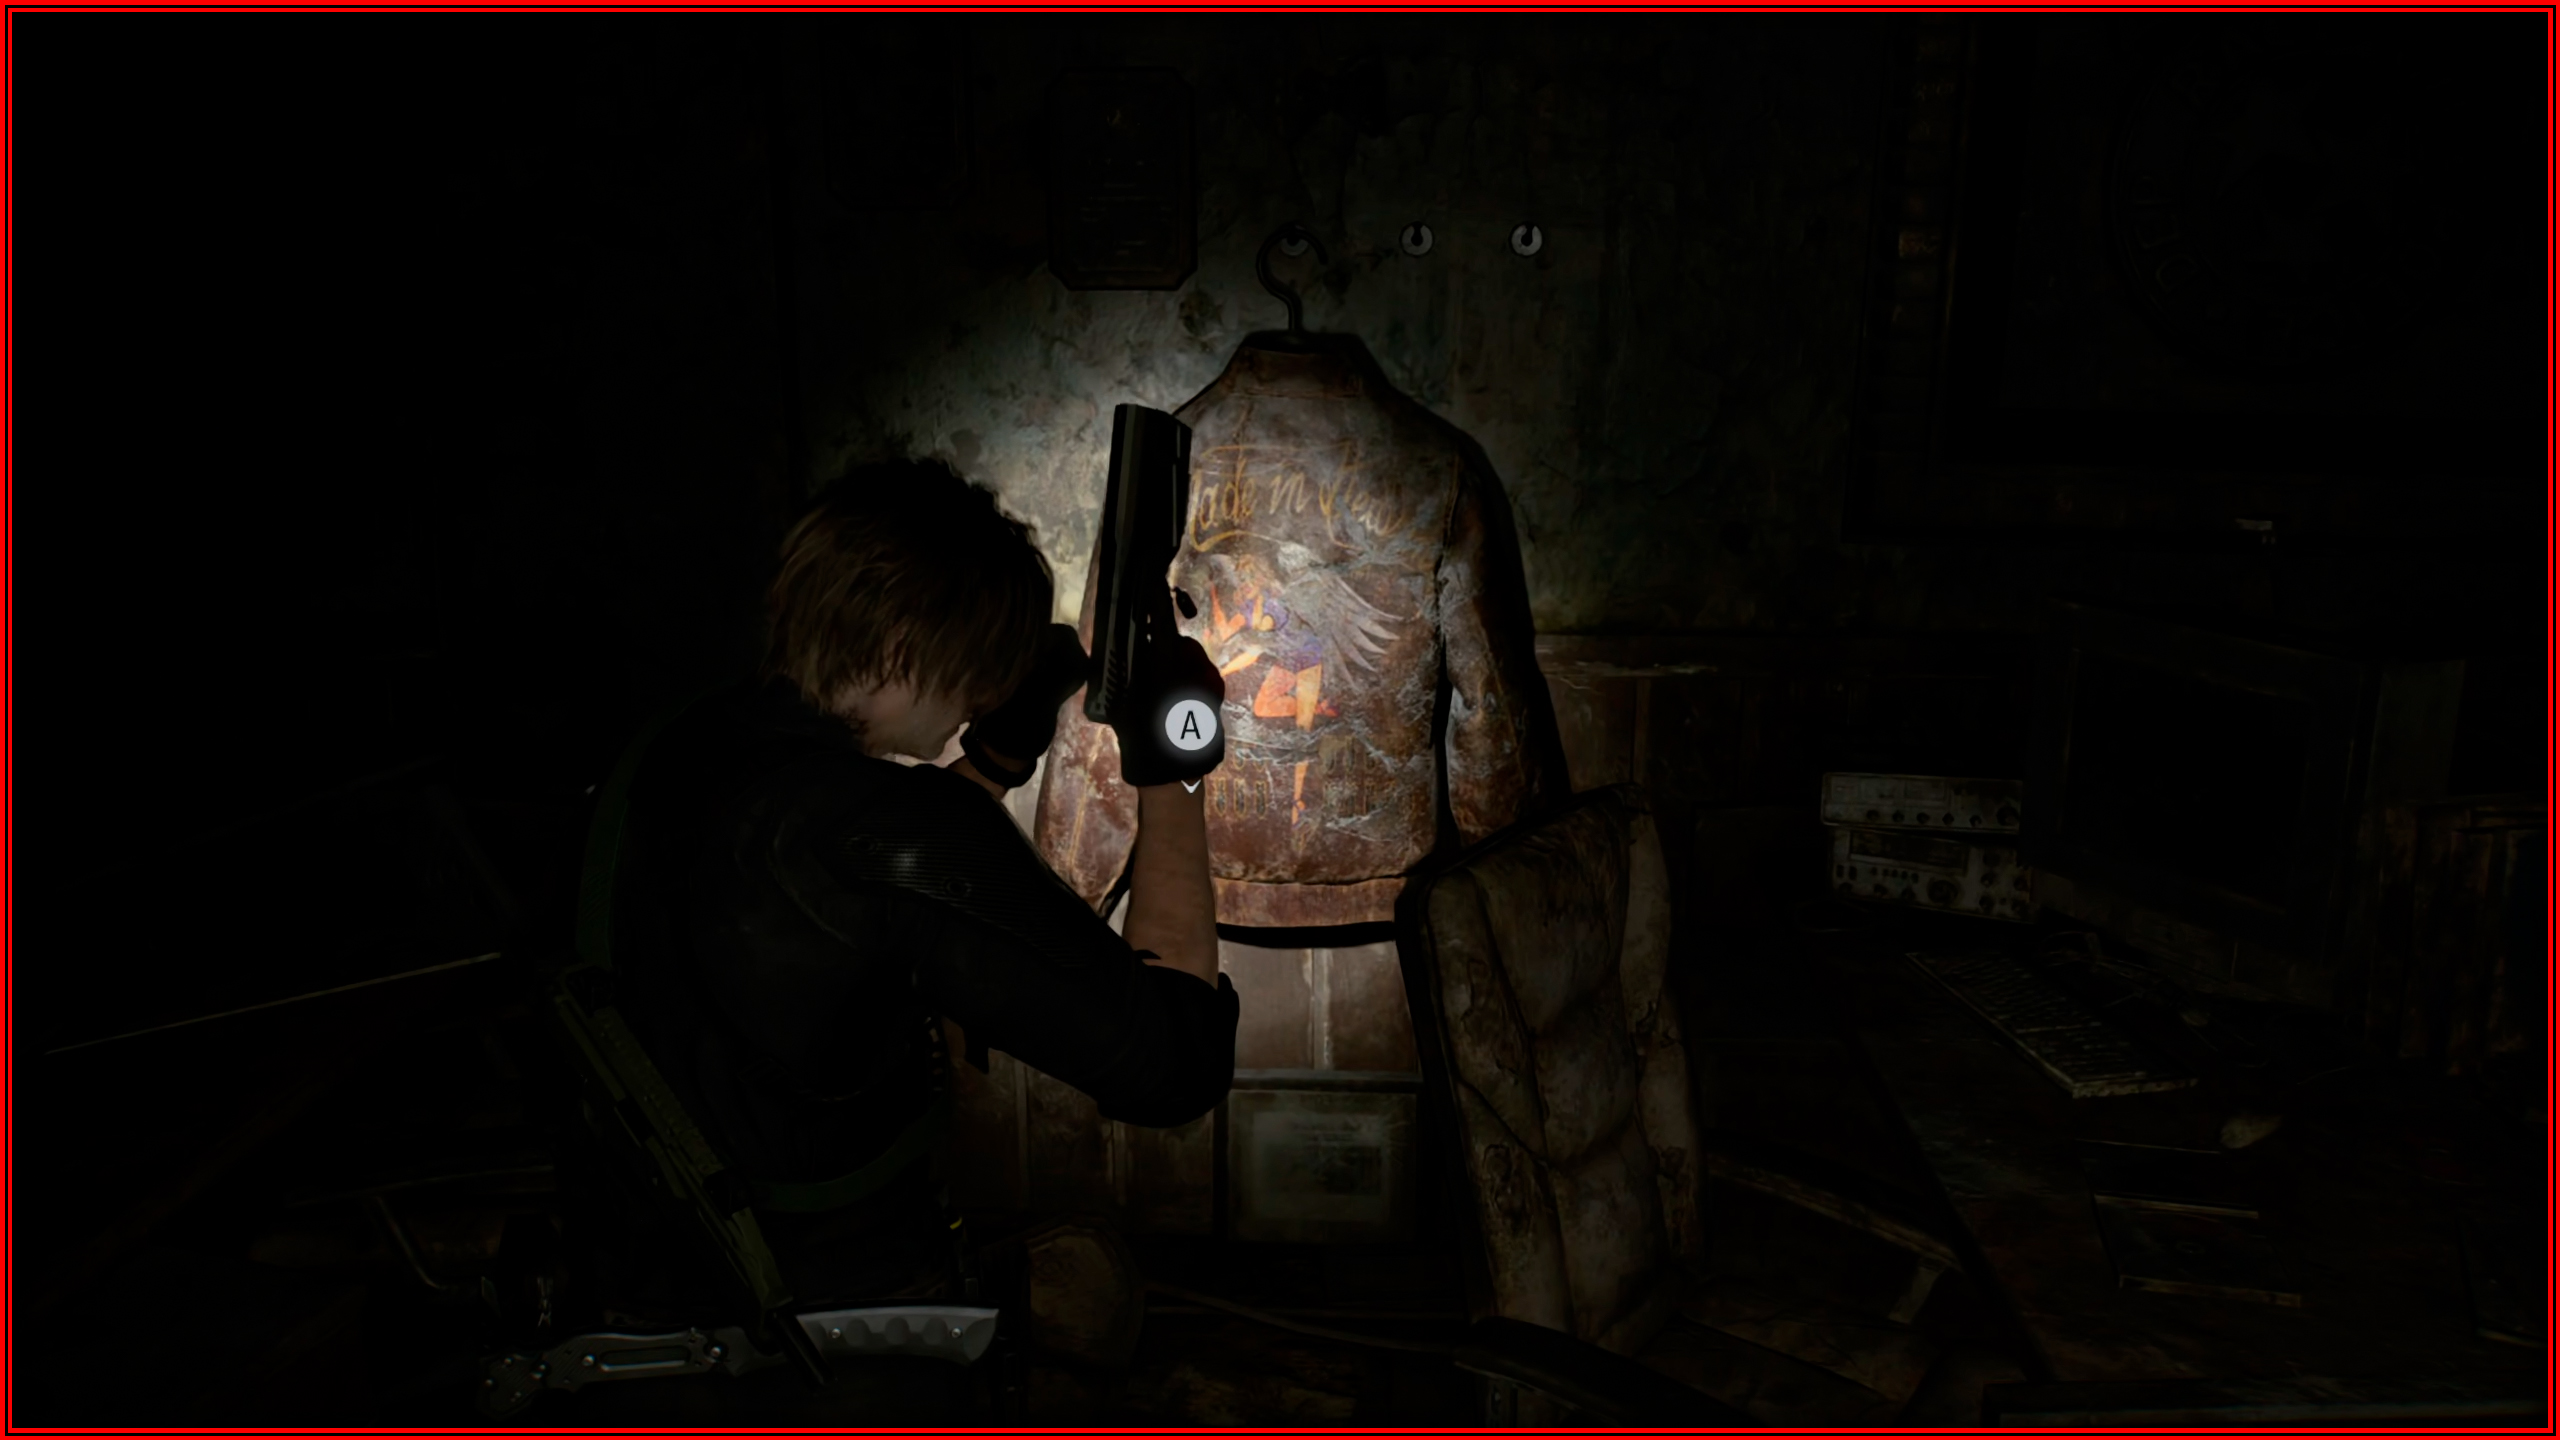
File 57/75 - Scavenger Hunt – Clue 1
S.T.A.R.S. Office: Inside the jacket.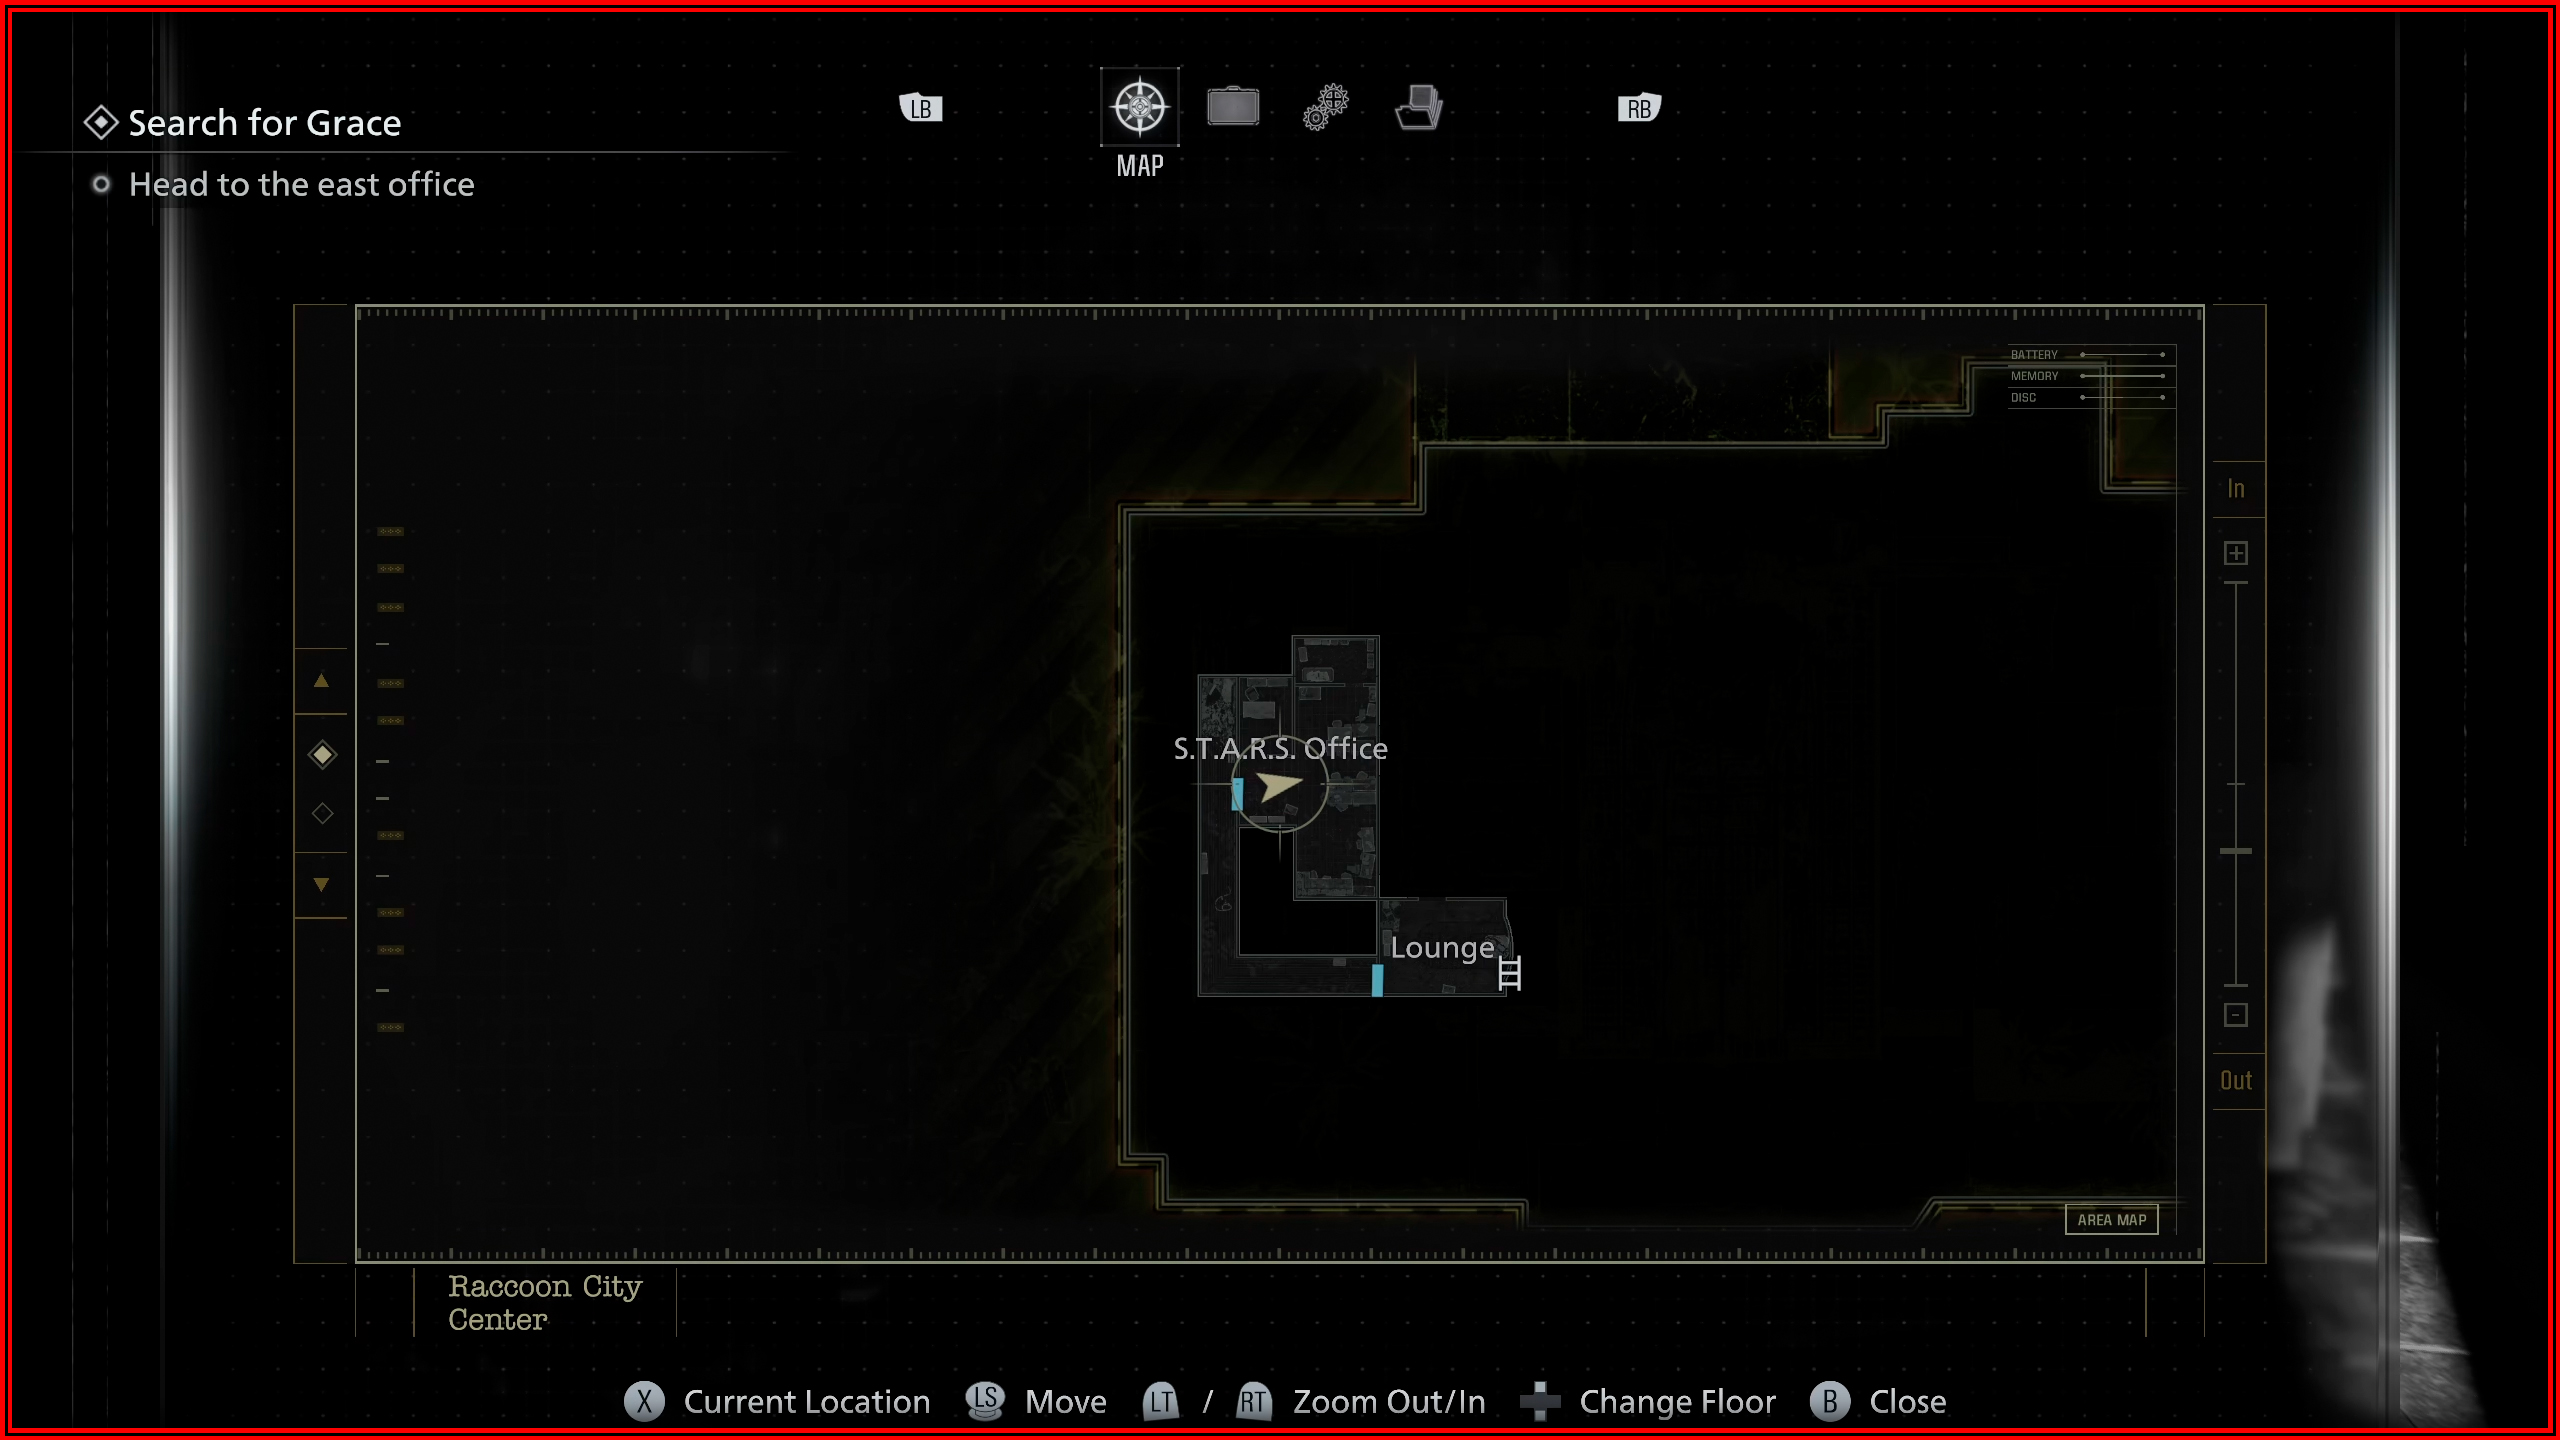
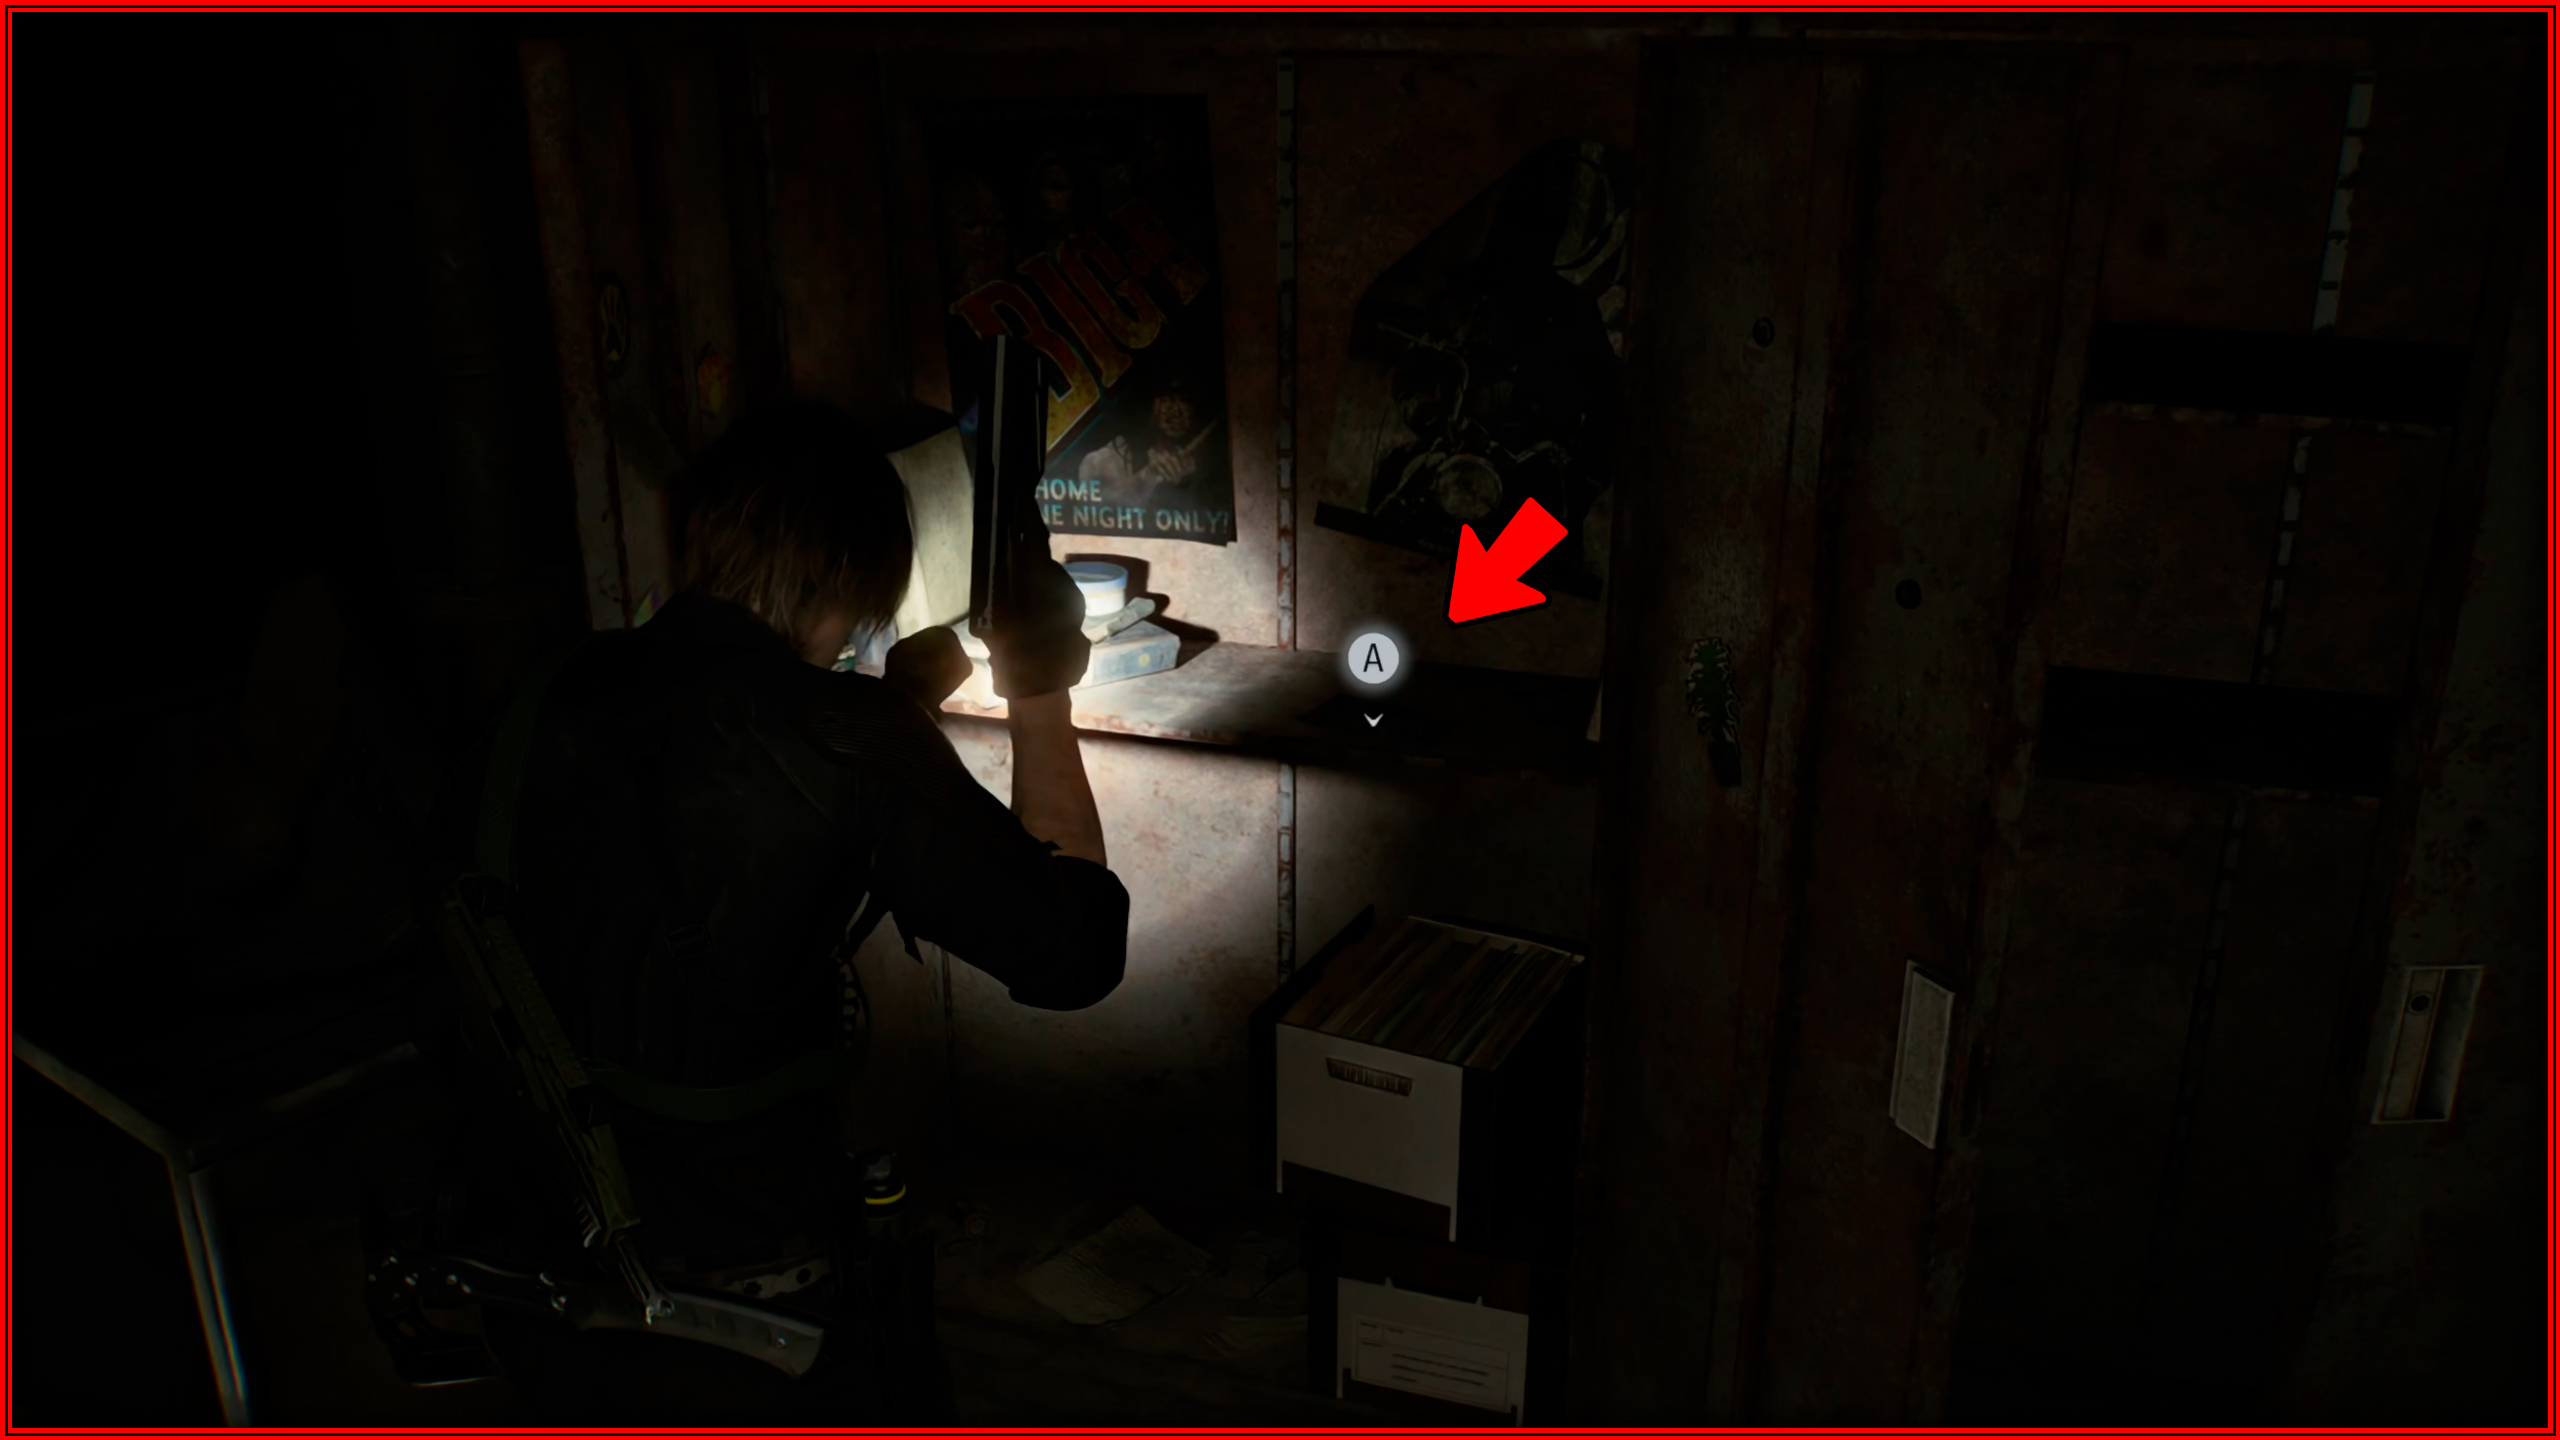
File 58/75 - Scavenger Hunt – Clue 2
S.T.A.R.S. Office: Inside the shelf on the right.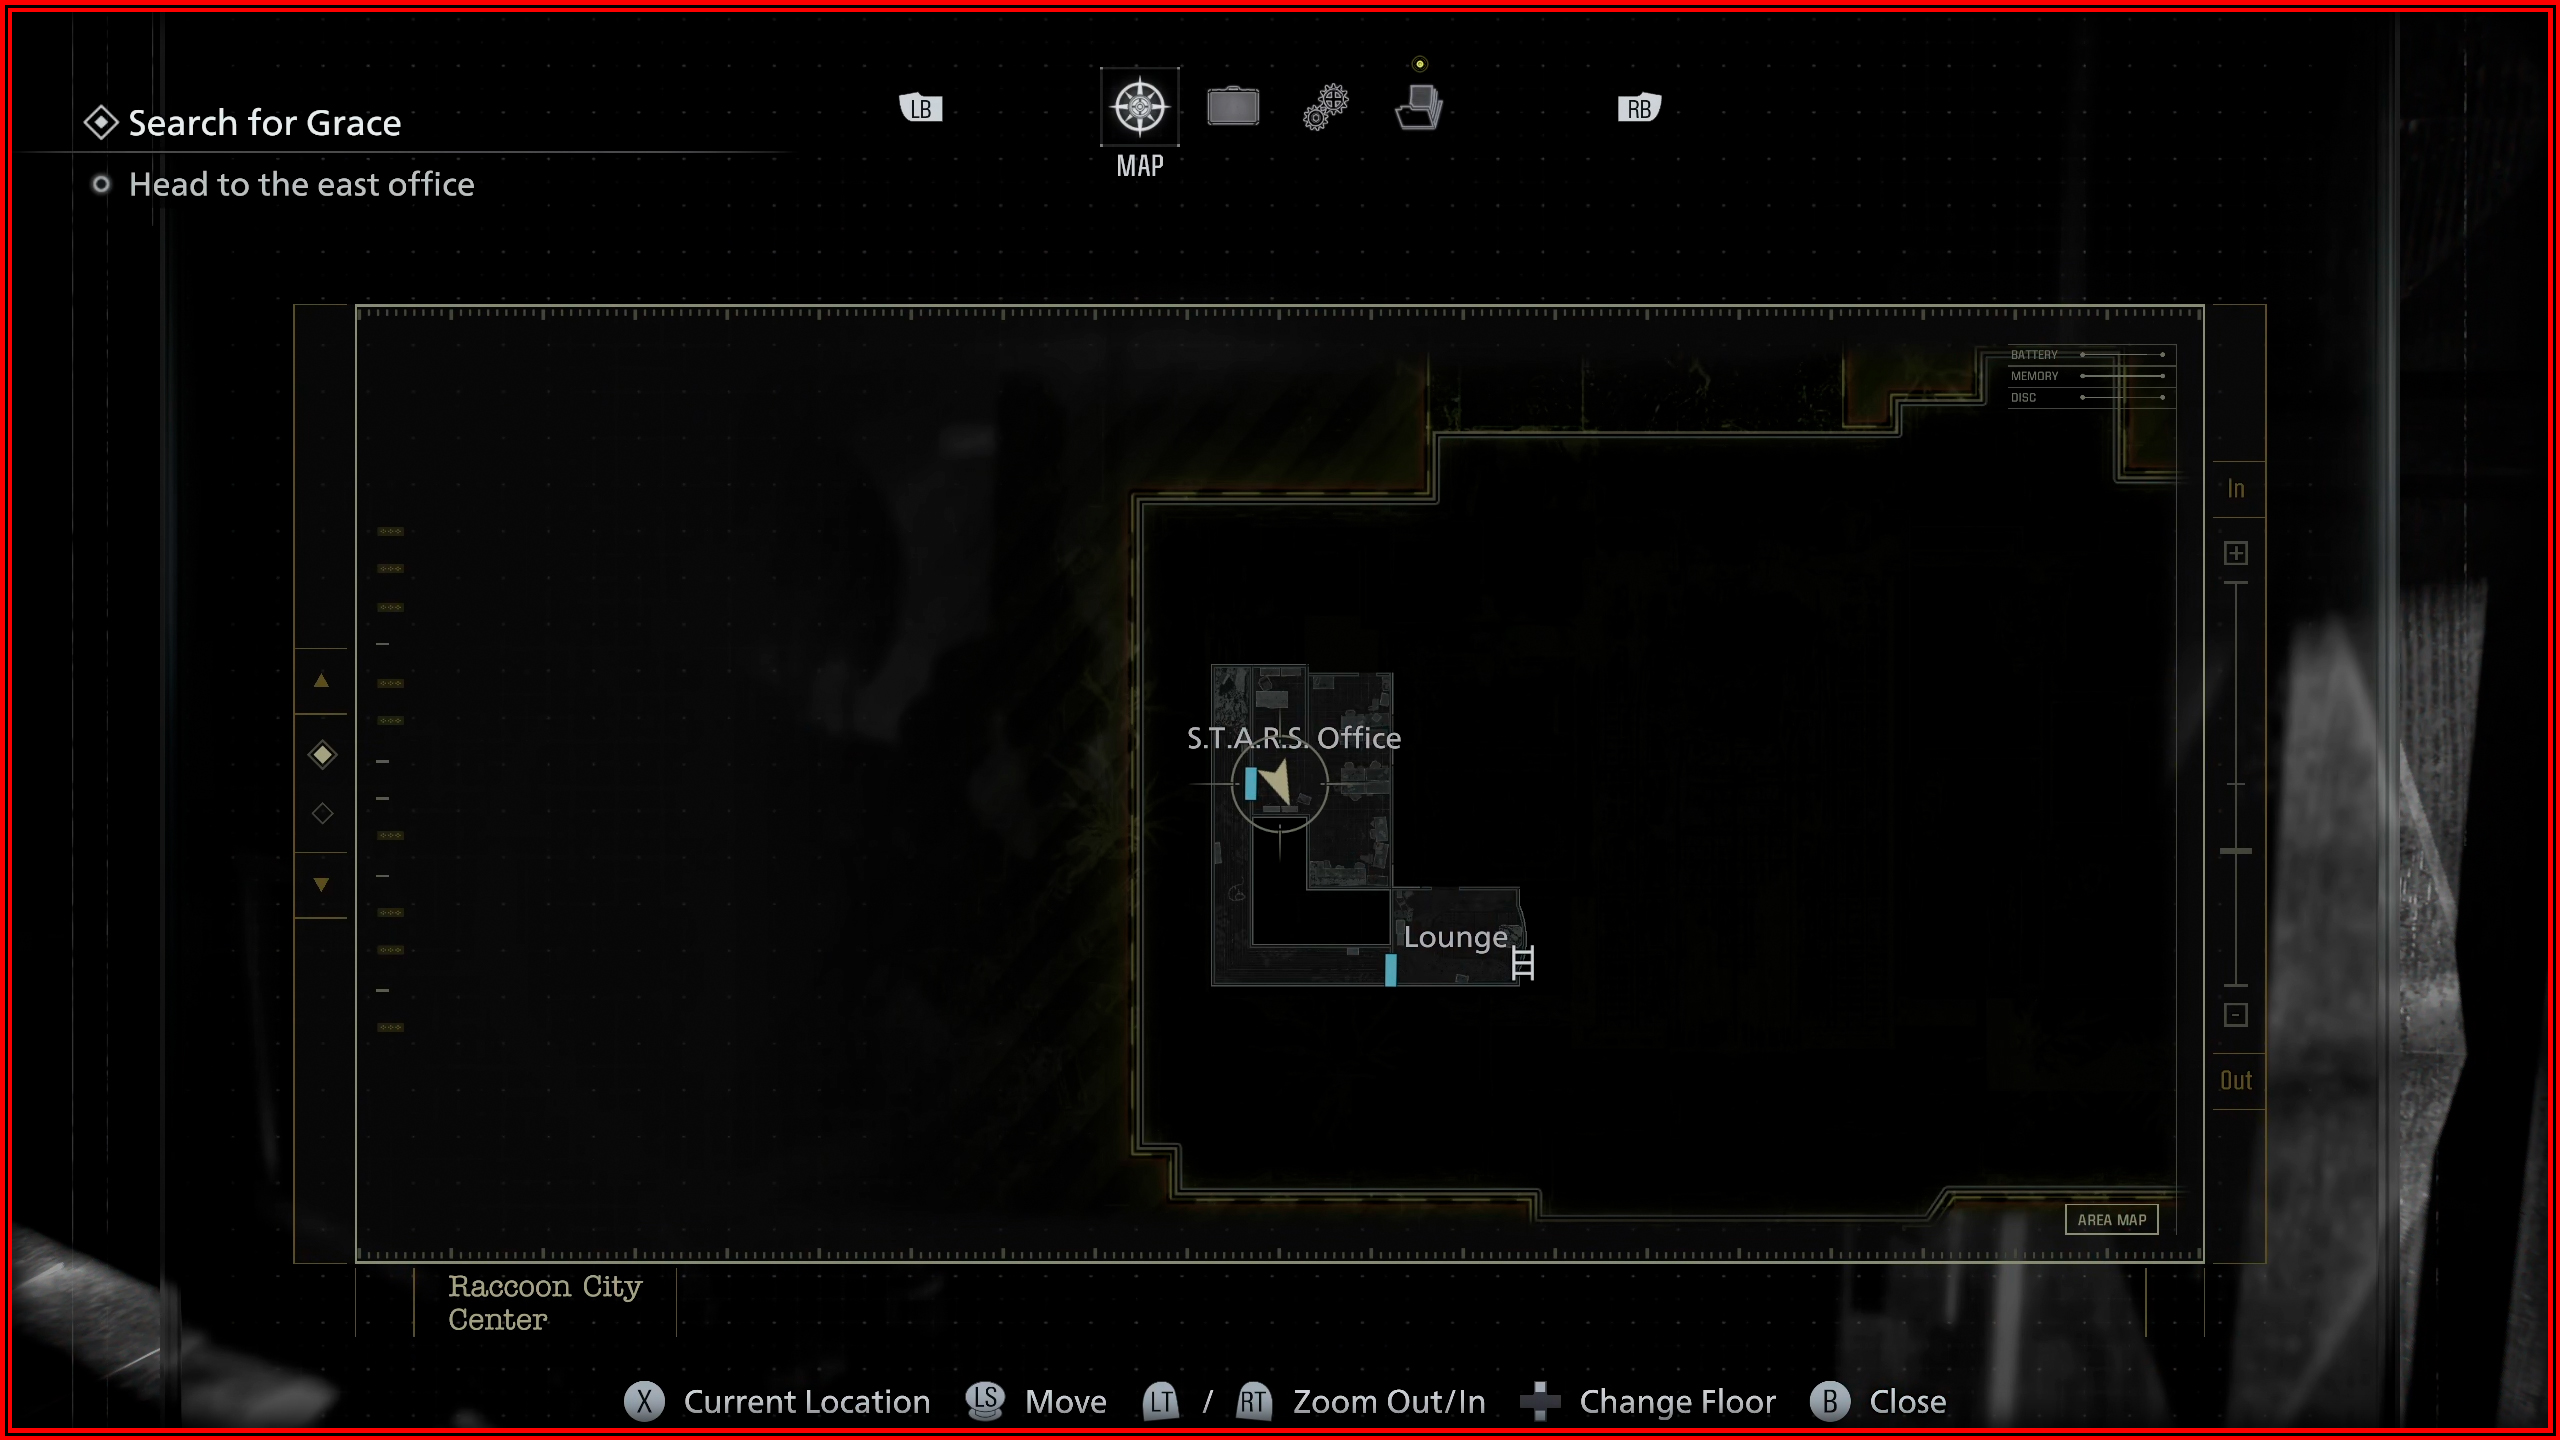
File 59/75 - Barry’s To Do List
S.T.A.R.S. Office: On the desk.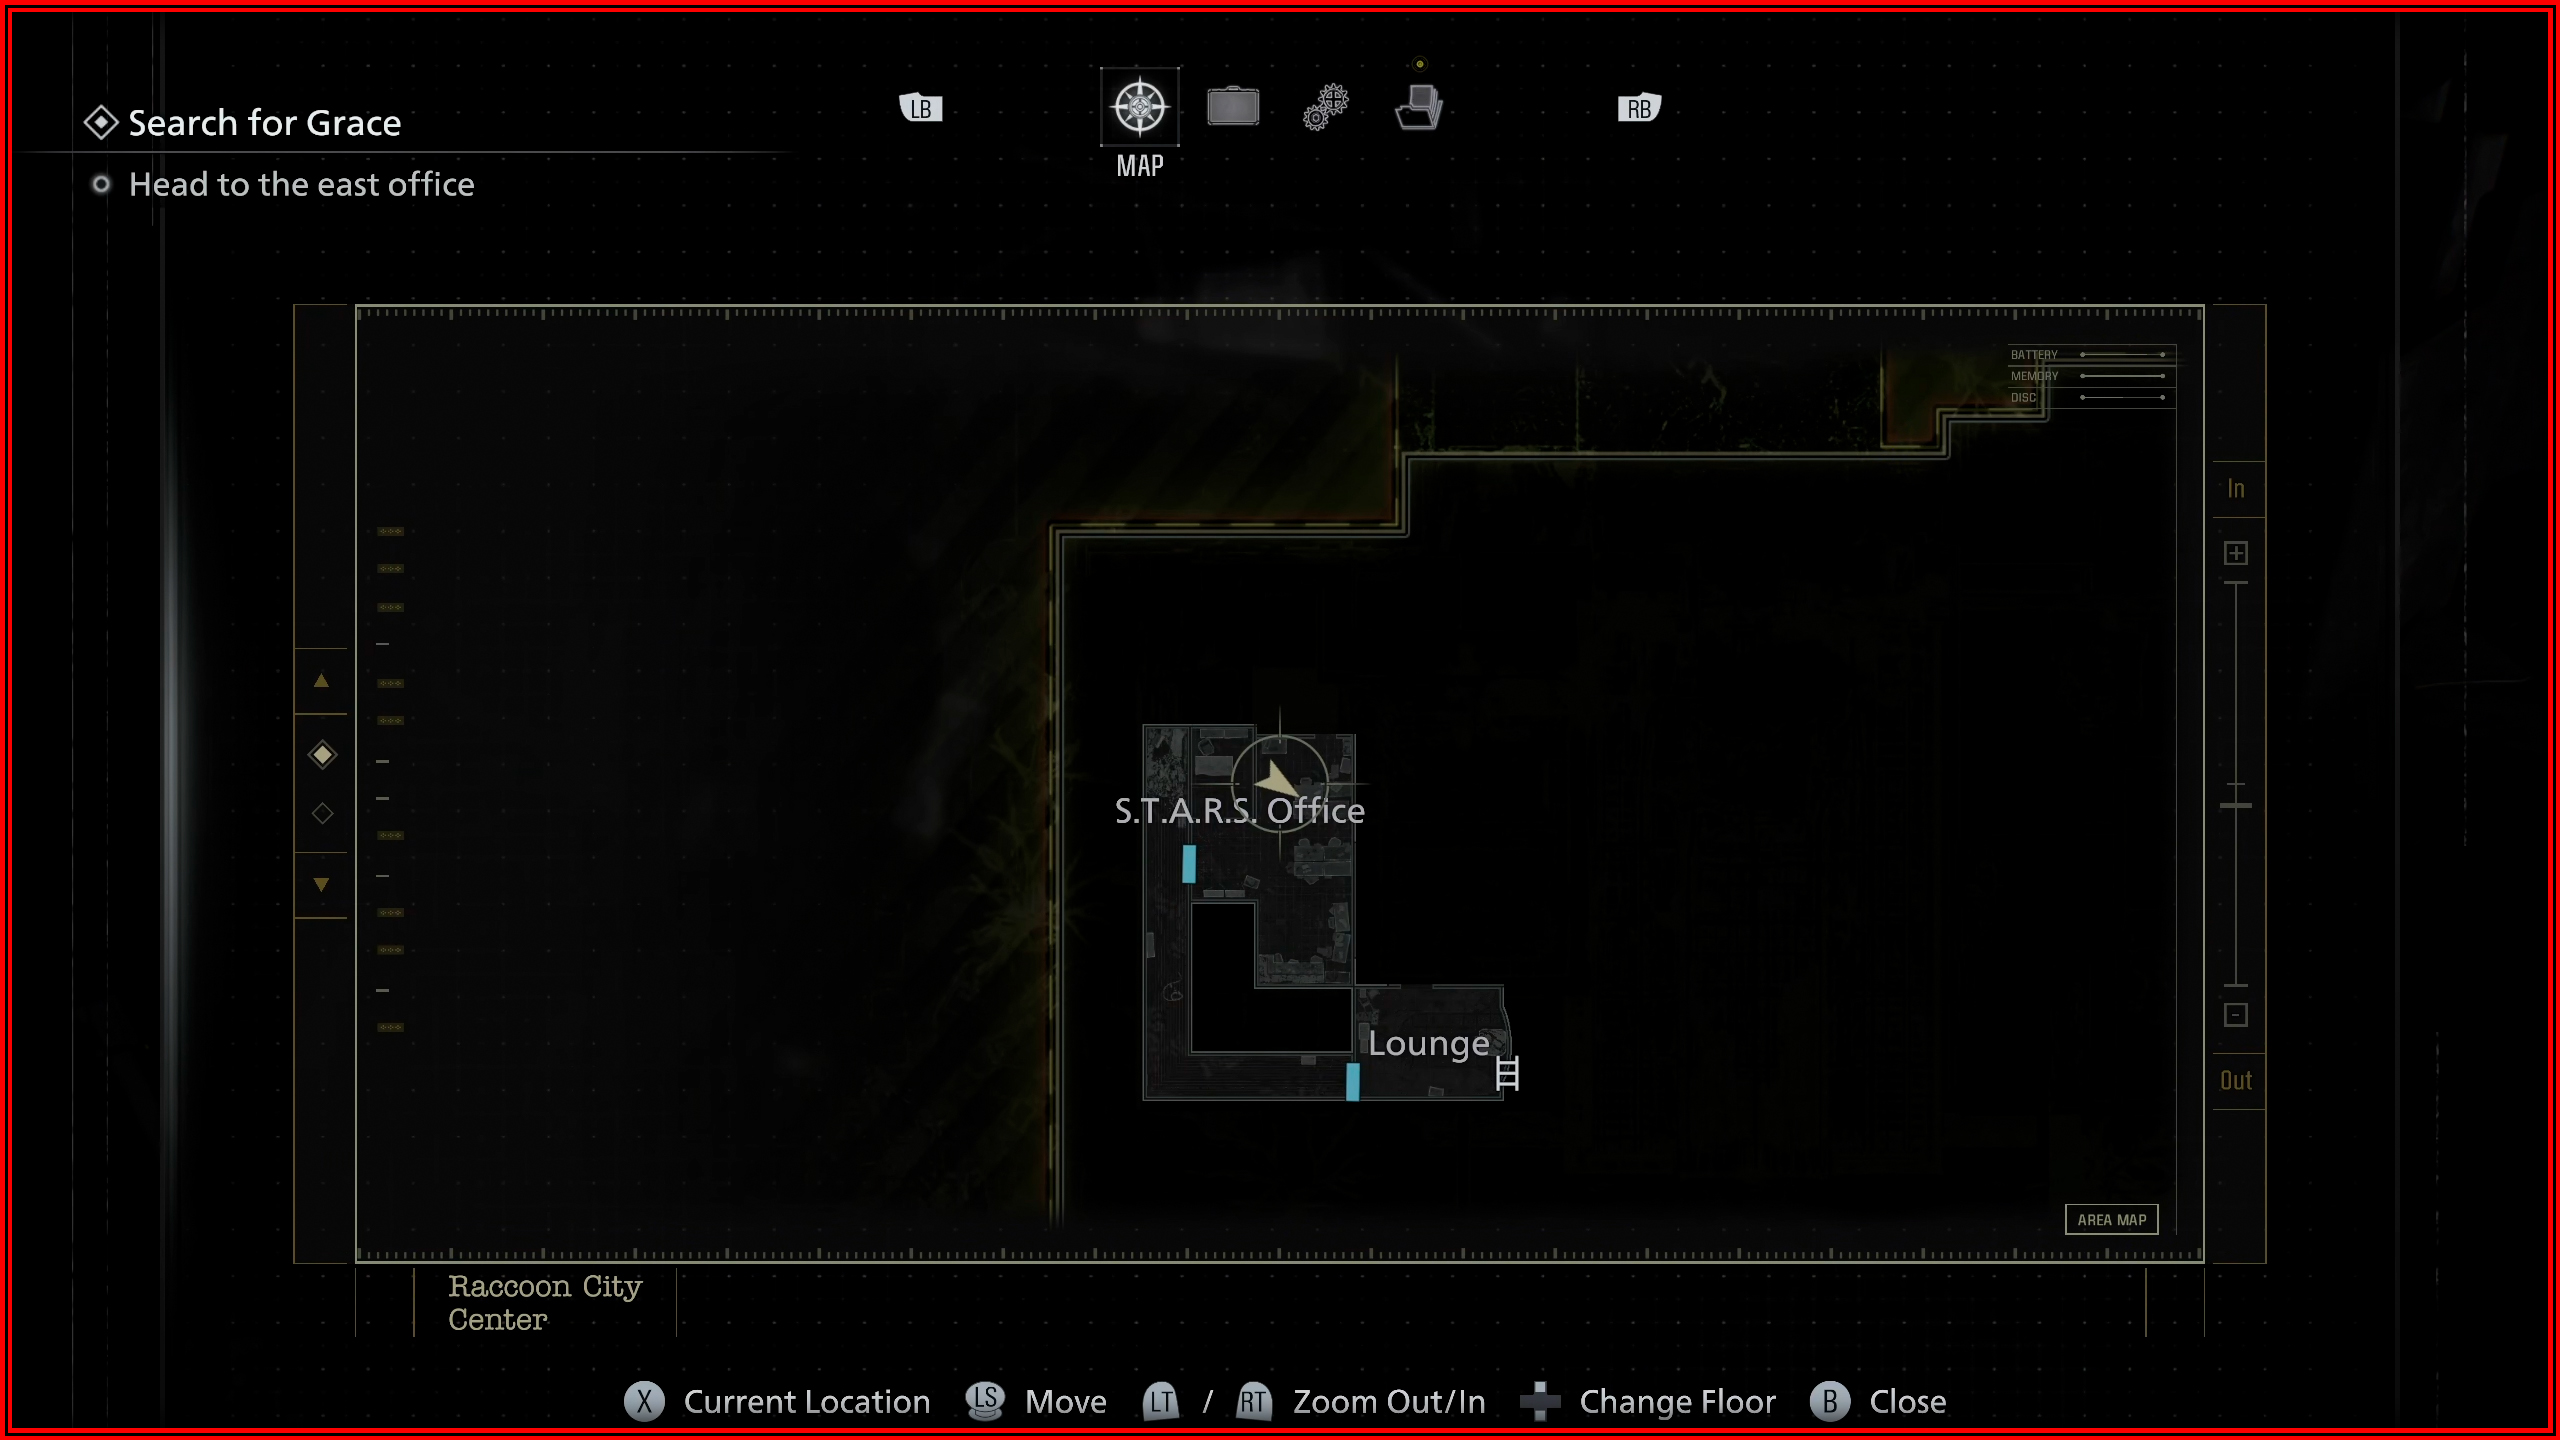
File 60/75 - Library Card
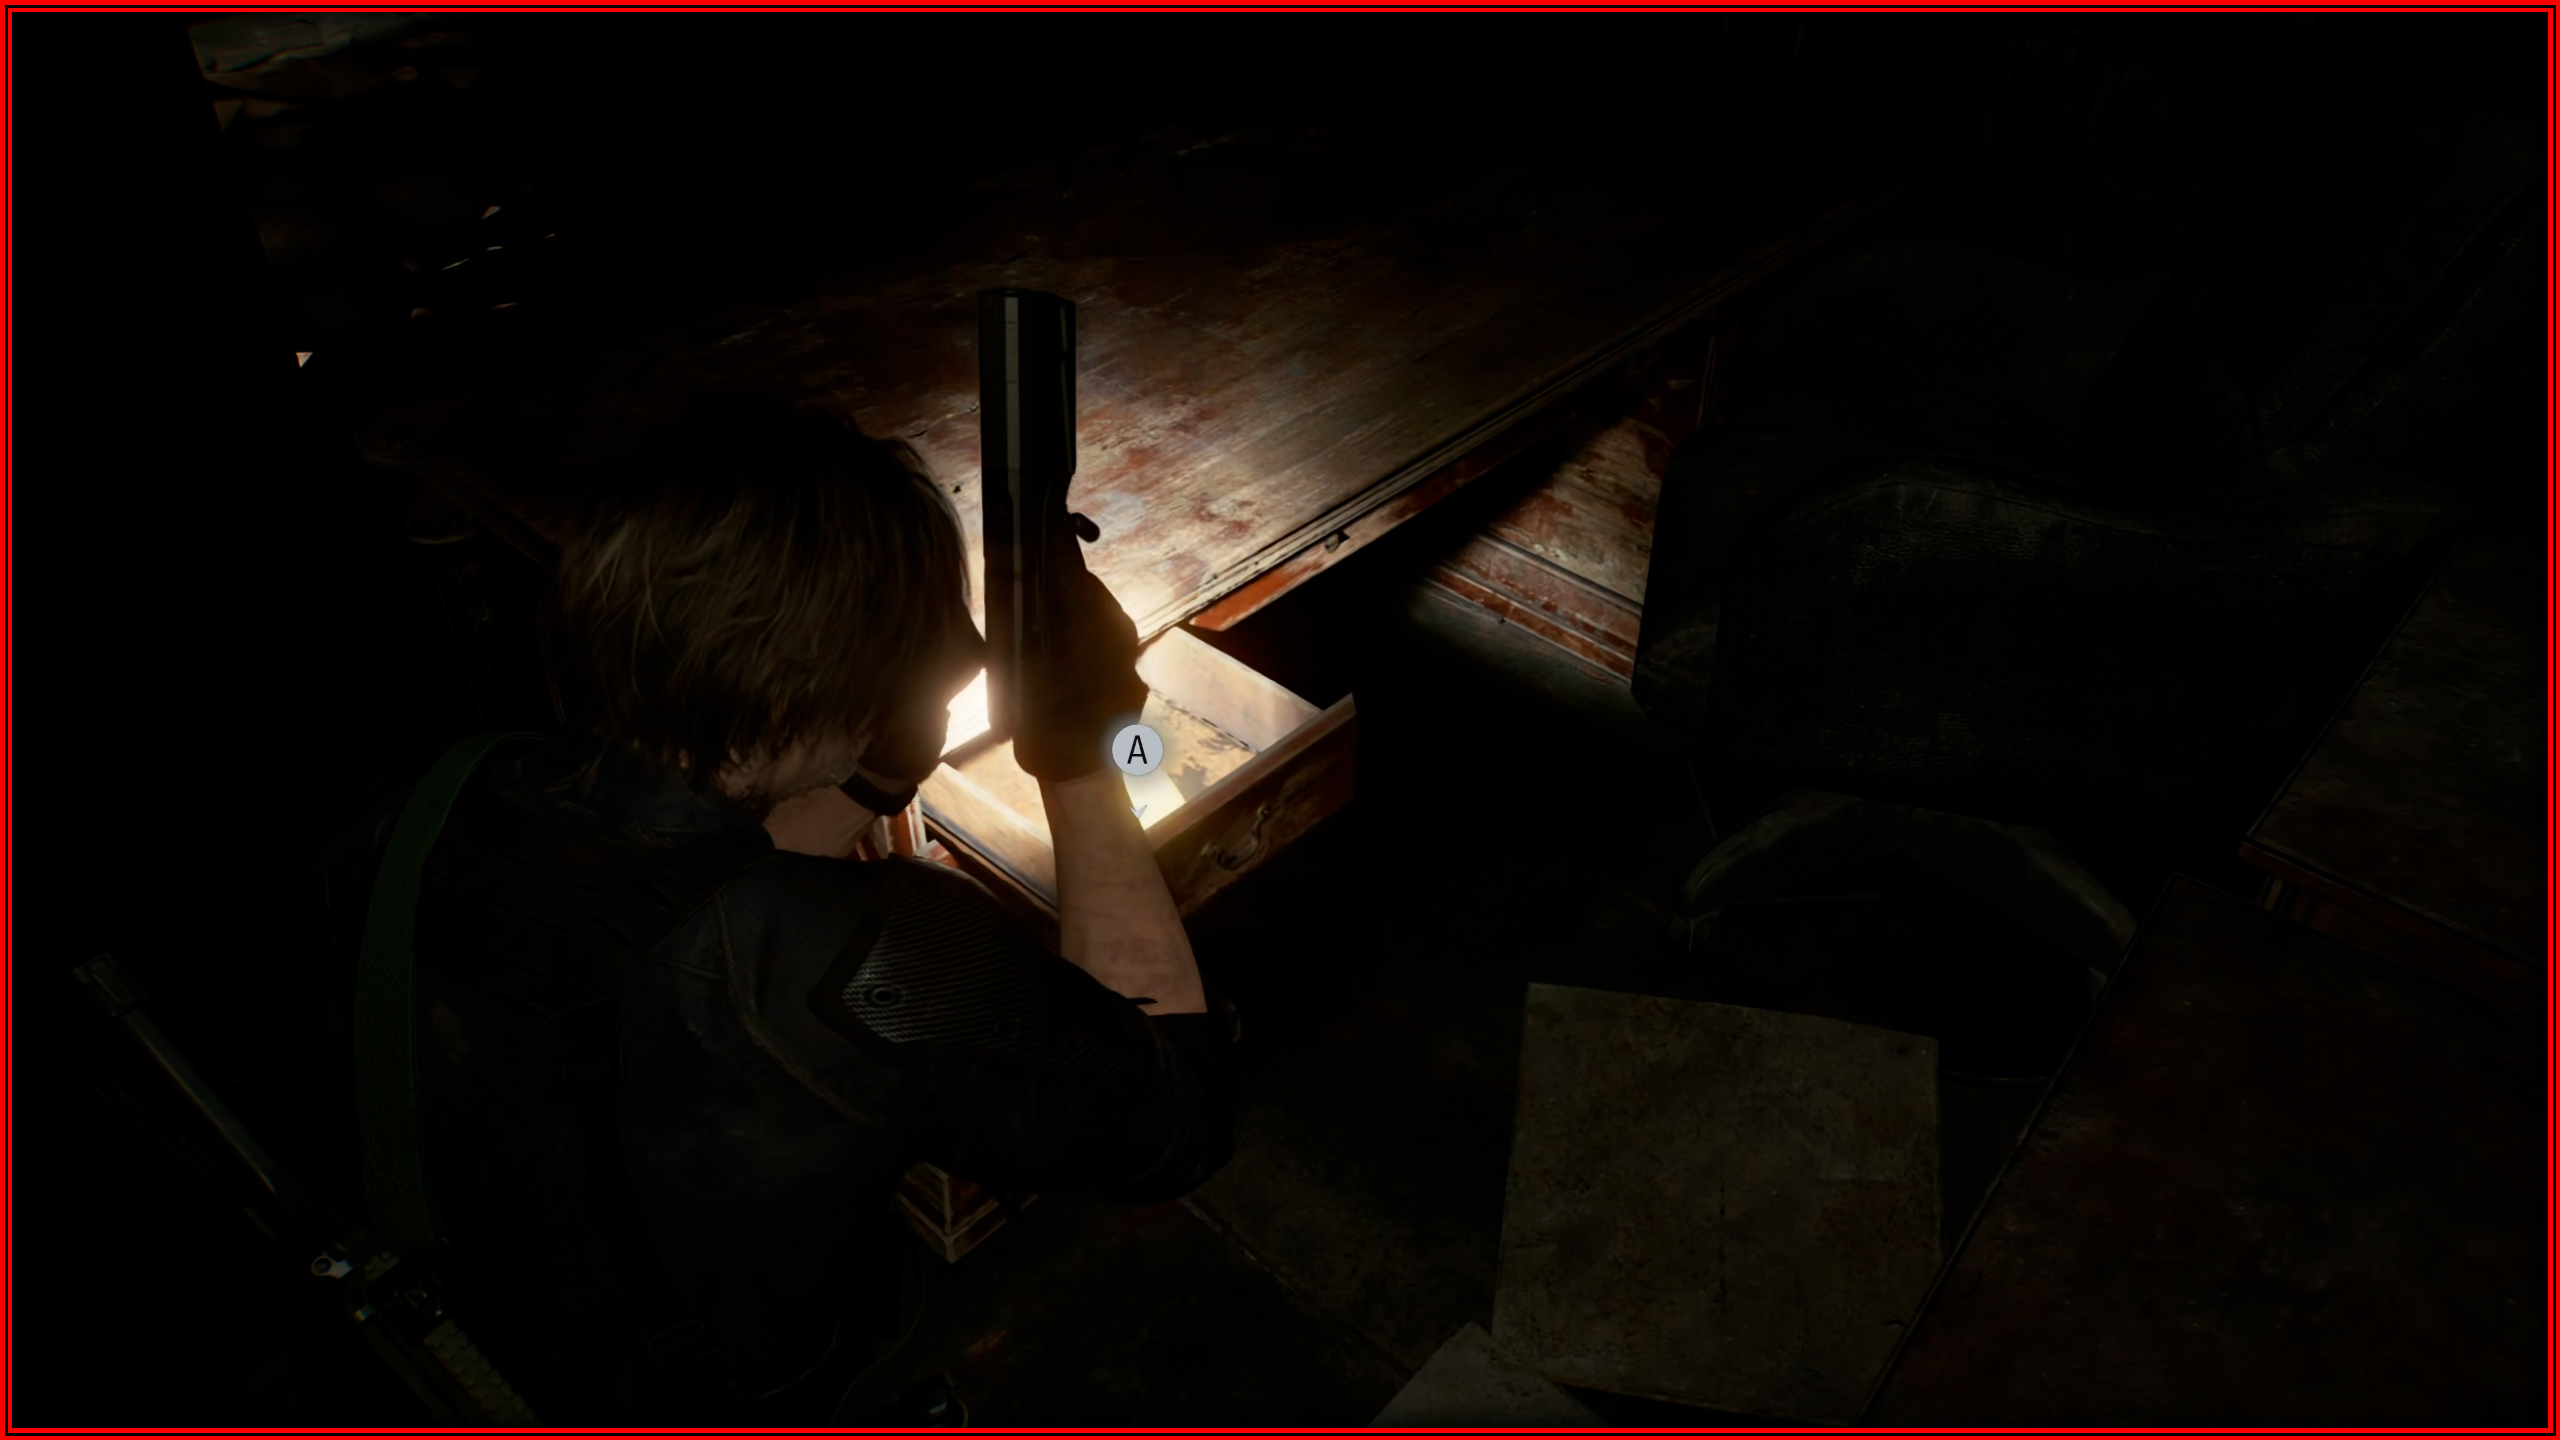
S.T.A.R.S. Office: Inside the desk drawer.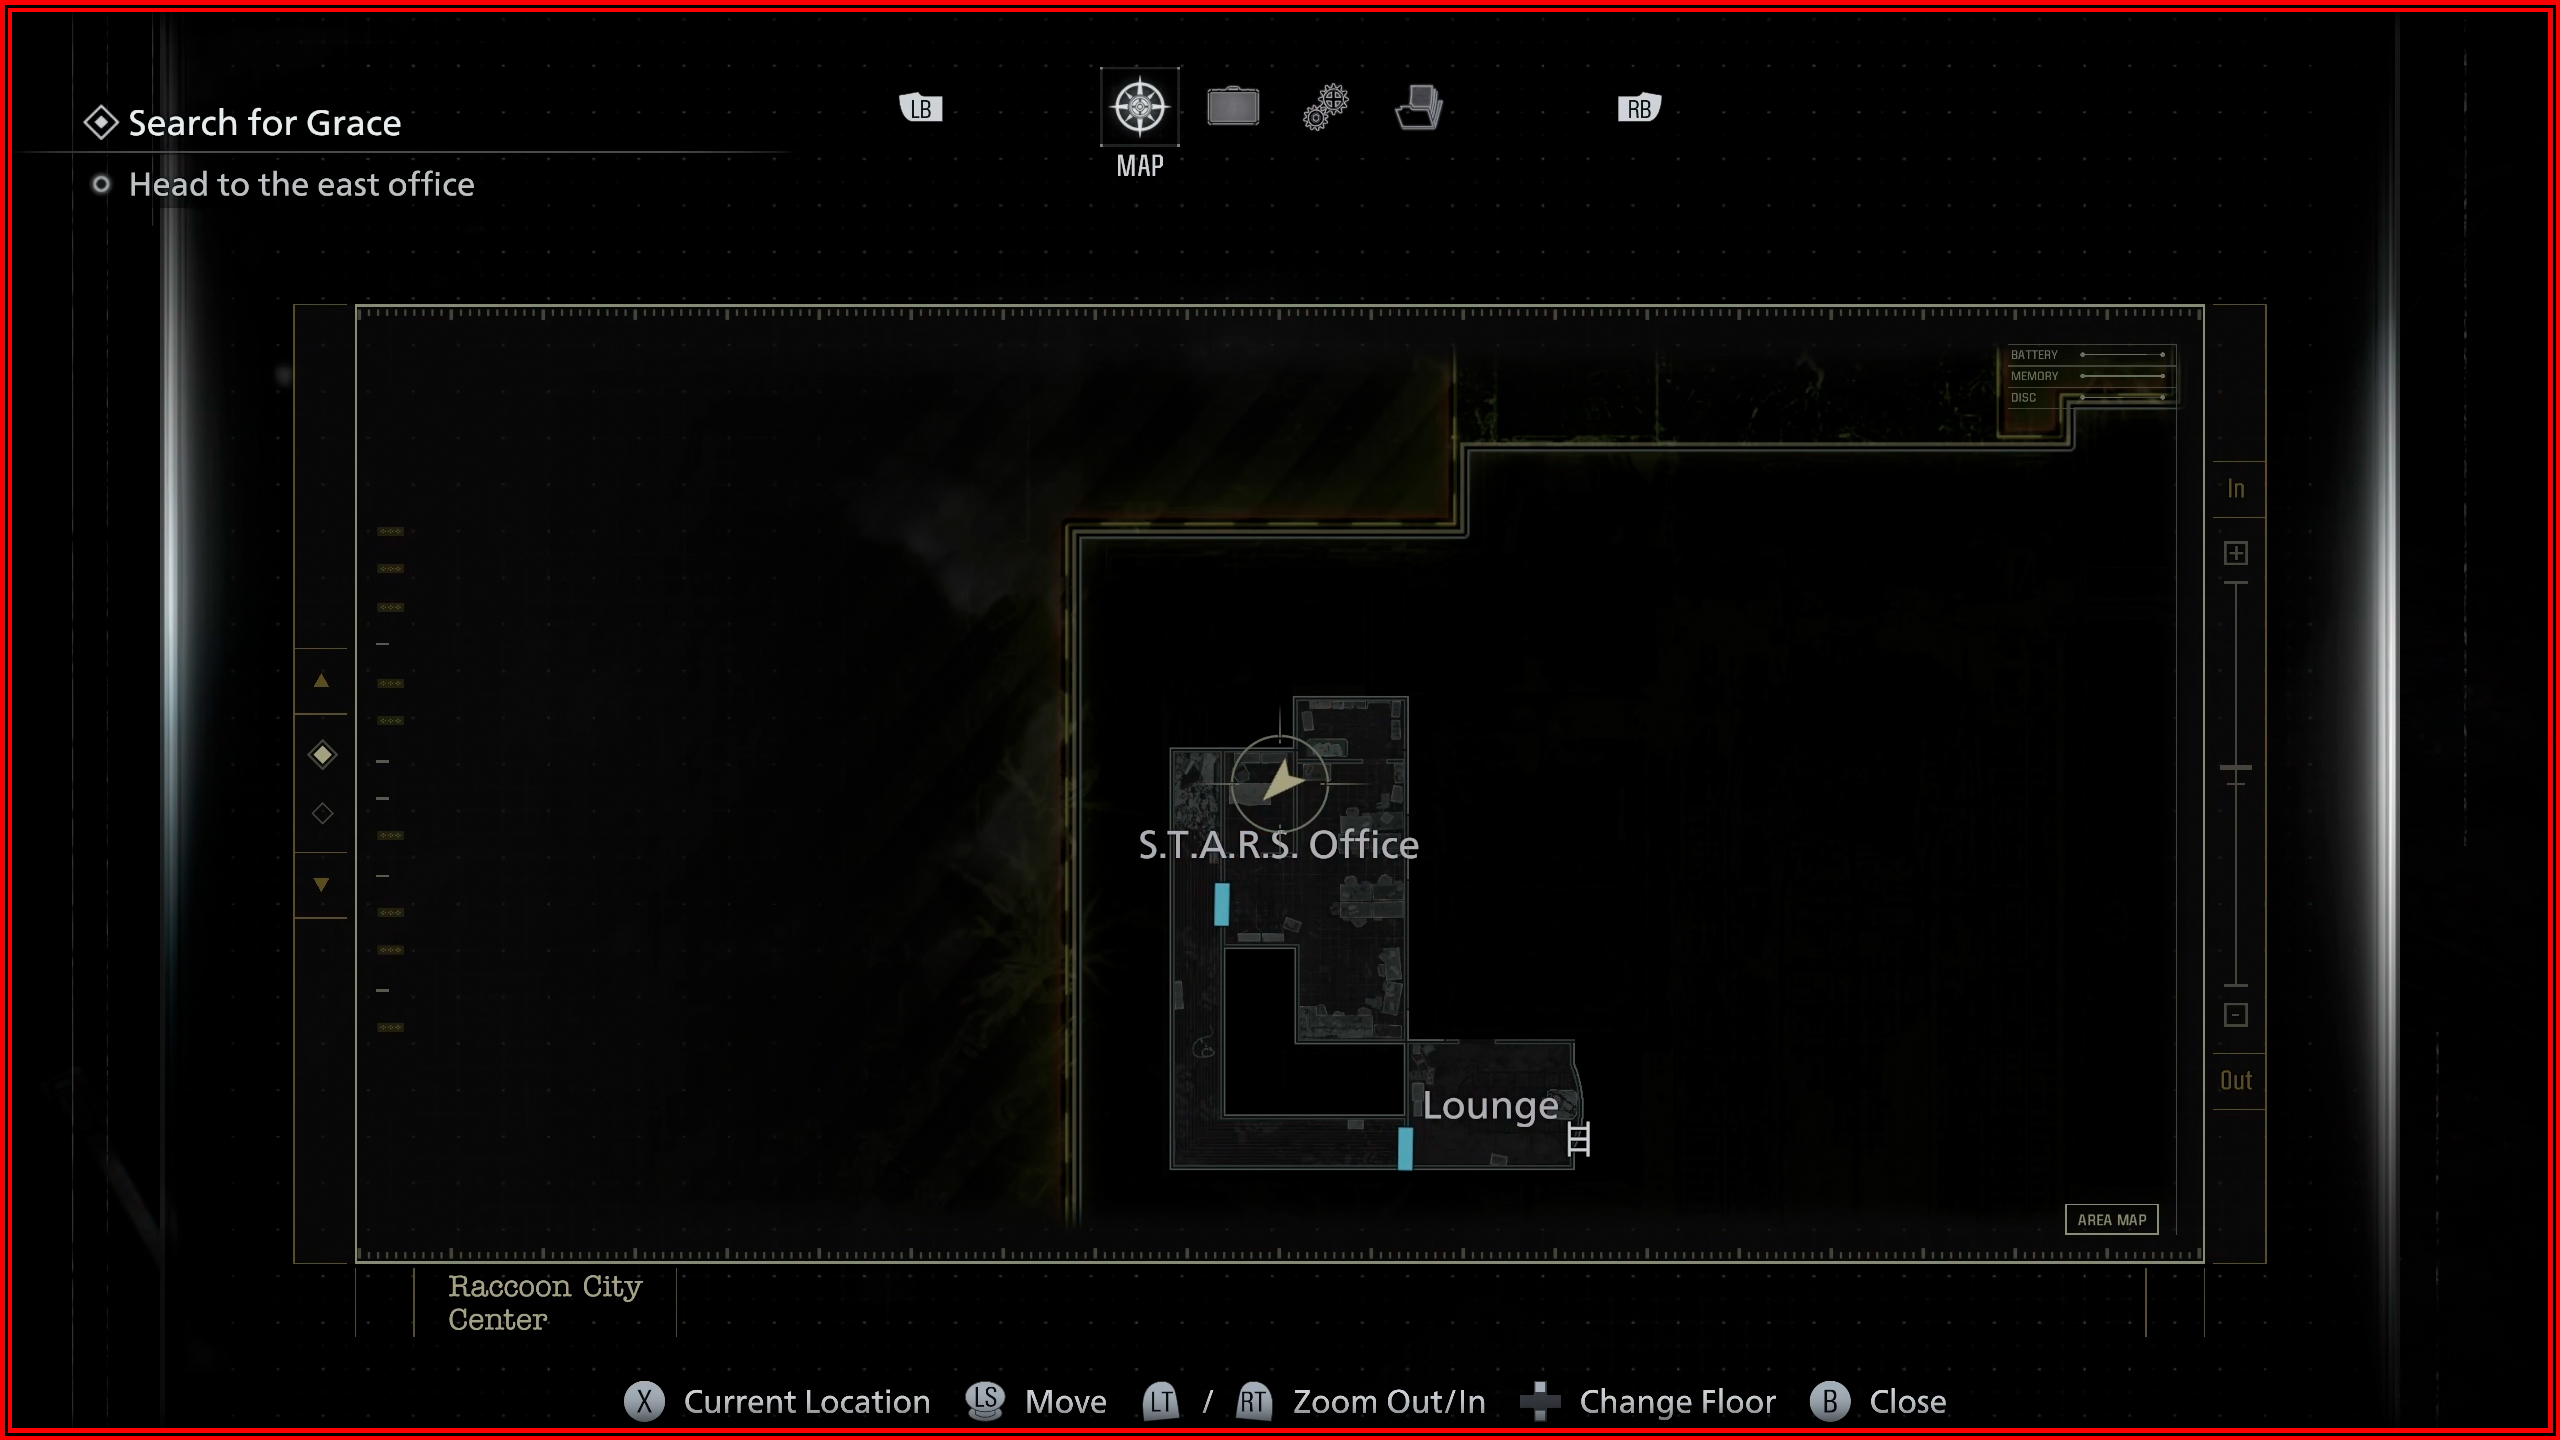
File 61/75 - Photograph
Library: On the second floor of the library, on the bookshelf (Only appears if you have read all 4 files in S.T.A.R.S. Office)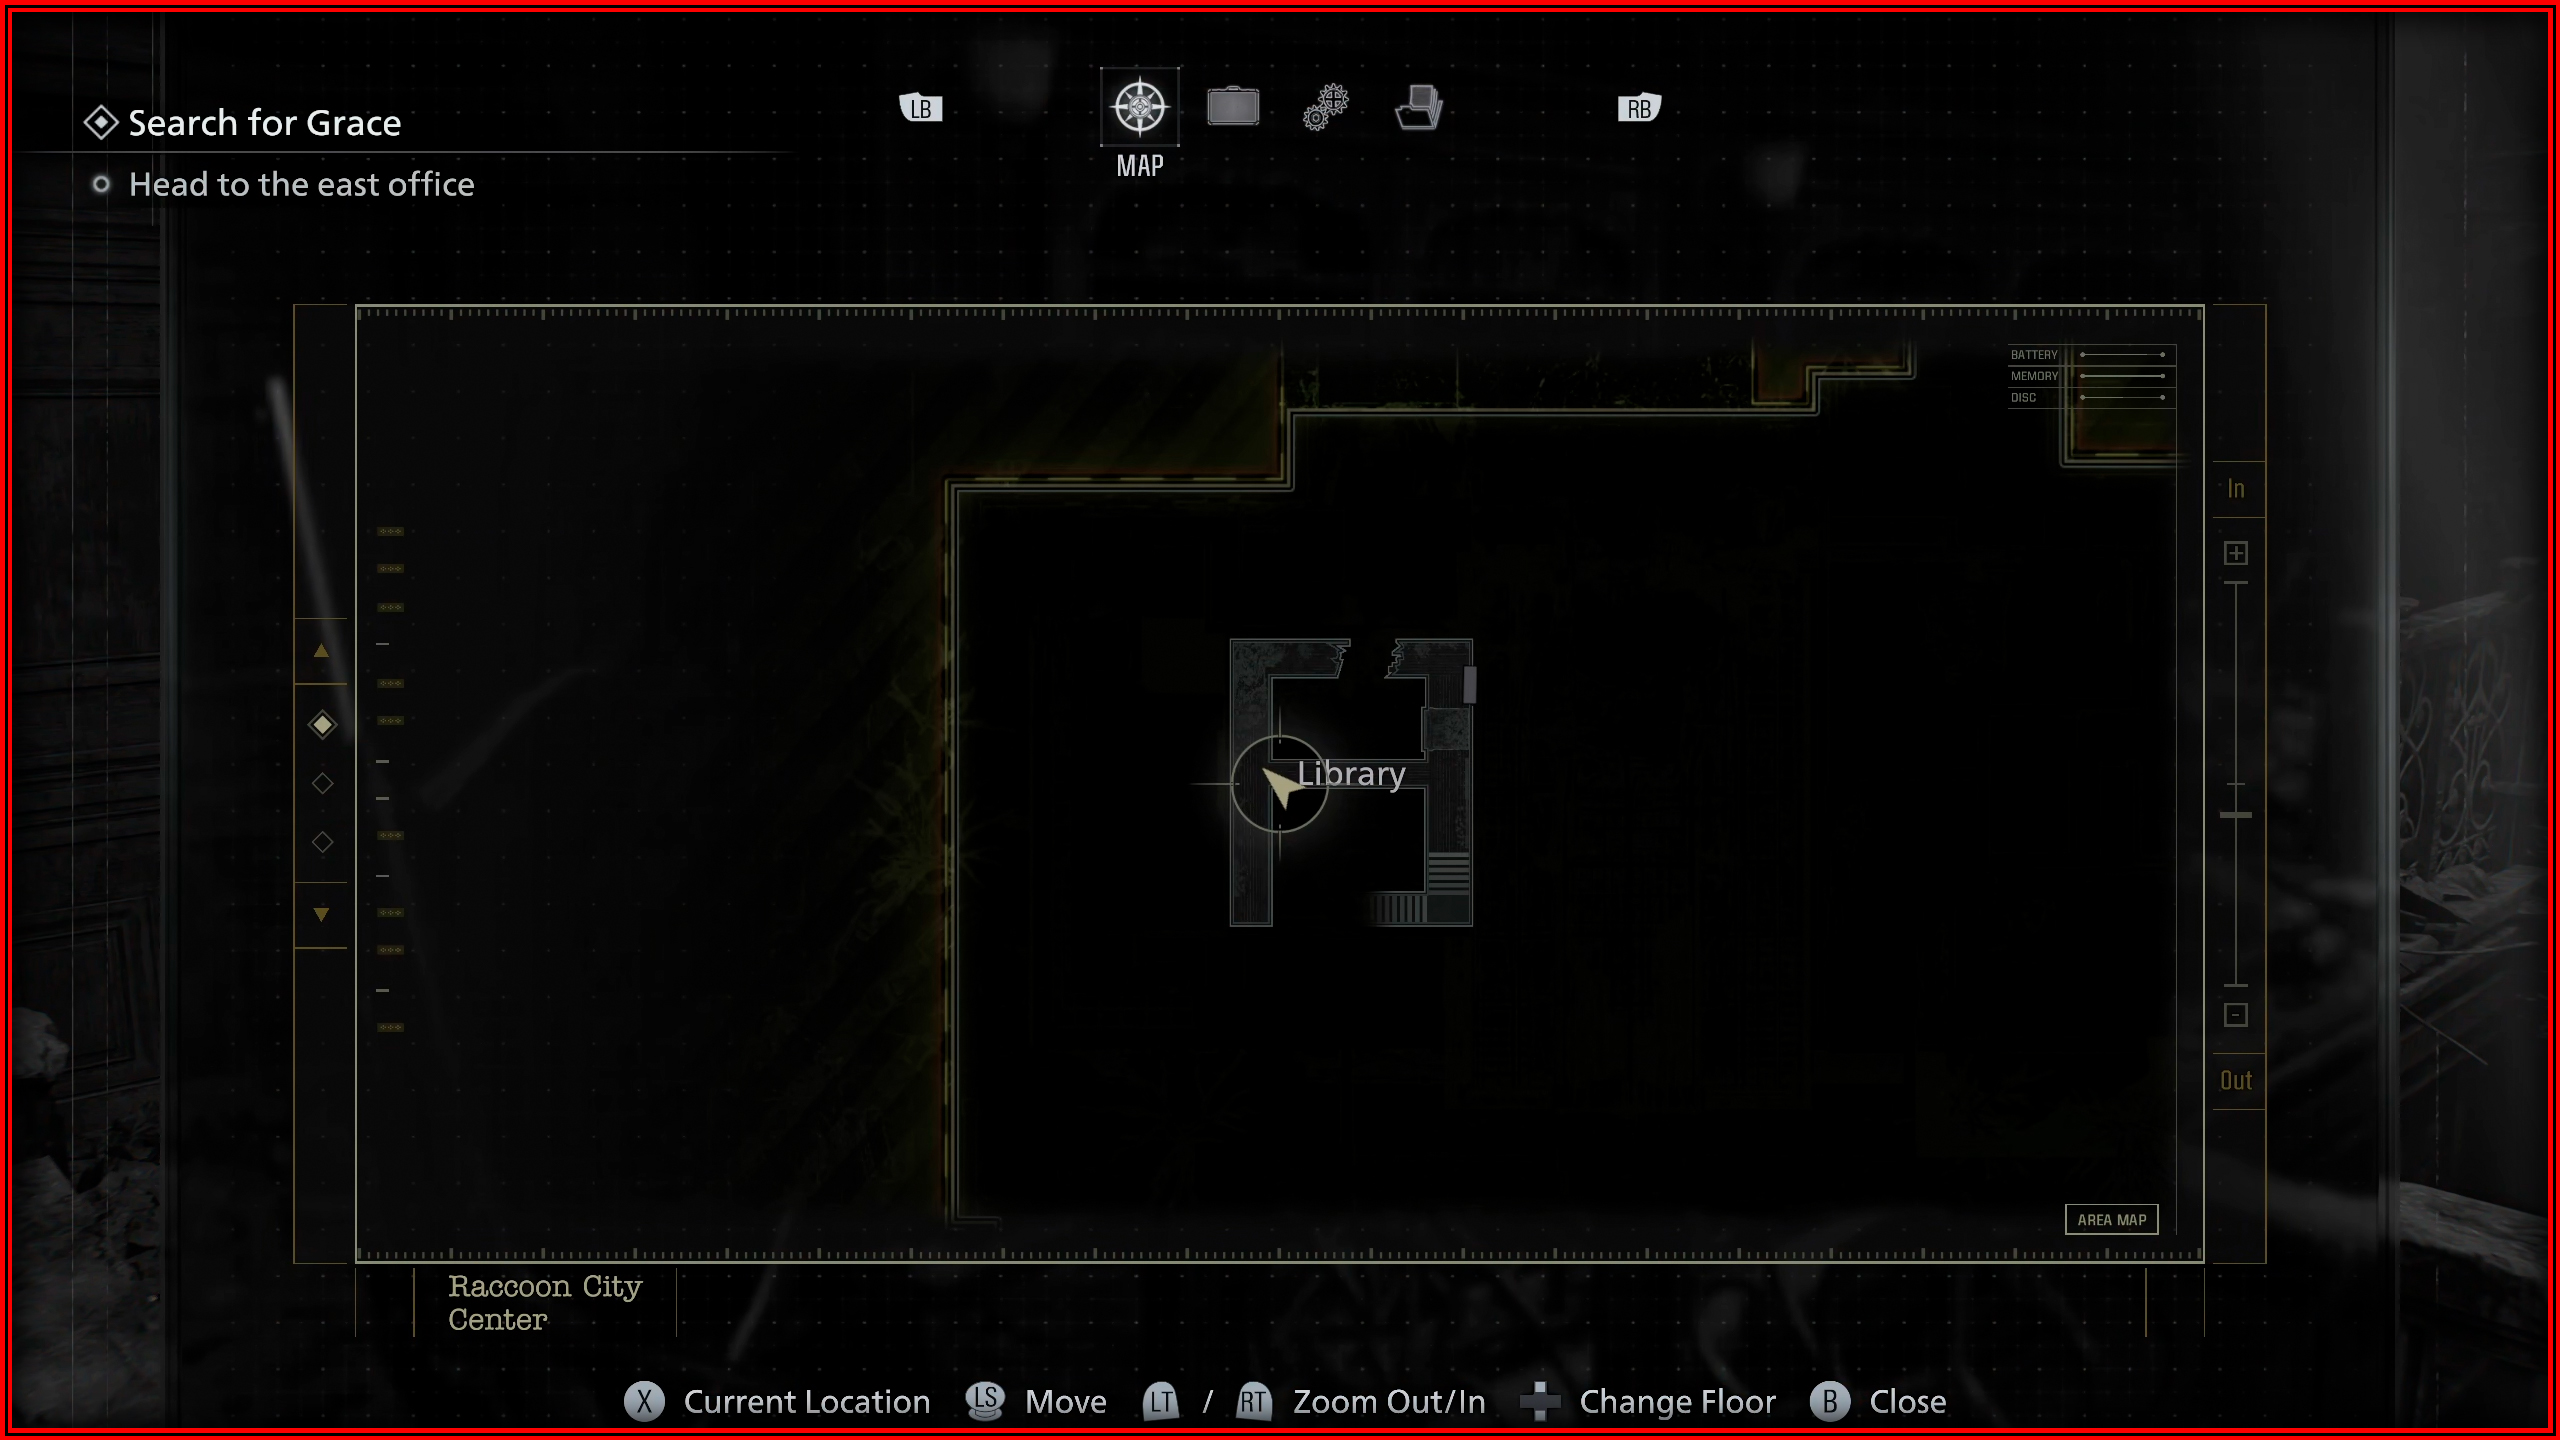
Orphanage
Orphanage
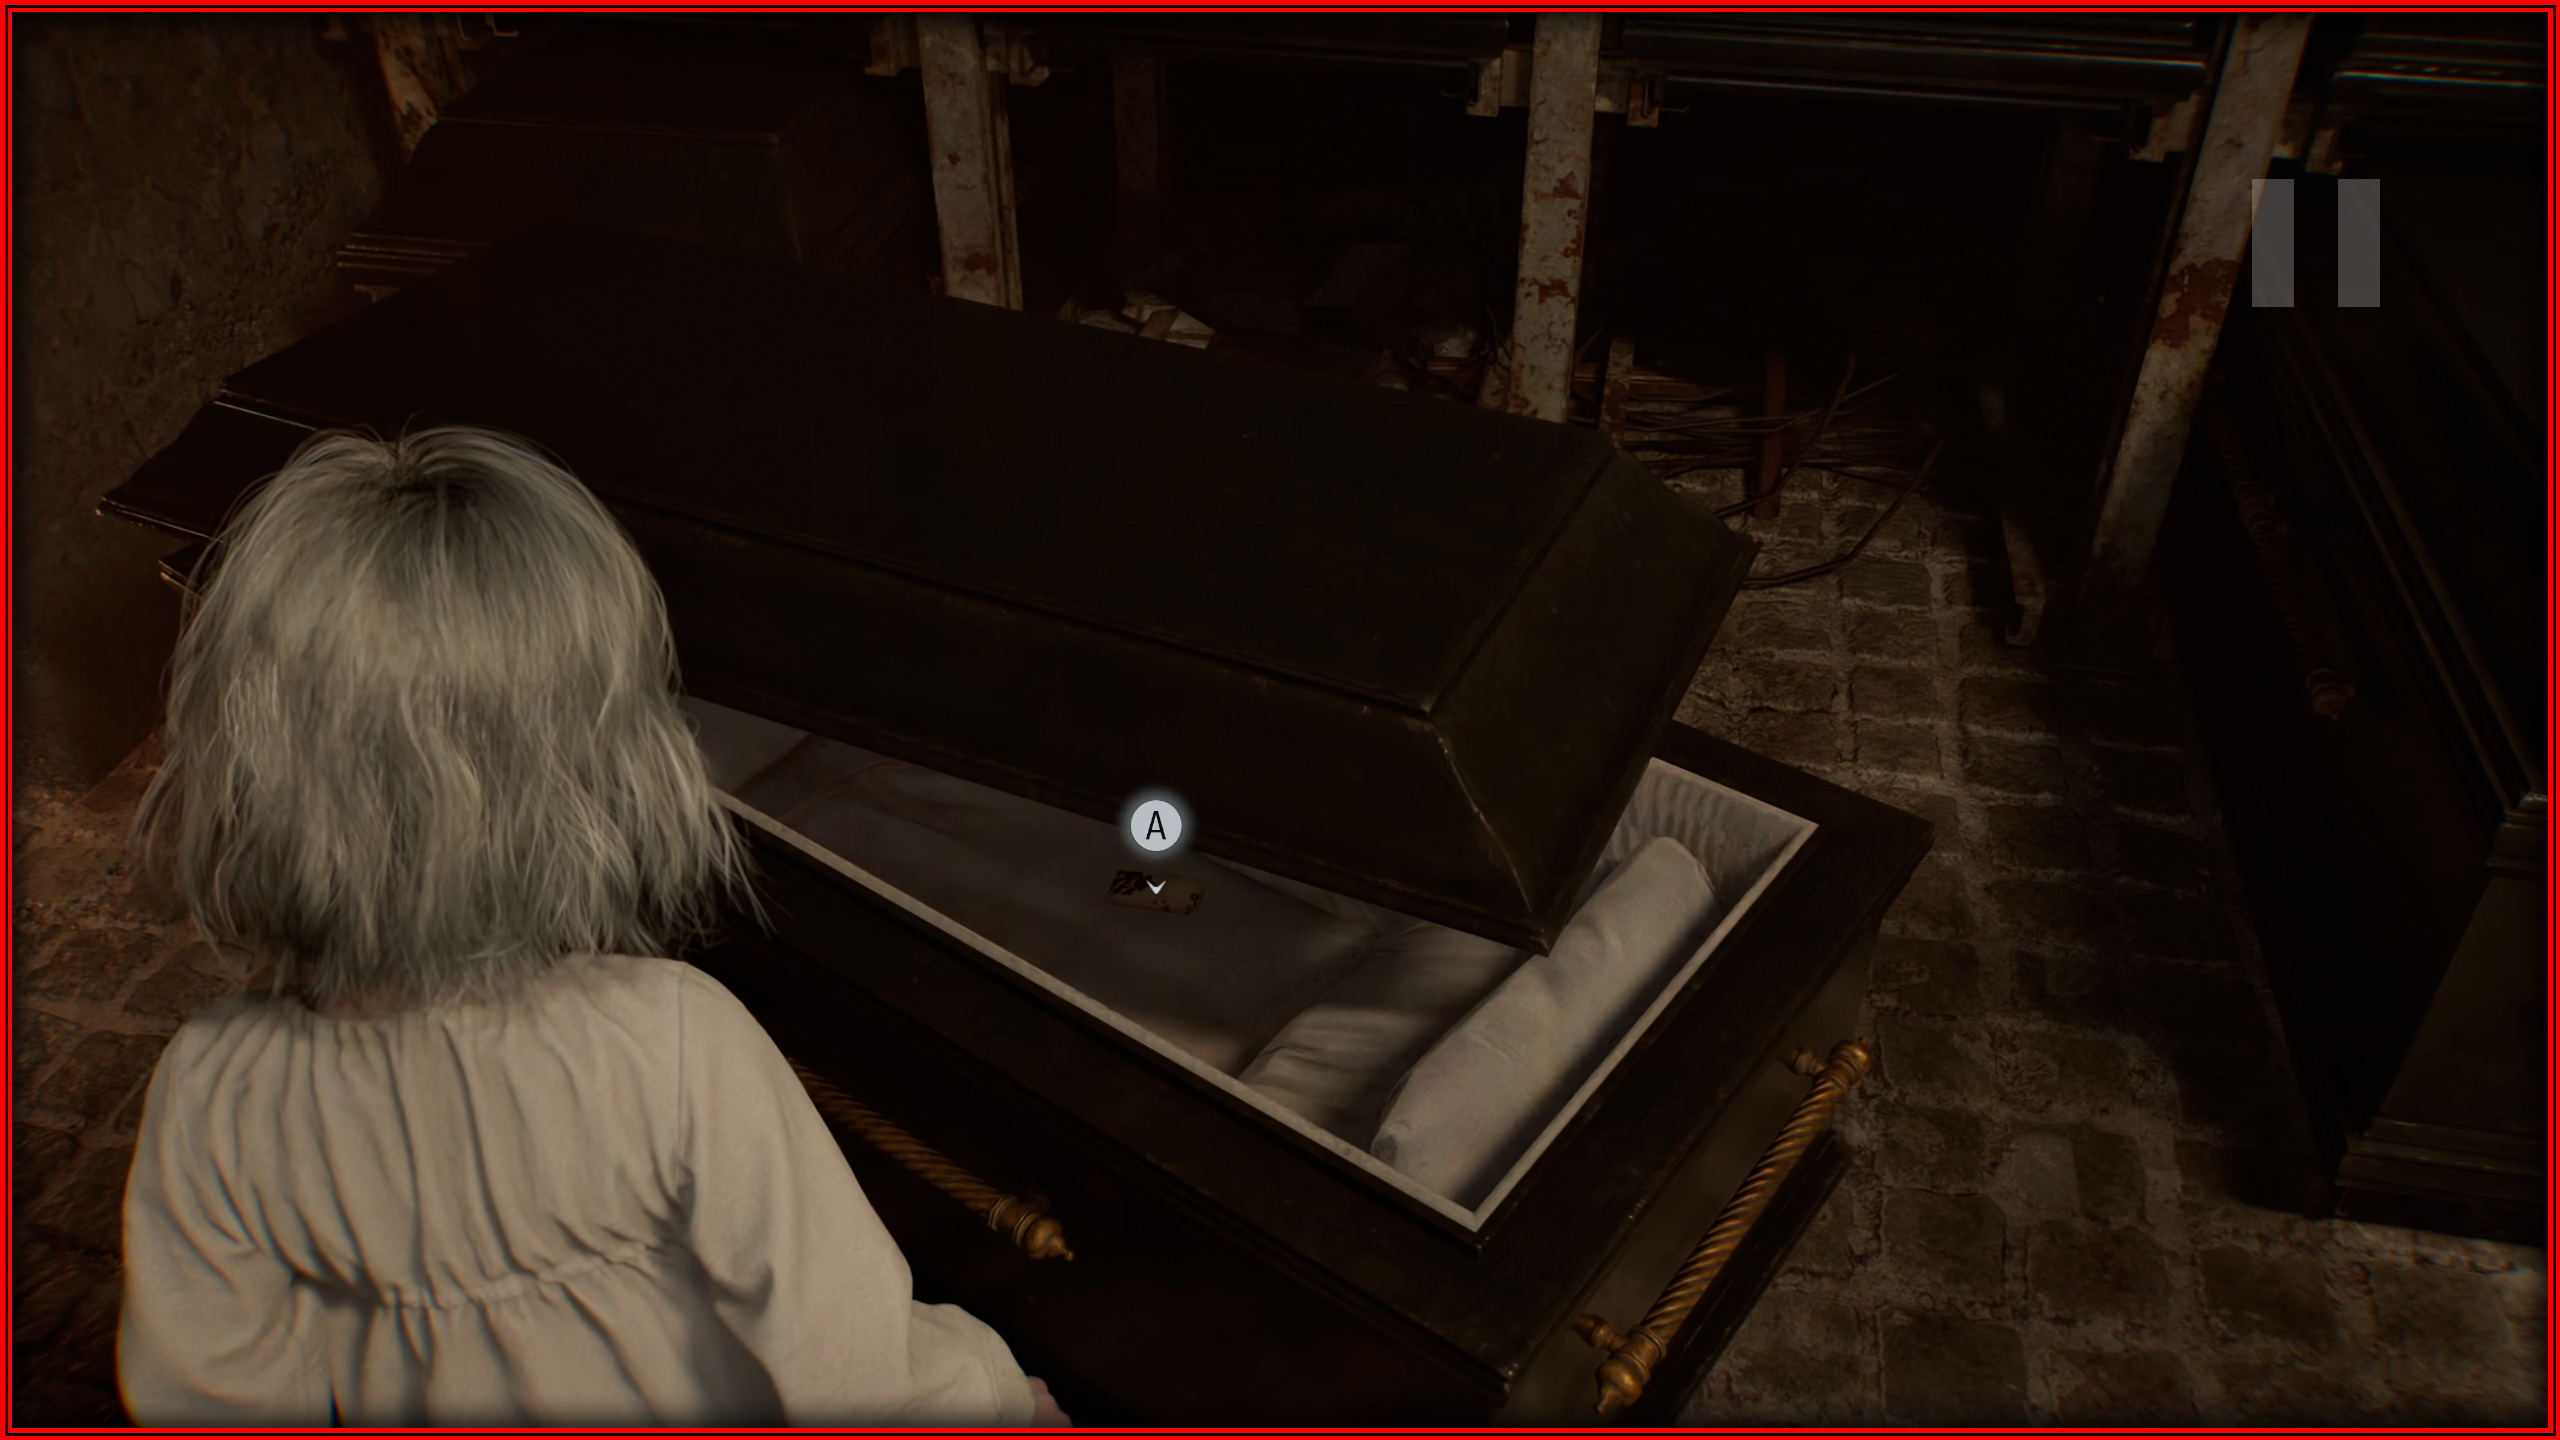
File 62/75 - Toe Tag
Crypt: Inside a coffin on the right of Underground Chapel.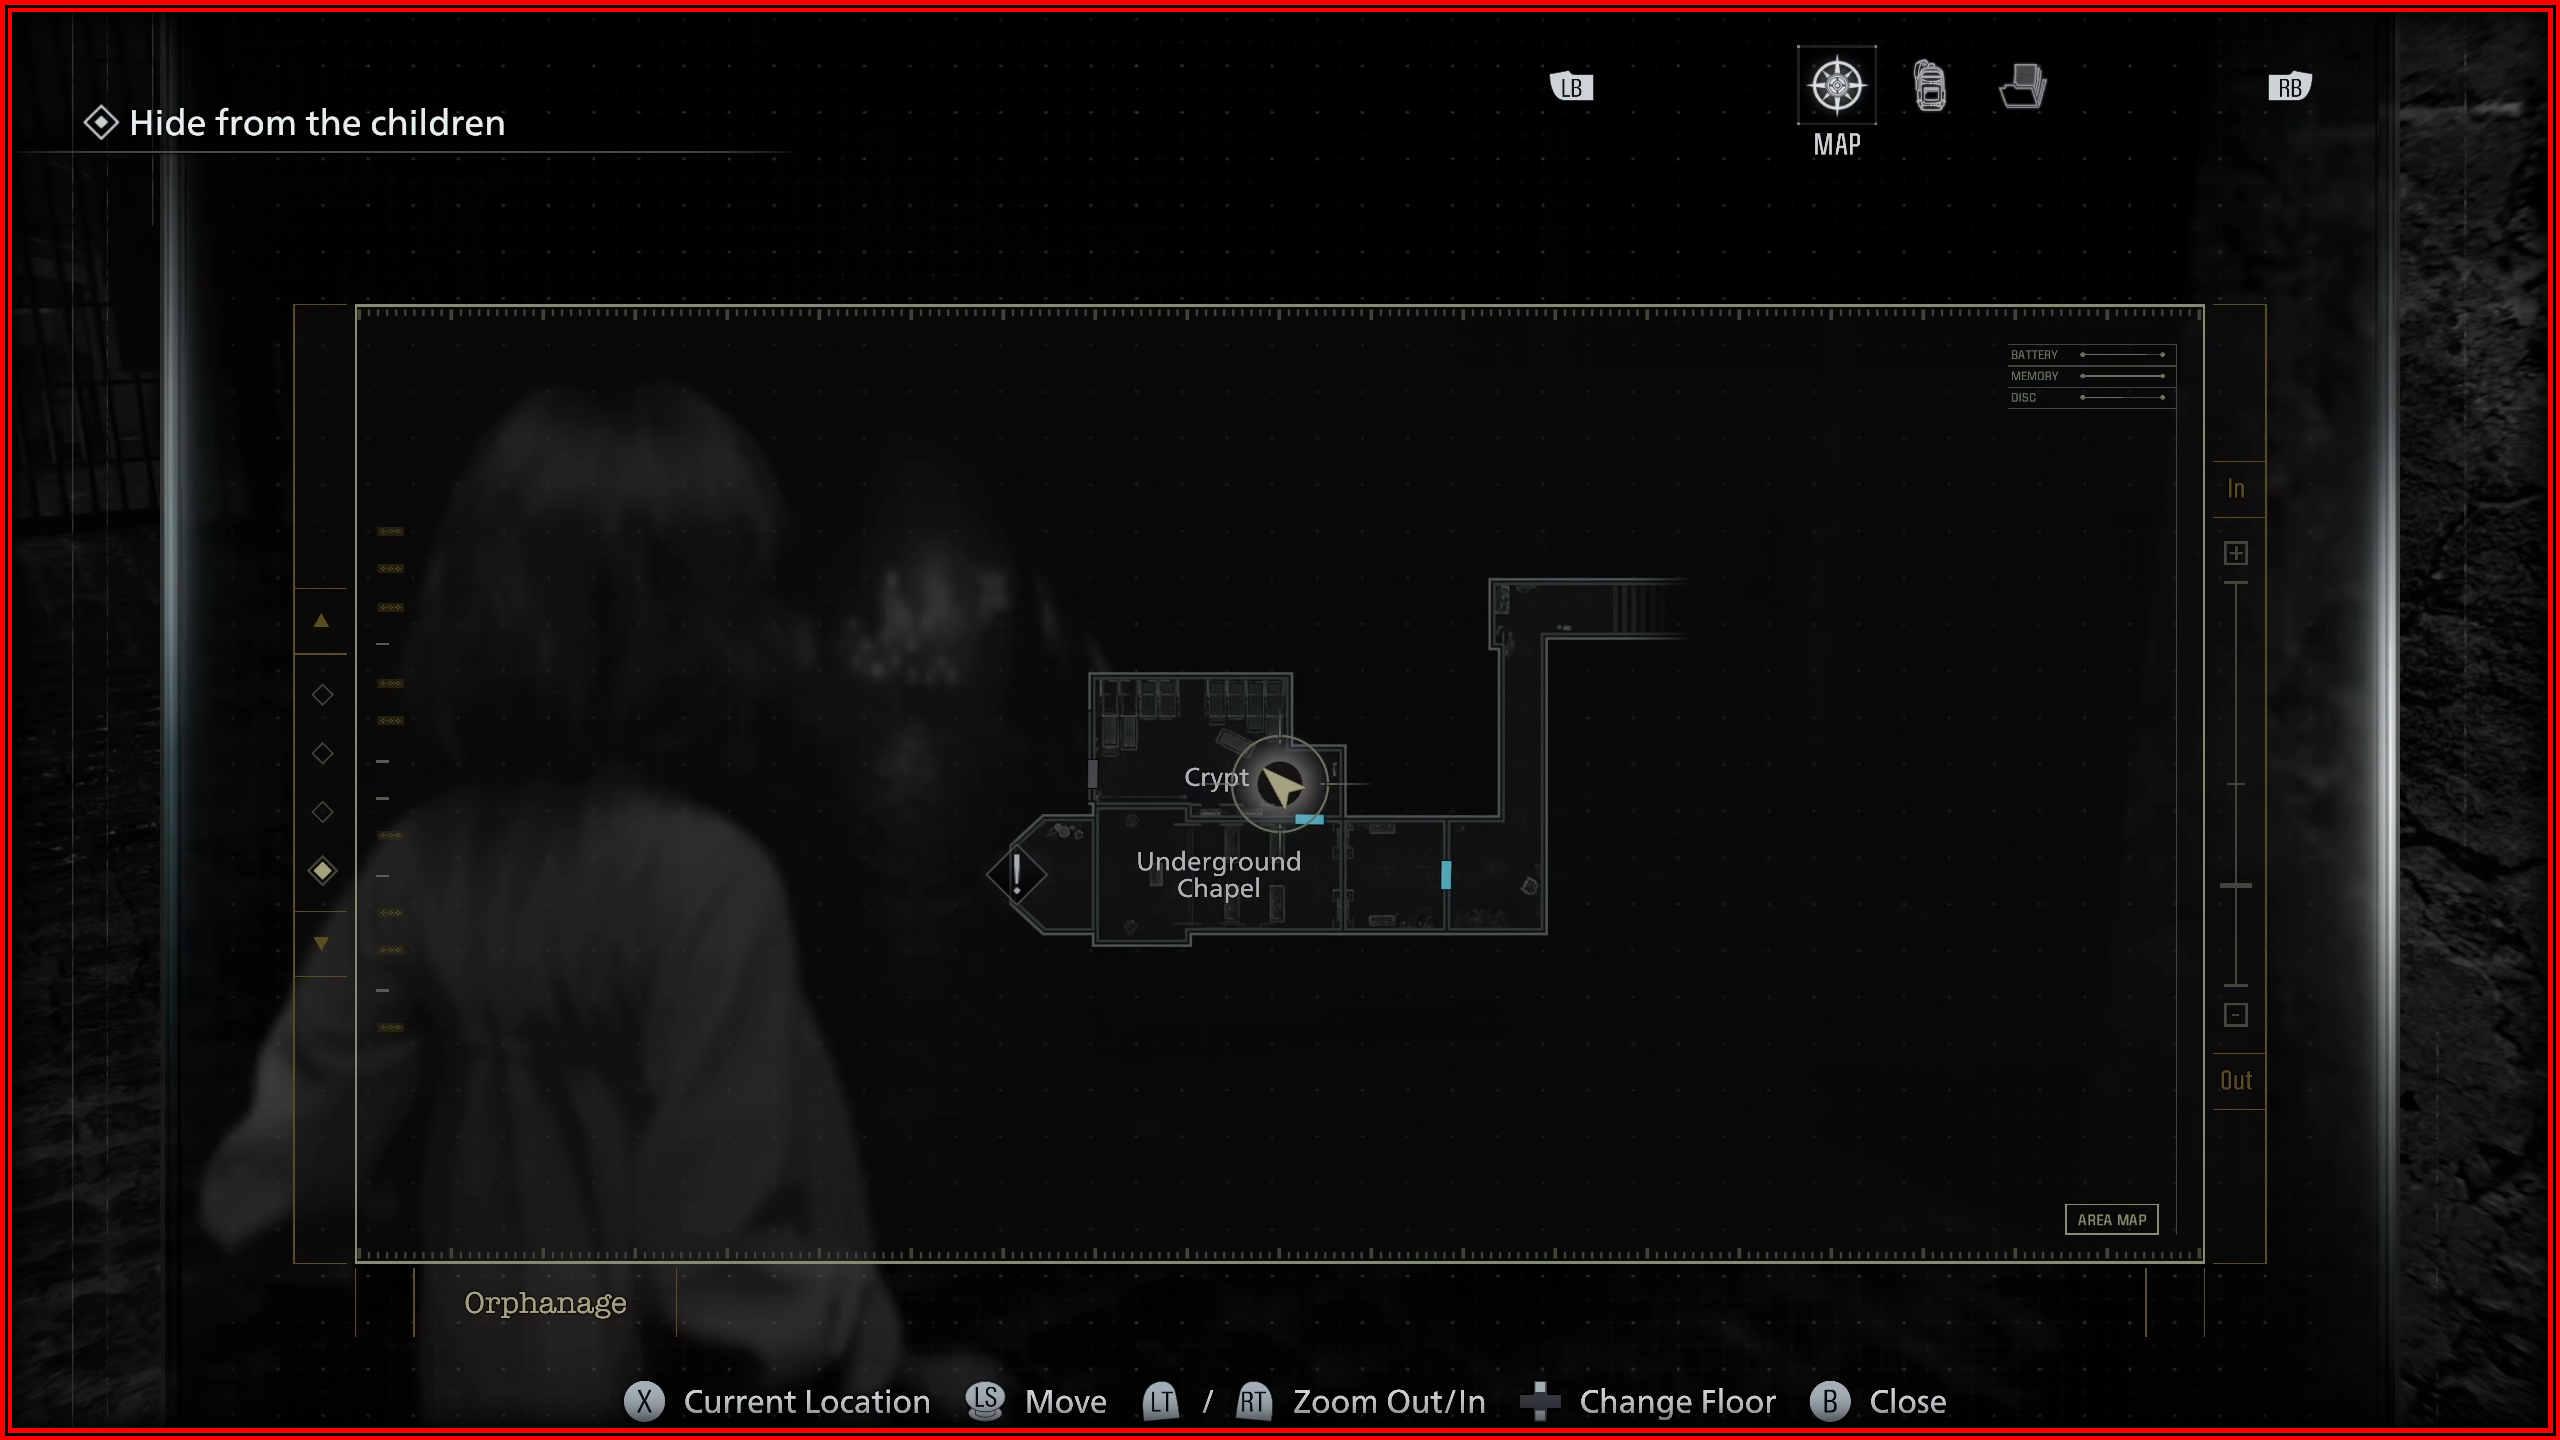
File 63/75 - Series 60 Results
Reseach Lab: On the left side of the desk.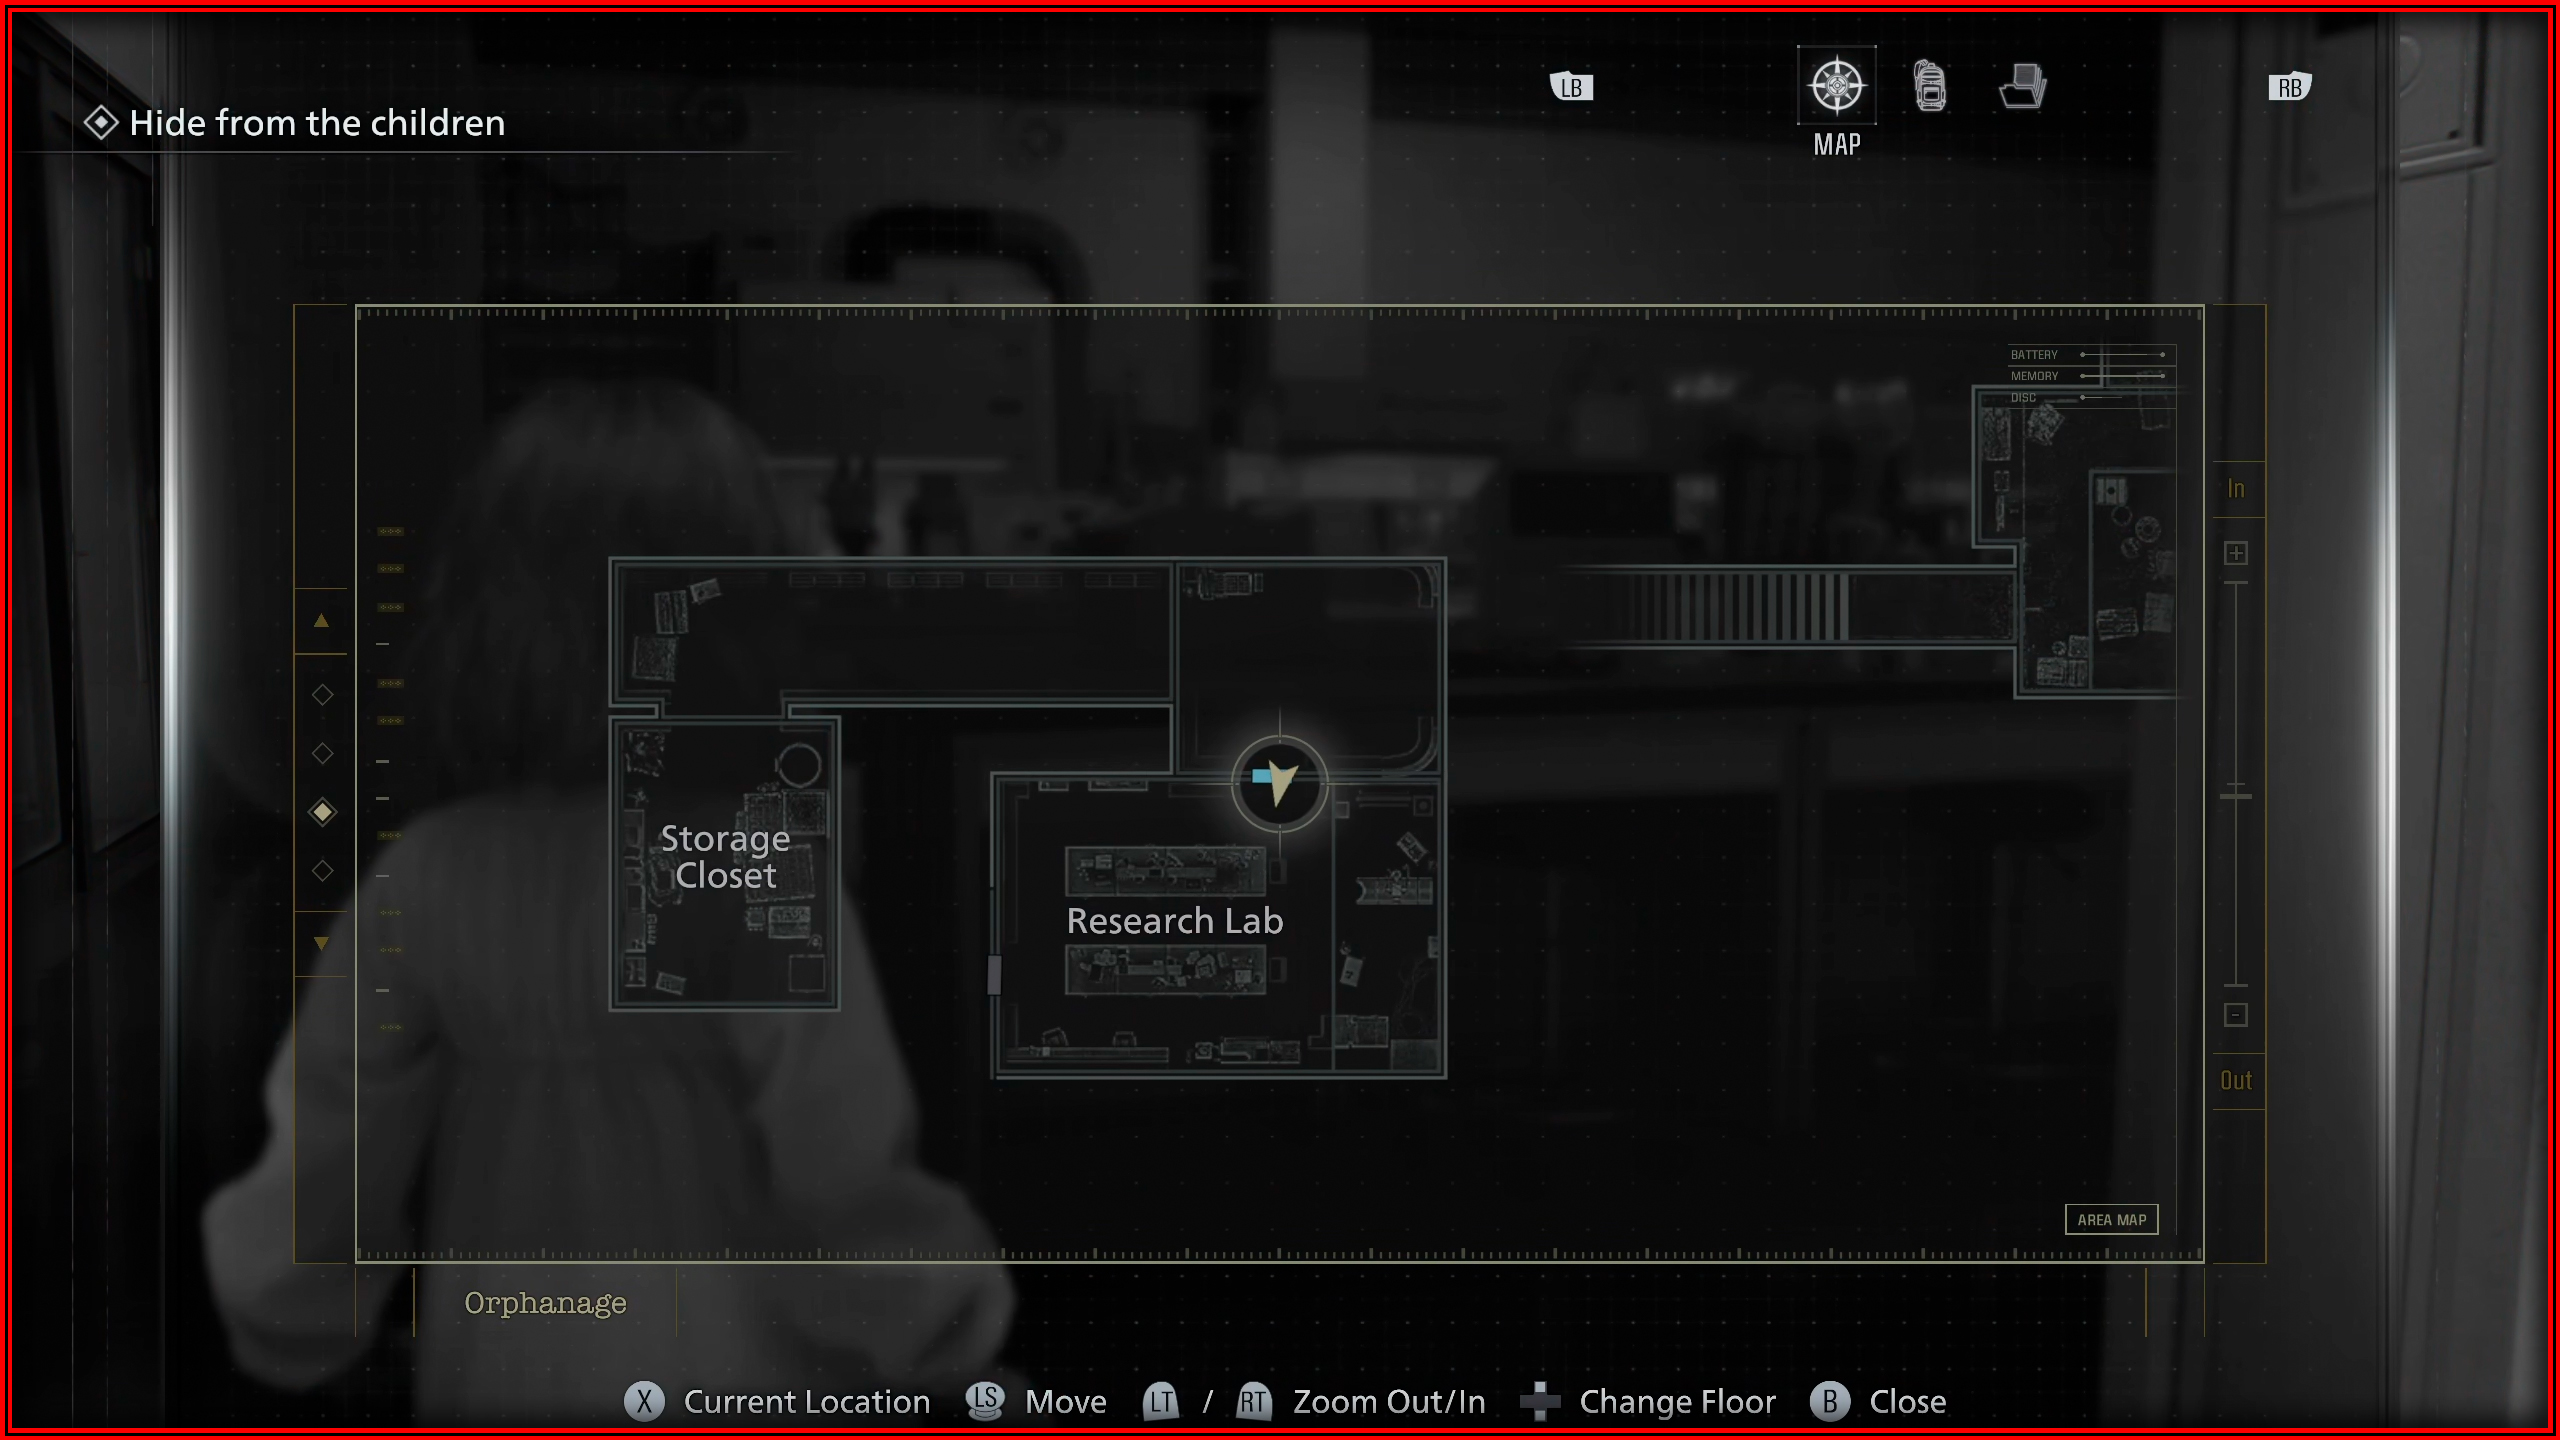
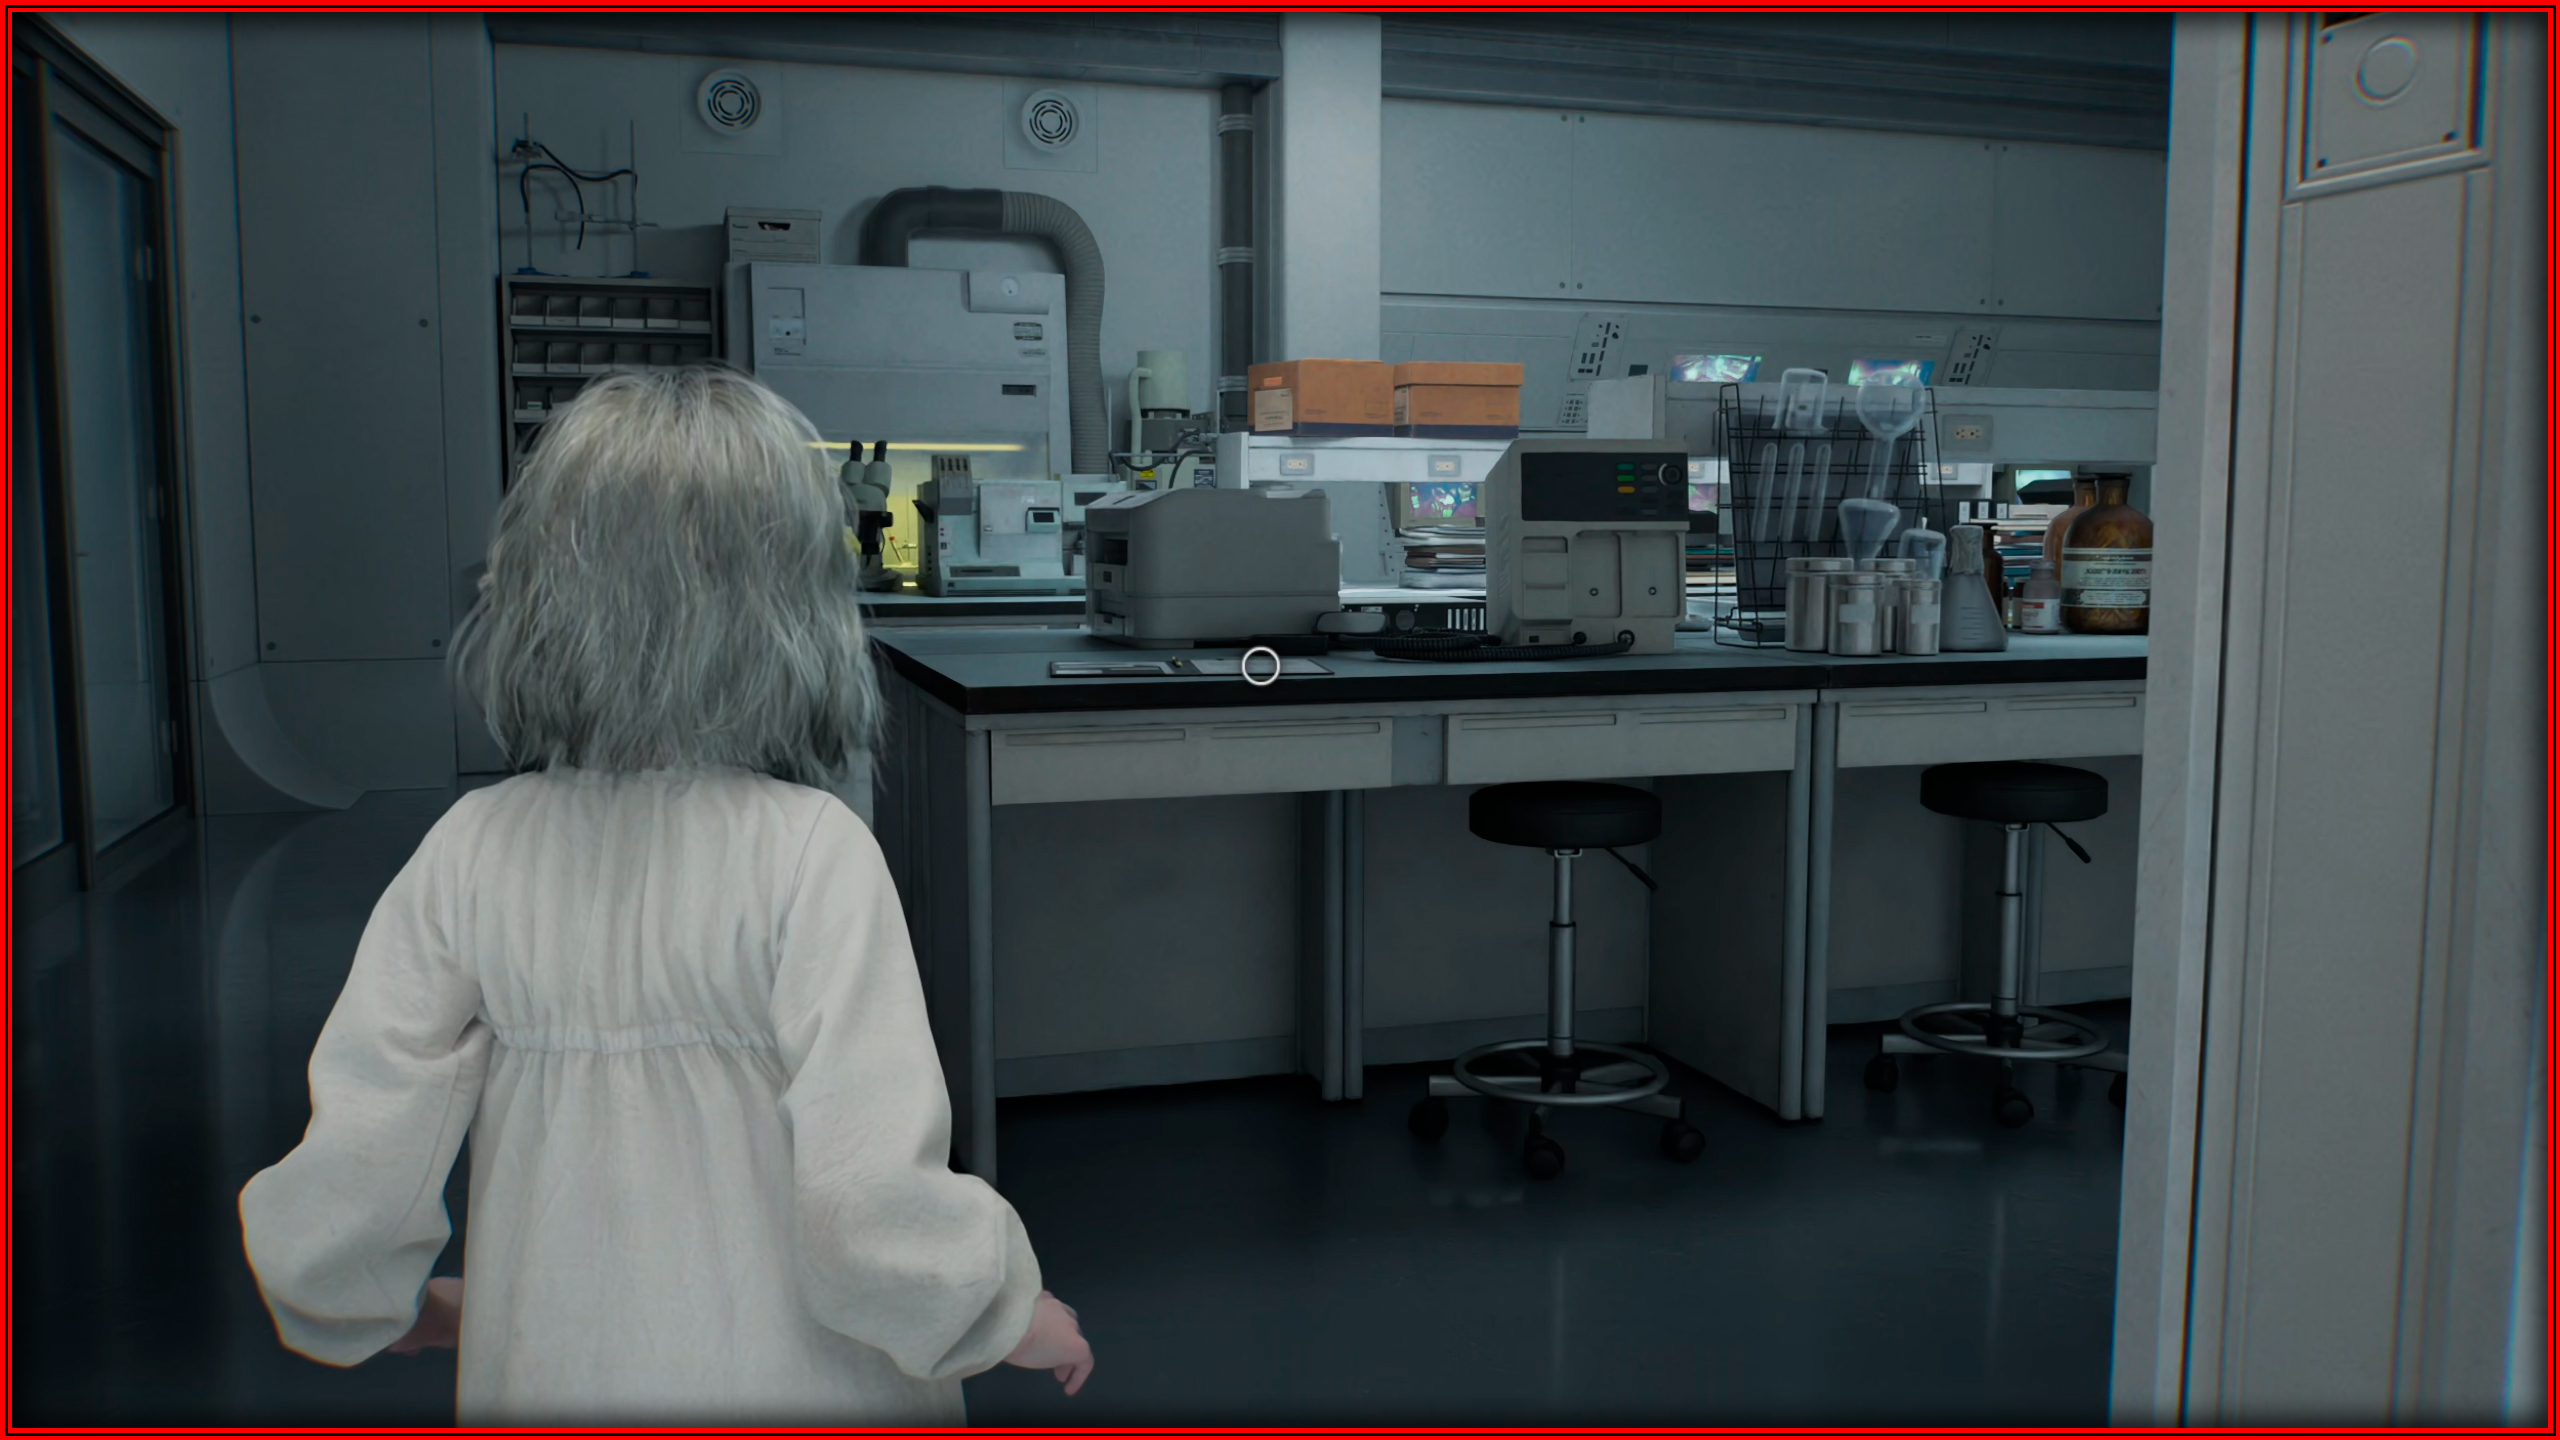
File 64/75 - New Researcher’s Notebook
Reseach Lab: On the right side of the desk.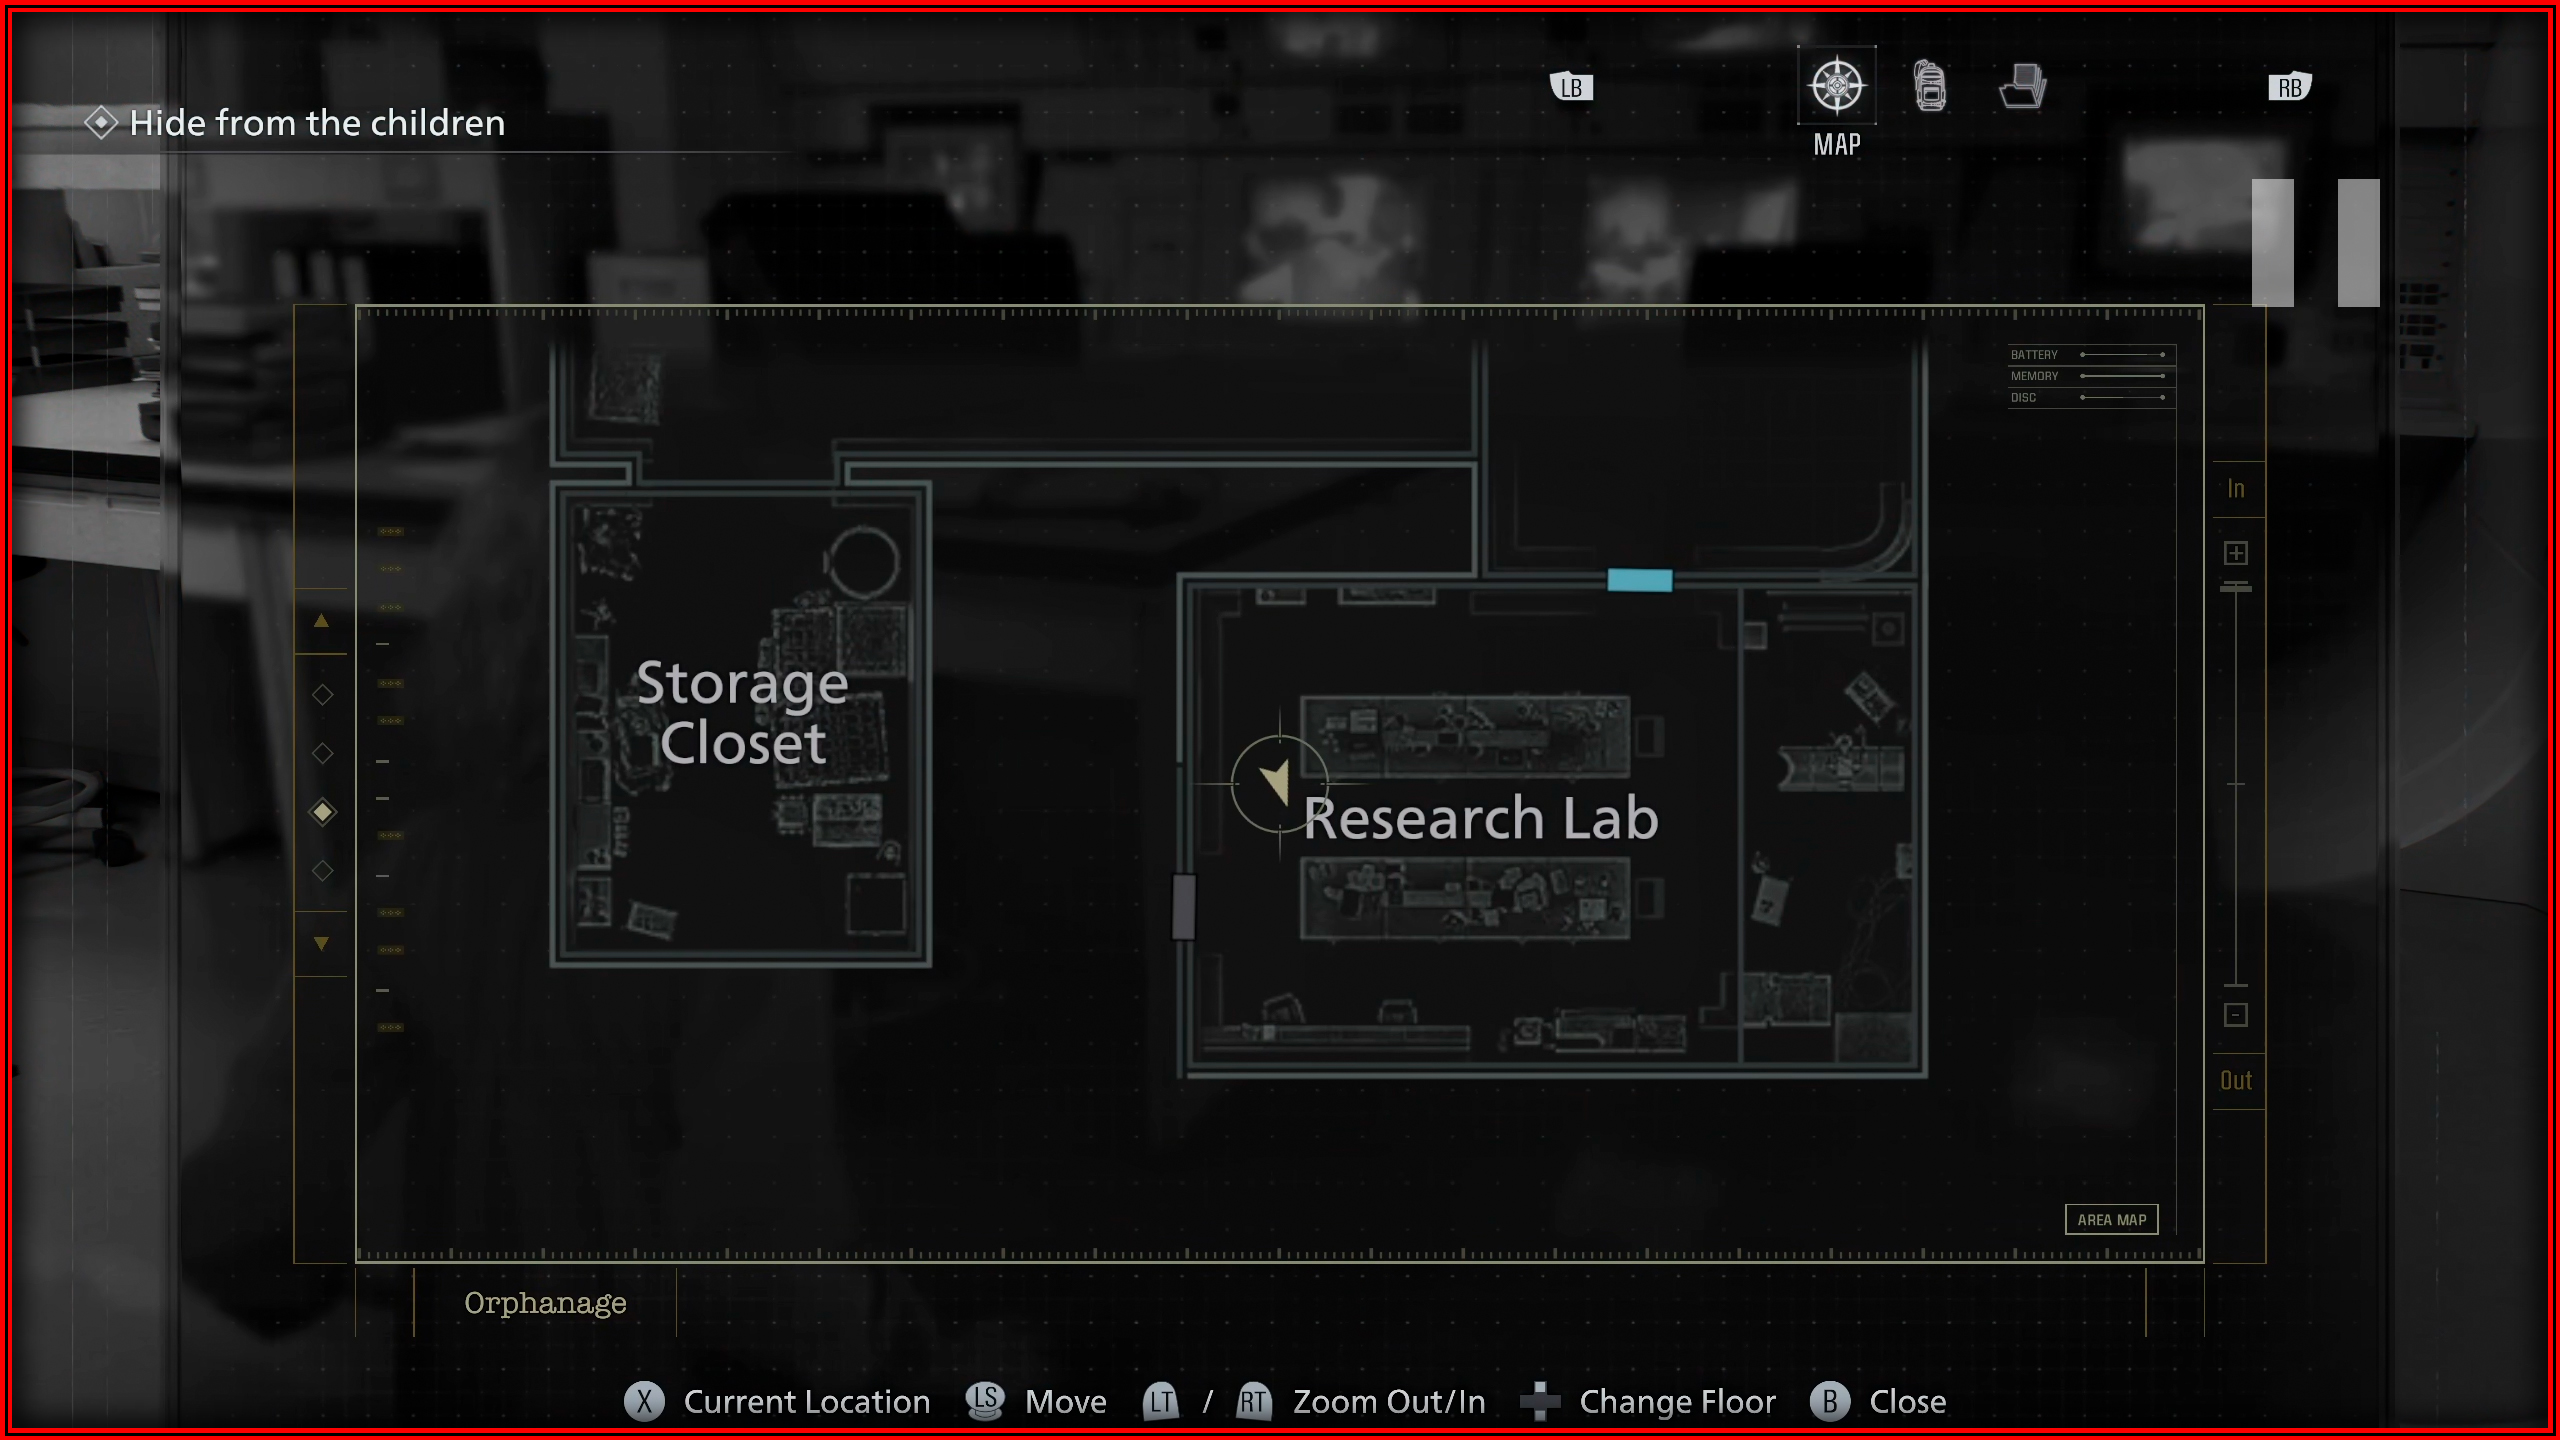

Raccoon City Center - Leon
File 65/75 - Guide Pamphlet
Main hall: Once you resume control of Leon, flee until a cutscene triggers in the Main Hall. As soon as it ends, turn around and check the bench to find this.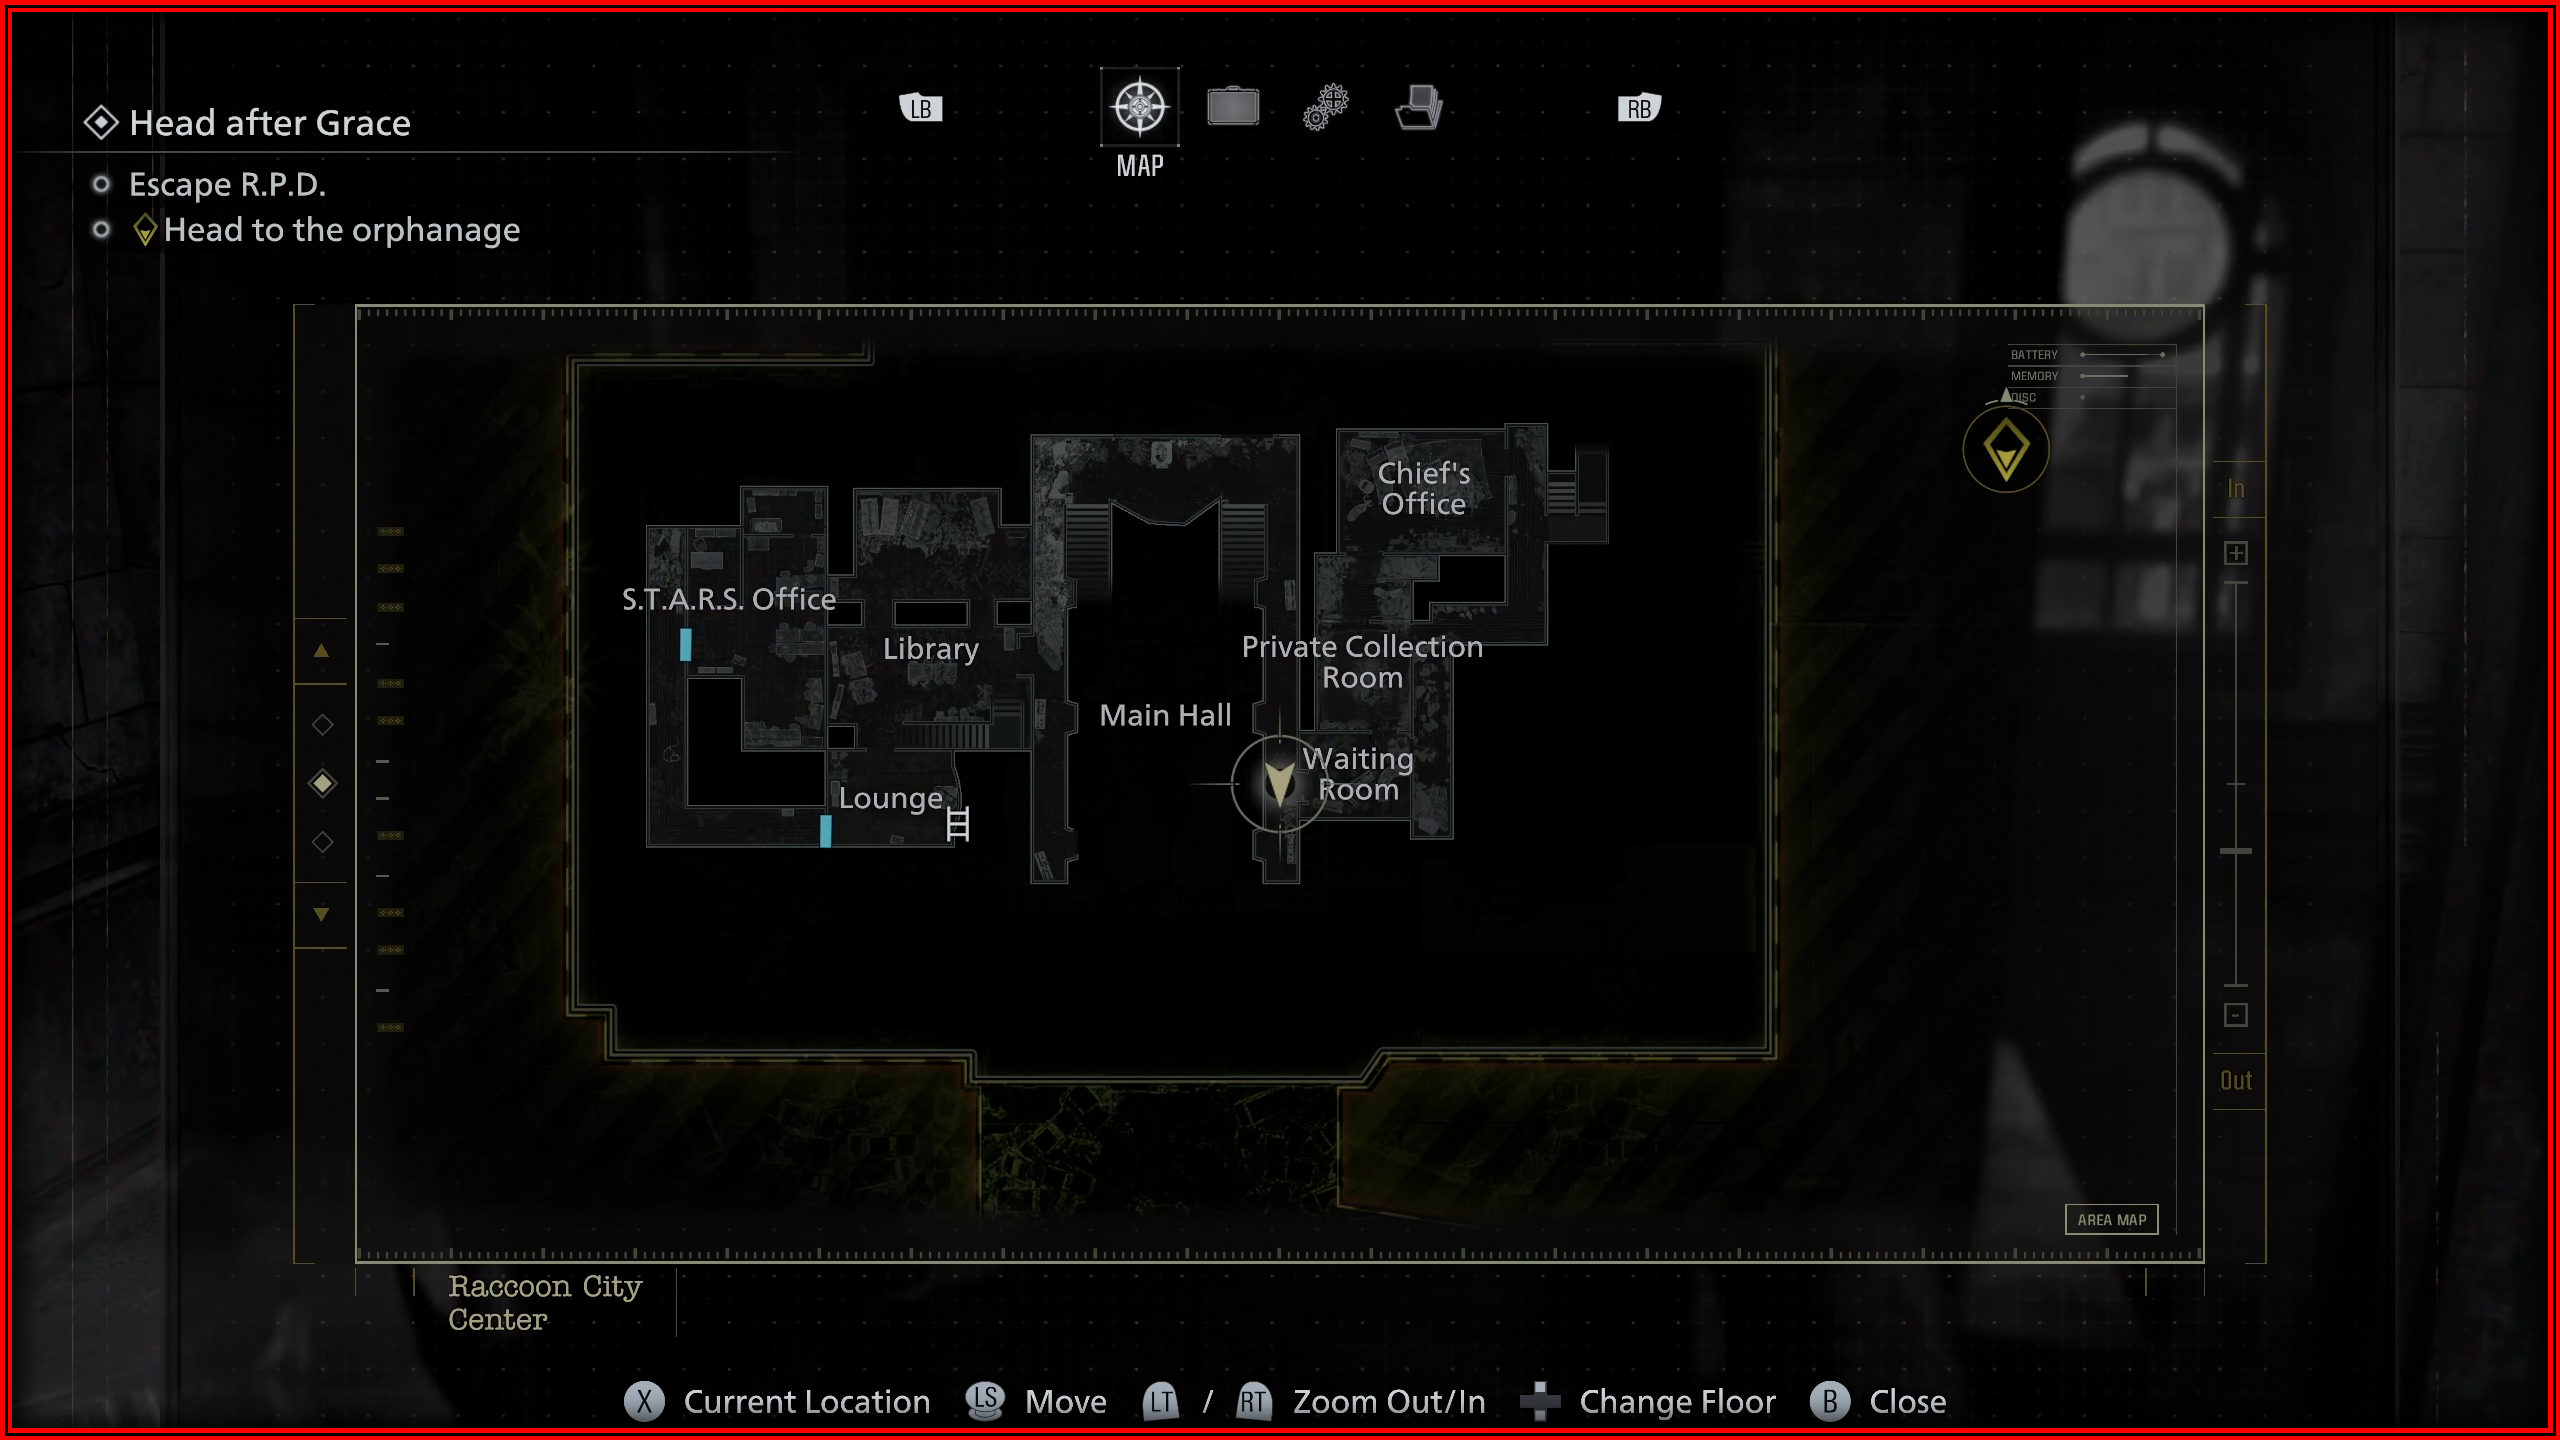
ARK – Leon
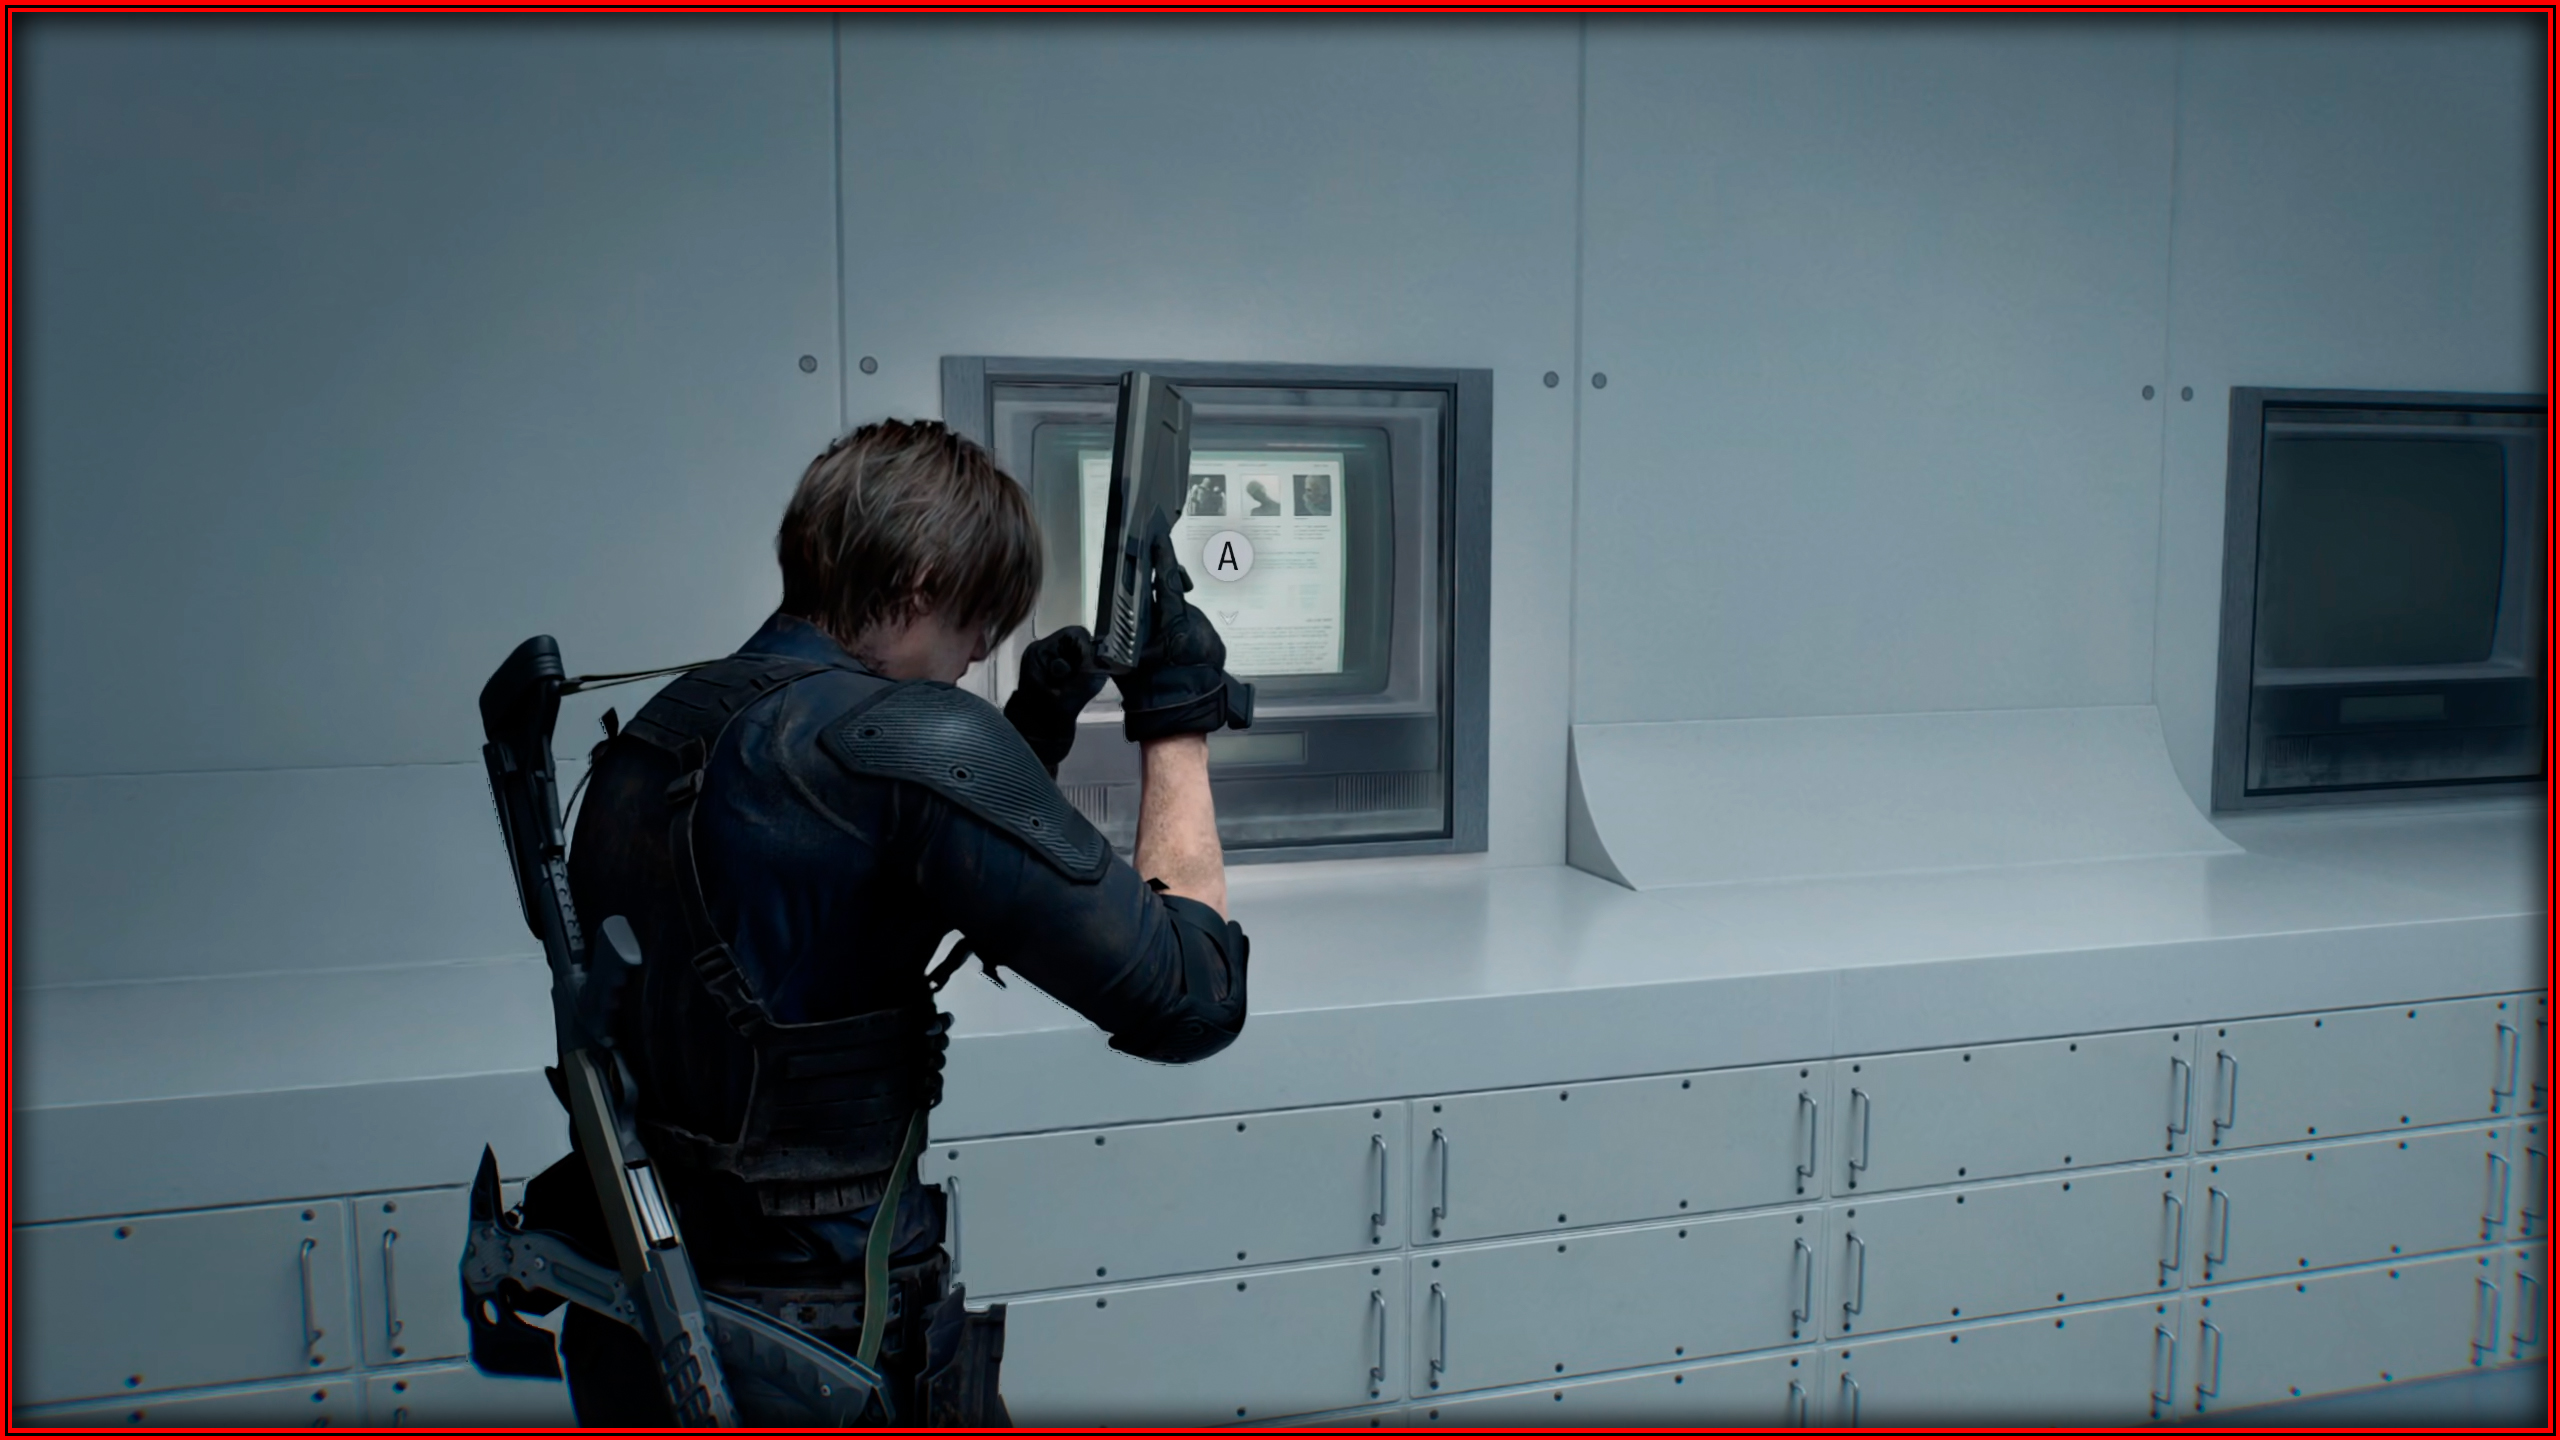
File 66/75 - N0-AH Status Report
Staff Room: On the monitor on the wall.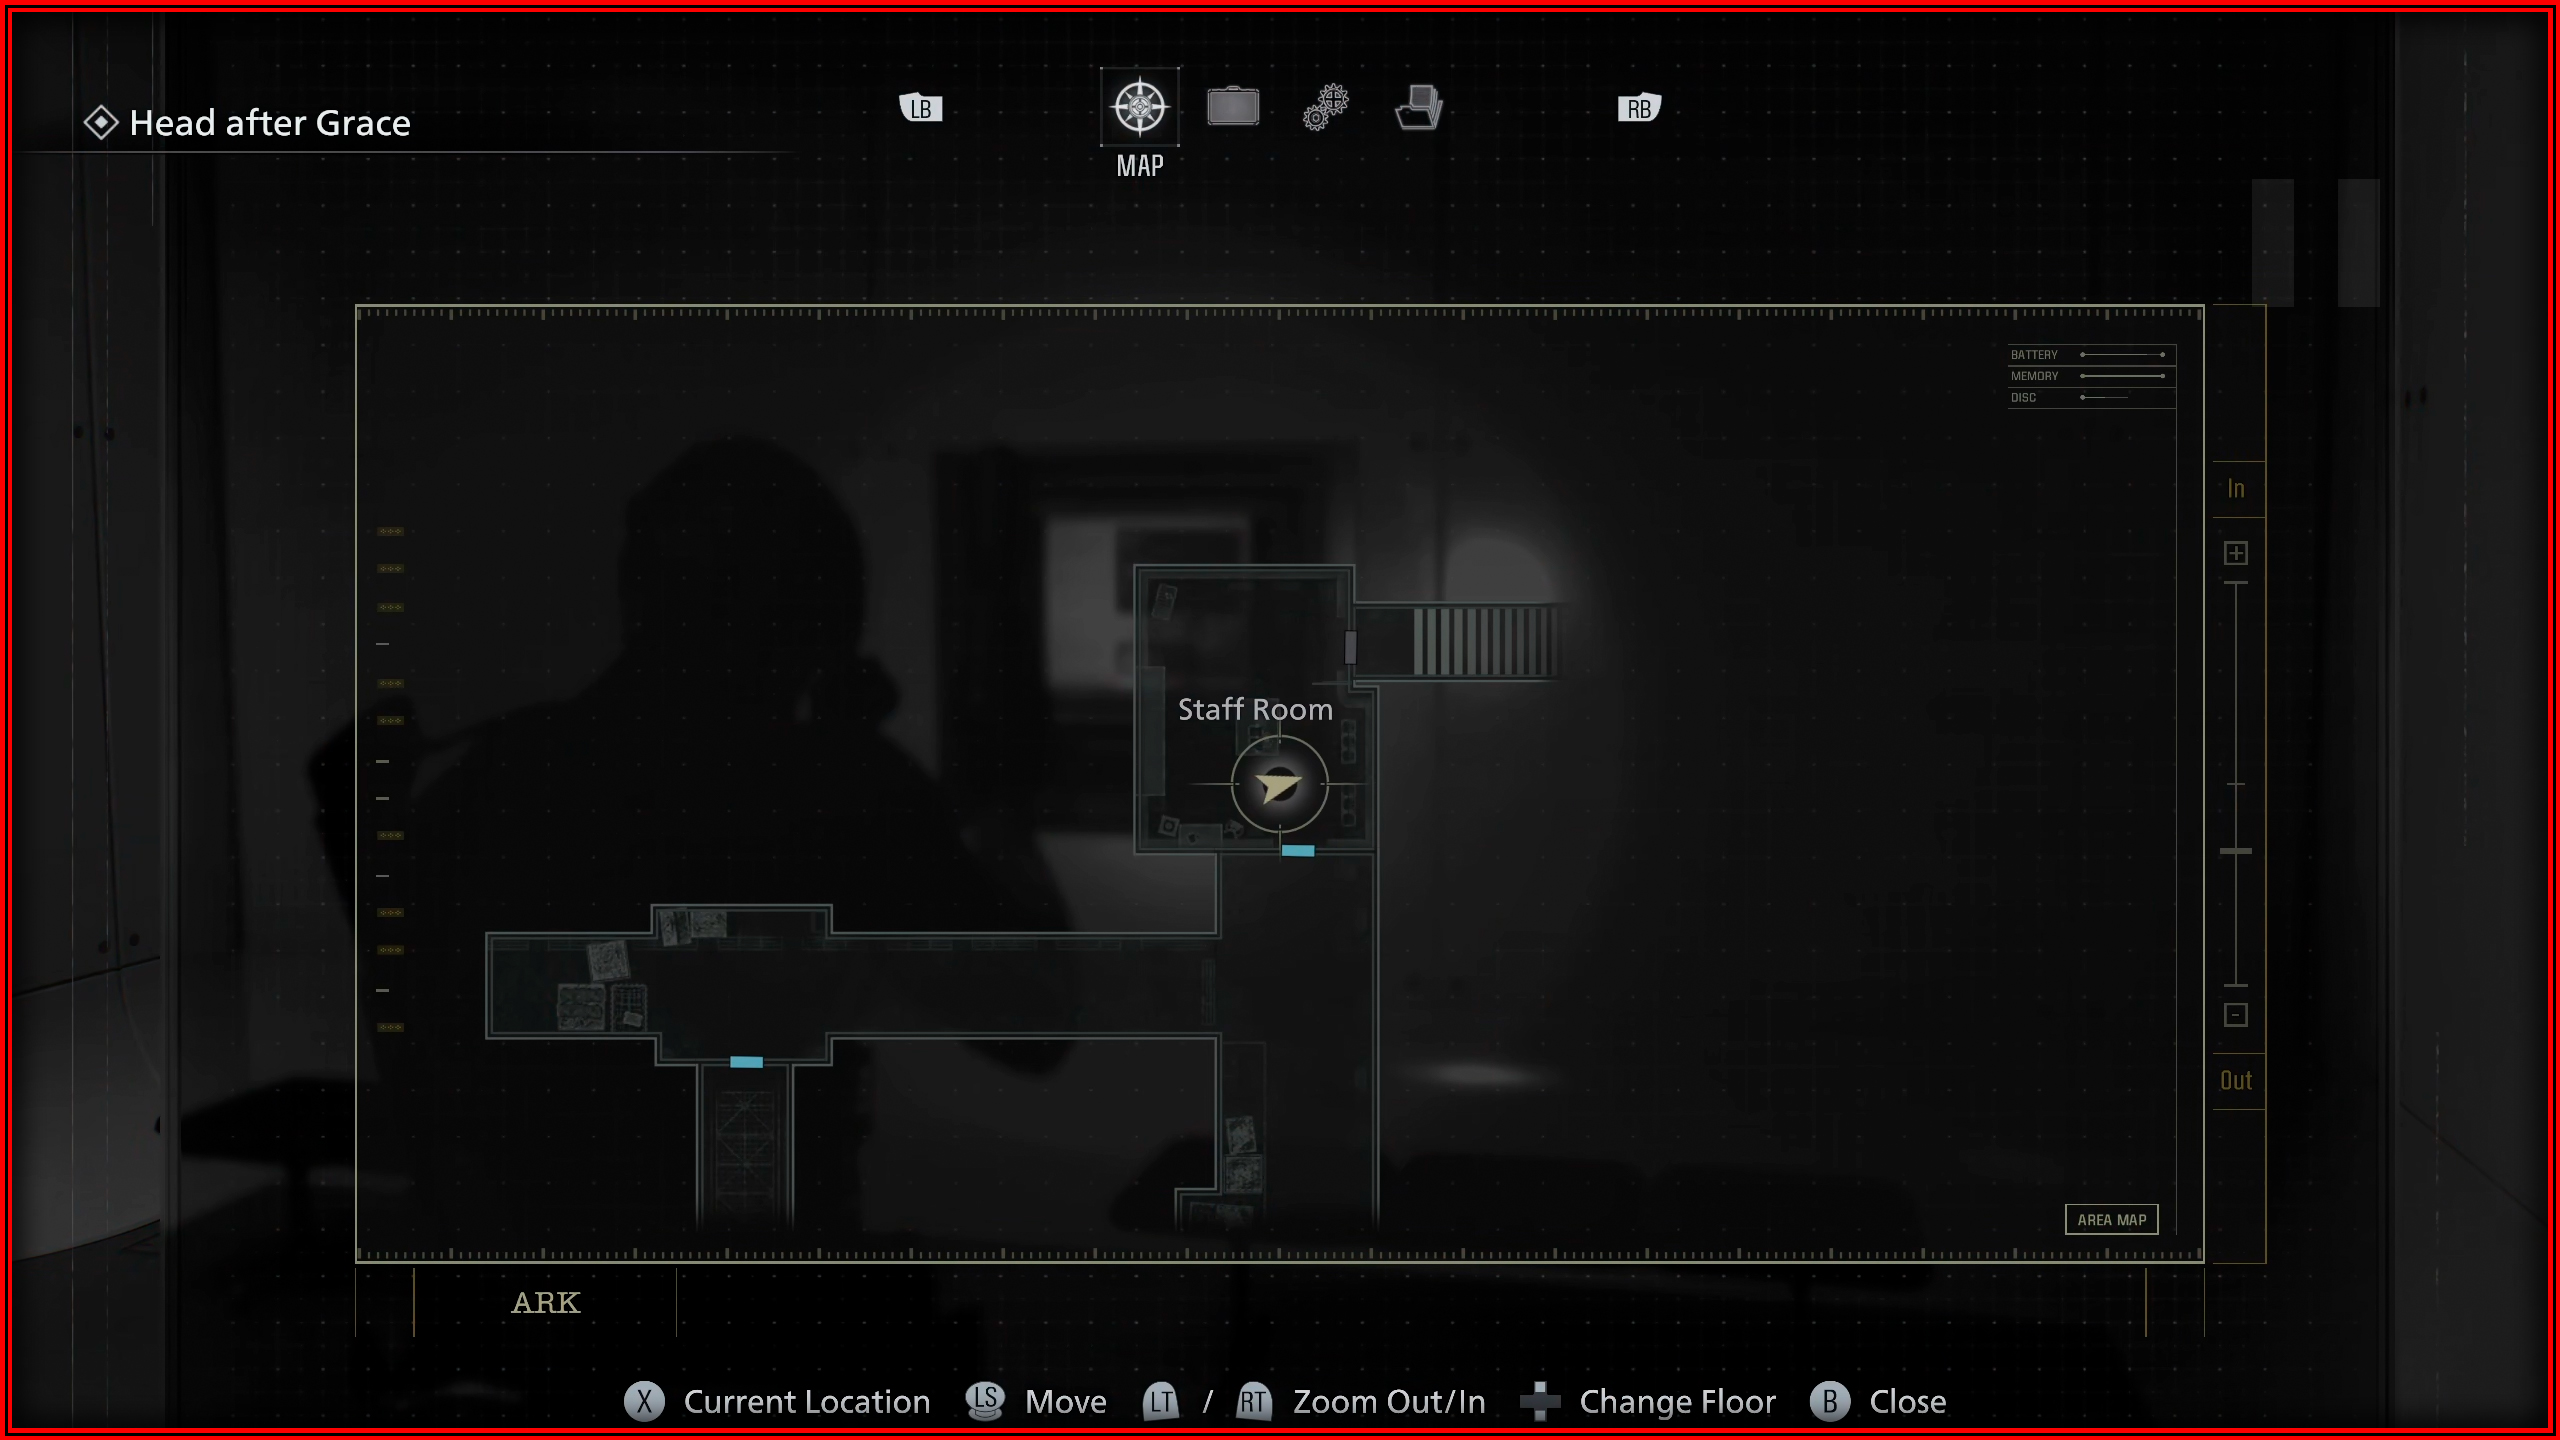
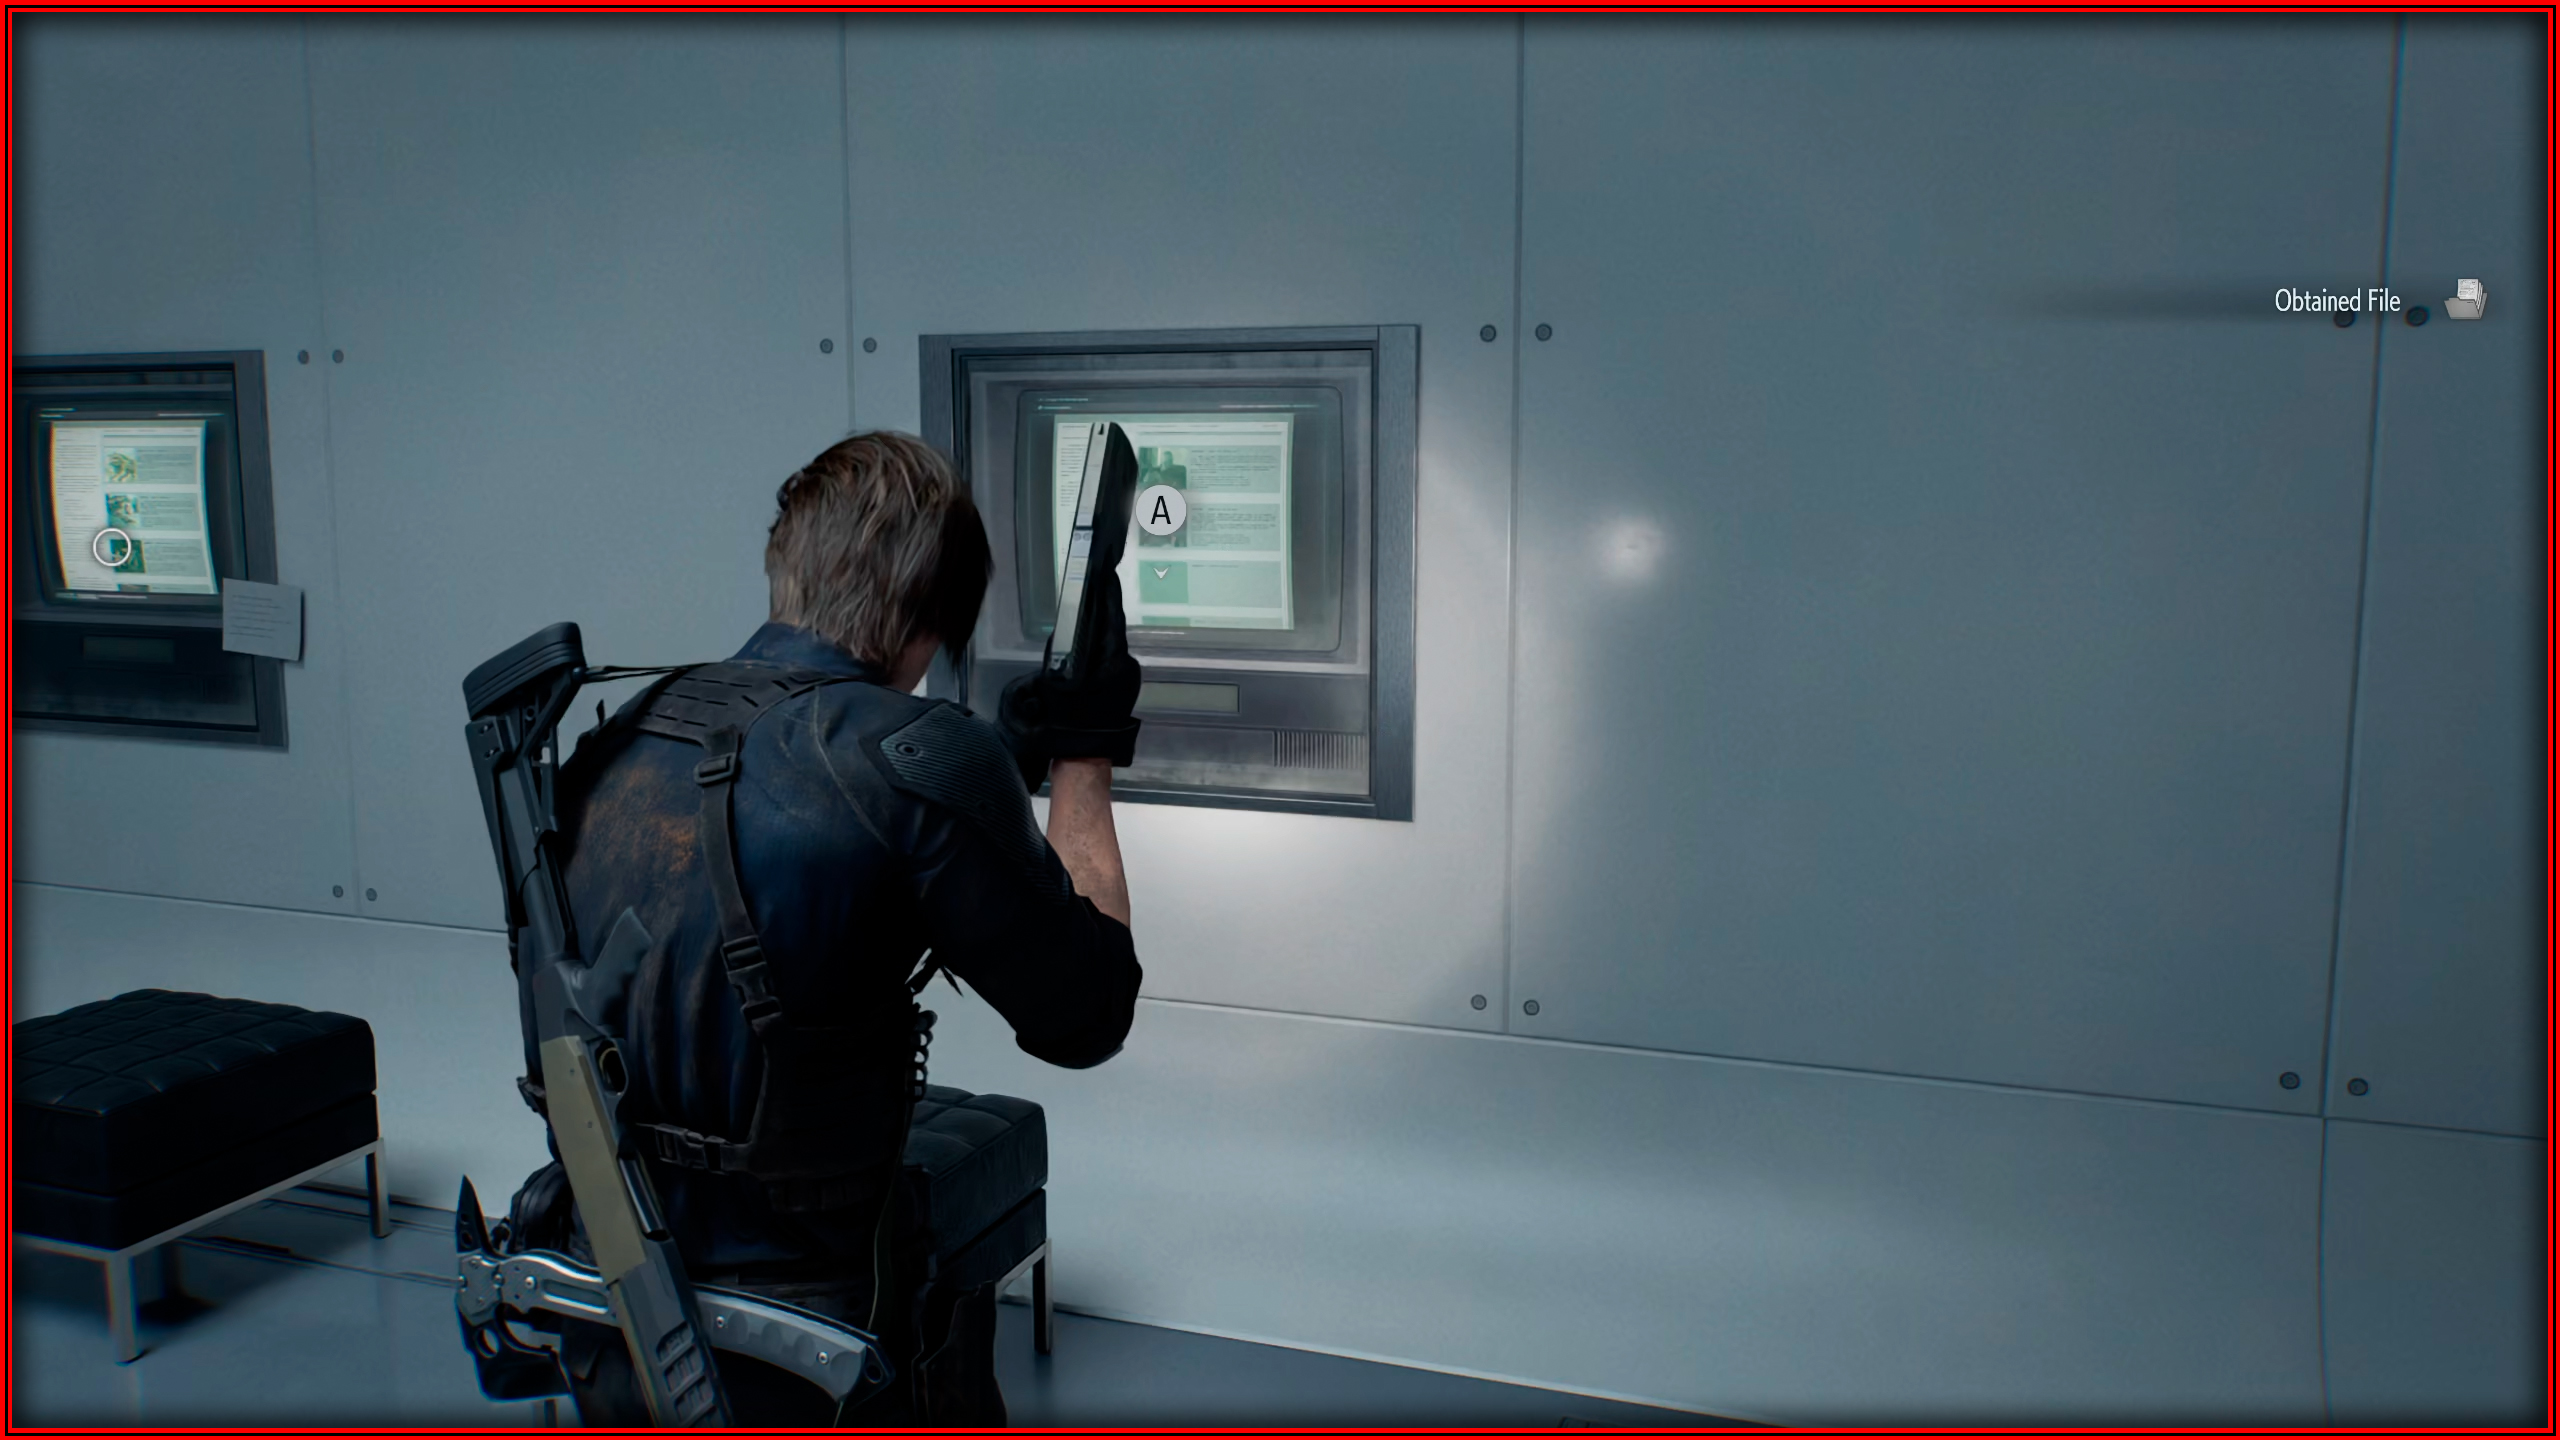
File 67/75 - Raccoon City Bioweapon Research – Report
Guest Lounge: On the monitor on the wall.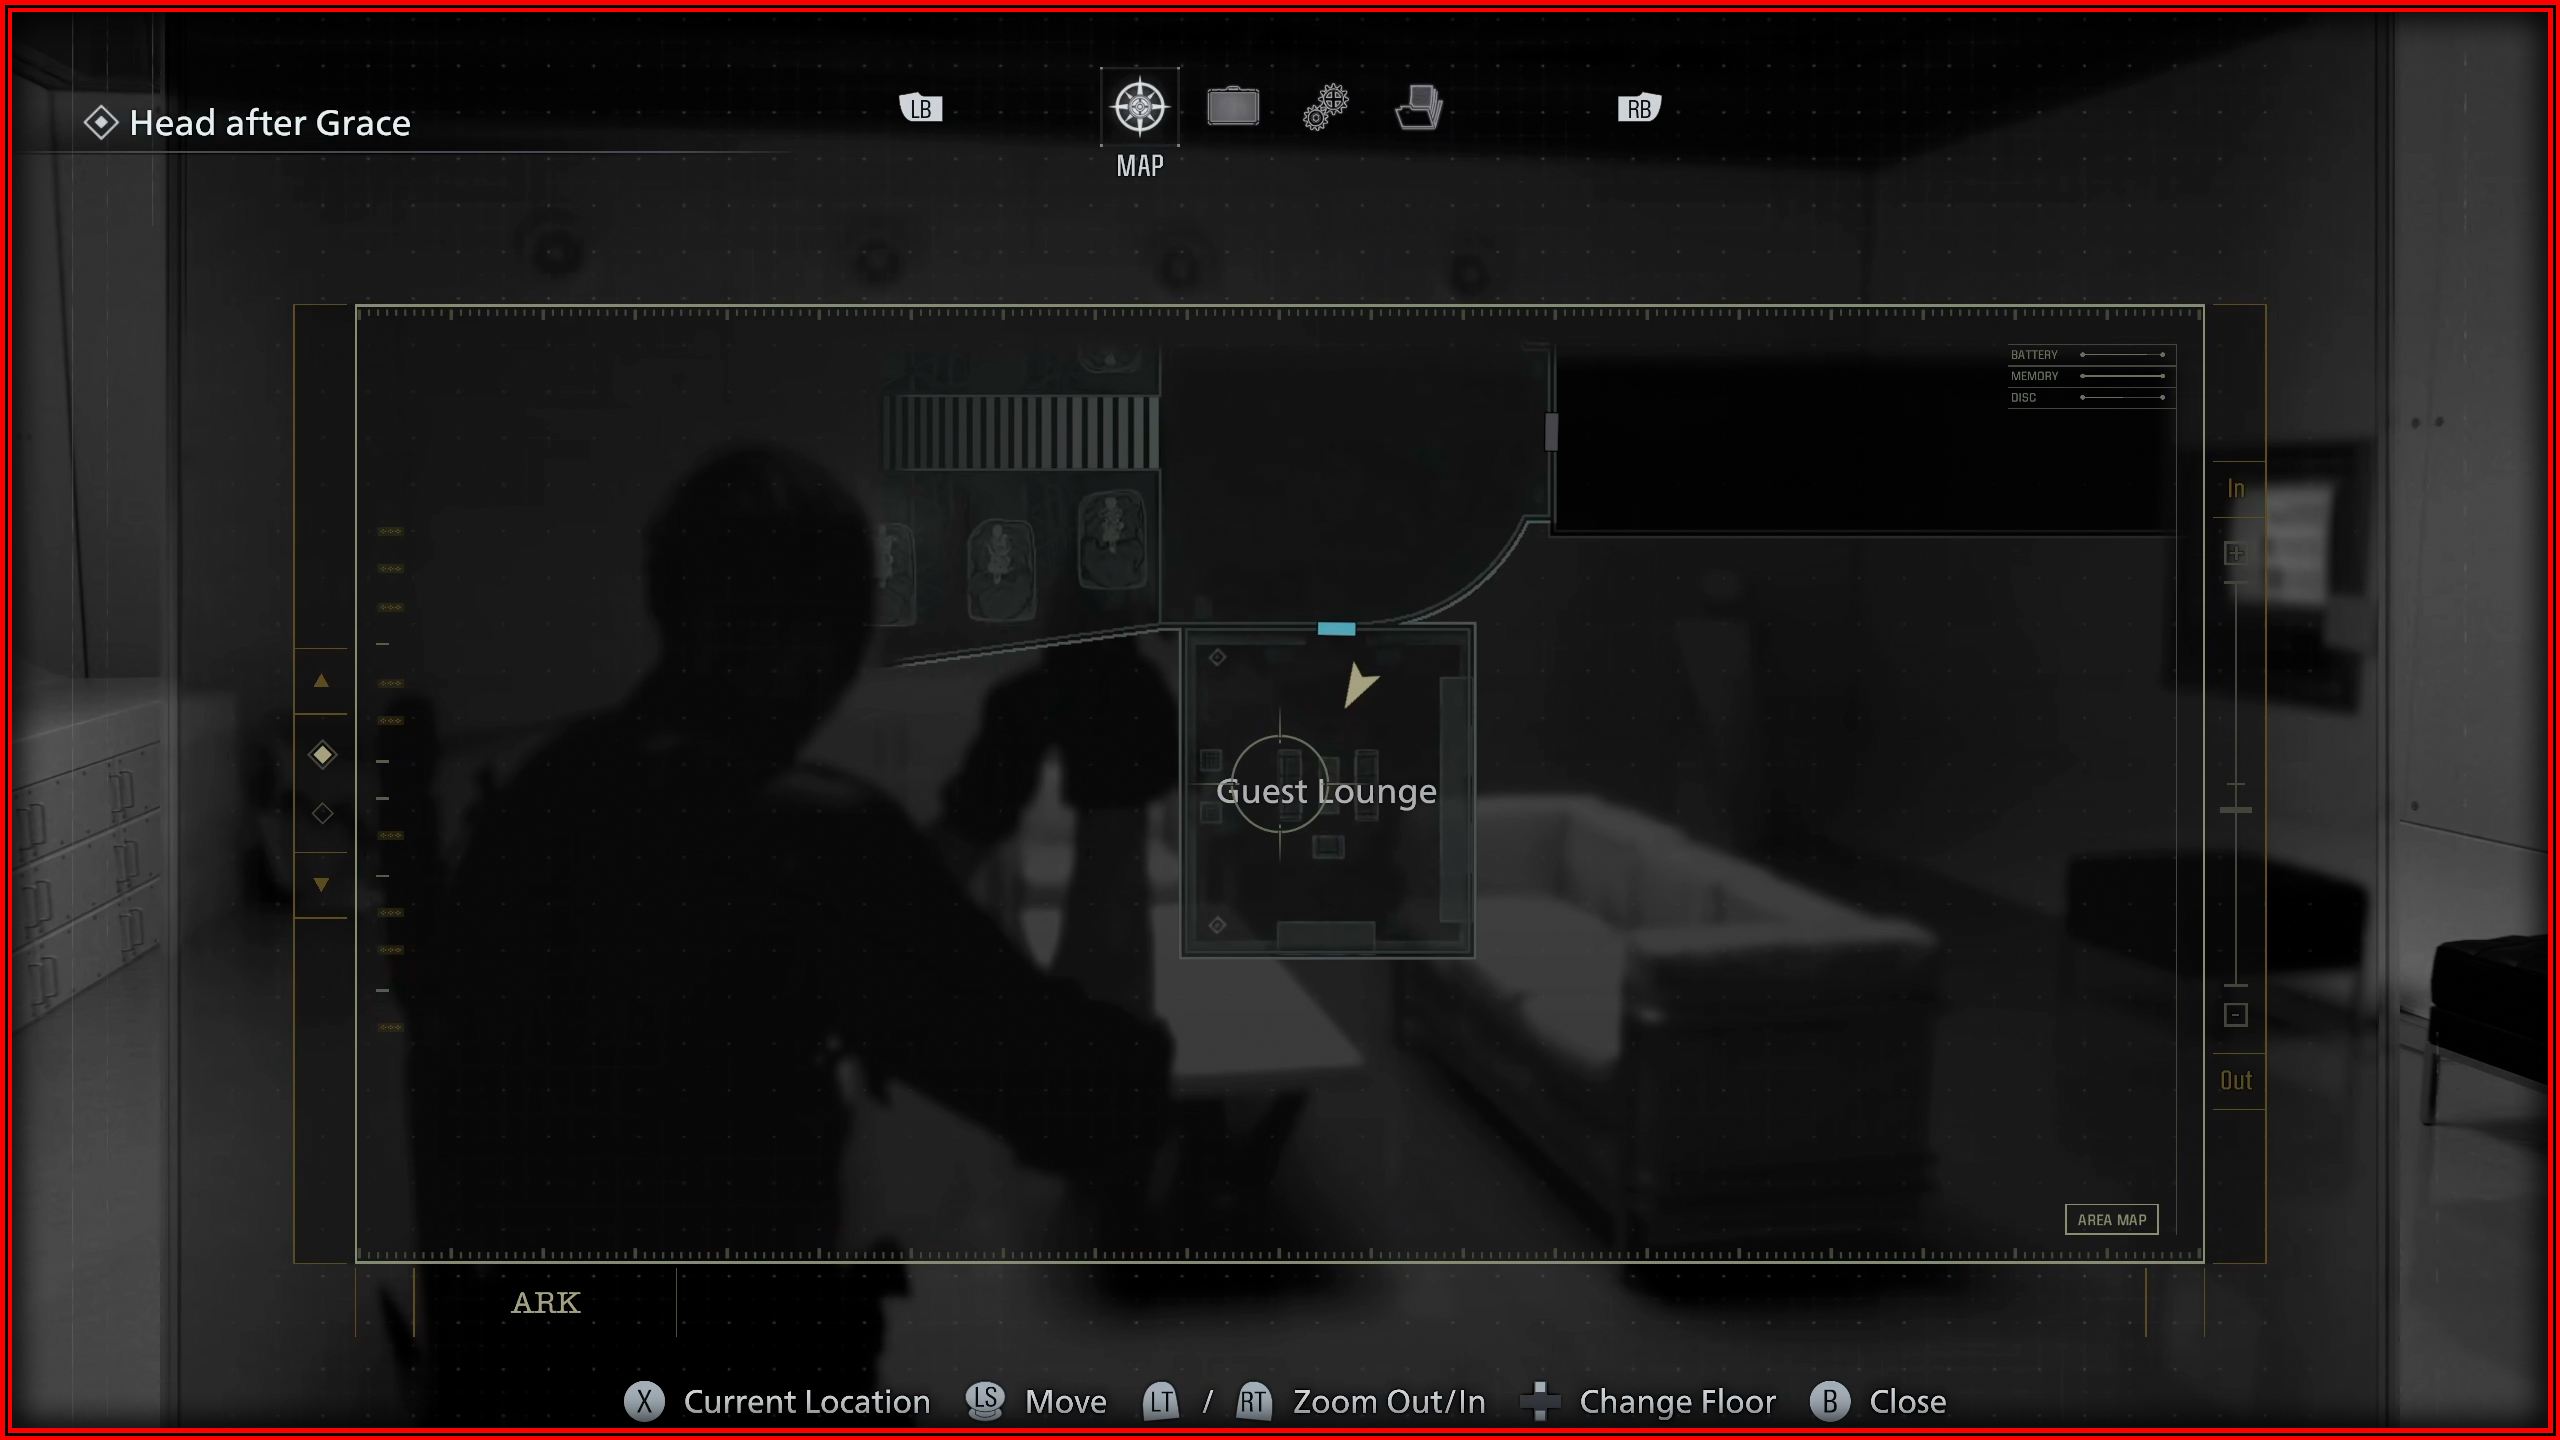
File 68/75 - Product Catalog 1 (2026)
Guest Lounge: On the monitor on the wall.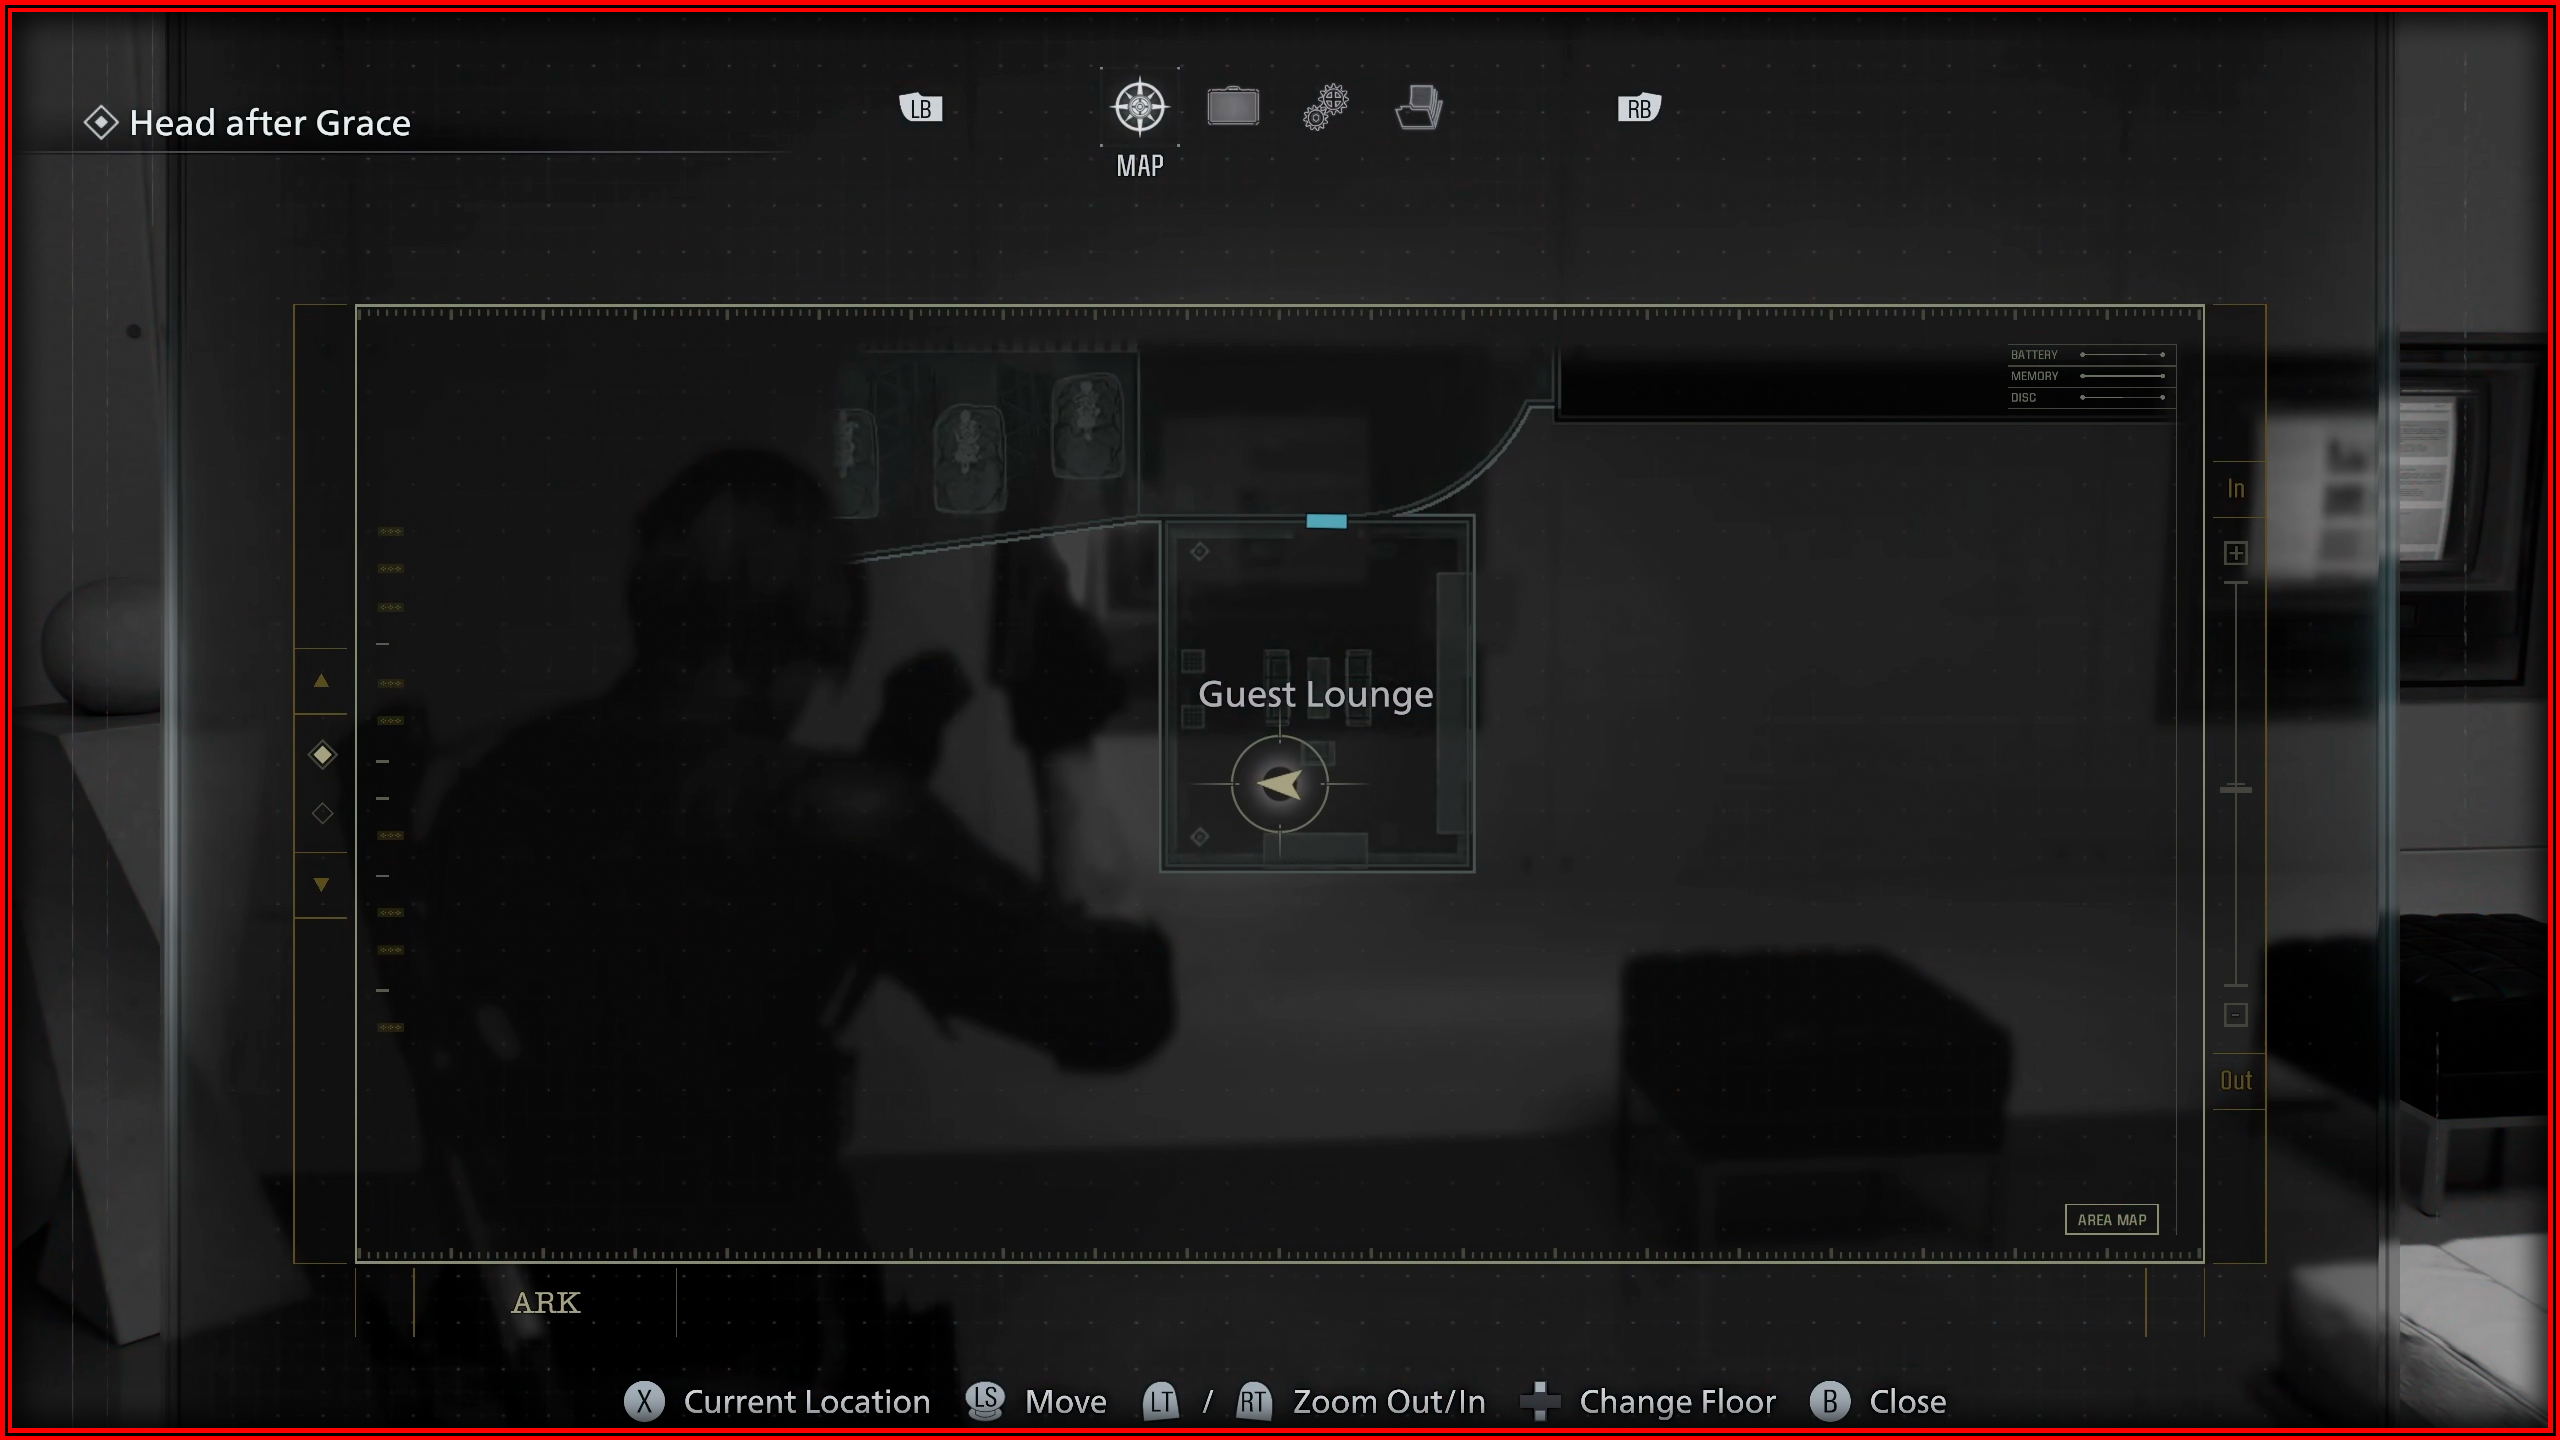
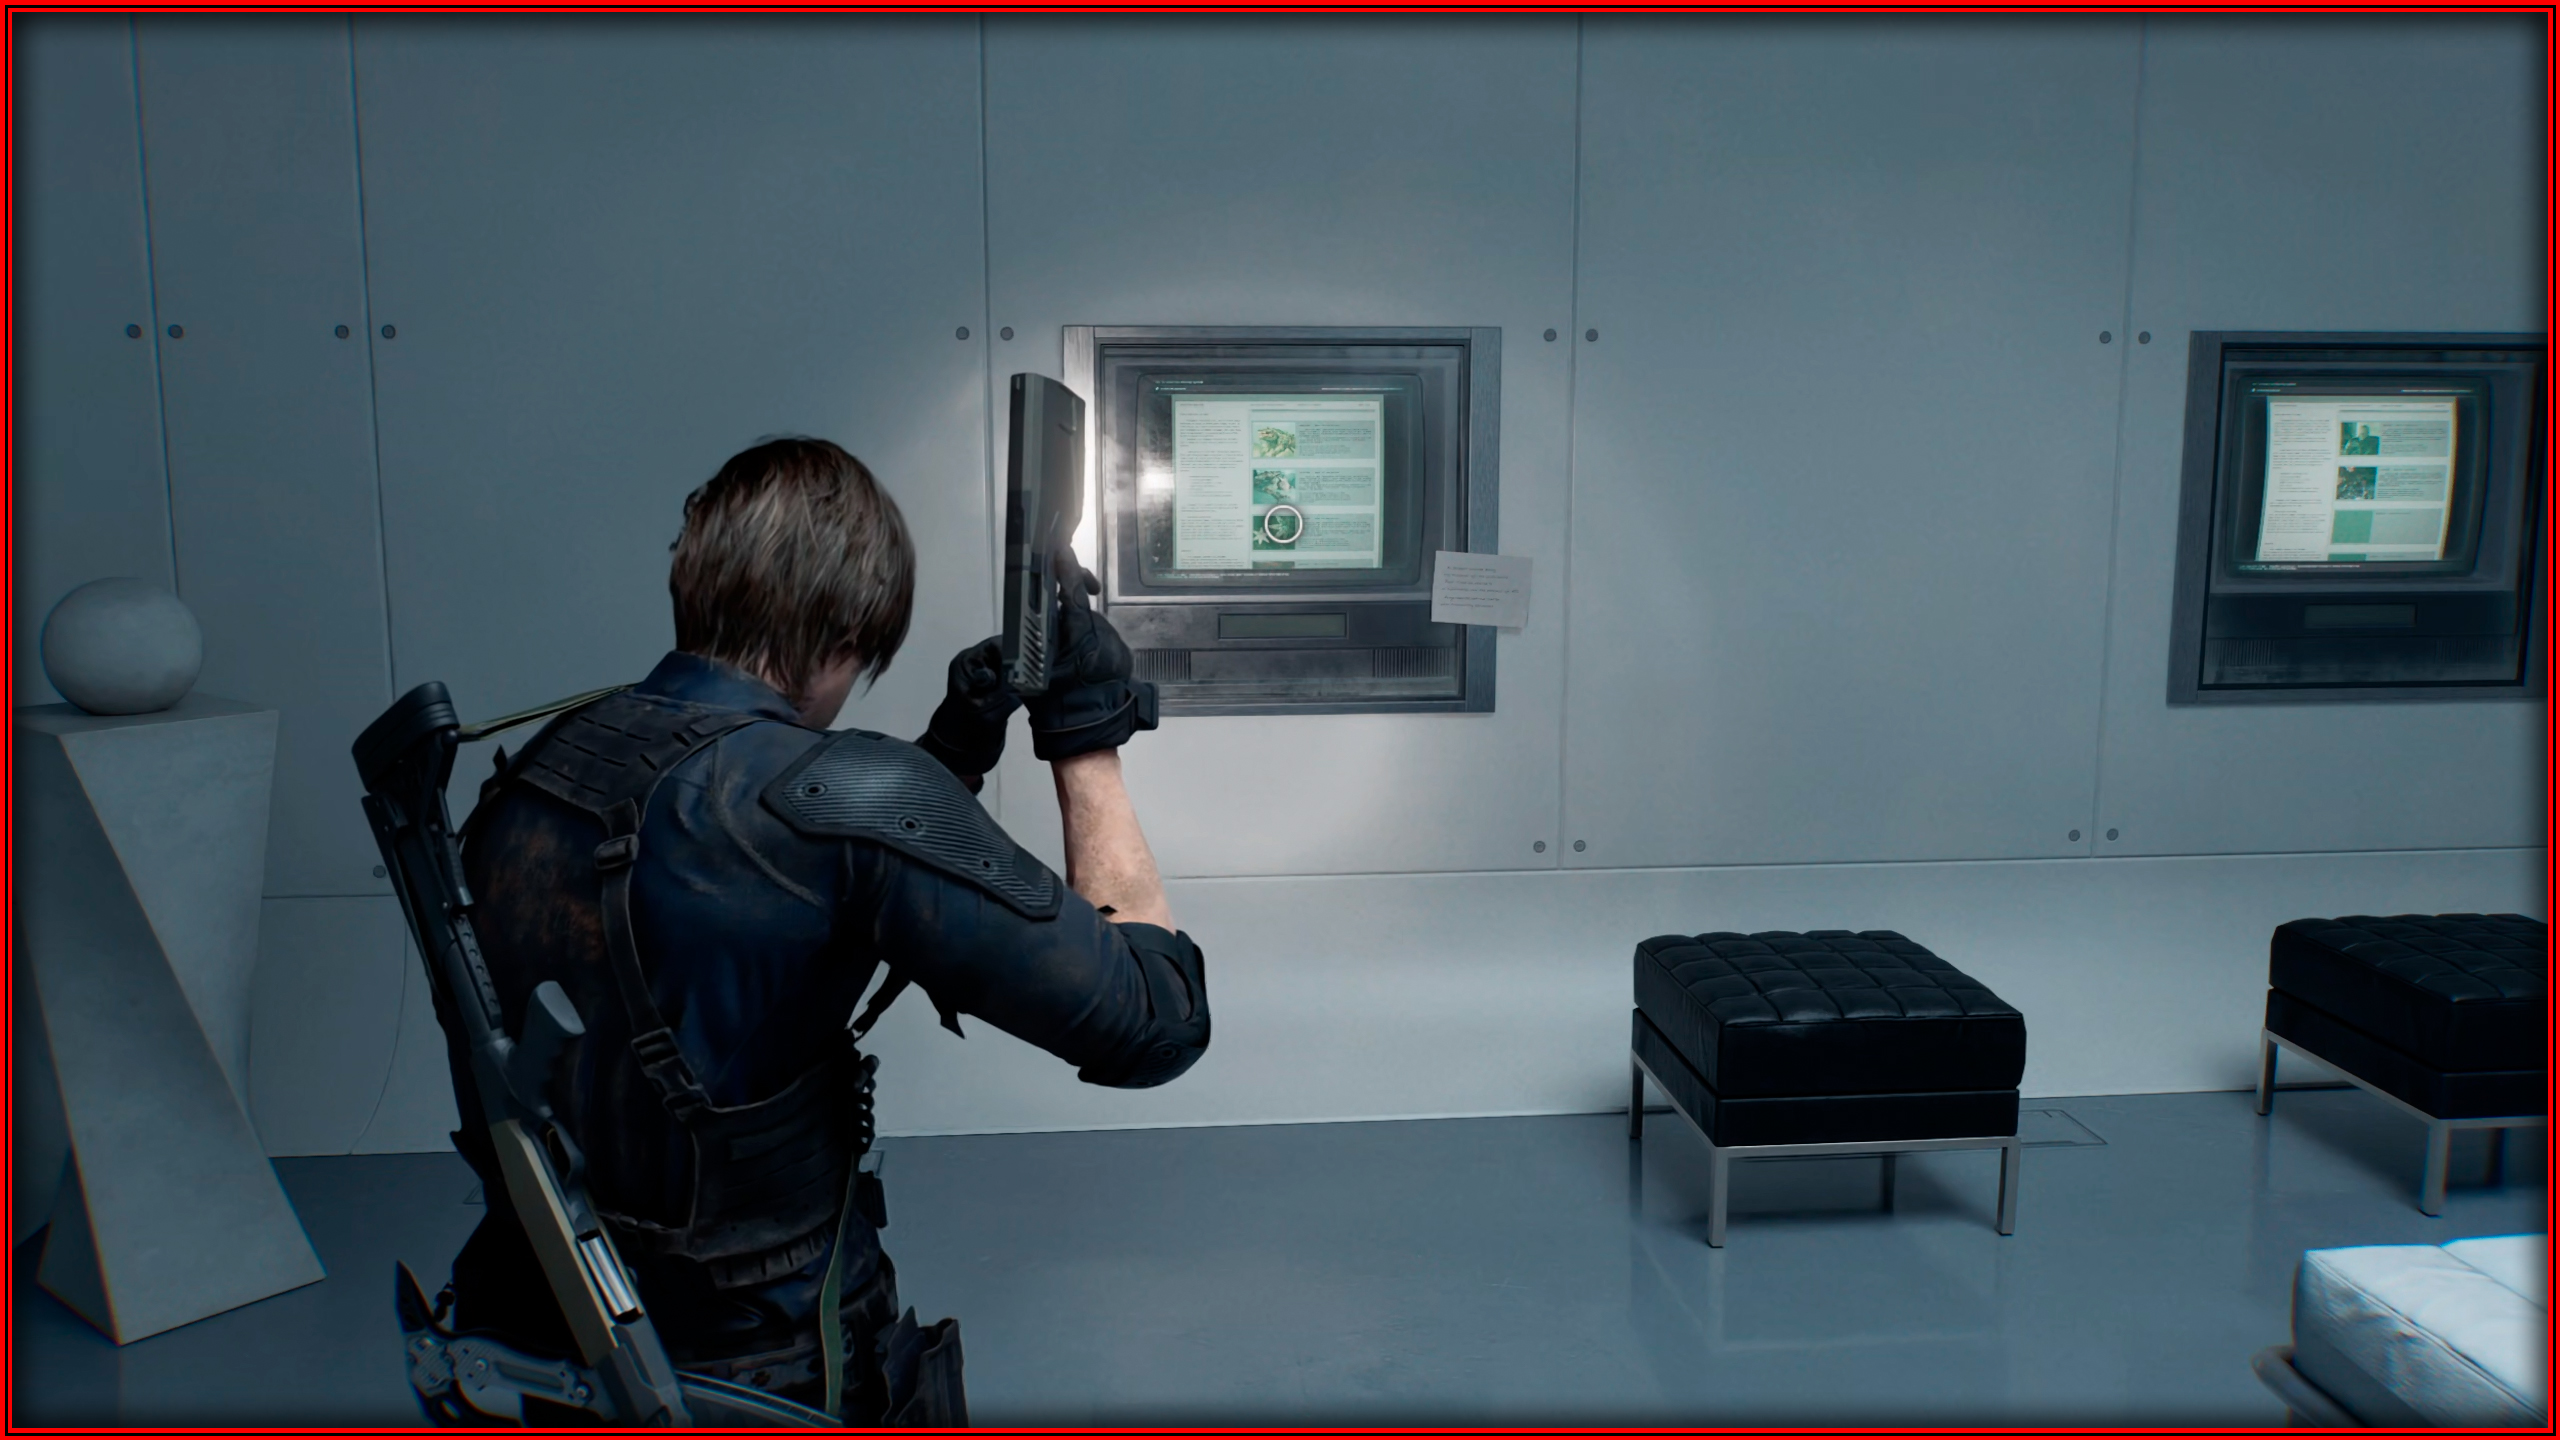
File 69/75 - Product Catalog 2 (2026)
Guest Lounge: On the monitor on the wall.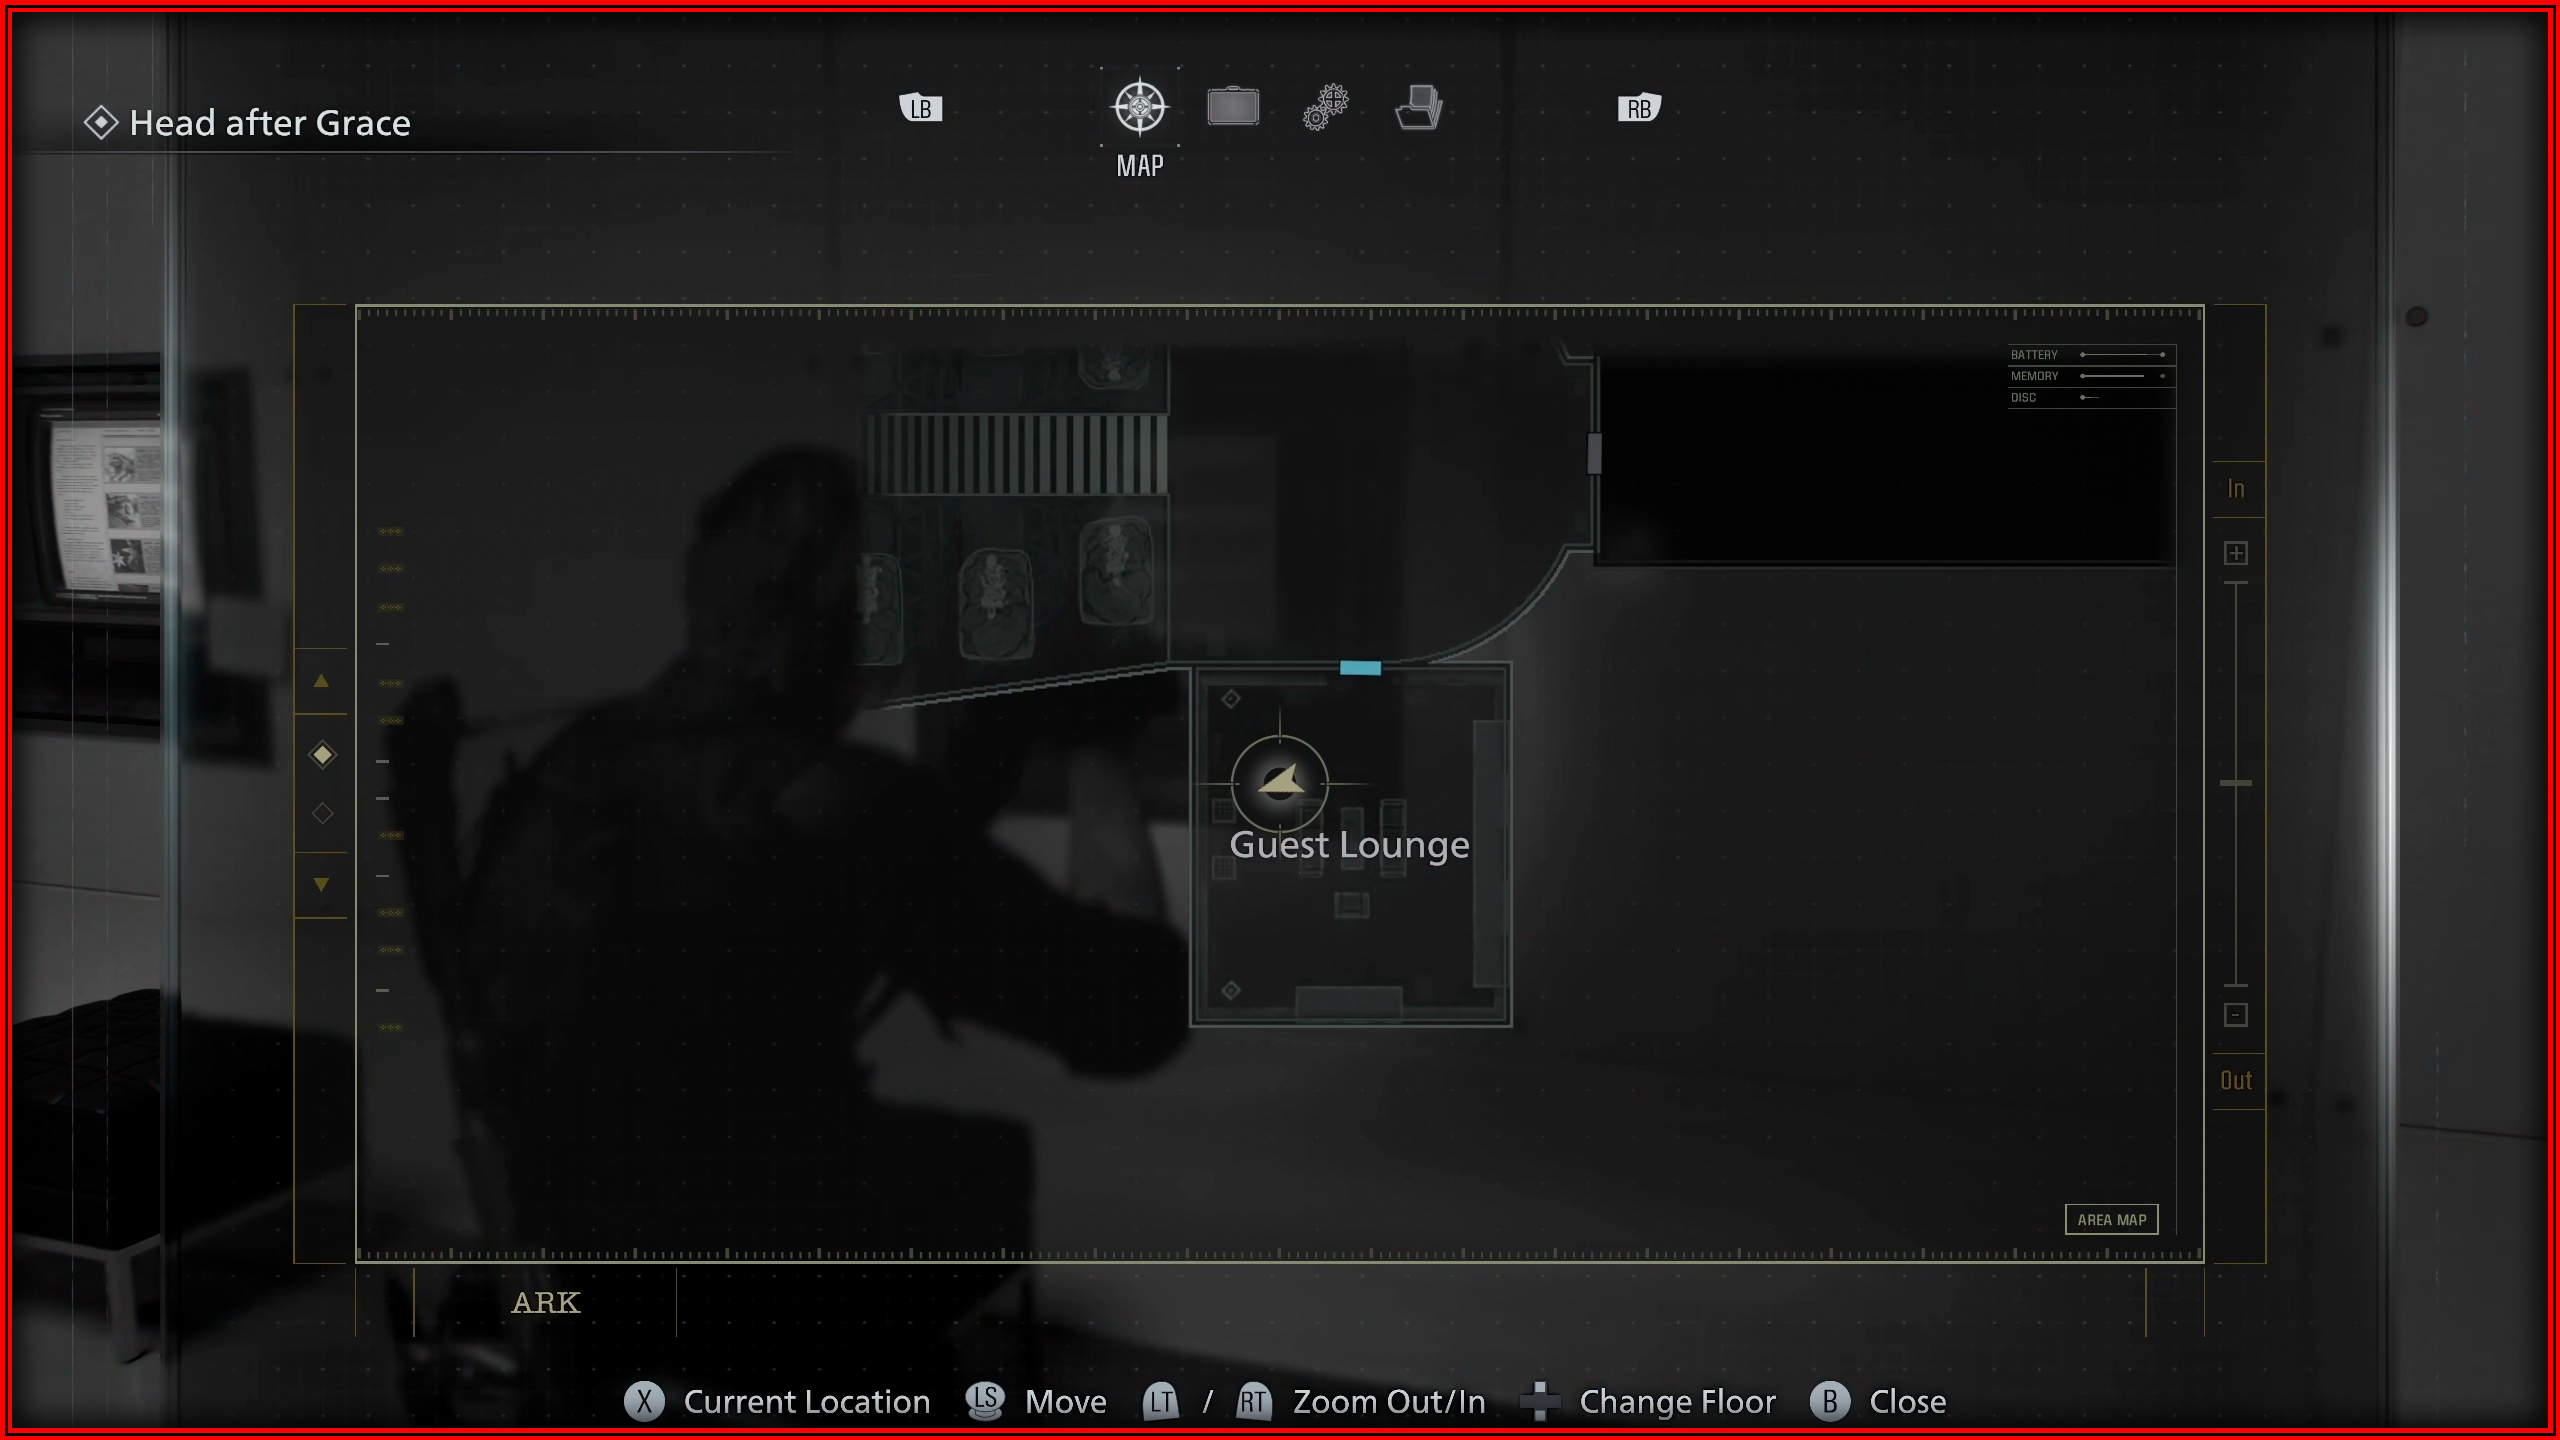
ARK – Grace
File 70/75 - Access Log: 51st Assembly Minutes
Monitor Control Room: On the monitor on the operating panel.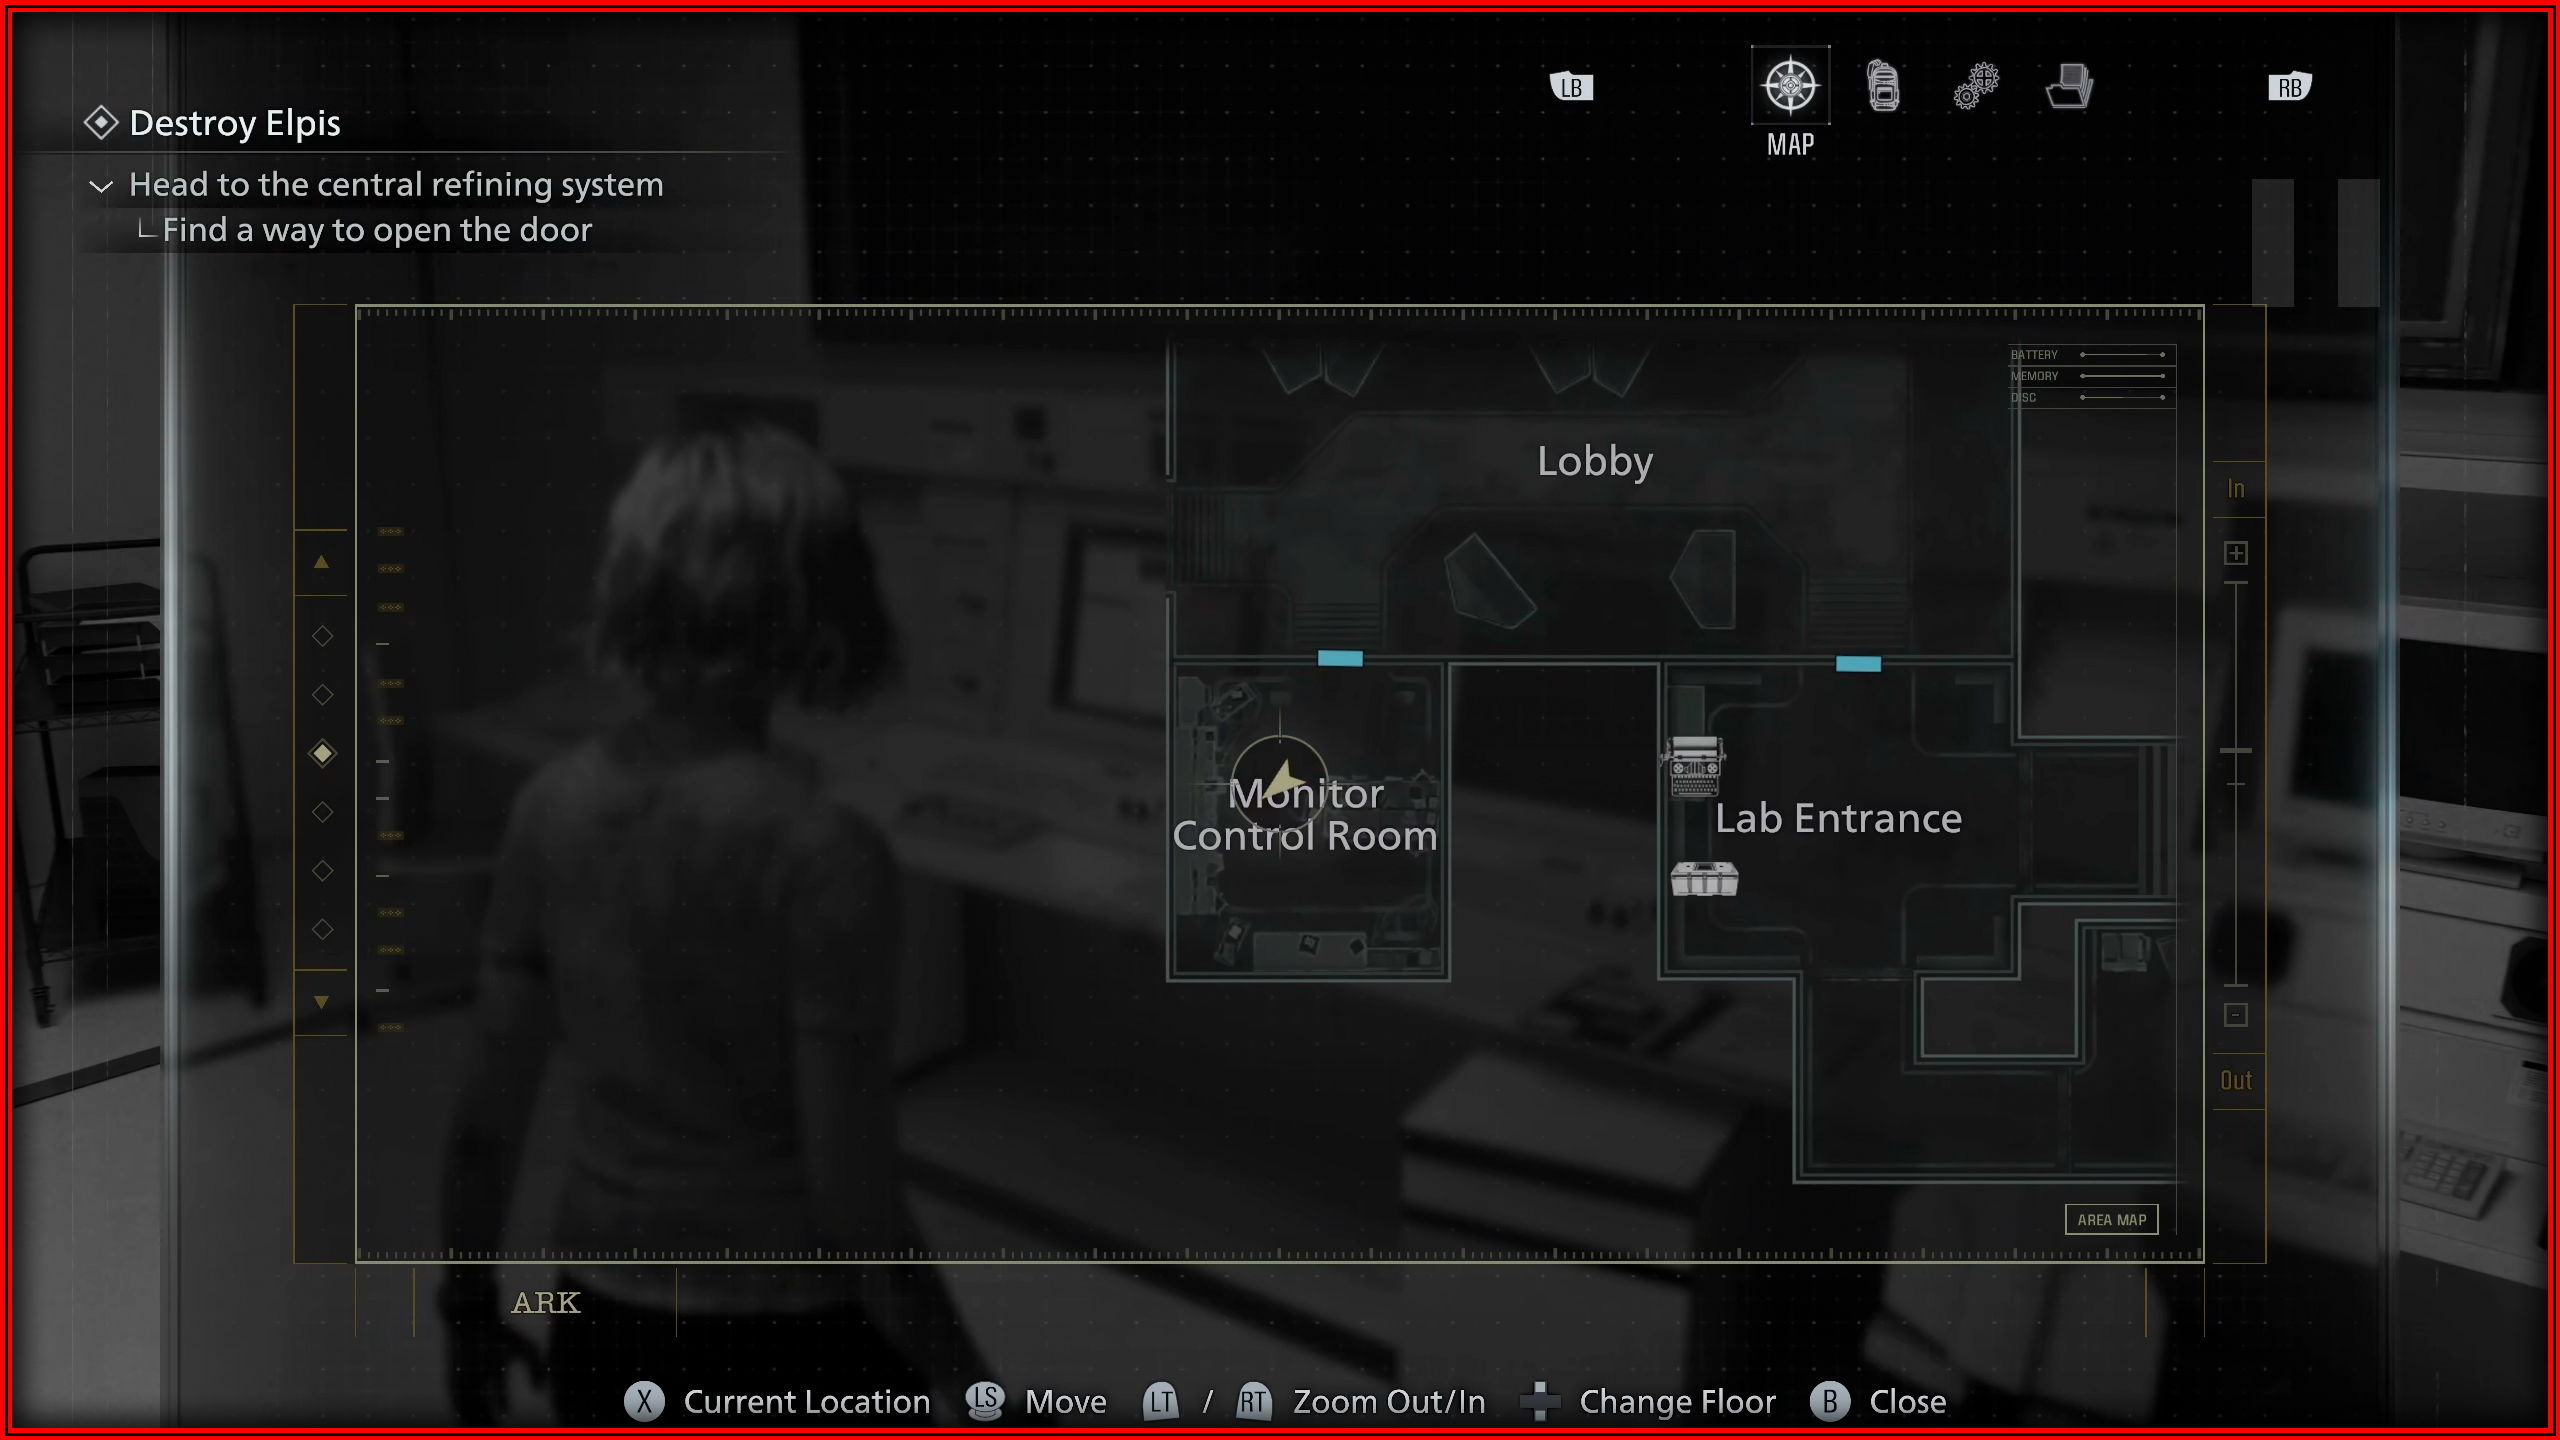
File 71/75 - Sterilization Chamber Safe
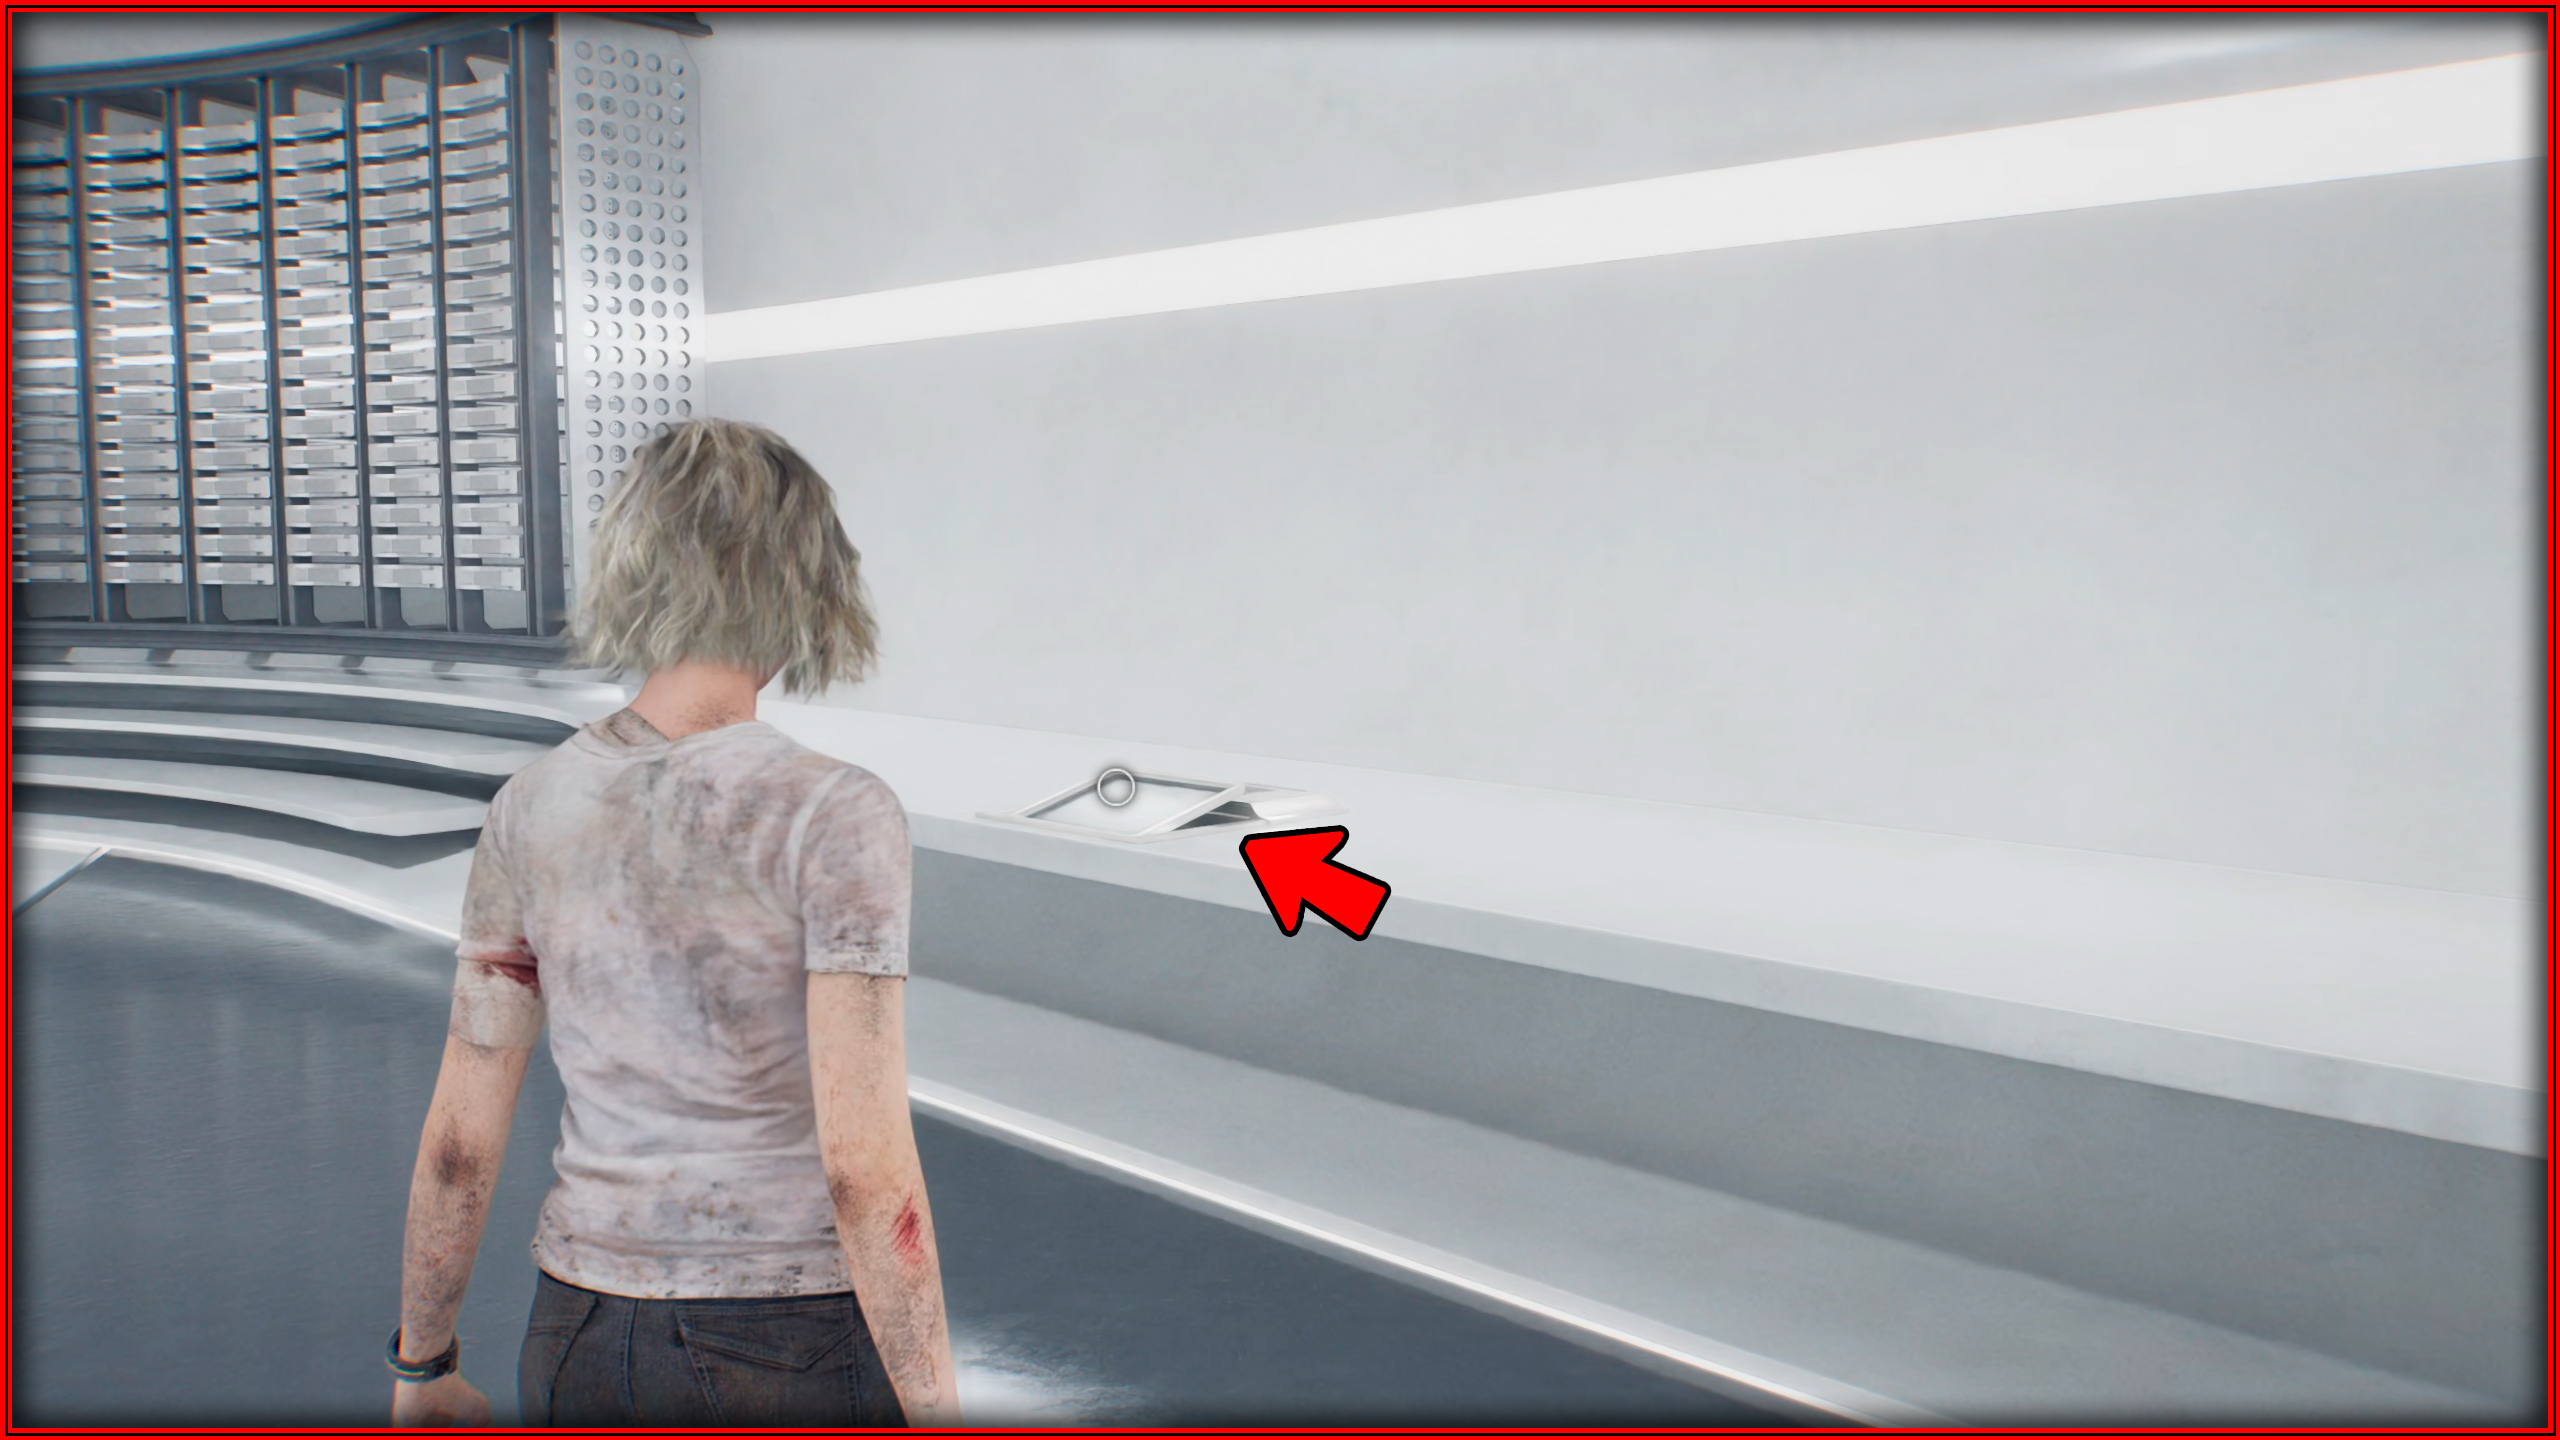
Before going into Bioweapon Repository 05, On top of a box next to a green herb.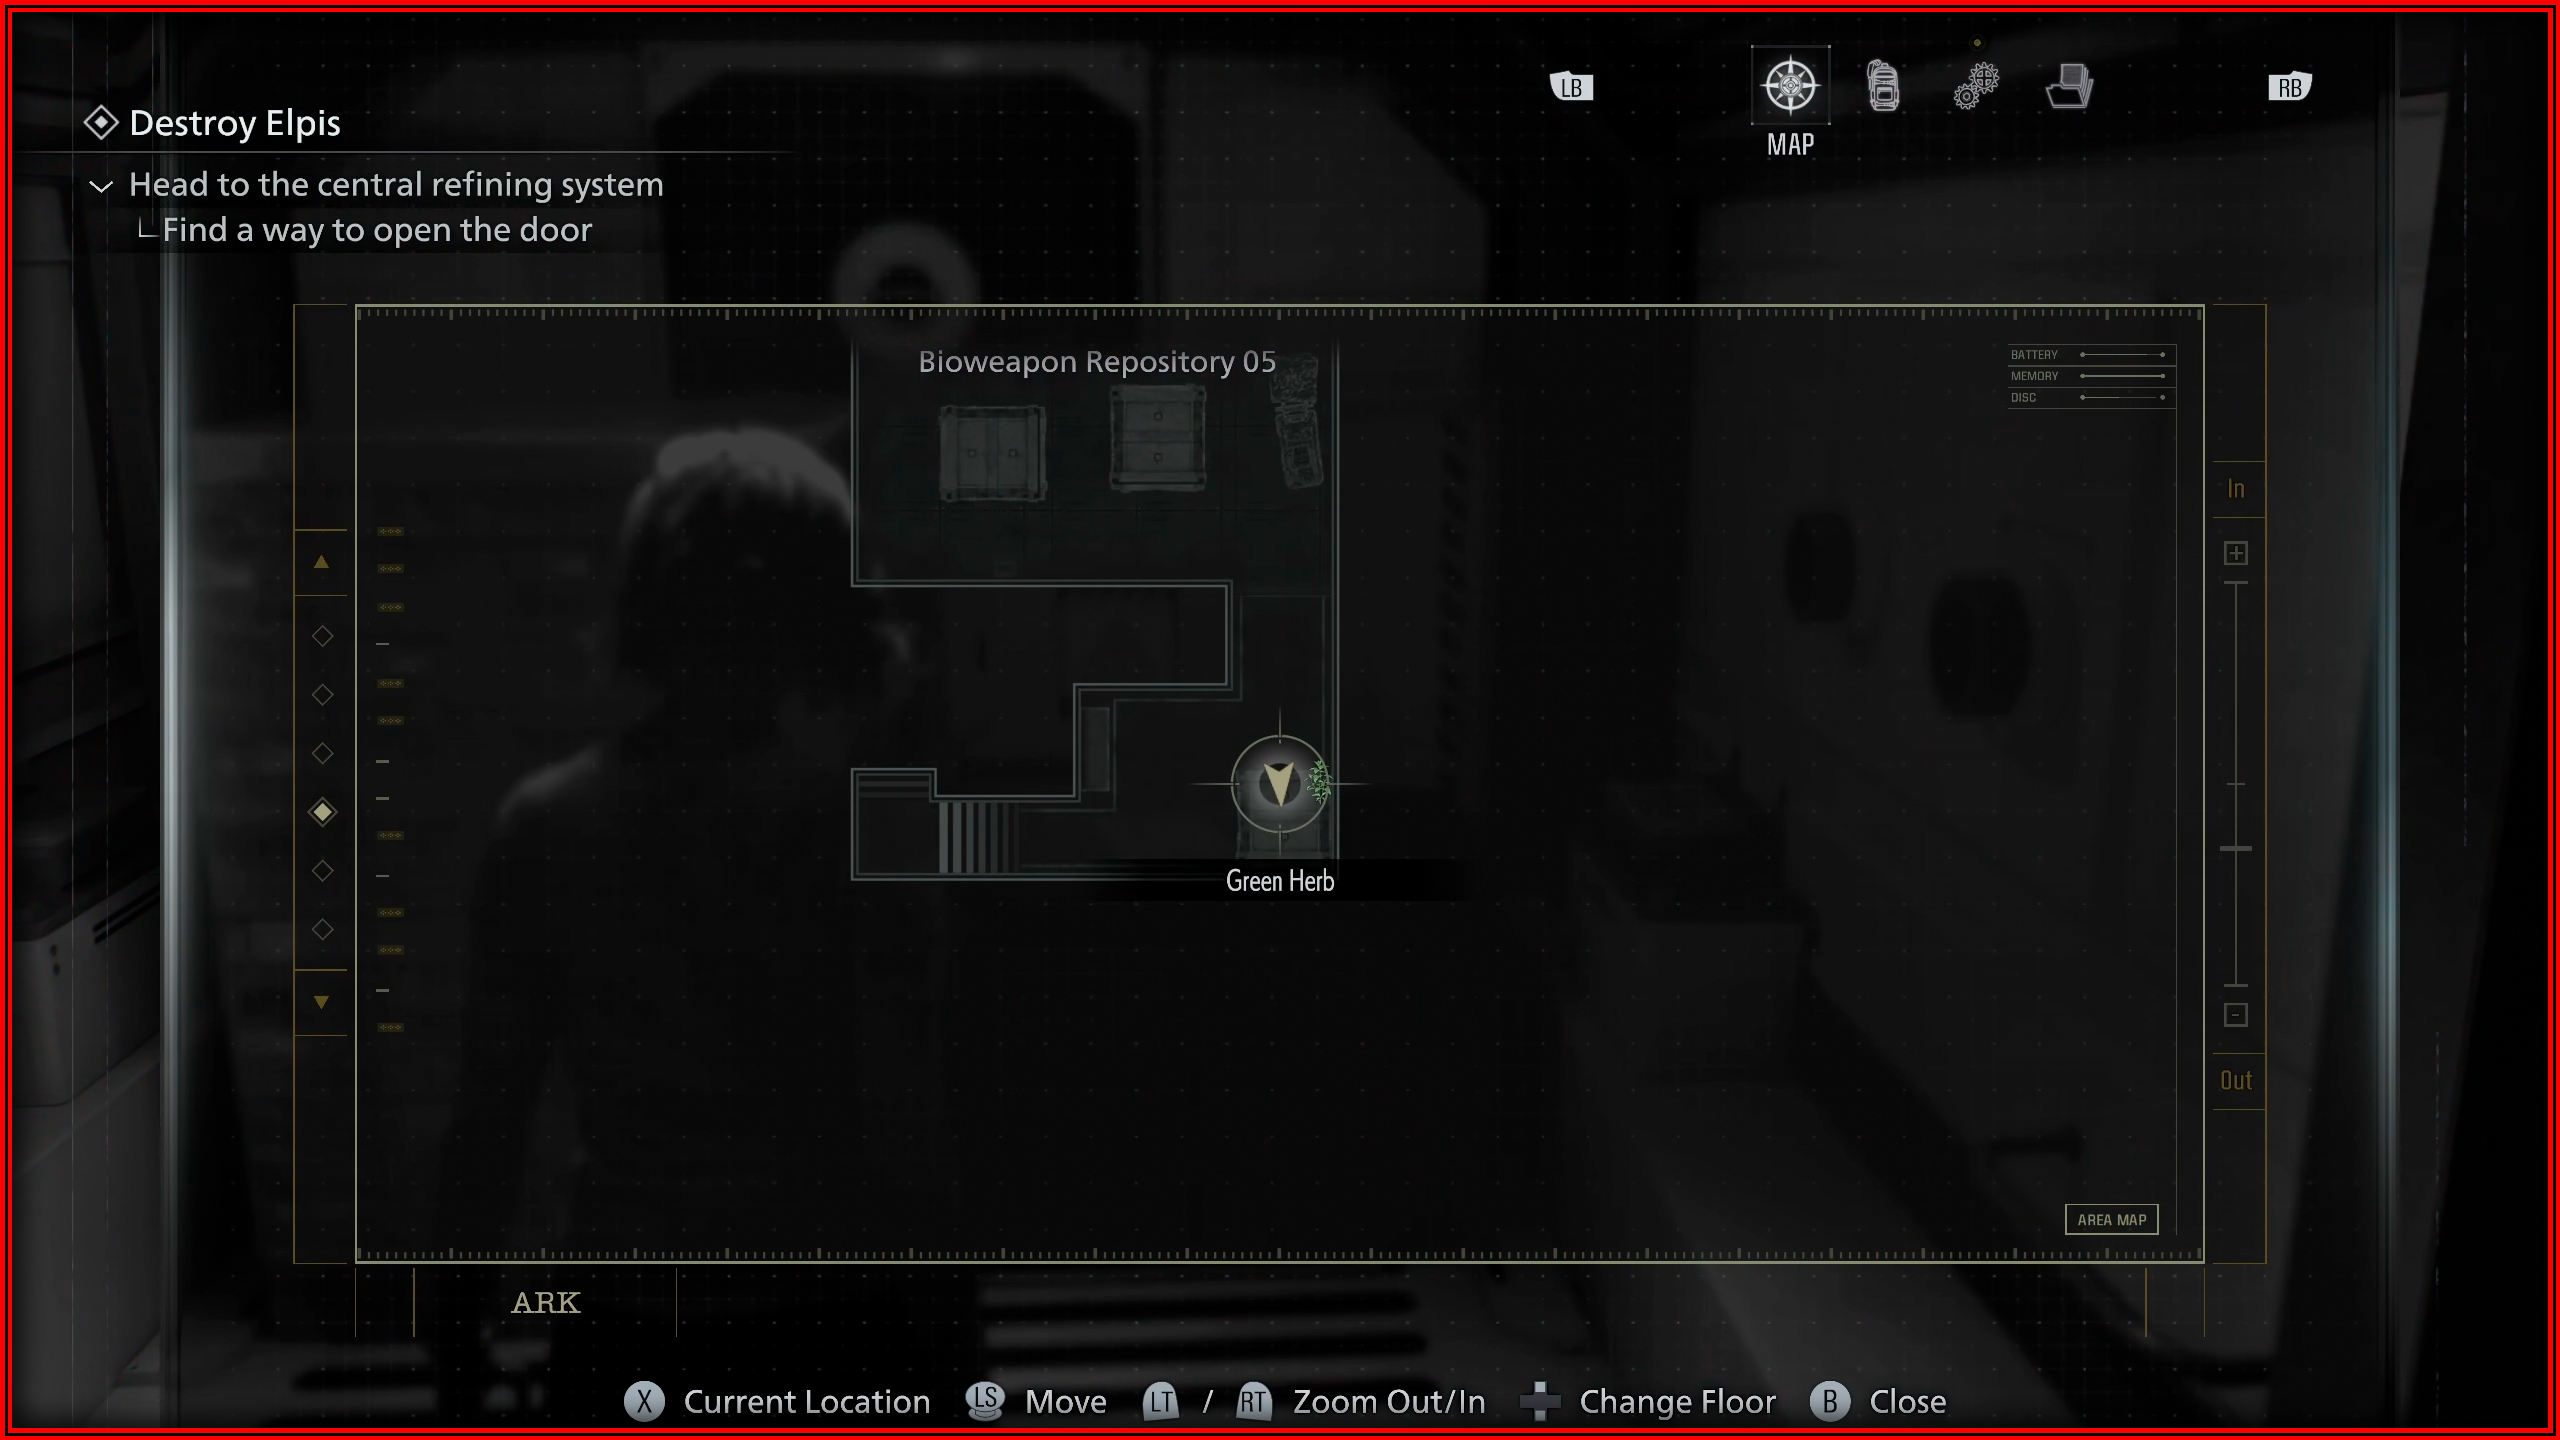
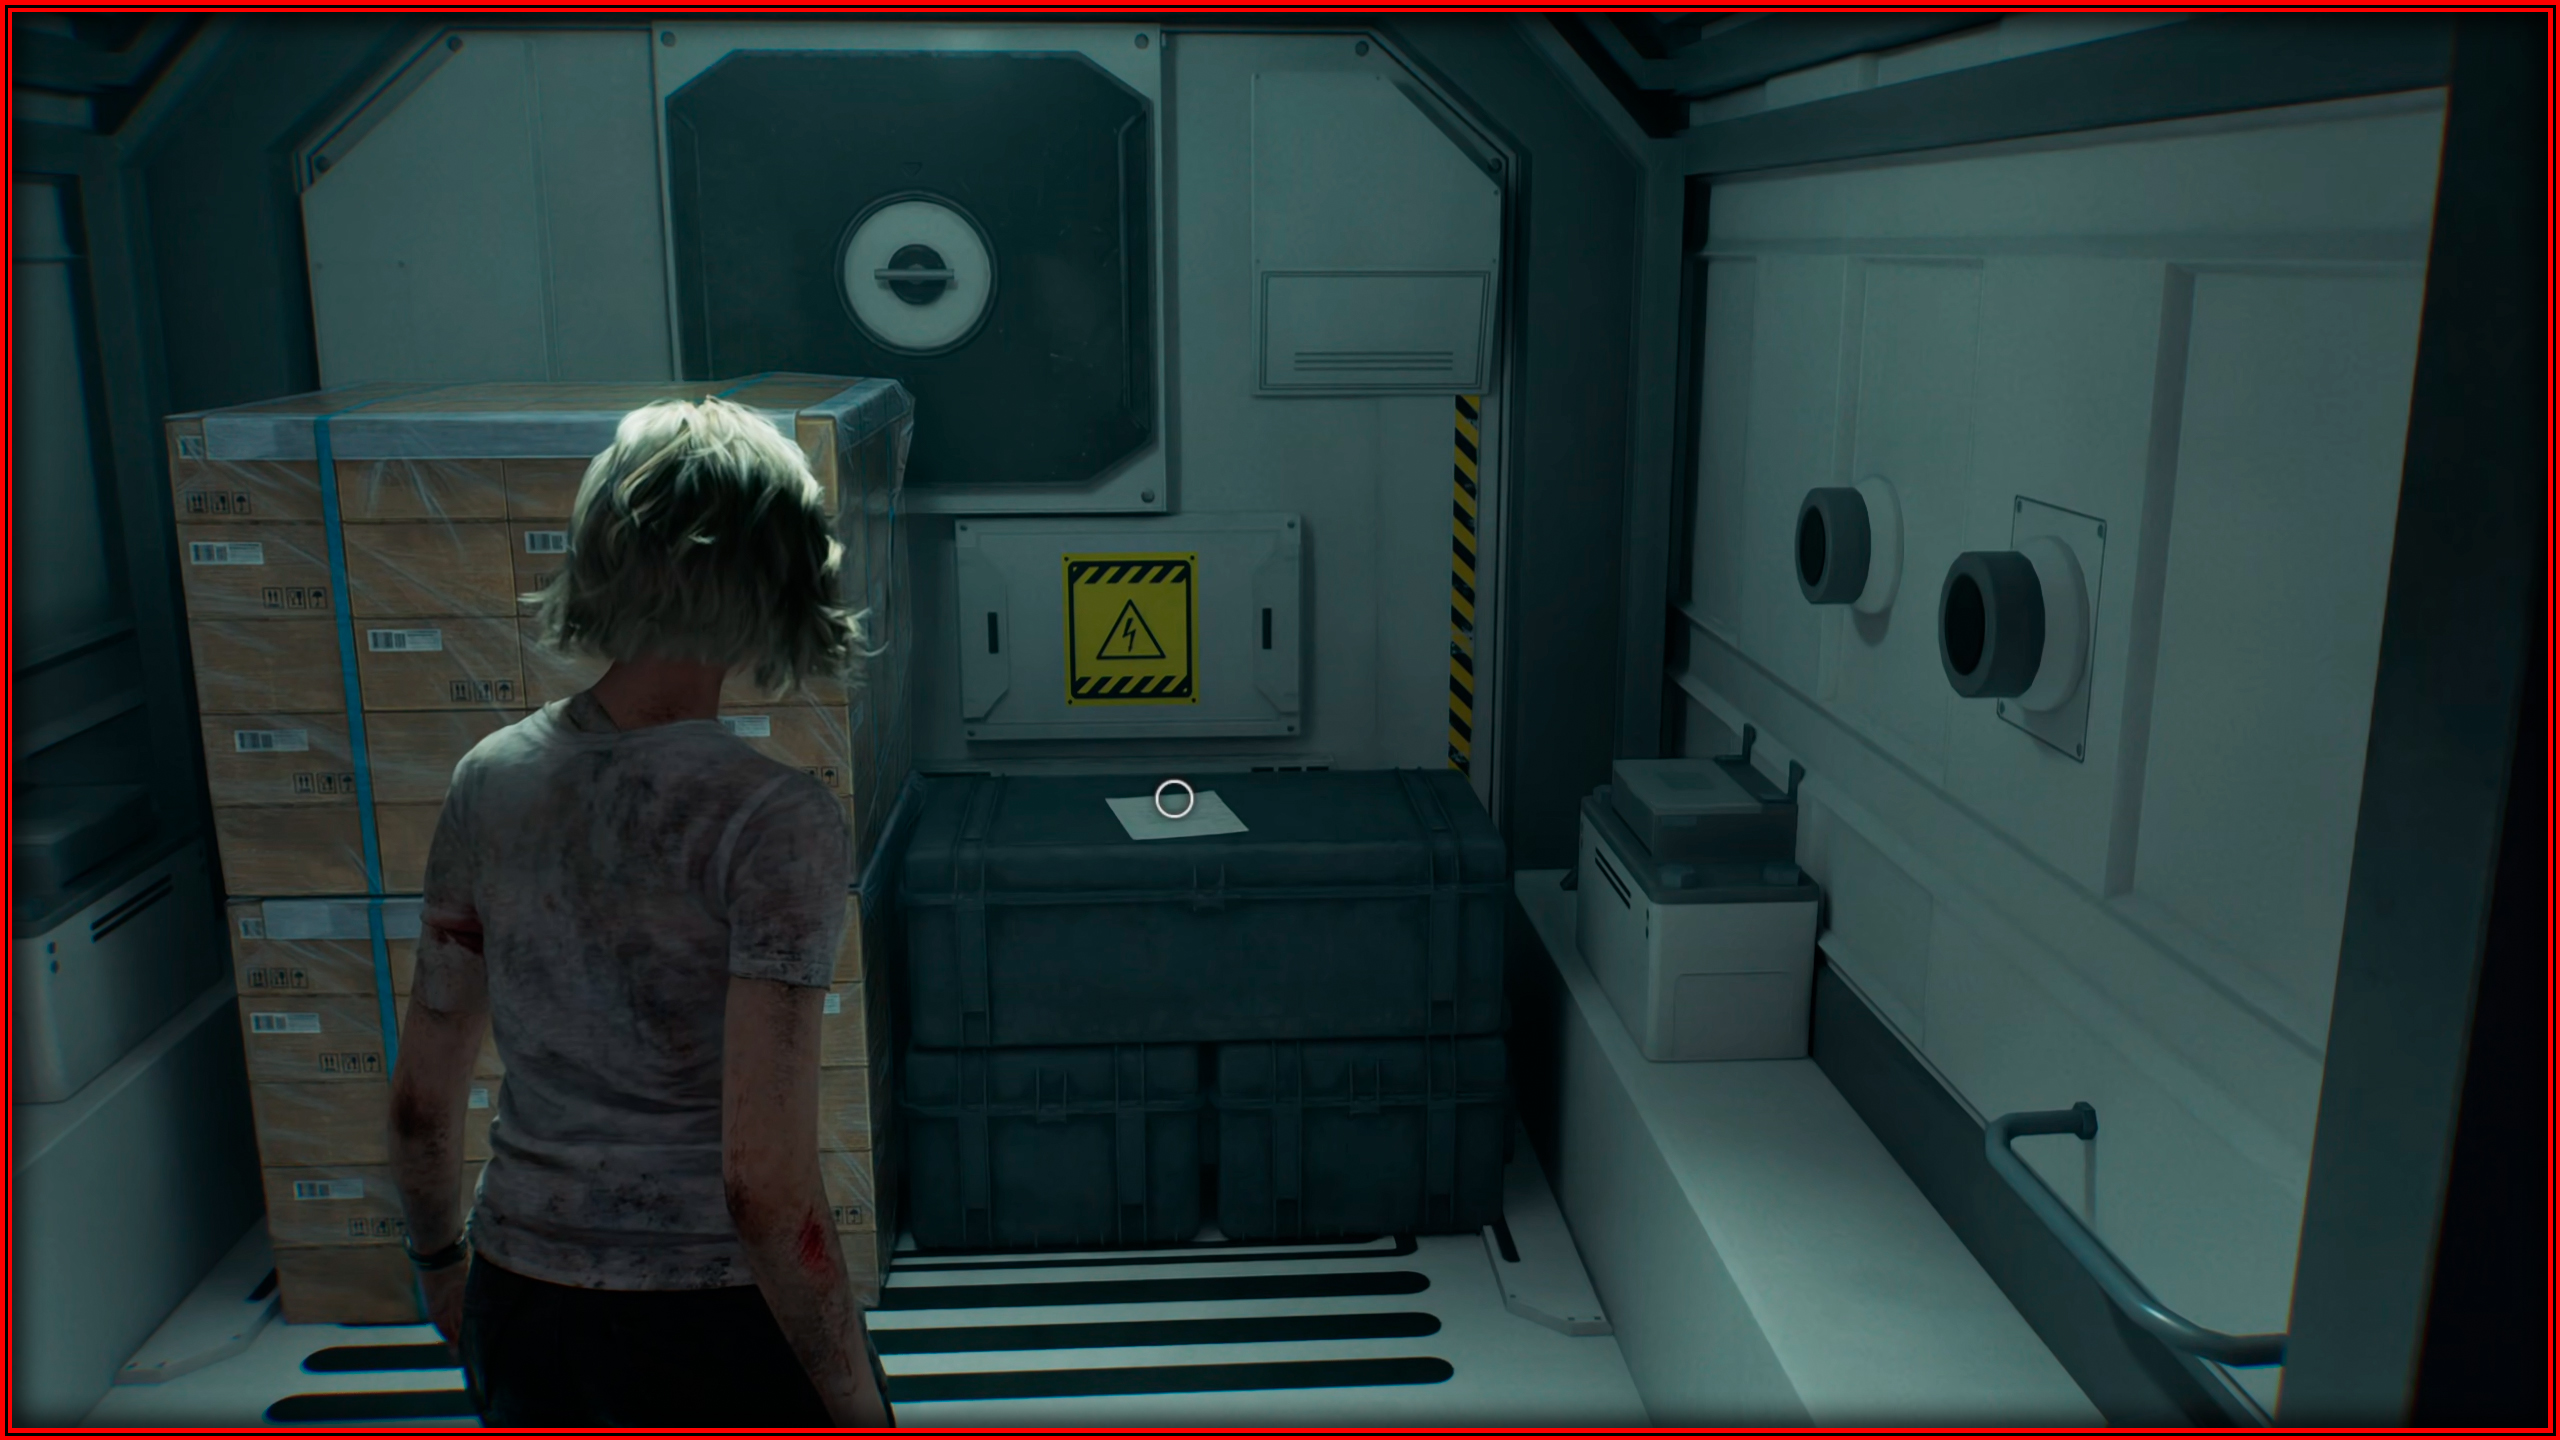
File 72/75 - Monitor Control Room Safe
Bioweapon Repository 05: Inside a container on the right side of the middle of the room.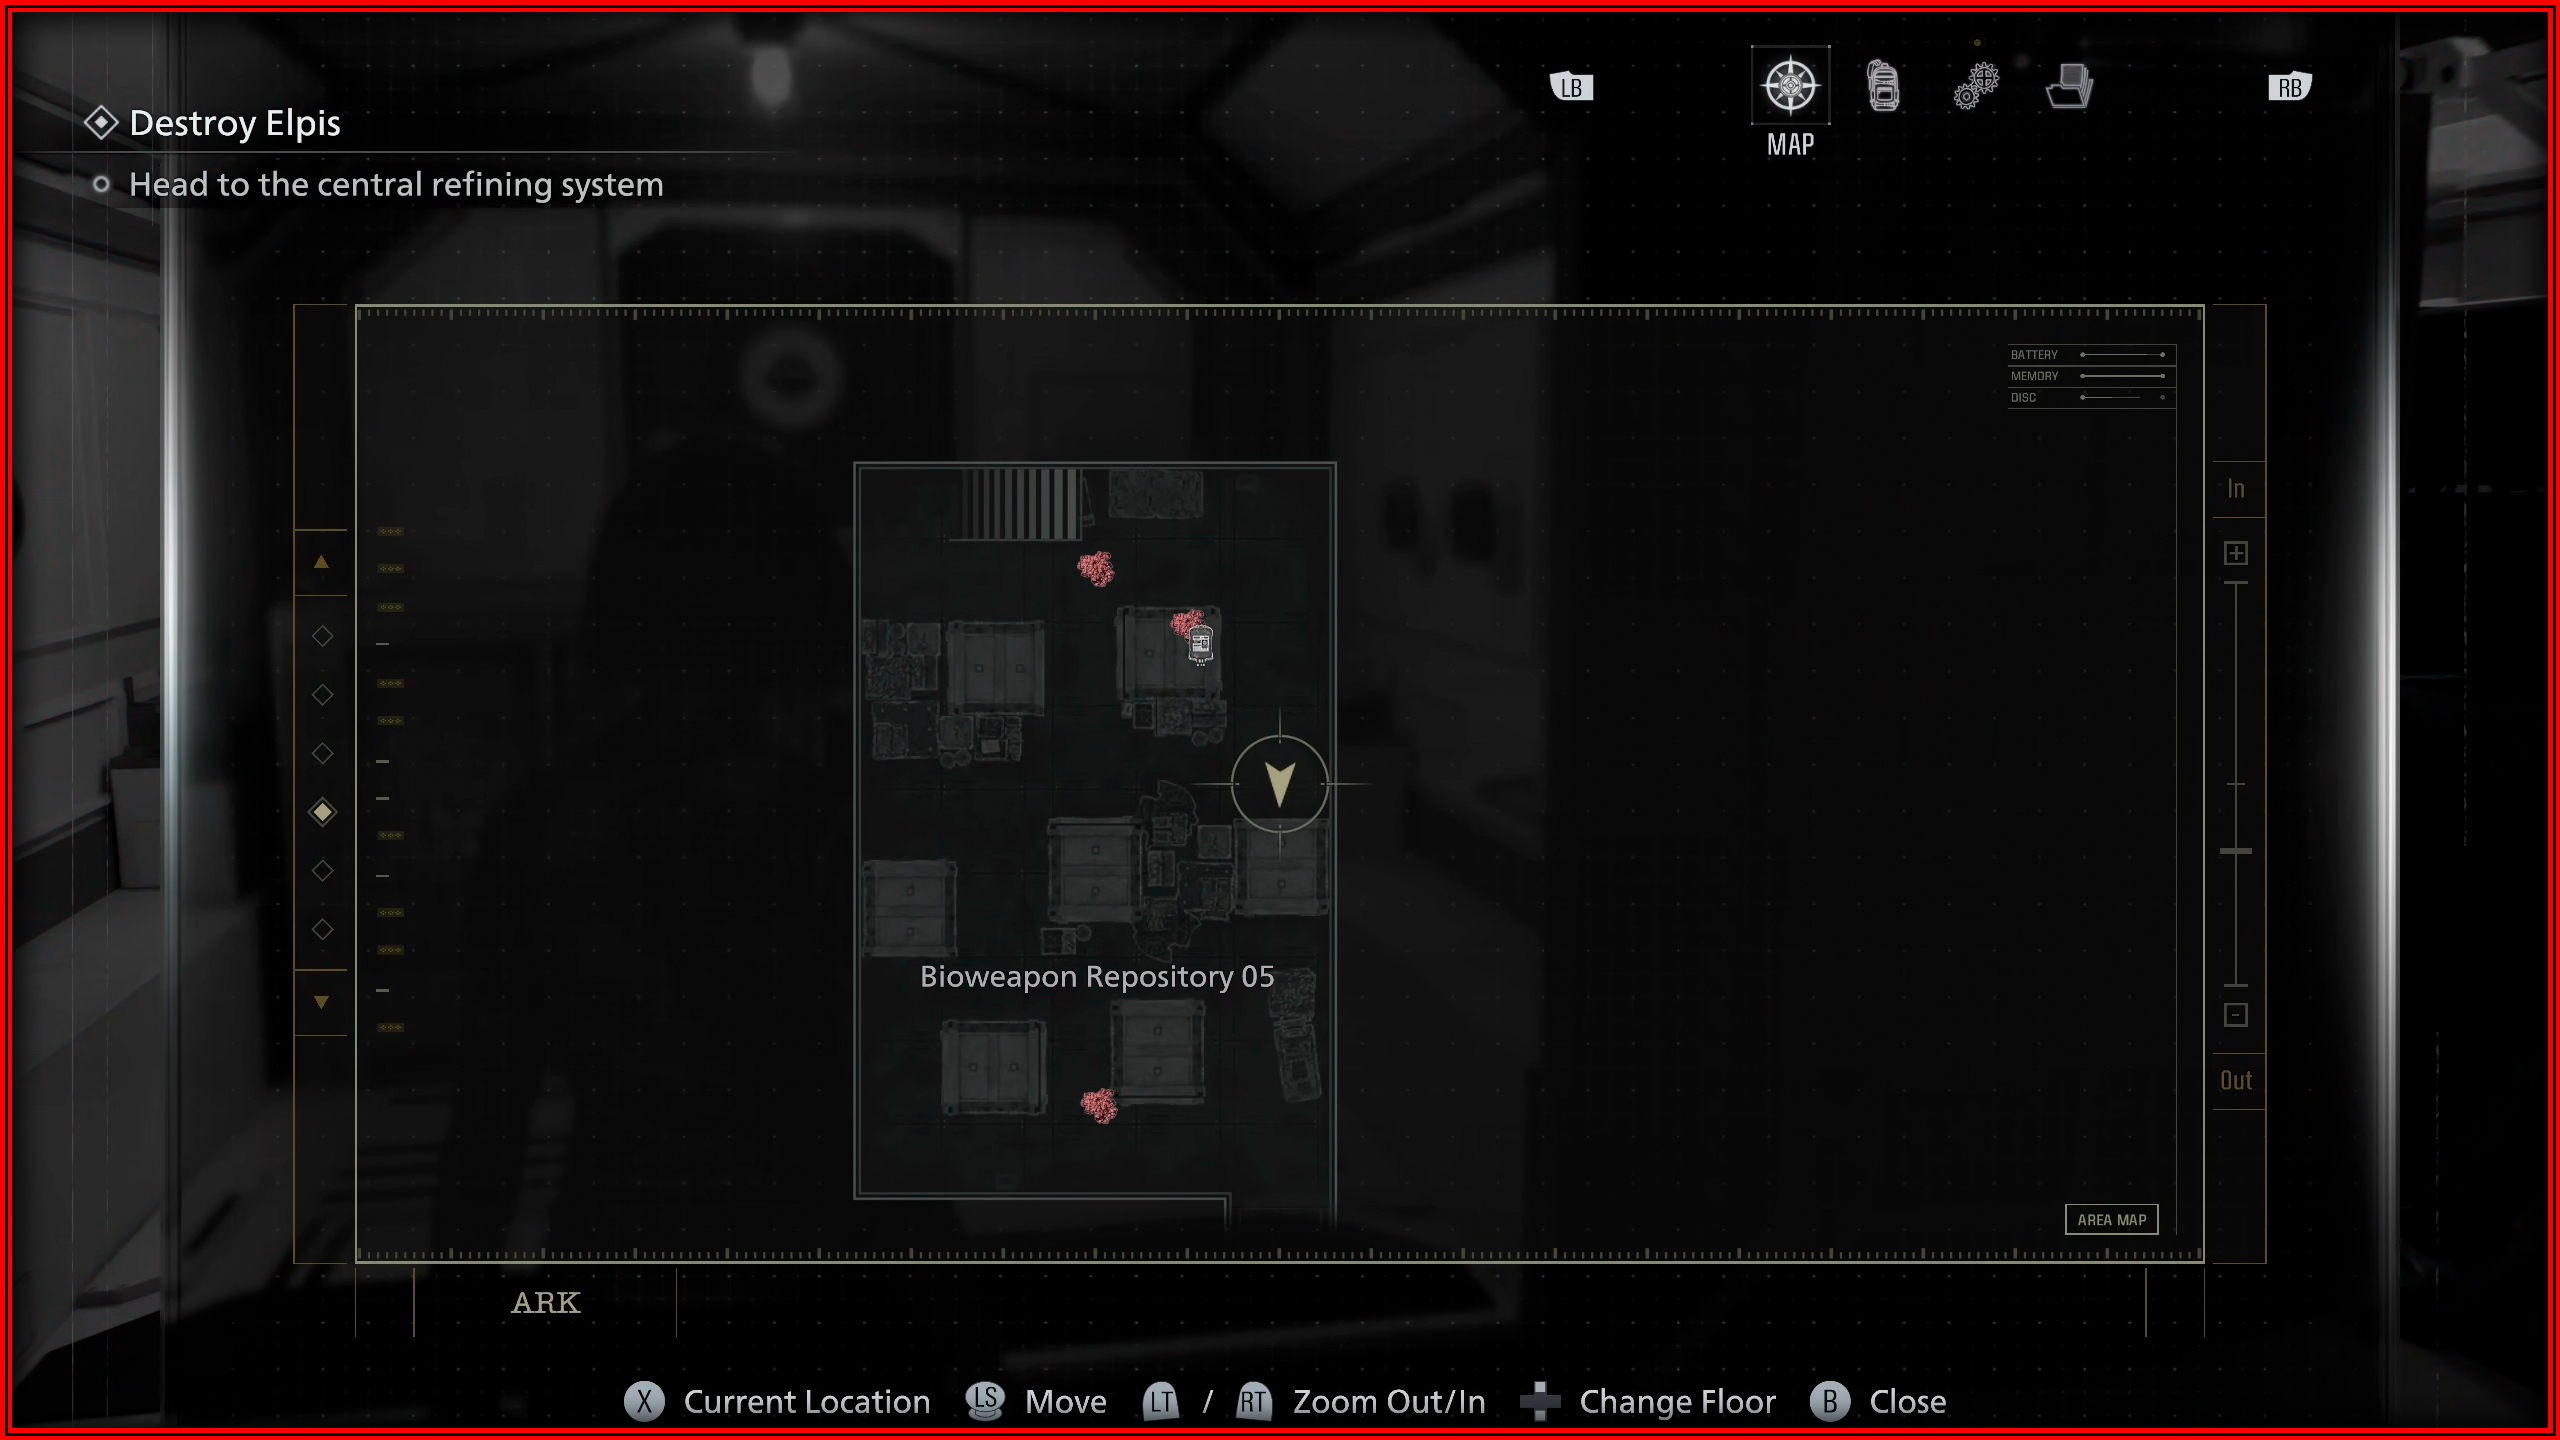

File 73/75 - Access Log: First Assembly Minutes
Archives:On the right wall, check the last monitor. (Important: Do this before engaging with the main console at the end.)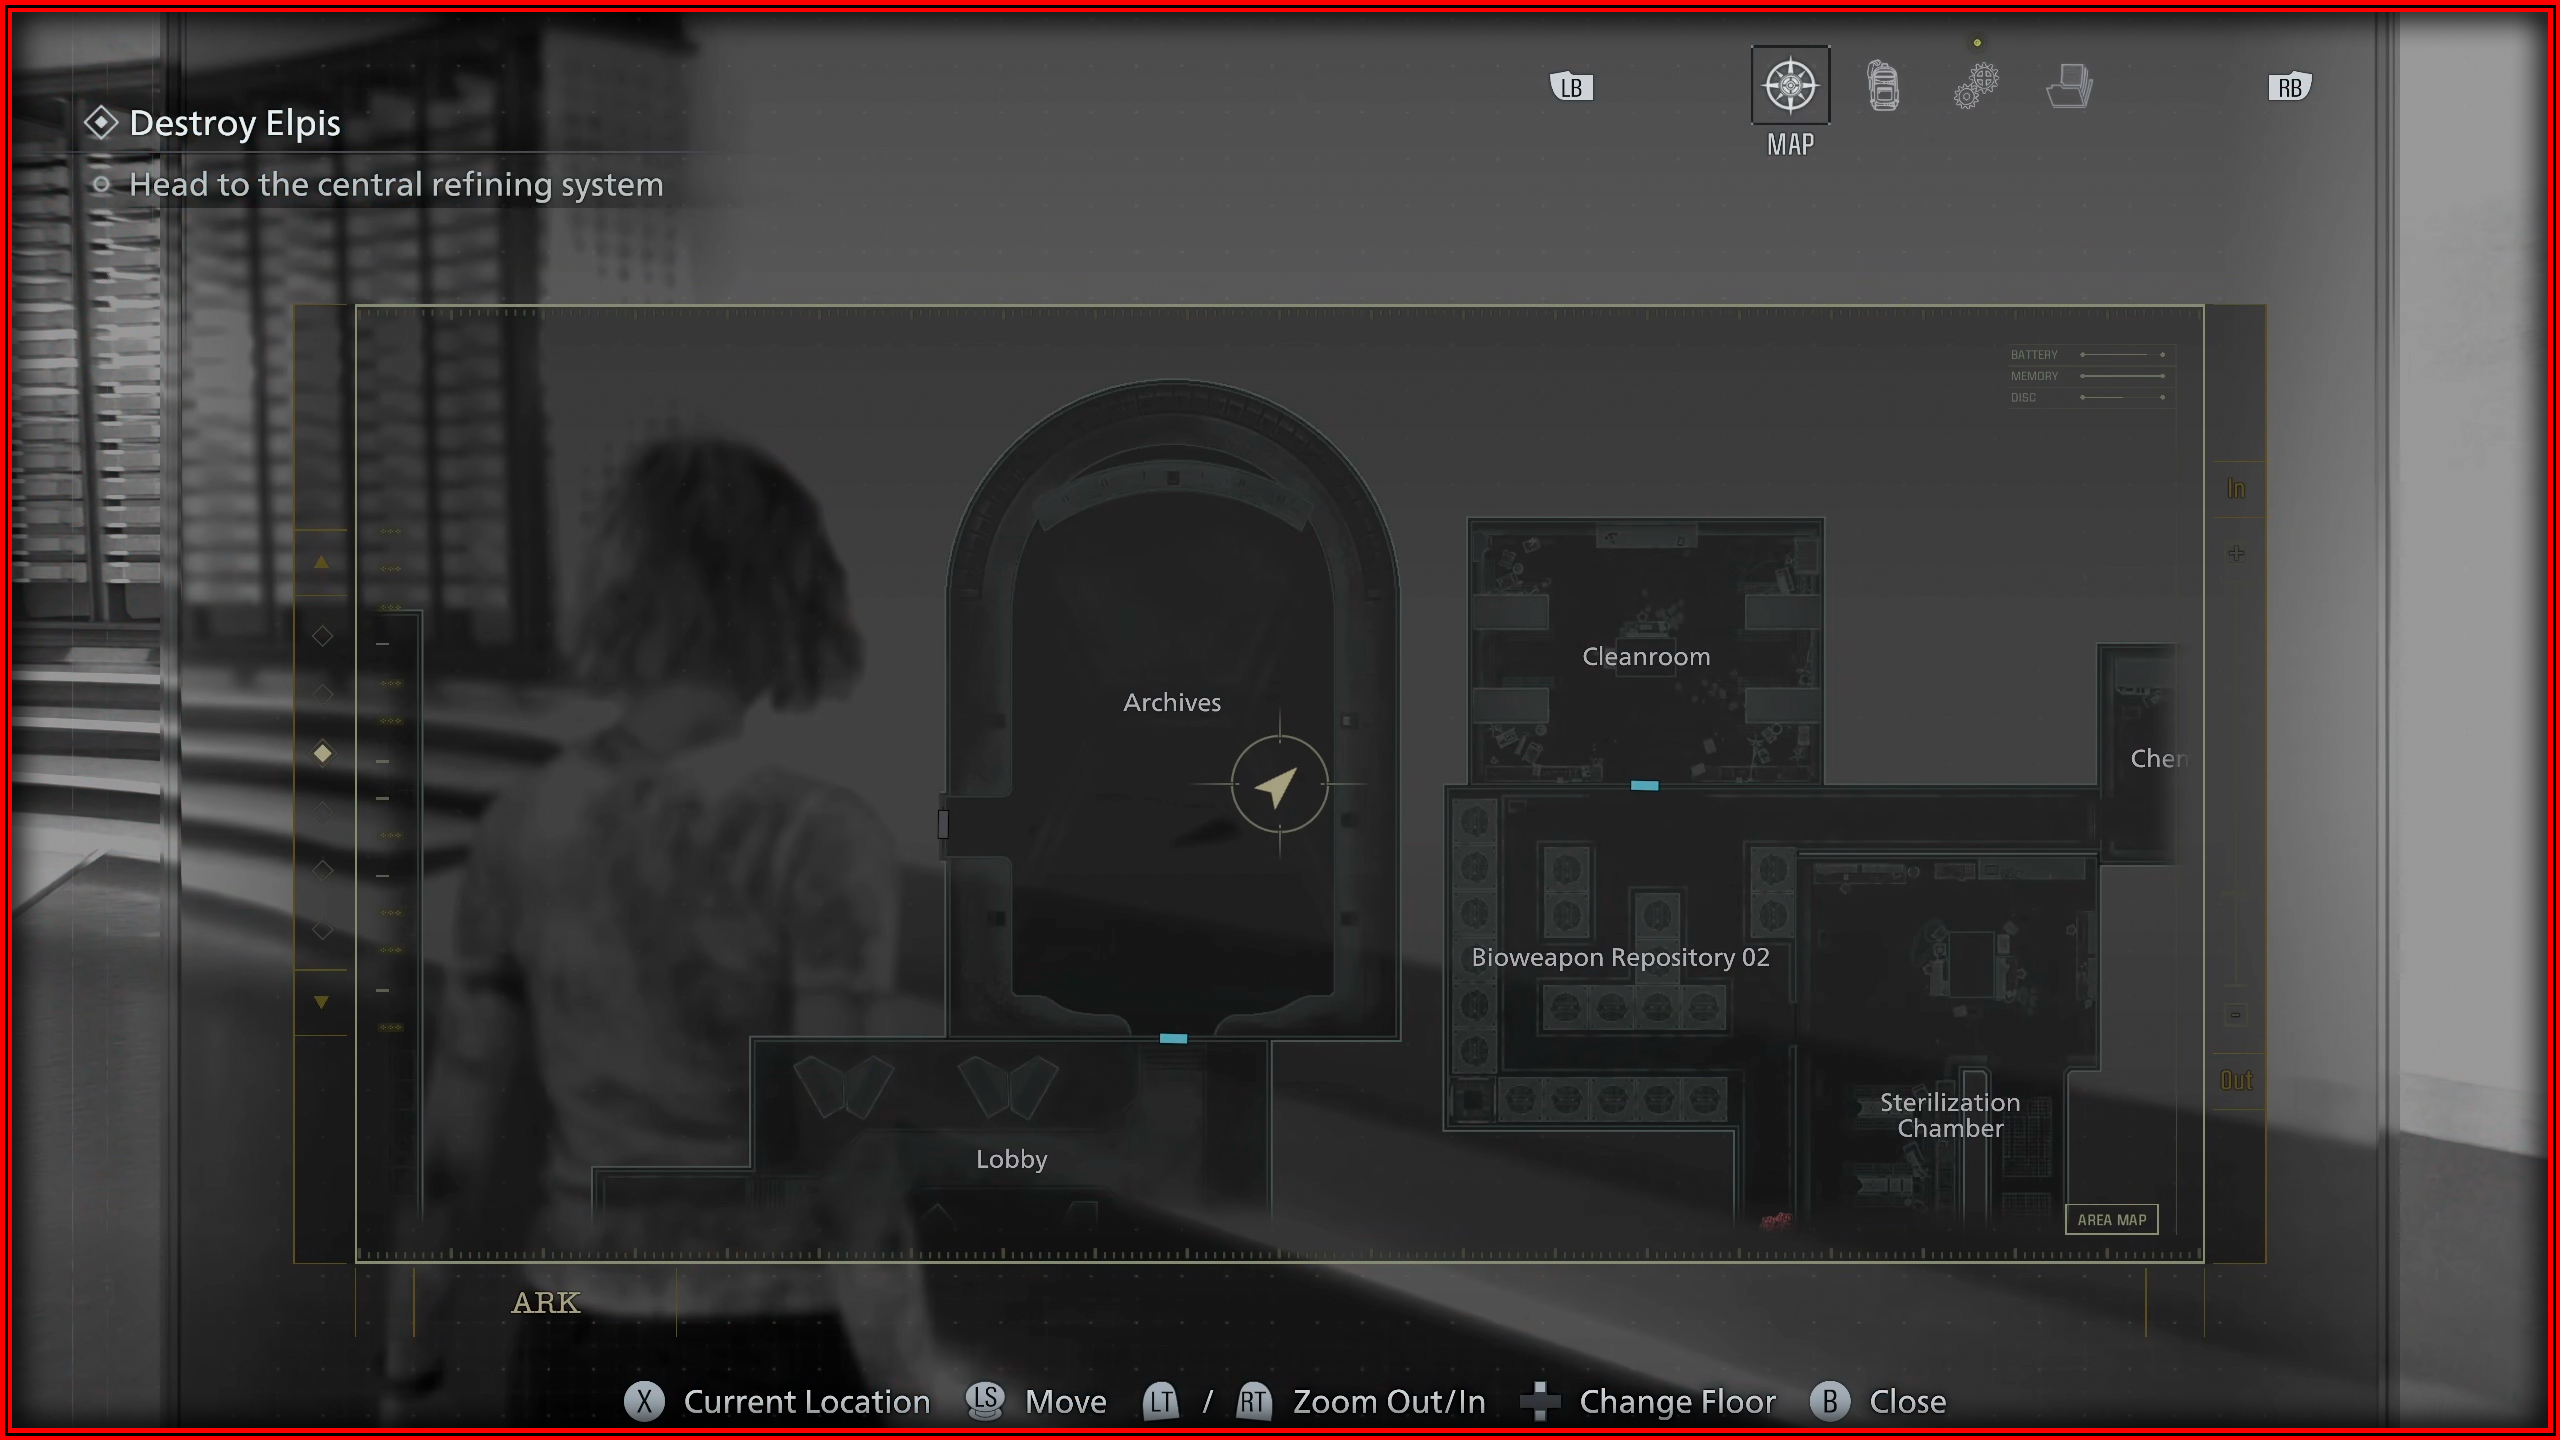
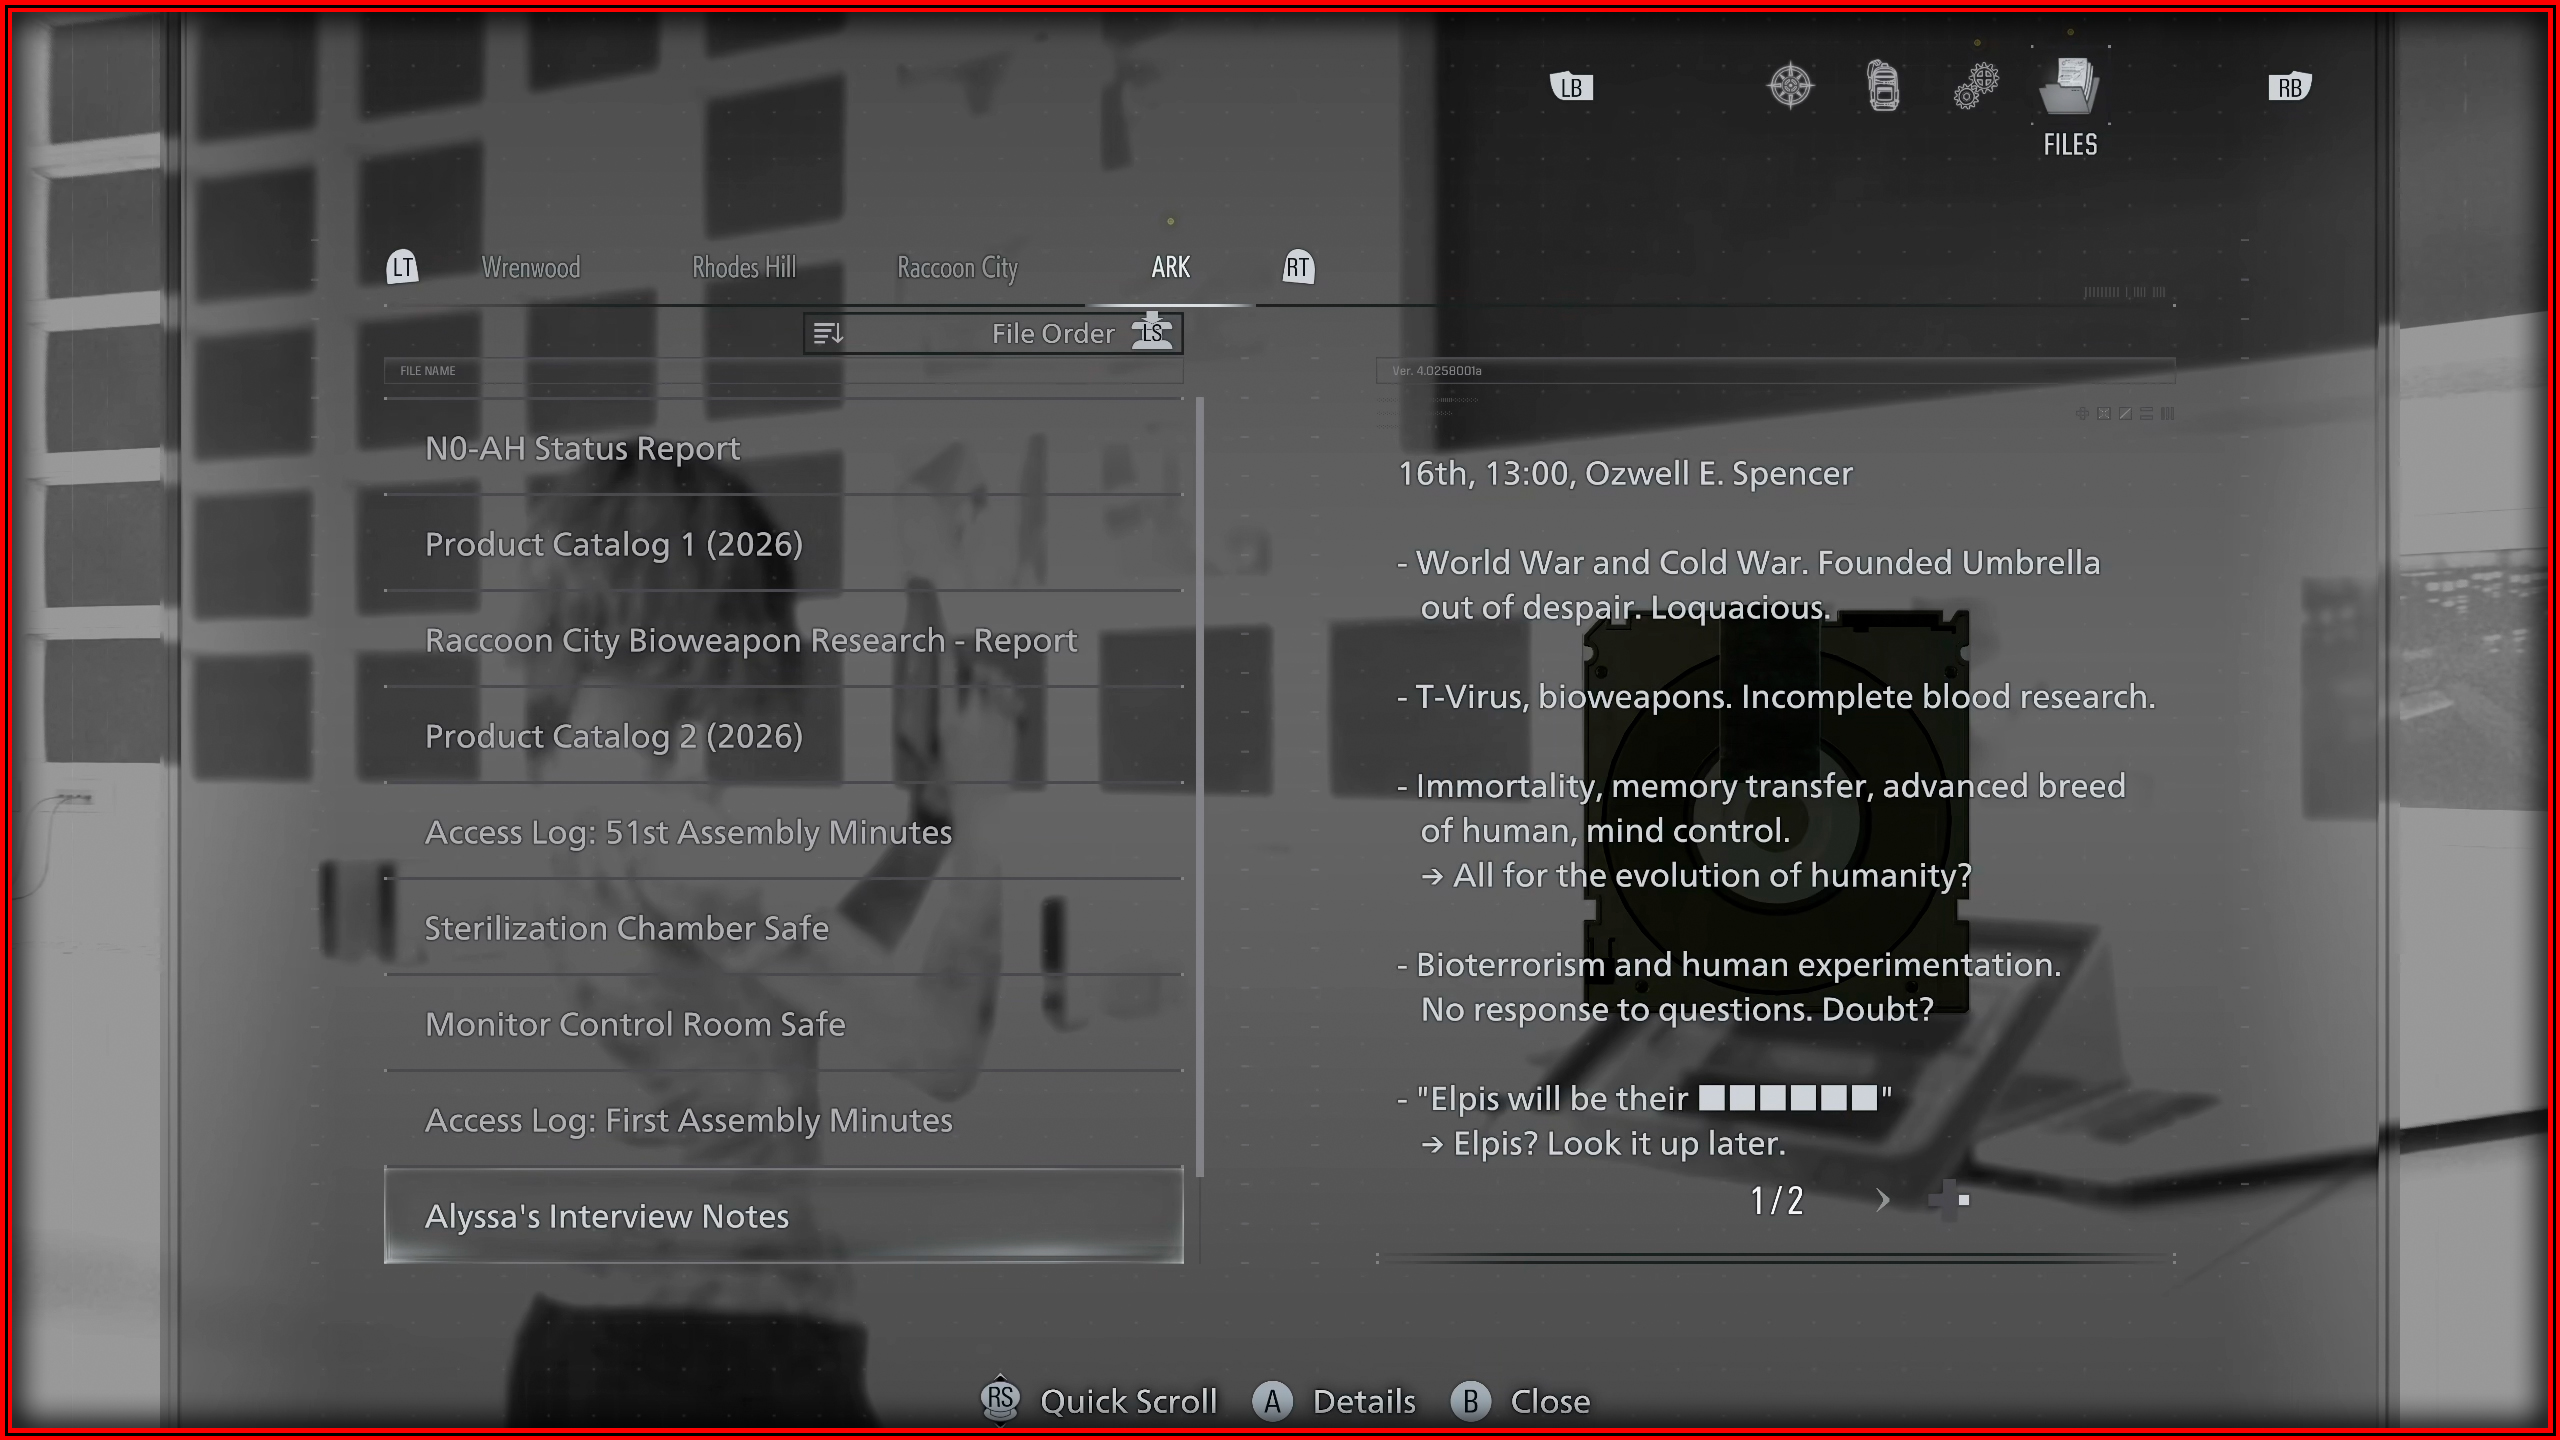
File 74/75 - Alyssa’s Interview Notes
Automatically obtained after a main story cutscene.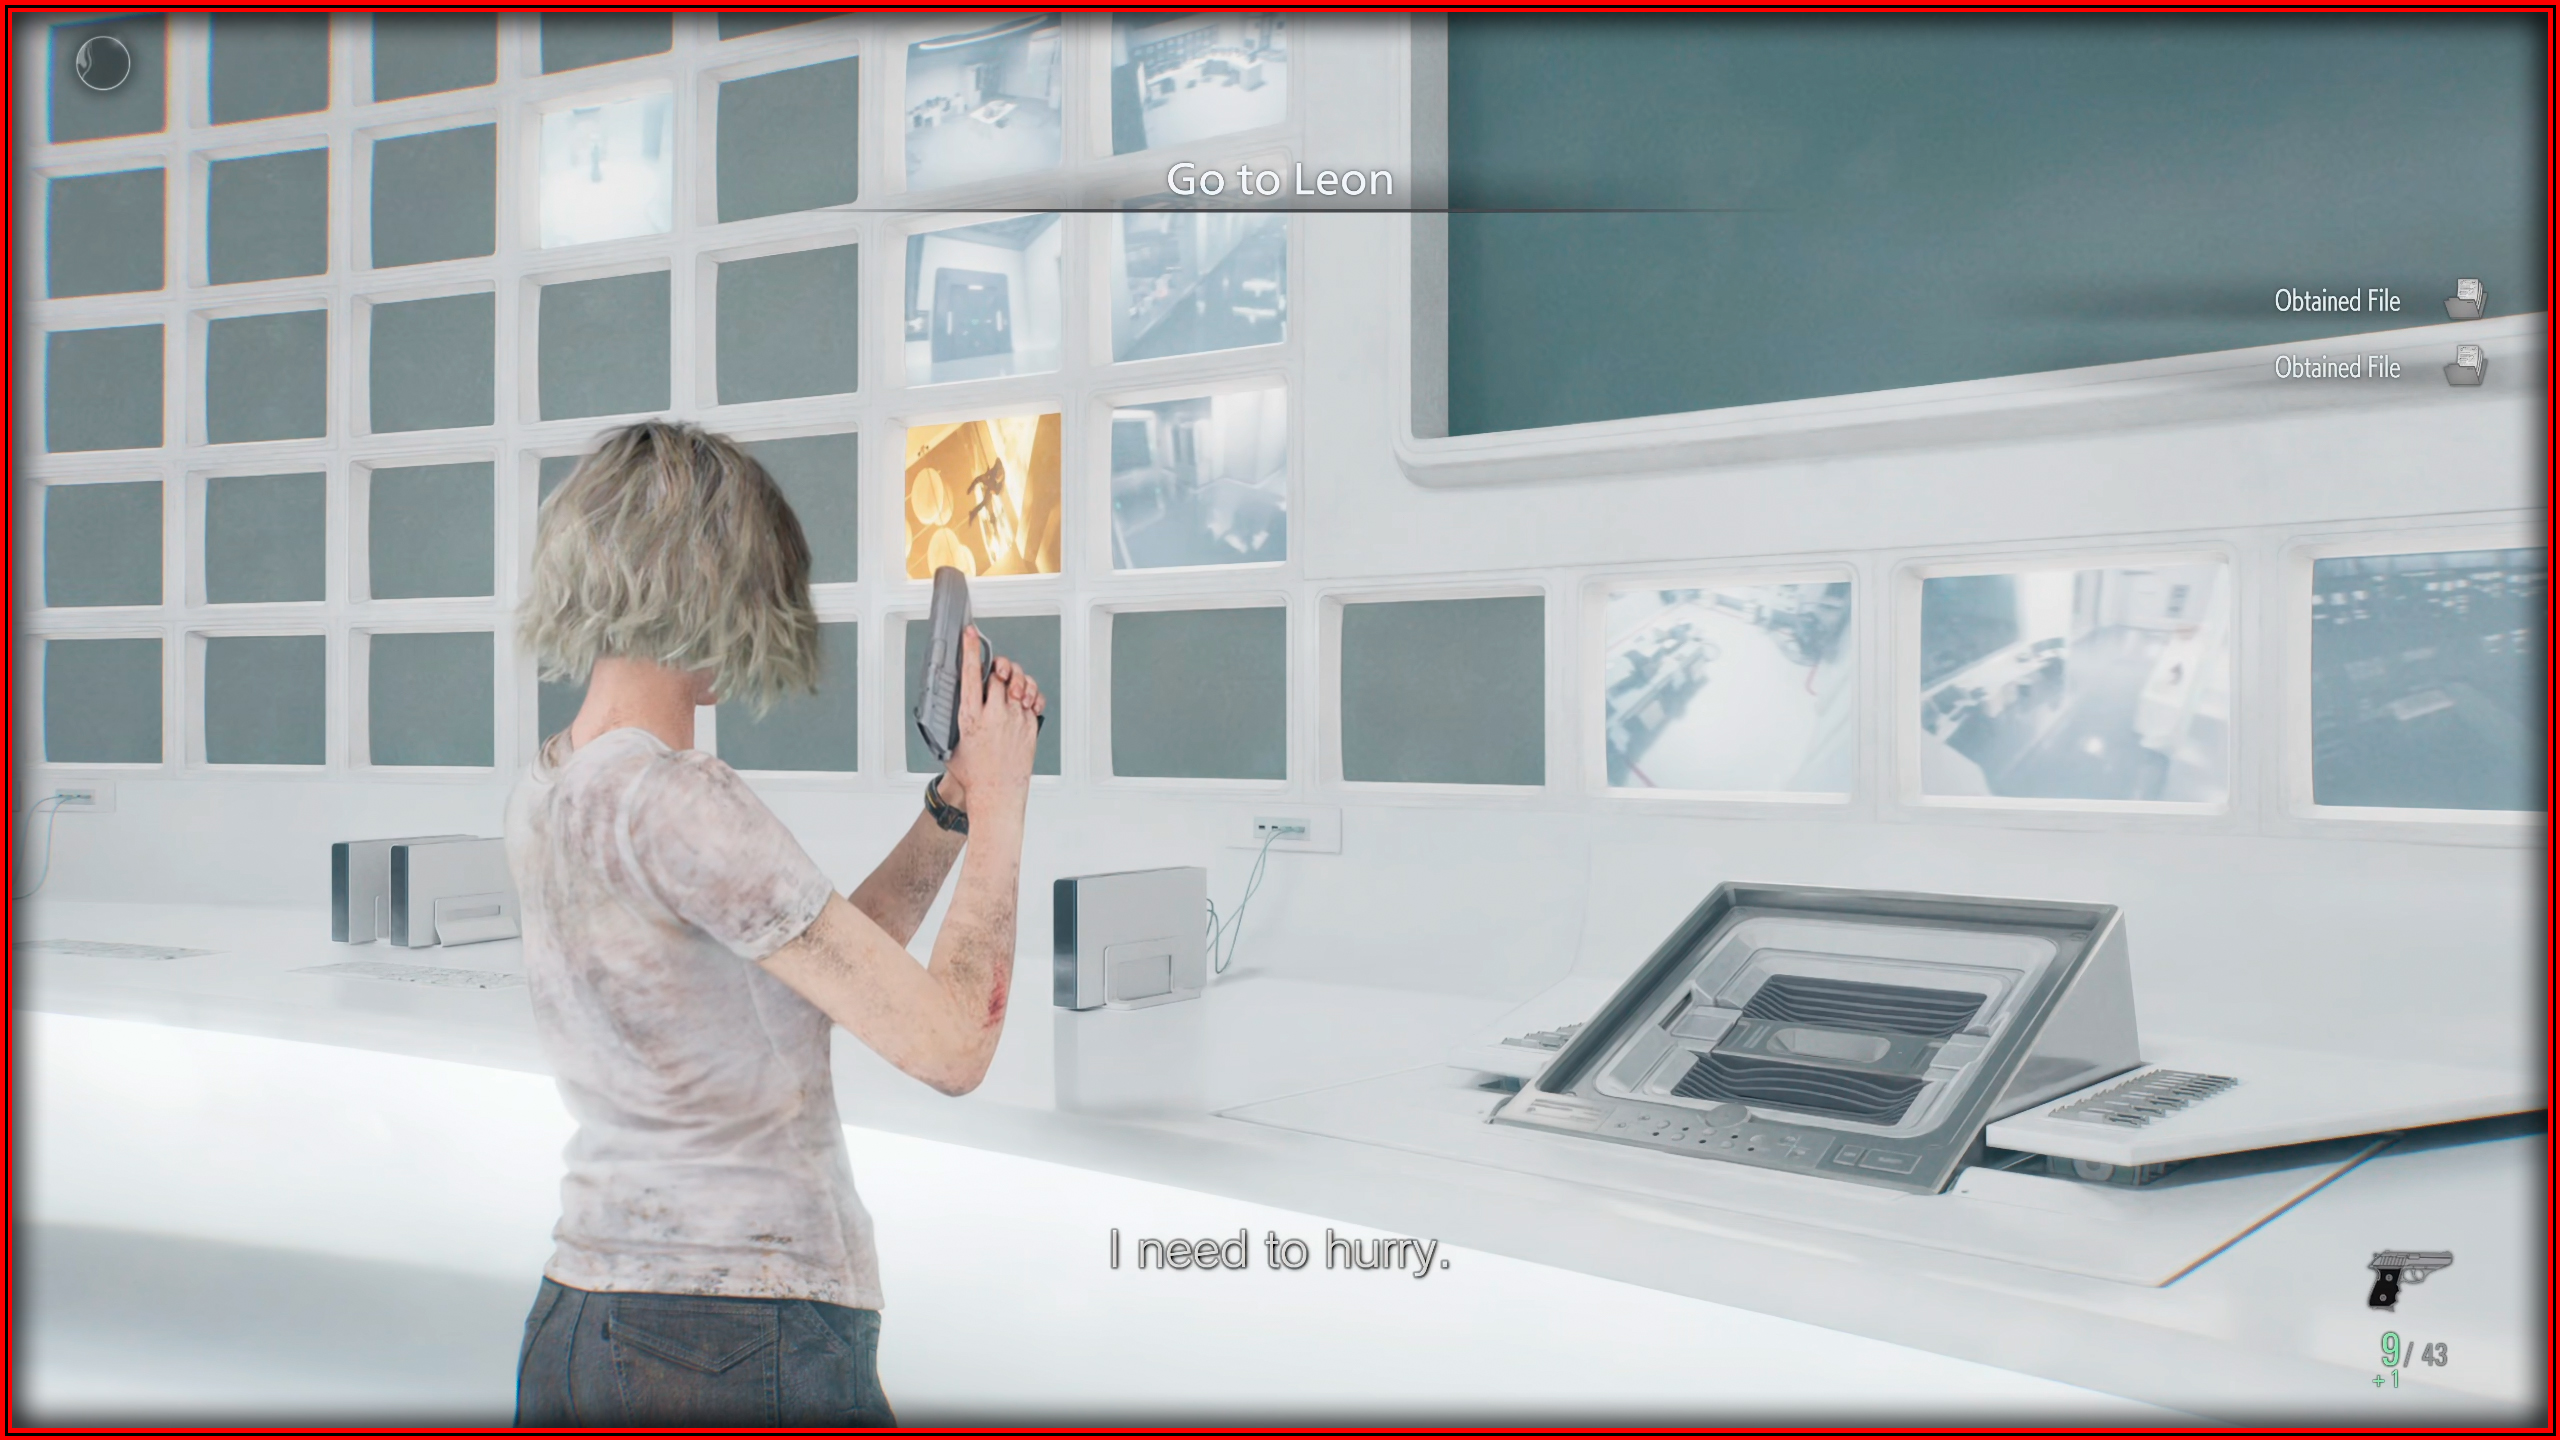
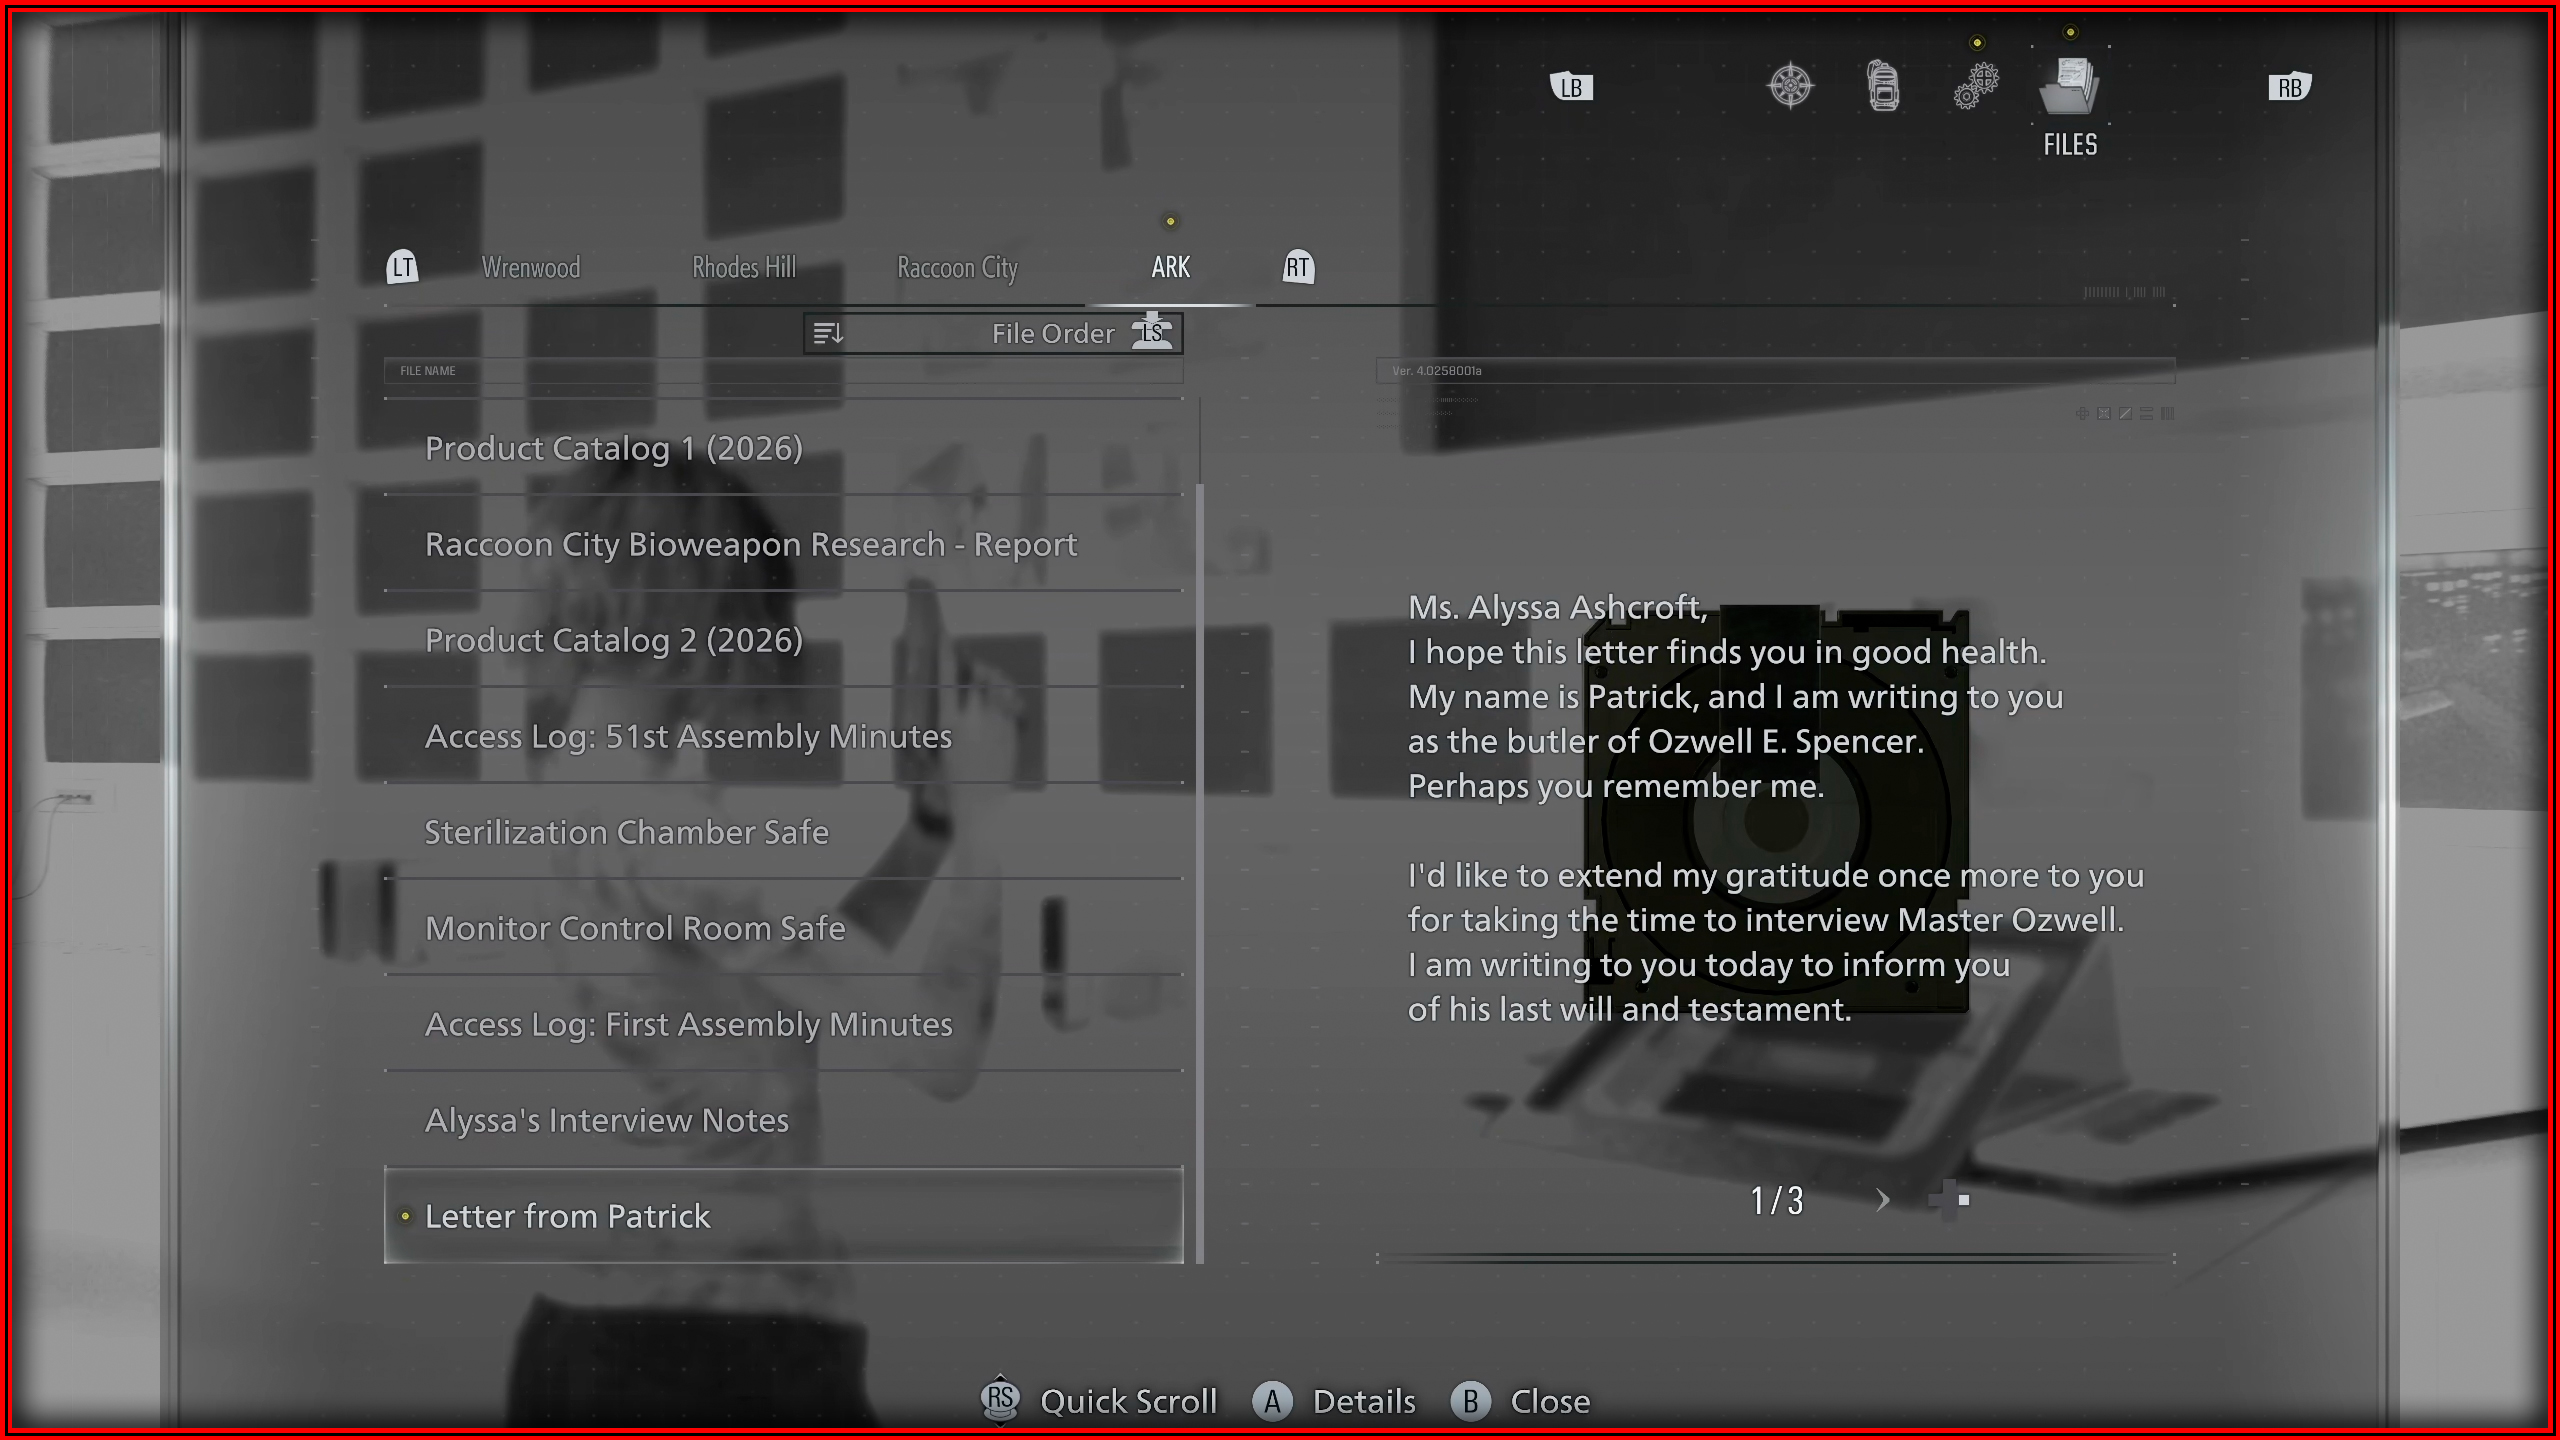
File 75/75 - Letter from Patrick
Automatically obtained after a main story cutscene.
Curator
 You need to purchase and view all 56 Concept Arts in the Bonuses Menu. All of them become available after finishing the game once, and each costs 100 Challenge Points, totaling 5600 Challenge Points.
Model Mania
 You need to purchase and view all 44 Models in the Bonuses Menu. All of them become available after finishing the game once, and each costs 100 Challenge Points, totaling 4400 Challenge Points.

Speed Demon
 This can be done on Casual difficulty. You need to finish the game by choosing "Release Elpis". You can check your time at any moment under Challenges - Speed Demon in the menu. You can use bonuses like the infinite knife "Koketsu" for Grace after finishing the game for the first time, greatly improving your time. You can also take the opportunity to try and complete this alongside the "Minimalist" and "Never Touch the Stuff" achievements.
Never Touch the Stuff
 It can be done on any difficulty. I recommend doing it on Casual difficulty since your health automatically recovers to yellow after some time. You can check your progress at any time under Challenges - Never Touch the Stuff in the menu. The number needs to be at 0 until you finish the game.
Minimalist
 It can be done on any difficulty. I recommend doing it on Casual difficulty and using the infinite knife "Kotetsu" to get past some enemies without spending ammo. If you want to be safe, just don't pick up the Blood Collector. You can check your progress at any time under Challenges - Minimalist in the menu. The number needs to be at 0 until you finish the game.
Rookie Agent

Obtained by completing the game on Casual difficulty. Completing it on higher difficulties will also grant you this achievement.
Rising Agent
 Obtained by completing the game on Standard (Modern) difficulty. Completing it on higher difficulties will also grant you this achievement.
Resolute Agent
 Obtained by completing the game on Standard (Classic) difficulty. Completing it on higher difficulties will also grant you this achievement.
Remarkable Agent
 After finishing the game once, the Insanity difficulty will be unlocked. Before attempting this difficulty, I recommend first trying to finish the game in under 4 hours on Casual difficulty to obtain the Speed Demon achievement. With this, you will have unlimited ink ribbons and Challenge Points to buy infinite ammo.

End
Thank you for reading this far. If you have any questions or suggestions, feel free to leave them in the comments.
My other guides:
https://steamcommunity.com/sharedfiles/filedetails/?id=3596793811
https://steamcommunity.com/sharedfiles/filedetails/?id=3564612330
https://steamcommunity.com/sharedfiles/filedetails/?id=3493898673
If you enjoyed this guide or found it helpful, please subscribe to my youtube channel.