R.E.P.O. Tactical Bestiary
 PineyDave
(315 ratings)
Apr 3, 2025 @ 11:29pm20,498561
CharactersGameplay BasicsWalkthroughsWeaponsEnglish
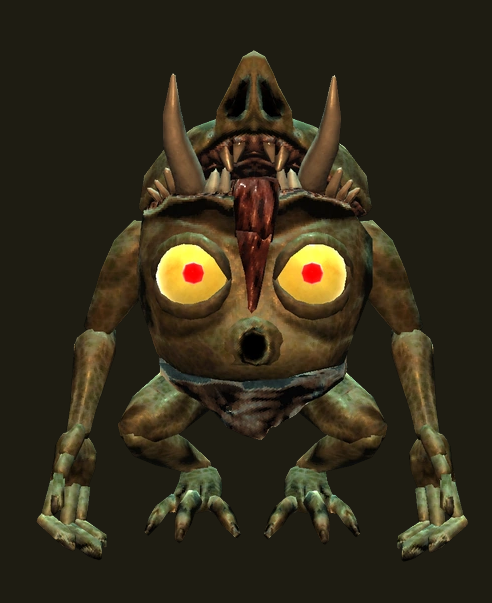
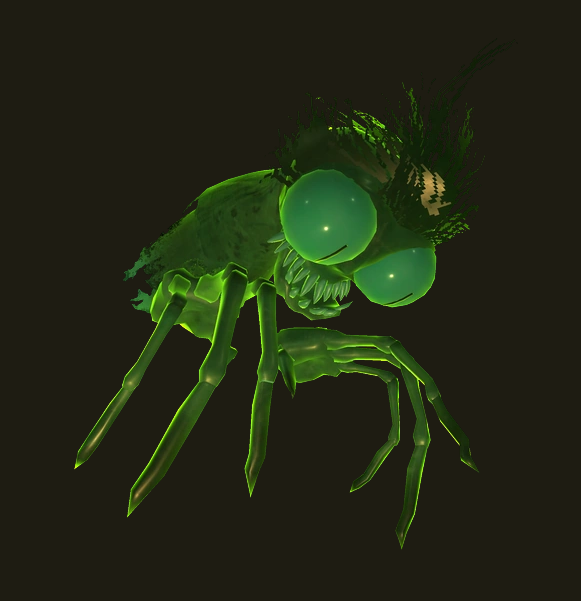
Animal
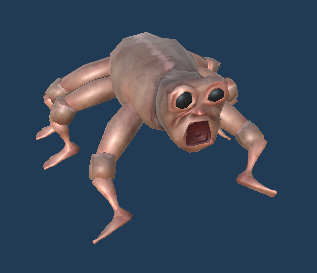
Description: The animal is a six-legged creature that will run around the room hysterically on sight of a player and are considered not to be a large threat if dealt with properly.
Lift Strength Required: 4+
Health: 150
Detection: Line of Sight
Damage: 2 Dmg per hit
Threat Level: 1
Orb Value: $2k-$4k
How to Avoid: Any elevations (tables, boxes, or chairs), sprinting away, or using double-jump to hop over the enemy.
How to Eliminate:
1) Use mines in restricted/confined spaces due to it's random, rapid movement
2) If stunned by combat or tranquilizer darts, use expensive objects to repeatably hit the animal
Additional Info: If hit by the animal the player will drop his/her held item.
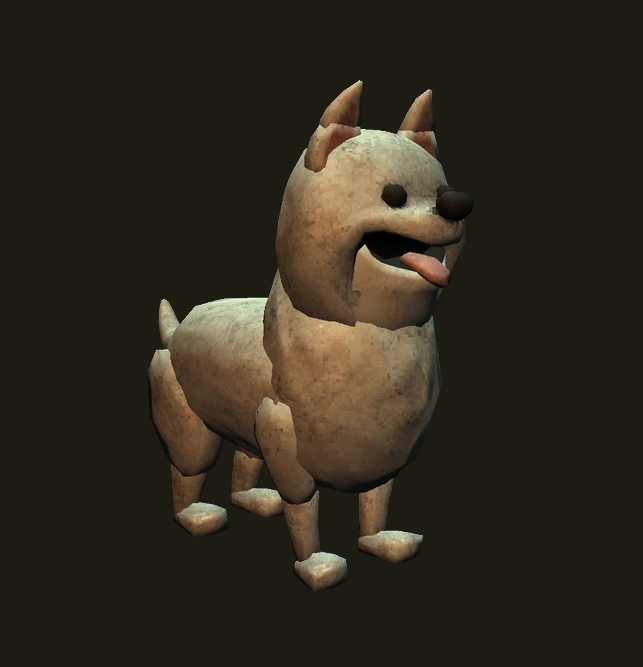
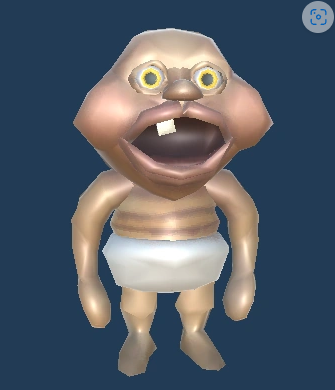
Apex Predator
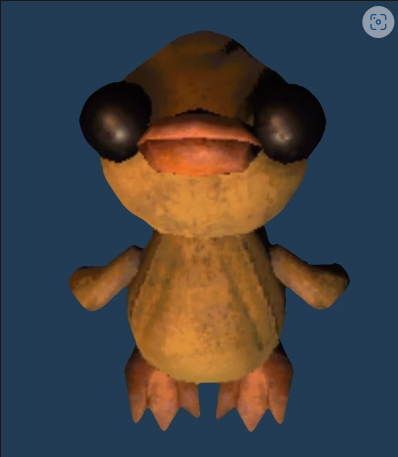
Description: This small creature is a favorite to many from its adorable appearance, however don't be fooled, for this creature will attempt to be held and will we become an apex predator over you.
Lift Strength Required: 0+ (Only if stunned)
Health: 150
Detection: Line of Sight
Damage: 10 Dmg per hit
Threat Level: 1
Orb Value: $2k-$3k
How to Avoid: Attempt to create distance from the duck when it is attacking you. It is easier to avoid if you have more stamina and speed so that it may not catch you.
How to Eliminate:
1) When using extraction points, position yourself so that it is inside or on the edge to be crushed
2) Compared to other monsters with more health, a shotgun is an easy one-hit-kill when fired
3) On the off chance you locate a toilet or a cauldron with the duck paying attention to you, you can either position him in the cauldron to kill him, or flush him in a toilet.
Additional Info: If you see a pit in the floor and think you can hastily throw him down avoid doing so because he could fly back up and begin attacking you.
Bangers
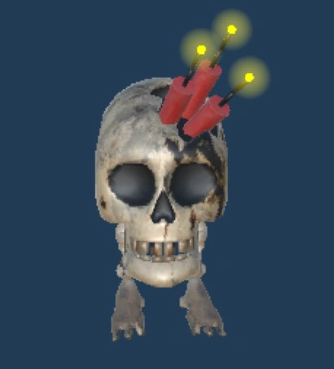
Description: Bangers are small skeletons that come it small packs of three that will follow you around until they explode which is warned by the increasing pace of the spark sound and model.
Lift Strength Required 0+
Health: 50
Detection: Once seen they can't be lost
Damage: Up to 30 based on explosion range
Threat Level: 1
Orb Value: N/A
How to Avoid: Avoiding them is not recommended not due to difficulty, but because they are easy to kill if they get to close.
How to Eliminate:
1) The easiest way to eliminate Bangers is by picking them up and bashing them against a wall about three times until they explode
Additional Info: Bangers have a fuse time of around 10 seconds, so eliminating the group of three they spawn in is considerably easy even at a slow pace. Another detail is that if they are close to detonation by health loss, you can use it as a weapon against other monsters for free damage.
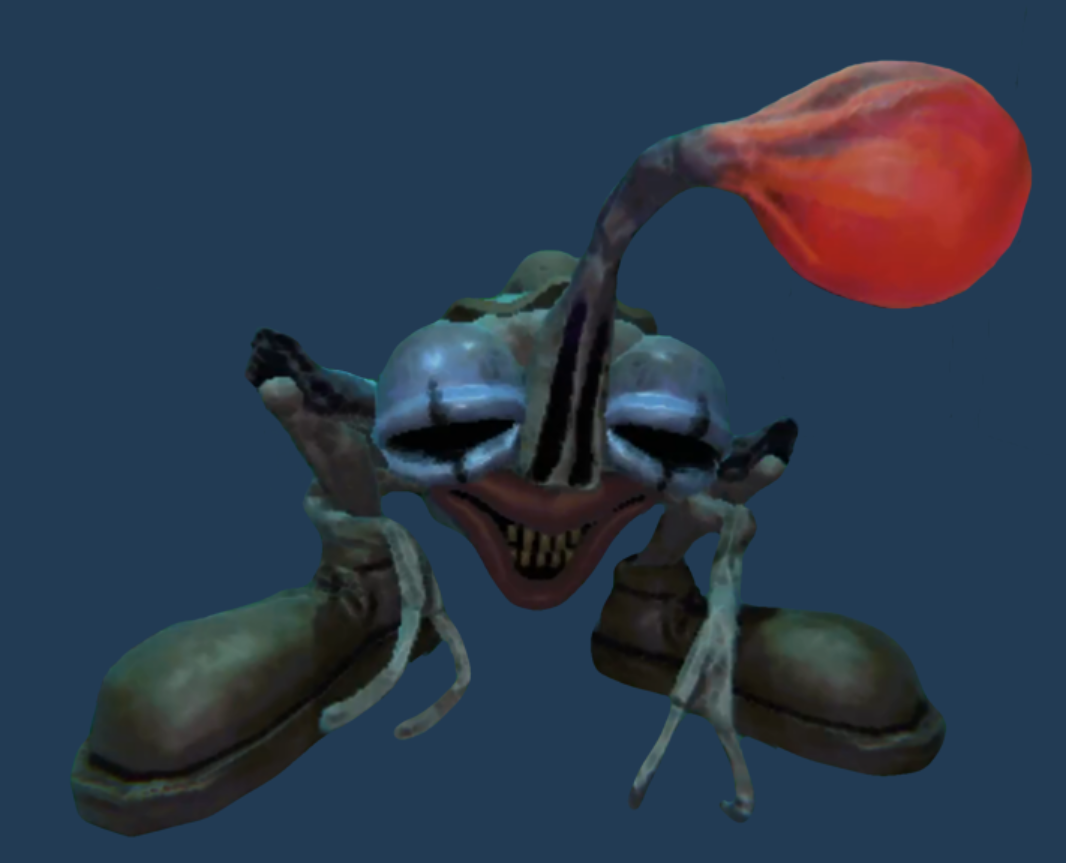
Birthday Boy
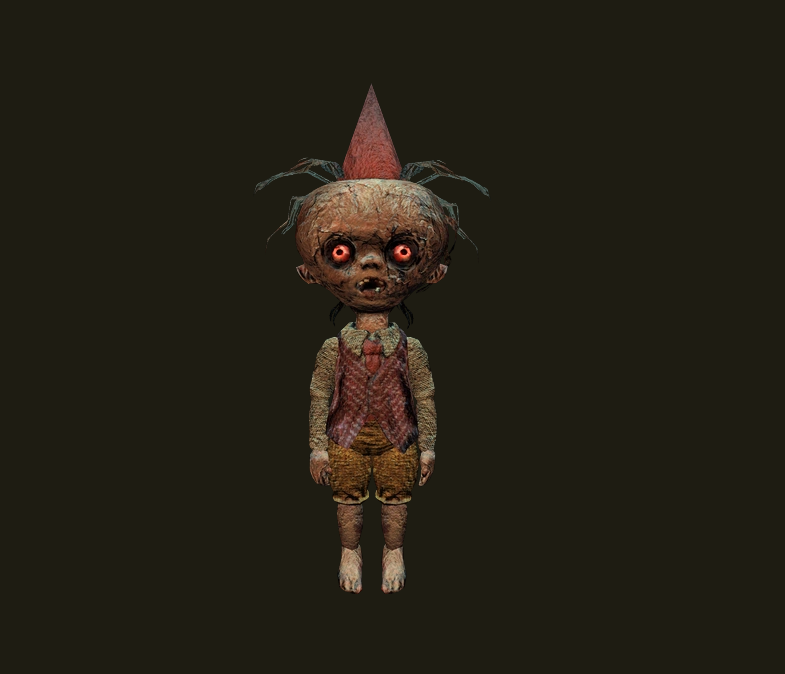
Description: The birthday boy is not happy about his day and his forehead says it all. Pennywise Jr. is and annoying monster that will litter your building with freakishly large balloons.
Lift Strength Required: 4+
Health: 150
Detection: Line of Sight after balloons pop
Damage: 10 (very fast hit rate)
Threat Level: 1
Orb Value: Small
How to Avoid: Do not under any circumstance pop his balloons either yourself or with an object (unless your careful) or else he'll hunt you down for about 30 seconds.
How to Eliminate:
1) Any way you want to kill him is acceptable
Additional Info: If the player pops a balloon he will hunt whoever did it but if an item pops a balloon he will investigate the area and if a player is nearby he will attack. If you kill him the balloon pertained by him will disappear, but if you somehow touch one while he is dead, he will respawn and immediately hunt. He can crawl underneath object so it is not an advised method of avoiding him.
Bella
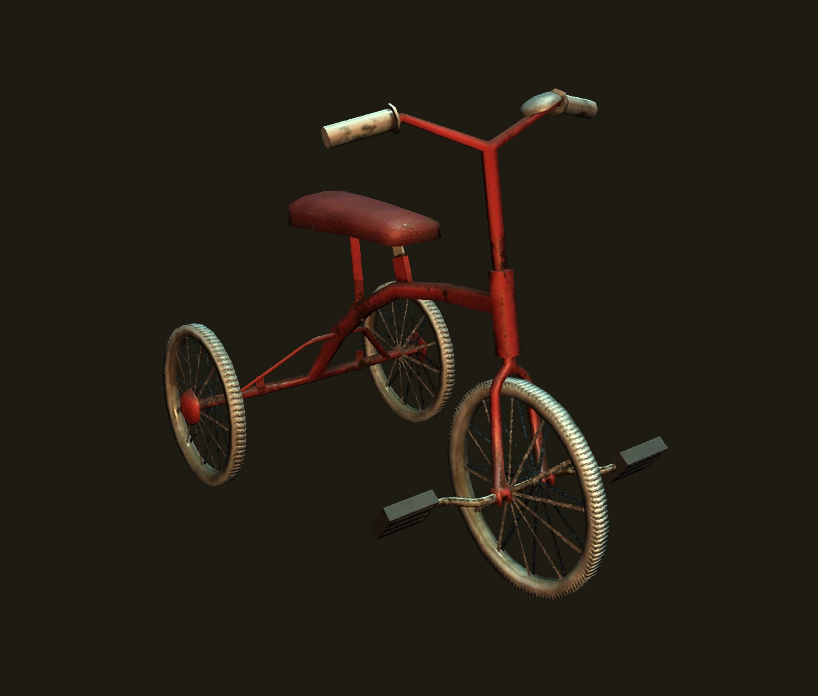
Description: It might just seem like a bike, but if you ruin the ride your going to take a long one into the afterlife with a fury of attacks only survivable by high health.
Lift Strength Required 9+
Health: 200
Detection: Blocking its path
Damage: 5 per hit (extremely fast hit rate)
Threat Level: 1
Orb Value: Small
How to Avoid: Simply stay out of its path and make room for it to pass by if it wanders near you.
How to Eliminate:
1) You can use any weapon to kill this monster, but do not attempt to do this when it is hostile or else your weapon will fling around either flying away or striking you head on.
Additional Info: Its bell is used as a warning system to tell whether you ruined the fun or not an if it goes off 3 times then it will rapidly chase after you. It will target the last person who caused ill intent or rang the bell last. The strikes do reset, but it isn't confirmed how long, but it is somewhere around 20 seconds.
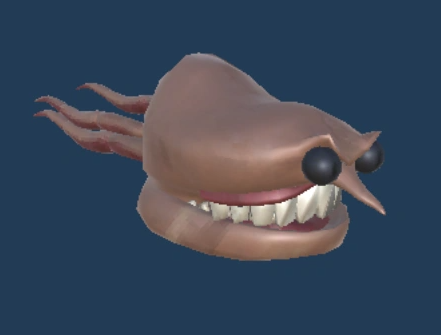
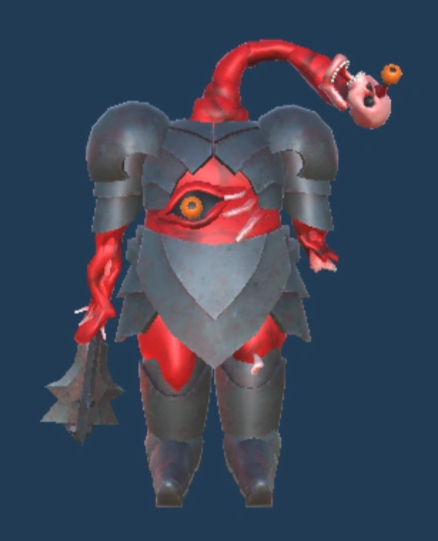
Bowtie
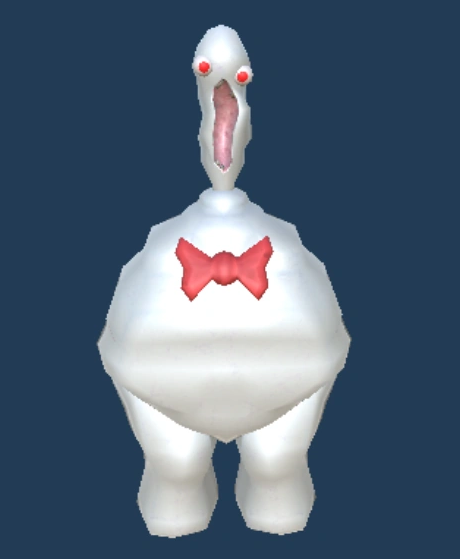
Description: Bowtie is a large monster that stomps around the hallways and is traceable by screen movement. His attack is a constant blow from the stomach area that will cause damage to both you and any nearby valuables.
Lift Strength Required: 7+
Health: 100
Detection: Line of Sight
Damage: 5 per tick
Threat Level: 2
Orb Value: $3k-$5k
How to Avoid: To avoid, simply hide under objects and stay crouched when maneuvering in the open and do not approach for its attack is medium range.
How to Eliminate:
1) Use weapons such as bats, hammers, or pans, because they have the capability of one-hit-kill
2) If no melee weapons are available at the moment use expensive objects to deal damage because cheaper object will barely scratch it.
Additional Info: Do not ever use devices like mines or grenades (shock wave, human, stun) due to the ability that Bowtie will deflect and bounce back the weapons.
Chef
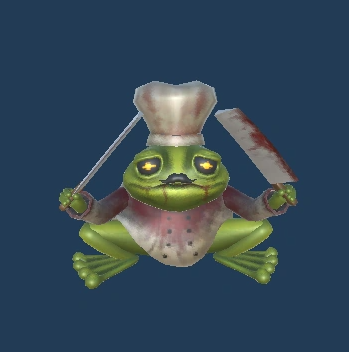
Description: The Chef is a frog that has fast movement and will launch at you if it sees you, which makes it easy to manipulate as you wish.
Lift Strength Required: 9+
Health: 150
Detection: Line of Sight
Damage: 10
Threat Level: 2
Orb Value: $2k-$5k
How to Avoid: To avoid you can stay out of it's way and if caught try to duck under cover and stay away from important valuable because it can damage them.
How to Eliminate:
1) It is easy to manipulate into jumping into pits, because once it sees you it will barrage jump in you direction which can be used to kill it.
2) Some maps don't have pits, so you can use generally any object you can pick up to stun him like smaller or medium valuables. Also doors that lay on the floor can stun him occasionally if he jumps on them.
Additional Info: Once the Chef is finish launching at you and it lands safely, it will stay stunned temporarily which can be used for object damage.
Cleanup Crew
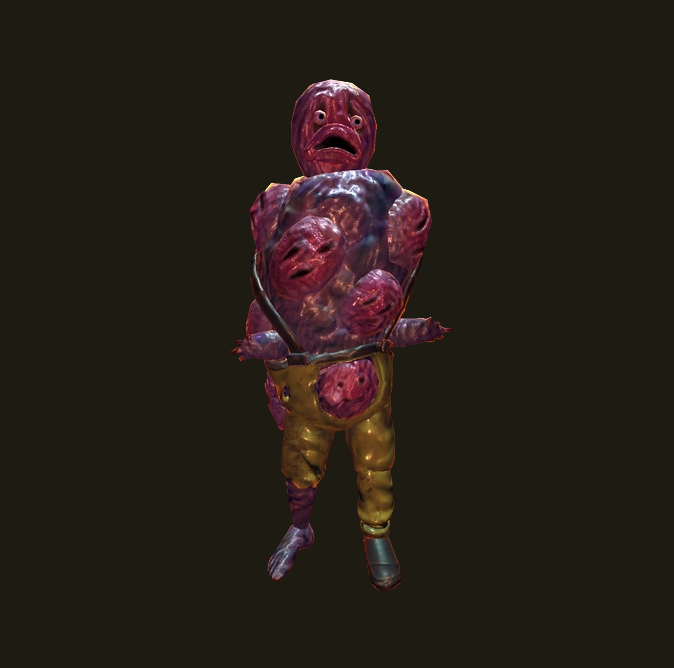
Description: The cleanup crew is an extremely annoying creature that can really end your run fast if you don't know what to look for because he always has a surprise around the corner.
Lift Strength Required 13+
Health: 350
Detection: Line of sight
Damage: 85 per head, 60 for proximity, and 15 per second for radiation
Threat Level: 3
Orb Value: Large
How to Avoid: Stay out of sight and do not run straight way from a head since it has heat-seeking capabilities, but has too fast of momentum. On death will drop a head as well.
How to Eliminate:
1) Any way is acceptable
Additional Info: The heads it chucks and drops are invincible and cannot be destroyed. They can be picked up but cannot not be scrolled in or out so you should always chuck it sideways. When a head explodes, an area around it is irradiated temporarily and will cause you harm.
Clown
Description: The clown is an annoying monster that is capable of shredding both you and you valuable in a variety of ways.
Lift Strength Required: 13+
Health: 250
Detection: Line of Sight
Threat Level: 2
Orb Value: $5k-$8k
Damage: Beam - First hit 30, Second hit 70; Kick - 10, Knock back from kick - 50
How to Avoid: When it fires the laser, based on where it is you can either duck, elevate yourself, or hide behind cover such as walls or pillars. As for the kick if your standing you can quickly hop over it, if sneaking walk backwards or remove yourself from the area.
How to Eliminate:
1) Generally it's going to be impossible to eliminate this monster, however as most other monsters you could simply use the gun or stun it to smack it.
Additional Info: Be aware that if you are standing so that the laser is aimed high enough that you can duck down, do not crouch too fast because it is possible for the clown to aim lower if your too fast.
Elsa
Description: This adorable critter is a harsh contender to fight with the apex predator's beauty, but be aware that by not satisfying it you are allowing it to be become your gym bro in a place that probably doesn't need one.
Lift Strength Required: Not possible (unless stunned)
Health: 600
Detection: Refusing to satisfy
Damage: 5 per hit and 25 into a wall
Threat Level: 1
Orb Value: $2k-$3k
How to Avoid: Whenever it roams near you and begins to bark give it attention and your good. If you fail at this simple requirement, Elsa's buff form is quite slow and you can easily outrun it.
How to Eliminate:
1) Use weapons to stun it from becoming buff
Additional Info: This creature can search under objects, but also has great jumping form so you can not climb away. Stunning it will cause it to become small again even if it is large although it will immediately begin to fight if you hurt it.
Gambit
Description: Gambit is a walking casino for whoever wants to work the slots, however the change you have a negative effect are as realistic as in real life
Lift Strength Required: 9+
Health: 150
Detection: Line of Sight
Damage: +25 HP on green, -50 HP on red, full HP on white, one health on black, and coin bag on yellow
Threat Level: 2
Orb Value: Medium
How to Avoid: Try to veer away from it but if it does grab you, you are stuck until it drops you.
How to Eliminate:
1) Any way is acceptable
Additional Info: When spinning the roulette wheel, do not have a friend (if you have any) knock it over or else it will explode an cause a guaranteed 60 damage. You can repeat the gamble as many times as you meet it just be aware your putting yourself at a high risk.
Gnome
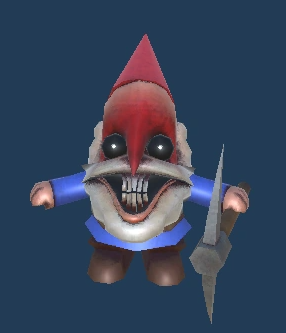
Description: Gnomes are simple to kill, but annoying monsters that appear in packs of four which will target loot in the vicinity, than will attack you no matter what.
Lift Strength Required: 0+
Health: 20
Detection: Once seen they can't be lost
Damage: 5
Threat Level: 1
Orb Value: N/A
How to Avoid: The enemy can't be avoided or maneuvered around, because of its size and that once it sees you it will follow you until killed.
How to Eliminate:
1) To kill the gnomes, all you have to do is throw them in the air or smash them on a surface to break/kill them
Additional Info: Be careful, because just as valuables do they will not break if they land in the C.A.R.T. or on an extraction point which will result in them attacking your loot, and if they are in the C.A.R.T. you might accidentally throw out precis money.
Headgrab
Description: This grimlin is a very basic creature to encounter, but be careful because he could abuse your friends and use them against you.
Lift Strength Required: 4+
Health: 150
Detection: Line of Sight
Damage: Normal claw deals 5 but a dropkick will deal 15
Threat Level: 2
Orb Value: Medium
How to Avoid: Just dip and dodge, but don't let him get a hold of your dead friends head
How to Eliminate:
1) Any way you want to kill him is acceptable
Additional Info: When you have a dead team mate and the creature finds his/her head, it can grab it like its name says, and increase its attack speed by quite a bit. If your head happens to be taken, you can see from the monster's perspective until your rescued. To get the head back, you just need to grab it off his head and it will cause him to be stunned as well.
Headman

Description: Headman is a very dangerous monster that can be a very annoying problem to be dealt with due to his absence of weaknesses or health, but that doesn't mean he can't be worked around.
Lift Strength Required: 13+
Health: 250
Detection: Line of Sight
Damage: 50
Threat Level: 3
Orb Value: $4k-$8k
How to Avoid: To avoid headman, it helps if you stay crouched around him and not to shine his flashlight even if you far away, because he can still see you.
How to Eliminate:
1) Without using your incredible 13+ strength, valuable items, or shop weapons, there are no easy ways to eliminate headman
Additional Info: There is another way to avoid headman, but it's here because it requires a loss of health. If you run at headman and crouch under him, you'll take 50 damage, but will lose your location.
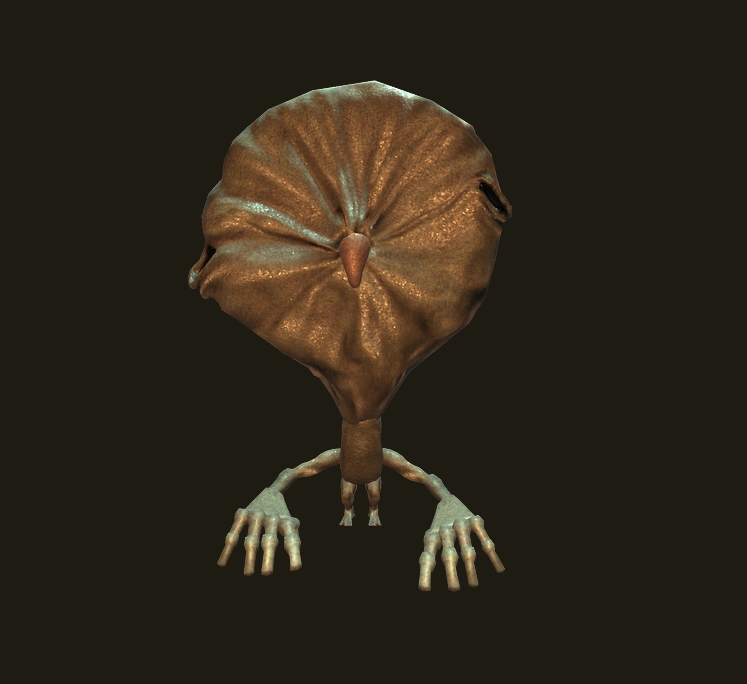
Heart Hugger
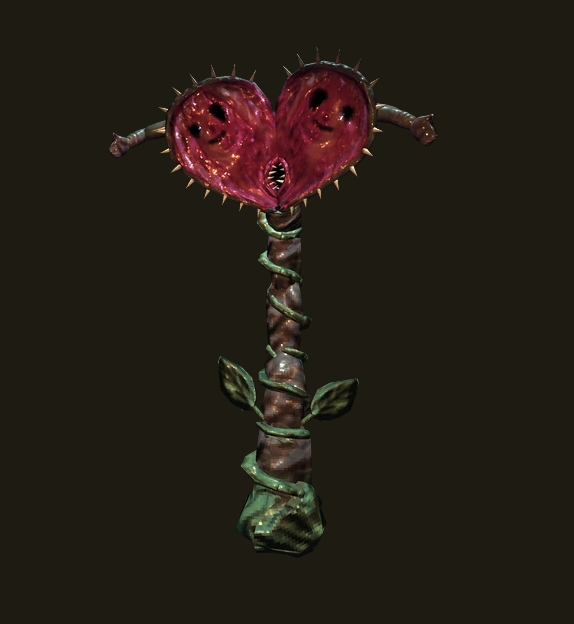
Description: Although the plant might look hideous, its gaze is something spectacular that of which i'm too... obsessed... with...
Lift Strength Required: 9+
Health: 300
Detection: Line of sight and proximity
Damage: 30 per hit
Threat Level: 2
Orb Value: Medium
How to Avoid: If you happen to see the heart hugger, stay at a distance because the closer you get the more likely it is to drag you in. Once it finishes its attack, it will burrow and relocate to another point in the structure.
How to Eliminate:
1) It's recommended that you should attack the plant while being dragged in because it is easy and open for a strike
Additional Info: If your playing with a partner, it is possible to drag them out although unless you get very far or close it will continue to suck you in. When it sucks you in, you are able to grab it and move it side to side possibly avoiding some extra damage.
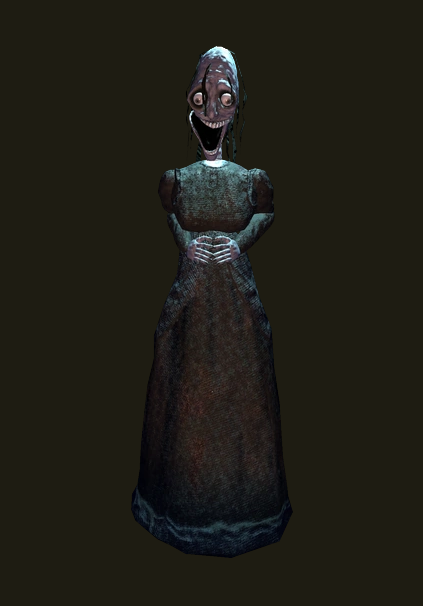
Hidden
Description: Hidden is possibly up there with the most annoying monsters due to his relentless attacks that you won't see coming until he is at you doorstep, so tips to avoid him are necessary.
Lift Strength Required: 4+
Health: 100
Detection: Line of Sight
Damage: 0
Threat Level: 1
Orb Value: $5k-$8k
How to Avoid: To avoid all you must do is not be seen or else you will be grabbed and moved a very far distance.
How to Eliminate:
1) To eliminate, you can pick him up using you four strength, or use friends to assist you with the combined force
2) Another way to eliminate him is to bully him using small items since his health is somewhat low
Additional Info: If you are being grabbed and your in multiplayer, friends are capable of grabbing you to rescue you, although he won't tire as fast and might repeat the action again. Another important tip is that you want to be cautious, because occasionally he can drop you on an enemy or in a pit.
Huntsman

Description: The Huntsman is the worst and most dangerous enemy in the game to some, because of his high damage and hearing that makes him a nuisance if caught off guard.
Lift Strength Required: 9+ or 0 (see additional info)
Health: 250
Detection: Any Loud Audio
Damage: 100
Threat Level: 3
Orb Value: $3k-$7k
How to Avoid: You can easily maneuver around the Huntsman by crouching around or by making no sound, but remember, making any noise or close contact will cause him to become aggressive and shoot at your location.
How to Eliminate:
1) To eliminate, you can grab him with strength, or abuse a strategy that requires no bonus stats
Additional Info: To perform the abusive strategy hide grab his attention and hide behind a wall to prevent his shot from hitting you, then grab him and rotate him from behind the wall, from there he will fall and you must grab his feet a repeatably slam him on the ground. It's important to know that you must re-grab him every time you slam him or else he will get back up.
Loom
Description: We all know death is inevitable, so when you encounter this monster, you'll know there is no running away.
Lift Strength Required 13+
Health: 500
Detection: Anywhere on the map based on who it chooses
Damage: Claps deal 100 and shockwaves deal 25
Threat Level: 3
Orb Value: Large
How to Avoid: You can either let it target another friend, get clapped by it, or block its path resulting in it eventually leaving. Getting in its way even though its not targeting you will temporarily cause it to switch hostility towards you.
How to Eliminate:
1) Weapons are the only things that can deal damage, so no cart bashing or wall slamming
Additional Info: No matter where you are this creature will find you and there is almost no hiding because you could be under or far behind something and it would still probably have long enough reach to hit you. If you are close to the clap but not directly hit, the shockwave will still deal damage to you. Luckily, it is not possible for it to spawn in the first round. If you or your friends need to lose agro, you can jump around it and it won't be able to turn fast enough and give up for a while.
Mentalist

Description: The mentalist is an odd floating alien that is easy to avoid as long as you have friends, but if not there is no escaping his psychic grasp.
Lift Strength Required: 4+
Health: 150
Detection: Line of Sight
Damage: 50
Threat Level: 2
Orb Value: $3k-$5k
How to Avoid: To avoid just don't get seen and if he gets slightly to close you can sprint around him and he might not pick you up.
How to Eliminate:
1) Since he only requires you to have 4 strength to lift, he can easily be picked up or you could just ignore him since he is oddly easy to move around
Additional Info: Similar to hidden, you can be rescued from his attack if you are able to have a friend grab you and pull you out before you get either too high or take the blow.
Oogly
Description: This ghost like entity is a very cool looking creature that makes you think about your next move before you even make it or else you might fall somewhere you have no intent of ever going again.
Lift Strength Required: 9+
Health: 200
Detection: Line of sight
Damage: 4 per hit
Threat Level: 2
Orb Value: Medium
How to Avoid: Stay out of their area of detection which is specially highlighted, and if you see one in a room full of pits, either move to another room or be careful because you will have no control once grabbed.
How to Eliminate:
1) If you have the strength, you can grab it right before it picks you up during its dash and smash its head in
2) If you have the skill to time grenade correctly, they work very well to hit it out of the air
3) Both melee and ranged weapons are quite difficult to use so use the other methods as options
Additional Info: Although its damage is low it will hit you multiple times in the air and possibly drop you from great heights so be aware of where your standing.
Peeper
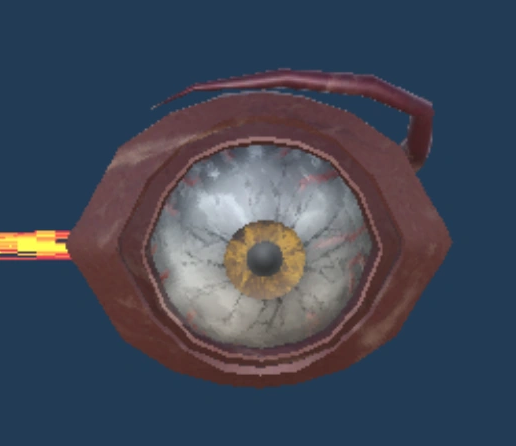
Description: The Peeper is an annoying over harmful monster that causes the player to look only at it until you break eyesight and as a little touch, your voice will become high pitched to others when your staring straight up.
Lift Strength Required: N/A
Health: 30
Detection: Line of Sight
Damage: After 3 seconds, will deal 2 Dmg per second
Threat Level: 1
Orb Value: N/A
How to Avoid: To avoid you must break eyesight if you make eye contact, you should look away or block eyesight, then wait a few seconds until it disappears.
How to Eliminate:
1) Unfortunately it is impossible to eliminate the Peeper, but it theoretically could be possible to block eyesight with a gun to shoot it.
2) On the off chance there is a second story or lower level on your map and the peeper sits on the lower level you can see it through the floor in which you can place a grenade to kill it.
Additional Info: You don't just have to use walls or furniture to block eyesight, you can also use object you're carrying such as health containers or valuables.
Reaper

Description: The scarecrow or reaper is a dangerous enemy that can seriously hurt you and any valuables around it especially if all your loot is clumped in the C.A.R.T.
Lift Strength Required: 9+
Health: 250
Detection: Line of Sight
Damage: 10
Threat Level: 3
Orb Value: $6k-$8k
How to Avoid: To avoid, know his line of sight is low, so by running short distance away, you can crouch to lose its attention.
How to Eliminate:
1) Since it requires so much strength, it's your best bet to use weapons from the shop in order to kill it
Additional Info: There is nothing to special about this monster, however you should be aware that it can hurt you even if your under furniture if it sees you do so.
Robe

Description: The Robe is a tall monster in the game that is well known in the R.E.P.O. community for its look. It is very dangerous and is almost impossible to kill unless you have weapons or incredible strength.
Lift Strength Required: 13+
Health: 250
Detection: Line of Sight
Damage: 50 during the crouch attack and 100 during a standing attack
Threat Level: 2-3
Orb Value: $5k-$8k
How to Avoid: To avoid you can hide under larger furniture if it sees you to avoid its crouch attack and if you see one coming for you, look away and walk away because if you look at it it will speed in your direction.
How to Eliminate:
1) To eliminate it is best to use high damage shop weapons or simply avoid due to its high health and random disappearance once ignored.
Additional Info: From game play I am unaware if this is a bug or feature, but if your at a distance you might only see slow moving particles near the floor revealing it's location as it is invisible until aggro-ed. If you can comment the answer to this issue that would be helpful.
Rugrat
Description: The Rugrat is an annoying small child that will wonder the corridors until it sees you in which it will throw an object at you as fast as a moving car.
Lift Strength Required: 4+
Health: 150
Detection: Line of Sight
Damage: Varies based on thrown valuable
Threat Level: 2
Orb Value: $2k-$4k
How to Avoid: Once seen by the baby it will steal the closest valuable then proceed to throw it at you, it will then run away temporarily which is when you should leave.
How to Eliminate:
1) The Rugrat is an easy monster to abuse using small valuable to scroll into it eventually killing it
2) If you are playing multiplayer, you can team up with friends to lift the child a repeatably bash it on the ground
Additional Info: The Rugrat is an extremely annoying monster when it throws your objects, because common sense tells you it will be damaged and you would be correct. You can catch the object, though it is thrown so fast it could still possibly hurt you or damage itself.
Shadow Child

Description: The Shadow Child is a tall skinny monster that is stationary unless it teleports away that has the aim for you to look at it long enough to pull you towards it violently and deal mediocre damage.
Lift Strength Required: 9+
Health: 150
Detection: If you look at it
Damage: 30
Threat Level: 1
Orb Value: $2k-$5k
How to Avoid: To avoid you can simply look in another direction, but if you want to observe its location, you can place it on the edge of your screen. If your a aggressive person or have some health to spend, you can tumble launch at it forcing it to despawn in a few seconds. If you ram an enemy with a cart that will trigger it's teleport ability in which you can move on, just make sure to move fast enough to have affect.
How to Eliminate:
1) The Shadow Child is a very difficult monster to kill which is due to it's disappearing factor, so the only good way is by either using a gun or ignoring it.
Additional Info: The Shadow Child is basically impossible to kill because if you try it is likely to disappear regaining all of its health in only a few seconds. Also, especially look away if it is by a pit for it will pull you into it which insta-killing you, and this has happened before.
Spewer
Description: The spewer is a small flying creature that will cause a lot of damage to enemies, valuables, yourself, and your voice.
Lift Strength Required: 3+
Health: 65
Detection: Line of Sight
Damage: 10 Dmg per second
Threat Level: 1
Orb Value: $1k-$4k
How to Avoid: Hide under objects to stay out of sight because once seen it becomes very hyper and charges at you.
How to Eliminate:
1) To eliminate you can use pure strength alone or with friends to bash on anything
Additional Info: The spewer has many weird abusive strategies, like if you hold at any strength and scroll out you can delay its movement, though you be able to grab it immediately after it breaks out of your grip. It has the odd feature that when it latches onto your face it will make you voice deep and you will occasionally vomit, but be warned it can damage your valuables.
Tick

Description: Ticks are ugly little creatures that are unique and rather harmless, although i know you for some reason want to touch him anyways even after many warning.
Lift Strength Required 0+
Health: 10
Detection: When holding an object, line of sight, proximity
Damage: 10 per second
Threat Level: 1
Orb Value: Small (only if full and not latched on)
How to Avoid: Unless aggravated it will aimlessly wander so you can simply leave it alone while you loot unless you get caught holding something.
How to Eliminate:
1) Any method works, but if you let it leech off of you, you will be able to kill it for loot
Additional Info: Once it's latched onto you there is no way to get rid of it unless you slam it to death or wait for it to finish sucking your life force. When you kill it, any health you lost while it leeched from you will be released in a small cloud on its body in its entirety.
Trudge
Description: The Trudge is a moving walking tank that is capable of eliminating entire friend groups in seconds even if your under cover it can pull you out when attacking. It is not the enemy that you want to trifle with.
Lift Strength Required: 13+
Health: 500
Detection: Line of Sight
Damage: 100
Threat Level: 3
Orb Value: $5k-$8k
How to Avoid: The trudge is another melee monster that you'll want to stay away from or crouch around at a distance, because it is possible it will pull you in.
How to Eliminate:
1) This monster is definitely worth avoiding, but if your reckless enough to face it, use baseball bats and medium value items for damage and stun, but if it is hard for you to stun, use a tranquilizer gun for temporary stun.
Additional Info: The Trudge will pull you in when it smashes the floor and can rarely hit you through walls if close enough, if you want to activate its attack for temporary cool down time, gown in to aggro then back up and wait for the attack to finish.
Upscream

Description: The Upscream is an extremely danger monster when near other monster or pits because it will force you into a stun lock which results in it doing as much damage as it wants (normally around 20) before walking away.
Lift Strength Required: 3+
Health: 50
Detection: Line of Sight
Damage: 10
Threat Level: 1
Orb Value: $2k-$4k
How to Avoid: To avoid it's best to stay out of sight and if you make contact, just wait until it walks away, because it is able to jump up and over furniture to reach you including the C.A.R.T.
How to Eliminate:
1) It is an easy elimination using cheap valuables to scroll in and out or bash it with said valuable
2) Another way is by using strength since it is easier to carry you or you and your teammates can bash it on the floor repeatably quickly killing the target
Additional Info: It is recommended to stay away from pits or other monsters when facing it, but if you come to get hit directly on and against the wall, you will bounce back hitting the monster for around 20 damage.
Additional Tips and Sources
Orb Value Pricing Website
The R.E.P.O. Wiki on Fandom[repogame.fandom.com]
Additional Tips and Facts:
1) When monster are walking or floating by and they are facing away from you, they generally won't turn and face you unless you are sprinting or it's the huntsman.
2) Any monster that has a health of 250 or below can be taken out in one go from the clown valuable when its nose is pressed three times in which you will have a few seconds to throw it at the enemy.
3) If you ever find a small monster that is easy to abuse or kill, it is great for making money since they will eventually respawn.
4) There is also a low chance of 4.6656% that any monster that it threat level 3, will be replaced one of the following:
3x Animals
4x Apex Predators
6x Bangers
3x Bellas
3x Birthday Boys
3x Bowties
3x Chefs
3x Elsas
2x Gambits
10x Gnomes
3x Headgrabbers
2x Heart Huggers
2x Hiddens
3x Mentalists
2x Ooglies
3x Peepers
3x Rugrats
4x Shadow Children
4x Spewers
4x Ticks
3x Upscreams
5) Once you complete and fill the final quota/extraction point, all monsters will make their way towards the truck for 12 seconds until stopping to head to the players current occupied room every 3 seconds.
Comments: Remember to feel free to send comments critiquing any mistakes, or if you want any personal tips or facts added, I will gladly fact check and add your recommendations no matter the difficulty.