DST Tasklist ("Spoilers" and how to "complete" game)
 Nikonoyo
(133 ratings)
Aug 8, 2022 @ 10:11pm14,942429
AchievementsCo-opCraftingGameplay BasicsLootMultiplayerSecretsStory or LoreWalkthroughsWeaponsEnglish
Opening
Before you read the tasklist please consider:
This tasklist is in its first stage (you could call it 1.0) and i just finished writing it, it works as a complete but not dense walkthrough. Also it's very casual in its writing and doesn't explain in-depth.
Also thanks for having a look, i hope it serves you. Wickerbottom rework version-dated.
It doesn't delve into the most shared tricks and shenanigans and assumes you know how to play the game and has read some great guides and watched a video or two by the likes of "Things you didn't know, Don't Starve!", but also doesn't treat you like a survival-wise or very knowledgeable player.
Also tries keeping it somewhat free of situation descriptive "SPOILERS", by not totally telling what happens and stuff if you take a peek on the future steps, but it's still meant for you to read it step-by-step as you're doing it, as it purposefully gives you all the best information you need for not wasting your time at the moment and in the future aswell.
thx
Neat fun facts and how to use tasklist
tips
If you deal enough damage in a brief window of time to dragonfly, she will be stunned and drop a scale
You can fast attack by holding F to attack and switching equipment (like helmets) when hit registers
You can survive a night if you have a firefly nearby, by entering and exiting the light at the text prompt
reference video broke
also there are some more tips/tricks while you're going through the list like prebuilding by crafting and not placing structures, you should probably use what you learn in its fullest potential you can imagine
 The beginning of the game and of the tasklist is a bit clustered, but it's this way because you have a lot of stuff to think about. It will get more organized and straightforward as you progress in the objectives. Most of the stuff in the beginning being a subjective vision of a "good start", you should take your time and do as you want or as your world situation demands in the moment.
To follow the tasklist, read "After creating your world" (it assumes autumn as starting season), read about the current season you're in, and especially in the first autumn you should read "Optional until needed".
The caves and lunar questlines will be way more straightforward, and assume you took your needed time to perform all of previous steps in "After creating your world", all seasons, and some stuff from "Optional until needed", when you reach them.
If you deal enough damage in a brief window of time to dragonfly, she will be stunned and drop a scale
You can fast attack by holding F to attack and switching equipment (like helmets) when hit registers
You can survive a night if you have a firefly nearby, by entering and exiting the light at the text prompt
reference video broke
also there are some more tips/tricks while you're going through the list like prebuilding by crafting and not placing structures, you should probably use what you learn in its fullest potential you can imagine
The beginning of the game and of the tasklist is a bit clustered, but it's this way because you have a lot of stuff to think about. It will get more organized and straightforward as you progress in the objectives. Most of the stuff in the beginning being a subjective vision of a "good start", you should take your time and do as you want or as your world situation demands in the moment.To follow the tasklist, read "After creating your world" (it assumes autumn as starting season), read about the current season you're in, and especially in the first autumn you should read "Optional until needed".
The caves and lunar questlines will be way more straightforward, and assume you took your needed time to perform all of previous steps in "After creating your world", all seasons, and some stuff from "Optional until needed", when you reach them.
After creating your world
hope you didn't disable anything important in world settings
would feel very silly to discover it while following the list
if you removed something in settings or anything like that with mods you could take a look to see if that removed thing has any vital importance like a unique drop or something that is very important
 (this part of the guide looks very much like those speedrun time-marking tools separators)
choose character
Spawn in (major reason for death)
Gather resources (atleast a full stack of grass, twigs, wood) stone and flint don't need to be full stacked as a priority
Get food until it reaches 20 of any type of available food, like 20 berries, or 10 berries and 10 carrots, etc.
 Prebuild a campfire by building it and not placing it (right click anywhere) it will be blue and can be placed anytime
Is also advised to always carry a full torch


 Build the first science machine, craft backpack, wooden armor, fire pit, spear, shovel, after building the alchemy machine you can hammer this down to get resources
Find a good spot to settle a base, place a fire pit and start gathering until you can build a alchemy machine (best to place away from firepit look next step)
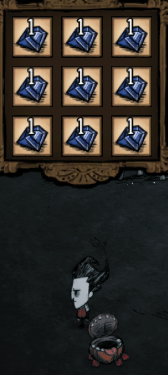
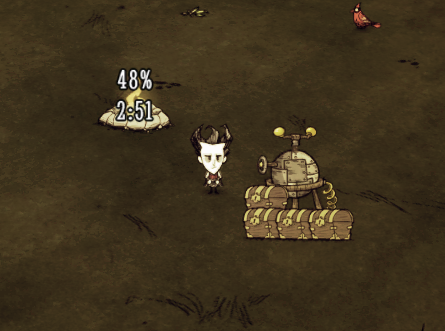 Setup your alchemy machine in a place inside the ring of light of the firepit, but far away enough to setup storage containers around it to maximize efficiency
Build atleast a 32 slot storage (4 common chests) and then expand on necessity
Gather a wider array of resources like living logs from the trees in the black forests (the one with the spiders and lots of trees, you can also kill treeguards)
Gather mob/foe drops by killing them or using the enviroment agaisnt them (gears from mechanical chess pieces, silk from spiders, etc)
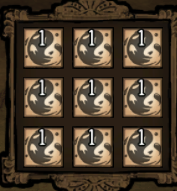
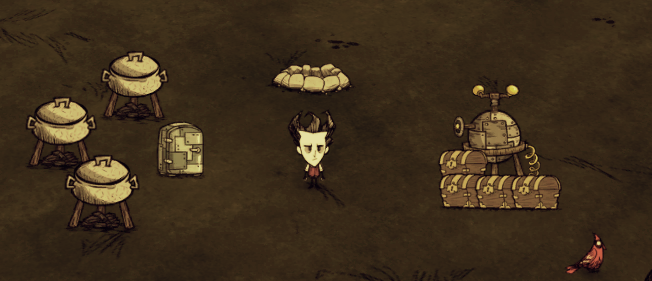 After gathering, prioritize building a fridge to put your food, build it following the same logic as the alchemy and storage, this time setting the fridge in the middle and crockpots around the fridge as near as possible to maximize efficiency (you can put stuff in the crockpot while the fridge is open when put this way, closest possible. Same logic with the Alchemy Machine.)

 It is advisable to start a marble farm by gathering marble and crafting marble beans, also building a garden jigmadig and hoe to grow crops
Explore distant places using the wormholes and be mapping and marking where they take you (use a mod, or use signs), use the shovel to take away the most inacessible resources because of distance from your base, including berry bushes, twigs, grass, etc and plant them near your base, you should also plant trees if they are scarce.
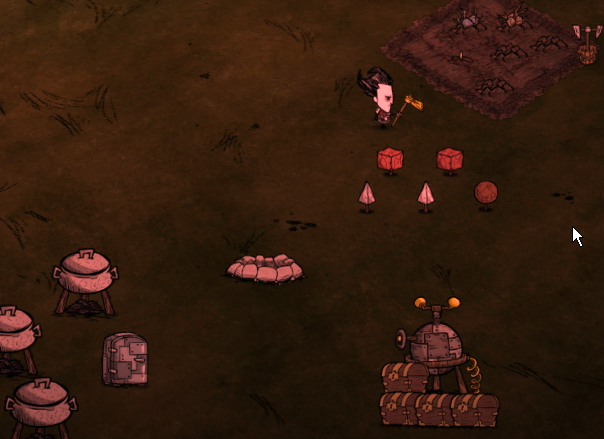
(Do you need an image? I bet you got the gist of it by now.)
(Protect all your farm, trees, twigs, grass with an dedicated Ice Flingomatic, you don't want them to burn.)
Build a tent and a siesta lean-to so you can recover health and sanity without using specific purpose food items (as pierogis and cooked green caps)
Build a prestihatitator, then you can go insane by fighting or more preferably digging graves and getting gems, killing (tanking) a bishop is advisable for the gem
Build a shadow manipulator, hammer down the prestihatitator, now you can craft very strong magic items early on
Build a bird trap and bird cage, put bird in cage, give it meat (preferrably monster meat) to get eggs
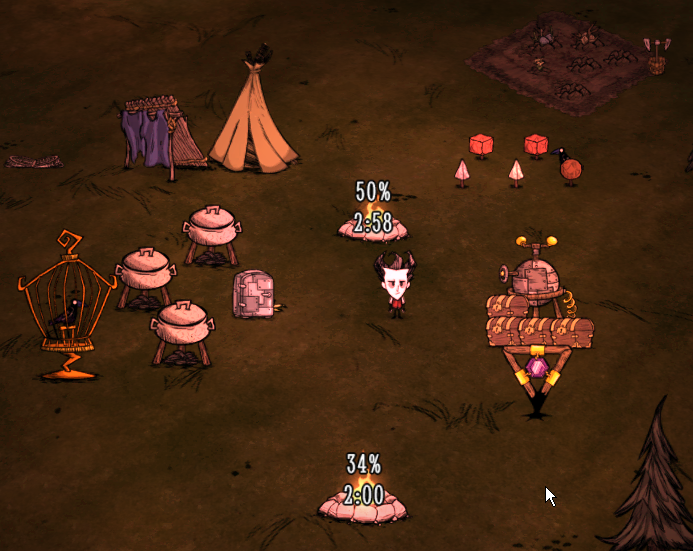
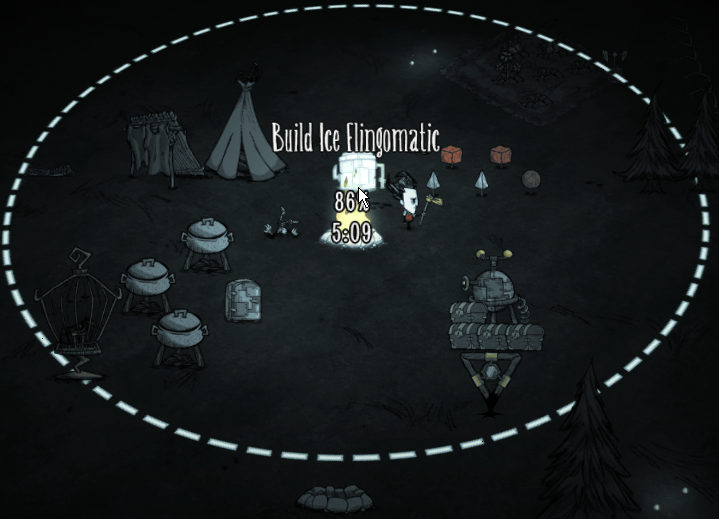
This guide base looks like the image below, but it usually should be bigger and wider so the ice flingomatic doesn't include the campfire in emergency mode. This serves only to ilustrate what you need to have at base. Build something better than this, you're going to need it by the time you reach the start of the caves questline.
 BASE SETUP COMPLETE. "After creating your world" stage of the list, checked out. Good job.
would feel very silly to discover it while following the list
if you removed something in settings or anything like that with mods you could take a look to see if that removed thing has any vital importance like a unique drop or something that is very important
(this part of the guide looks very much like those speedrun time-marking tools separators)choose character
Spawn in (major reason for death)
Gather resources (atleast a full stack of grass, twigs, wood) stone and flint don't need to be full stacked as a priority
Get food until it reaches 20 of any type of available food, like 20 berries, or 10 berries and 10 carrots, etc.
Prebuild a campfire by building it and not placing it (right click anywhere) it will be blue and can be placed anytimeIs also advised to always carry a full torch
Build the first science machine, craft backpack, wooden armor, fire pit, spear, shovel, after building the alchemy machine you can hammer this down to get resourcesFind a good spot to settle a base, place a fire pit and start gathering until you can build a alchemy machine (best to place away from firepit look next step)
Setup your alchemy machine in a place inside the ring of light of the firepit, but far away enough to setup storage containers around it to maximize efficiencyBuild atleast a 32 slot storage (4 common chests) and then expand on necessity
Gather a wider array of resources like living logs from the trees in the black forests (the one with the spiders and lots of trees, you can also kill treeguards)
Gather mob/foe drops by killing them or using the enviroment agaisnt them (gears from mechanical chess pieces, silk from spiders, etc)
After gathering, prioritize building a fridge to put your food, build it following the same logic as the alchemy and storage, this time setting the fridge in the middle and crockpots around the fridge as near as possible to maximize efficiency (you can put stuff in the crockpot while the fridge is open when put this way, closest possible. Same logic with the Alchemy Machine.)It is advisable to start a marble farm by gathering marble and crafting marble beans, also building a garden jigmadig and hoe to grow cropsExplore distant places using the wormholes and be mapping and marking where they take you (use a mod, or use signs), use the shovel to take away the most inacessible resources because of distance from your base, including berry bushes, twigs, grass, etc and plant them near your base, you should also plant trees if they are scarce.
(Do you need an image? I bet you got the gist of it by now.)
(Protect all your farm, trees, twigs, grass with an dedicated Ice Flingomatic, you don't want them to burn.)
Build a tent and a siesta lean-to so you can recover health and sanity without using specific purpose food items (as pierogis and cooked green caps)
Build a prestihatitator, then you can go insane by fighting or more preferably digging graves and getting gems, killing (tanking) a bishop is advisable for the gem
Build a shadow manipulator, hammer down the prestihatitator, now you can craft very strong magic items early on
Build a bird trap and bird cage, put bird in cage, give it meat (preferrably monster meat) to get eggs
This guide base looks like the image below, but it usually should be bigger and wider so the ice flingomatic doesn't include the campfire in emergency mode. This serves only to ilustrate what you need to have at base. Build something better than this, you're going to need it by the time you reach the start of the caves questline.
BASE SETUP COMPLETE. "After creating your world" stage of the list, checked out. Good job.
Optional until needed
(it carries throughout all seasons but you can manage a few in first autumn):
Find a eye bone. (Probably will be near a road, swamp, or ponds.)
Turn Chester into Snow Chester or Shadow Chester (Fill all slots with one blue gem or one nightmare fuel respectively). Will only turn into shadow chester in full moon. Snow chester works as a fridge and also preserves living animals inside it, shadow chester has 3 extra slots and rots things faster.
You shoud always be considering crafting character specific items for these who have it, like the spear and helmets from wigfrid, wanda clocks, wickerbottom books,etc

Destroy a three sized spider nest without fire and use the eggsack by planting it in front a walrus camp so that is easier to kill the walrus on winter
Kill as many koalefants as there are players for the meat and trunks to be used to make a breezy vest for Winter
Consider crafting a sewing kit so your clothing related items (especially the hard ones to make) don't break
Tame a beefalo by offering him grass, using the bell and then you can ride it by crafting a saddle (if you can't figure it out how to do, you probably should not skip directly to see it as it has spoilers for caves, but it's thoroughly in the CAVES questline.
Shear beefalos with scissors
Build a Think Tank at base, so you can craft boat kits and sea-related items.
Find a pig village to trade trinkets for gold with the Pig King, find a swamp to break down the pig head poles with a hammer to get pigskin so you can craft armor and umbrella
Find the gloomer statue near the pig village, and get glommer flower in the full moon. Also grab the pan flute near it
Find some mandrakes so you can craft some pan flutes for messy situations later. Carry one with you at dangerous places, it might save your life
If there's enough time you can enter the caves (consider that 6 bats will spawn in the hole location every night) to get light bulbs so you can have a fueled lantern instead of a torch, which is much more practical (it only lacks the perks of not setting enemies on fire on attack or structures)
Kill Bearger away from base if your first autumn is extended so he doesnt rob your food and destroys your base (very hard to do)
Having a reliable way of getting monster meat is also advised (so you can have infinite eggs and 1 monster meat fodder every meal). You can do this by using the aforementioned eggsack near things that will kill them without eating the meat (do not place it near hounds, pigs, and other creatures that eat meat from ground nor let the spiders have the time and opportunity to eat it)
sadly i don't have a video for this but you can do this with spiders and tentacles, spiders and tallbirds, and some other ways. Explore! (or look up somewhere)
You can also destroy some beehives to get honeycombs that can be used to make beeboxes (6 beeboxes are good) so you have infinite honey, place it not so near your base as you will not want them flying in your base. Also protect them and the nearby flowers with Ice Flingomatics. (You need to capture the bees with a net and put it in the box, you should also capture some butterflies with the net and use them in the ground near the bees to plant a flower [you need atleast 6 nearby flowers for each beebox to make the bare minimum of honey ] [the more flowers = faster honey] and you should also consider making a beekeeping hat to use when harvesting honey as to not take heavy accidental damage [bees get aggressive when you harvest]). Bee boxes inside caves (weird) need natural cave light so they exit the beebox to produce honey.
It will look something like this
Find a eye bone. (Probably will be near a road, swamp, or ponds.)
Turn Chester into Snow Chester or Shadow Chester (Fill all slots with one blue gem or one nightmare fuel respectively). Will only turn into shadow chester in full moon. Snow chester works as a fridge and also preserves living animals inside it, shadow chester has 3 extra slots and rots things faster.
You shoud always be considering crafting character specific items for these who have it, like the spear and helmets from wigfrid, wanda clocks, wickerbottom books,etc
Destroy a three sized spider nest without fire and use the eggsack by planting it in front a walrus camp so that is easier to kill the walrus on winter
Kill as many koalefants as there are players for the meat and trunks to be used to make a breezy vest for Winter
Consider crafting a sewing kit so your clothing related items (especially the hard ones to make) don't break
Tame a beefalo by offering him grass, using the bell and then you can ride it by crafting a saddle (if you can't figure it out how to do, you probably should not skip directly to see it as it has spoilers for caves, but it's thoroughly in the CAVES questline.
Shear beefalos with scissors
Build a Think Tank at base, so you can craft boat kits and sea-related items.
Find a pig village to trade trinkets for gold with the Pig King, find a swamp to break down the pig head poles with a hammer to get pigskin so you can craft armor and umbrella
Find the gloomer statue near the pig village, and get glommer flower in the full moon. Also grab the pan flute near it
Find some mandrakes so you can craft some pan flutes for messy situations later. Carry one with you at dangerous places, it might save your life
If there's enough time you can enter the caves (consider that 6 bats will spawn in the hole location every night) to get light bulbs so you can have a fueled lantern instead of a torch, which is much more practical (it only lacks the perks of not setting enemies on fire on attack or structures)
Kill Bearger away from base if your first autumn is extended so he doesnt rob your food and destroys your base (very hard to do)
Having a reliable way of getting monster meat is also advised (so you can have infinite eggs and 1 monster meat fodder every meal). You can do this by using the aforementioned eggsack near things that will kill them without eating the meat (do not place it near hounds, pigs, and other creatures that eat meat from ground nor let the spiders have the time and opportunity to eat it)
sadly i don't have a video for this but you can do this with spiders and tentacles, spiders and tallbirds, and some other ways. Explore! (or look up somewhere)
You can also destroy some beehives to get honeycombs that can be used to make beeboxes (6 beeboxes are good) so you have infinite honey, place it not so near your base as you will not want them flying in your base. Also protect them and the nearby flowers with Ice Flingomatics. (You need to capture the bees with a net and put it in the box, you should also capture some butterflies with the net and use them in the ground near the bees to plant a flower [you need atleast 6 nearby flowers for each beebox to make the bare minimum of honey ] [the more flowers = faster honey] and you should also consider making a beekeeping hat to use when harvesting honey as to not take heavy accidental damage [bees get aggressive when you harvest]). Bee boxes inside caves (weird) need natural cave light so they exit the beebox to produce honey.
It will look something like this
Seasons
BASE SETUP COMPLETE(?),
but you might want to consider preparing for seasons so you can survive year-round.
edited season images taken from https://steamcommunity.com/sharedfiles/filedetails/?id=375794293
the mentioned guide above has almost all game mechanics explained but its a bit outdated
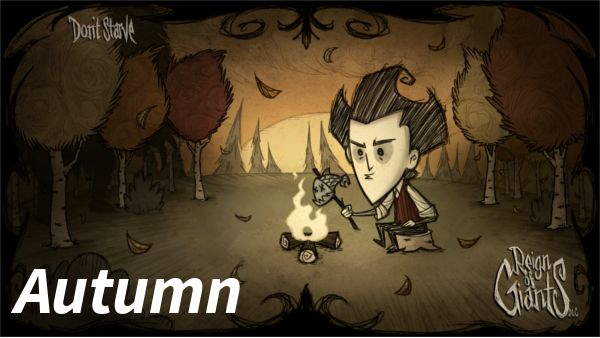 Autumn usually is a pretty ok season, compared to the others, use it to explore caves, explore seas, fight bosses, gather resources, and do stuff you usually would need some kind of seasonal equipment to do so, as not having to carry a thermal stone, eyebrella, etc, aliviates your personal storage problems.
Beware of the hounds in the following years.
Beware of Bearger, fight him away from your base, is a difficult fight even with 2+ people with common equipment (log armor, spears, ice/fire staff, darts, pan flute).
Check if everything is alright for next season, and how much time you have left until next season.
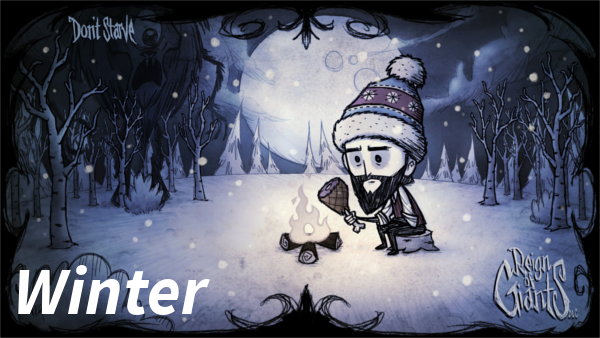 Winter will be very harsh to the unprepared, use autumn to gather resources and build your base, and gather enough food storaged in fridge to pass winter early on.
Don't starve, and don't go too far from your safety zone as you can get yourself in a pretty bad situation if killed or going out without proper survival items
The first day of winter you will need two thermal stones, until you can (and should) hunt a winter koalefant so you can craft a puffy vest (1 Winter Koalefant Trunk, 8 Silk, 2 Beefalo Wool. Giving the recipe so you can prepare early on to craft it immediately after getting the trunk) After crafting it, only one thermal stone is needed]
You should hunt walruses for his sanity hat (tam o' shanter) and walrus tooth (to make walking cane)
Prepare to kill Deerclops, it's not hard, only make sure to have sanity regen afterwards or be confident on fighting nightmare creatures after killing him away from base, he will despawn if no one is near him (You can use him as a safe method of destroying trees and structures to get their resources as he moves and attacks slowly)
After killing him use his eye to make a eyebrella so you can be ready for the rains in Spring
You should mine as many ice as you can (spawns in rocky biome and also spawns 4 ice rocks when penguins make a nest, this happens when you walk near water)
Use this ice for making recipes in crockpot using ice as a fodder who allows a recipe like (monster meat, berry, ice, ice = meatballs)
Build ice flingomatics away from firepit but protecting storage area, farms and structures (for this reason that you should build it considerably away from fire pit)
Spend rest of winter safely and wisely, stop to think for a moment on what you should be doing, perhaps rethinking your life or chatting with friends in the cold nights can also help you
Talking about ice flingomatic, remember that you can turn it on or off, if it is extinguishing your fireplace or you don't want to waste fuel and take a risk, allowing you to put one covering all base if your base got small like in this image.
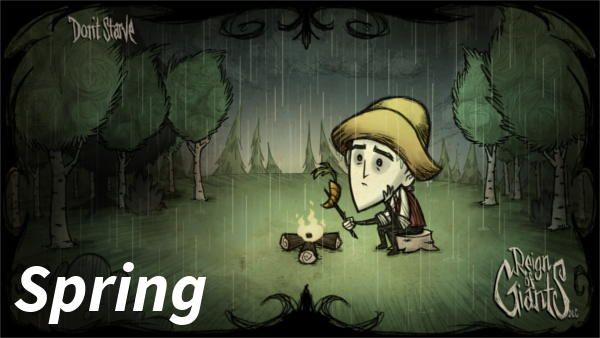 You will probably enter spring with its key feature: it's raining at all times.
You can be struck by lightning and take damage, and so can your structures, that will catch fire
Getting wet is going to kill you by either freezing, sanity dropping, or not being able to use your weapons and tools, or your inventory food spoiling faster
If you already have the eyebrella, you good. If not, you should consider crafting a umbrella, or using the tent to get yourself always dry
You can use spring as means to get lots of food, specially on the farm
Beware of the frog rain, as if you hit a frog, you're probably going to be overwhelmed and afterwards, dead
Killing the moose/goose is (risky) good so you can get its meat and feathers to make a weather pain (ranged weapon that will be very good for caves final boss) or a luxury fan (heat tool for surviving summer)
You can hunt suspicious dirt piles while in spring rain to possibly find Charged Volt Goats, but killing the common oasis desert spawning goats proves very useful as the volt goat horns are used to make both weather pain and morning star, very strong weapons in their own unique way.
If you don't have already, go get nitre from regular rocks so you can make a endothermic fire pit for your base. Also prebuild the endotermic fire to place on the go
Expand upon your inventory and collect more stuff if comfortable. At this point, it will be quite a feat if your base wasn't damaged, burned, or destroyed *yet.*
 Summer goes hard. You and your friends better be prepared, as the solutions are usually found in other seasons. If you don't have the means to reduce temperature, find the quickest method of the below, and then continue following the list as normal:
Use what is at your disposal to regulate your temperature, eat ice, rest at siesta lean-to, stand near endothermic campfire, use summer clothing (same logic as winter), make two thermal stones and put them in the fridge, or snow chester, or insulated pack. The thermal stone works inside the backpack and insulated pack alike
Staying near the desert with pools of lava (Dragonfly desert) should be avoided.
In the second day of summer Antlion will spawn and the oasis desert is going to have a sandstorm. Sandstorm disappears with rain.
If screen is shaking, don't stand near important structures, as they will break with a crater appearing in your feet. (You can avoid avoid this by giving trinkets to Antlion, but this being worth it is situational, but even so, isn't great)
After dealing with heat issues and being able to explore, call your friends, prepare a fish rod or two for everyone, two to three days of food that isn't going to spoil before this time period if you dont want to eat fish, then go to the oasis (if you don't know where is it, it's the desert that has cactus and no pools of lava, yes you will need to cross the sandstorm until you reach it).
Don't fight Antlion if you find him on the way. The oasis only has water in summer. Fish in it until you unpack a crumbled package containing the Desert Google blueprints. Go back and craft them. Now you will be immune to sandstorms and moonstorms if wearing this.
To kill Antlion, two extra armor pieces and 100 health worth of healing, and two spears, or one dark sword, and a whiteish very cold stone to give him to start the fight so he starts frozen may be more than sufficient, as he will make a small arena around him where you will need to dodge sand spikes coming out of the ground but isn't much more complicated than that.
but you might want to consider preparing for seasons so you can survive year-round.
edited season images taken from https://steamcommunity.com/sharedfiles/filedetails/?id=375794293
the mentioned guide above has almost all game mechanics explained but its a bit outdated
Autumn usually is a pretty ok season, compared to the others, use it to explore caves, explore seas, fight bosses, gather resources, and do stuff you usually would need some kind of seasonal equipment to do so, as not having to carry a thermal stone, eyebrella, etc, aliviates your personal storage problems.Beware of the hounds in the following years.
Beware of Bearger, fight him away from your base, is a difficult fight even with 2+ people with common equipment (log armor, spears, ice/fire staff, darts, pan flute).
Check if everything is alright for next season, and how much time you have left until next season.
Winter will be very harsh to the unprepared, use autumn to gather resources and build your base, and gather enough food storaged in fridge to pass winter early on.Don't starve, and don't go too far from your safety zone as you can get yourself in a pretty bad situation if killed or going out without proper survival items
The first day of winter you will need two thermal stones, until you can (and should) hunt a winter koalefant so you can craft a puffy vest (1 Winter Koalefant Trunk, 8 Silk, 2 Beefalo Wool. Giving the recipe so you can prepare early on to craft it immediately after getting the trunk) After crafting it, only one thermal stone is needed]
You should hunt walruses for his sanity hat (tam o' shanter) and walrus tooth (to make walking cane)
Prepare to kill Deerclops, it's not hard, only make sure to have sanity regen afterwards or be confident on fighting nightmare creatures after killing him away from base, he will despawn if no one is near him (You can use him as a safe method of destroying trees and structures to get their resources as he moves and attacks slowly)
After killing him use his eye to make a eyebrella so you can be ready for the rains in Spring
You should mine as many ice as you can (spawns in rocky biome and also spawns 4 ice rocks when penguins make a nest, this happens when you walk near water)
Use this ice for making recipes in crockpot using ice as a fodder who allows a recipe like (monster meat, berry, ice, ice = meatballs)
Build ice flingomatics away from firepit but protecting storage area, farms and structures (for this reason that you should build it considerably away from fire pit)
Spend rest of winter safely and wisely, stop to think for a moment on what you should be doing, perhaps rethinking your life or chatting with friends in the cold nights can also help you
Talking about ice flingomatic, remember that you can turn it on or off, if it is extinguishing your fireplace or you don't want to waste fuel and take a risk, allowing you to put one covering all base if your base got small like in this image.
You will probably enter spring with its key feature: it's raining at all times.You can be struck by lightning and take damage, and so can your structures, that will catch fire
Getting wet is going to kill you by either freezing, sanity dropping, or not being able to use your weapons and tools, or your inventory food spoiling faster
If you already have the eyebrella, you good. If not, you should consider crafting a umbrella, or using the tent to get yourself always dry
You can use spring as means to get lots of food, specially on the farm
Beware of the frog rain, as if you hit a frog, you're probably going to be overwhelmed and afterwards, dead
Killing the moose/goose is (risky) good so you can get its meat and feathers to make a weather pain (ranged weapon that will be very good for caves final boss) or a luxury fan (heat tool for surviving summer)
You can hunt suspicious dirt piles while in spring rain to possibly find Charged Volt Goats, but killing the common oasis desert spawning goats proves very useful as the volt goat horns are used to make both weather pain and morning star, very strong weapons in their own unique way.
If you don't have already, go get nitre from regular rocks so you can make a endothermic fire pit for your base. Also prebuild the endotermic fire to place on the go
Expand upon your inventory and collect more stuff if comfortable. At this point, it will be quite a feat if your base wasn't damaged, burned, or destroyed *yet.*
Summer goes hard. You and your friends better be prepared, as the solutions are usually found in other seasons. If you don't have the means to reduce temperature, find the quickest method of the below, and then continue following the list as normal:Use what is at your disposal to regulate your temperature, eat ice, rest at siesta lean-to, stand near endothermic campfire, use summer clothing (same logic as winter), make two thermal stones and put them in the fridge, or snow chester, or insulated pack. The thermal stone works inside the backpack and insulated pack alike
Staying near the desert with pools of lava (Dragonfly desert) should be avoided.
In the second day of summer Antlion will spawn and the oasis desert is going to have a sandstorm. Sandstorm disappears with rain.
If screen is shaking, don't stand near important structures, as they will break with a crater appearing in your feet. (You can avoid avoid this by giving trinkets to Antlion, but this being worth it is situational, but even so, isn't great)
After dealing with heat issues and being able to explore, call your friends, prepare a fish rod or two for everyone, two to three days of food that isn't going to spoil before this time period if you dont want to eat fish, then go to the oasis (if you don't know where is it, it's the desert that has cactus and no pools of lava, yes you will need to cross the sandstorm until you reach it).
Don't fight Antlion if you find him on the way. The oasis only has water in summer. Fish in it until you unpack a crumbled package containing the Desert Google blueprints. Go back and craft them. Now you will be immune to sandstorms and moonstorms if wearing this.
To kill Antlion, two extra armor pieces and 100 health worth of healing, and two spears, or one dark sword, and a whiteish very cold stone to give him to start the fight so he starts frozen may be more than sufficient, as he will make a small arena around him where you will need to dodge sand spikes coming out of the ground but isn't much more complicated than that.
CAVES questline part 1
YEAR-ROUND SURVIVAL SETUP COMPLETE,
but there's ruthless caves, and more stuff you need to do on the surface.
(it needs to be noted that this part especially assumes the worse is going to happen, and also assumes inexperienced exploring and also fighting, in some degree.)
(also needs to be noted that the next steps from here and now on will be very complicated having many enviromental hazards, very hard bossfights, meticulous and some obligatory steps, time-demanding, and a major world reseting endeavor [as you're expected to die multiple times trying to complete it without prior experience])
Go into the cave near your base (if there is one) and collect lightbulbs to prototype a lantern, that should always be carried. Bunnyman will attack you if you have any meat or egg related food in your inventory, but not if it is a hambat or if inside a Chester/Woby/Hutch.
Consider that when you're inside a cave events still happen, seasonal bosses may wait you at the exit, and depth worms will attack you as if they were hounds in the surface, Antlion "remote attacks" cause boulders to fall in your position.
The big tentacles are wormholes. Upon attacking them, more normal tentacles will spawn around the big tentacle. If the big one dies, so does the other ones (respawns)
You need to explore until you either find a lunar biome or a orange-y tile biome with lots of cave lichen, being the wild biome, that is a indicator of the entrance to the ruins. Near this biome you need to be very careful not to be near the splumonkeys as they will rob you of everything they can, and upon approaching the orange walls, be careful not to be in the biome as the grey tile with fissures turns redder, as this indicates the monkeys are going to turn into shadowmonkeys and follow you to attack as long as the red period is going.
You need to harvest the orange walls with a hammer, taking rapidly the dropped thulecite as to not be robbed, and taking care to kill the slurpers (purple tongued black fur balls) which will equip into your head, making your head equipment drop in the ground, which may cause it to be robbed by the monkeys.
Going further into the ruins biomes is dangerous, being advisable to turn back and return better prepared, with logsuits/nightarmor, a bee queen crown/sanity restoring methods, a eye mask/shield of terror or football helmets, lantern, a stack of not easily perishable food, a great deal of healing measured by how confident you are (it is a good idea to use the bundling wraps from Bee Queen) and also be mindful if going in a non-autumn season of what is needed to survive the temperatures and weather. Harsh biomes ahead.
Harvest the newly found ancient statues as you will need the gems and nightmare fuel they give for crafting. Killing the Dragonfly or Spazmatism is also good methods. If you're confident, have space, and want to make your time's and trip's worth, have with you the following to craft all you want to have in this moment in just one trip:
(2 thulecite, 3 nightmare fuel, 1 green gem to make a construction amulet, is interesting to craft first as it halves the material cost of the next crafting recipes), 20 thulecite, 27 nightmare fuel, 3 yellow gem, 2 orange gem, 2 green gem, 1 walking cane, 7 living log, 1 luxury axe, 1 opulent pickaxe. (These values don't consider the cost of the construction amulet neither its recipe cost halving it would have if equipped while crafting these items) (also, individual)
You are looking for a Broken Ancient Pseudoscience Station, and may repair it with 6 thulecite. After repairing it, craft the items. They will NOT be available for crafting anywhere, always requiring you to come back to the station.
You should probably go back now, if you didn't do it before (impressive or stupid, maybe both)
If you want to kill a boss now you could go after an Toadstool cap to fight Toadstool. It can yield interesting rewards, you having the axes and patience to kill it.
Reorganize, and get ready to go even further to find the Labyrinth. Beware of the spiders, and trapped chests (it is still worth to check them), then be well prepared to fight the Ancient Guardian of the labyrinth, grab the spoils, don't leave the Ancient Key behind as it is obligatory for progressing.
CAVES questline part 2
If you haven't already, now is the time to tame a beefalo. If you don't know how to do it, here is a snippet from the wiki page:
Obtain a Saddle.
Bond the Beefalo with Beefalo Bell if available.
Feed it 10 Twigs, then saddle and ride the Beefalo.
Riding accumulates Domestication.
When you get kicked off, right click it to hop back on. If it doesn't let you, feed it 5 more Twigs, and try again.
If feeding 5 Light Bulbs, Petals, or Foliage, must be fed every 160 seconds; if feeding 5 Twigs, every 210 seconds.
Brush the Beefalo daily. Leave the it at a Salt Lick and feed until it farts. The Beefalo also gains Domestication when fed.
Beware, as overfeeding contributes to Pudgy. You can then tend to other matters, such as farming Twigs and Cut Grass. If you are riding the Beefalo to train, you can feed less and refer to step 4.
Hitch the Beefalo at a Grooming Station to avoid it wandering around and fighting other mobs.
Once domesticated, leave the Beefalo by a Salt Lick.
Occasional riding should refill the Domestication.
The beefalo is needed so you can use it to find the three marble sculptures setpiece, and then find the respective 3 different suspicious marble, loading them onto the beefalo and assembling all 3 marble sculptures.
Leave them as they are for now, as you're going to need some preparing.
Using 4-5 thulecite crowns, mobility and healing and a strong weapon will prove almost fundamental for succeeding in the latter: waiting for new moon (no moon in sky) and breaking a marble sculpture when all three are repaired, spawning the shadow pieces trio and starting the bossfight (tanking is probably going to be necessary). You may kill them in any order, being common to kill them in this order: first Knight, then Bishop, Rook last. If you fail and die, you may return to the statues and pick their respective sketches so you can retry the fight by creating all 3 equivalent statues in a Potter's Wheel (Marble and cut stone only.) with the new moon rule still applying to start the fight by breaking them. On success, a Shadow Atrium will drop.
Recover, prepare, and go to the caves to mine for fossils which can be found in Stalagmites (10%) and Spilagmites (100%), being 8 fossils the total needed.
Explore the ruins, until you find a big tentacle that leads into a black tiled, labyrinth like, obelisk full, isolated piece of biome called the Atrium.
By normal means, it can only be entered via big tentacle wormhole or lazy explorer. You can't progress in the Atrium with sanity above 15% as the obelisks won't let you pass, unless you're using a Nightmare Amulet or Lazy Explorer, be mindful of the very deadly consequences of being there while having no way/items to control your sanity.
Prepare one last time, and bring your best equipment (questionable, as you may want to test the waters first so you don't lose as much on dying and then can be better prepared), being obligatory to bring 8 fossils, shadow atrium, ancient key, hammer, and a way to pass the obelisks to reach the Gateway Room. Best equipment, sanity control and healing possible is advised (also wiki page gud) unless you know you don't really need it (really betting on the power of friendship in this one).
Using the fossils, assemble the skeleton in the correct manner, which can be found out when the fifth fossil is placed, with the horizontal bull-like skeleton being the right way to assemble it (you can recover 100% of fossil using the hammer, being able to quickly rearrange the skeleton to the correct form). When all 8 fossils are placed and the correct skeleton is near the Ancient Gateway, inside the Gateway Room, check all the stuff you have, and recall you're now going to fight the final boss of the ruins, and arguably the reason you followed through all the steps until now, to win this fight. Don't let him eat the Woven Shadows and heal, good fight.
Take a rose home, if you will.
Familiarize yourself with your new items, reorganize, then go on throughout the surface searching for moon rocks and the Moon Stone (the one in the dense evergreen forest with suspicious moonrock and moonrubble nearby), which you need to repair using a few moon rocks. Also search for the round Suspicious Boulder and store the Celestial Orb. Prepare some walls around the Moon Stone as it will make the job easier and then put the Star Caller staff in it (it doesn't matter if the staff is damaged) in the dawn just before the full moon night (the same day). When night comes, defend the beam of light for 1 minute (it might be impossible to do or possible to do multiple staves as it depends on the night lasting more than one minute [winter is your best bet]).
Use the deconstruction staff atleast once in the newly formed Moon Caller's Staff to get its Iridescent Gem as it's obligatory for the future objectives, following moon caller staves can be used as normal without any kind of other purpose.
SAY PAL, YOU LOOK SO GOOD.
Is this how it ends?
MOON questline
Well, look at that, you survived. One down, one to go.
Now you should be pretty confident in your ability to survive, but overconfidence is a slow and insidious killer. 120 seconds is a long time to think what has gone wrong that made you (and your friends) die together during any of the next steps. Continuing,
You might have found the Lunar Grotto biome while exploring the caves, this biome being the one with the white shards and lunar theme. In this biome you will need to find the Ancient Archive biome, bring with you the Iridescent Gem you got from using the deconstruction staff on the Moon Caller's Staff, 1 moon rock, also bring the usual good equipment, as you might be used to by now.
You will need to explore the Ancient Archive until you find the Archive Switch setpiece, which consists of three pedestals, with two of them having a iridescent gem, all you have to do is place yours in the empty slot.
Take a distilled knowledge from a yellow and a blue Fountain of Knowledge (the red one is used to make amberosia with 3 filler, give to dust moths to grind thulecite) and bring them to the center of the Archive Orchesthina (the ritual shaped disc with orange circles), dropping the distilled knowledge in the center.
The puzzle is completely randomly generated and its solved by trial and error.
Learn the Astral Detector blueprint, and craft it. (1 thulecite, 1 moon rock)
Go to the surface, and start using it by placing it, following the beams of light. After 10 uses, you can reutilize it by gathering 100% the ingredients back by hammering the astral detector down.
This process works much like the suspicious marble line, and following the beams of light will bring you to the lunar island, usually accessible via boat or wormhole.
If you haven't before, now you're going to to explore the seas on a boat, be mindful that it is very easy to get yourself in a bad situation while in a boat, considering that most of the time the boat integrity essentially serves as your current health, being that it reaches 0 you lose your boat and gets a heavy setback.
Take great care when approaching ocean setpieces especially when unknown, and being non-stop exploring in a boat can also take its toll on killing you long-term.
Once you find the lunar island, search for a place with 3 close lunar fissures (maybe as near as the three chess sculptures setpiece), as assembling all parts in nearby fissures is obligatory, being 6 (3 in the first, 3 in the second, 1 piece last structure) pieces in total to be found that build up to 3 structures.
The astral detector will dig up 2 of those pieces (Celestial Sanctum Icon and Ward), pointing then for sunken celestial altar pieces (probably is a good idea to take a look around the lunar island to find the three inviting formations so you can just mine them and skip using a Pinchin' Winch to grab them from the underwater salvageable which can be more complicated). If you're going after the underwater salvageables for the celestial pieces intead of mining them, follow the next steps:
The astral detector will point to the Crab King after all other parts are collected, find him only so you can discover his position (he will be inert and appear as a big rocky castle-like ocean structure), but there's no obligatory reason to interact with him yet as you don't have what is needed to progress in killing him.
If you haven't found yet, search for the Hermit Island, a small lunar island with a a house, bee boxes and drying racks (if you want to be prepared and save time you can already be bringing the following, albeit bear in mind its very risky to lose all you brought in your boat if it sinks: 10 cookie cutter shells [by killing ocean cookie cutters around salt formations], 12 Boards, 10 Marbles, 12 Ropes, 5 Moon Rocks, 10 Cactus Flowers, 1 Empty Bottle, 1 Cut Stone, 1 Flower Salad [or the ingredients and a crock pot], 10 Butterflies, 8 Berry Bushes, 8 Fertilizer, 6 Meat items or kelp, 1 Rain or snow protection item [in the correct season] [dst wiki])
You need to do Crabby Hermit some favors, which only give progress the first time they're done, with the first one giving you access to the bottle exchange tab when near her, which can be used to trade a empty bottle for the Pinchin' Winch you're going to need later, and also perhaps now if you want to take the Underwater Salvageables.
After upgrading her home 3 times and planting 10 butterflies (creating flowers), planting and fertilizing (8 berry bushes), giving her a flower salad, giving her a insulation dress (winter clothing piece) if snowing, giving Pretty Parasol/Umbrella/Eyebrella if raining, drying food items in all drying racks on the island (6 total), removing all underwater salvageables around her island, killing a meat bulb (it can't be one planted by a player, the meatbulb will spawn in the island at the beginning of spring if not spawned already), you can also give her a heavy Fallounder/Bloomfin Tuna/Scorching Sunfish/Ice Bream/Ocean Fish which can be identified as heavy by weighing with a Pocket Scale.
Doing 10 different tasks (each level of the house counts as 1 different task) will culminate in a 10 level friendship with the Hermit, that reveals her name a bit before she gives you Pearl's Pearl. Now you have what you need to progress by fighting with Crab King, but some things need to be addressed first.
Crab King proves very difficult and its fight revolves around keeping yourself in a boat long enough to kill him before he destroys your boat and you sink. You probably won't need any armor, instead relying on boat kits and boat patches. You need Pearl's Pearl and 8 gems (using all purple ones may be expensive but usually plays very easier if you have spare boat kits. This fight is specially recommended with friends, as you should not let him heal himself. You may want to use a Weather Pain when he tries to heal himself by putting rocks in his body, so you can cancel it). Failing it the first time is common, but good preparation and following a coordinate strategy will win the battle first try.
After defeating Crab King, use a Pinchin' Winch to grab the last piece of the three structures and assemble all three together in nearby fissures, as previously mentioned. (5 tiles max distance)
Have a nice surprise.
Preferrably using the desert goggles, enter the new storms and find Wagstaff. You can now also use the Astroggles.
Mine the charged glassy rocks (they will lose their charge in 12 minutes becoming useless), and also bring a bug net to catch the moongleams in the storms. Use the bundling wrap from killing Bee Queen so you can preserve 30 Infused Moon Shards without them spoiling. It's almost obligatory.
Complete its task by initially following him until he stops, then giving him his tools (each different design has a unique permanent name you can memorize) and defending him from the Misshapen Birds and Moonblind Crows. He will rewards you 1 Restrained Static.
In total, you will need 6 Restrained Static, 15 Moongleams, 30 Infused Moon Shards, 2 Electrical Doodad, 1 Celestial Orb (If you haven't found a round Suspicious Boulder to get the Celestial Orb, you can find them to mine in rocky biomes with meteor showers. It's RNG dependant, but not very rare. It has 100% chance of spawning if not available before day 60, in the next meteor shower.)
The third and last stage of the building is the key to (immediatly) start the last bossfight of this tracklist, and arguably the hardest.
Separate one Restrained Static, 20 Infused Moon Shards, and the Celestial Orb in your inventory, as they are needed to complete the third stage and start the bossfight. Also bring a light source and keep it in your inventory. Gloomer's goop good too.
Do your best to prepare, there is no more need to enter in equipment details as you are now very experienced. All advice is especially to not lose your world now.
Now it's Just dust. And the Void. And Them.
Checkmate
Thank you for reading/following through.
If you used the tasklist as i think it would be used, you've probably had some kind of journey inside the game with this list reaching the end.
Comment or leave a suggestion if you will. I'm going to read it.
THE END.
If you used the tasklist as i think it would be used, you've probably had some kind of journey inside the game with this list reaching the end.
Comment or leave a suggestion if you will. I'm going to read it.
THE END.